tap a picture to see it big · tap DONE as you go - this device remembers
Step 1 of 8
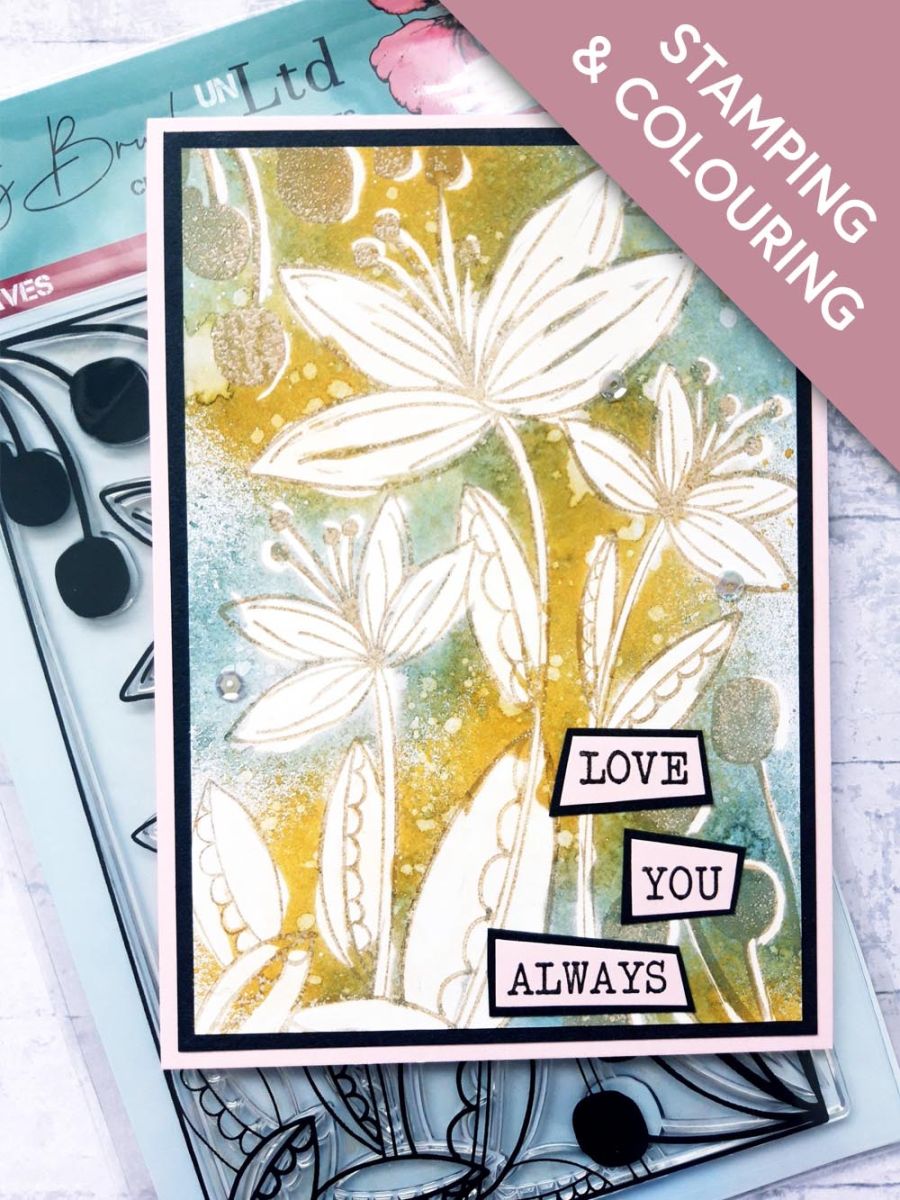
Ink up the Lush Leaves stamp, with the Izink brown Pigment ink.
Wipe over the white card (6 1/2 x 4 1/2"), with your anti static bag, before stamping your image.
Apply the clear embossing powder over your stamped image, then having got your WOW heat tool good and hot, heat set the powder.
Step 2 of 8
Randomly spray your artwork with the Izink Misty Morning and Butterscotch.
Allow to dry naturally if possible, and once dry, buff your work, to remove any excess ink.
Step 3 of 8
Splatter water over your artwork, wait a few seconds, before "lifting" the ink with a paper towel.
Step 4 of 8
Apply water to your stamped image, wait a few seconds, then lift out the ink. Repeat this as many times as you wish, depending on how much ink you want to remove.
This is referred to as the "faux bleaching" technique. You can also use diluted household bleach, to give a stronger lift.
Set this aside to dry off.
Step 5 of 8
Ink up your chosen sentiment words, from the Thirsty Brush More Than Words Creative Stamps, with the Onyx Black Versafine.
Stamp on to the pink card you set aside earlier, when cutting down your pink, top folding card blank.
Cut each word out, straight...or wonky like me!!
Step 6 of 8
Adhere these on to the black card (4 x 4"), and trim to create black mats for each word.
Step 7 of 8
Adhere your words on to your card, in the bottom right corner.
Adhere your artwork on to the black card (6 3/4 x 4 3/4") and then on to the front of your pink, top folding card blank.
Step 8 of 8
To finish, add sequins to your artwork, as required.
You made it!
Share your make with the Stamps By Me community - and keep this guide for next time.
Hello! I'm Toni's AI craft helper - I know the projects from Toni's shows, our guides and everything in the shop. Ask me anything, like "which dies go with this stamp set?" or "what do I need to start ink blending?"
An AI helper (not Toni herself), answering from Toni's shows and our shop - please check the product page before you buy.