Step 1 of 8
Cut the following card panels in BOTH Black AND White cardstock: 4 x 4" and 4 1/4 x 4 1/4"








Prices change straight away. Every language is our own translation, not Google.
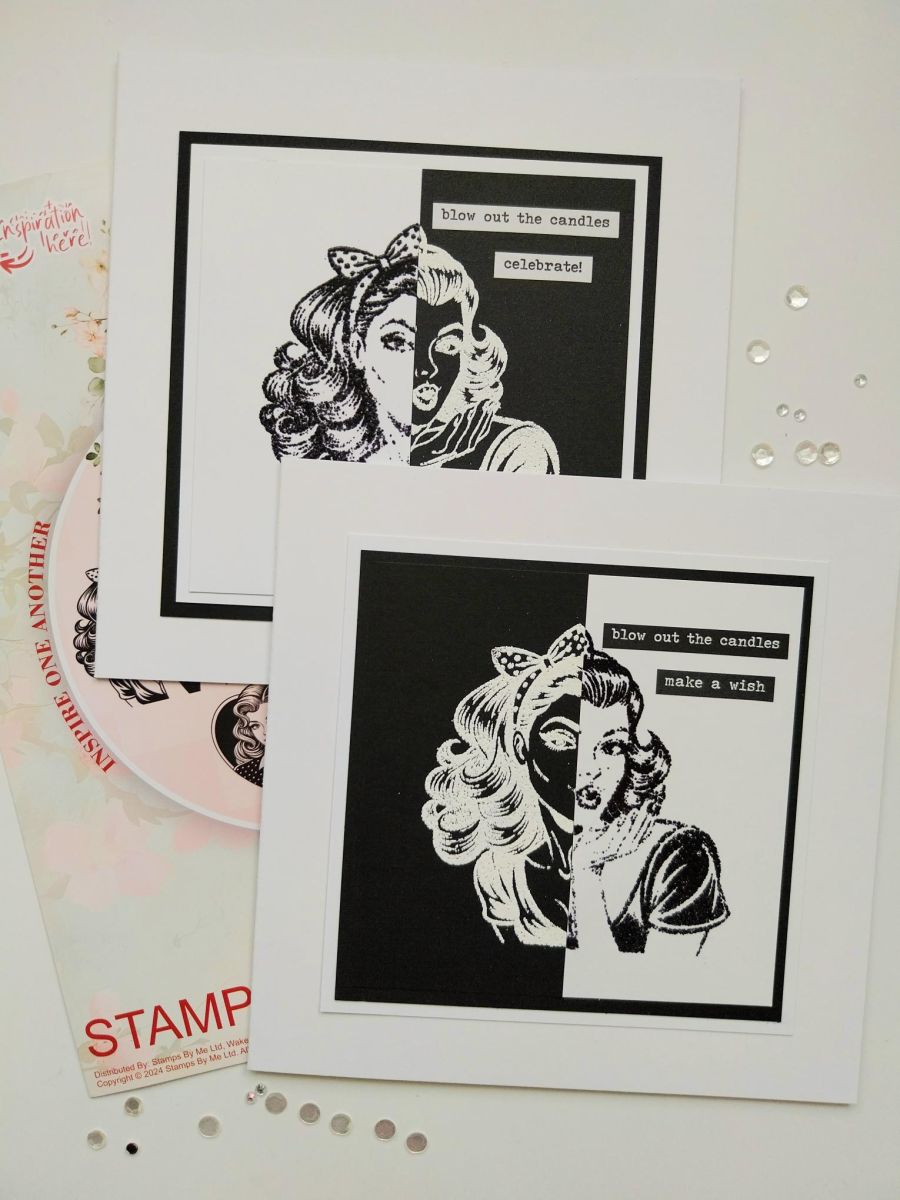
Cut the following card panels in BOTH Black AND White cardstock: 4 x 4" and 4 1/4 x 4 1/4"
Secure the 4" square black panel in the bottom right corner of your Eureka stamping platform. Place this stamp in the centre of the panel and pick up with the Eureka door. Wipe over the card with your anti-static bag.
Stamp the image with your sticky embossing ink pad, then shake the white embossing powder over the top. Tap off any excess powder back into the pot, get your heat tool hot then heat set the powder, as seen here.
NB: DO NOT MOVE THE STAMP DURING THIS PROCESS....KEEP IT IN THE SAME PLACE READY FOR THE SECOND PANEL!!
Secure the 4 x 4" white card panel back in the bottom right corner, as before. Wipe over with the anti-static bag.
Stamp and heat emboss as before but this time use Black embossing powder. Alternatively, use your Midnight ink then apply clear embossing powder over the top.
Now cut each embossed panel in half...each square panel MUST be cut in the SAME place, although where you choose to cut the panels is up to you.
Swap one panel over with the opposite colour. Now match up and adhere the black and white images onto the previously cut black and white card panels (4 1/4 x 4 1/4"), as shown here. You now have two toppers!
Cut two more "mats", one in black cardstock and one in white, both 4 1/2" x 4 1/2".
Adhere the black-matted topper onto the white mat and the other topper onto the black mat.
Adhere both to the card blanks, then add your chosen sentiment tabs to complete your makes.
Share your make with the Stamps By Me community - and keep this guide for next time.
Prefer the previous layout? Open the old page.