


Step 1 of 9
Ink up the Imala Vineyard stamp with the Salvaged Patina Distress Oxide.
Spritz the stamp with water, and stamp on to the white card 5 3/4 x 5 3/4".








Prices change straight away. Languages are translated by Google.
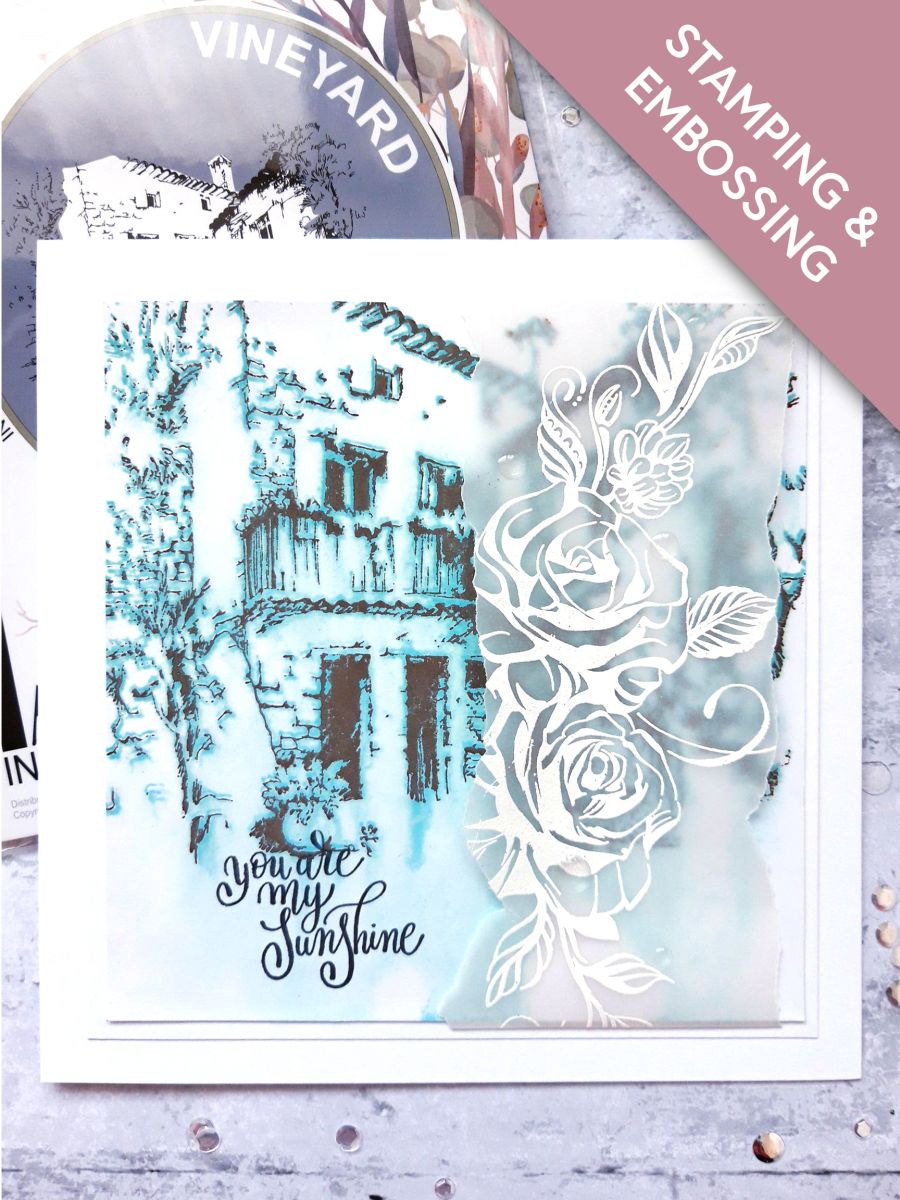
Ink up the Imala Vineyard stamp with the Salvaged Patina Distress Oxide.
Spritz the stamp with water, and stamp on to the white card 5 3/4 x 5 3/4".
Spritz the stamped image with water, and allow the ink to bleed. You can hold the card up so the ink drips down.
You can reink, and stamp the image again, spritzing with more water, allowing it to bleed further, until you are happy with the effect achieved. I restamped mine twice, to get this result.
Keep the card and stamp in place, within your Eureka, as you will be restamping it in the next step.
If possible allow your artwork to dry naturally, but you can speed things up with your heat gun, if you're impatient like me!!
Ink up the stamp again, with the Vintage Photo Distress Oxide.
Spray the stamp lightly, before stamping over the top of your stamped image. You can reink and stamp again, to get a clearer, more defined image, but try not to add any more water. The idea is to get a crisp image over the distressed image.
Set to one side to allow your artwork to dry.
Dust over your torn vellum strip with the anti static bag.
Ink up the Imala Rose Ornament with the Versmark sticky ink. Stamp centrally, just off the left hand edge of the vellum.
Apply the embossing powder over your stamped image.
Heat up your heat gun first, getting it nice and hot, then follow the powder, moving the heat gun as soon as the powder turns. This will minimise warping or burning the vellum.
Place the embossed strip over the right hand side of your stamped image, tucking the top and bottom ends of the vellum over the card. Secure on the back with double sided tape.
Ink up the sentiment, from the My Sunshine Lamination Stamp Collection, with the Smoky Grey Versafine.
Stamp bottom left of your artwork.
Once dry, adhere your artwork on to the white card (6 x 6").
Adhere this on to the front of your card blank.
To finish, add some clear, adhesive gems, around your embossed image.
Share your make with the Stamps By Me community - and keep this guide for next time.
Prefer the previous layout? Open the old page.



