QUICK LINKS

info@howtocraftnetwork.com
We just got smarter - shop and watch with the SBM appGET THE APPWatch us live on your smart TVSEE HOWDiscover our dedicated IPTV channel - go to my-telly.comWATCHCollect loyalty points on every orderFIND OUT MORE
Welcome to the How to Craft Network
 
SBM SHOP
FOLLOW US
GIVE YOUR FRIENDS $10 OFF REFER A FRIEND › DISCOVER MY-TELLY.COM › WE JUST GOT SMARTER GET THE APP › AWARD WINNING CHANNEL ON YOUR TV › JOIN THE CLUB FOR SAVINGS ›
 
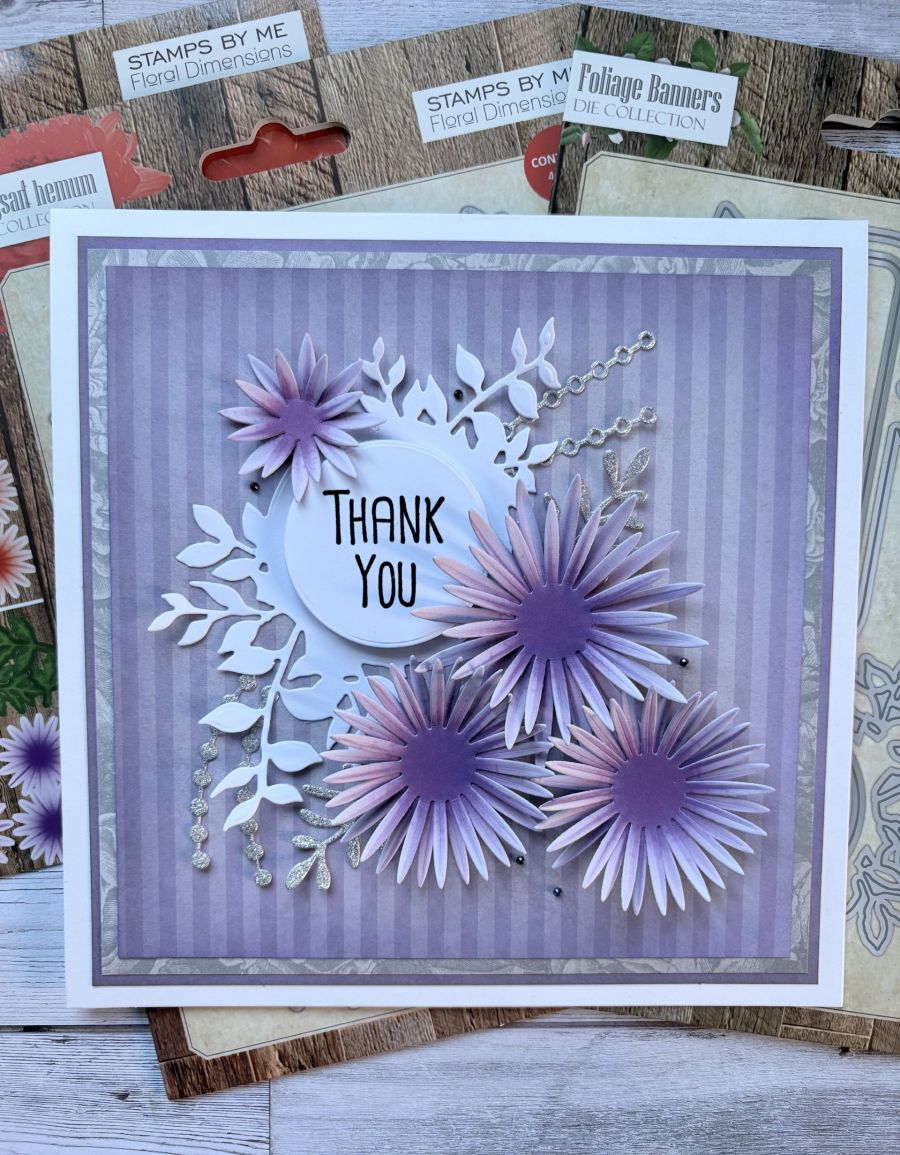
Thank You
How to guide · 8 steps

Thank You

28 January 2026✦ Toni DarrochDie CuttingInk TechniquesStamping TechniquesStretch Your Supplies
8steps
Step 1 of 8

Everything you need

0 of 19 ready
The list
From your craft stash
Tick what you have - this device remembers.

Step by step

tap a picture to see it big · tap DONE as you go - this device remembers
Step 1 of 8
Choose a sheet of paper from each of the Shabby packs. Trim a plain one to 6 1/2 x 6 1/2’, Roses to 6 3/8 x 6 3/8 and a striped one to 6 x 6’. 

 

Step 2 of 8

Lightly blend Indigo ink around the edges of the plain & striped paper. 

Step 3 of 8

Adhere all 3 layers to the white card blank.

Step 4 of 8

Die cut the round banner from white card and some of the Adornments from silver glitter card. Then a few of the Chrysanthemums from the paper pack.

Step 5 of 8

Stamp the sentiment from the Just For You stamp set onto the white circle, using Midnight Ink.

Step 6 of 8
Adhere the banner to the card and then using foam pads, add the white circle. 
Step 7 of 8

Arrange the foliage and flowers around the banner, then glue down. 

Step 8 of 8

Finally add a few gems around the die cuts.

You made it!

Share your make with the Stamps By Me community - and keep this guide for next time.

⇩ DOWNLOAD THE PDF

More die cutting guides

all the guides ›

Prefer the previous layout? Open the old page.