tap a picture to see it big · tap DONE as you go - this device remembers
Step 1 of 8
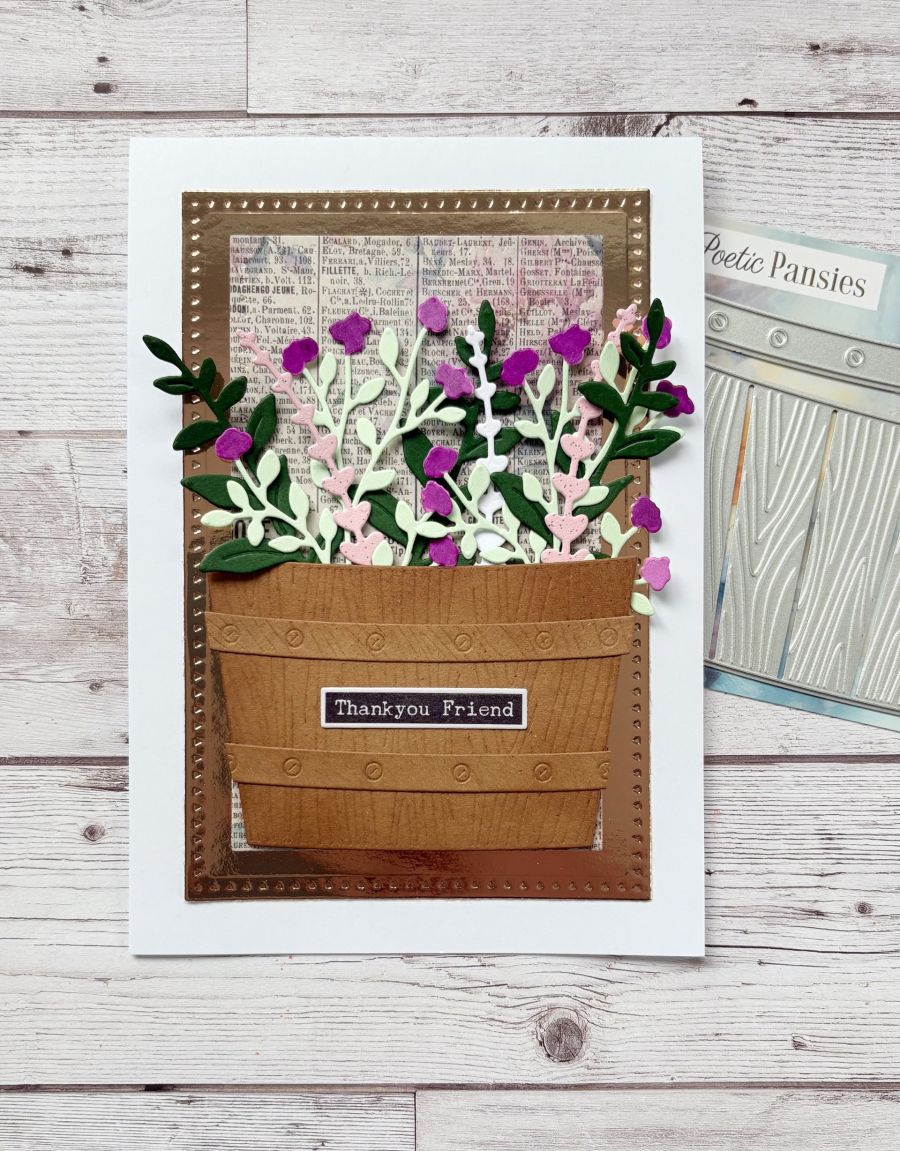
Die cut the basket and two of the strips from Kraft card. Use a blending brush to add Vintage Photo Distress ink. Then die cut several elements from the Perfect Pots die collection. You can choose to have any combination or amount to suit.
Step 2 of 8
Add some colour to the die cuts using a pink & purple SBM Gossip Alcohol Markers.
Step 3 of 8
Die cut two rectangles, one from Mirri card and the next size down from the Romantic Garden papers. Adhere together and add to your card blank.
Step 4 of 8
Arrange the die cuts and glue them behind the basket die.
Step 5 of 8
Using the dies as a guide, cut ONE drop from the Sepia or Typewriter washi roll. Lift up the backing sheet along one end of the tape and adhere across the top of an A4 sheet of white card. Slowly peel away the backing, as you use your hand to smooth the washi tape down on to the card. Once the backing has been fully removed, you can burnish the washi to ensure there are no air bubbles or creases.
Step 6 of 8
Line up the second die, secure in place and run through your machine.
Step 7 of 8
Once all elements are die cut, pop out the sentiments, pick out the one you are using for this project and keep the rest in a tub for future projects.
Step 8 of 8
Add the basket to the card using foam pads. Finally add your chosen washi tape sentiment.
You made it!
Share your make with the Stamps By Me community - and keep this guide for next time.
Hello! I'm Toni's AI craft helper - I know the projects from Toni's shows, our guides and everything in the shop. Ask me anything, like "which dies go with this stamp set?" or "what do I need to start ink blending?"
An AI helper (not Toni herself), answering from Toni's shows and our shop - please check the product page before you buy.