


Step 1 of 11
Create a mask for this stamp, from the Imala Wildflowers Stamp Collection, from a masking sheet or copy paper.








Prices change straight away. Every language is our own translation, not Google.
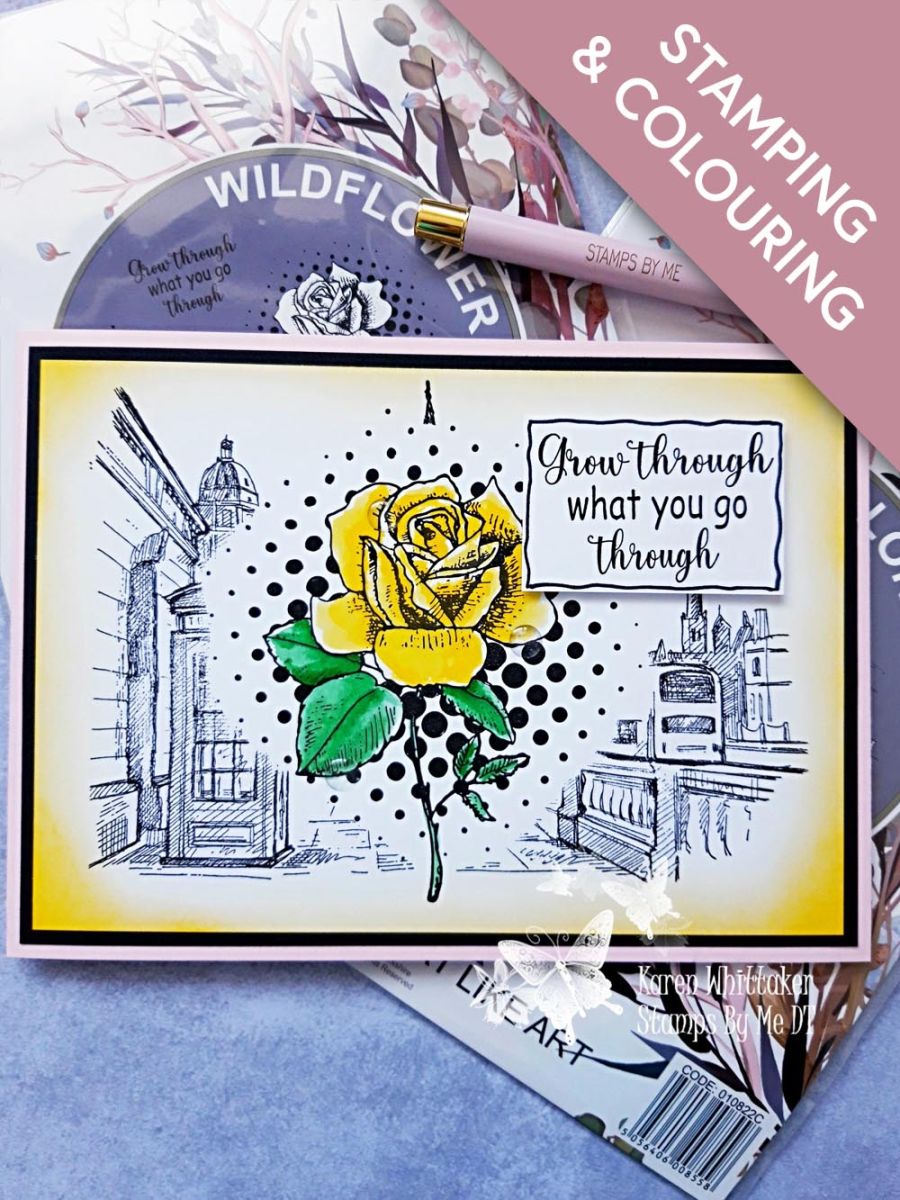
Create a mask for this stamp, from the Imala Wildflowers Stamp Collection, from a masking sheet or copy paper.
Place the mask in the centre of the white card, cut to 7 3/4 x 5 1/4", placed in landscape view, as shown here. You can use low tack tape or washi, to secure your mask in place.
Ink up the fantastic Imala London stamp with the Onyx Black Versafine and stamp across your card and mask.
Carefully remove the mask and dry the stamped image.
Ink up the Wildflowers stamp, with the Versafine and stamp in the centre.
Using the Sherbet ink pad and your blending tool, apply the ink around the outer edges of the card, fading the colour out as you move in towards your stamped image.
Apply a little of the Sherbet and Hedgerow to your craft mat, add a little water and paint your Rose.
Once dry, adhere to the black card.
Adhere to the front of your pink, landscape card blank and set to one side.
Ink up the sentiment stamp, from the Wildflowers set, with the Versafine and stamp on to the white card, cut to 2 1/2 x 1 1/2".
Use a black pen to draw a decorative, wiggly frame around your sentiment.
Adhere to the top right of your artwork, with foam pads.
To finish, add clear adhesive gems to your Rose.
Share your make with the Stamps By Me community - and keep this guide for next time.
Prefer the previous layout? Open the old page.



