










QUICK LINKS

info@howtocraftnetwork.com
We just got smarter - shop and watch with the SBM appGET THE APPWatch us live on your smart TVSEE HOWDiscover our dedicated IPTV channel - go to my-telly.comWATCHCollect loyalty points on every orderFIND OUT MORE
Welcome to the How to Craft Network
 
SBM SHOP
FOLLOW US
GIVE YOUR FRIENDS $10 OFF REFER A FRIEND › DISCOVER MY-TELLY.COM › WE JUST GOT SMARTER GET THE APP › AWARD WINNING CHANNEL ON YOUR TV › JOIN THE CLUB FOR SAVINGS ›
 
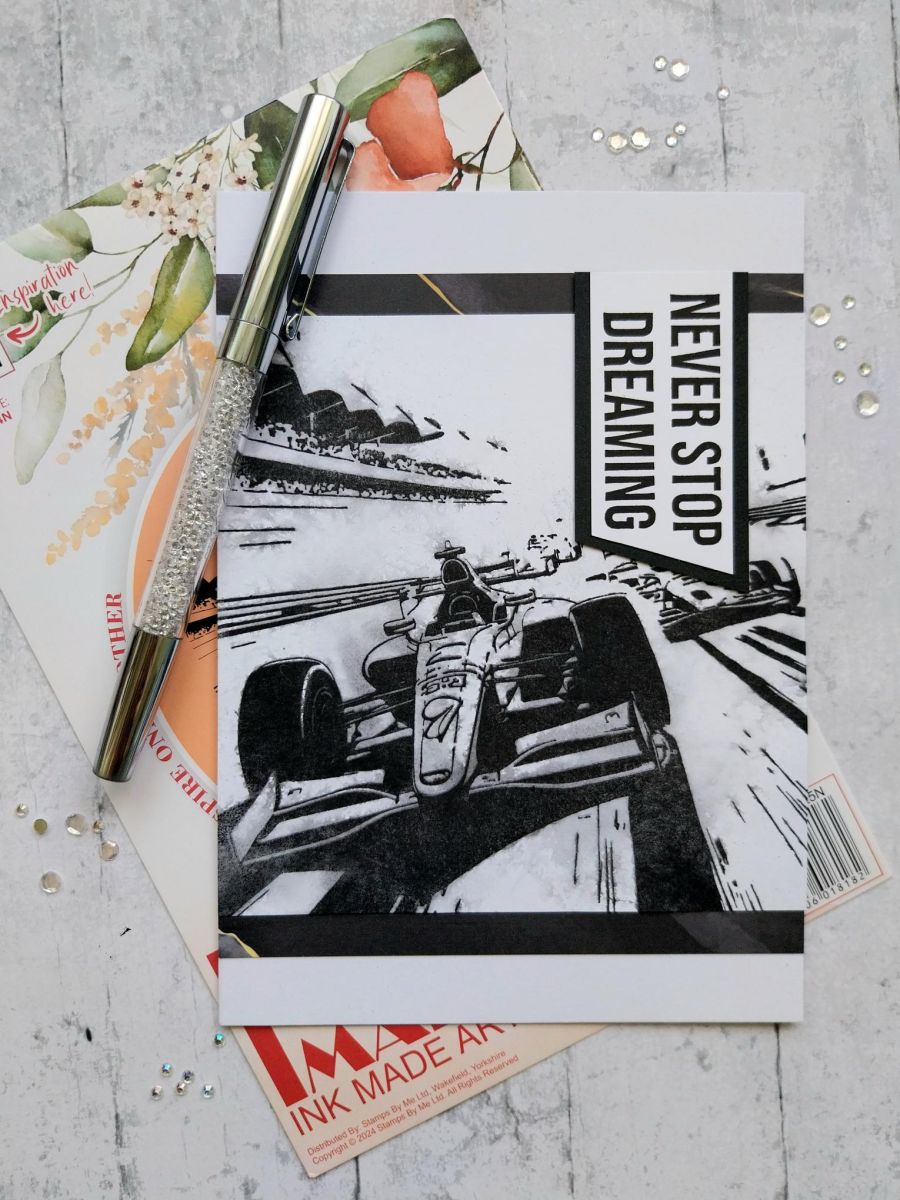
Never Stop Dreaming
How to guide · 6 steps

Never Stop Dreaming

2 October 2024✦ Toni Darroch✦ Carley DuffStamping Techniques
6steps
Step 1 of 6

Everything you need

0 of 12 ready
The list
From your craft stash
Tick what you have - this device remembers.

Step by step

tap a picture to see it big · tap DONE as you go - this device remembers
Step 1 of 6

Trim a piece of white card to 5 x 5". Stamp the image from Pit Stop in Black Soot. DO NOT MOVE THE STAMP AND CARD. Spray the stamped image lightly with water, allowing the ink to "bleed". Once you are happy with the result, mop up the excess water/ink with a paper towel and blast dry with a heat tool. This is referred to as the "bleeding" technique. 

Step 2 of 6

Re-ink the stamp with your Midnight ink pad and stamp back over the image, giving back definition to your artwork. Dry with heat tool and pop aside. 

Step 3 of 6

Trim a sheet from the Charcoal Paper pad, to 5 x 5 3/4". 

Step 4 of 6

Adhere your artwork on to the black paper, flush with the sides and an equal depth of paper visible top and bottom, as seen here. 

Step 5 of 6

Adhere to your card black, again flush with sides and equal gap top and bottom. 

Step 6 of 6

Stamp your sentiment in Midnight, on to a piece of white card and trim to shape. Adhere on to black card and trim to create a "mat". 

You made it!

Share your make with the Stamps By Me community - and keep this guide for next time.

⇩ DOWNLOAD THE PDF

More stamping techniques guides

all the guides ›

Prefer the previous layout? Open the old page.


