Everything you need
0 of 13 ready
The list
From your craft stash
Step by step tap a picture to see it big · tap DONE as you go - this device remembers
1
Step 1 of 7
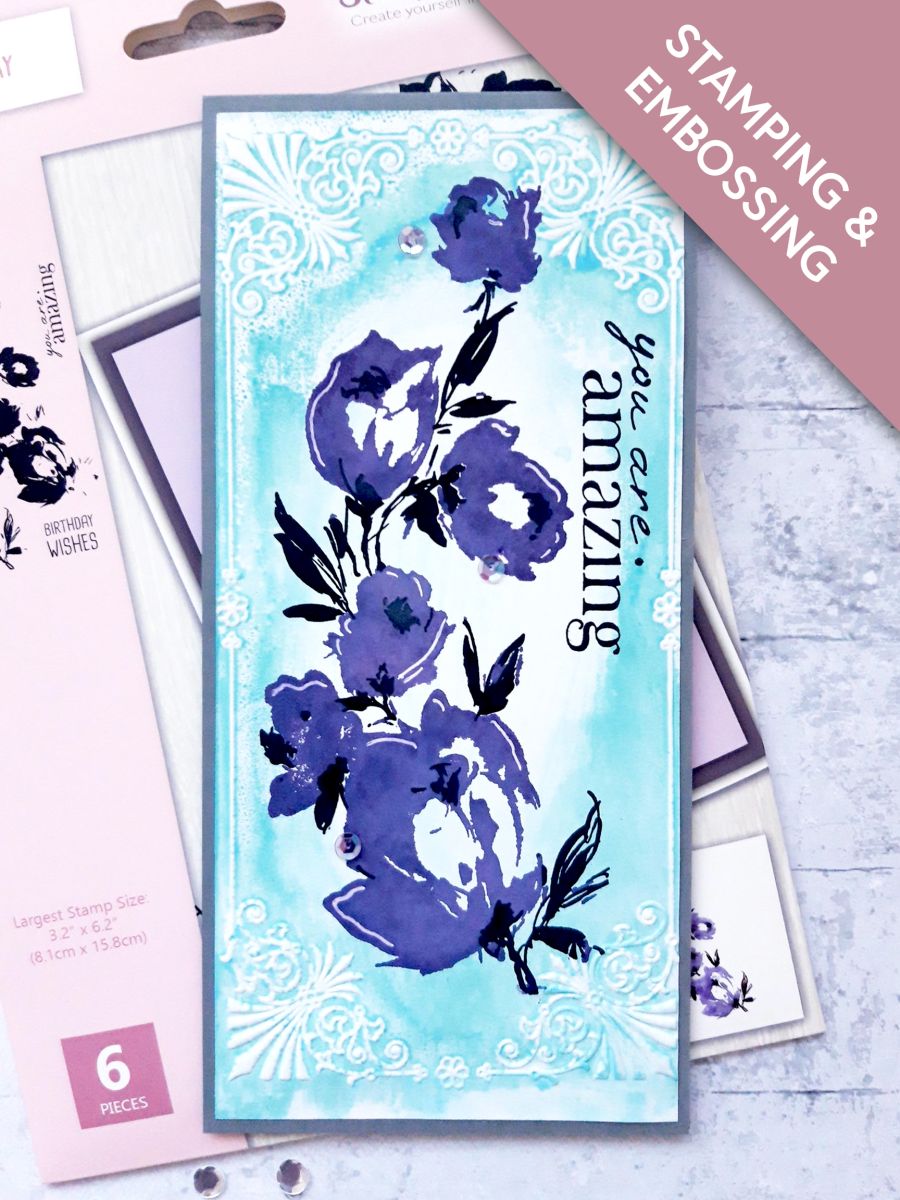
Apply the Salvaged Patina Oxide to the DEBOSSED side of the Vintage Frame Embossing Folder.
TIP: If you like a distressed look, like me, don't ink right up to all the edges.
Spritz folder with water, then dab away the ink, from an area in the centre of the frame, as shown on this photo.
✓ DONE
2
Step 2 of 7
Lay the white card carefully, inside the folder, and run it through your embossing machine.
Dry off the ink thoroughly.
✓ DONE
3
Step 3 of 7
Ink up the solid floral stamp, from the Wonderful Day Lamination Stamp Collection, with the Villainous Potion Oxide.
Spritz with water and stamp in the centre of your embossed frame.
You can reink and re stamp, until happy with the result.
✓ DONE
4
Step 4 of 7
Ink up the coordinating detailed stamp, with the Onyx Black Versafine.
Line up, and stamp on to your stamped image.
TIP: If you are unsure where to stamp the detail, the images on the packaging will help you.
✓ DONE
5
Step 5 of 7
Ink up the sentiment stamp, from the same set, in the Versafine.
Stamp down the right hand, inside edge, of the embossed frame.
✓ DONE
6
Step 6 of 7
Use a white gel pen to add accents, and highlights, to your stamped floral image.
✓ DONE
7
Step 7 of 7
Glue your dried artwork on to the card blank.
To finish off your card, add sequins as required.
✓ DONE
You made it!
Share your make with the Stamps By Me community - and keep this guide for next time.
Prefer the previous layout? Open the old page .