


Step 1 of 12
Remove this decorative paper from the Imala Collage Paper Pad and tear to approx 8 x 5 1/2" ( so it will sit nicely on your card blank).








Prices change straight away. Languages are translated by Google.
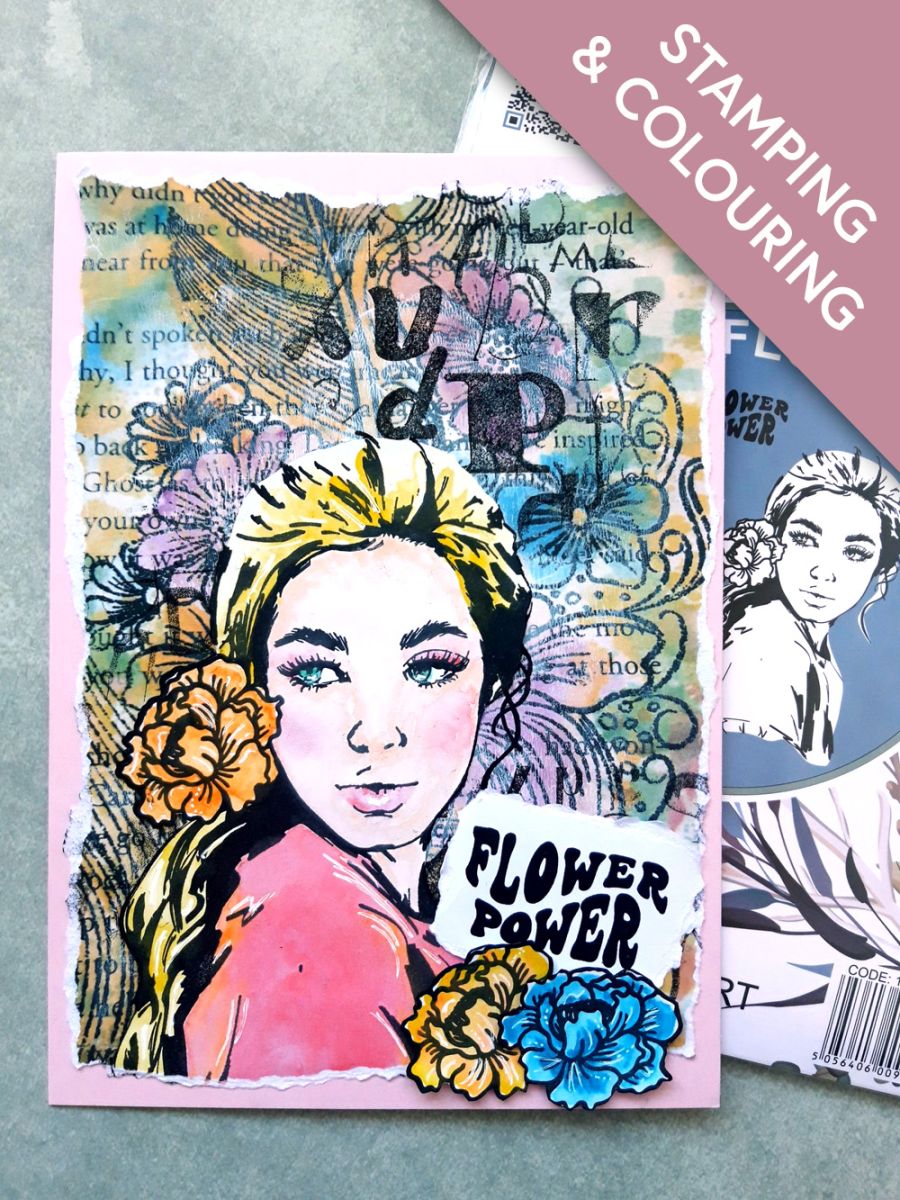
Remove this decorative paper from the Imala Collage Paper Pad and tear to approx 8 x 5 1/2" ( so it will sit nicely on your card blank).
Pop some white Gesso on to your glass mat, then use a brayer, or a dry flat paint brush, to randomly apply it over the decorative paper. This pushes the vibrant design back, allowing your focal image to pop.
Randomly ink up the Imala Jumbled Up, with the Onyx Black Versafine. Hold the stamp in your hand and randomly stamp on to the gessoed paper, thus creating a distressed effect.
Ink up our gorgeous Flower Power girl with the Versafine and stamp just off the bottom left of your background. Set aside to dry.
Reink her and stamp on to the white card, cut to 7 x 5".
Cut her out, setting the remaining white card to one side for the next step.
Paint her using your watercolour paints and set aside to dry.
Reink the flower in her hair and stamp twice, on to the white card you set aside.
Cut around the flowers, then paint with your watercolours.
Adhere your painted image over the top of the stamped image, on the decorative paper, tearing off any overhang.
Adhere on to your pink card blank.
Adhere your florals to the bottom right of your lady, using foam pads, for added dimension.
Set to one side.
Ink up the sentiment stamp with the Versafine and stamp on to the white card (3 x 2").
Once the ink is dry, tear around your sentiment.
Adhere your sentiment on to your card, so its tucked just under the flowers.
Finally, use a white gel pen to add accents and highlights to your artwork.
Share your make with the Stamps By Me community - and keep this guide for next time.
Prefer the previous layout? Open the old page.



