QUICK LINKS

info@howtocraftnetwork.com
We just got smarter - shop and watch with the SBM appGET THE APPWatch us live on your smart TVSEE HOWDiscover our dedicated IPTV channel - go to my-telly.comWATCHCollect loyalty points on every orderFIND OUT MORE
Welcome to the How to Craft Network
 
SBM SHOP
FOLLOW US
GIVE YOUR FRIENDS $10 OFF REFER A FRIEND › DISCOVER MY-TELLY.COM › WE JUST GOT SMARTER GET THE APP › AWARD WINNING CHANNEL ON YOUR TV › JOIN THE CLUB FOR SAVINGS ›
 
House On A Hill
How to guide · 10 steps

House On A Hill

3 February 2022Distress InkInk TechniquesStamping Techniques
10steps
Step 1 of 10

Everything you need

0 of 18 ready
The list
From your craft stash
Tick what you have - this device remembers.

Step by step

tap a picture to see it big · tap DONE as you go - this device remembers
Step 1 of 10

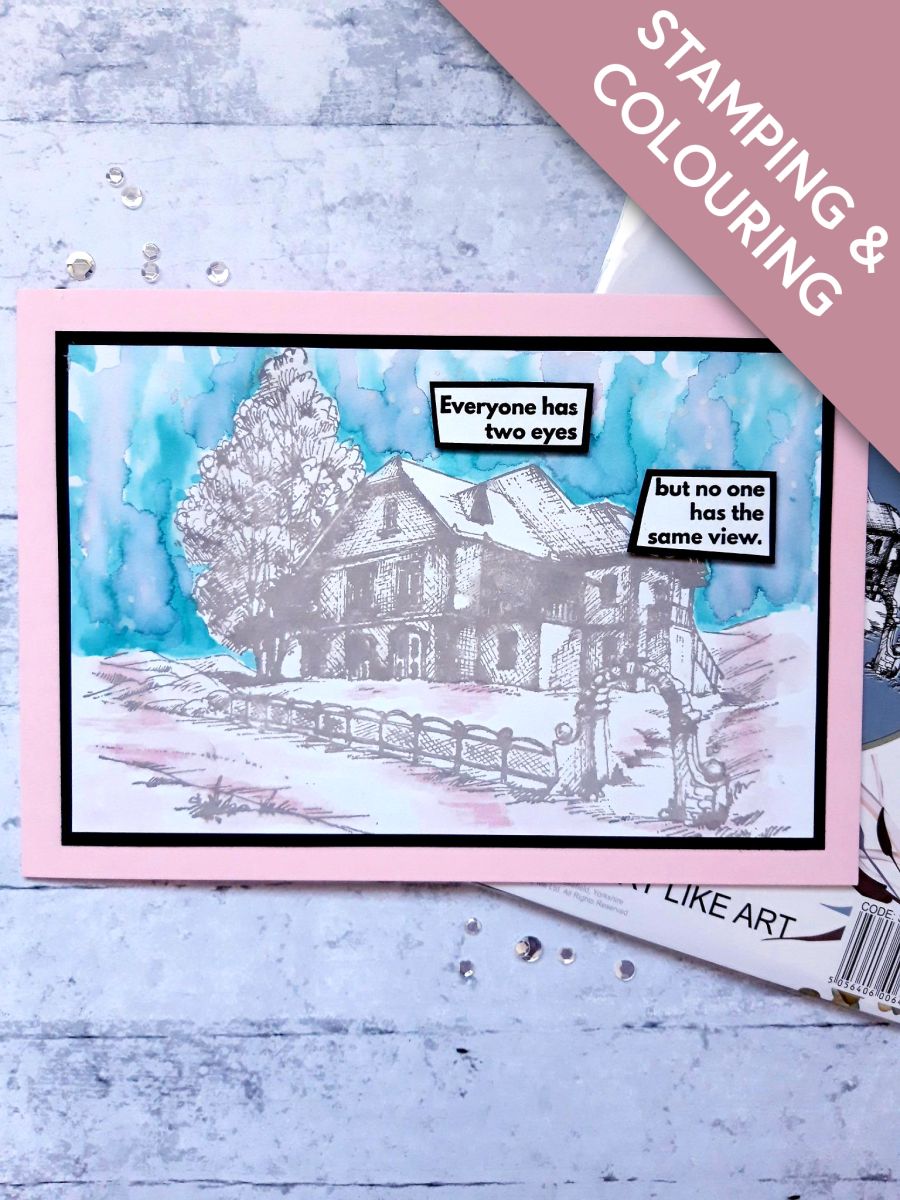
Ink up your stamp from the Imala House On A Hill set, with the Hickory Smoke Distress Oxide. 

Spritz the stamp with water and stamp on to the white, landscape card (7 1/4 x 4 3/4").

To achieve a loose, watercolour effect, you can spritz the stamped image, allow it to bleed for a few seconds, and restamp over the top. 

Whilst the image is still wet, use your paintbrush to move the ink around, add more ink etc, to create colour. depth and shade to your image. 

Once happy with the result dry off your artwork. 
Step 2 of 10

Spray the Izink Bleu Clair Shine Spray on to a craft or glass mat, and water down.

Use your paint brush to "wet" the sky, on your stamped image, then dab the watered down spray along the skyline, tip up your card and allow the ink to drip down, and move freely. This is known as the wet in wet technique. You can add more ink, spray directly on to your card and tease the ink with your paint brush, until you are happy with the result.  

Step 3 of 10

Whilst the ink is still wet, spray the Izink Rose Poudre on to your mat, water down and dab it in random areas, again spritzing it with water and allowing the ink to move and blend with the blue ink. You can add more of the Rose Poudre, until you are happy with the effect. 

Step 4 of 10

Use the Rose Poudre to paint in a few pink reflections, and highlights, where required, on the grass, path etc. 

Step 5 of 10

Add splatters of the White Lace Confetti paint over your artwork, as required. I like lots of splats!!

Allow your artwork to dry, or if impatient like me, speed it up with a heat gun. 


Step 6 of 10

Adhere your artwork on to the black cardstock (7 1/2 x 5")

Step 7 of 10

Adhere this on to the front of your pink, top folding card blank, and set to one side. 

Step 8 of 10

Ink up the sentiment stamp, from the Celebrate And Create Lamination Stamp Collection, with the Onyx Black Versafine. 


Stamp on to the 2 1/2 x 2 1/2" white card, then cut the sentiment in to 2. I went for jaunty angles, but you don't have to. 

Adhere these on to the black card and cut, to create a black mat for each. 

Step 9 of 10

Add the sentiments to your card, using wet glue, or foam pads which will add dimension. 

Step 10 of 10

To finish, add some sparkle where required, using the Gossip Clear Overlay Glitter pen. I added mine to the ground, tree and roof.  

You made it!

Share your make with the Stamps By Me community - and keep this guide for next time.

⇩ DOWNLOAD THE PDF

More distress ink guides

all the guides ›

Prefer the previous layout? Open the old page.