Give your friends $10 off their first order!
Refer a FRIEND


WHAT YOU WILL NEED:
White top folding card blank (cut down to 7 x 5")
Black card (6 3/4 x 4 3/4")
White card (6 1/2 x 4 1/2")
White card (6 x 6")
Stamps from Textured Wall Stamp Collection
Stamps and dies from Possibility Stamp And Die Collection
Dies from Diamond Stitching Nesting Dies Collection
Distress Oxide: Vintage Photo
Versafine Ink Pad: Onyx Black
Izink Pigments: Stratosphere, Thundercloud, Olive Drab
Paint brush
Water spray bottle
Double sided foam sheet or foam pads
Eureka 101
Paper Trimmer
Perfect Together Glue
Die Cutting machine
[click image to enlarge] 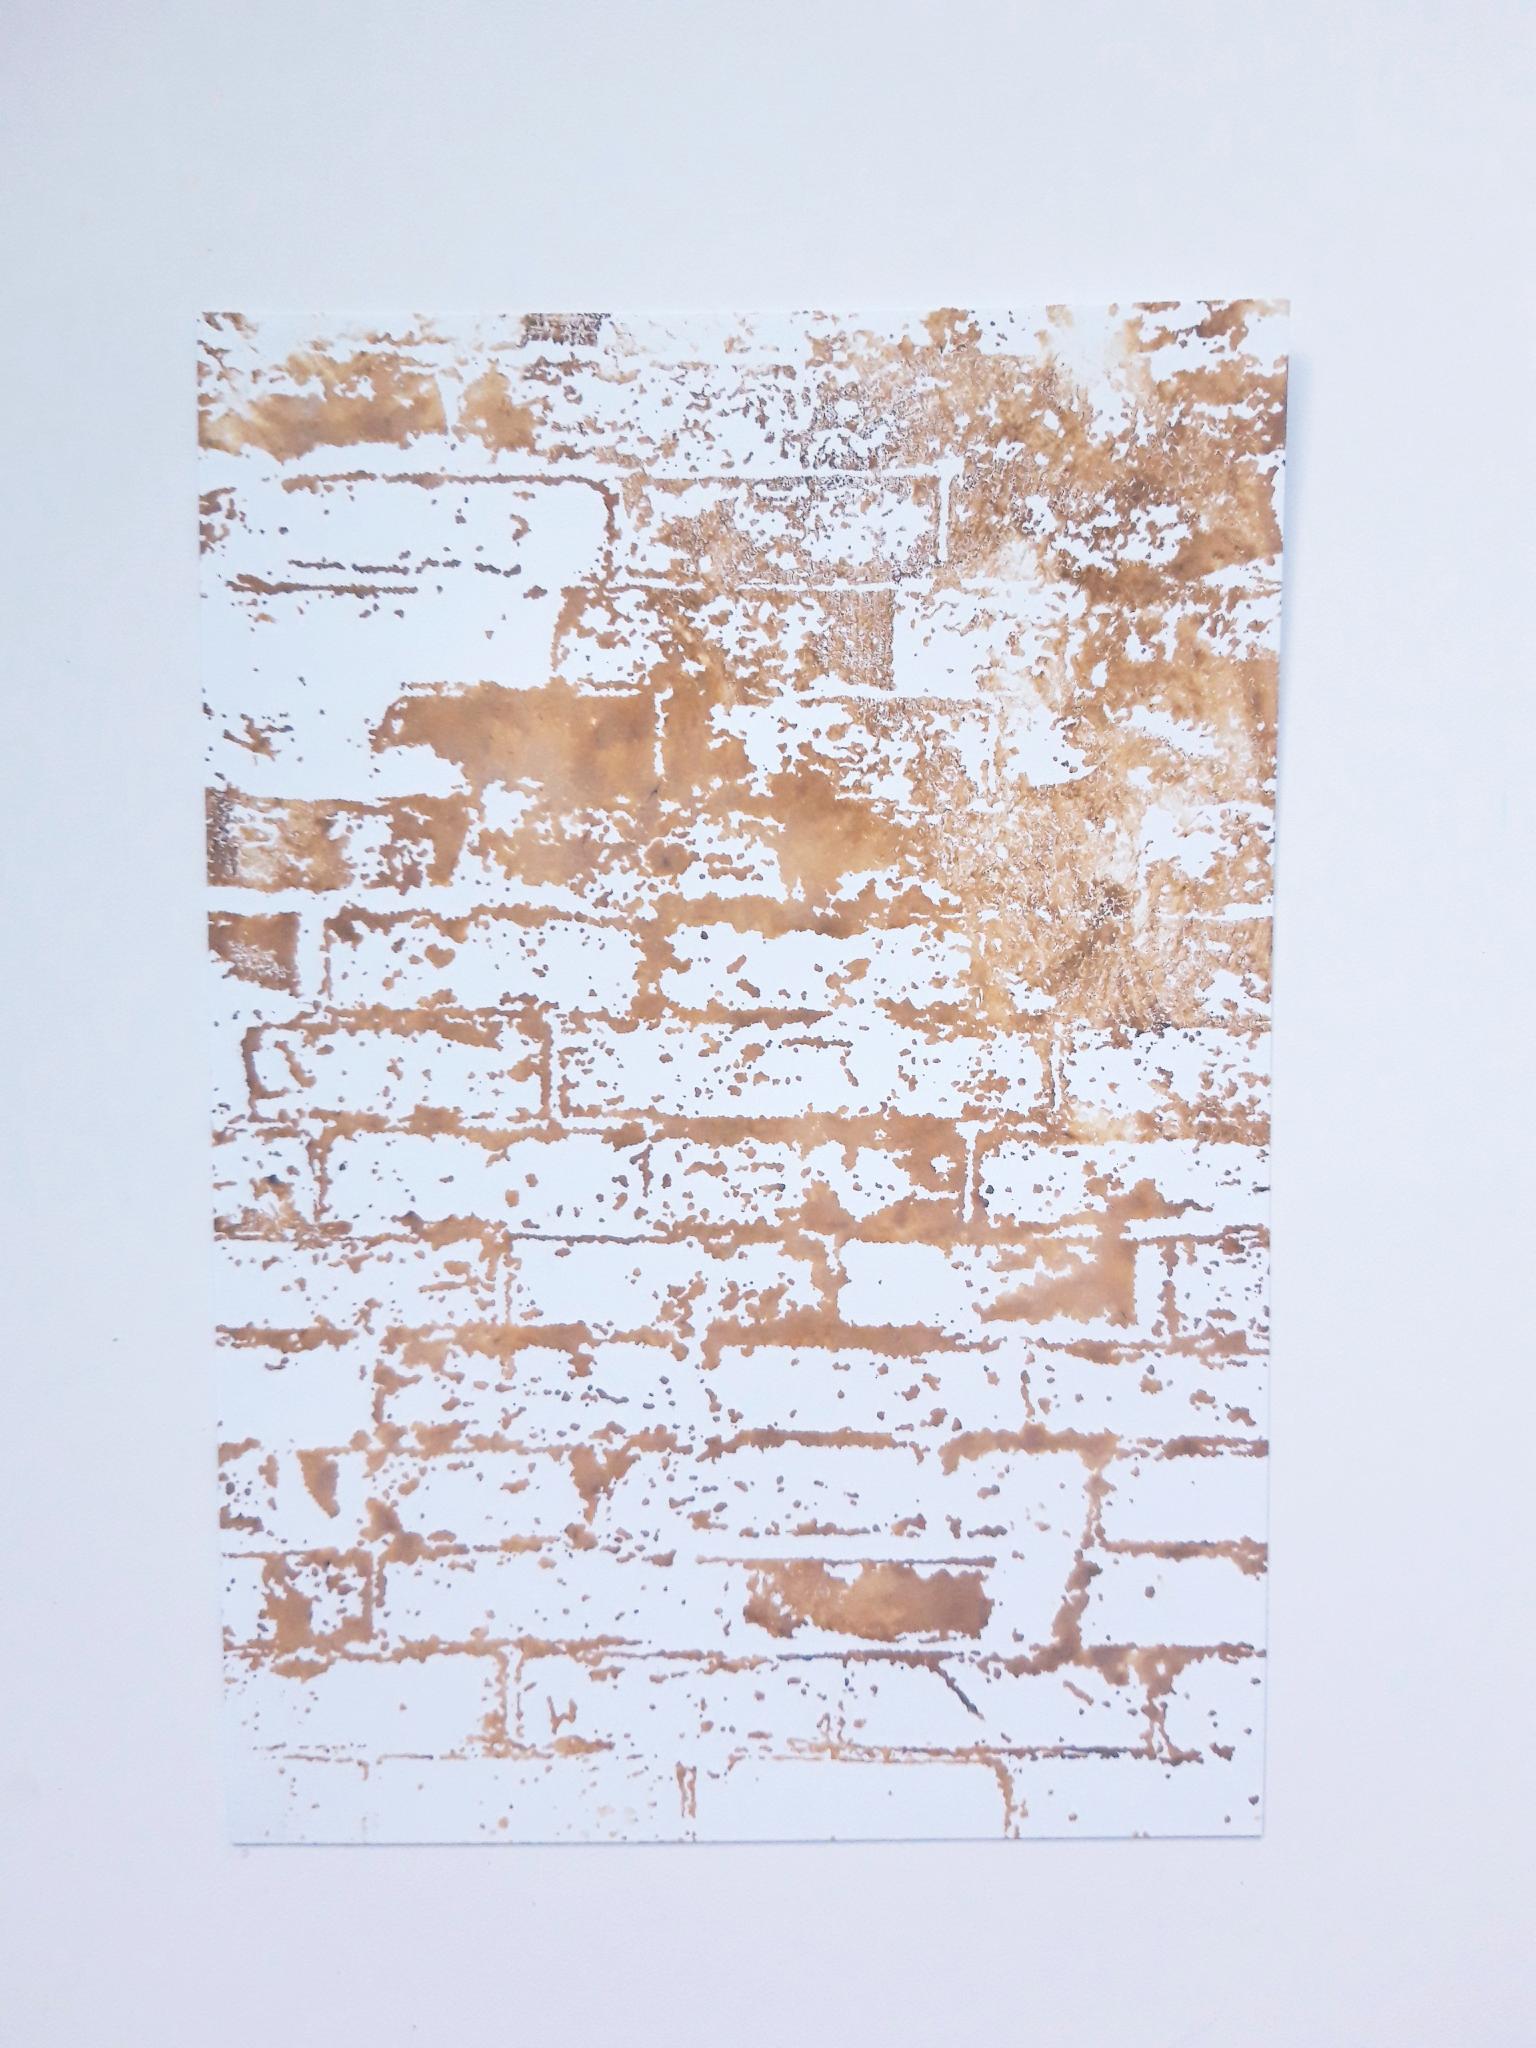
|
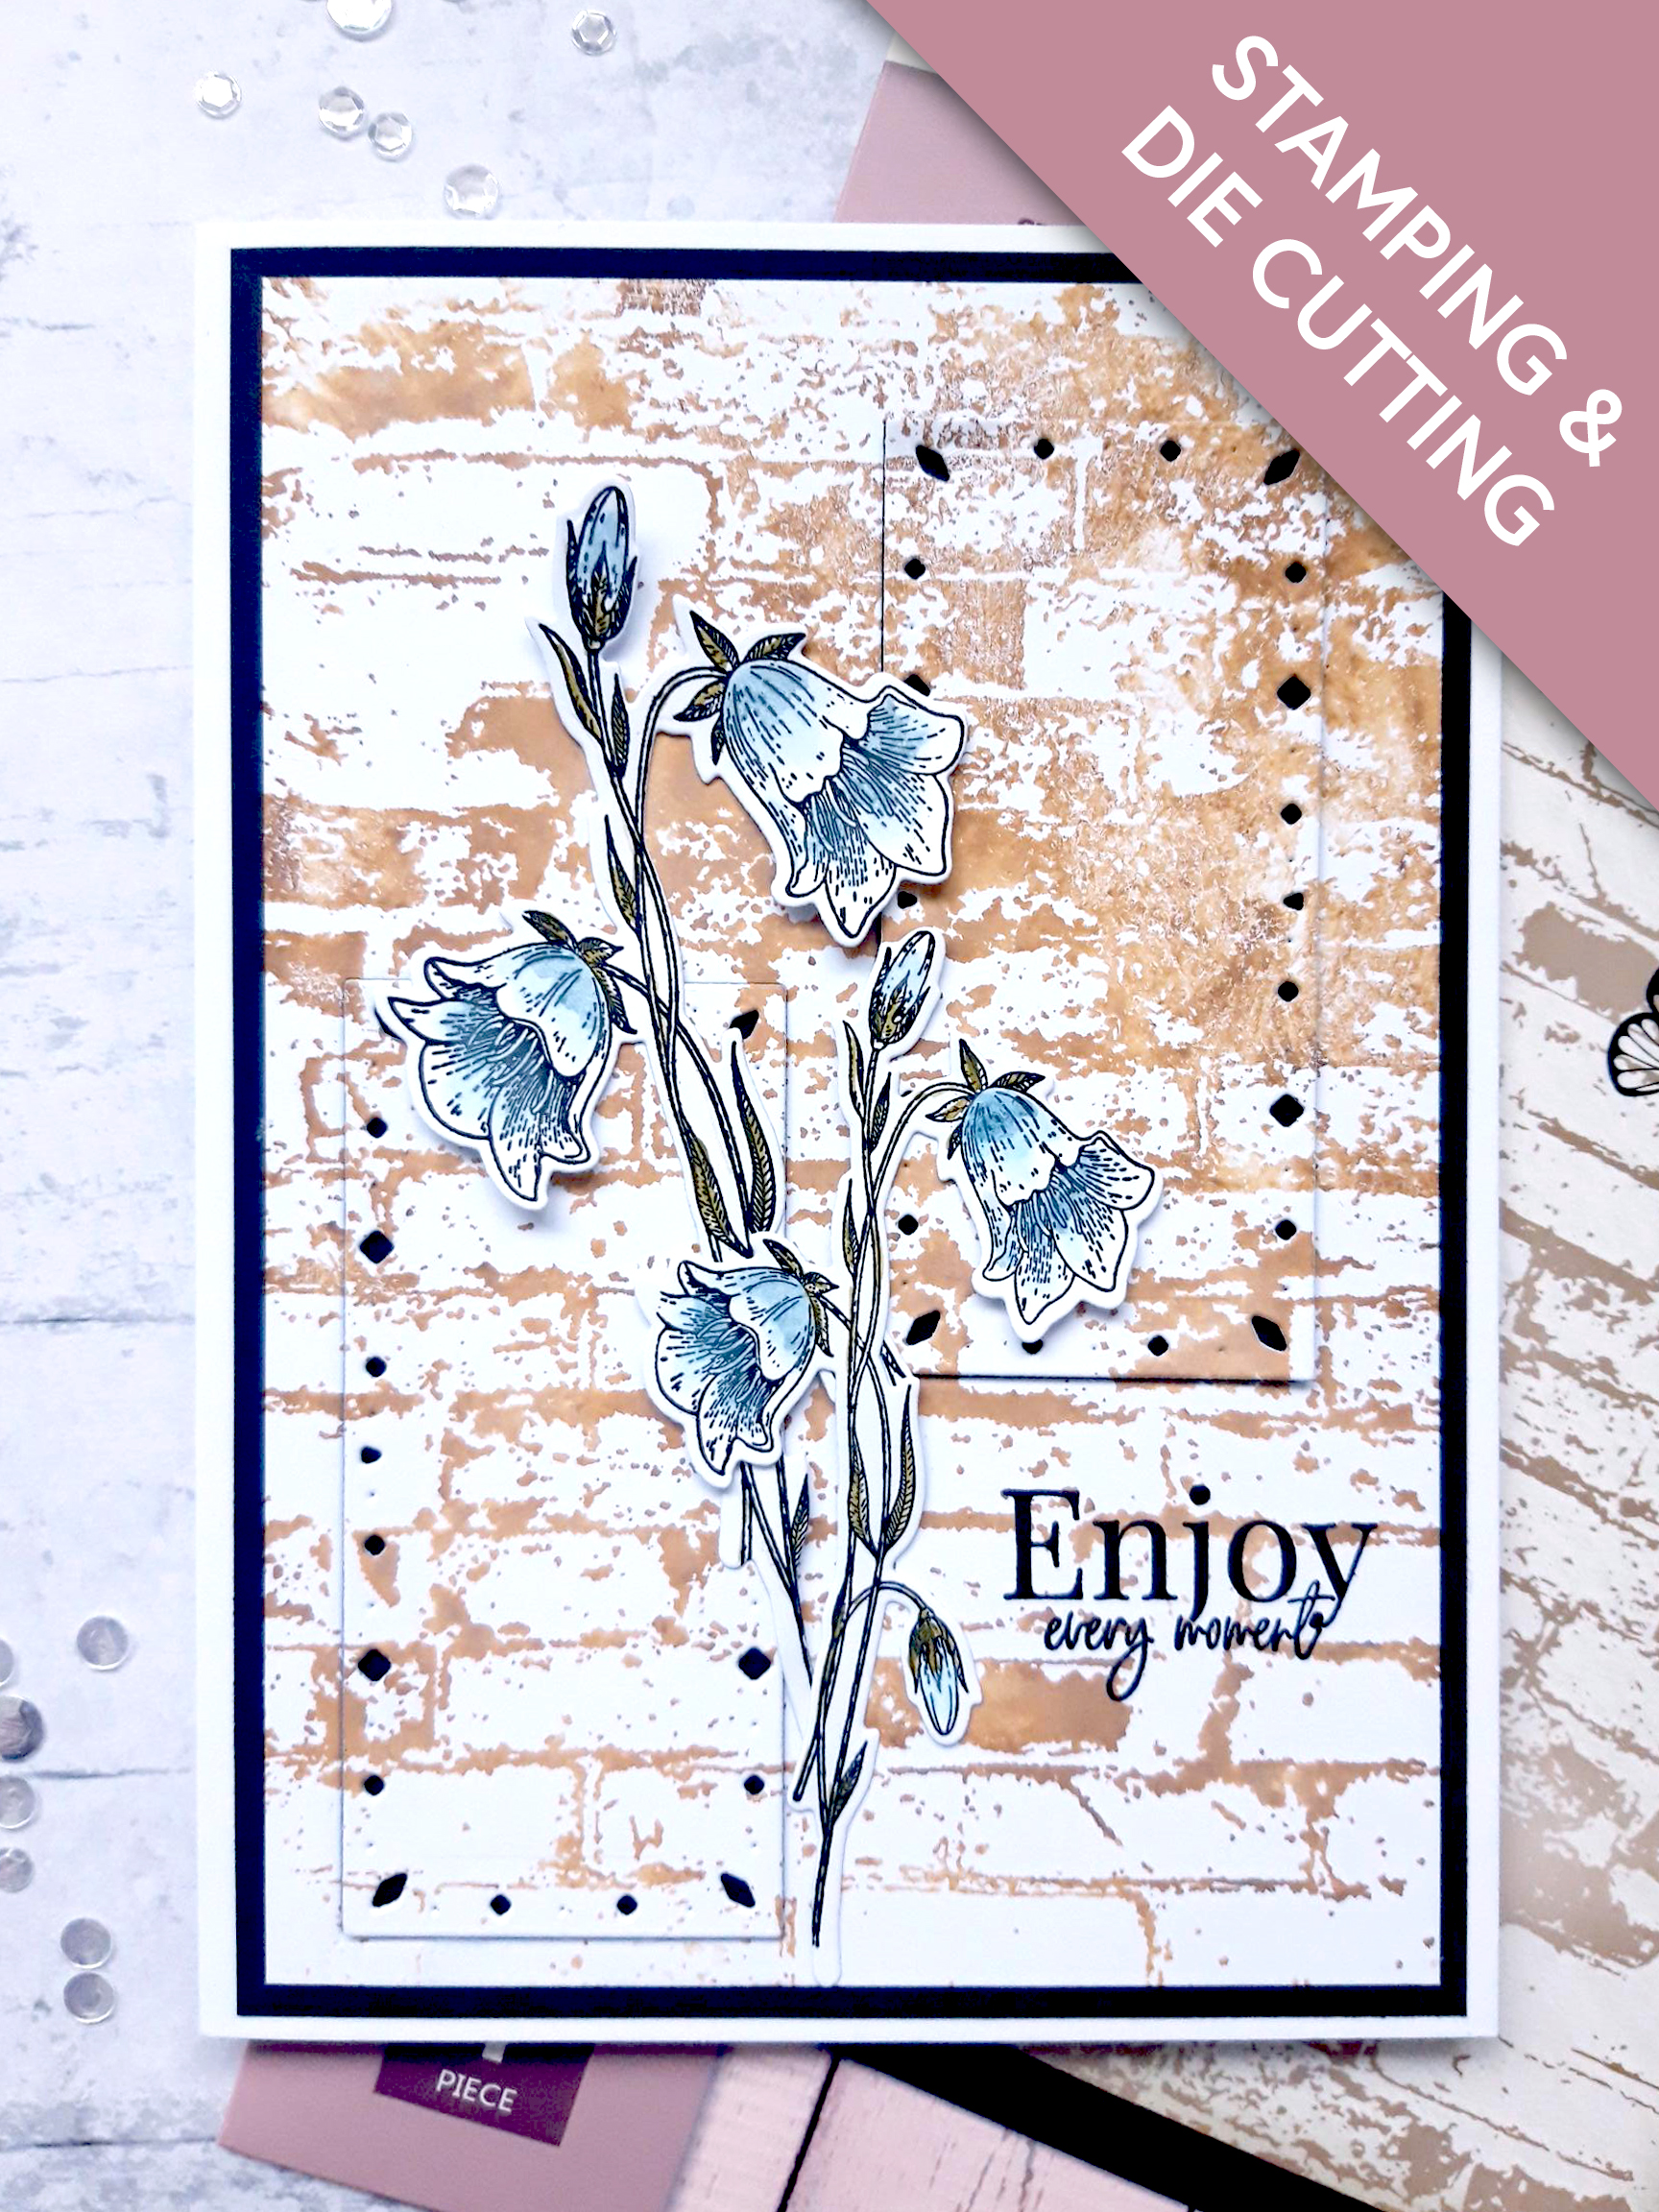
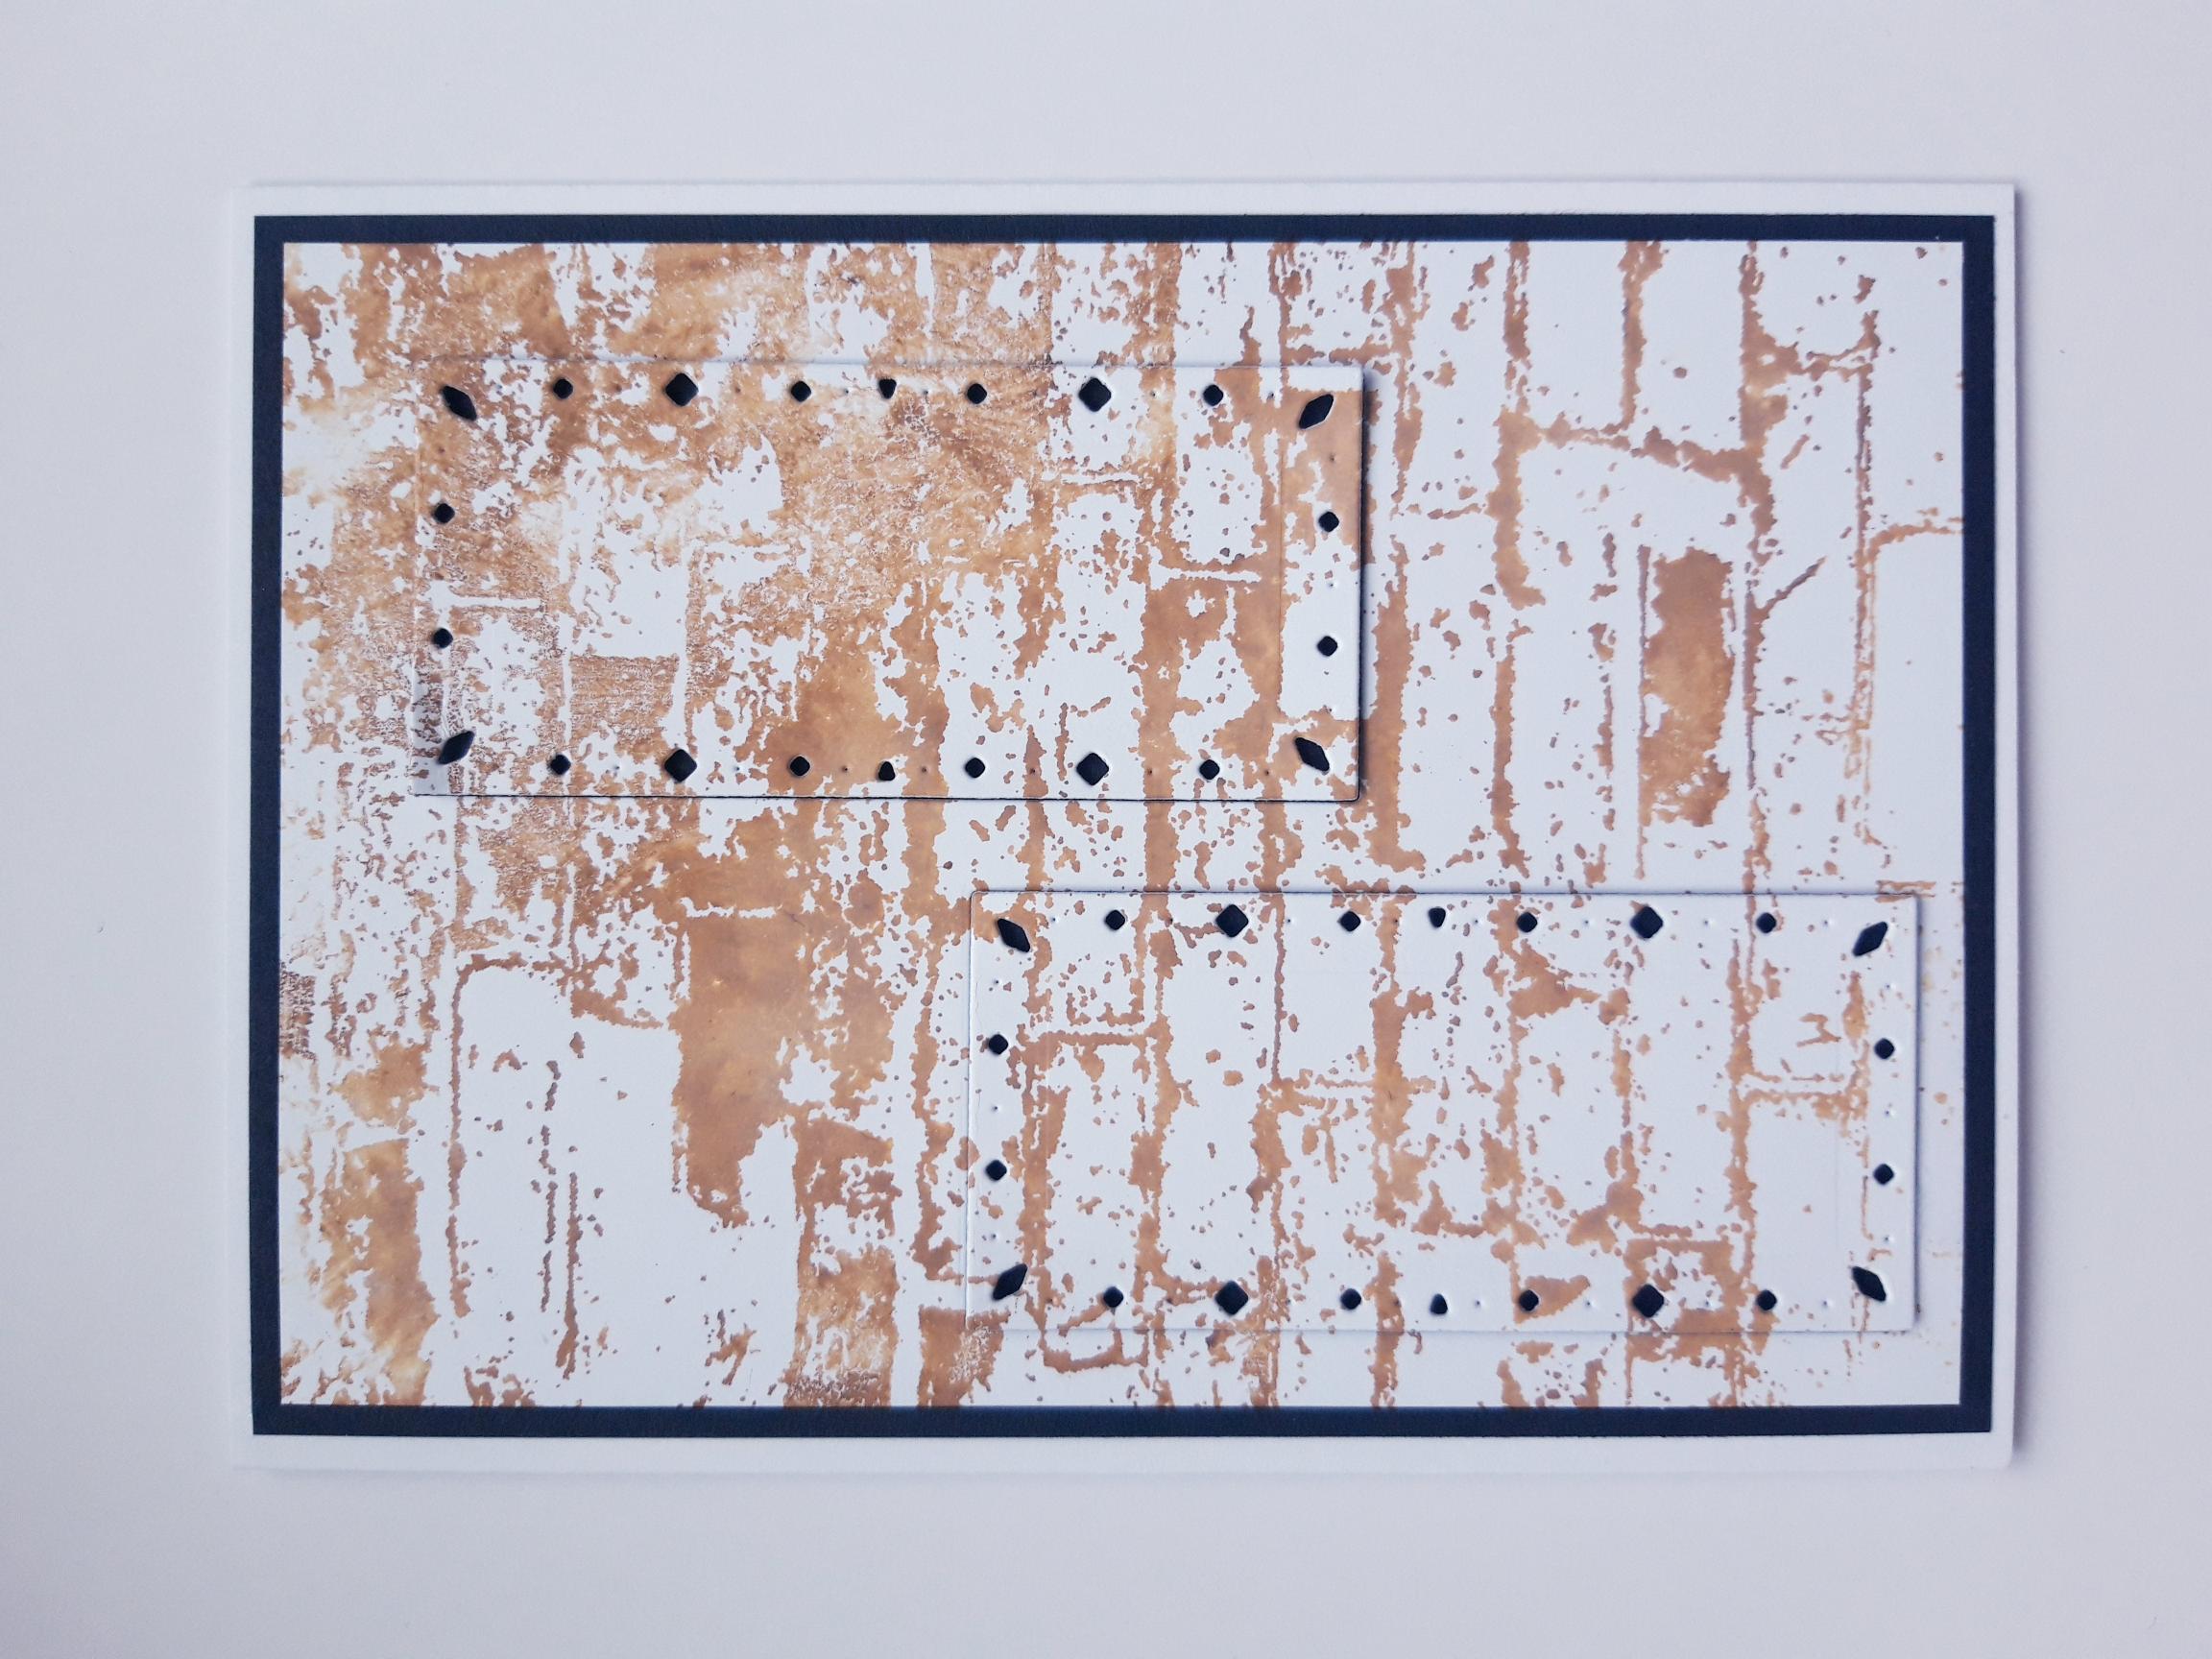
Ink up the stamp from the Textured Wall Stamp Collection, with the Vintage Photo Distress Oxide. Spritz the stamp with water, and stamp on to the white card (6 1/2 x 4 1/2"). |

|
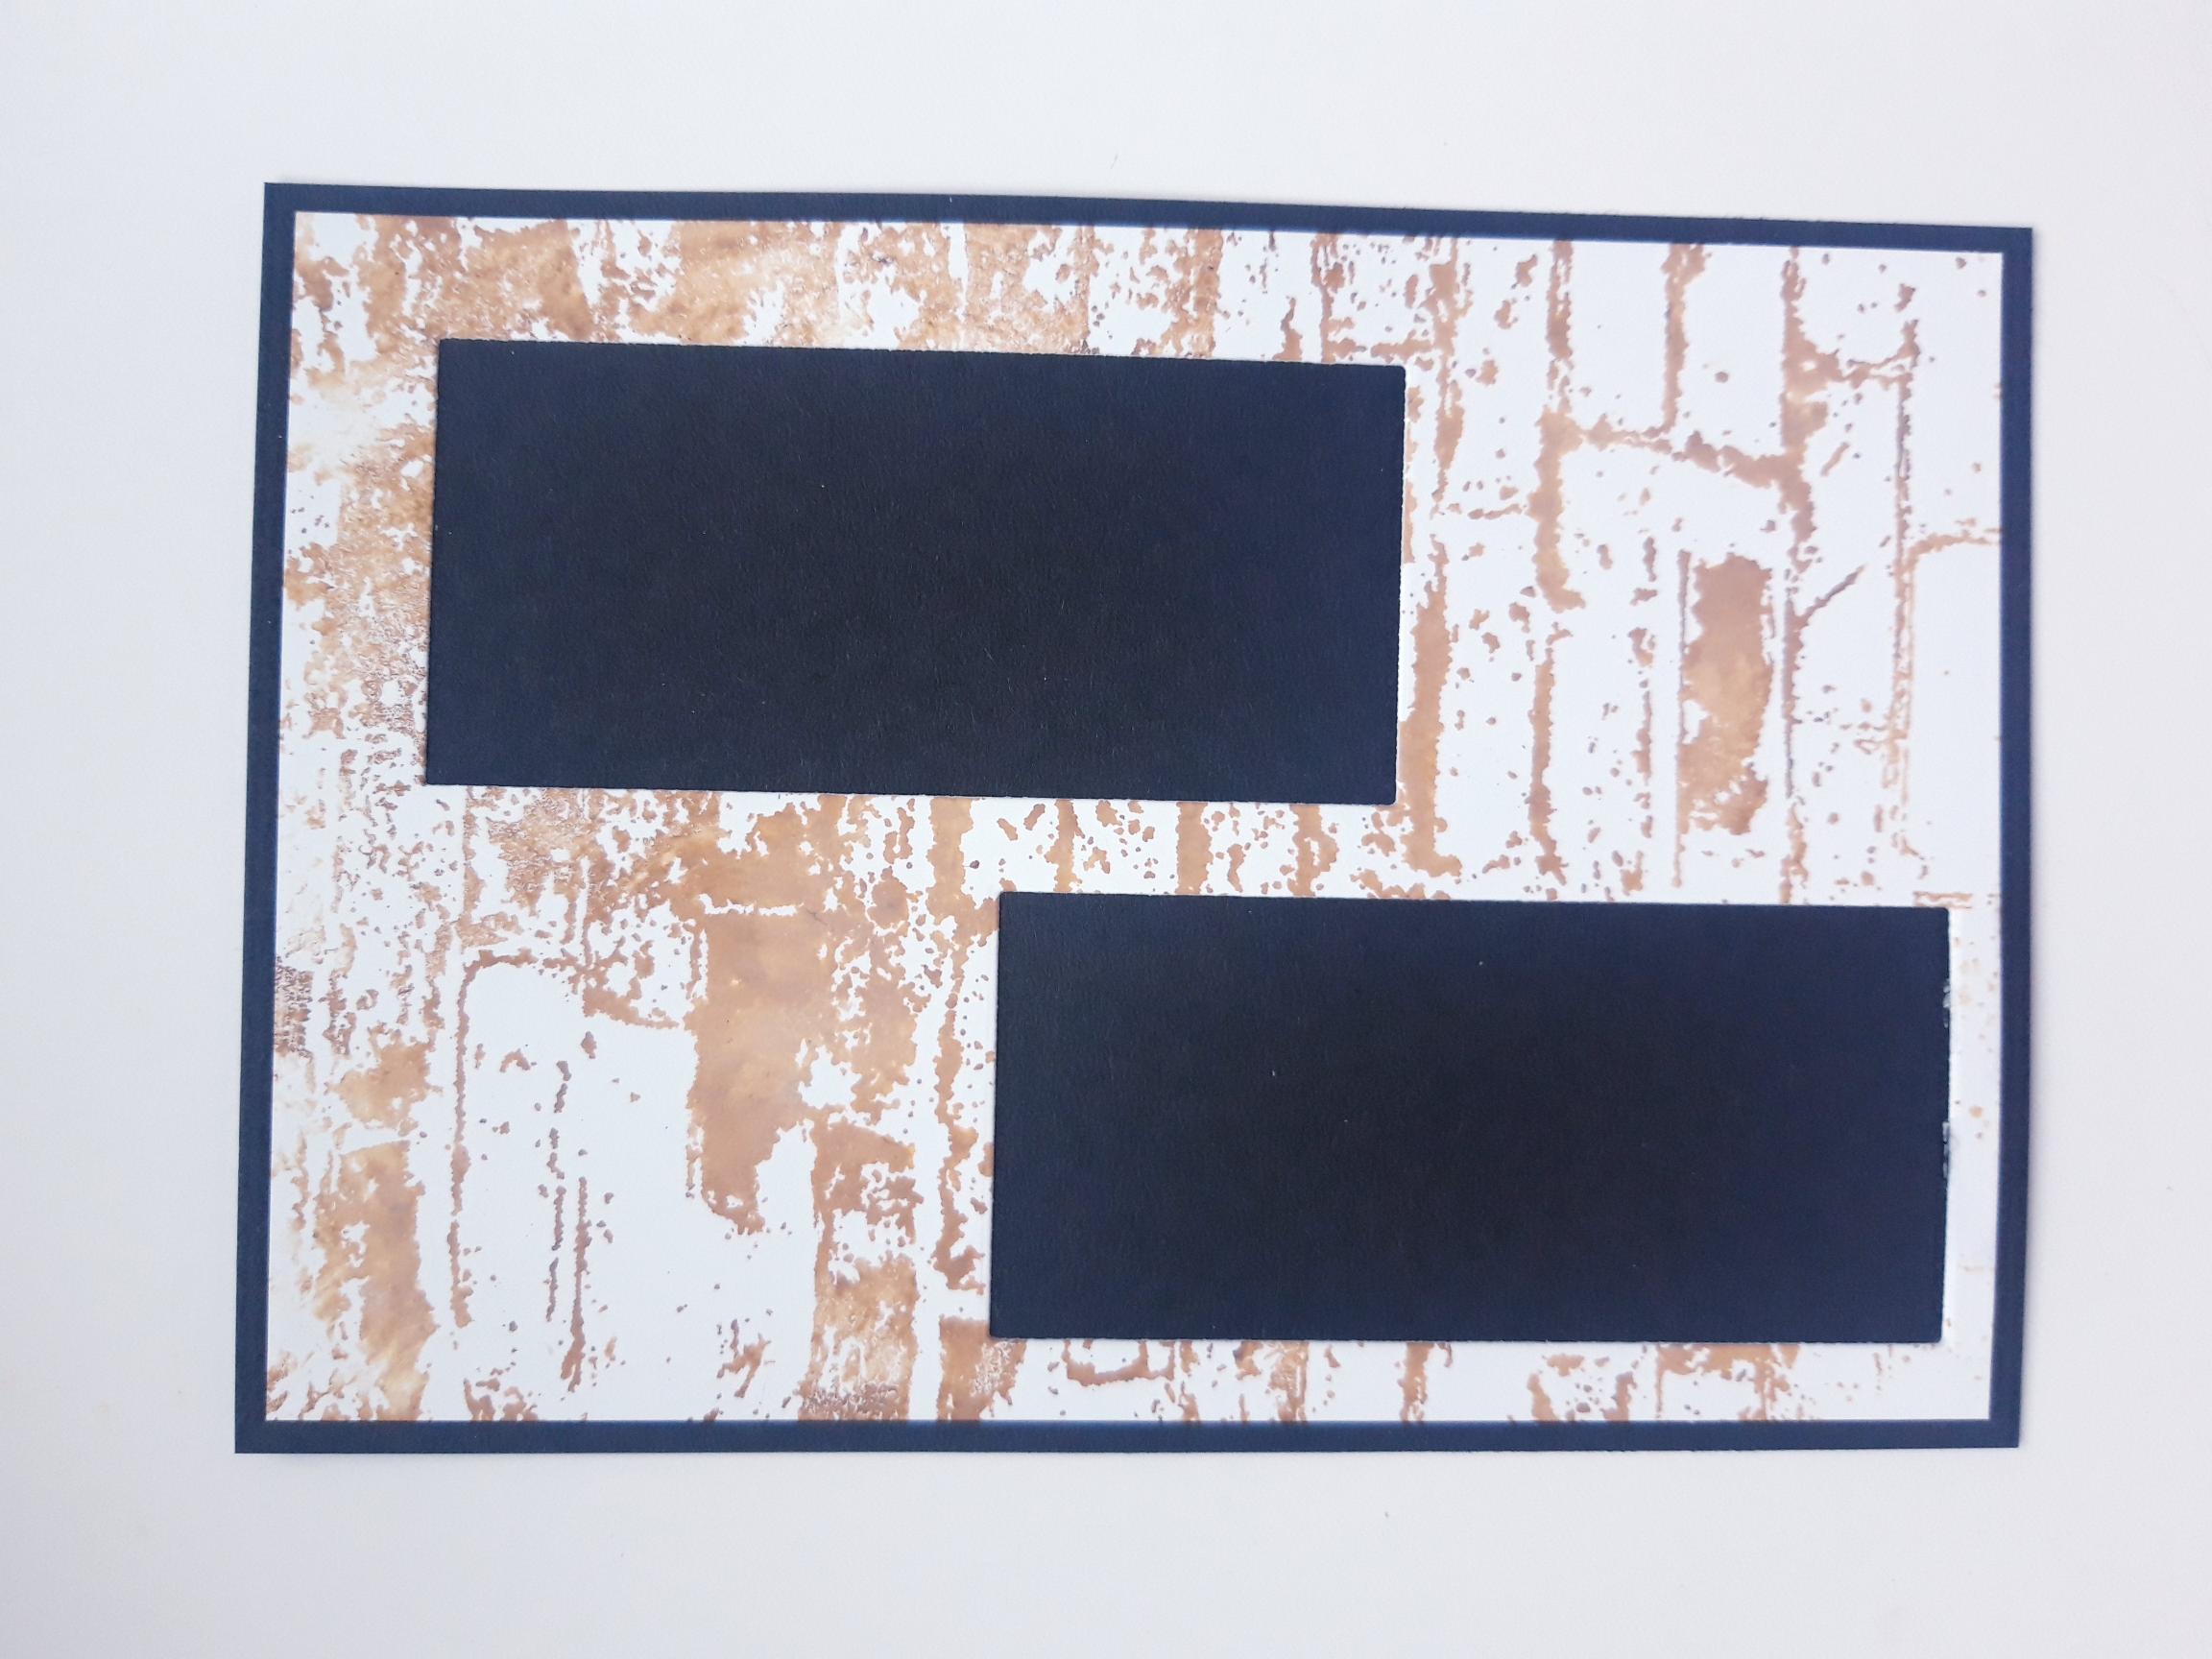
Use the die that measures approx 3 3/4 x 1 3/4", from the Diamond Stitching Nesting Dies Collection, to die cut out TWO vertical apertures, from your stamped wall background. Have 1 low and the other slightly higher, as shown in this picture. |
|
Mat your background on to the black card (6 3/4 x 4 3/4"). Alternatively, if you don't want "black" to show through (see finished sample), you can mat your background on to white card. |
|
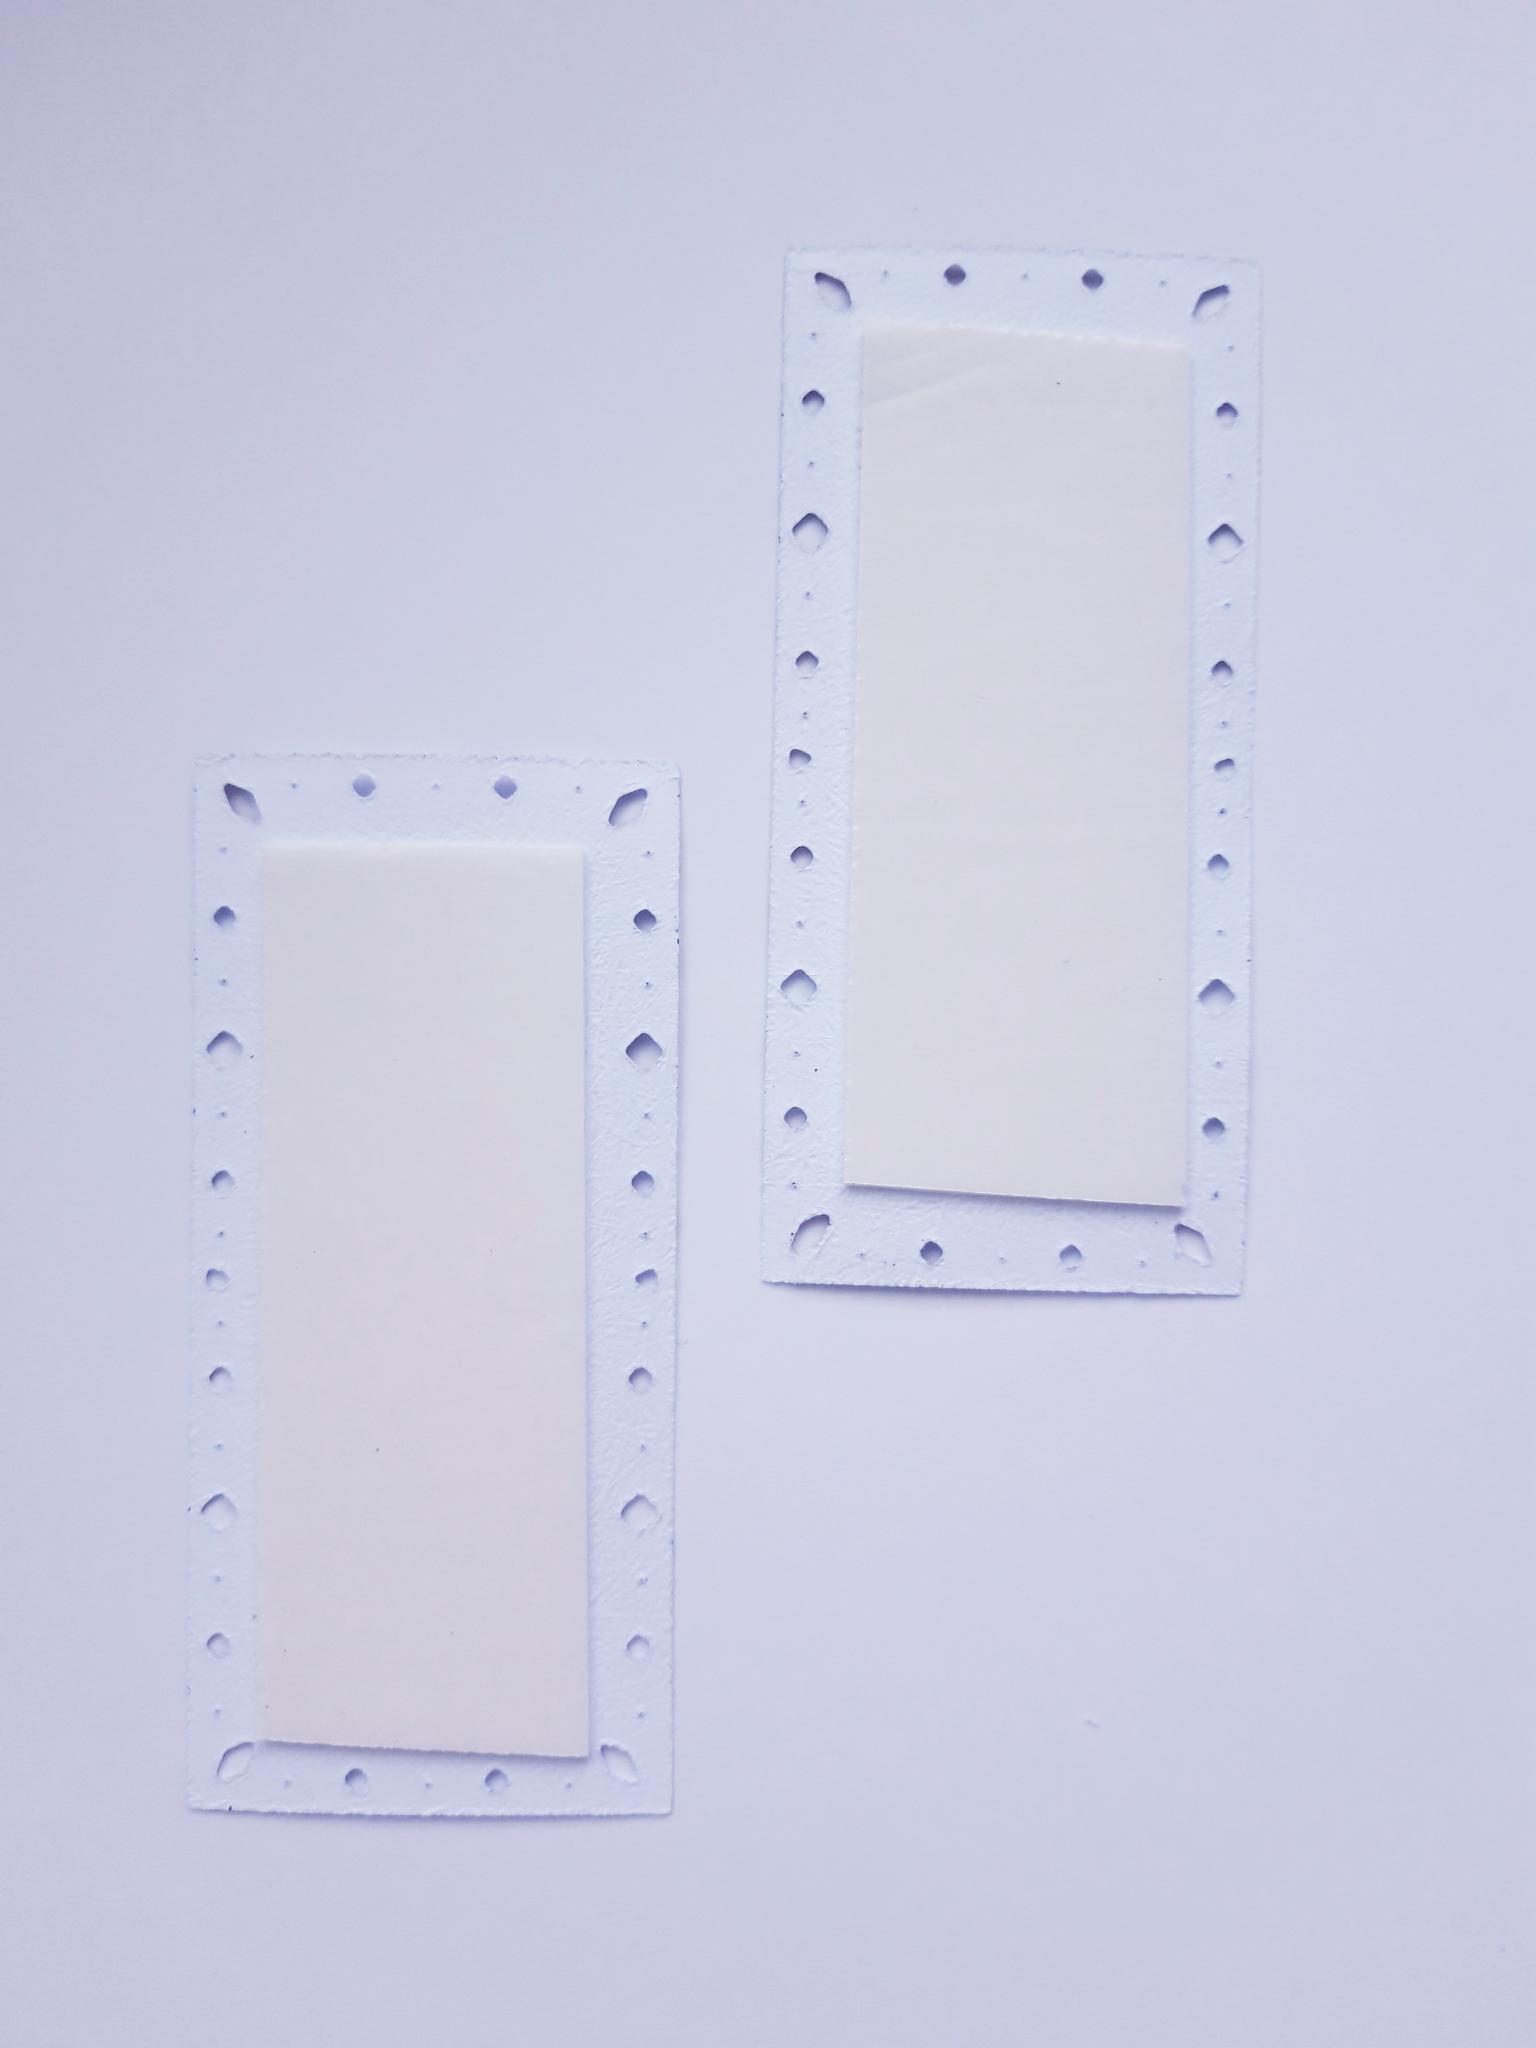
Cut a piece of the double side foam sheet, to adhere on the back of each die cut panel. |

|
Peel off the backing from the foam sheet, and adhere in place, inside each die cut aperture. |
|
Adhere this on to the front of your card blank, and set to one side. |
|
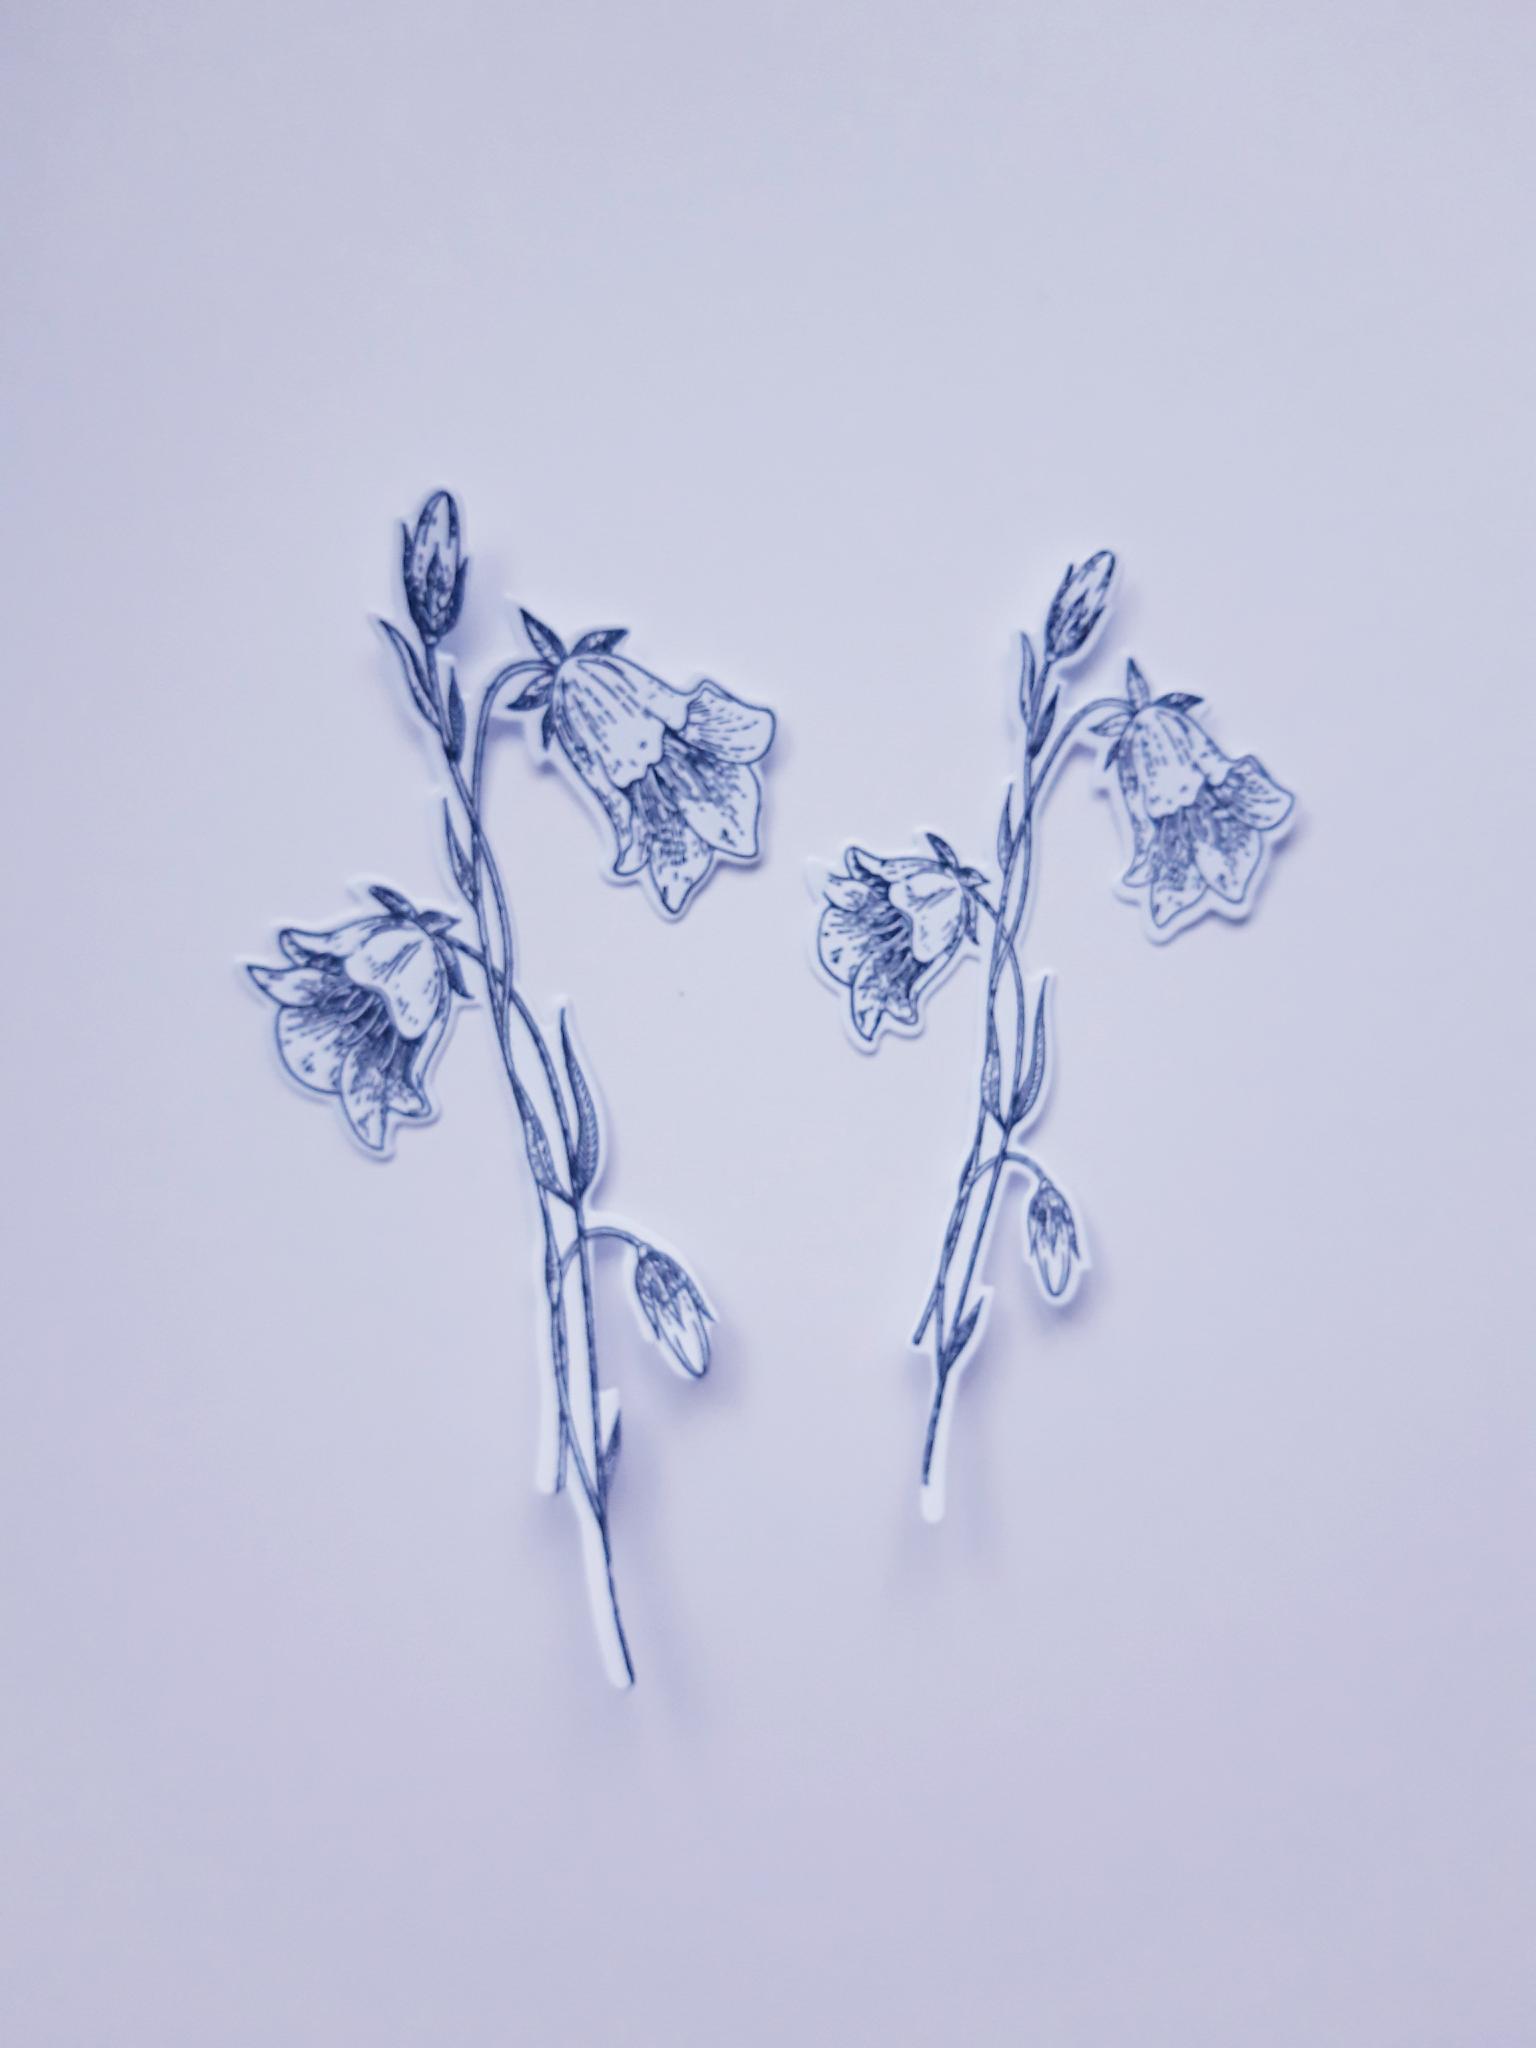
Ink up the floral stamps, from the Possibility Stamp and Die Collection, with the Onyx Black Versafine. Stamp each one on to the 6 x 6" white card. Use the coordinating dies to die cut your stamped images. |
|
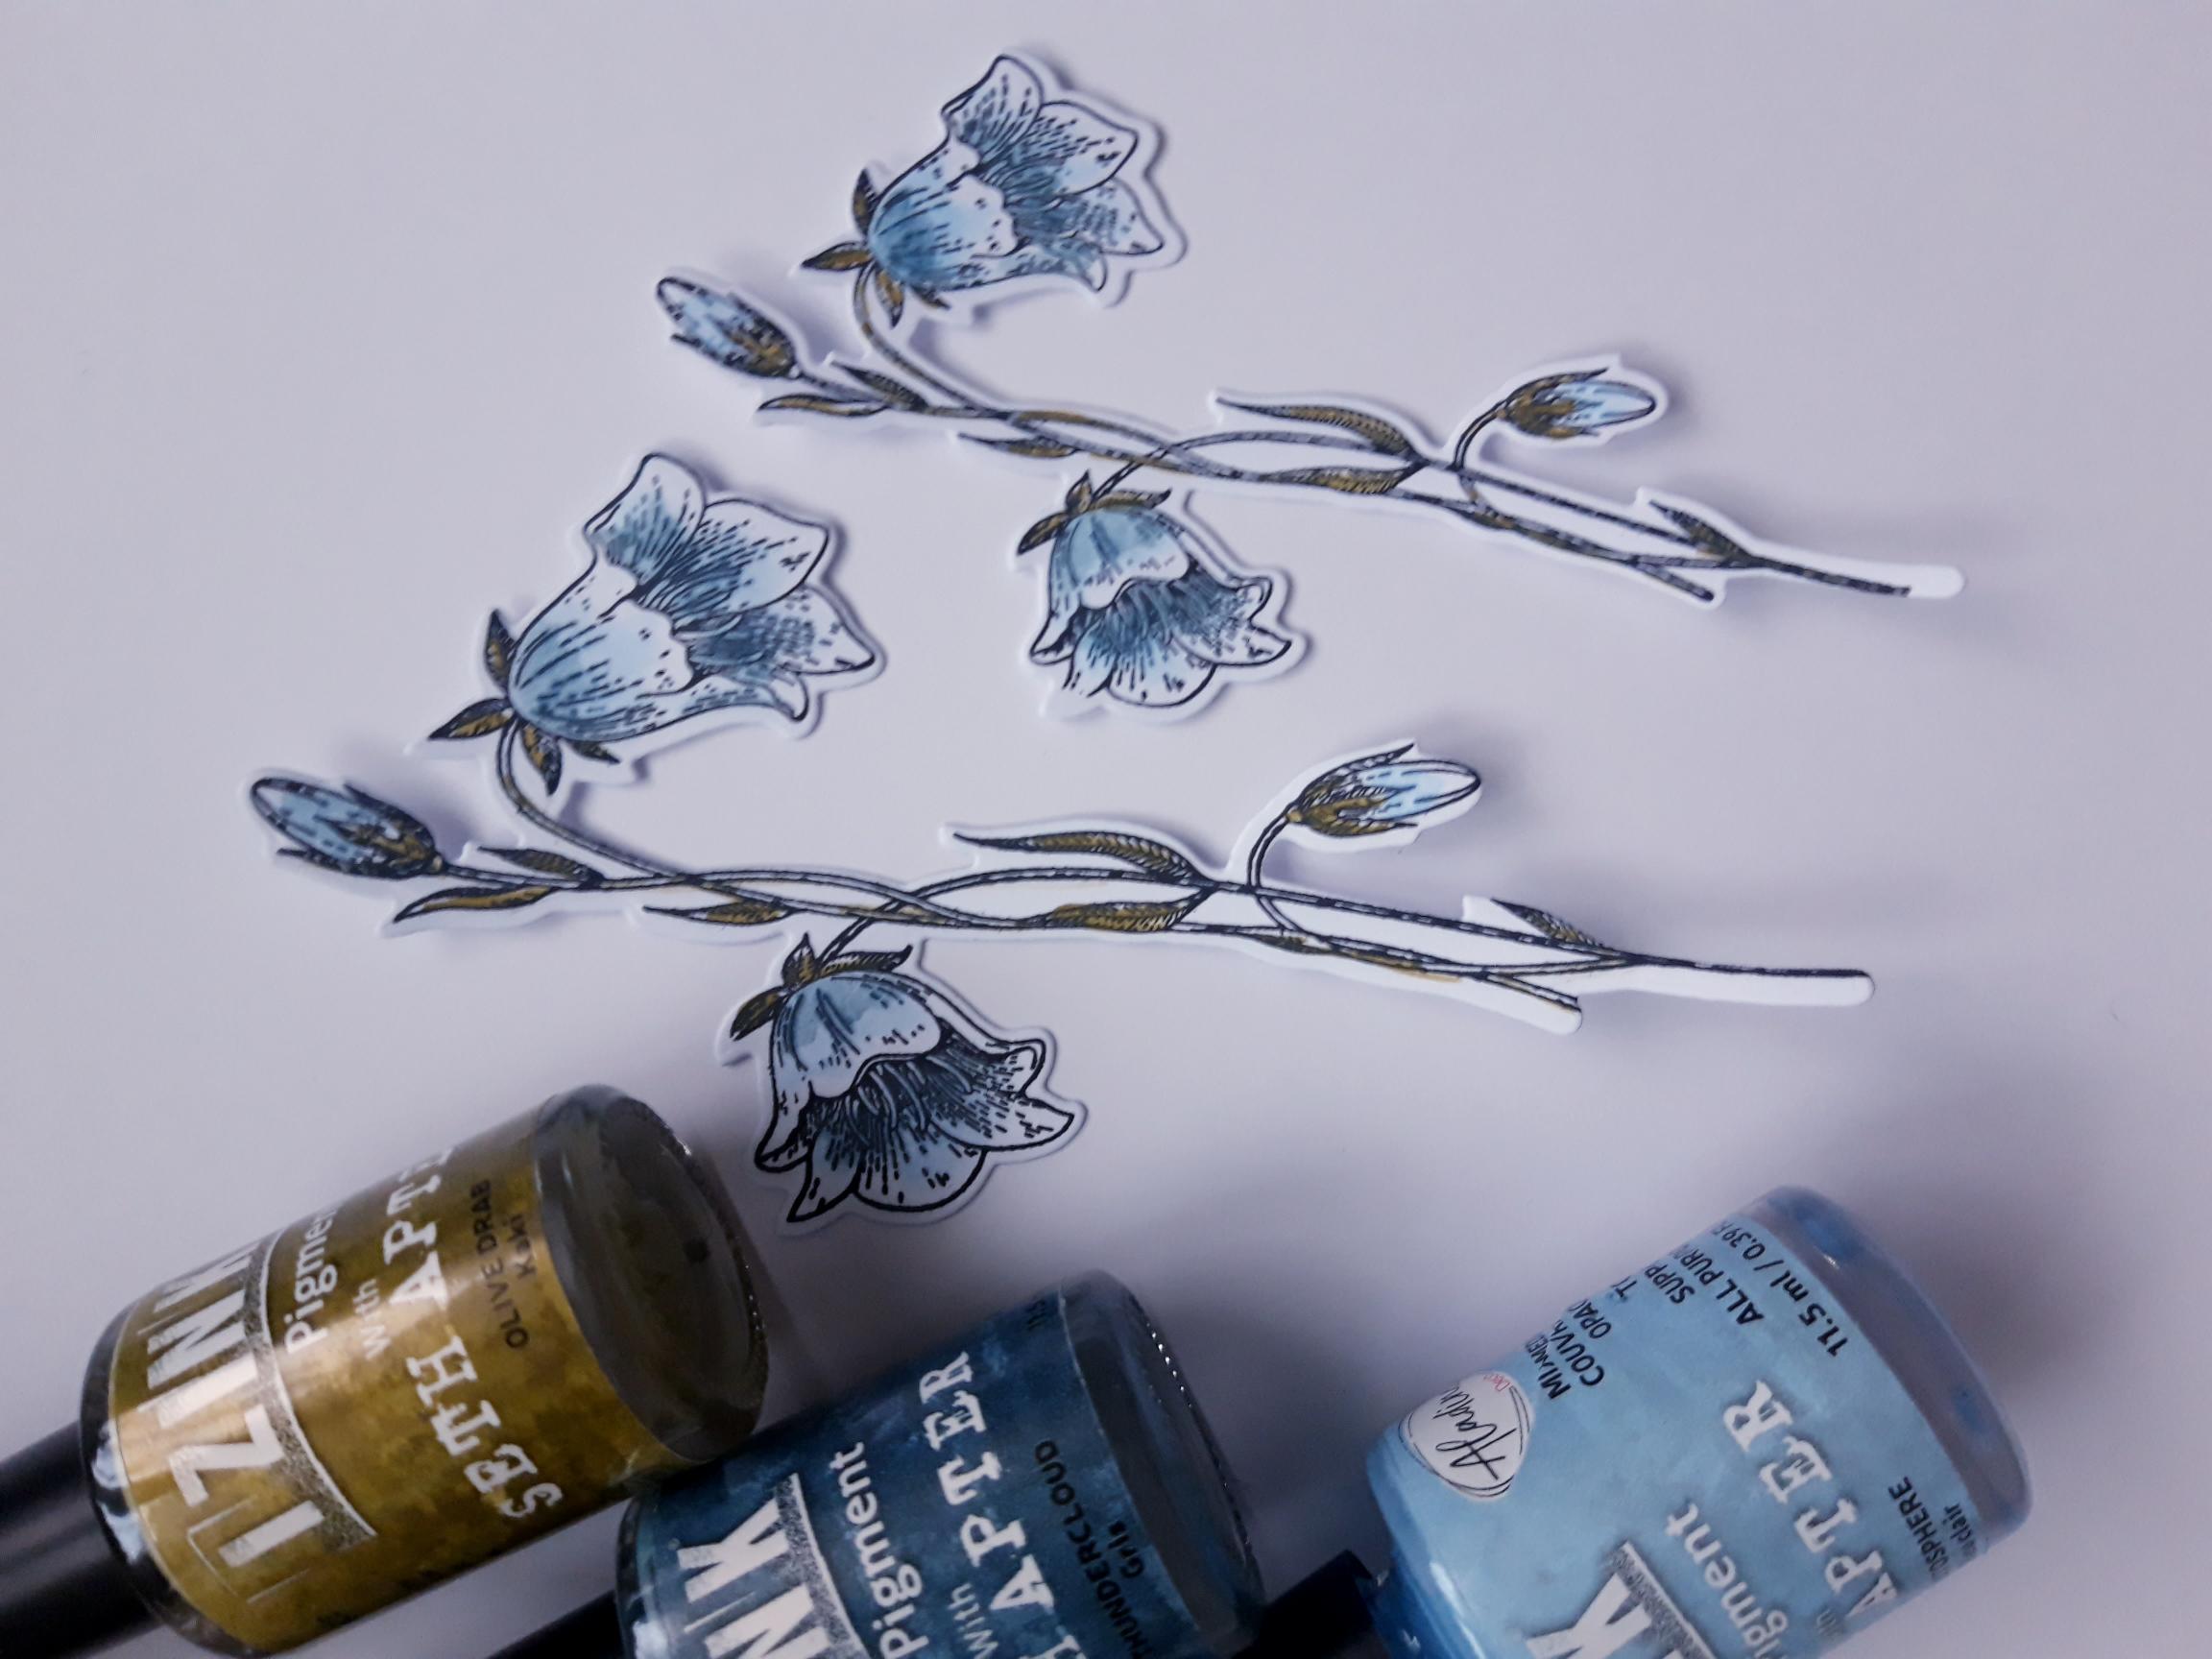
Apply a little of the Izink Pigments on to your craft, or glass mat. Add a little water, and use your paint brush to colour in your die cut, floral elements. |

|
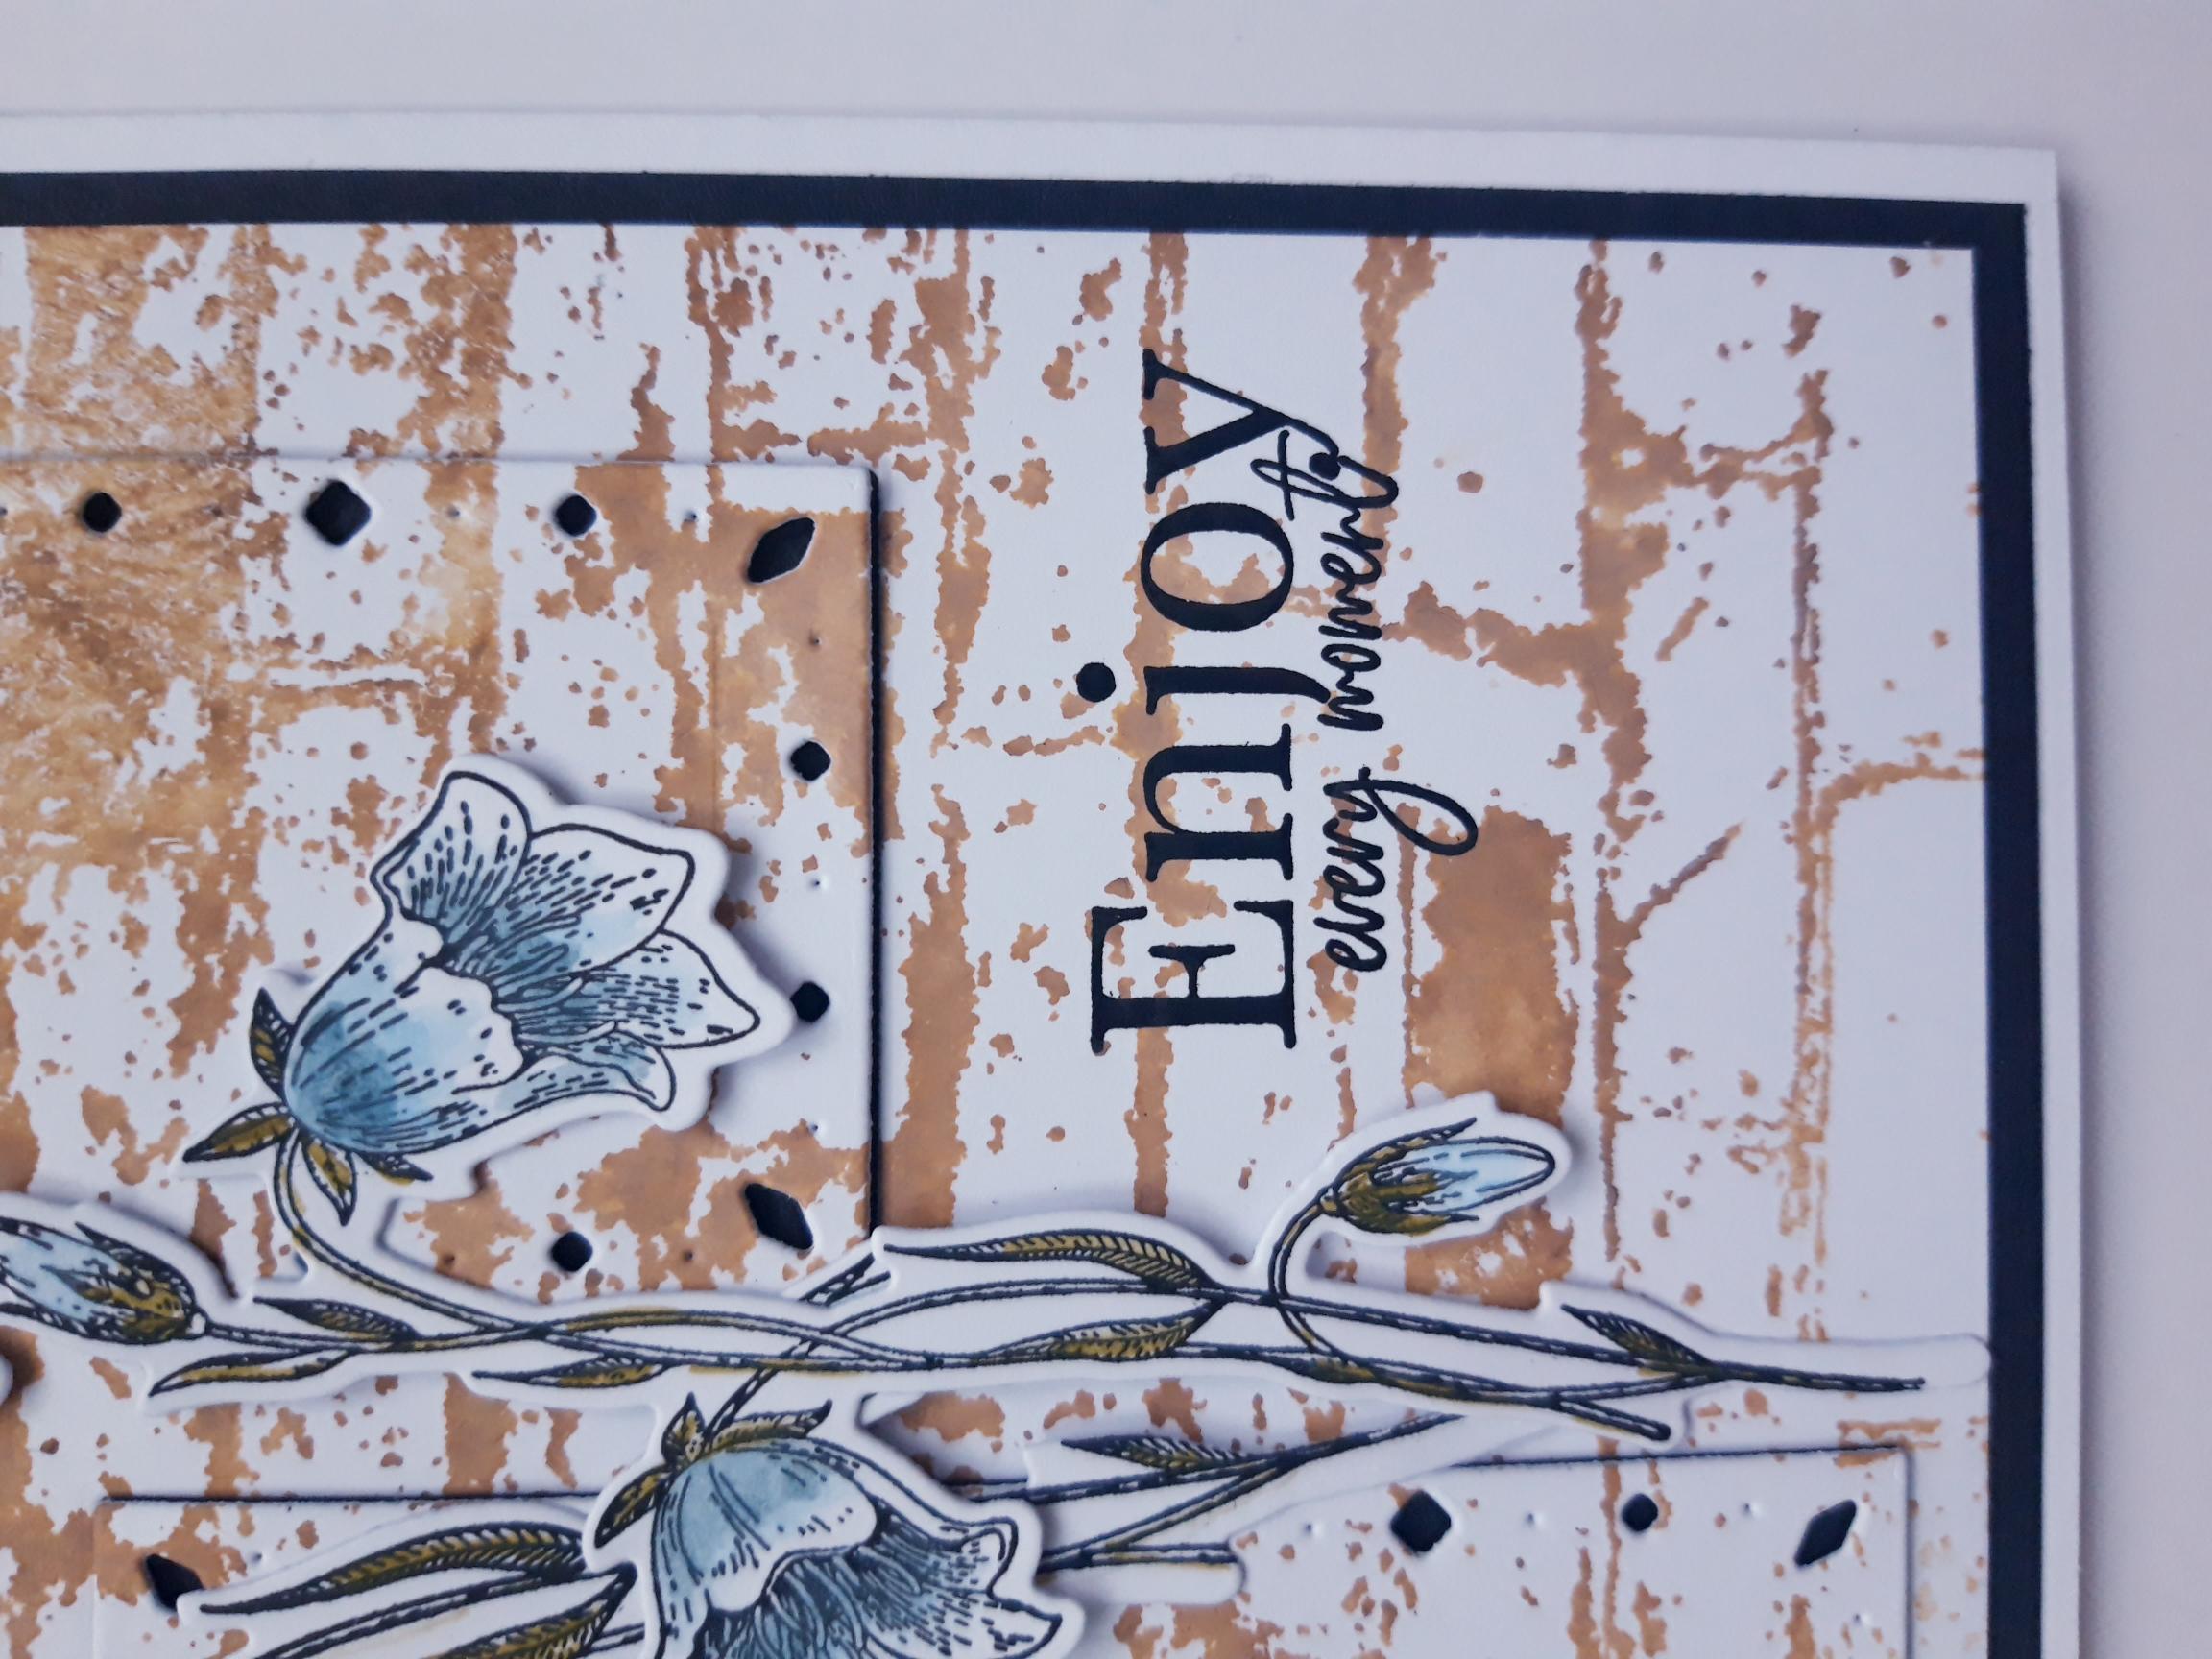
Adhere your floral elements, where required, on to your card. |
|
To finish, ink up your sentiment stamp, from the Possibility Collection, with the Versafine, and stamp in the lower right corner of your card. |