Give your friends $10 off their first order!
Refer a FRIEND


WHAT YOU WILL NEED:
Black top folding card blank ( 8 1/4 x 5 3/4")
White card (7 3/4 x 5 1/4")
A4 white card
A4 black card
Dies from Cinched Together Die Collection
Stamps from Bonjour Slimline Stamp And Die Collection
Stamps from Romantic Rose Stamp And Die Collection
Dies from Thirsty Brush UnLtd Build a Bloom Creative Dies
Stamp from Textured Wall Stamp Collection
Versafine Ink Pad: Onyx Black
Distress Oxide: Fossilized Amber, Villainous Potion, Iced Spruce
Black pen
Sequins: Amethyst
Gem pick up and pokey tool
Water spray bottle
Eureka 101
Paper Trimmer
Perfect Together Glue
Die Cutting machine
[click image to enlarge] 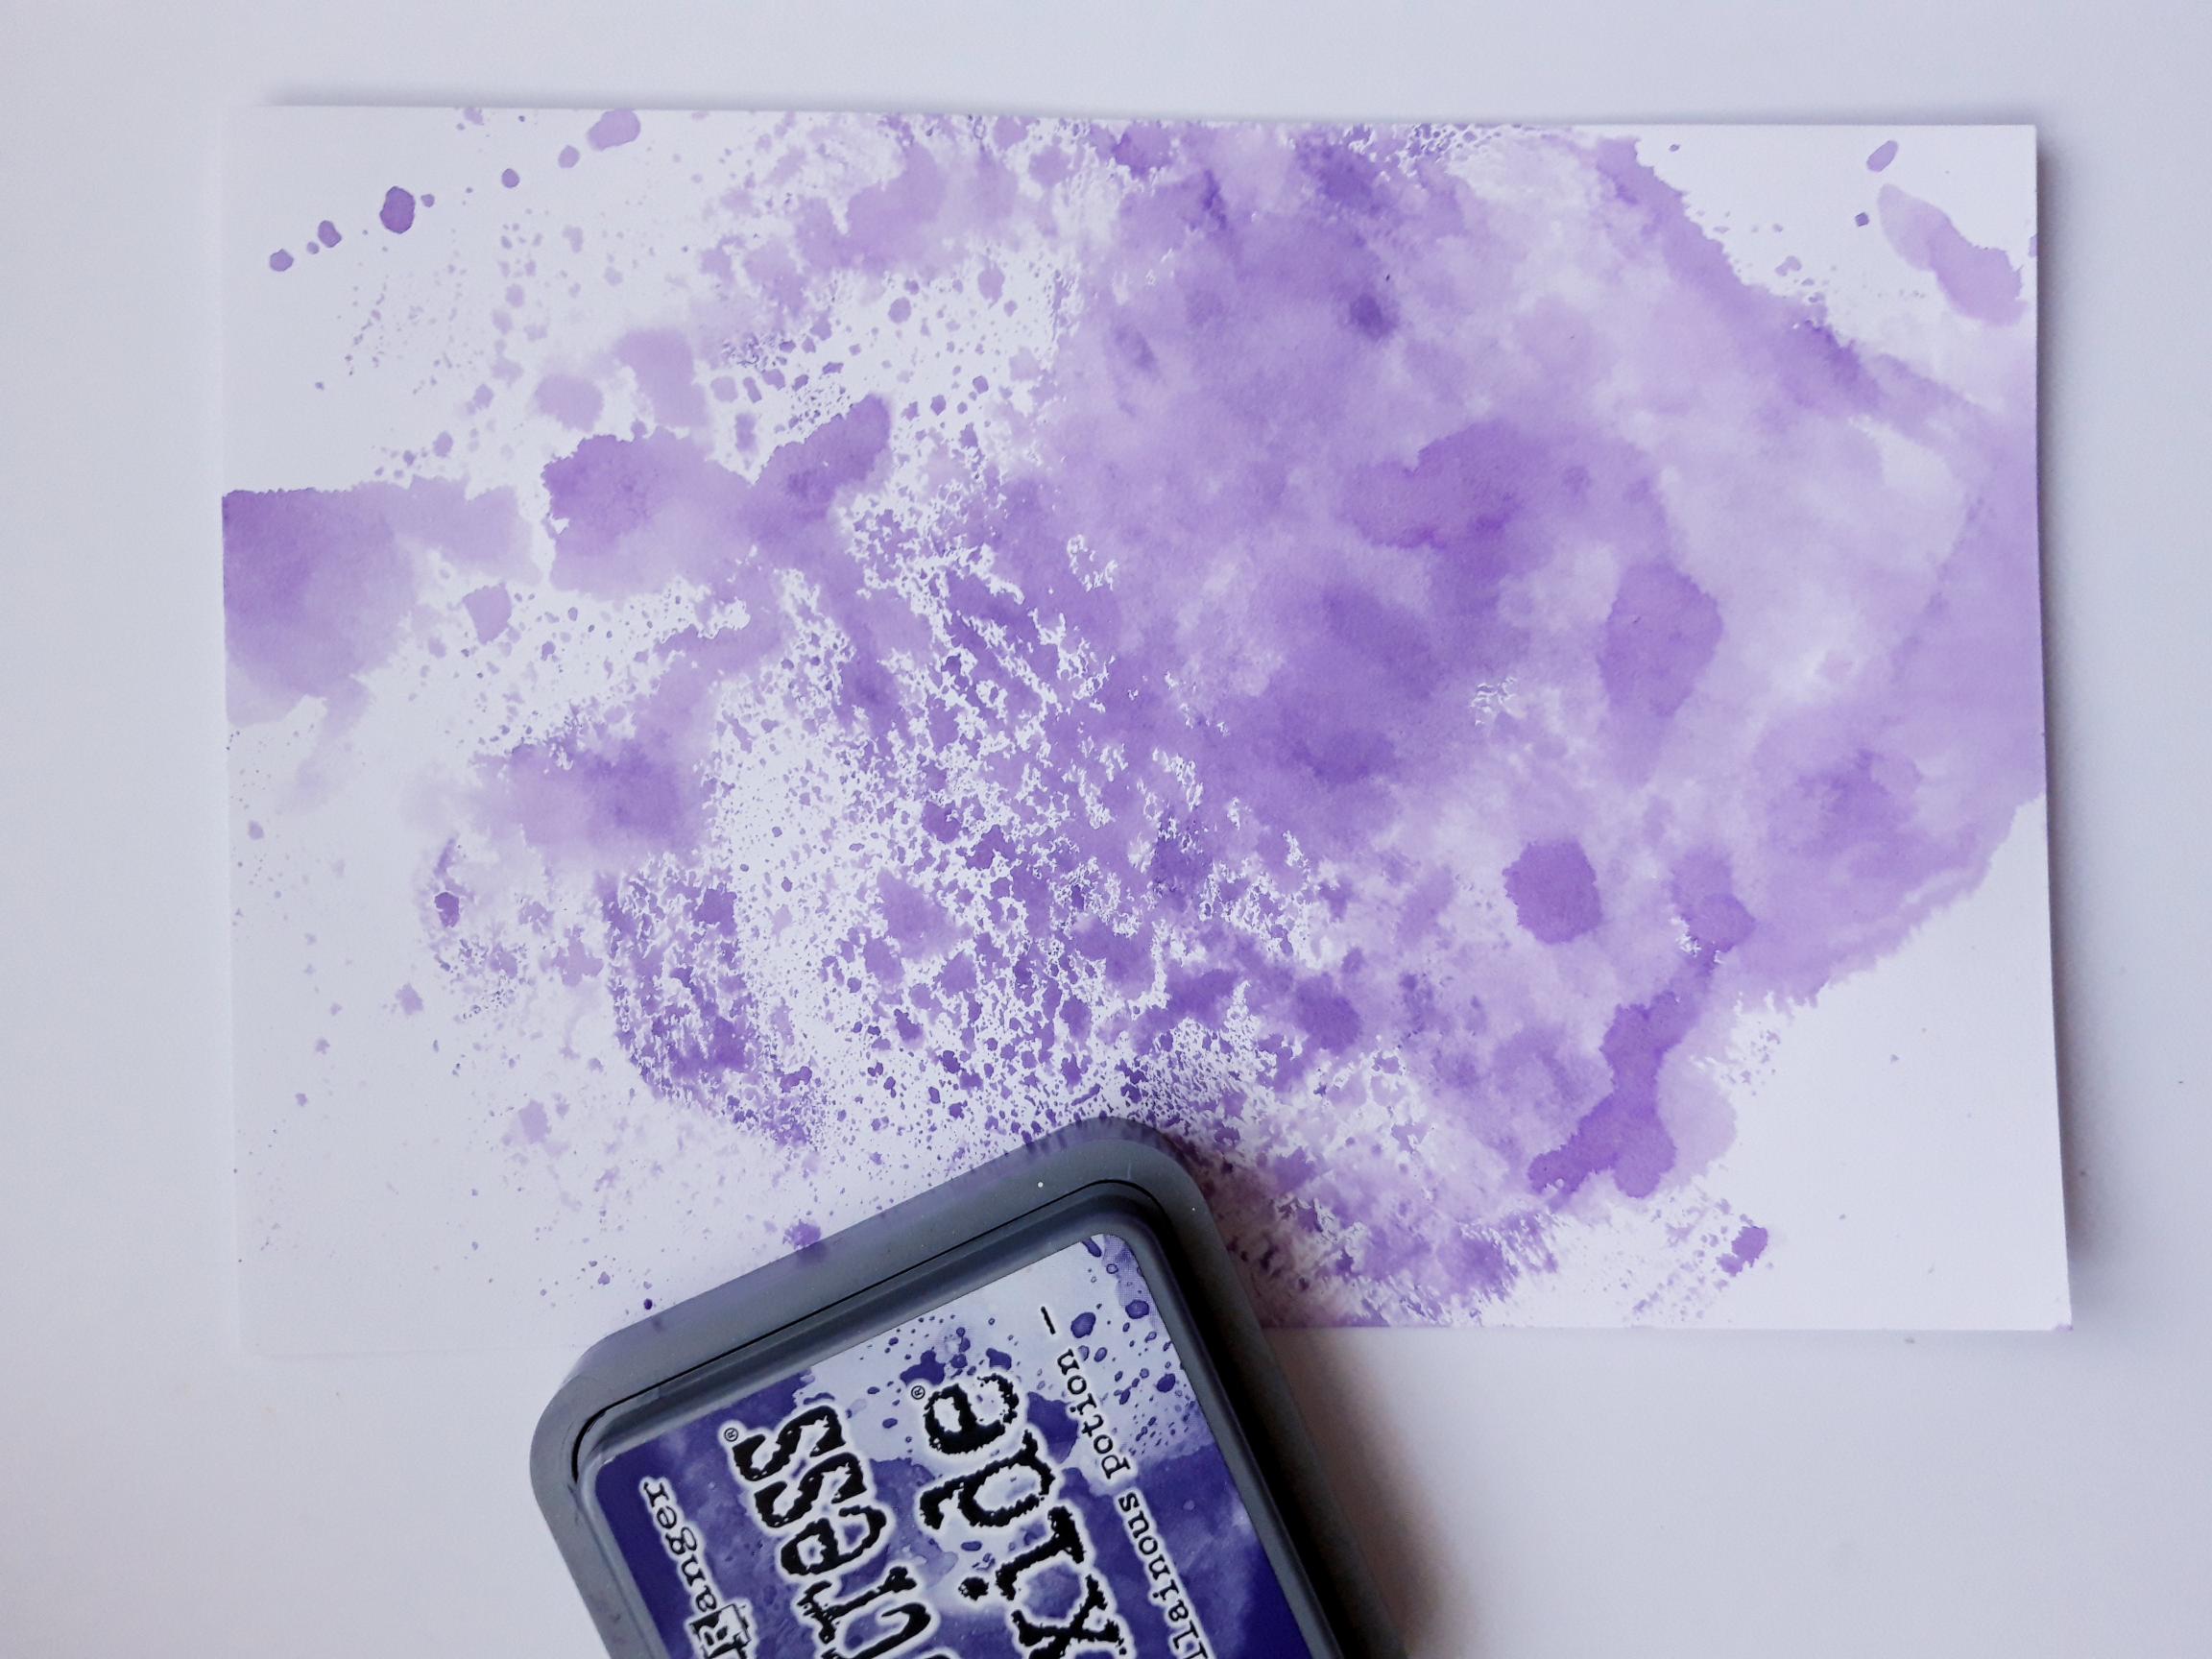
|
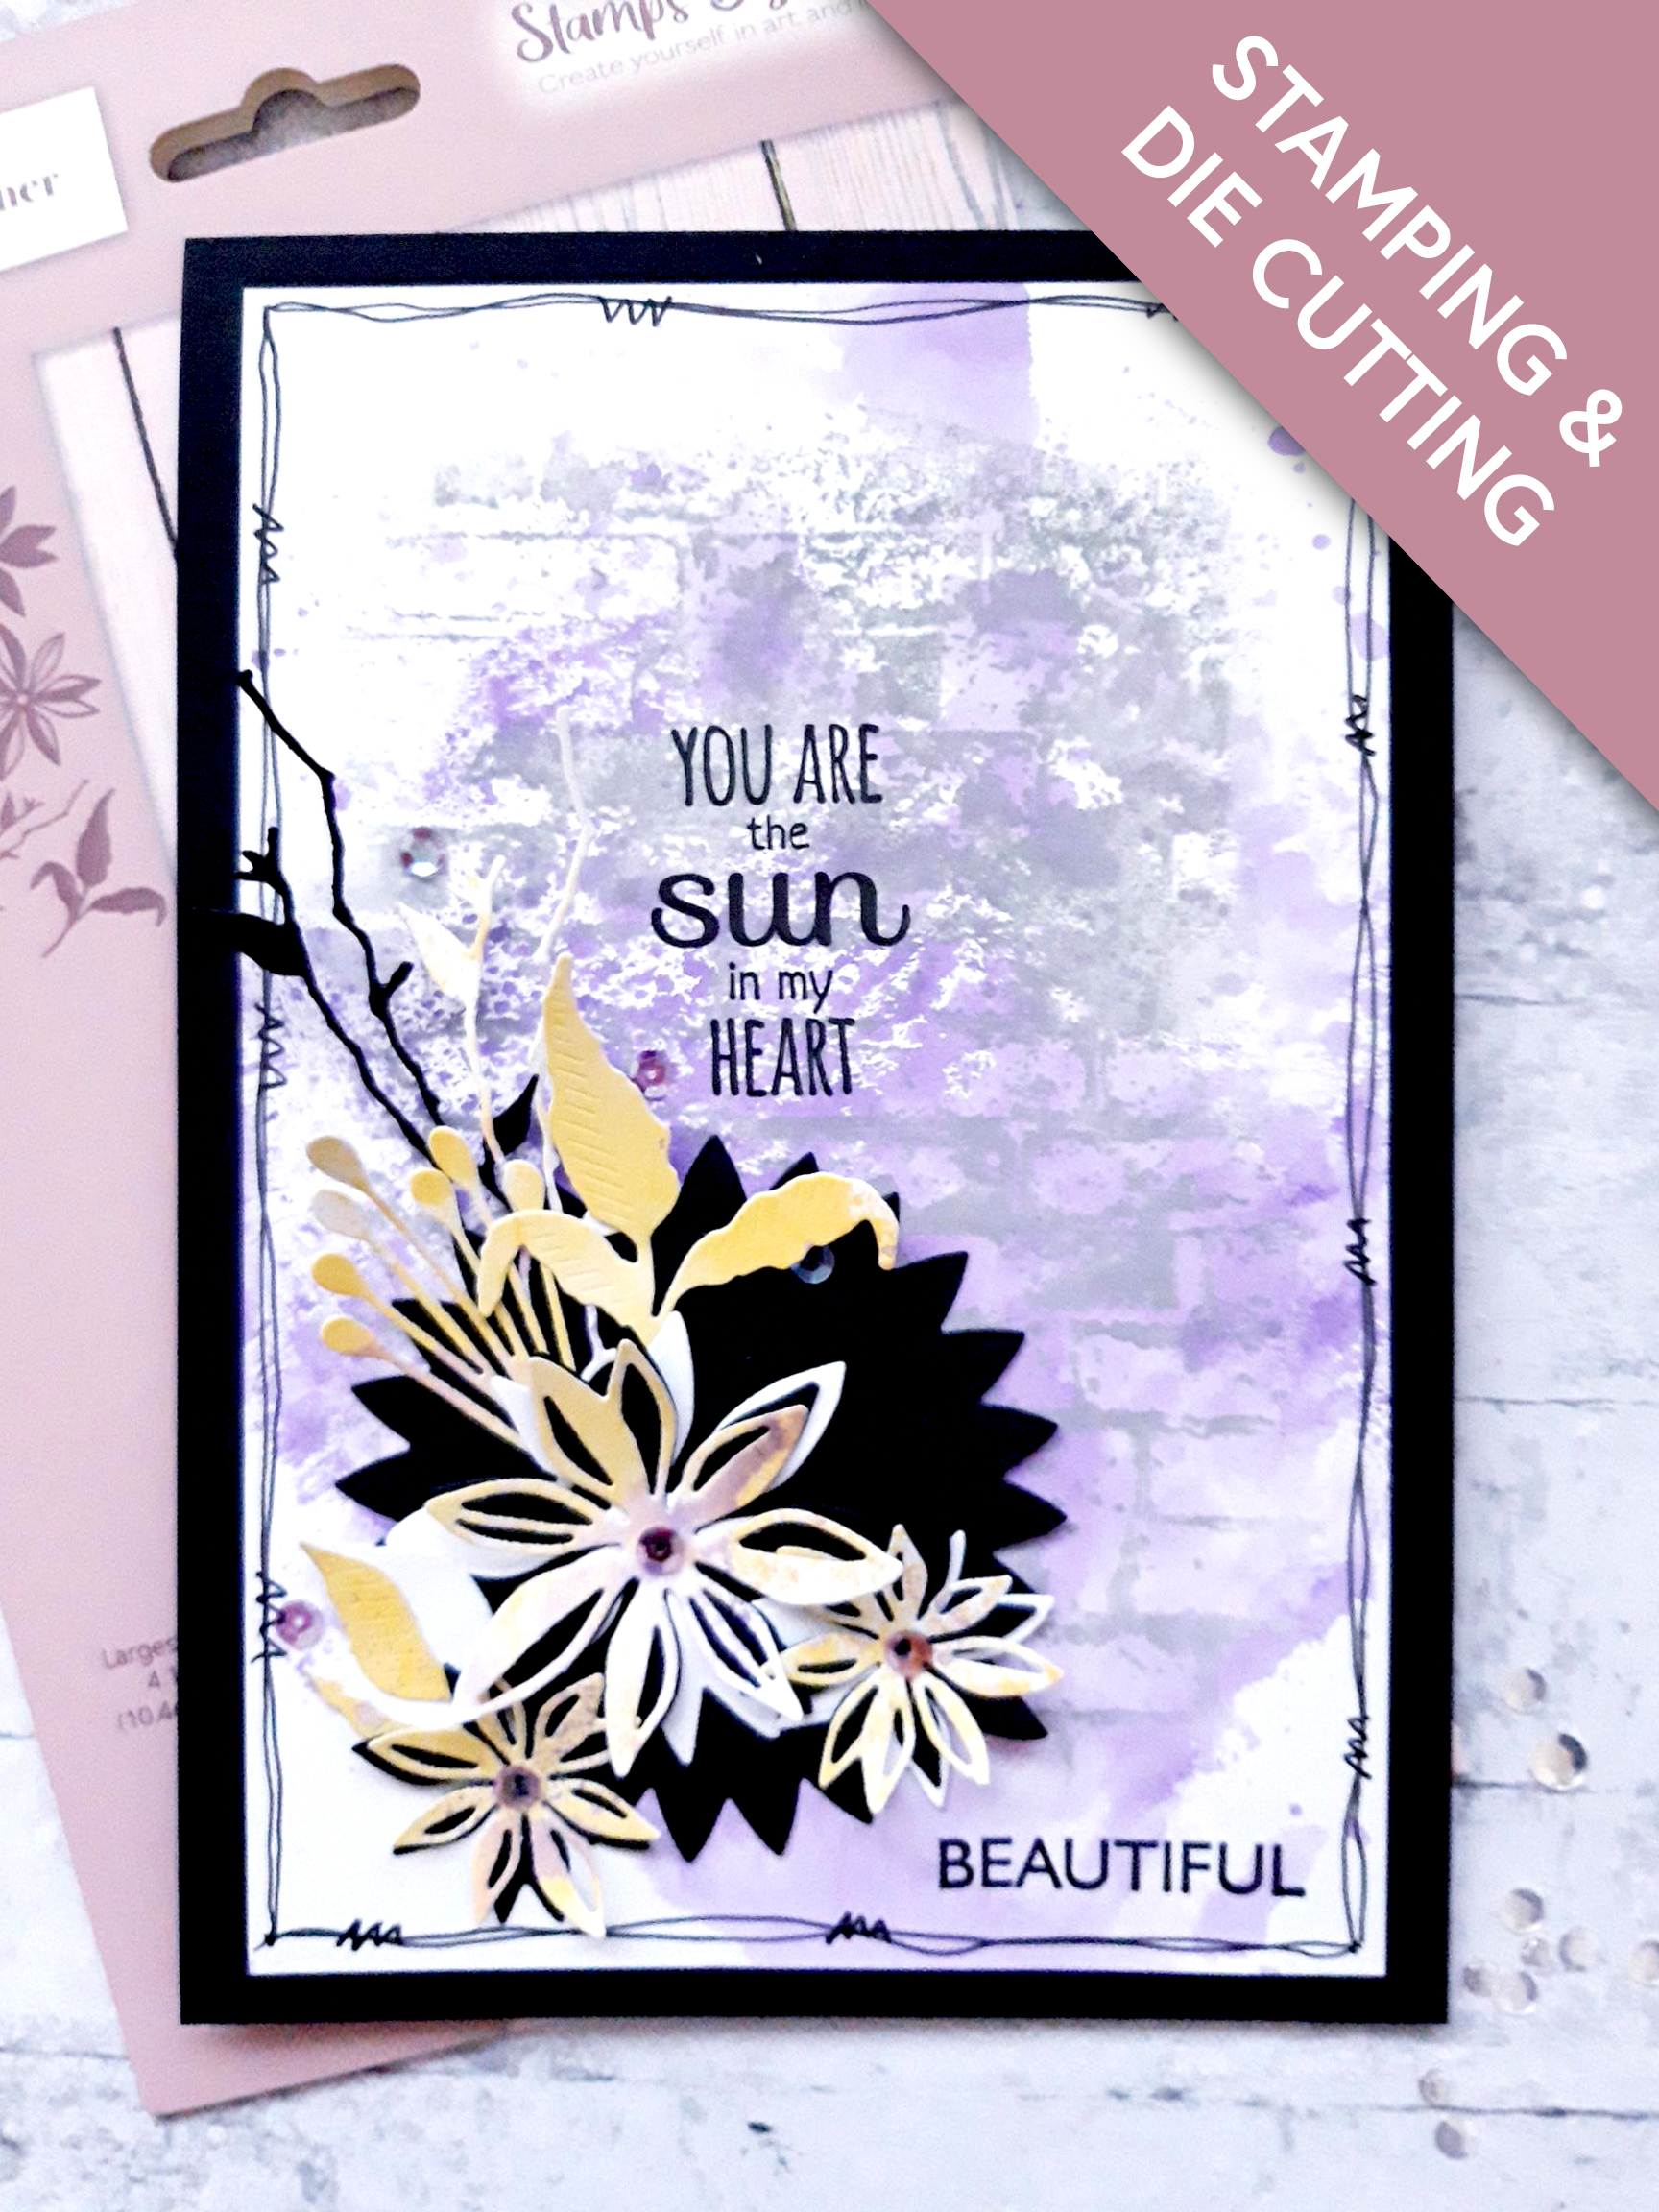
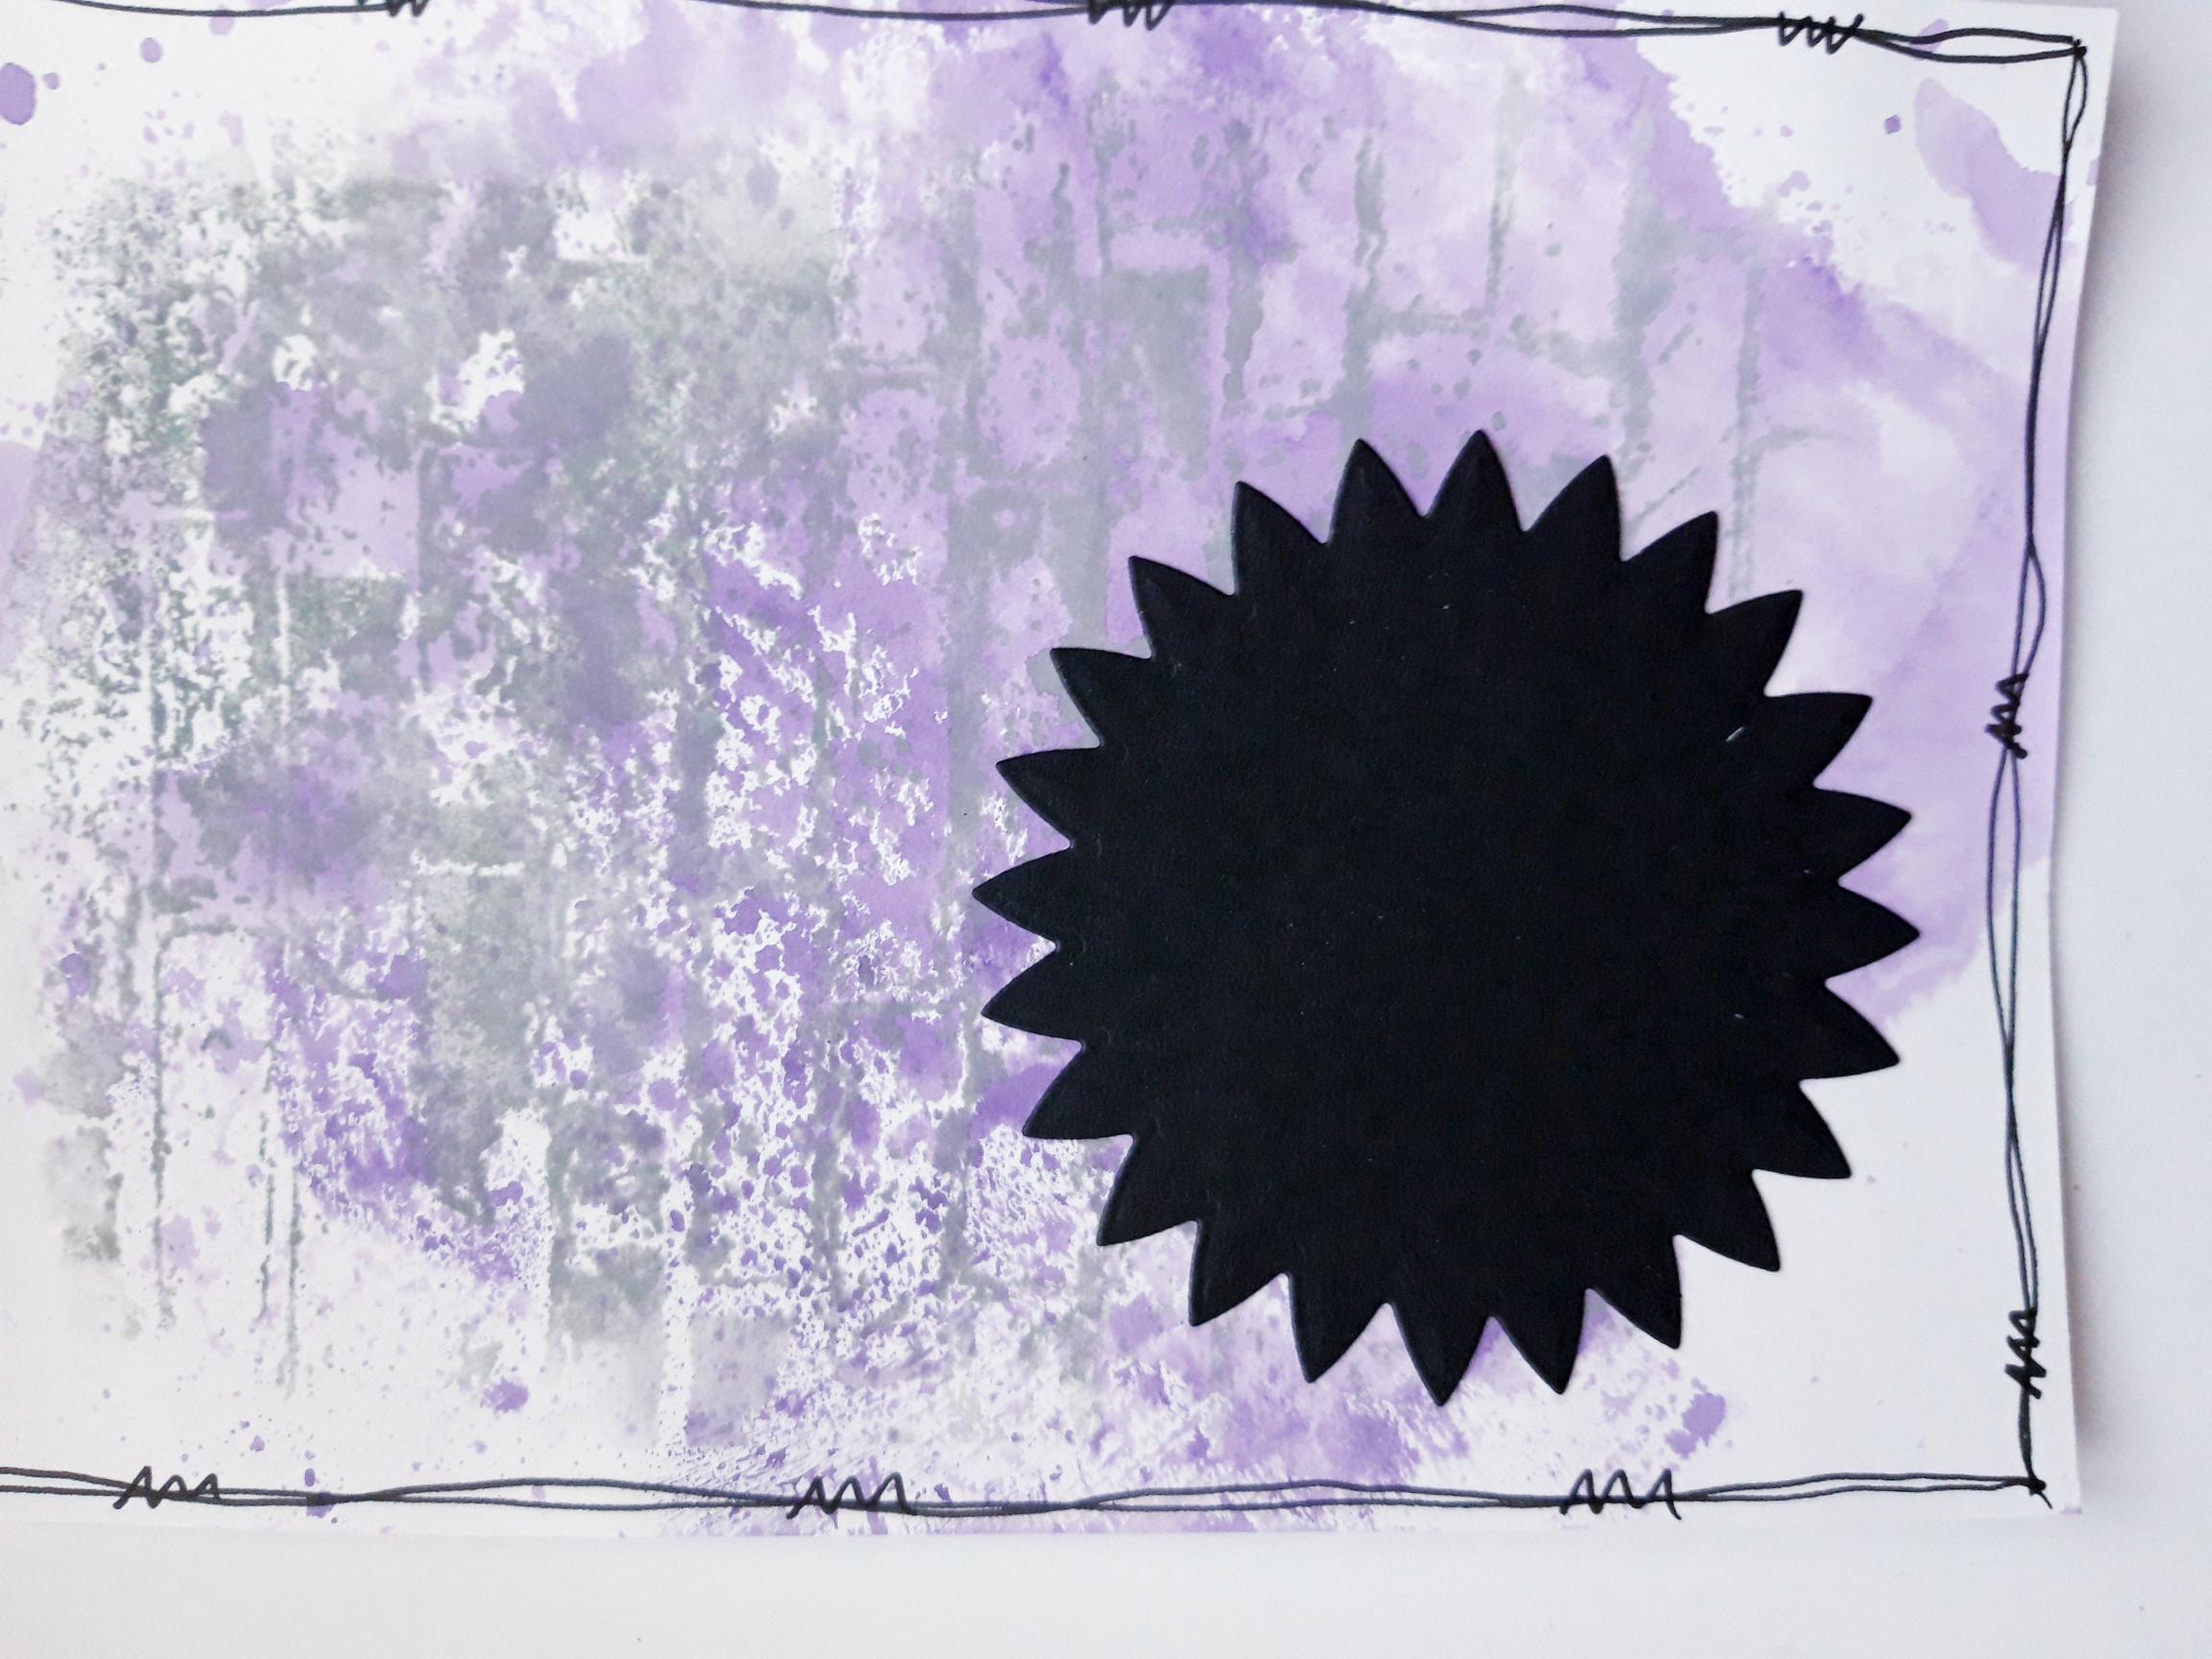
Apply the Villainous Potion Distress Oxide to your craft, or glass mat, and spritz with water. Smoosh the white card (7 3/4 x 5 1/4") in to the ink. Dry this off naturally, or with a heat gun. |
|
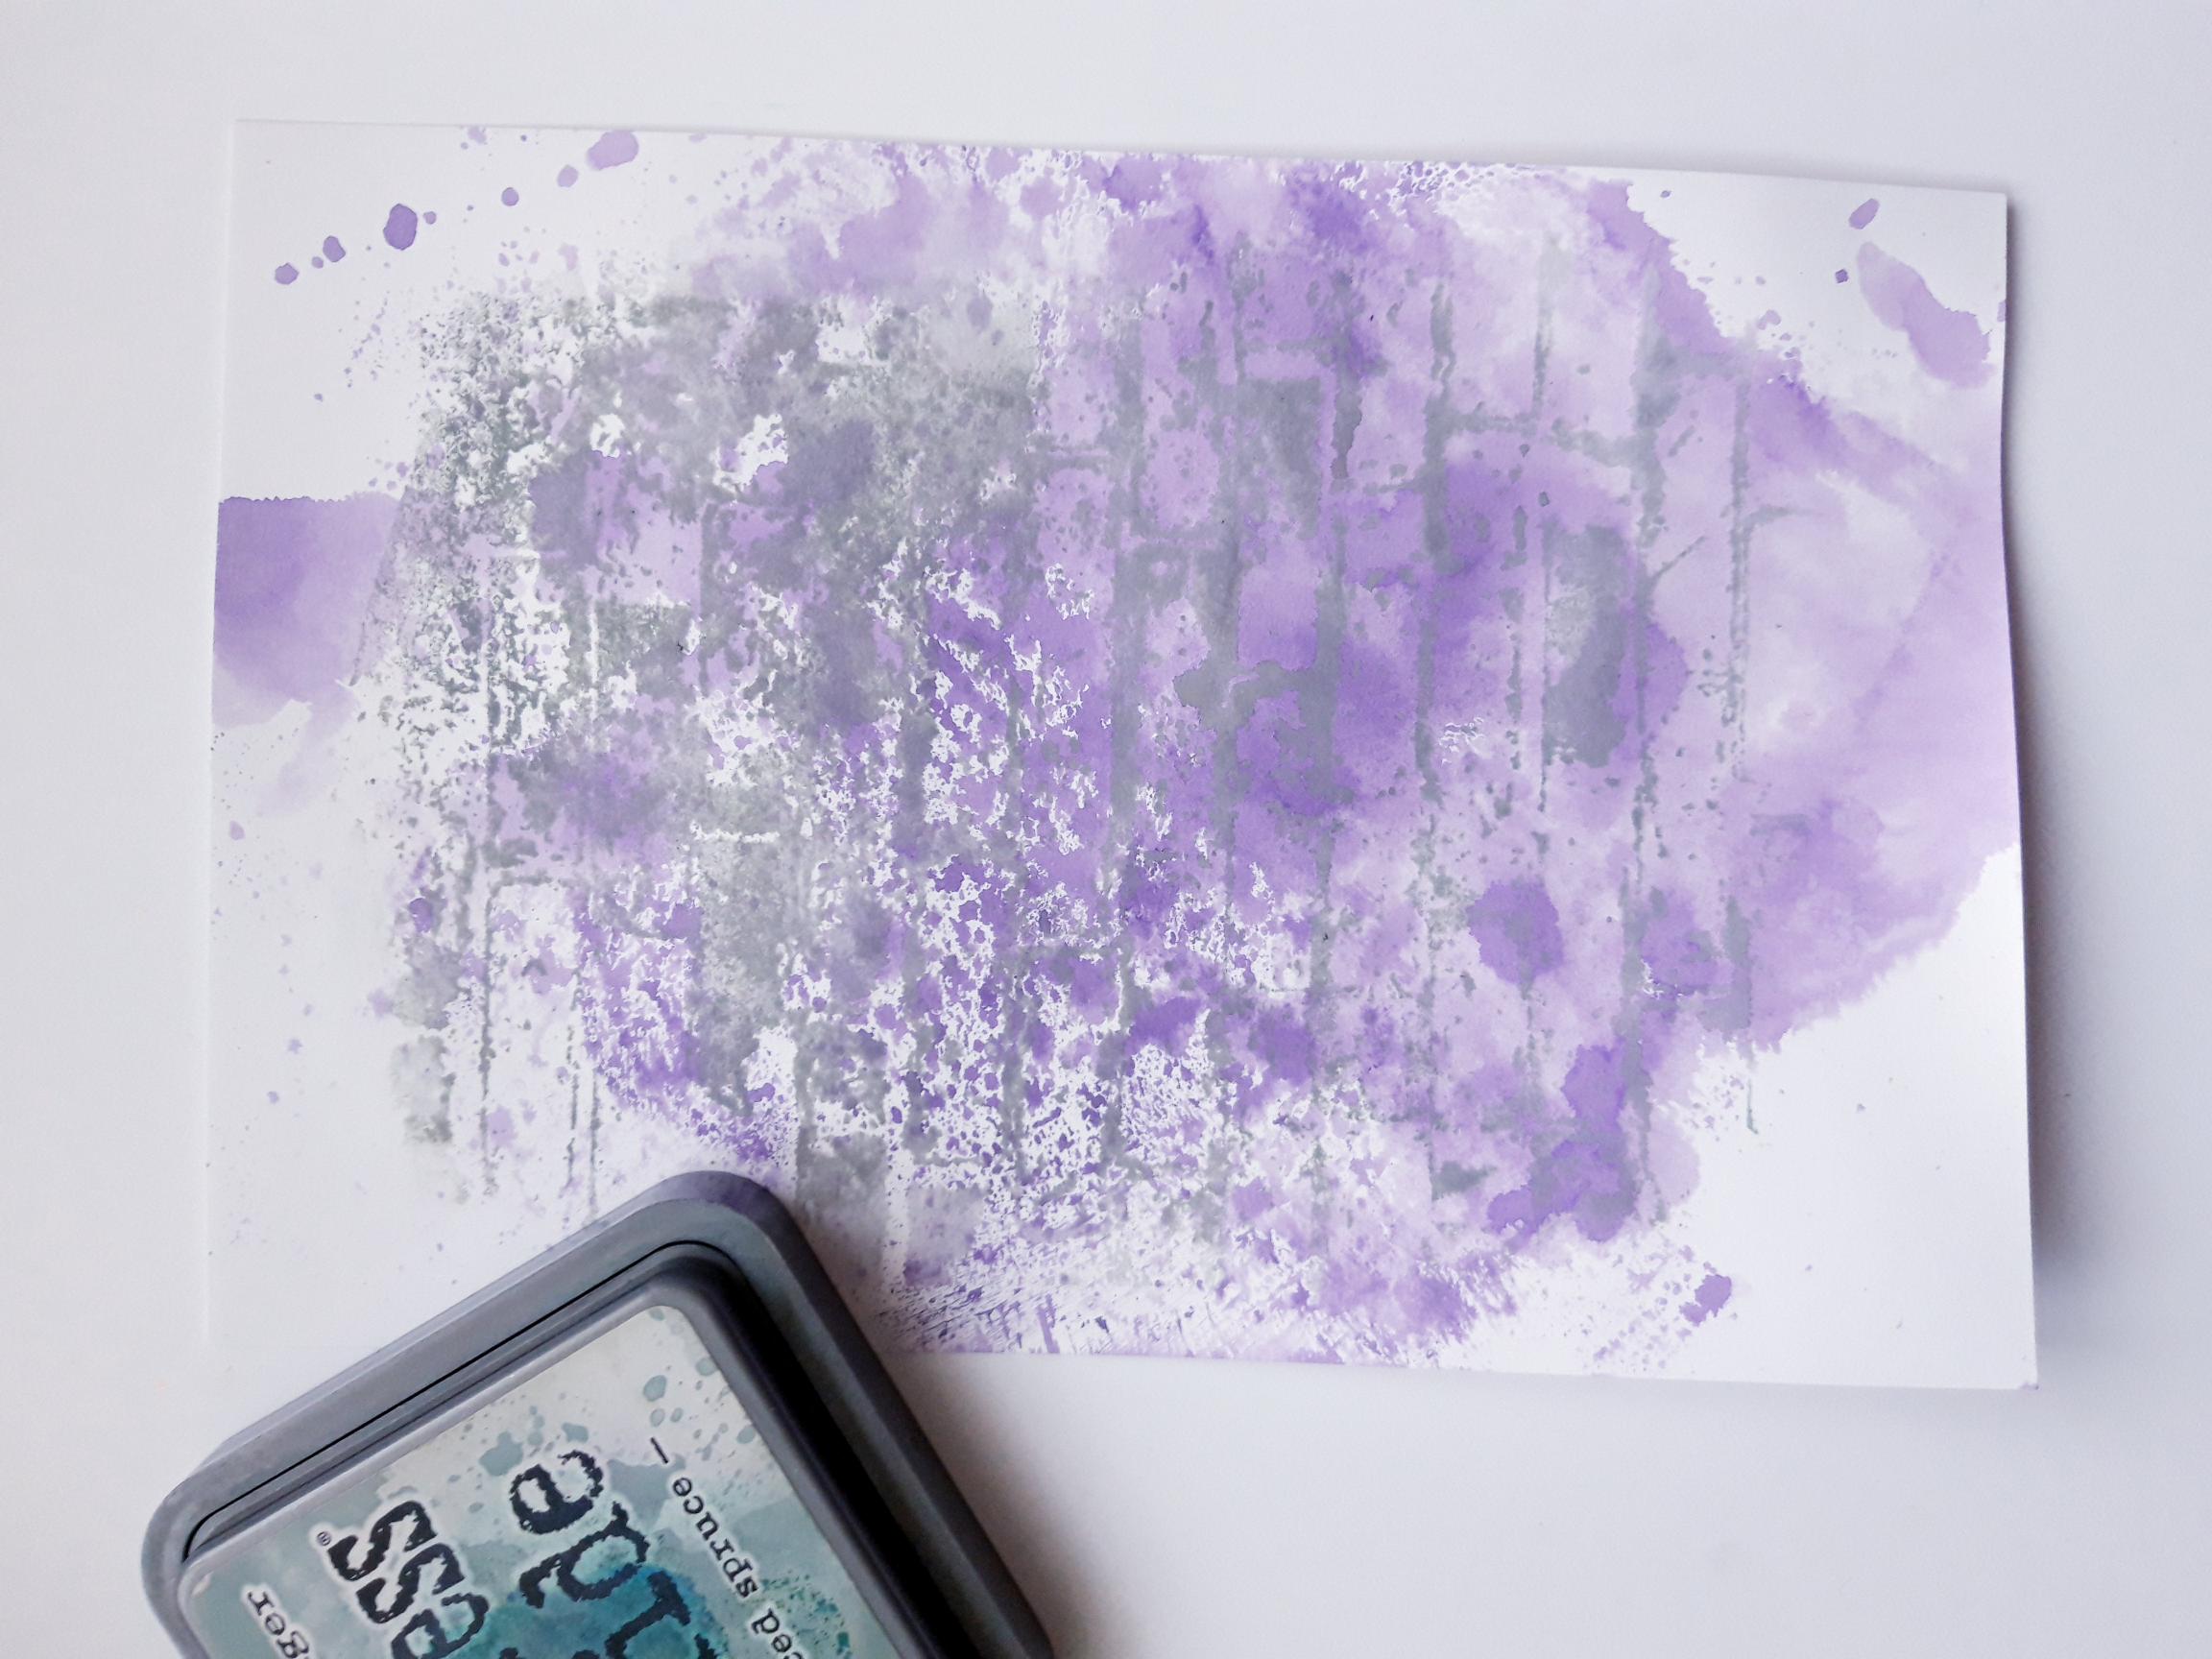
Ink up the stamp from the Textured Wall Stamp Collection, with the Iced Spruce Oxide. Spritz with water and randomly stamp on to your background. |
|
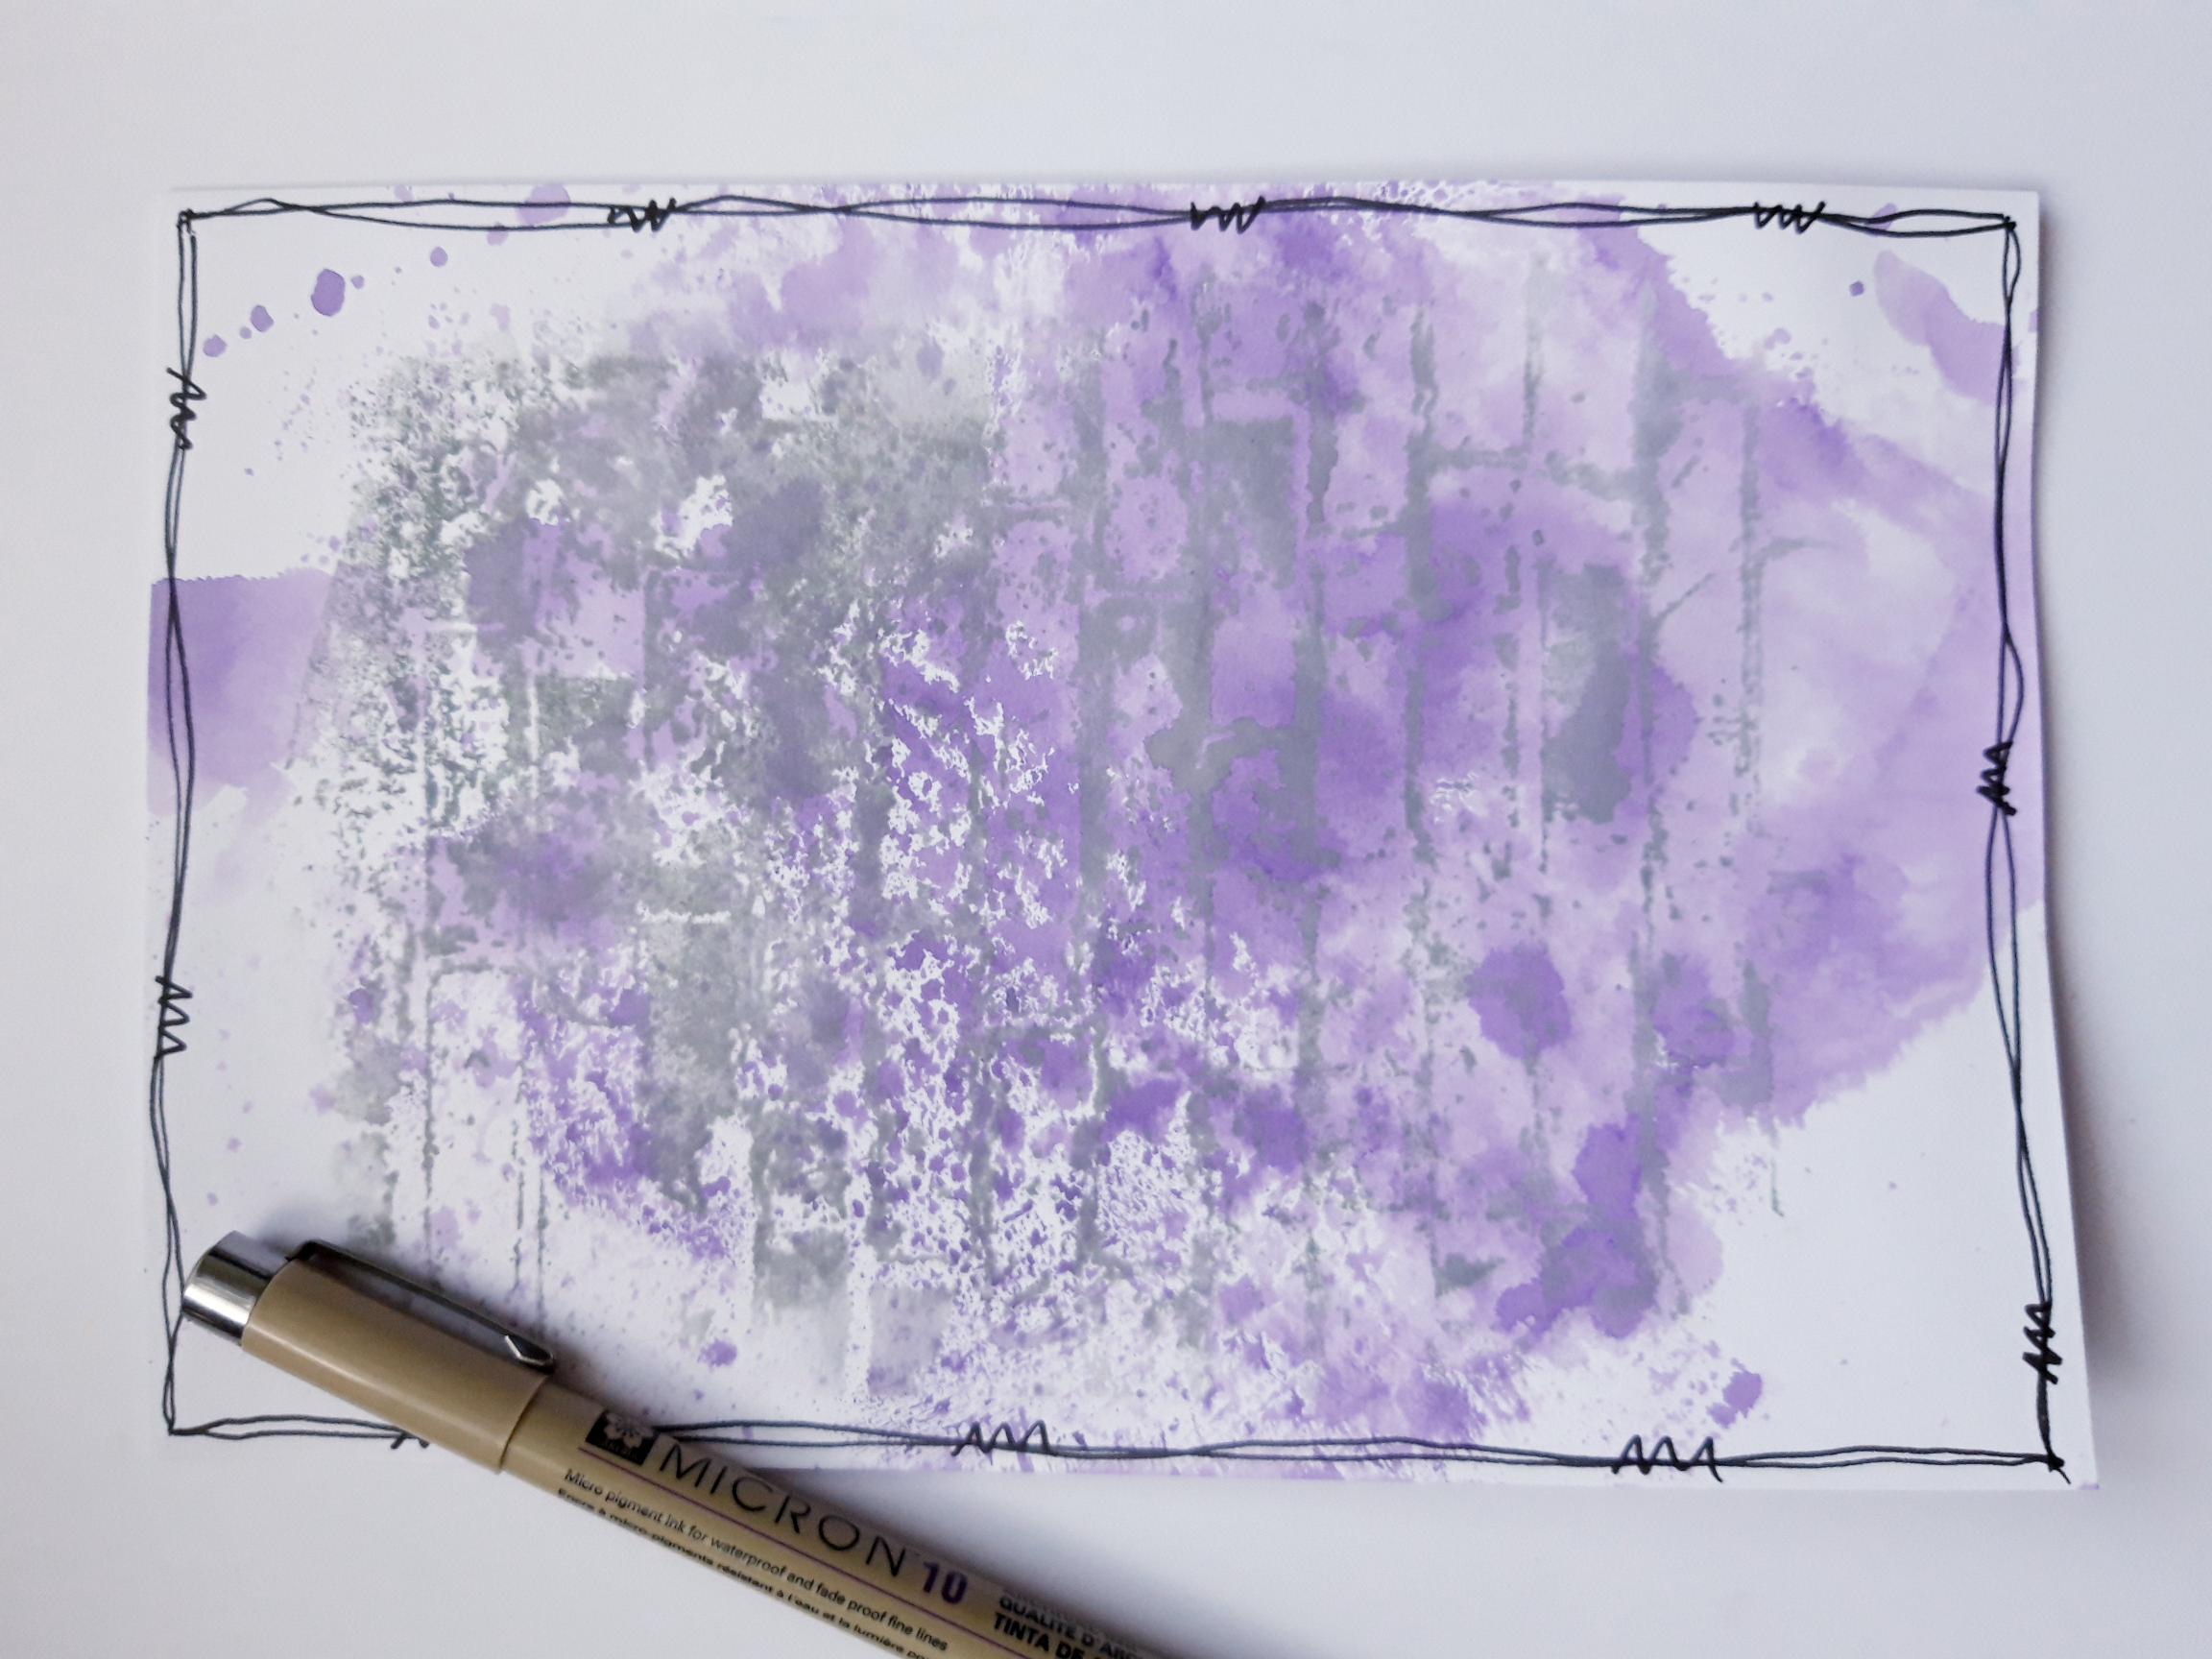
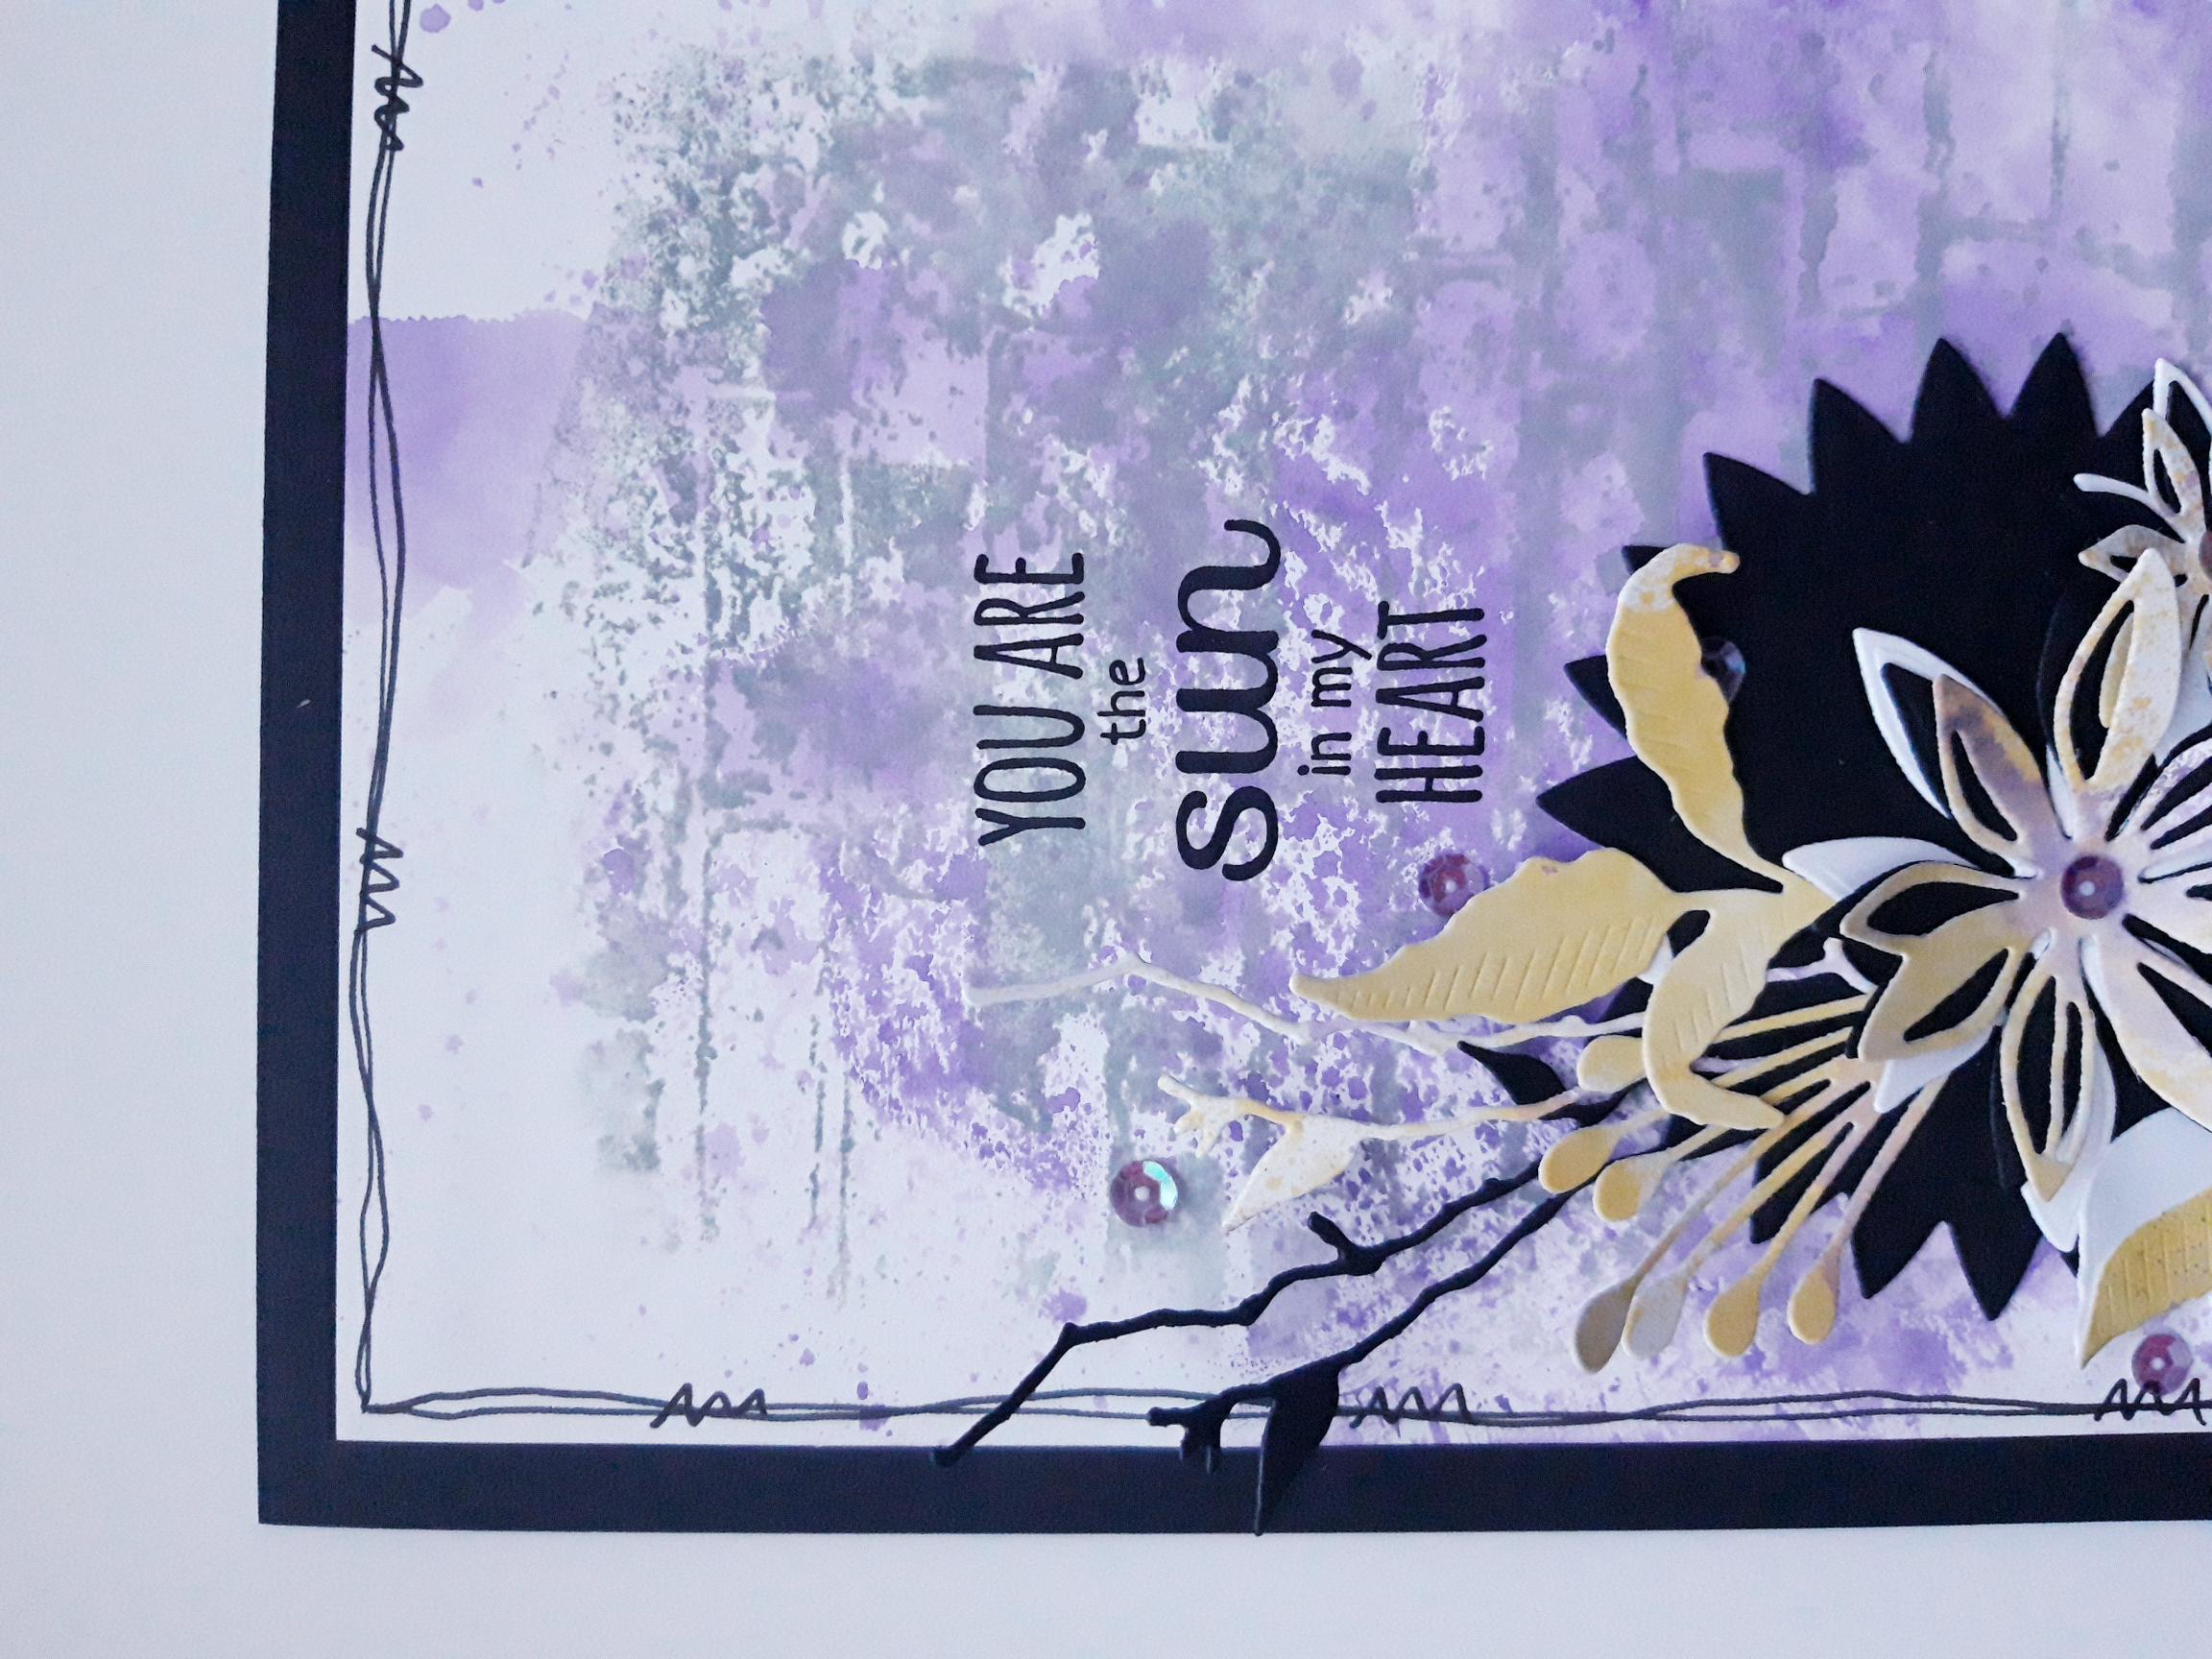
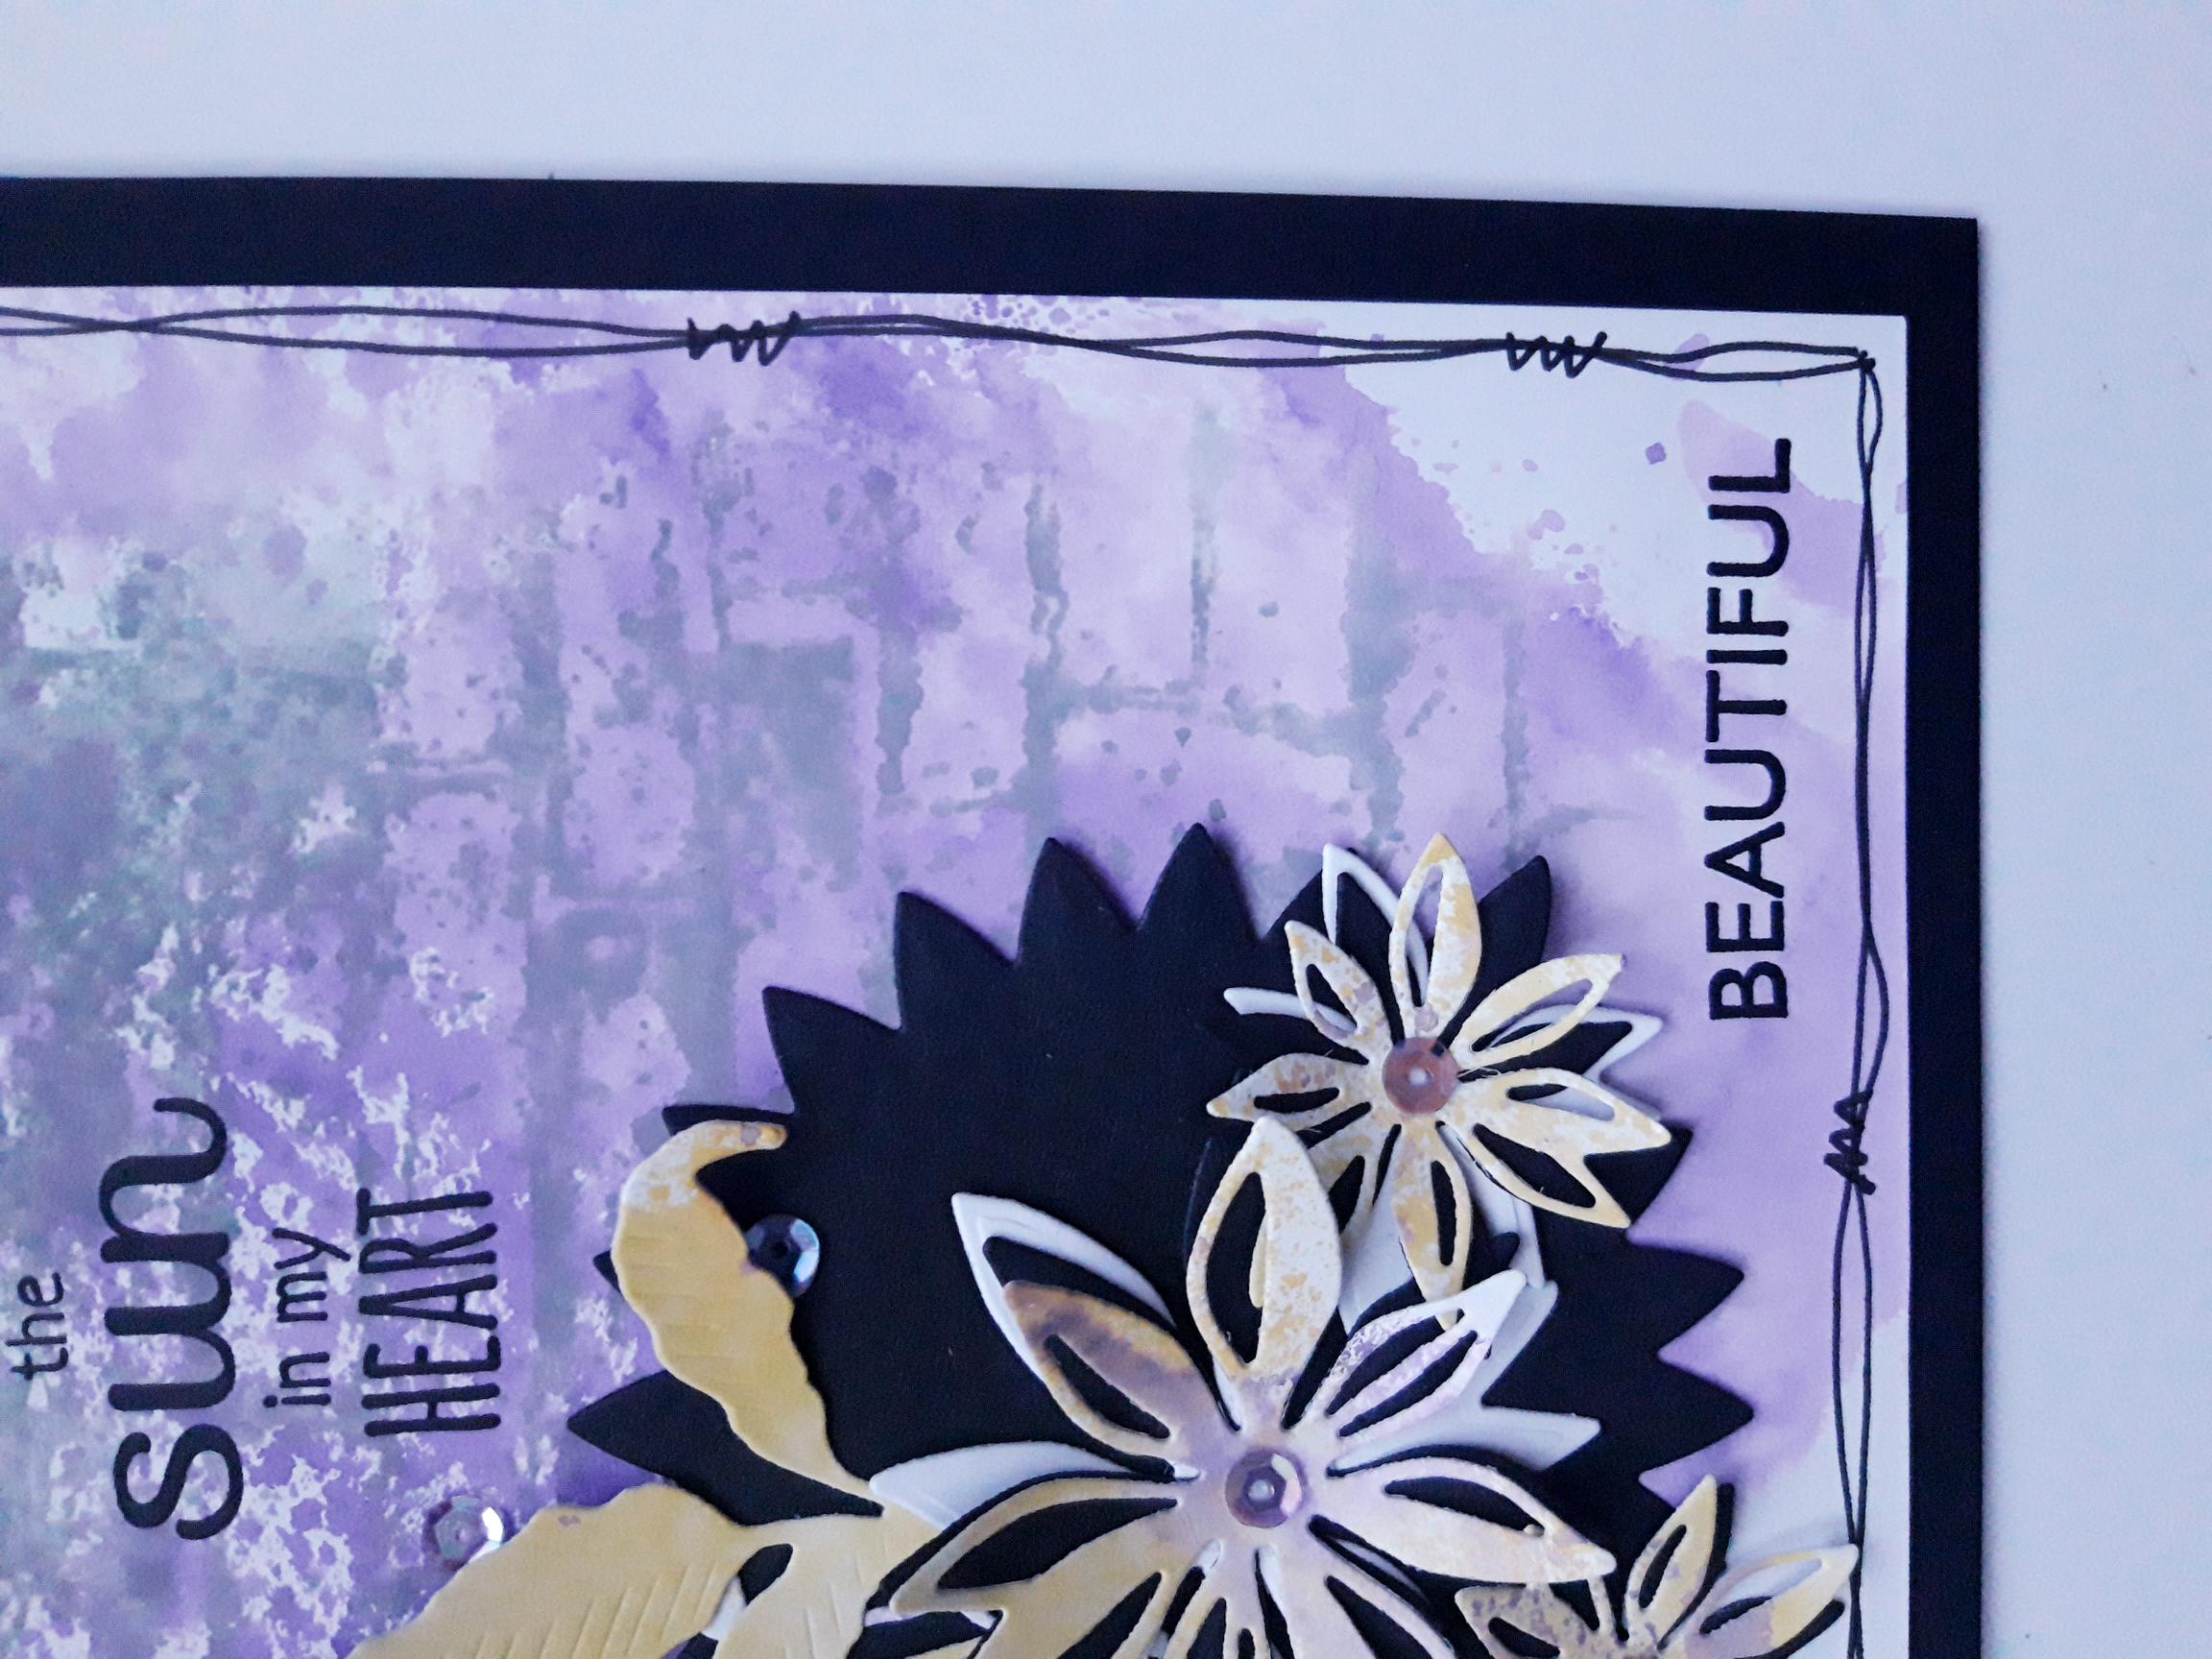
Use a black pen to draw a decorative, wiggly frame, around your background, and set to one side. |
|
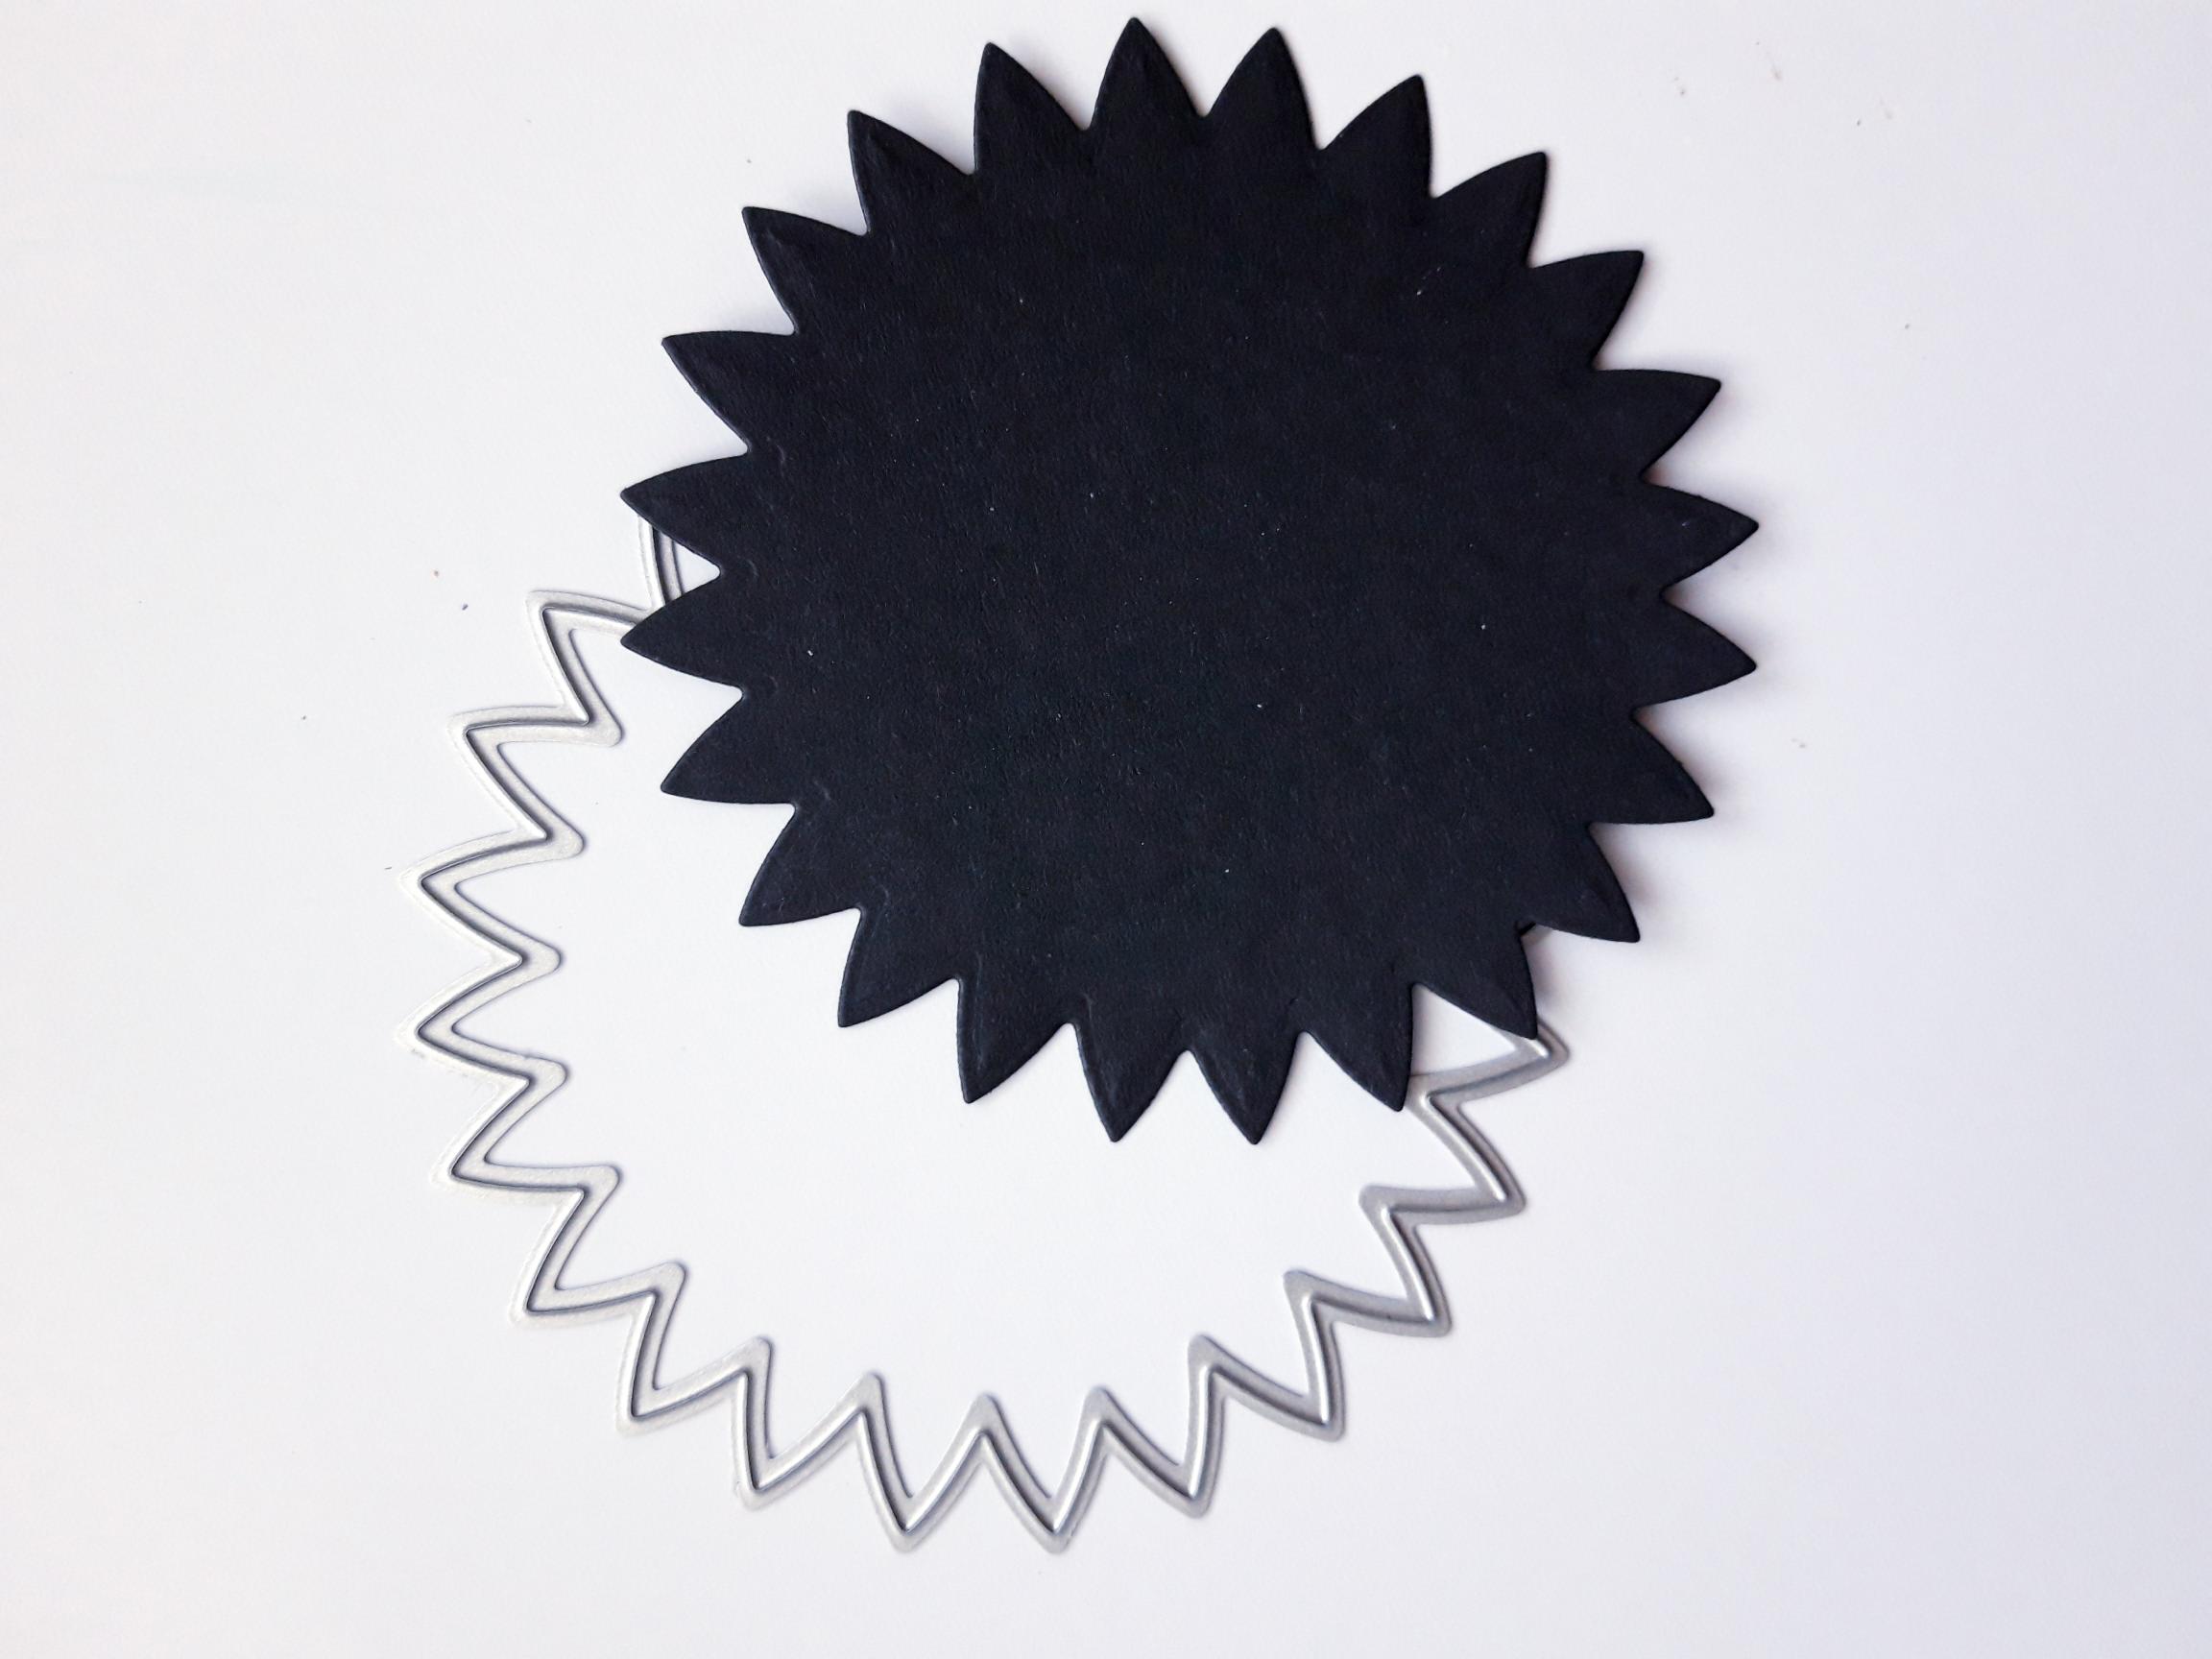
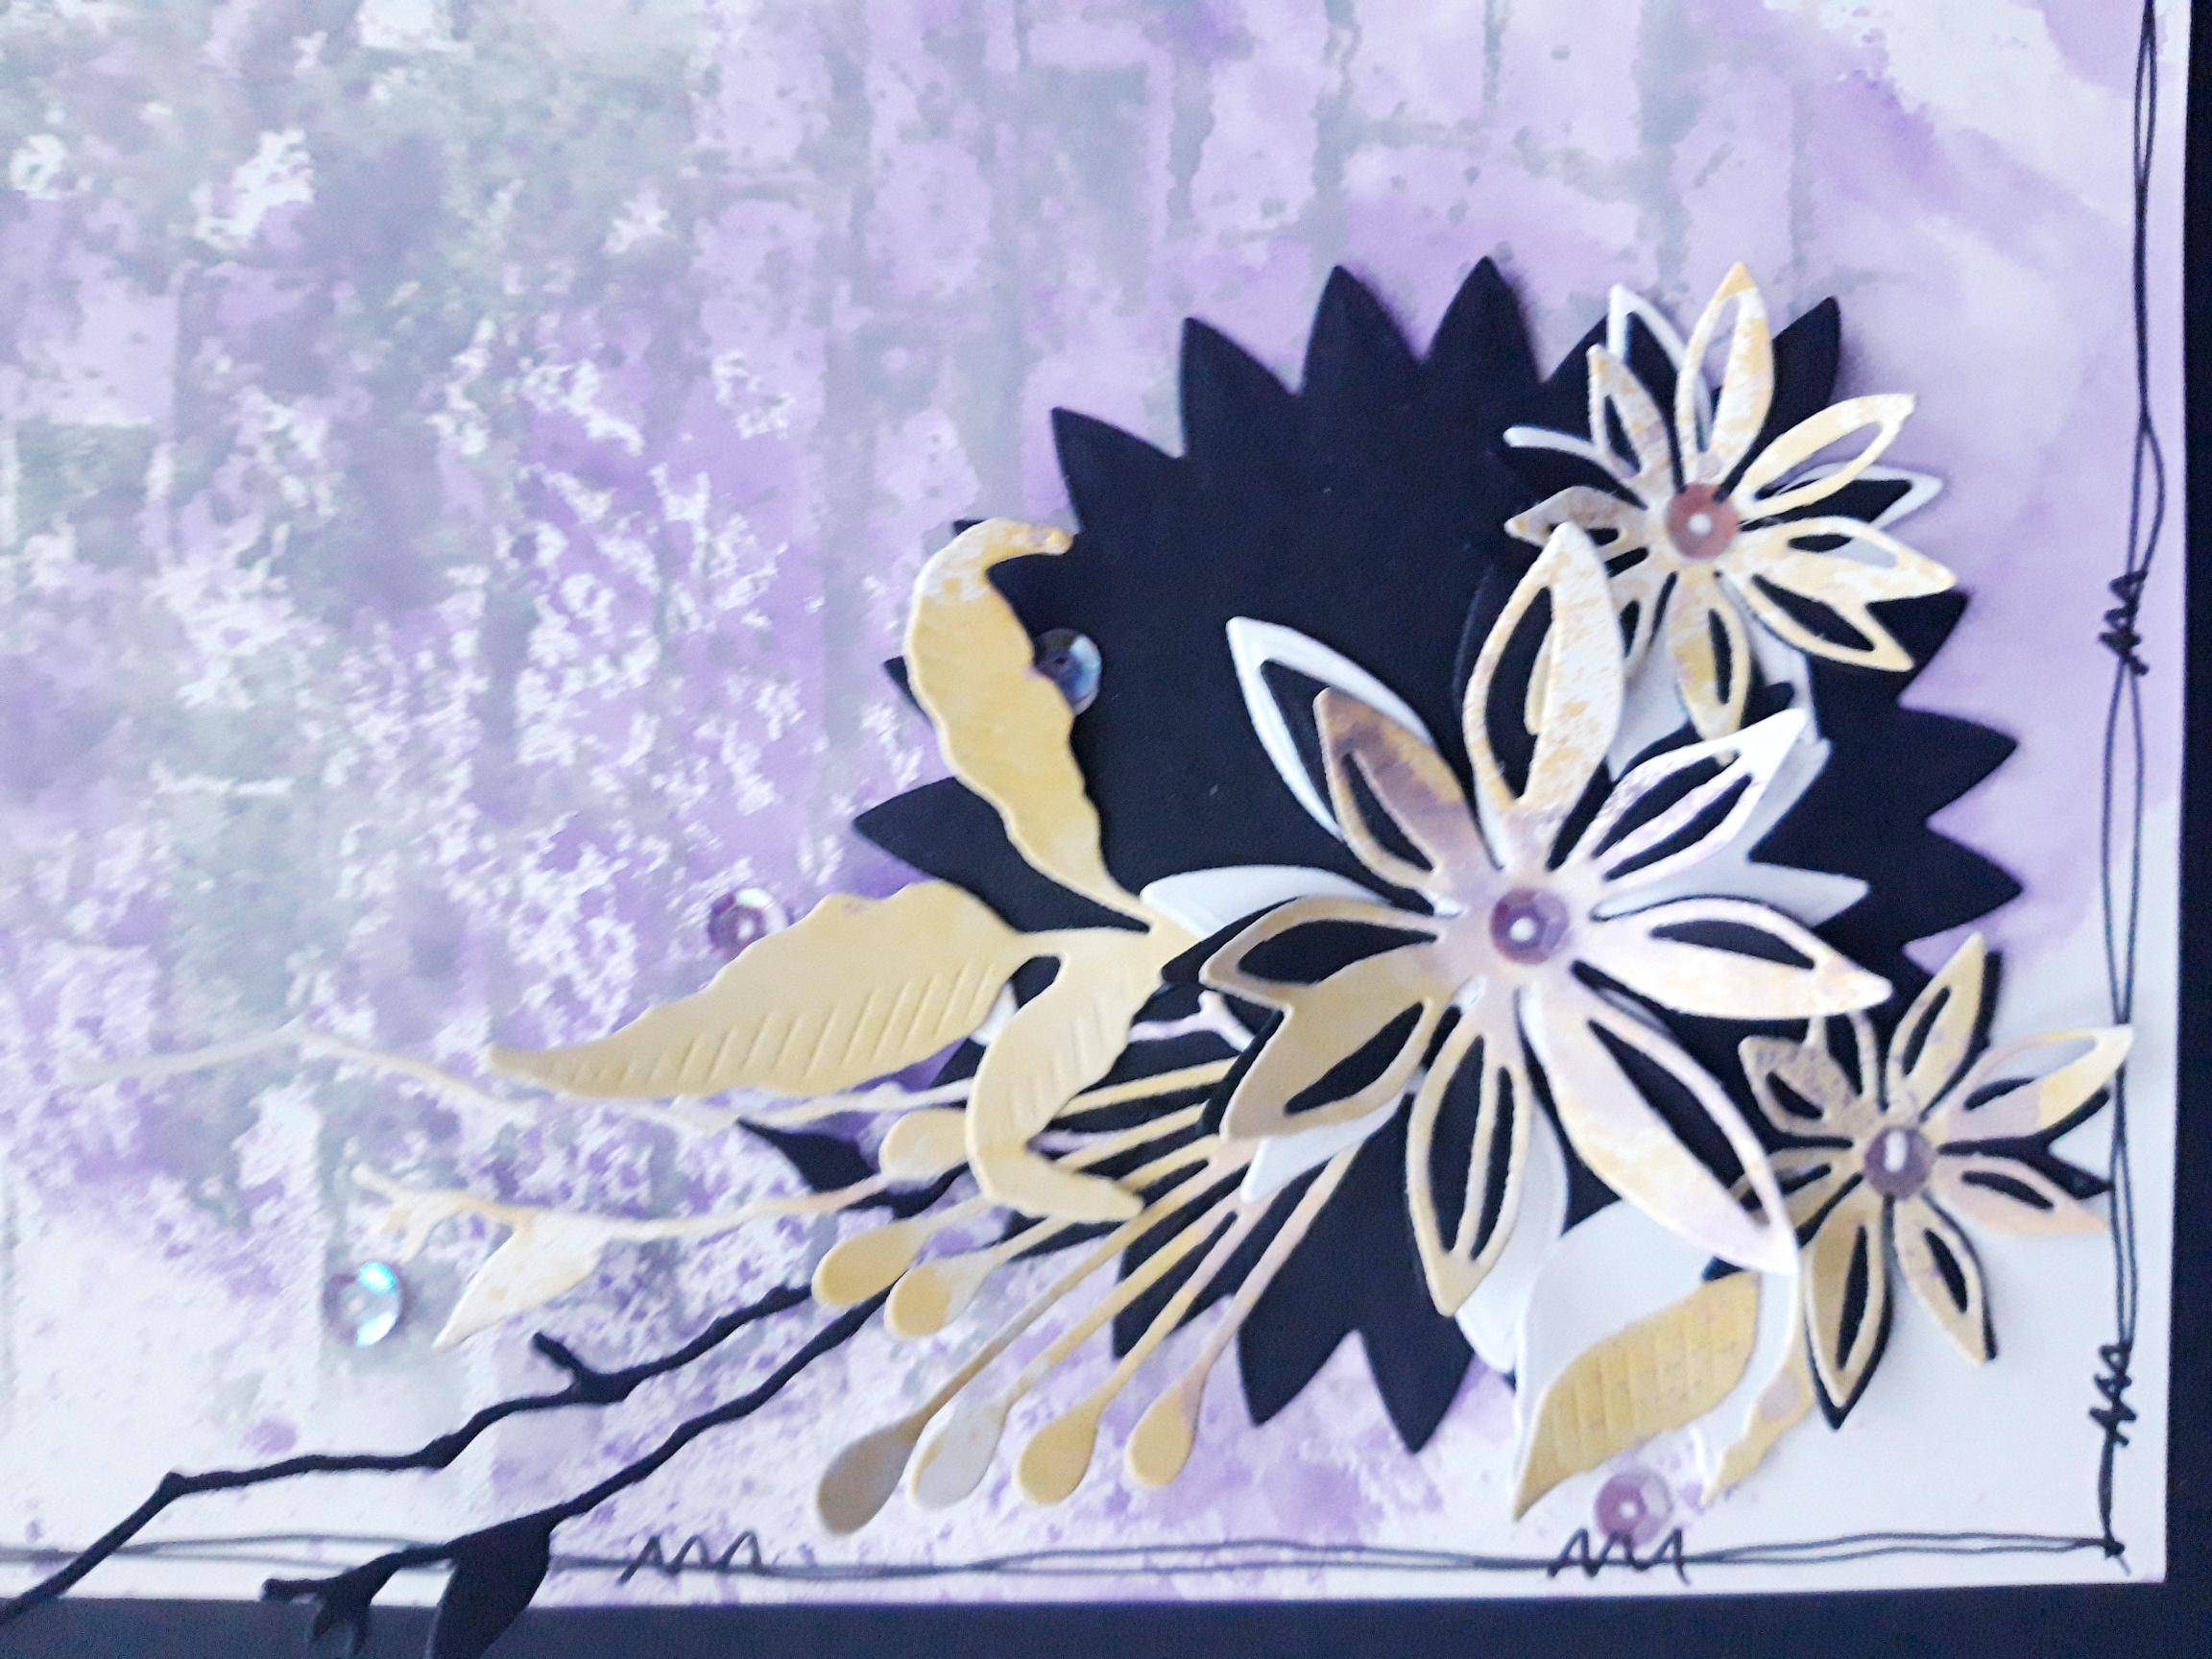
Place the star die, from the Build a Bloom Creative Dies set, on to the A4 black card. Roughly cut off a piece of the card big enough for the die, and set the rest of the card to one side for later. Run the die through your die cutting machine. |
|
Glue the die cut star bottom left of your inked background, and set to one side. |
|
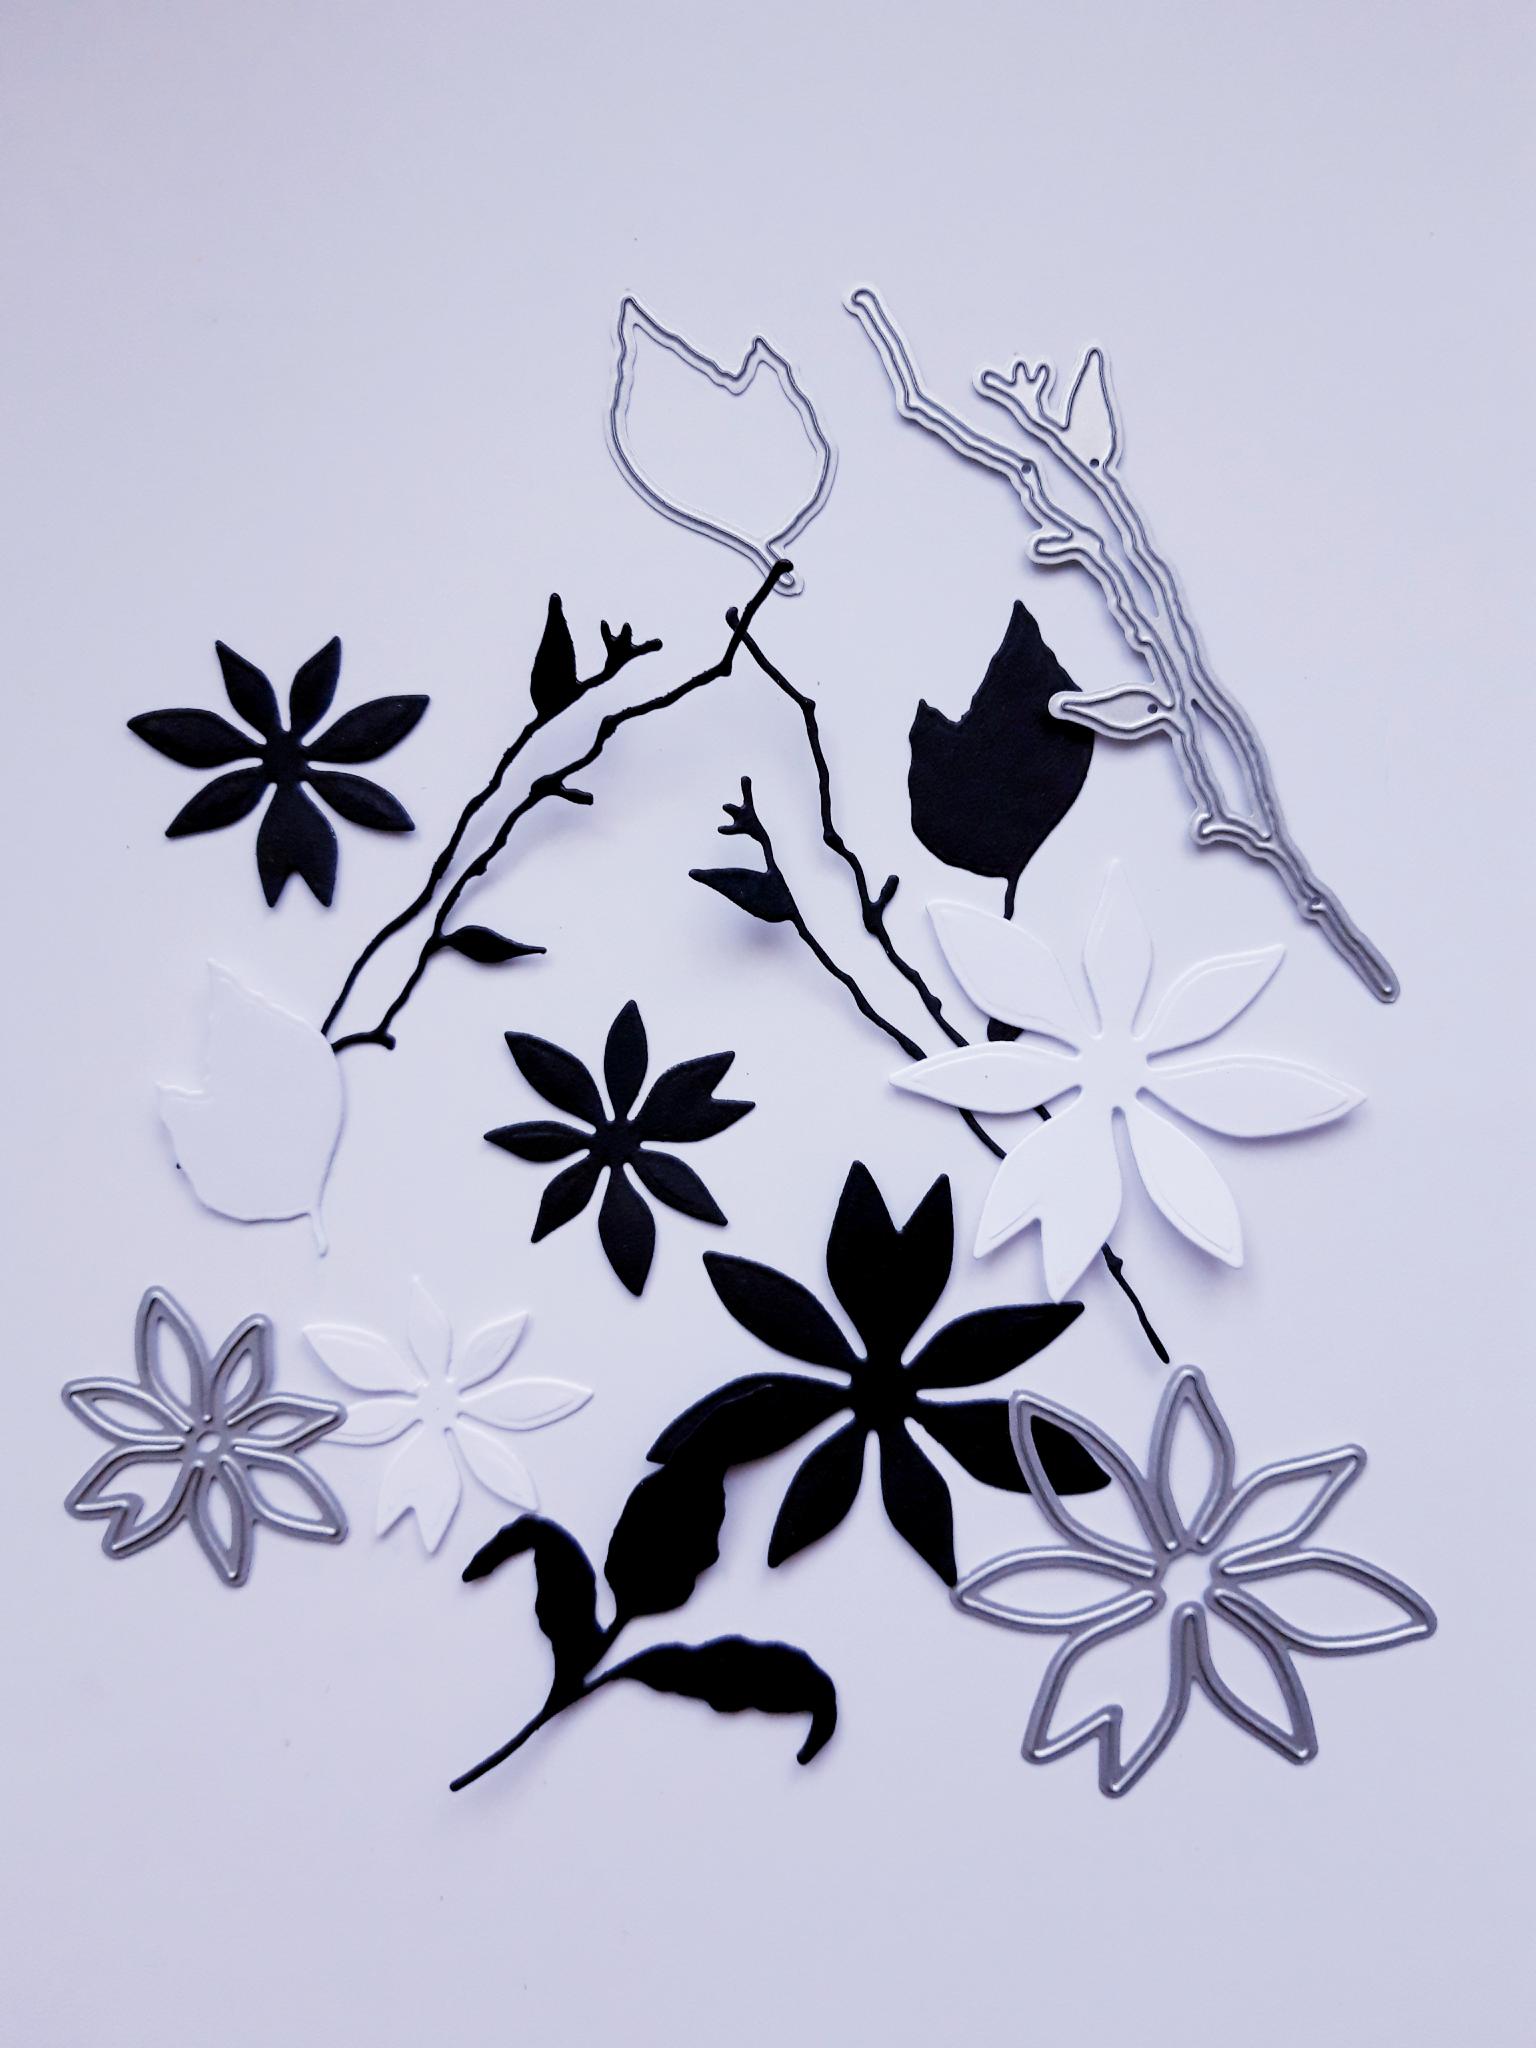
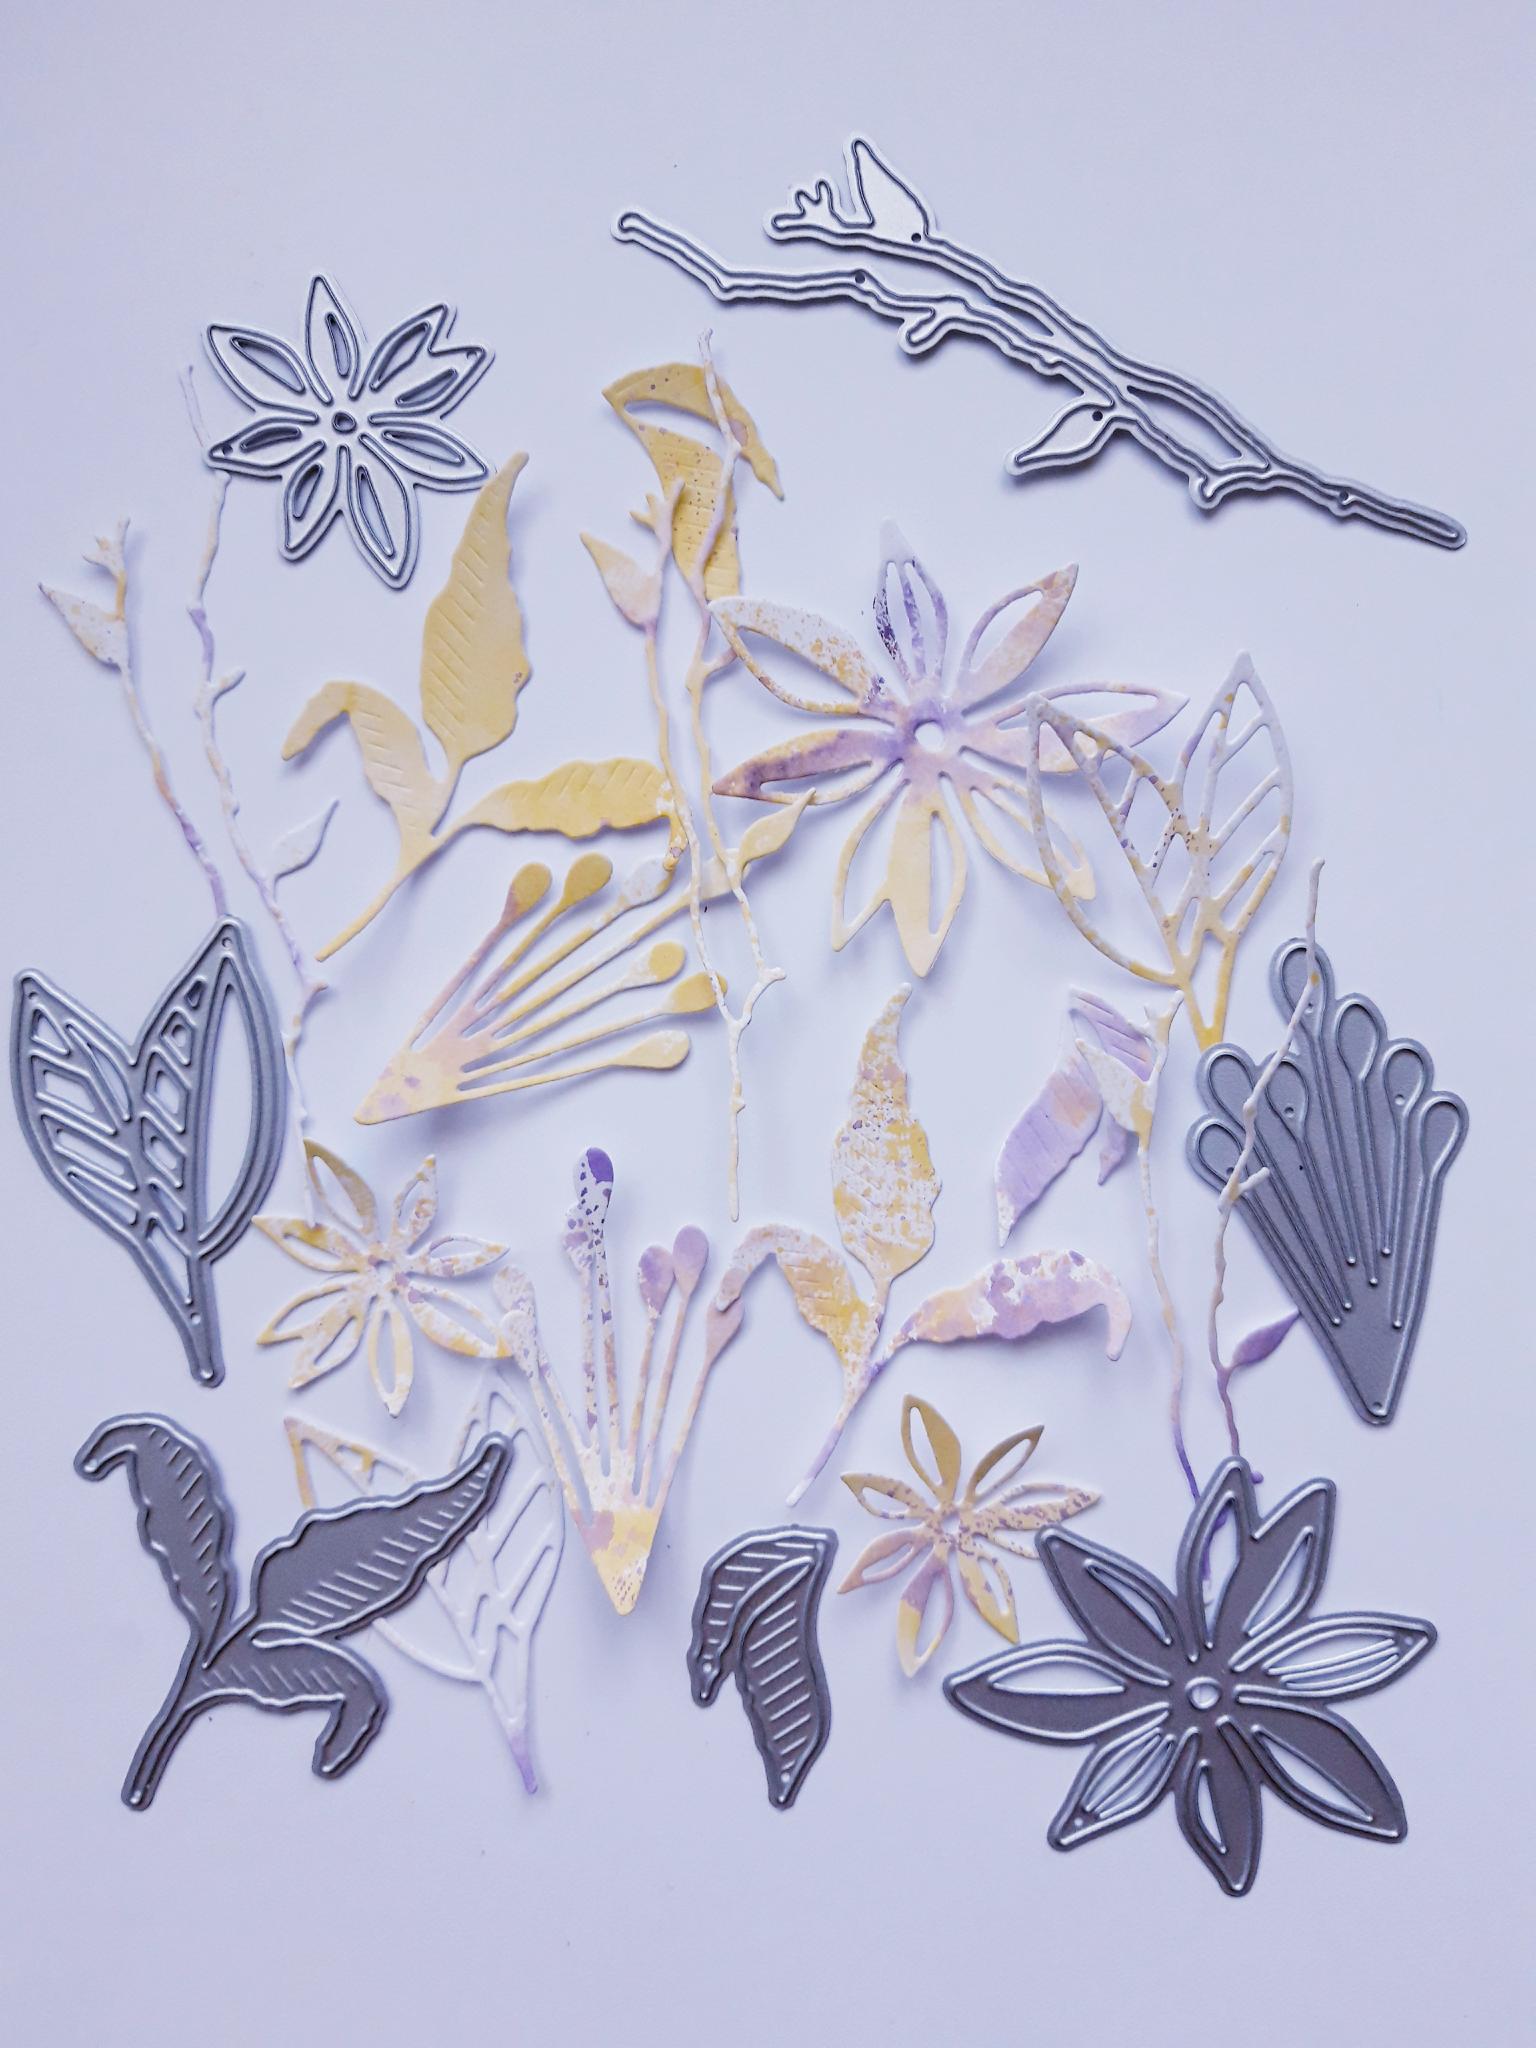
Using the solid dies, from the Cinched Together Die Collection, die cut a selection of them, from both the white and black card, as shown in this photo. You dont have to use them all on this card. You will need to set aside the remaining white cardstock for the next step, so when cutting the white ones, roughly cut a piece of the white card off, big enough for the number of dies you are cutting out. |
|
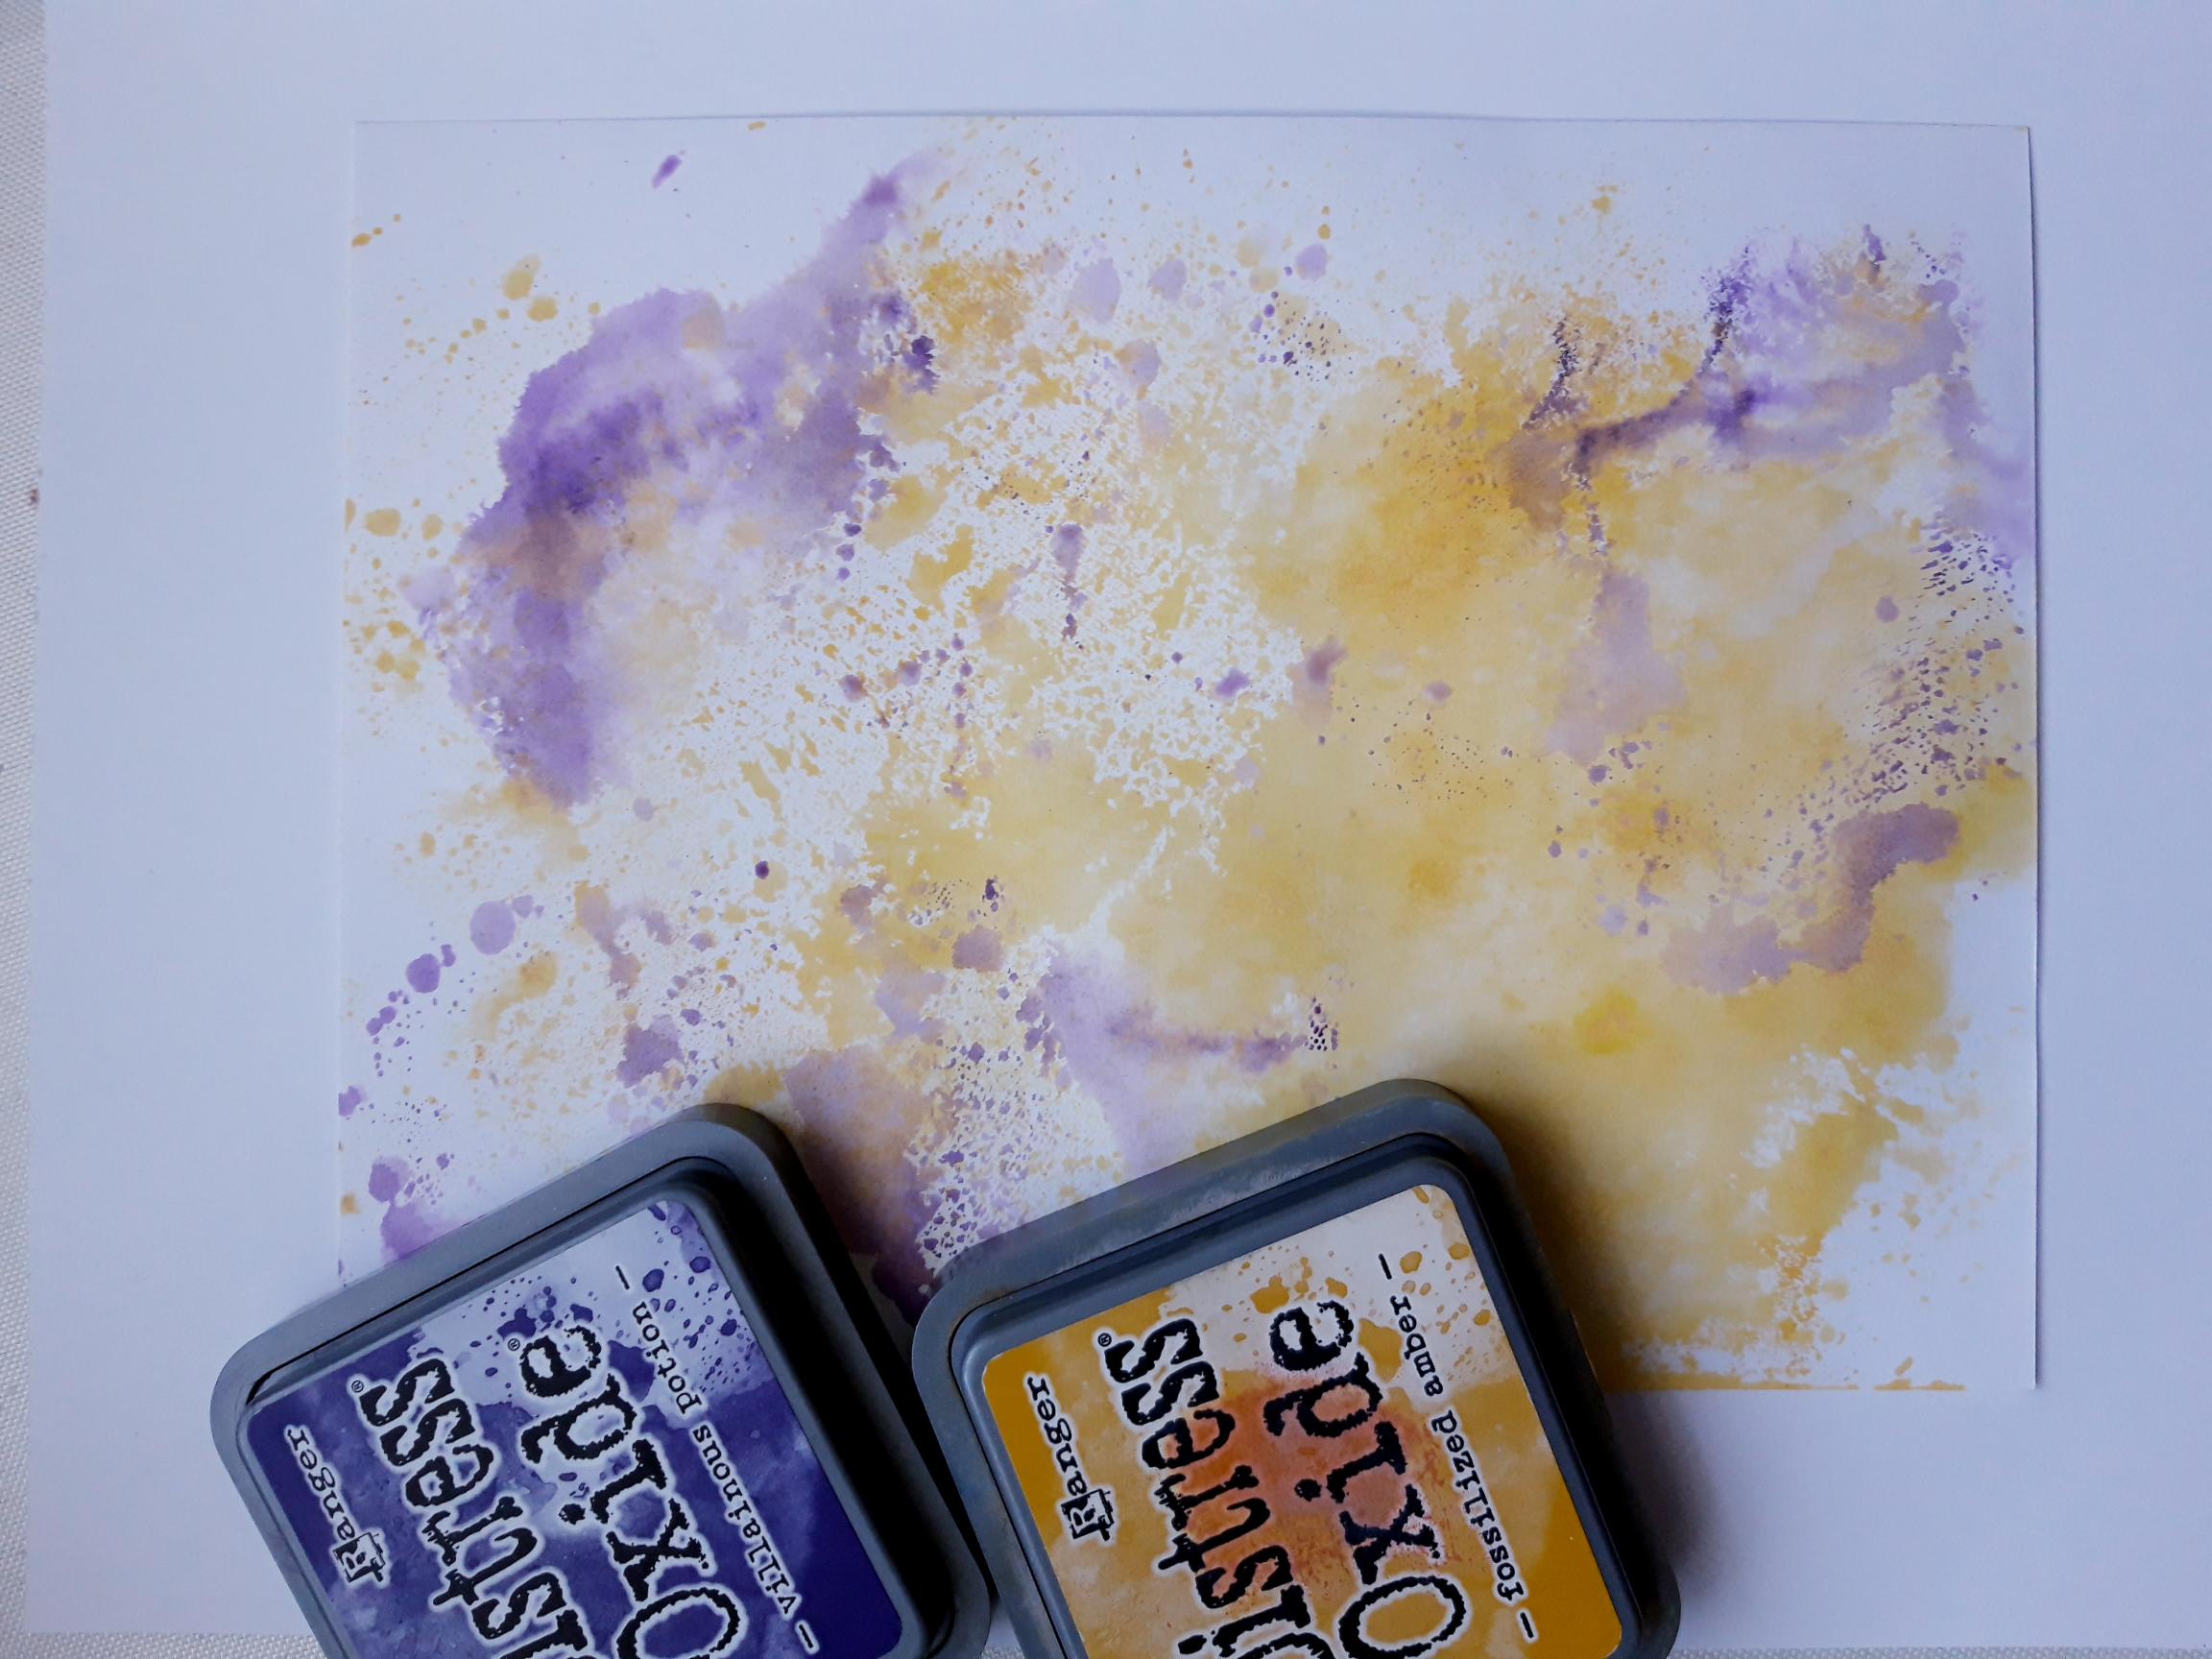
Apply the Fossilized Amber Oxide on to your mat, and spritz with water. Smoosh the remaining white card, that you set aside in the last step, and pick up the ink. Dry the ink off, then repeat with the Villainous Potion Oxide. Dry off completely, before proceeding to the next step. |
|
Using the detailed dies, from the Cinched Together Die Collection, cut out a random selection of florals and foliage, from the inked background you created in the previous step. Again you may not use them all, but any left over, can be kept for another day. |
|
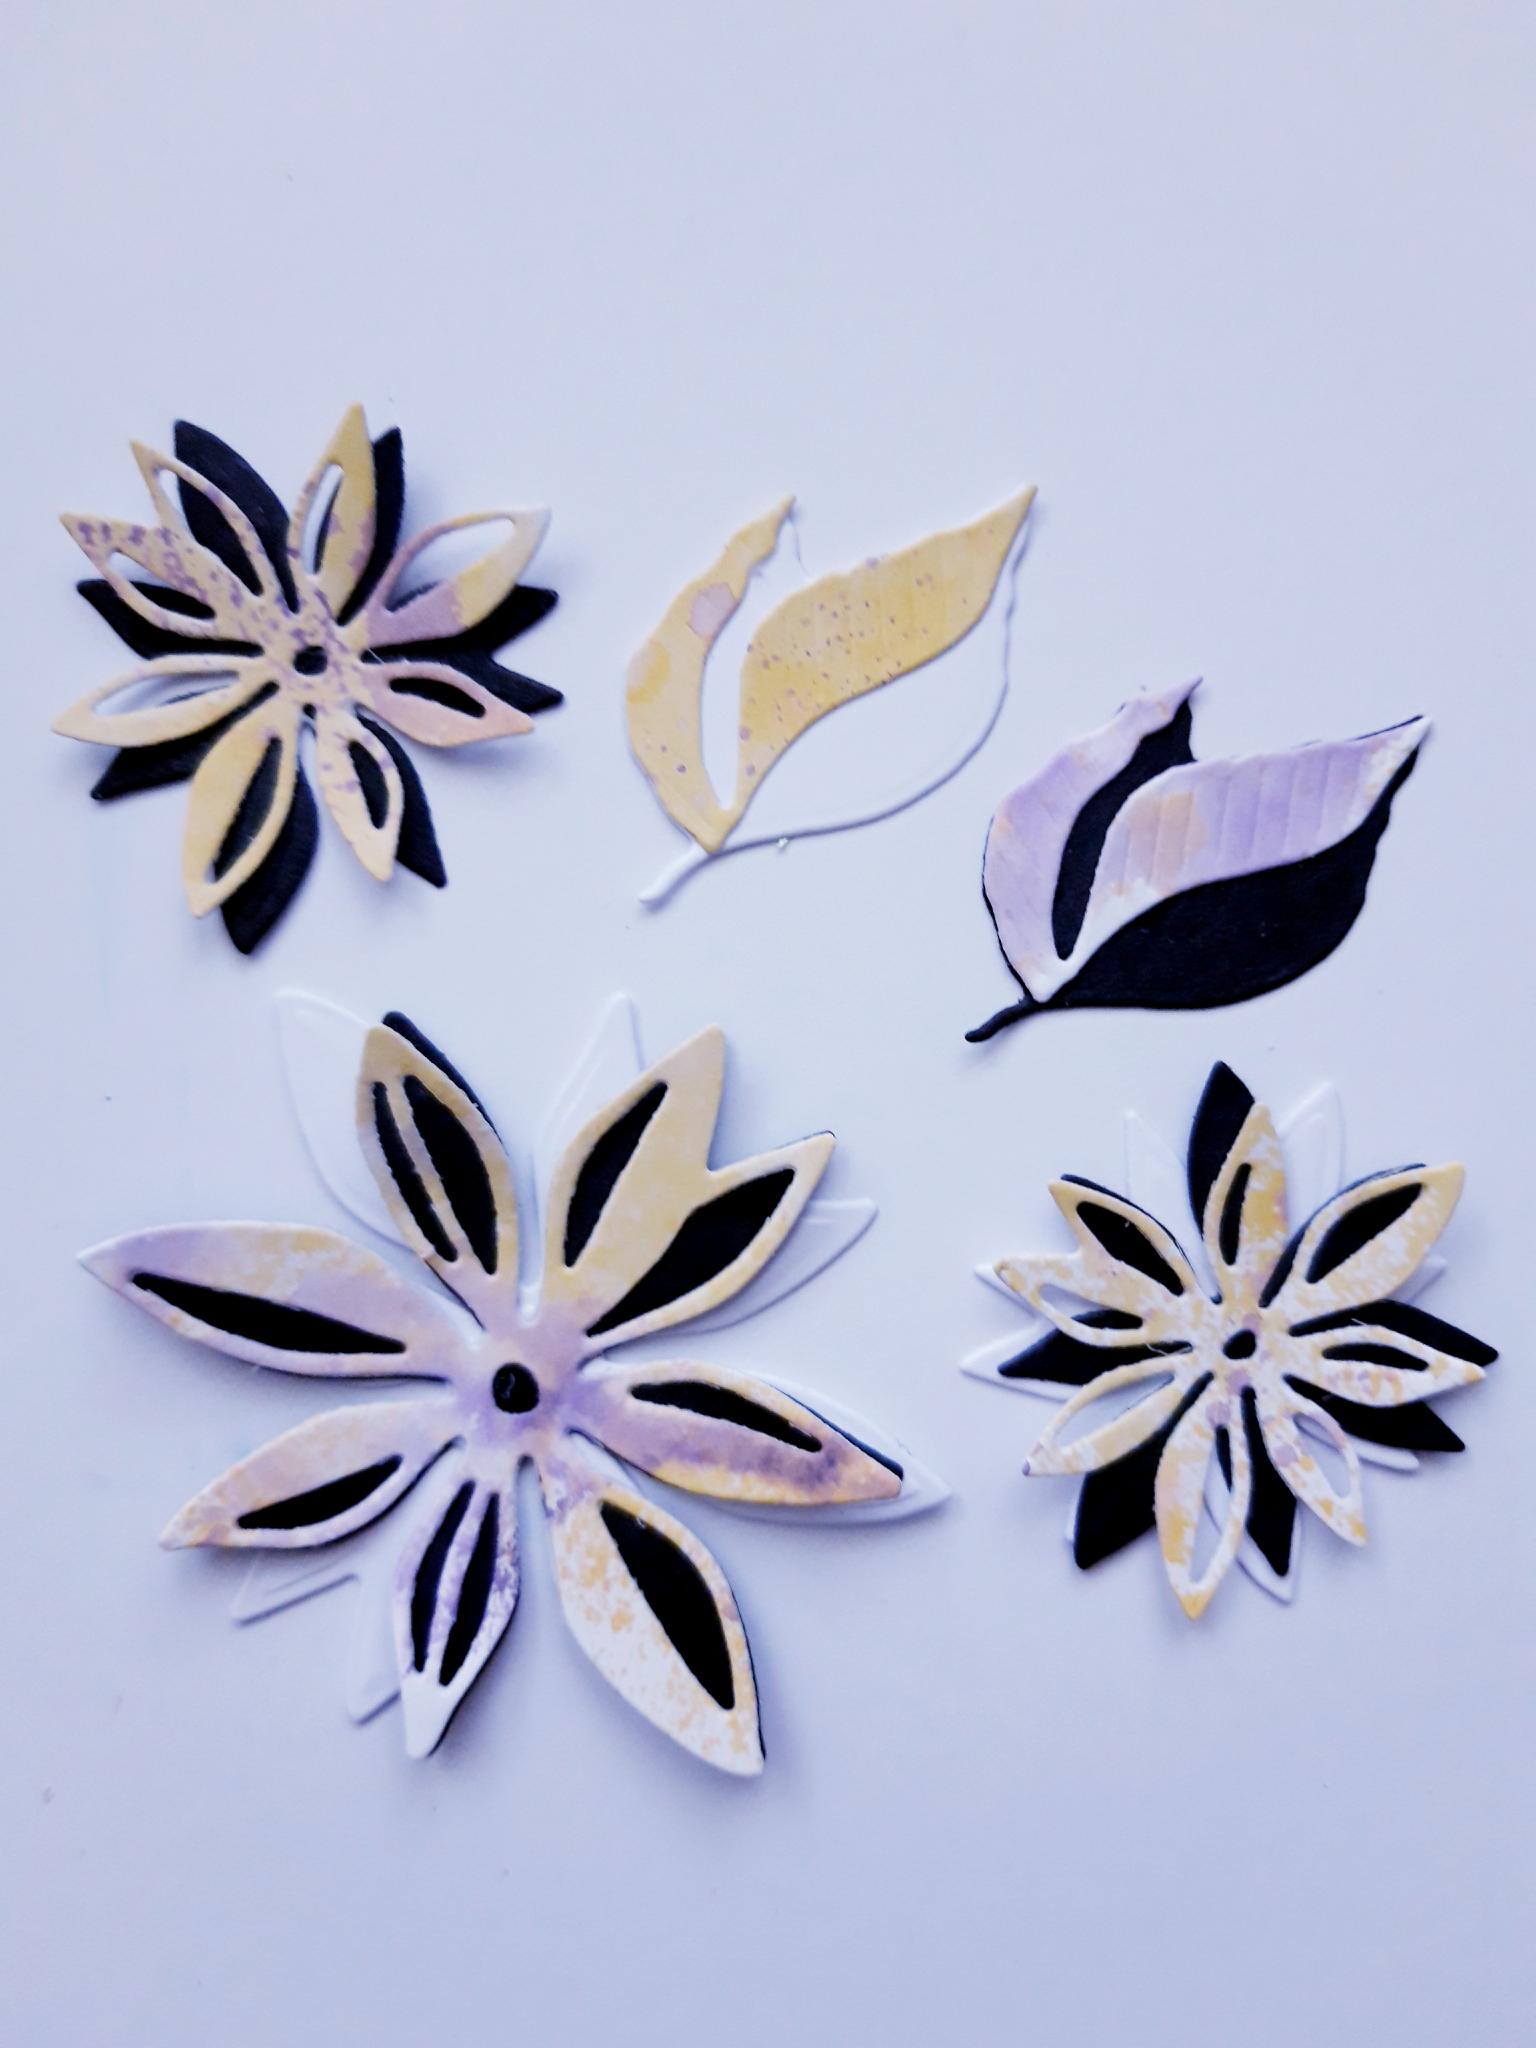
Using the photos on the Cinched Together packaging as a guide, build up your layered flowers, combining the black and white die cut elements, with the coloured elements, as shown in this image. |
|
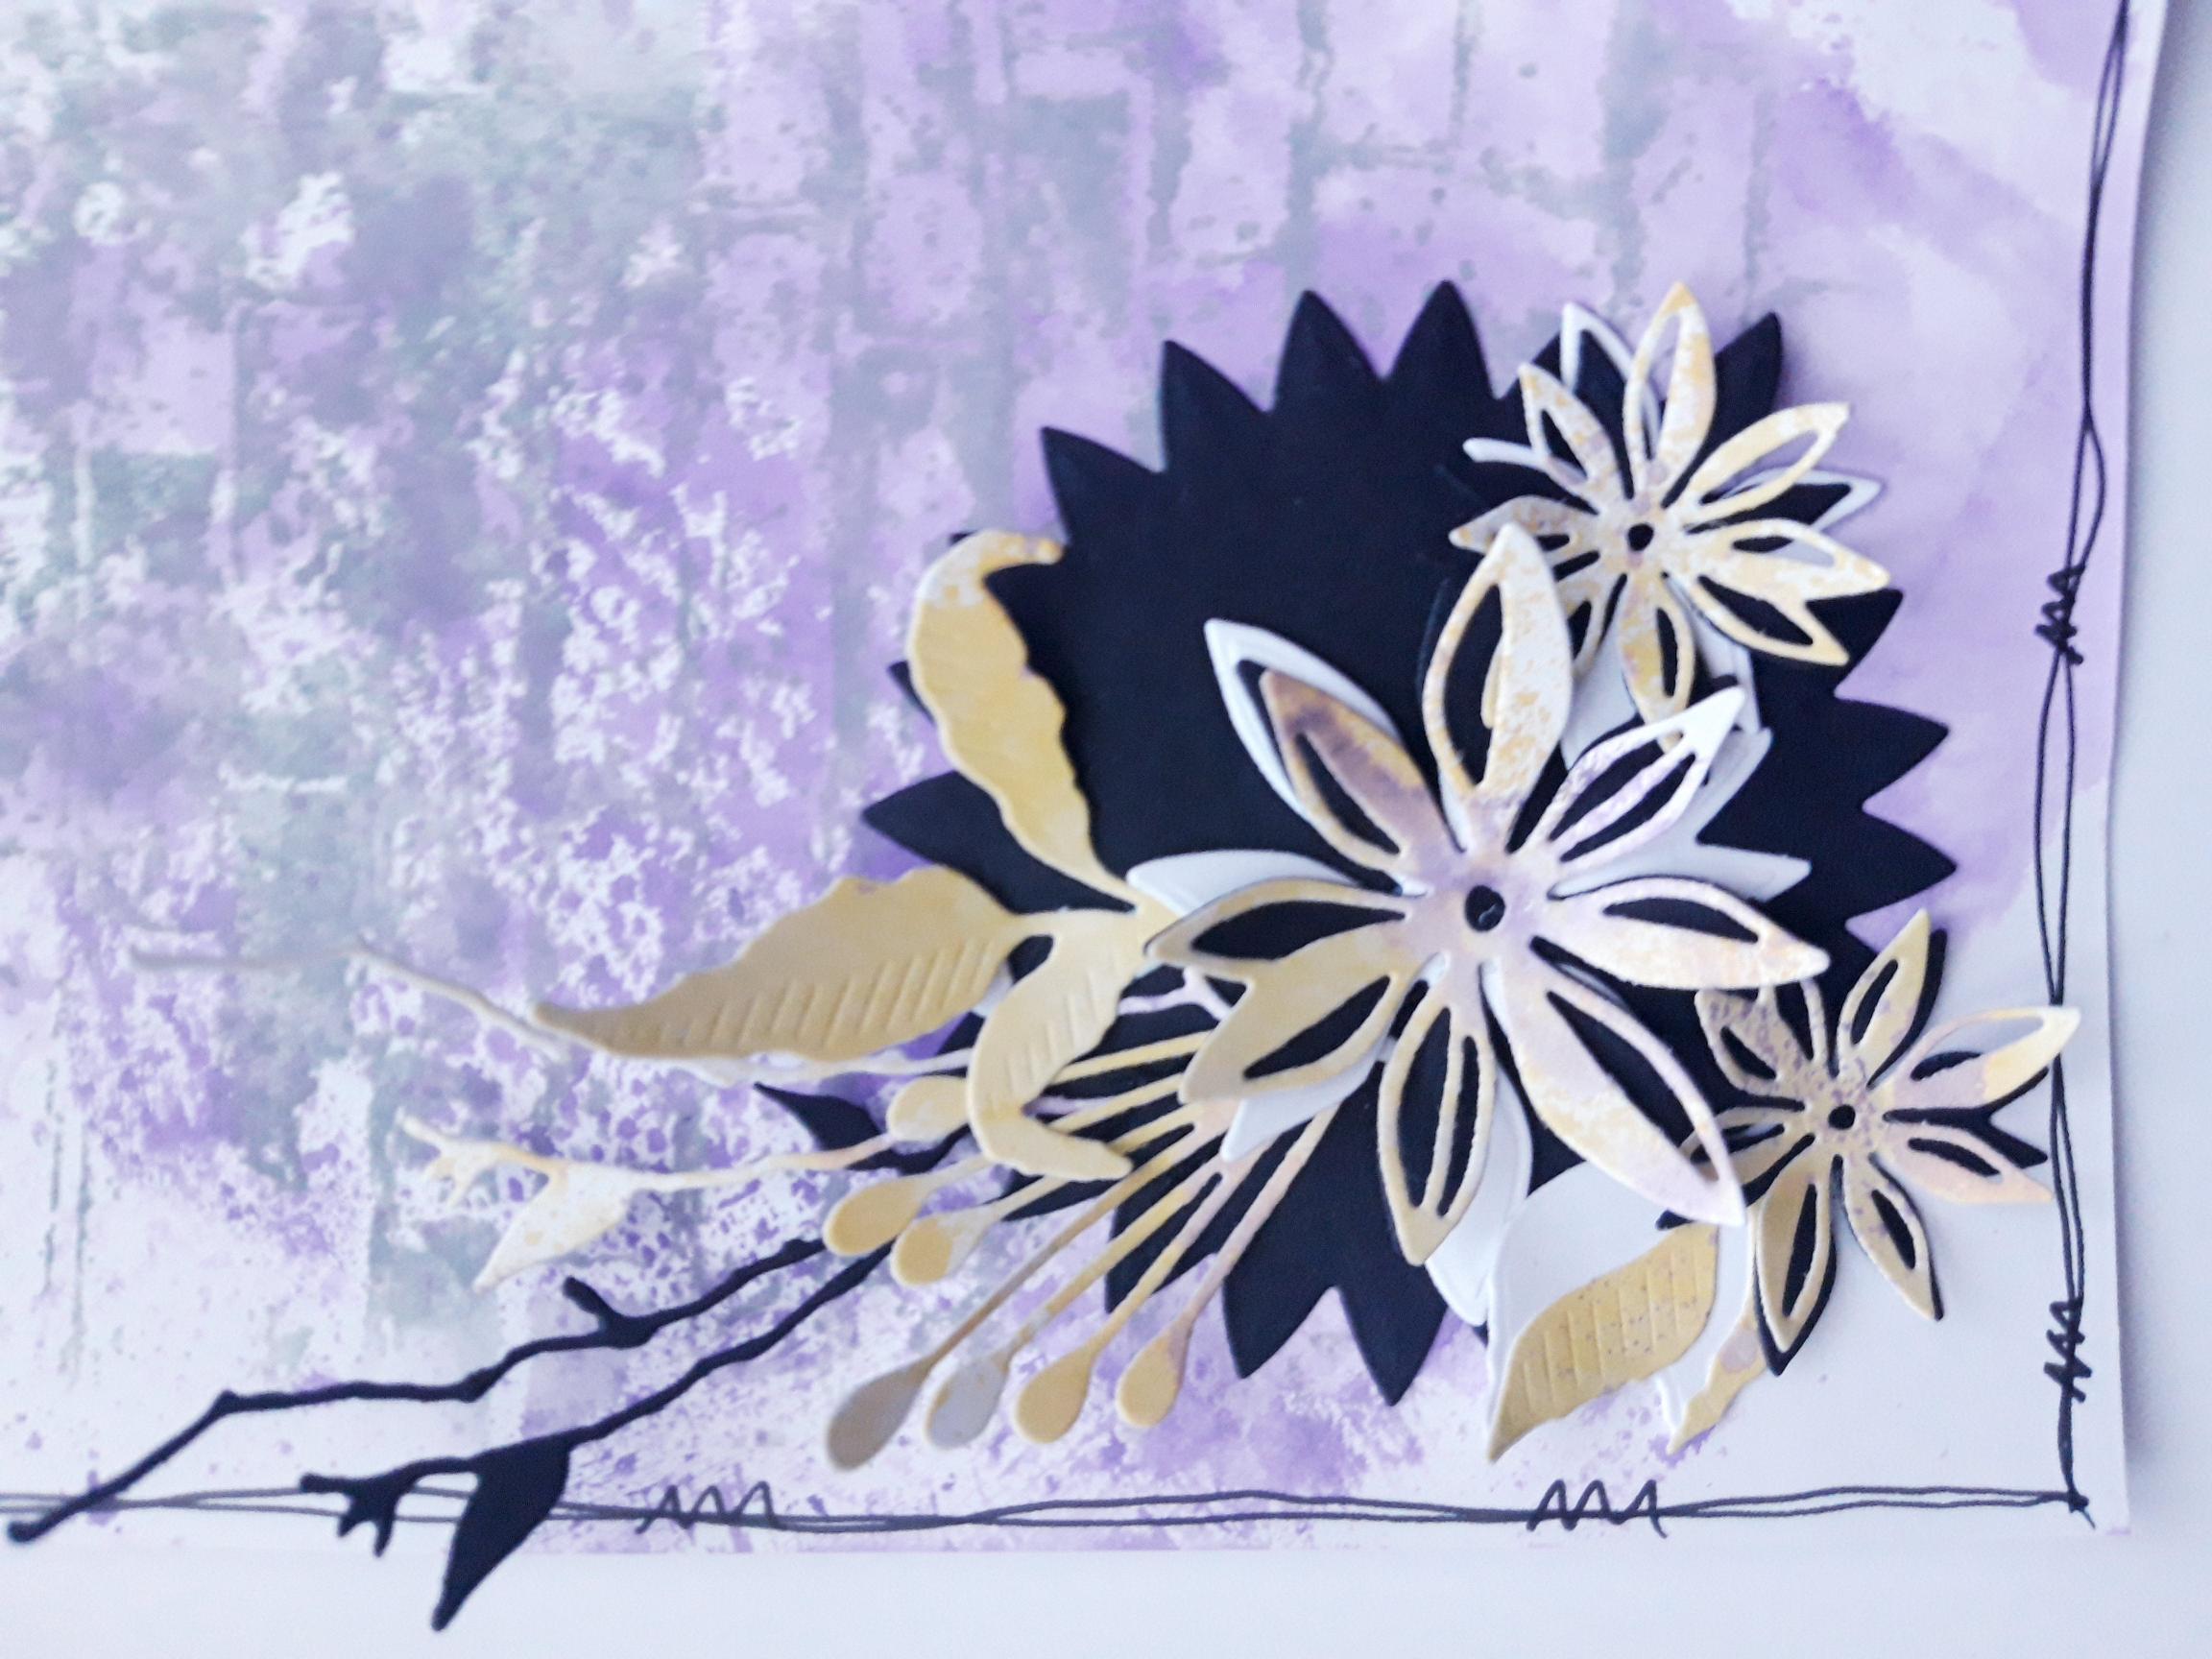
Before gluing down your floral elements, have a play and decide which ones you want to use, and how you want your layout to look. Once decided, glue all your elements in place, over the black die cut star. |
|
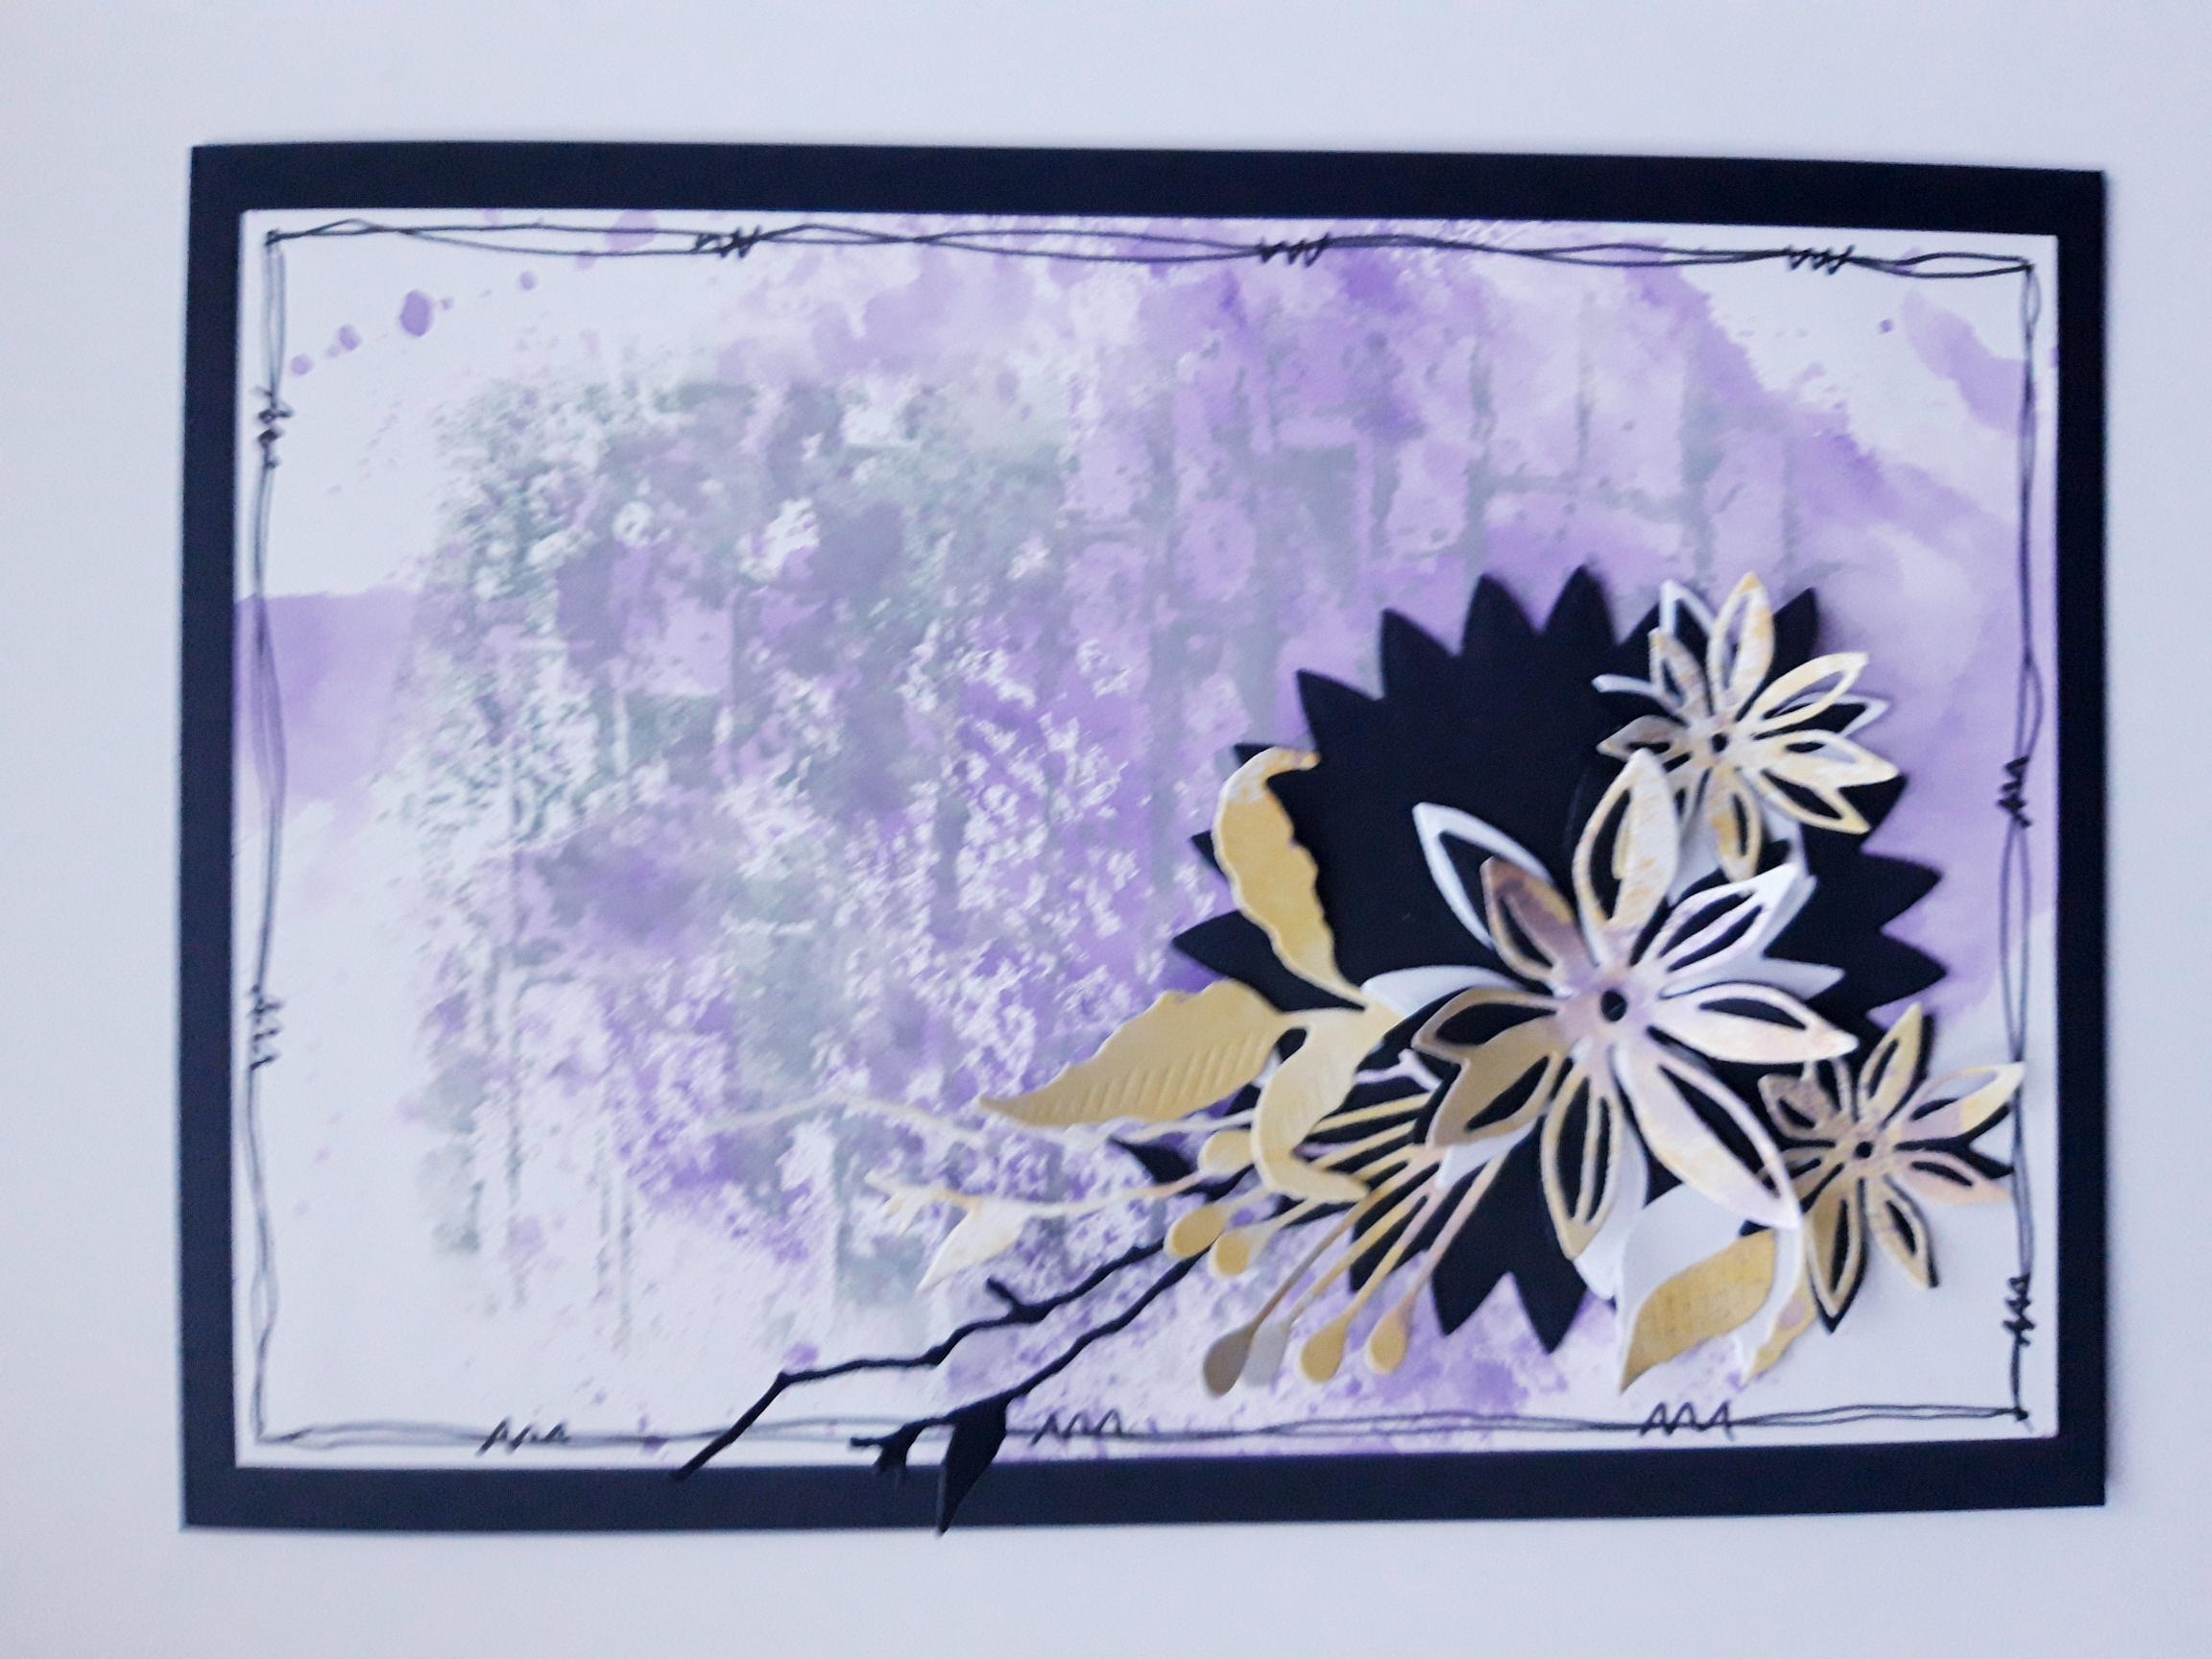
Once dry, adhere this on to the black, top folding card blank. |
|
Adhere sequins on, around, and tucked under, your 3D elements. |
|
Ink up the sentiment stamp from the Romantic Rose Stamp And Die Collection, with the Onyx Black Versafine. Stamp just above your floral design. |
|
To finish, ink up the sentiment stamp, from the Bonjour Slimline Stamp And Die Collection, with the Versafine, and stamp bottom right of your artwork. |