Give your friends $10 off their first order!
Refer a FRIEND


WHAT YOU WILL NEED:
Cream Card blank 6 x 8"
Kraft cardstock
Beautiful Day Bundle
Stitch Circle die Collection
SBM Hybrid Ink Pad: Midnight
Distress Ink/Oxide: Frayed Burlap
Blending brush
Confetti Ink: White Lace
Paint brush
Eureka 101 Watercolour Tablet
SBM A3 Magnetic glass mat
Paper Trimmer
Glue/foam pads
Die Cutting machine
[click image to enlarge] 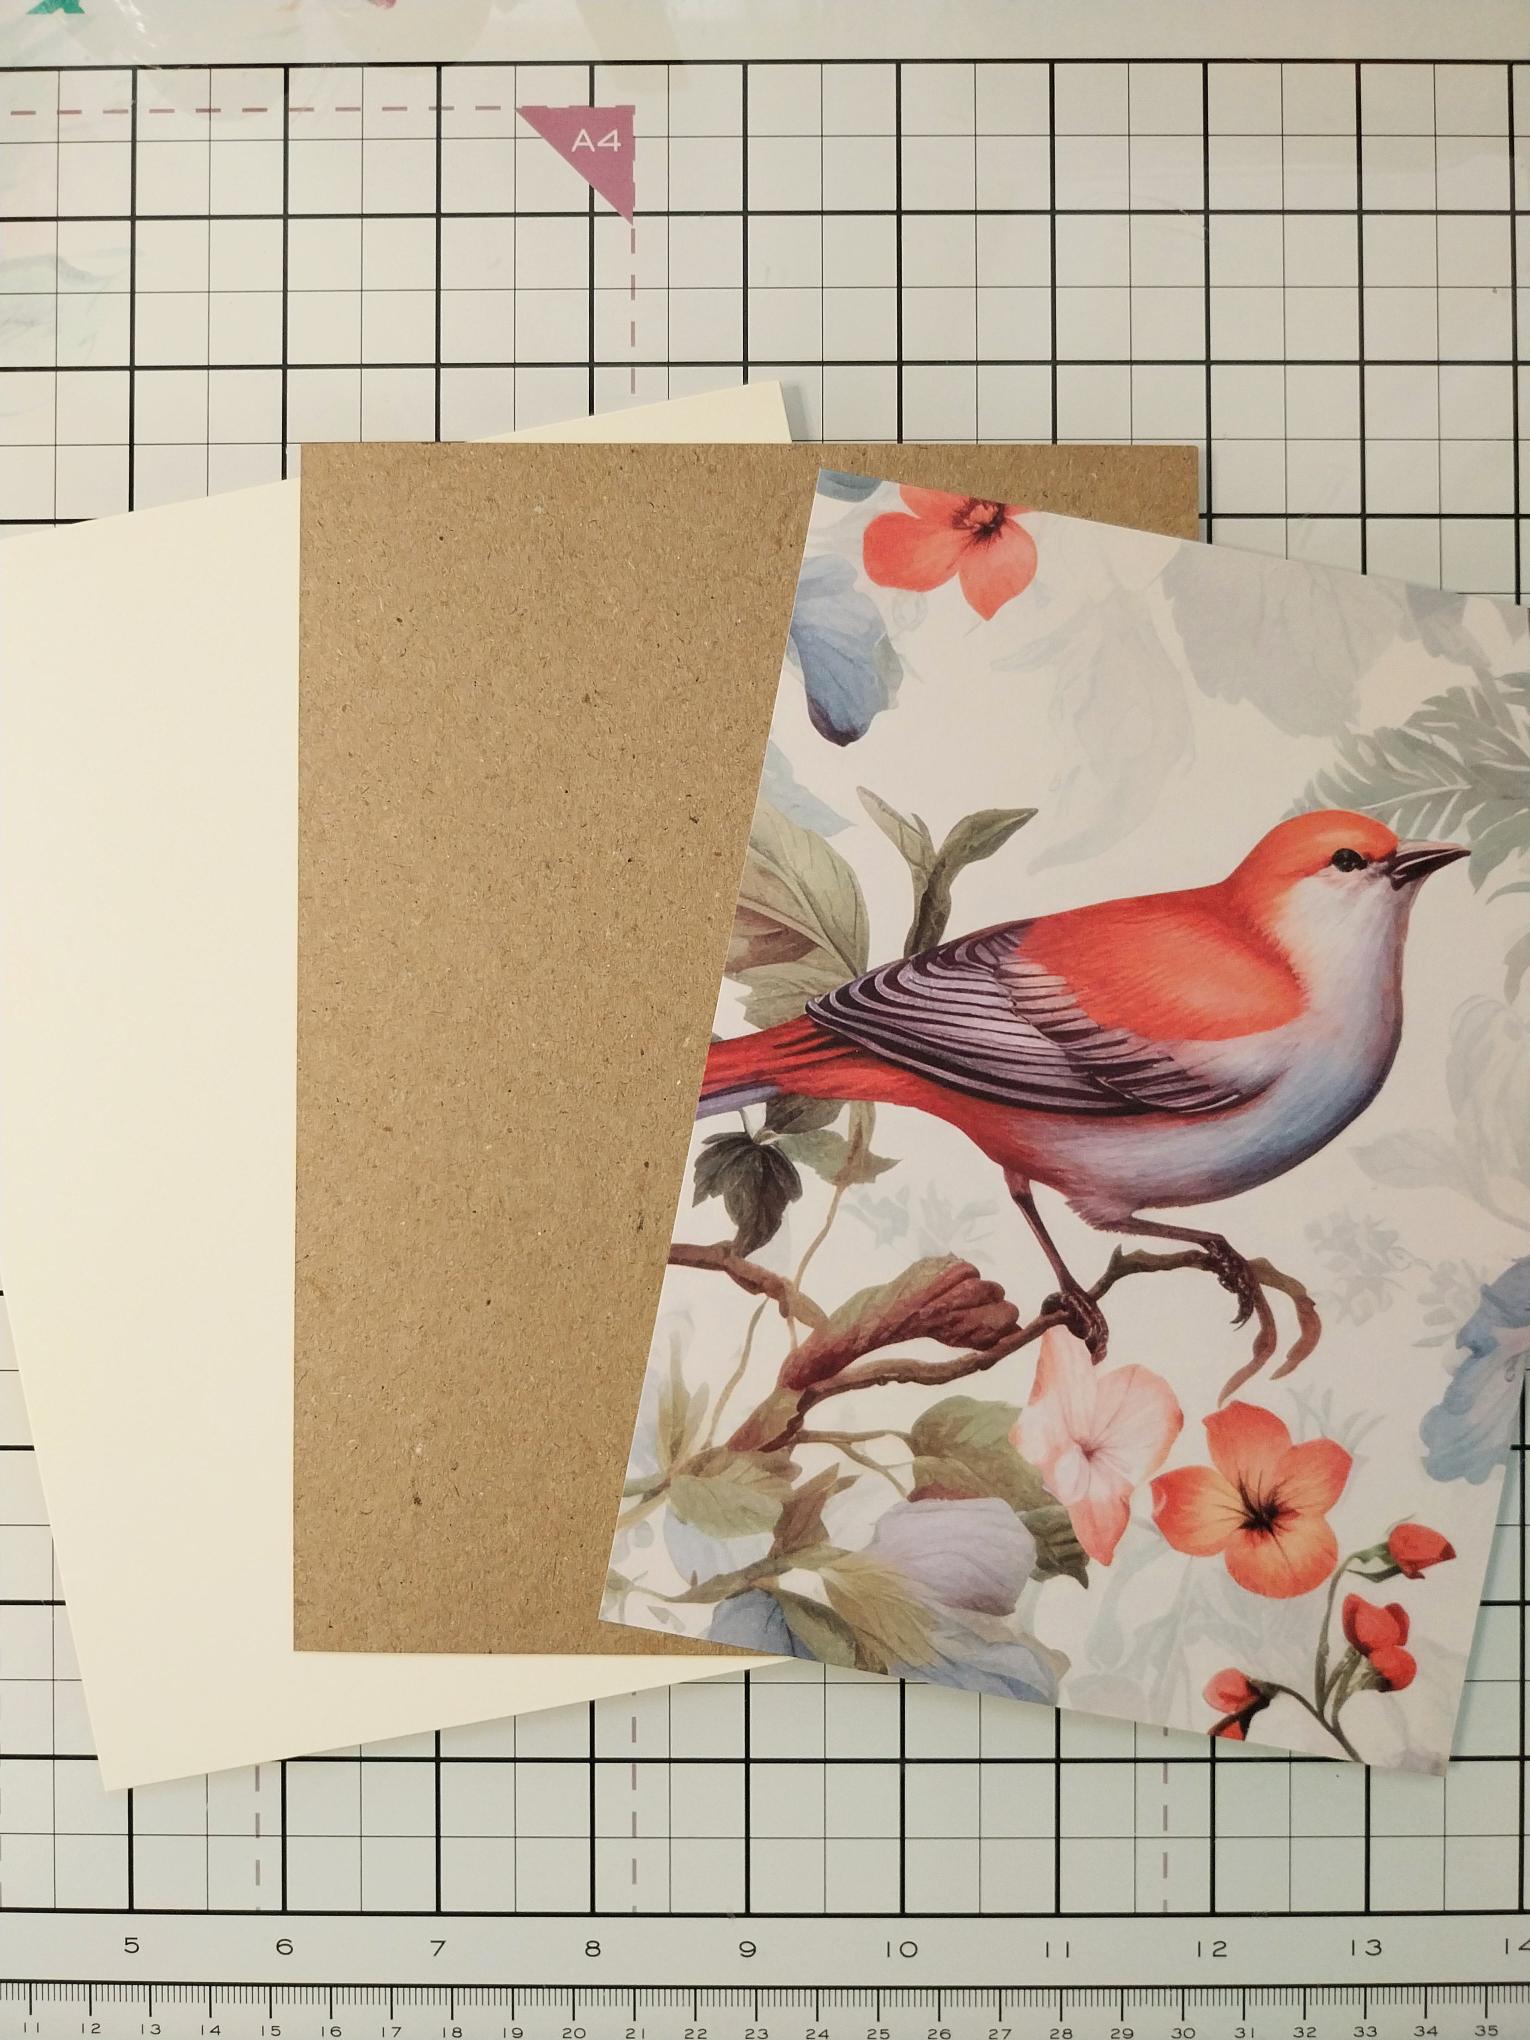
|
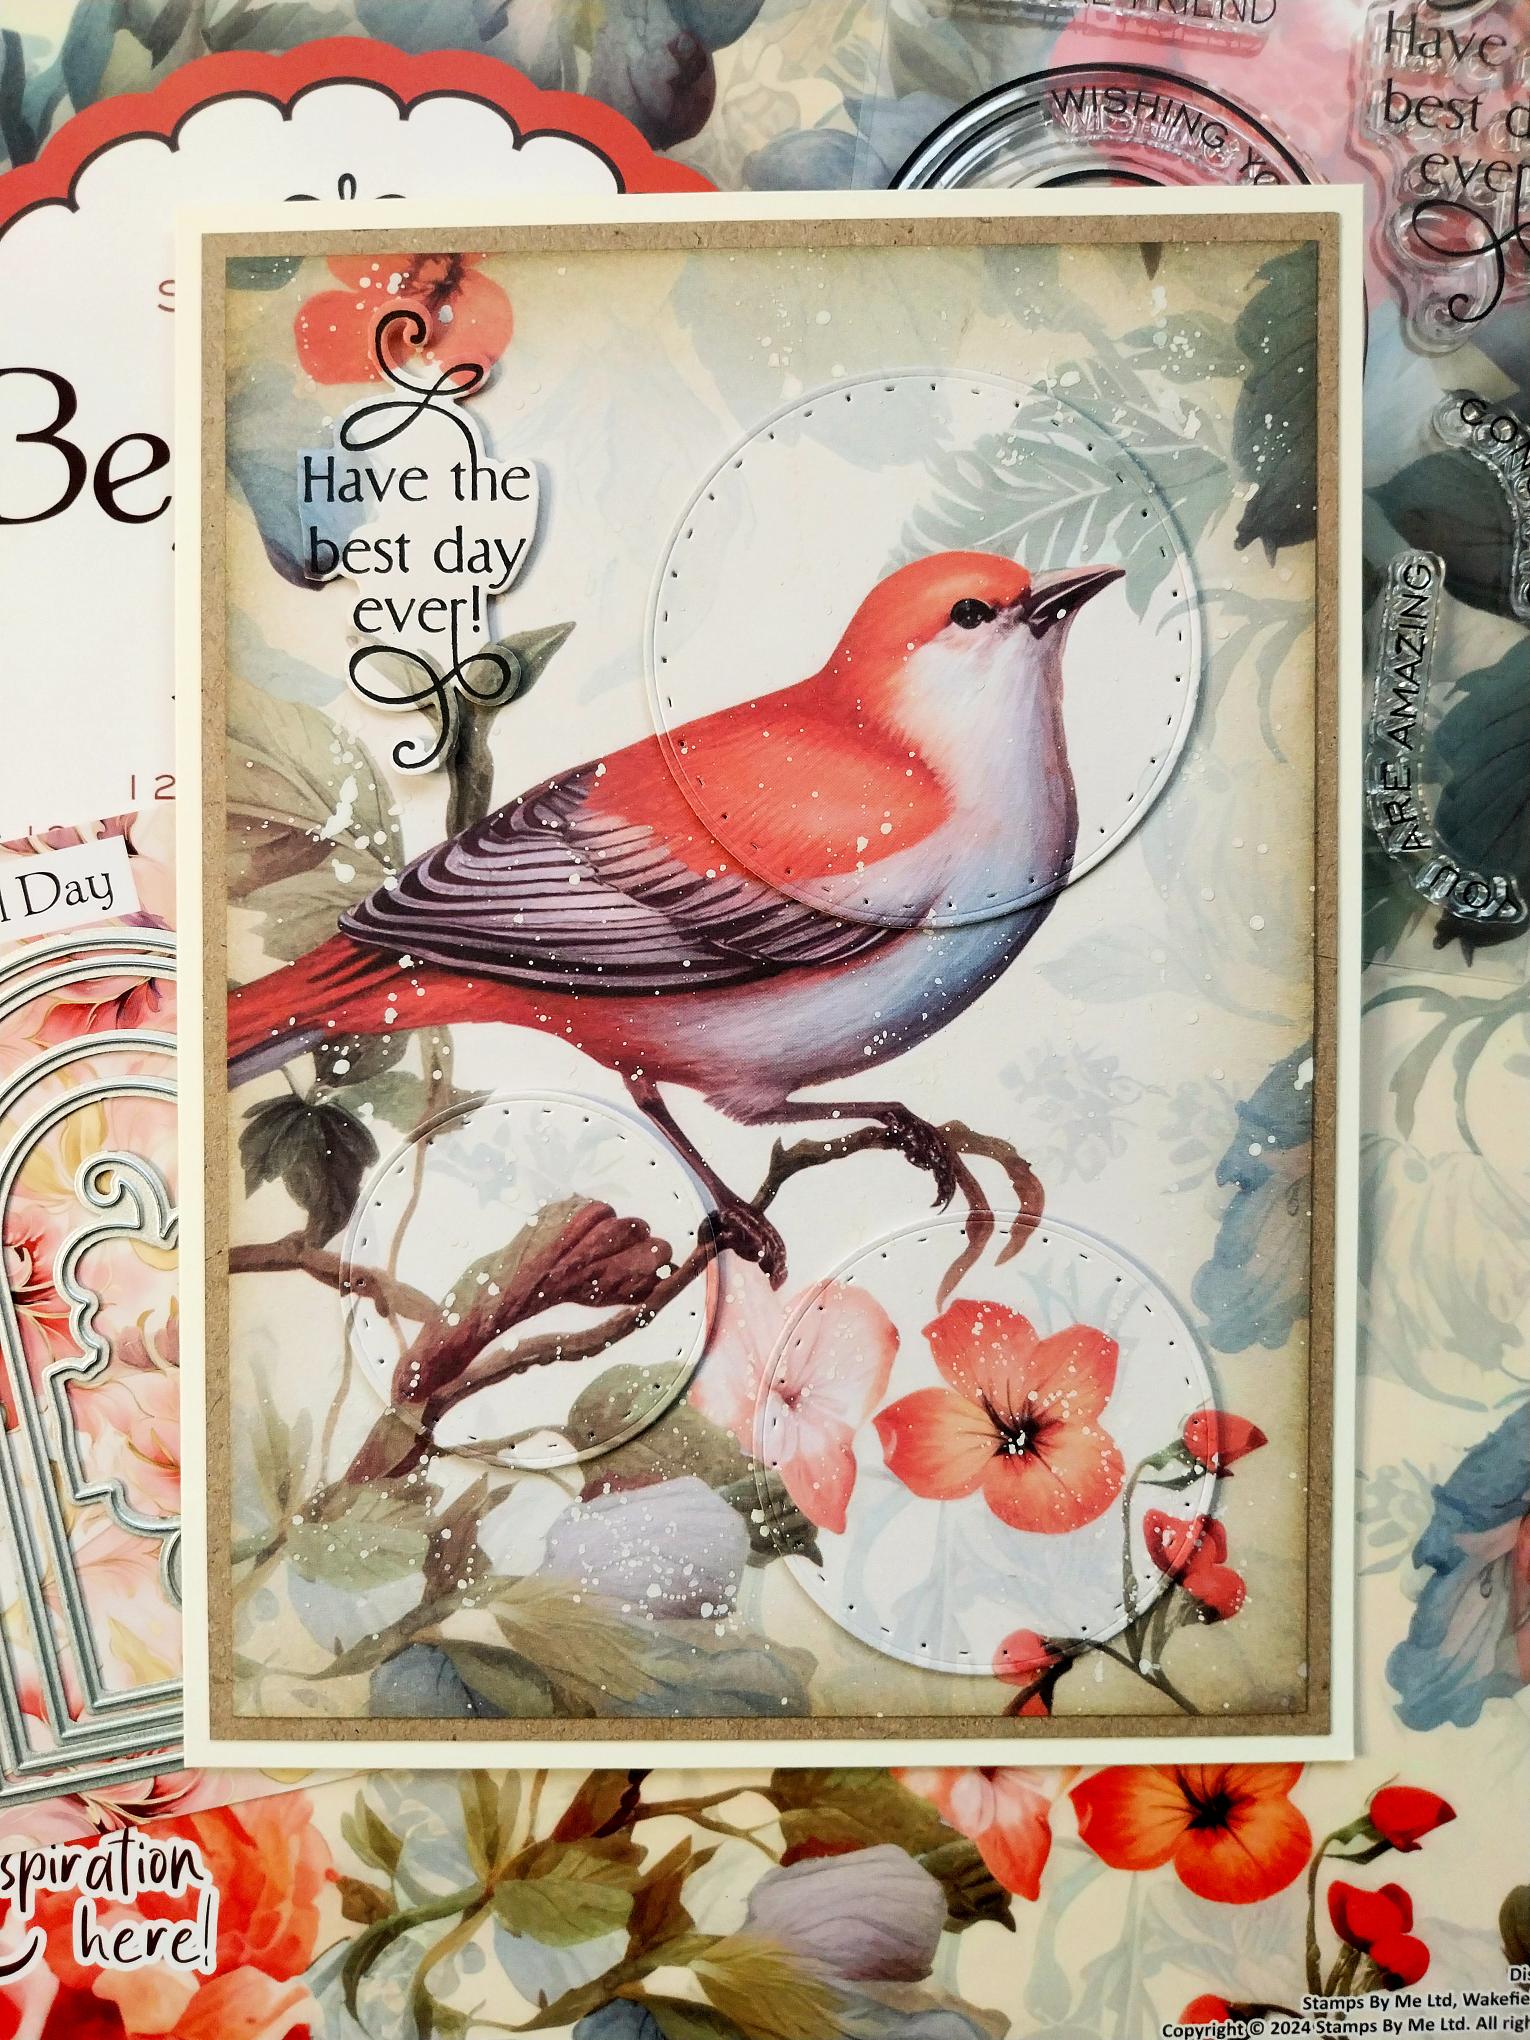
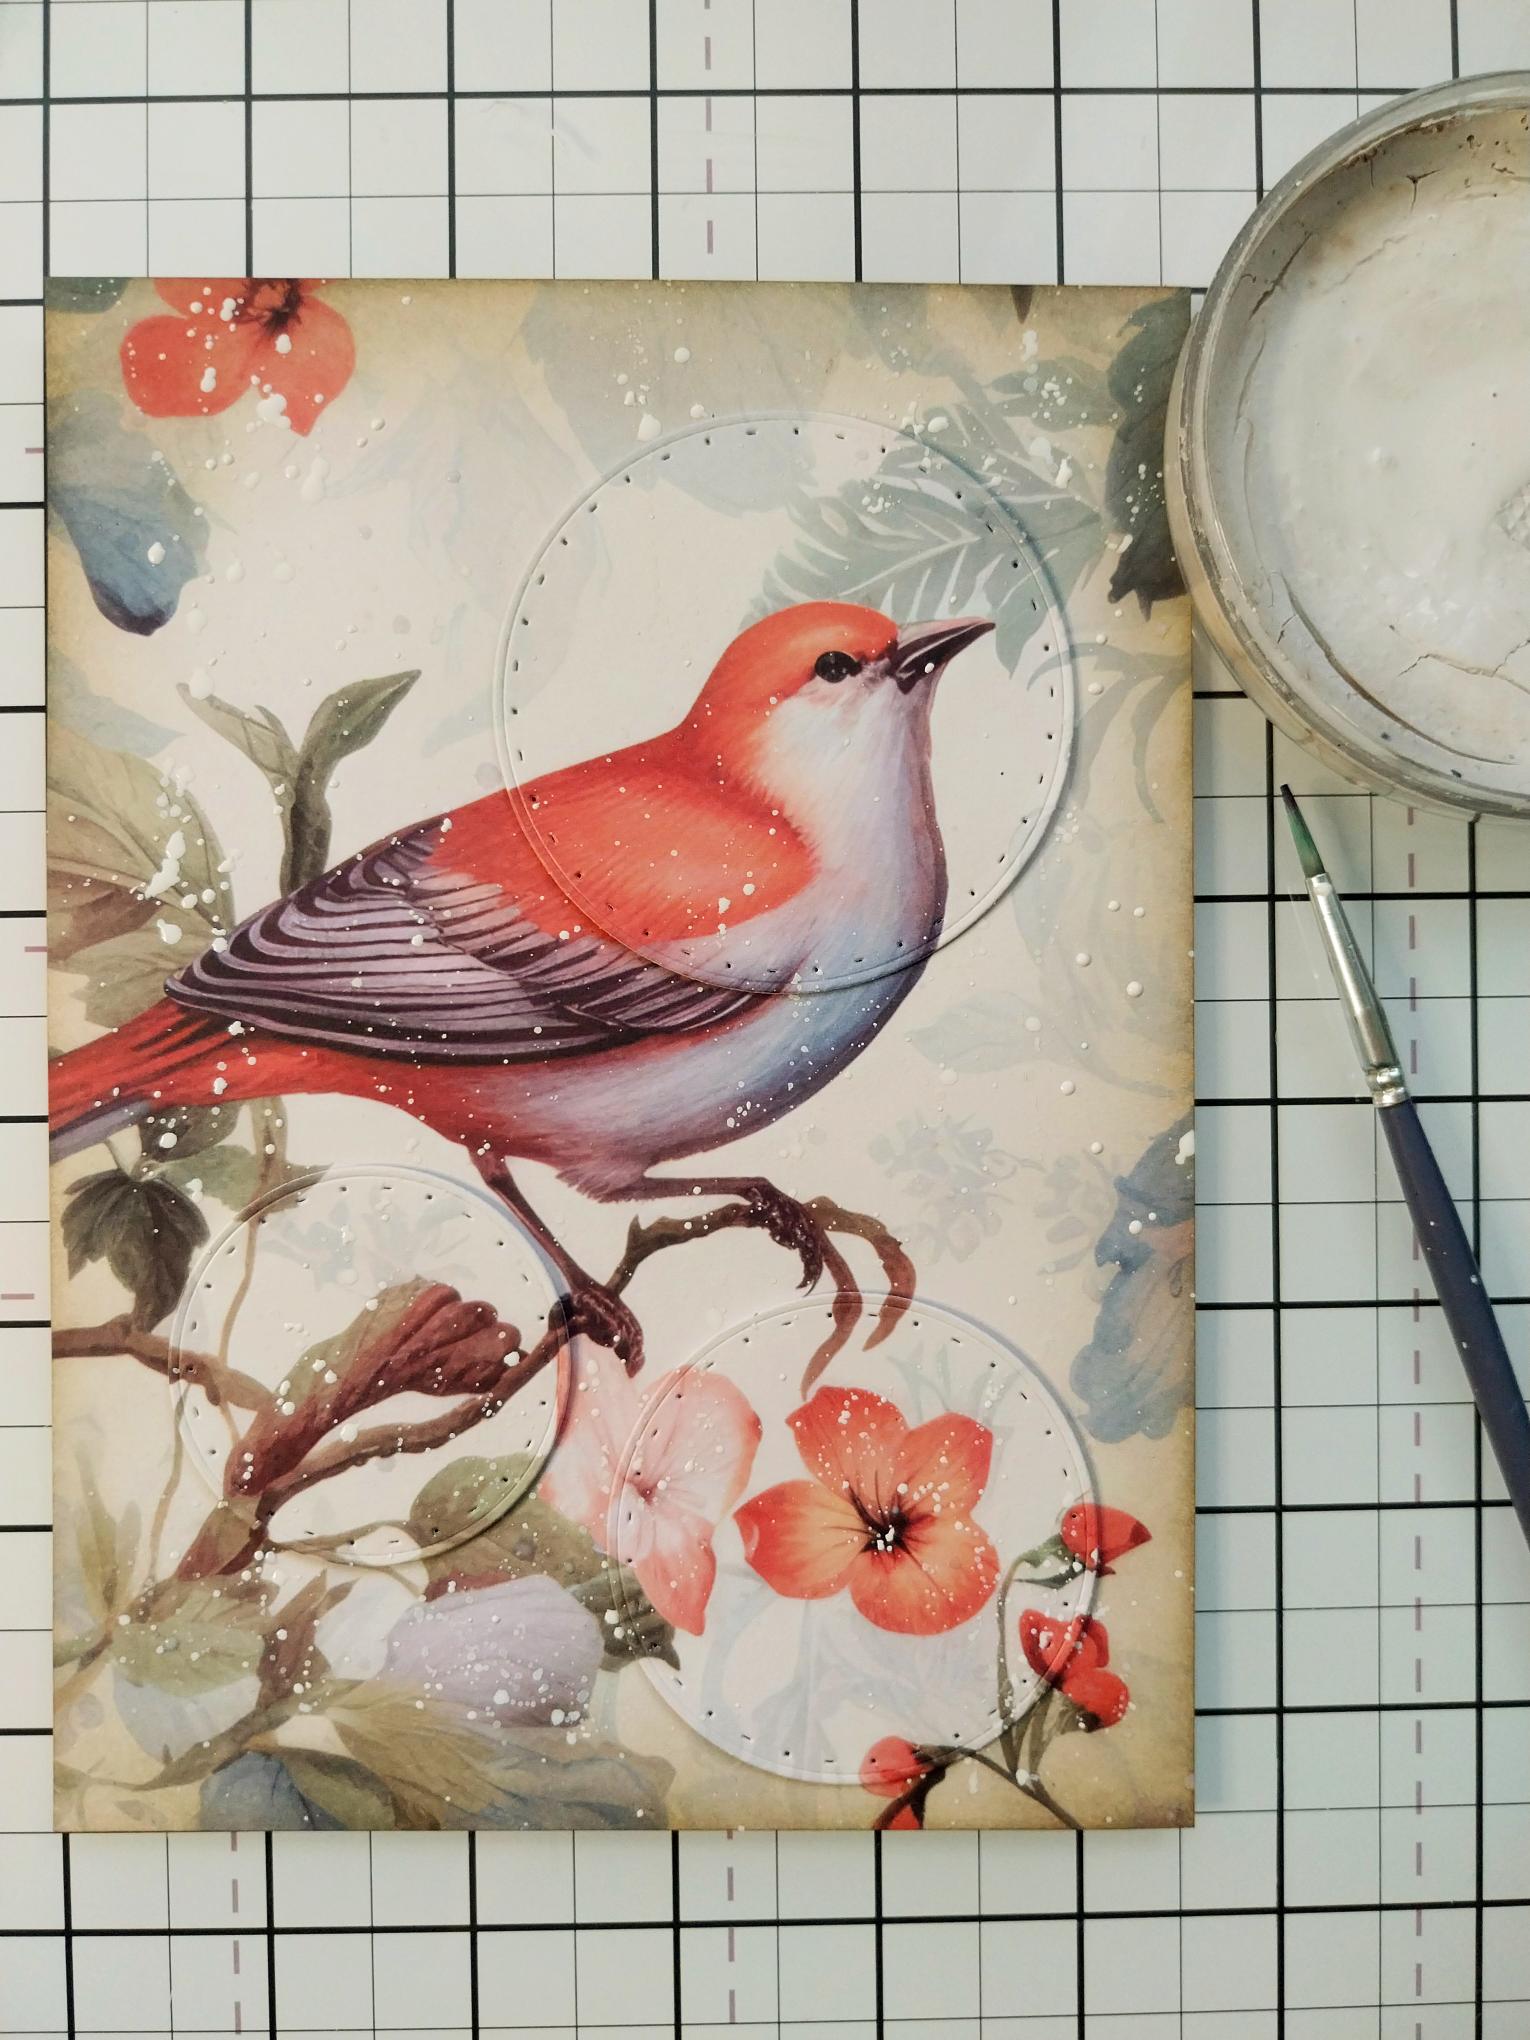
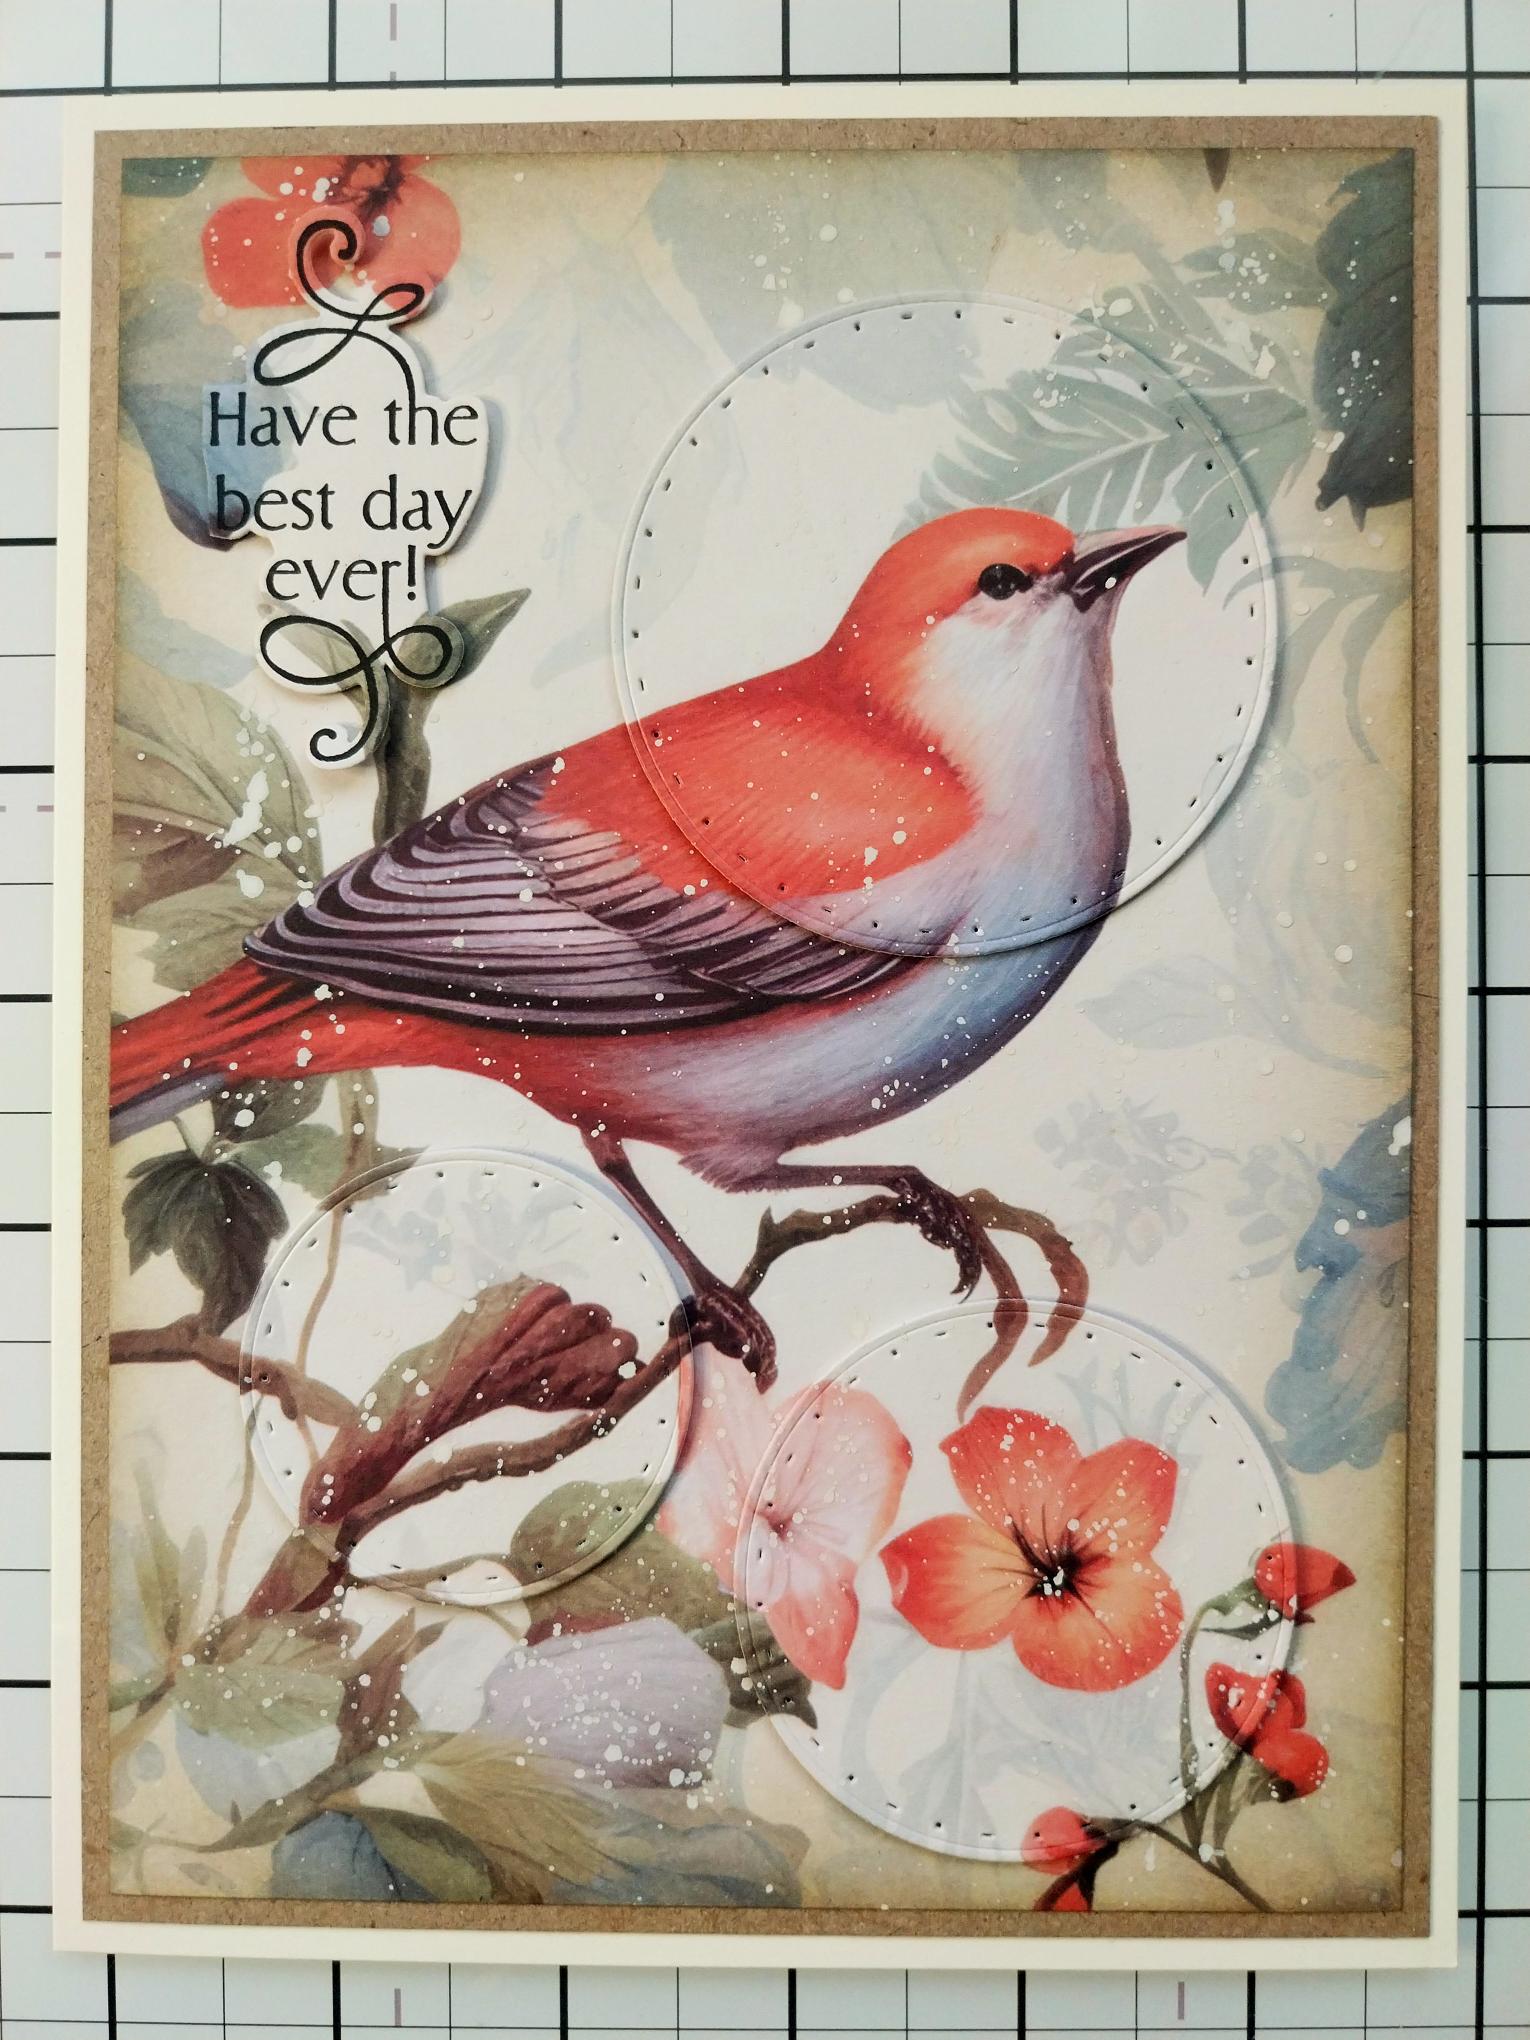
You will need a cream 6 x 8" card blank, kraft card trimmed to 5 3/4 x 7 3/4" and this decorative sheet trimmed to 5 1/2 x 7 1/2" with the bird, branck and flowers as your focal areas (you will need a second sheet of the SAME design for the next step). |
|
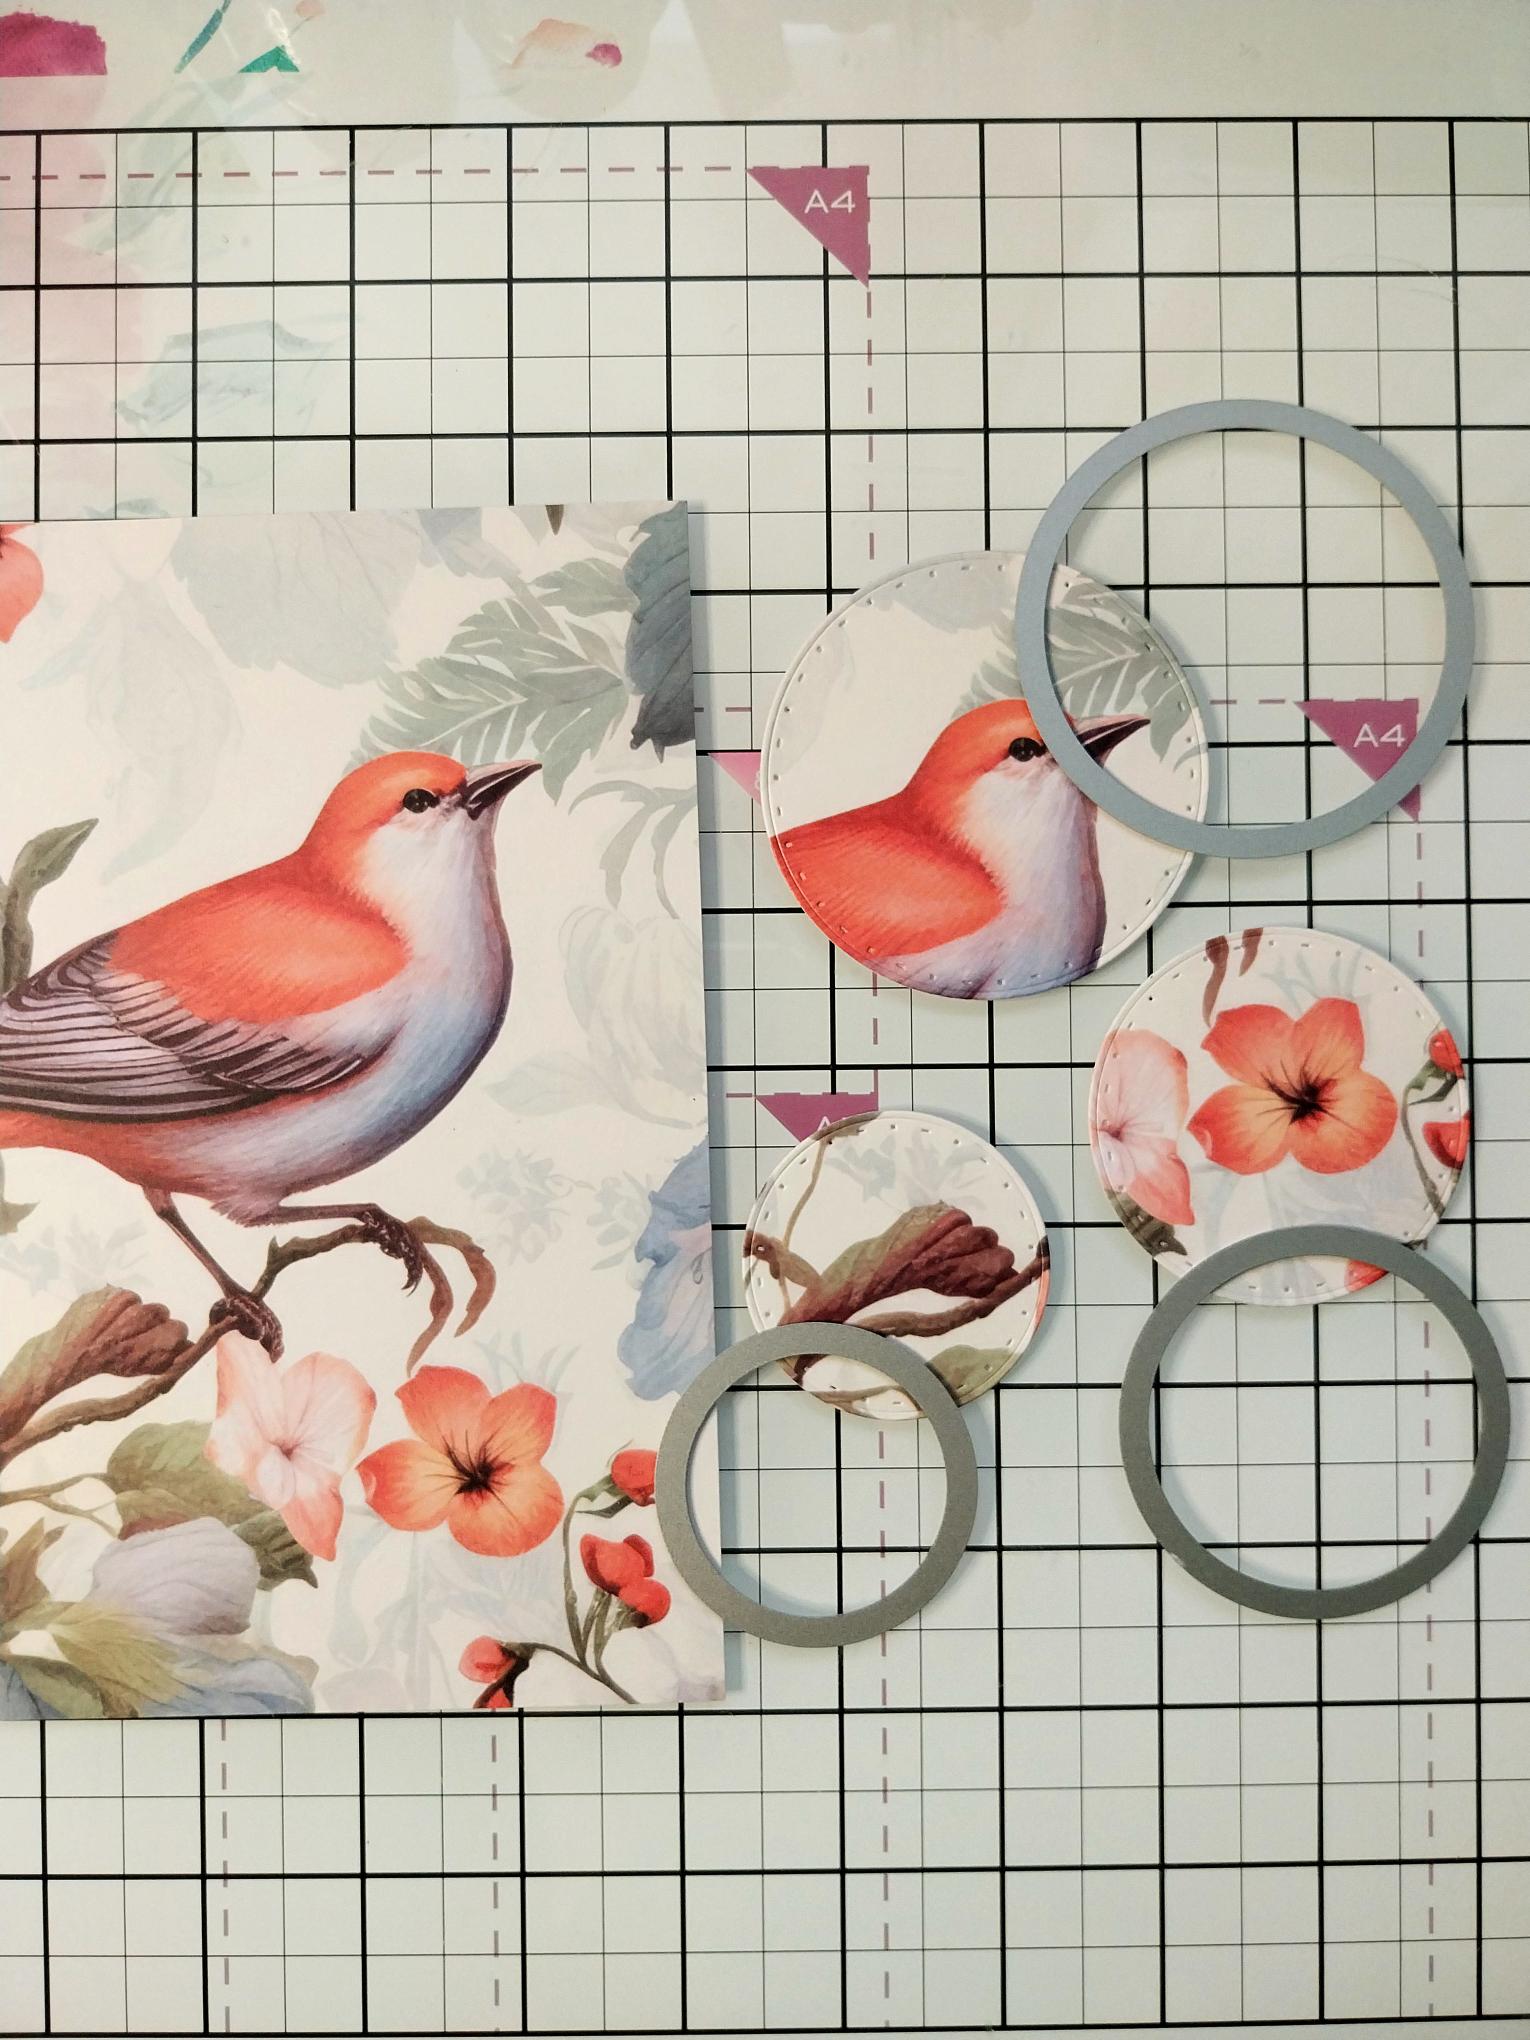
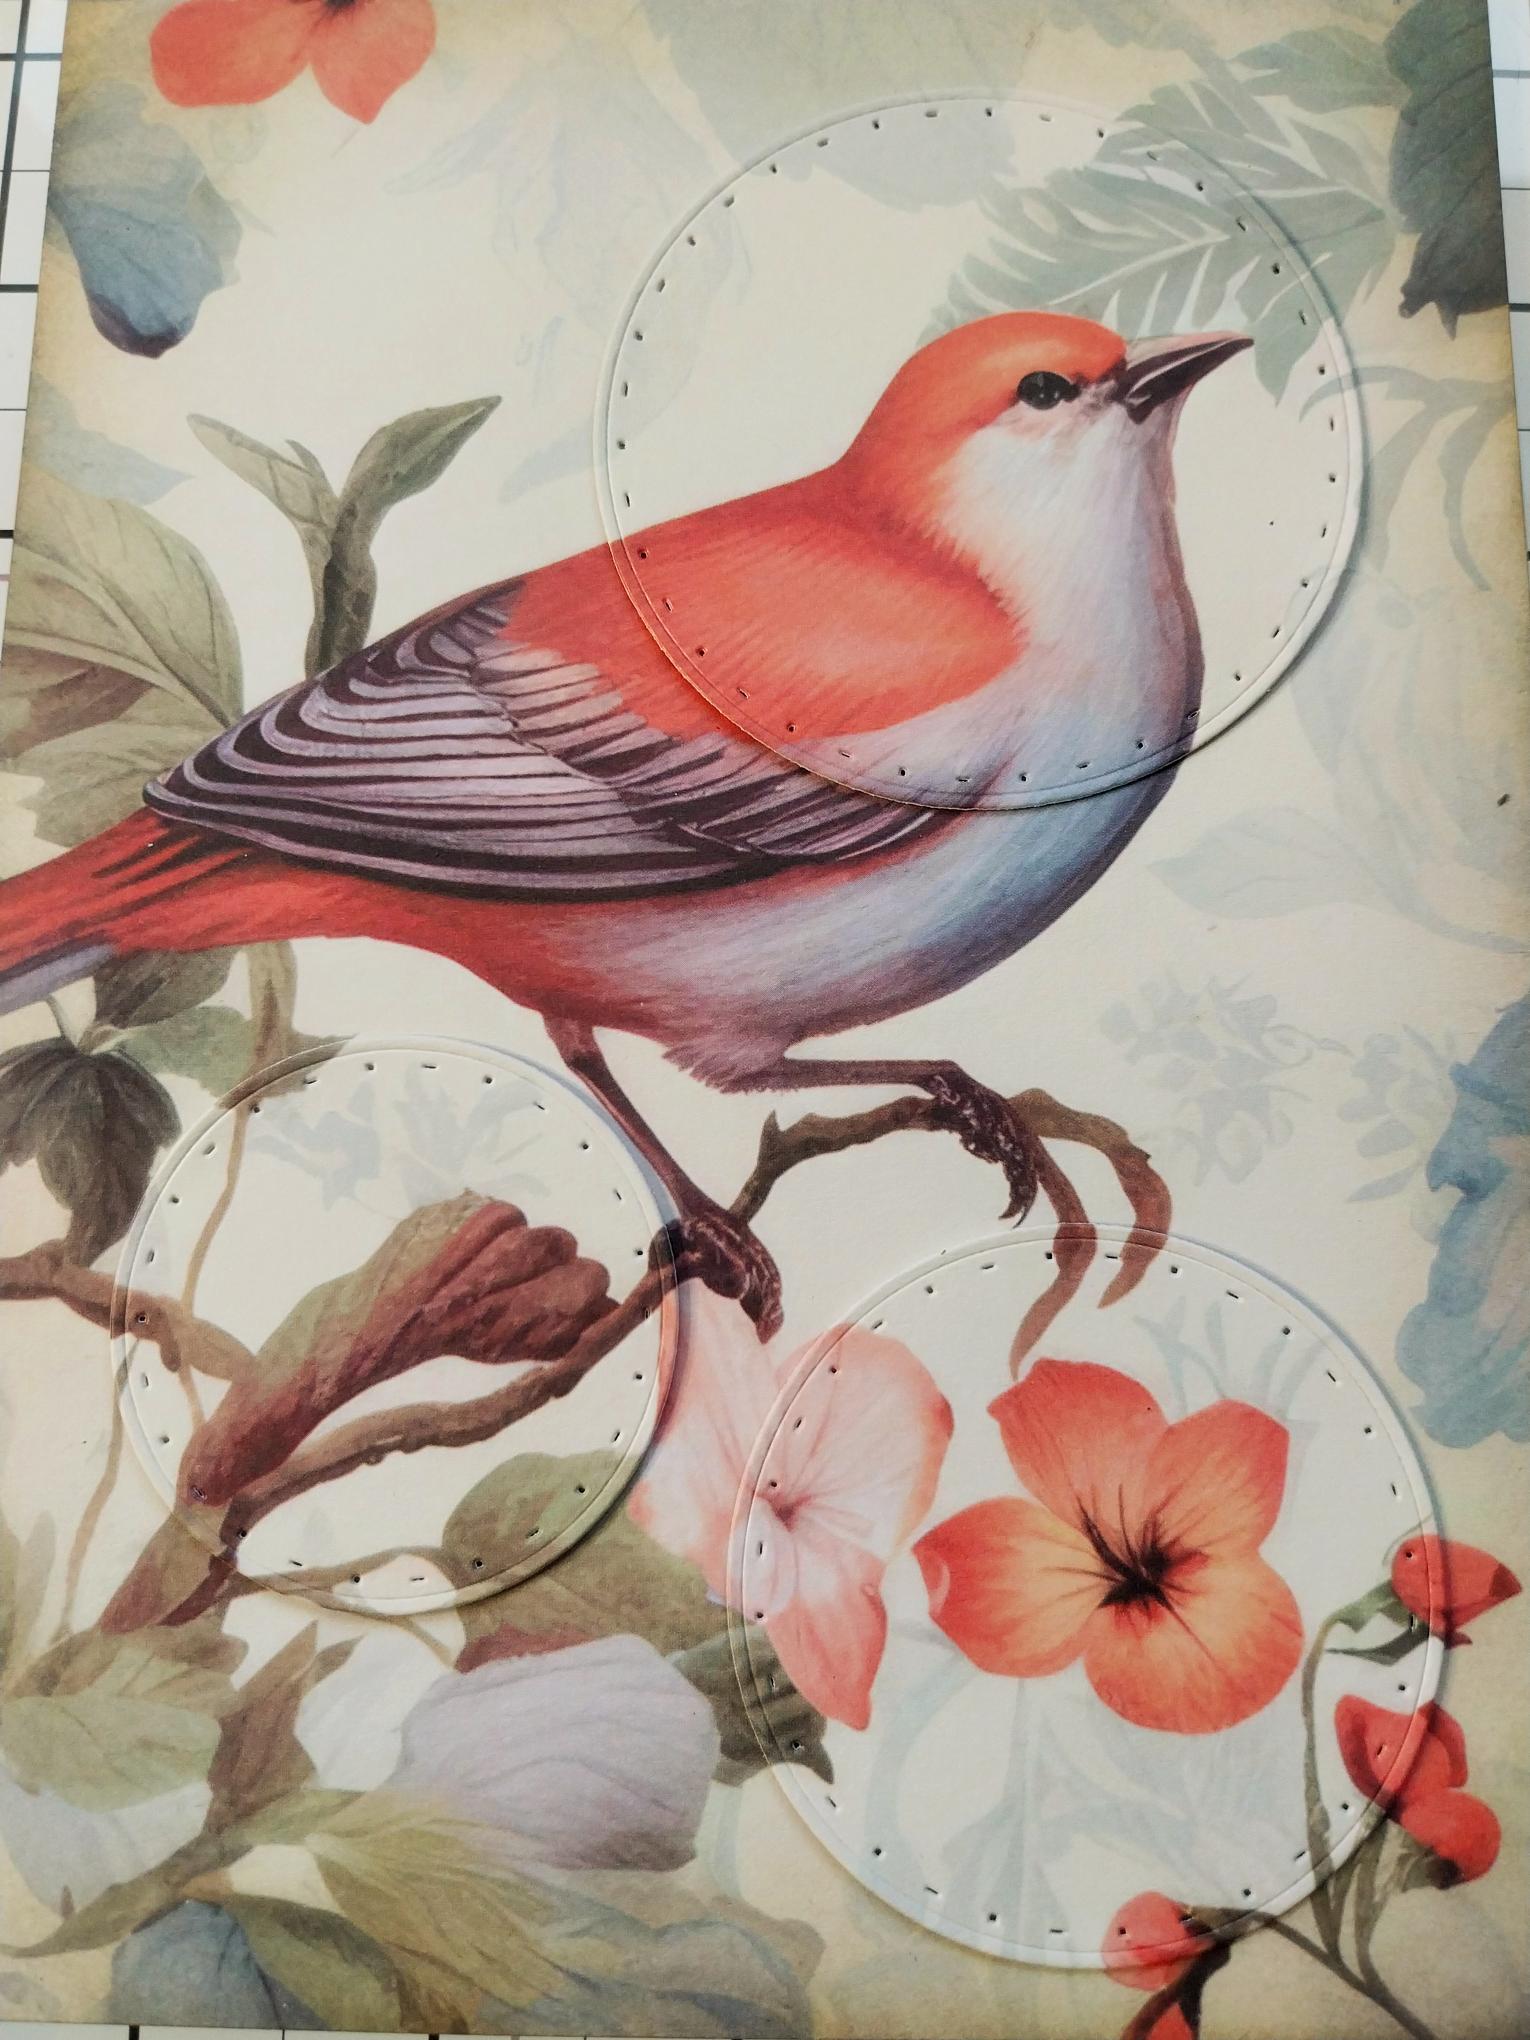
From the second sheet you will need to die-cut 3 circles. These must incorporate focal areas of the design that are also on the first sheet you trimmed down. I chose the birds head, part of the branch and flower heads. KEEP the leftover paper as you will need this later! |

|
Ink around the edges of your printed paper with Frayed Burlap. |
|
Line up the designs and adhere your three die-cut circles on to the inked paper. This is known as the "spotlight technique" or an "eclipse" card. |
|
Splatter the White Lace Confetti paint over your artwork and allow to dry (or dry with a heat tool if you are impatient like me!). |
|
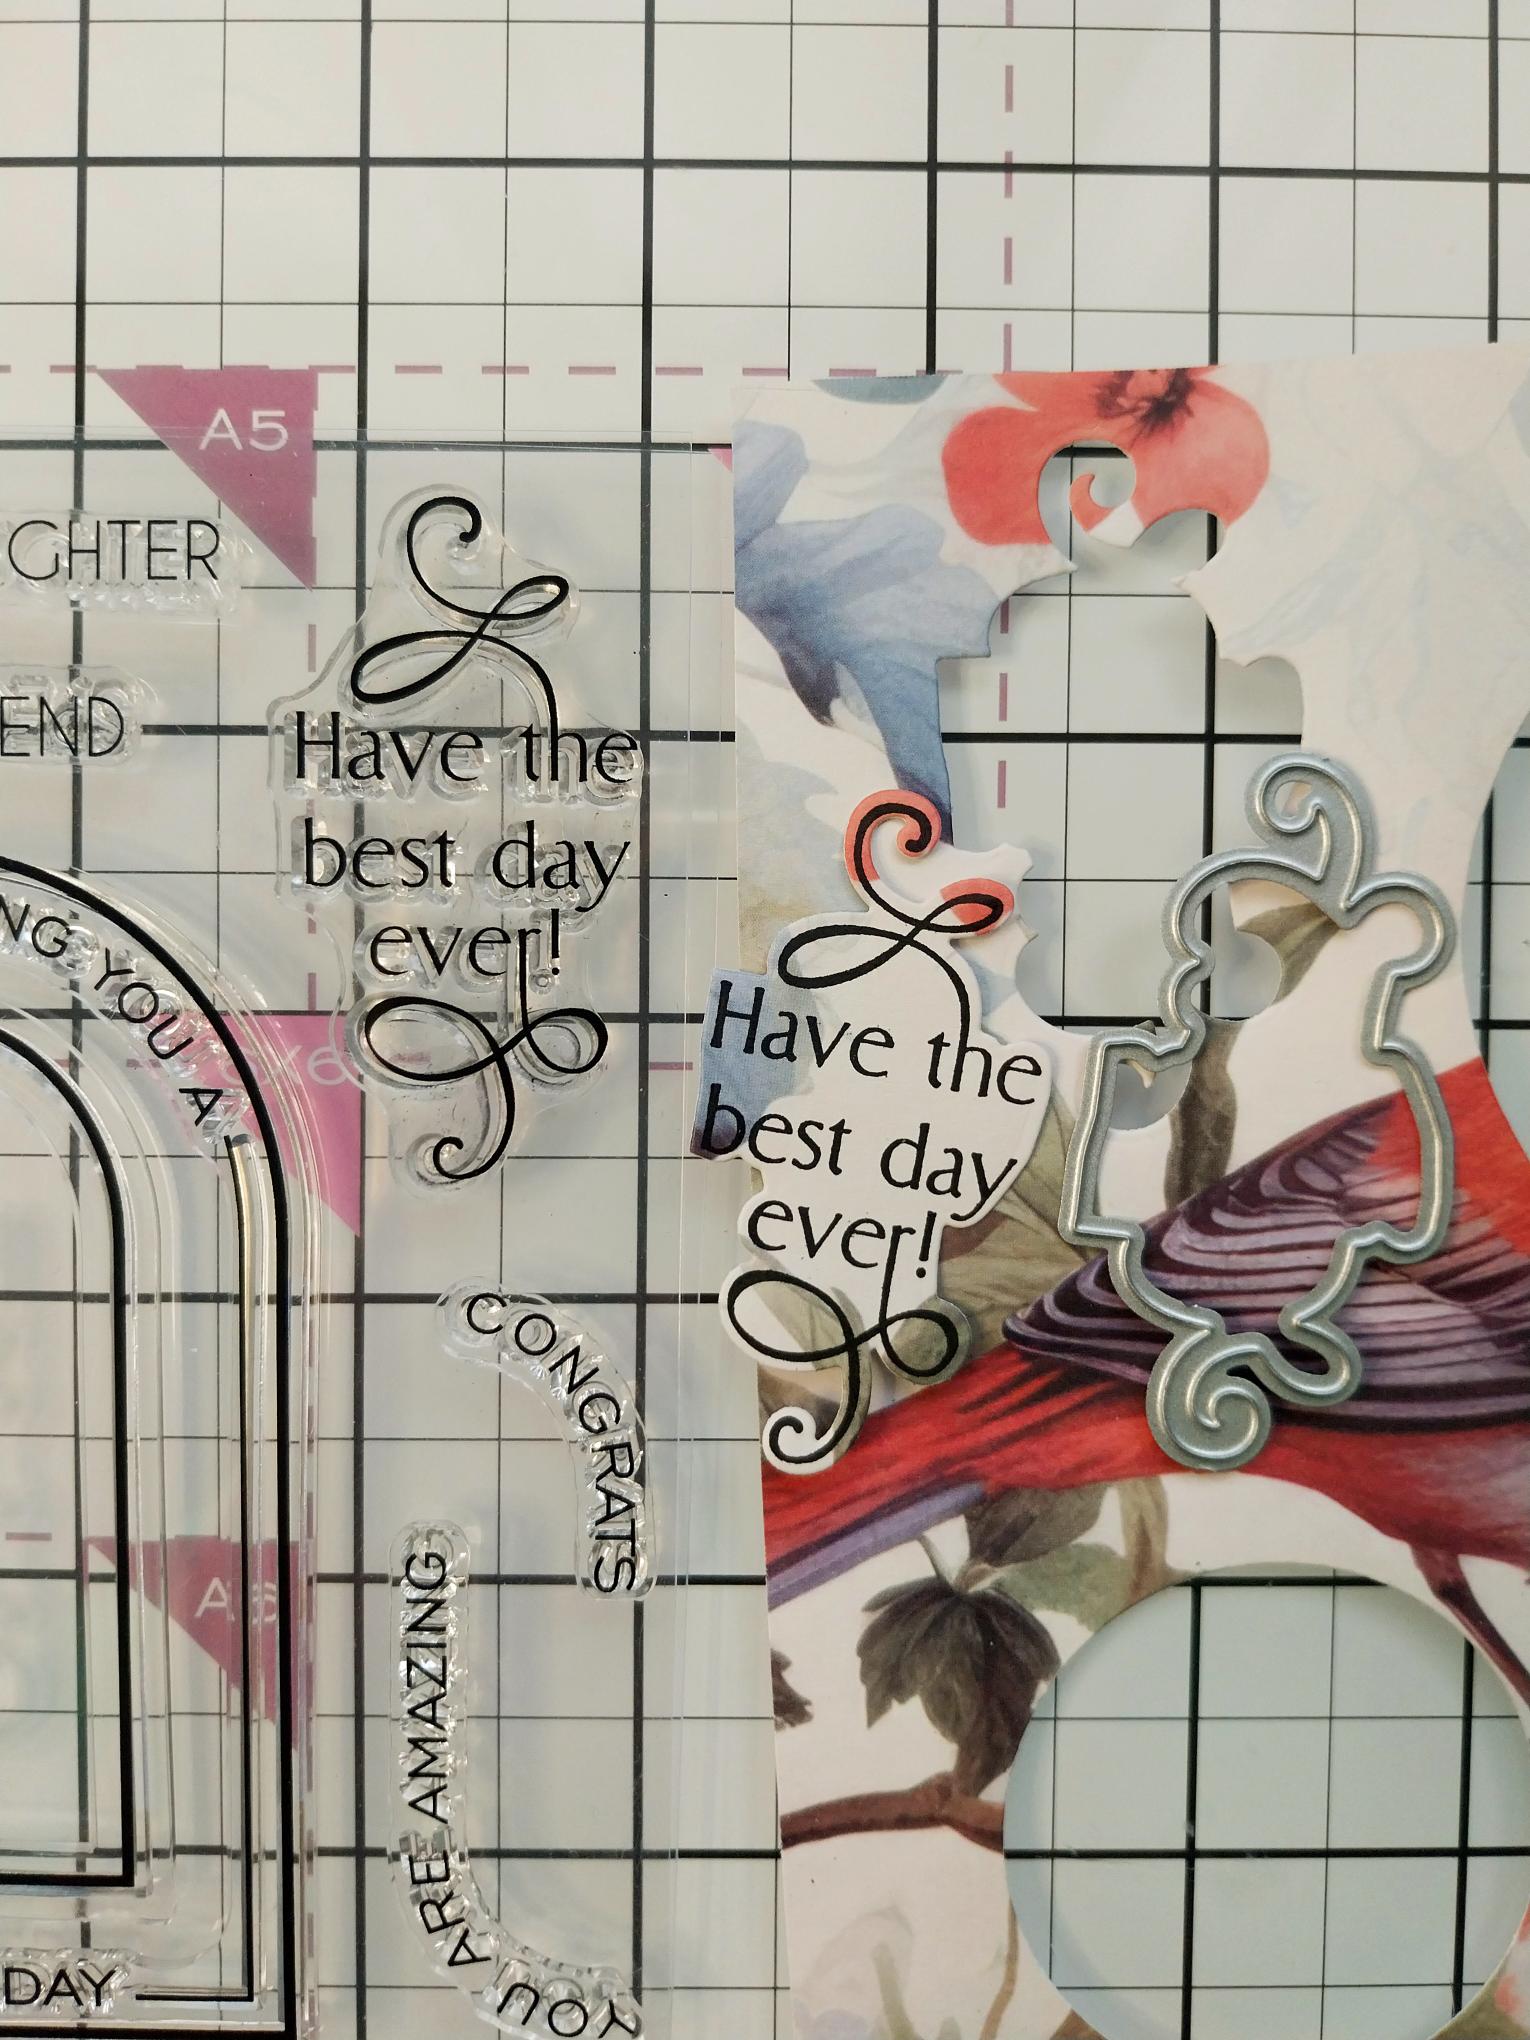
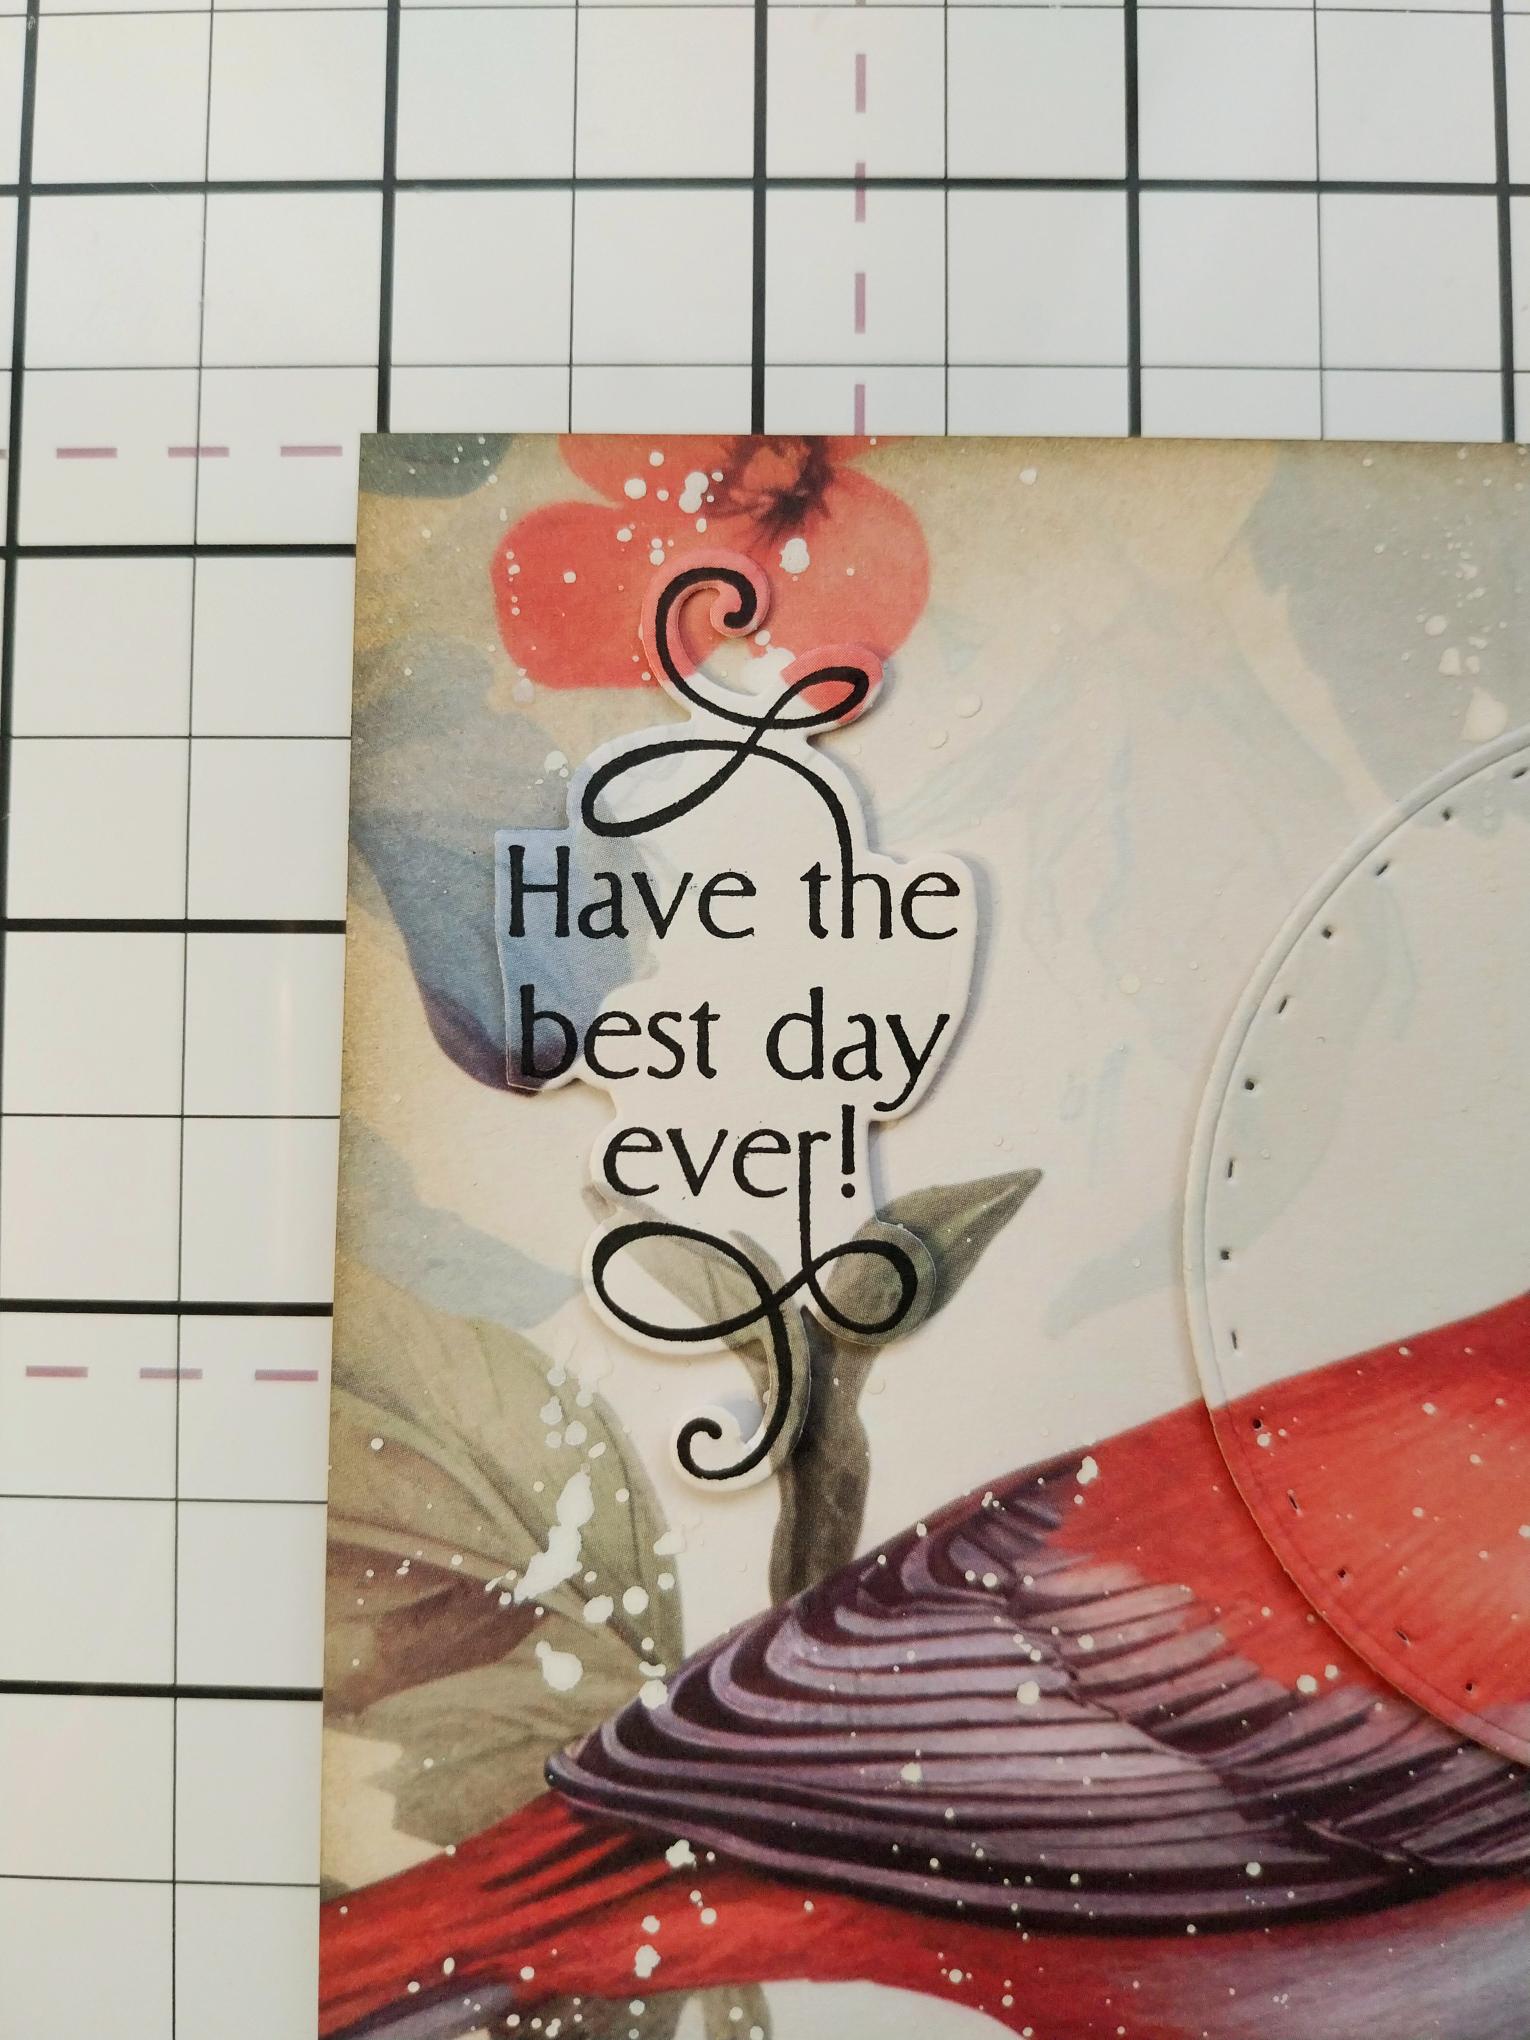
Using the leftover paper that you popped aside earlier, pick an area of the design that is on your original paper, stamp the sentiment with the Midnight ink and die-cut. Check out the next step first, if you are unsure of what result you are trying to achieve. |
|
Line it up with your artwork and adhere in place, thus creating a "spotlight" sentiment. |
|
Mat your finished artwork onto the kraft card and then onto your cream card blank. |