Give your friends $10 off their first order!
Refer a FRIEND


WHAT YOU WILL NEED:
White Card blank 6 x 8"
White cardstock
Slice Of Joy and Time For Tea Lamination Set
Patchwork Palette 7 x 7 Paper Pad
Circle Nesting Dies
Versafine Ink Pad: Smokey Grey
SBM Dye Ink Pad: Heather
Distress Ink/Oxide Ink pad: Frayed Burlap
Water spray bottle
Blending brush
Eureka 101 Watercolour Tablet
SBM A3 Magnetic glass mat
Paper Trimmer
Glue/foam pads
Die Cutting machine
[click image to enlarge] 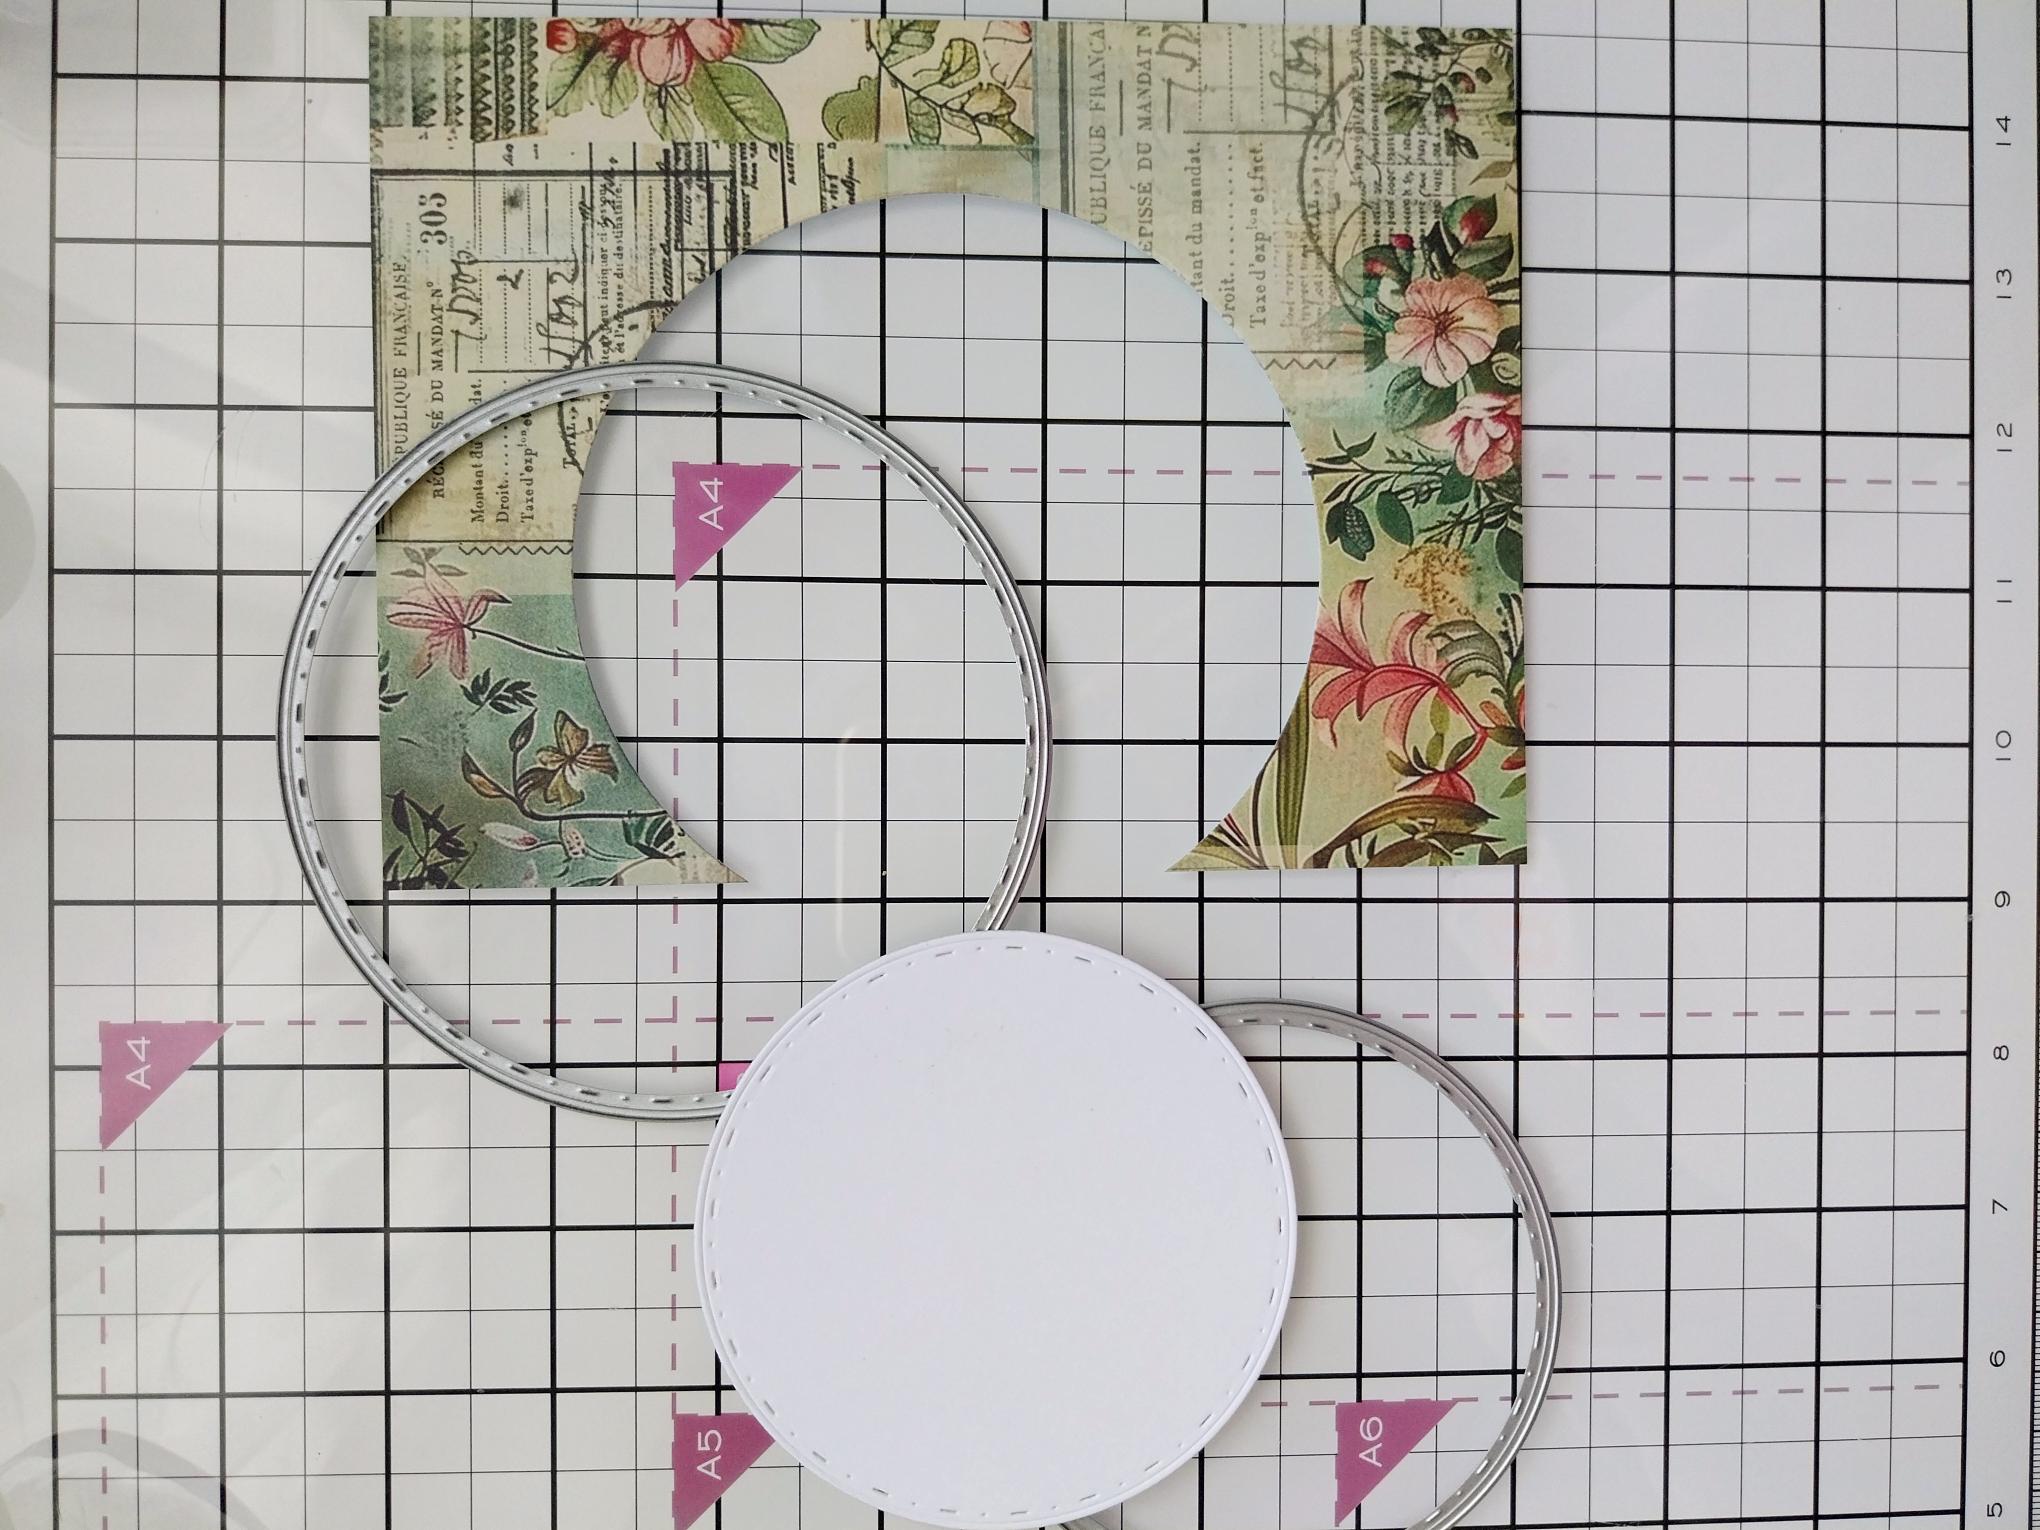
|
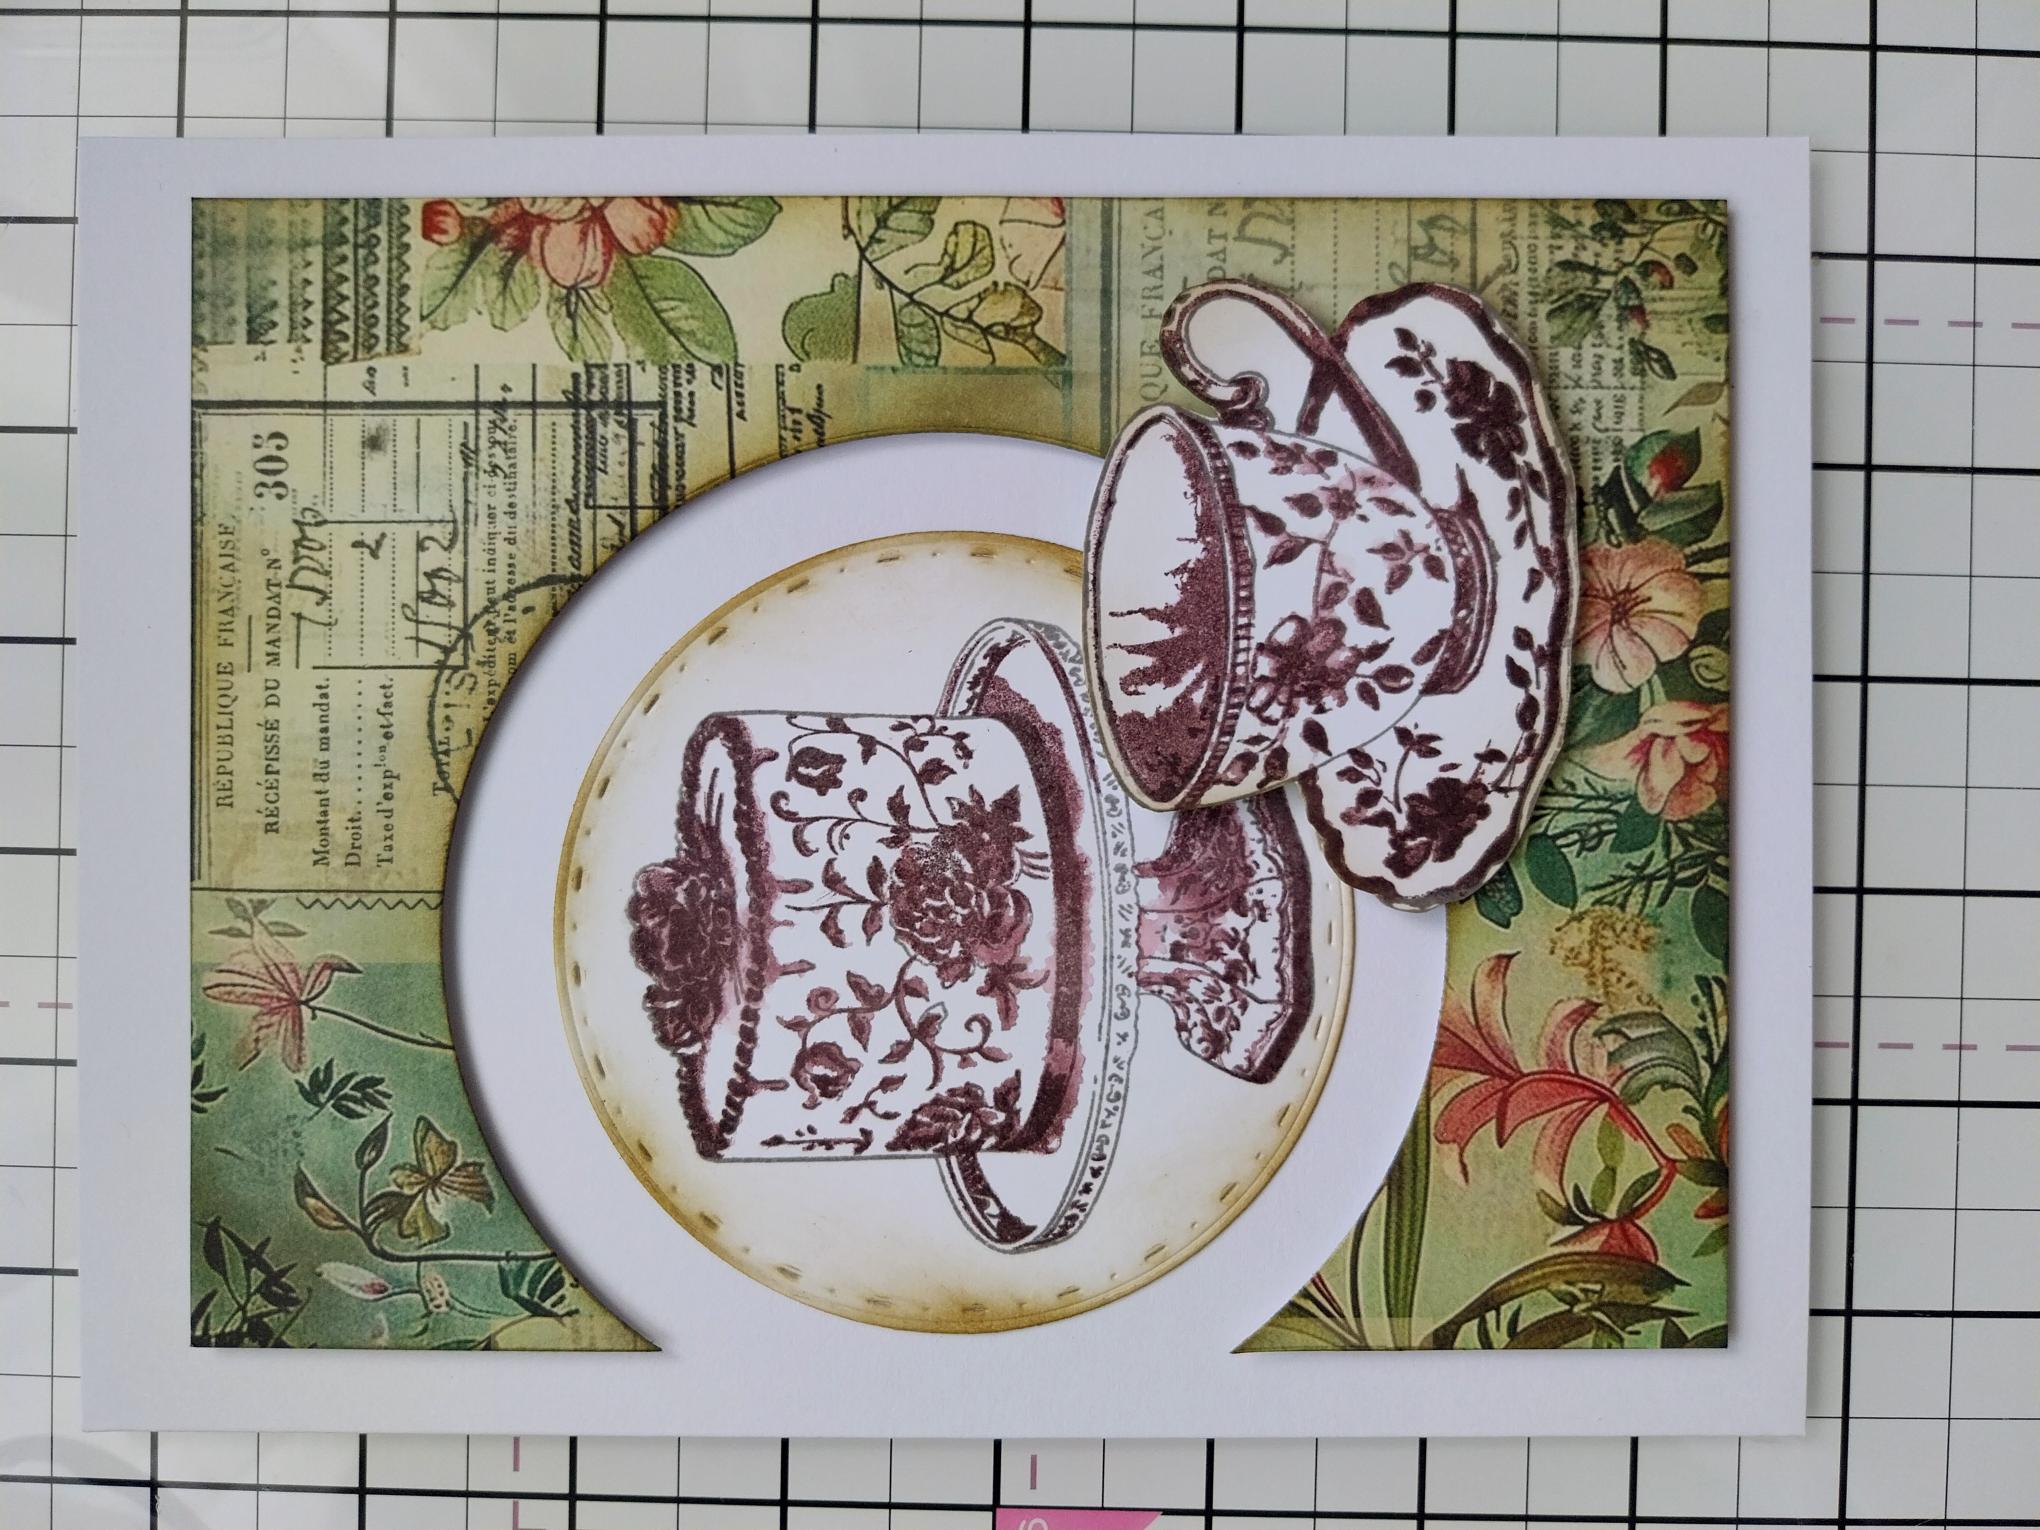
Choose your paper from Patchwork Palette and trim to 5 1/4 x 7". Die cut a partial circle aperture from the left side of the paper and a smaller circle from white card...NB: the white die-cut circle must be big enough to stamp the lamination cake onto. |
|
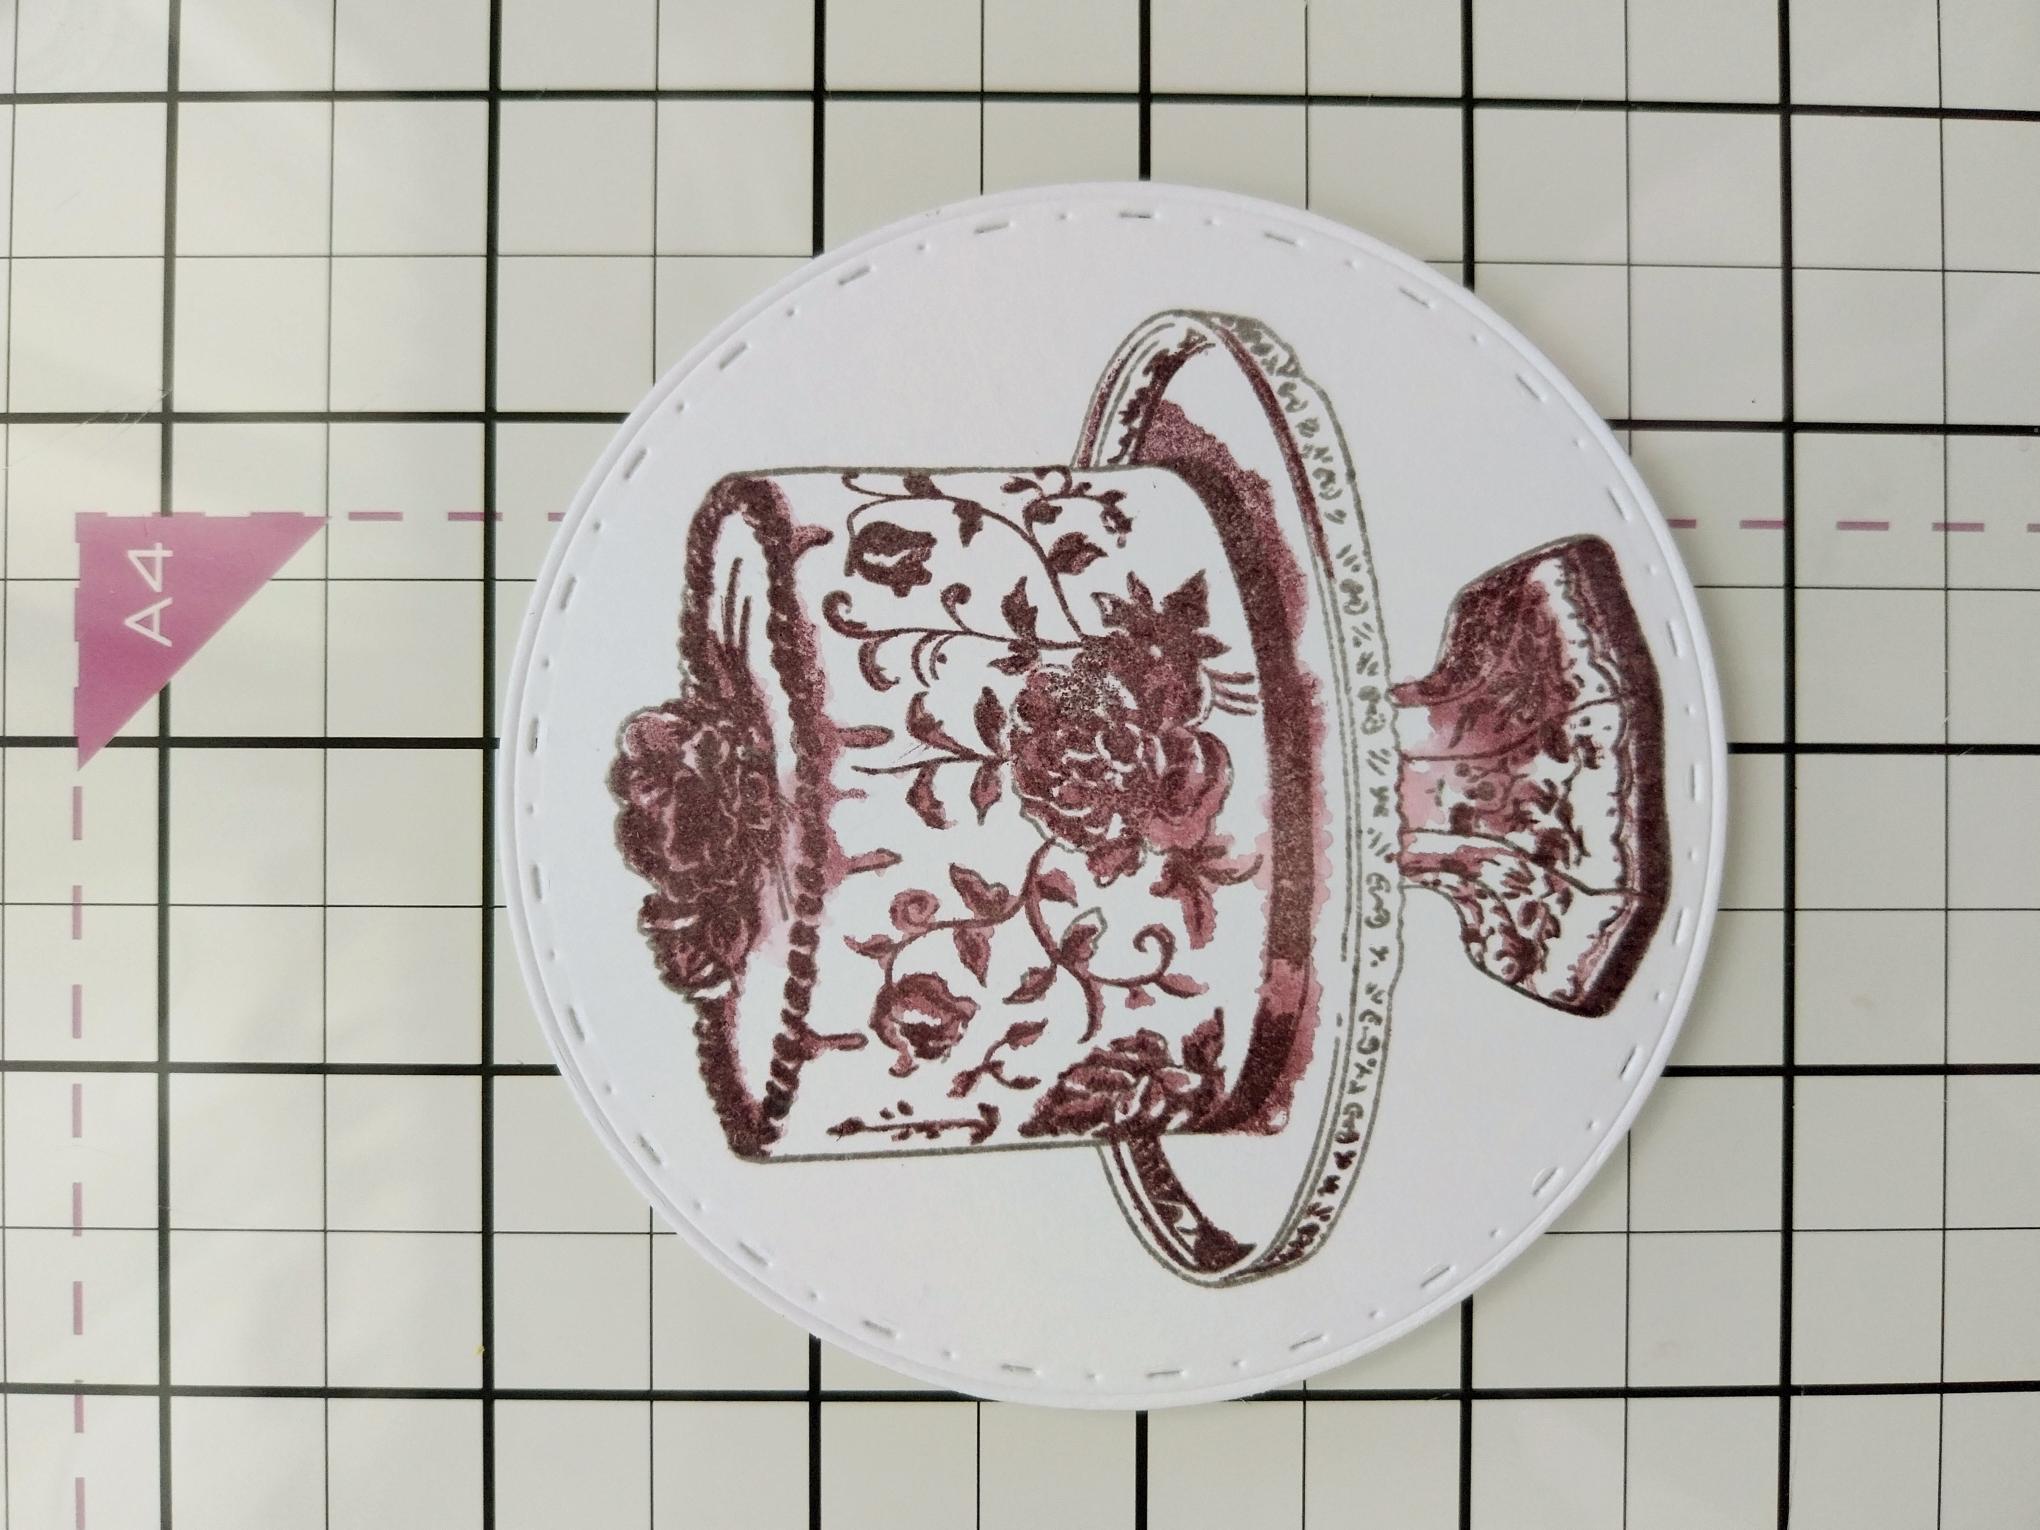
Ink the solid stamp with Heather, spritz lightly with water and stamp onto the die-cut card. Dry the ink then stamp the detailed stamp in the Smokey Grey Versafine. |
|
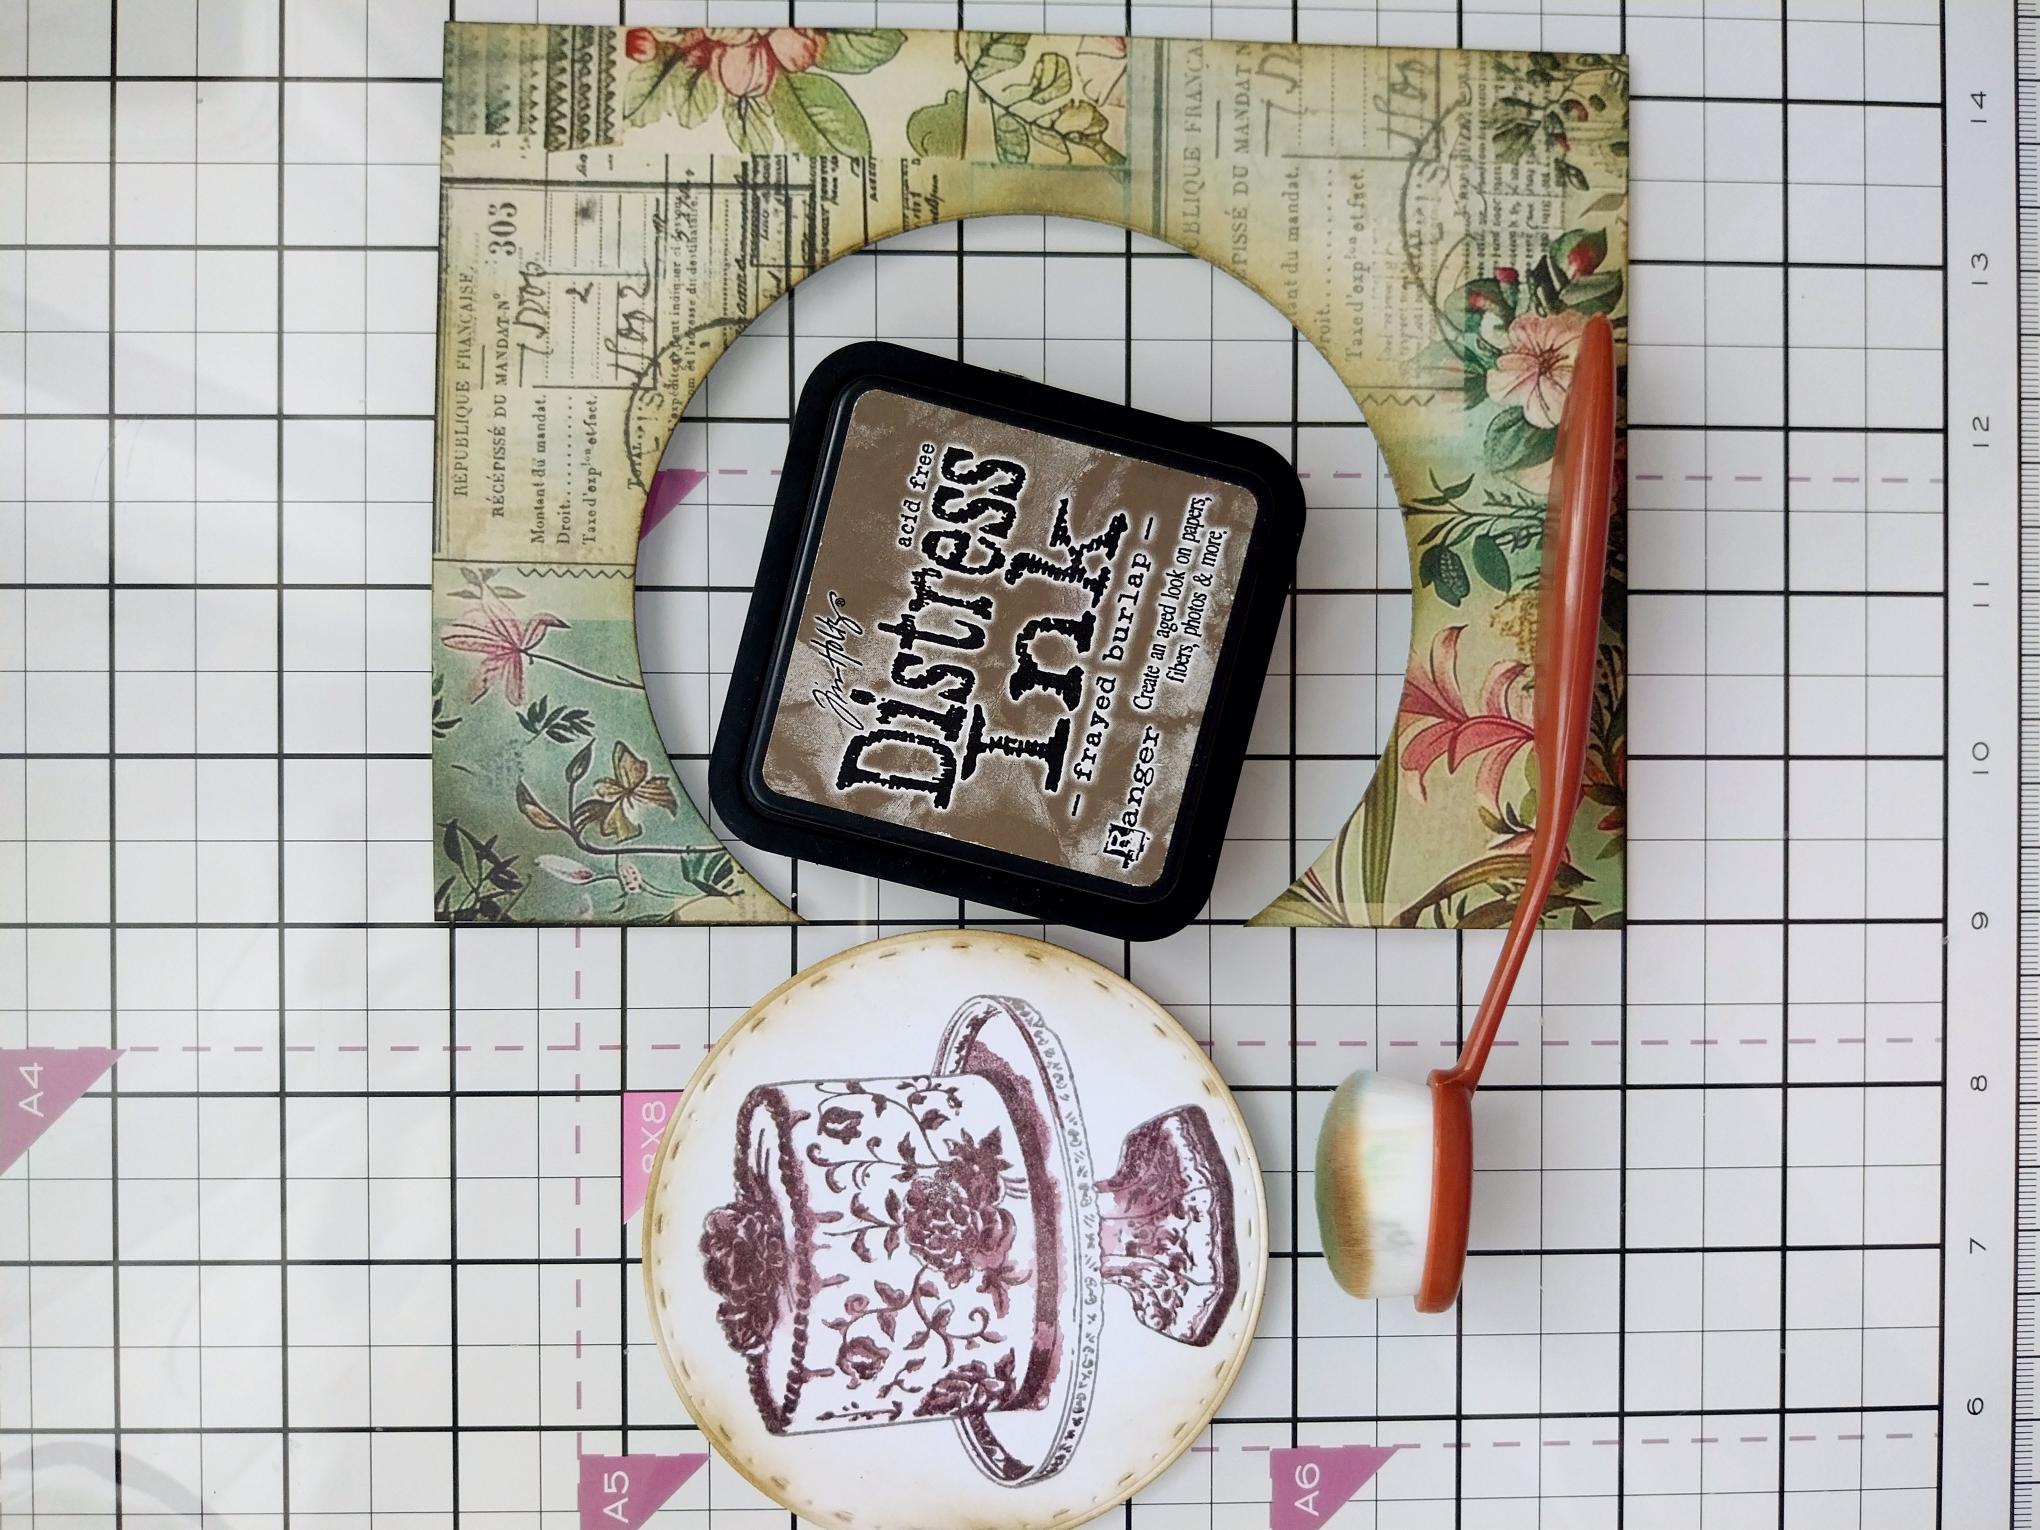
Use the Frayed Burlap to ink around the edges of both the paper and the die cut circle. |
|
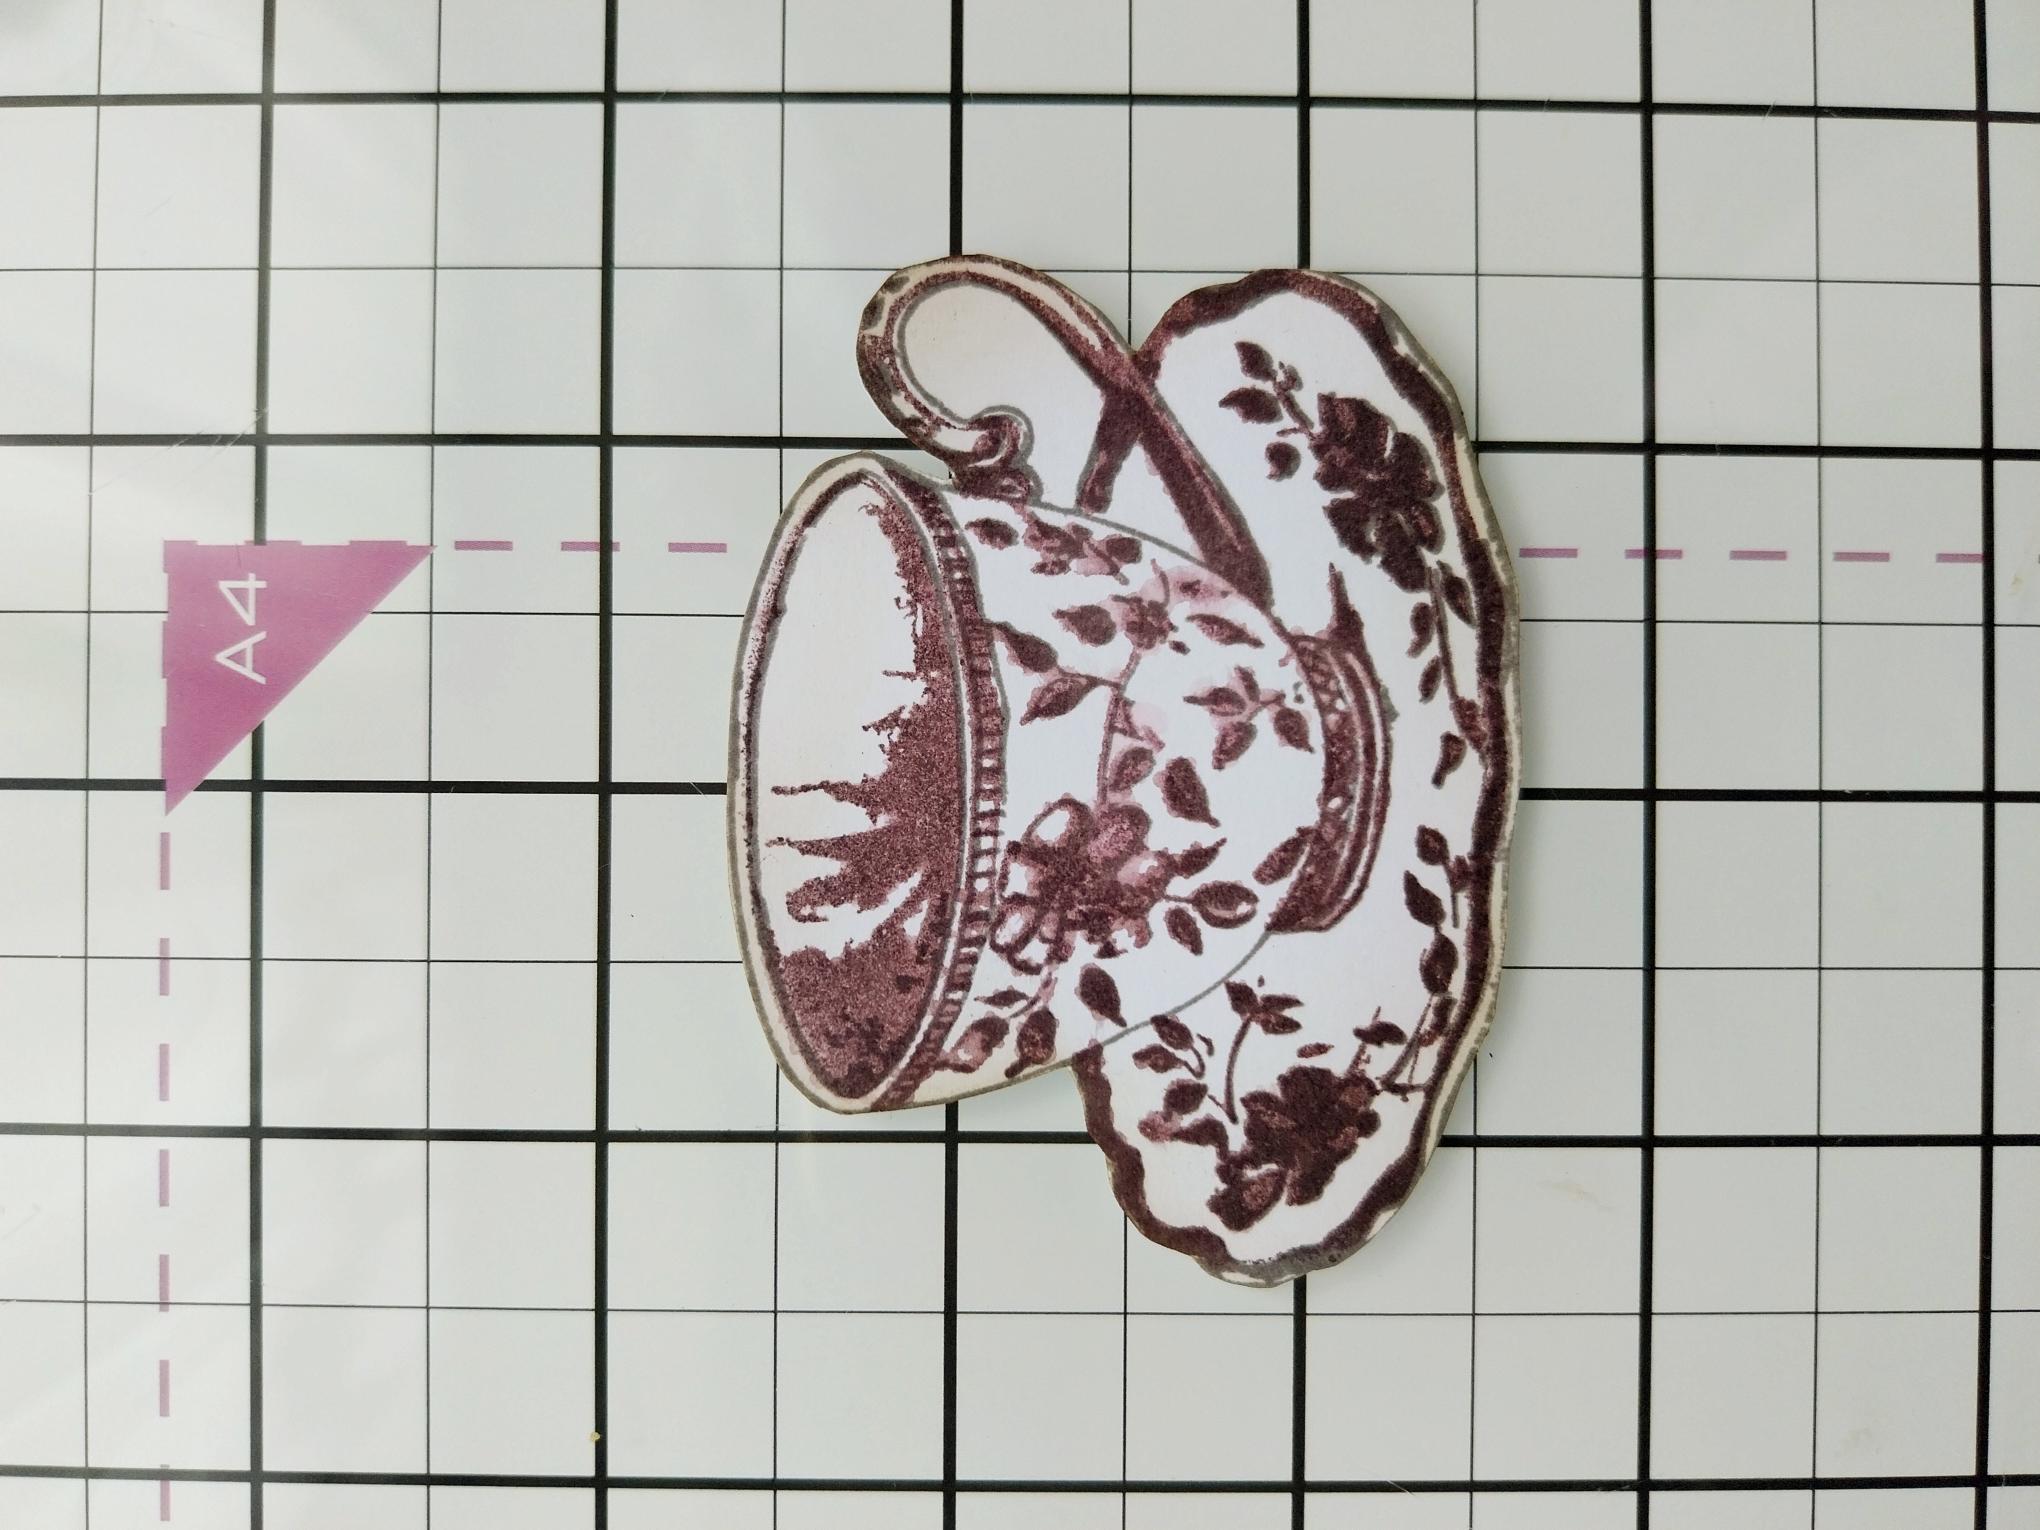
On a seperate piece of white card, ink up the solid teacup stamp with Heather, spritz lightly with water and stamp. Stamp the detailed stamp with the Versafine and once dry, fussy cut. |
|
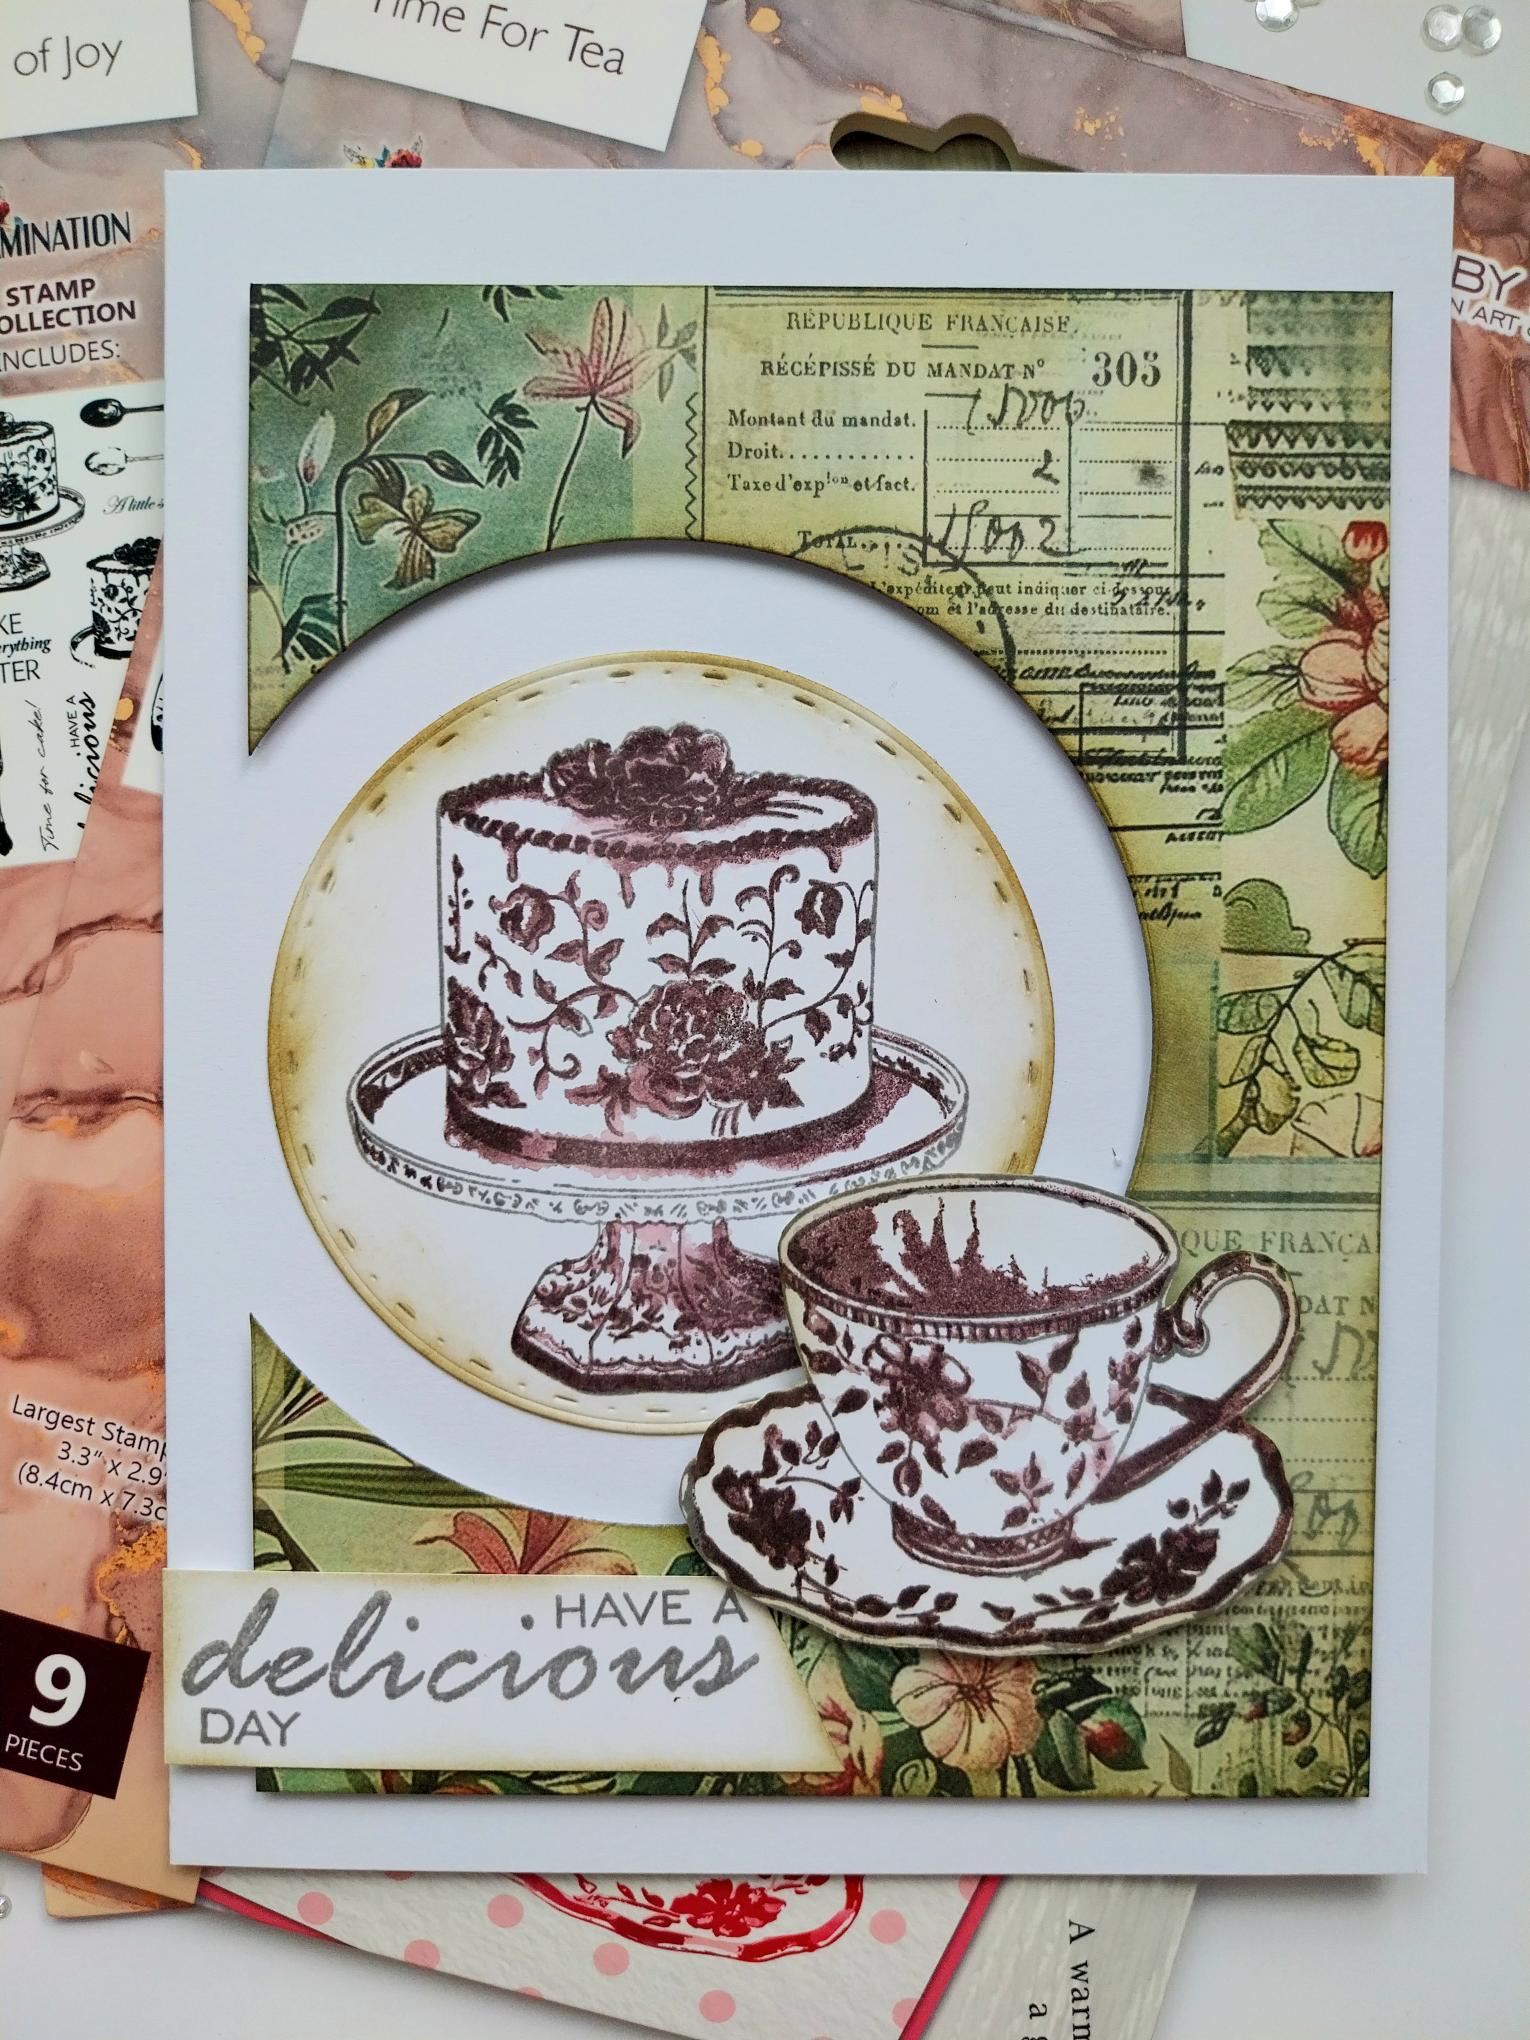
Adhere the inked paper onto your card blank. Adhere the stamped circle inside the die-cut aperture and then use foam pads to adhere the teacup bottom right of the aperture, as shown here. |
|
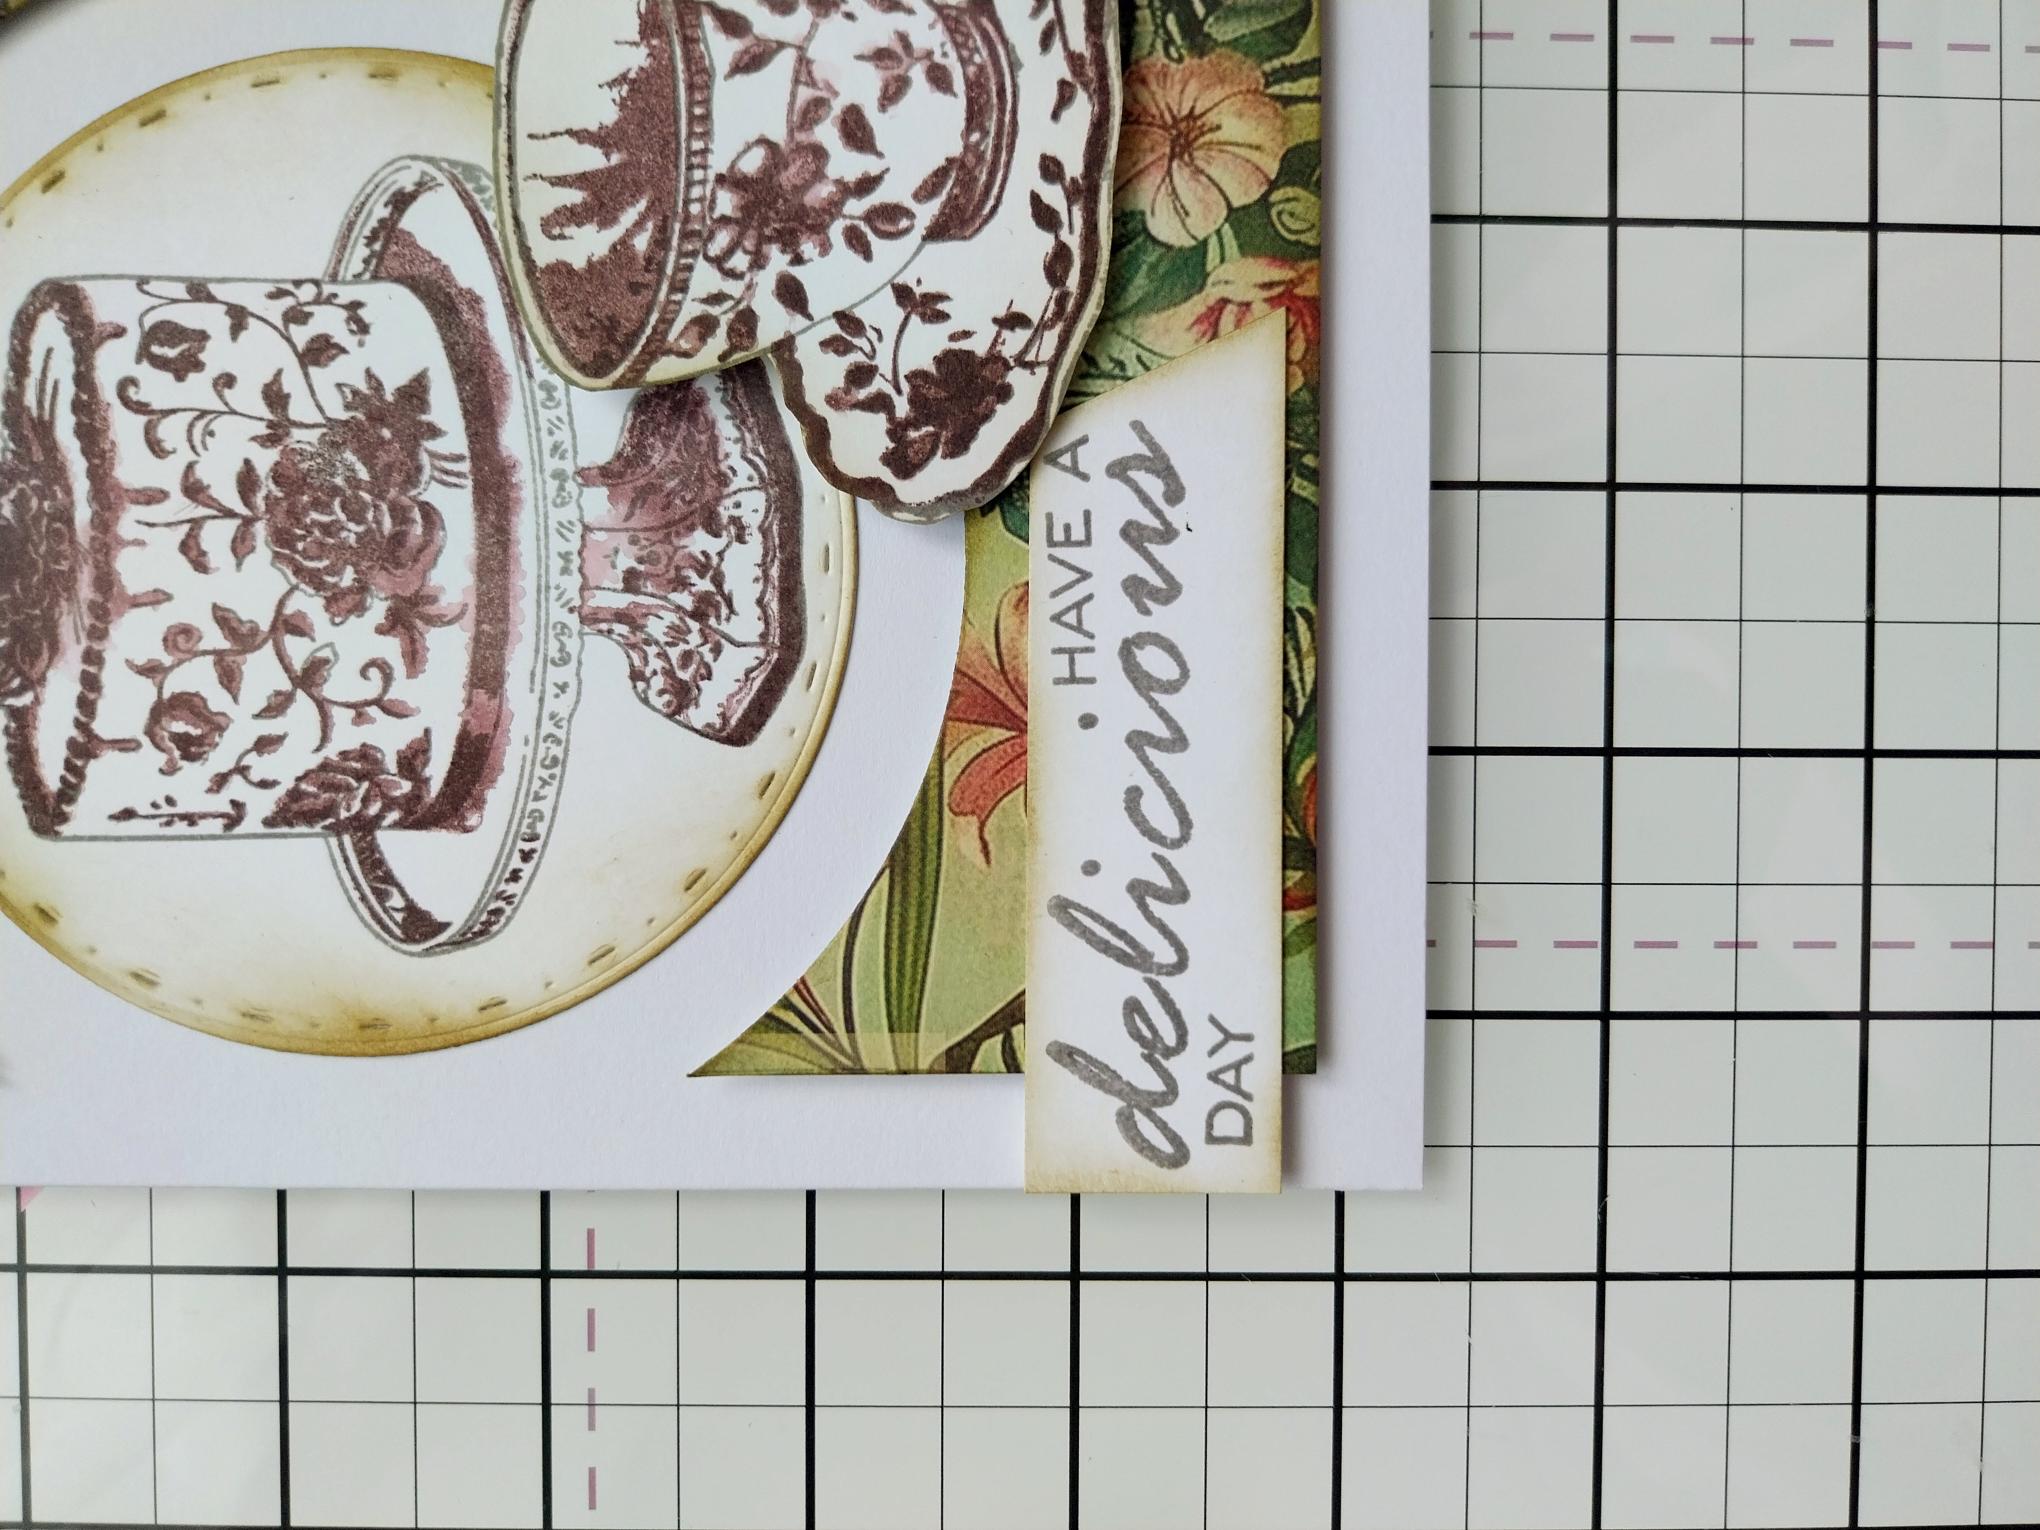
Stamp your sentiment onto a piece of white card, in the Versafine. Trim to create a banner, ink around the edges with the Heather and then adhere to the bottom left of your card, with foam pads. |