Give your friends $10 off their first order!
Refer a FRIEND


WHAT YOU WILL NEED:
Teal Card blank 6 x 8"
Kraft/black/white cardstock
Vellum
Holly & Berry Paper Pack 7 x 7
Holly & Berry Texture Paper Pack 7 x 7
Oak Slices Die Collection
Perfect Pinecones Large Die Collection
Decorative Brooches Die Collection
Love, Hope & Joy Die Collection
All Surfaces Metallic Sparkle 8 x 8 Paper Pack
Distress Oxide/ Ink Pad: Frayed Burlap, Walnut Stain, Vintage Photo, Fossilized Amber
Blending brush
Stickles/glitter
SBM A3 Magnetic glass mat
Paper Trimmer
Glue/foam pads/double-sided tape
Die Cutting machine
[click image to enlarge] 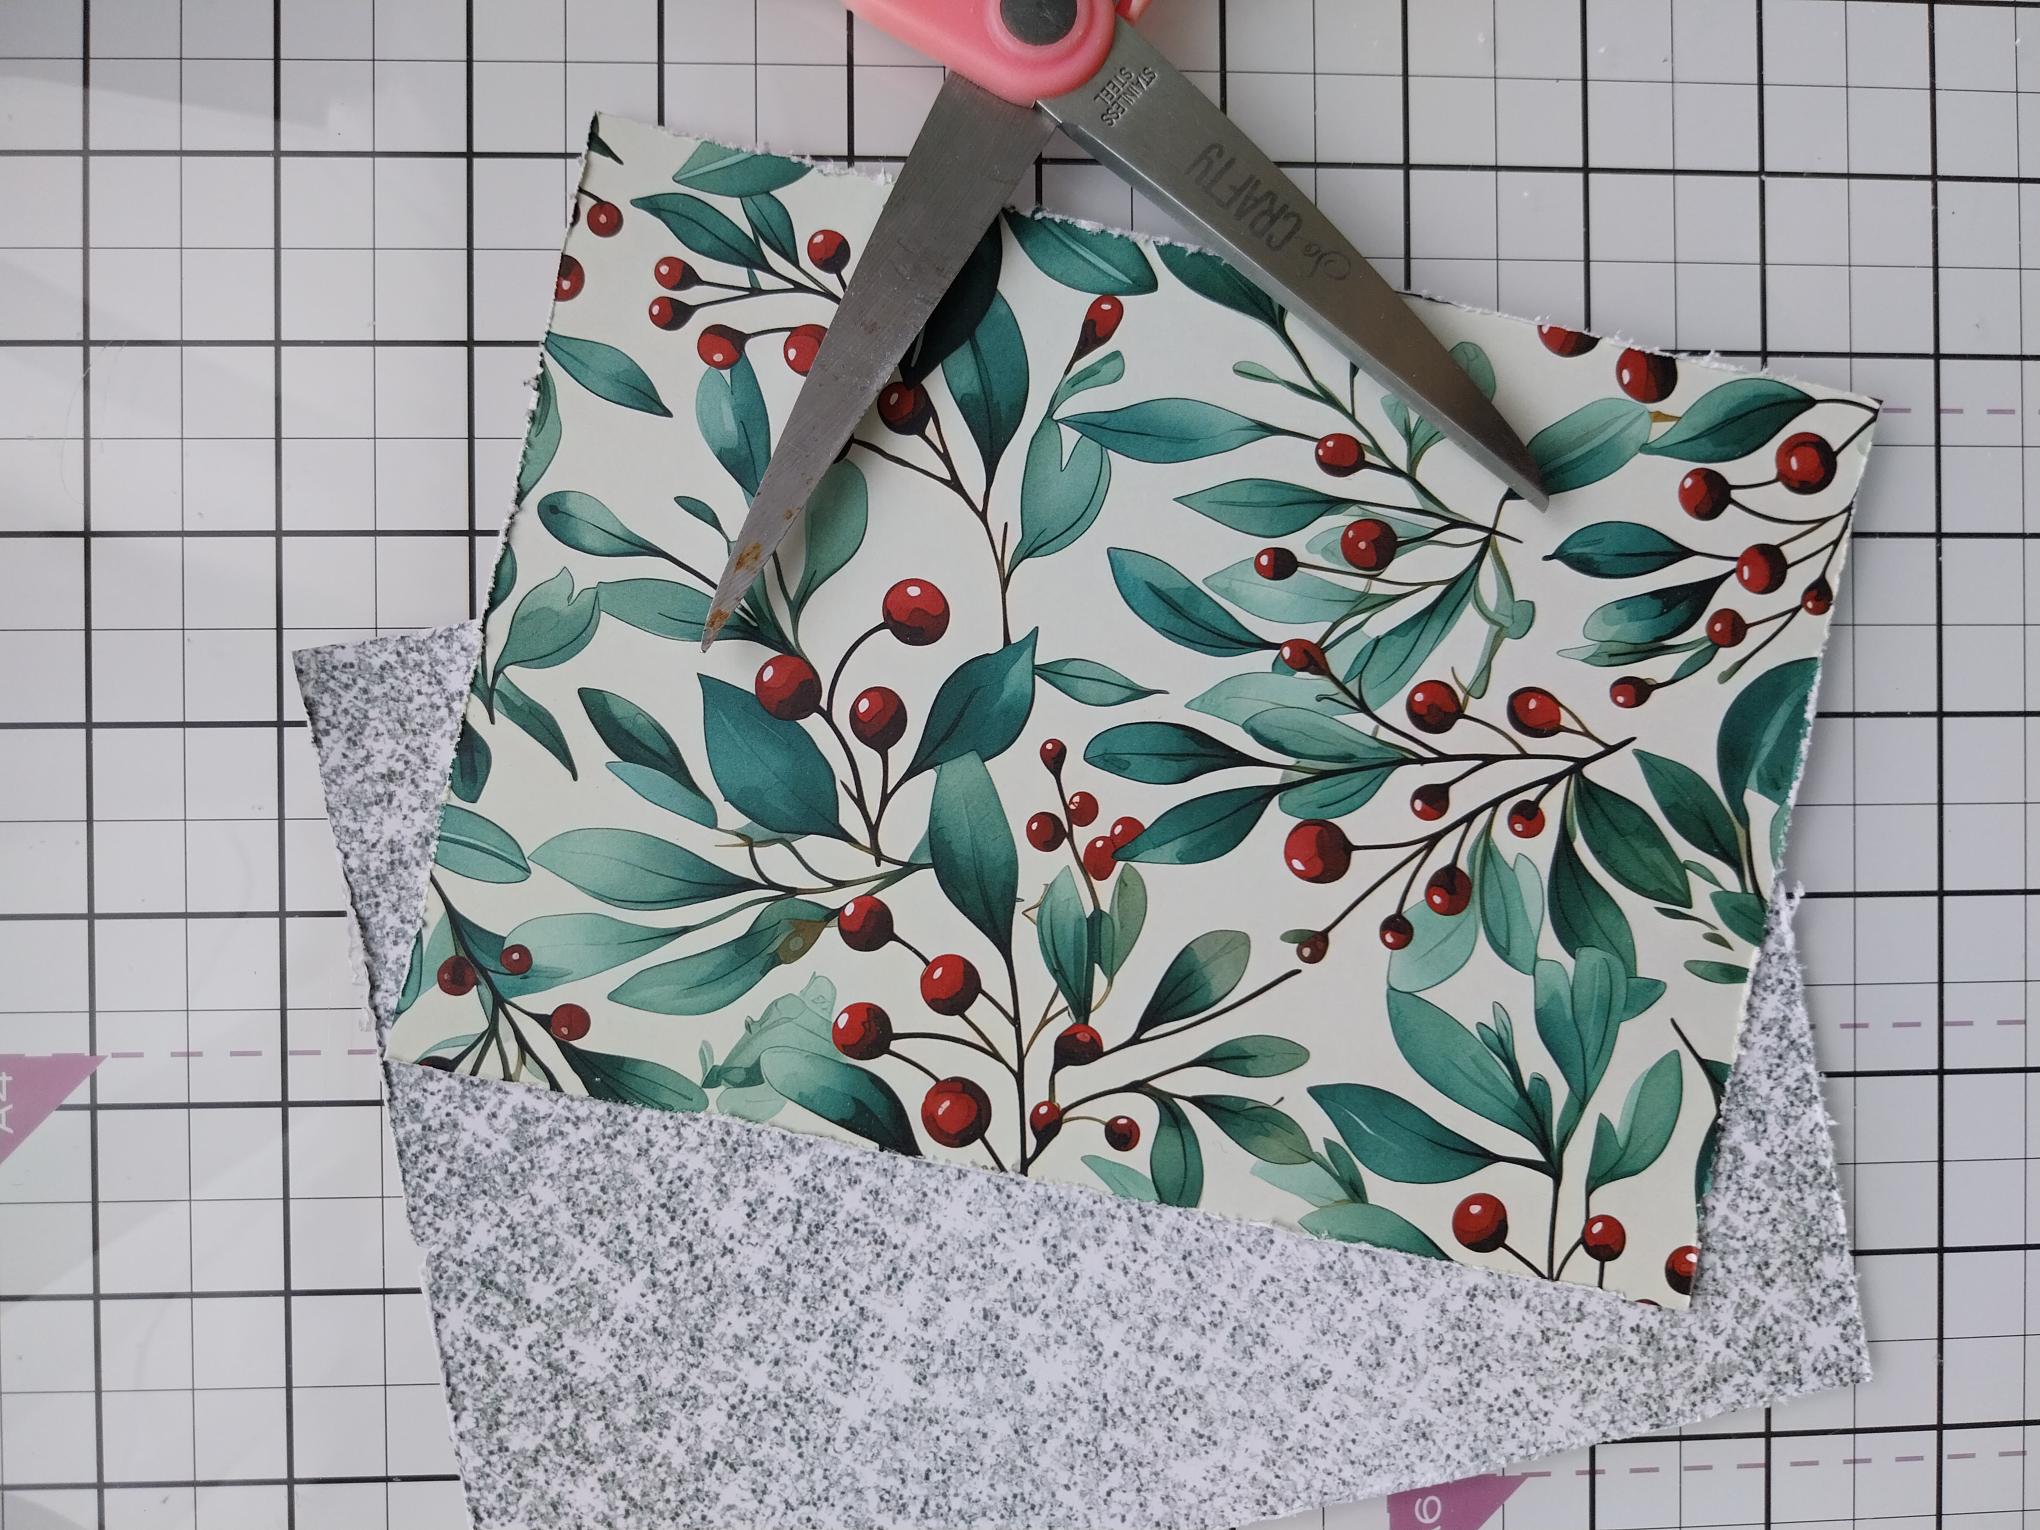
|
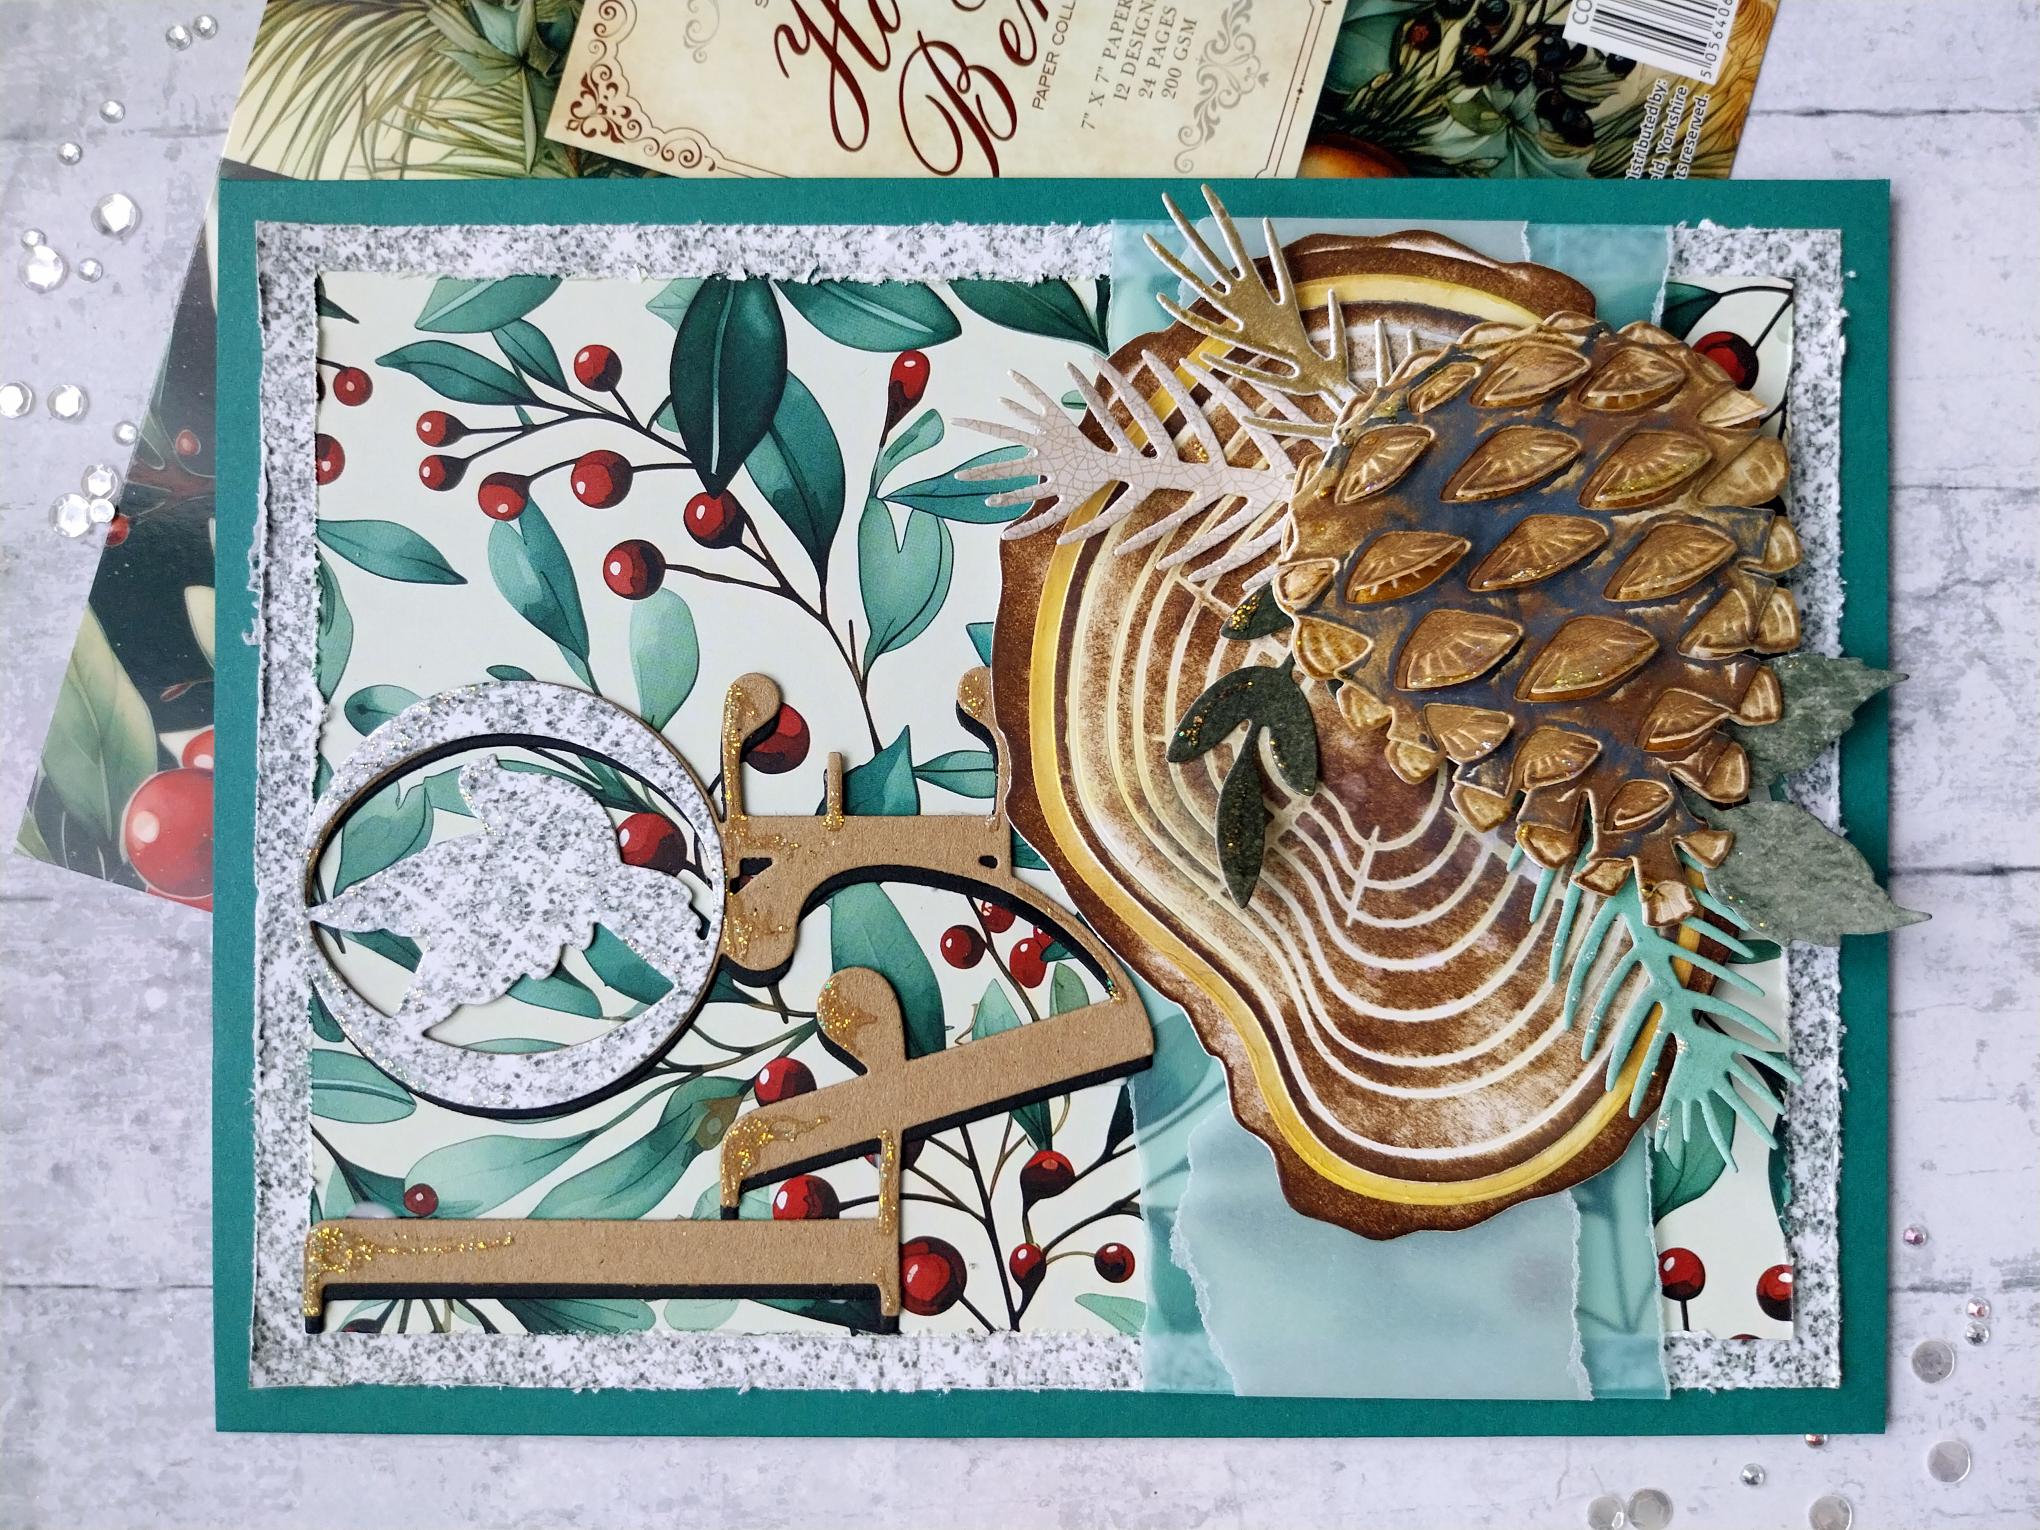
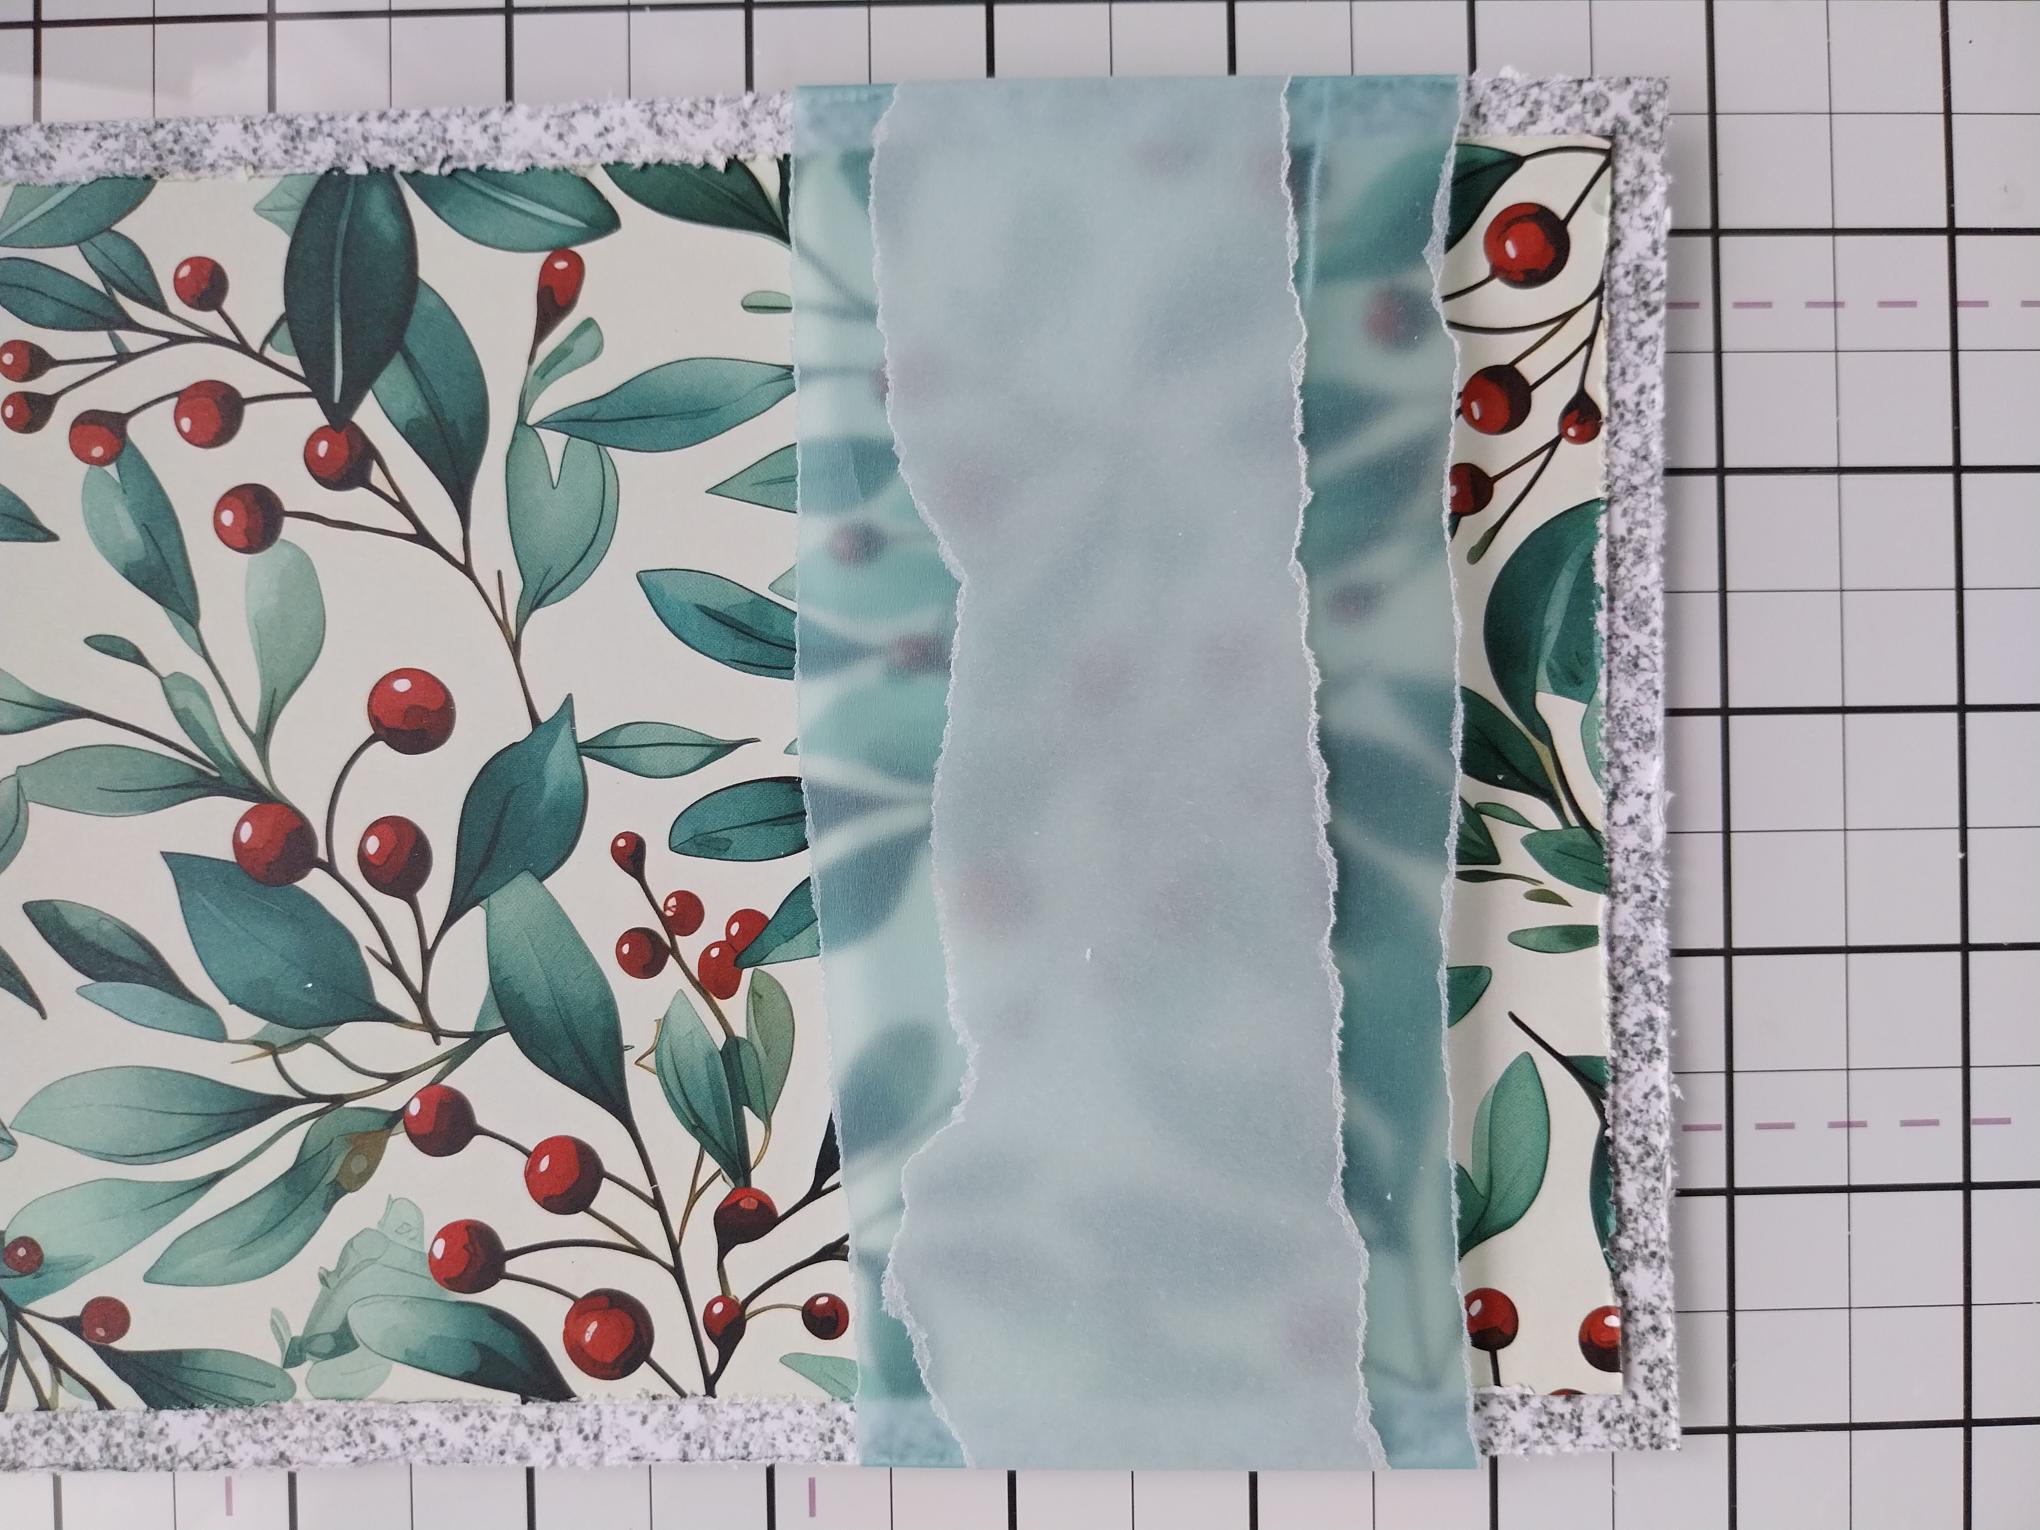
Cut this decorative Holly paper to 5 x 7" and distress around the edges with the edge of your scissors. Trim a coordinating paper from the Metallic Sparkles pack to 5 1/2 x 7 1/2" and distress the edges as before. |
|
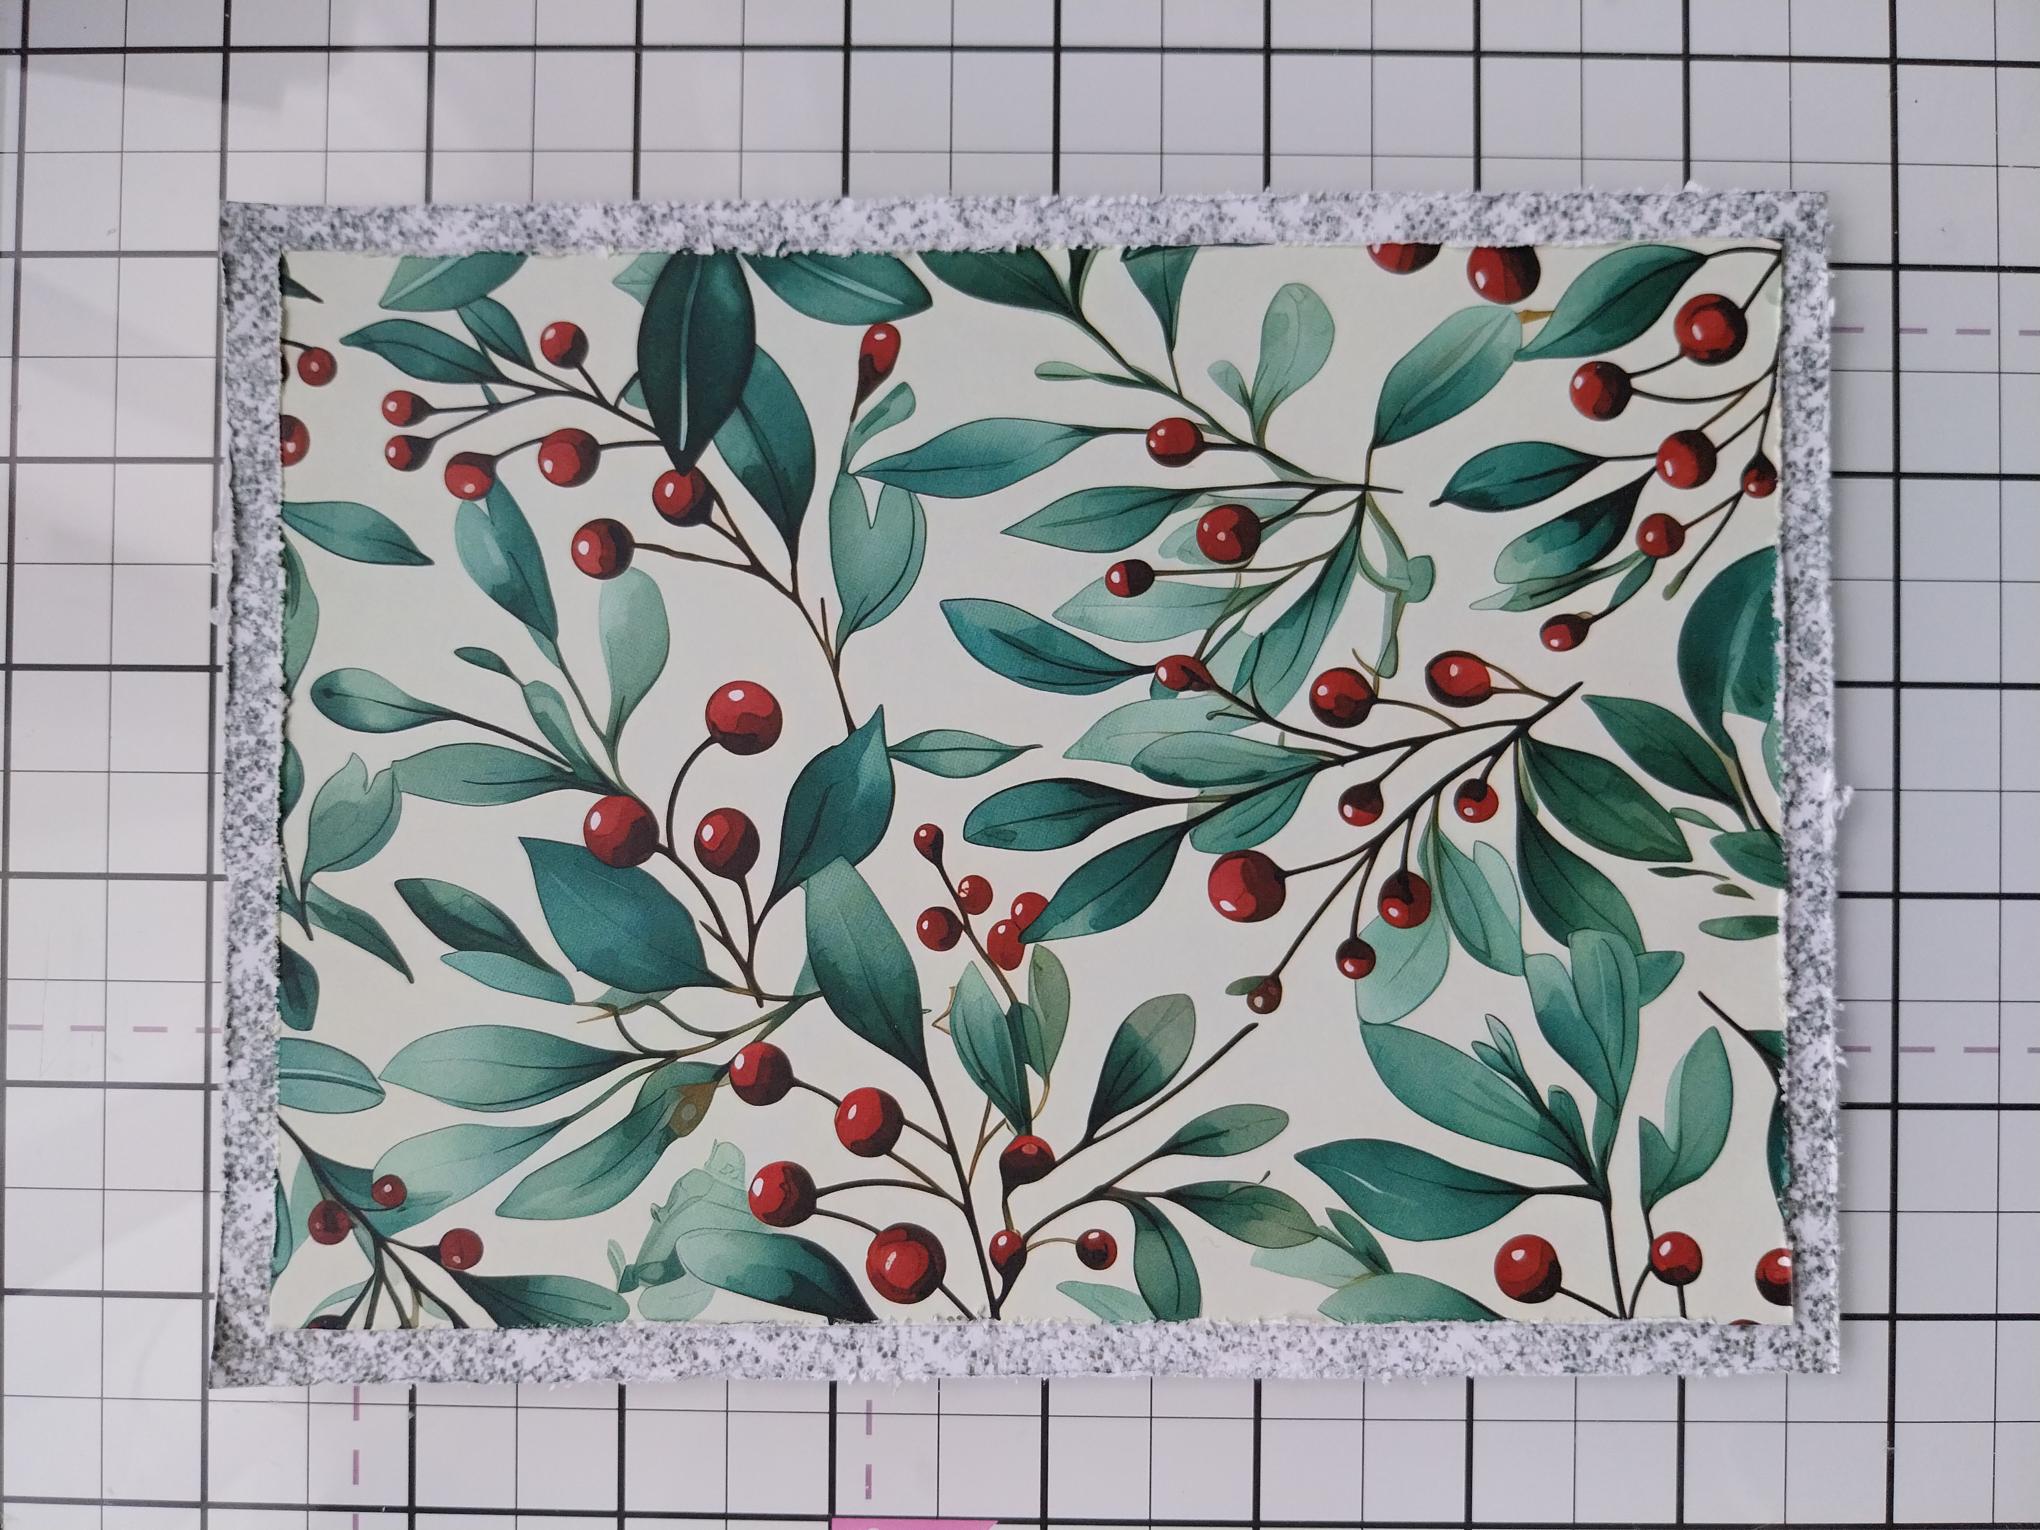
Adhere the Holly paper onto the sparkles paper. |
|
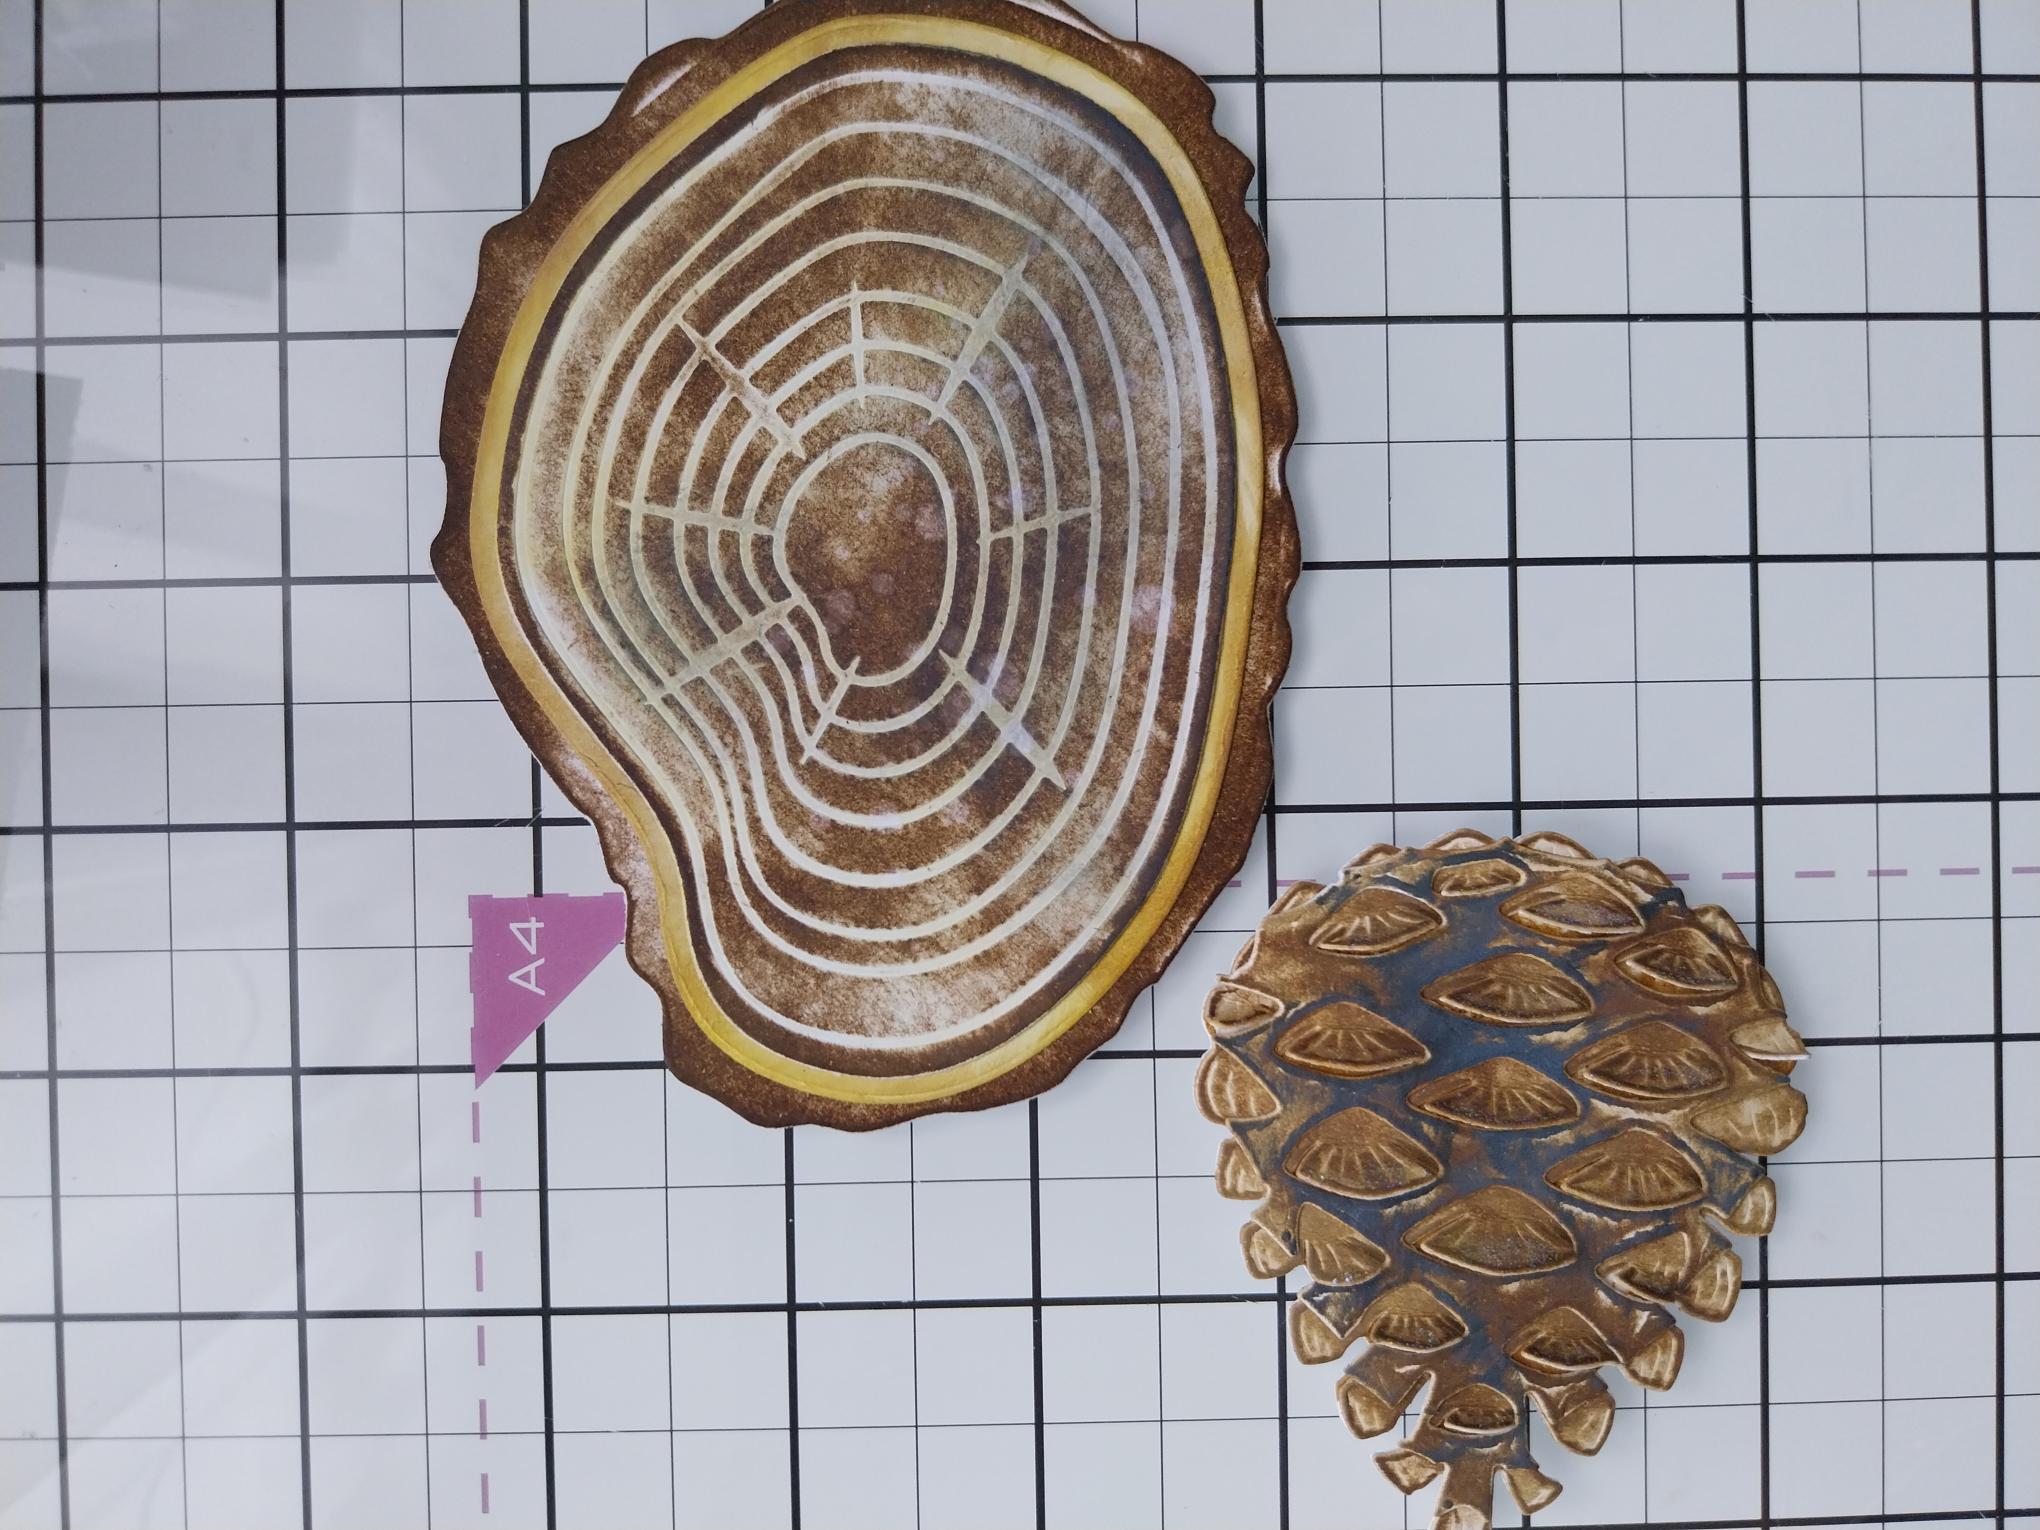
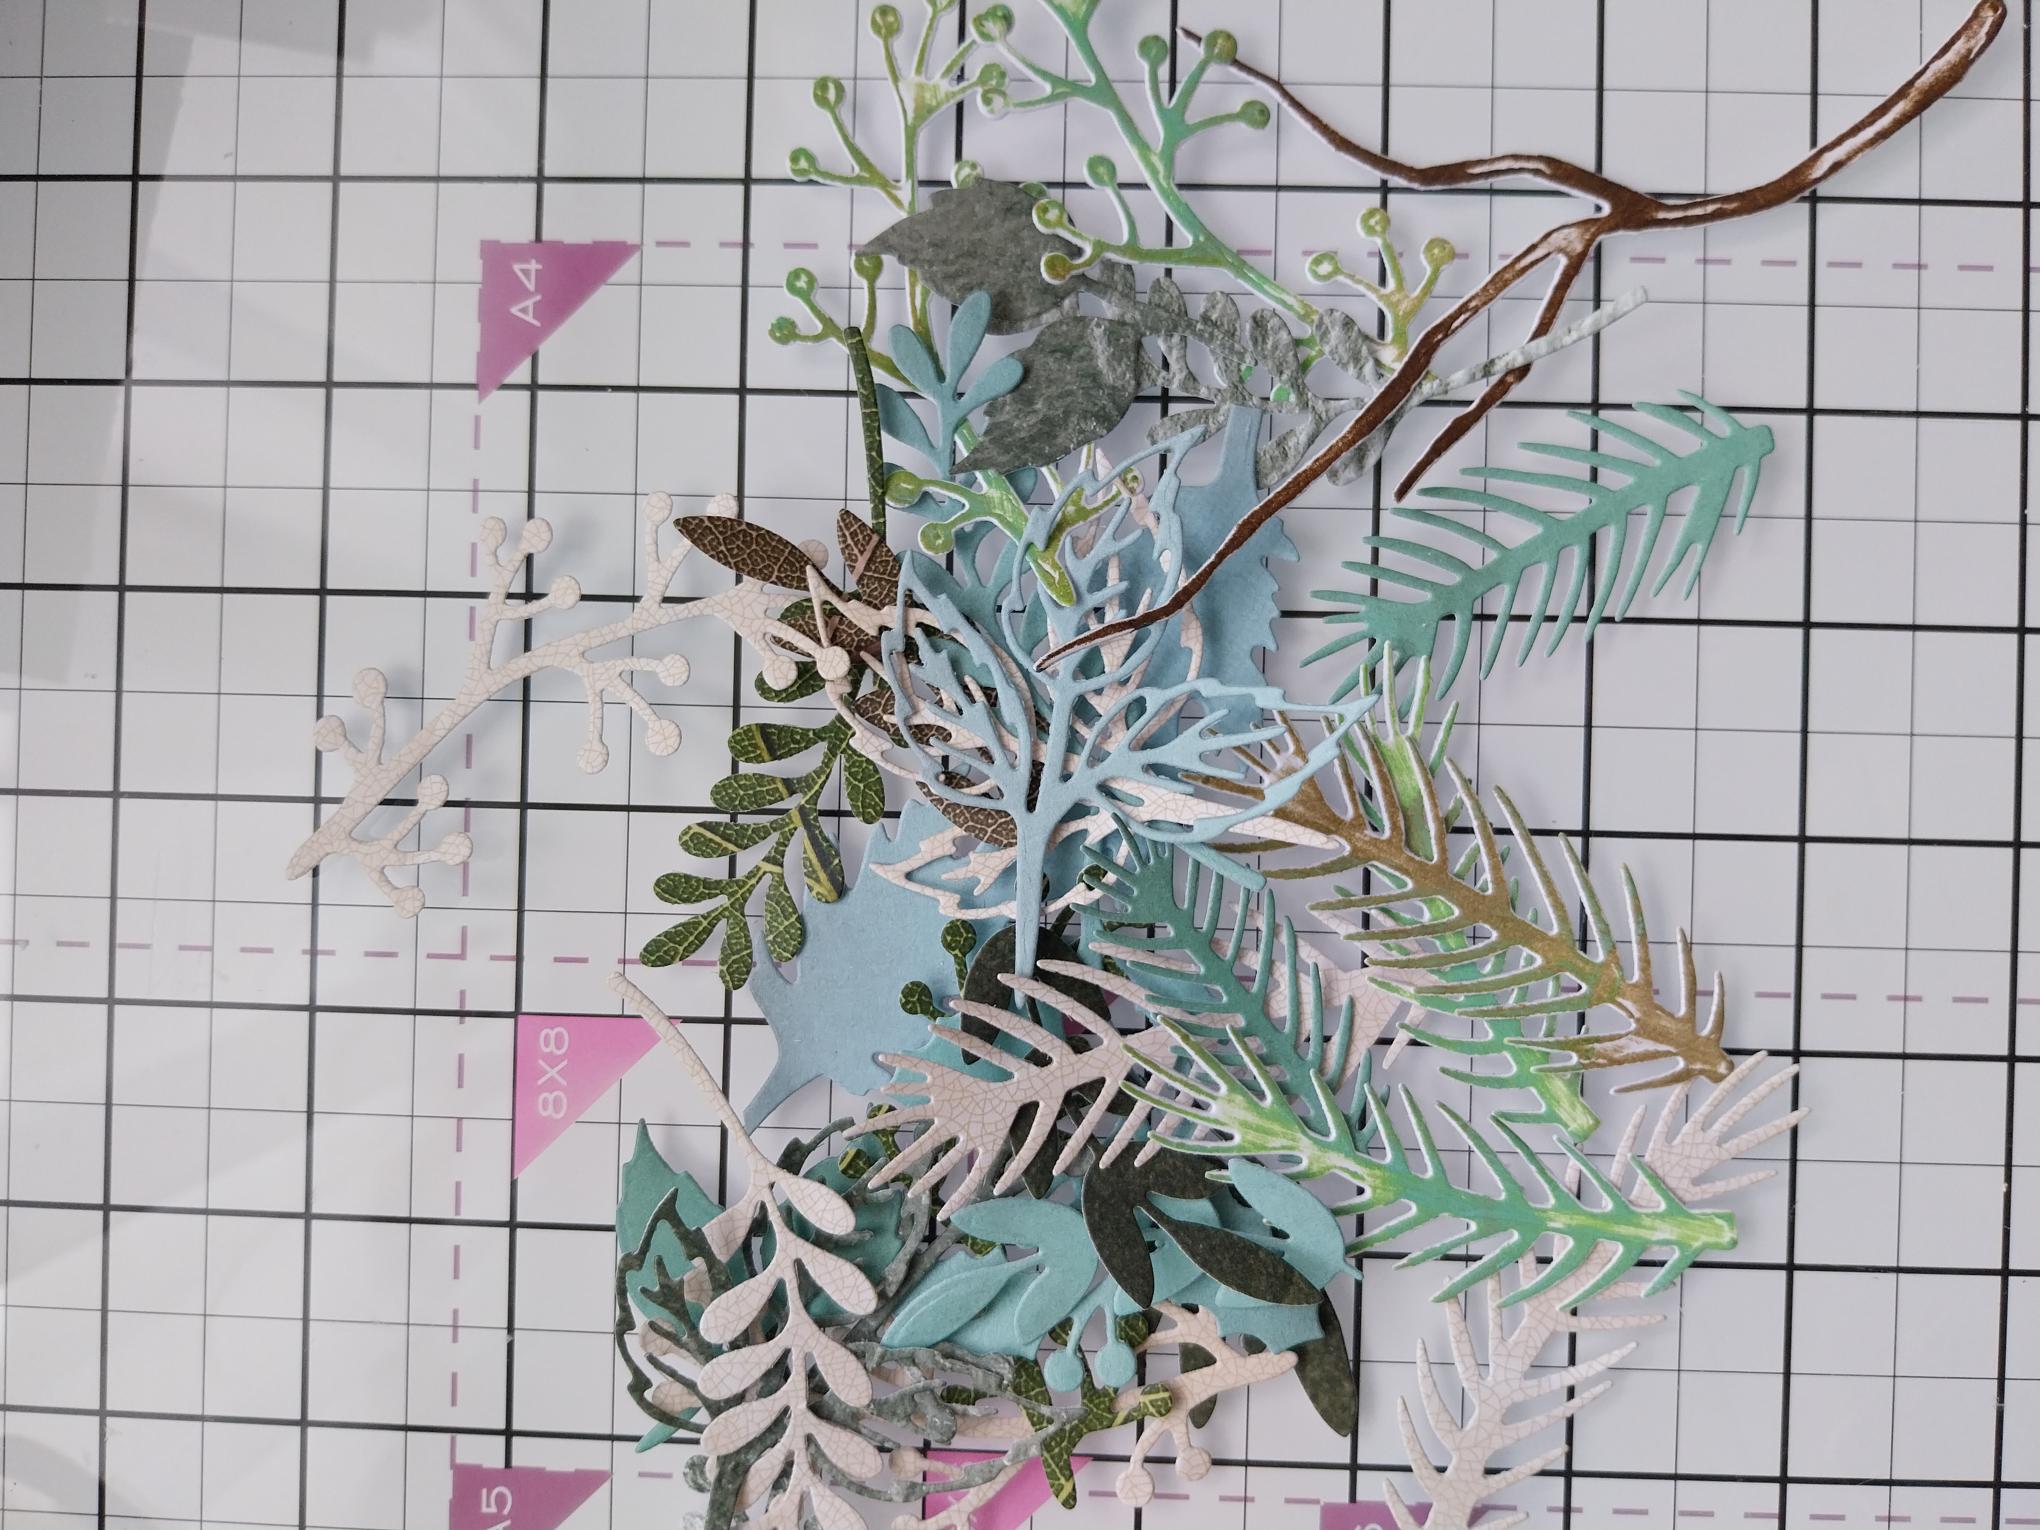
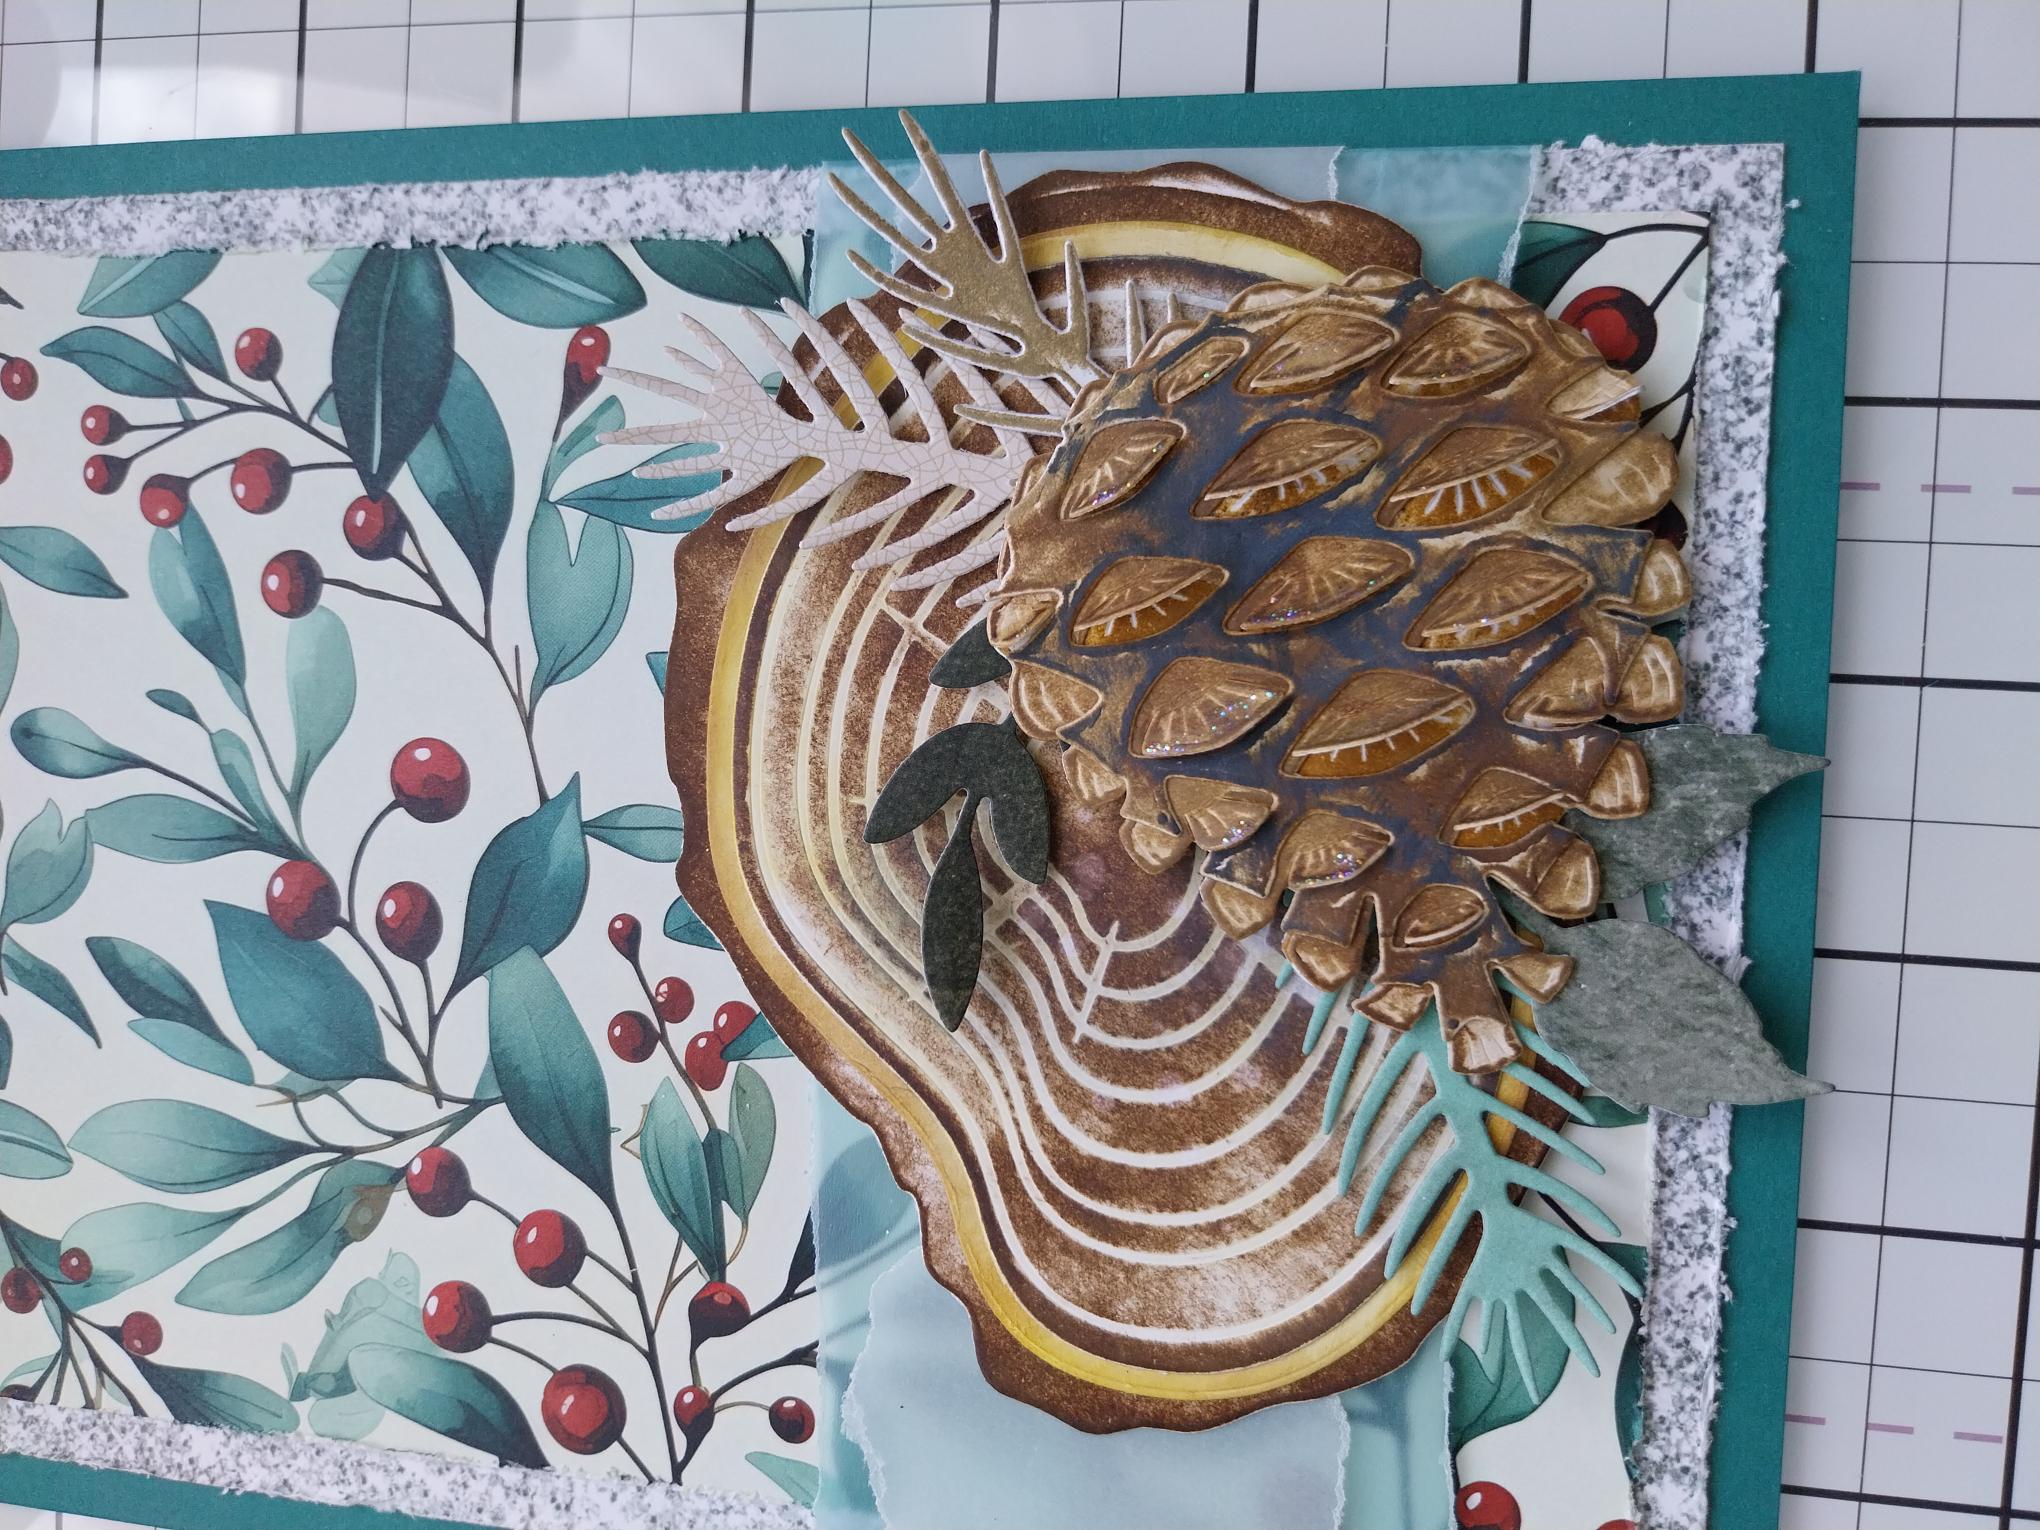
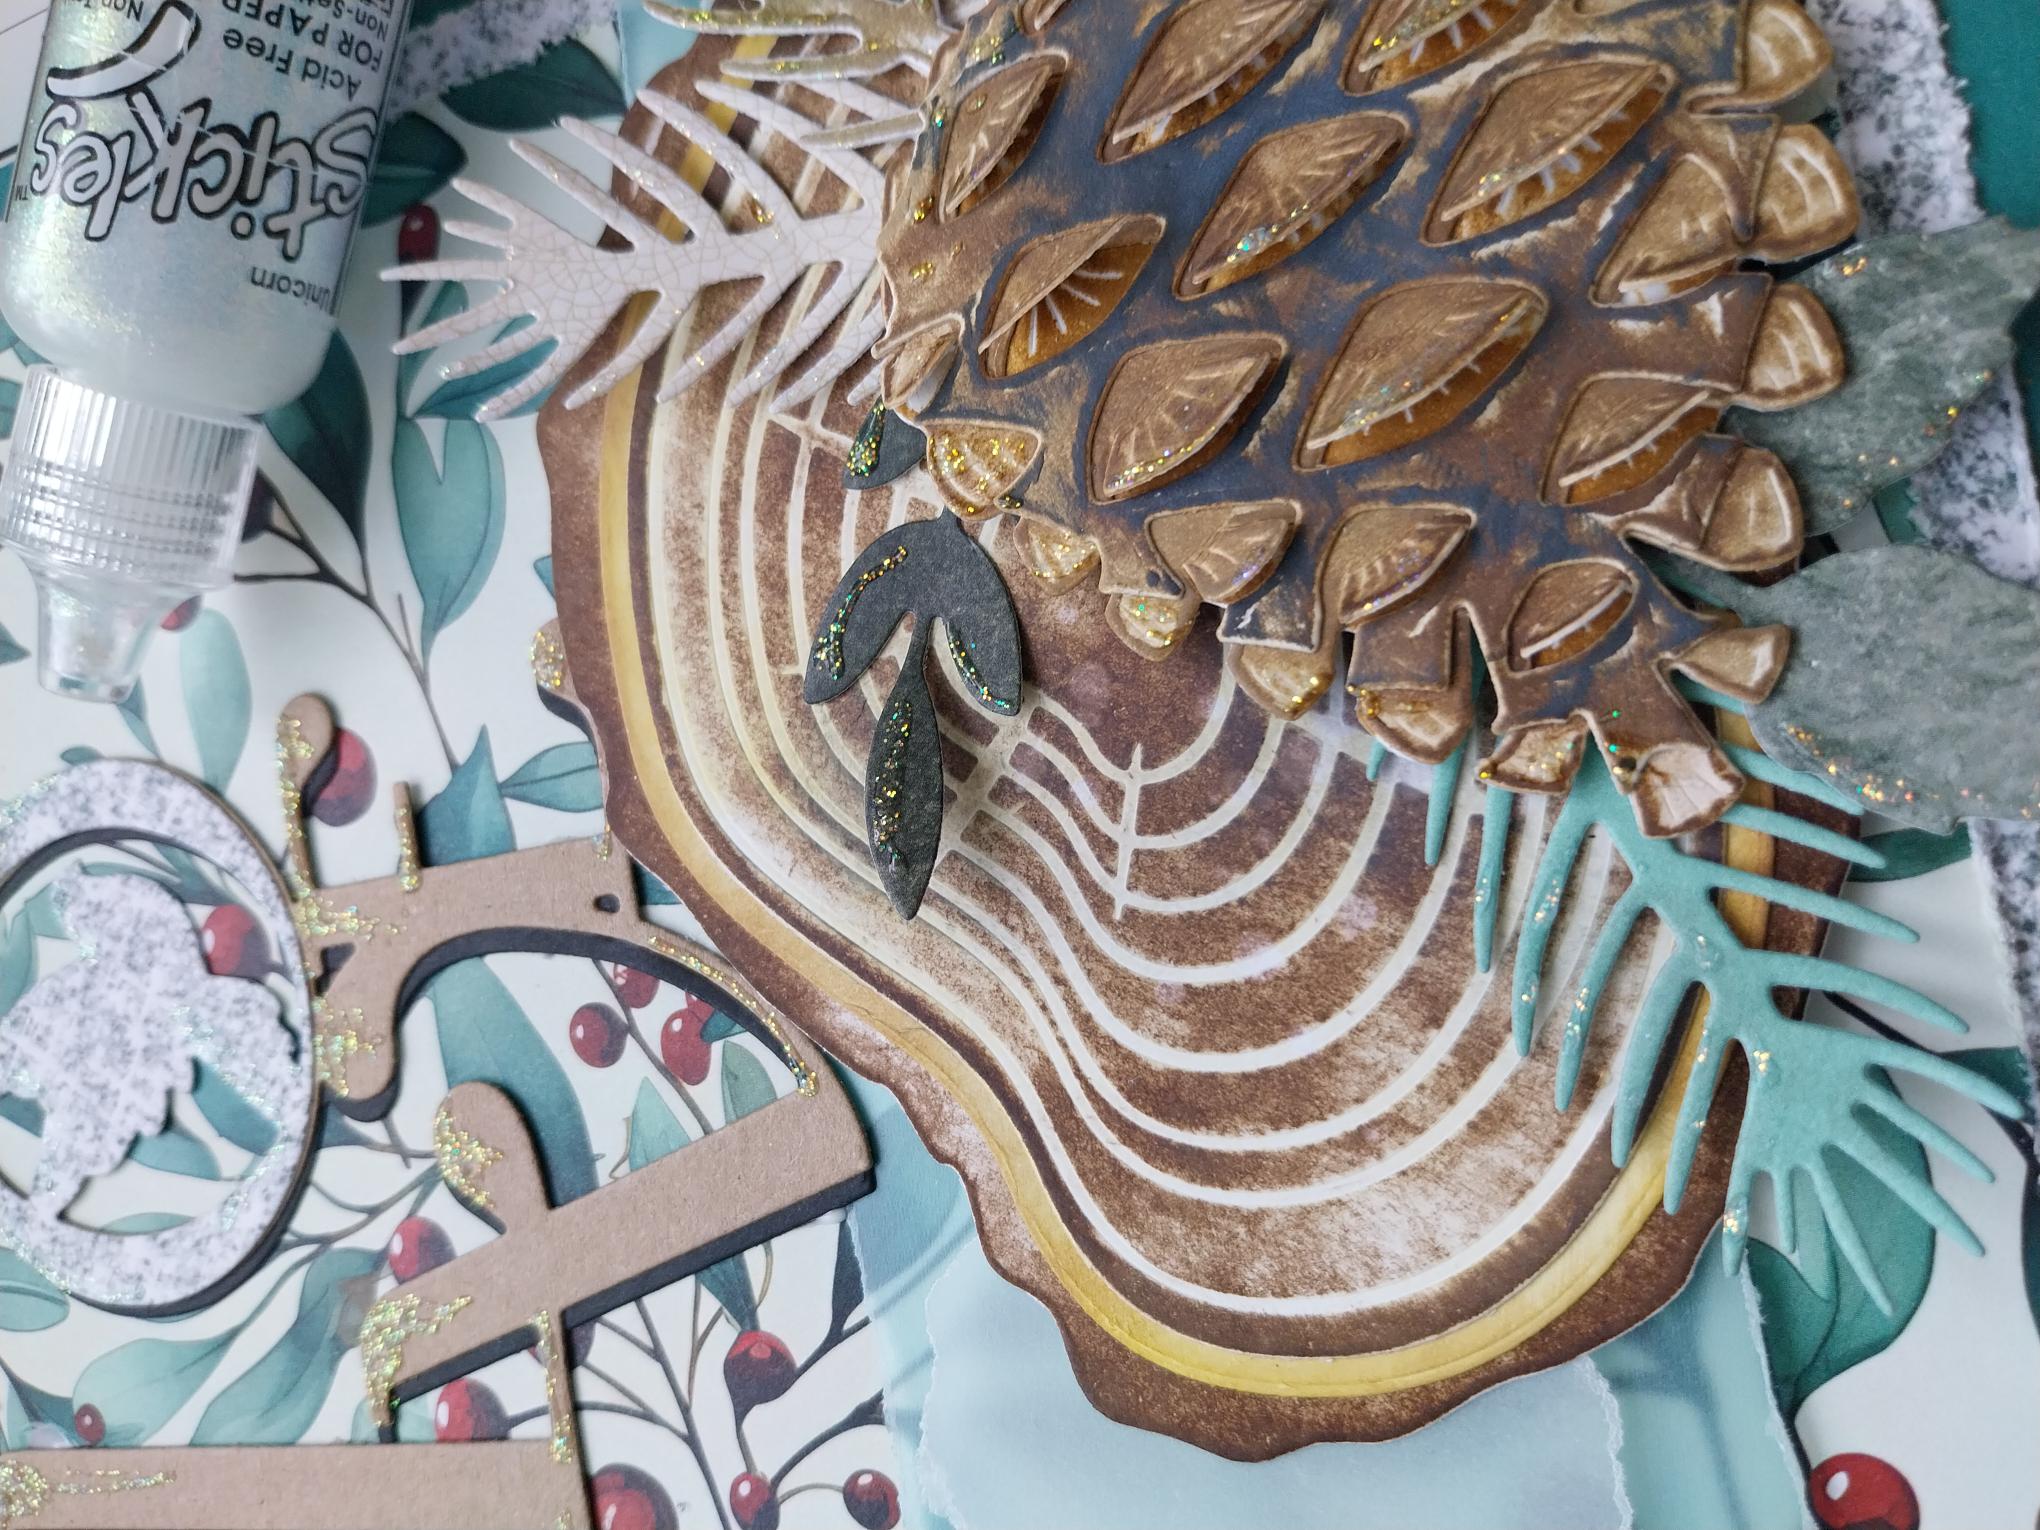
Die cut and create an Oak Slice and a Pine Cone, using your Distress Inks to create colour and dimension. |
|
Die cut a selection of foliage dies from your coordinating papers. |
|
Wrap a torn panel of coloured vellum across the bottom third of the papers and secure the tucked overhangs on the reverse, with double-sided tape. Tear a smaller panel of clear vellum, place over the coloured vellum and secure the vellum overhangs as before. |

|
Adhere onto your Teal card blank. |
|
Use a mixture of wet glue and foam pads to create and adhere a 3D display in the bottom right corner. |
|
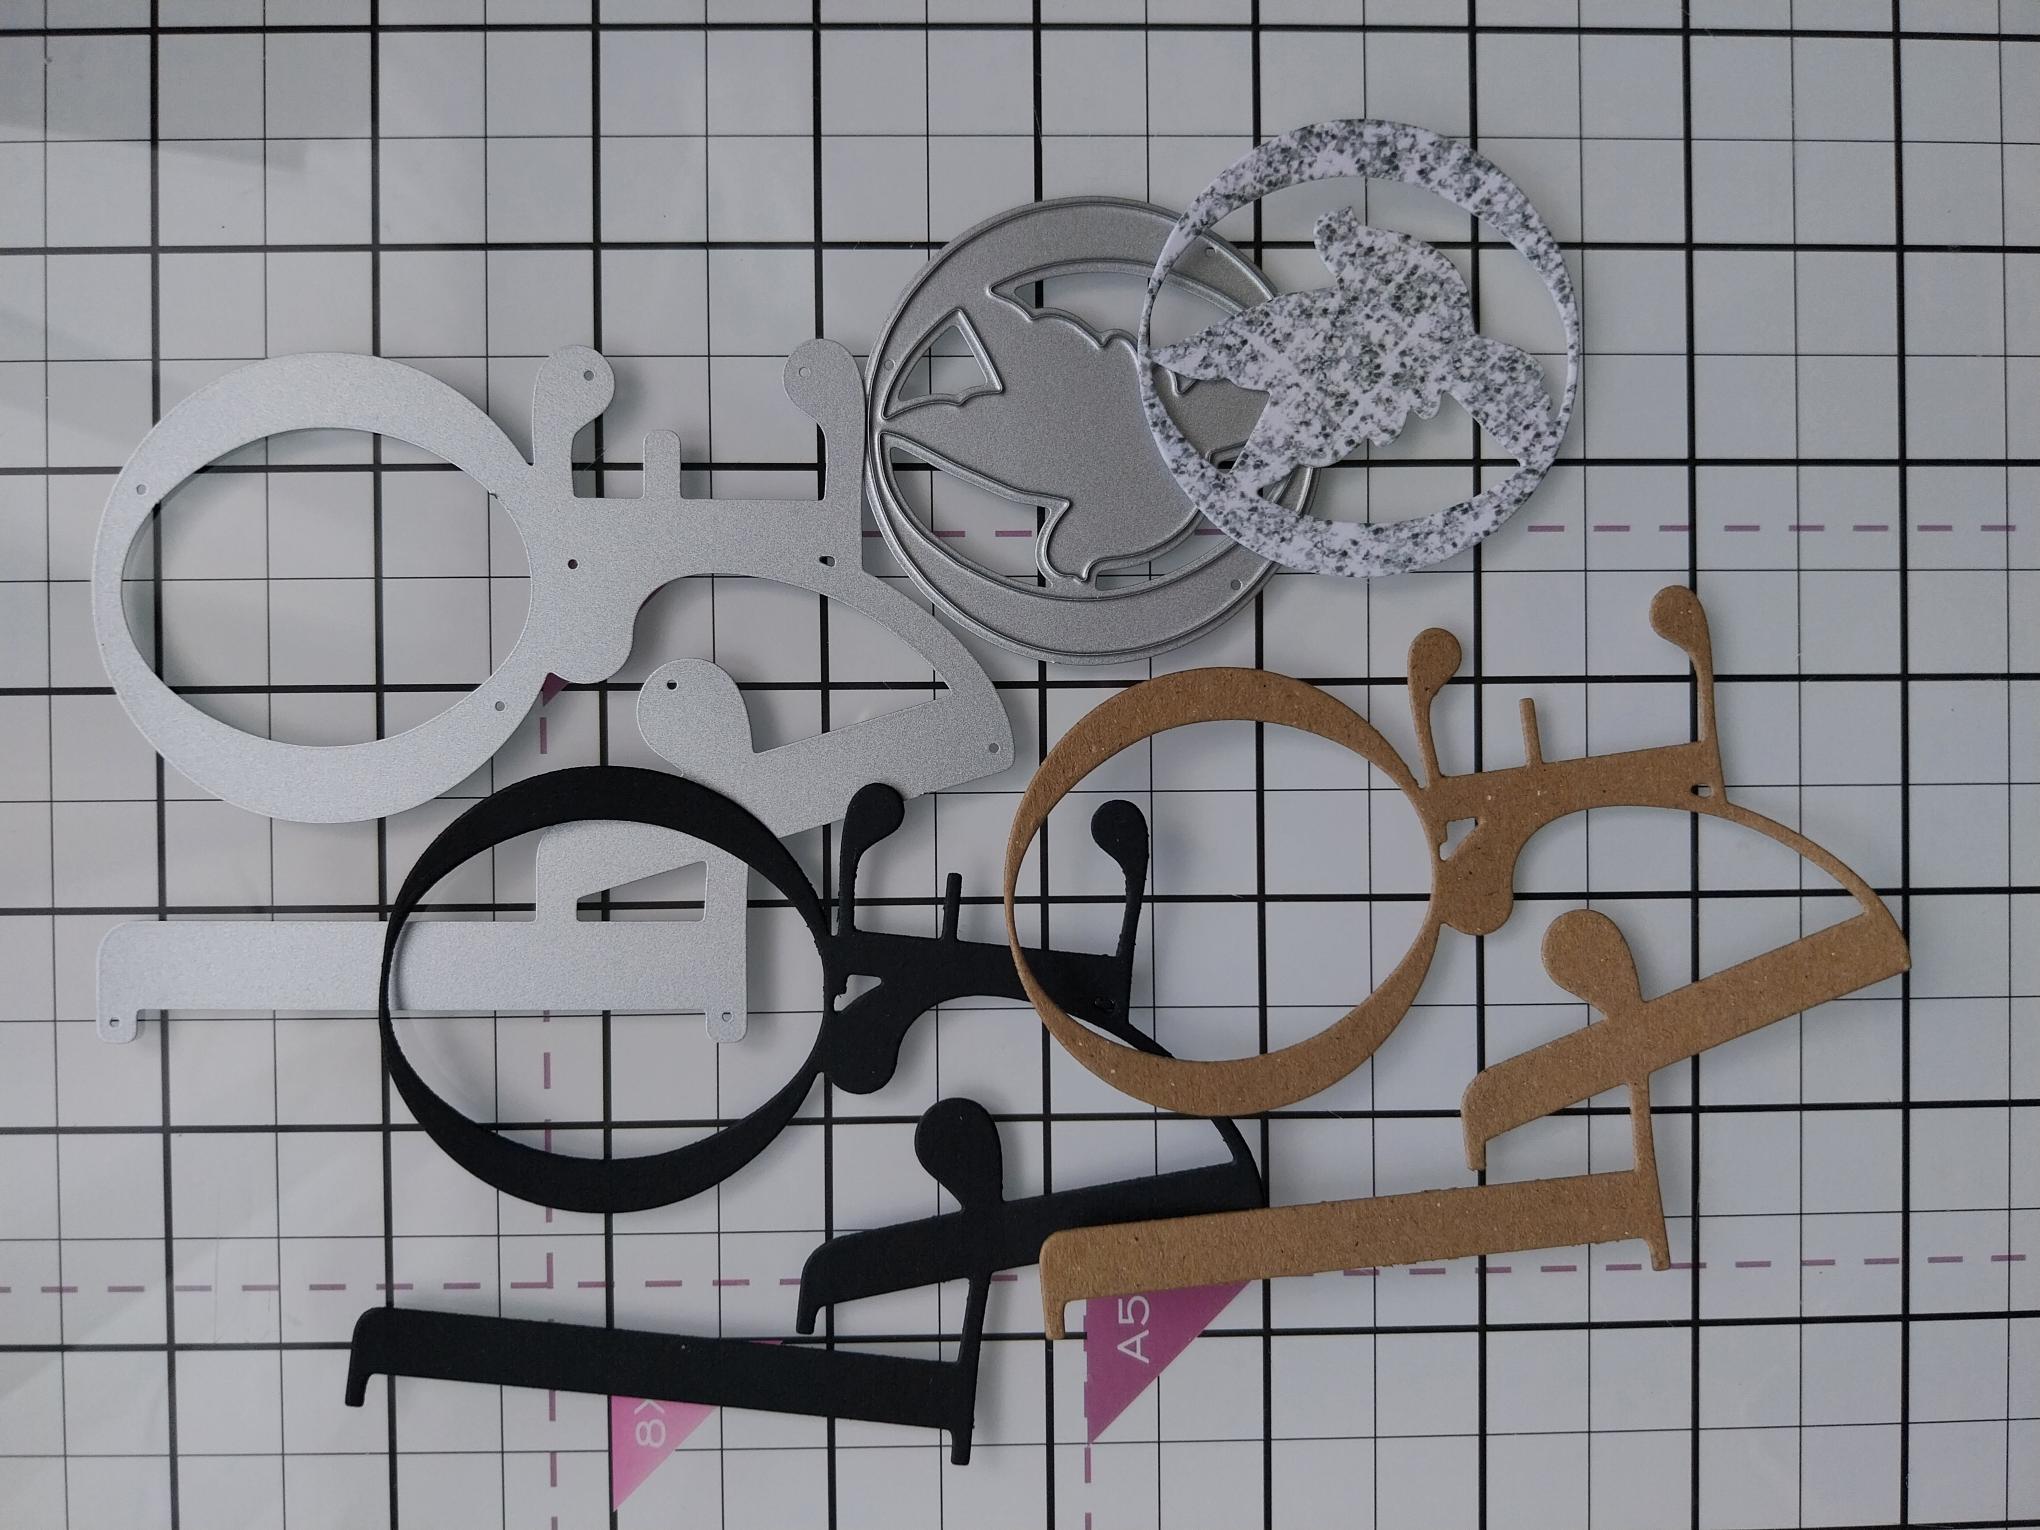
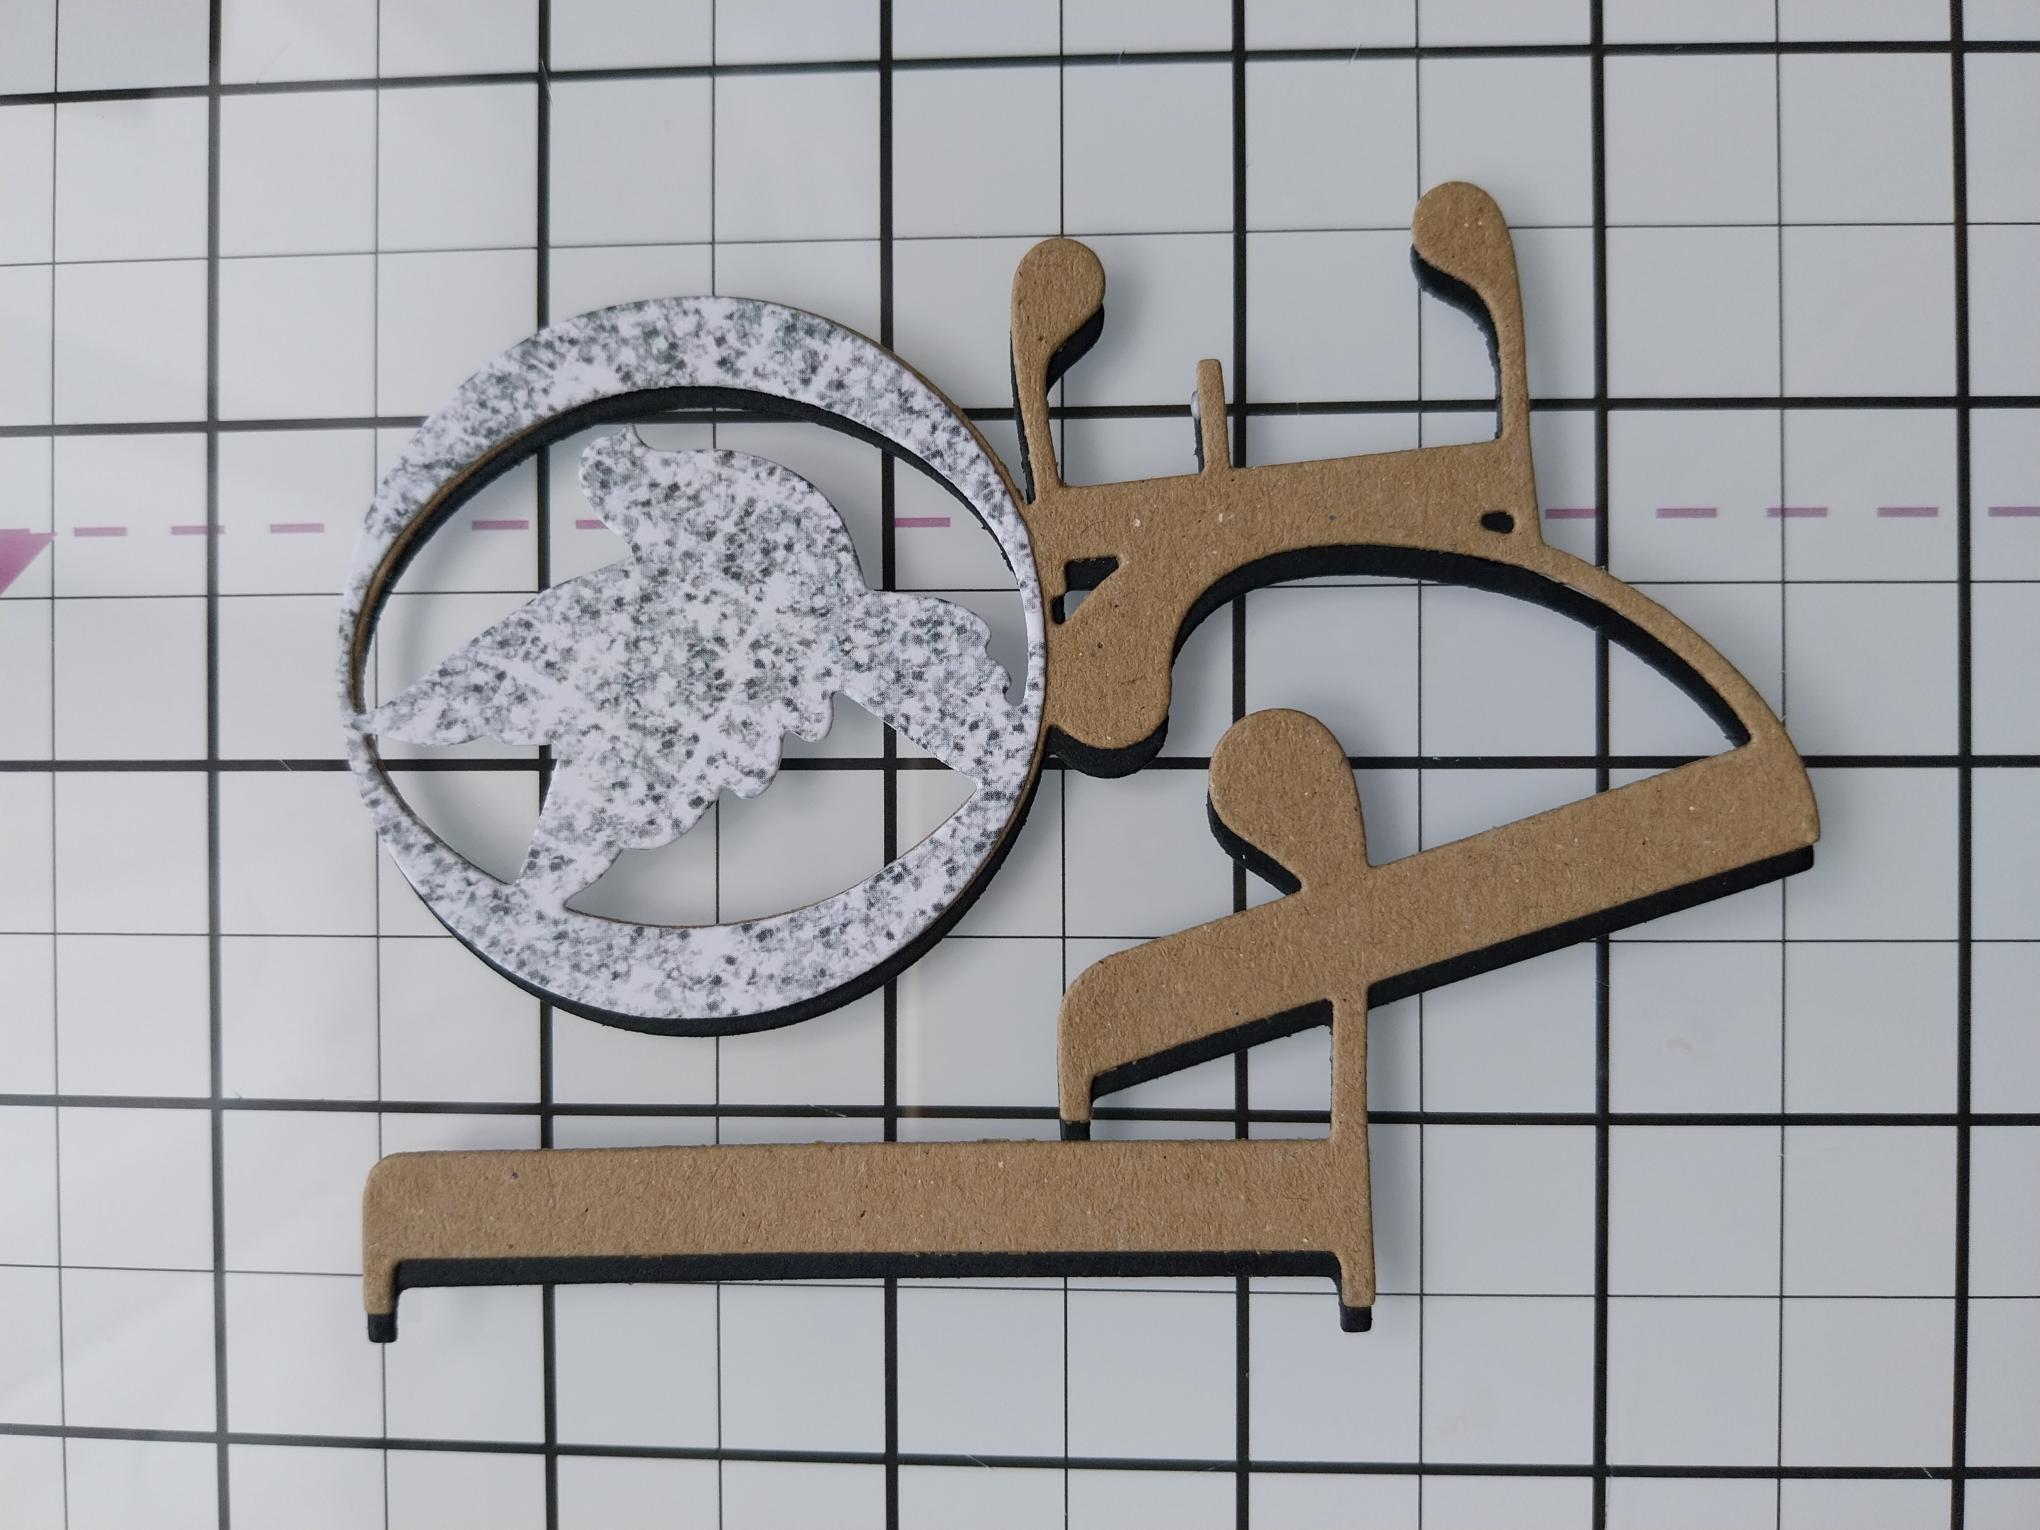
Die-cut the LOVE sentiment in kraft and black cardstock and the Dove brooch from the sparkle paper. |
|
Adhere together, placing the black die-cut at the back, creating a drop-shadow. |

|
Secure the 3D sentiment on your card, in the top left corner. |
|
To finish, use your Stickles to add a touch of festive sparkle. |