Give your friends $10 off their first order!
Refer a FRIEND


WHAT YOU WILL NEED:
Black top folding card blank ( cut to 7 1/2 x 5 1/2")
White card ( 7 1/2 x 5 1/2")
Book page (approx 7 1/2 x 5 1/2")
White card (2 x 1 1/2")
Stamps from Imala Rose Ornament
Stamps from Smile Everyday Lamination Stamp Collection
Dies from Pressed Flowers Die Collection
Versafine Ink Pad: Onyx Black
Izink Pigments: Lychee, Wet Meadow, Stratosphere, Avalanche
Distress Oxide: Vintage Photo
Paint brush
White gel pen
Black pen
Sequins: Down The Bay
Gem pick up and pokey tool
Water spray bottle
Eureka 101
Paper Trimmer
Perfect Together Glue
Foam Pads (optional)
Die Cutting machine
[click image to enlarge] 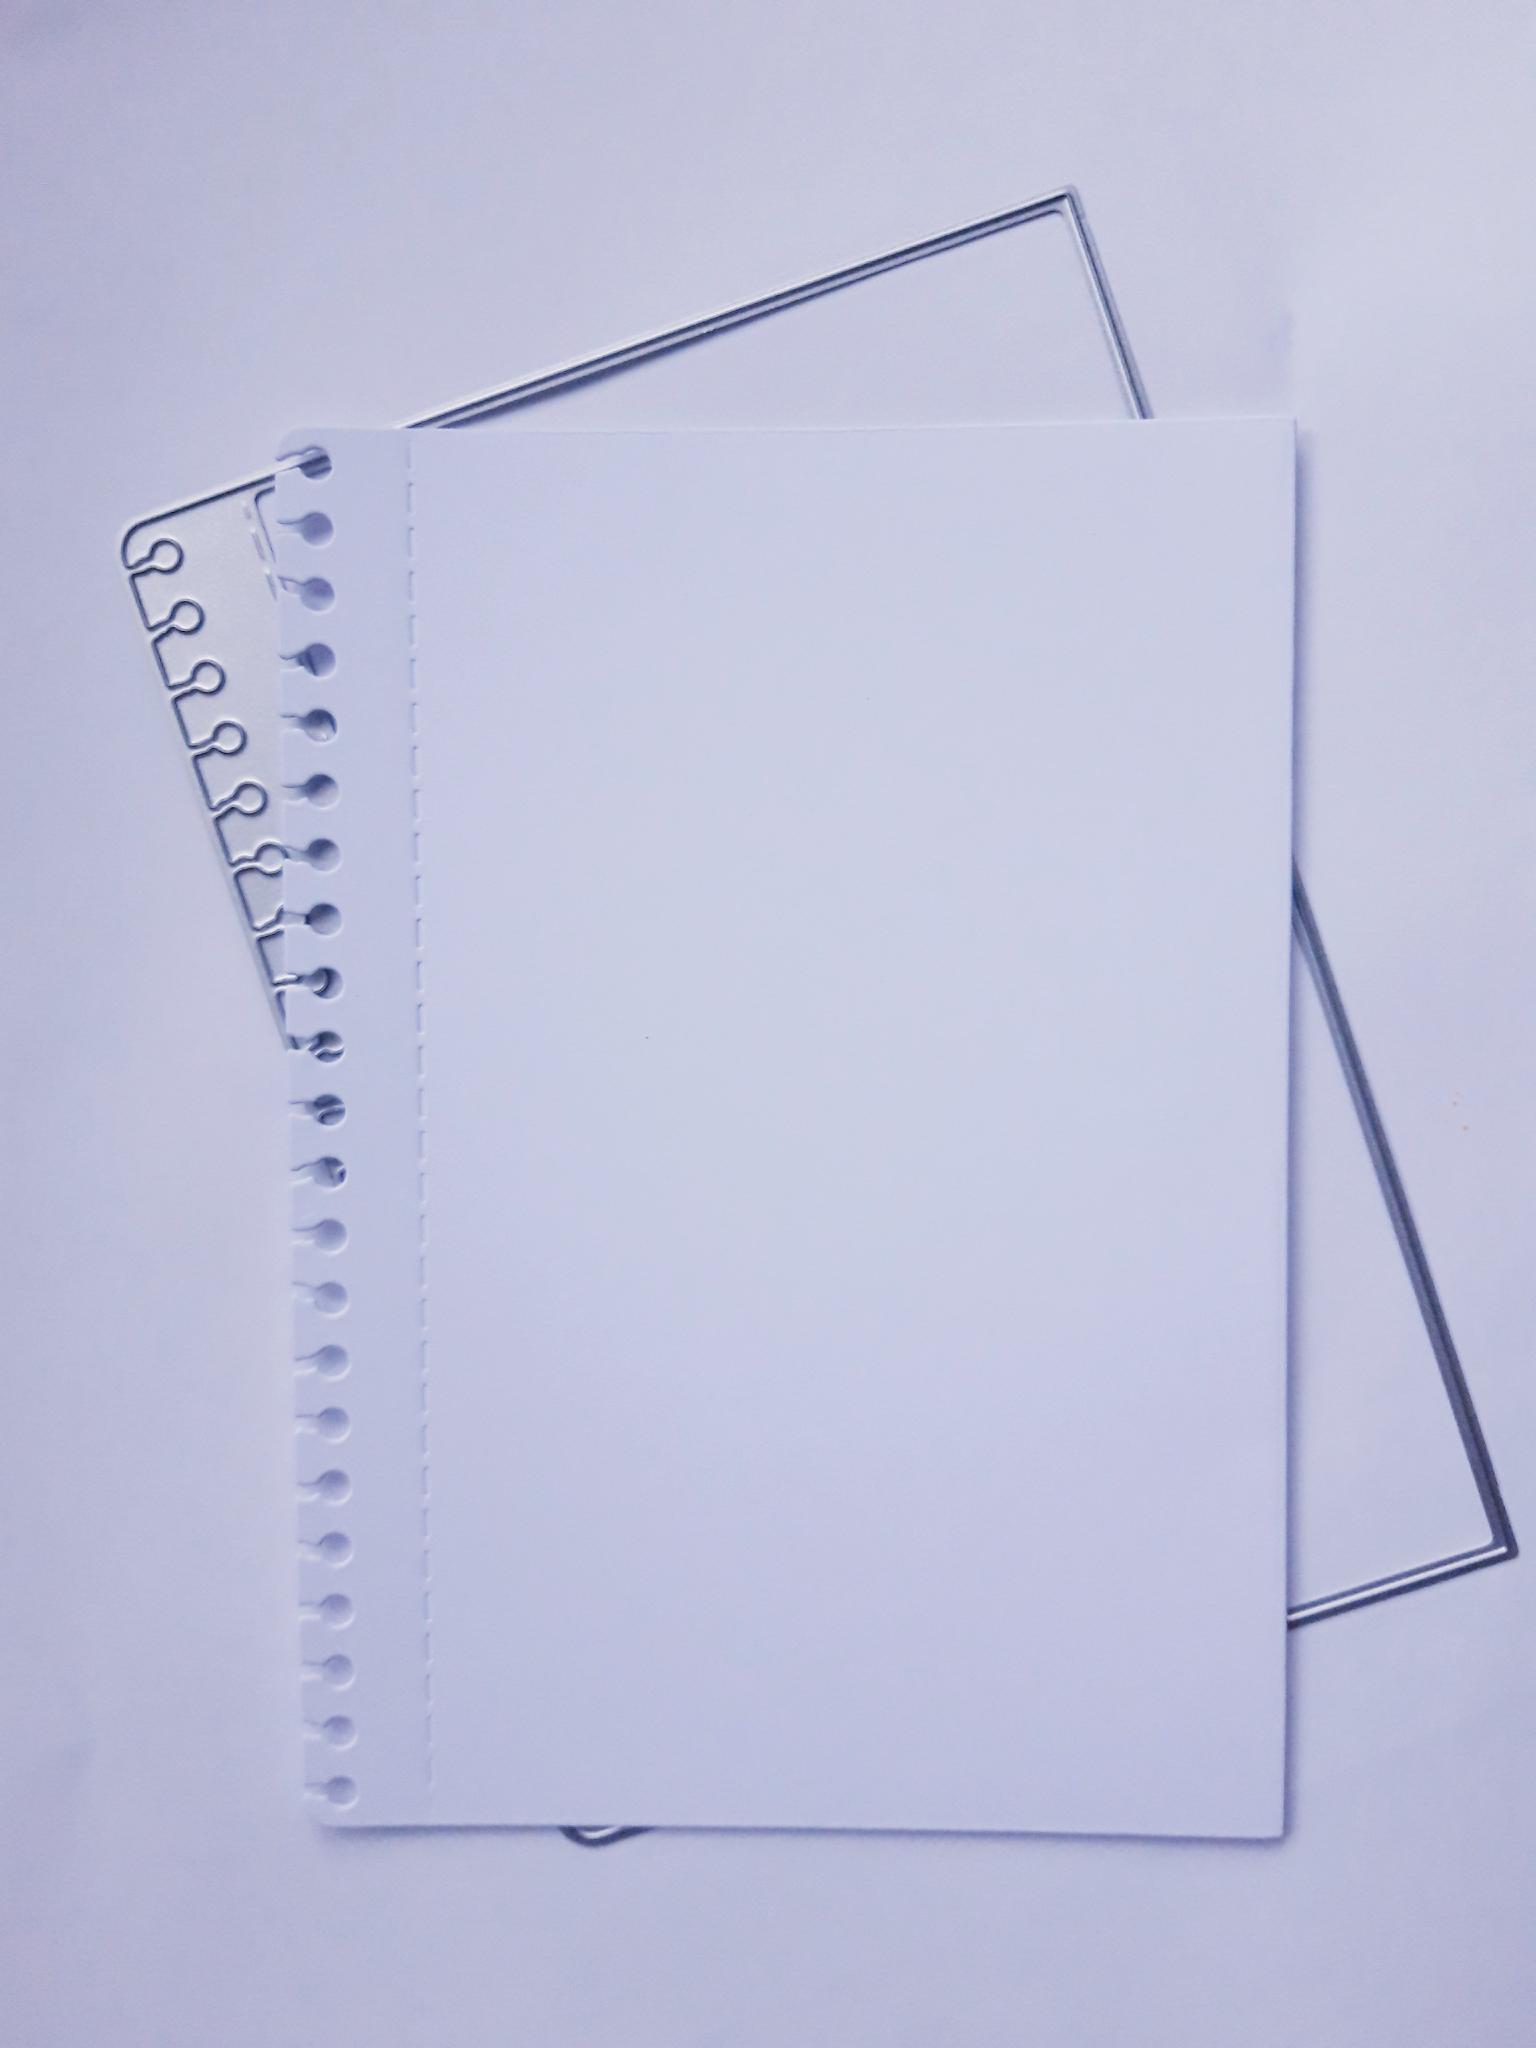
|
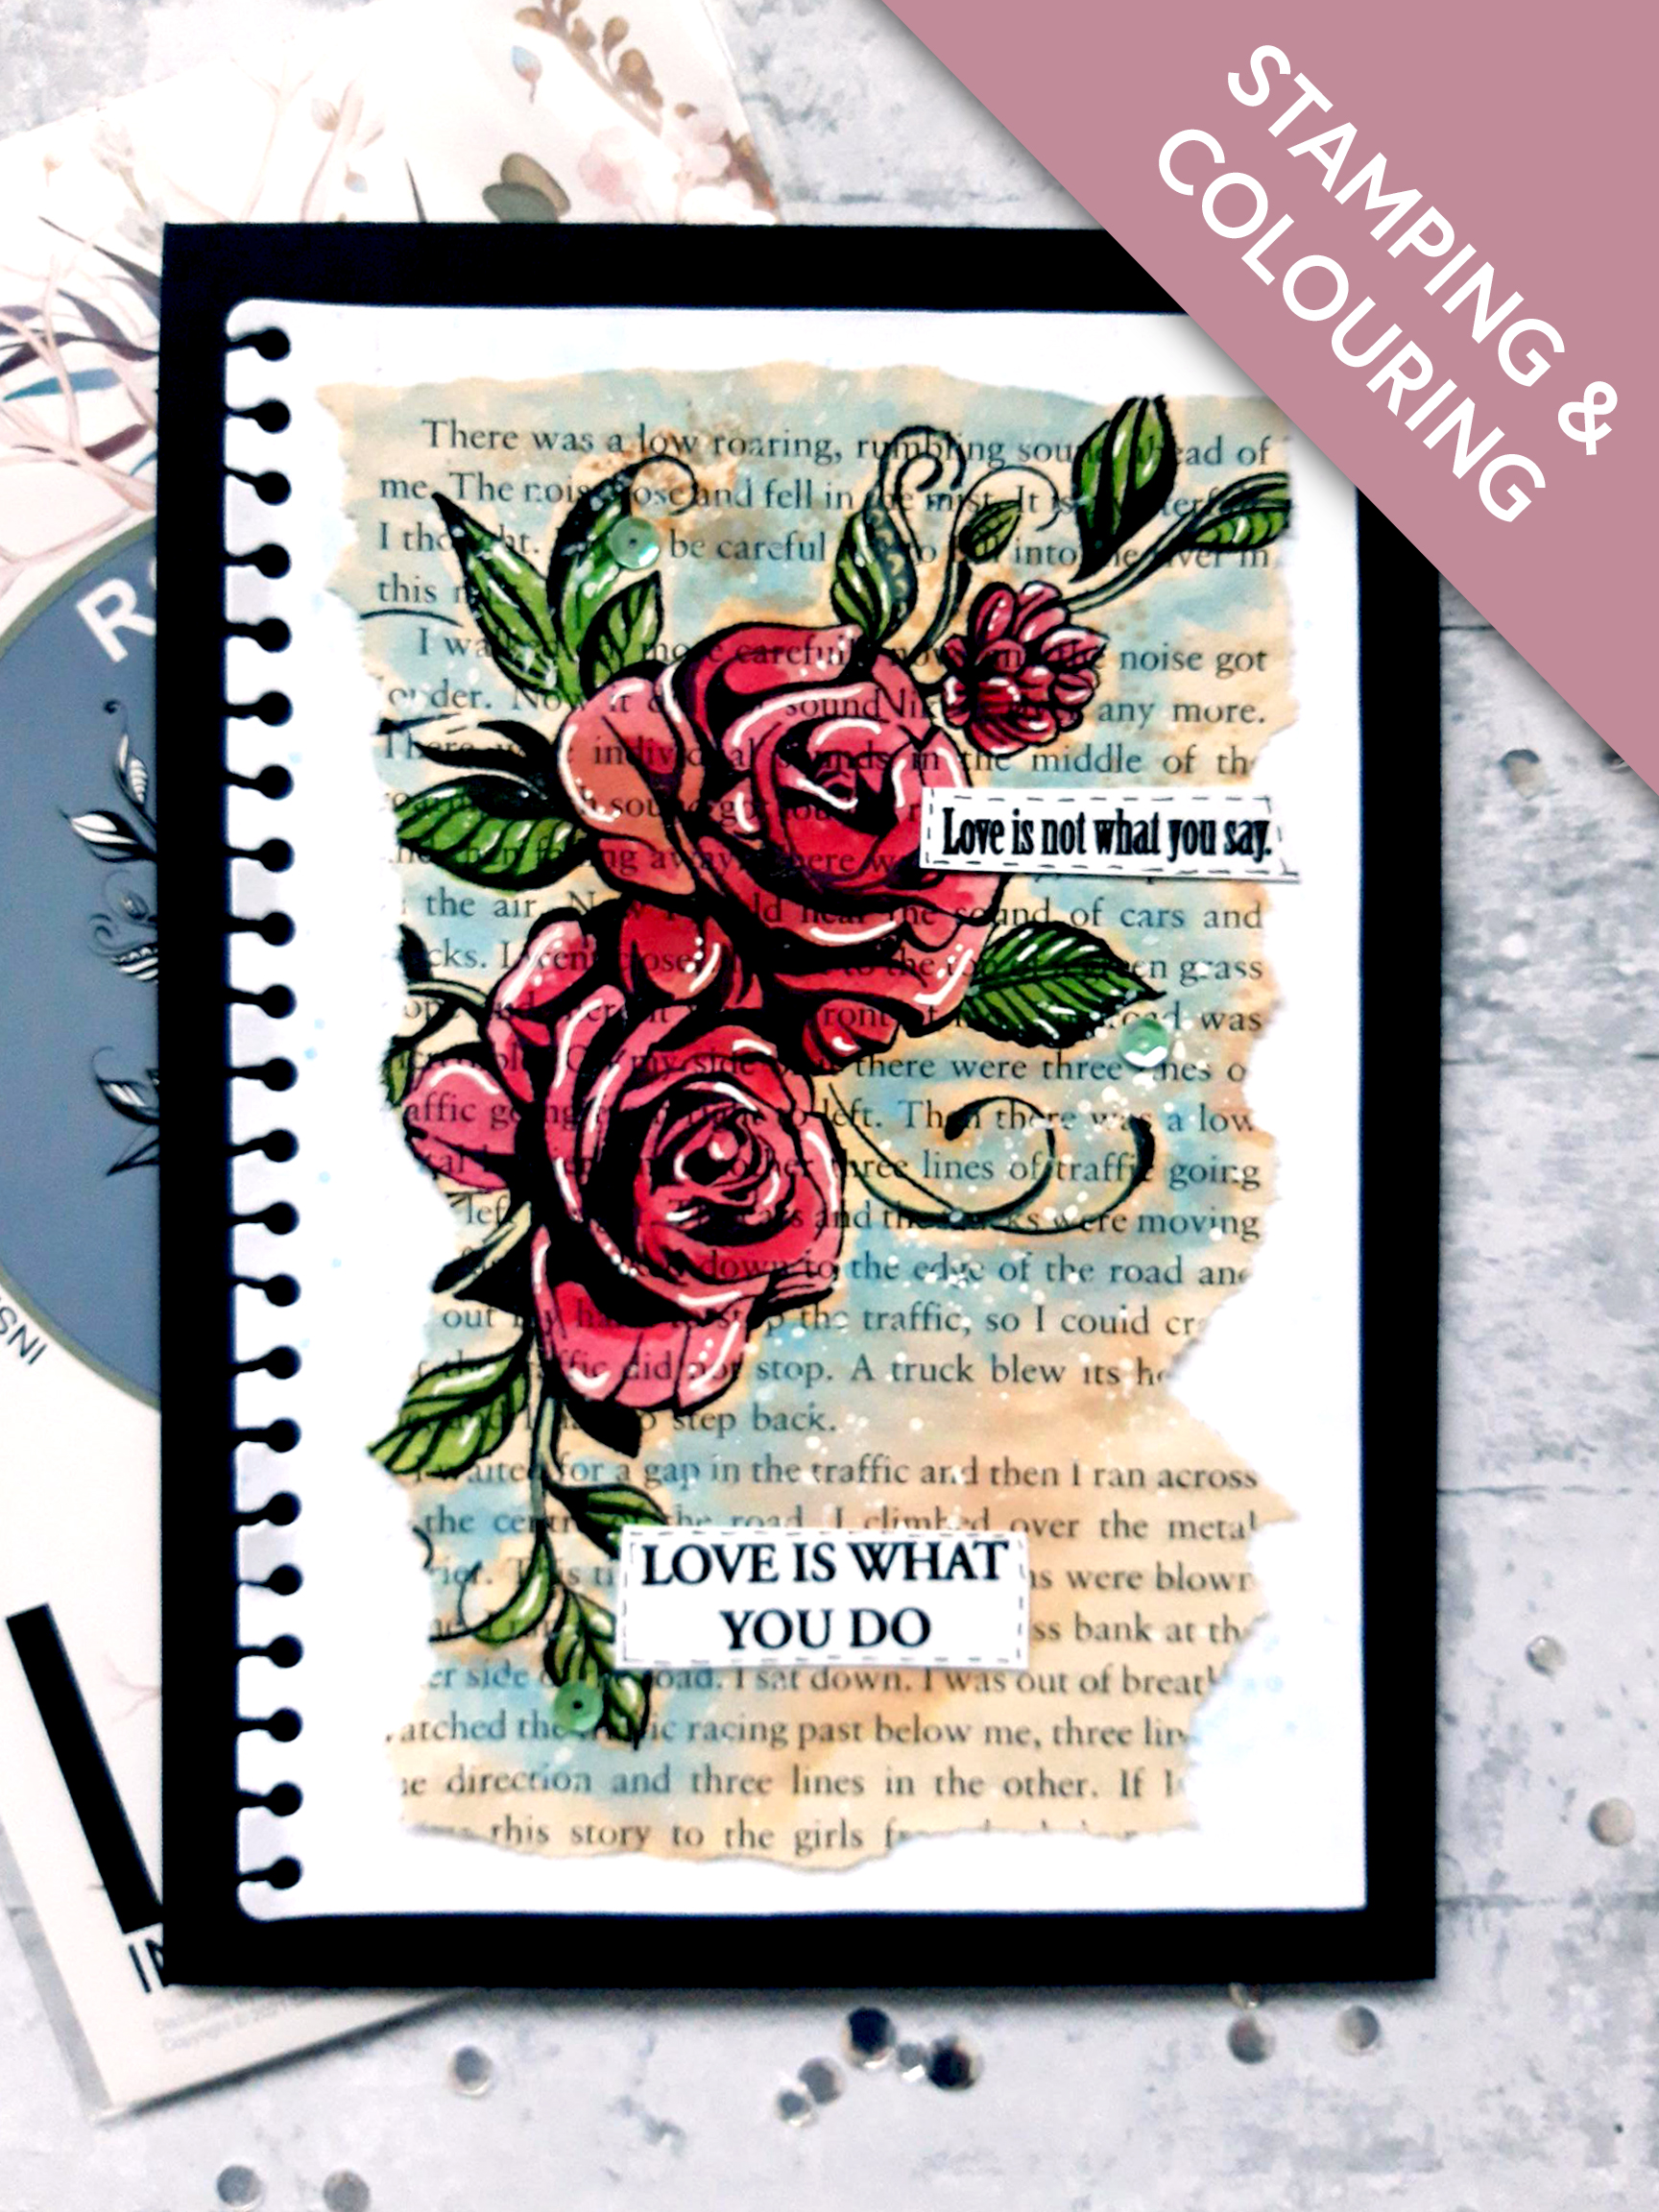
Place the page die, from the Pressed Flowers Die Collection, on to the white card (7 1/2 x 5 1/2"). Run through your die cutting machine. |
|
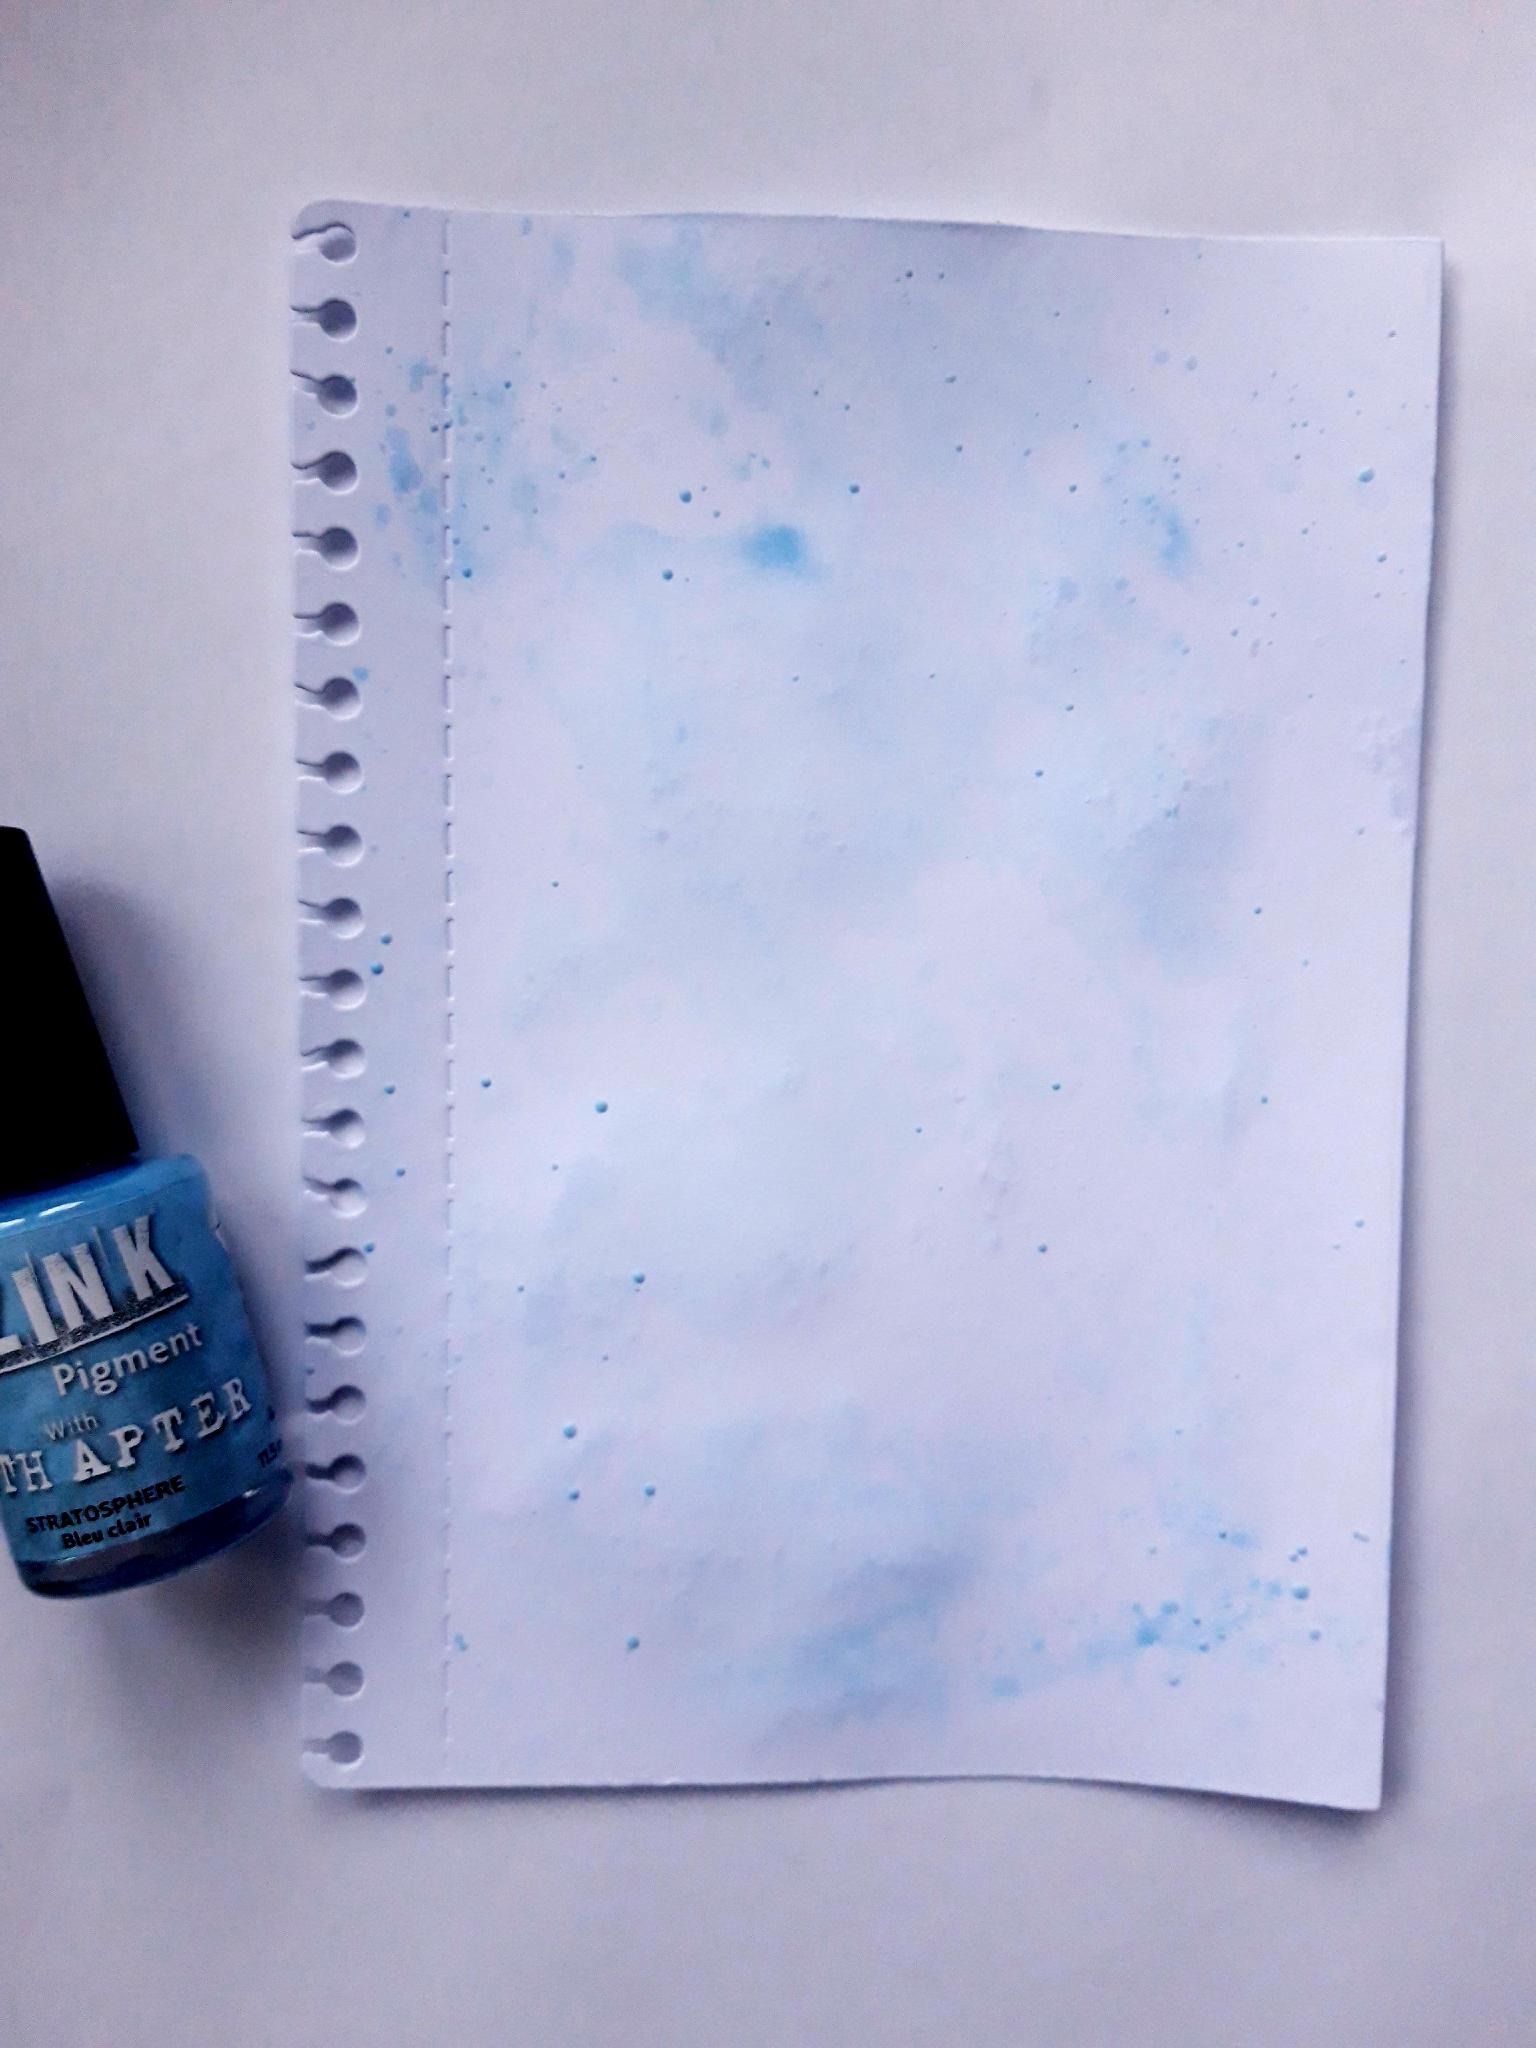
Apply a little of the Izink Stratosphere Pigment on to a craft or glass mat. Spray with water, then pick up the ink on to your die cut page, to create your background. Set to one side to dry. |
|
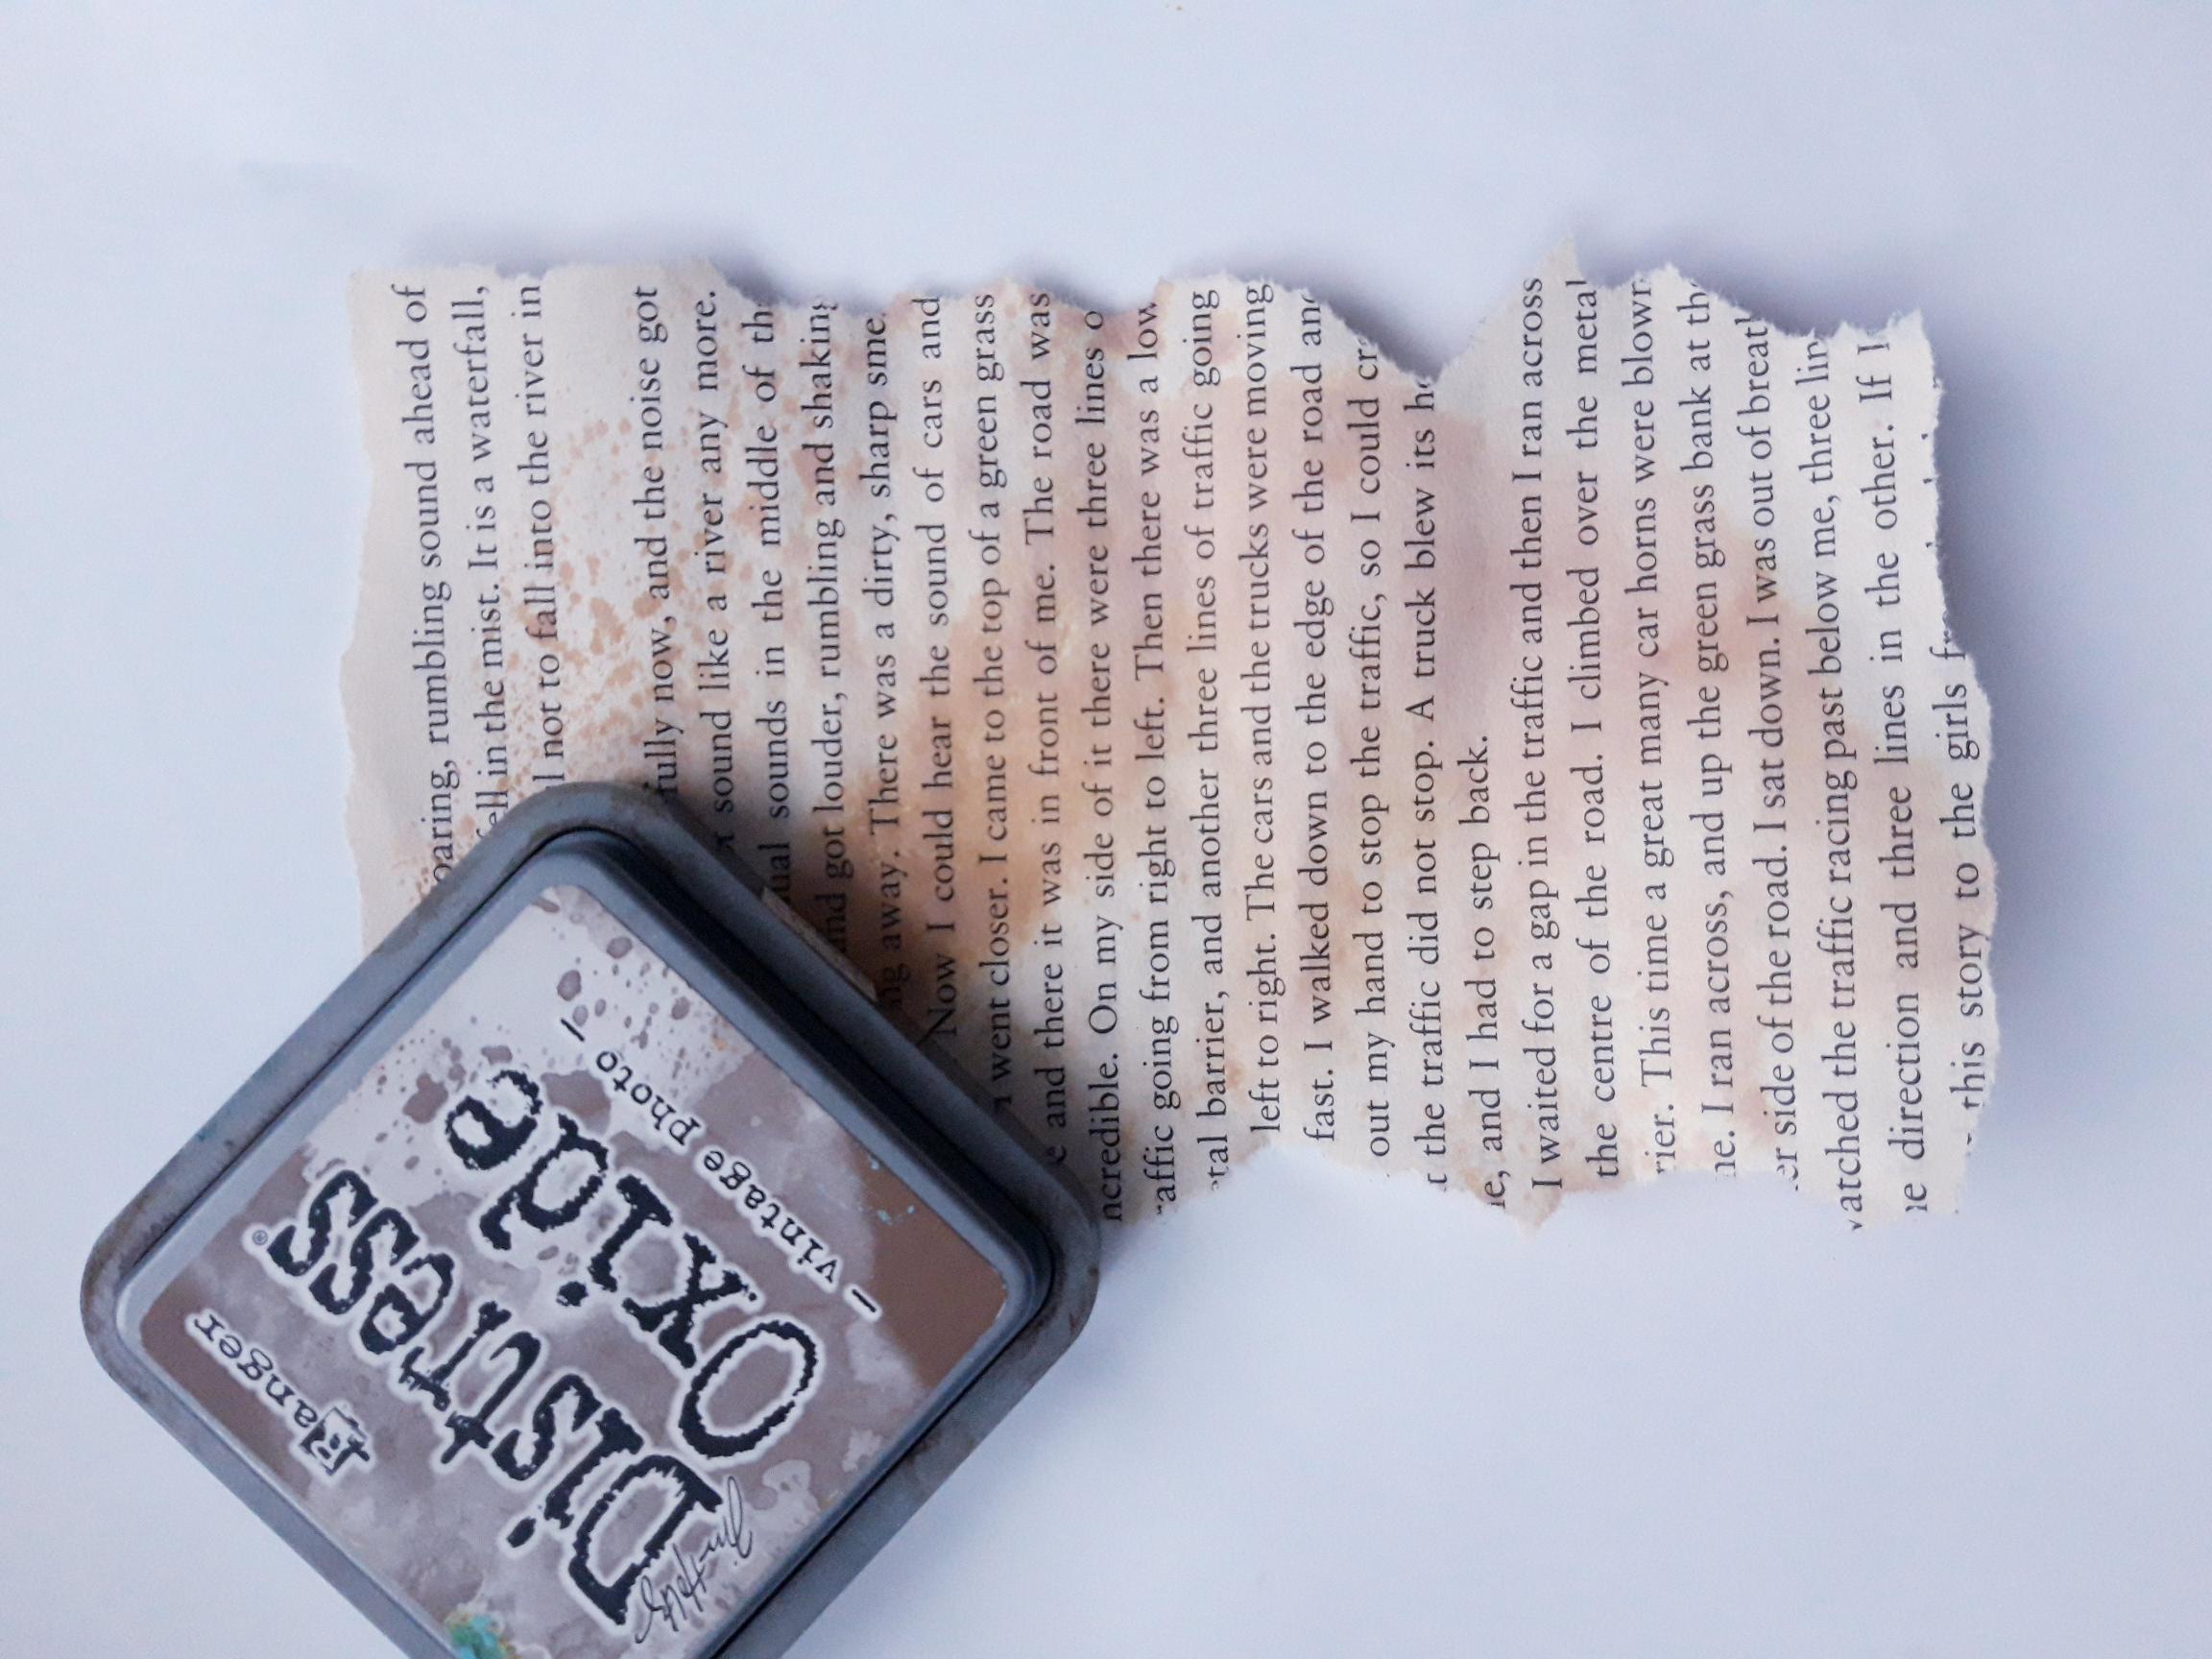
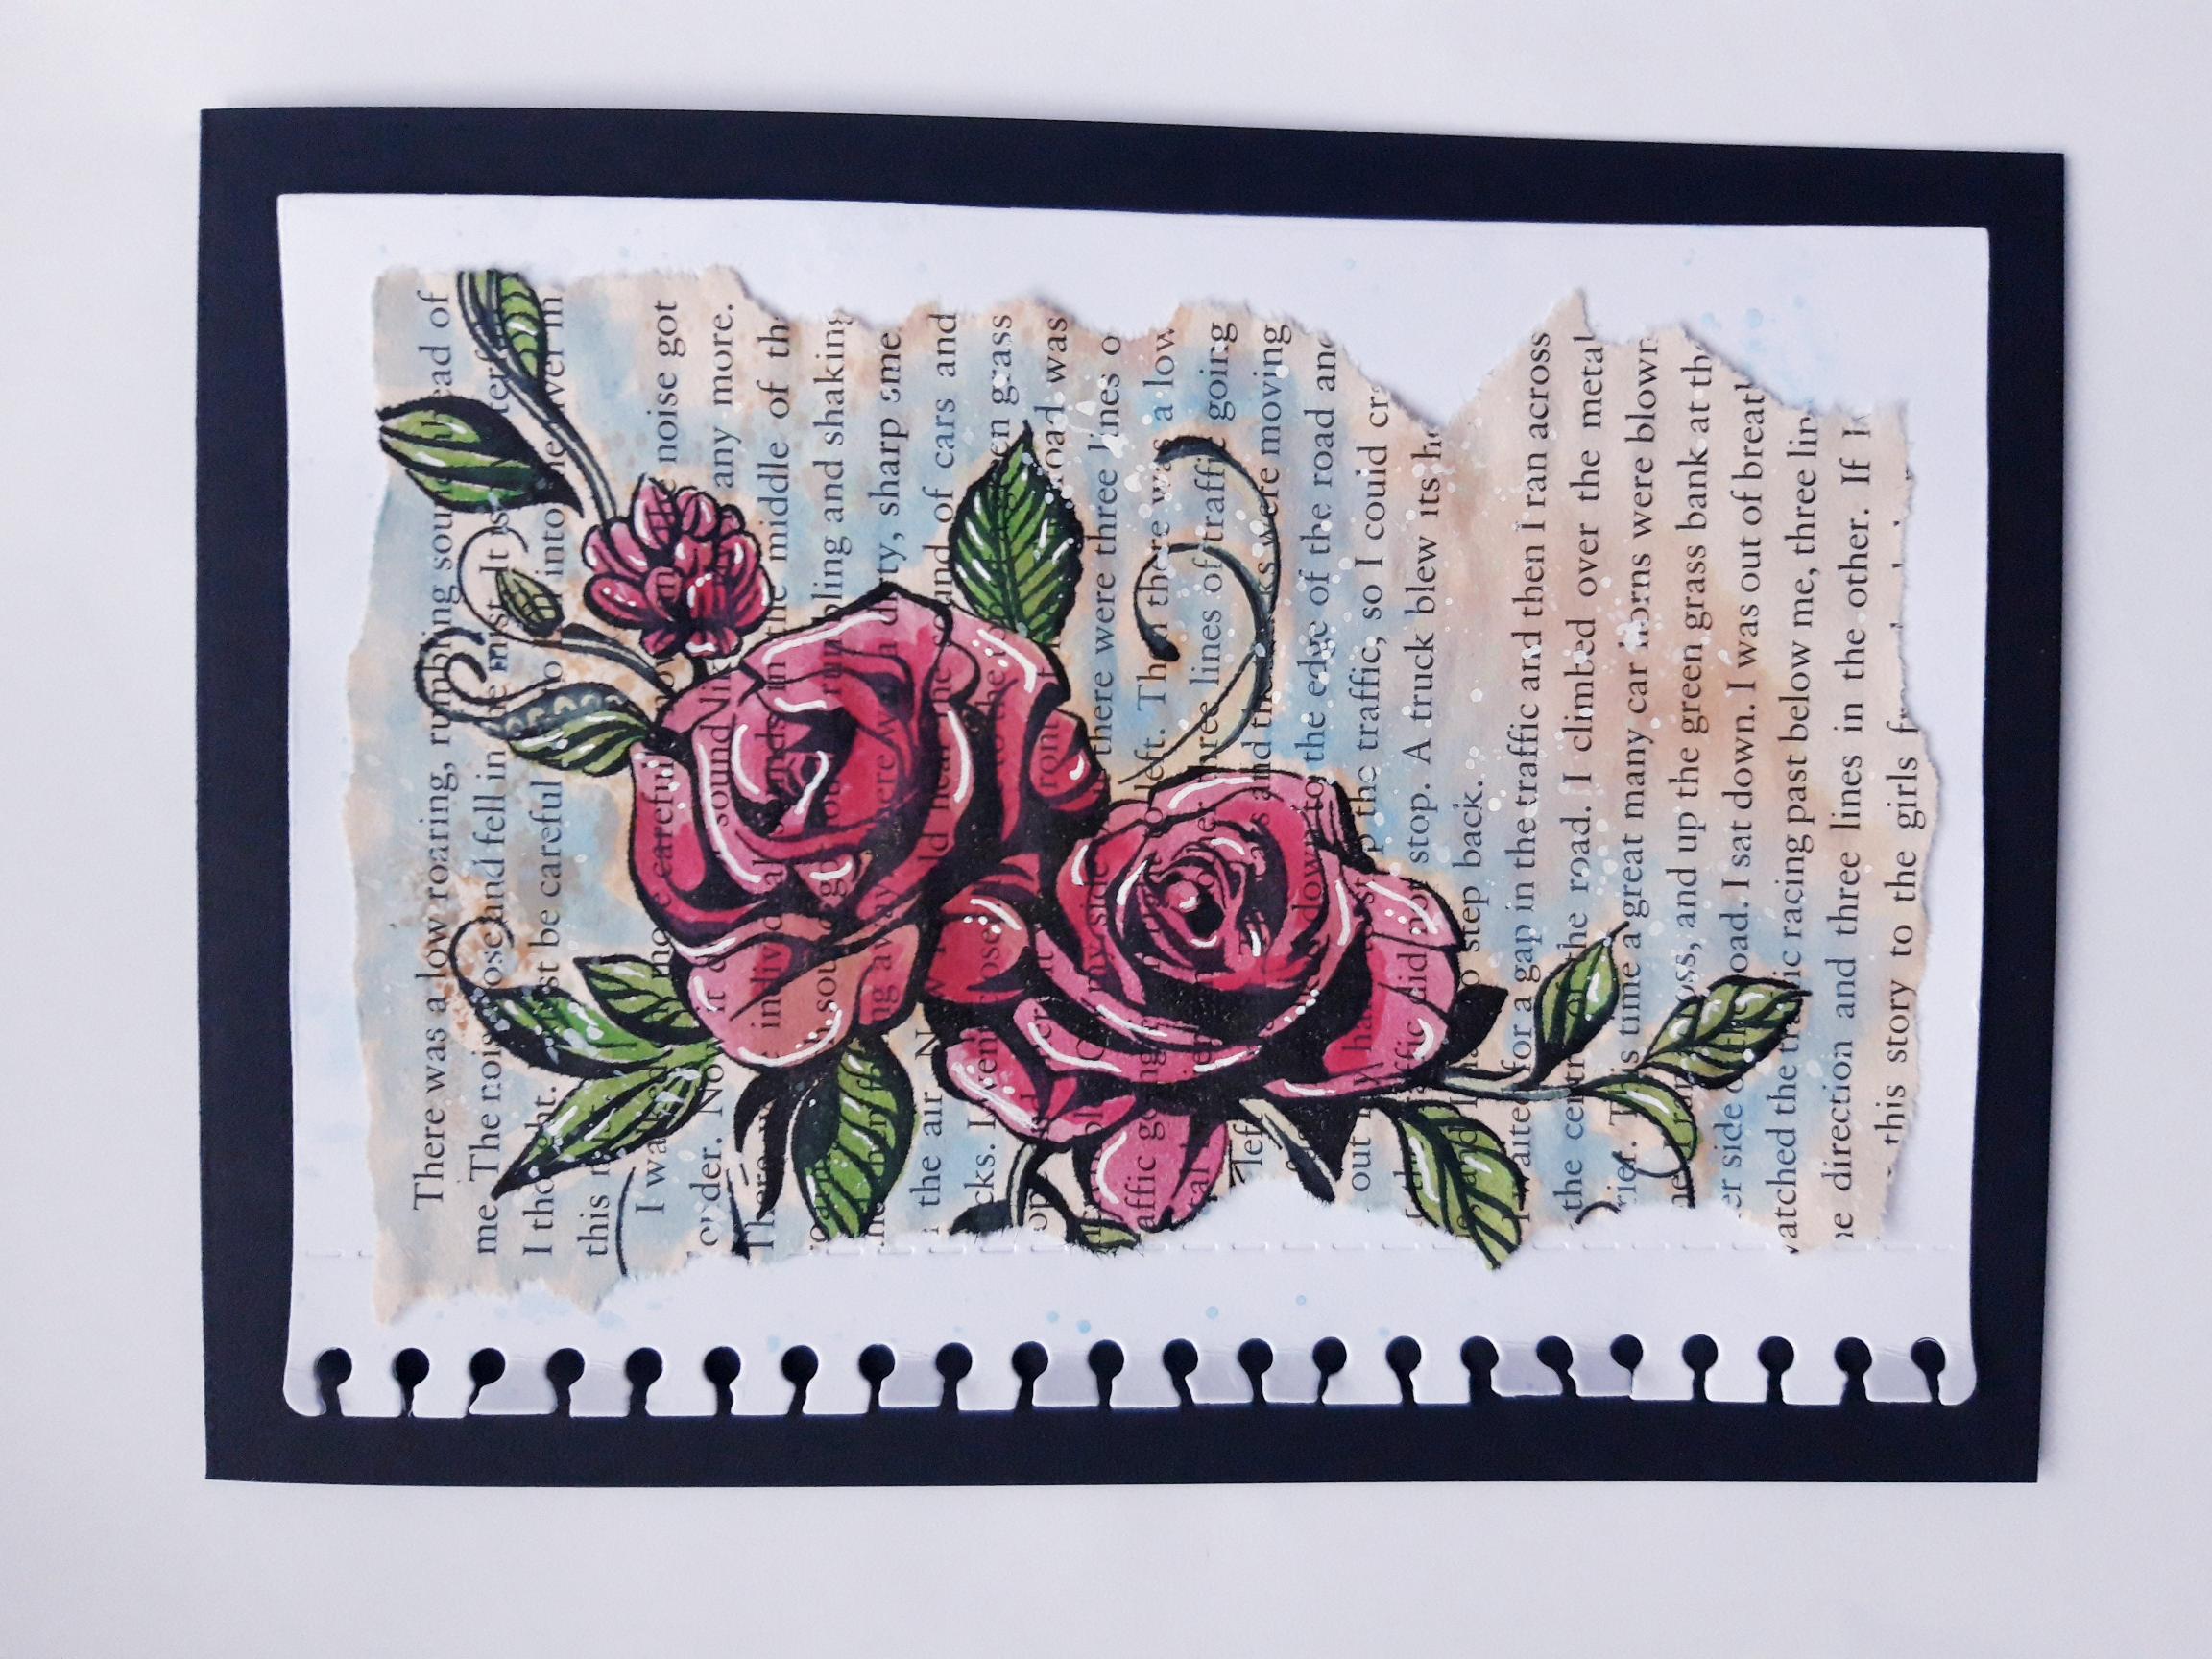
Tear your book page to the desired size, so it will fit on your die cut page. Add the Vintage Photo Oxide on to your craft mat. Spritz with water and pick up the ink with the torn book page. Allow the ink to dry before completing the next step. |

|
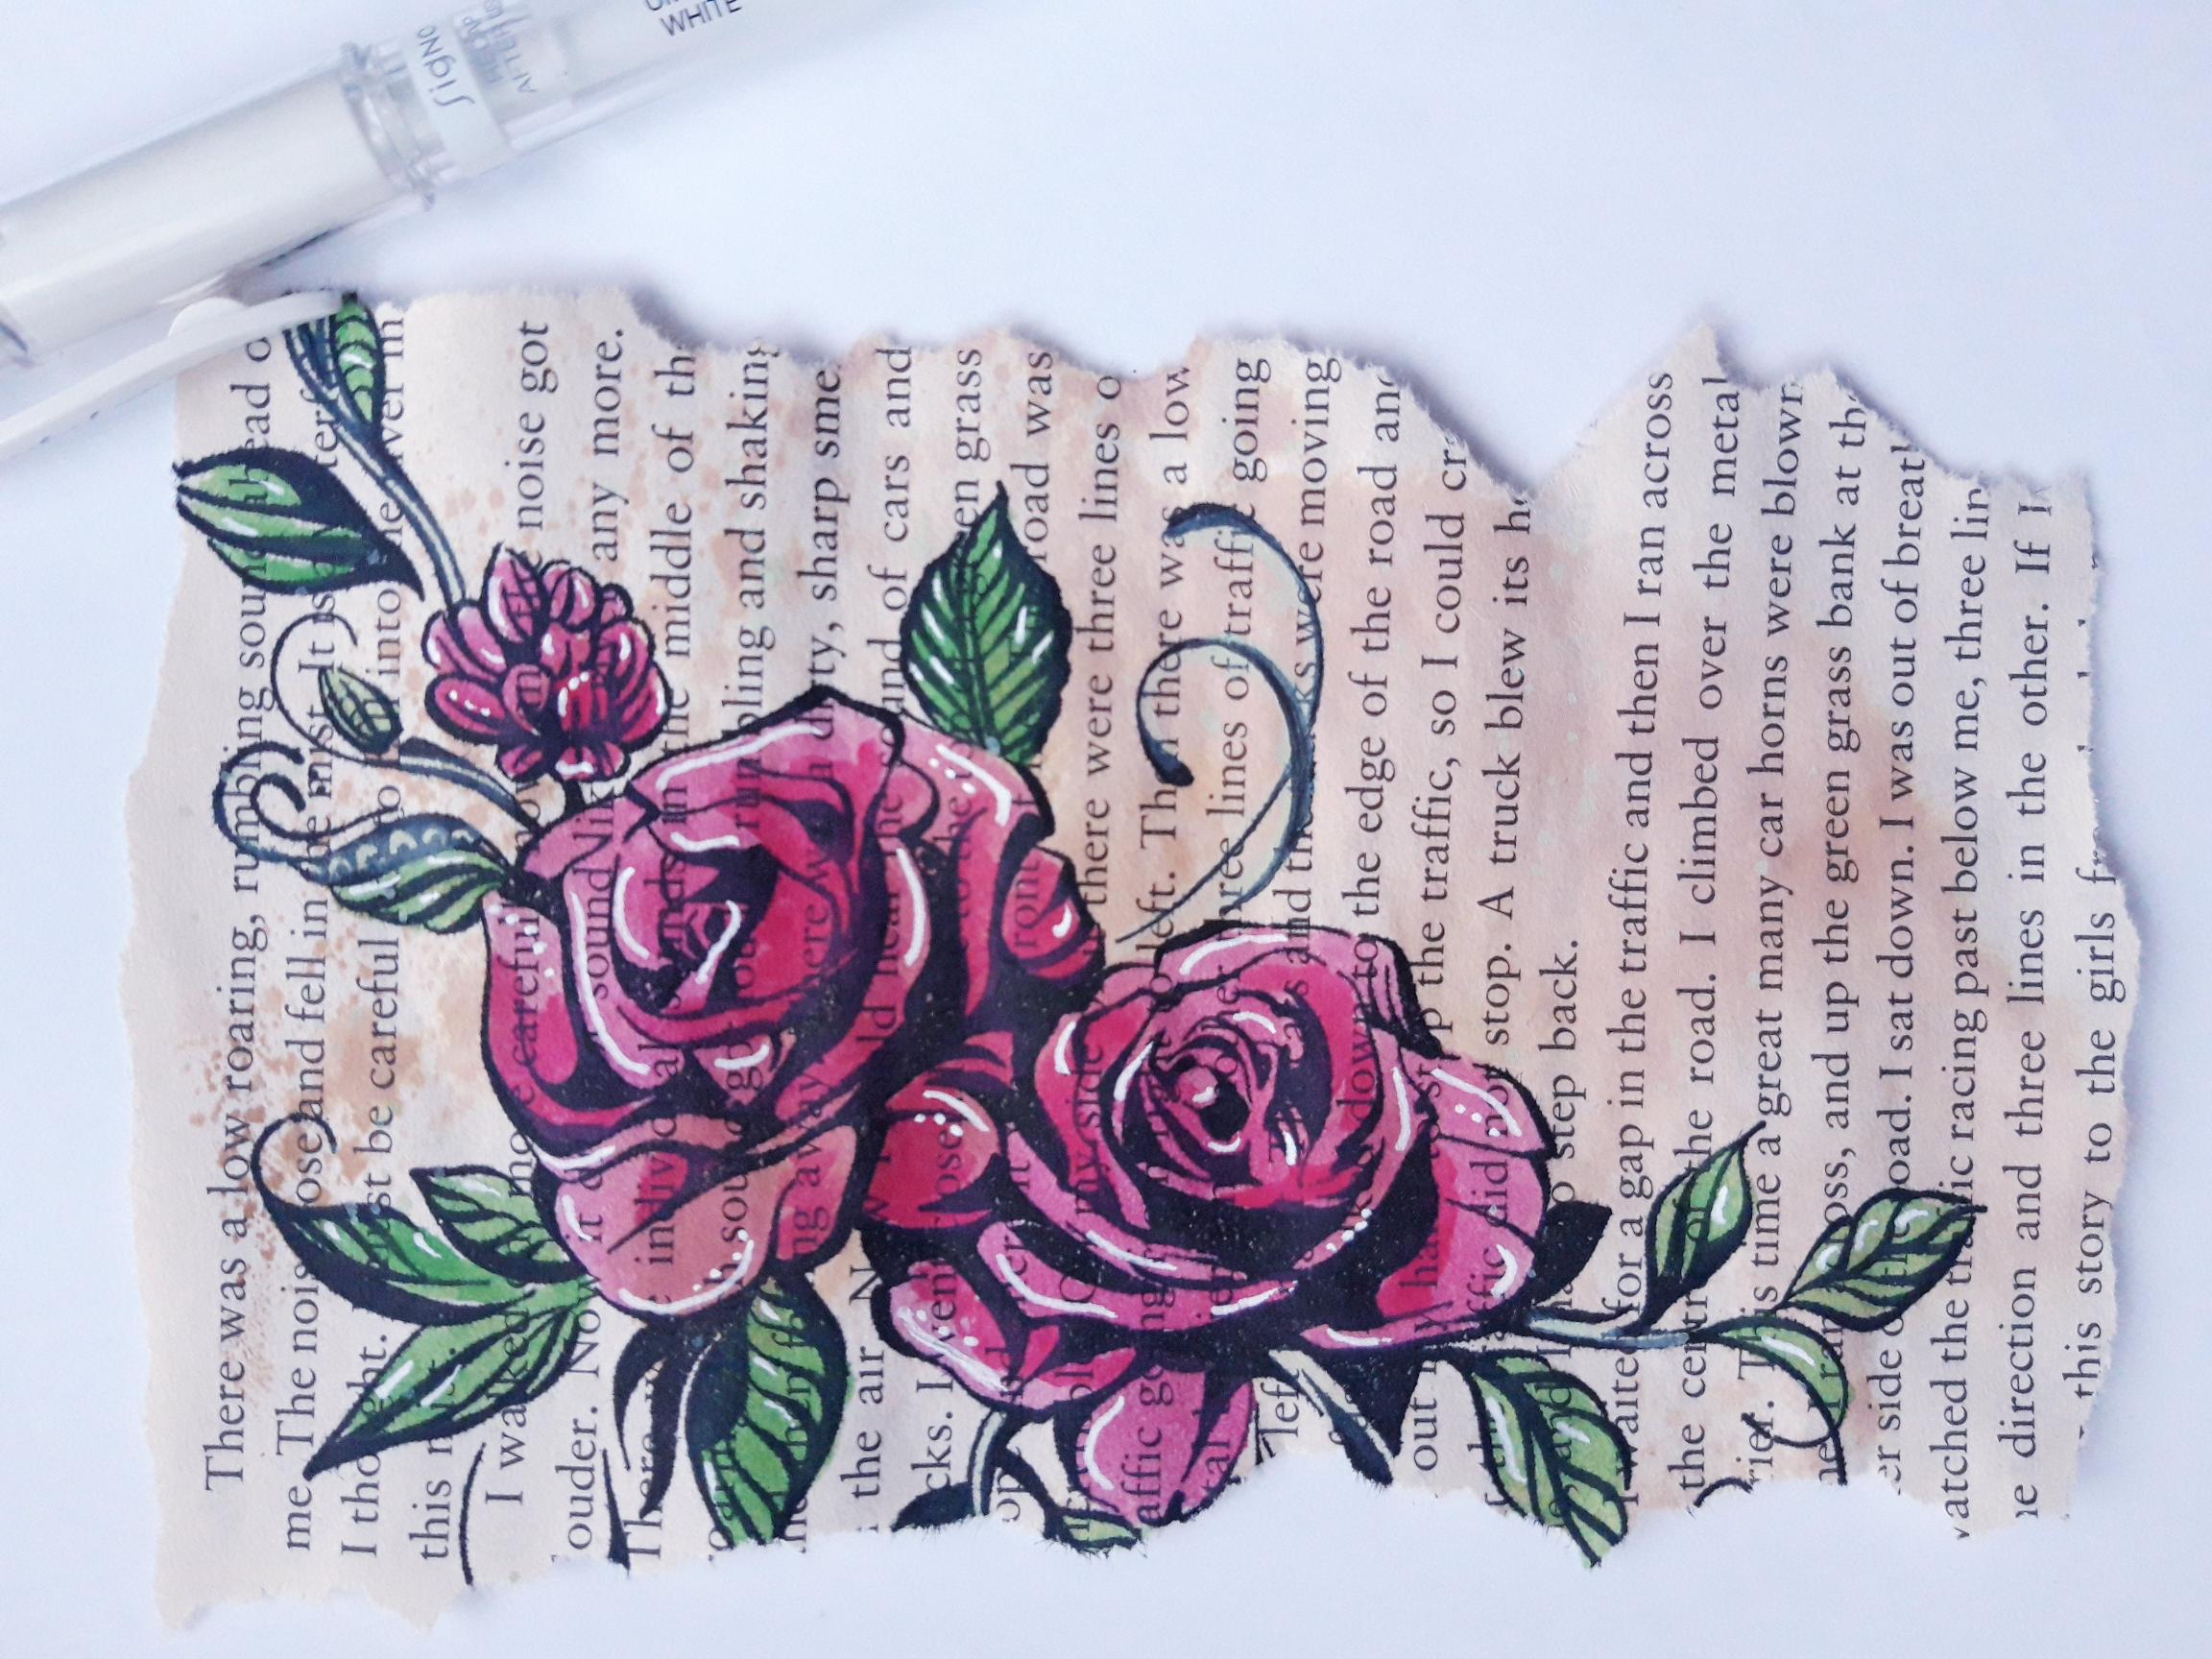
Ink up the rose stamp, from the Imala Rose Ornament set, with the Onyx Black Versafine. Stamp just off the left hand edge of your torn book page. |

|
Apply a little of the Lychee, Avalanche and Wet Meadow Pigments on to your craft mat. Add a little water and paint your stamped image. I mixed the Avalanche with both the Lychee and the Wet Meadow, using them as a base colour for my artwork. Then I used them on their own, to add depth and shadow where required. Allow the artwork to dry completely, before proceeding to the next step. |
|
Use your white gel pen to add accents, and highlights, to your artwork. |
|
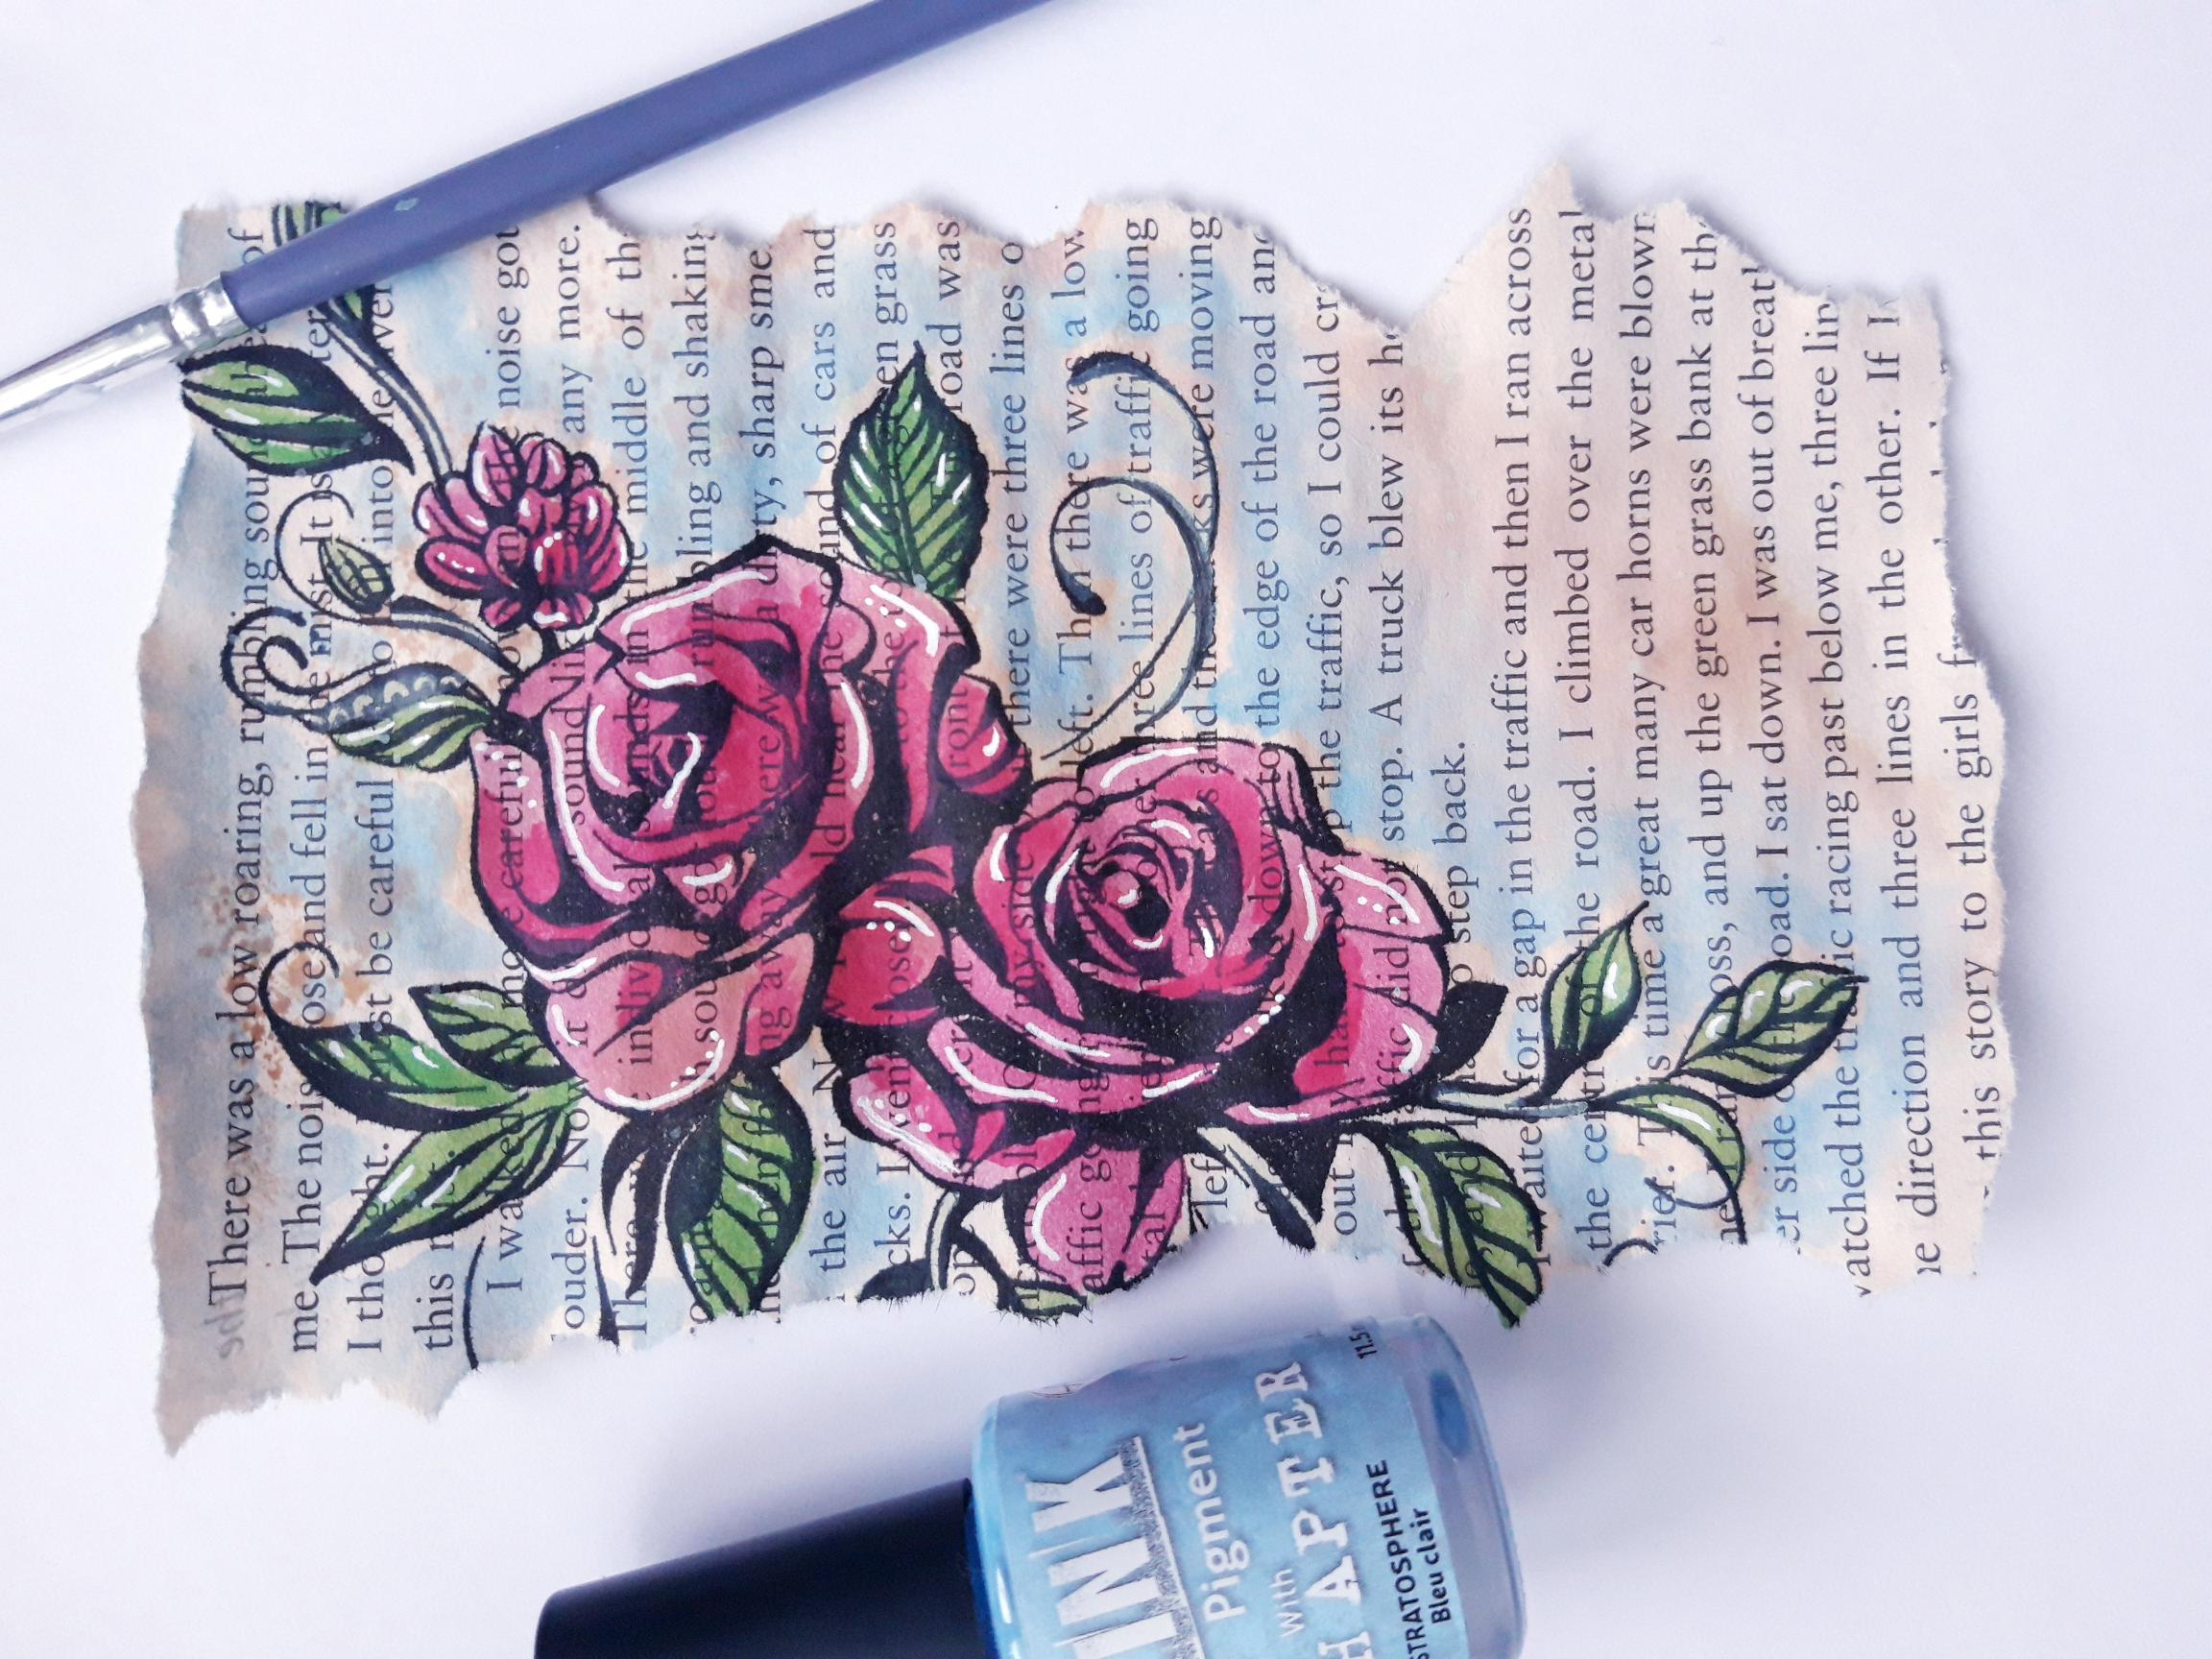
Apply a little of the Izink Stratosphere Pigment on to your craft mat. Add a little water and paint a wash around your artwork. Start off light, then you can go in and build up the colour where required, to add depth and shadow.
|
|
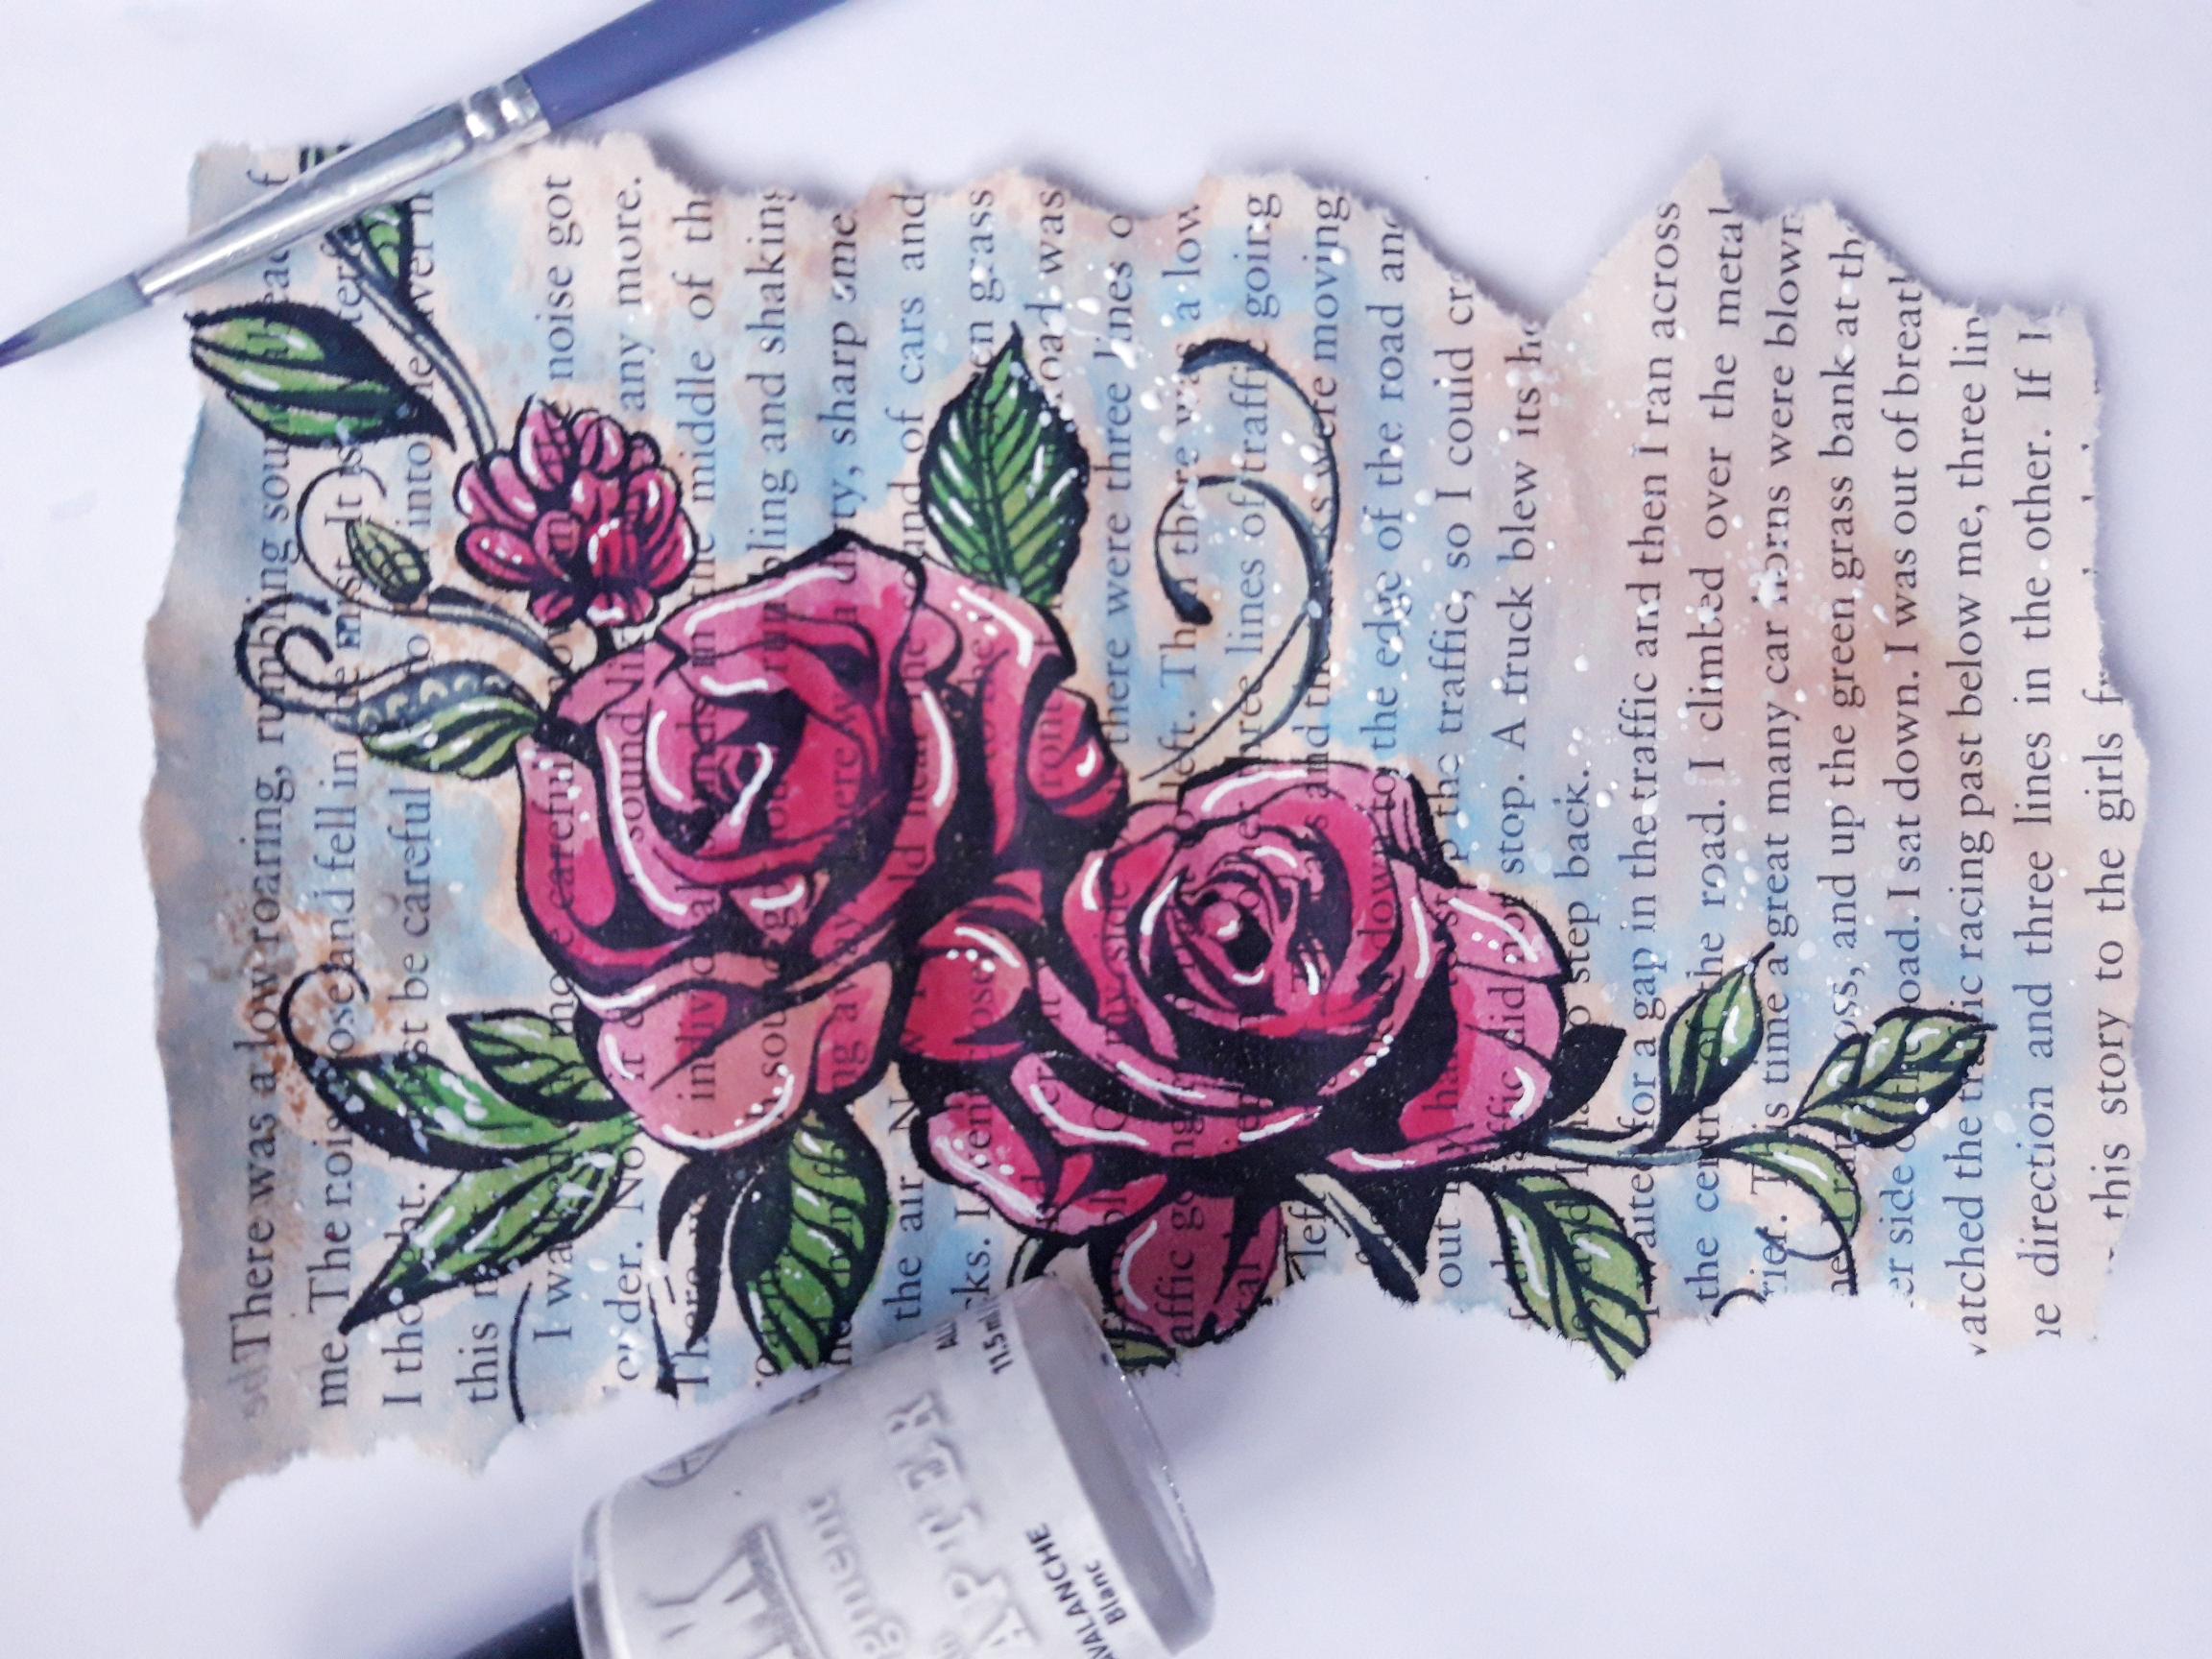
Apply a little of the Izink Avalanche Pigment on to your craft mat. Add a little water and splatter over your artwork, with a paint brush, as much as required...I like a lot of splats!! Dry off your artwork, before moving on to the next stage. |
|
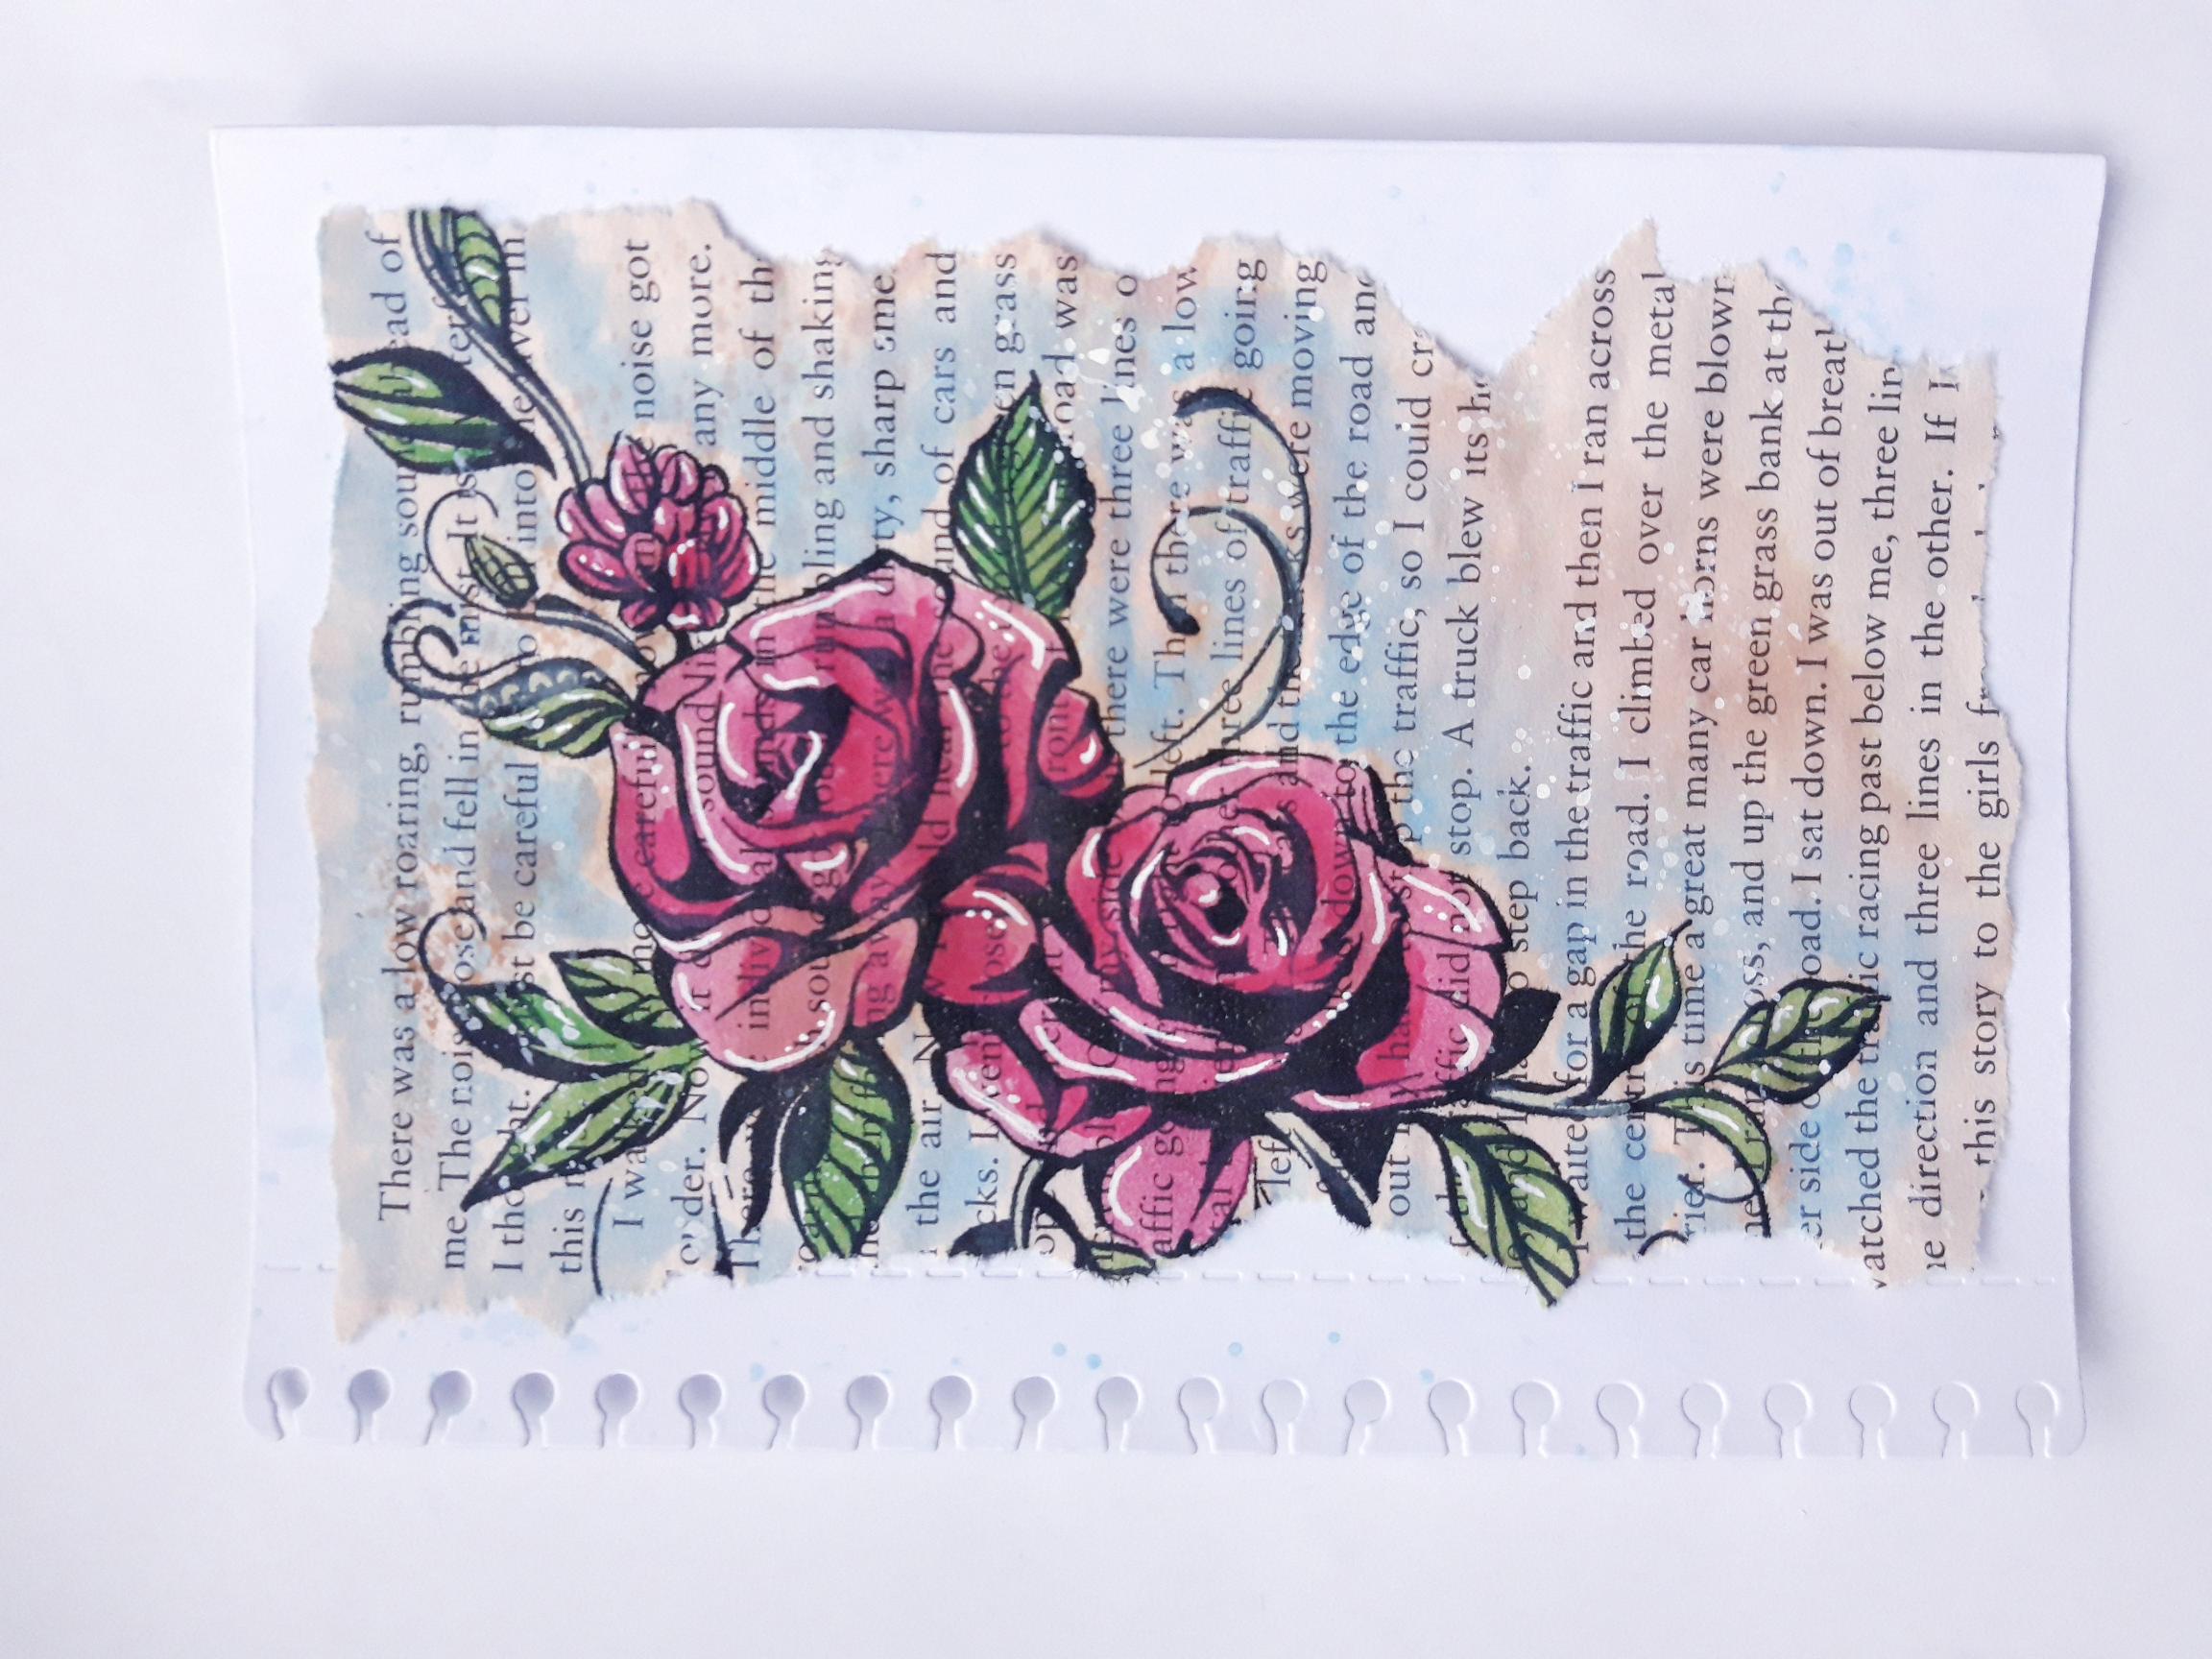
Adhere your artwork on to the die cut page you set aside earlier. |
|
Adhere on to the front of your black, top folding card blank. Set to one side. |
|
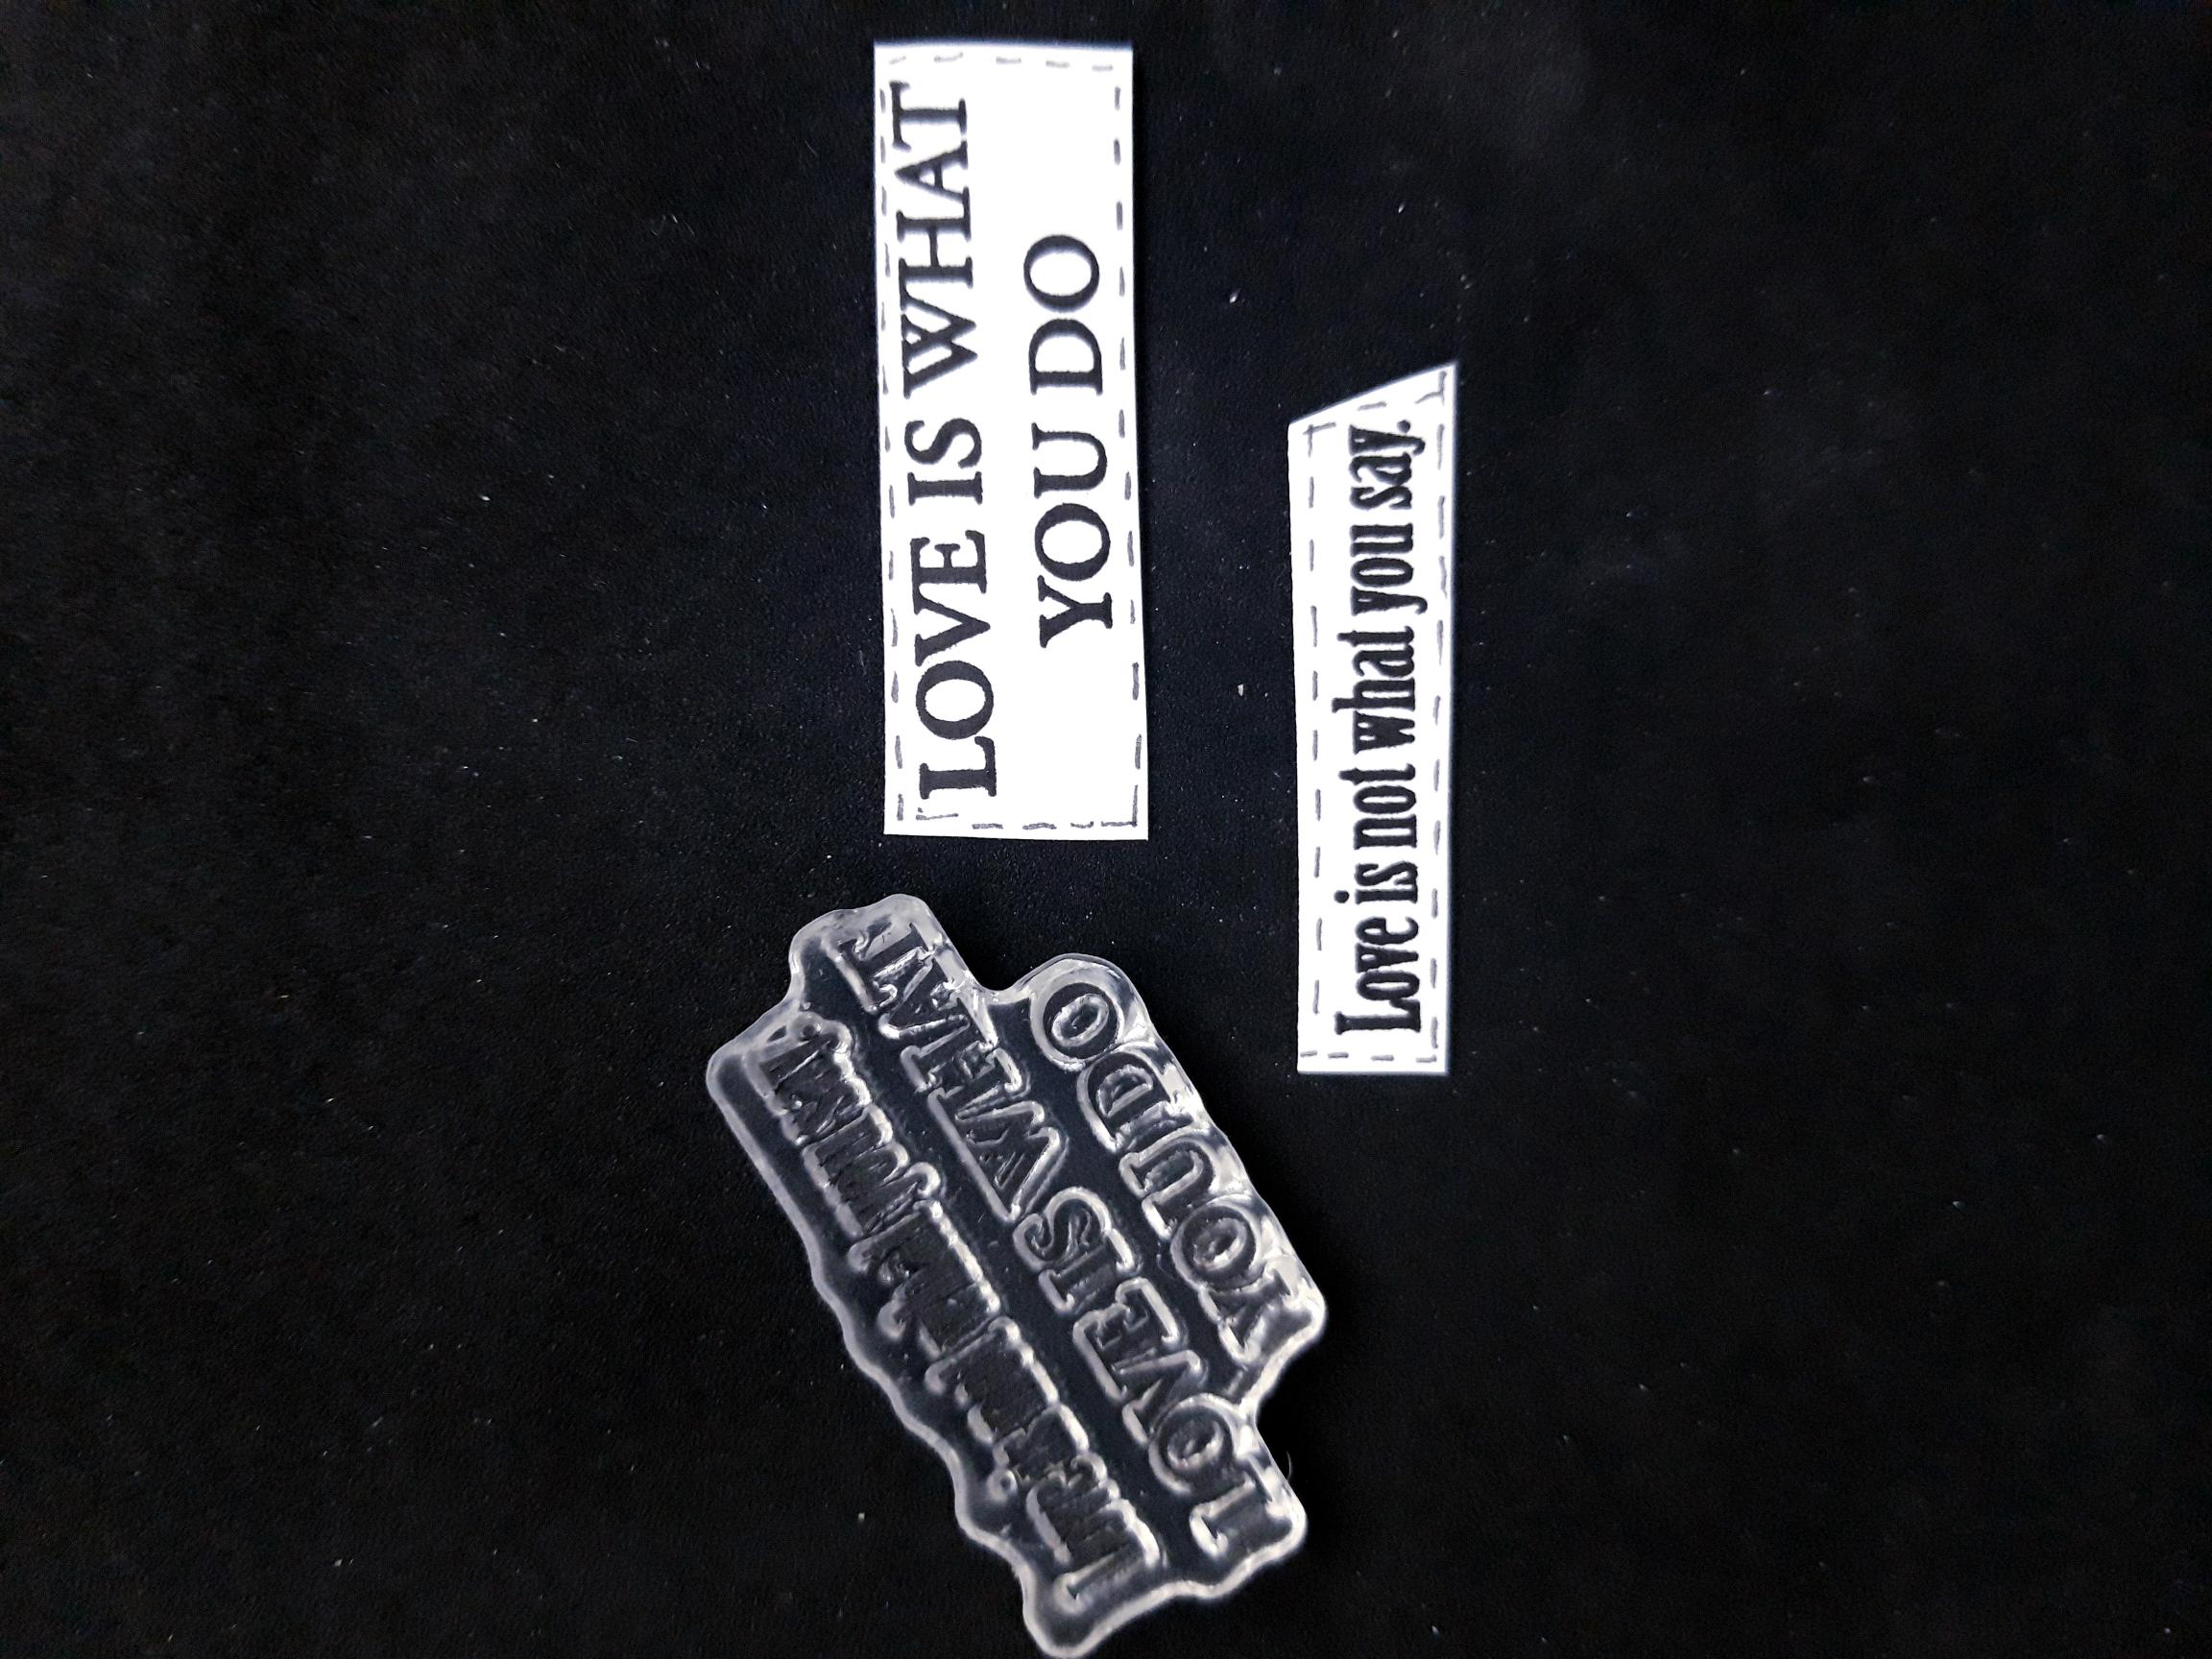
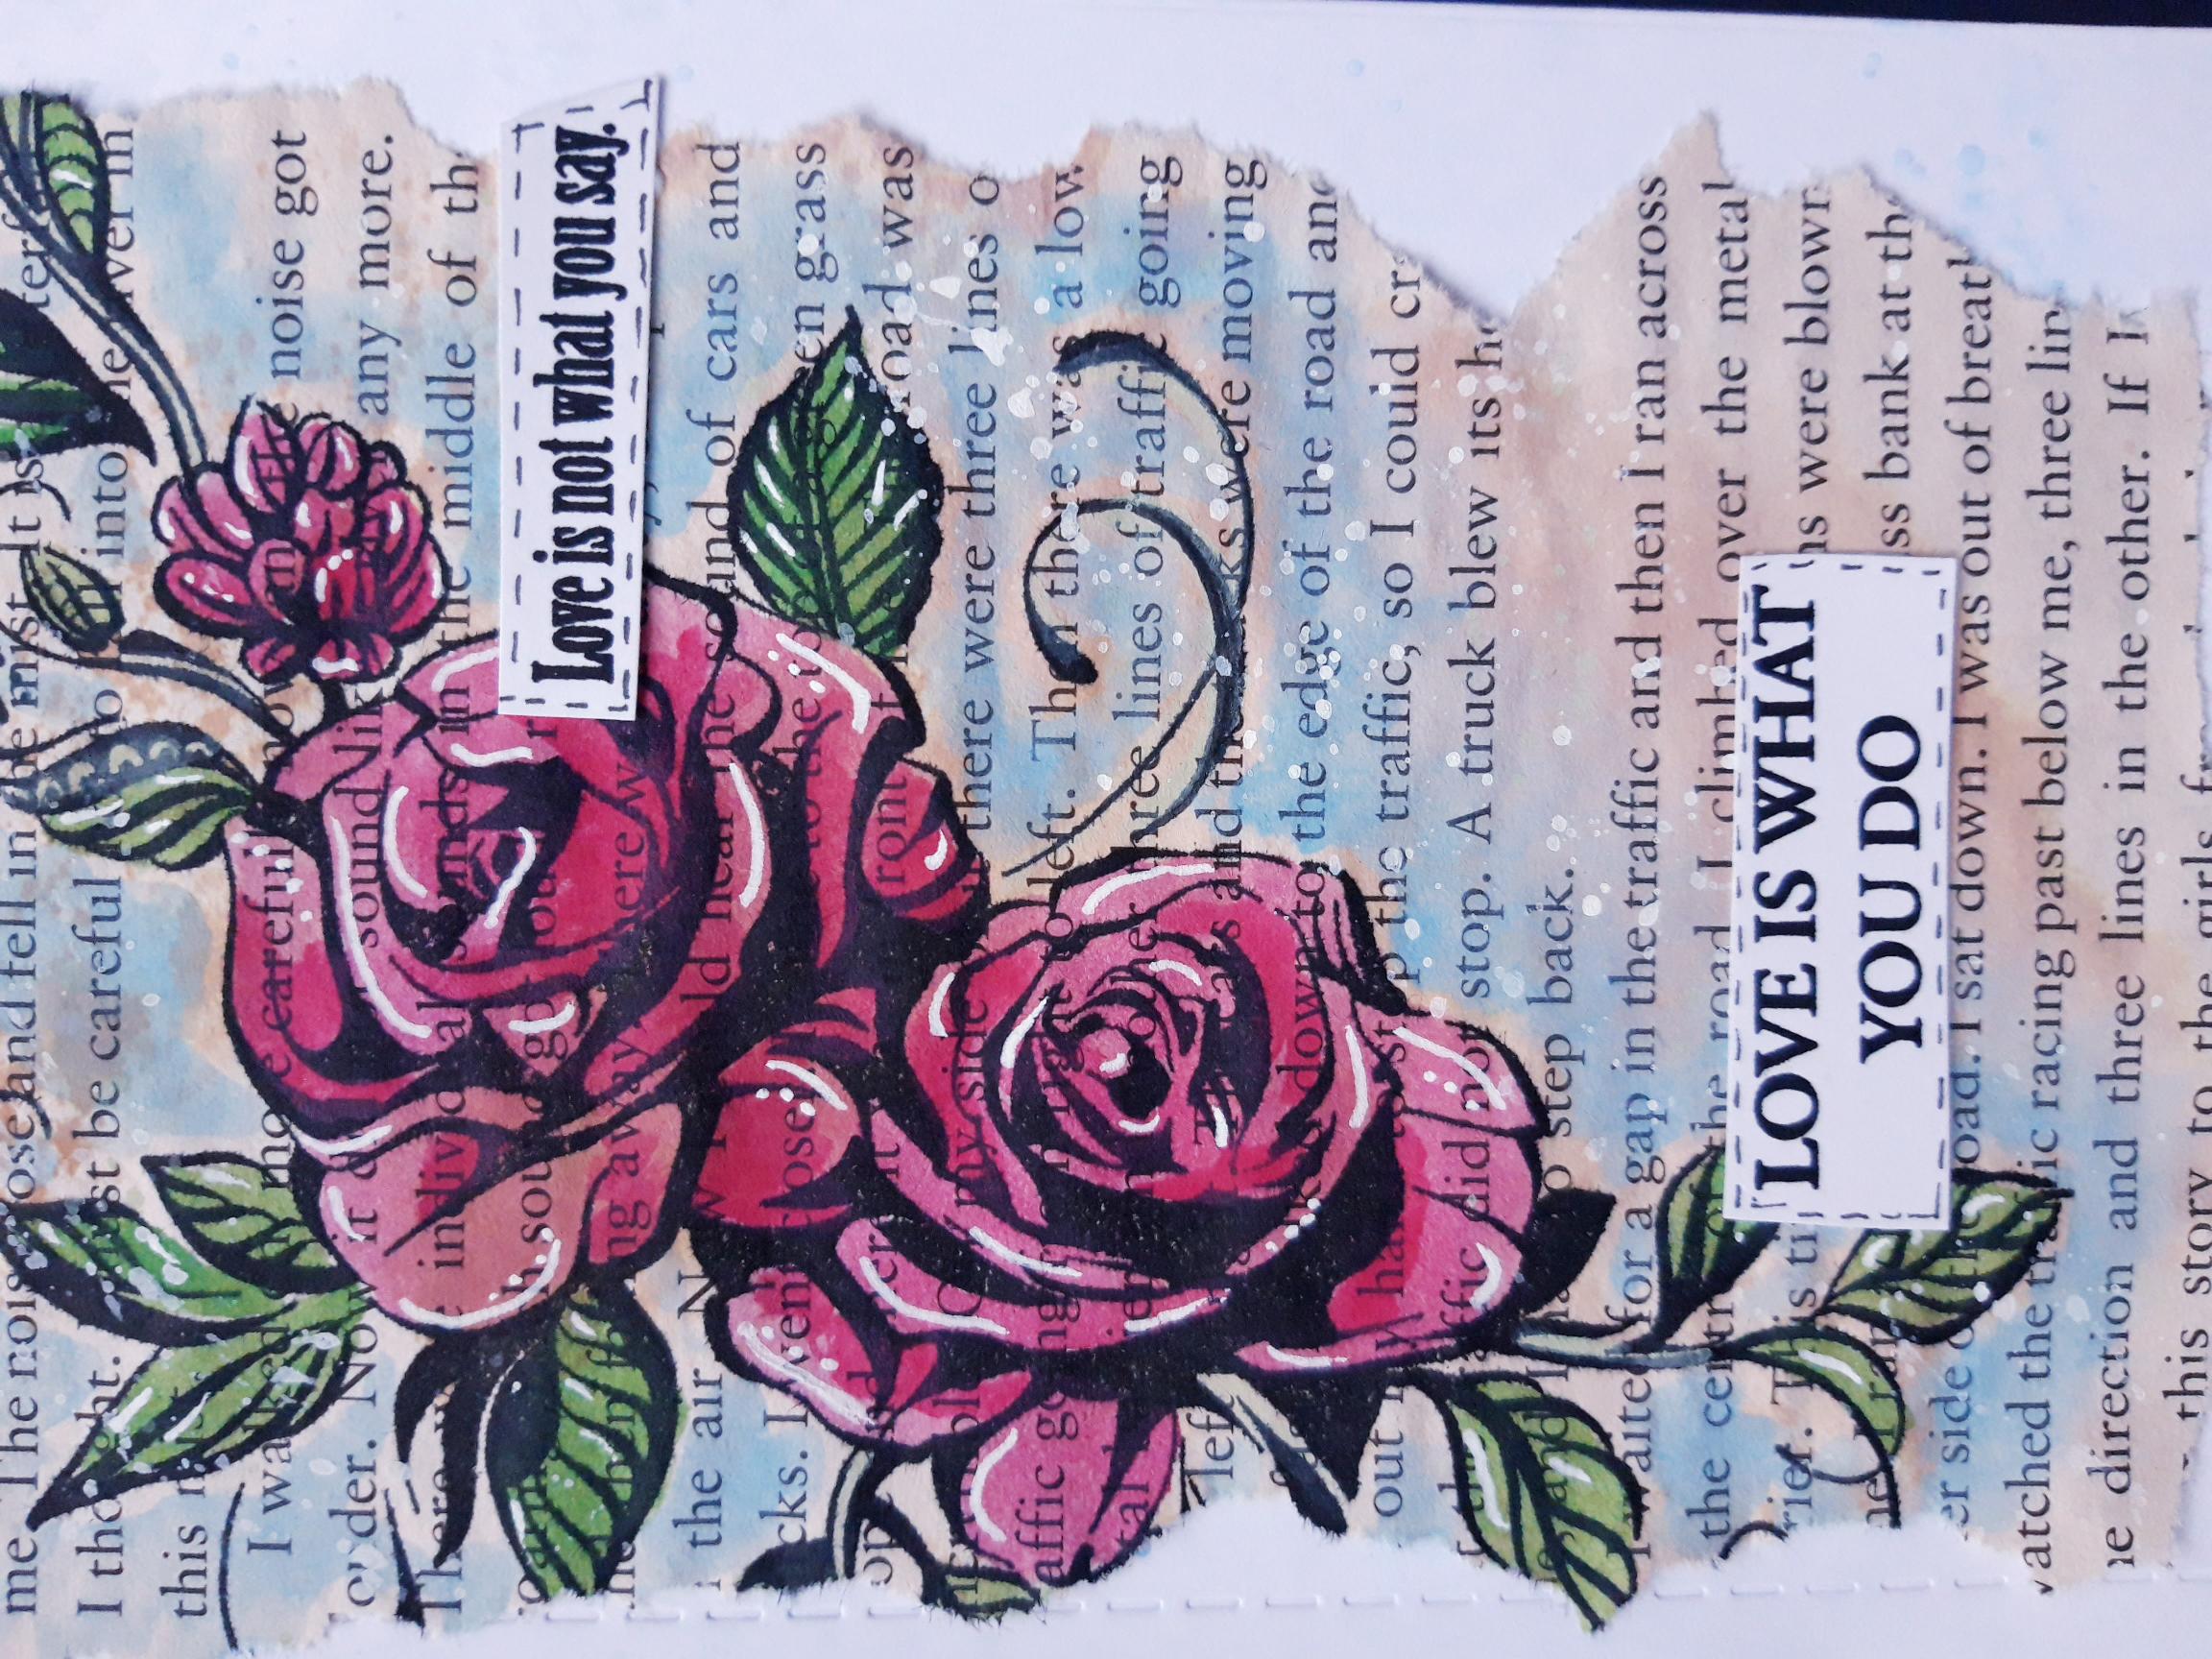
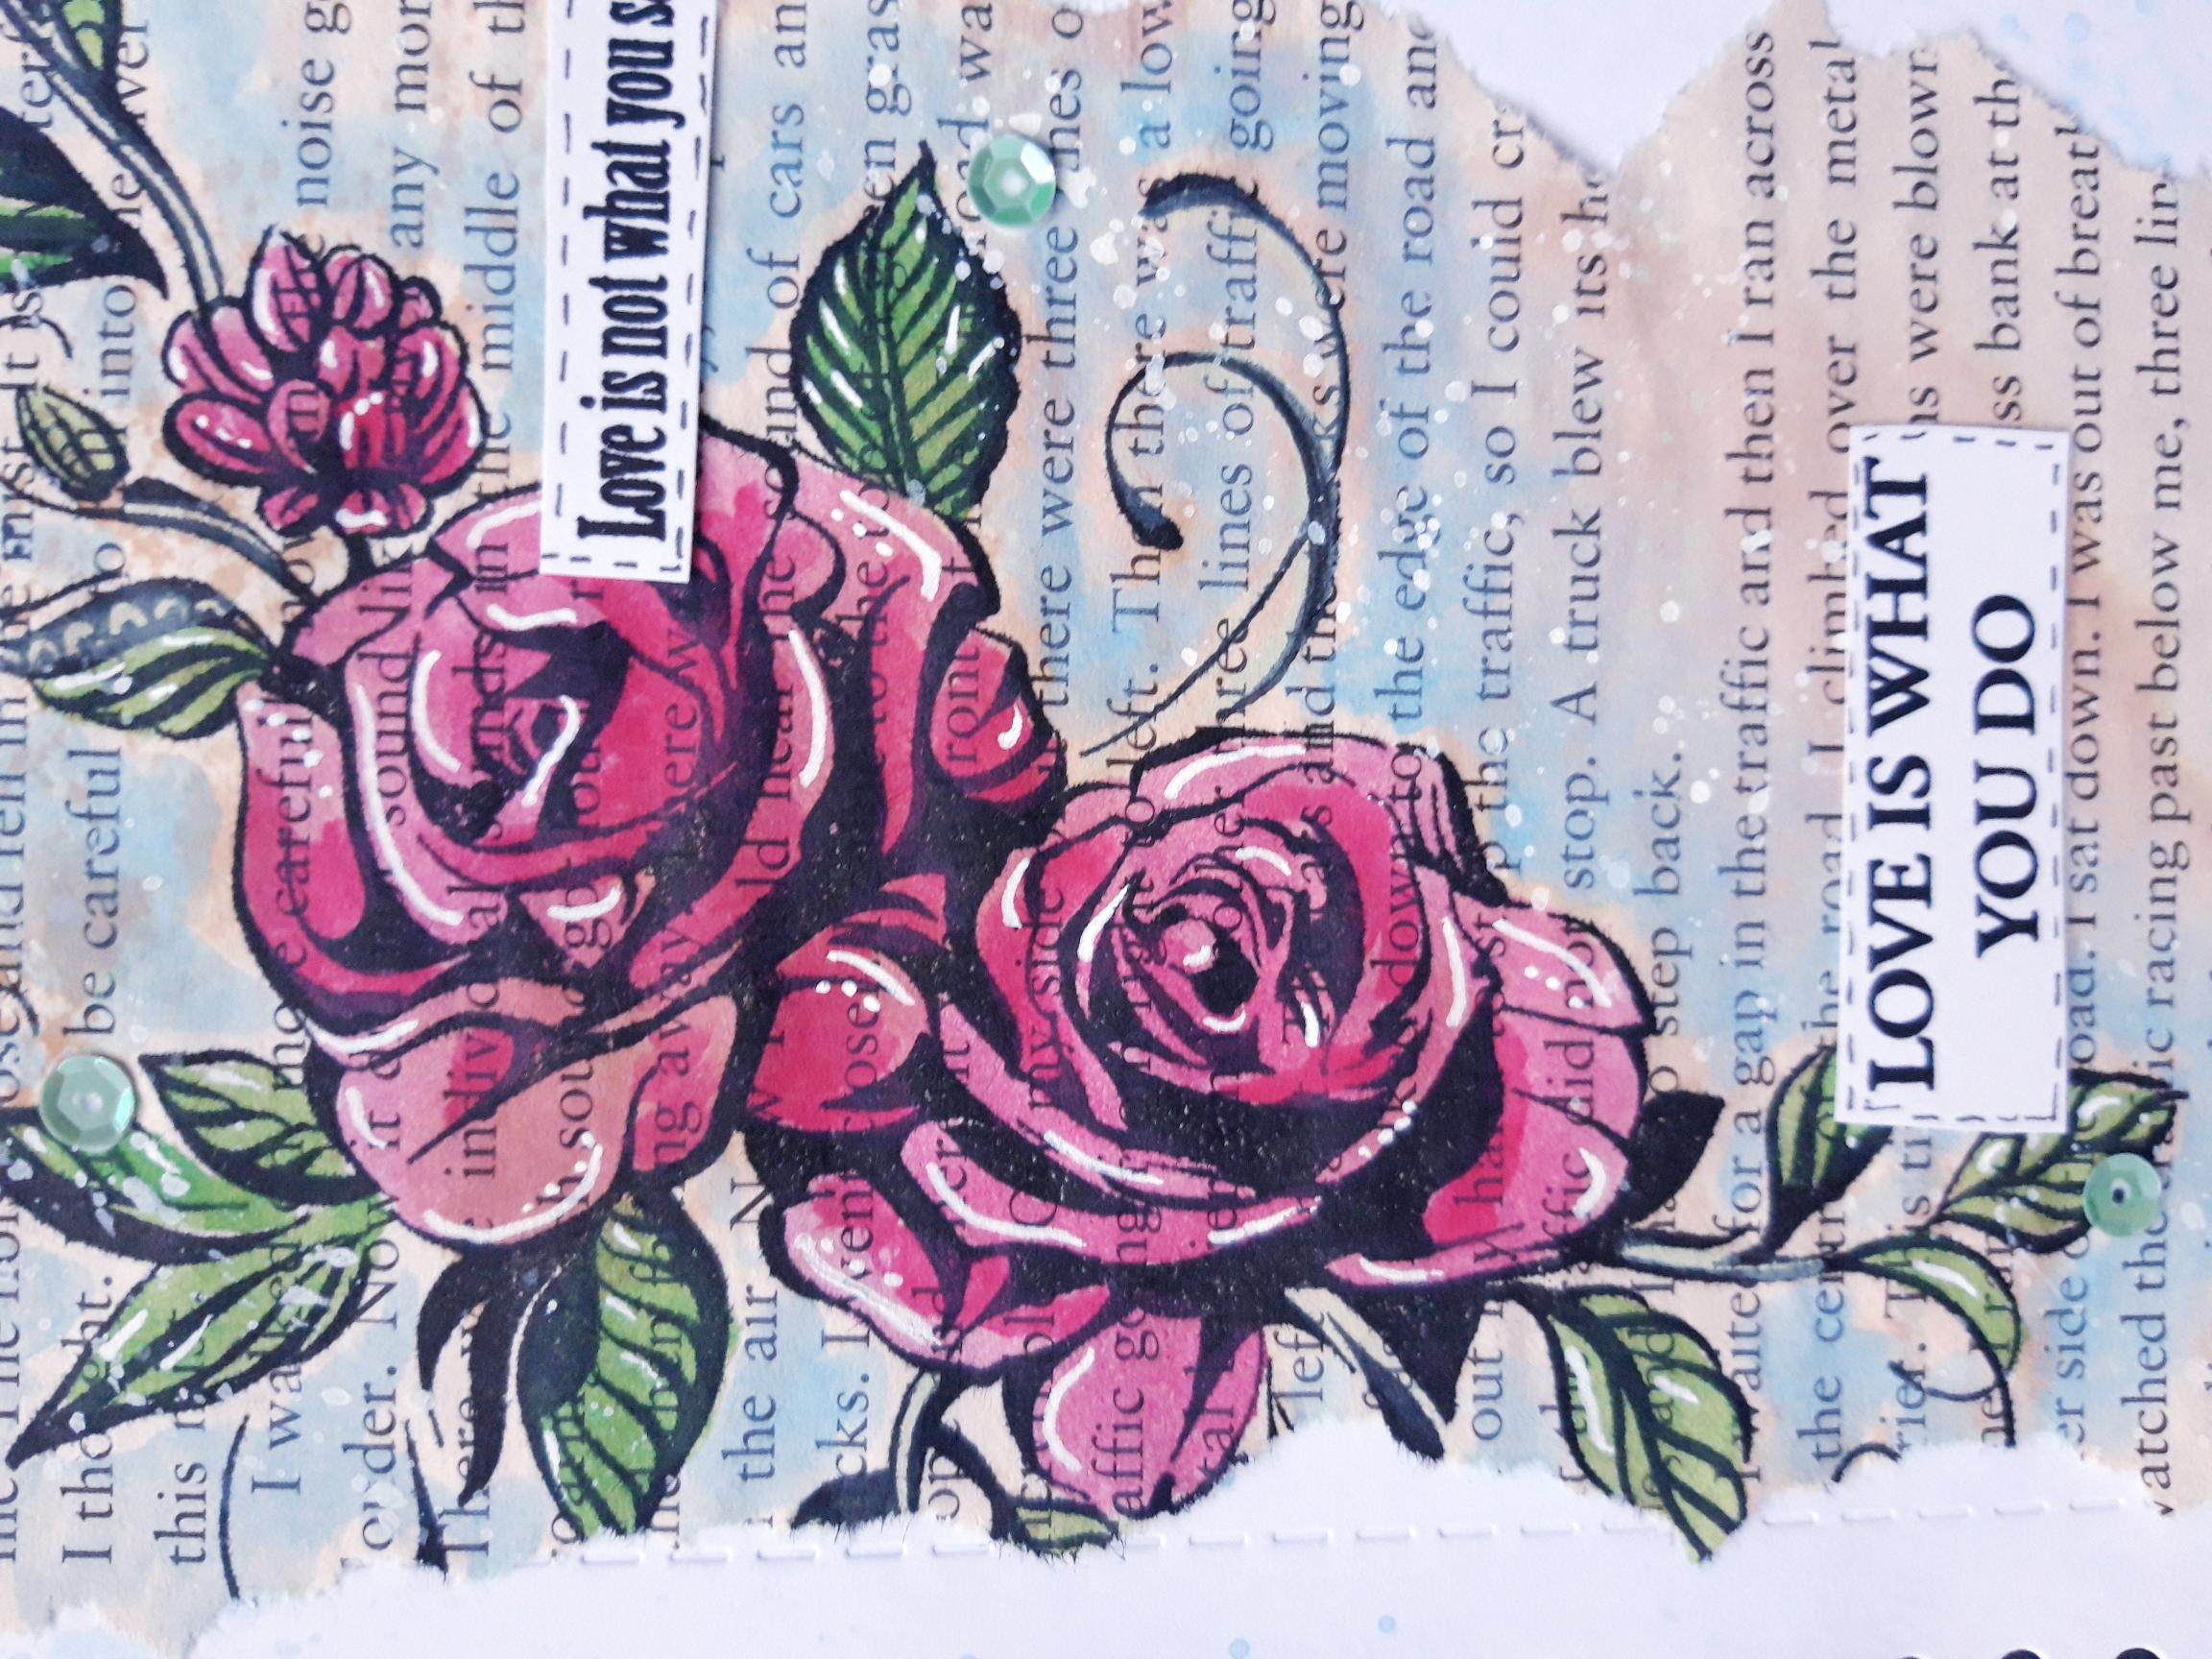
Ink up the sentiment stamp, from the Smile Everyday Lamination Stamp Collection, with the Onyx Black Versafine. Stamp on to the white card (2 x 1 1/2"). Cut the sentiment in to strips, and use the black pen to draw a stitched frame around each one. |
|
Glue the sentiment strips on to your artwork, using either wet glue, or foam pads. |
|
Add sequins on to your artwork, as desired, to complete your card. |