Give your friends $10 off their first order!
Refer a FRIEND


White card blank 5 x 7"
White cardstock
Daffodil Dreams Stencil & Die Set
Here For You Lamination
Shabby Chic 7 x 7" Paper Pad
Distress Ink/Oxide Pad: Fossilized Amber, Wild Honey, Brushed Corduroy, Walnut Stain
Versafine Ink Pad: Sepia
Blending brush
Water spray bottle
Paint brush
Confetti Ink: White Lace
Eureka 101 Watercolour Tablet
SBM A3 Magnetic glass mat
Paper Trimmer
Glue
[click image to enlarge] 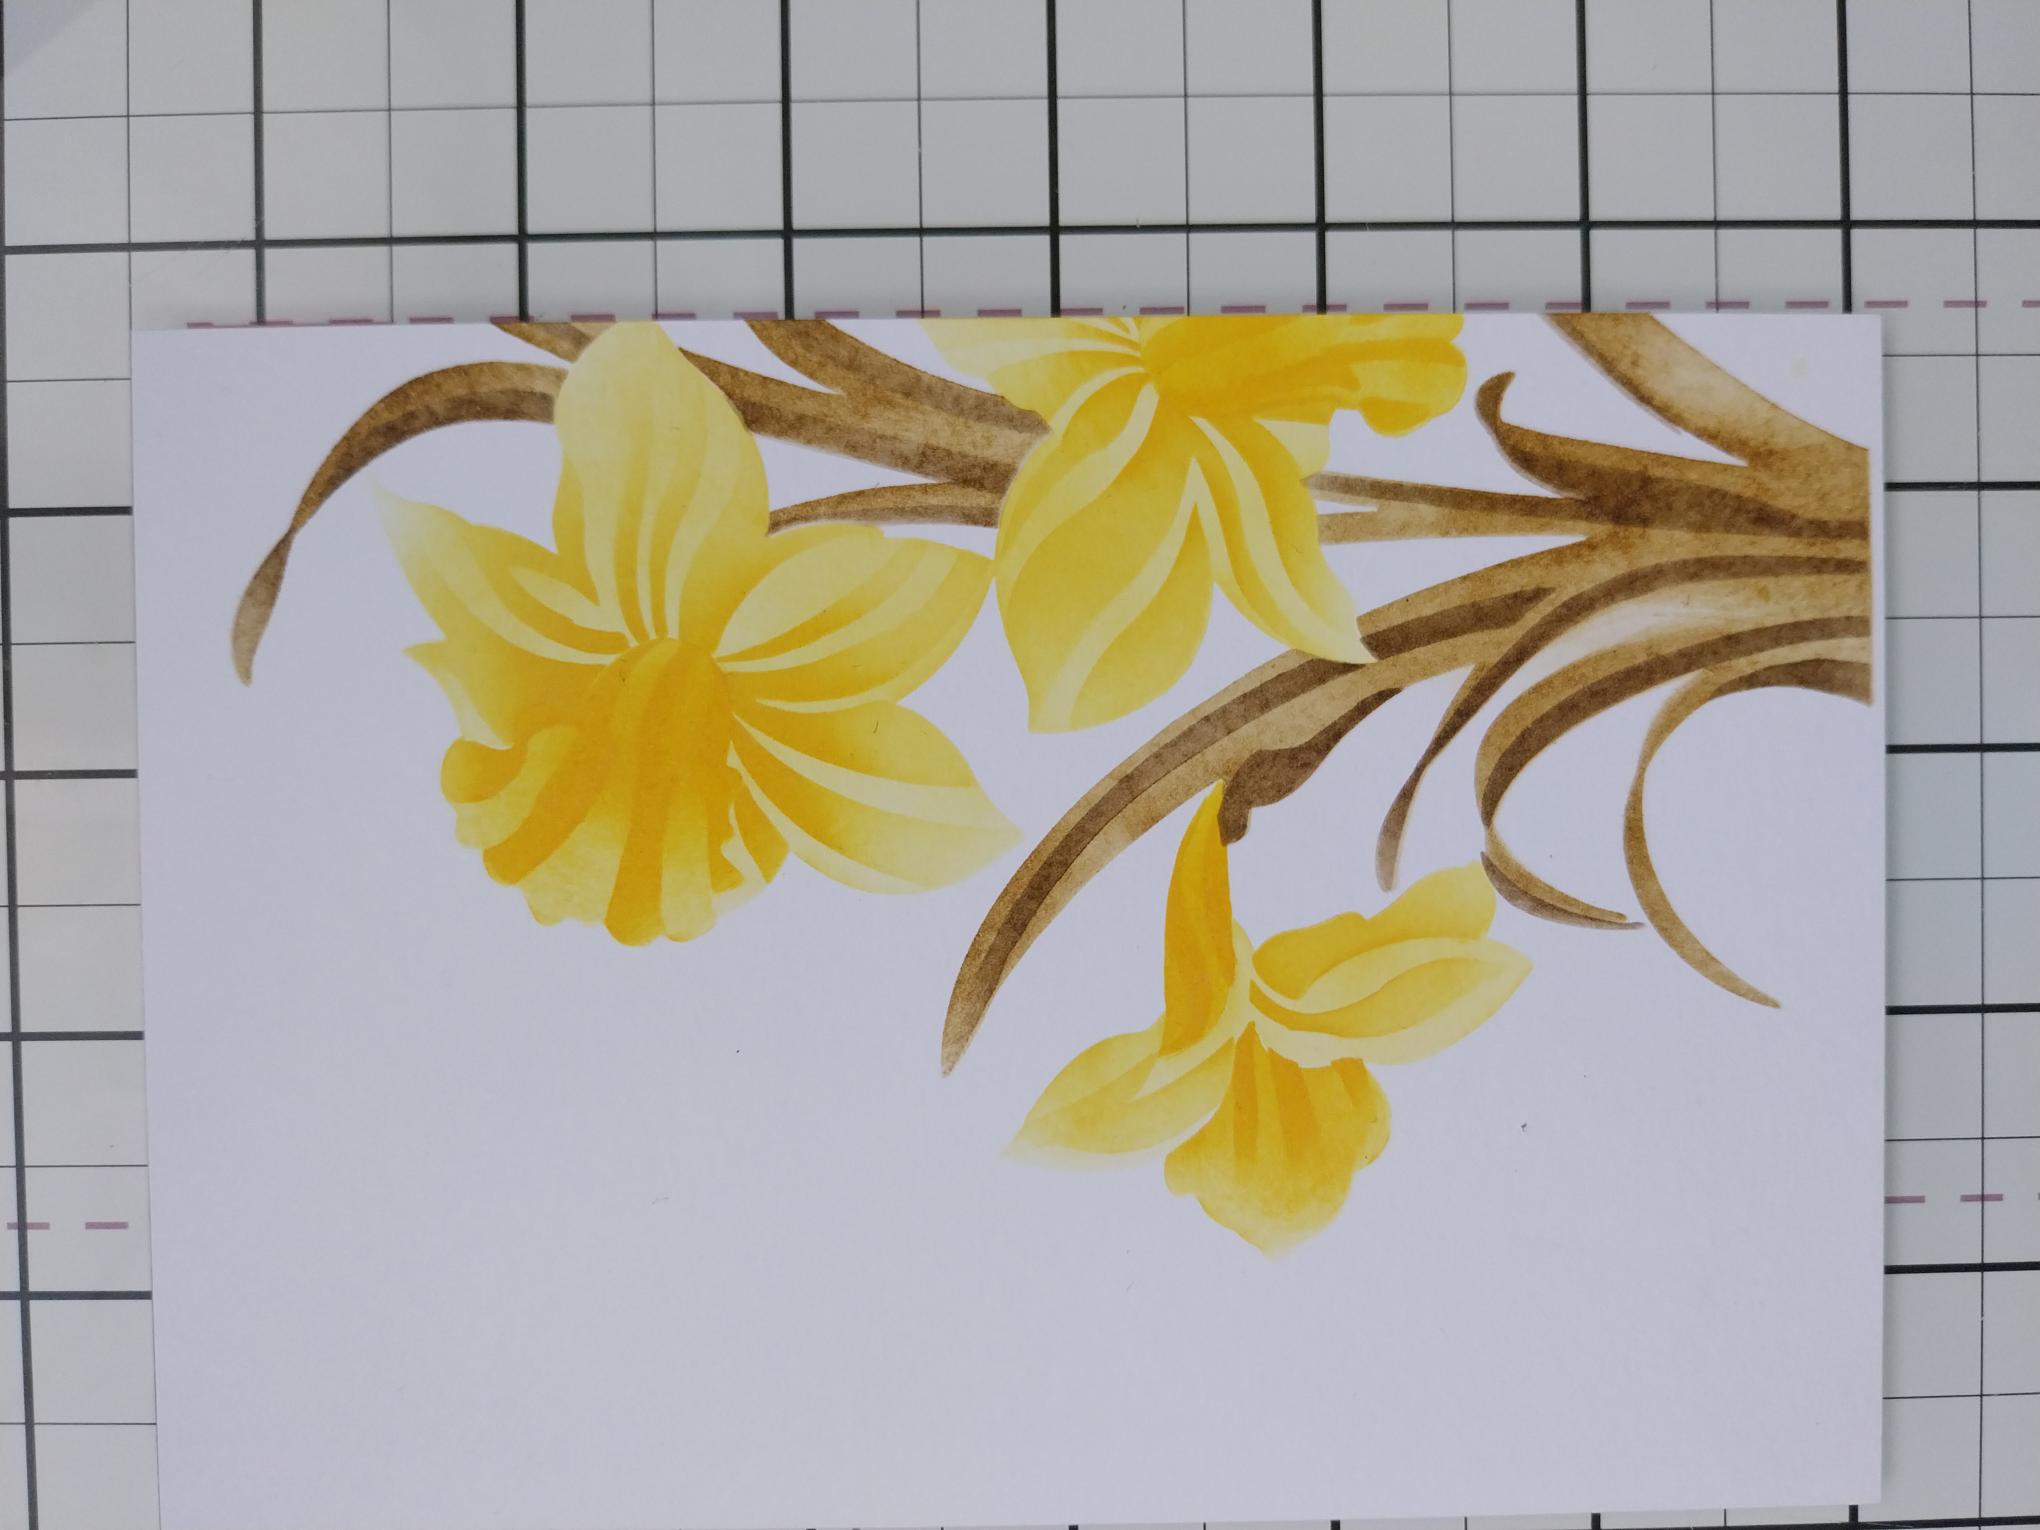
|
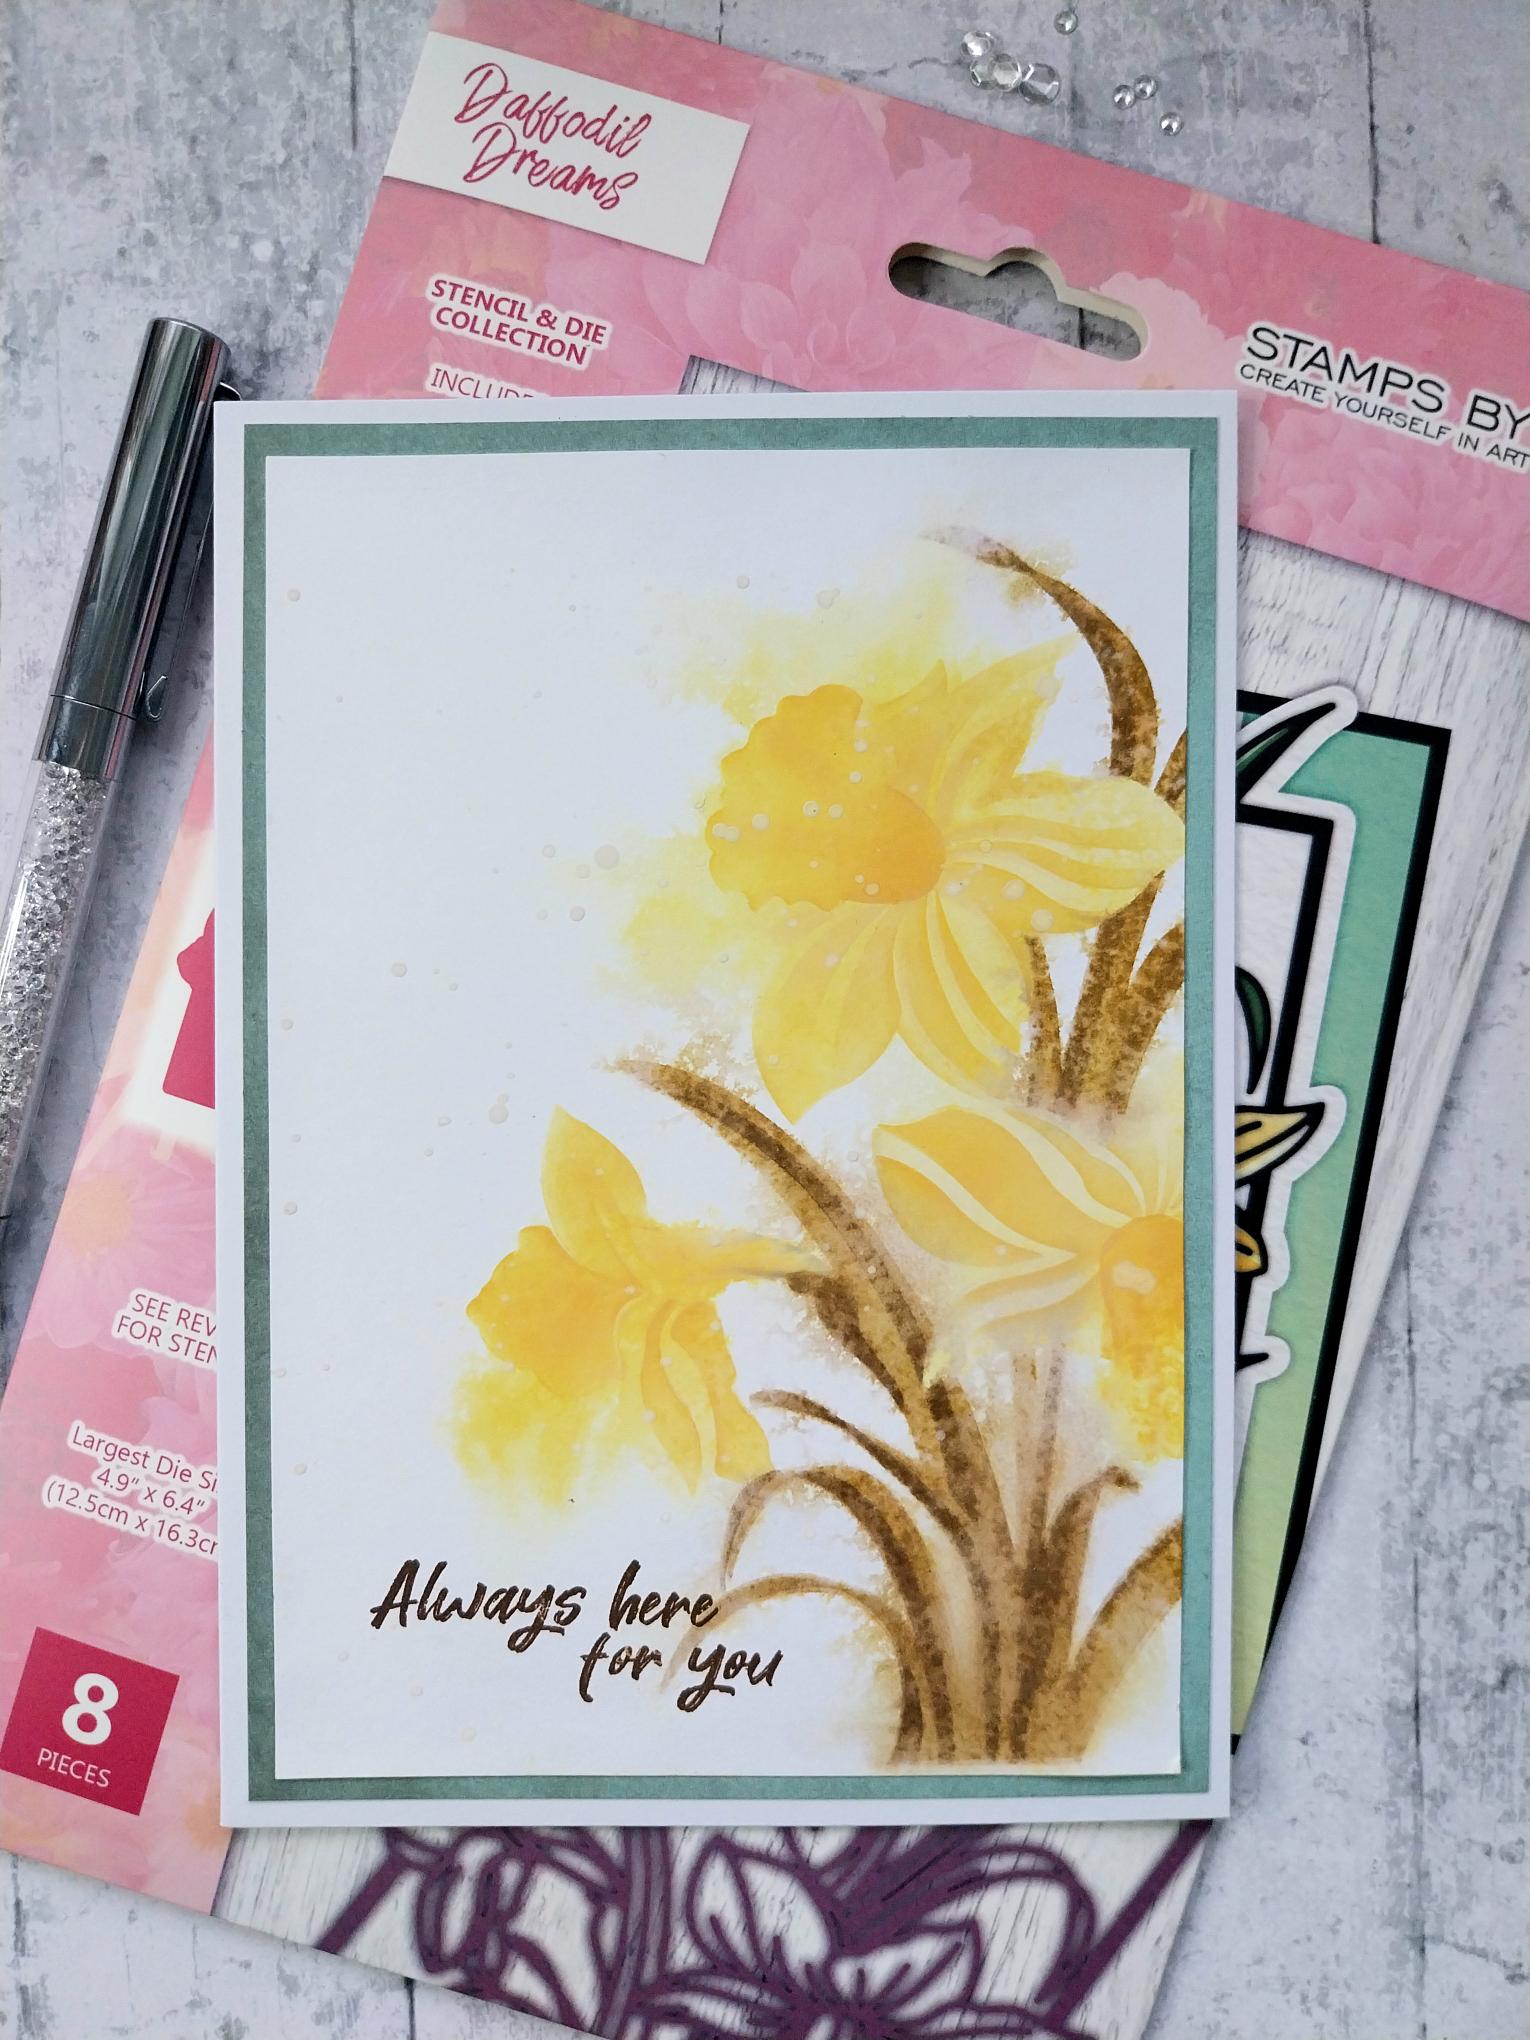
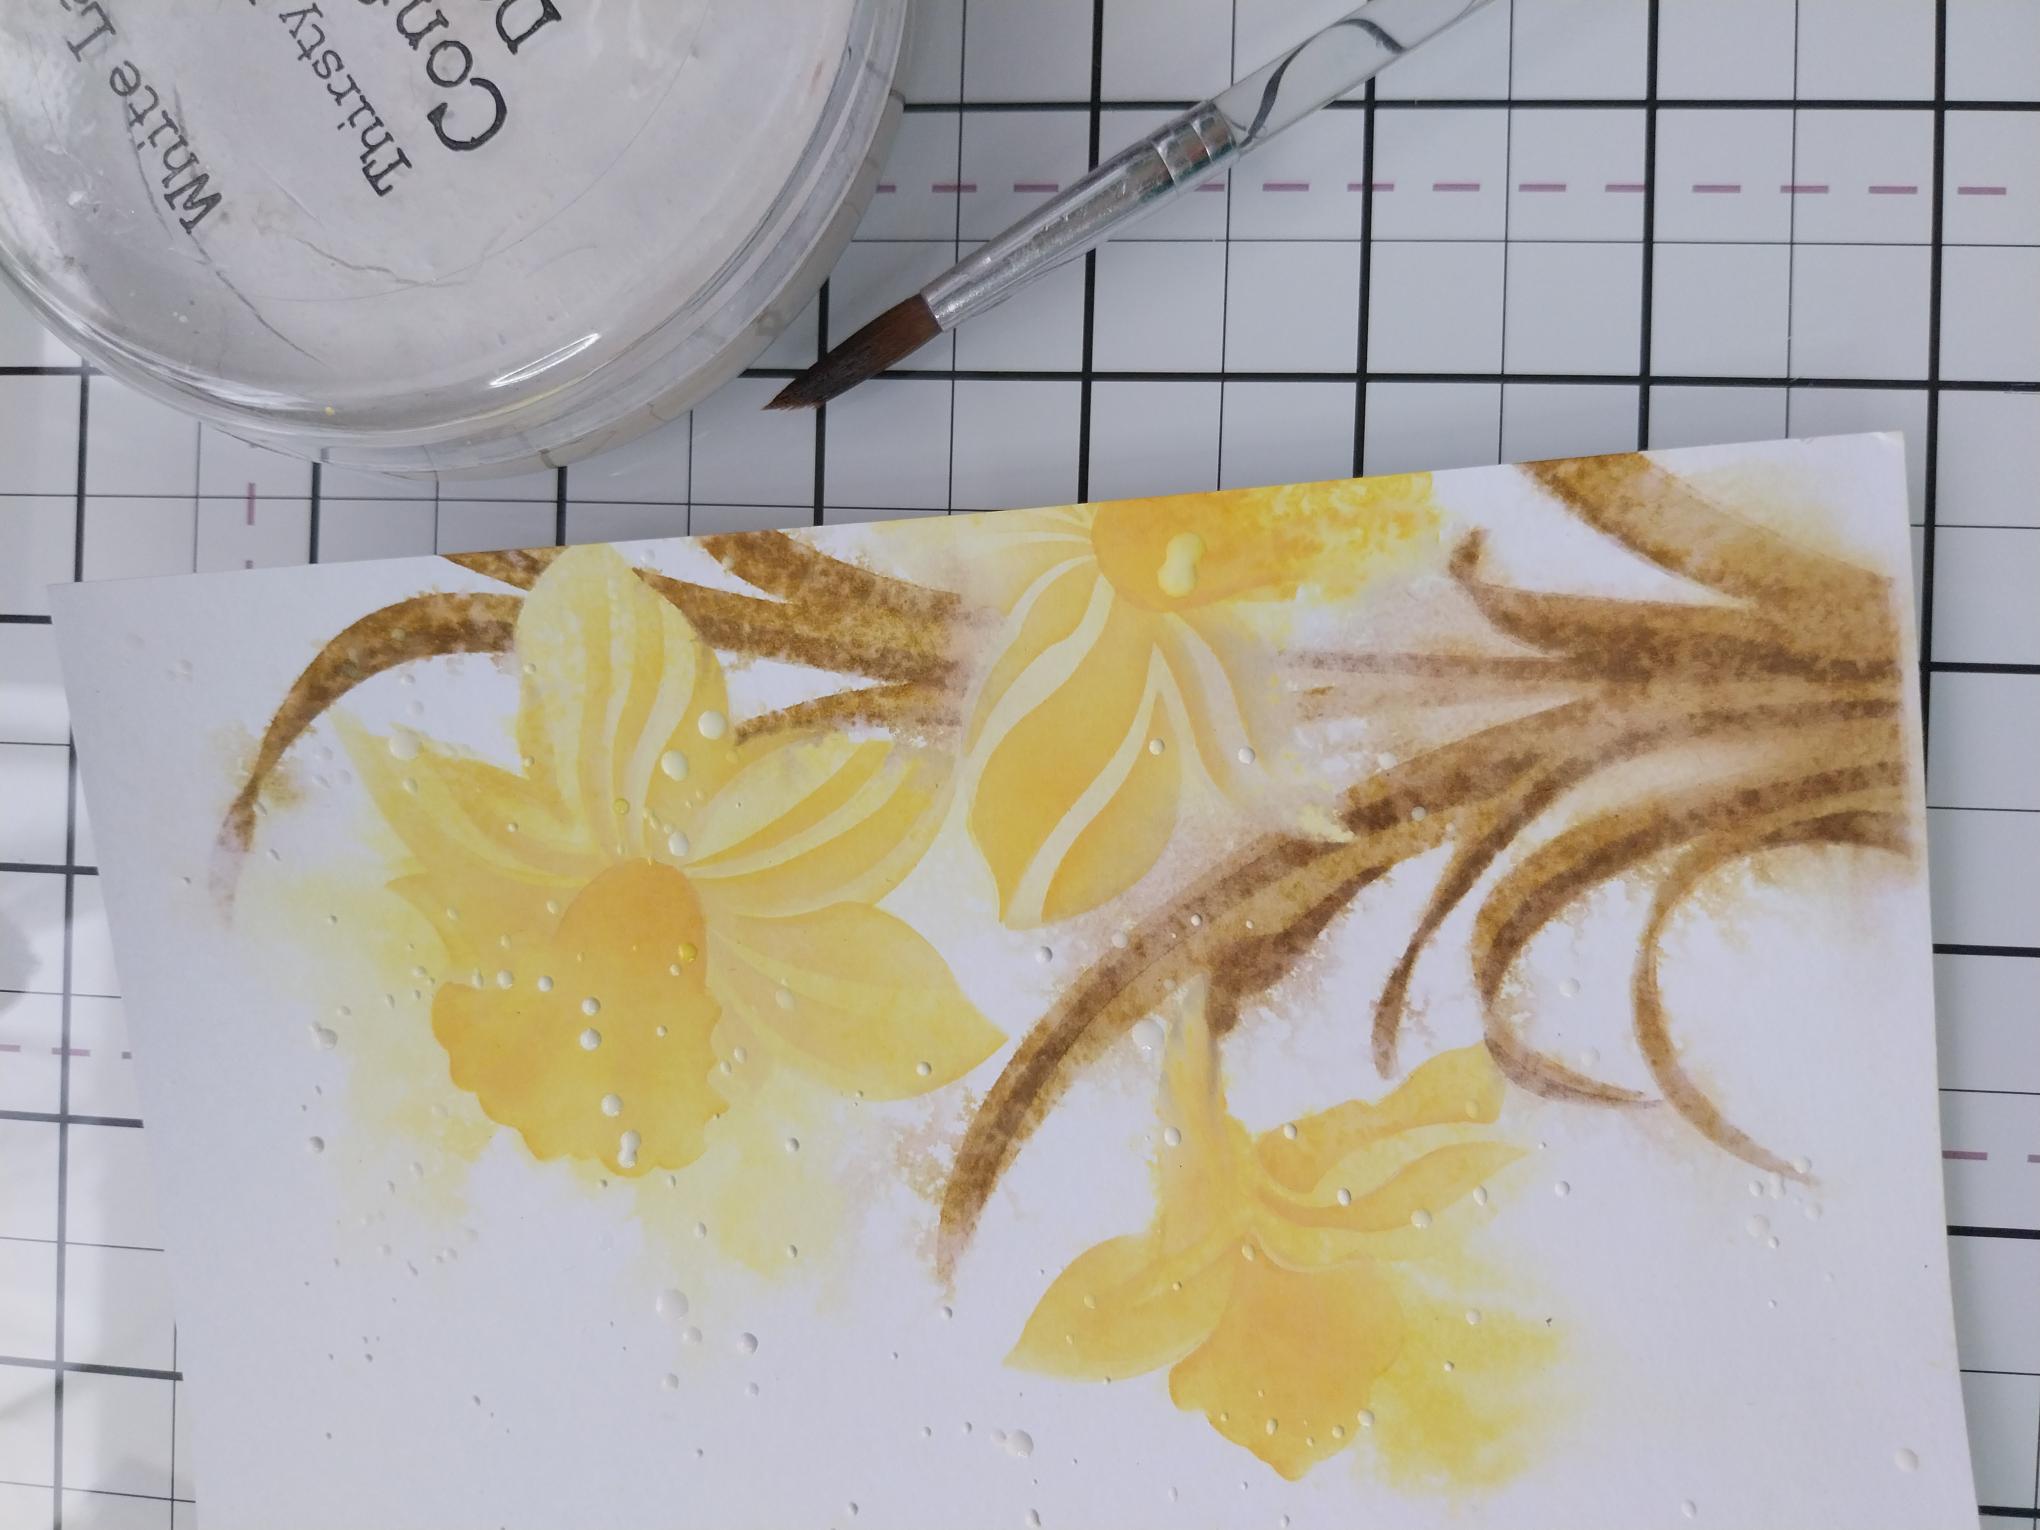
Cut a piece of white card to 4 1/2 x 6 1/2". Place stencil 1 on the card so the Daffodil image is going off the right edge. Blend with the Fossilized Amber. Line up stencil 2 and lightly blend with Wild Honey. Secure stencil 3 in place and blend with the Wild Honey but applying more colour than before. Line up stencil 4 and blend with Wild Honey, intensifying the colour depth even more. Line up stencil 5 and blend with Brushed Corduroy Secure stencil 6 in place and apply the Walnut Stain. |
|
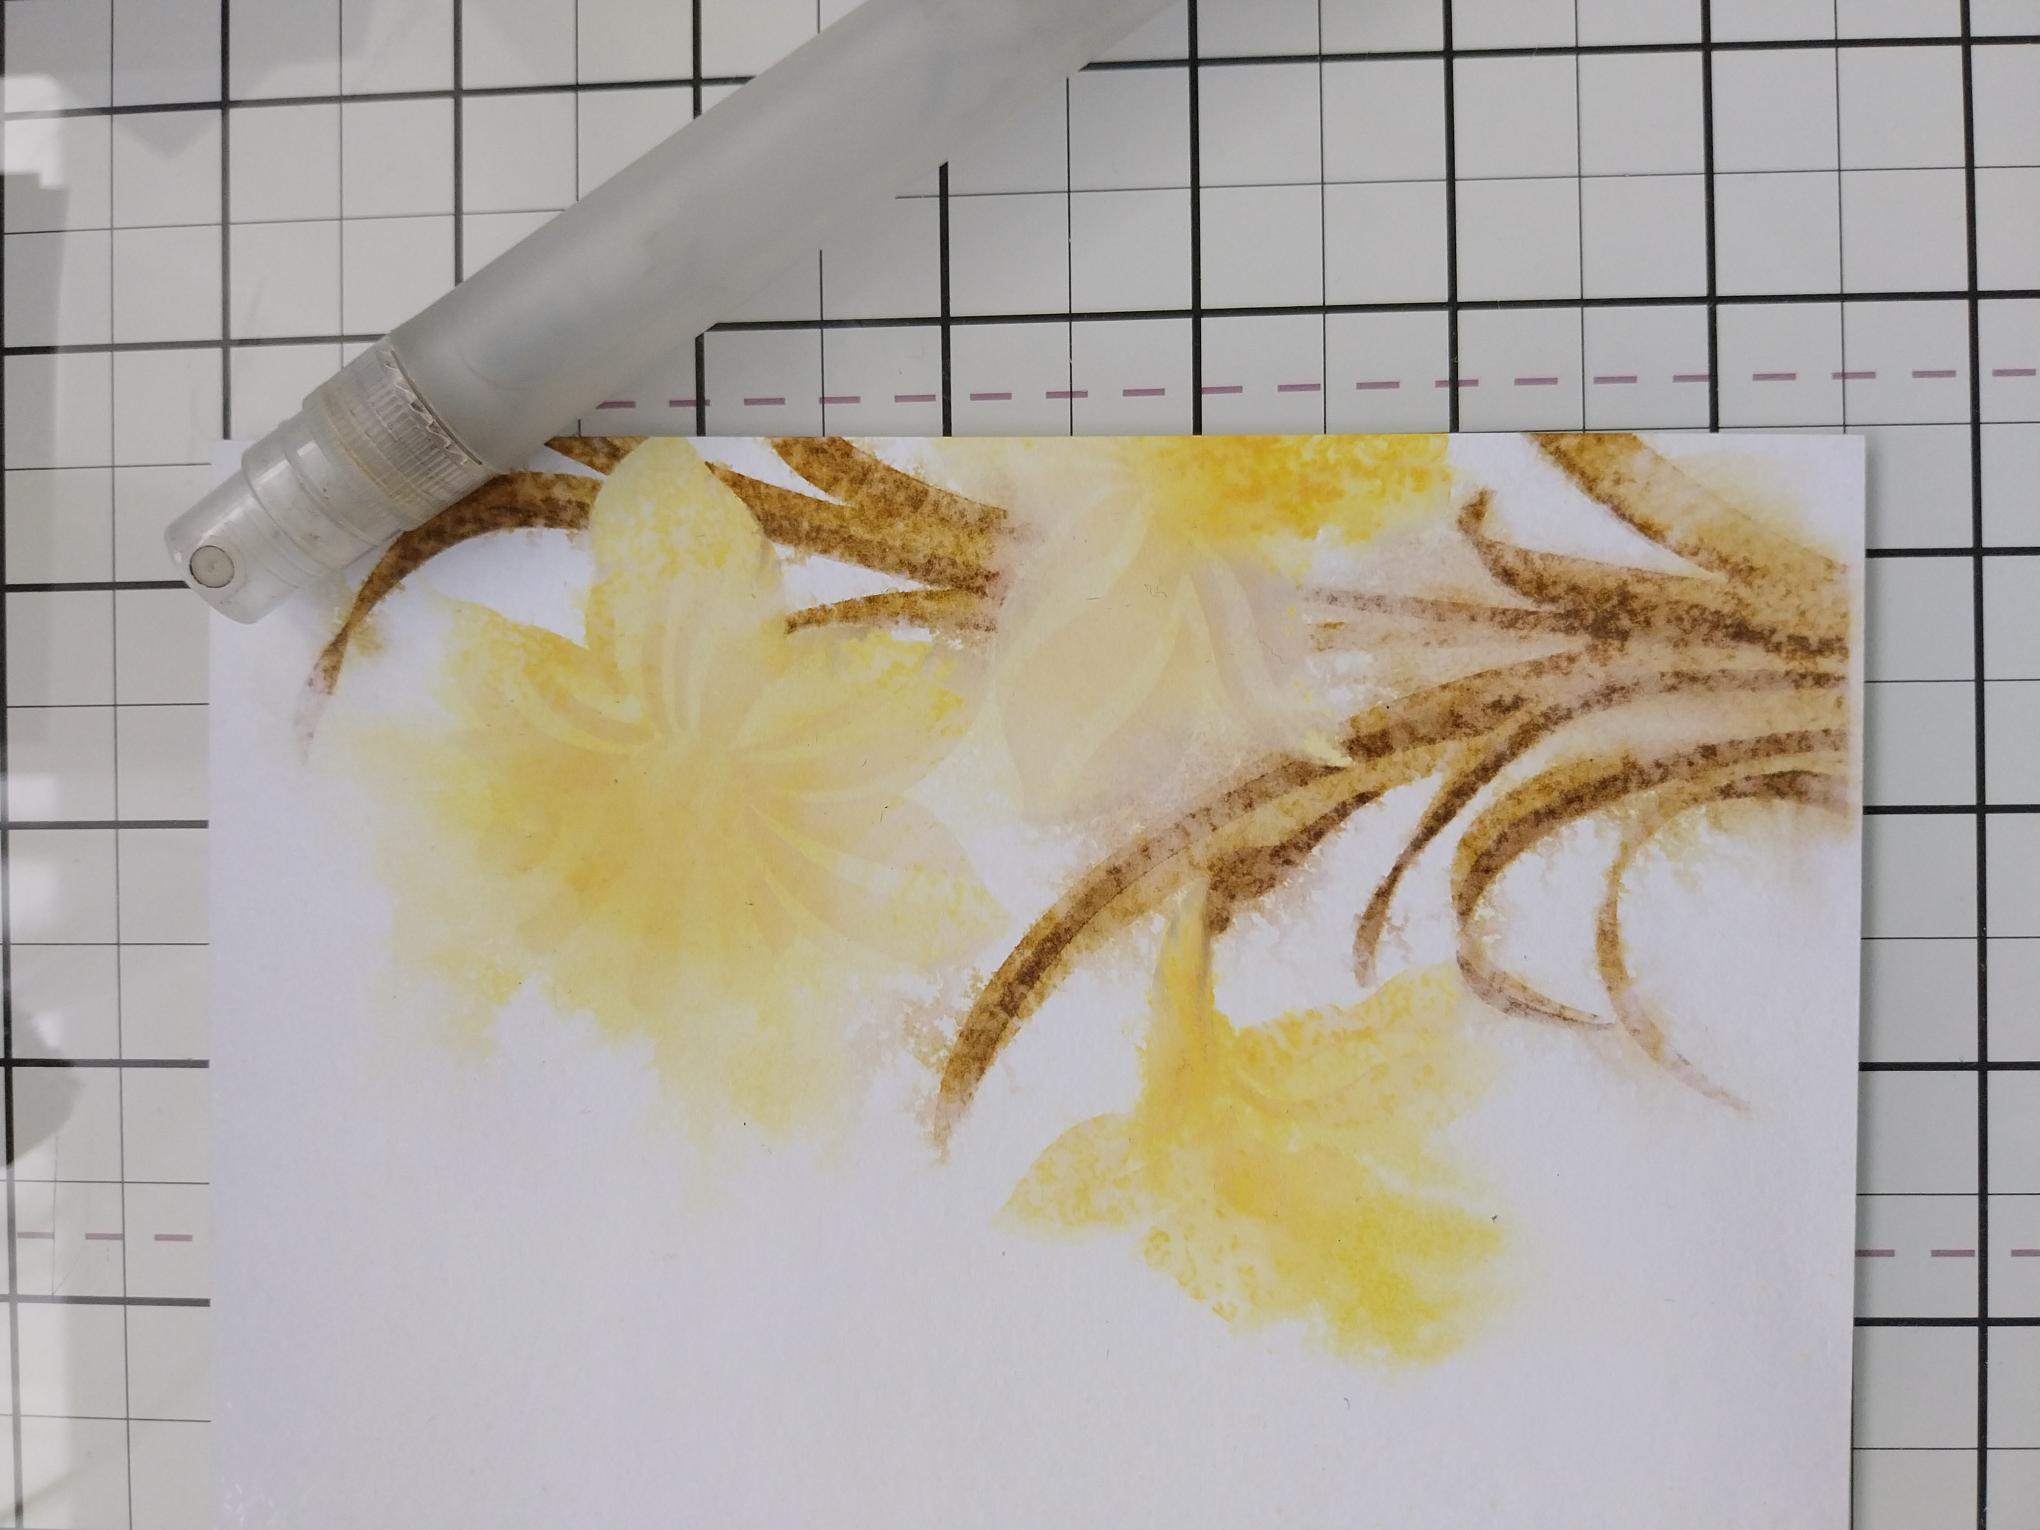
Lightly spritz your stencilled image with water and allow the ink to "move" as little or as much as you like. Then mop up the excess and dry with heat tool. This is referred to as the "bleeding ink technique". |
|
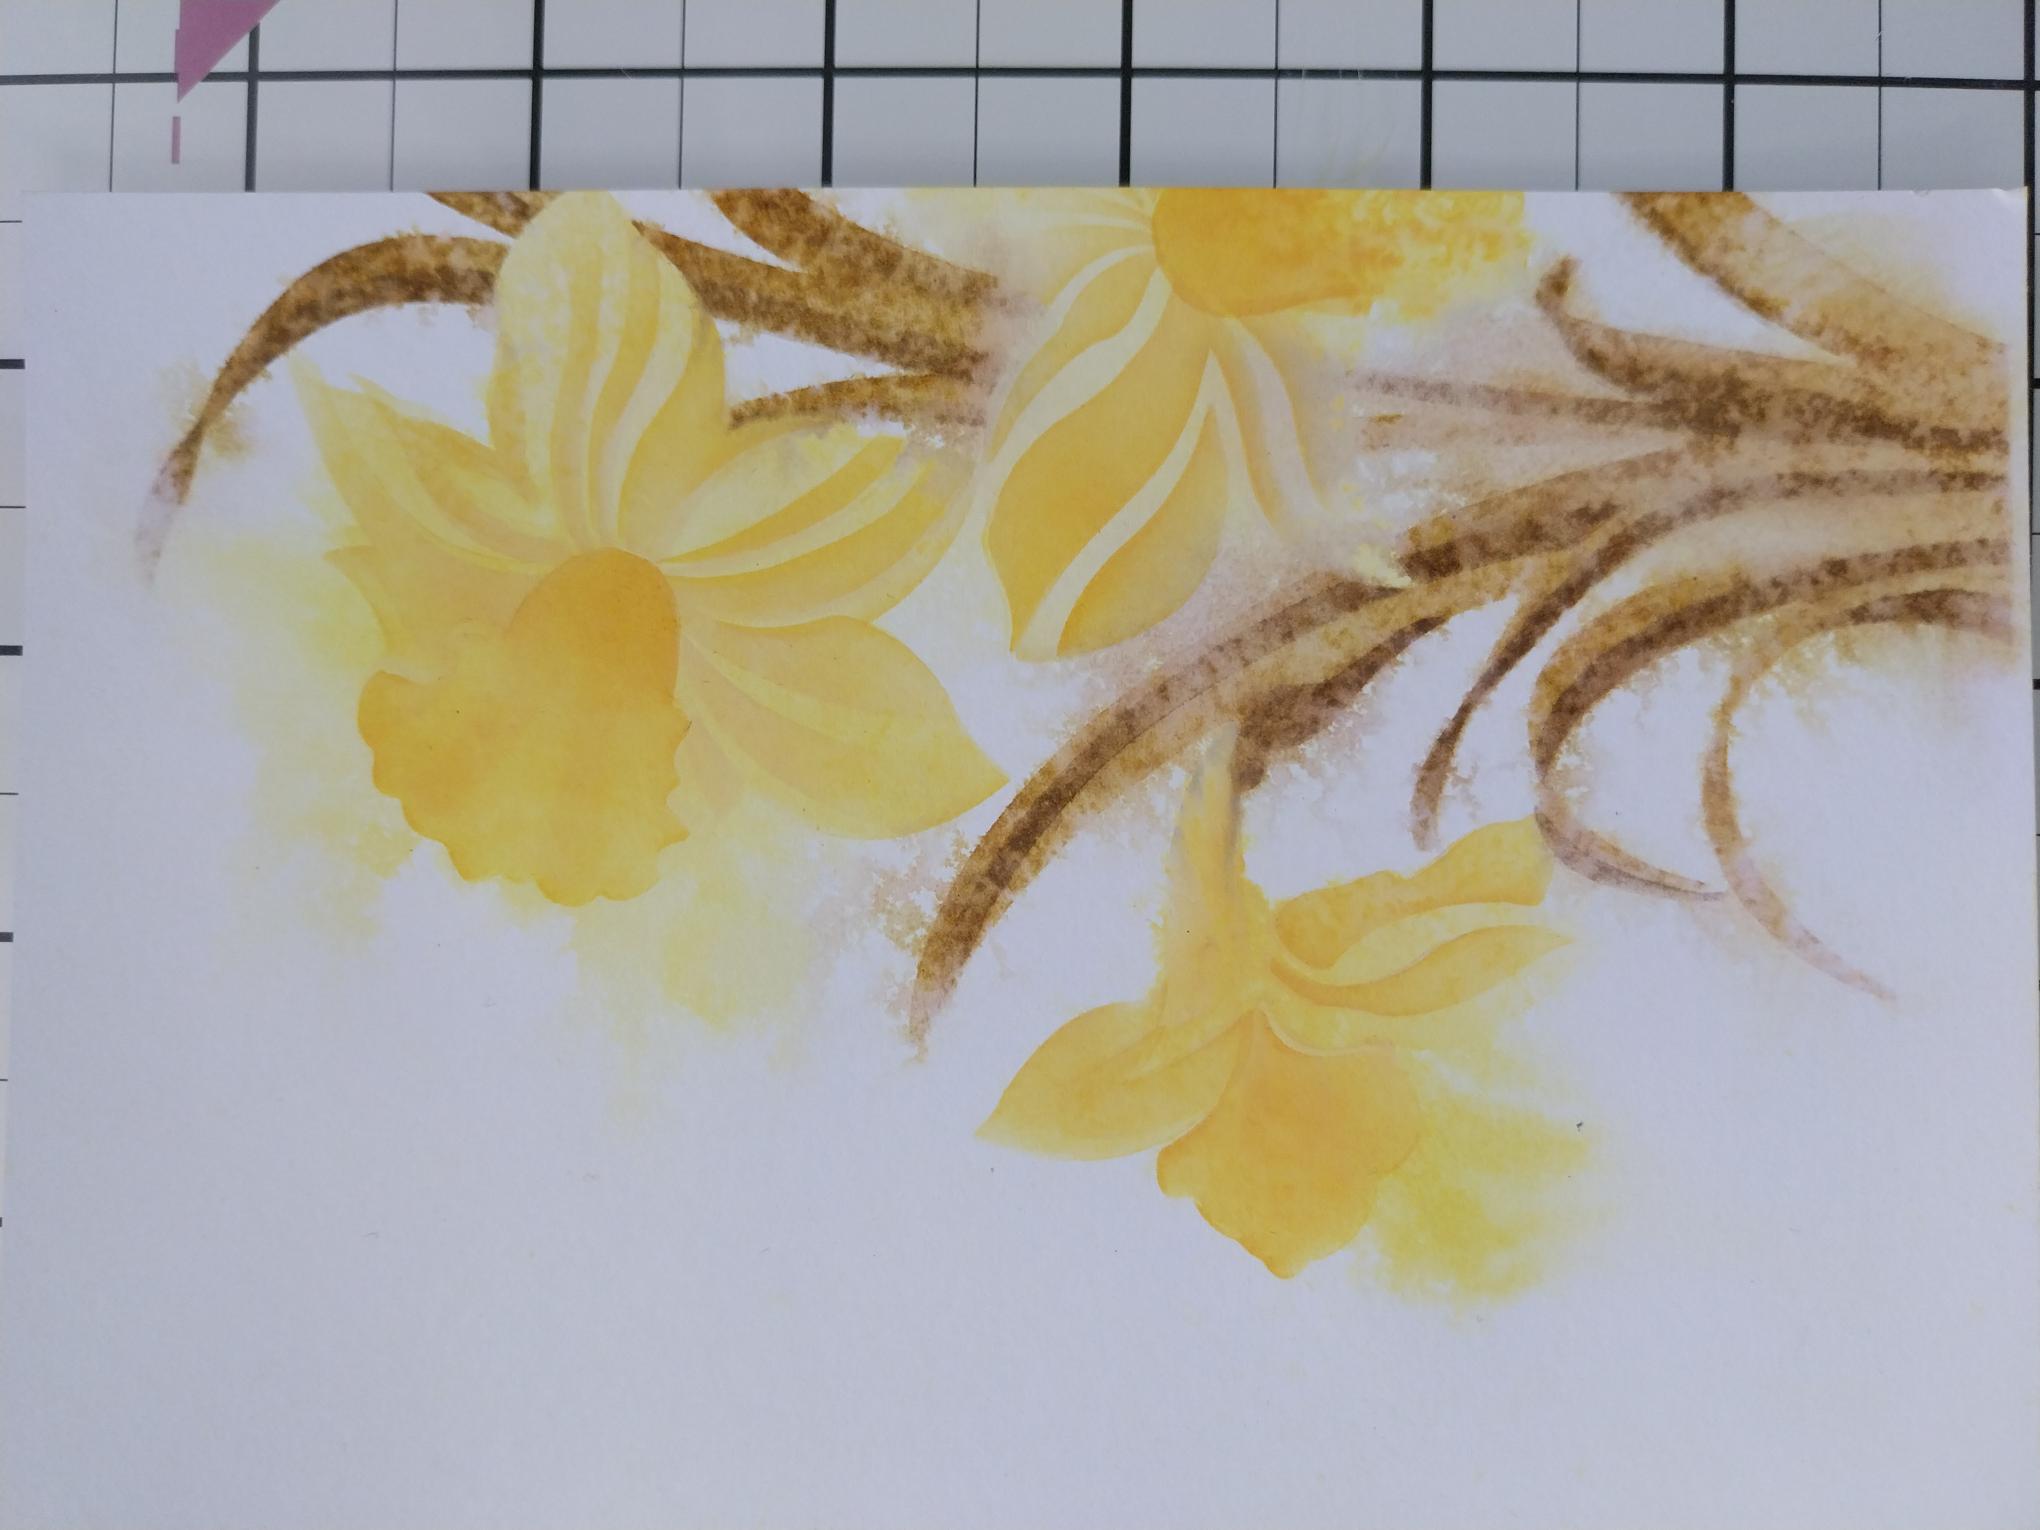
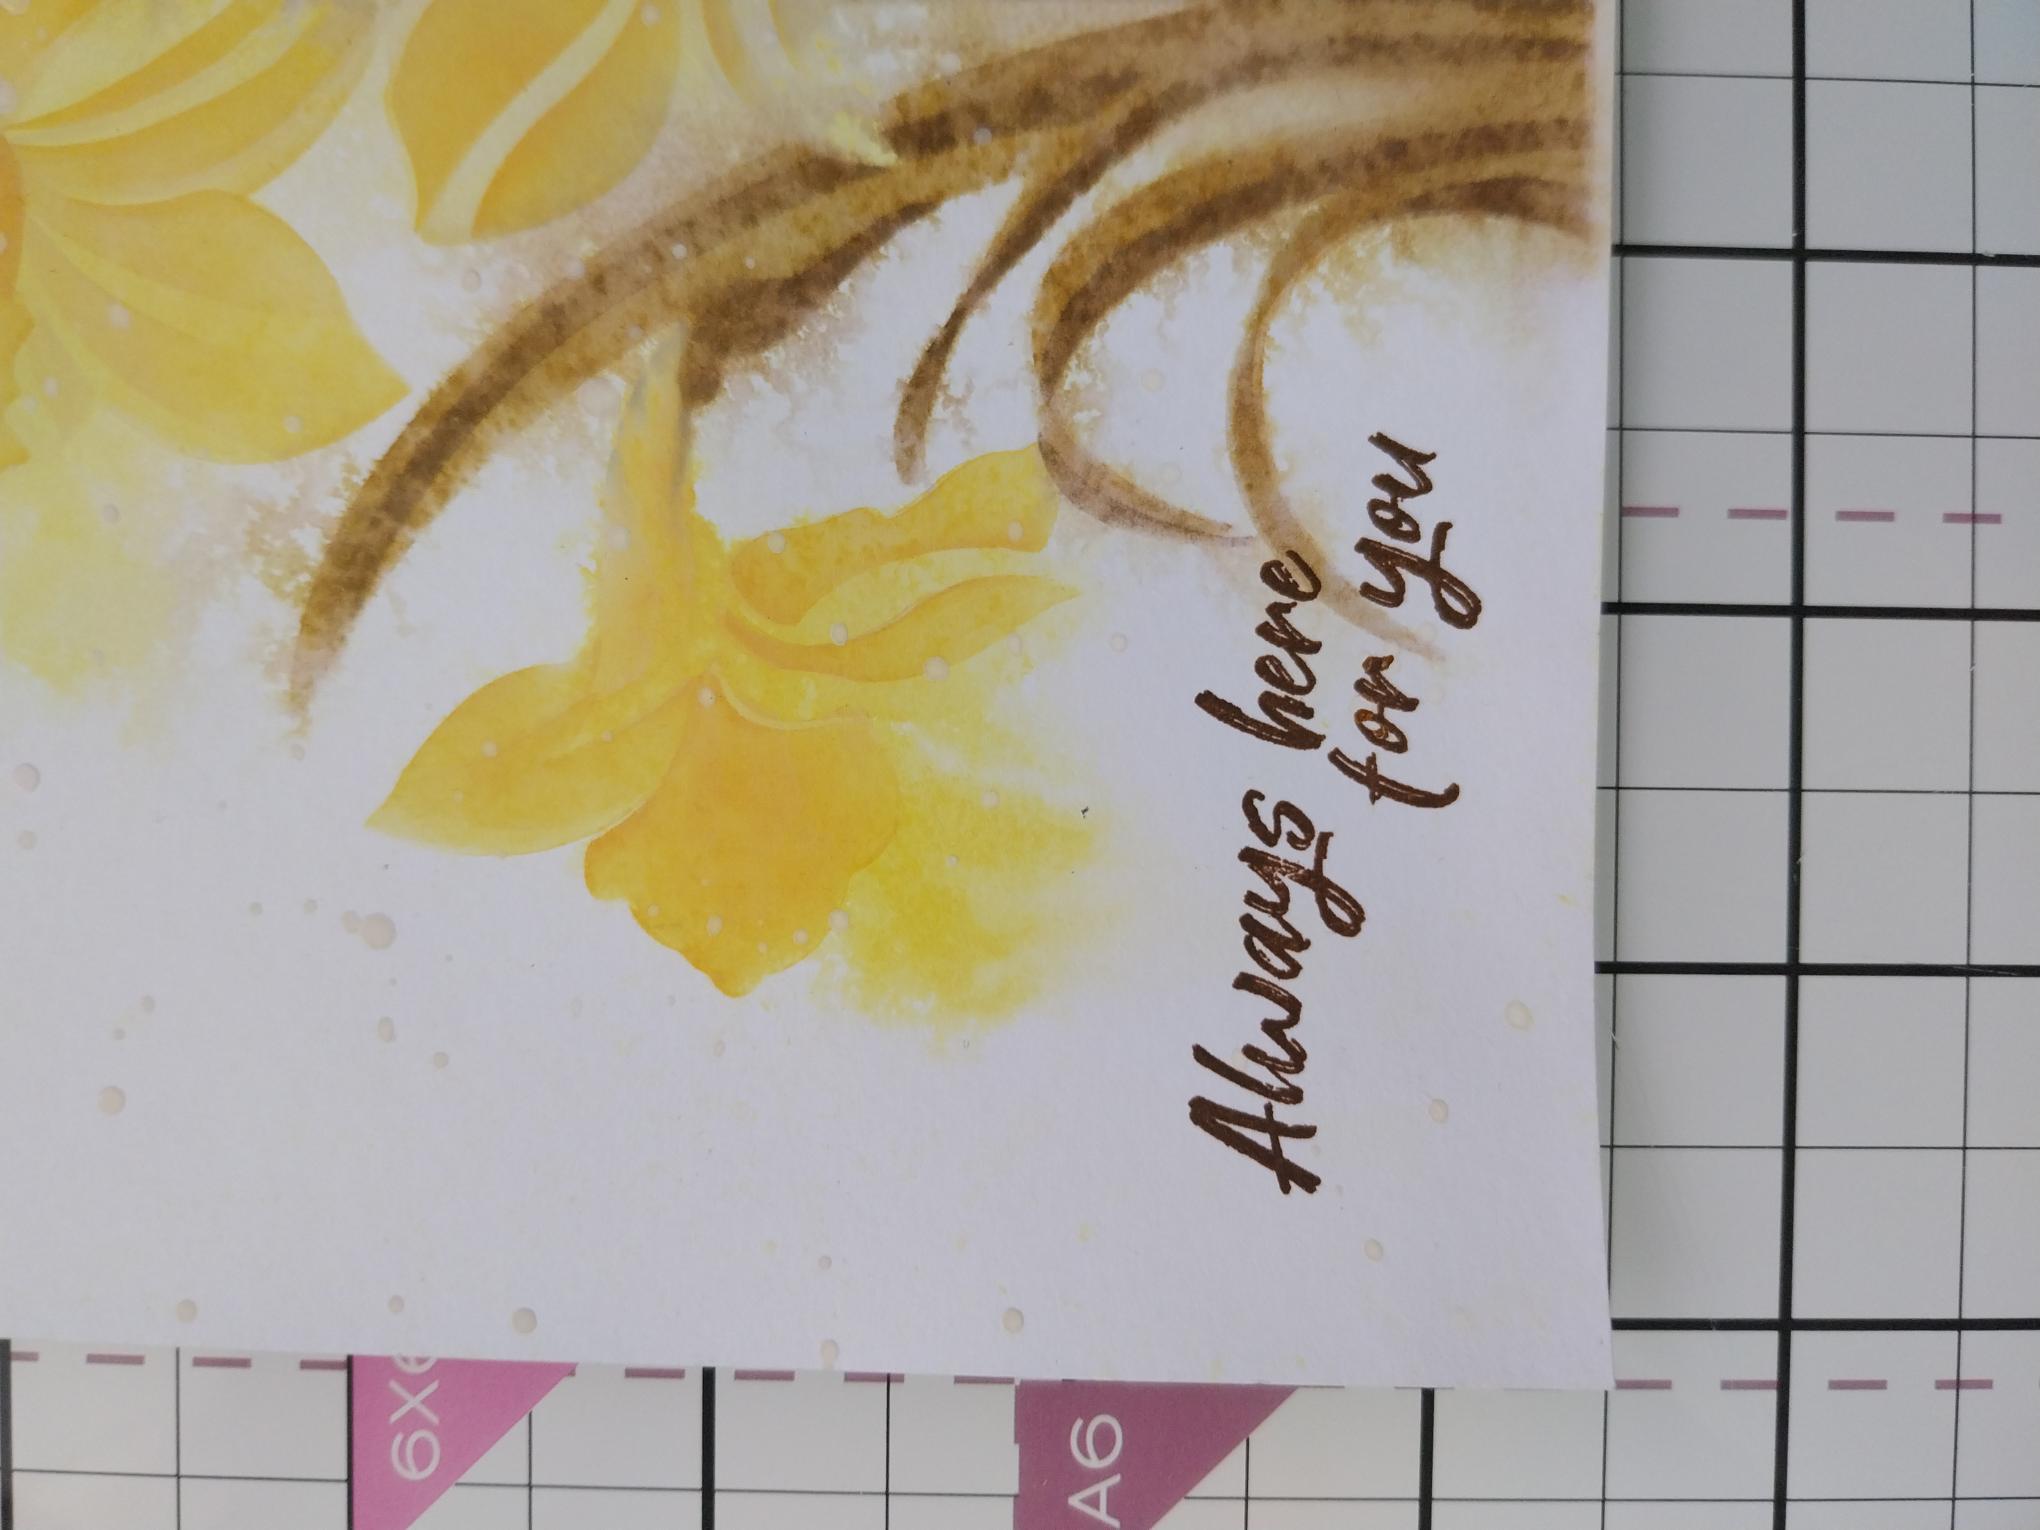
You can now go back in with the stencils, adding back in definition to any areas of your design. Personally, I like the really loose, watercolour effect but the choice is yours. |
|
Add a little water to your Confetti ink and splatter over your artwork. Again, I like lots of splats but the choice is yours. |
|
Stamp the sentiment bottom left, in the Sepia Versafine ink. |
|
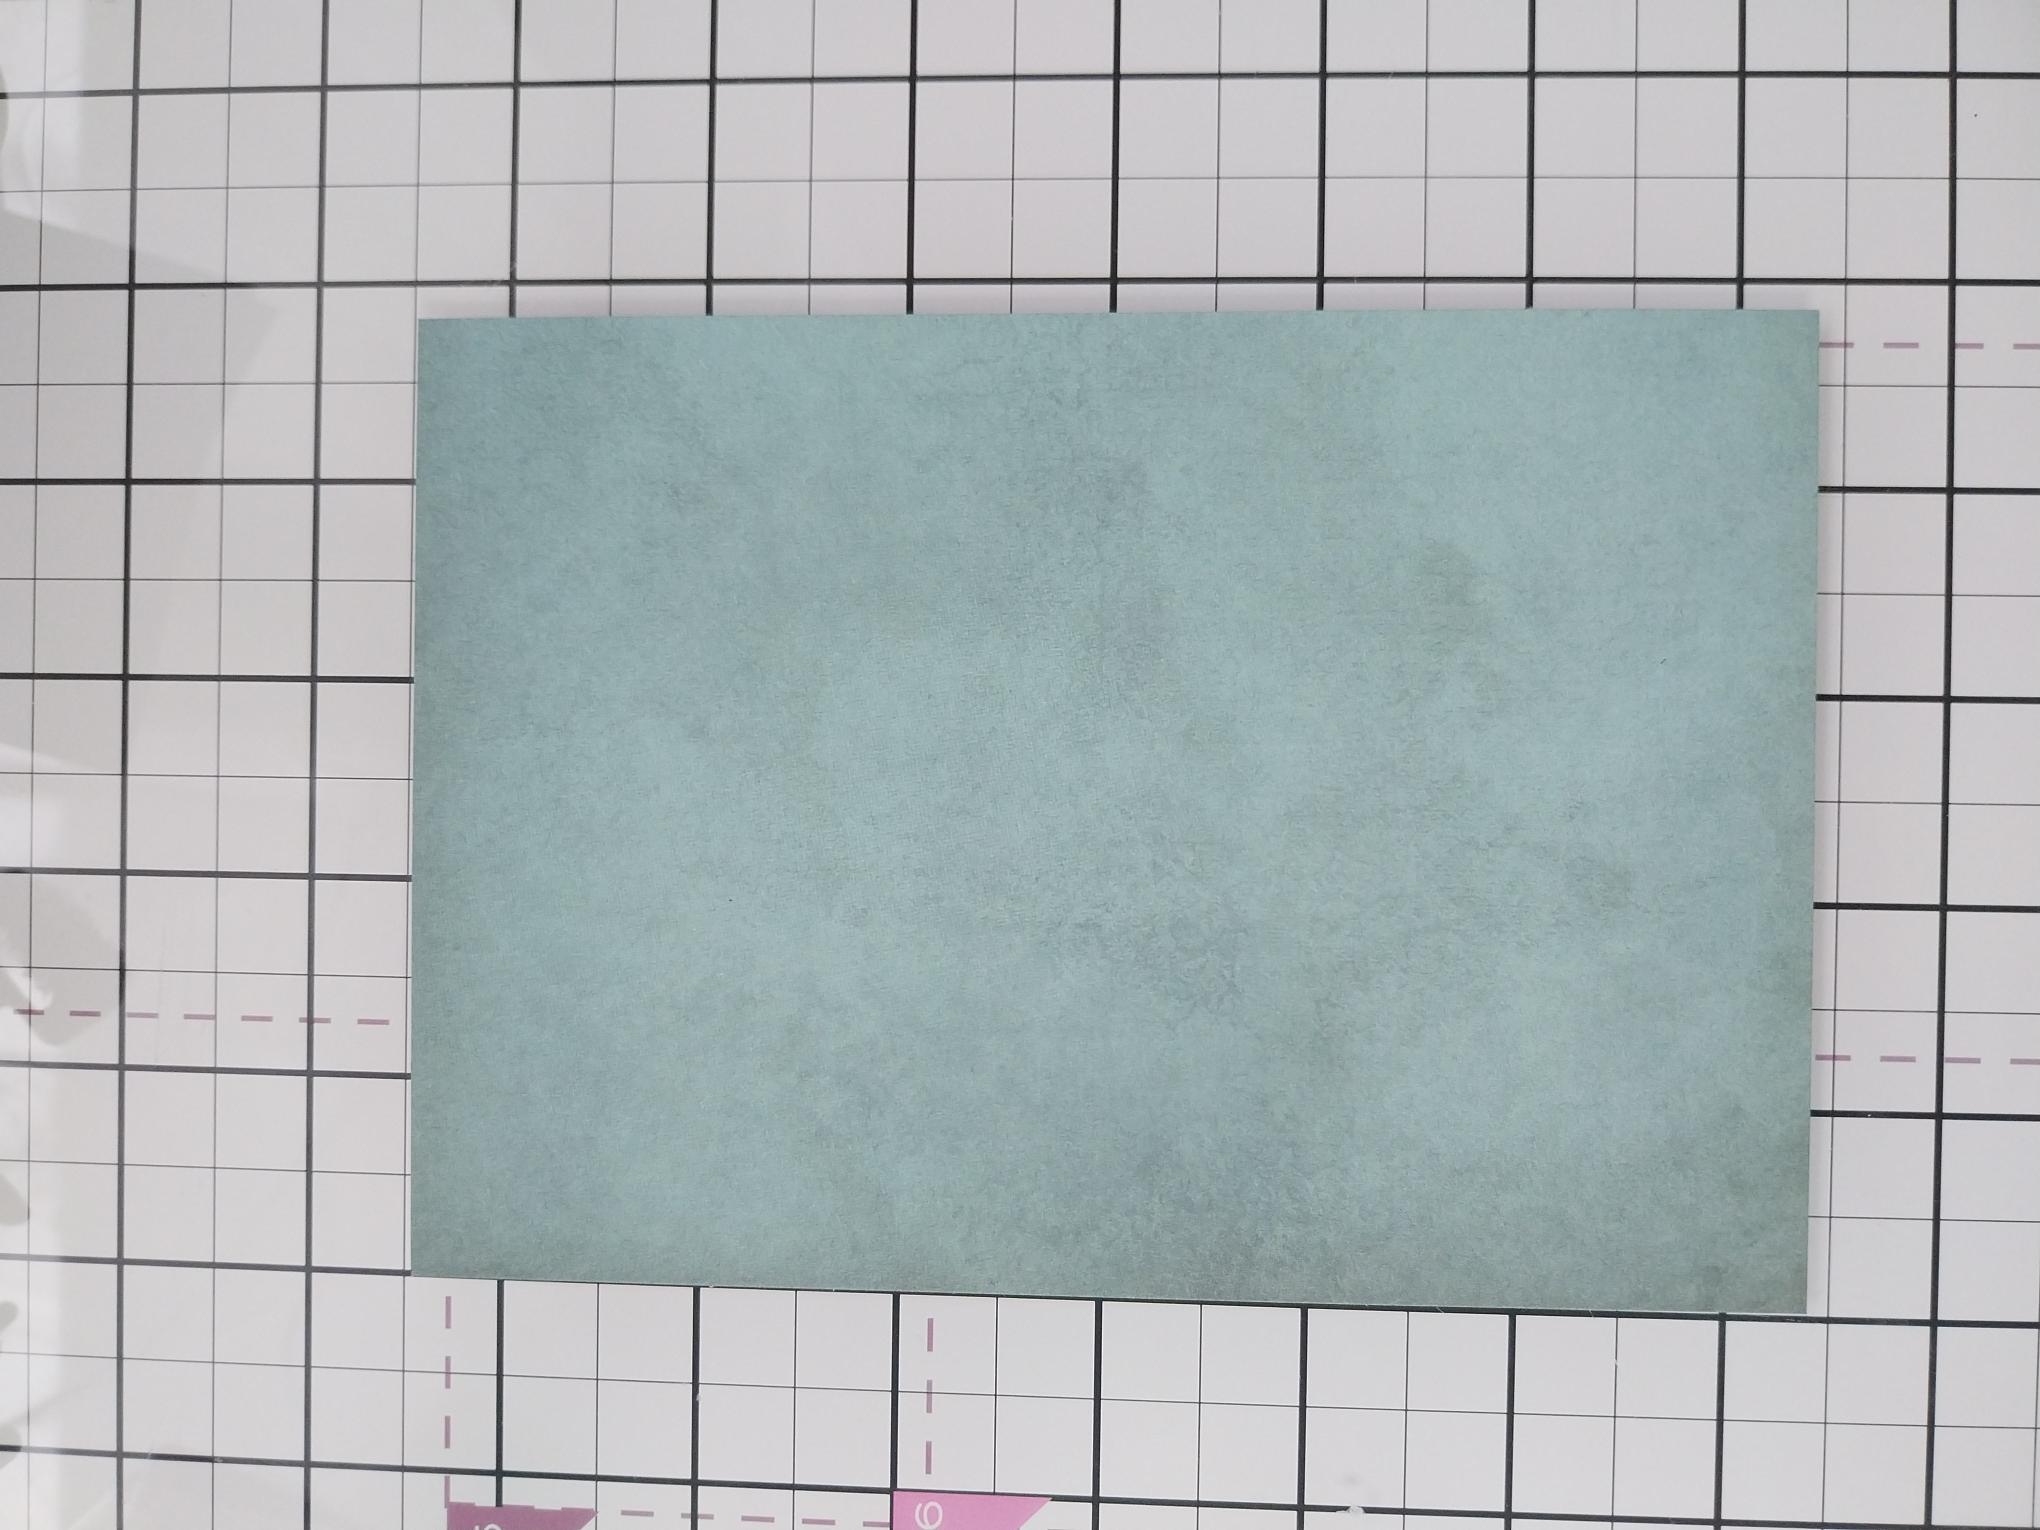
Cut a sheet of coordinating paper from your Shabby Chic paper pad, to 4 3/4" x 6 3/4". |

|
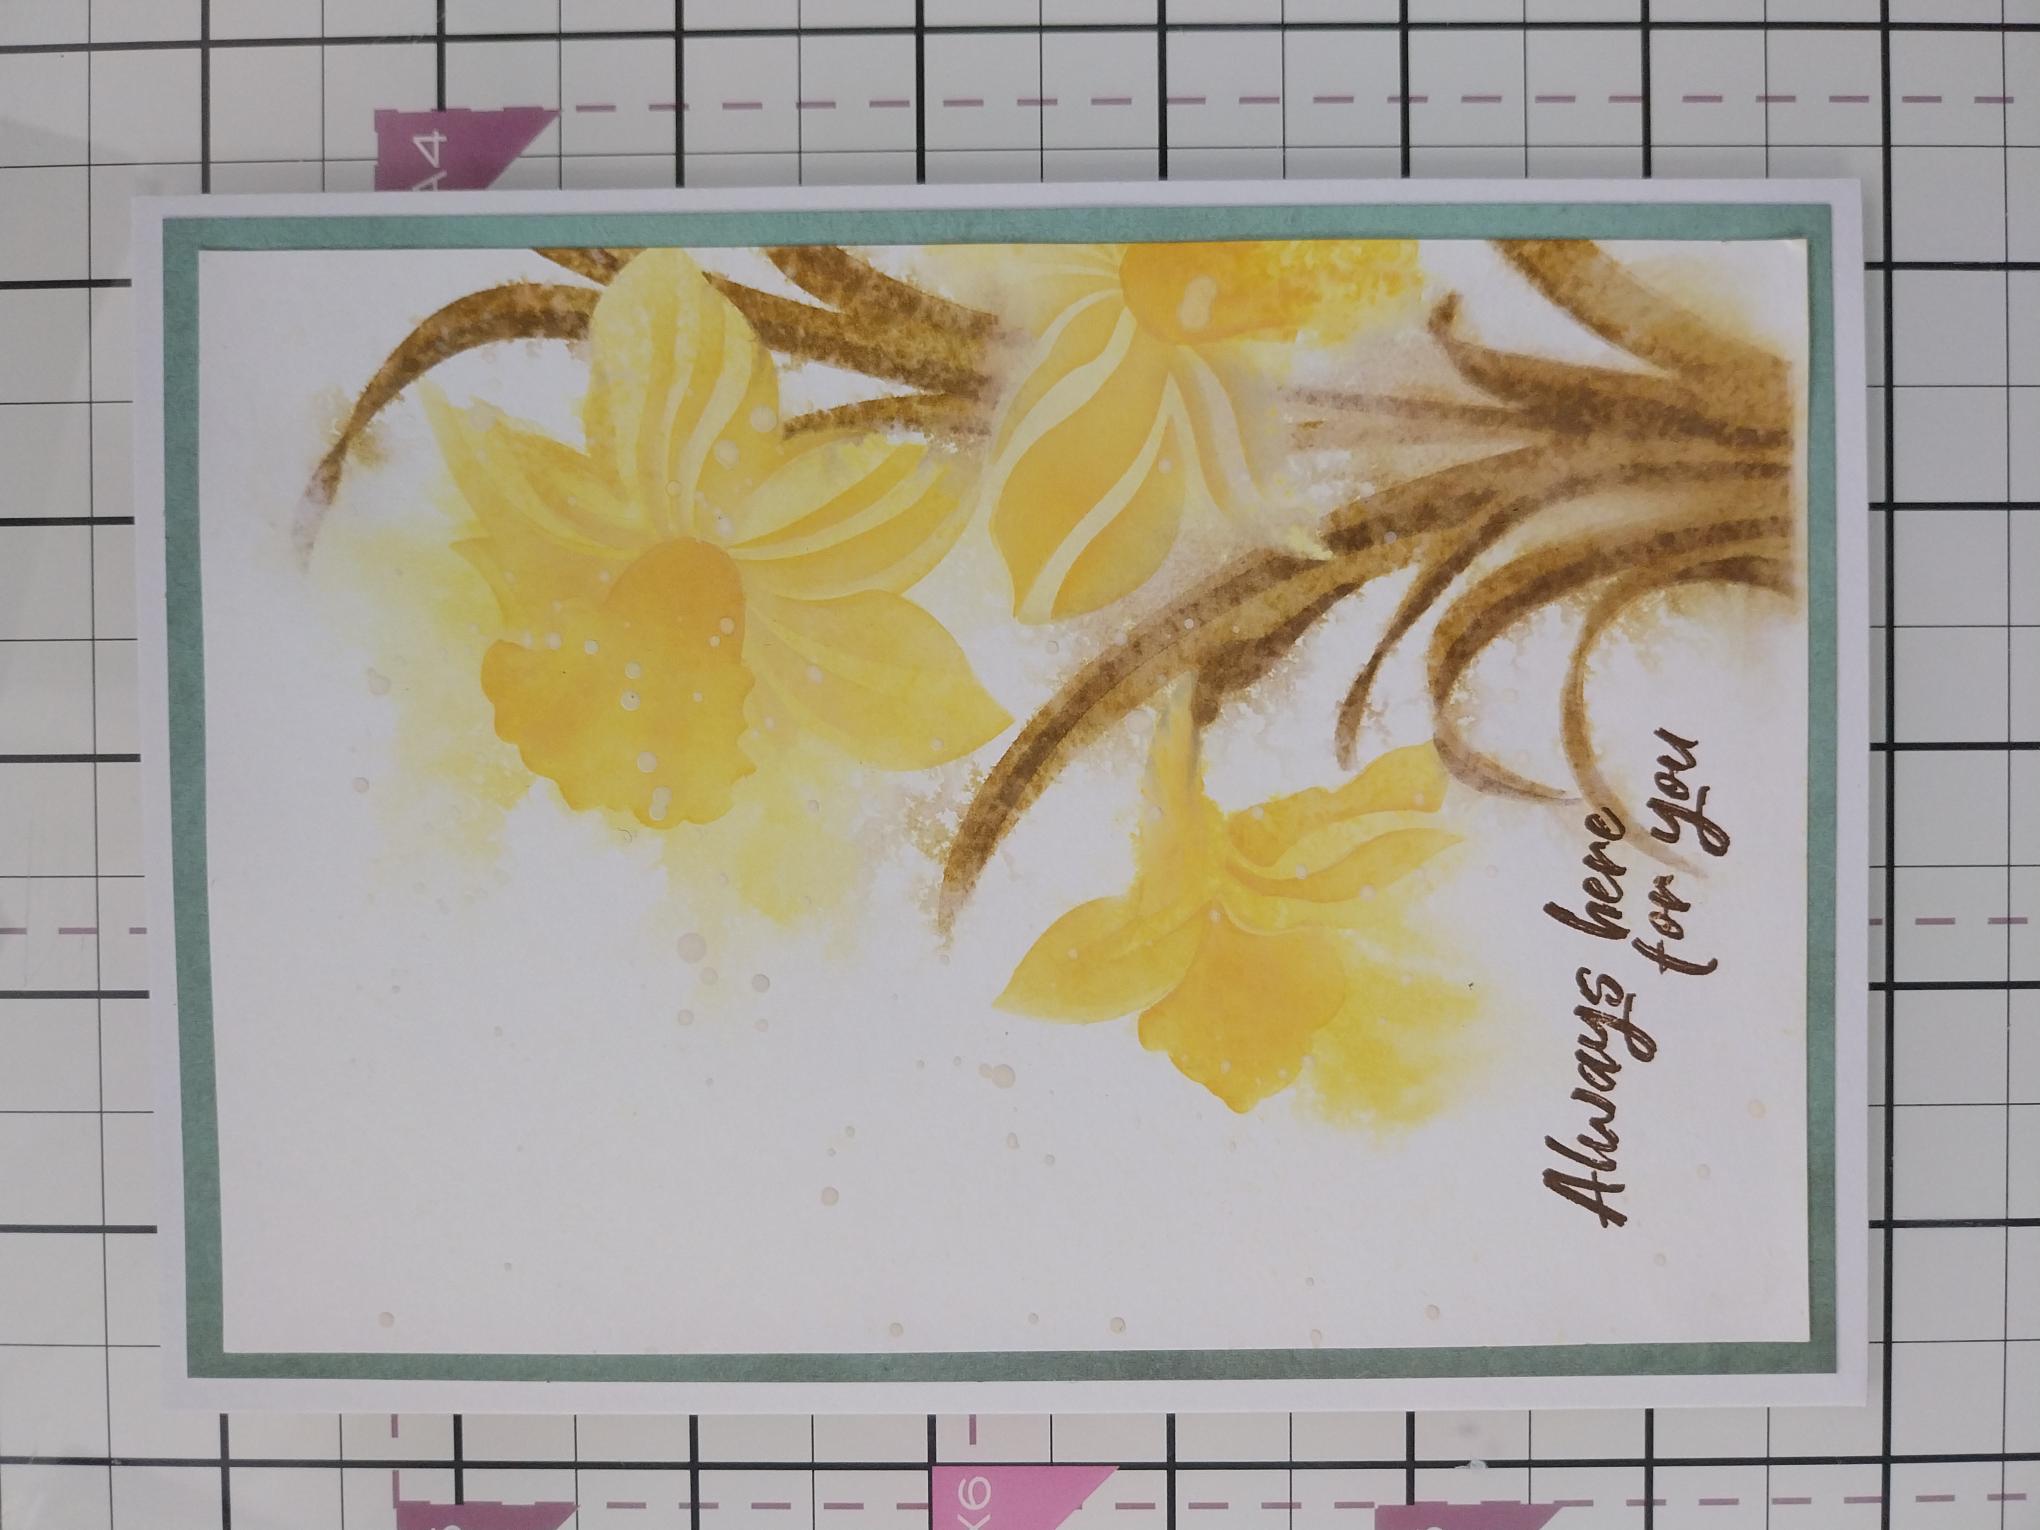
Mat your artwork onto the coordinating paper. |
|
Adhere to your card blank, to finish. |