Give your friends $10 off their first order!
Refer a FRIEND


WHAT YOU WILL NEED:
White card blank (7 x 7")
Black card (6 1/4 x 6 1/4")
White card (6 x 6")
White card (5 x 3")
White card (5 x 2")
Stamps from Thirsty Brush UnLtd More Than Words Creative Stamps
Stamps from Thirsty Brush UnLtd Buttercup Bubbles Creative Stamps
Dies from Thirsty Brush UnLtd Tagged Creative Dies
Versafine Ink Pad: Onyx Black
Distress Oxide: Villainous Potion, Fossilized Amber
White gel pen
Black pen
Gossip Glitter pen: Clear overlay
Bakers Twine
Hole punch
Blending brush or tool
Water spray bottle
Paint brush
Sequins: Amethyst
Eureka 101
Paper Trimmer
Perfect Together Glue
Die Cutting machine
[click image to enlarge] 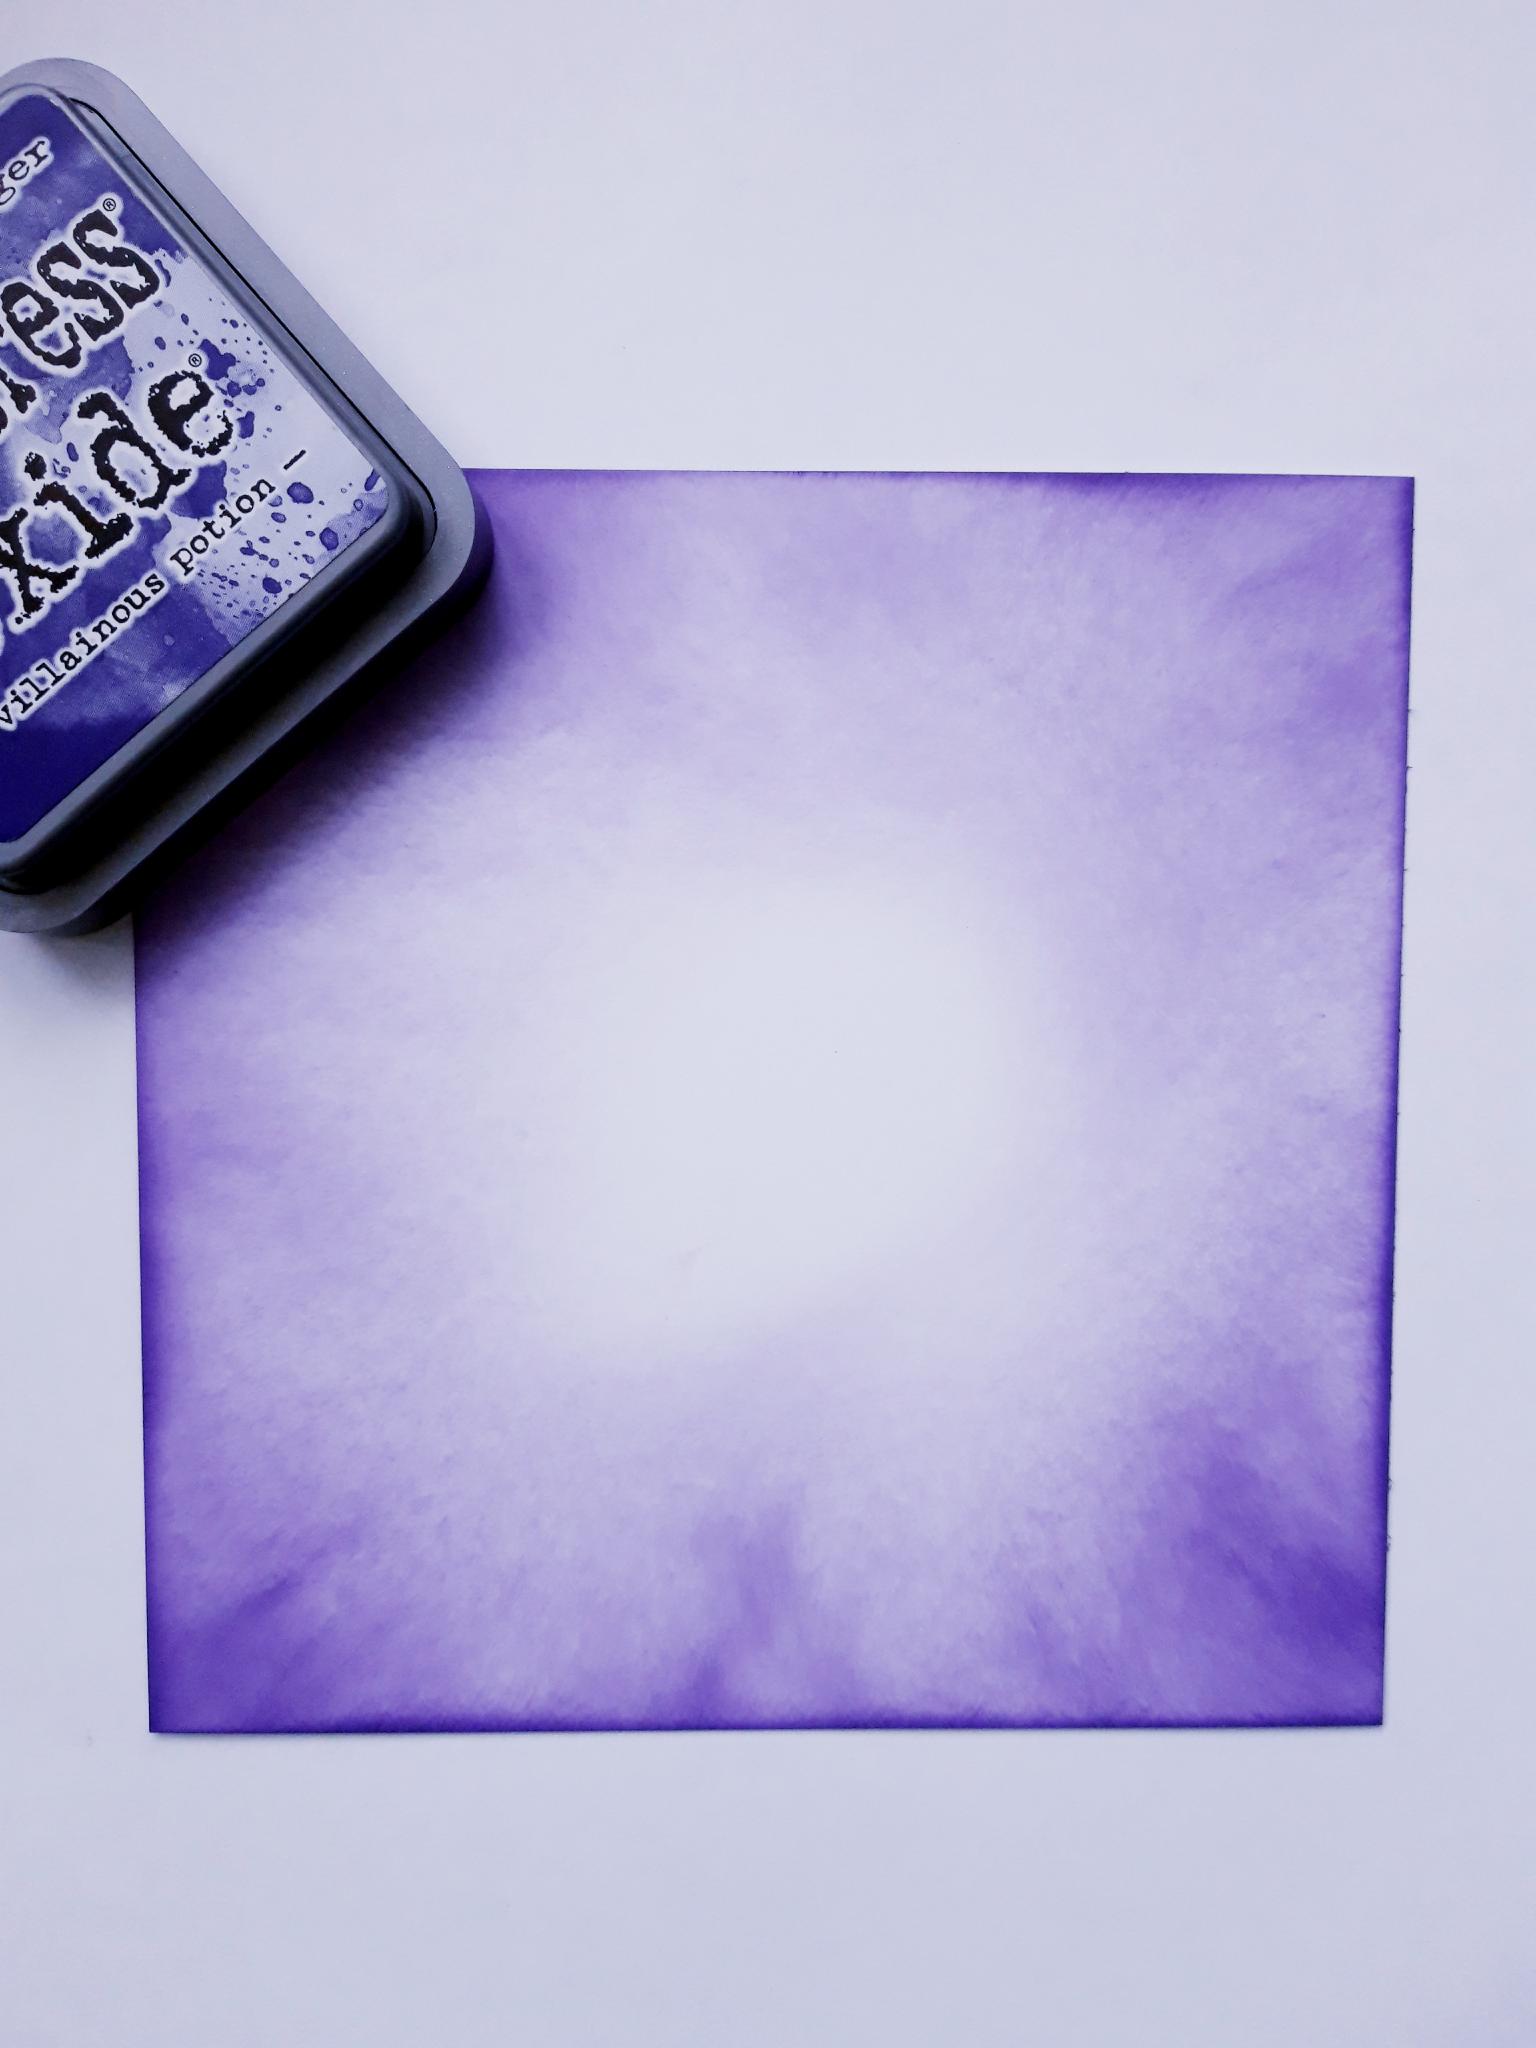
|
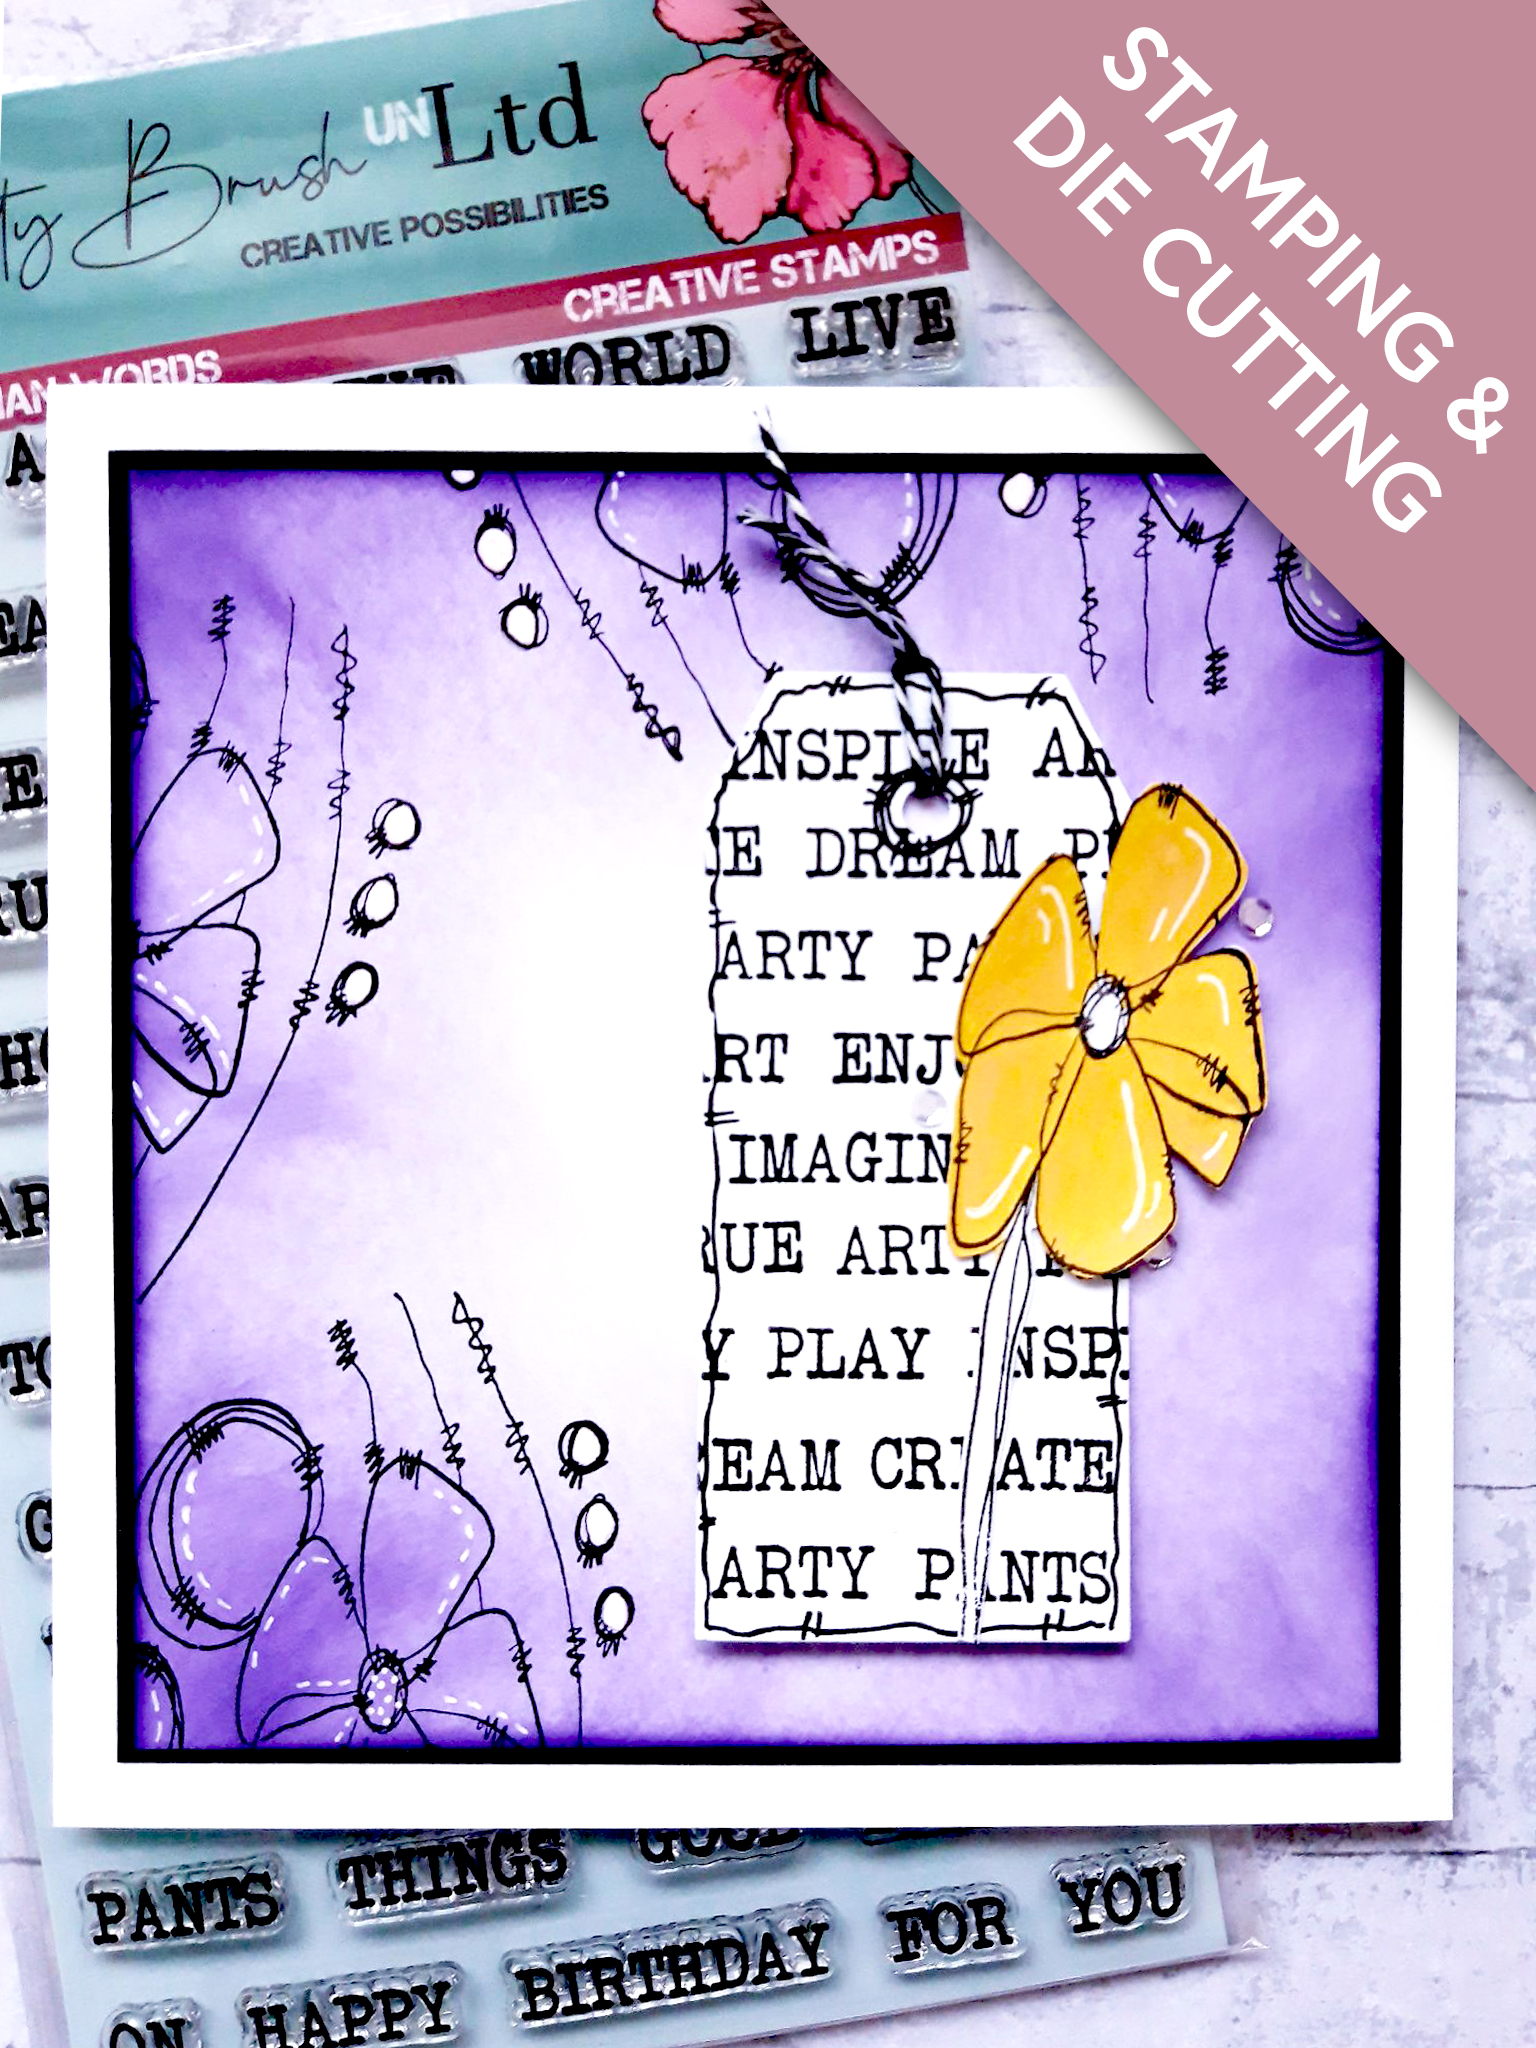
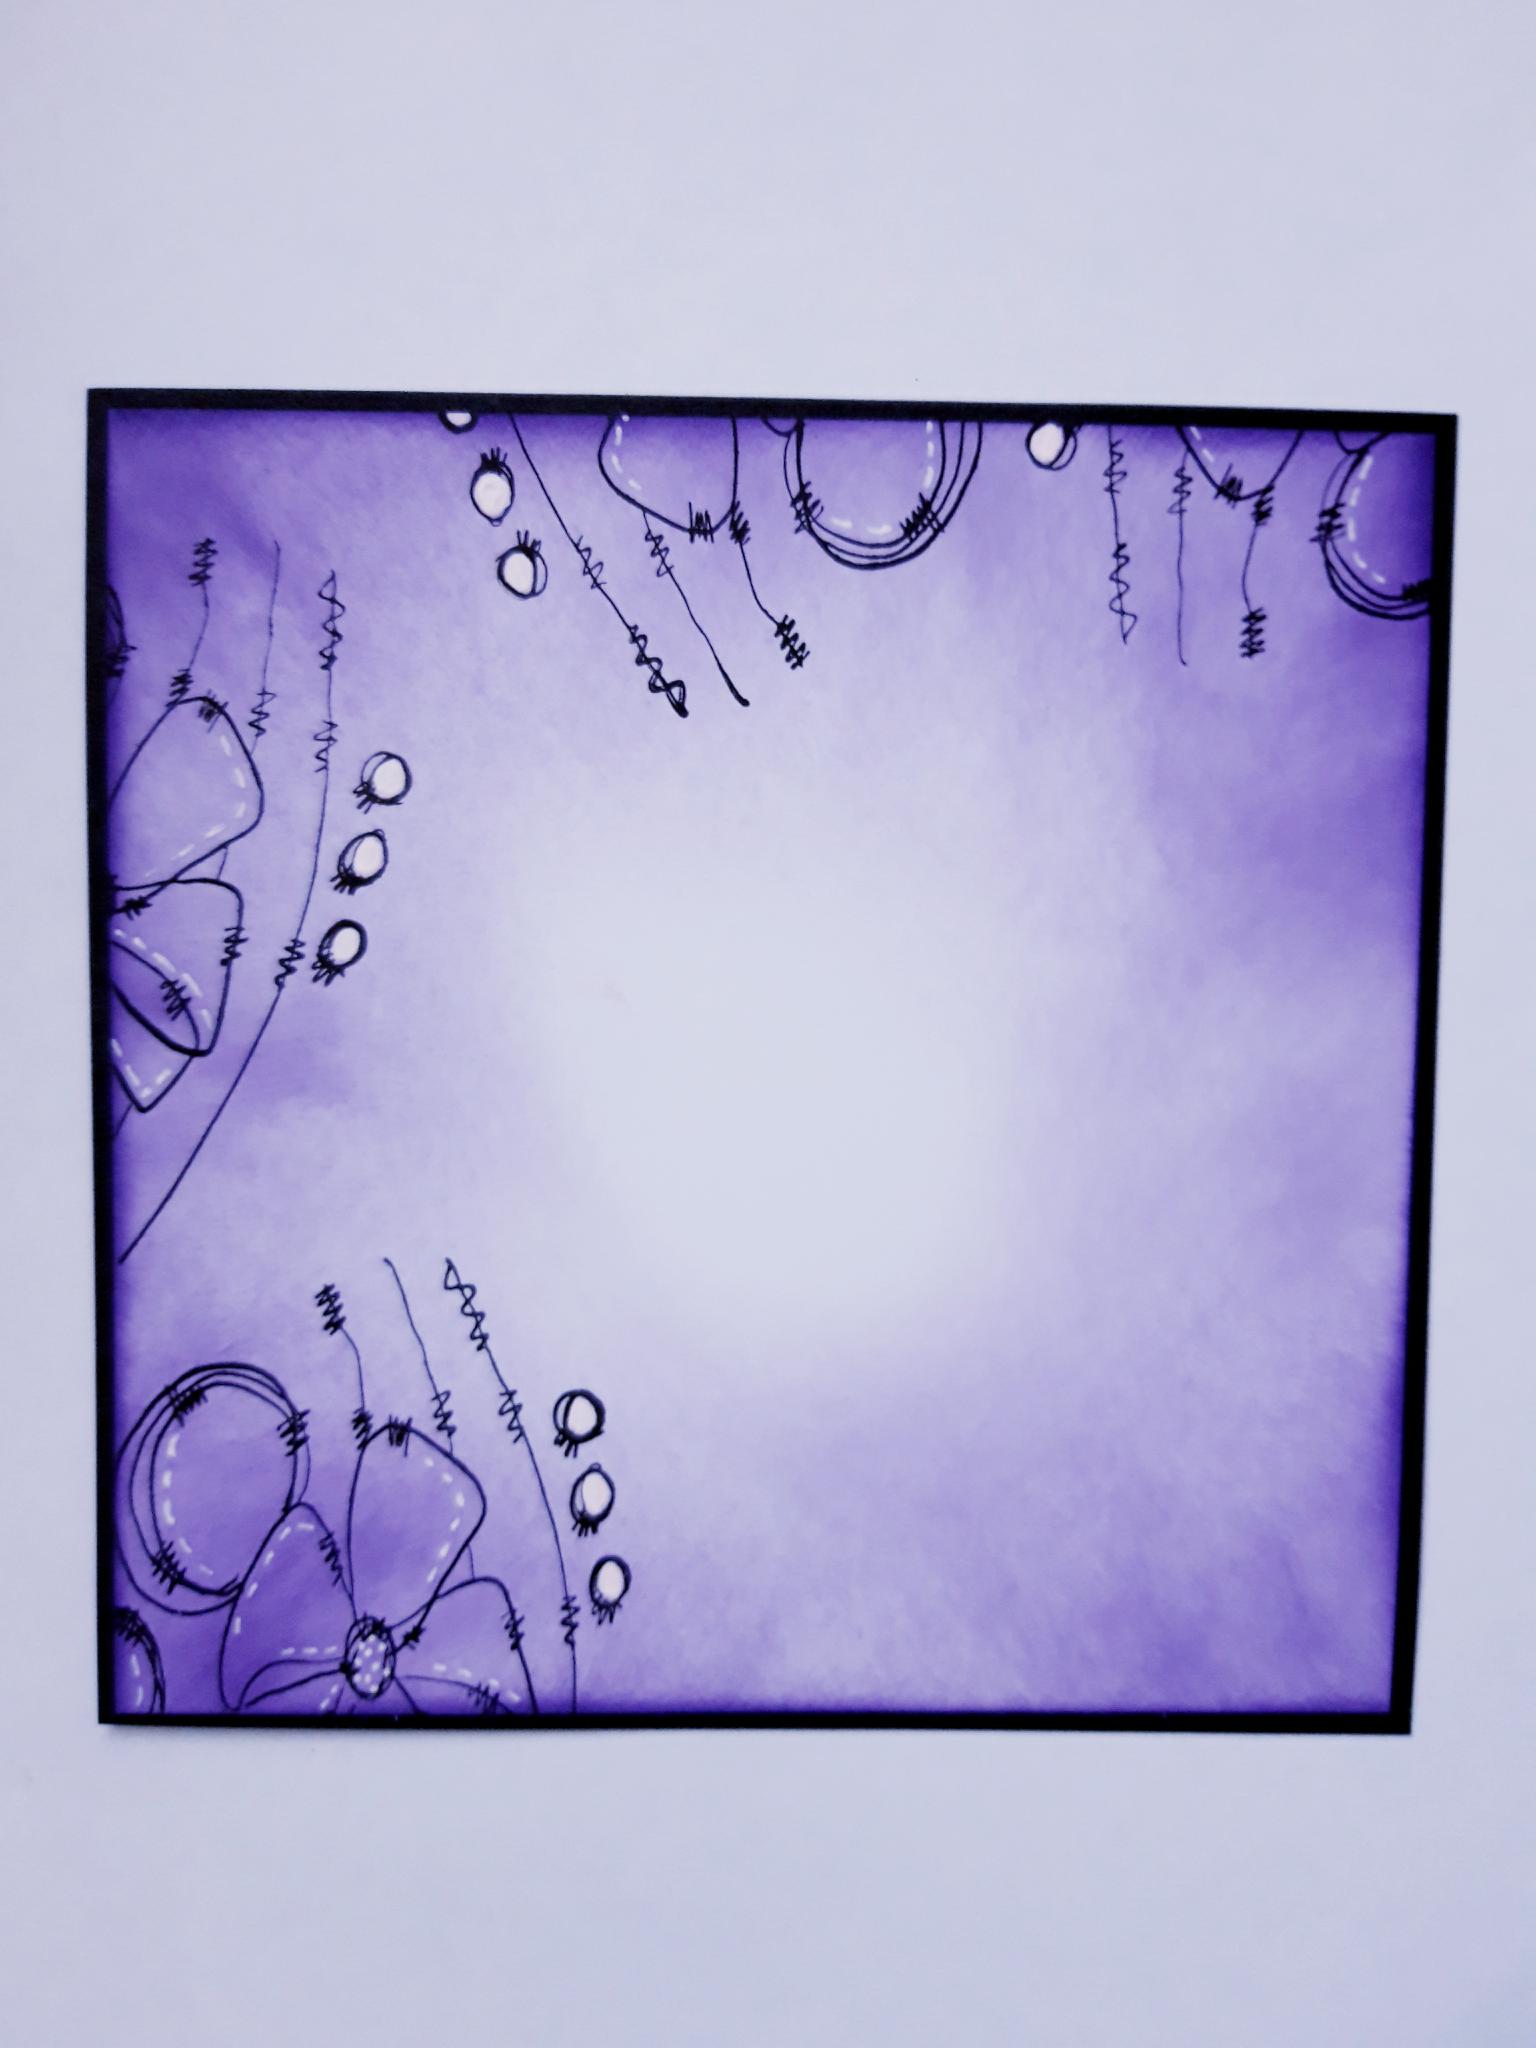
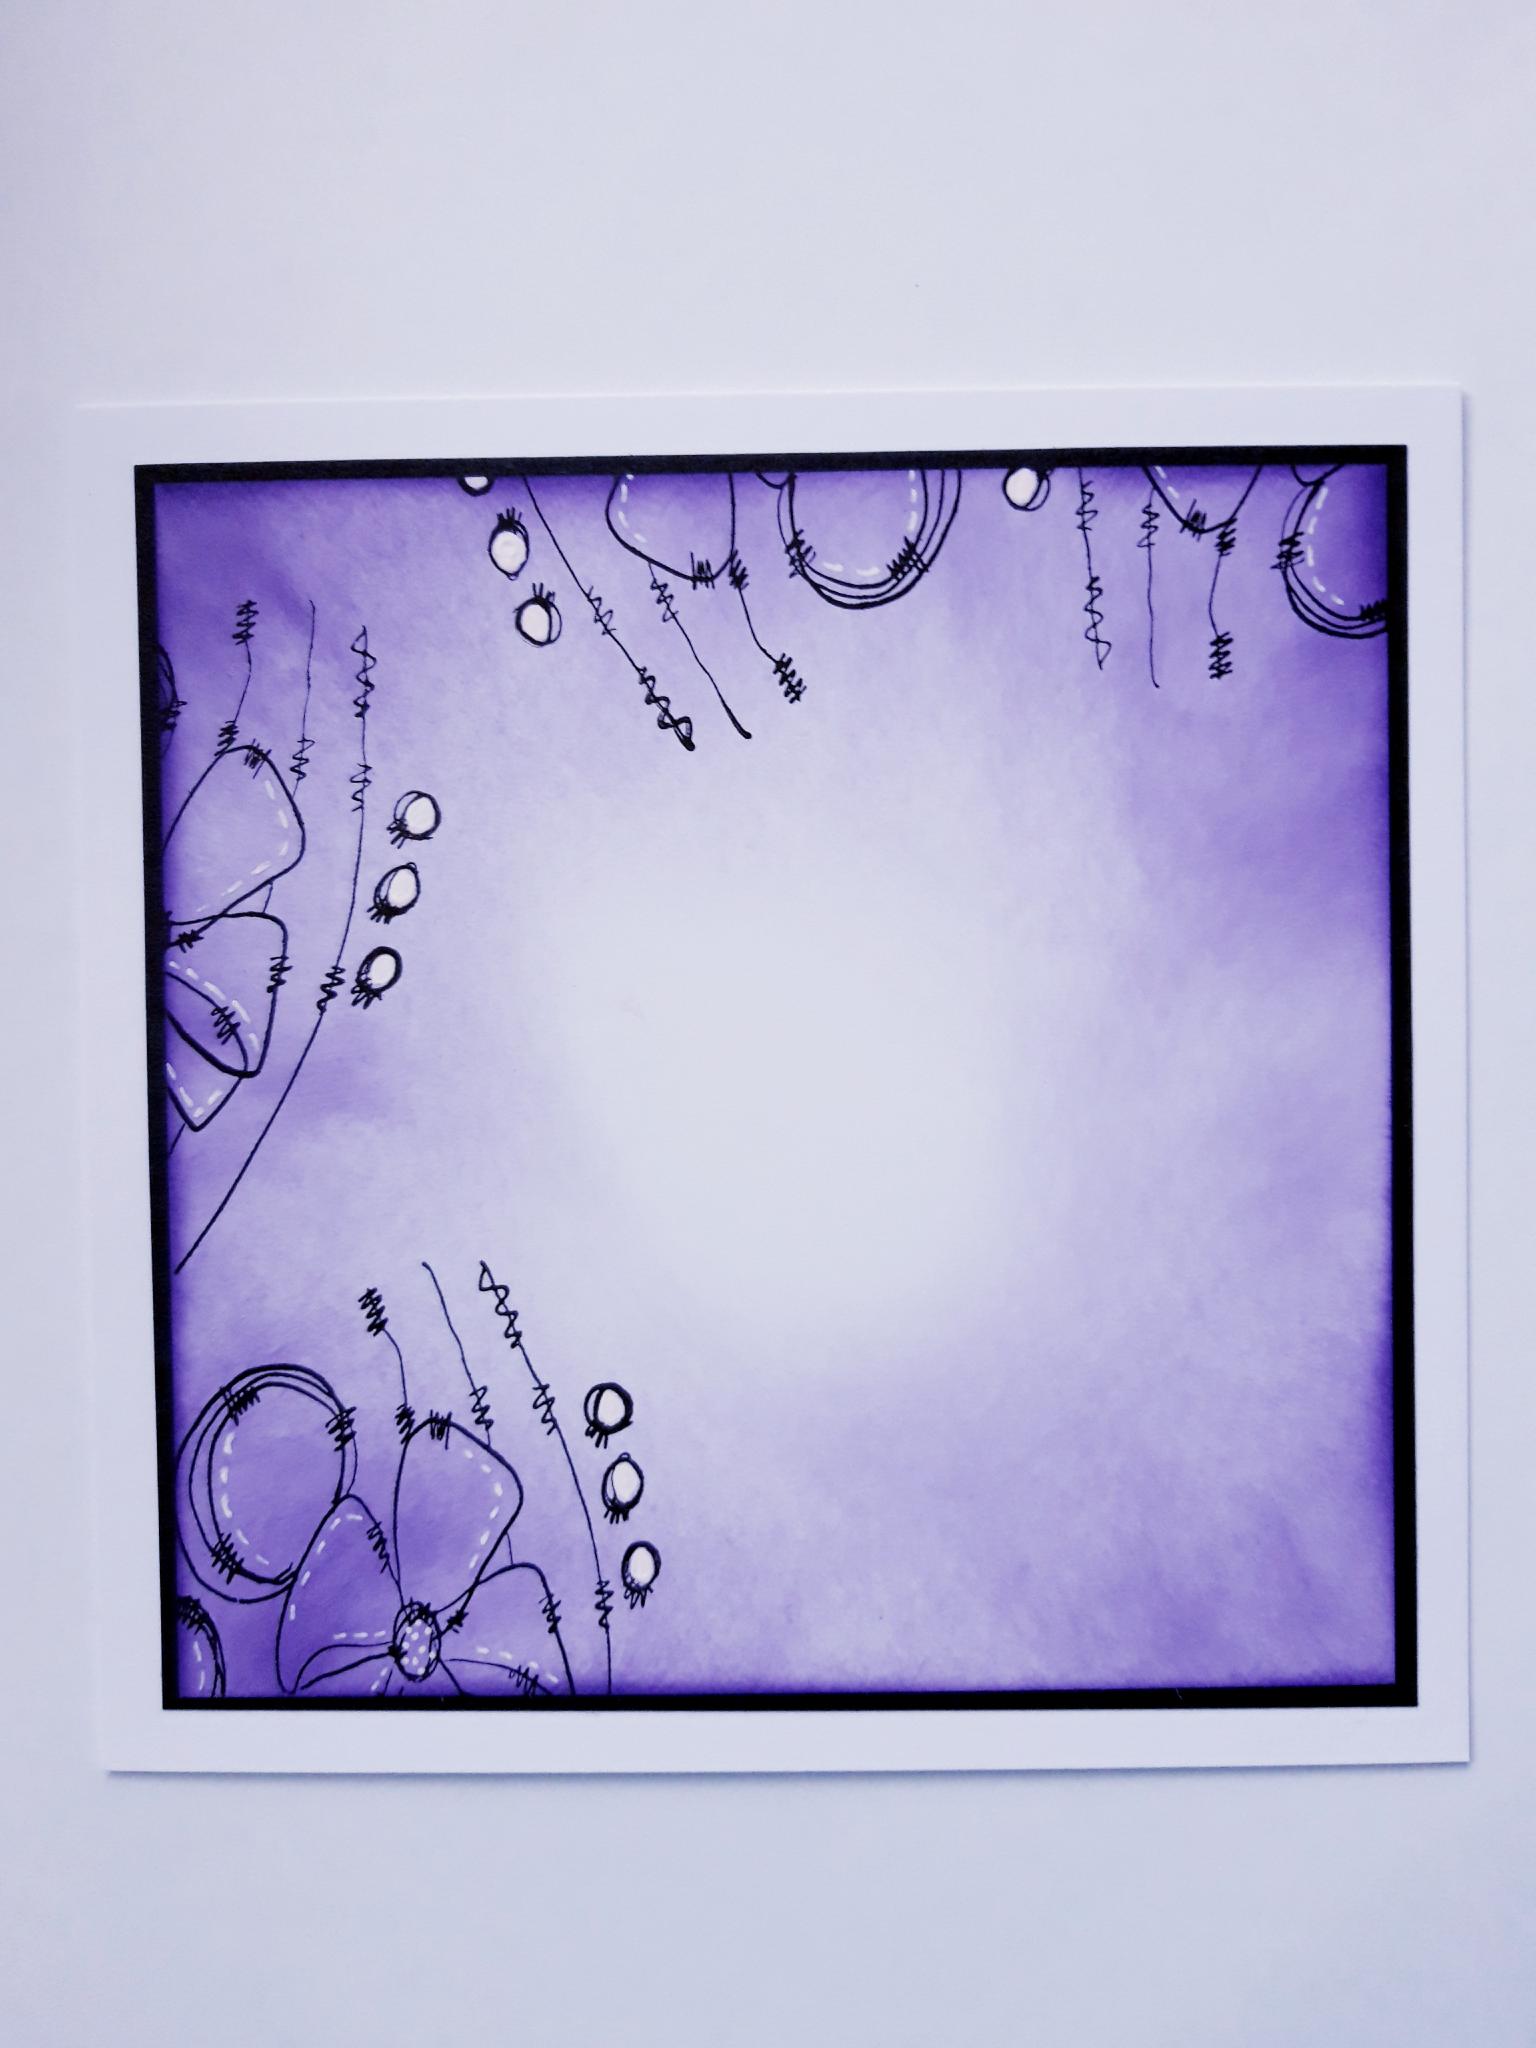
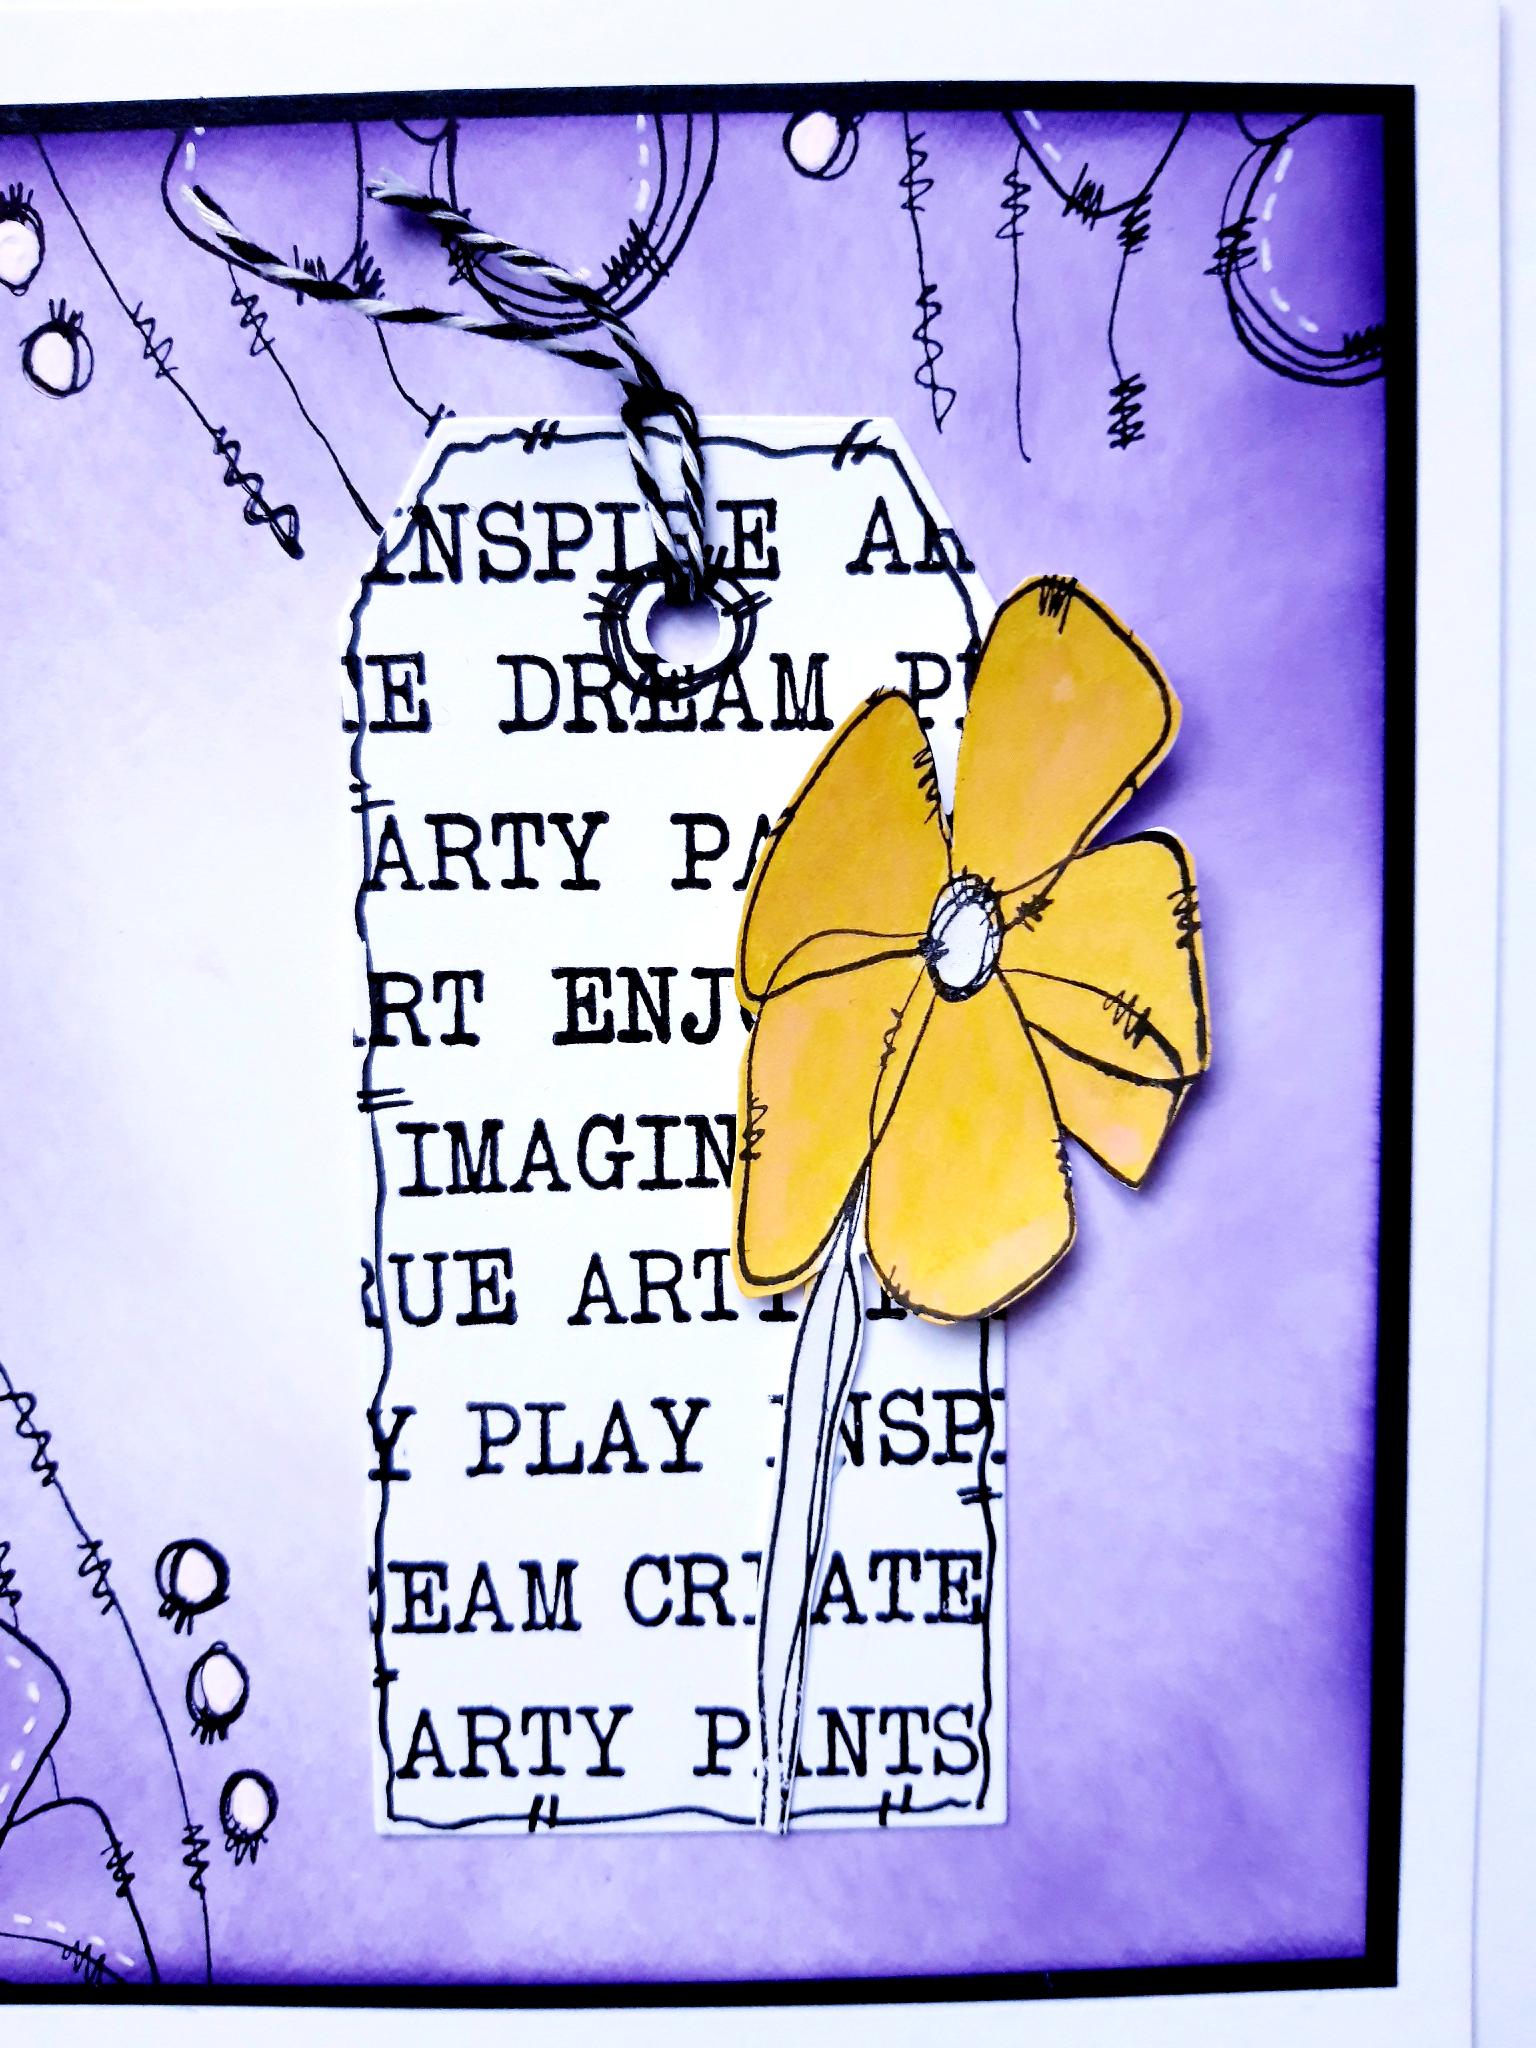
Blend the Villainous Potion Oxide around the edges of the 6x6" white card, with your blending brush, fading the colour out towards the centre.
|
|
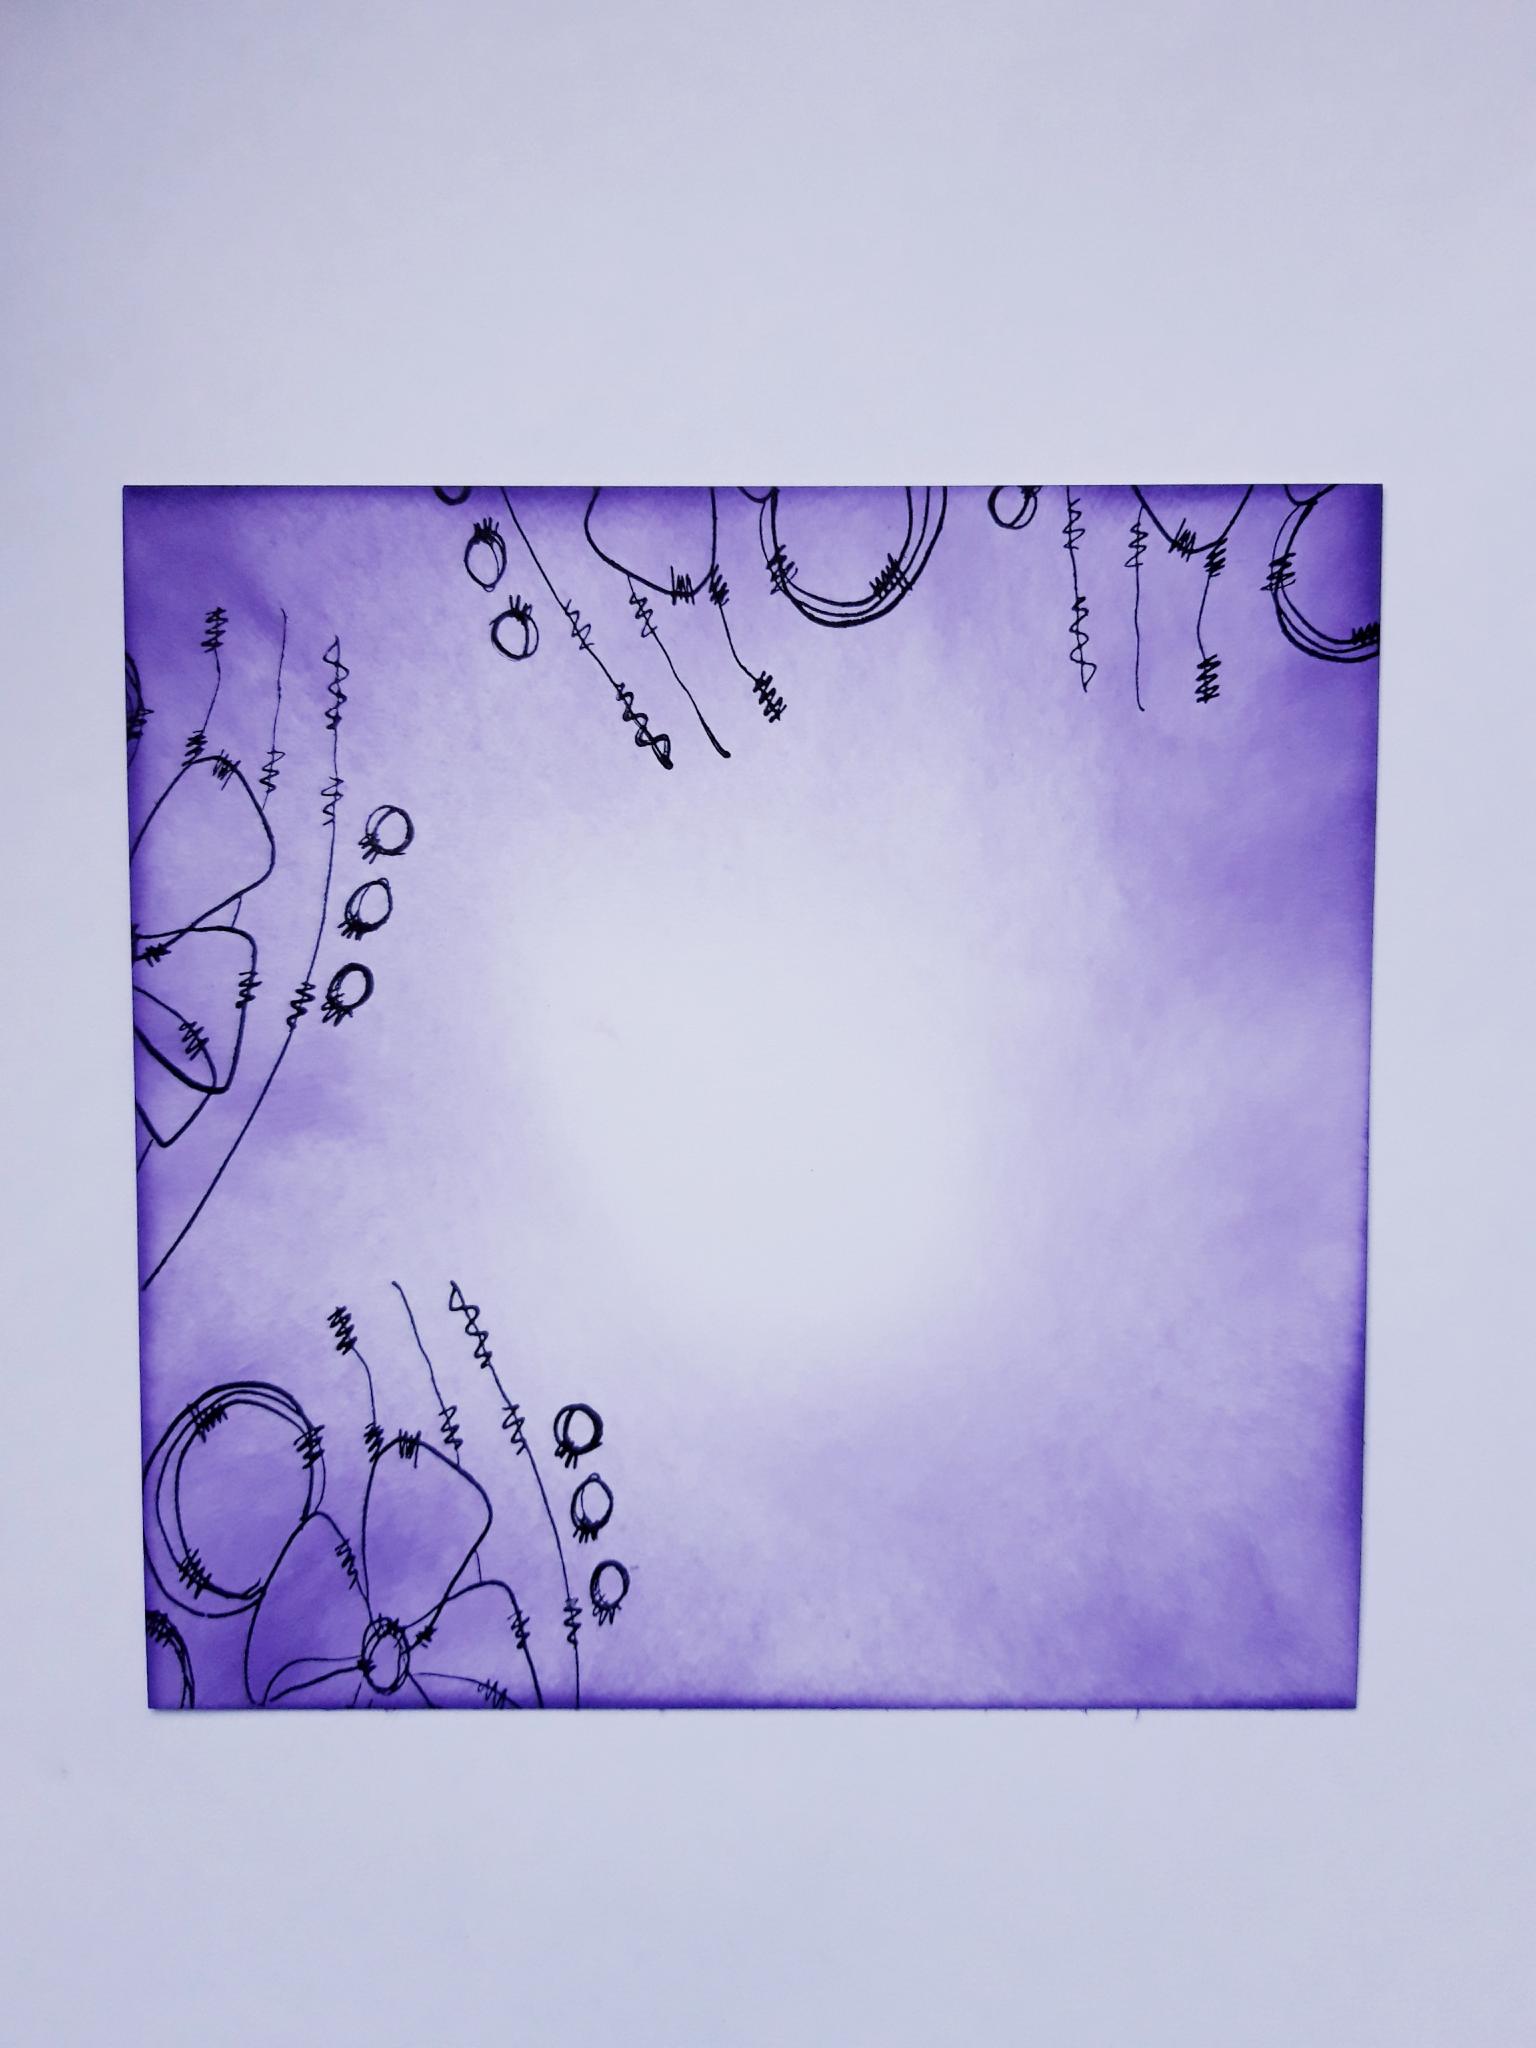
Ink up the floral stamp from the Buttercup Bubbles stamp set, with the Onyx Black Versafine. Stamp just off the top and left hand sides of your background. |
|
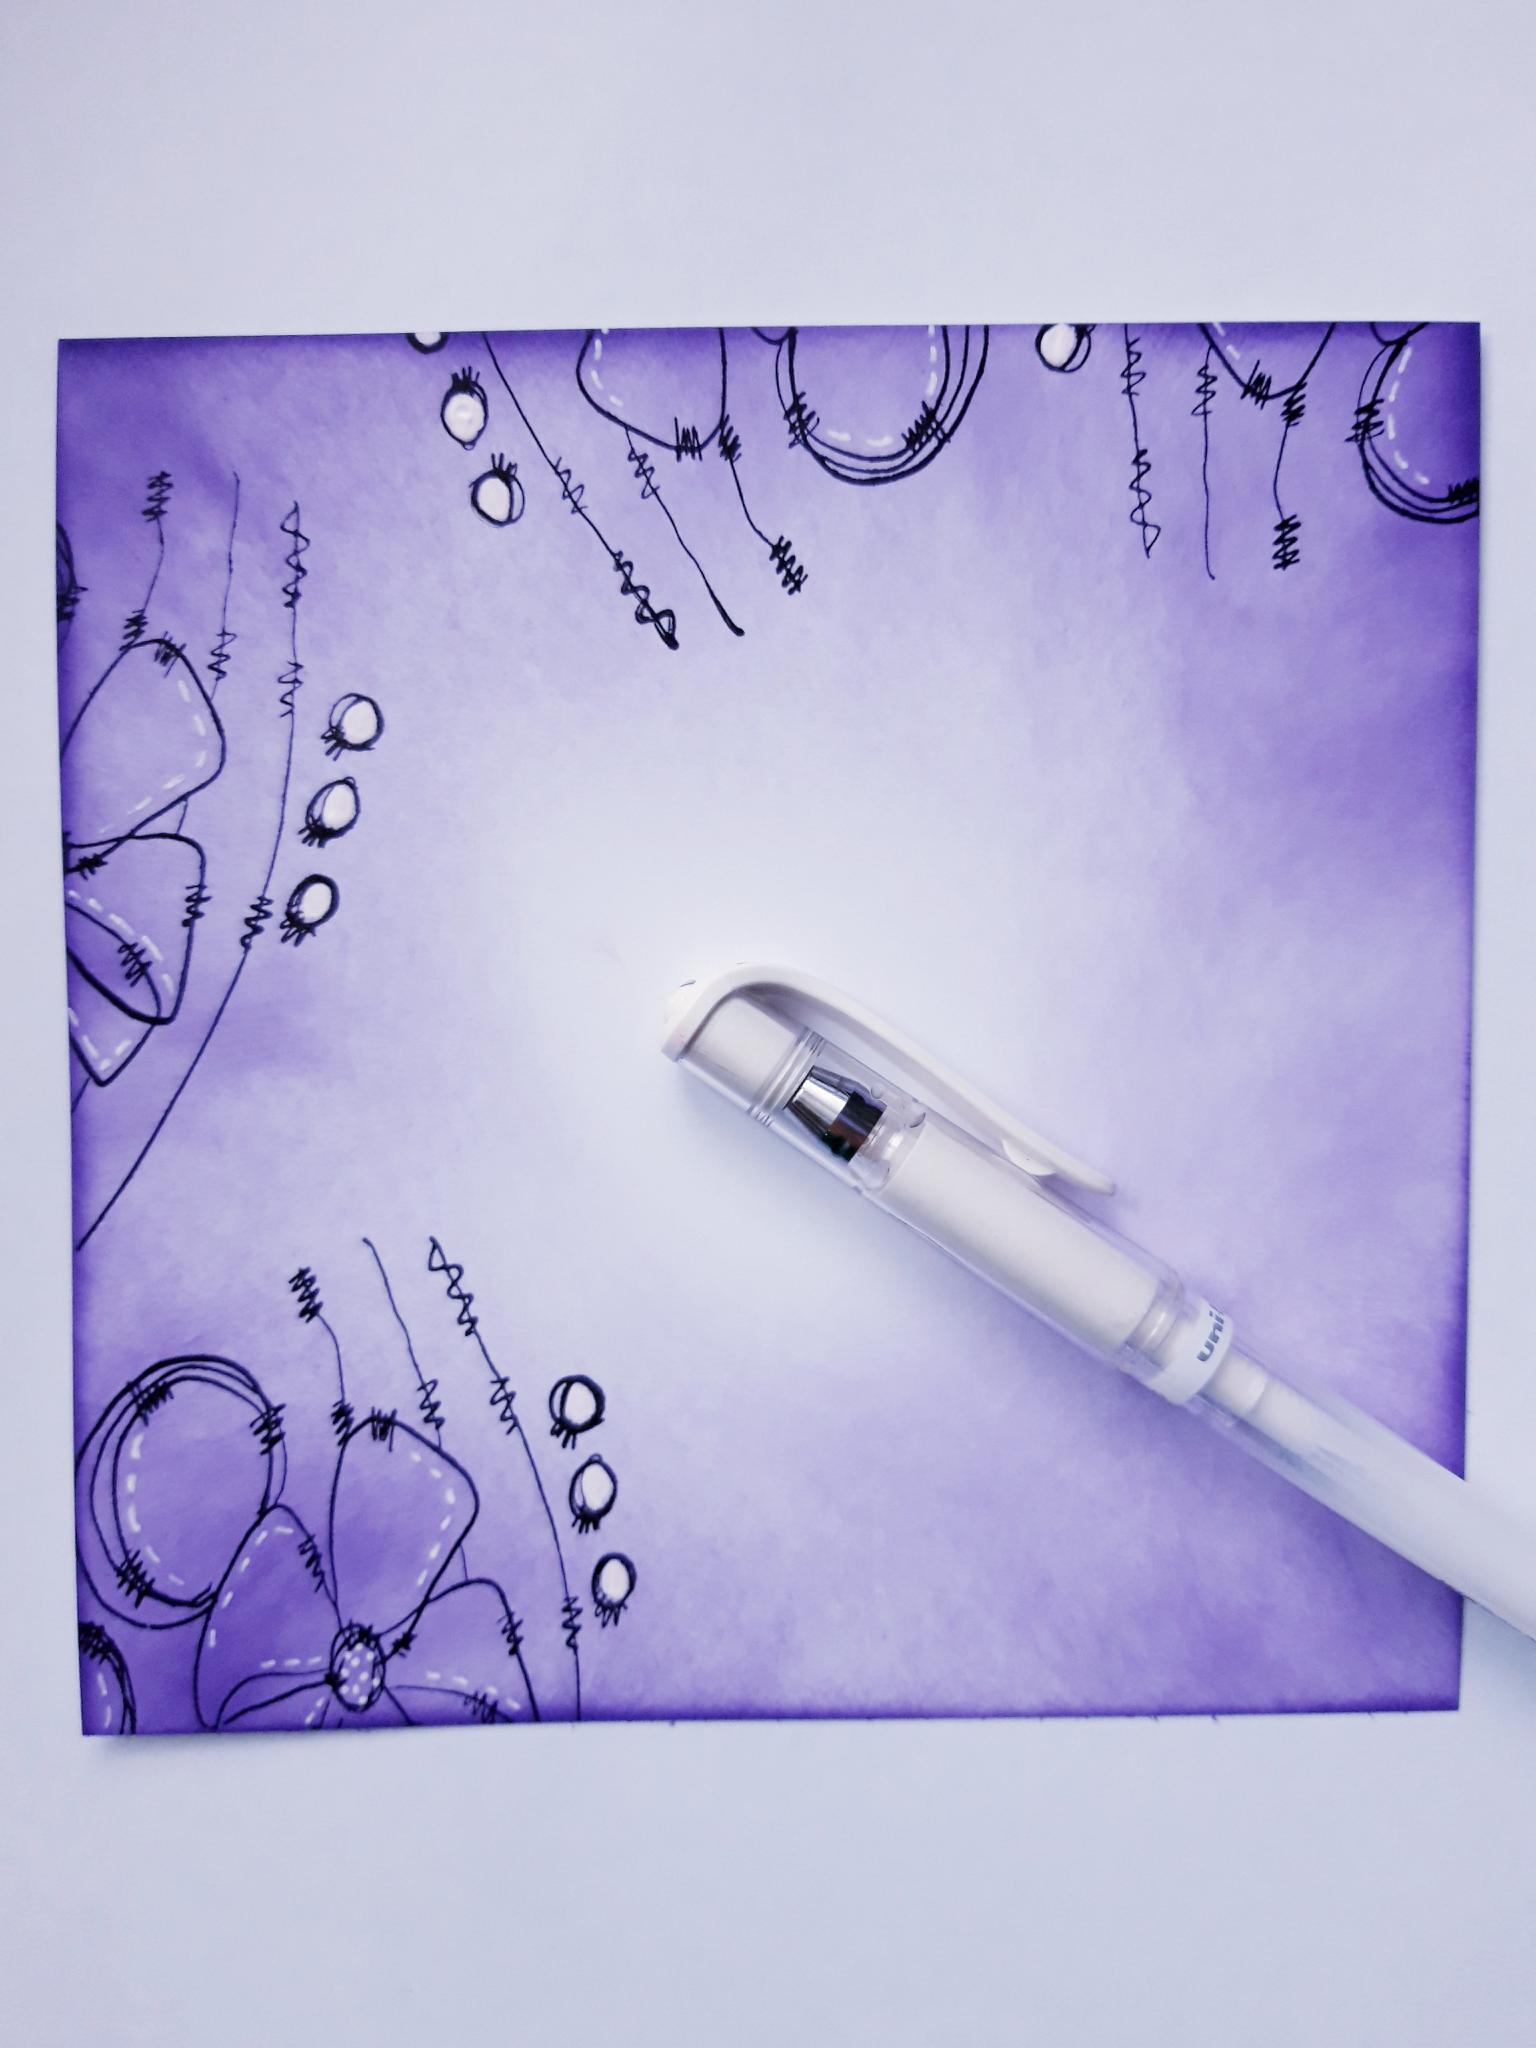
Once the ink is dry, use your white gel pen to add stitched detail to your stamped images, and colour in the little circles. |
|
Glue your background on to the black card. |
|
Glue this on to the front of your card blank, and set to one side. |
|
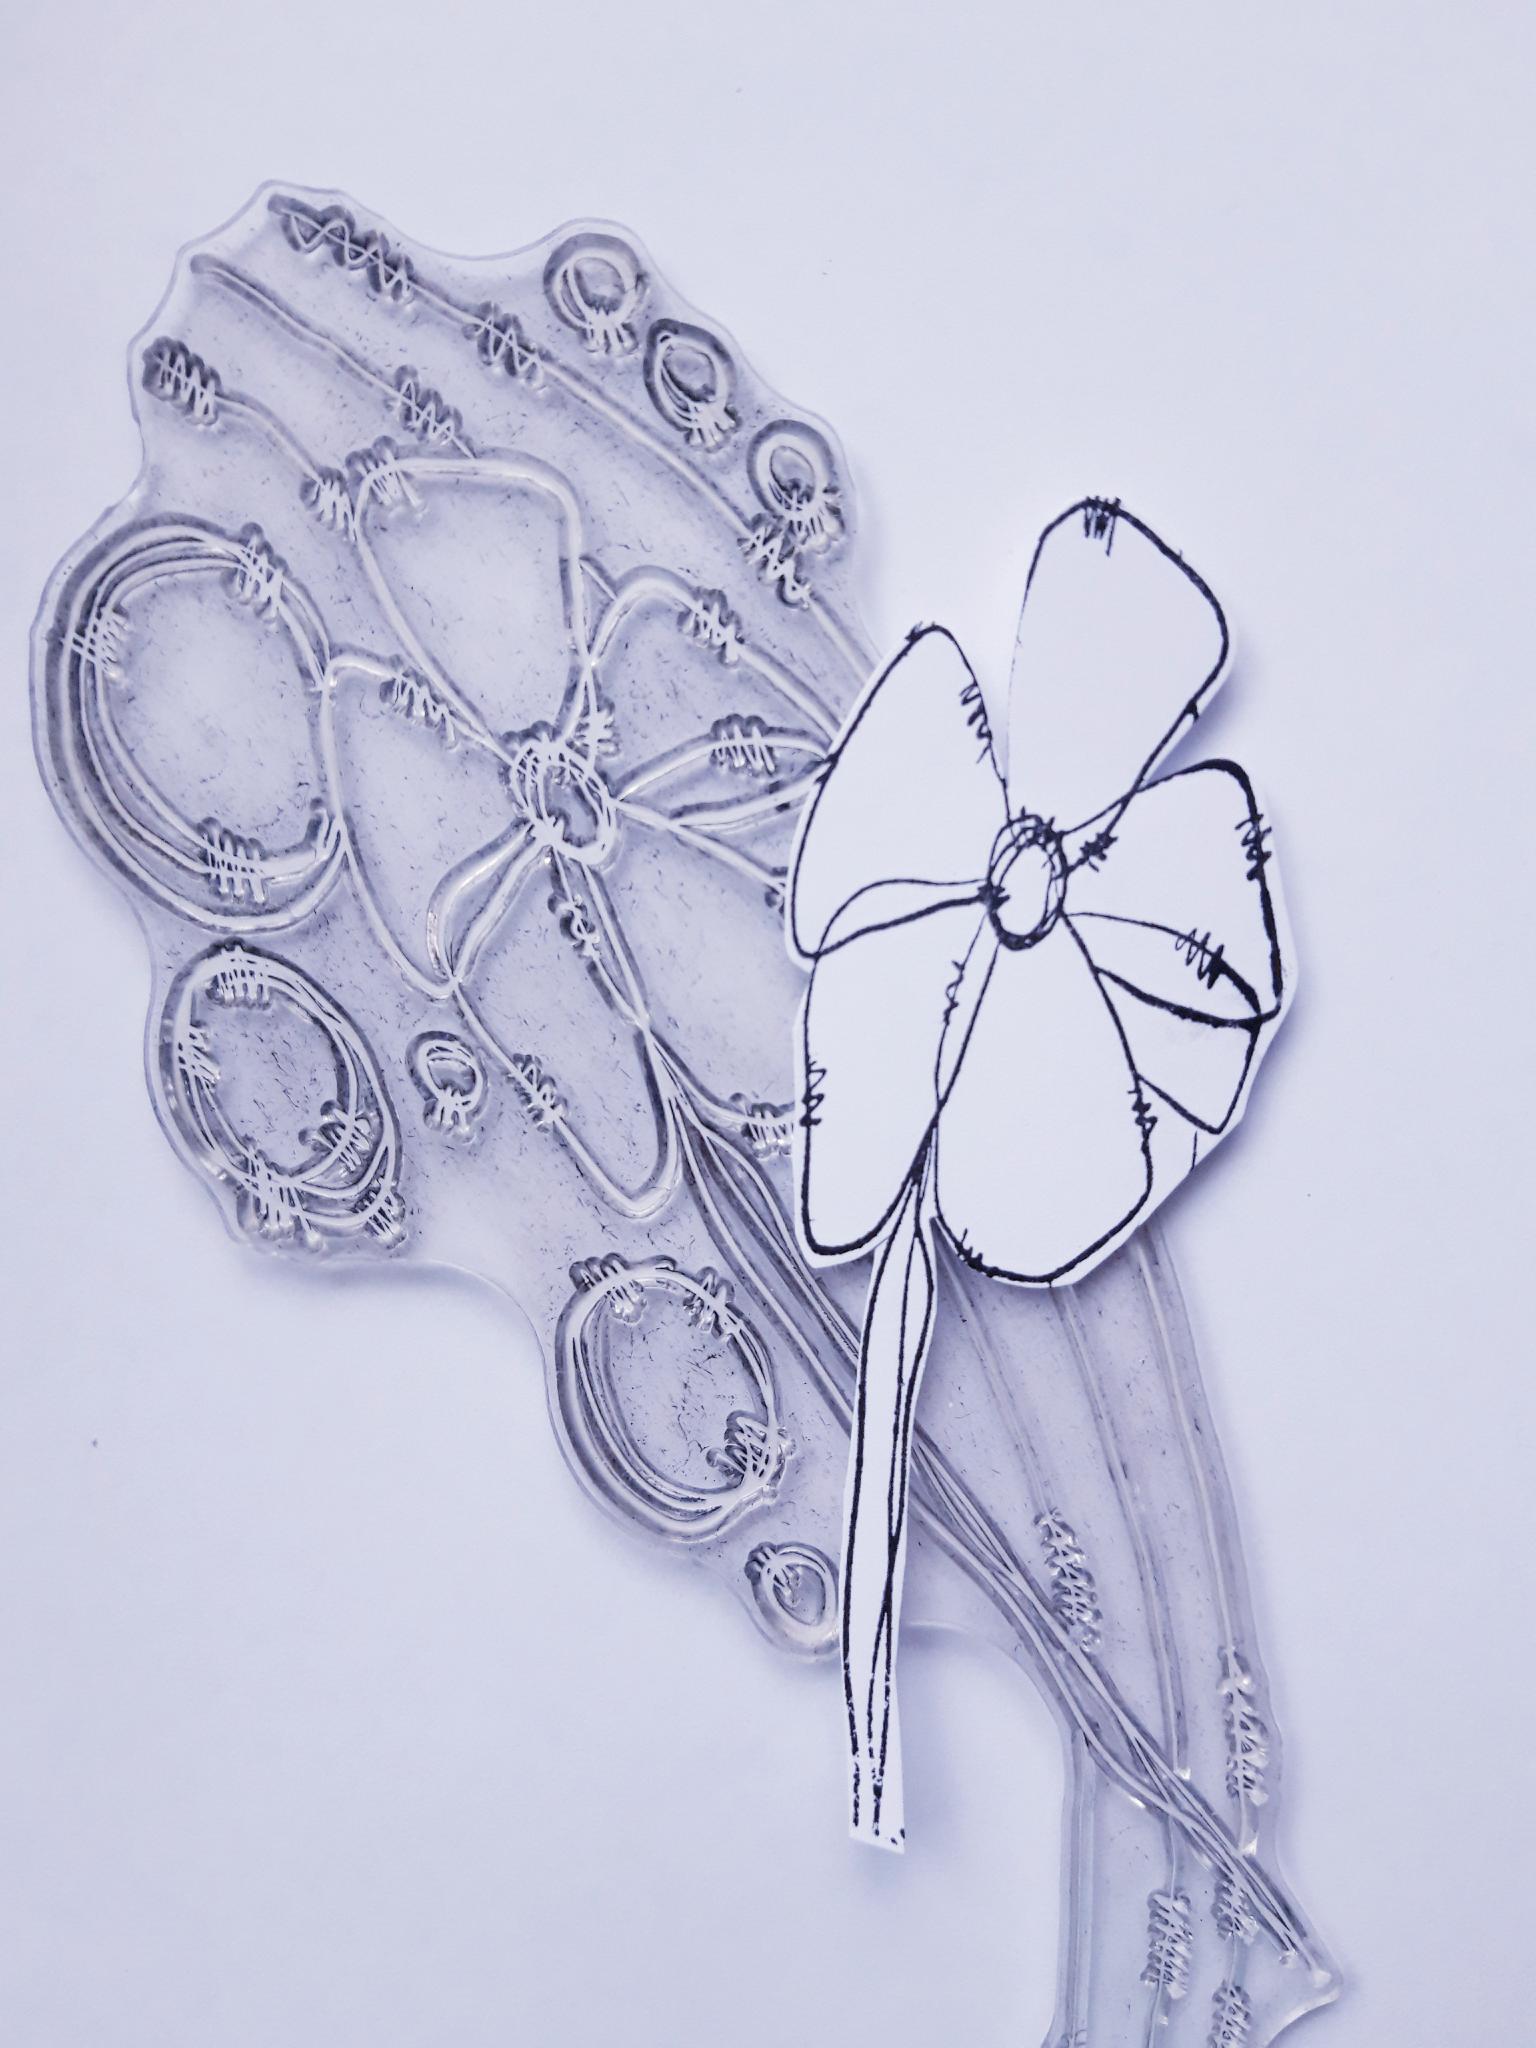
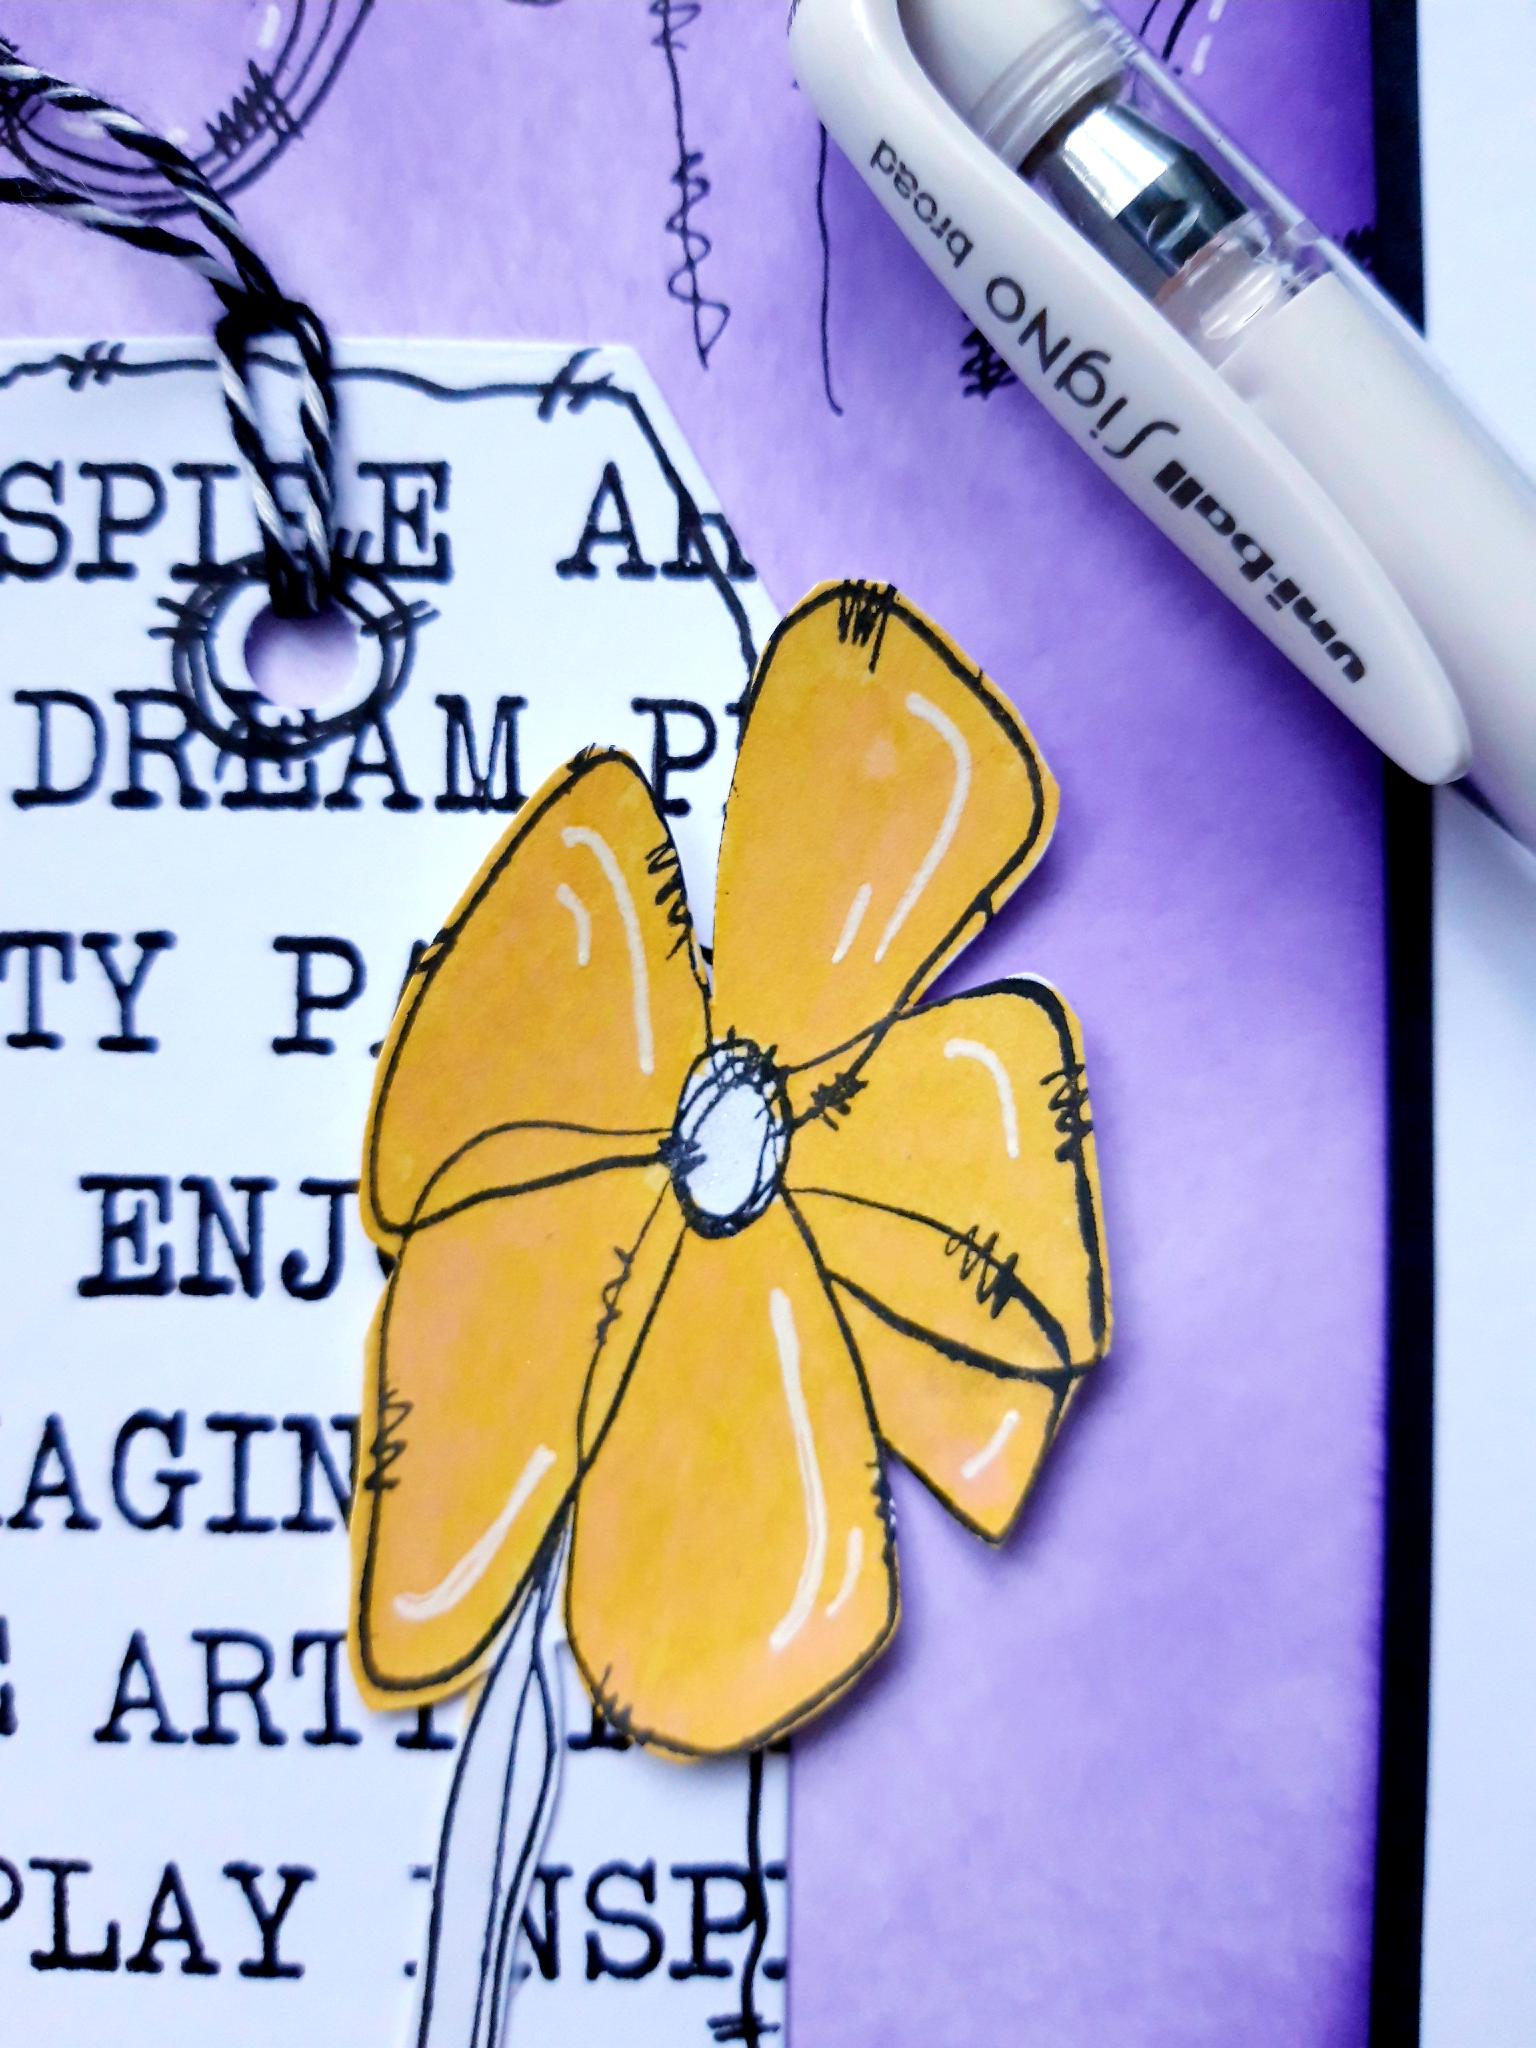
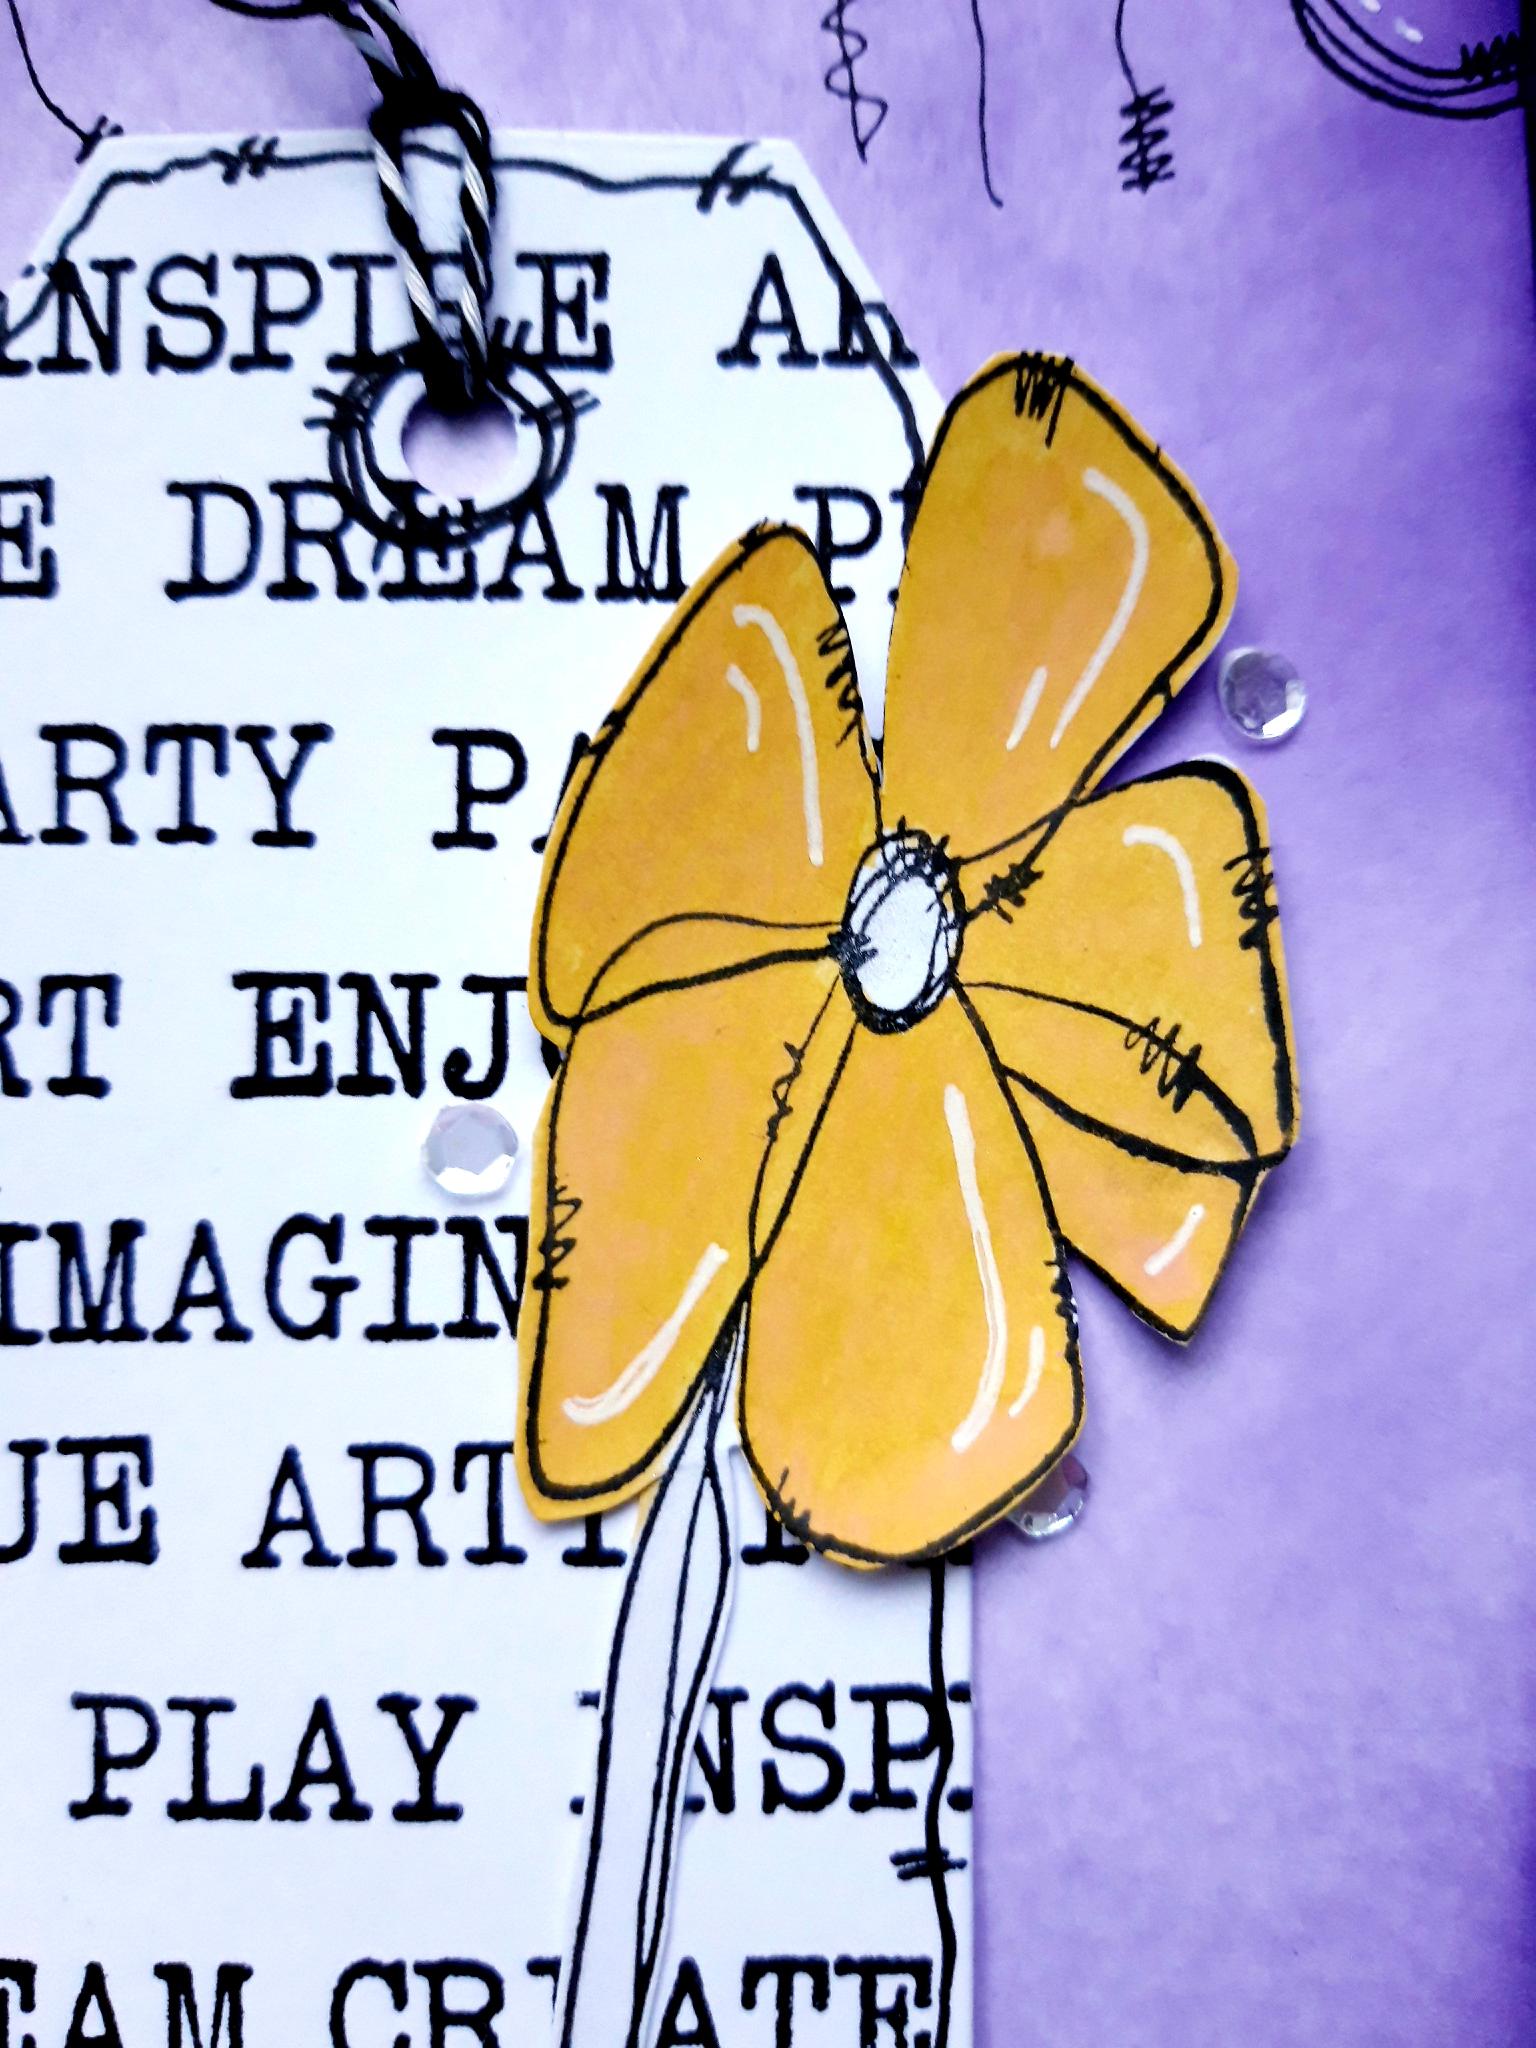
Ink up the same floral stamp again, with the Versafine, but you will only need the flower head and stem. Stamp on to the 5 x 2" white card. Once ink is dry, cut out your flower. |
|
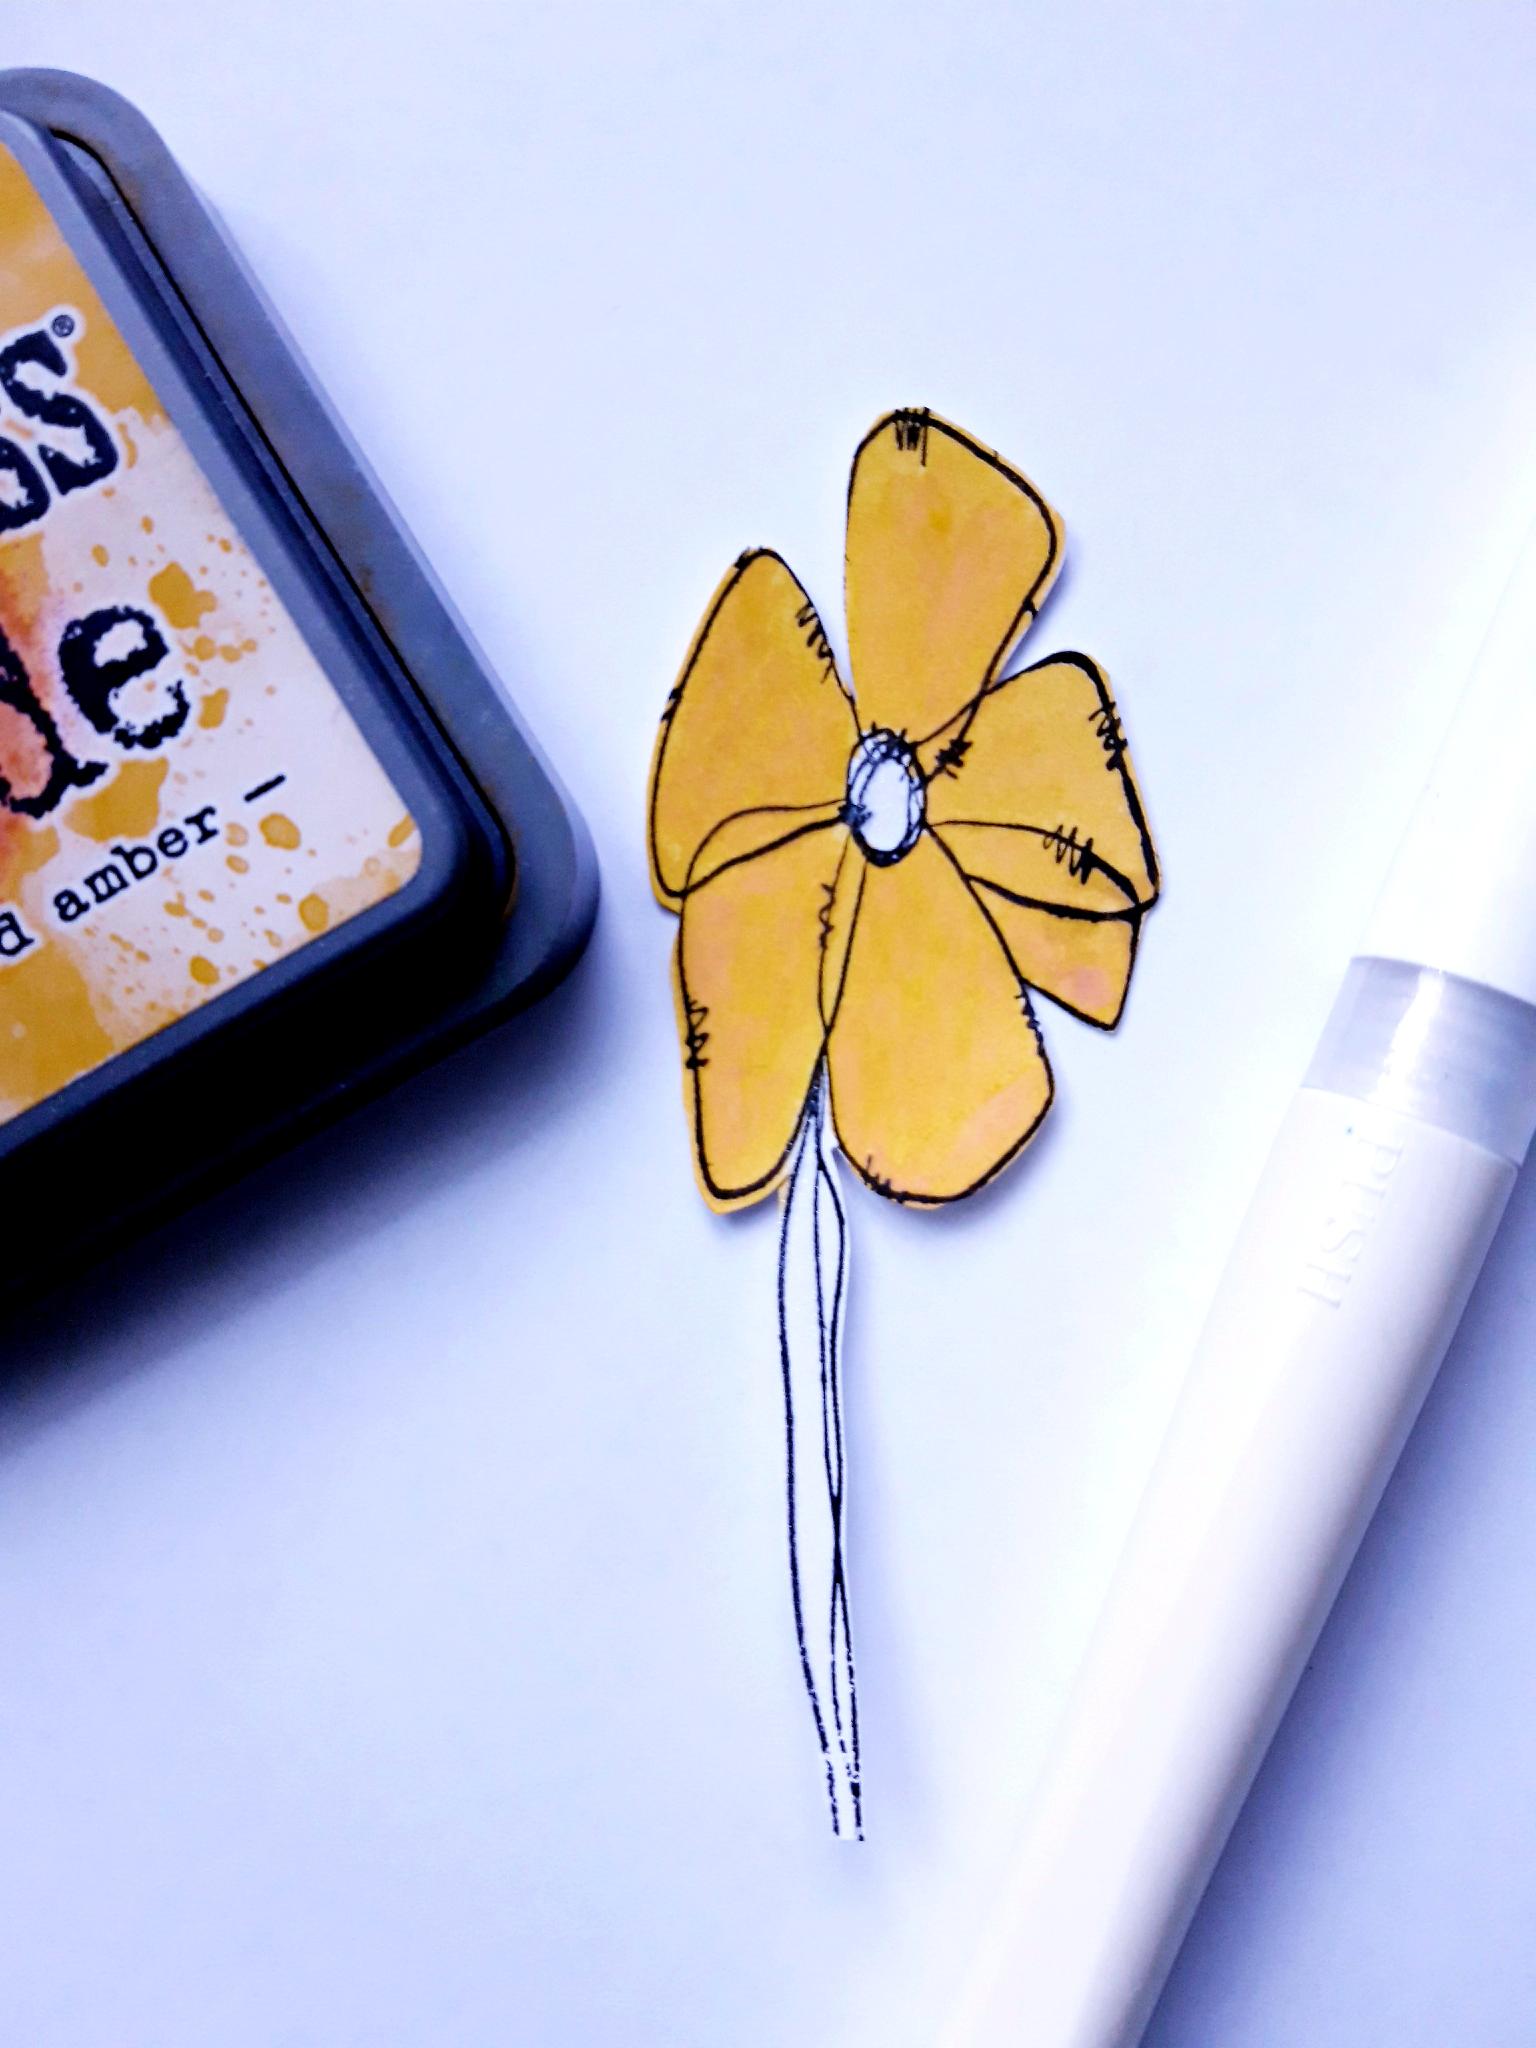
Apply the Fossilized Amber Oxide on to a craft or glass mat. Spritz with water and use a paint brush to colour in your petals. Once the ink is dry, colour over the top with the clear Gossip Glitter pen. Set to one side. |
|
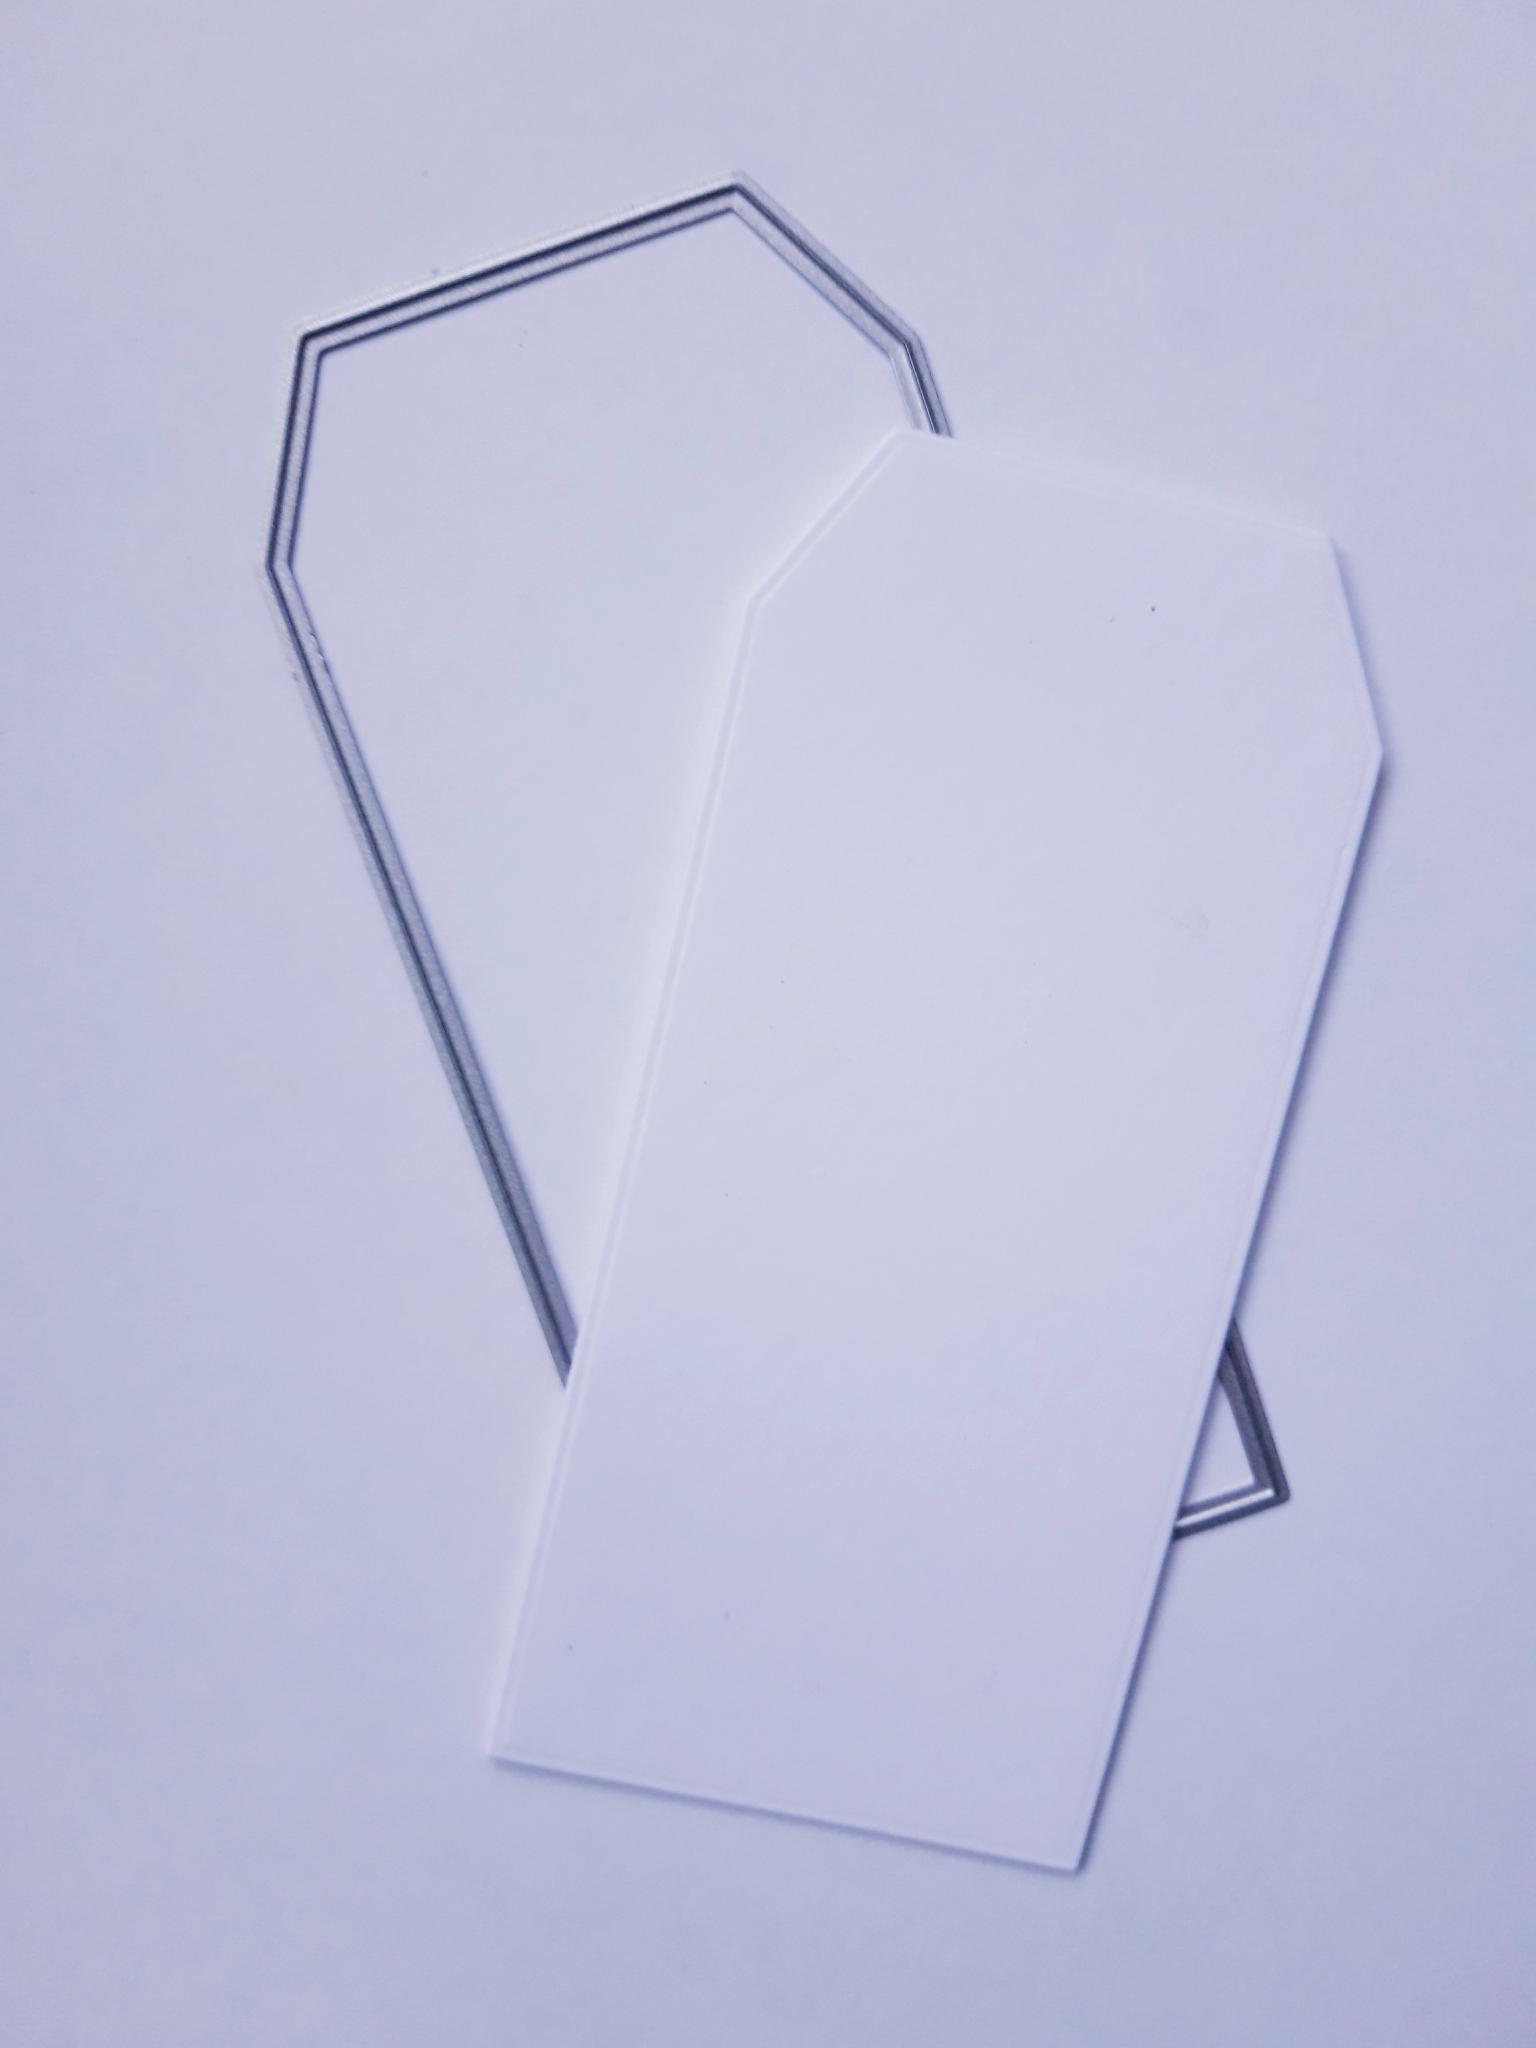
Place the tag die, that measures approx 4 1/2 x 2", from the Tagged Creative Dies set, on to the 5 x 3" white card. Run through your die cutting machine. |

|
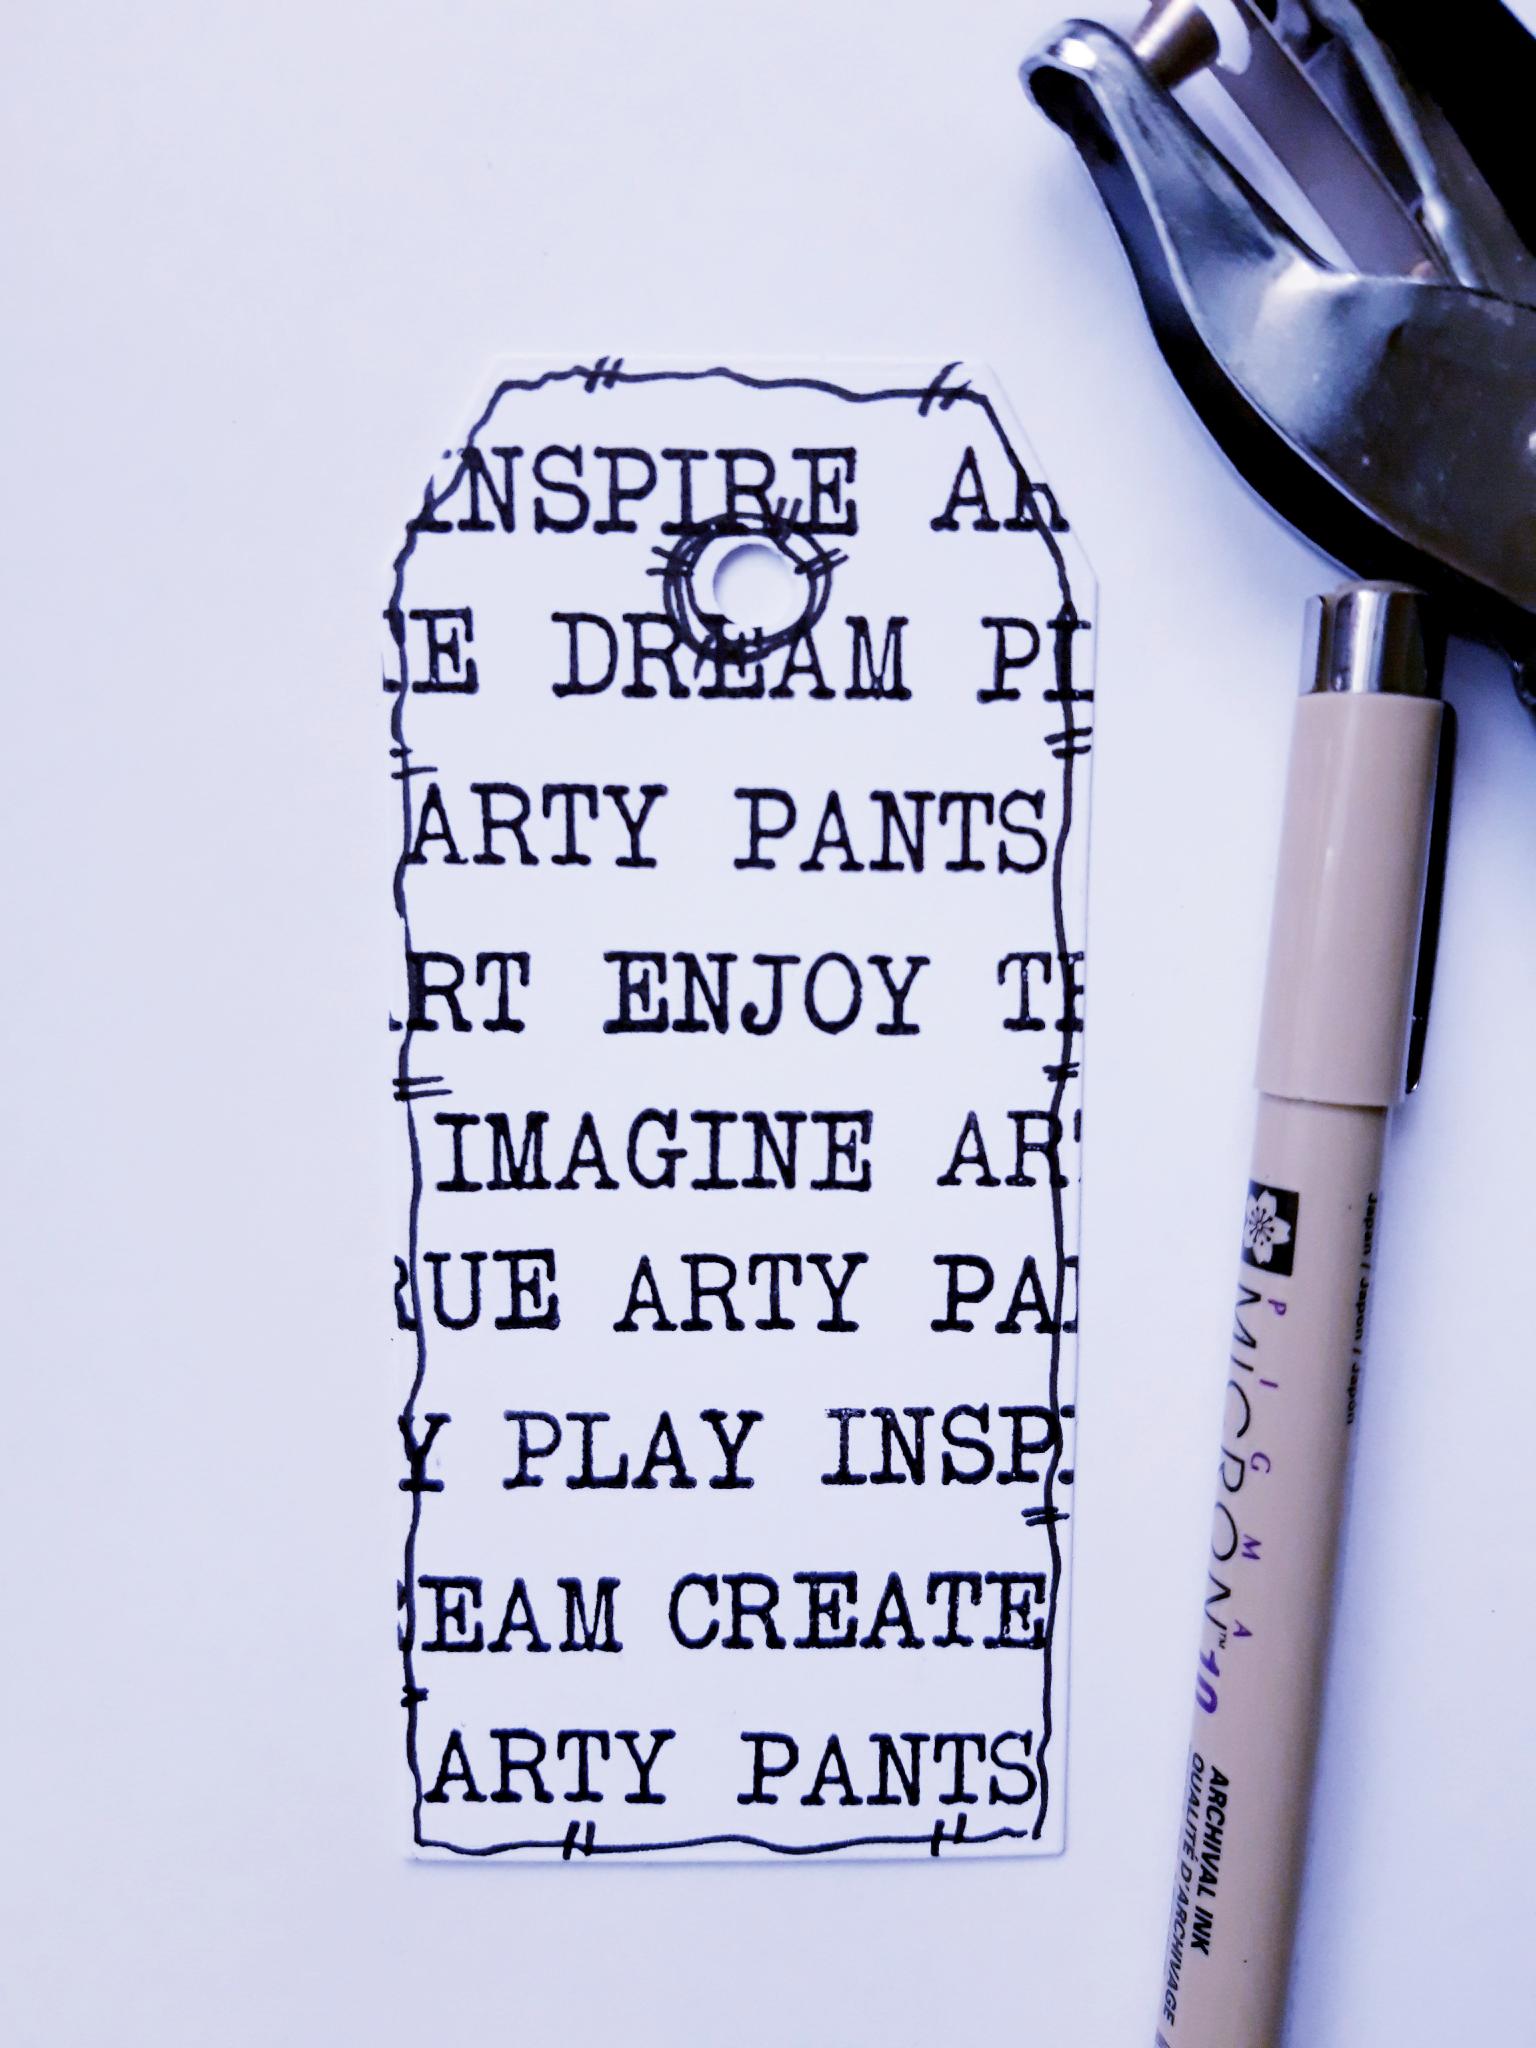
Inking up stamps from the More Than Words Creative Stamps set, with the Versafine, create a words background on the tag. |
|
Punch a hole at the top of your tag, with a hole punch. Use a black pen to draw a decorative, wiggly frame, around your tag, and the punched hole. |
|
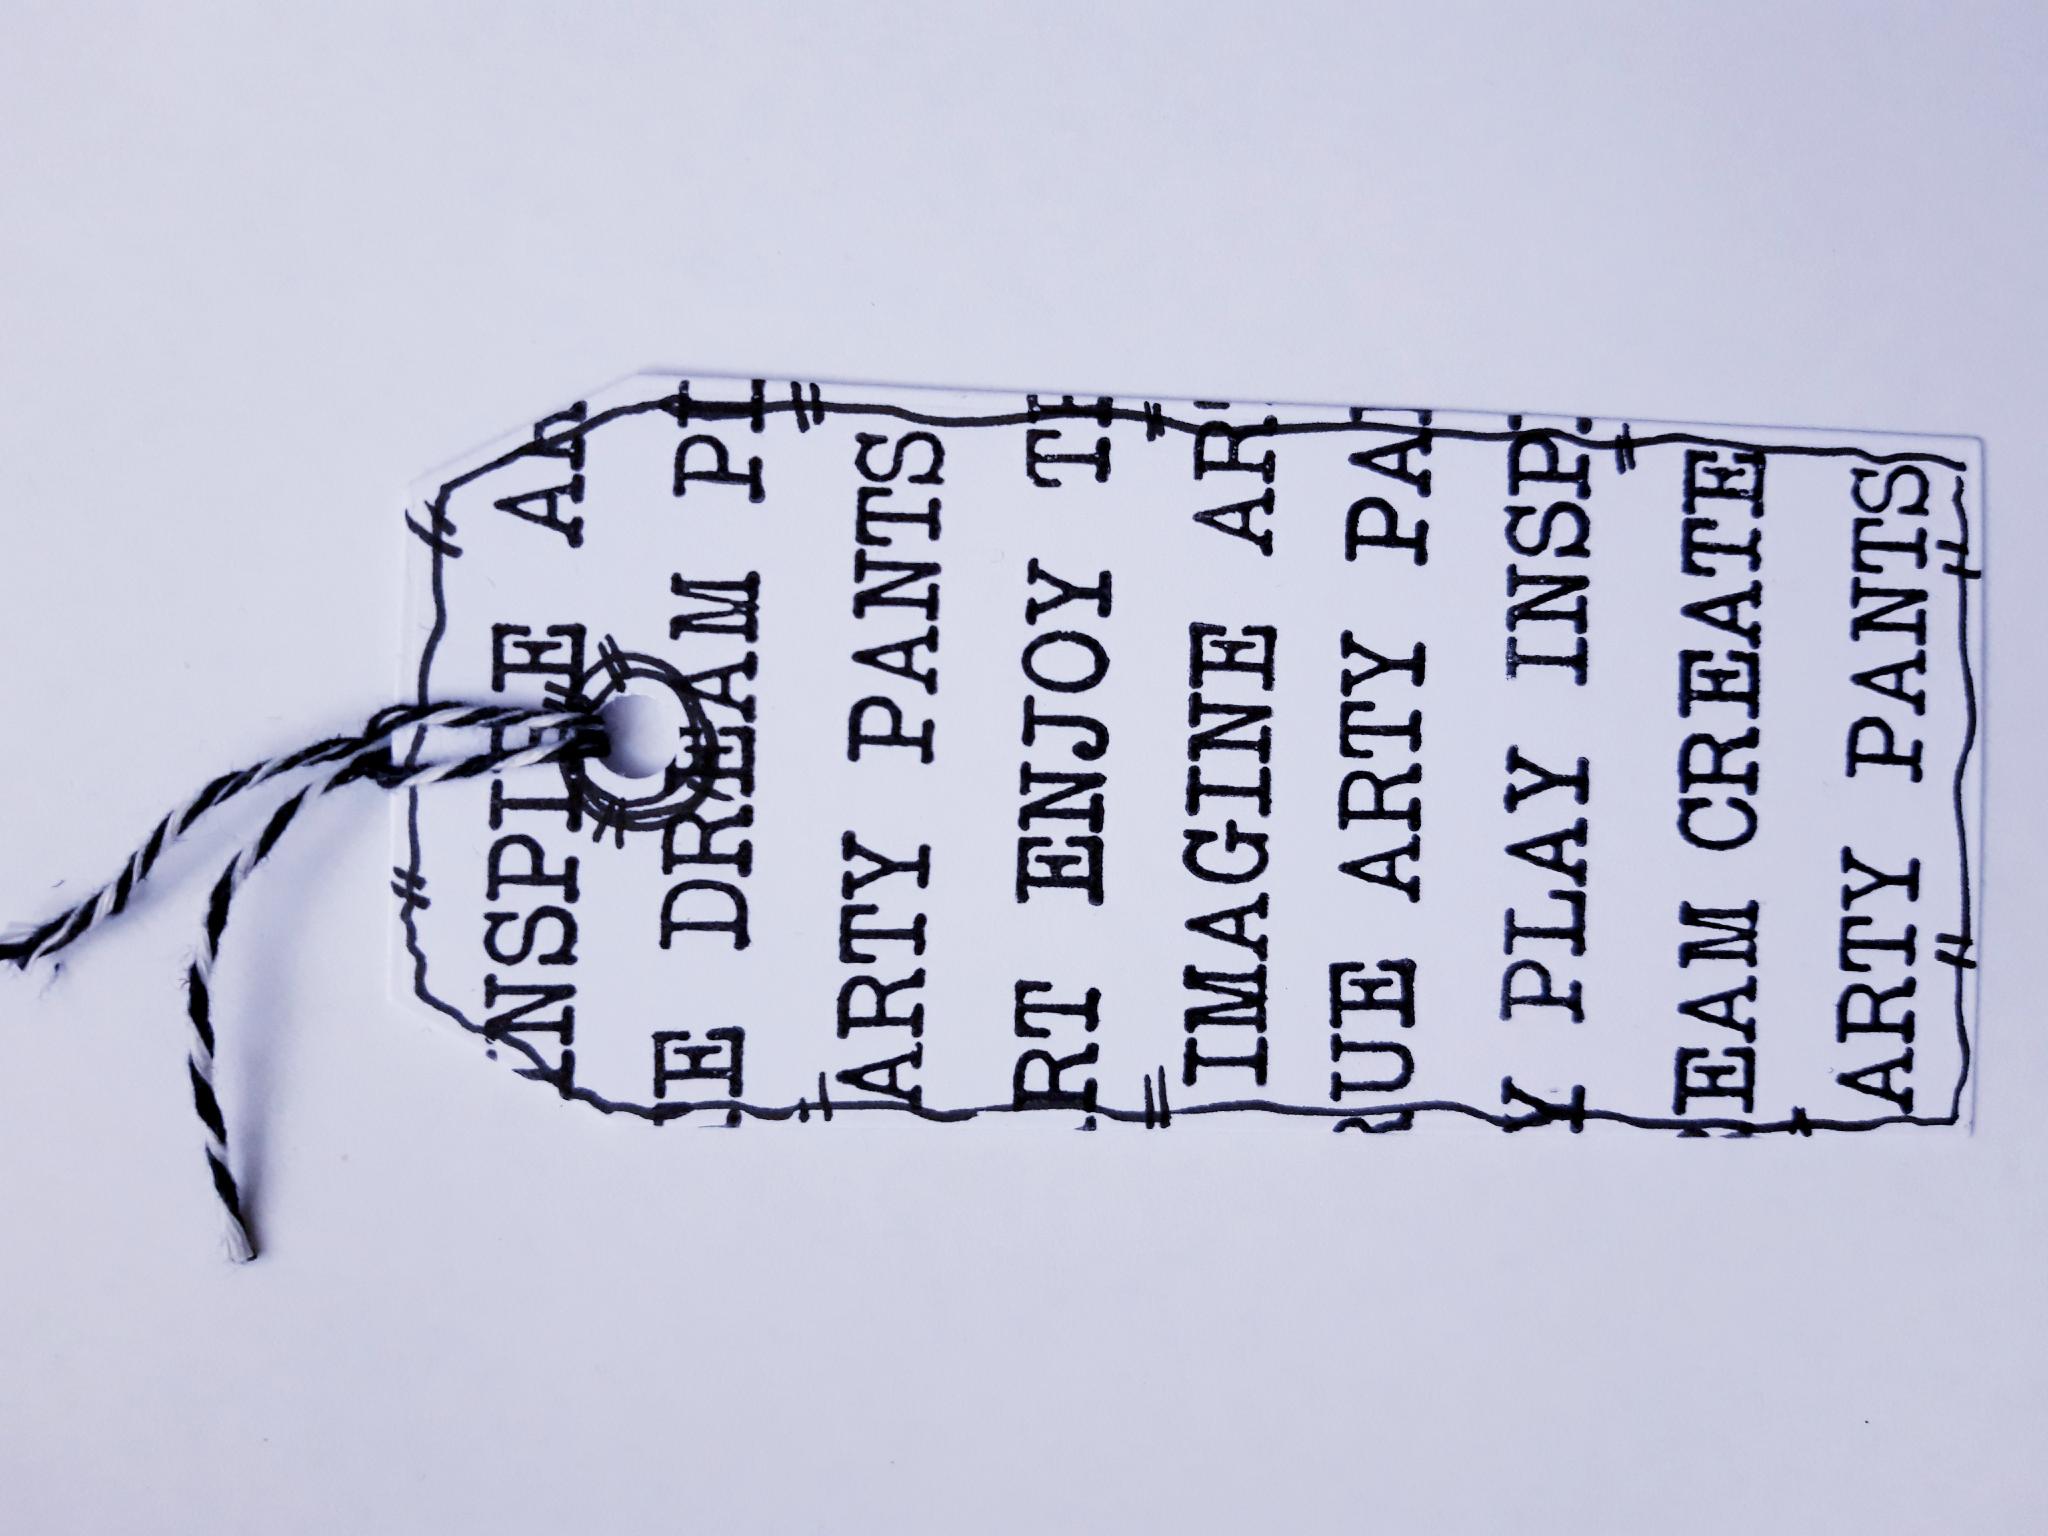
Tie Bakers Twine through the punched hole. |
|
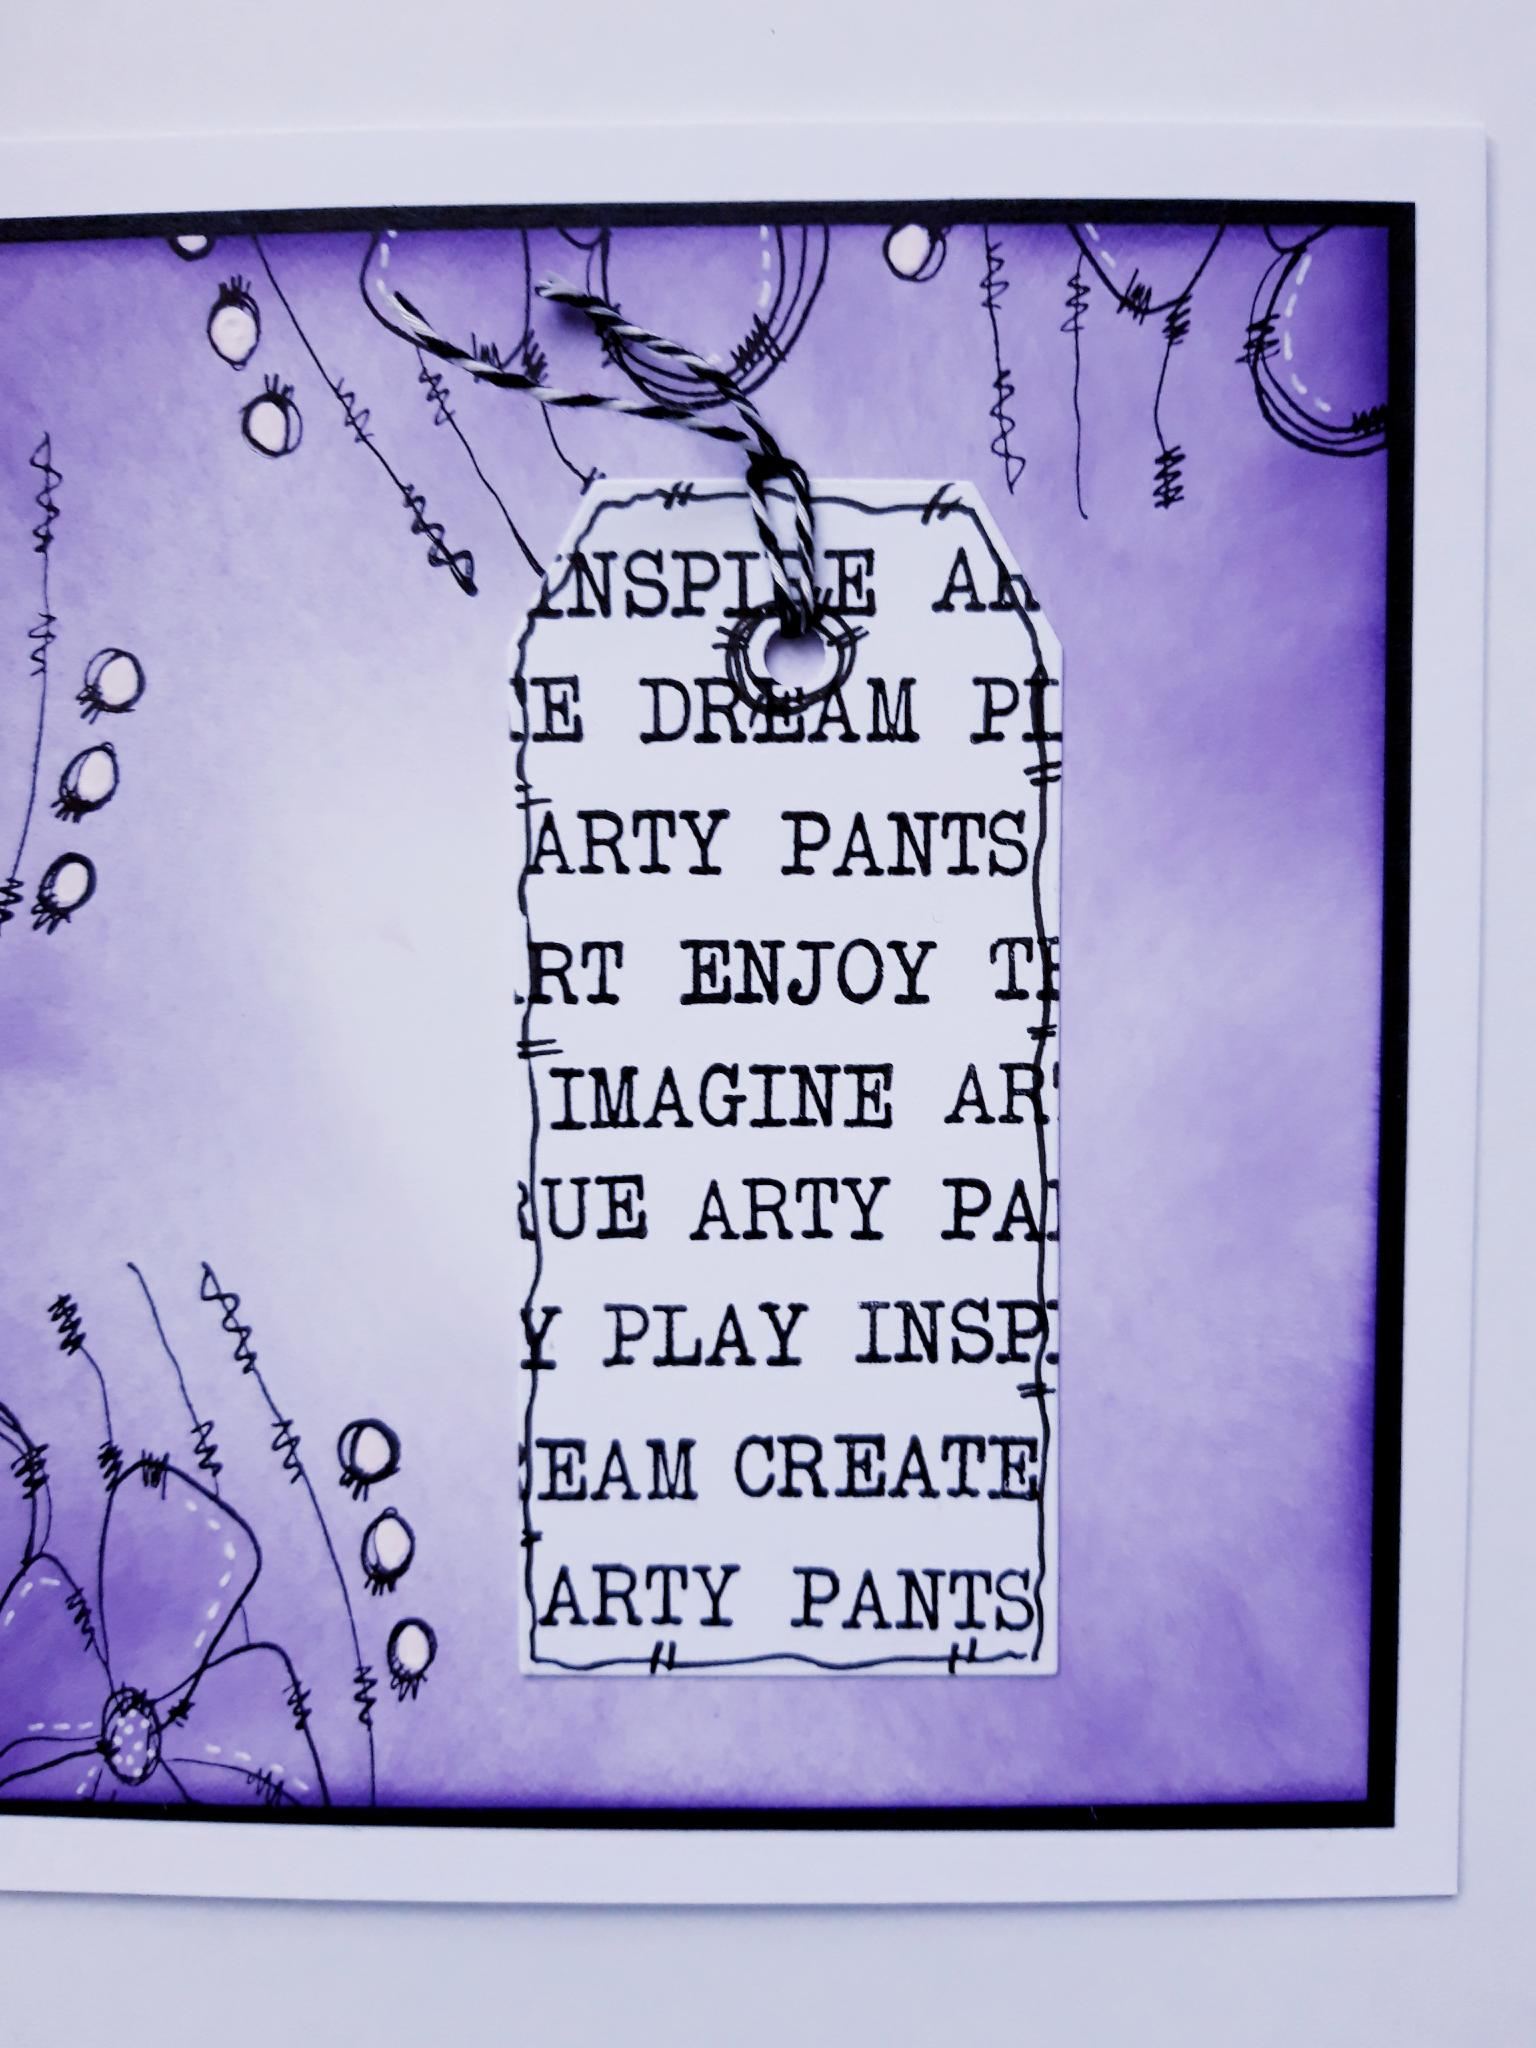
Apply glue to the top of the tag, and adhere it on to your background. |
|
Adhere the die cut flower to the right of your tag. |
|
Use your white gel pen to add highlights to the petals of your flower. |
|
To finish, add sequins around your artwork. |