Give your friends $10 off their first order!
Refer a FRIEND


White card blank 6 x 8"
White cardstock 5 x 7"
Whispering Leaves Stamp, Die & Stencil Collection
All Surfaces Gilded Gold 8 x 8 Paper Pad
Vellum
Izink Spray: Butterscotch, Spring Green, Coffee, Bronze Shimmer
WOW Embossing Ink pad
WOW Gold Embossing Powder
WOW heat tool
Anti-static bag
Paint brush
Eureka 101 Watercolour Tablet
SBM A3 Magnetic glass mat
Paper Trimmer
Glue
Double-sided tape
Masking tape
[click image to enlarge] 
|
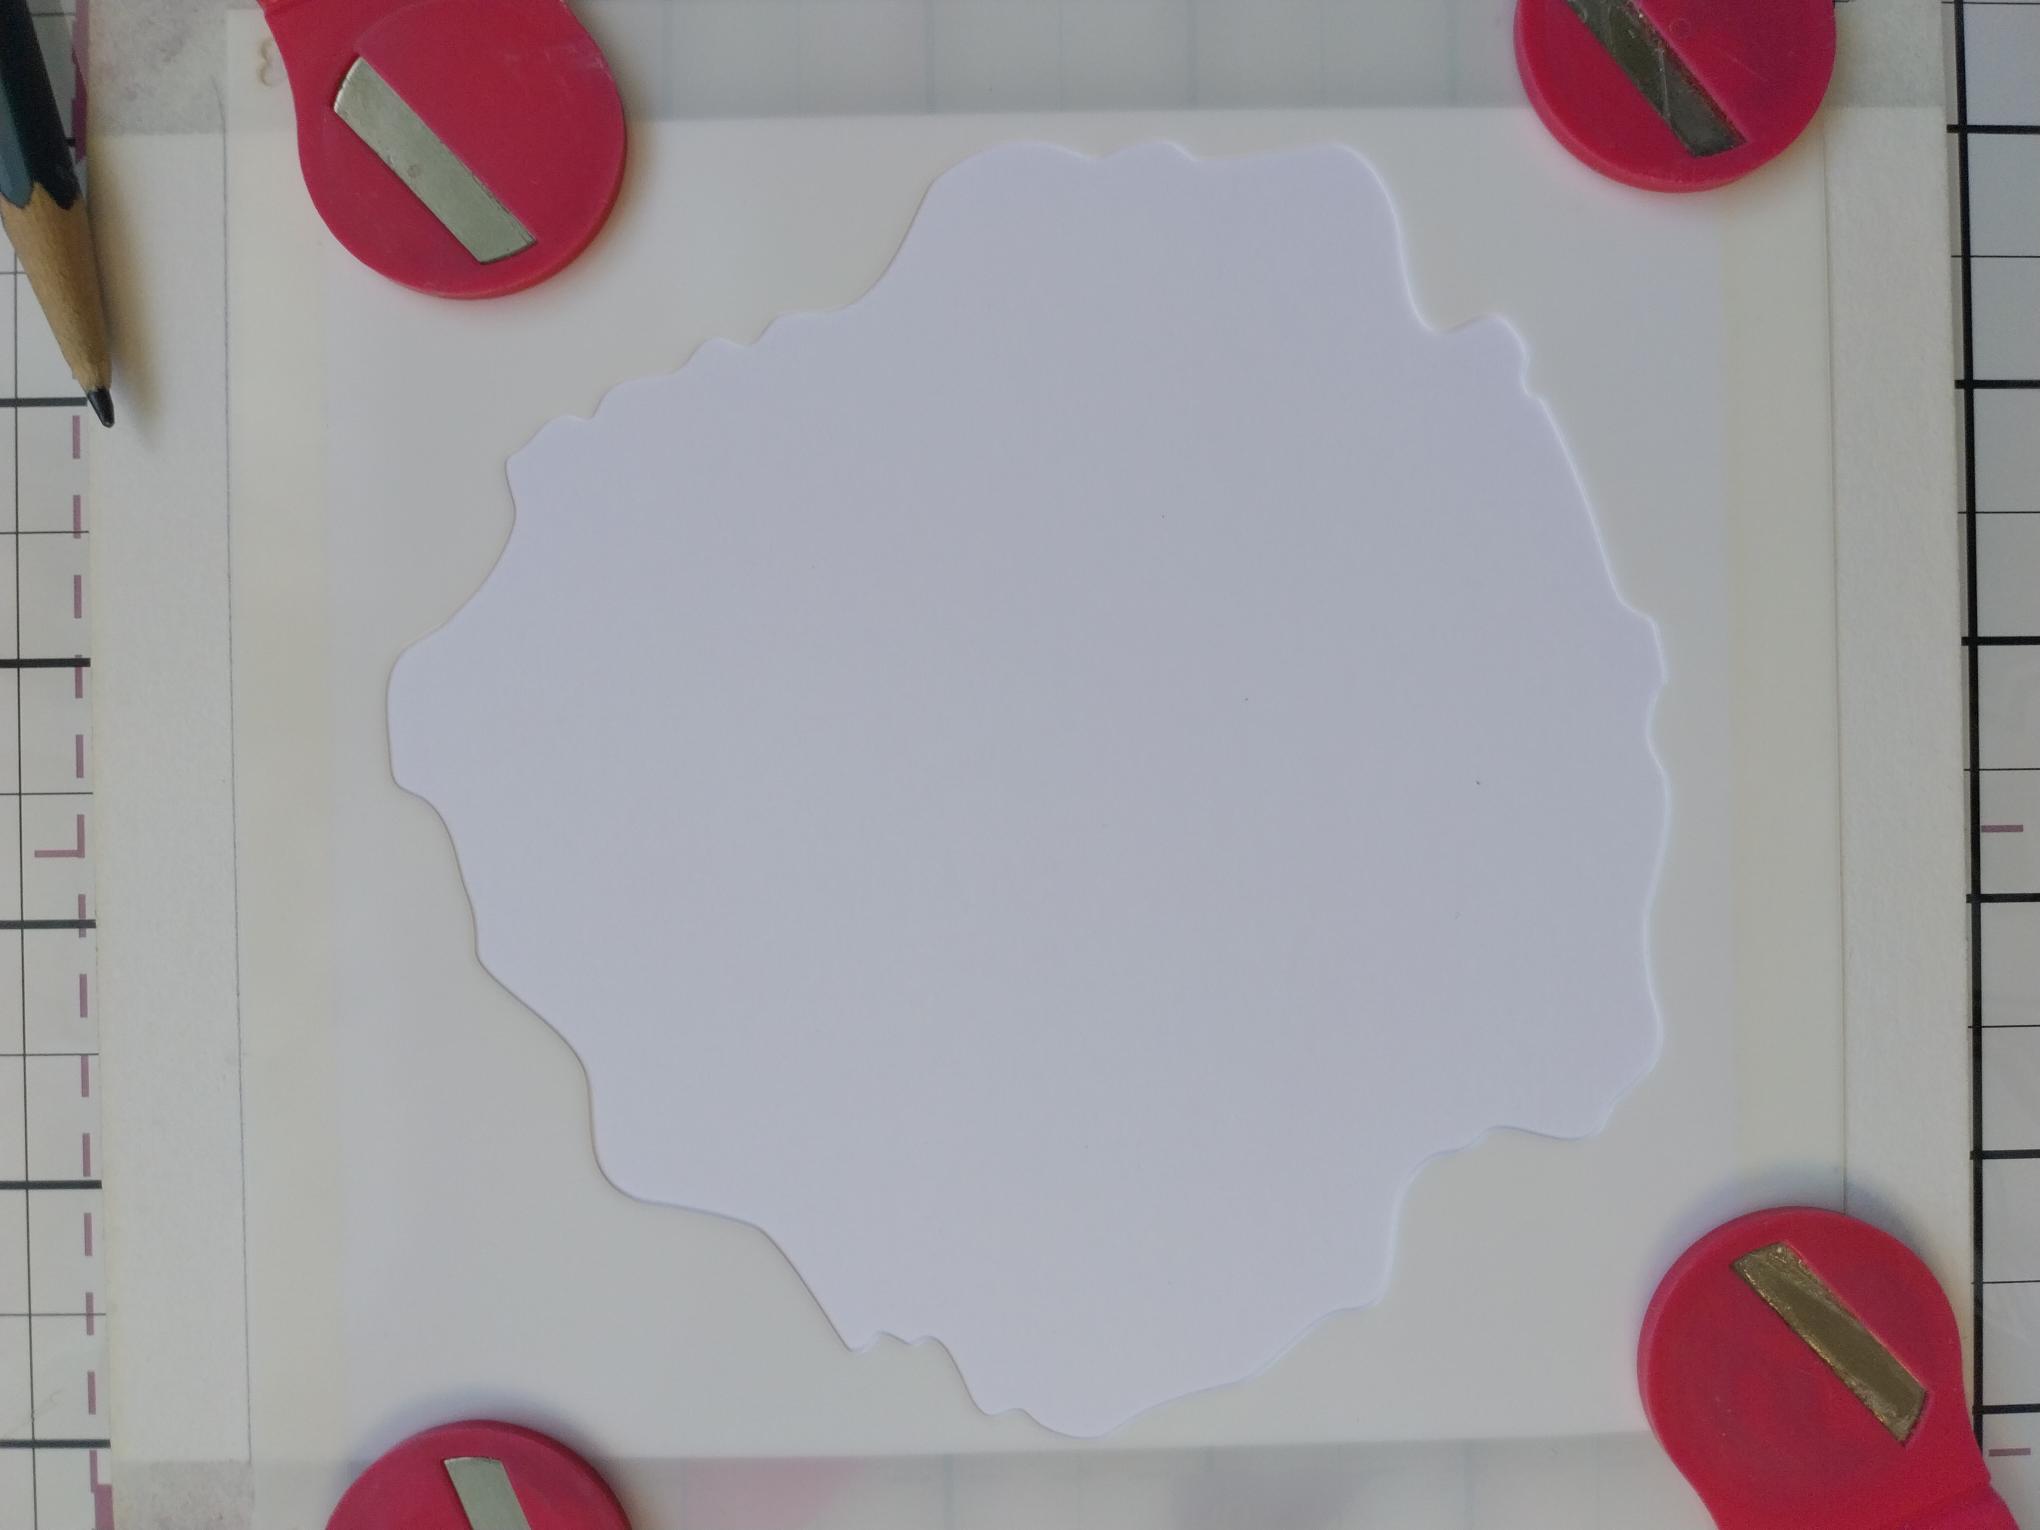
Place the white cardstock on your glass mat and apply masking tape equally, across the top and bottom as seen here. |
|
Secure stencil 1 in place. |
|
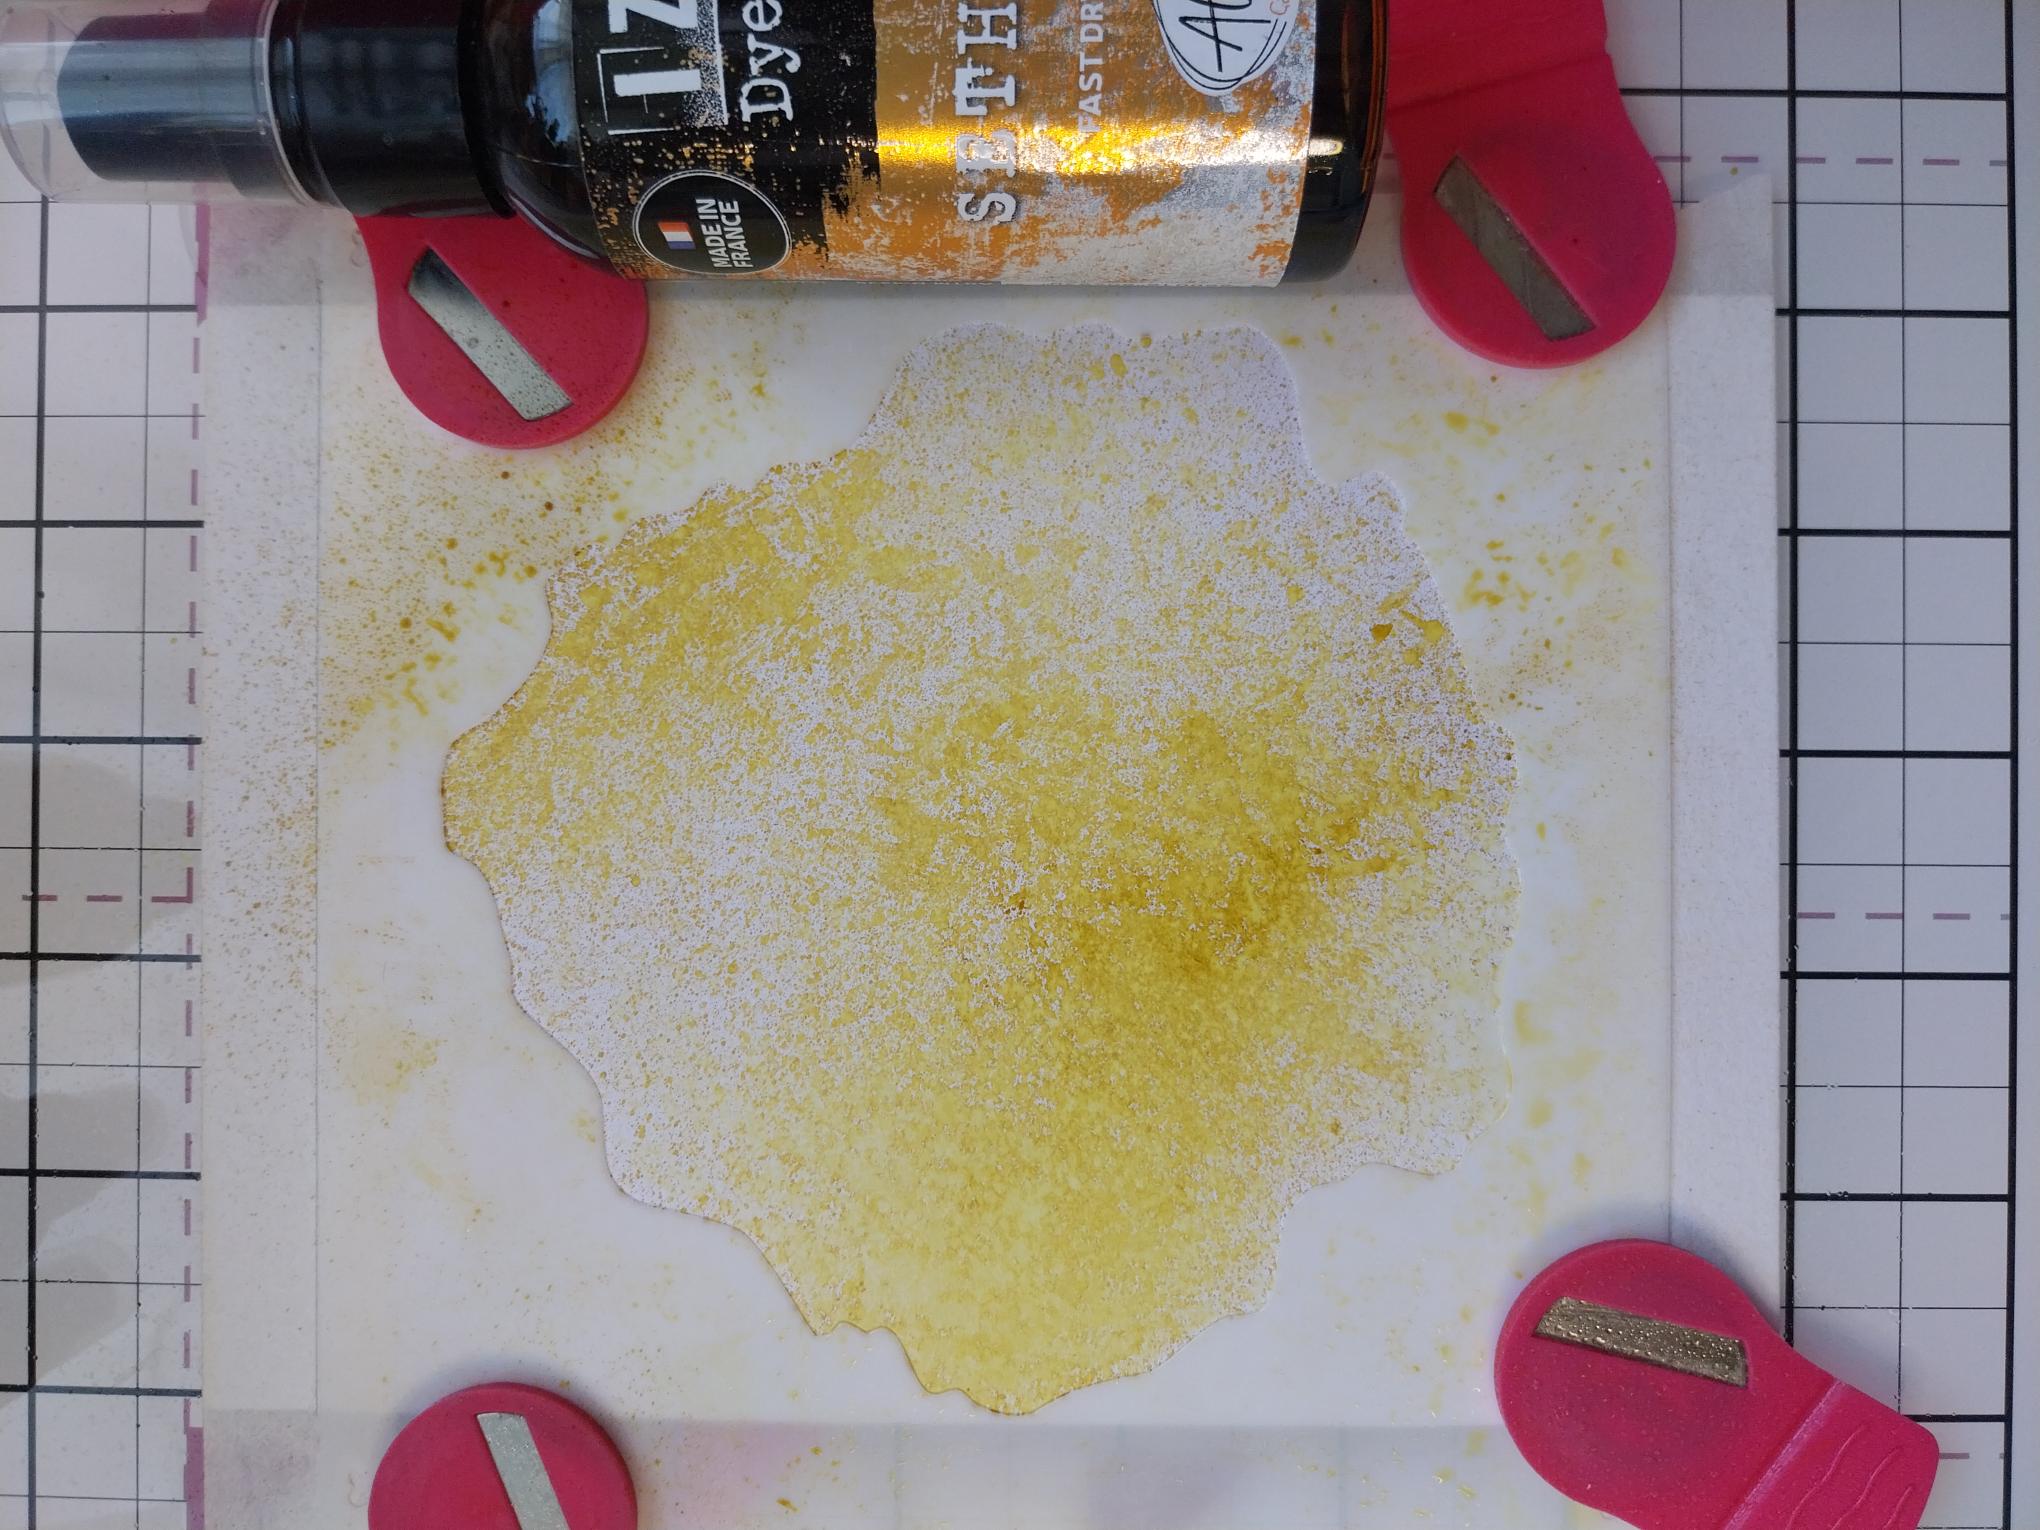
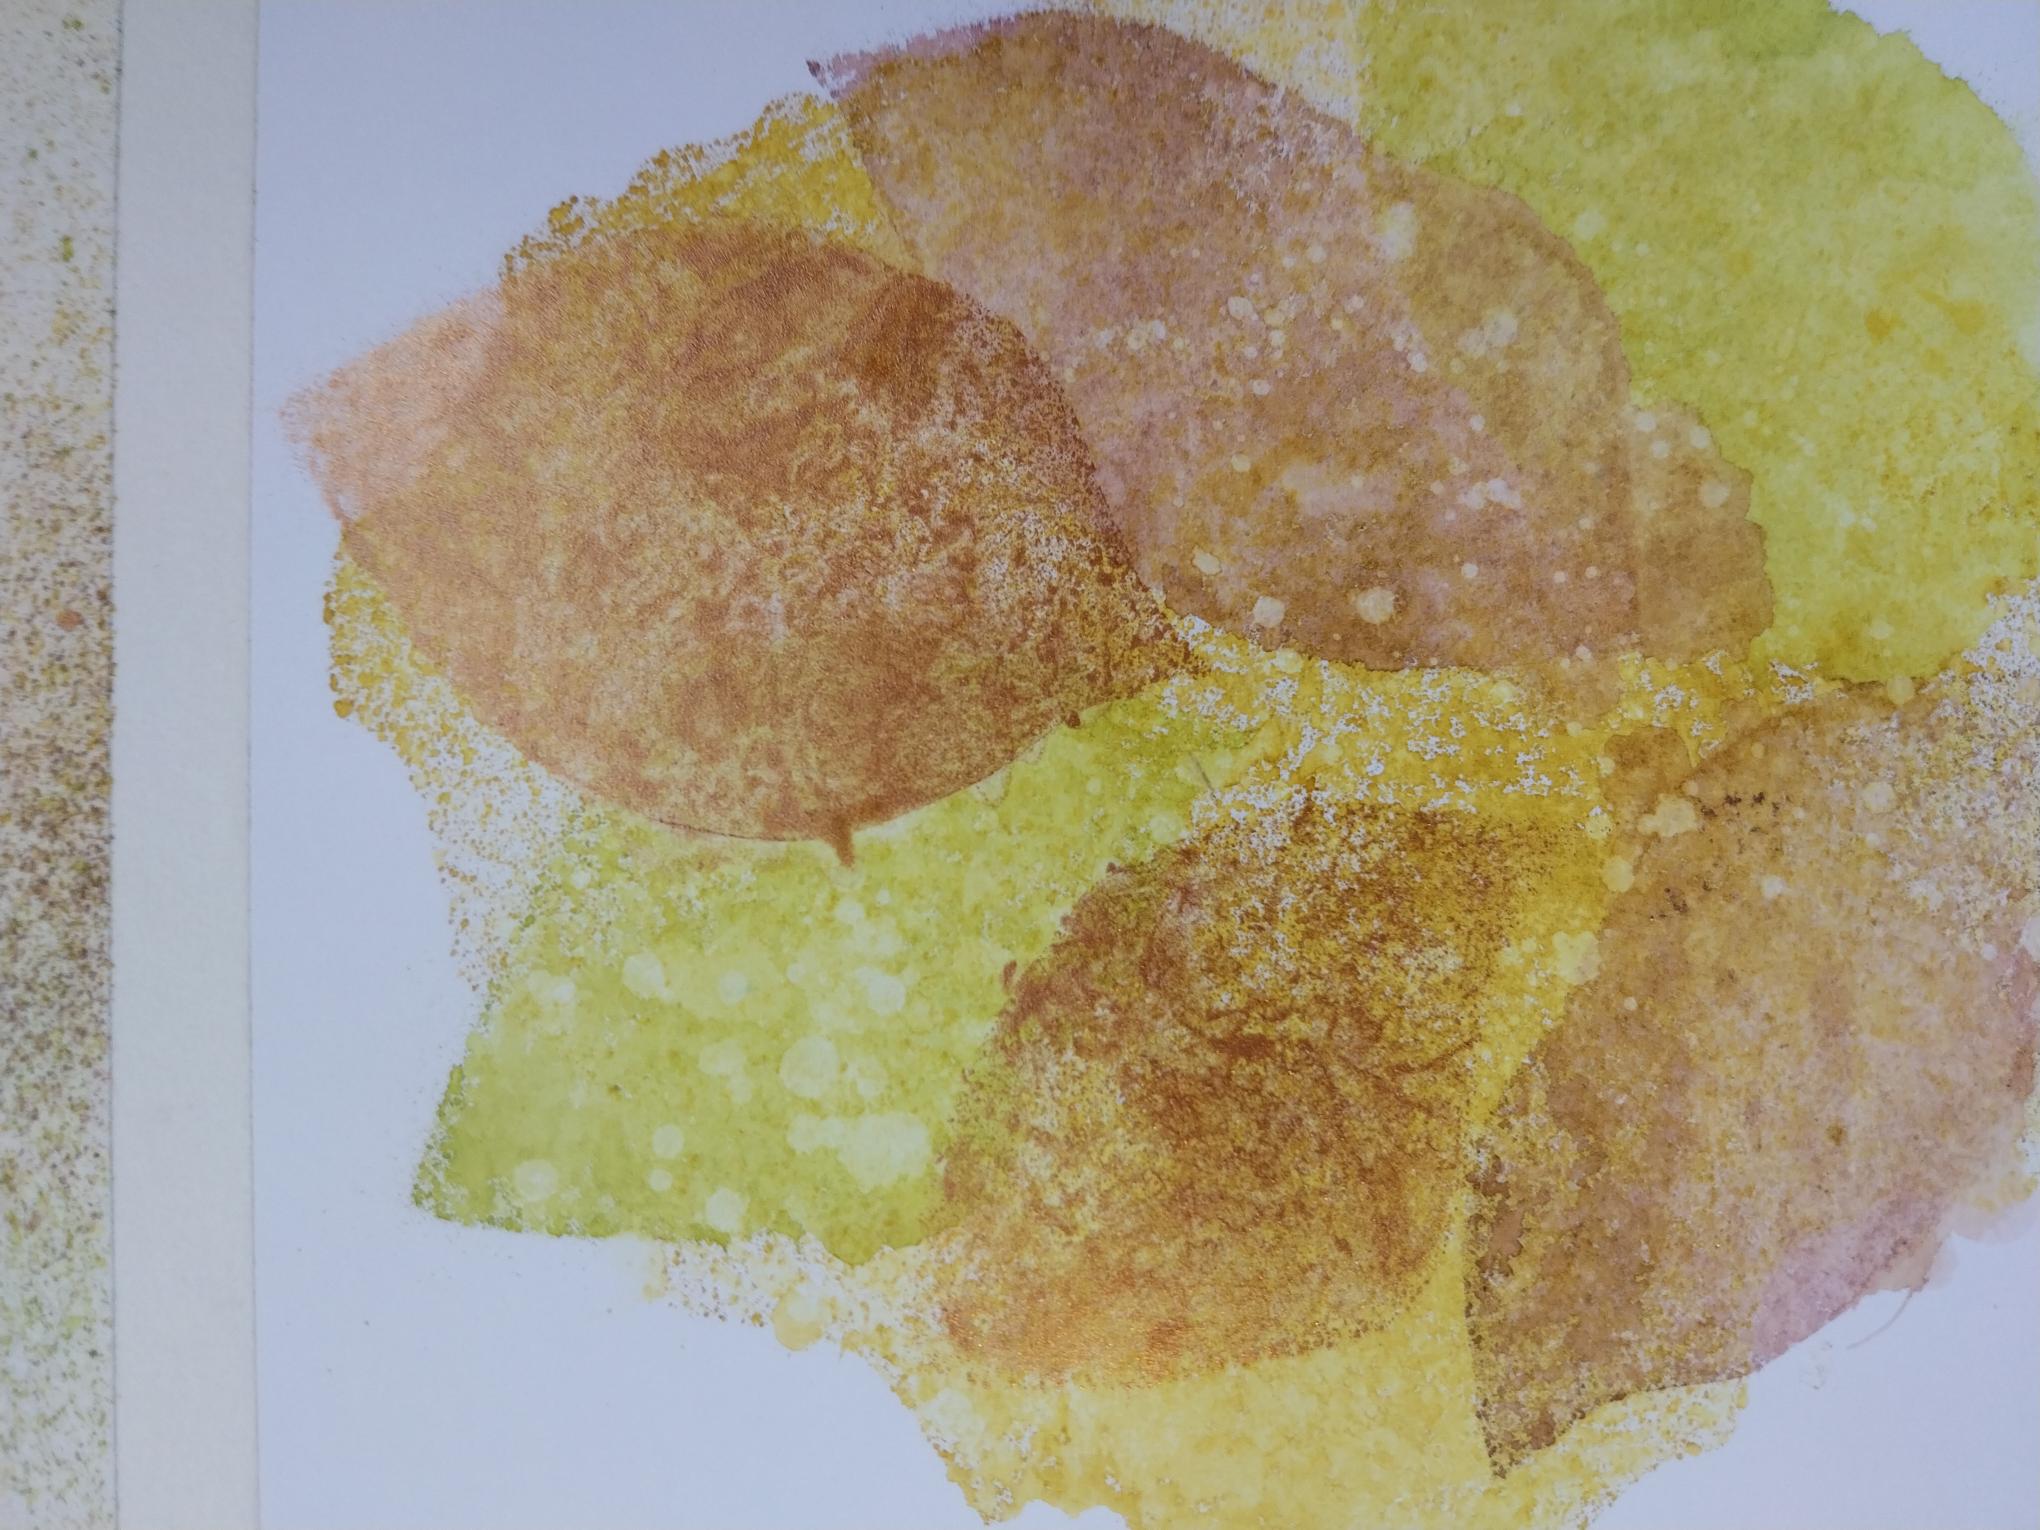
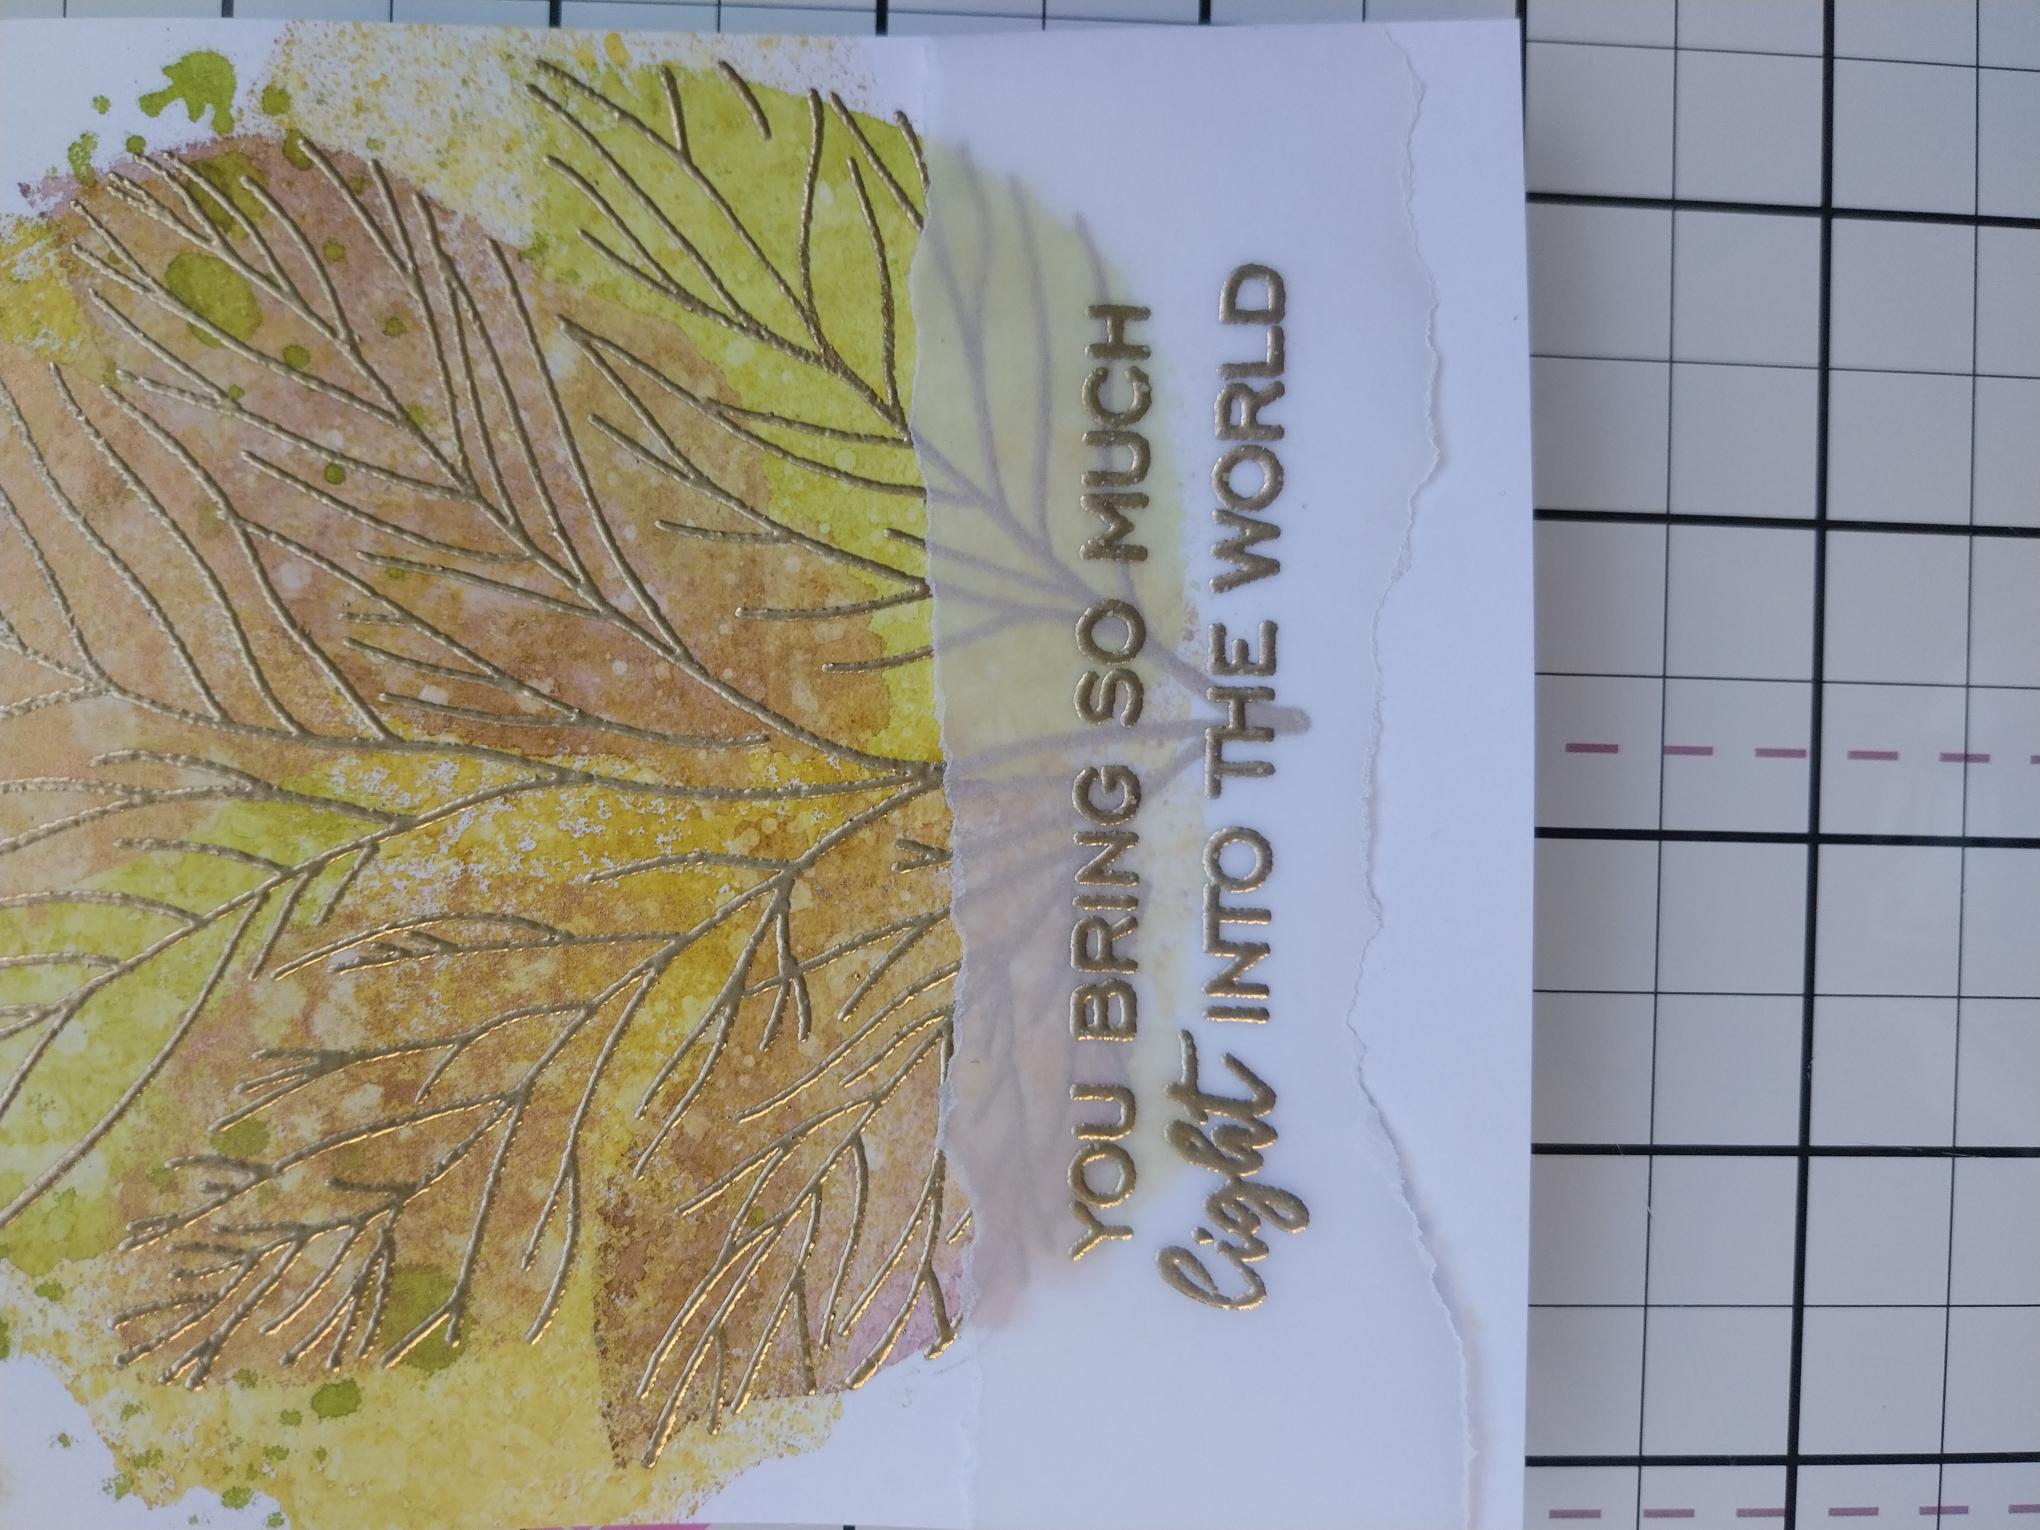
Spray the Butterscotch through the stencil, mop up excess and blast dry with heat tool.
|
|
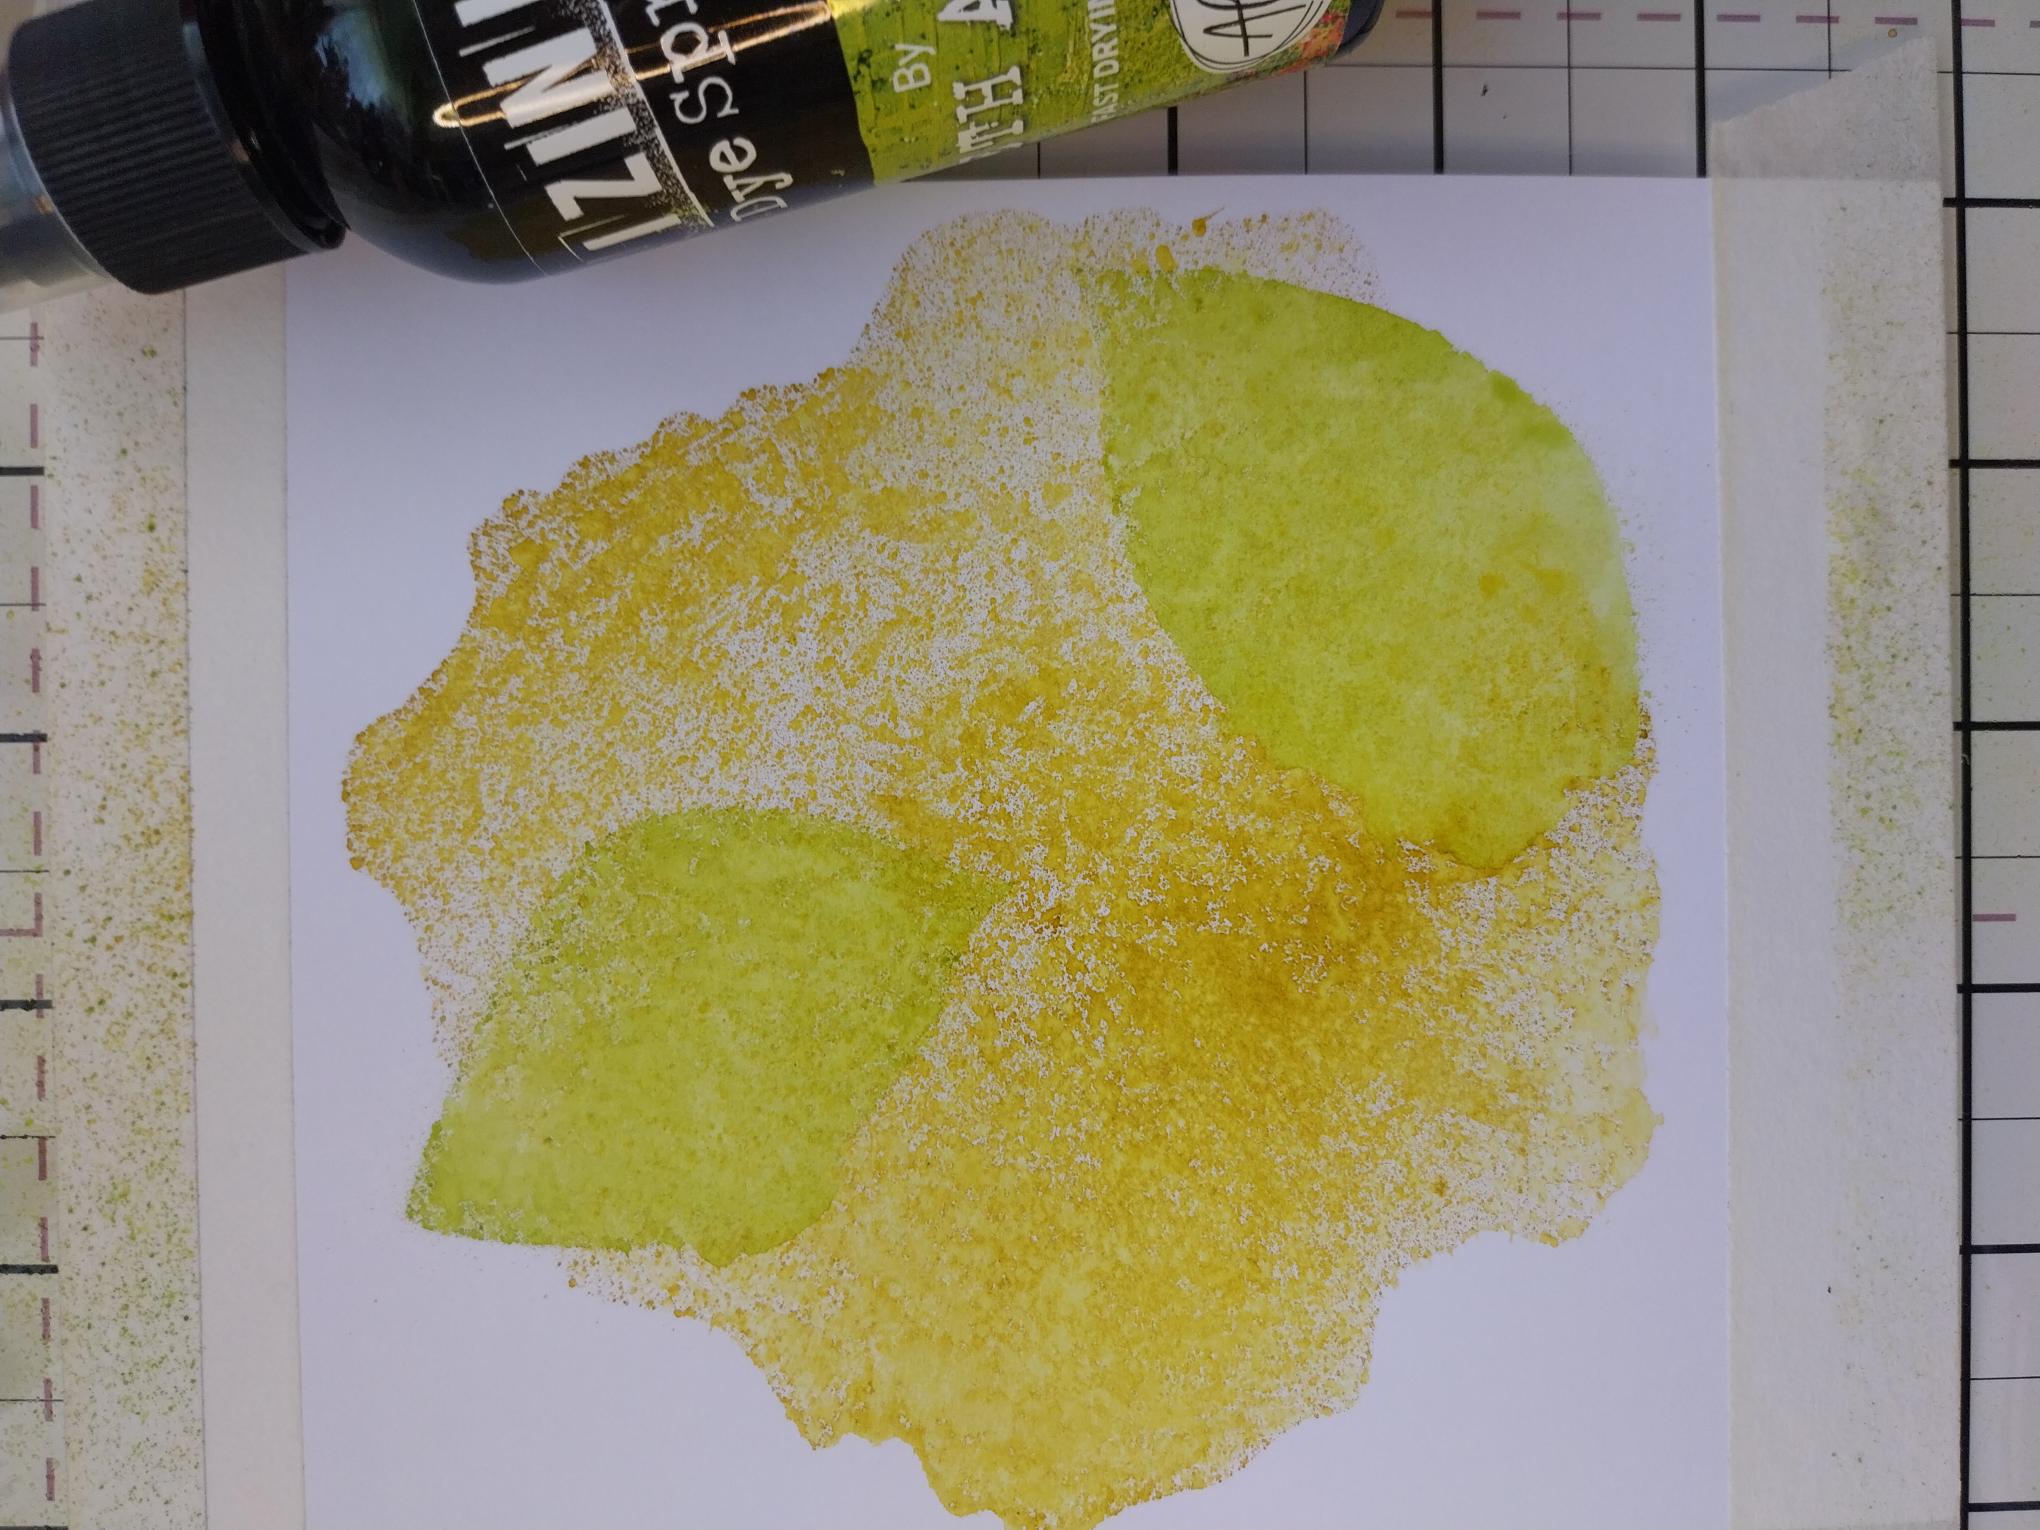
Line up stencil 2. Spray with the Spring Green. Mop up excess before splattering with water. Wait a few seconds then lift up the ink and dry as before.
|
|
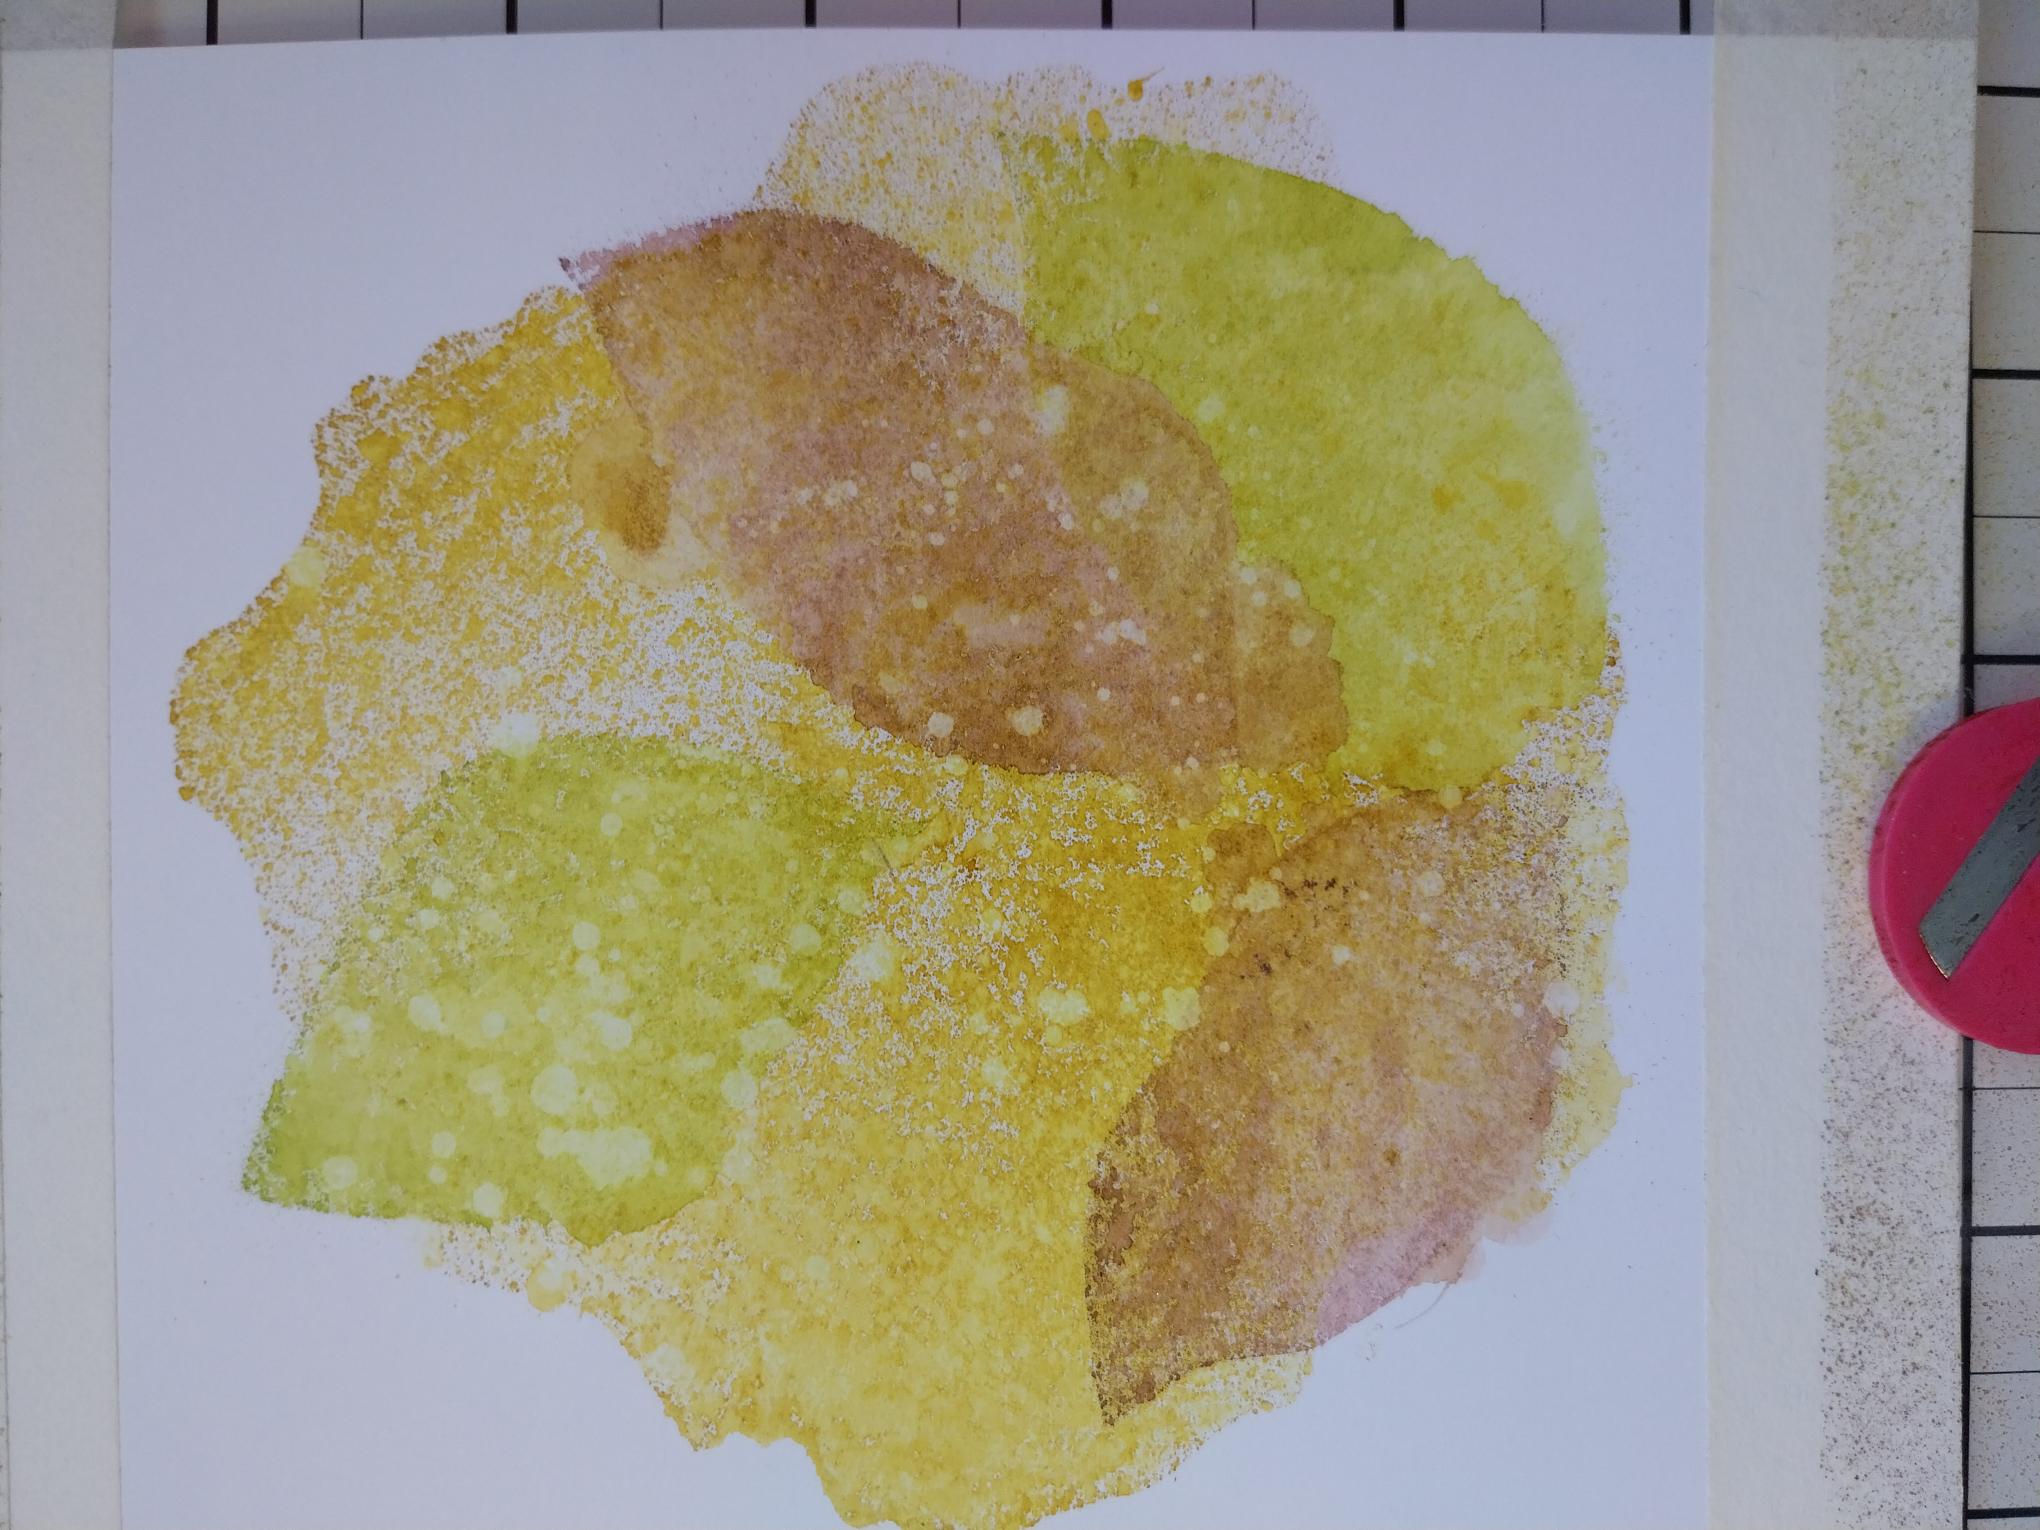
Line up stencil 3. Spray with the Coffee, splatter with water and dry as before.
|
|
Line up stencil 4. Spray with the Bronze Shimmer, splatter and dry.
|
|
Line up stencil 5. Sray with Spring Green, splatter and dry. |
|
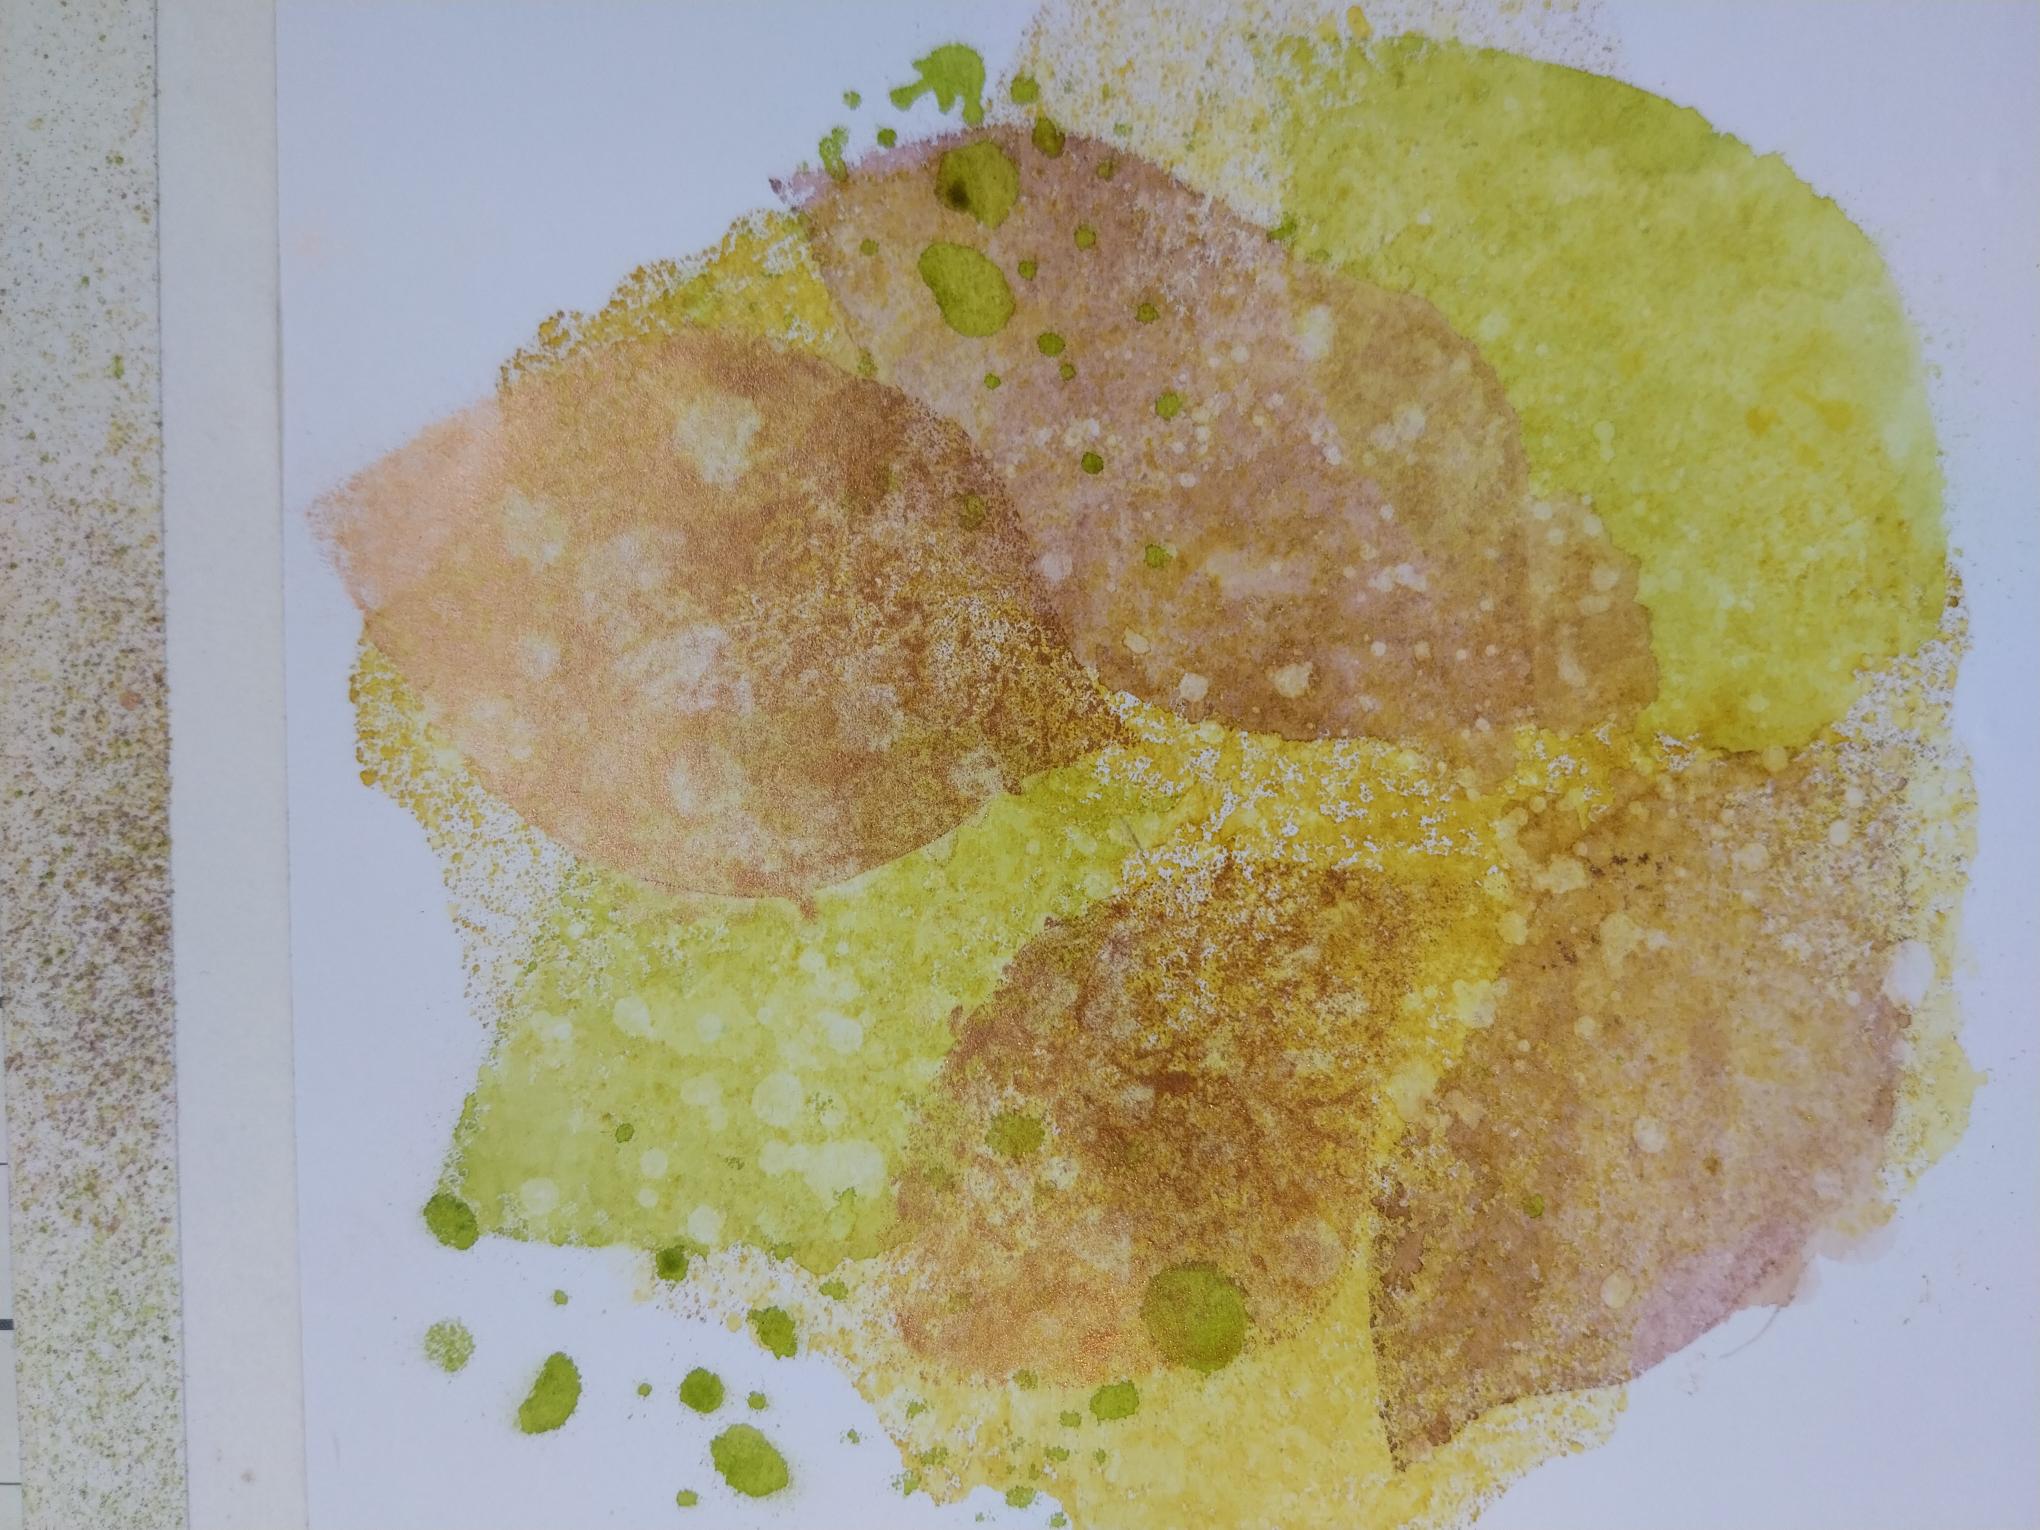
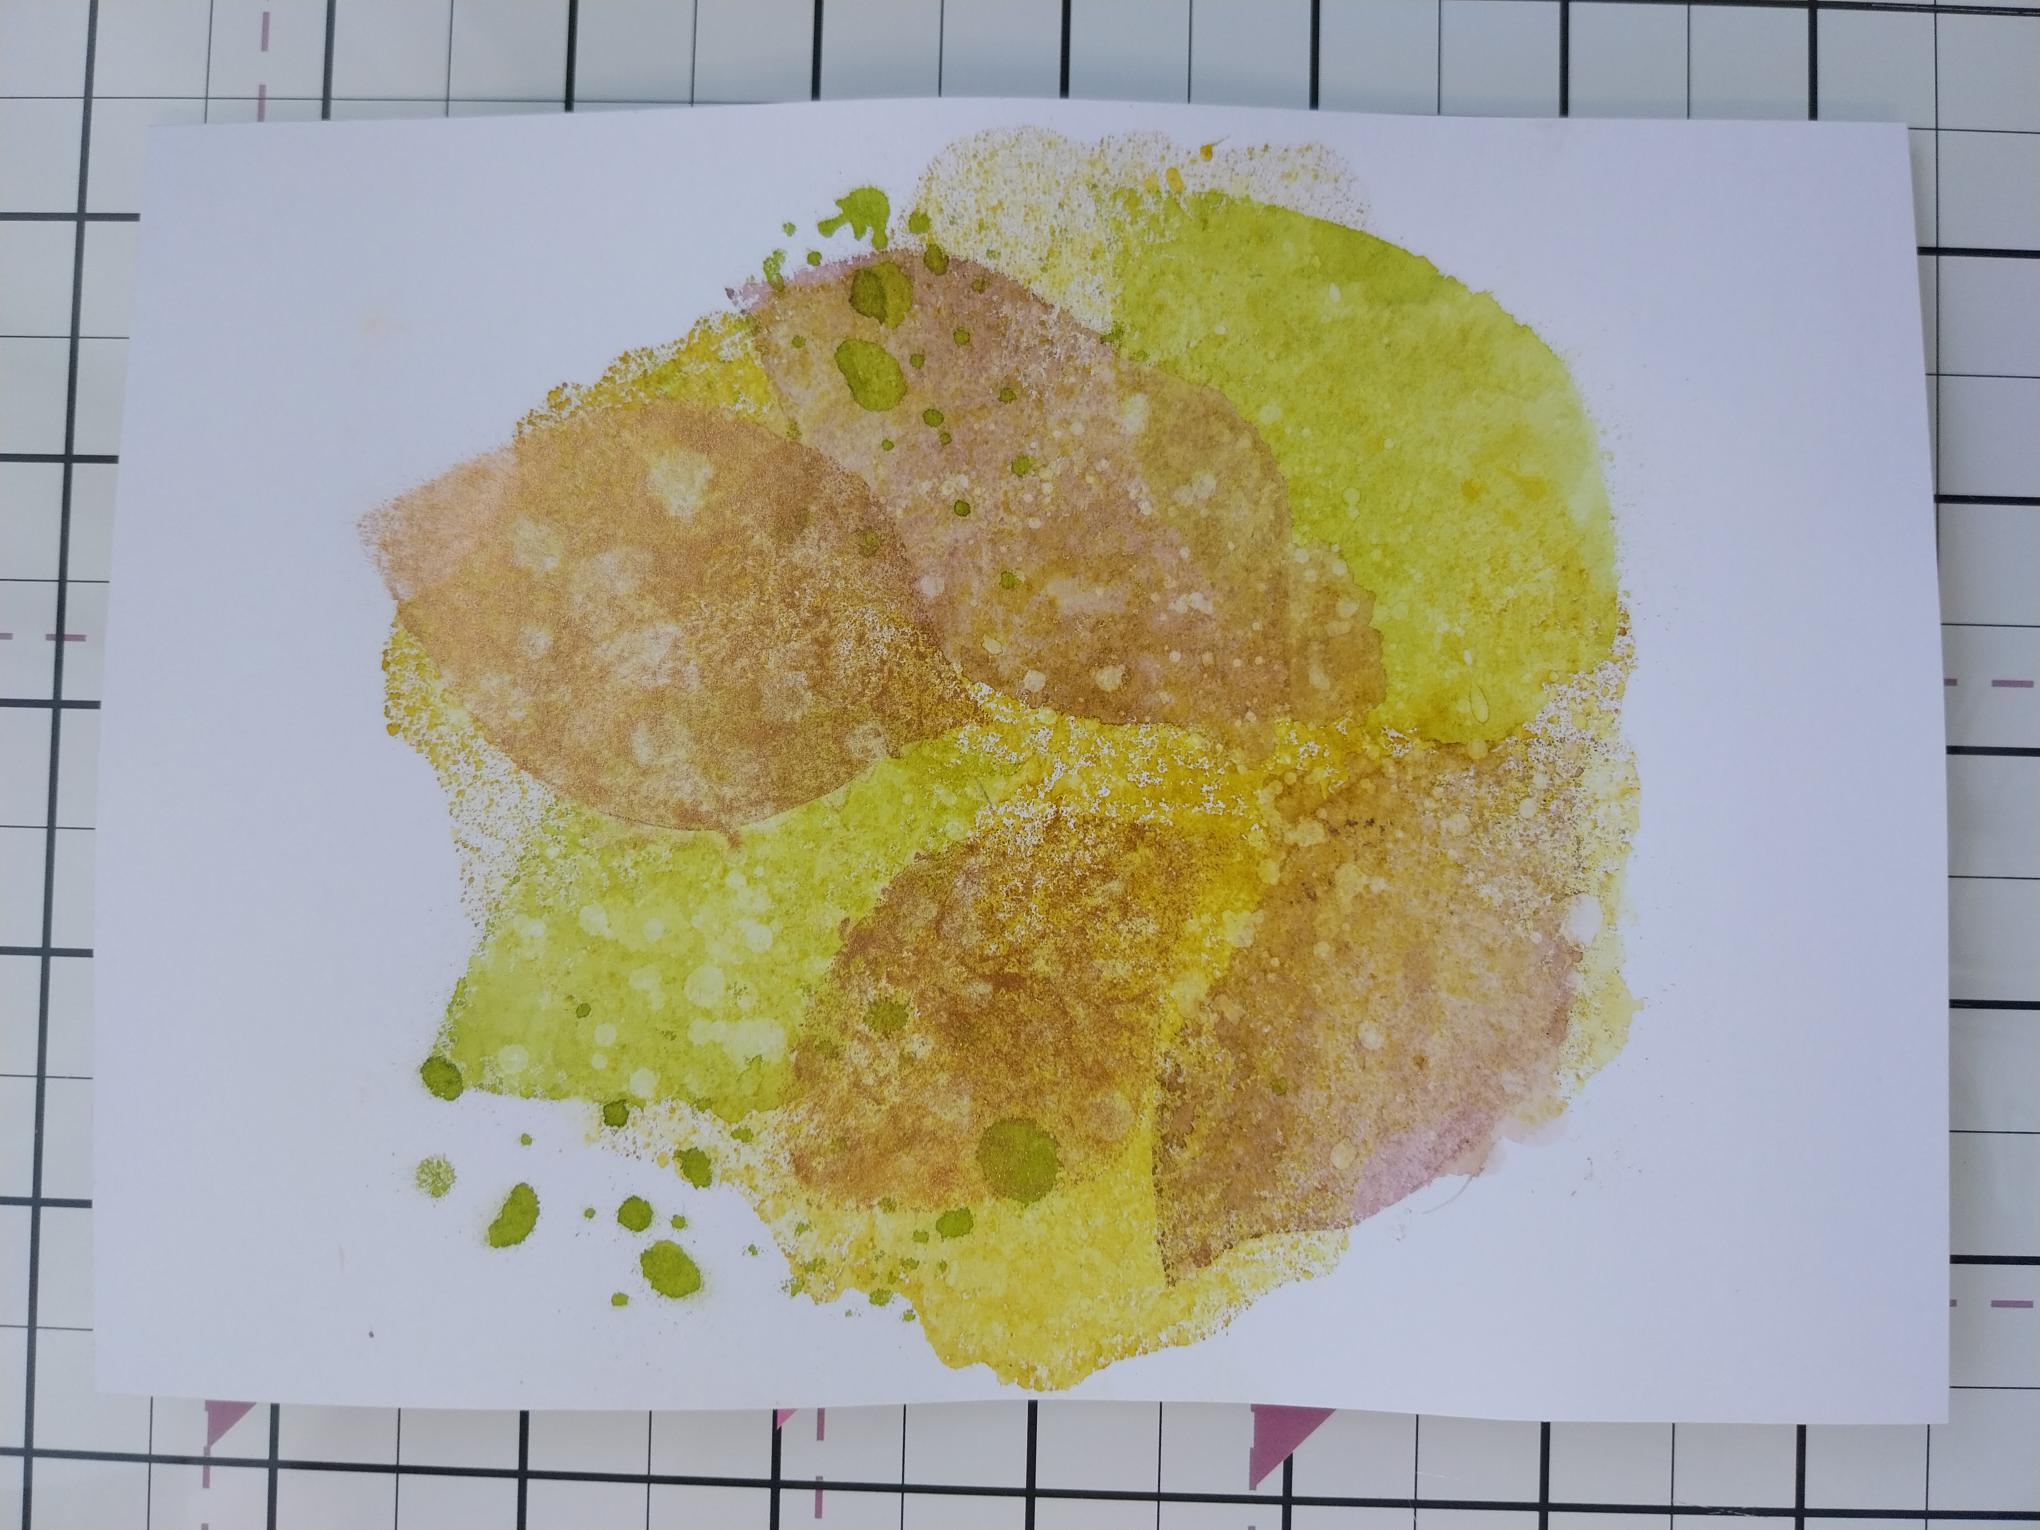
Remove the masking tape before THOROUGHLY drying your stencilled image. |
|
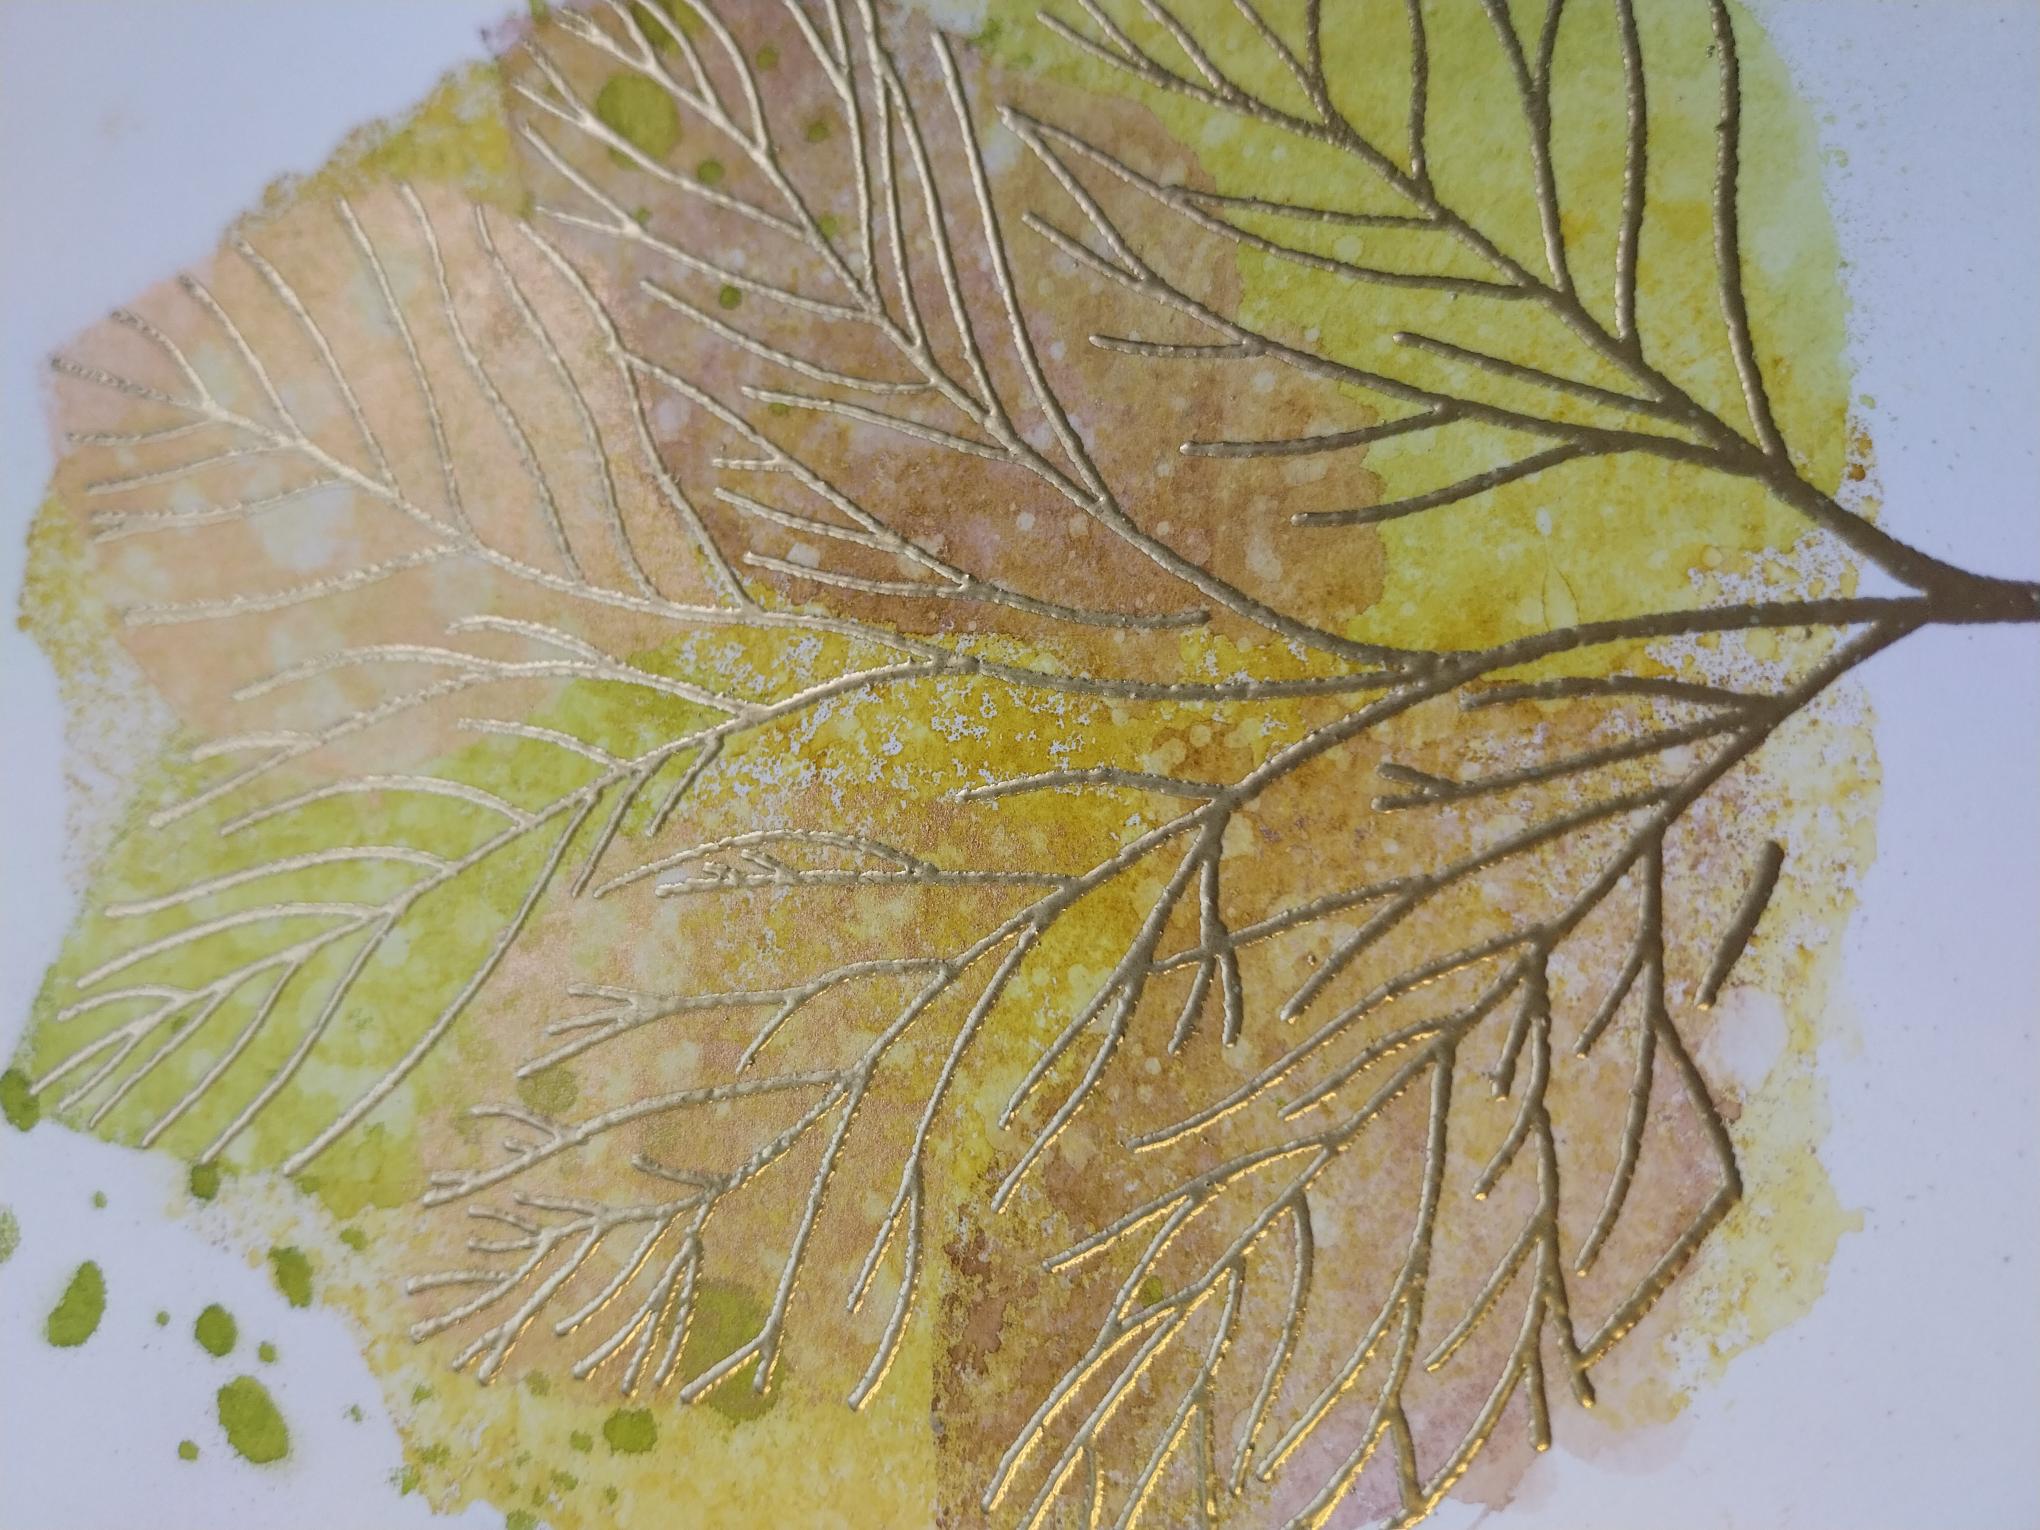
Smother your stencilled image with your anti-static bag!! You need it to be completely dry before stamping with the coordinating stamp, in the WOW sticky embossing ink. Apply the Gold embossing powder over the sticky image, shaking off and decanting any excess powder back in the pot. Ensure your heat tool is HOT before heat setting the powder. |
|
Tear a panel of vellum slightly wider than the width of the stencilled card and deep enough for your sentiment to fit into. Wipe over the vellum with the anti-static bag before stamping and heat embossing your sentiment across the centre of the vellum panel. Lay across the bottom third of your embossed card, tuck the edges of the vellum over and secure on the reverse with your double-sided tape. |

|
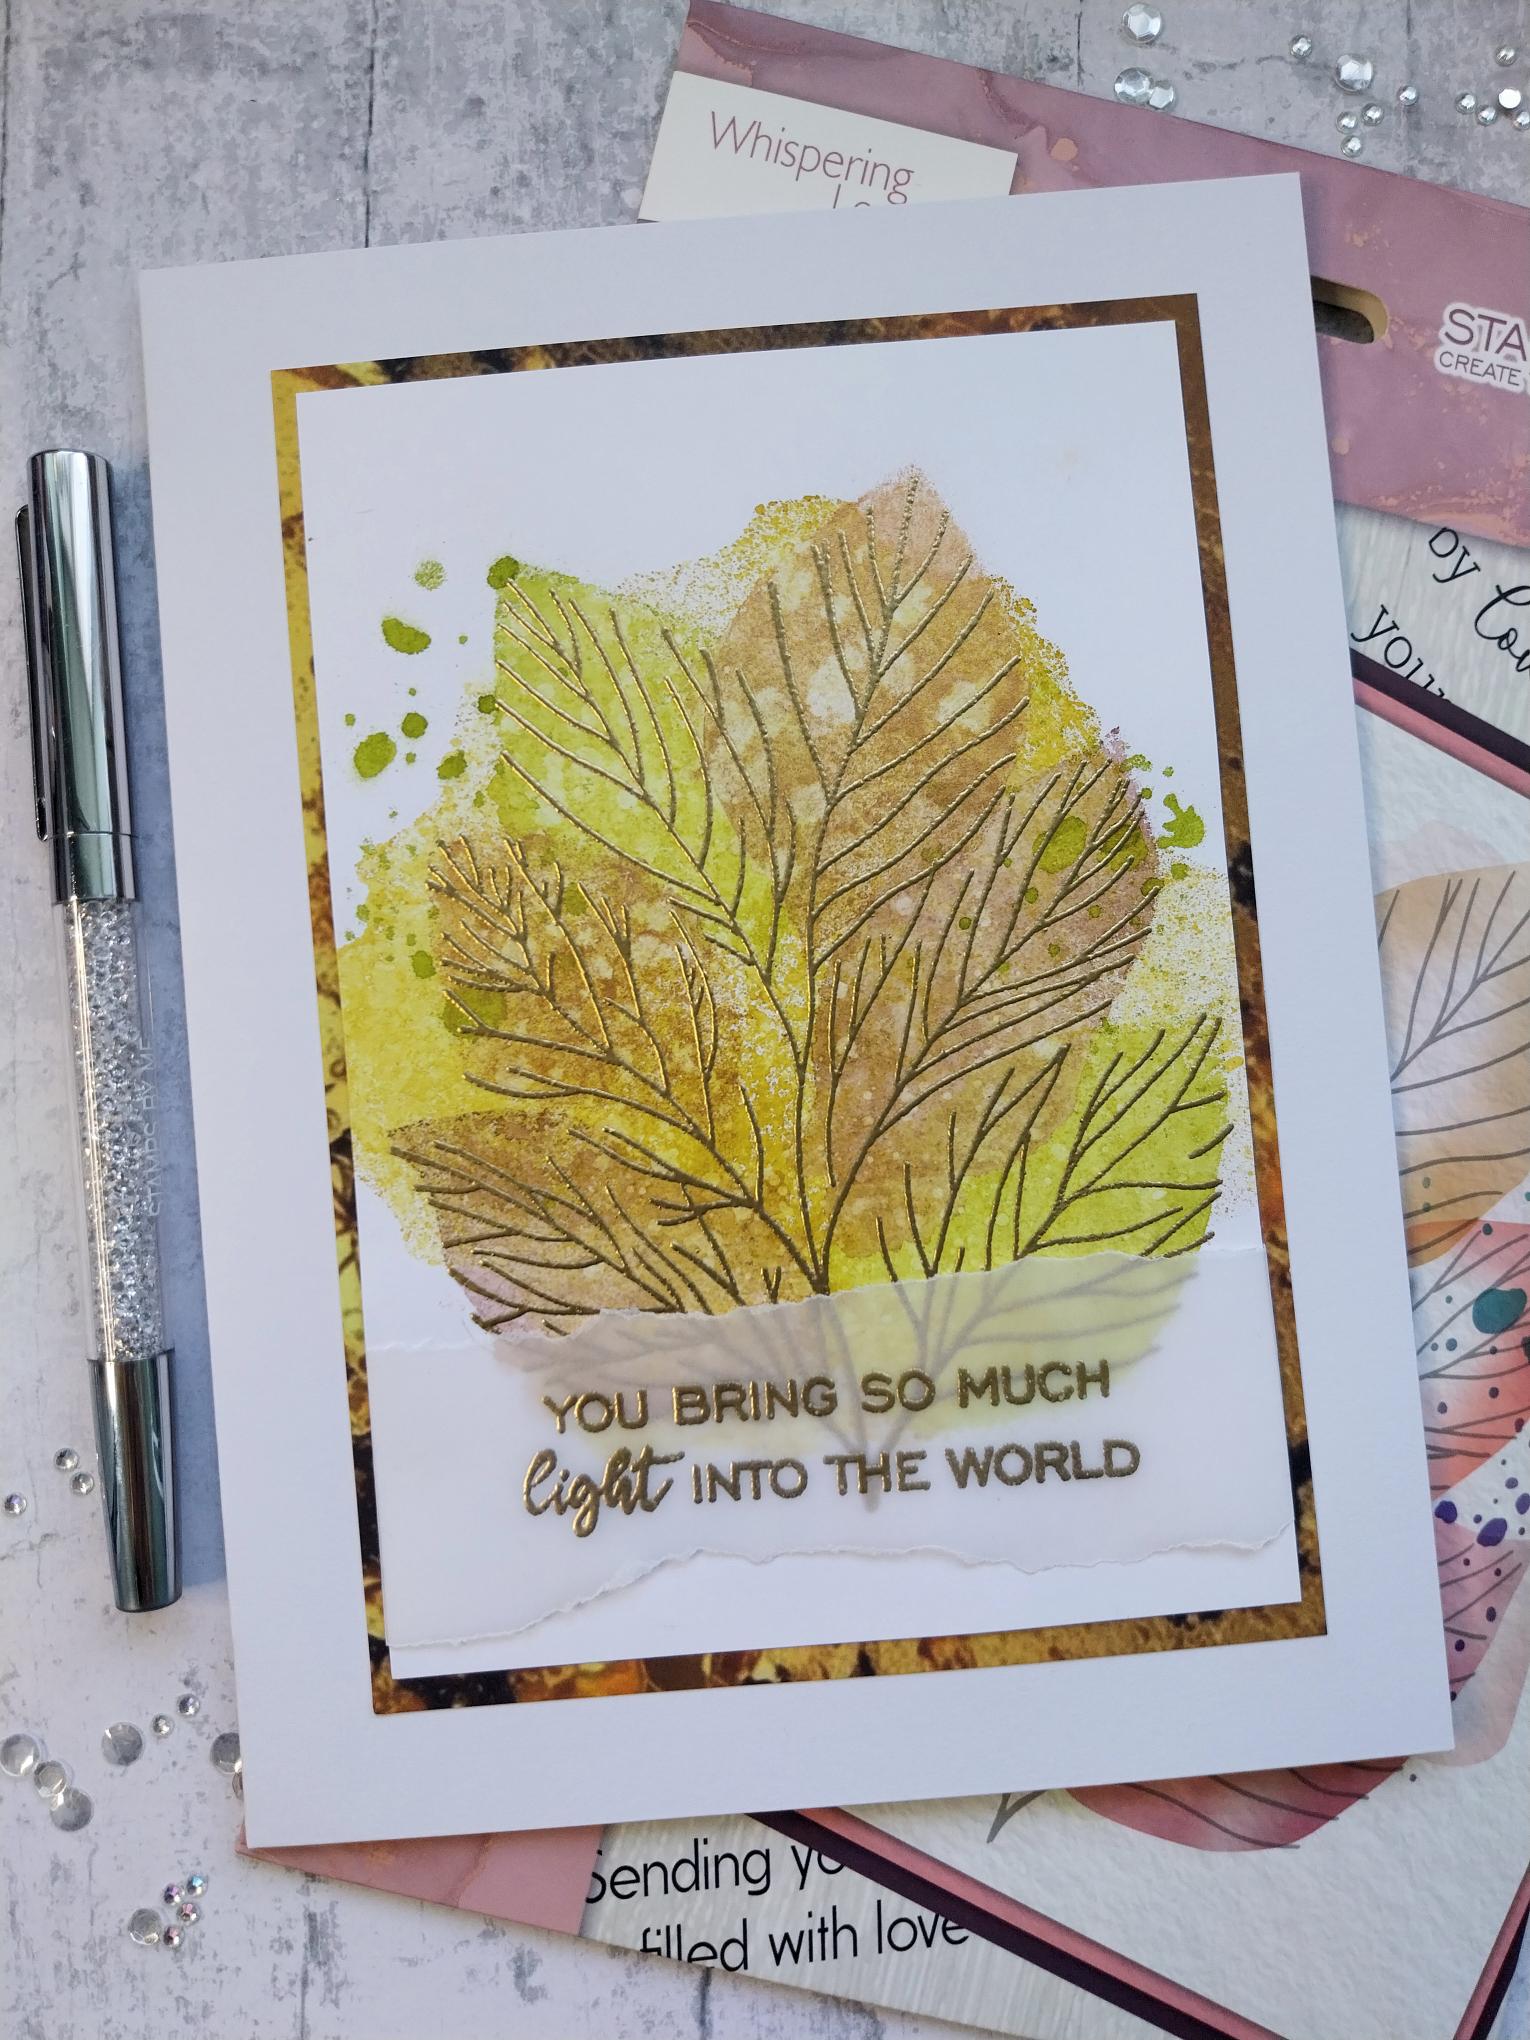
Cut a coordinating sheet of decorative paper, from the Gilded Gold paper pad, to 5 1/4 x 7 1/4". |
|
Adhere your embossed card onto the paper and then onto your card blank. |