Give your friends $10 off their first order!
Refer a FRIEND


WHAT YOU WILL NEED:
Teal card blank 7 x 7"
Kraft cardstock 6 1/2 x 6 1/2"
White cardstock 6 1/4" x 6 1/4"
White cardstock
IMALA Storyteller A5 Stamp
IMALA One More Chapter A5 Stamp
Create Together Club Chapter One: Beautiful Notes "script" stamp
Versafine Ink Pad: Smoky Grey
SBM Premium Dye Ink Pad: Tiffany
Distress Ink Pad: Walnut Stain
Blending tool
Water Spray Bottle
Paint brush
Ribbon
Hole Punch
Eureka 101 Watercolour Tablet
SBM A3 Magnetic glass mat
Paper Trimmer
Glue
Foam pads
[click image to enlarge] 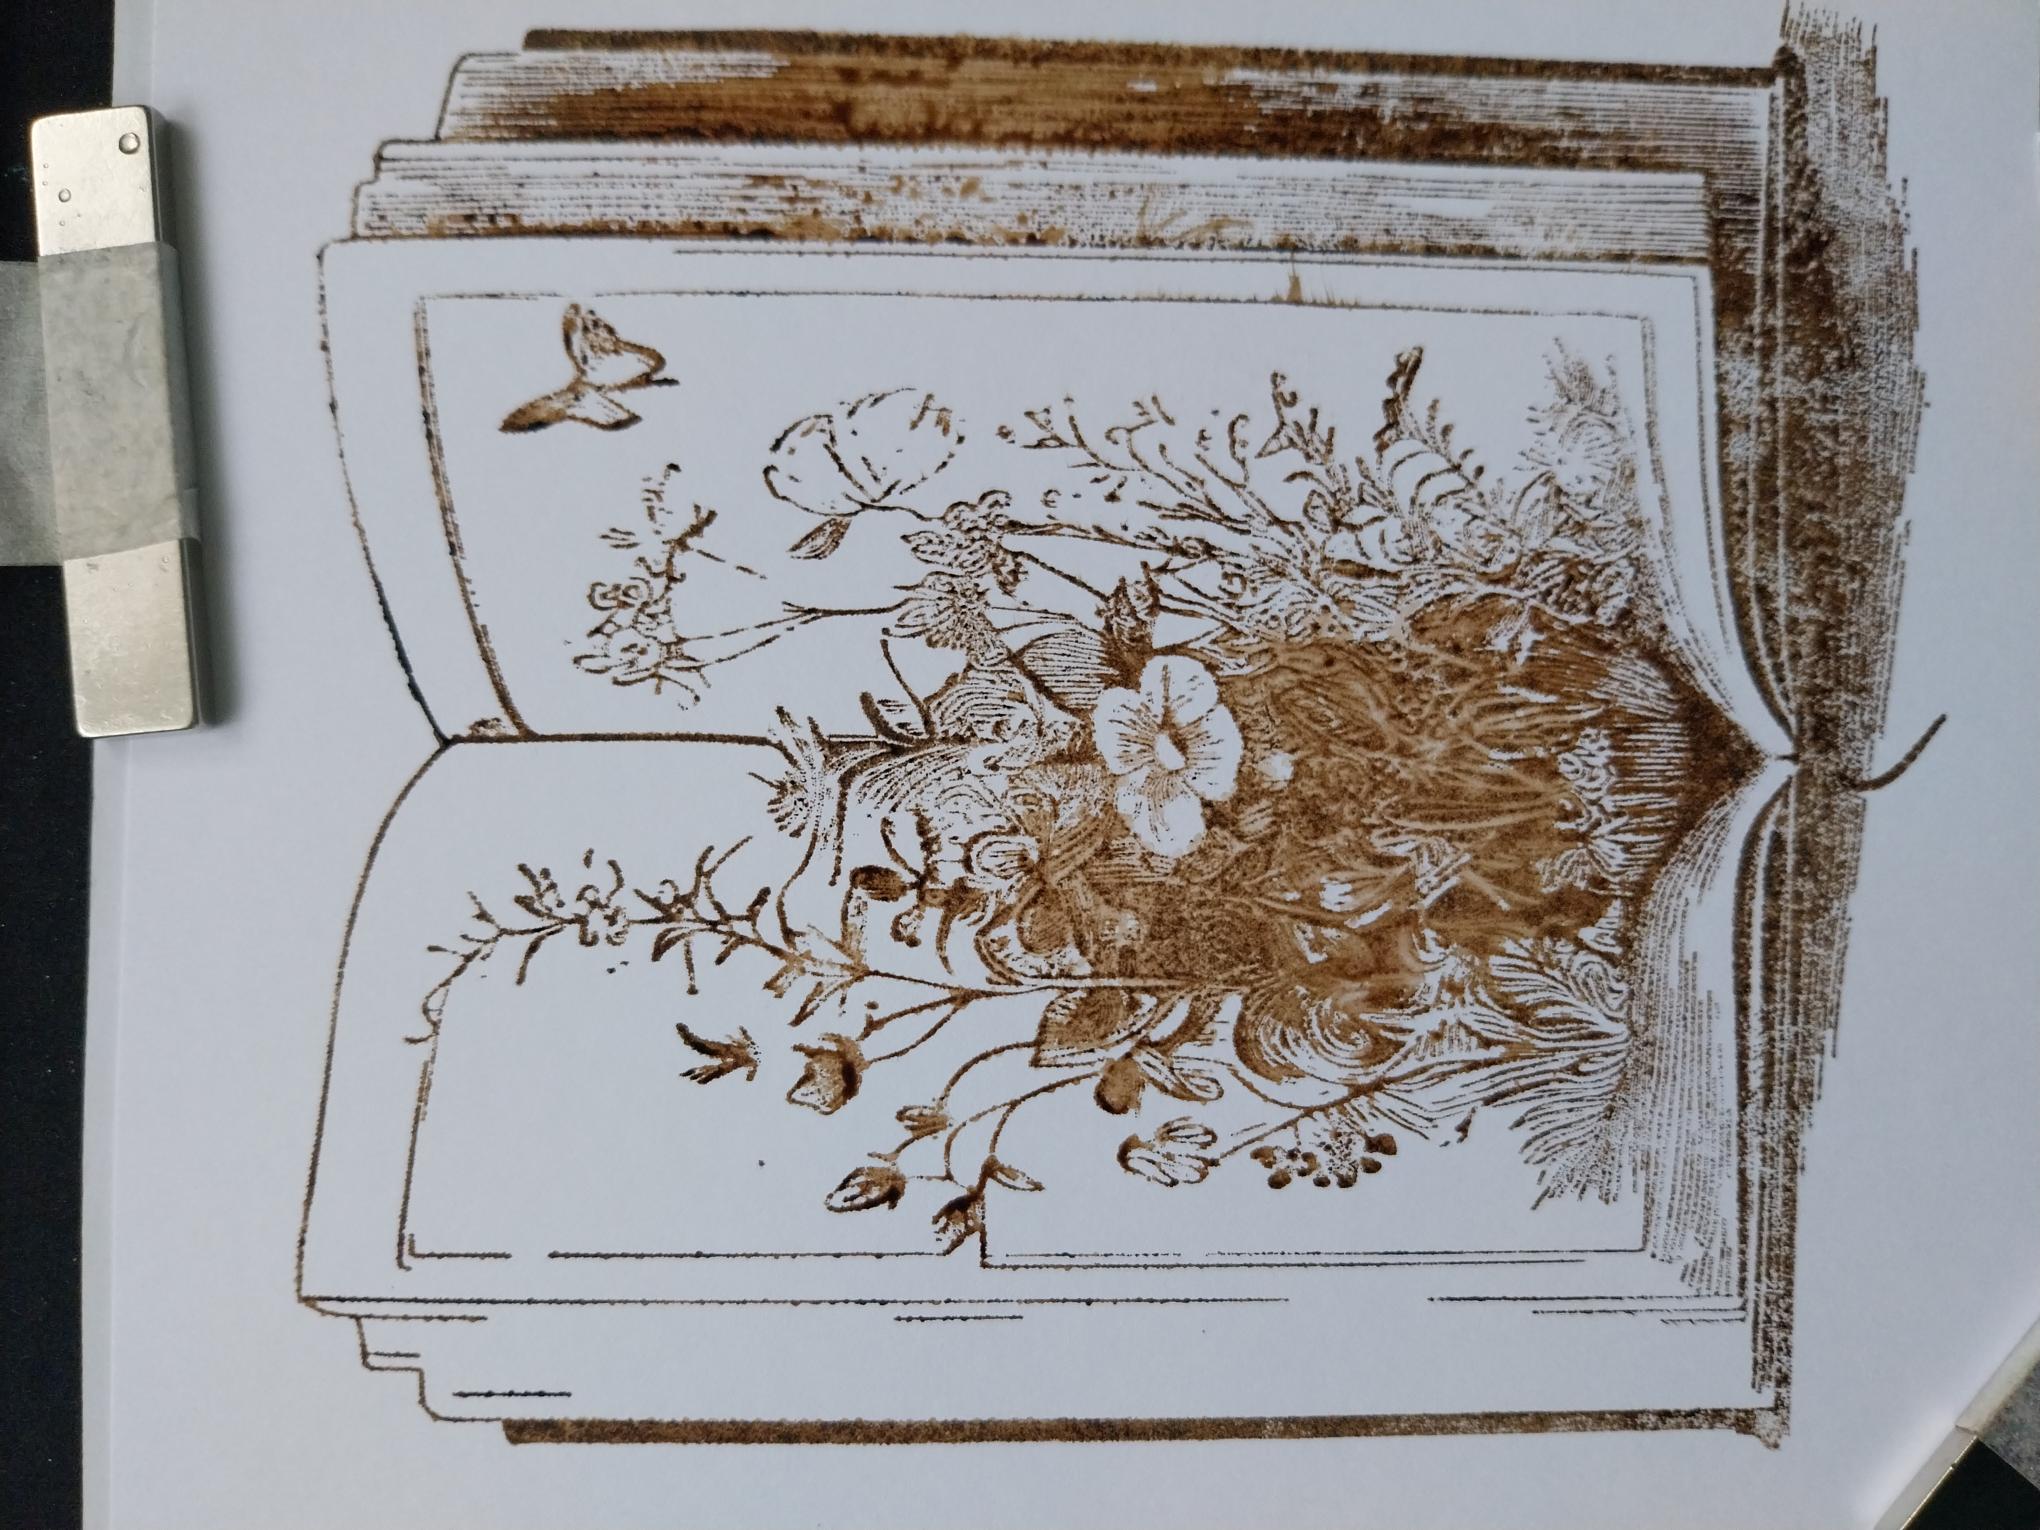
|
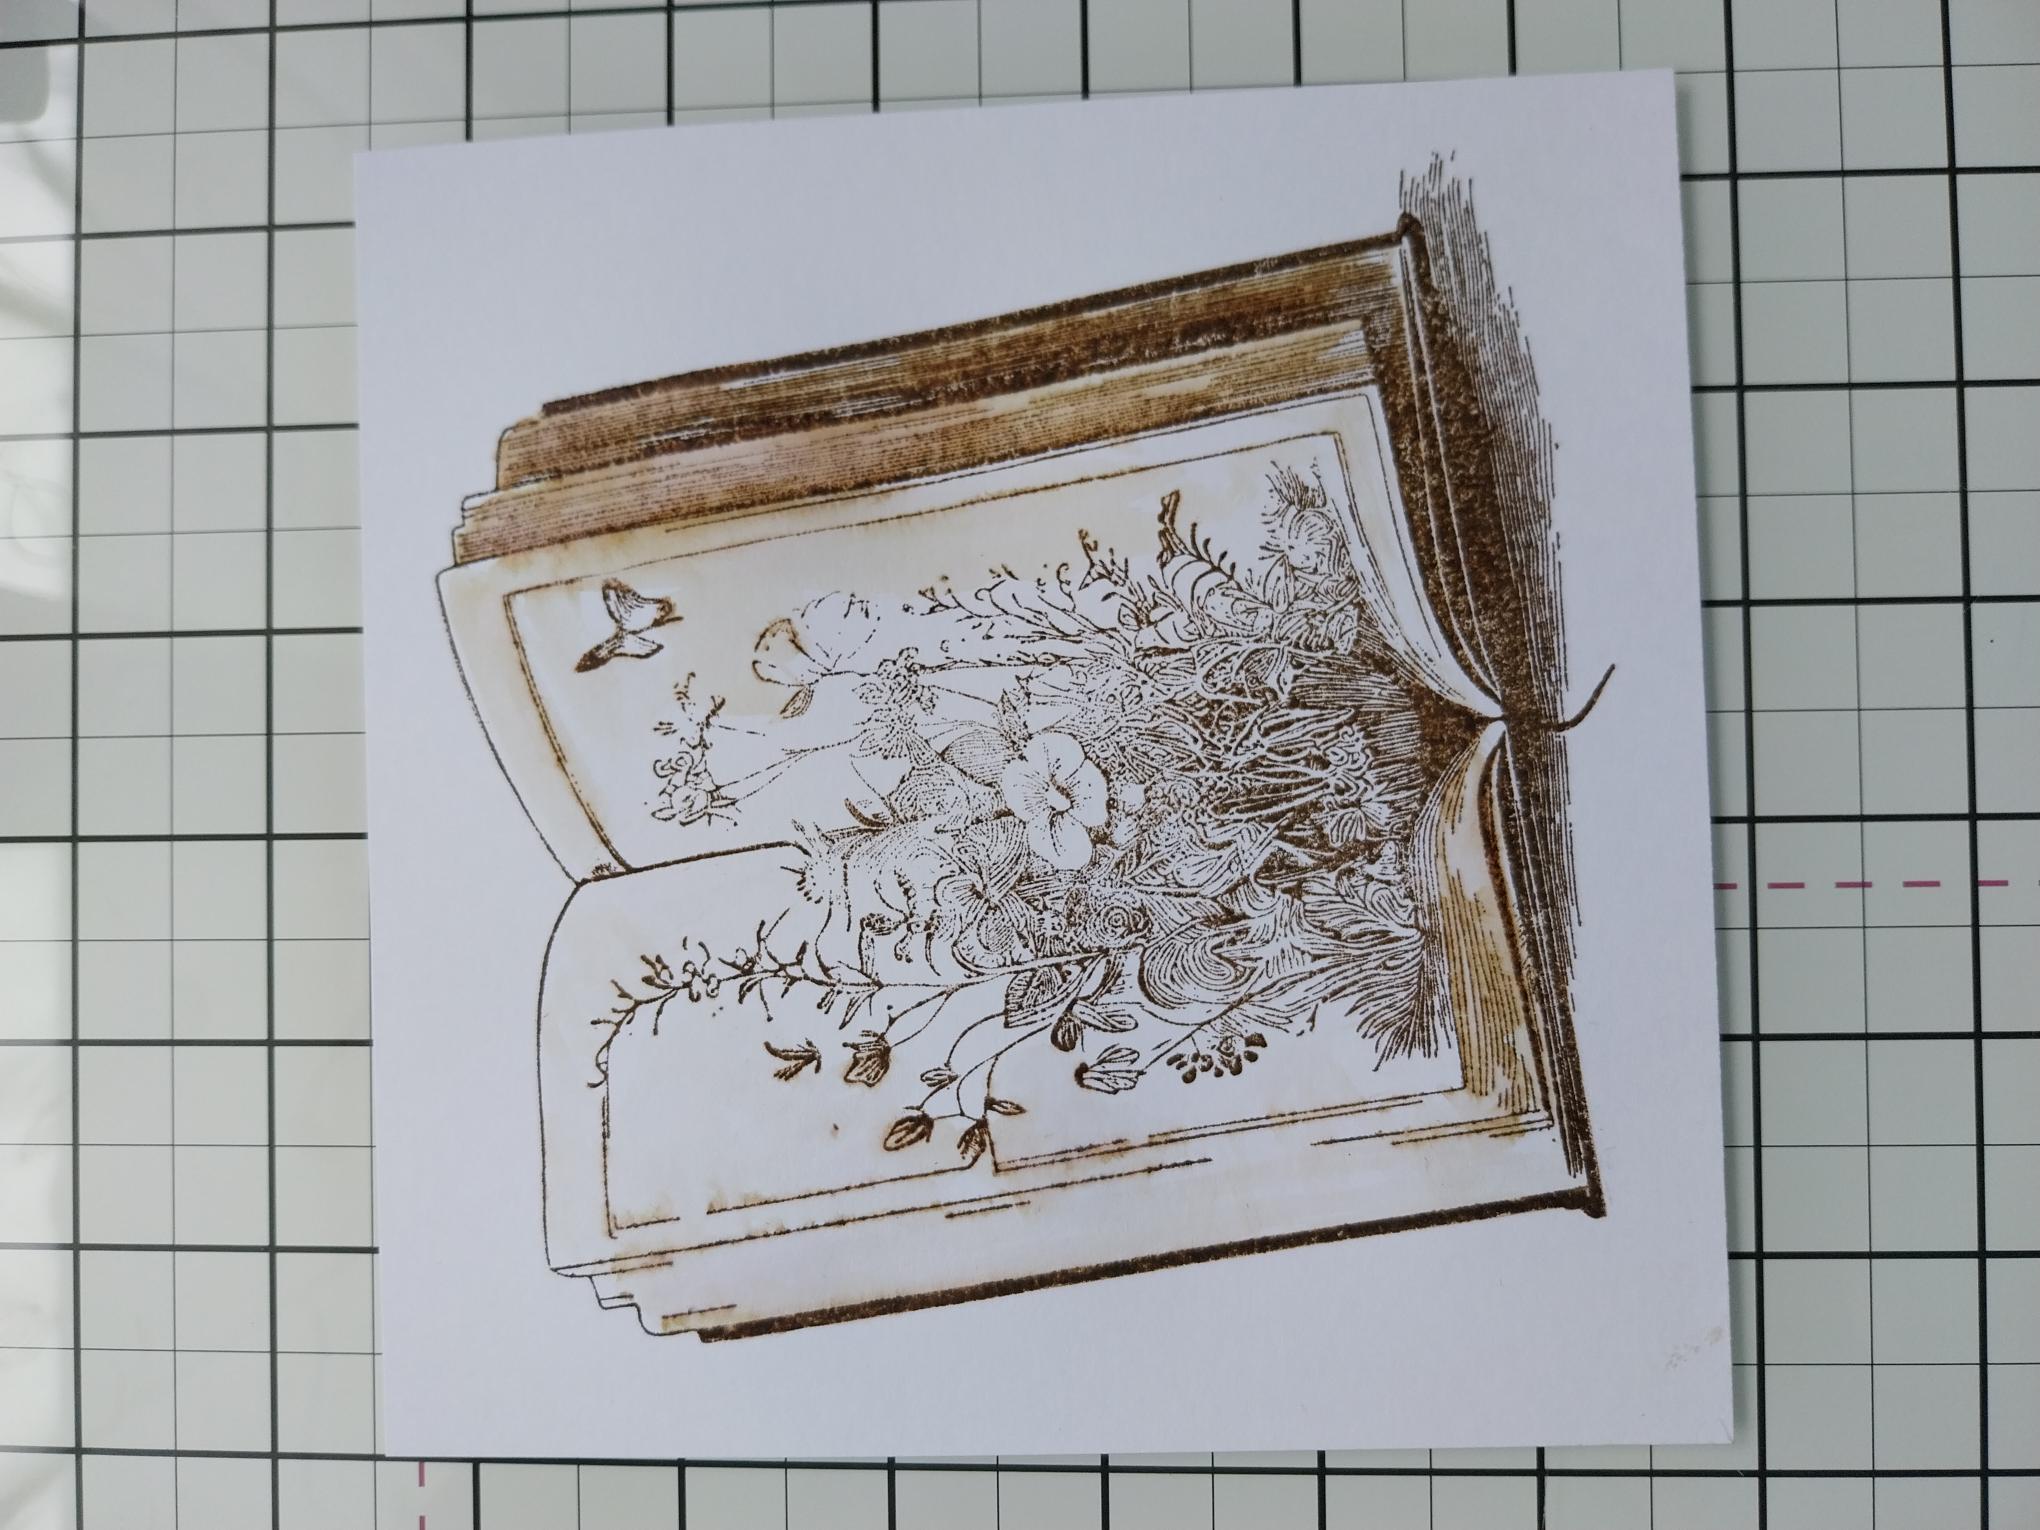
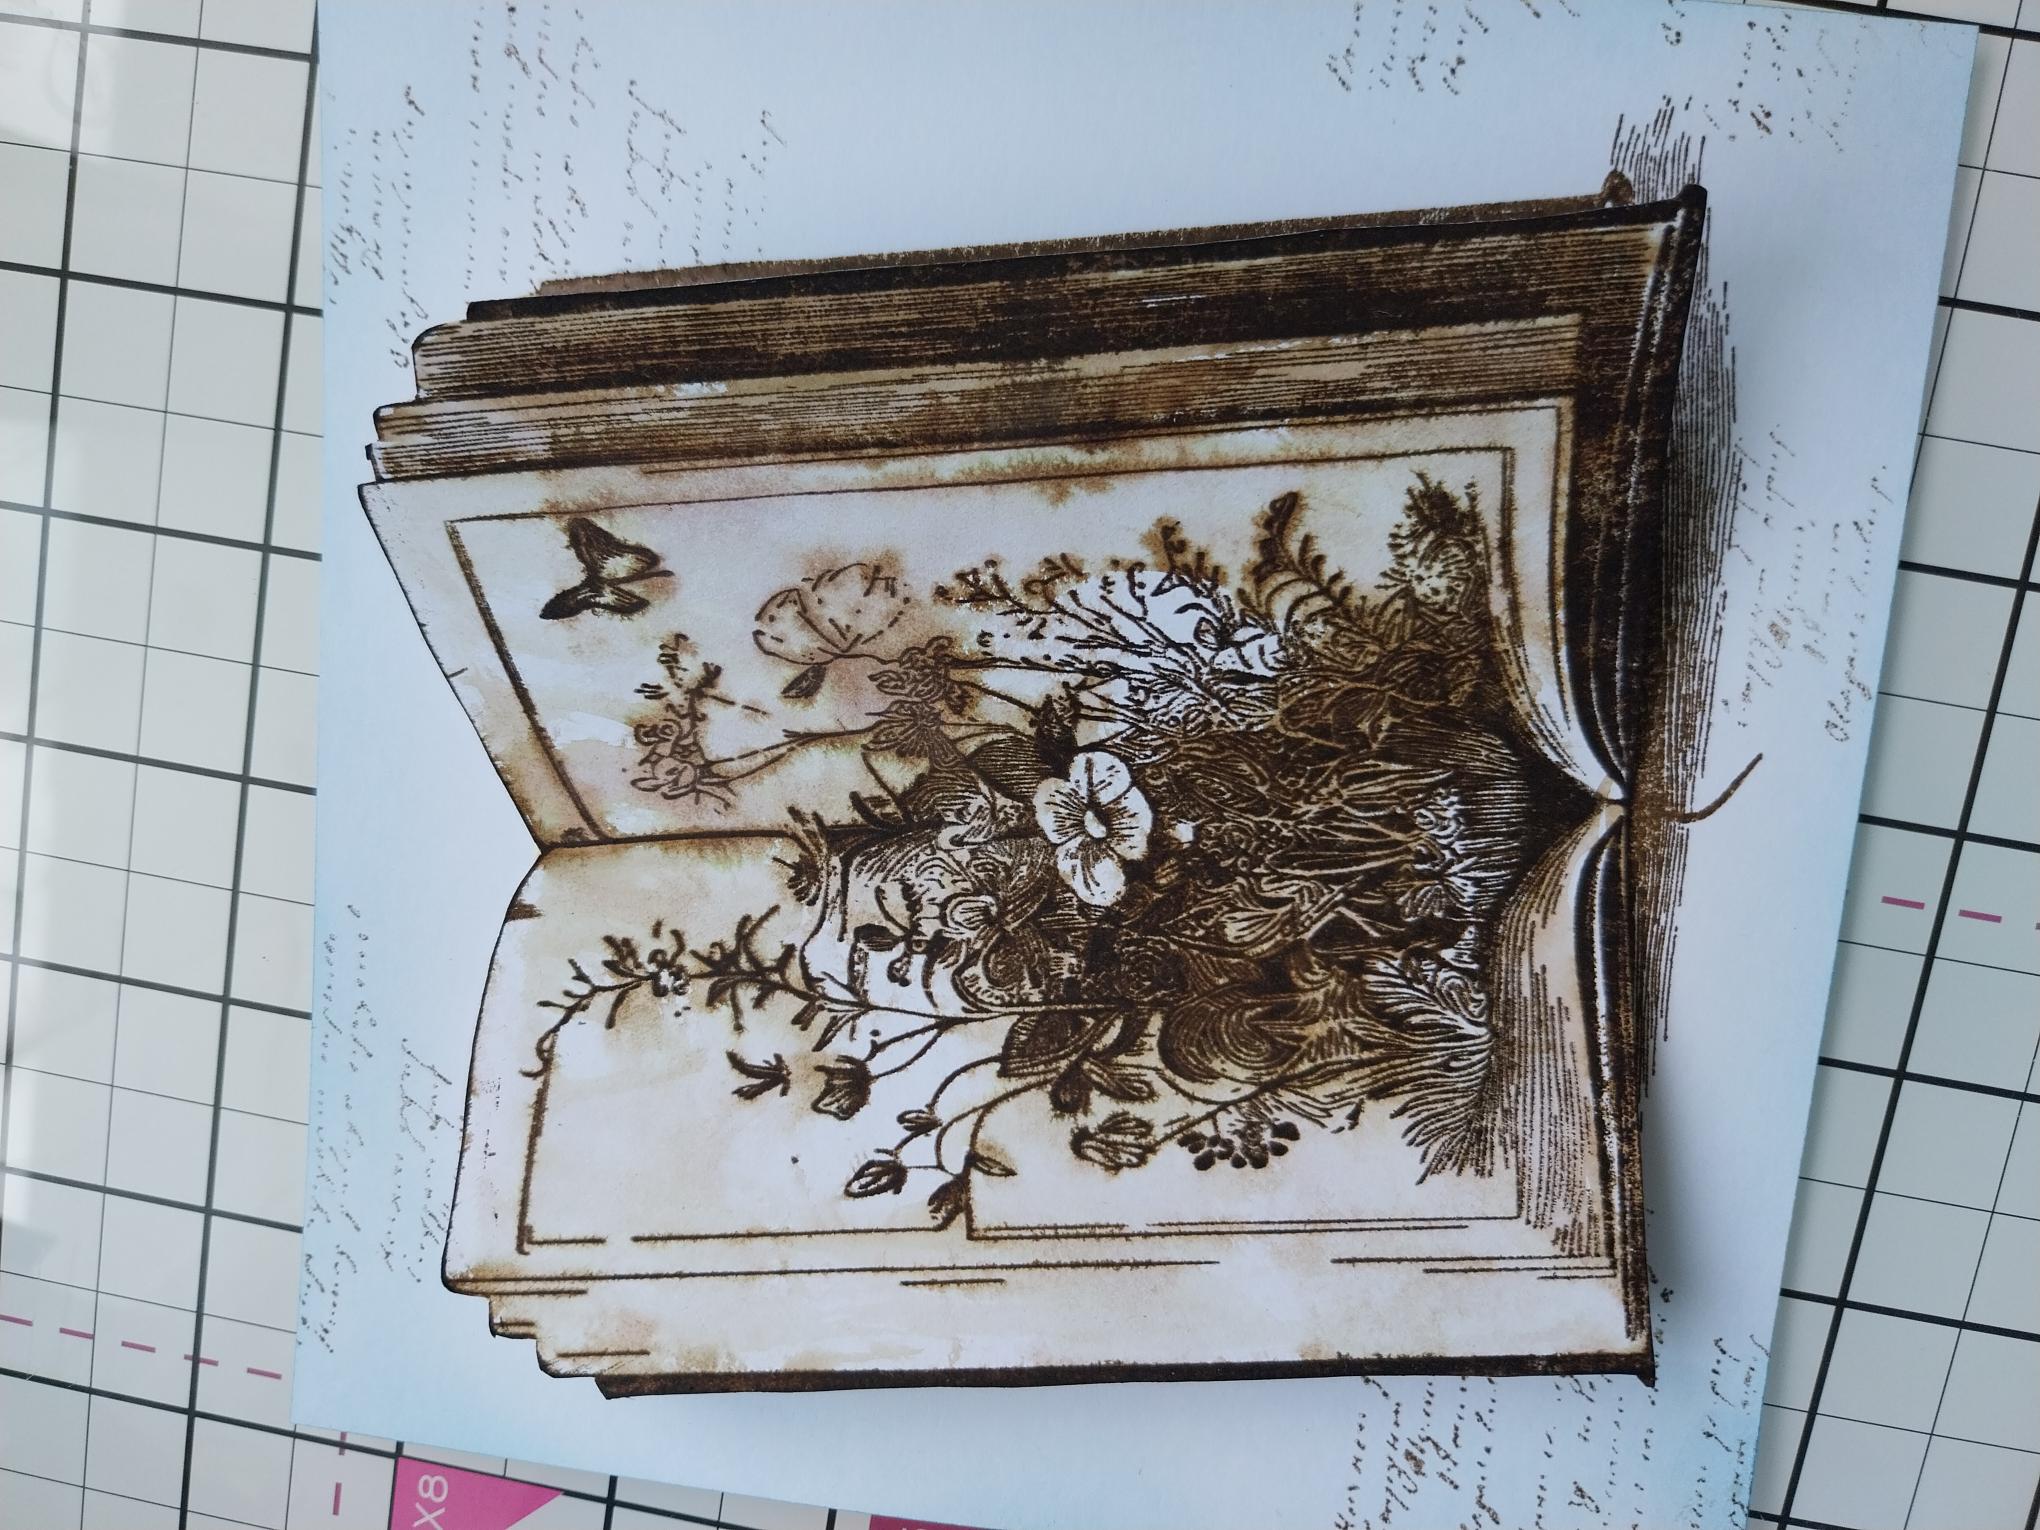
Stamp the beautiful open book with the Walnut Stain Distress Ink, on to a piece of white cardstock. DO NOT MOVE THE STAMP OR CARD FOR THE NEXT STEP!!!!! |
|
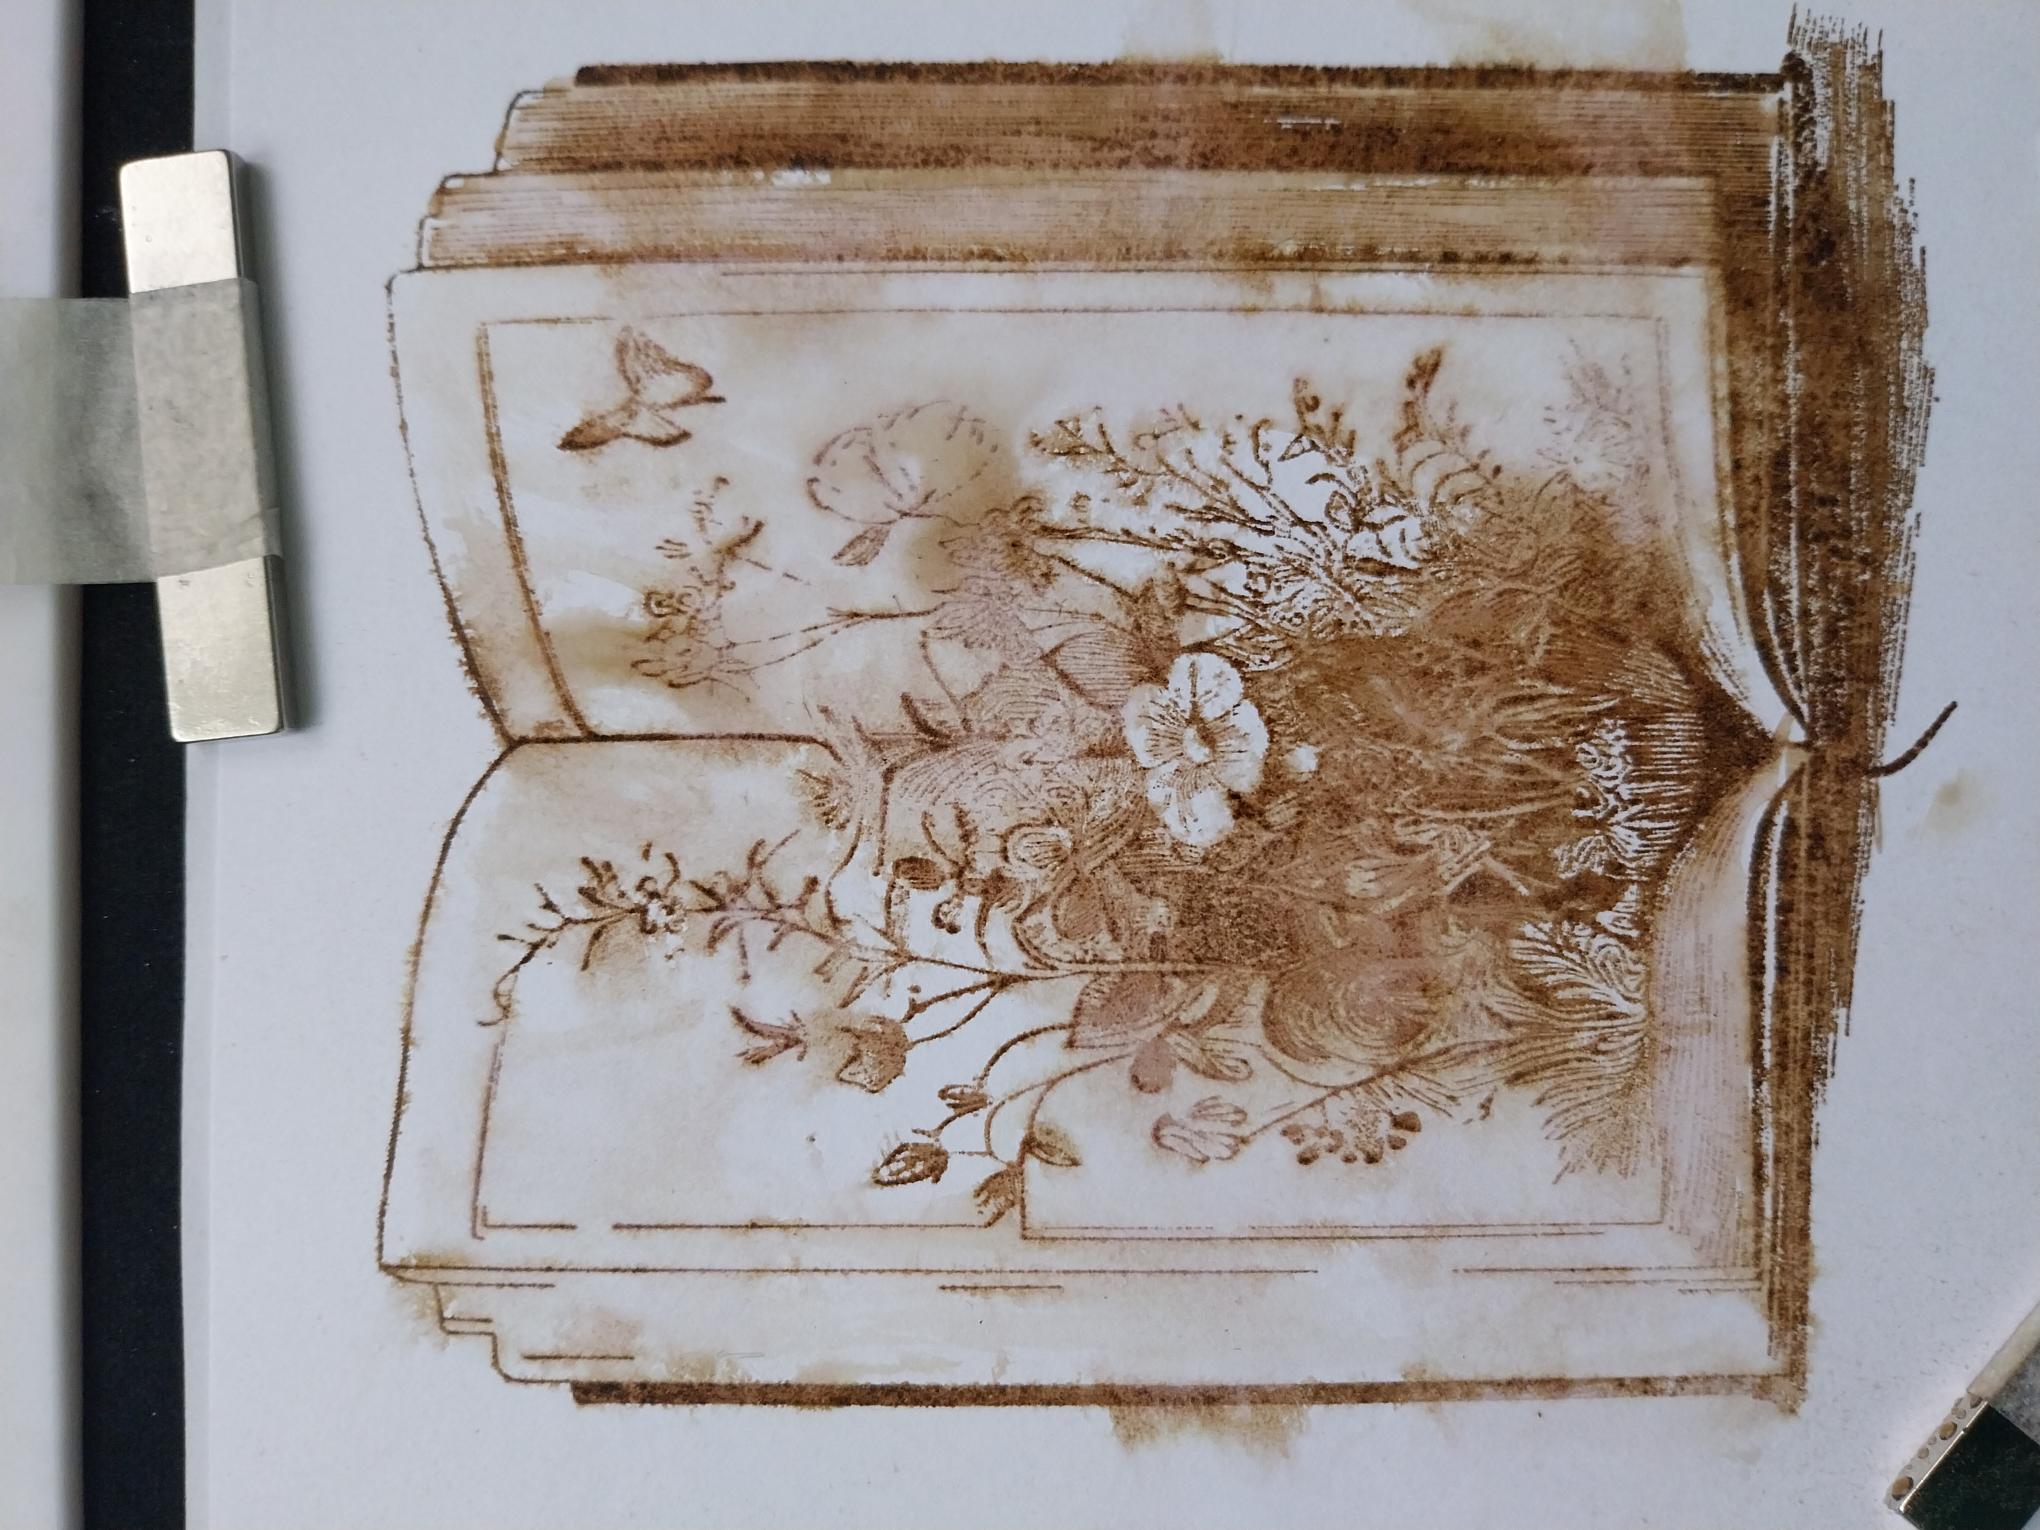
Whilst the ink is still wet, spritz the stamped image with water and allow the ink to "bleed". How much it bleeds is up to you! Mop up the excess water and ink with a paper towel. This is referred to as the "bleeding" technique. DO NOT MOVE ANYTHING AT THIS STAGE! |
|
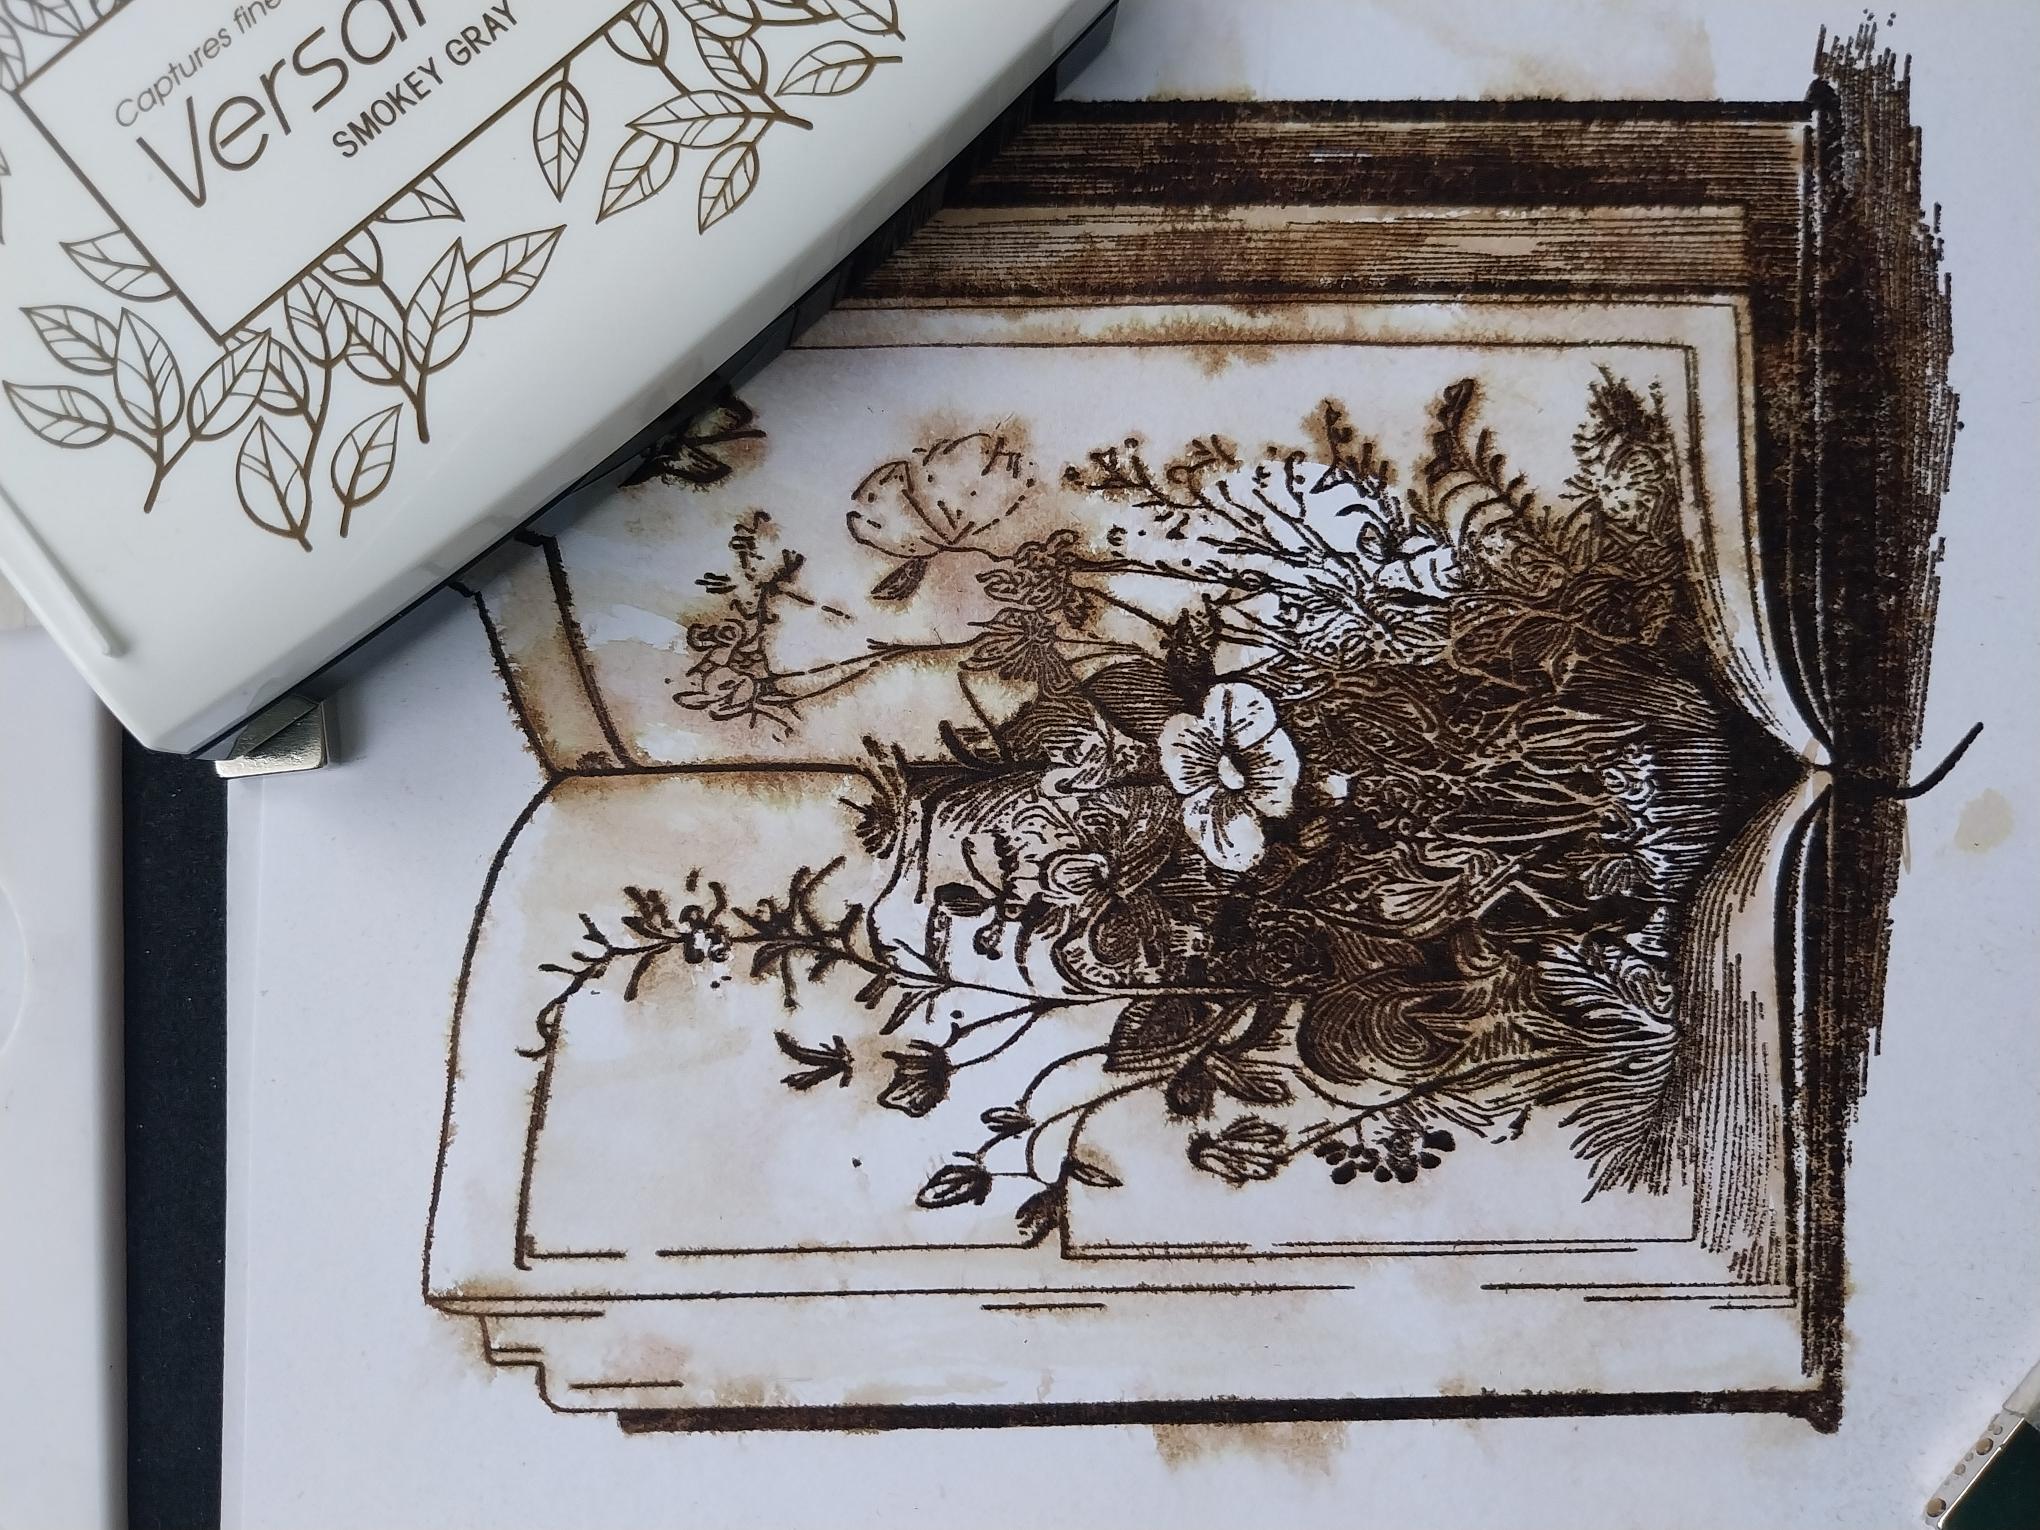
Re-ink and stamp back over your image with Smoky Grey Versafine. This will add definition back in to your stamped image. |
|
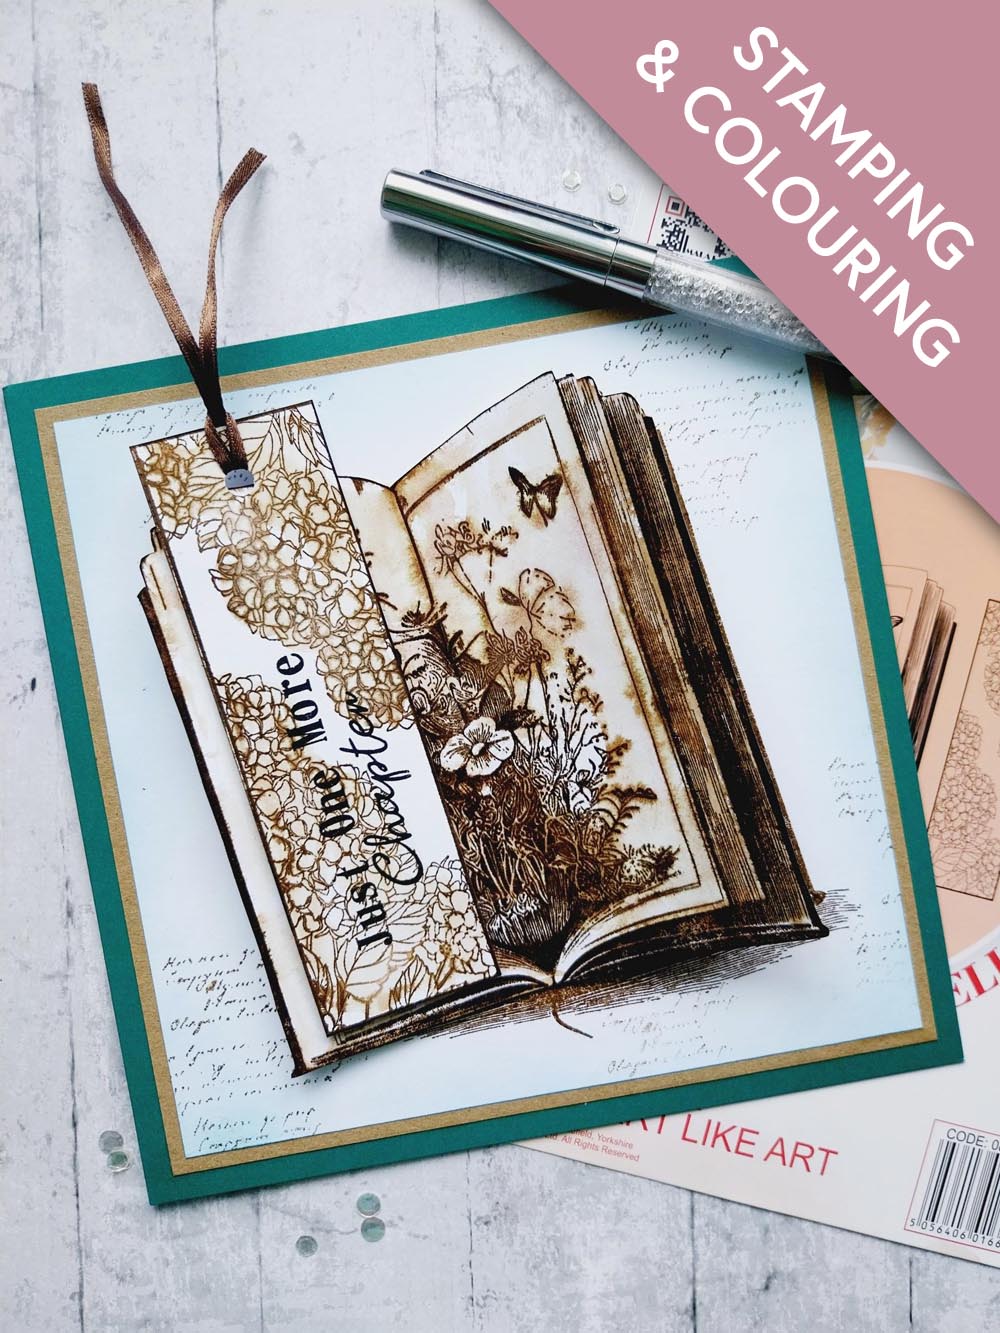
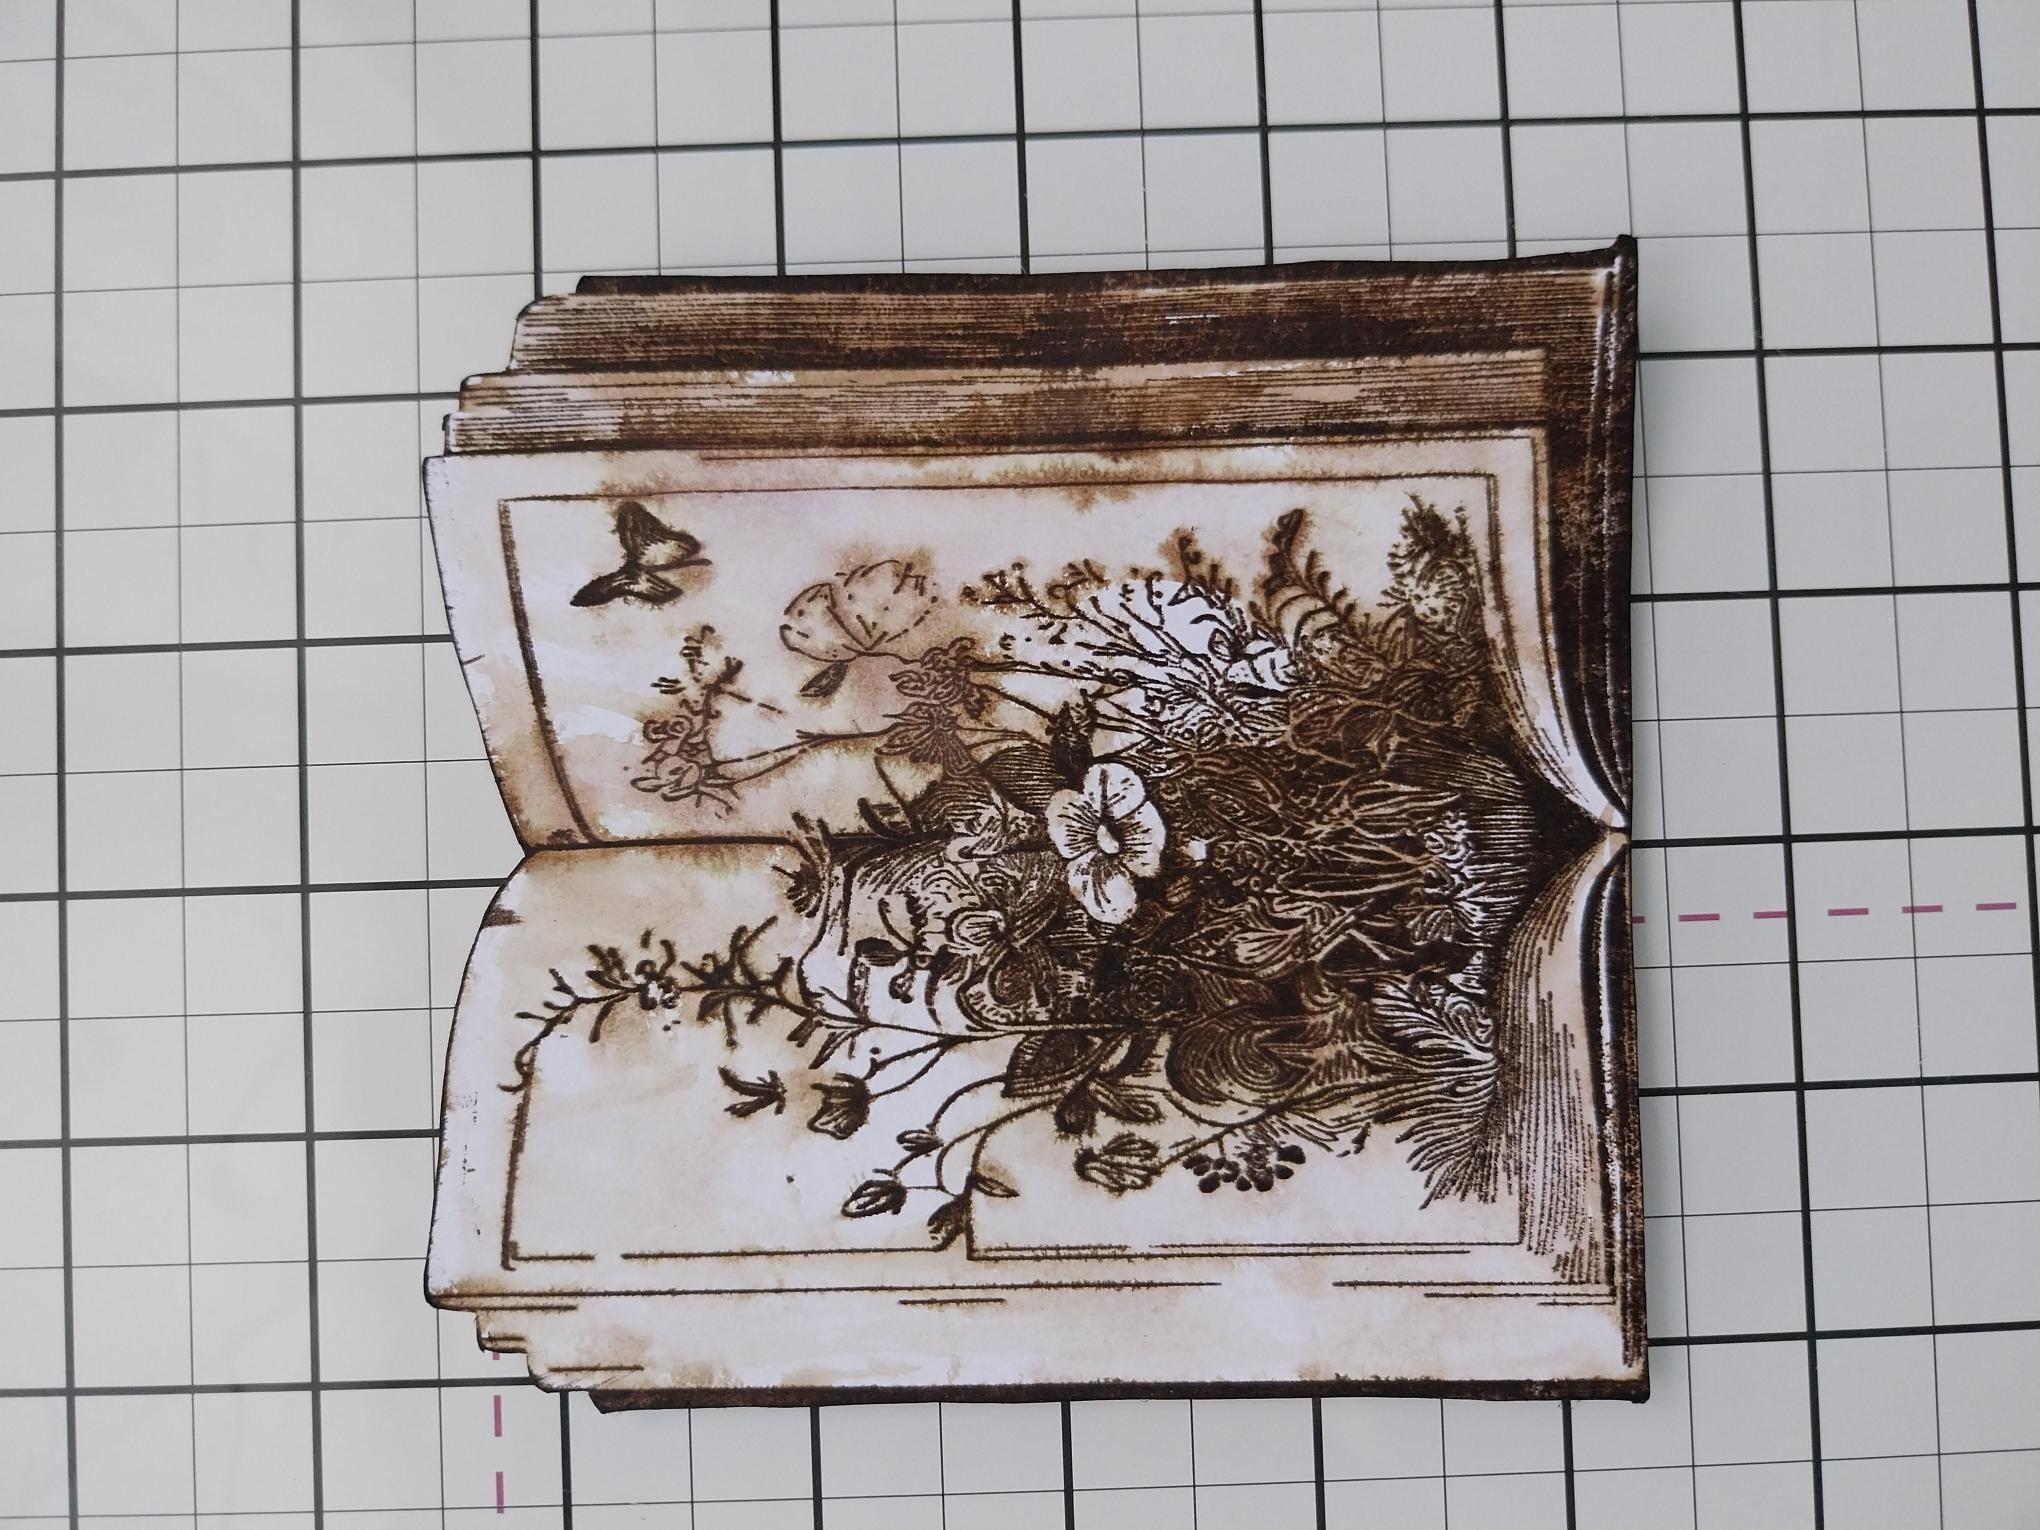
Once dry, fussy cut your book as seen here, trimming off the shadows at the bottom. Pop it to one side. |
|
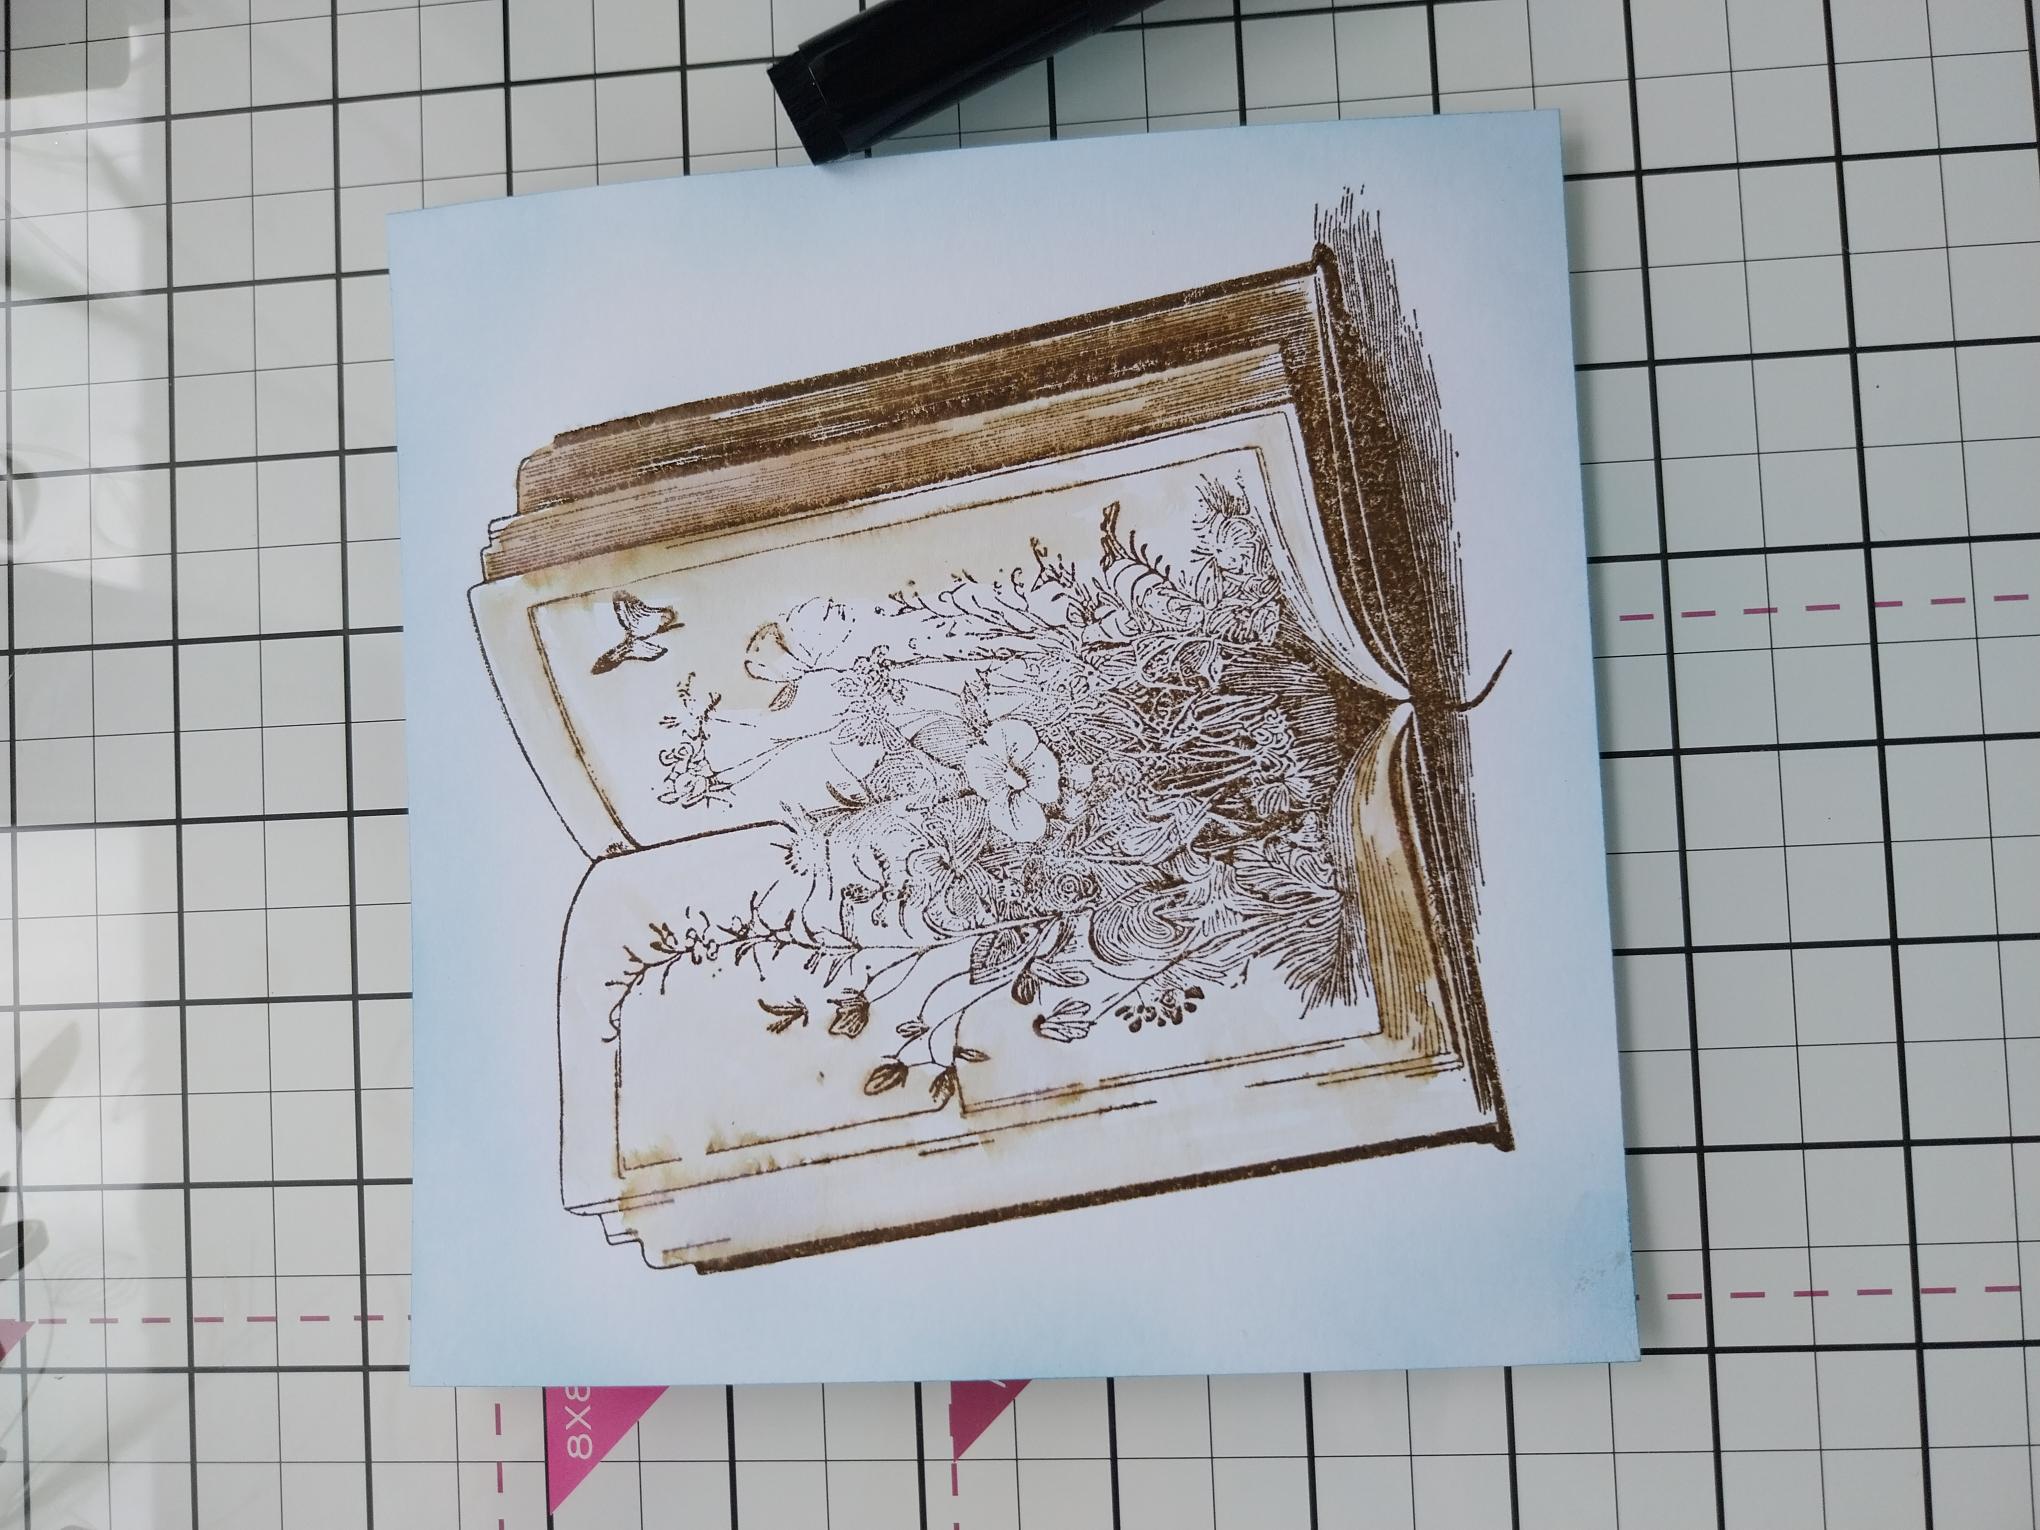
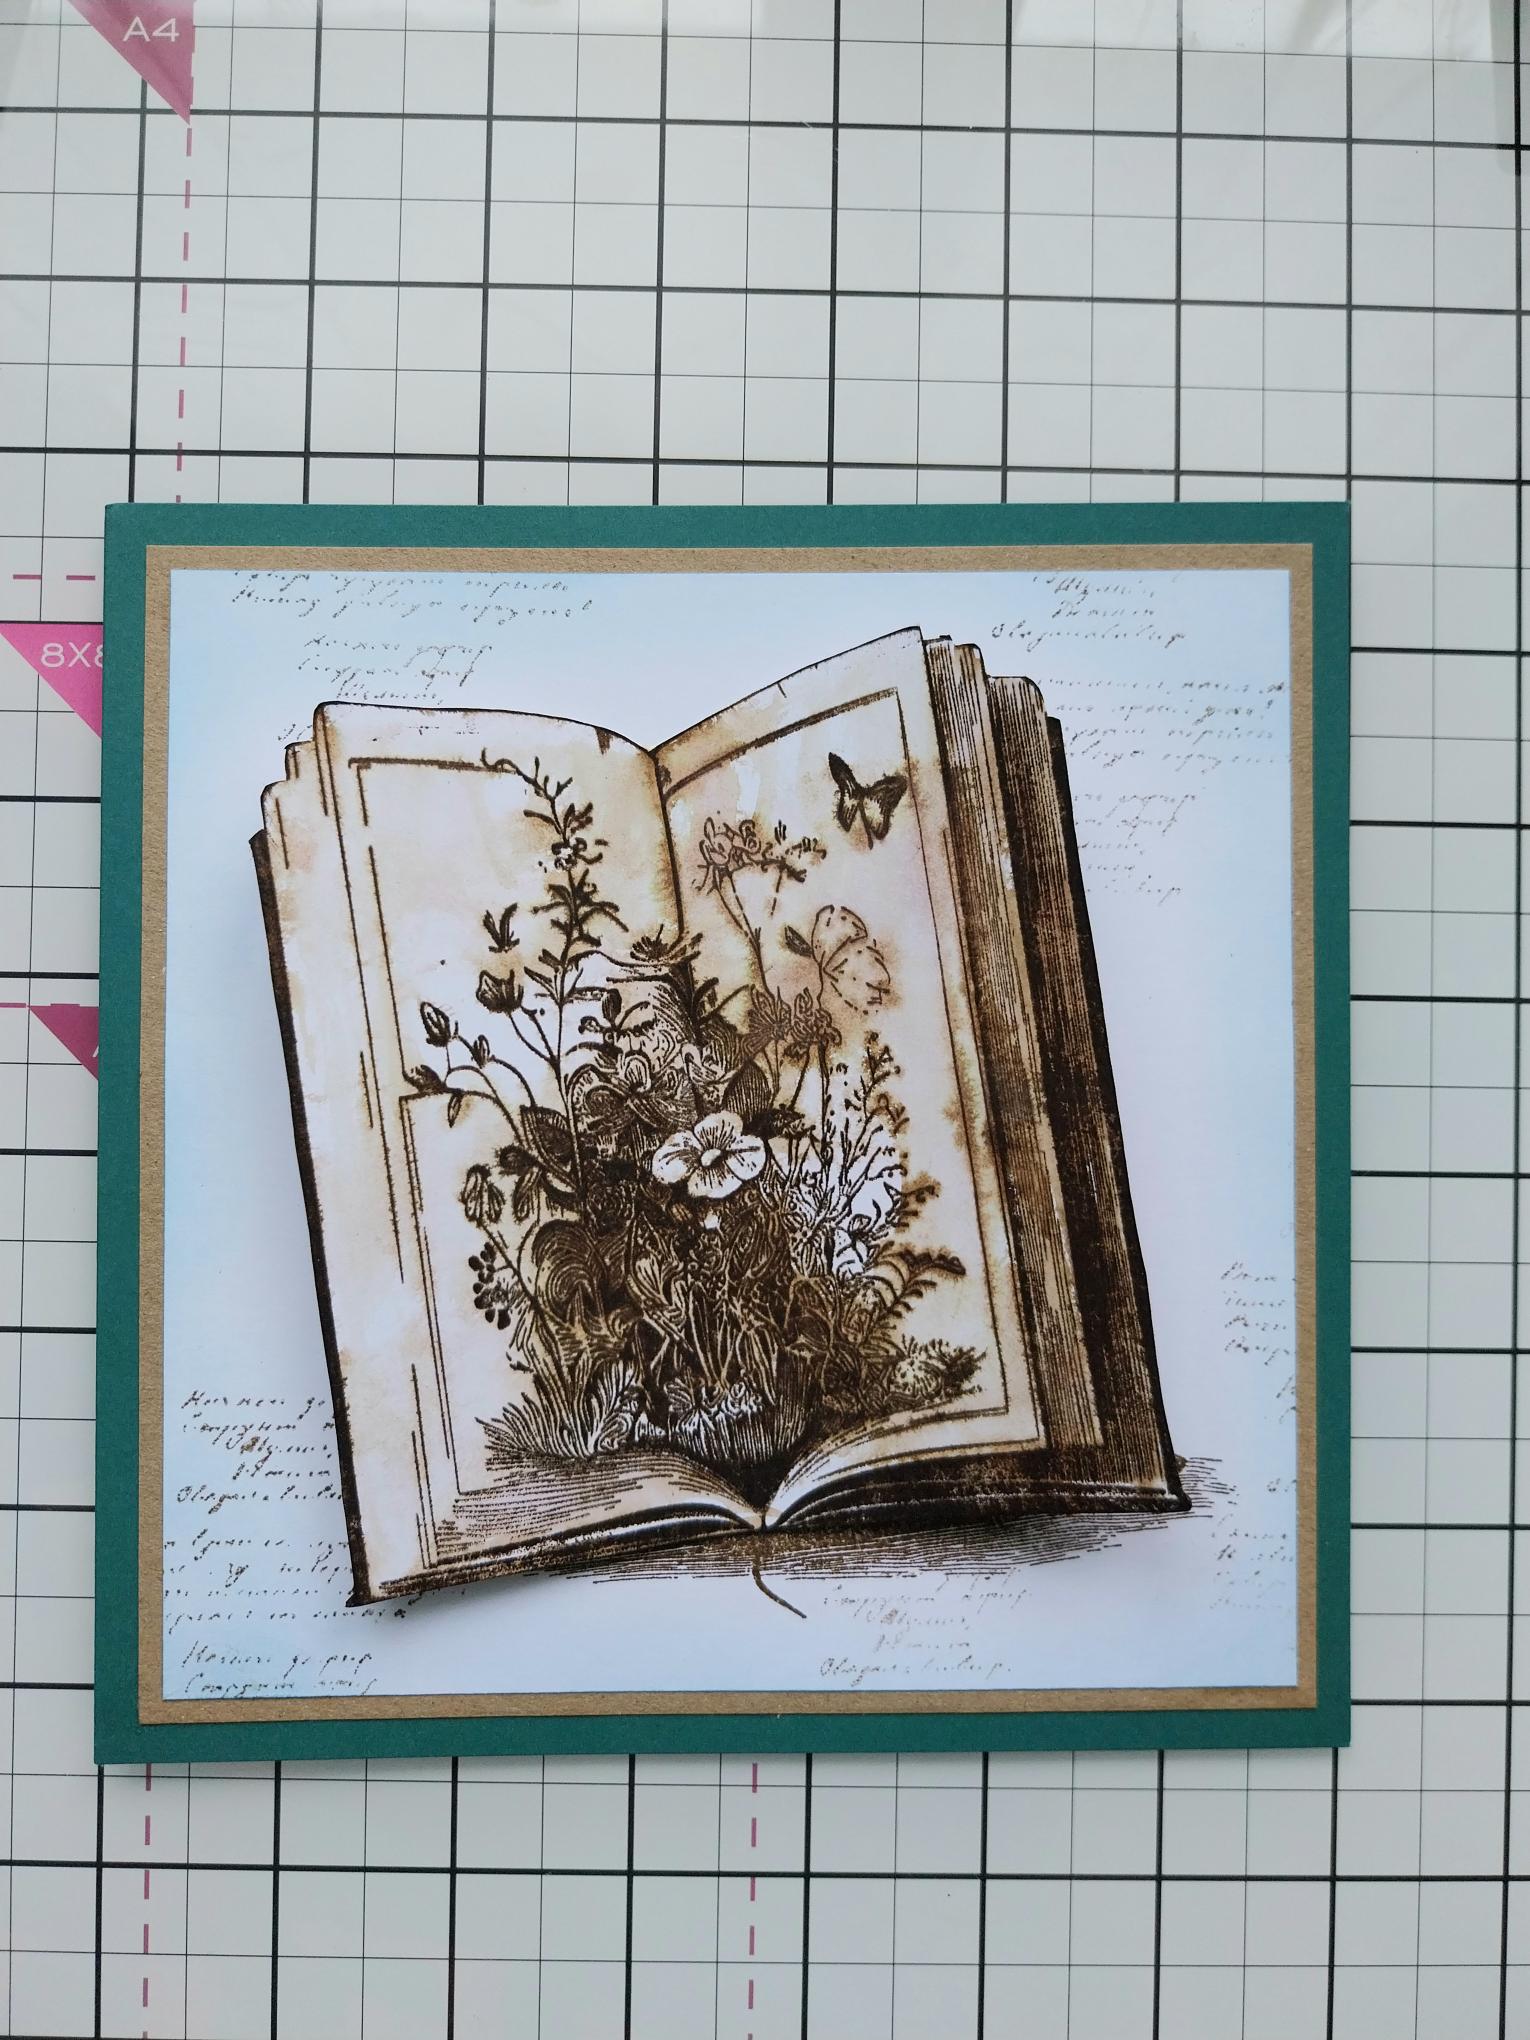
Re-stamp the book, with the Walnut Stain, on to the white cardstock trimmed to 6 1/4" square. Whilst the ink is still dry, use a paint brush to drag out the colour, creating a light watercolour effect. |
|
Blend around the edges of the card with Tiffany. |
|
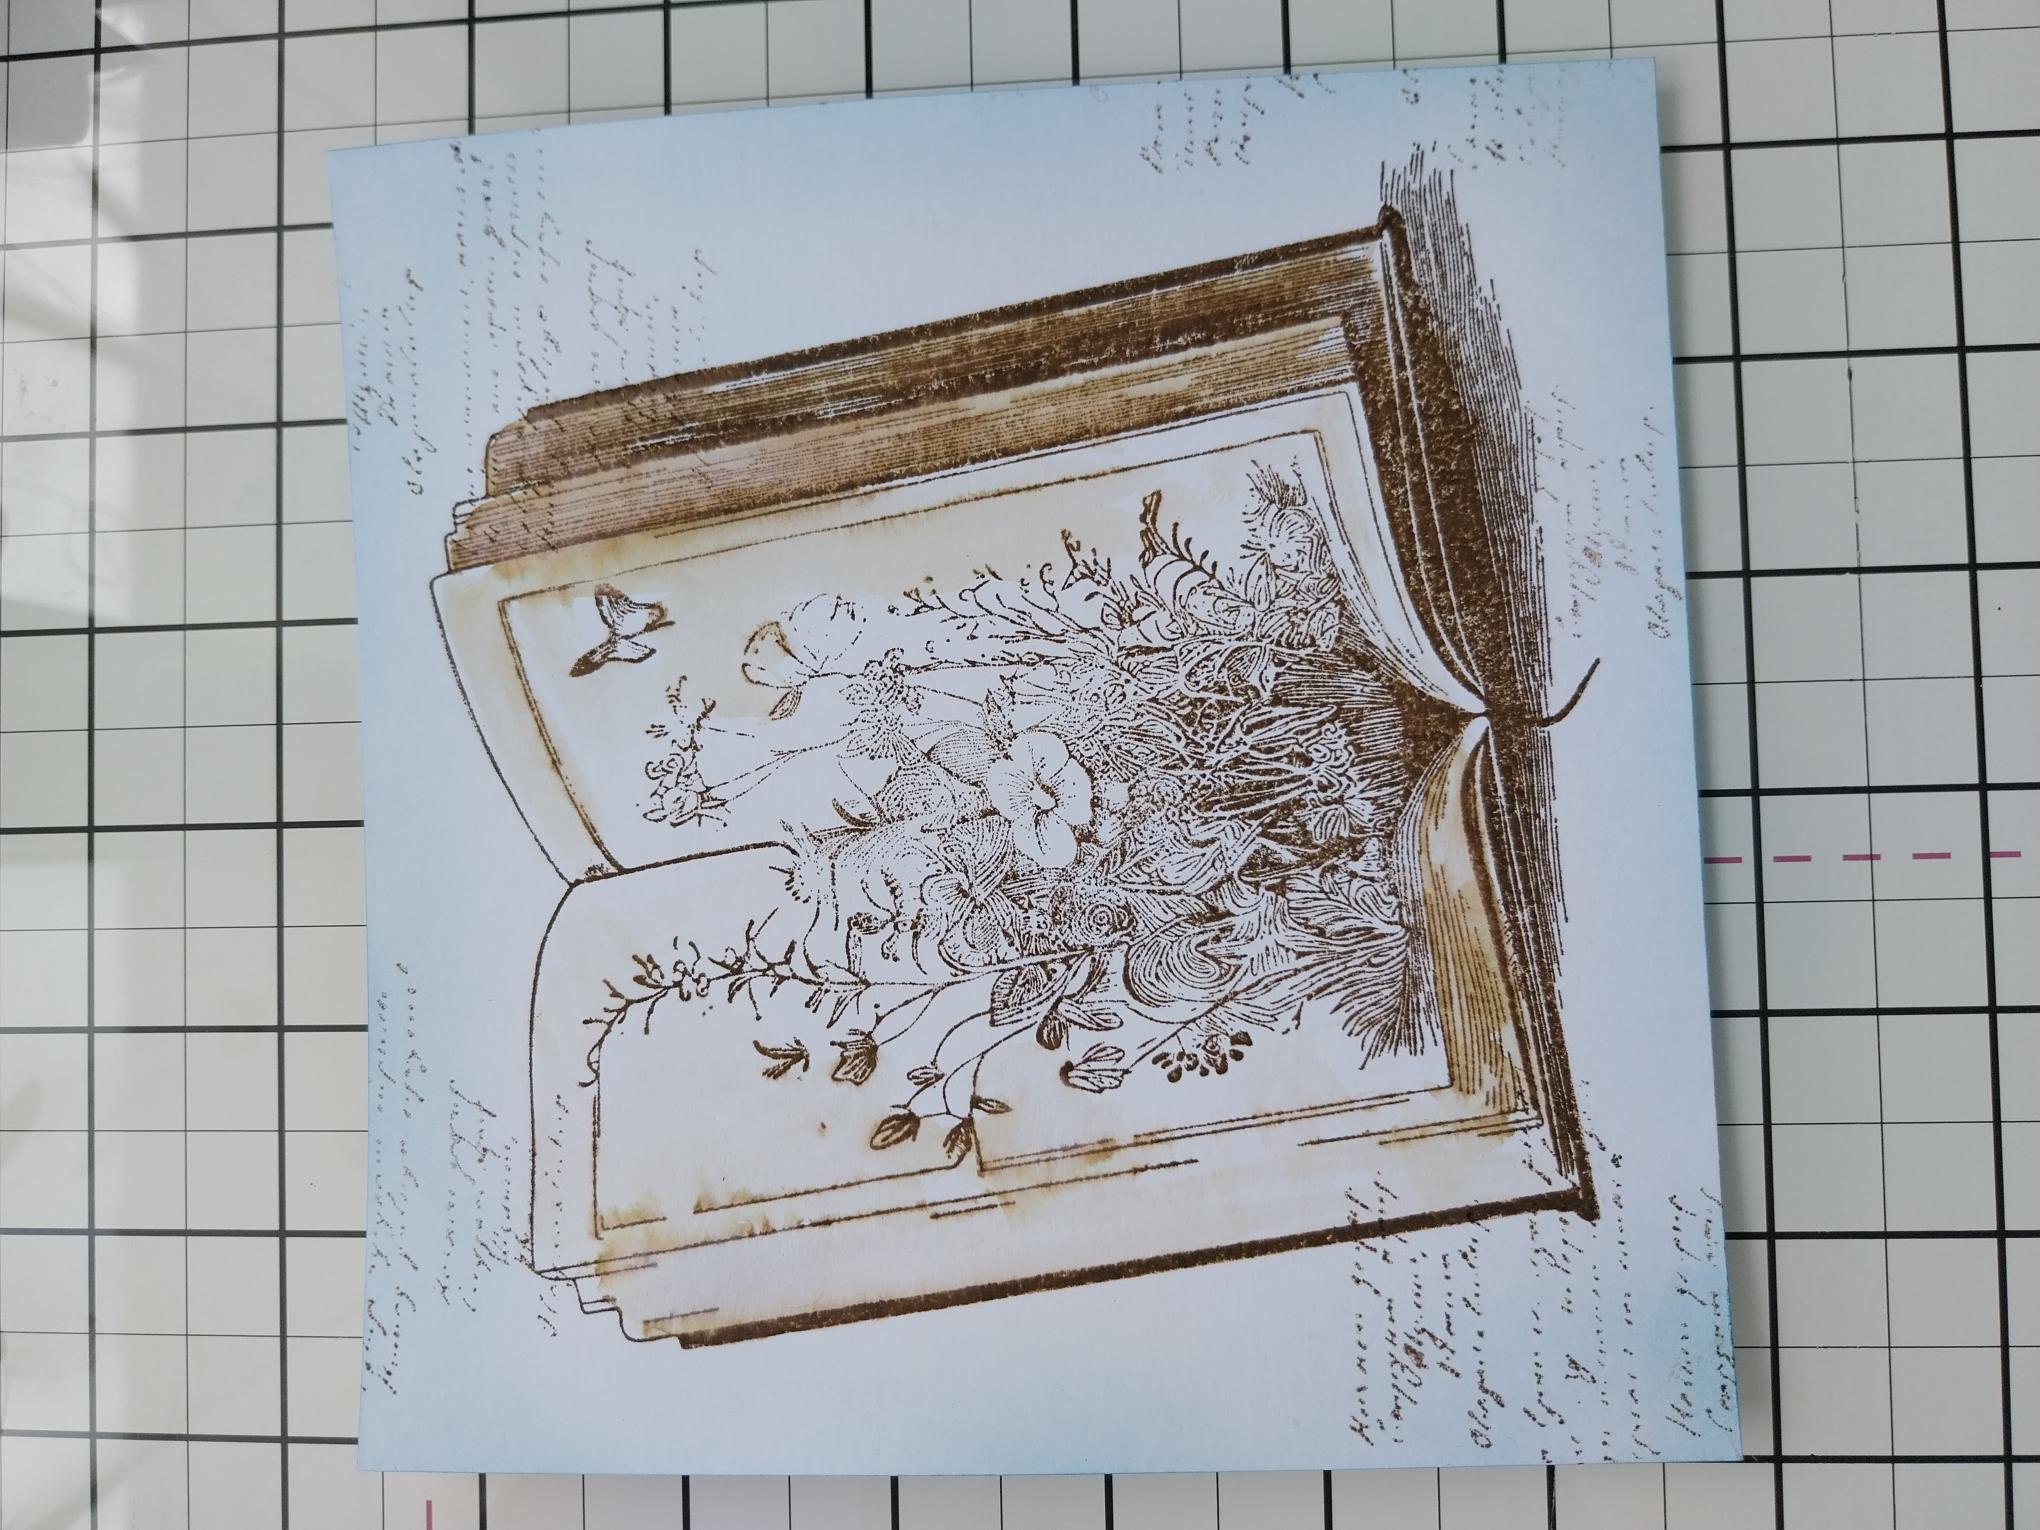
Randomly stamp the script, with the Walnut Stain, taking some of the script off the edges of the card. |
|
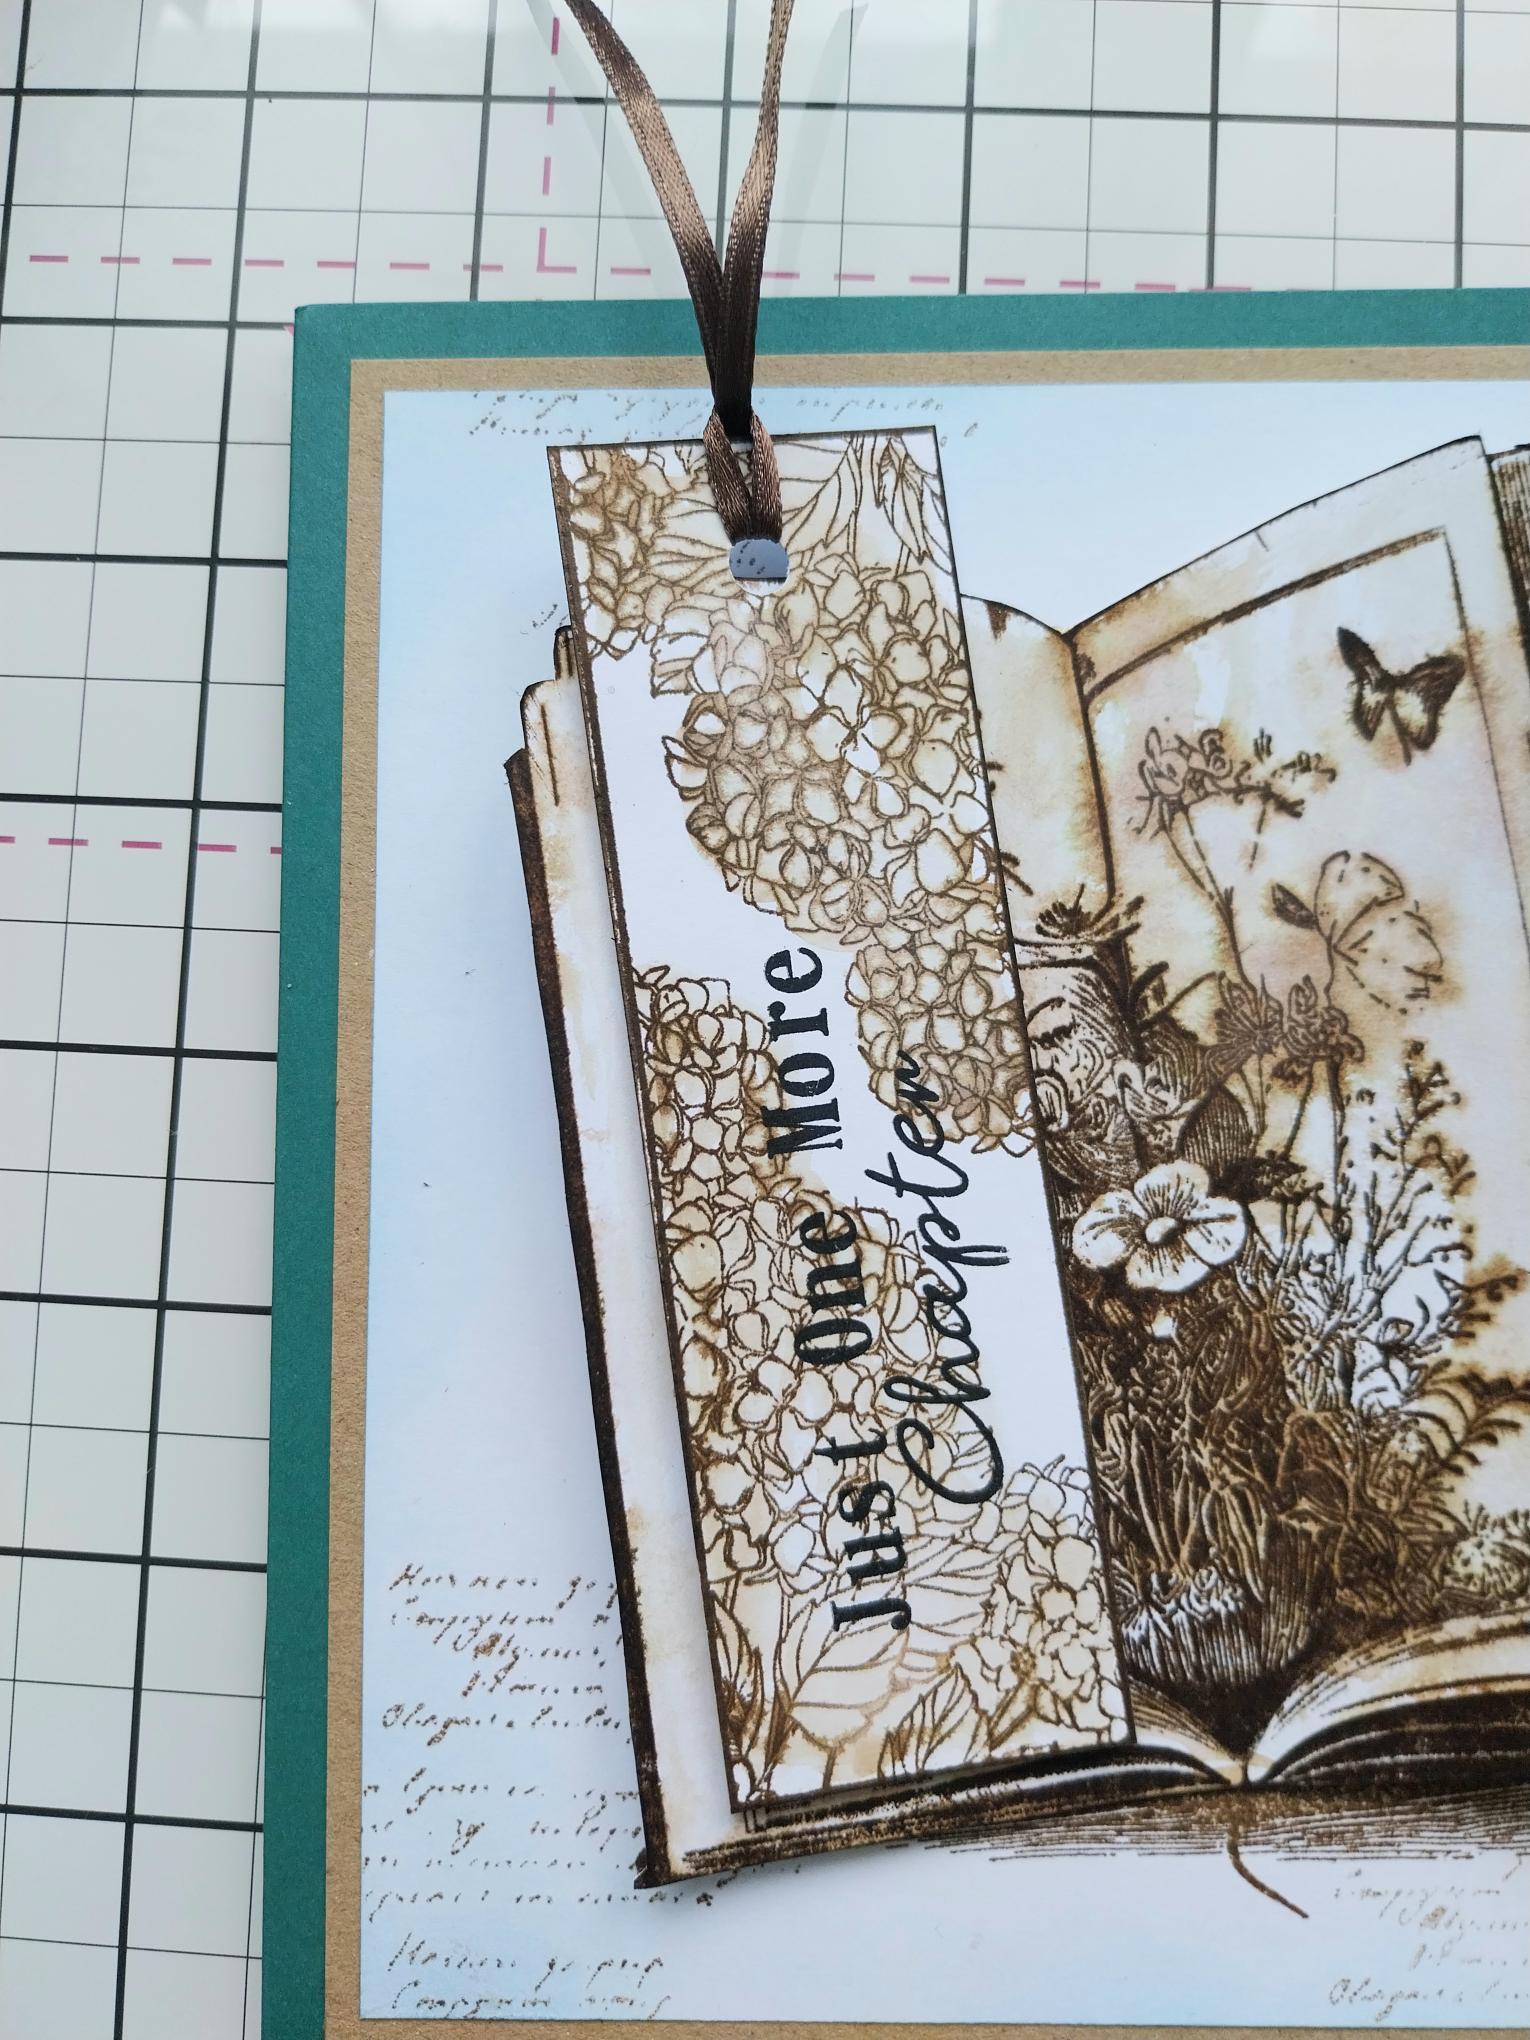
Mould the pages of the cut out book, line it up and adhere on to the stamped image, using foam pads down the centre of the book only. This will create the illusion of real open book pages. |
|
Mat your artwork on to the kraft card and then on to your Teal card blank. Pop to one side. |
|
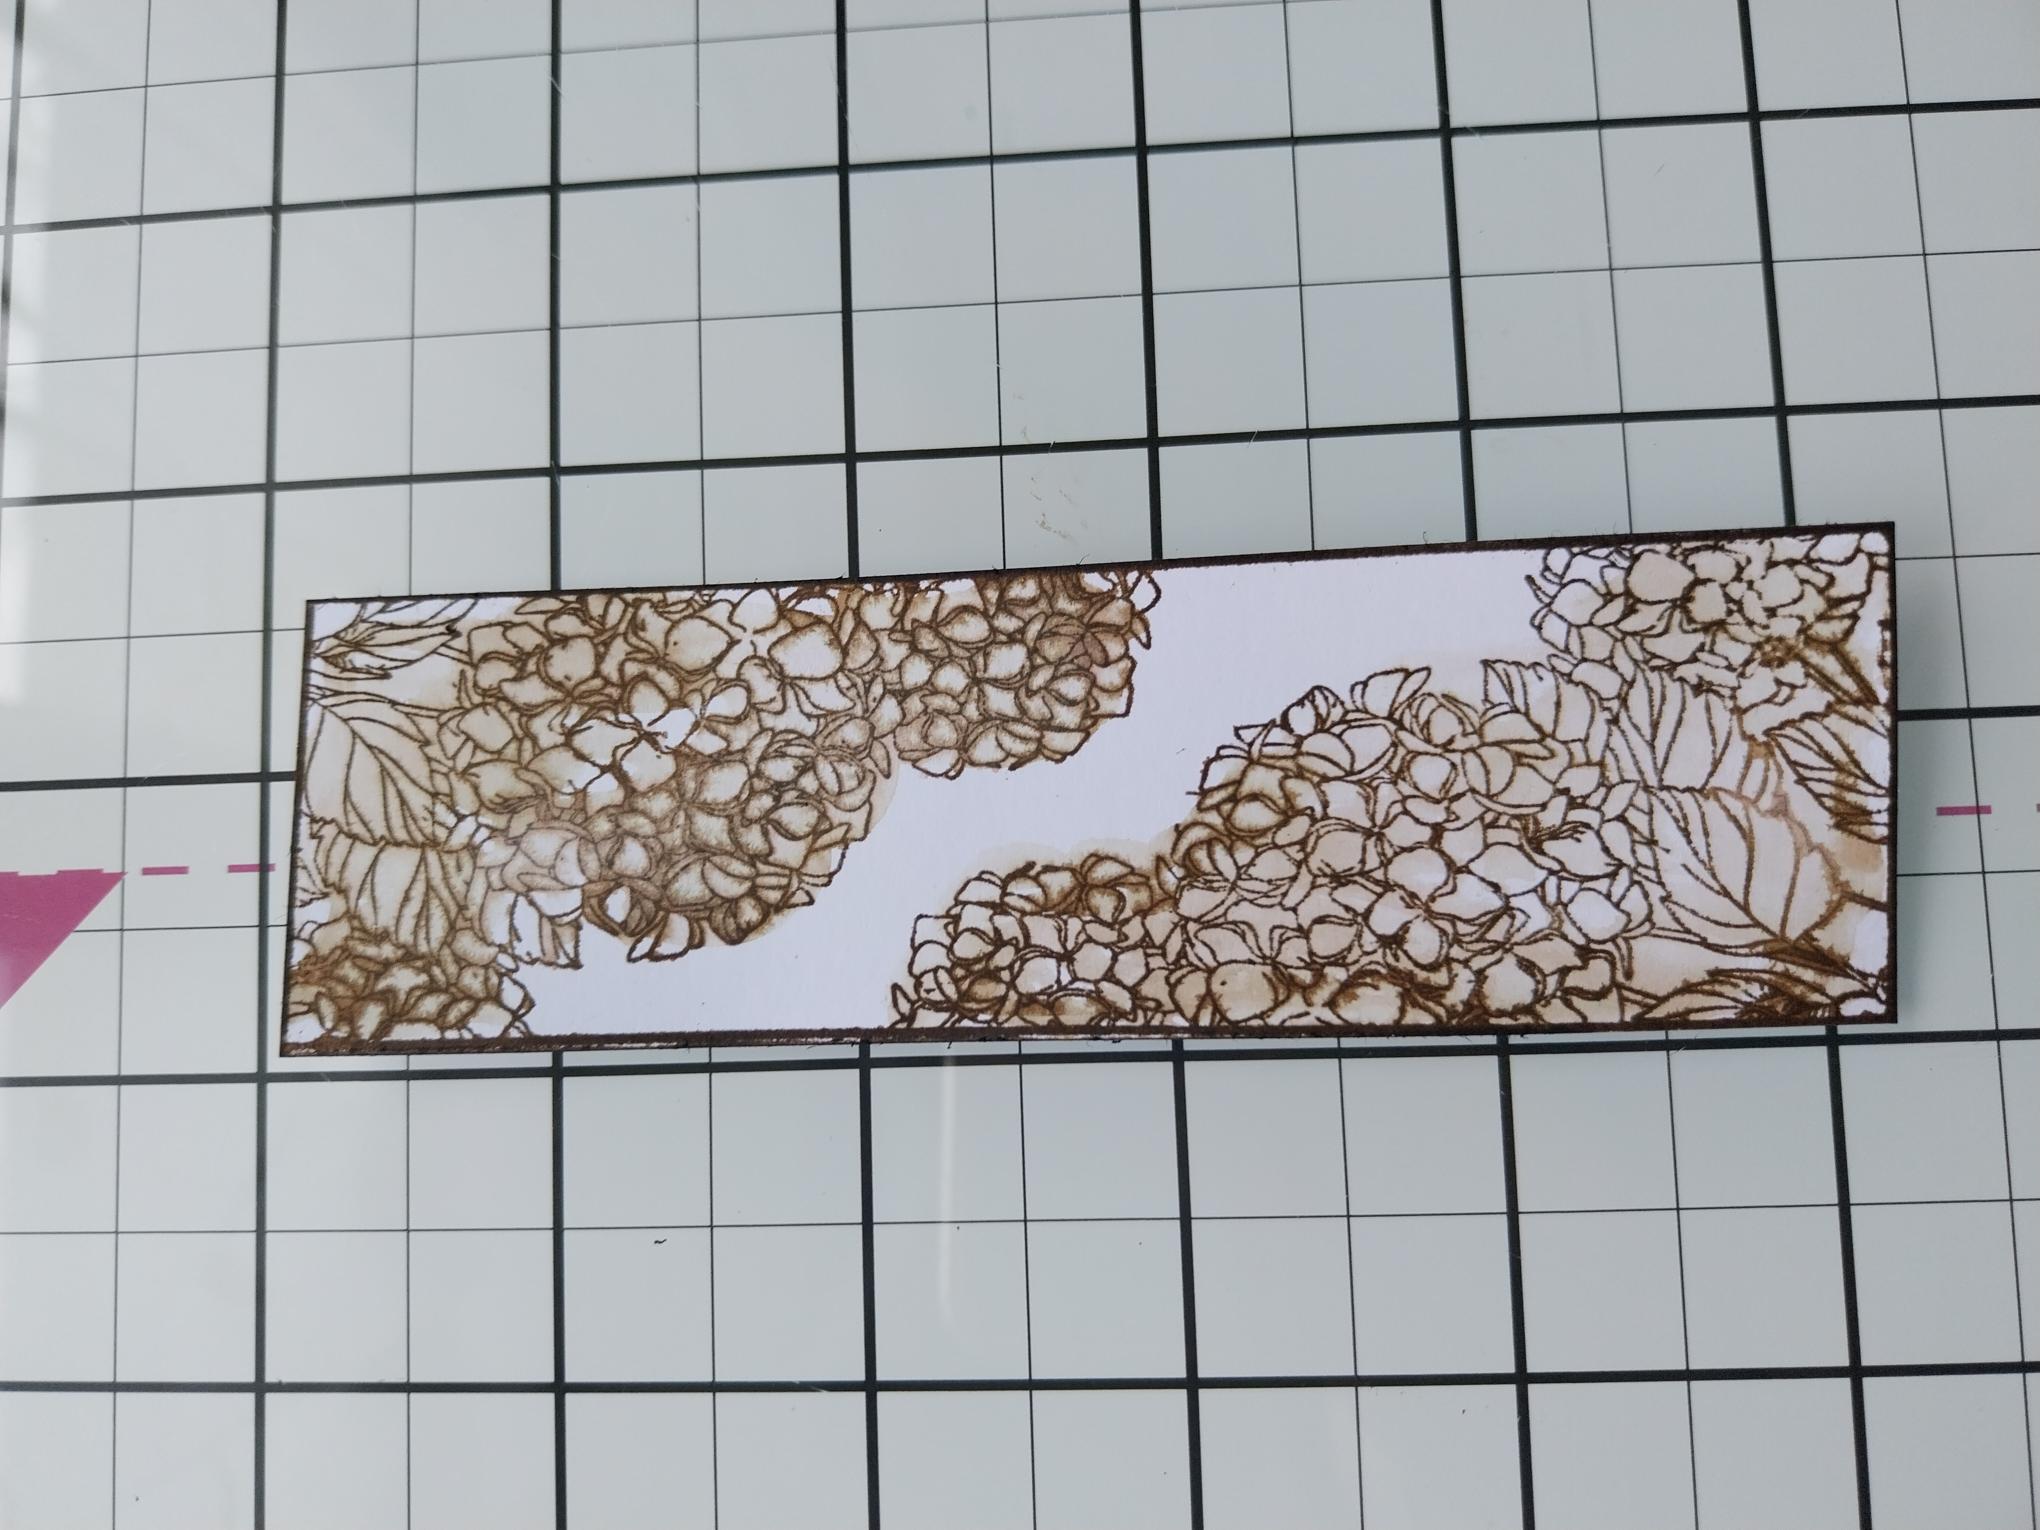
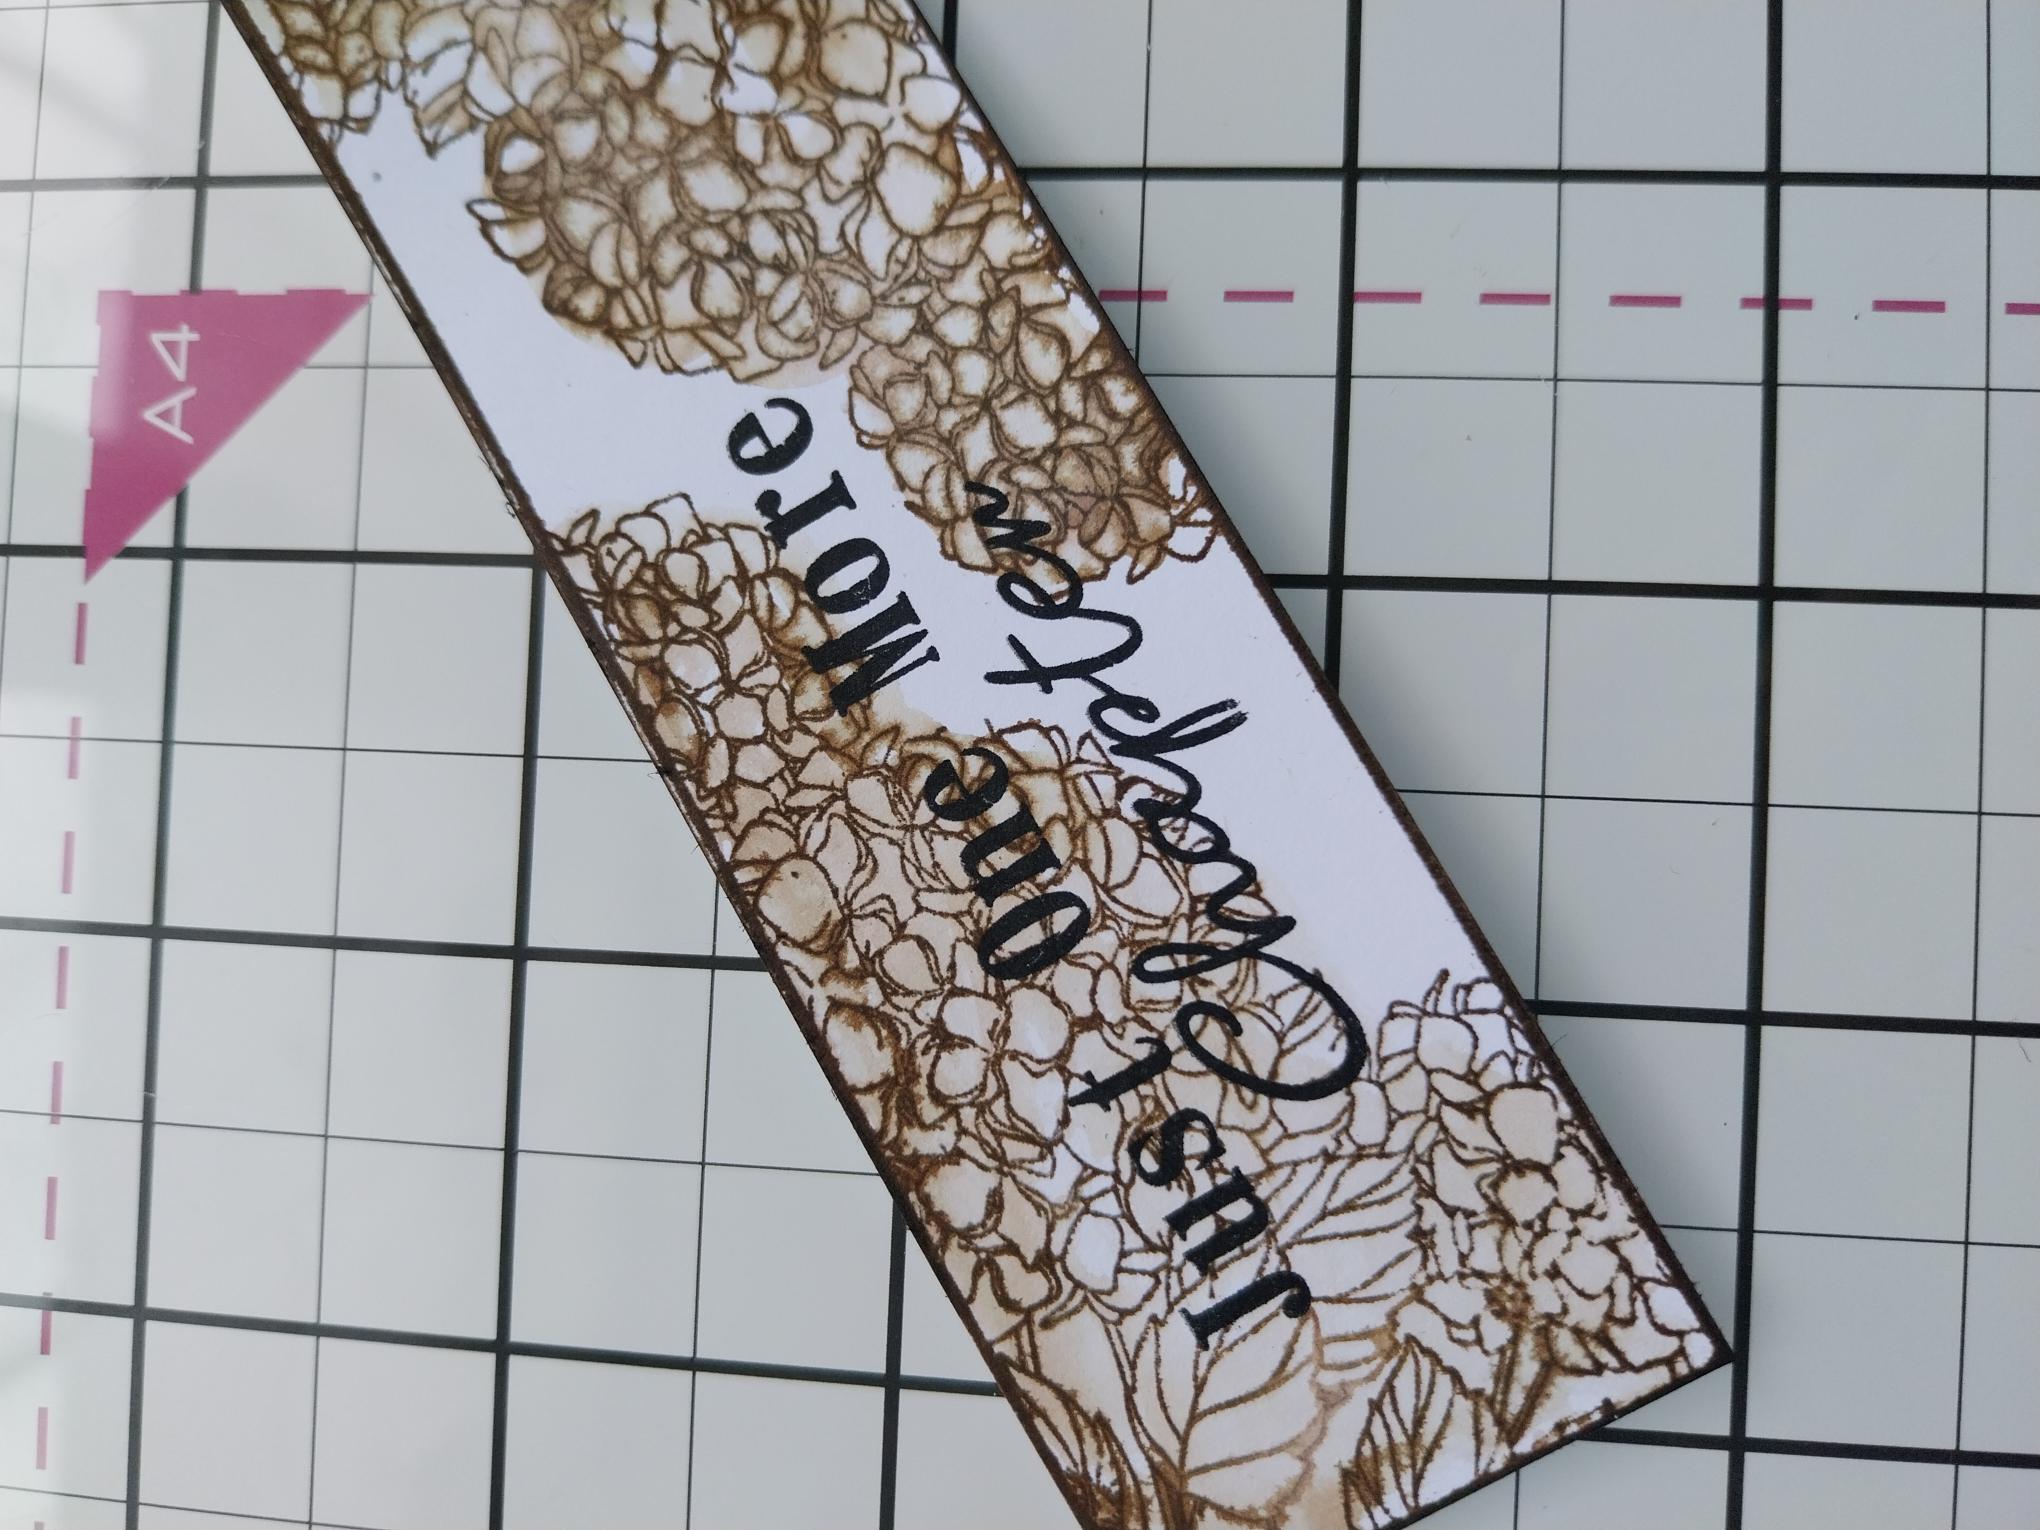
Stamp the bookmark that comes in the same set, in Walnut Stain, on to white card and trim to size. |
|
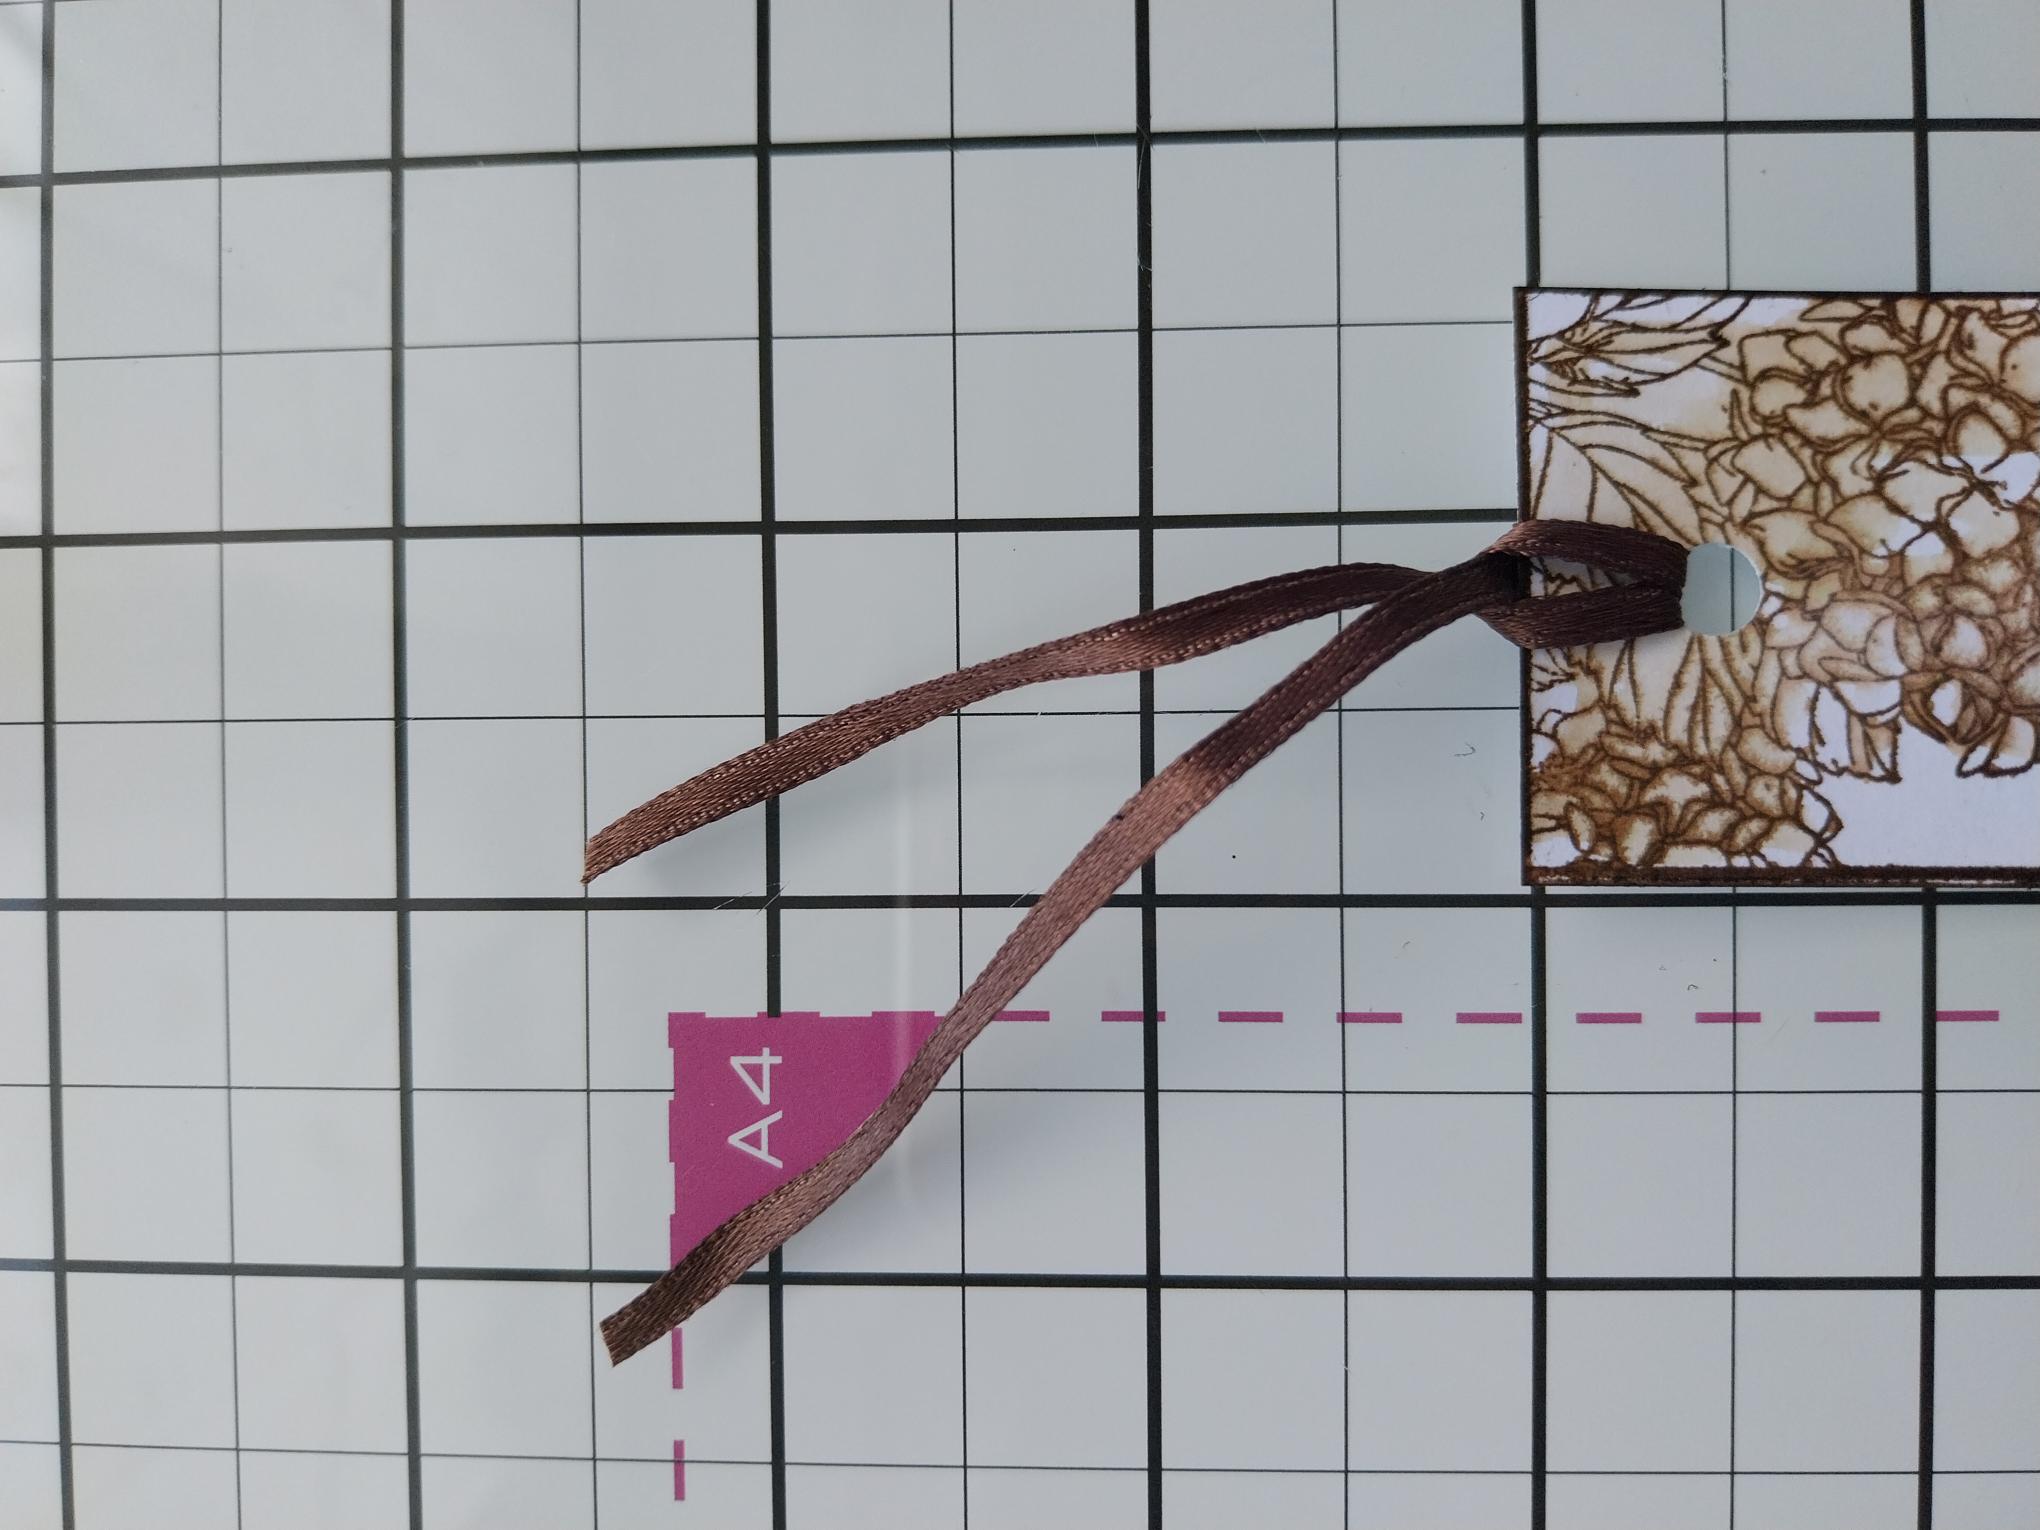
Punch a hole at the top of your bookmark and secure the ribbon of your choice. |
|
Stamp the sentiment from One More Chapter, with the Versafine. |
|
To complete, adhere your bookmark on to your 3D book with permanent or removable adhesive, depending on whether you want the recipient to be able to remove and use the bookmark. |