Give your friends $10 off their first order!
Refer a FRIEND


WHAT YOU WILL NEED:
Black top folding card blank (8 1/4 x 5 3/4")
White cardstock (7 3/4 x 5 1/4")
Stamps from Lamination Magic In Everyday Stamp Collection
Sentiment from Christmas Blessings Stamp Collection
Versafine Ink Pad: Onyx Black
Izink Dye Ink pads: Grenadine, Menthe, Emeraude
Sequins from Creative Box
Black pen
Spray water bottle
Eureka 101
Paper Trimmer
Perfect Together Glue
[click image to enlarge] 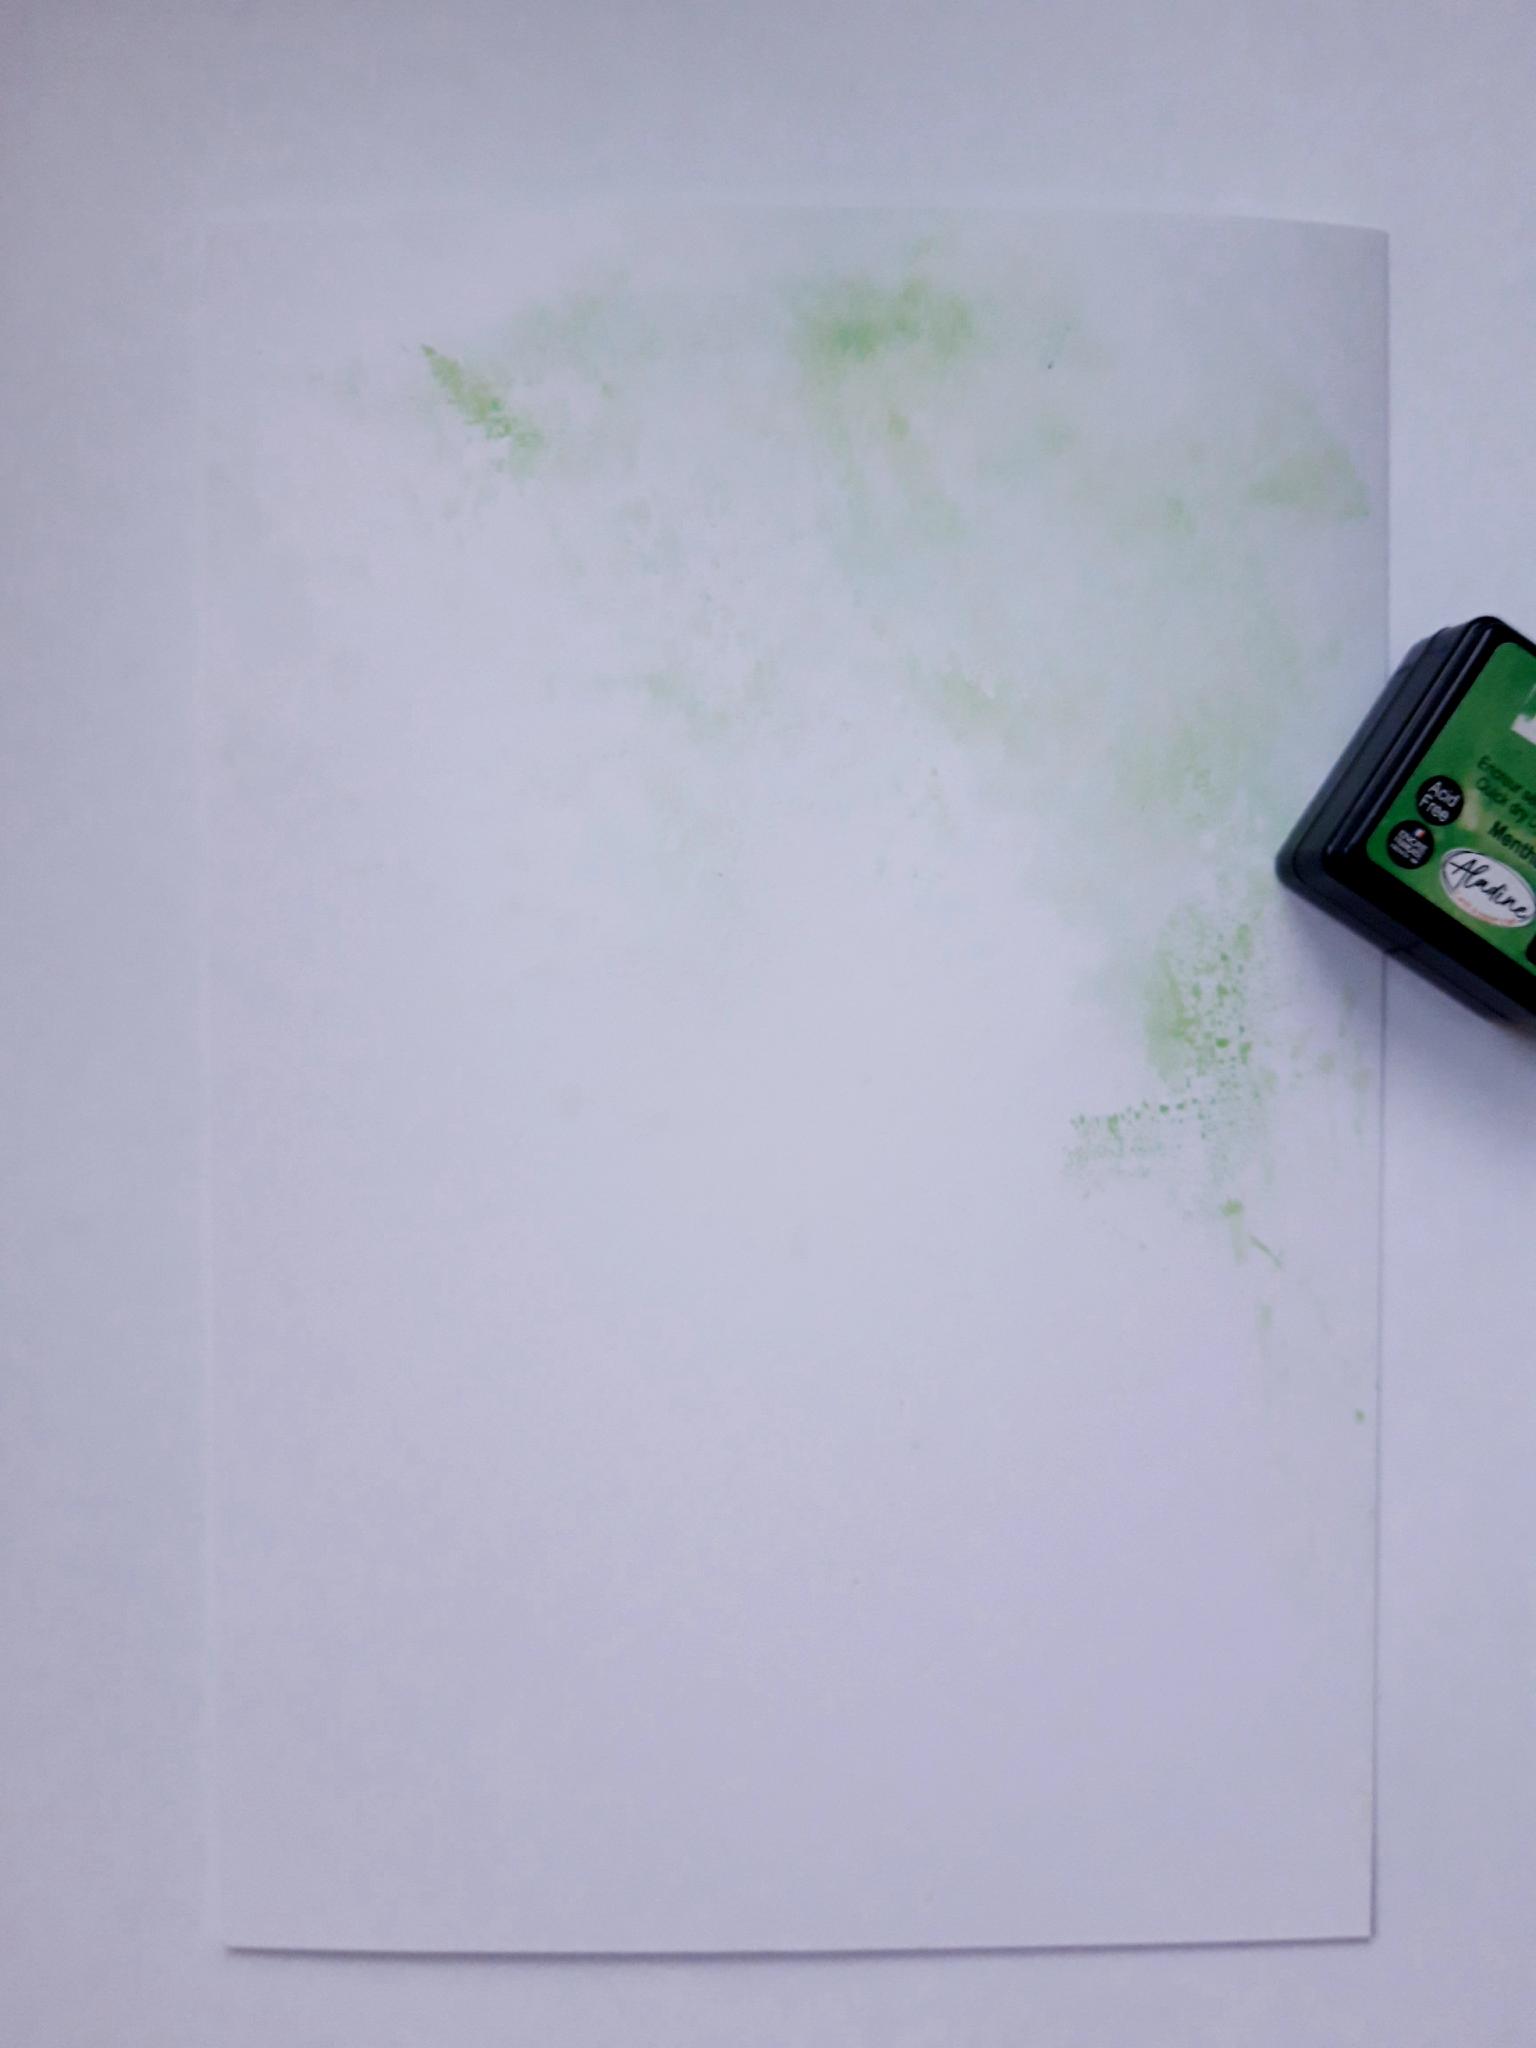
|
Apply some of the Izink Menthe ink on to a craft or glass mat. Spritz with a little water and mop up the ink on to the top, right hand corner, of the white cardstock. |
|
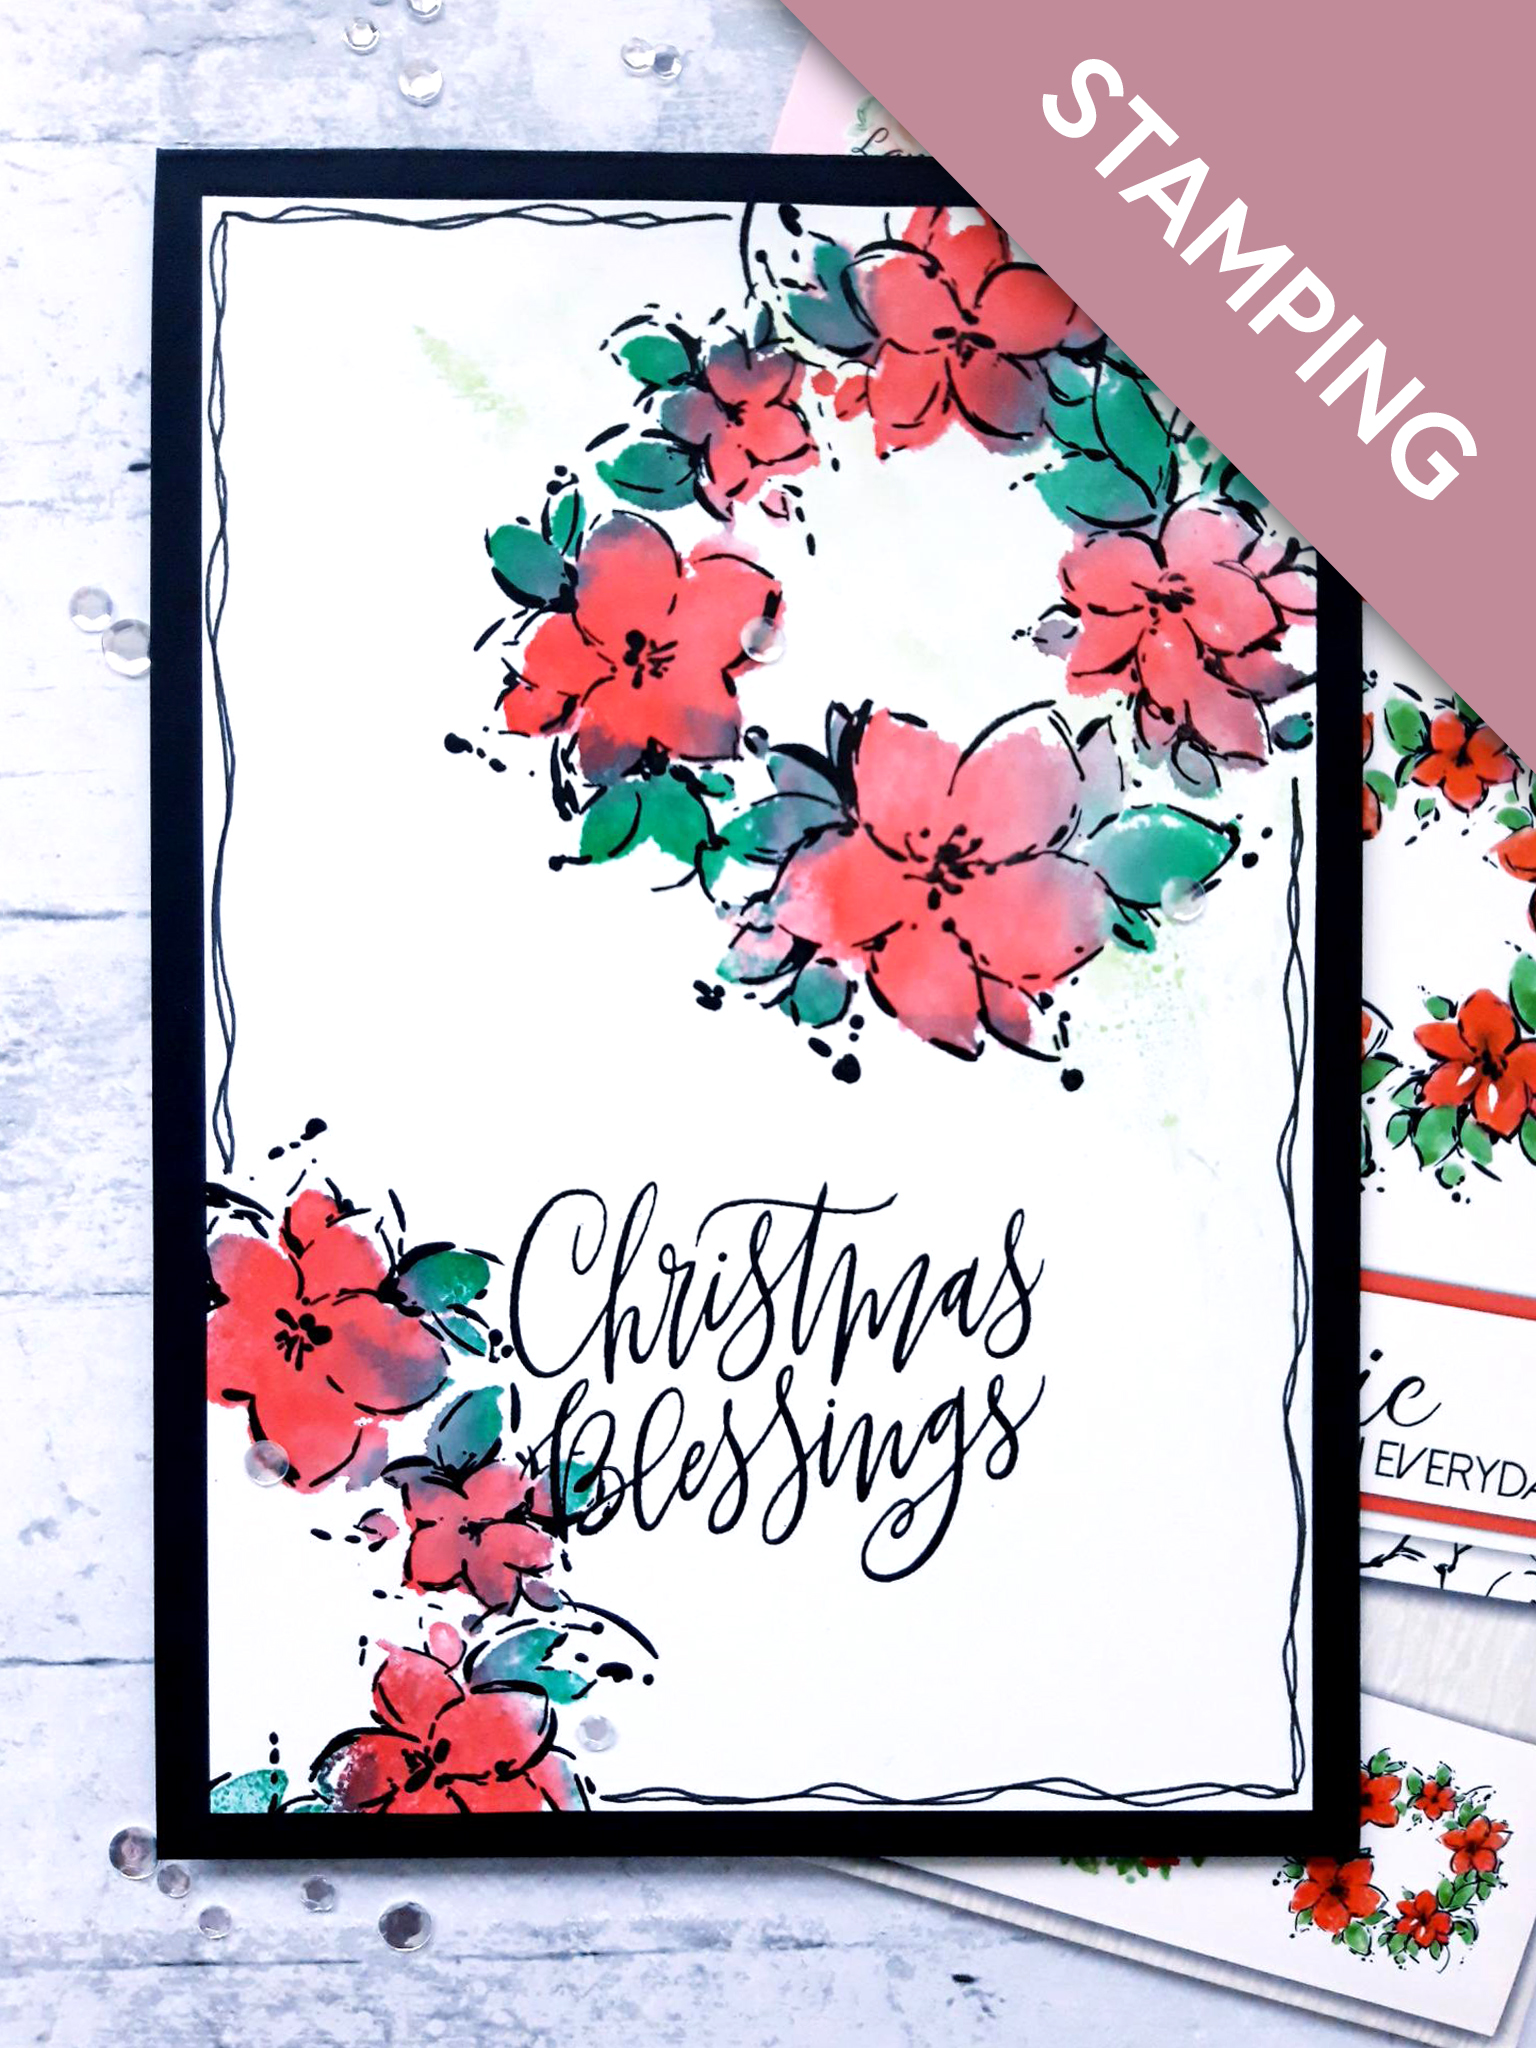
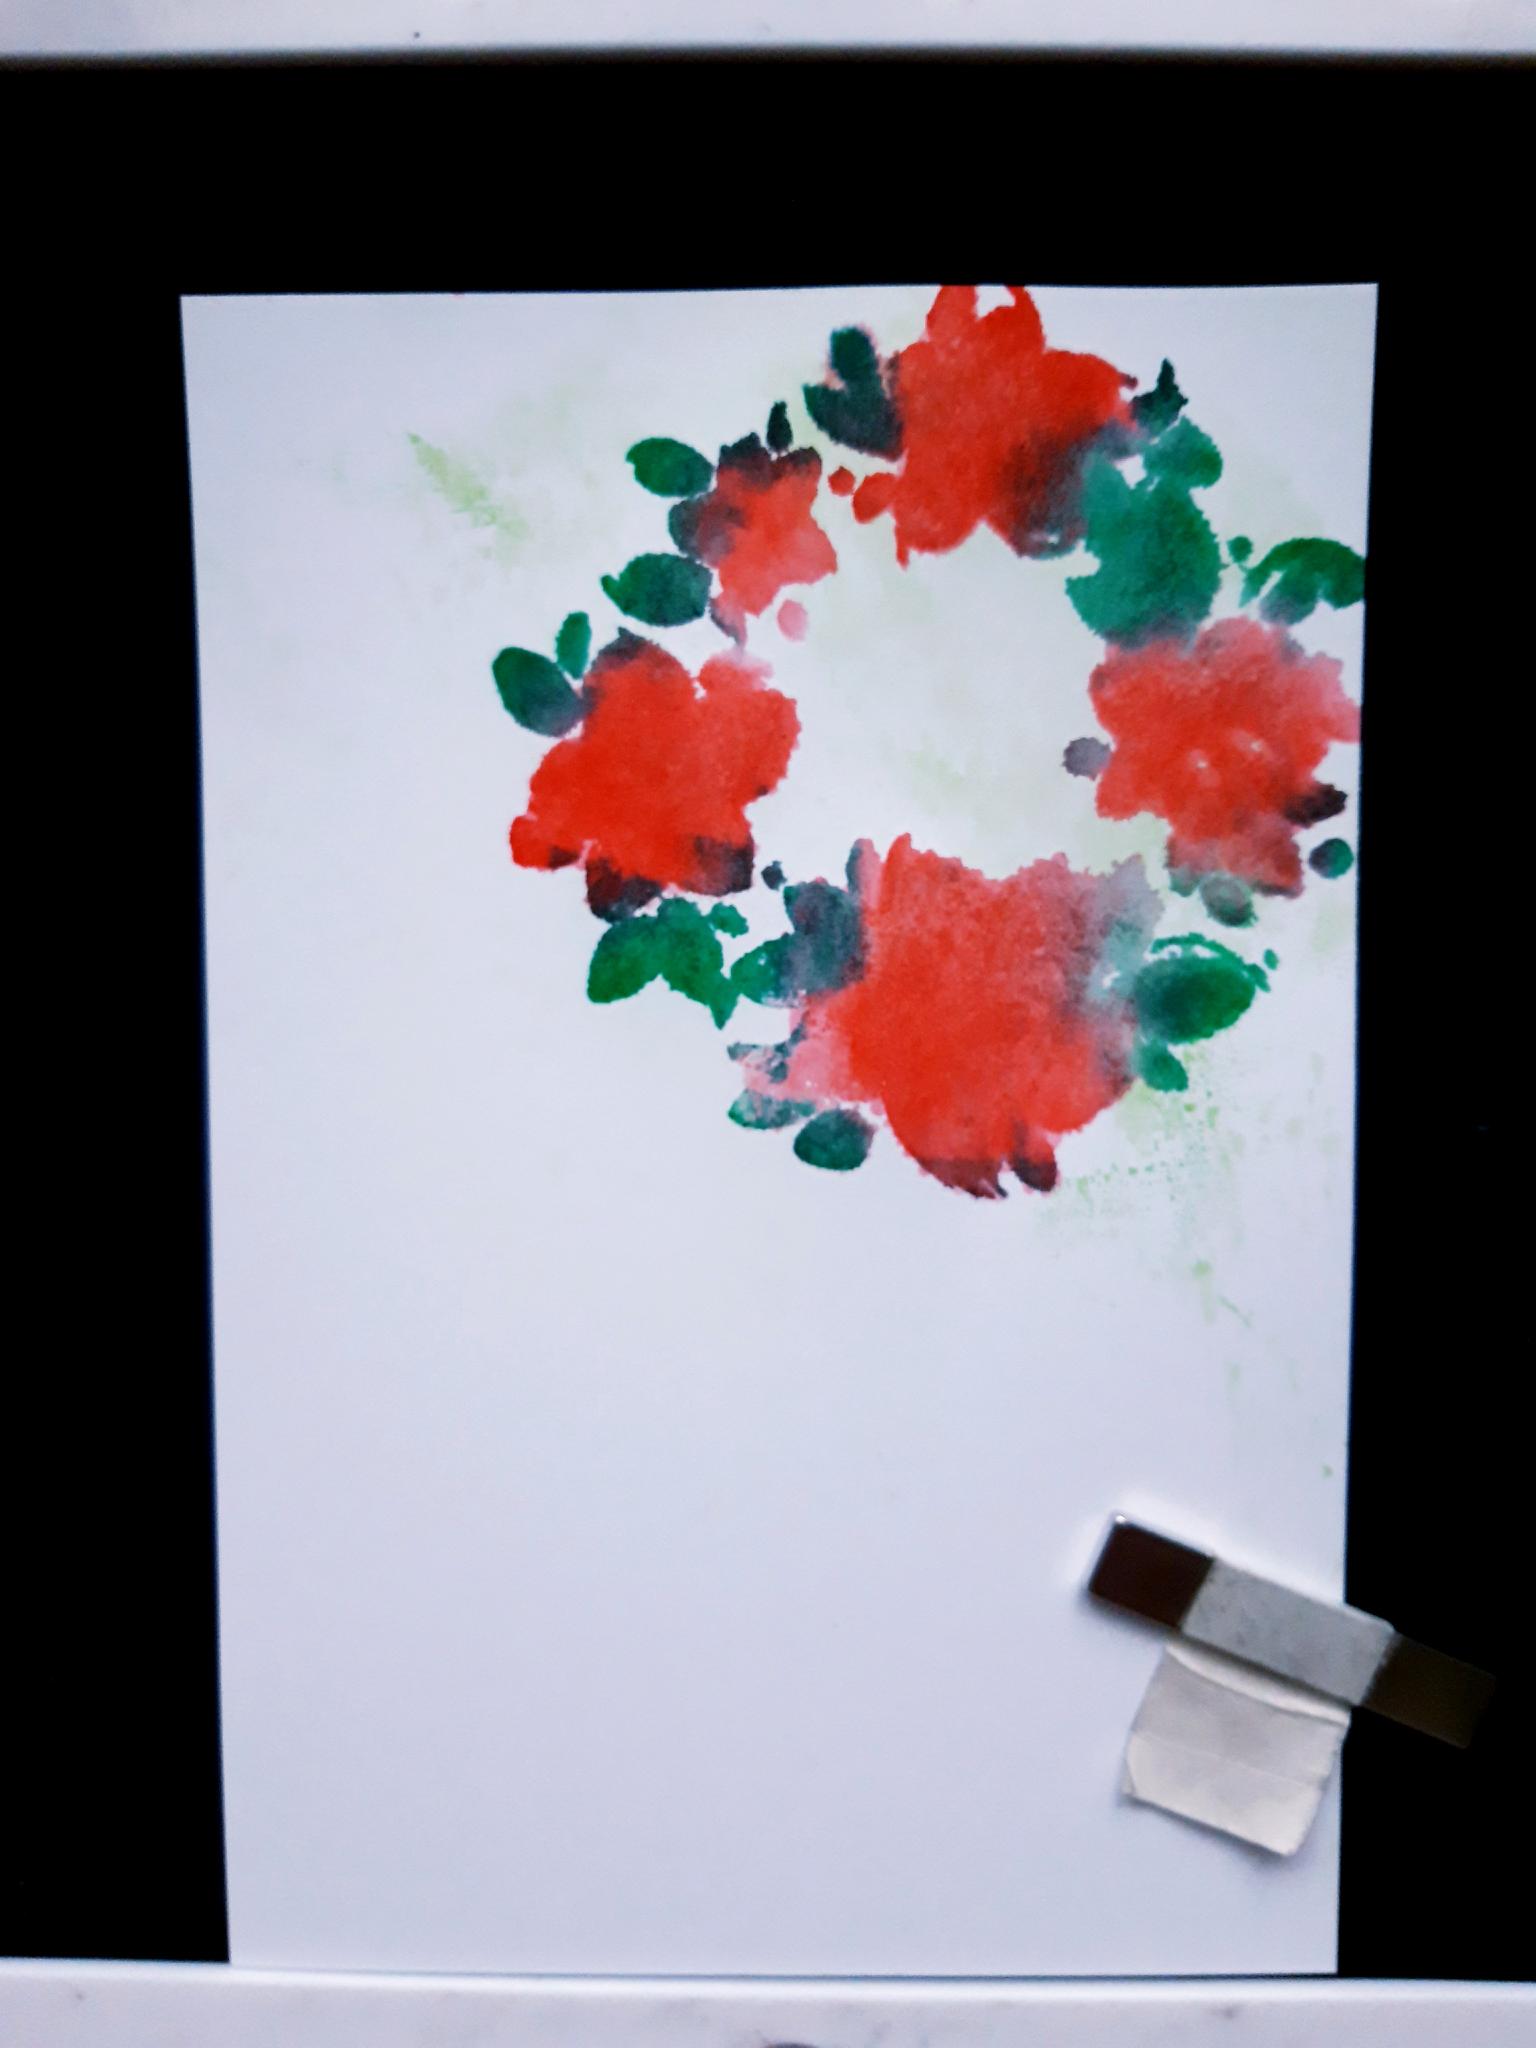
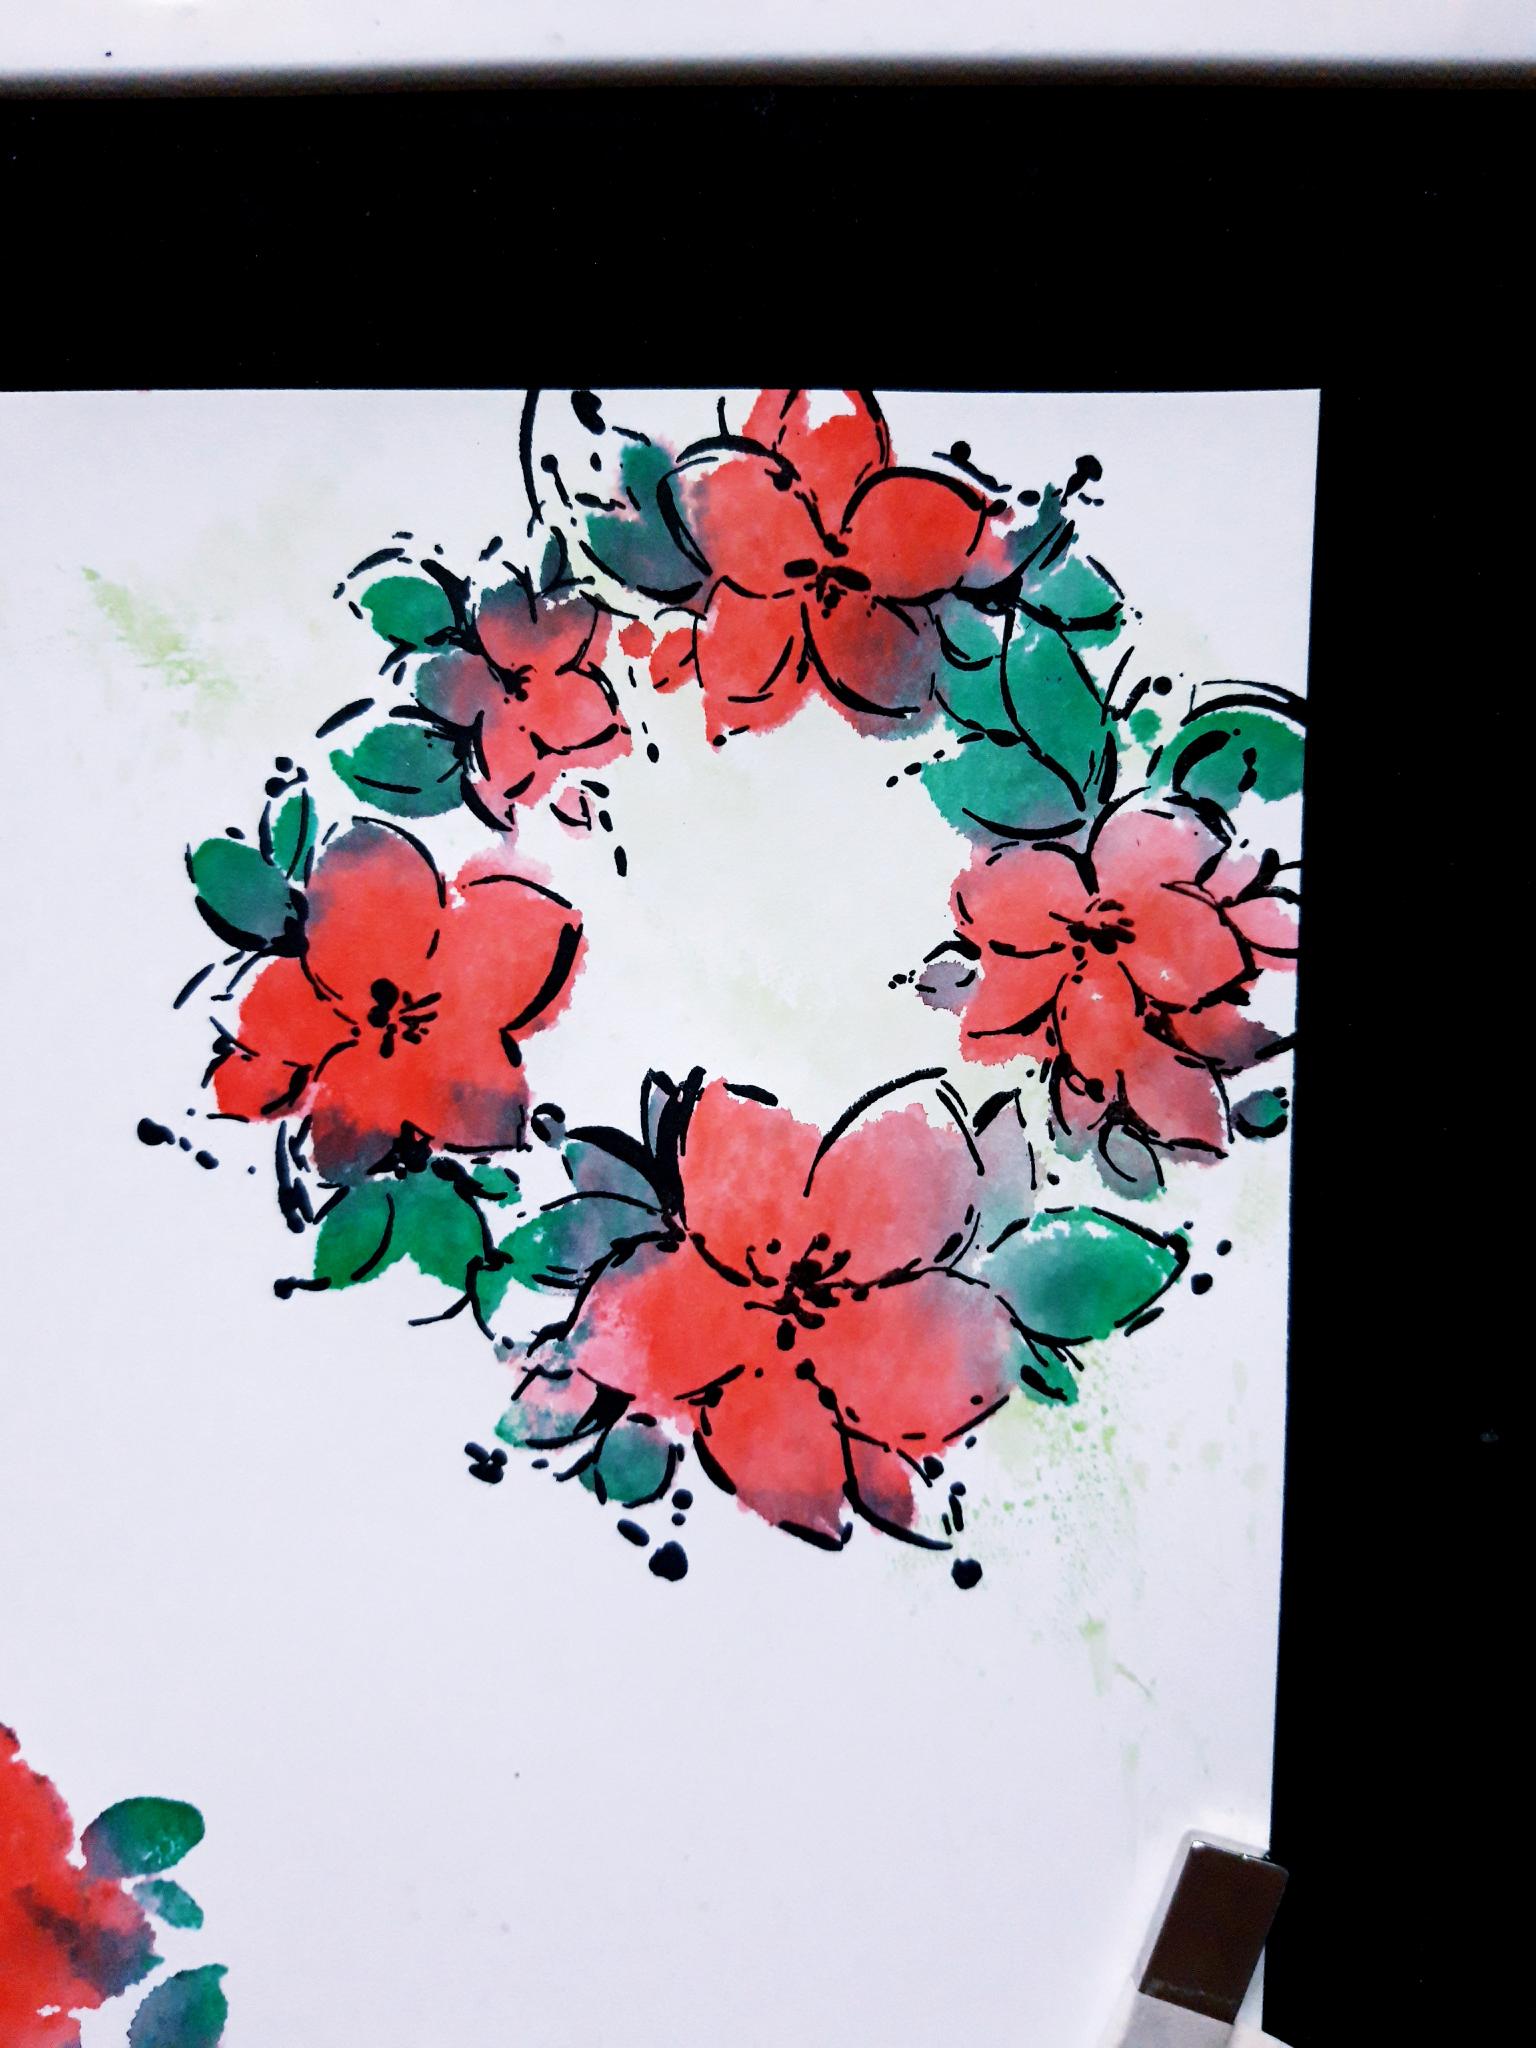
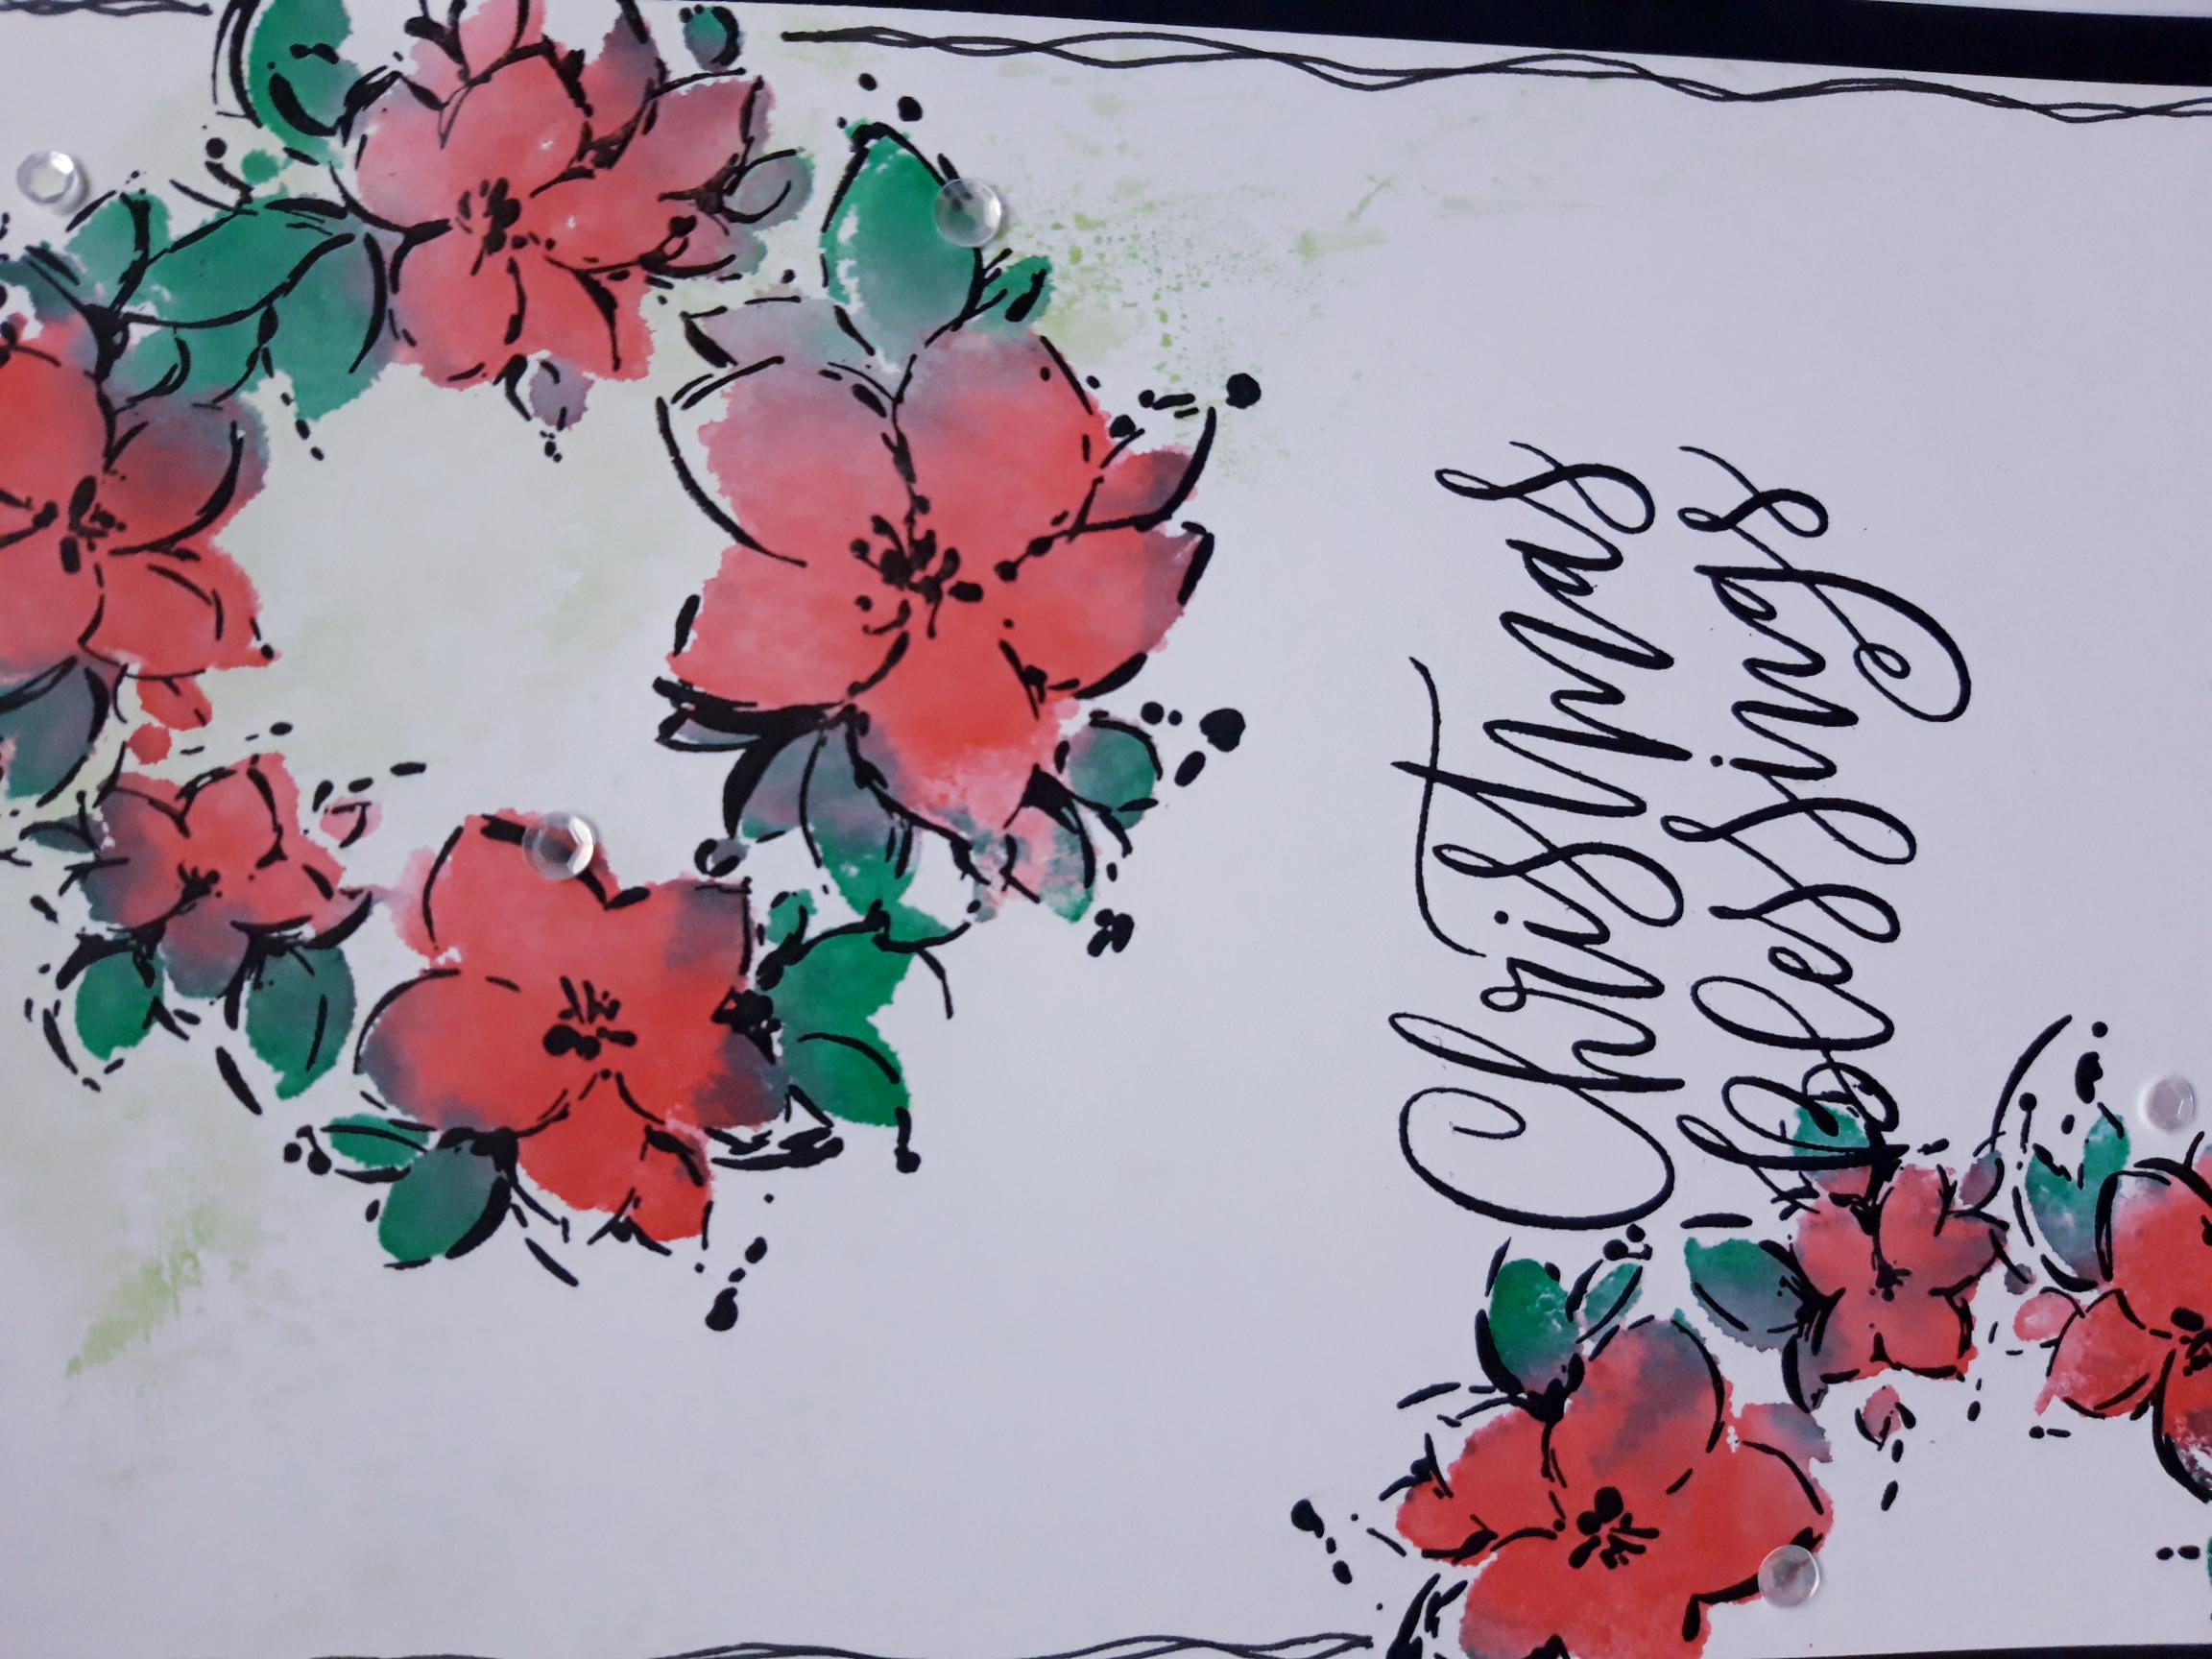
Ink up the solid wreath stamp, from the Magic In Everyday Stamp Collection, with the Izink ink pads (use the images on the packaging, to differentiate between the foliage and petals). Spritz with water and stamp in the top right corner, taking the design just off the edges of the card. You can reink, and stamp, as required, until you are happy with the effect.
|
|
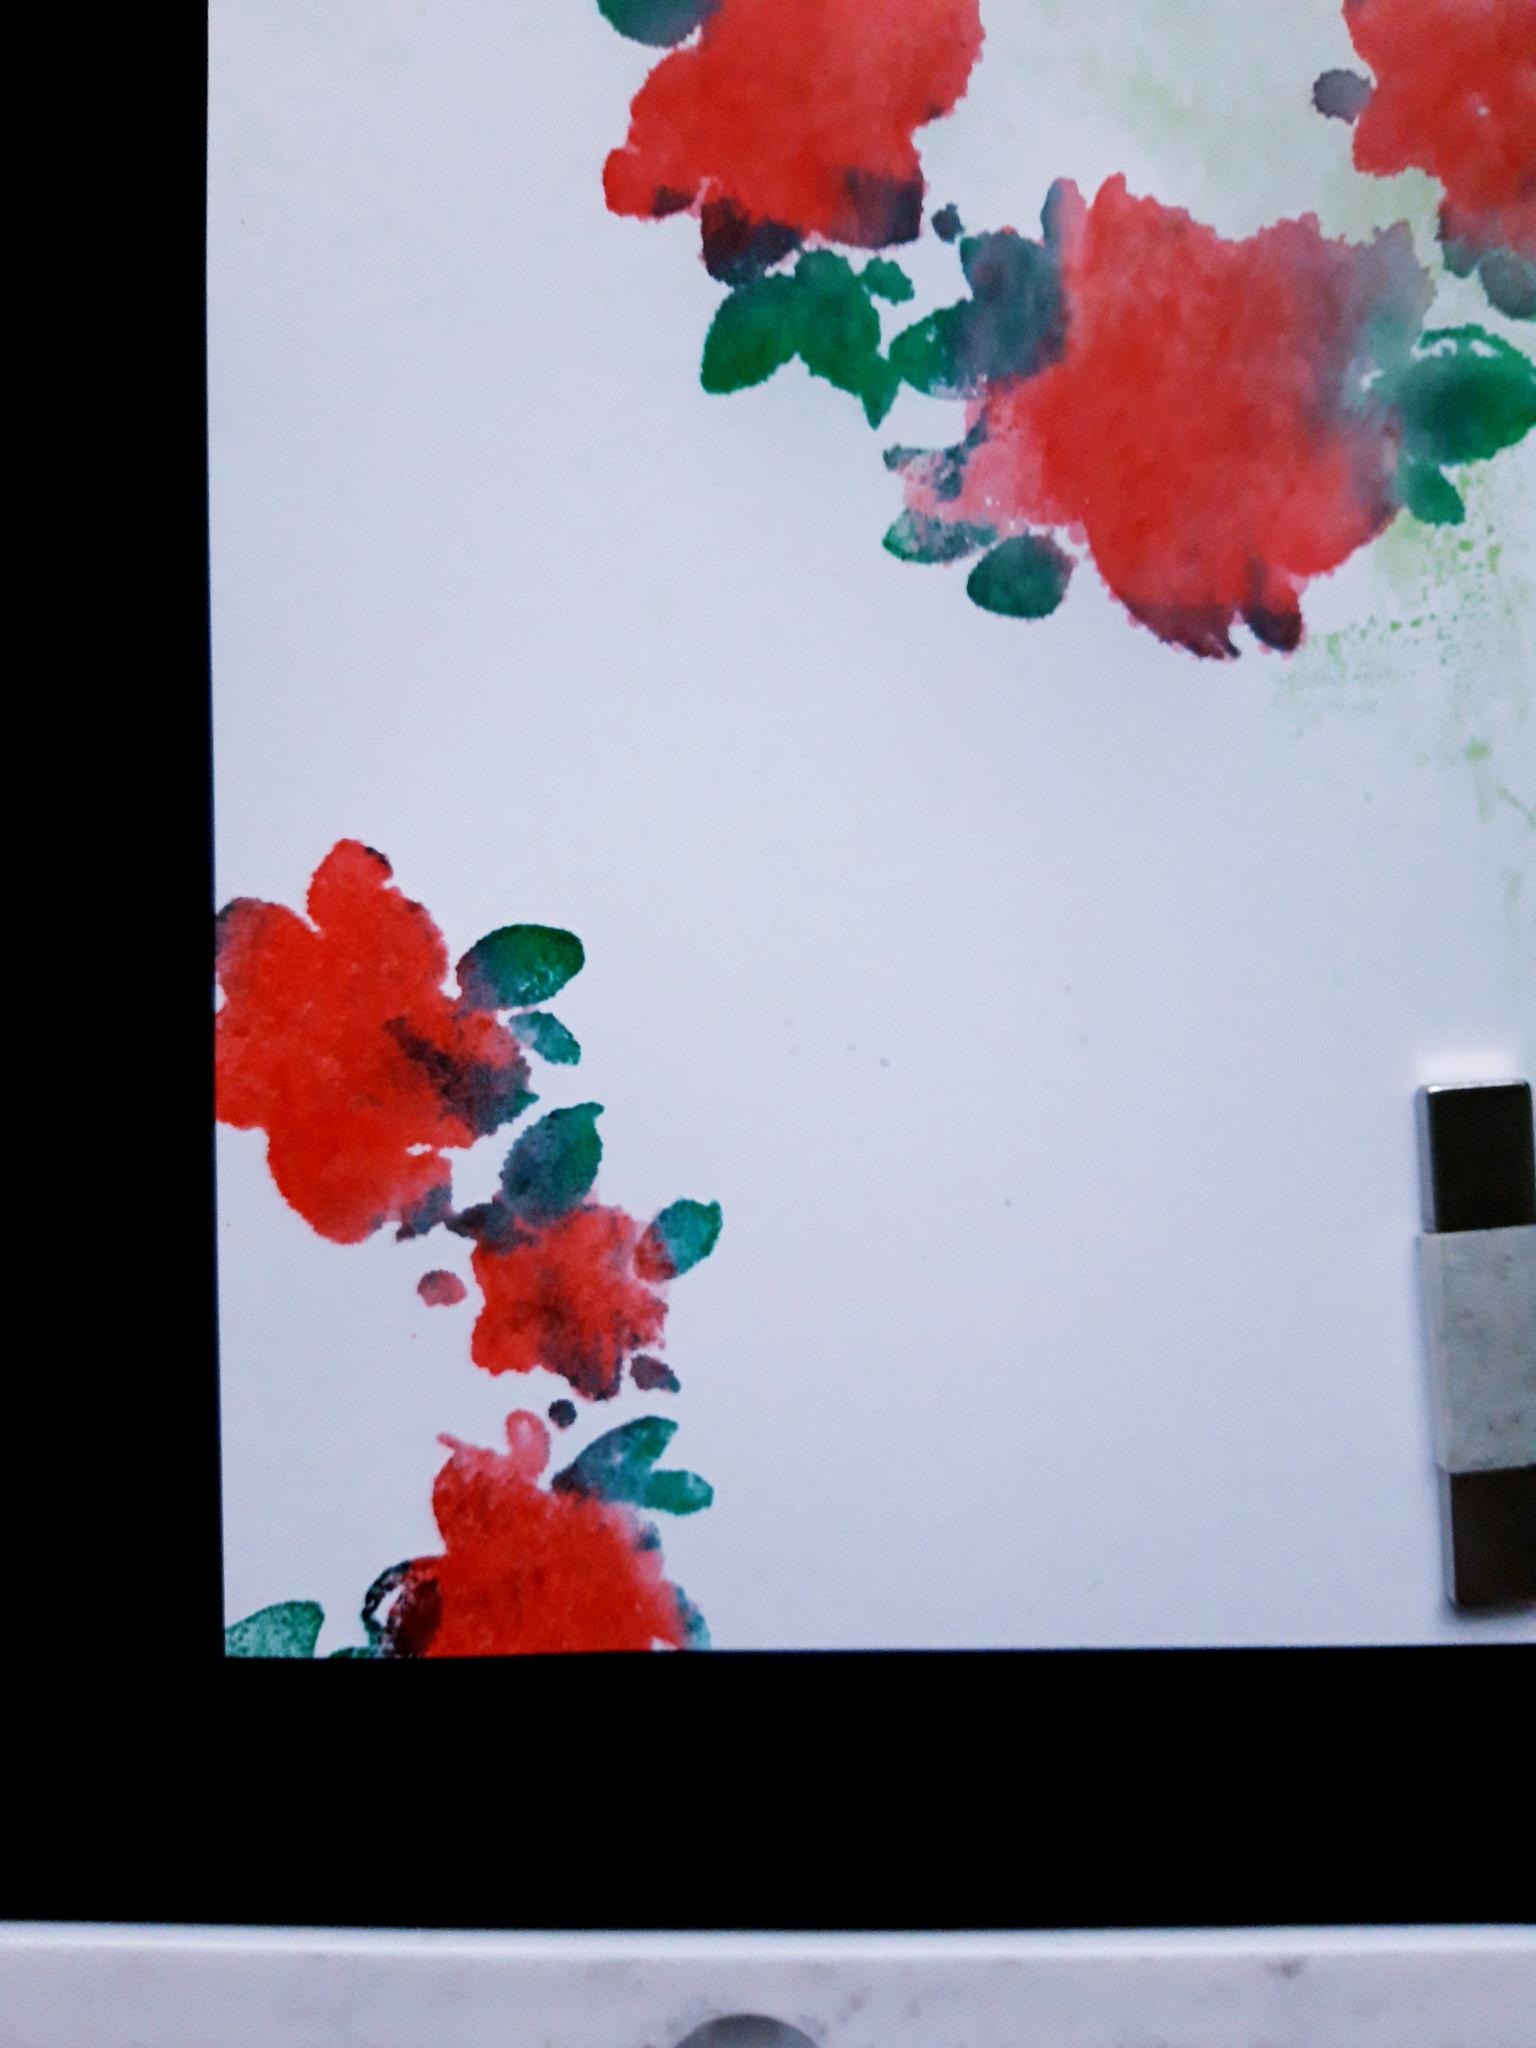
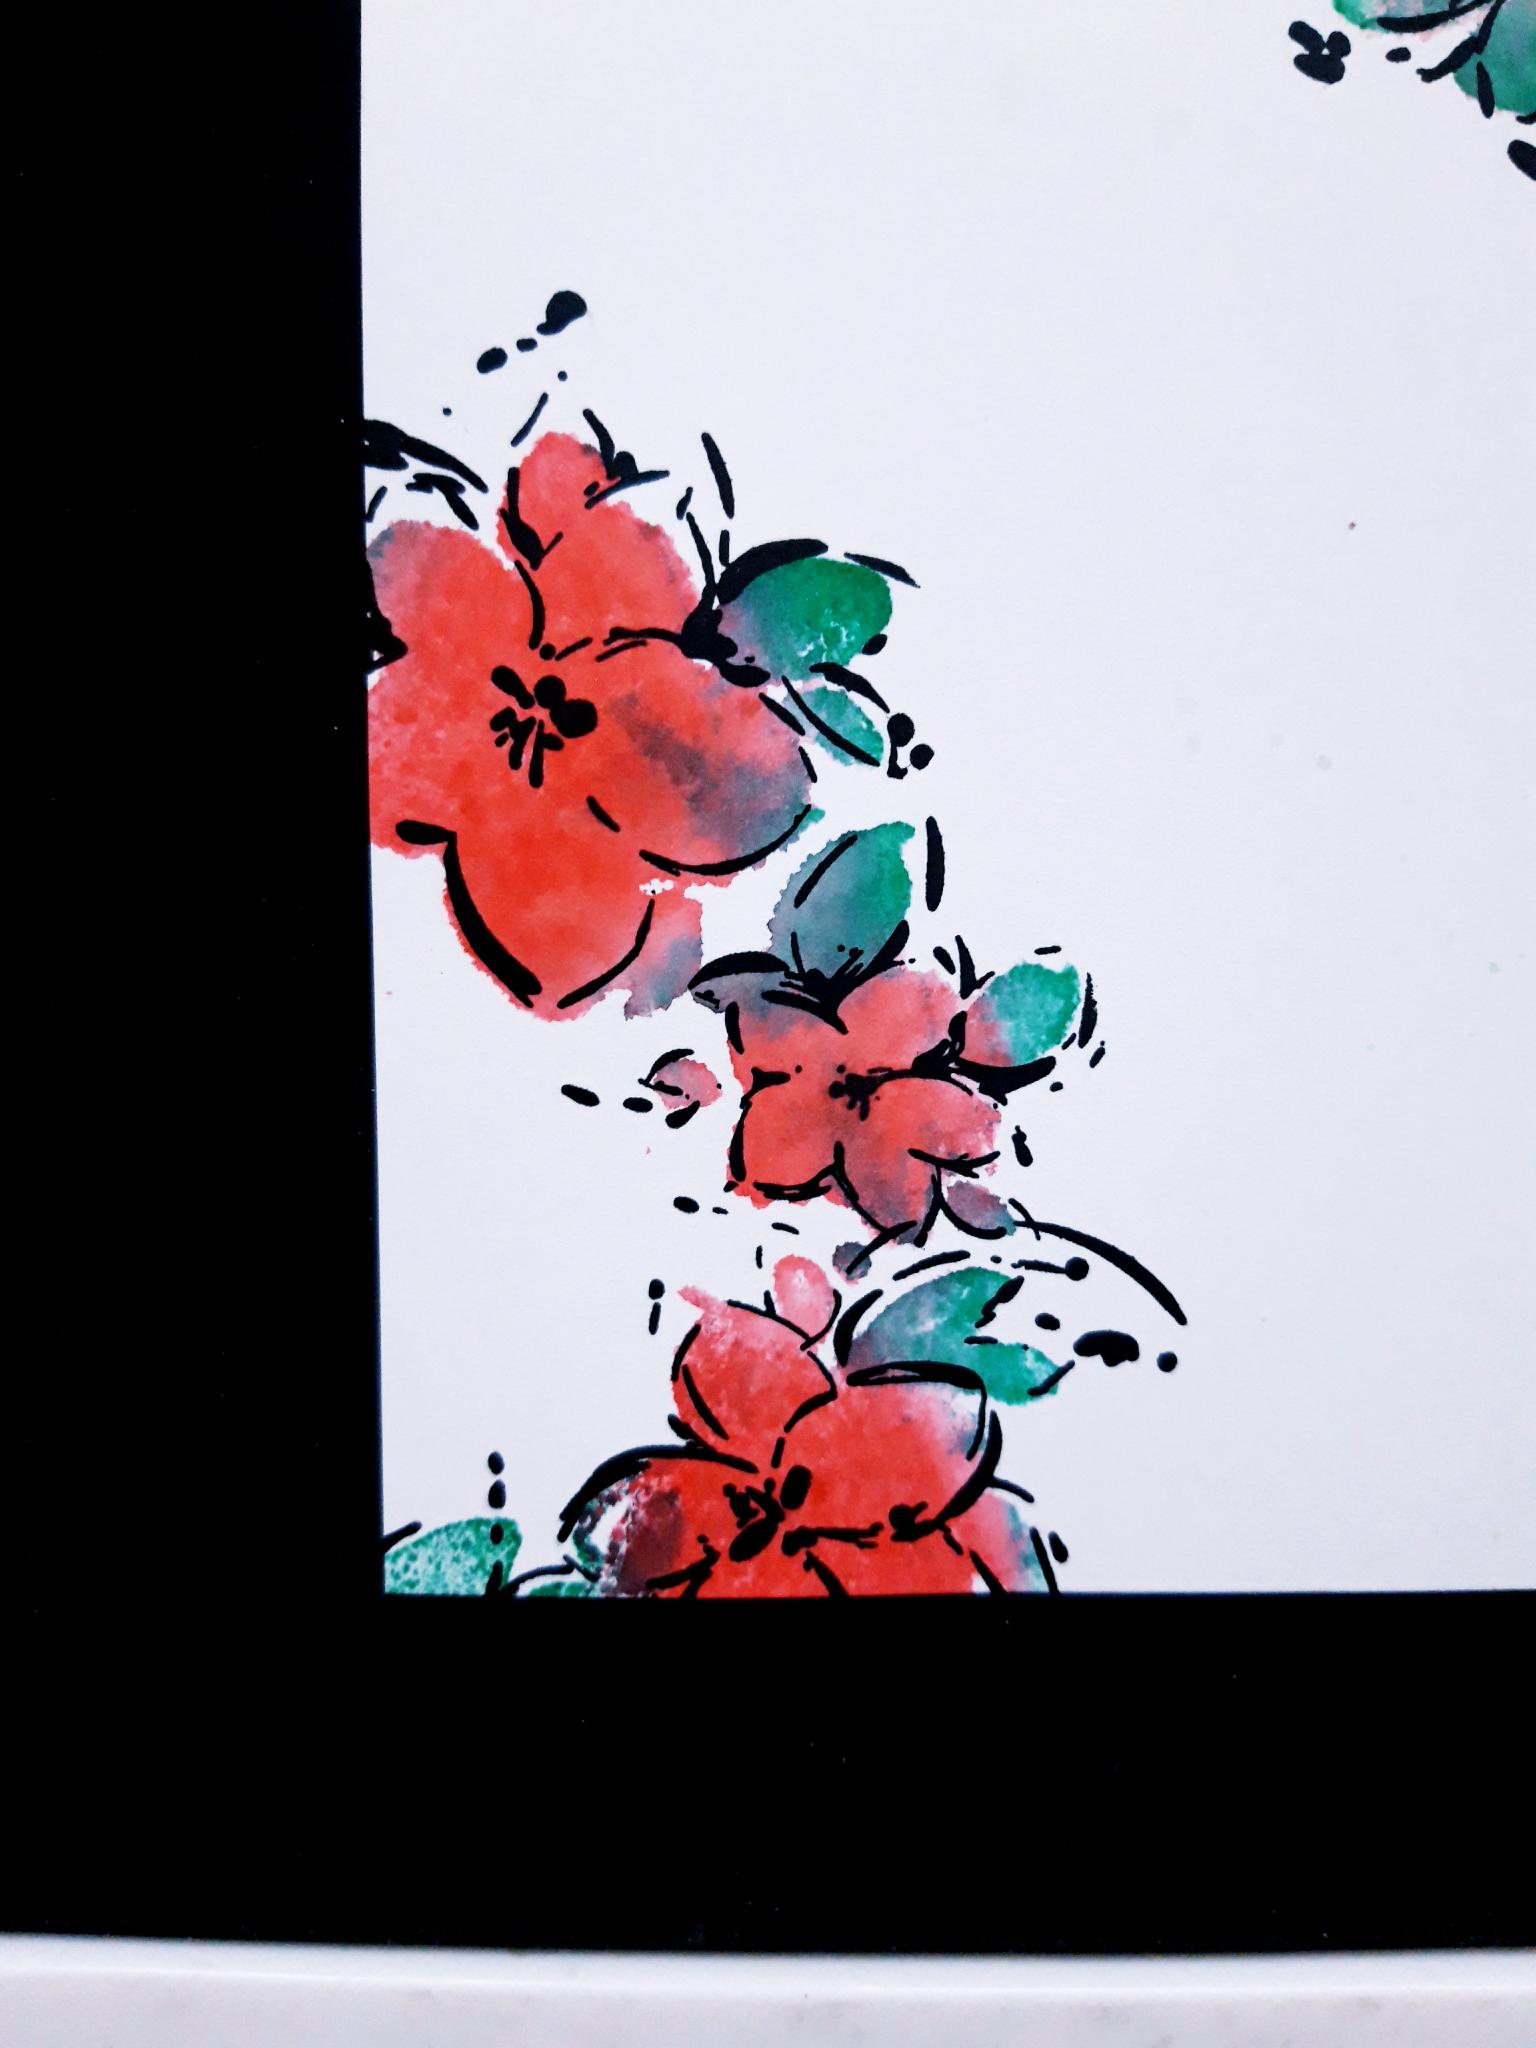
Repeat the steps above, stamping the wreath in the bottom left corner. Dry off your stamped images thoroughly. |
|
Ink up the coordinating, detailed stamp, with the Onyx Black Versafine. Line it up, and stamp over the image in the top left corner. If you are unsure where to stamp, use the images on the packaging as a guide. |
|
Repeat the previous step, stamping over the image in the bottom left corner. |

|
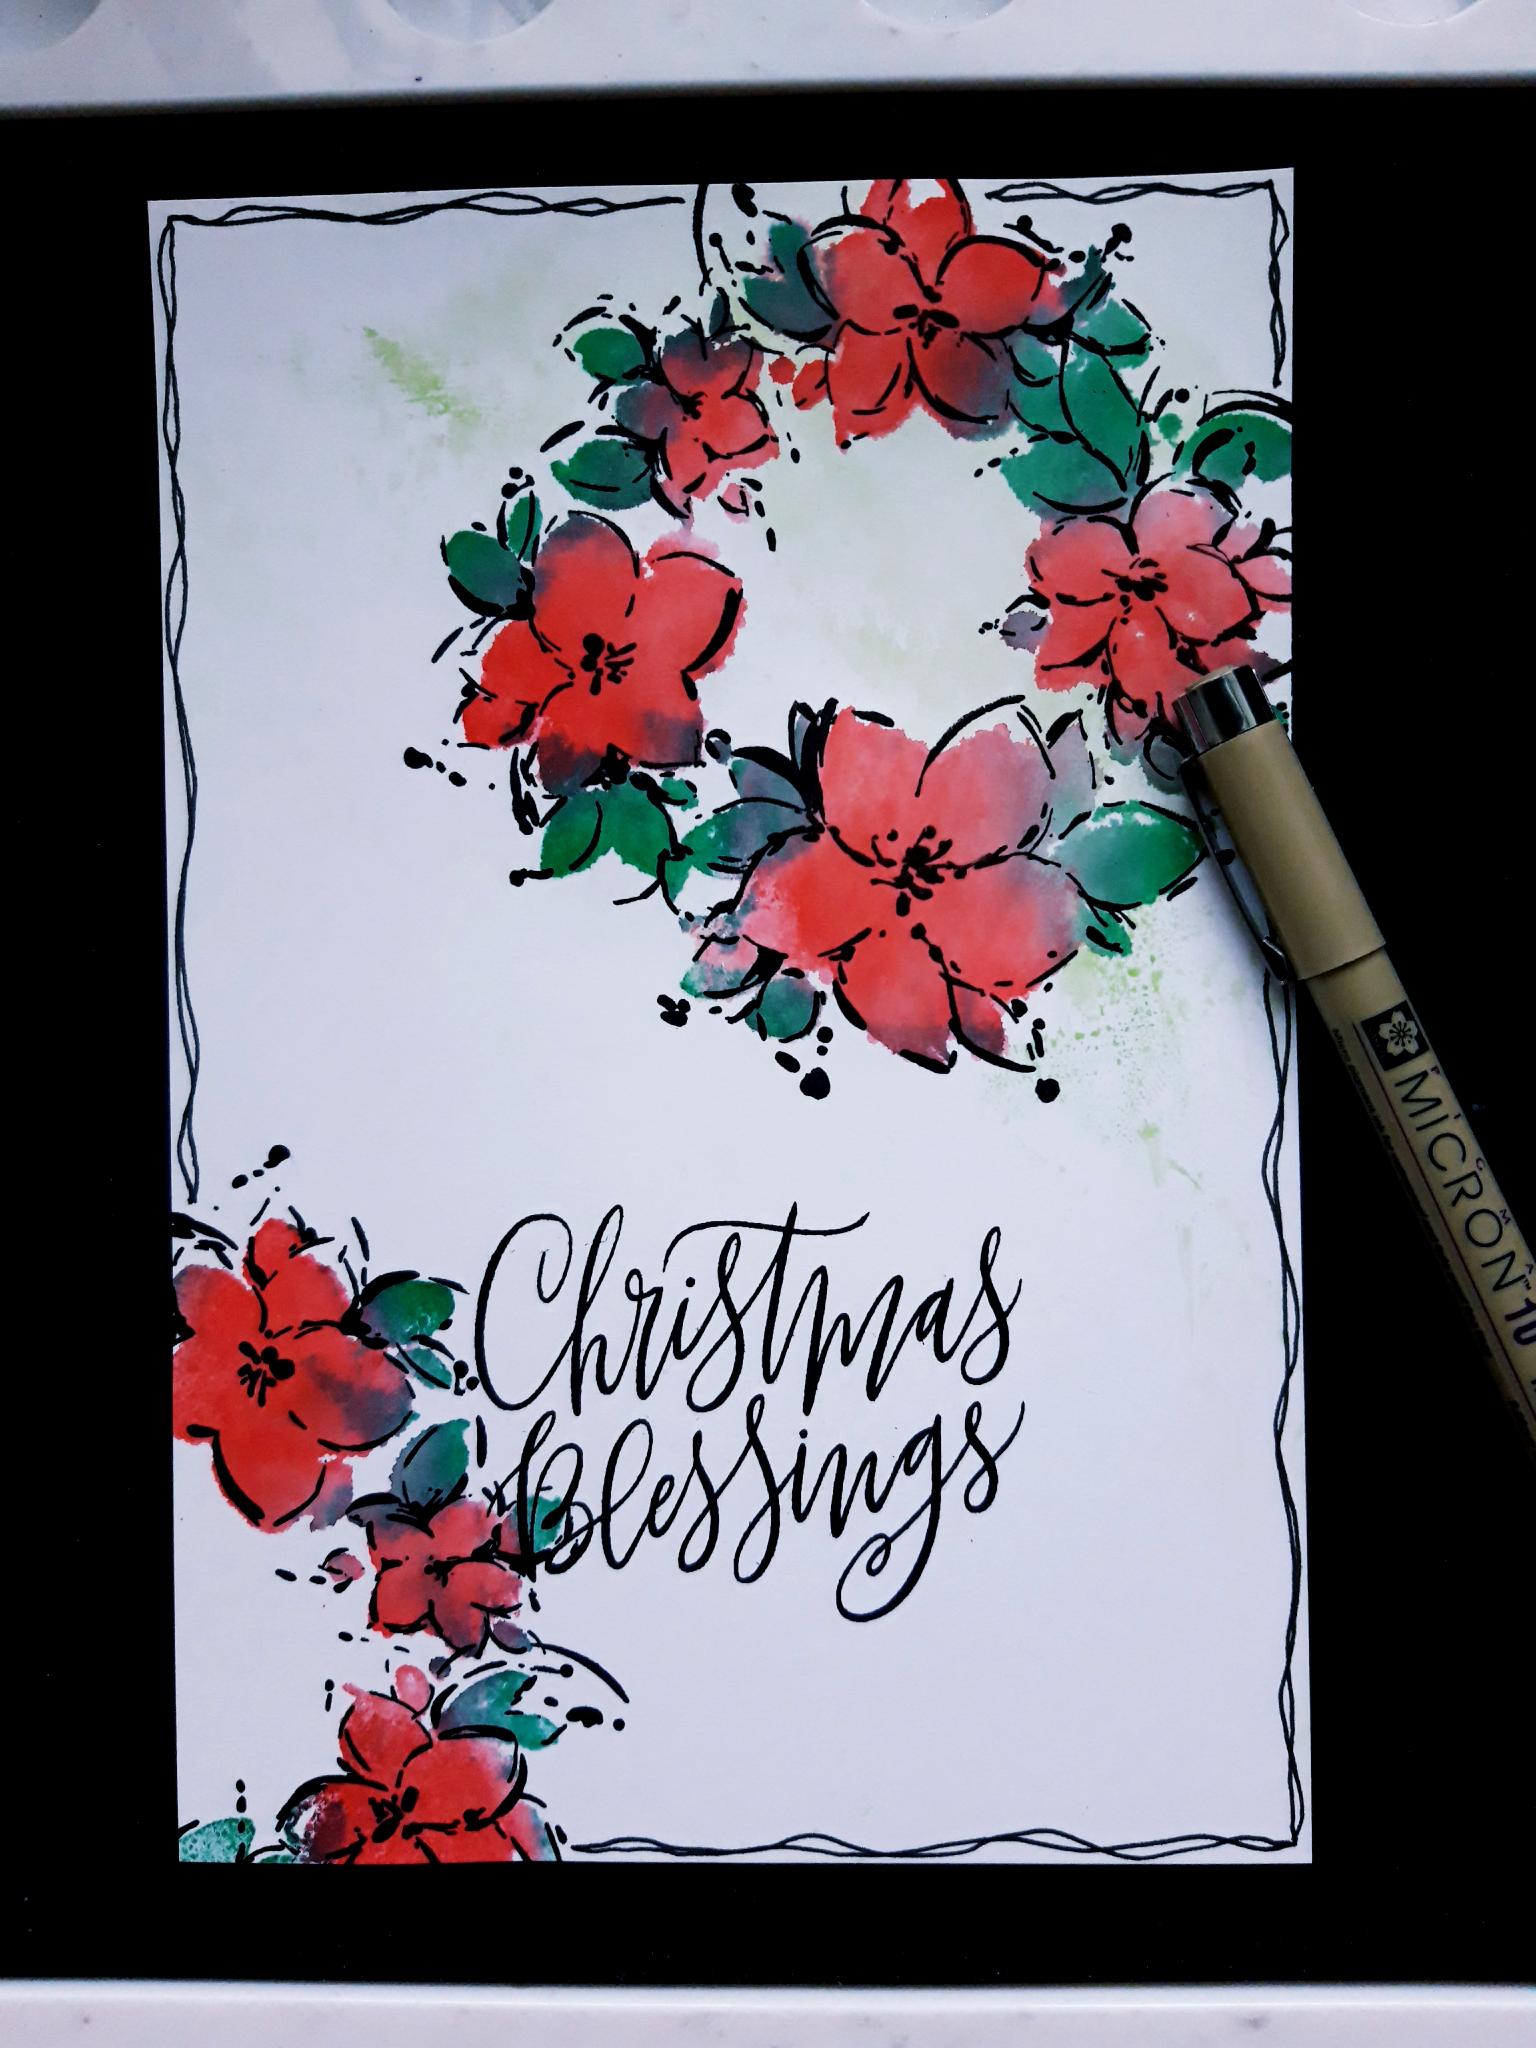
Ink up the sentiment stamp, from the Christmas Blessings Stamp Collection, with the Onyx Black Versafine. Stamp where desired. |
|
Use a black pen to draw a decorative, wiggly frame around your artwork. |
|
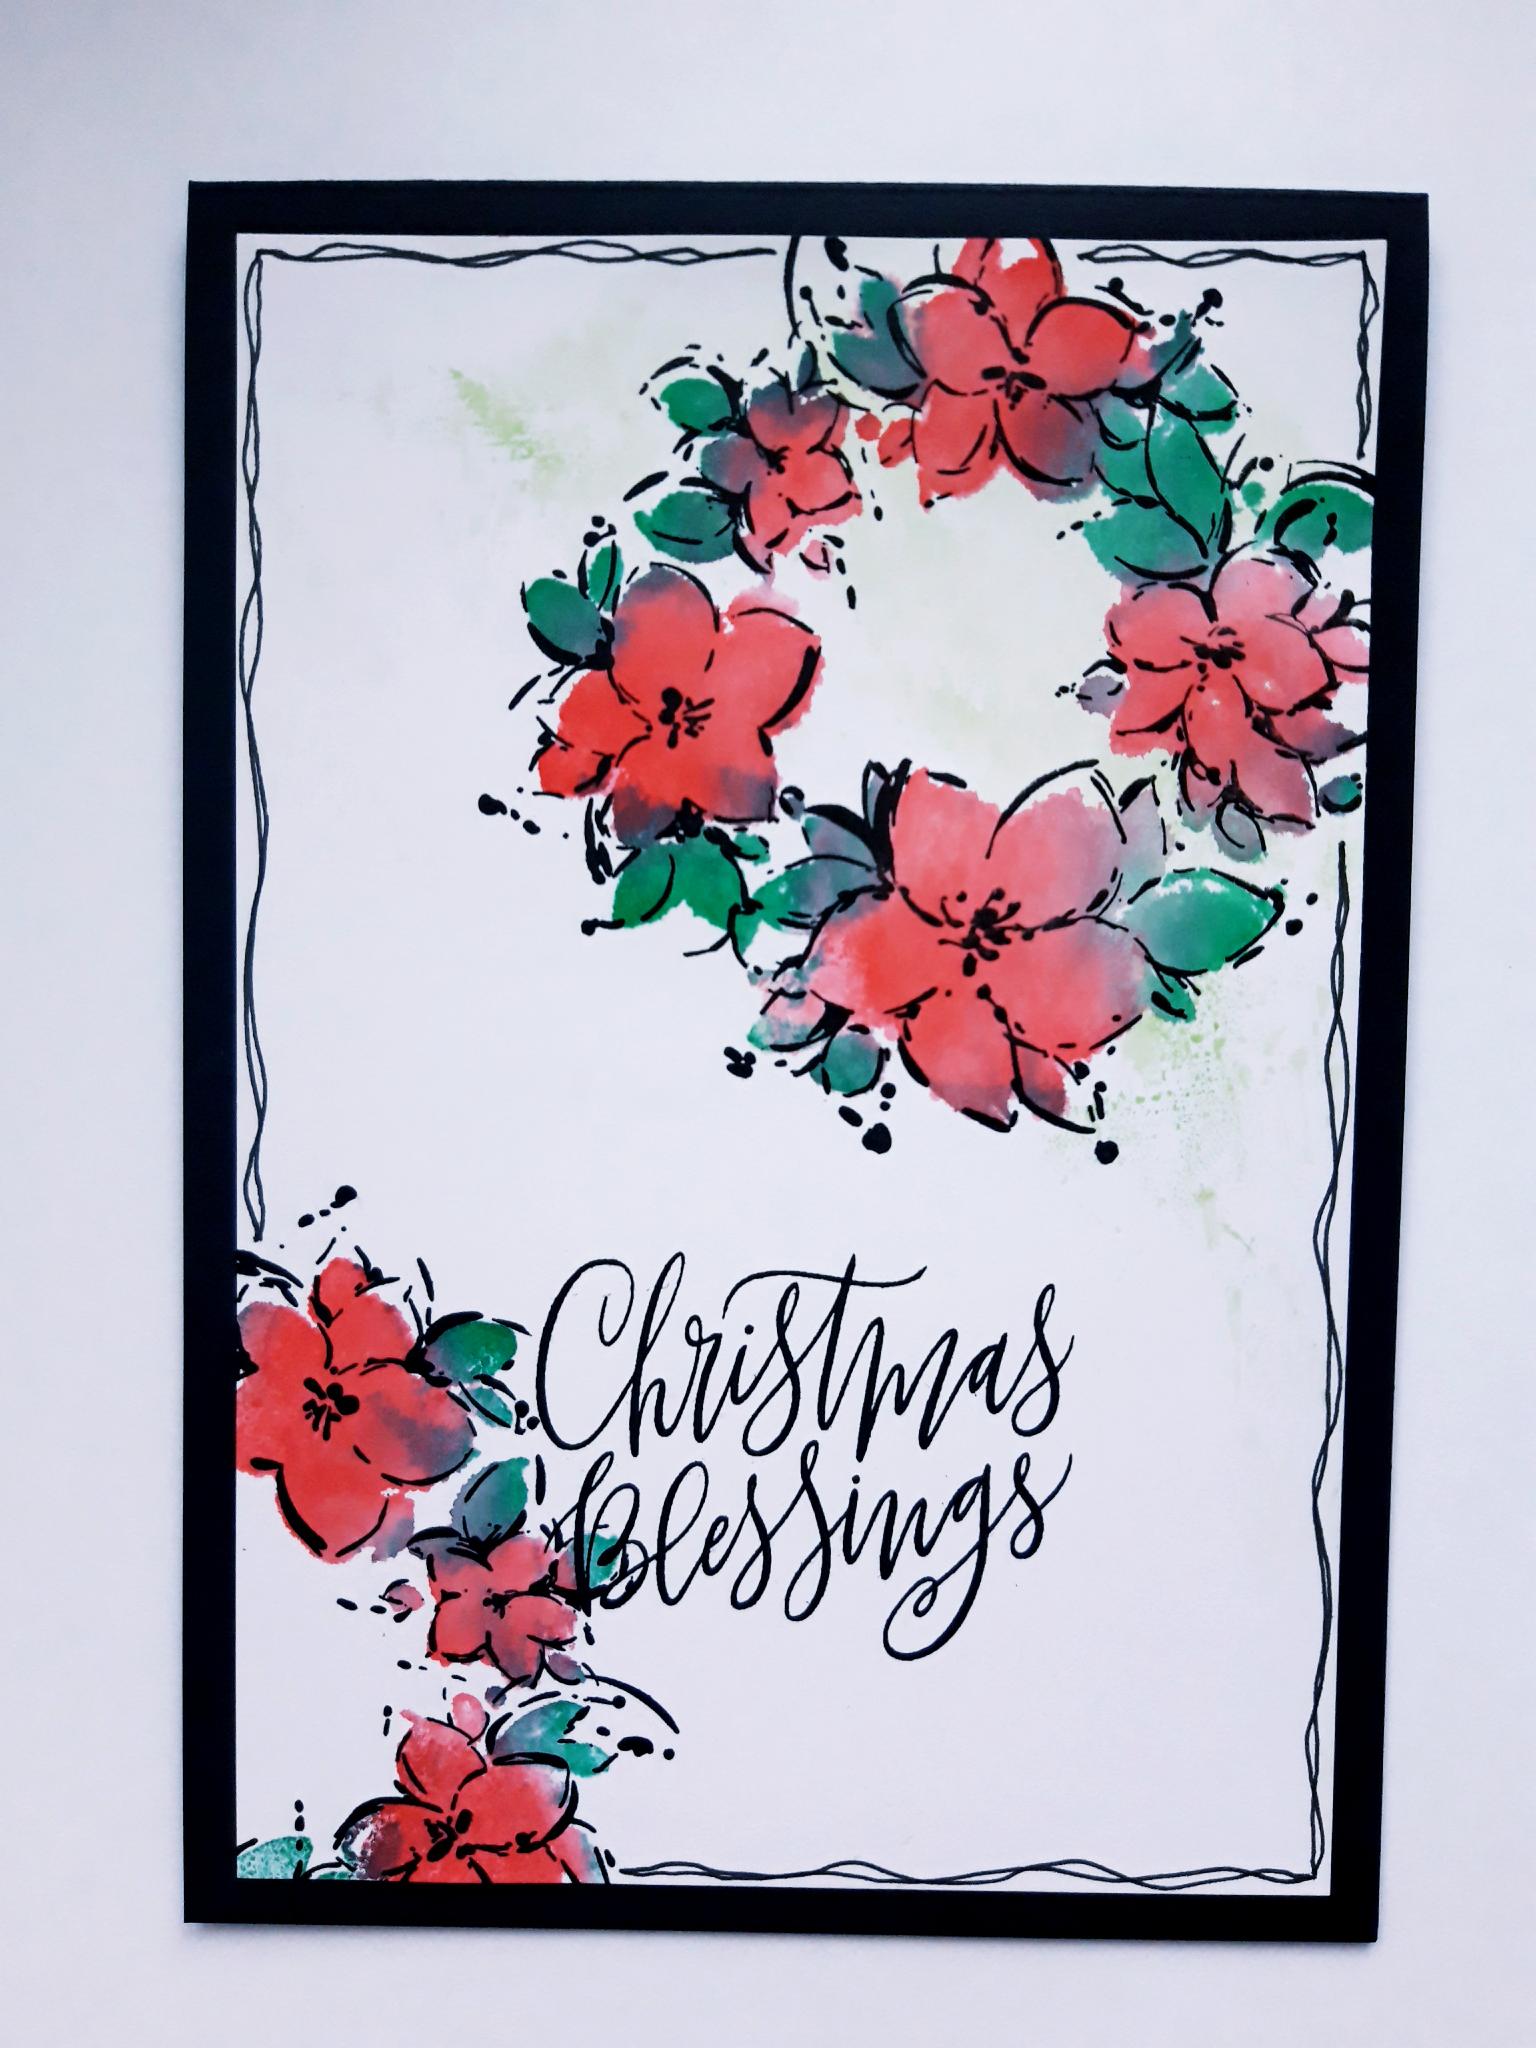
Glue your artwork on to your black, top folding, card blank. |
|
To finish, glue sequins around your artwork. |