Give your friends $10 off their first order!
Refer a FRIEND


WHAT YOU WILL NEED:
White card (7 x 7")
Stamps from Hooray Lamination Stamp Collection
Stamps from Retro Stamps Collection
Versafine Ink Pad: Onyx Black
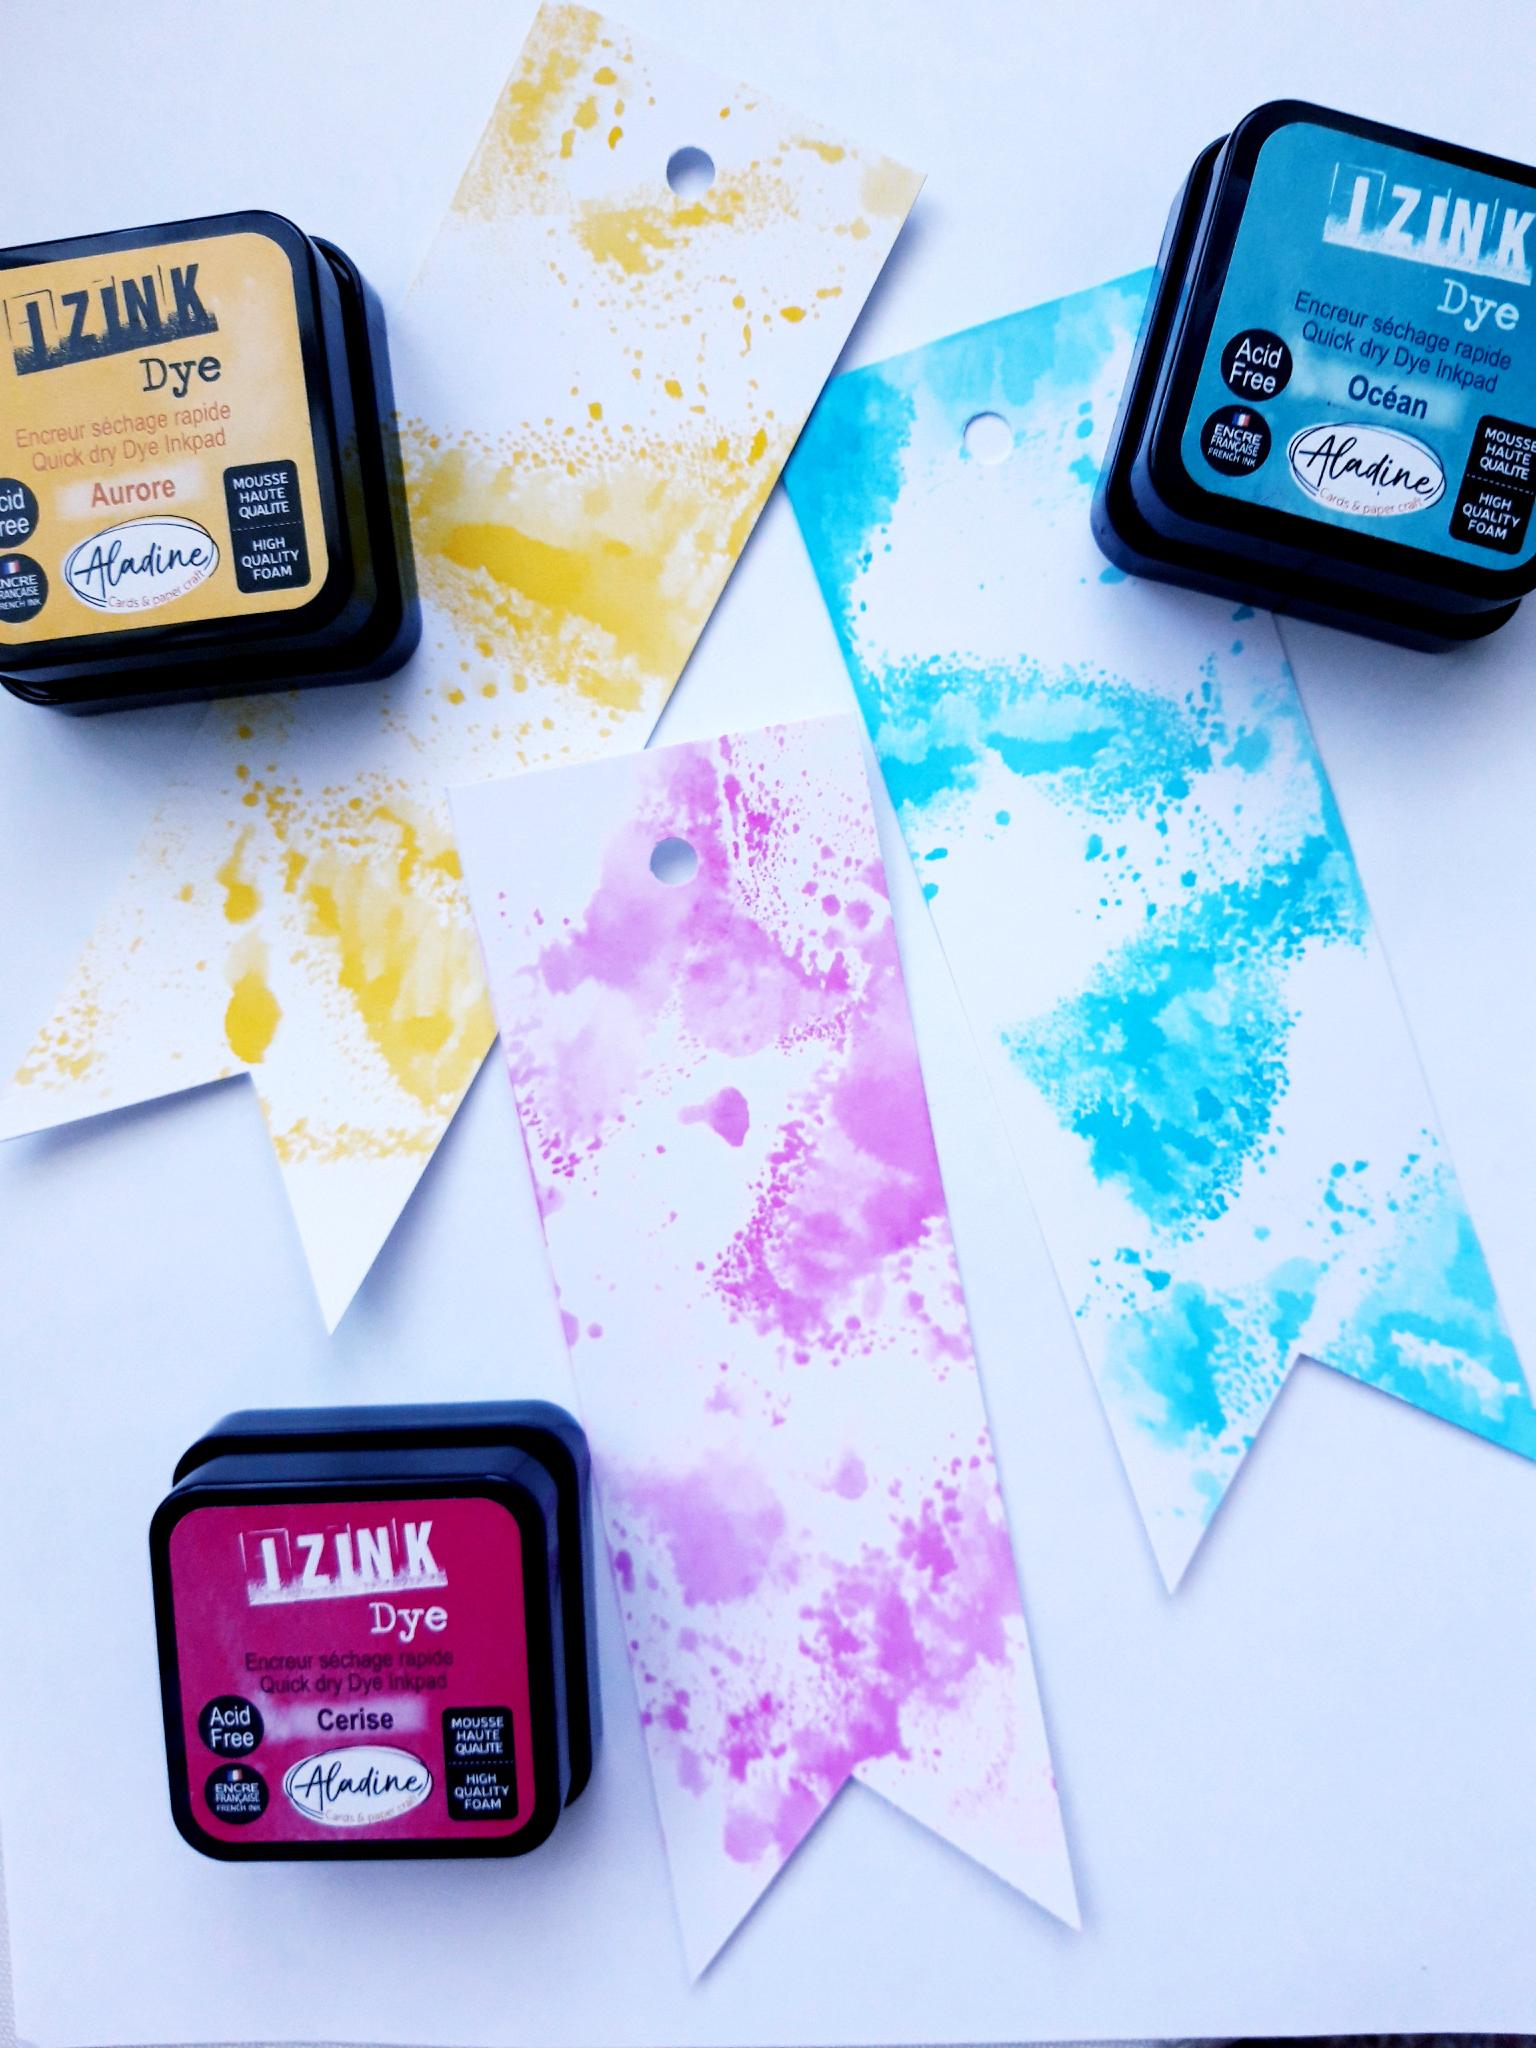
Izink Dye Ink Pad: Aurore, Cerise, Ocean
Banner Punch
Water spray bottle
Black Pen
Bakers Twine
Hole Punch
Heat gun (optional)
Eureka 101
Paper Trimmer
[click image to enlarge] 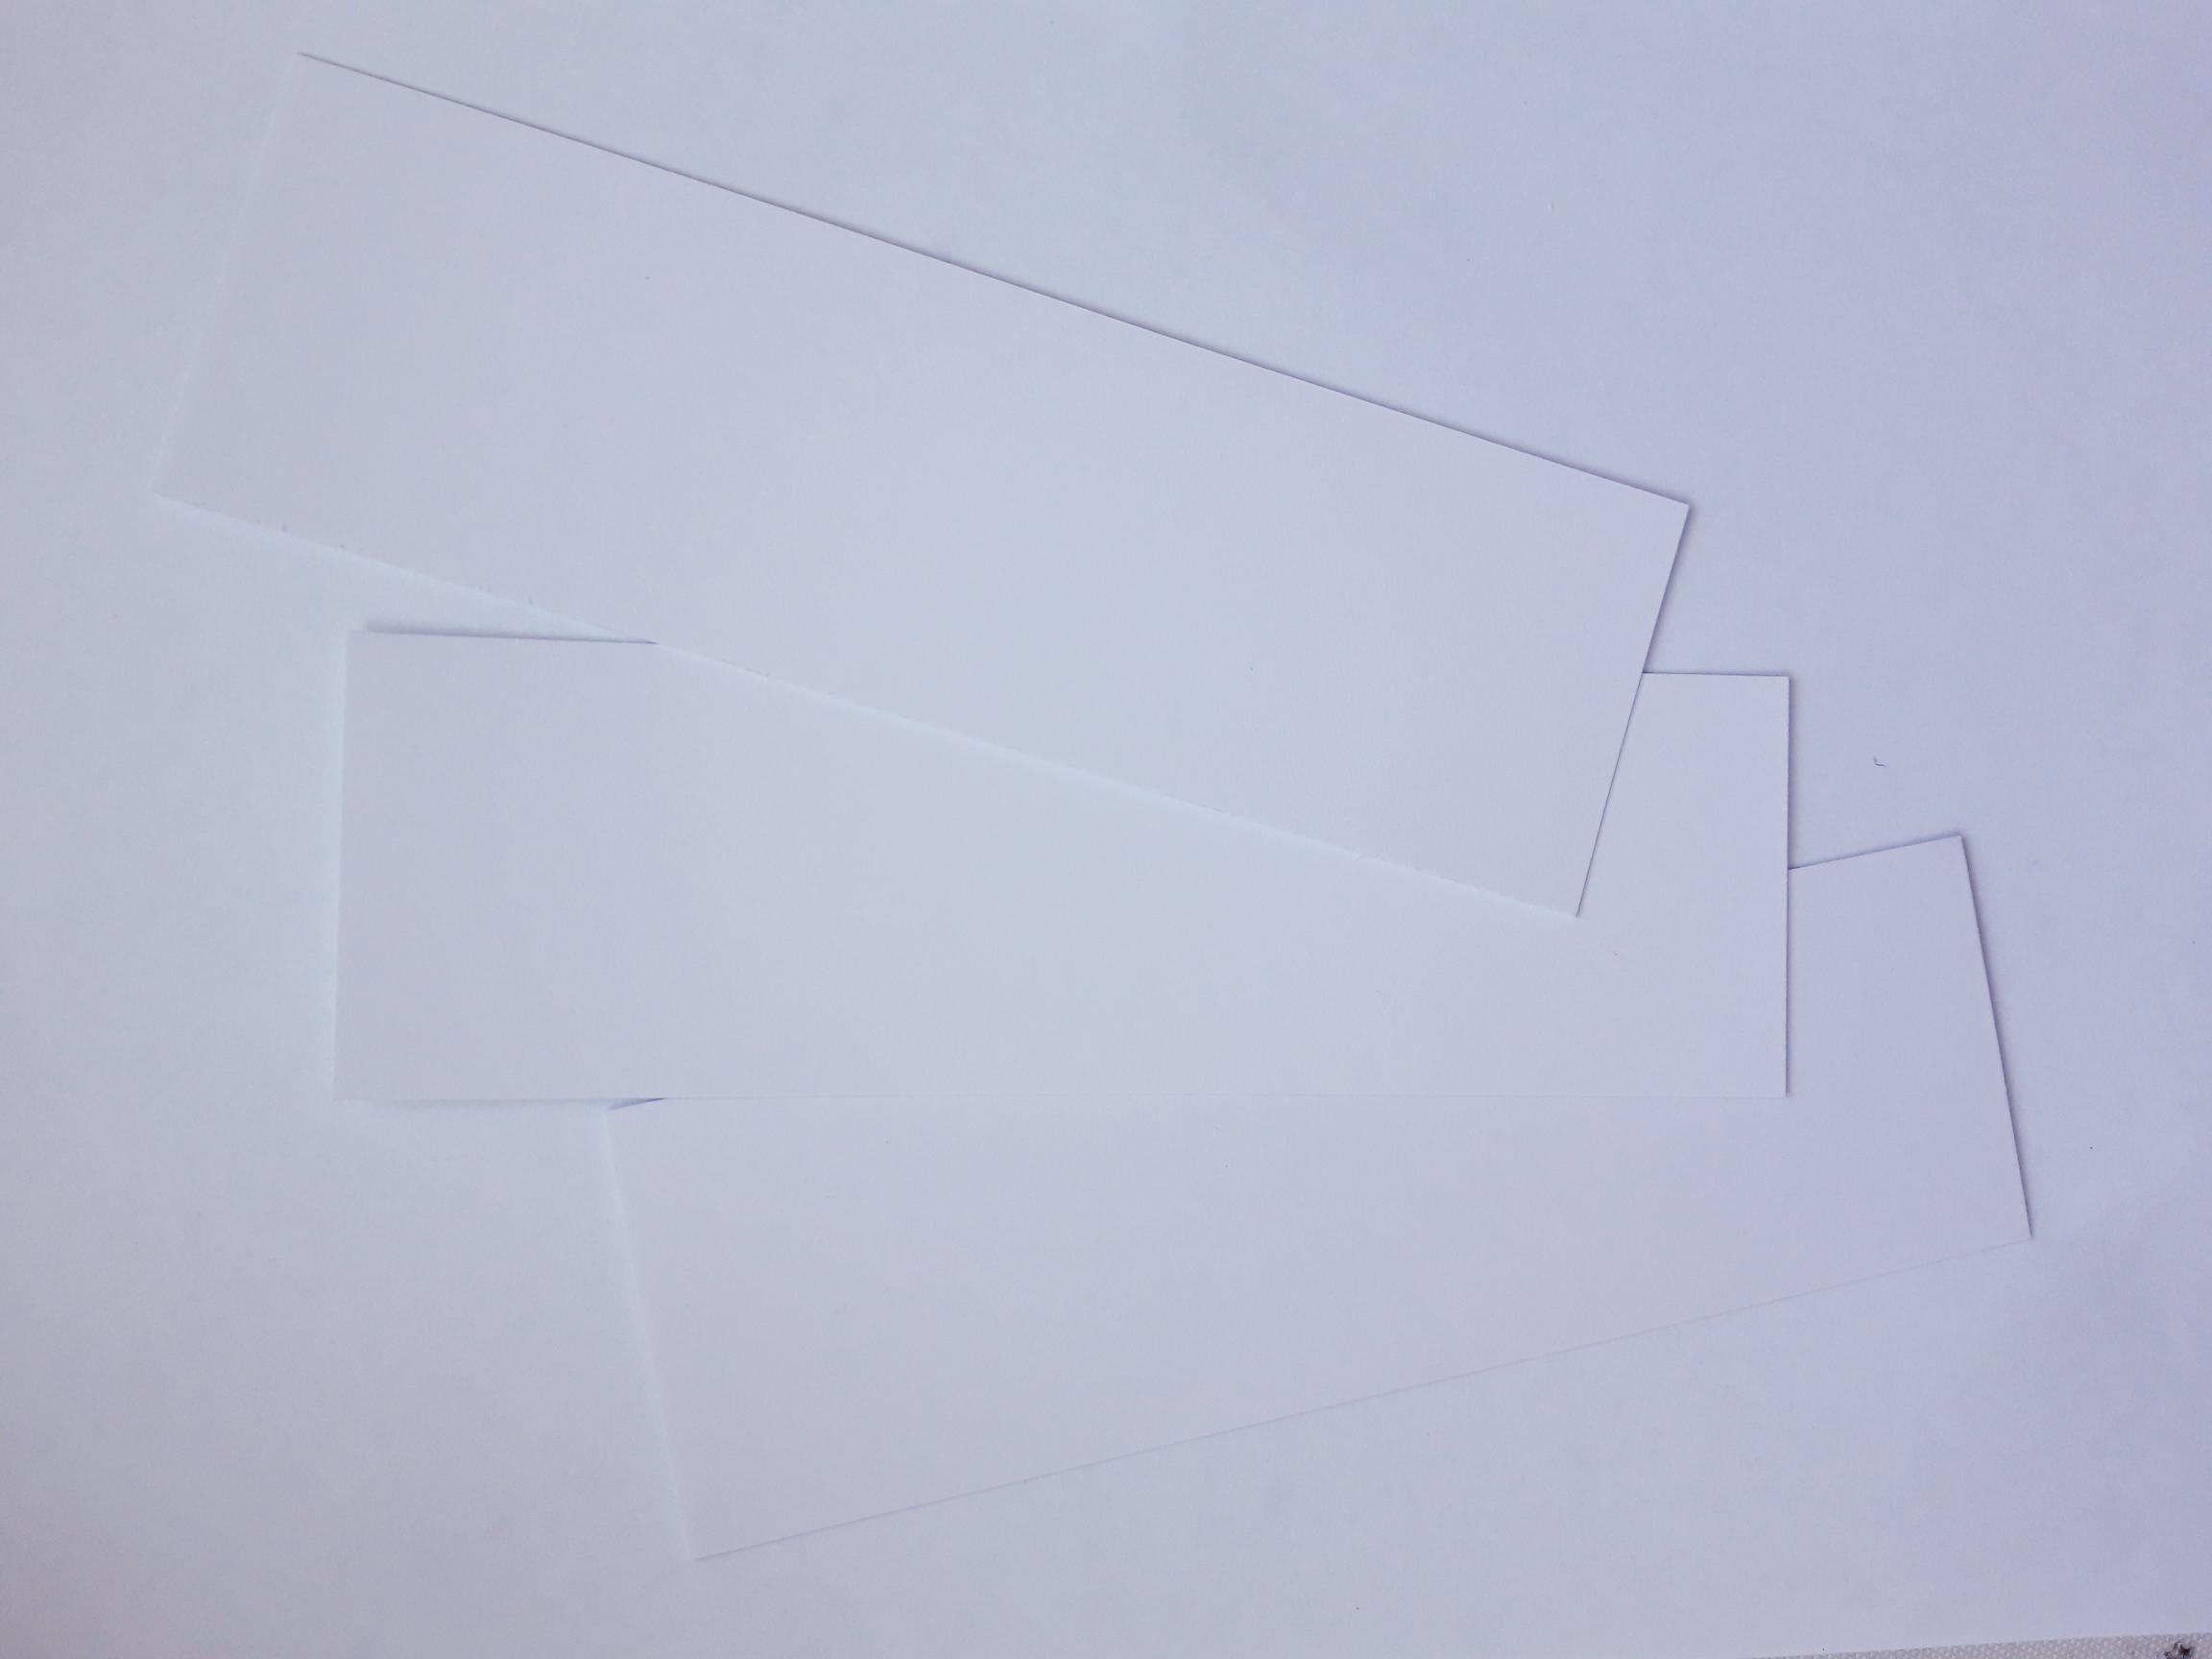
|
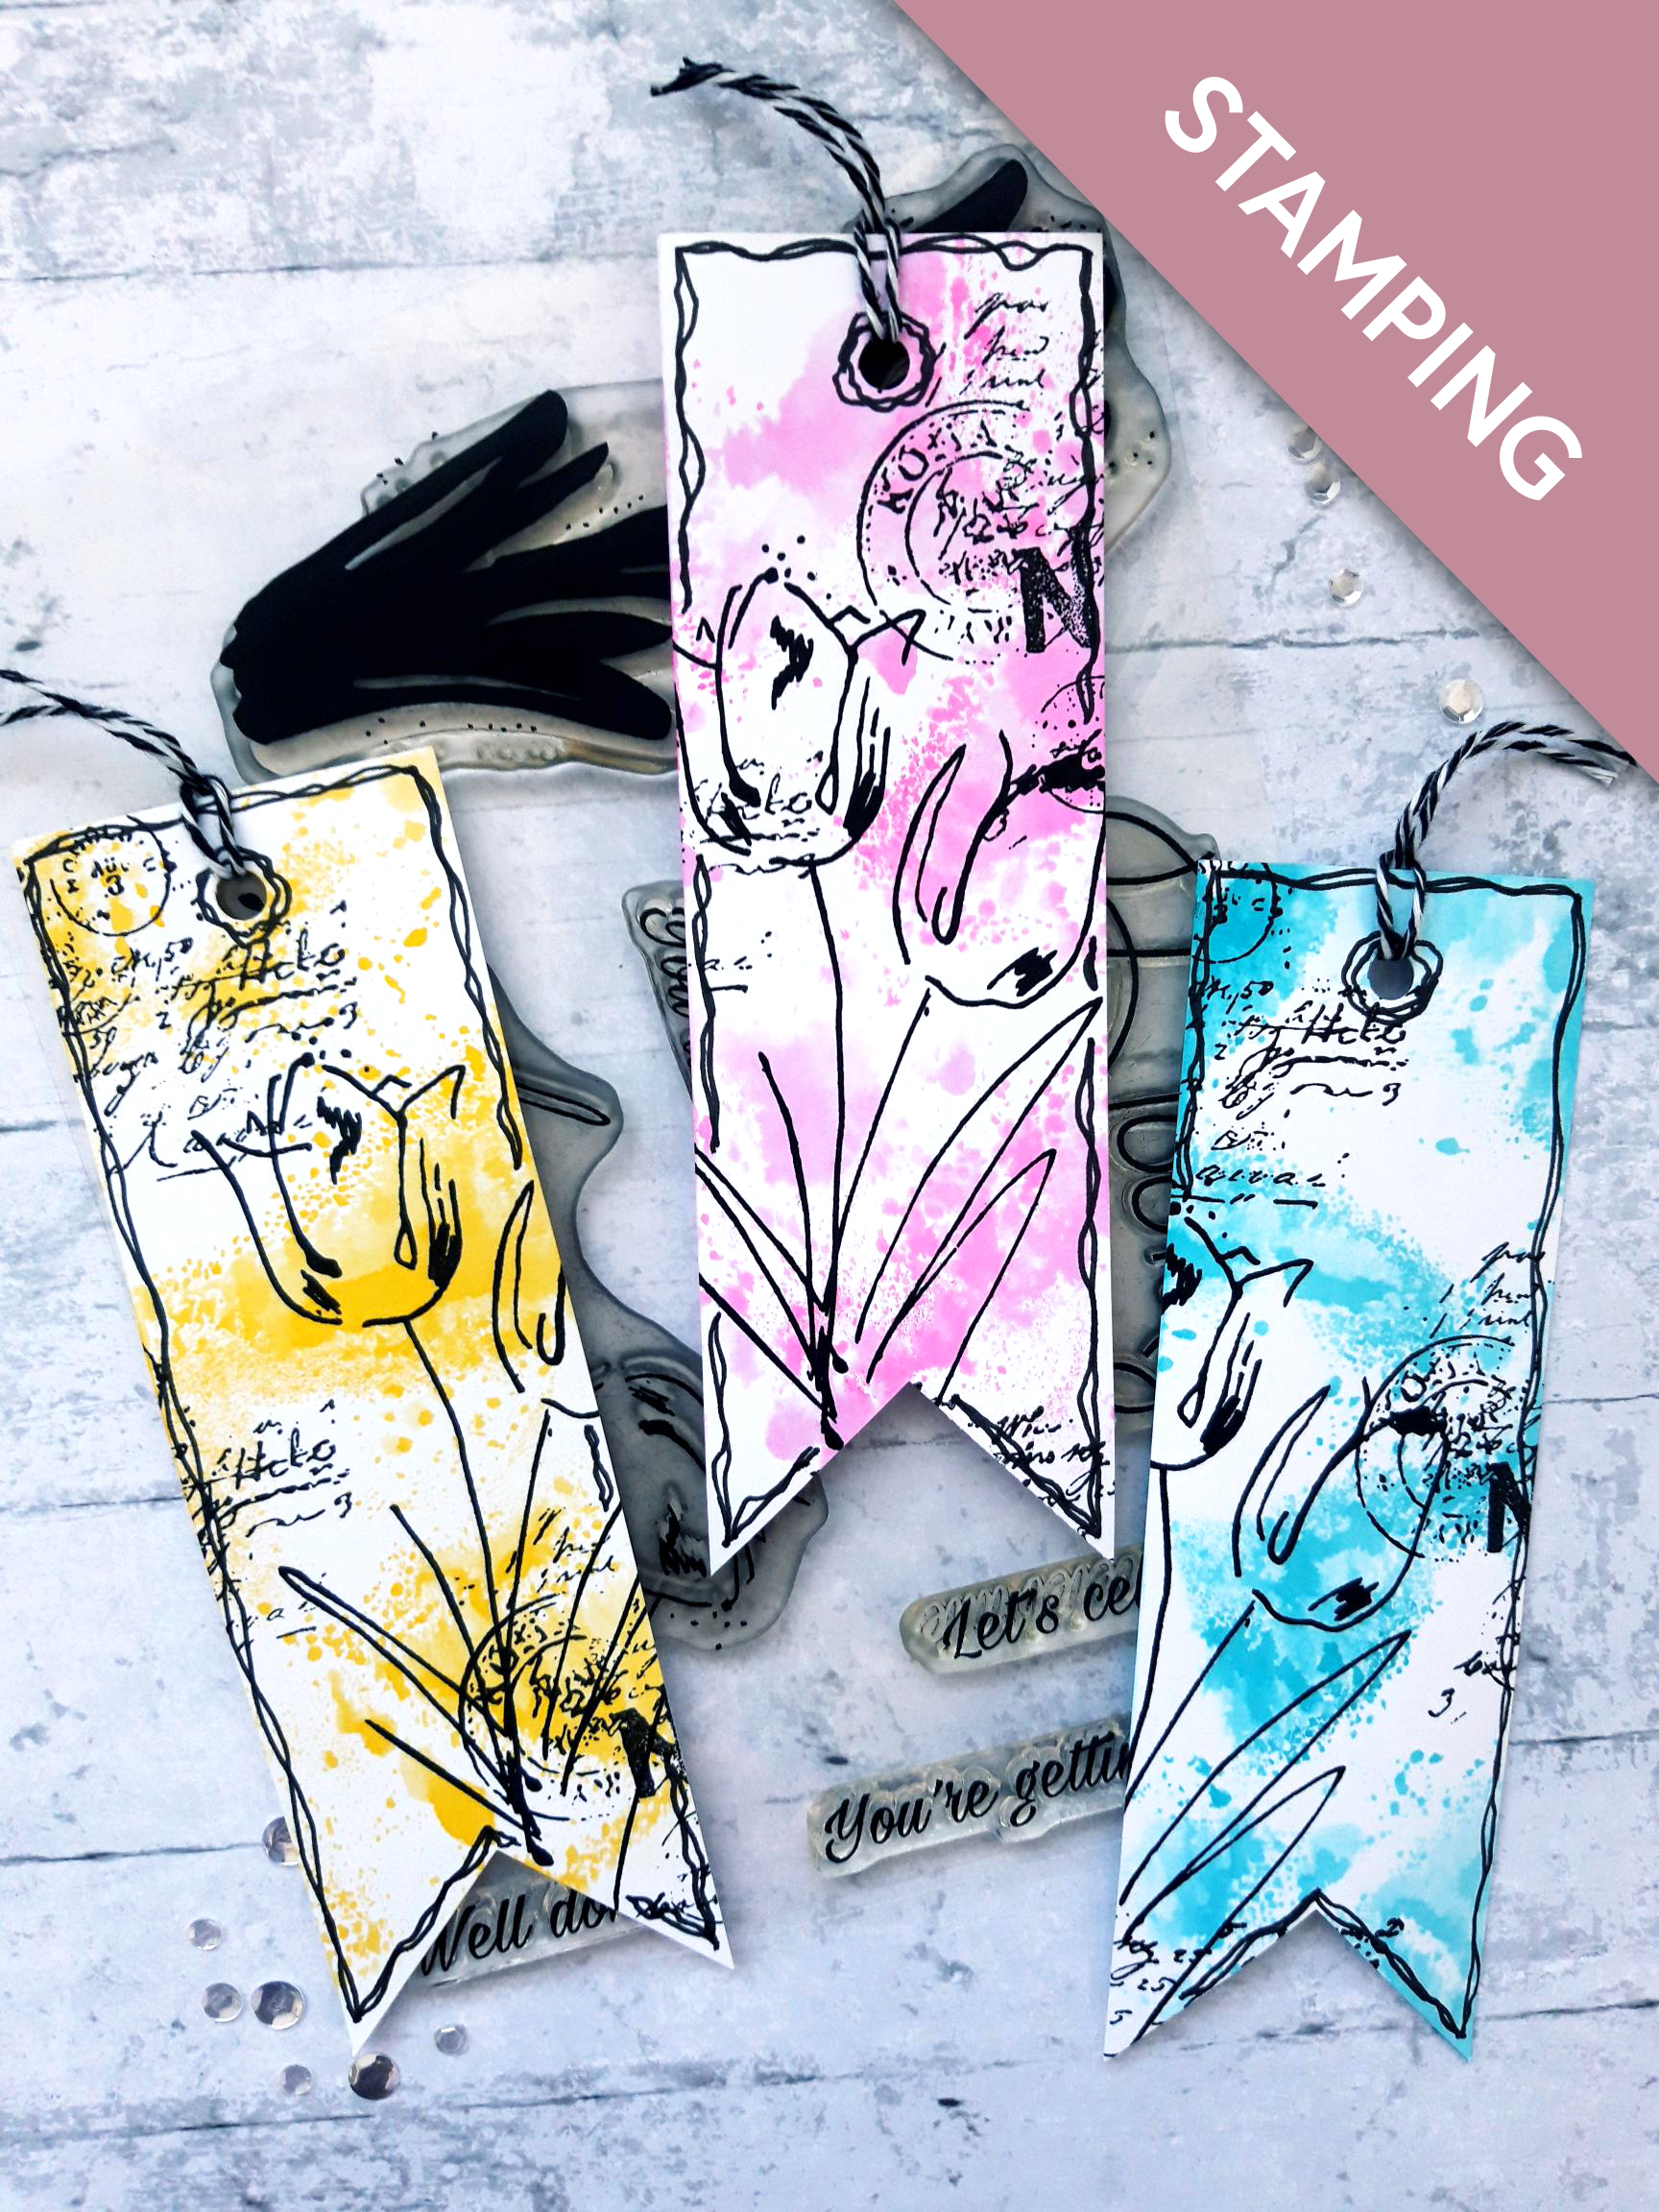
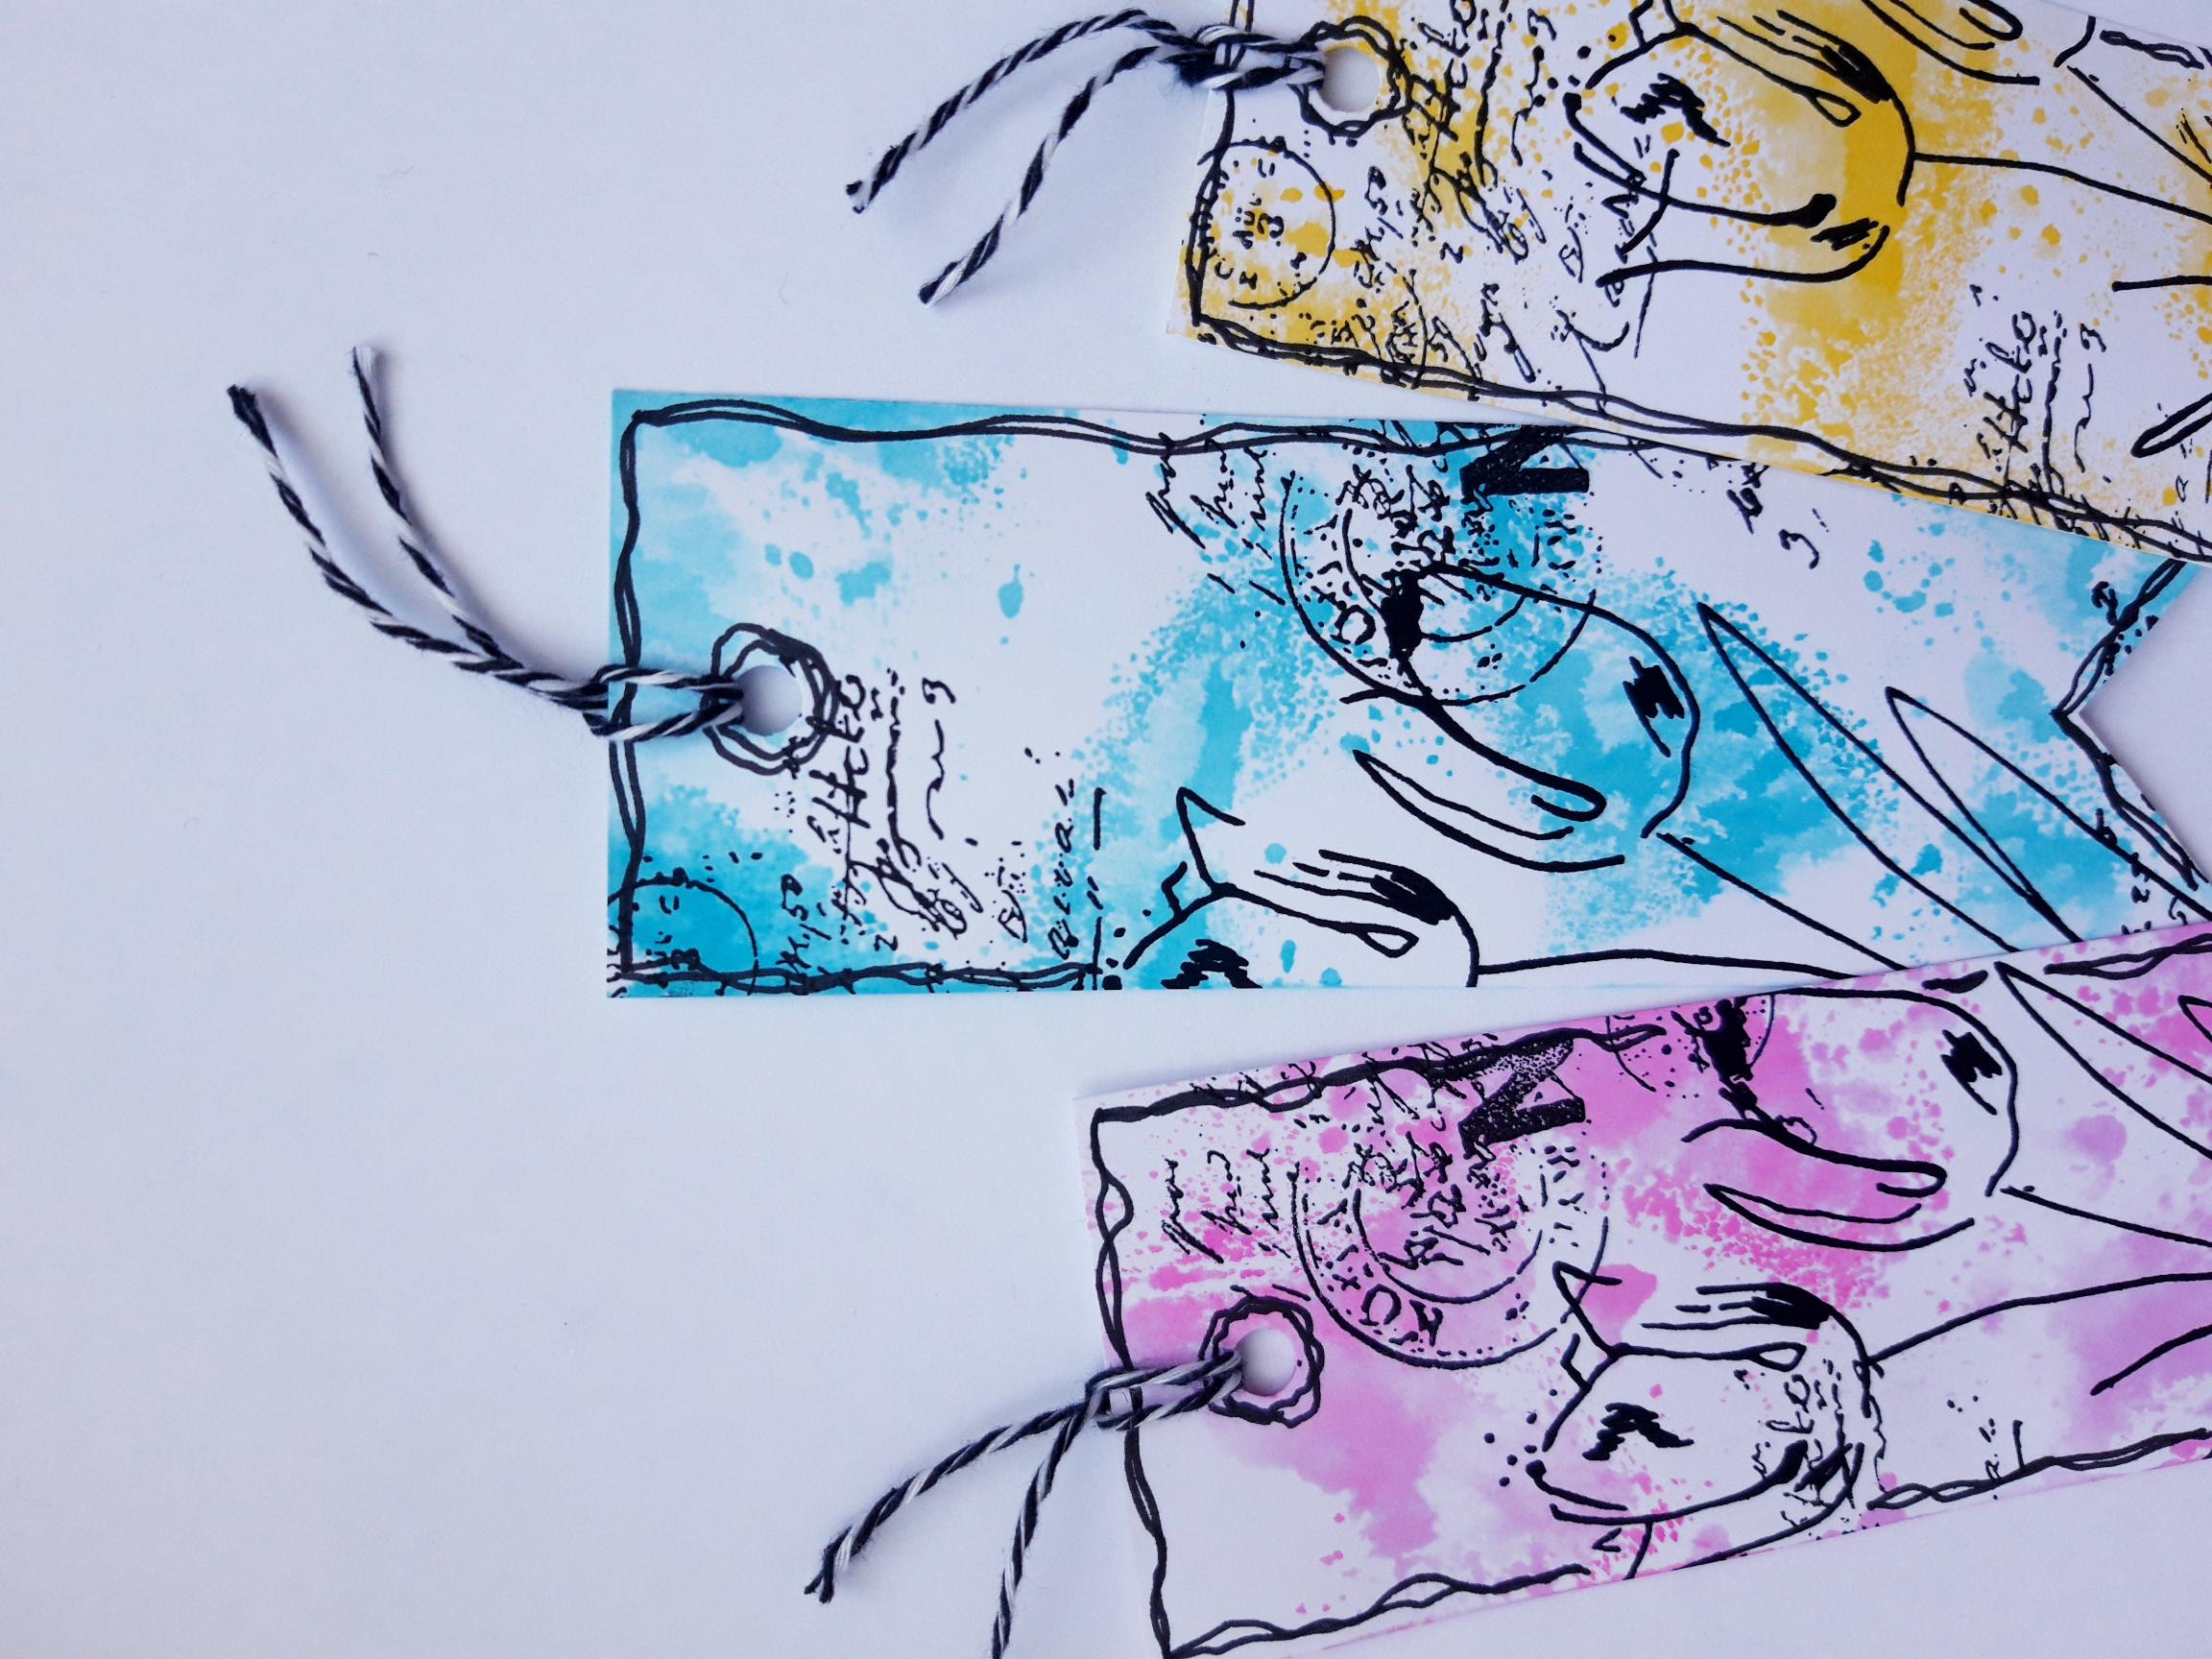
Cut the white cardstock in to THREE strips, each measuring 6 x 2" |
|
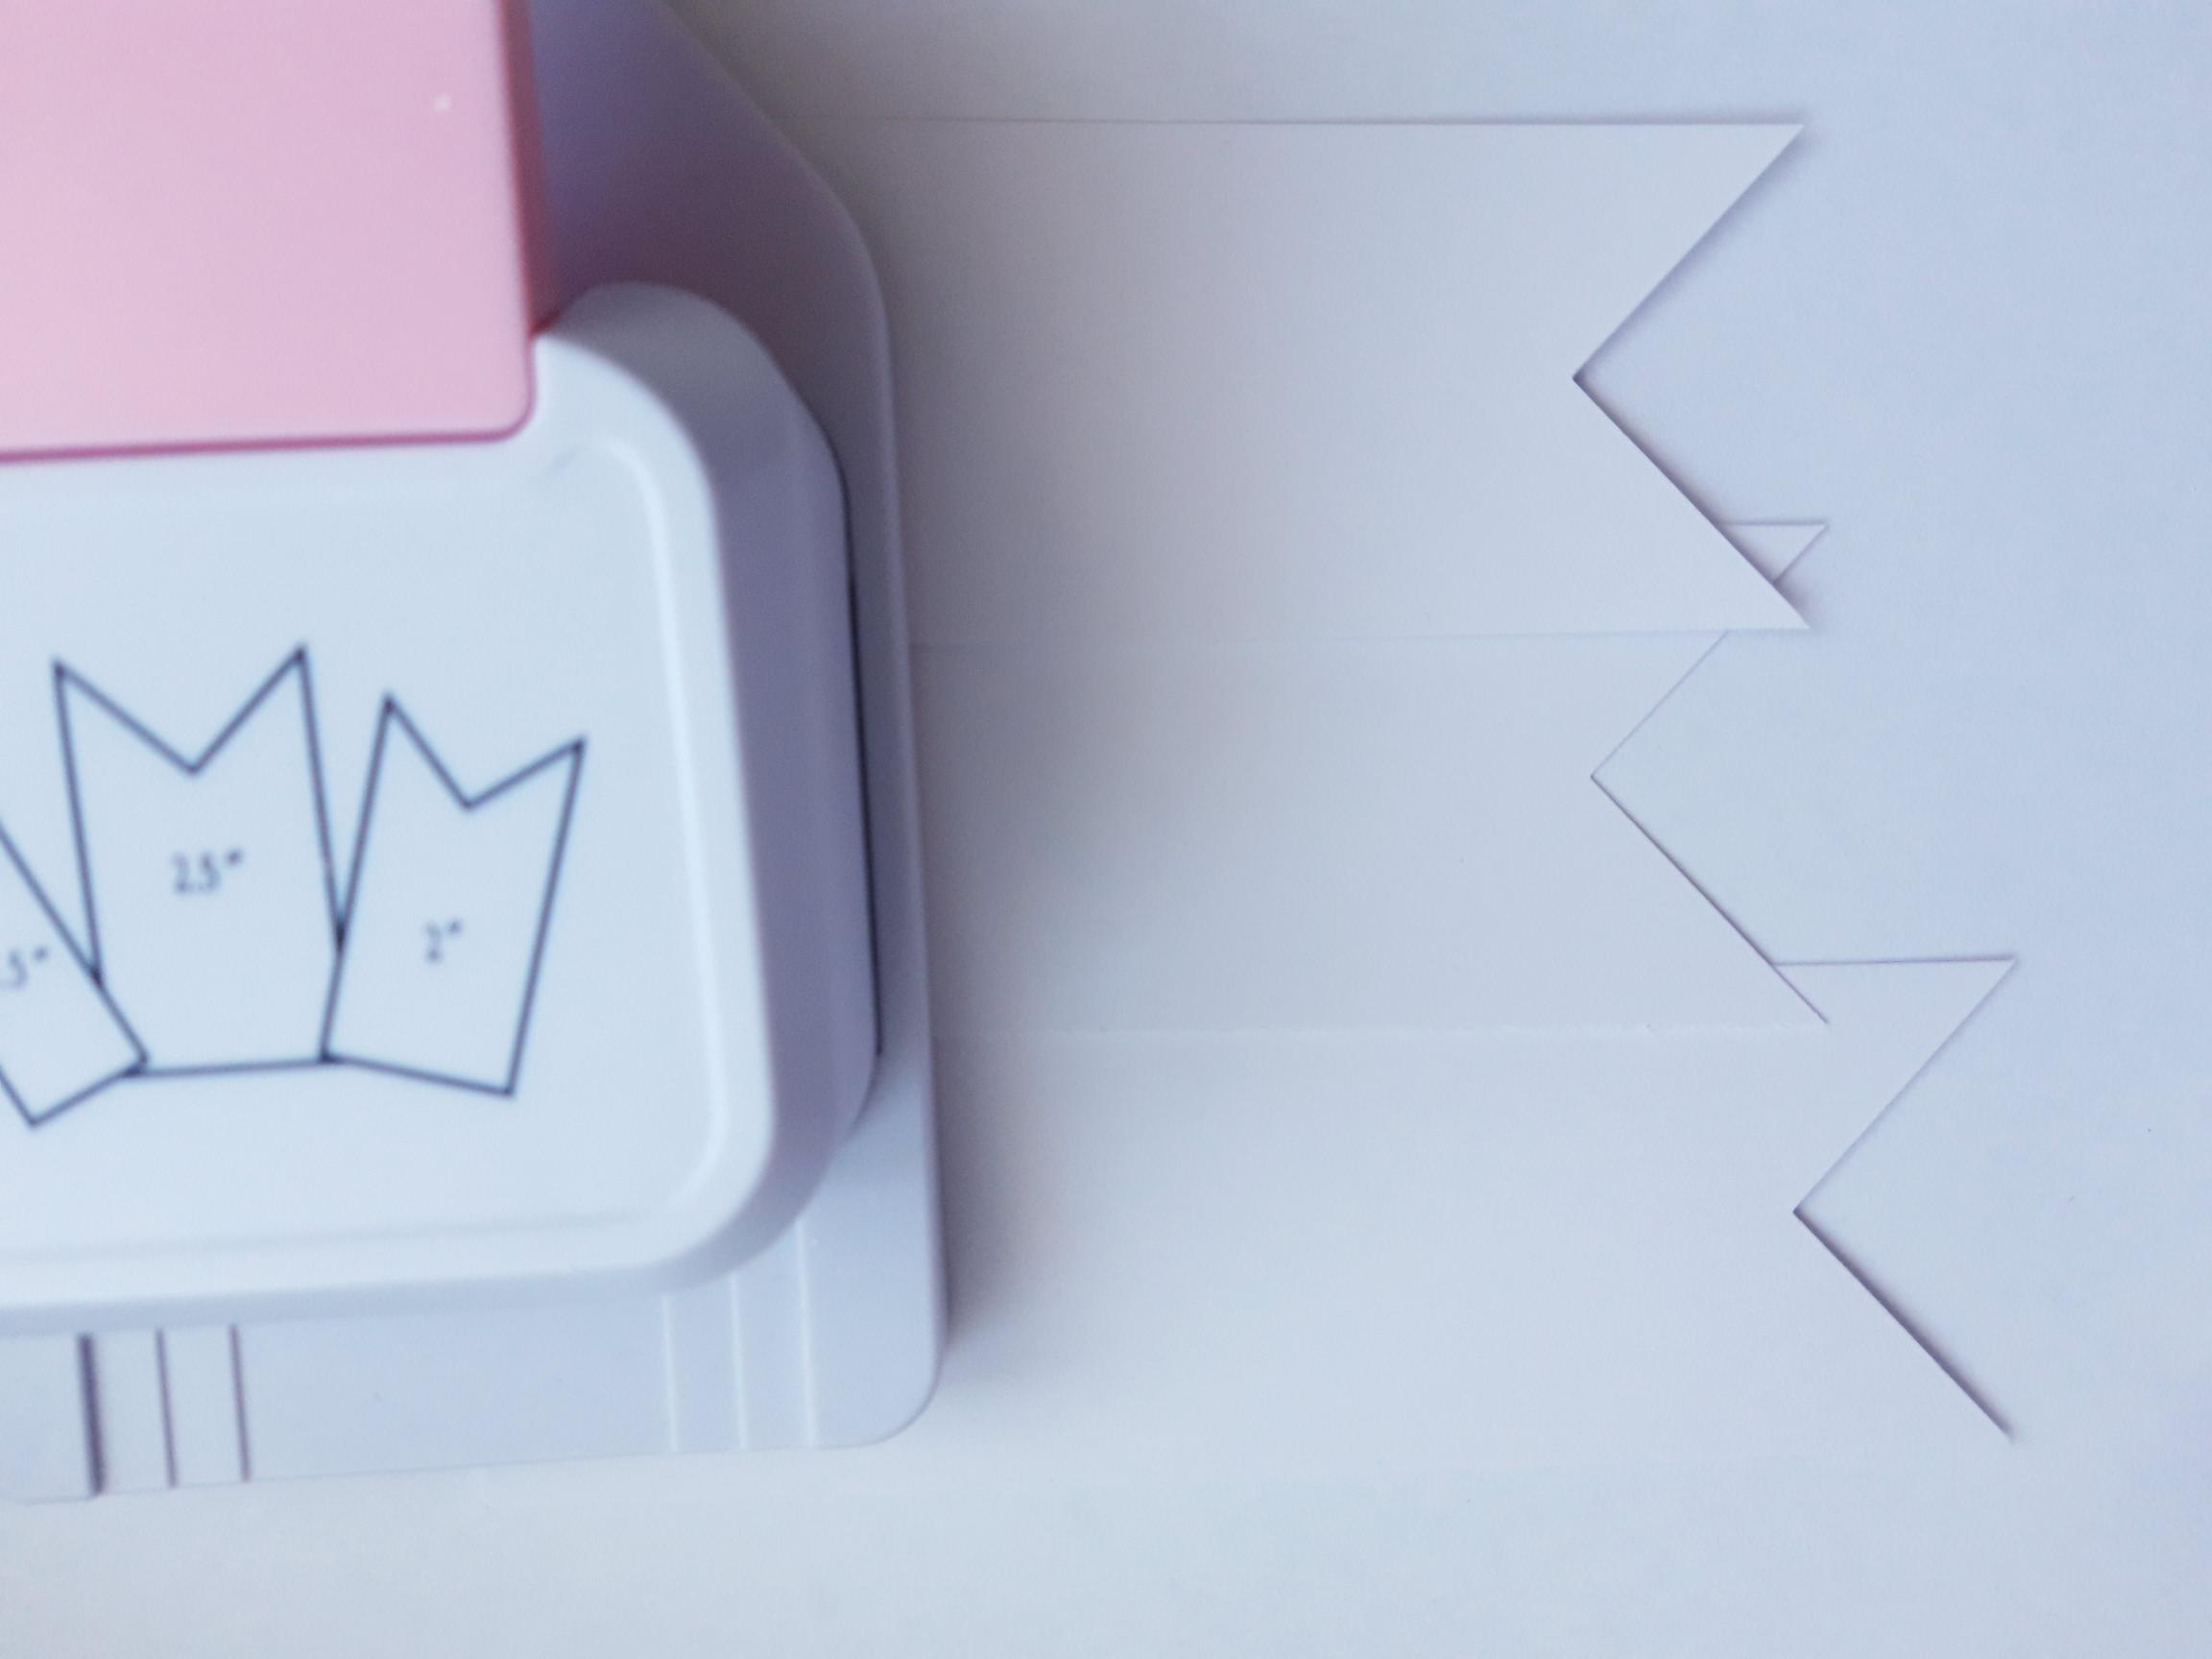
Use the Banner Punch on one end, of each of the bookmarks. |
|
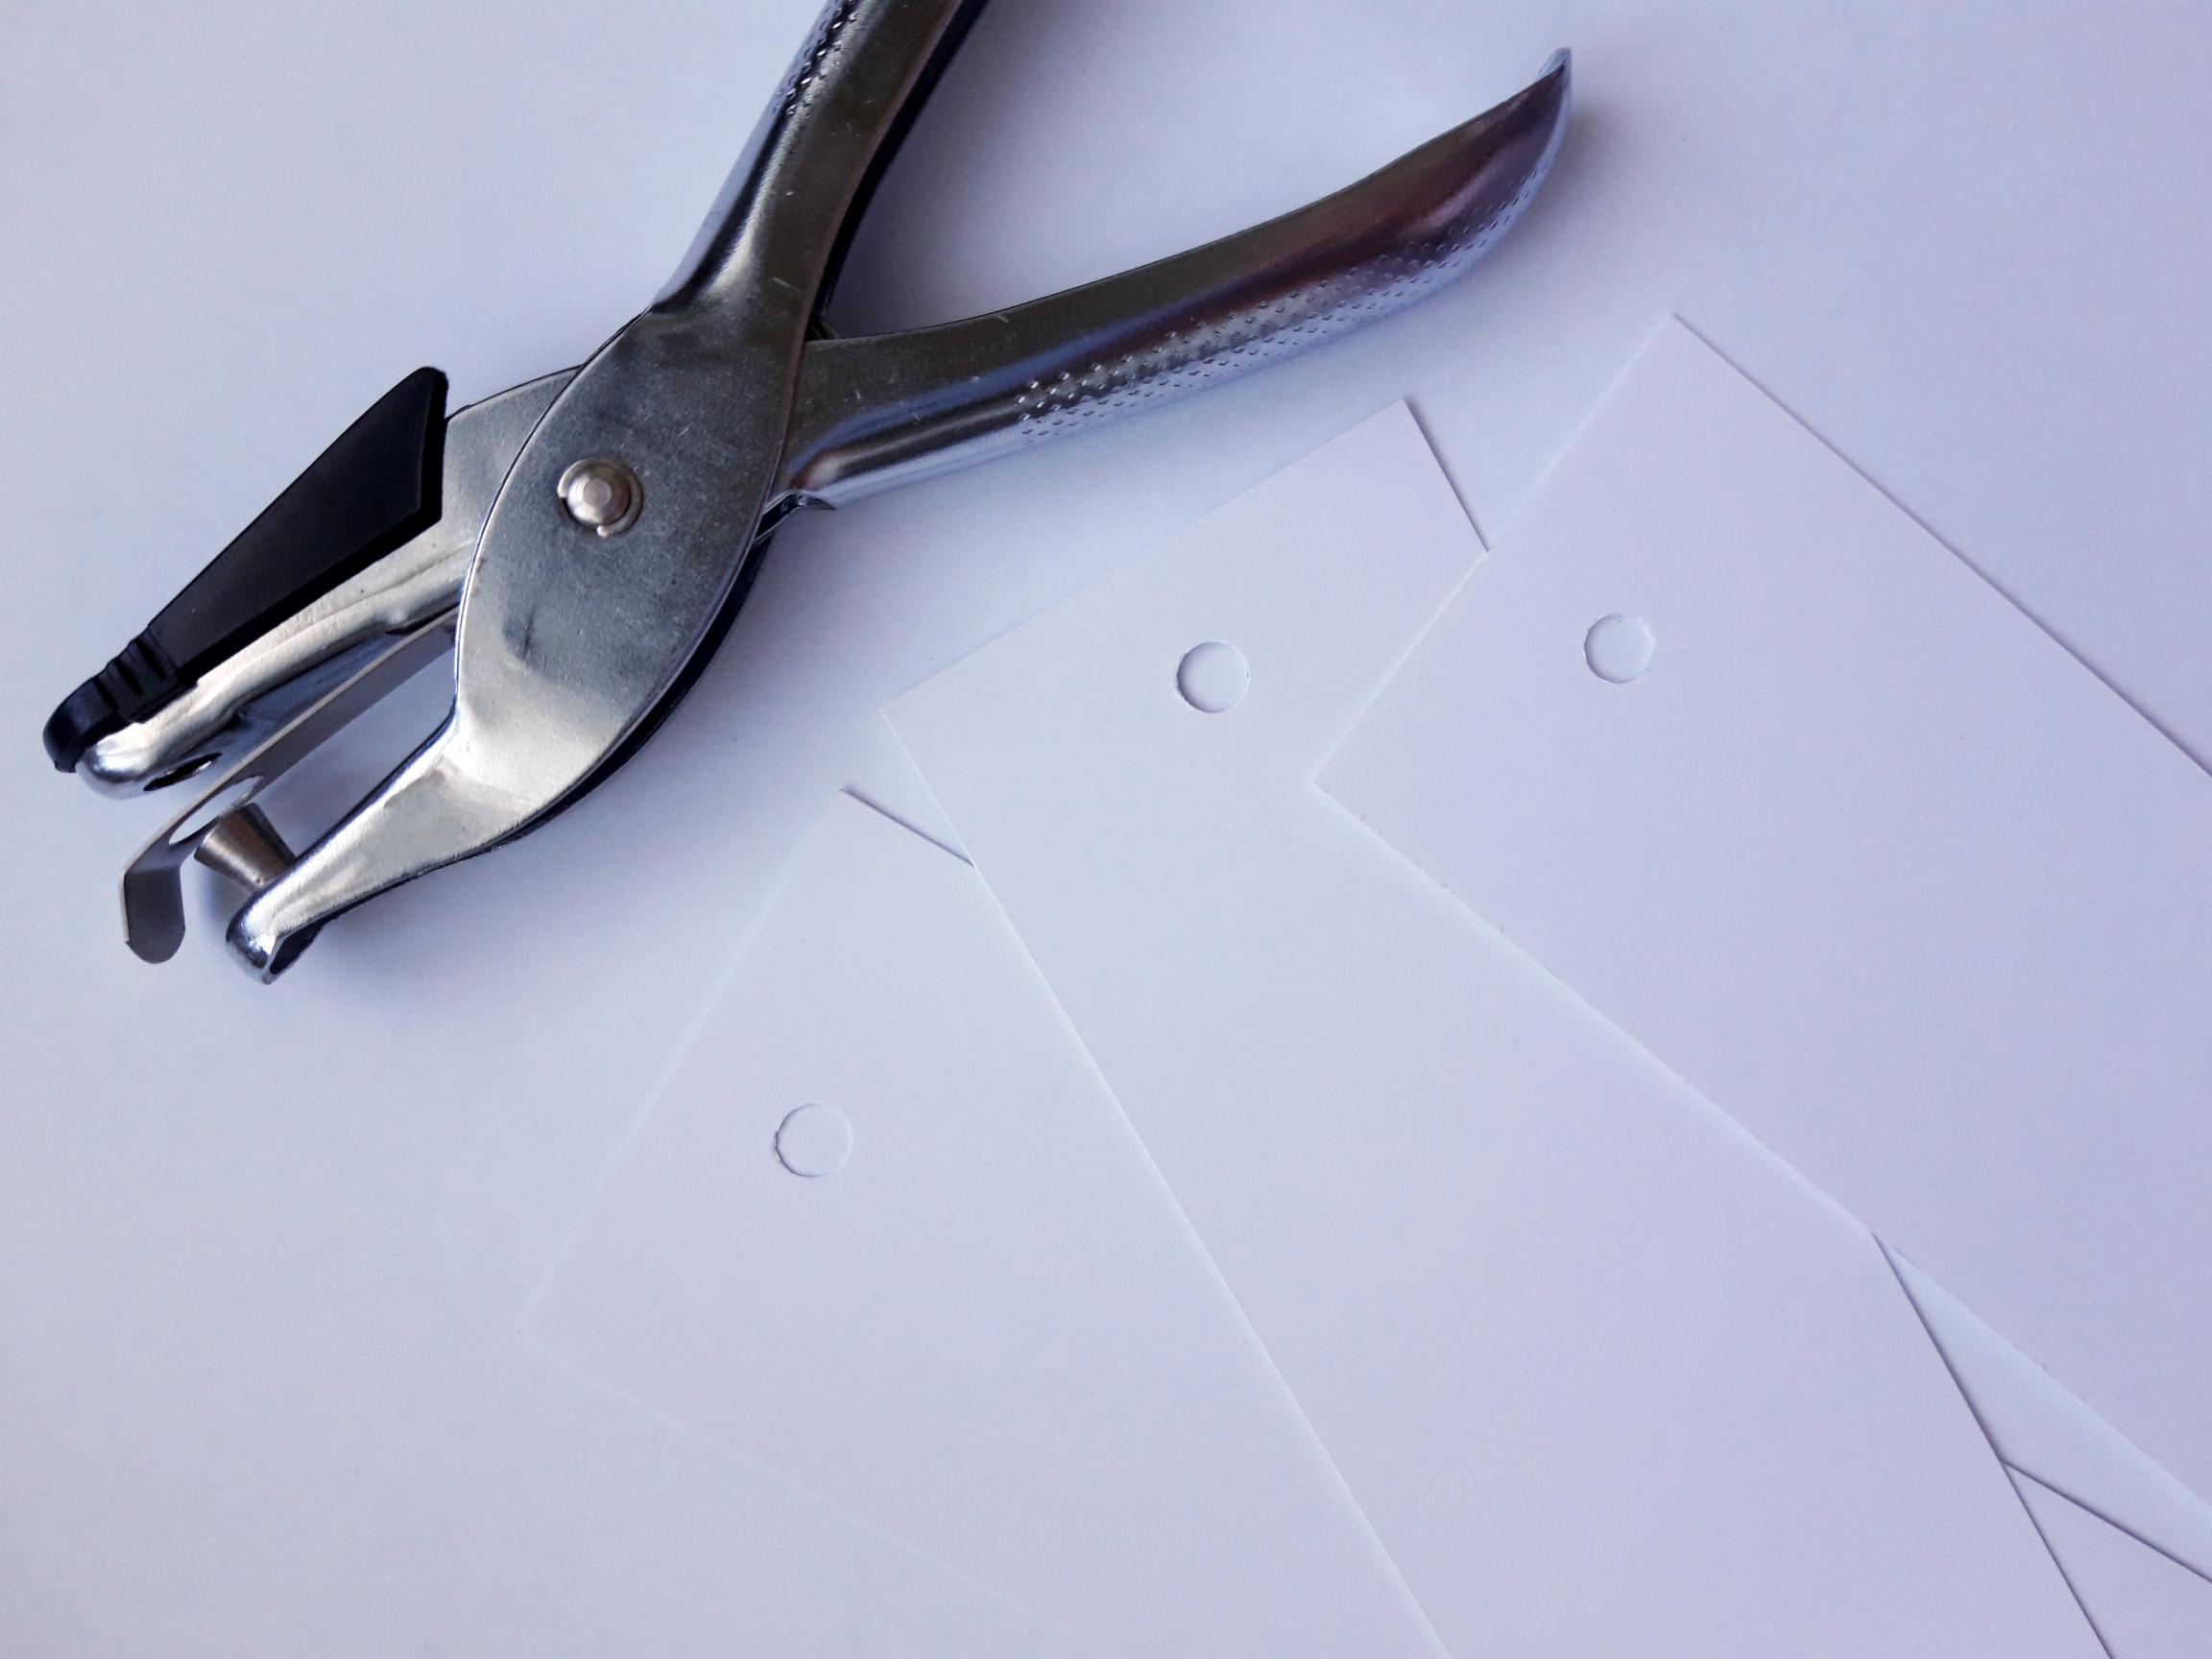
Use a hole punch on the other end, of each of the bookmarks. |
|
Apply some ink, from the Izink Aurore, on to a craft or glass mat. Spritz with a little water, then pick up the ink, on both sides, of one of the bookmarks. Dry the ink with a heat gun, or hang it up to dry. You can ink one side at a time, drying in between. Repeat these steps using the Izink Cerise, on both sides of the second bookmark, and the Izink Ocean on the third one. Dry all the ink thoroughly. |
|
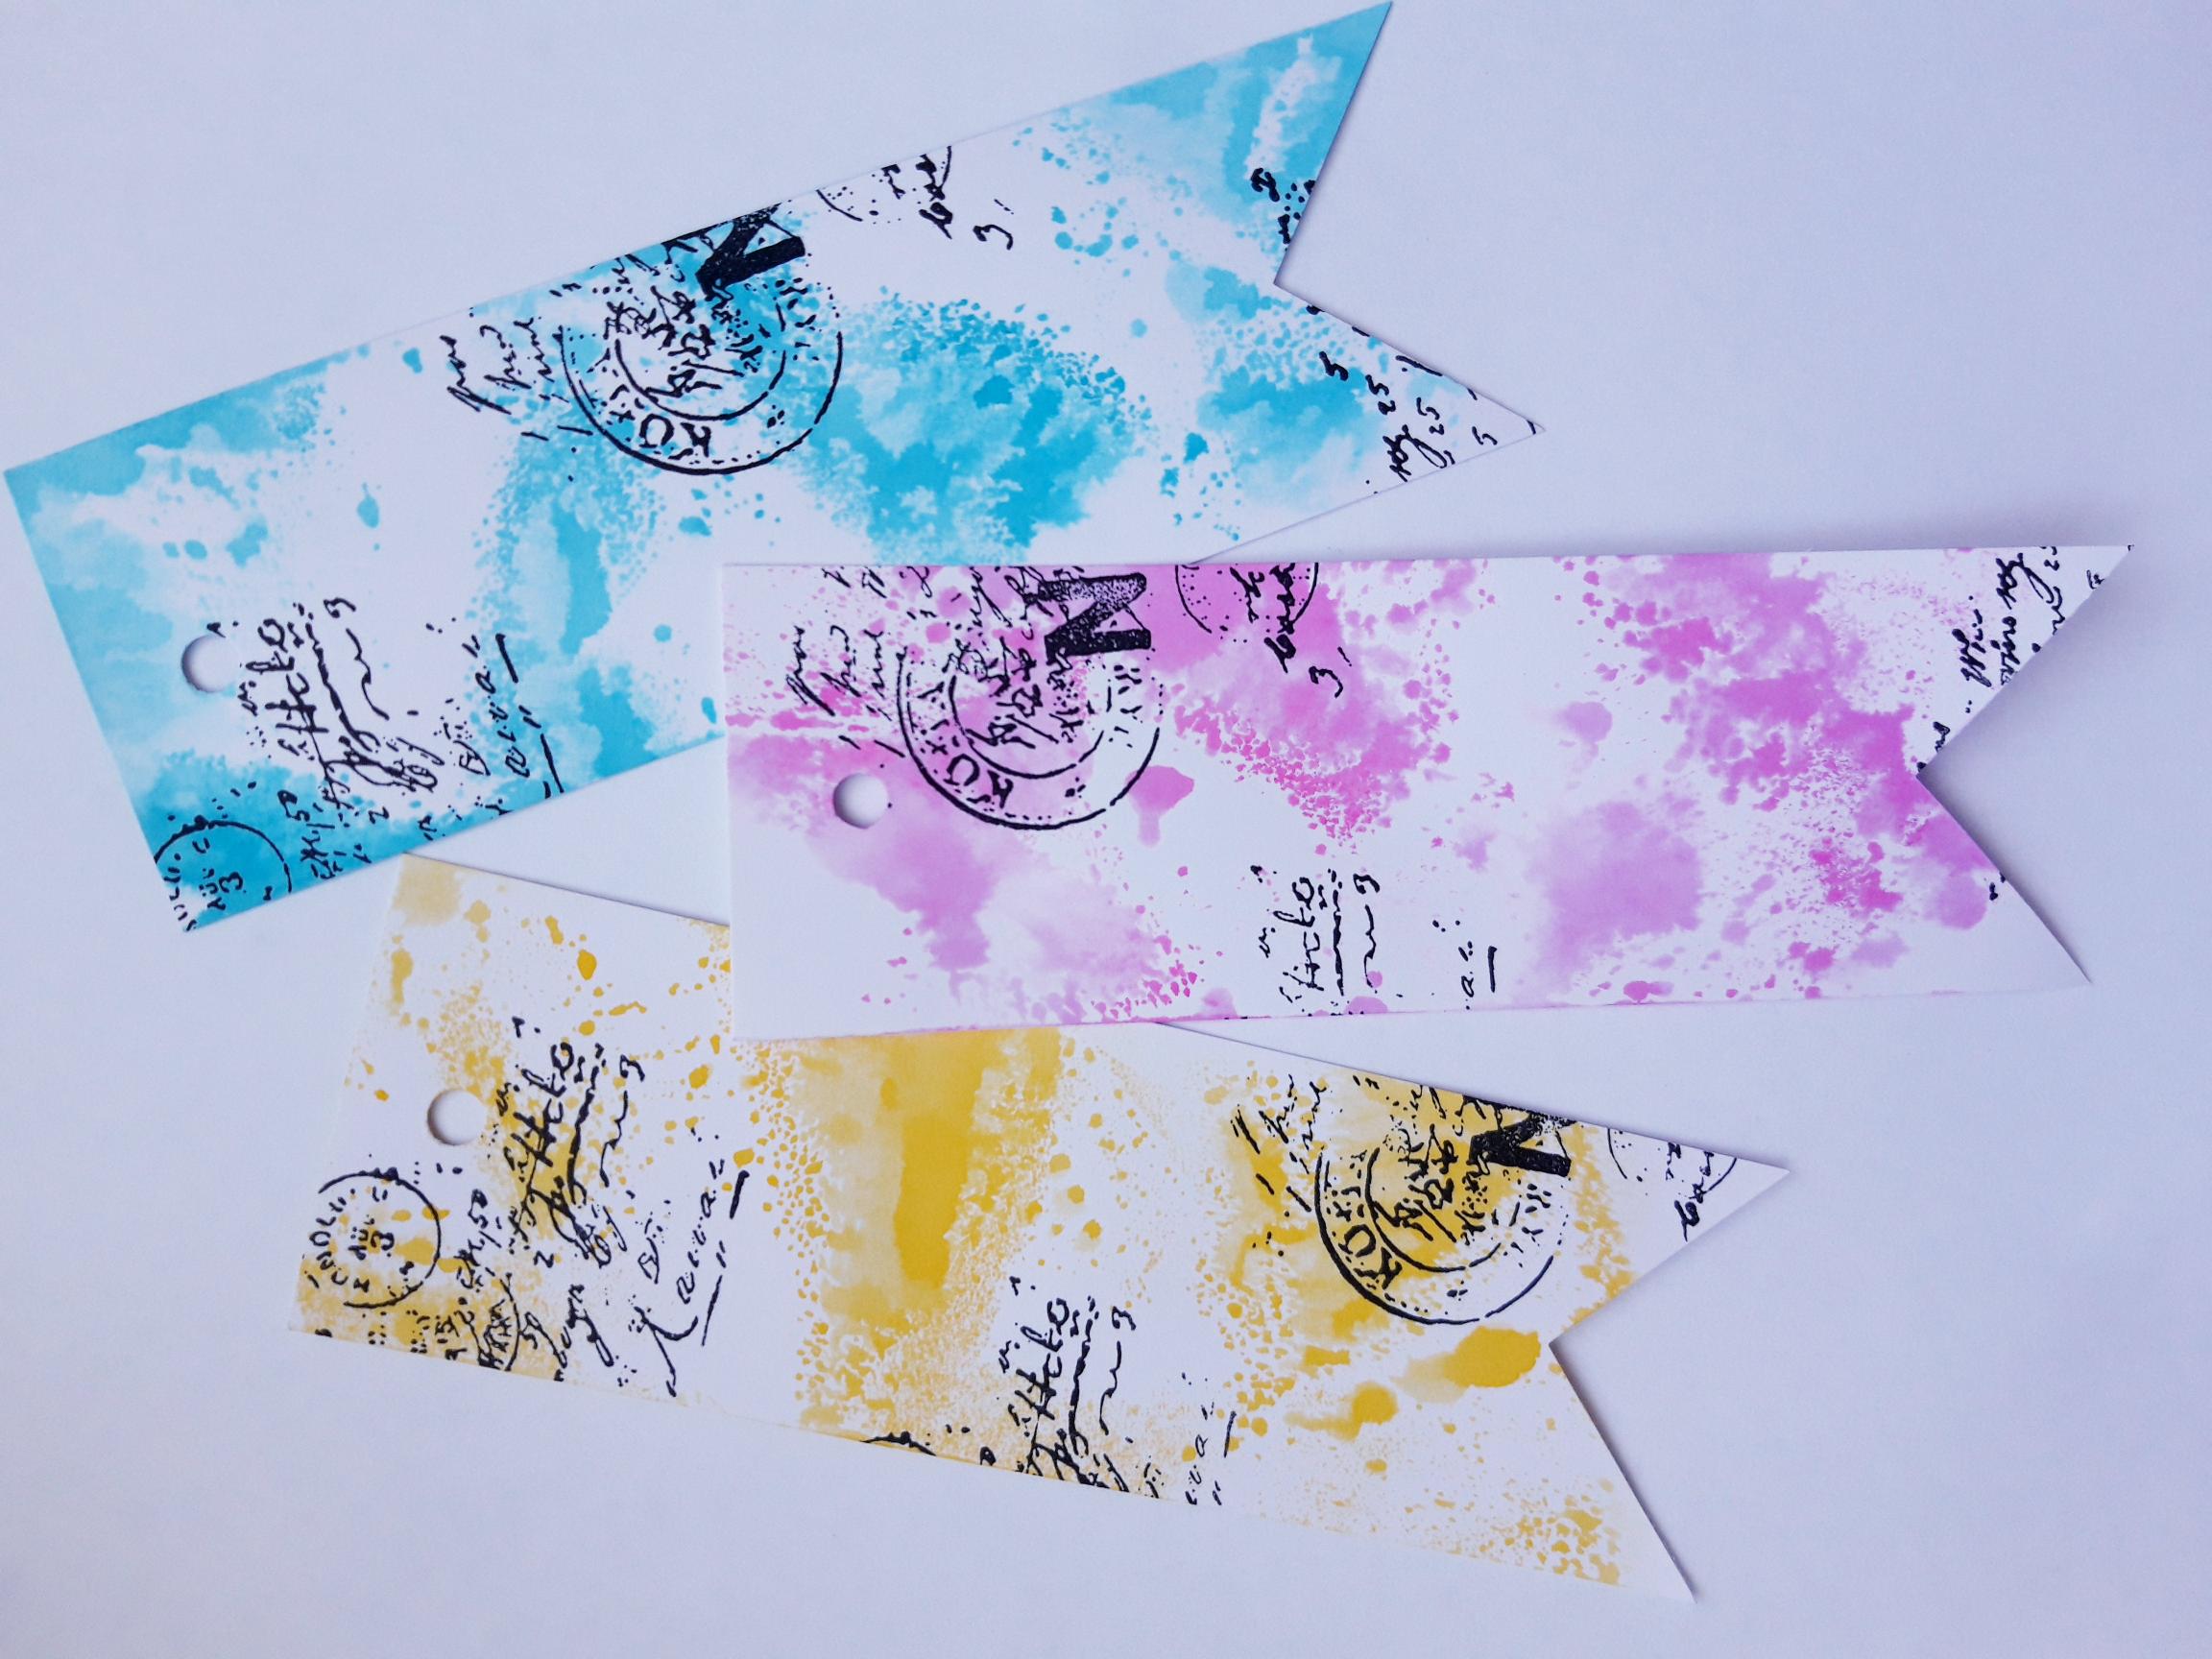
Ink up one, or more, of the stamps from the Retro Stamps Collection, in the Onyx Black Versafine. Randomly stamp on to one side of each of the bookmarks, ensuring some of the images are taken off the edges. Do not be to precise, as a random, distressed look is required. I chose to stamp on one side of each of my bookmarks, but you can do both sides if you wish. |
|
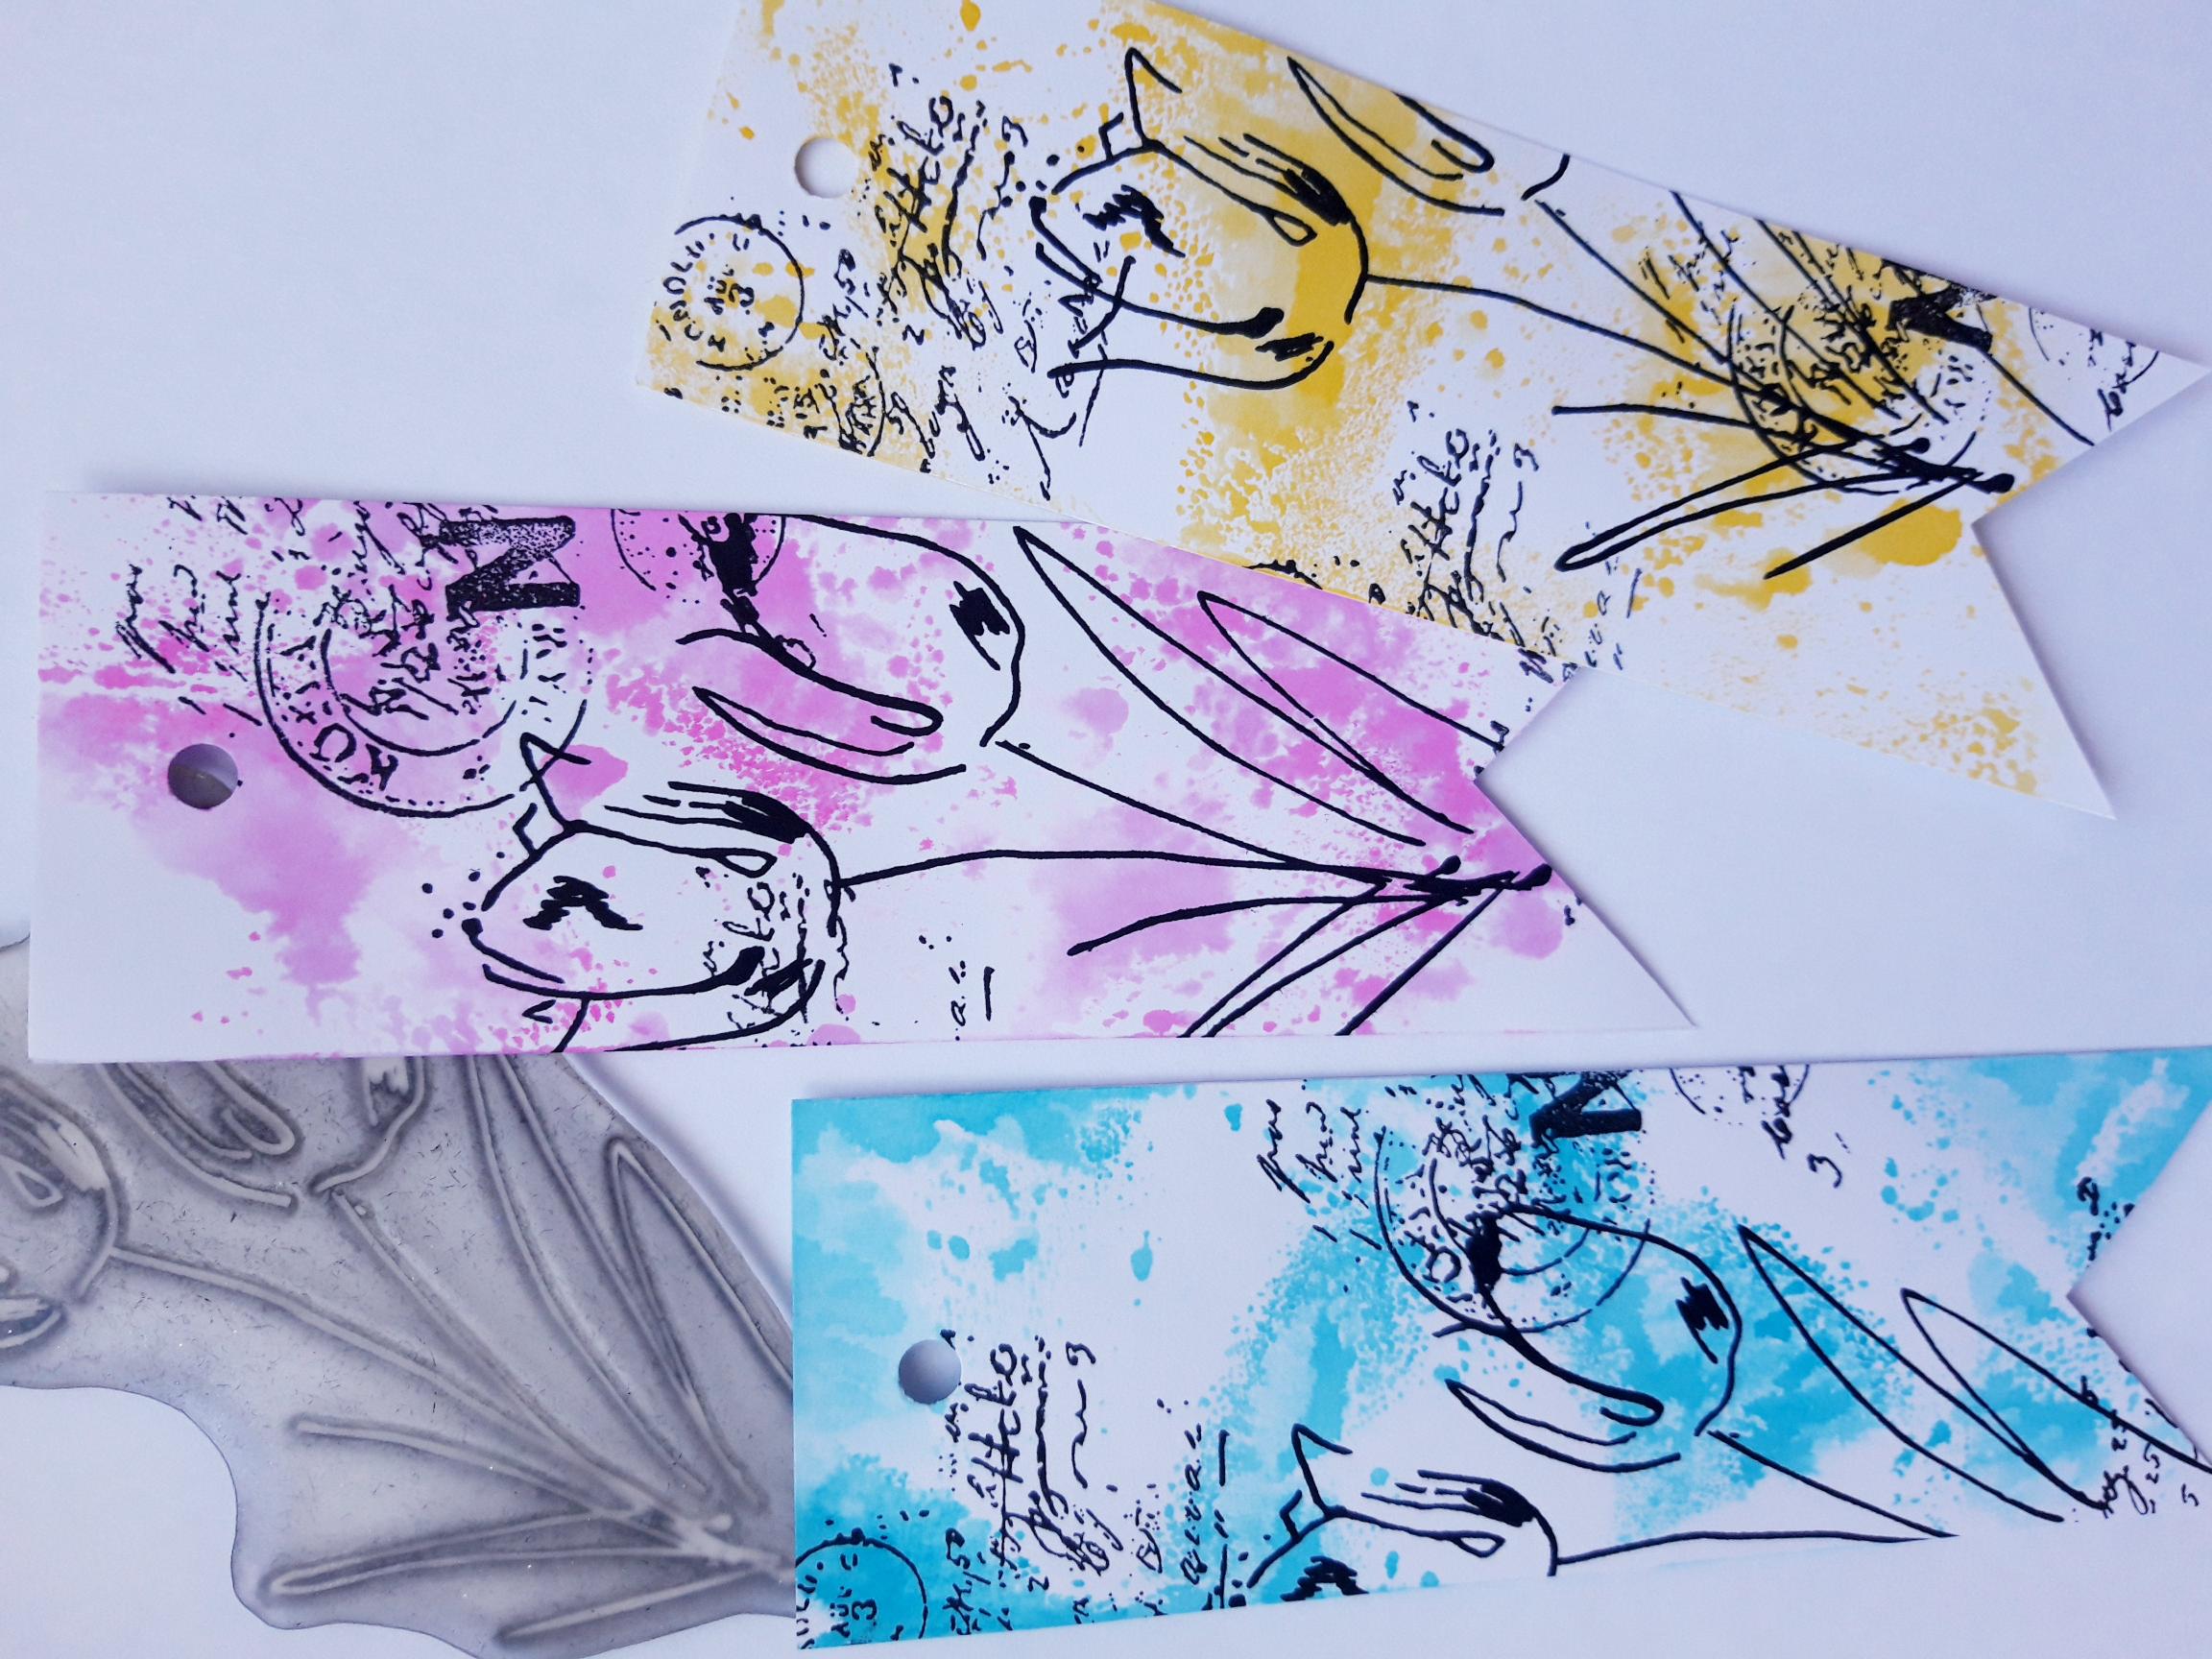
Ink up the detailed stamp, from the Hooray Lamination Stamp Collection, with the Onyx Black Versafine. On each of the Bookmarks, stamp your floral image in a different position. |
|
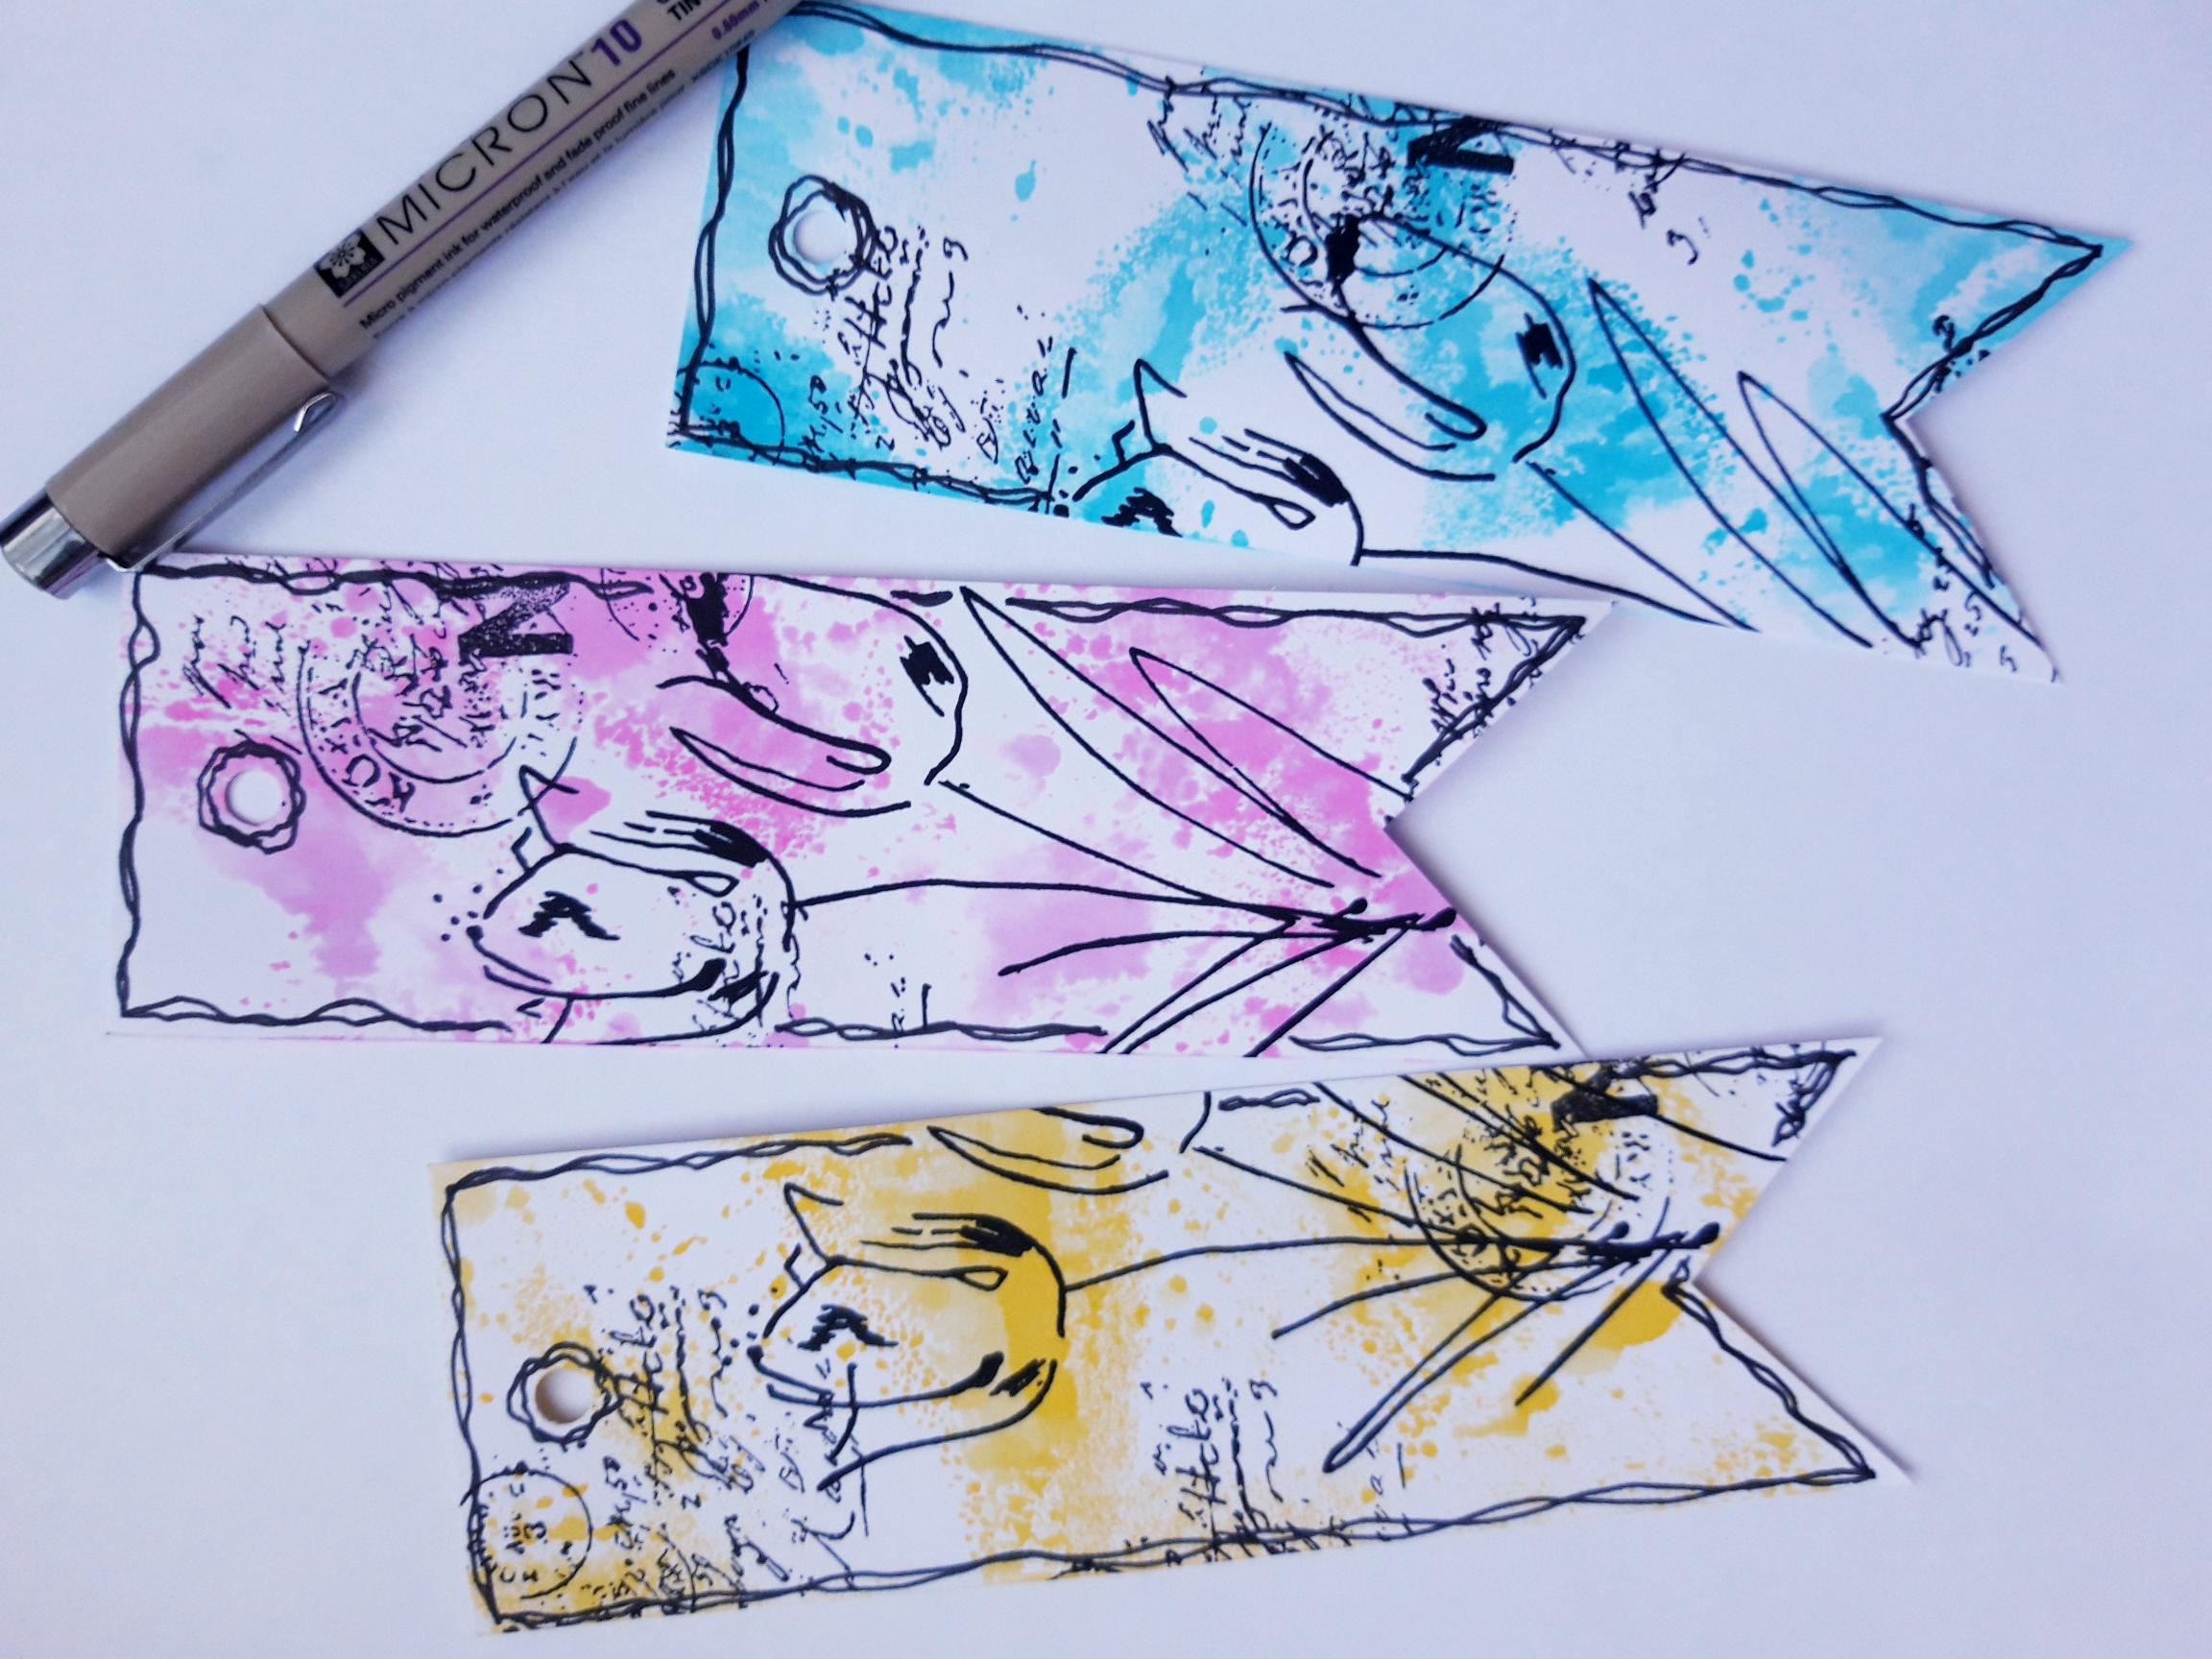
Use a black pen to draw a decorative, wiggly frame, around the bookmarks and the punched out holes. |
|
To finish, tie some Bakers Twine through each of the bookmarks. |