Give your friends $10 off their first order!
Refer a FRIEND


WHAT YOU WILL NEED:
White card blank 6 x 6"
Silver holographic/mirri card
White card
Let's Sing 6 x 6" Embossing Folder
Quattro D Rockin Around
Create Together Celebration Birthday Box: Cotton Pines: Sentiment Tabs
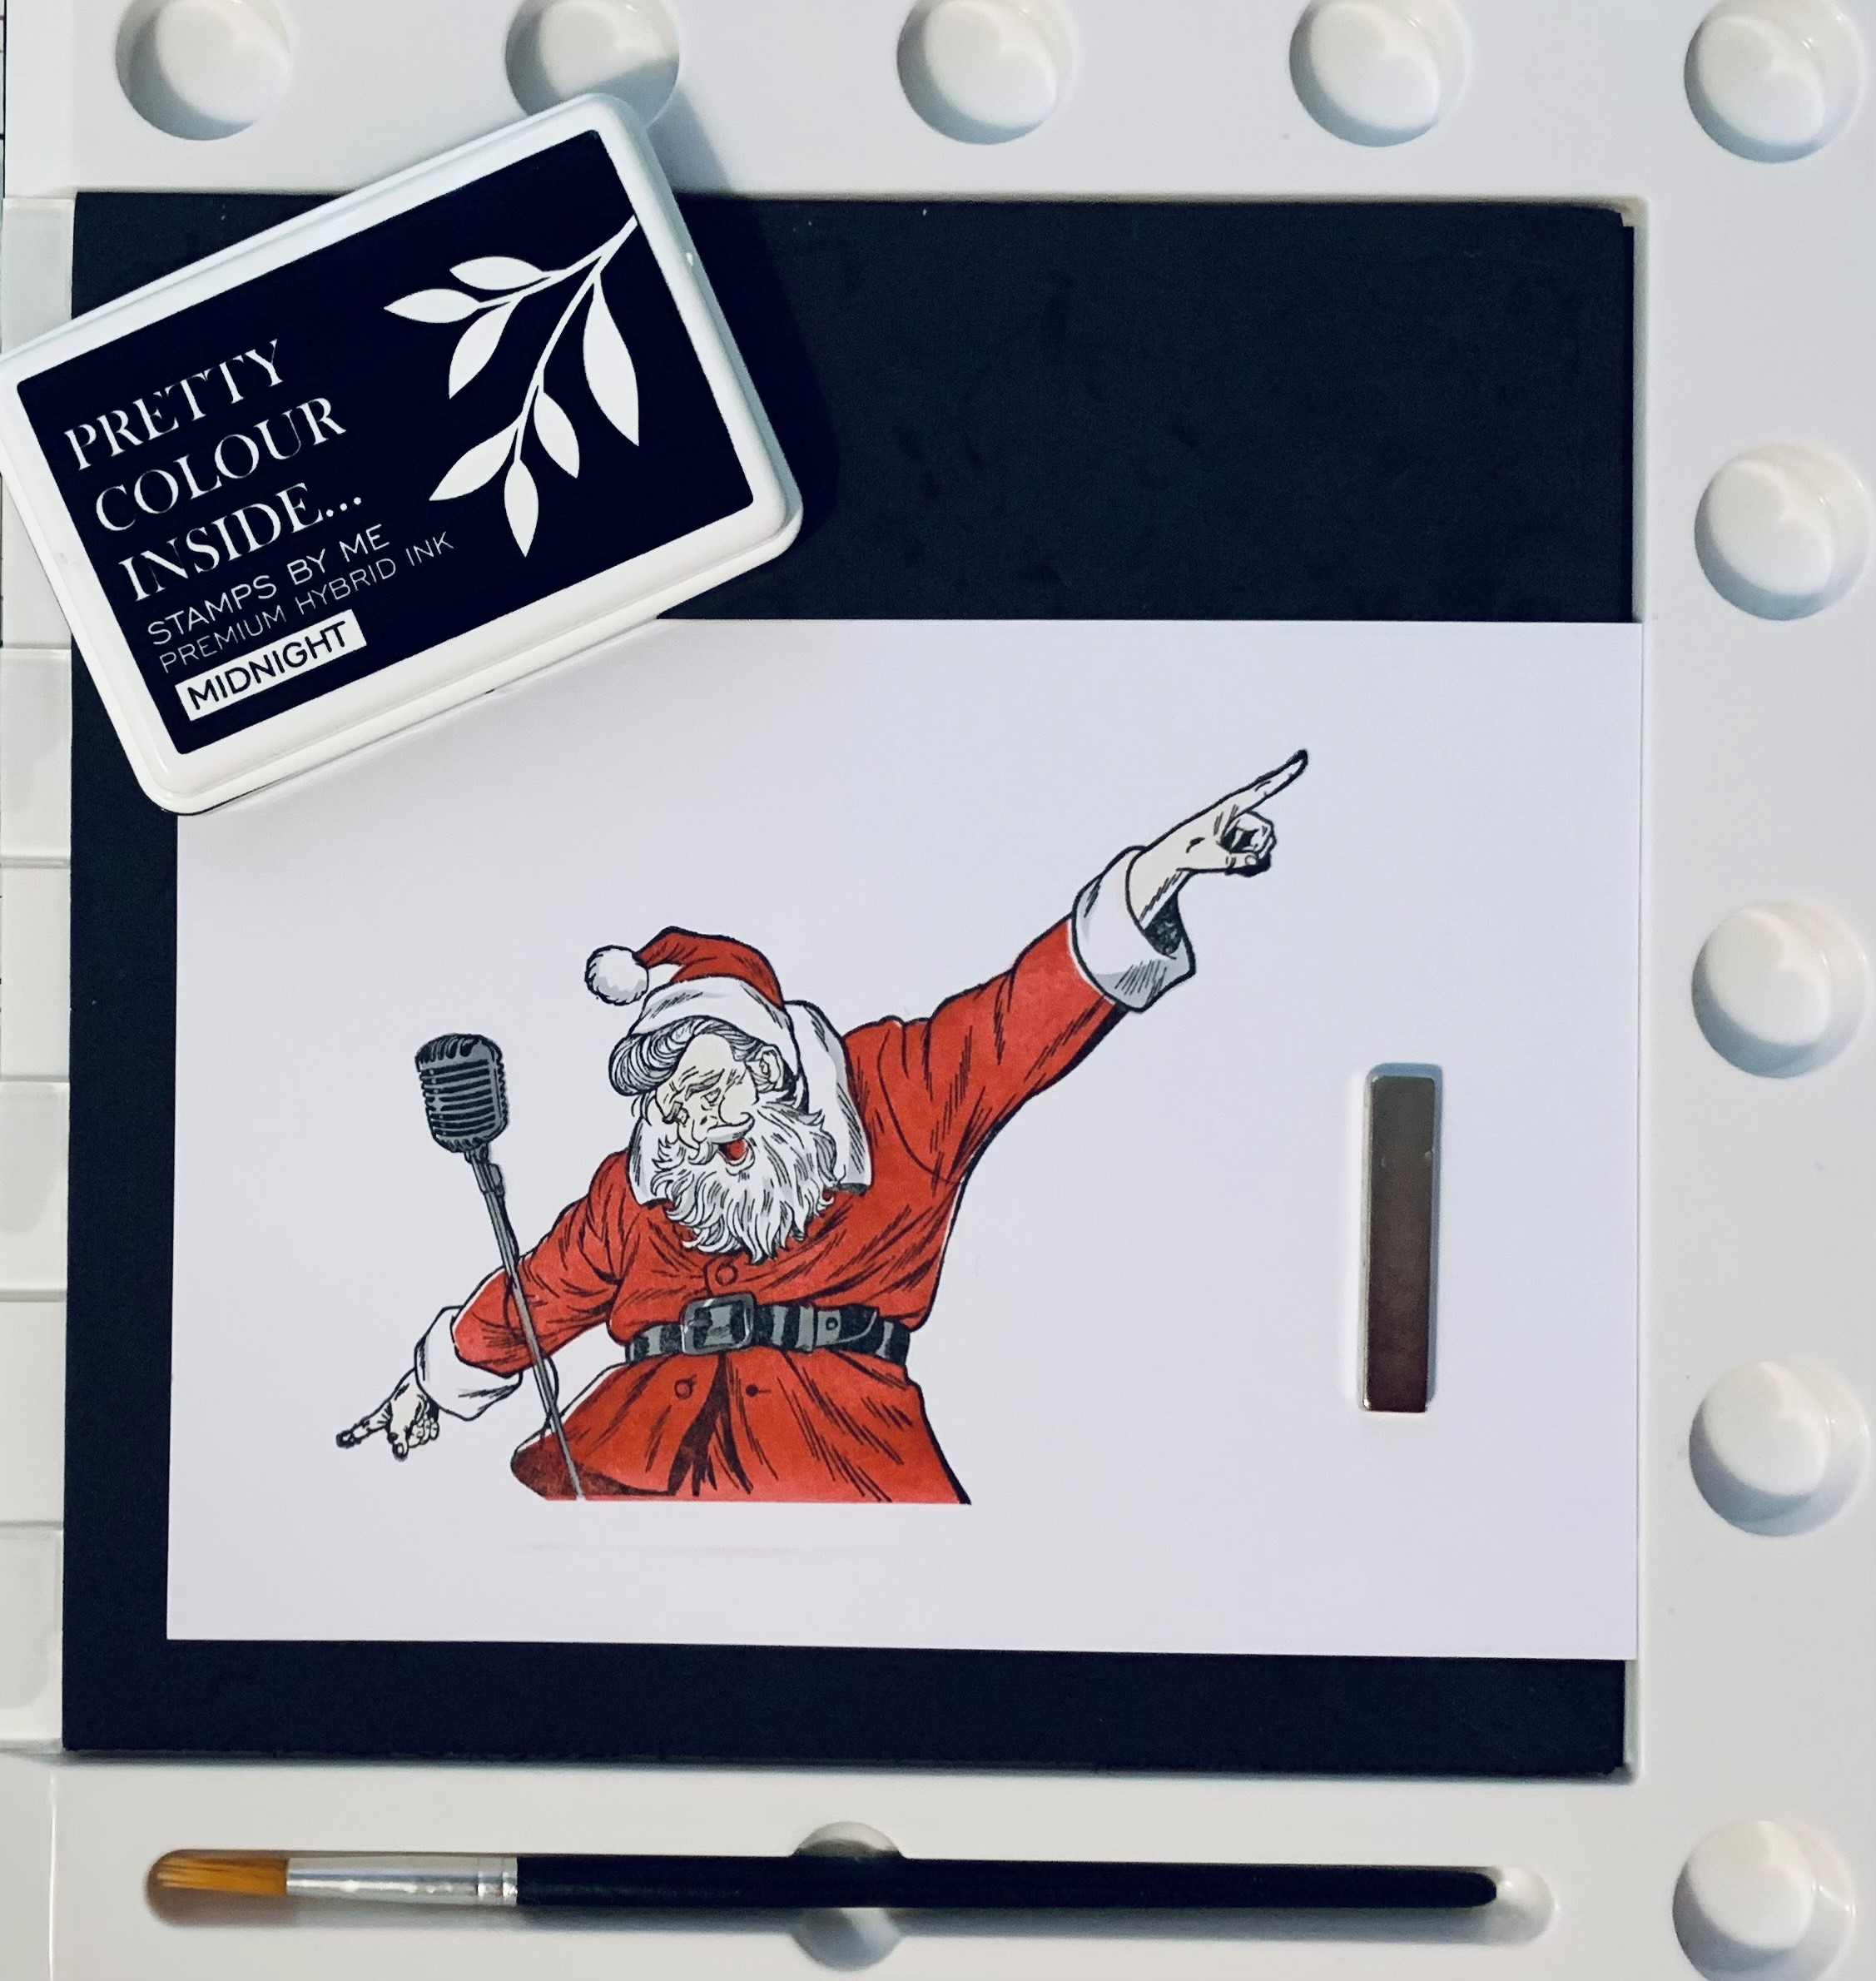
SBM Hybrid Ink Pad: Midnight
Distress Ink/Oxide Ink pad: Black Soot, Fired Brick, Festive Berries, Tattered Rose
Blending brush
Eureka 101 Watercolour Table
SBM A3 Magnetic glass mat
Paper Trimmer
Glue, foam pads, double-sided adhesive tape
Die Cutting machine
[click image to enlarge] 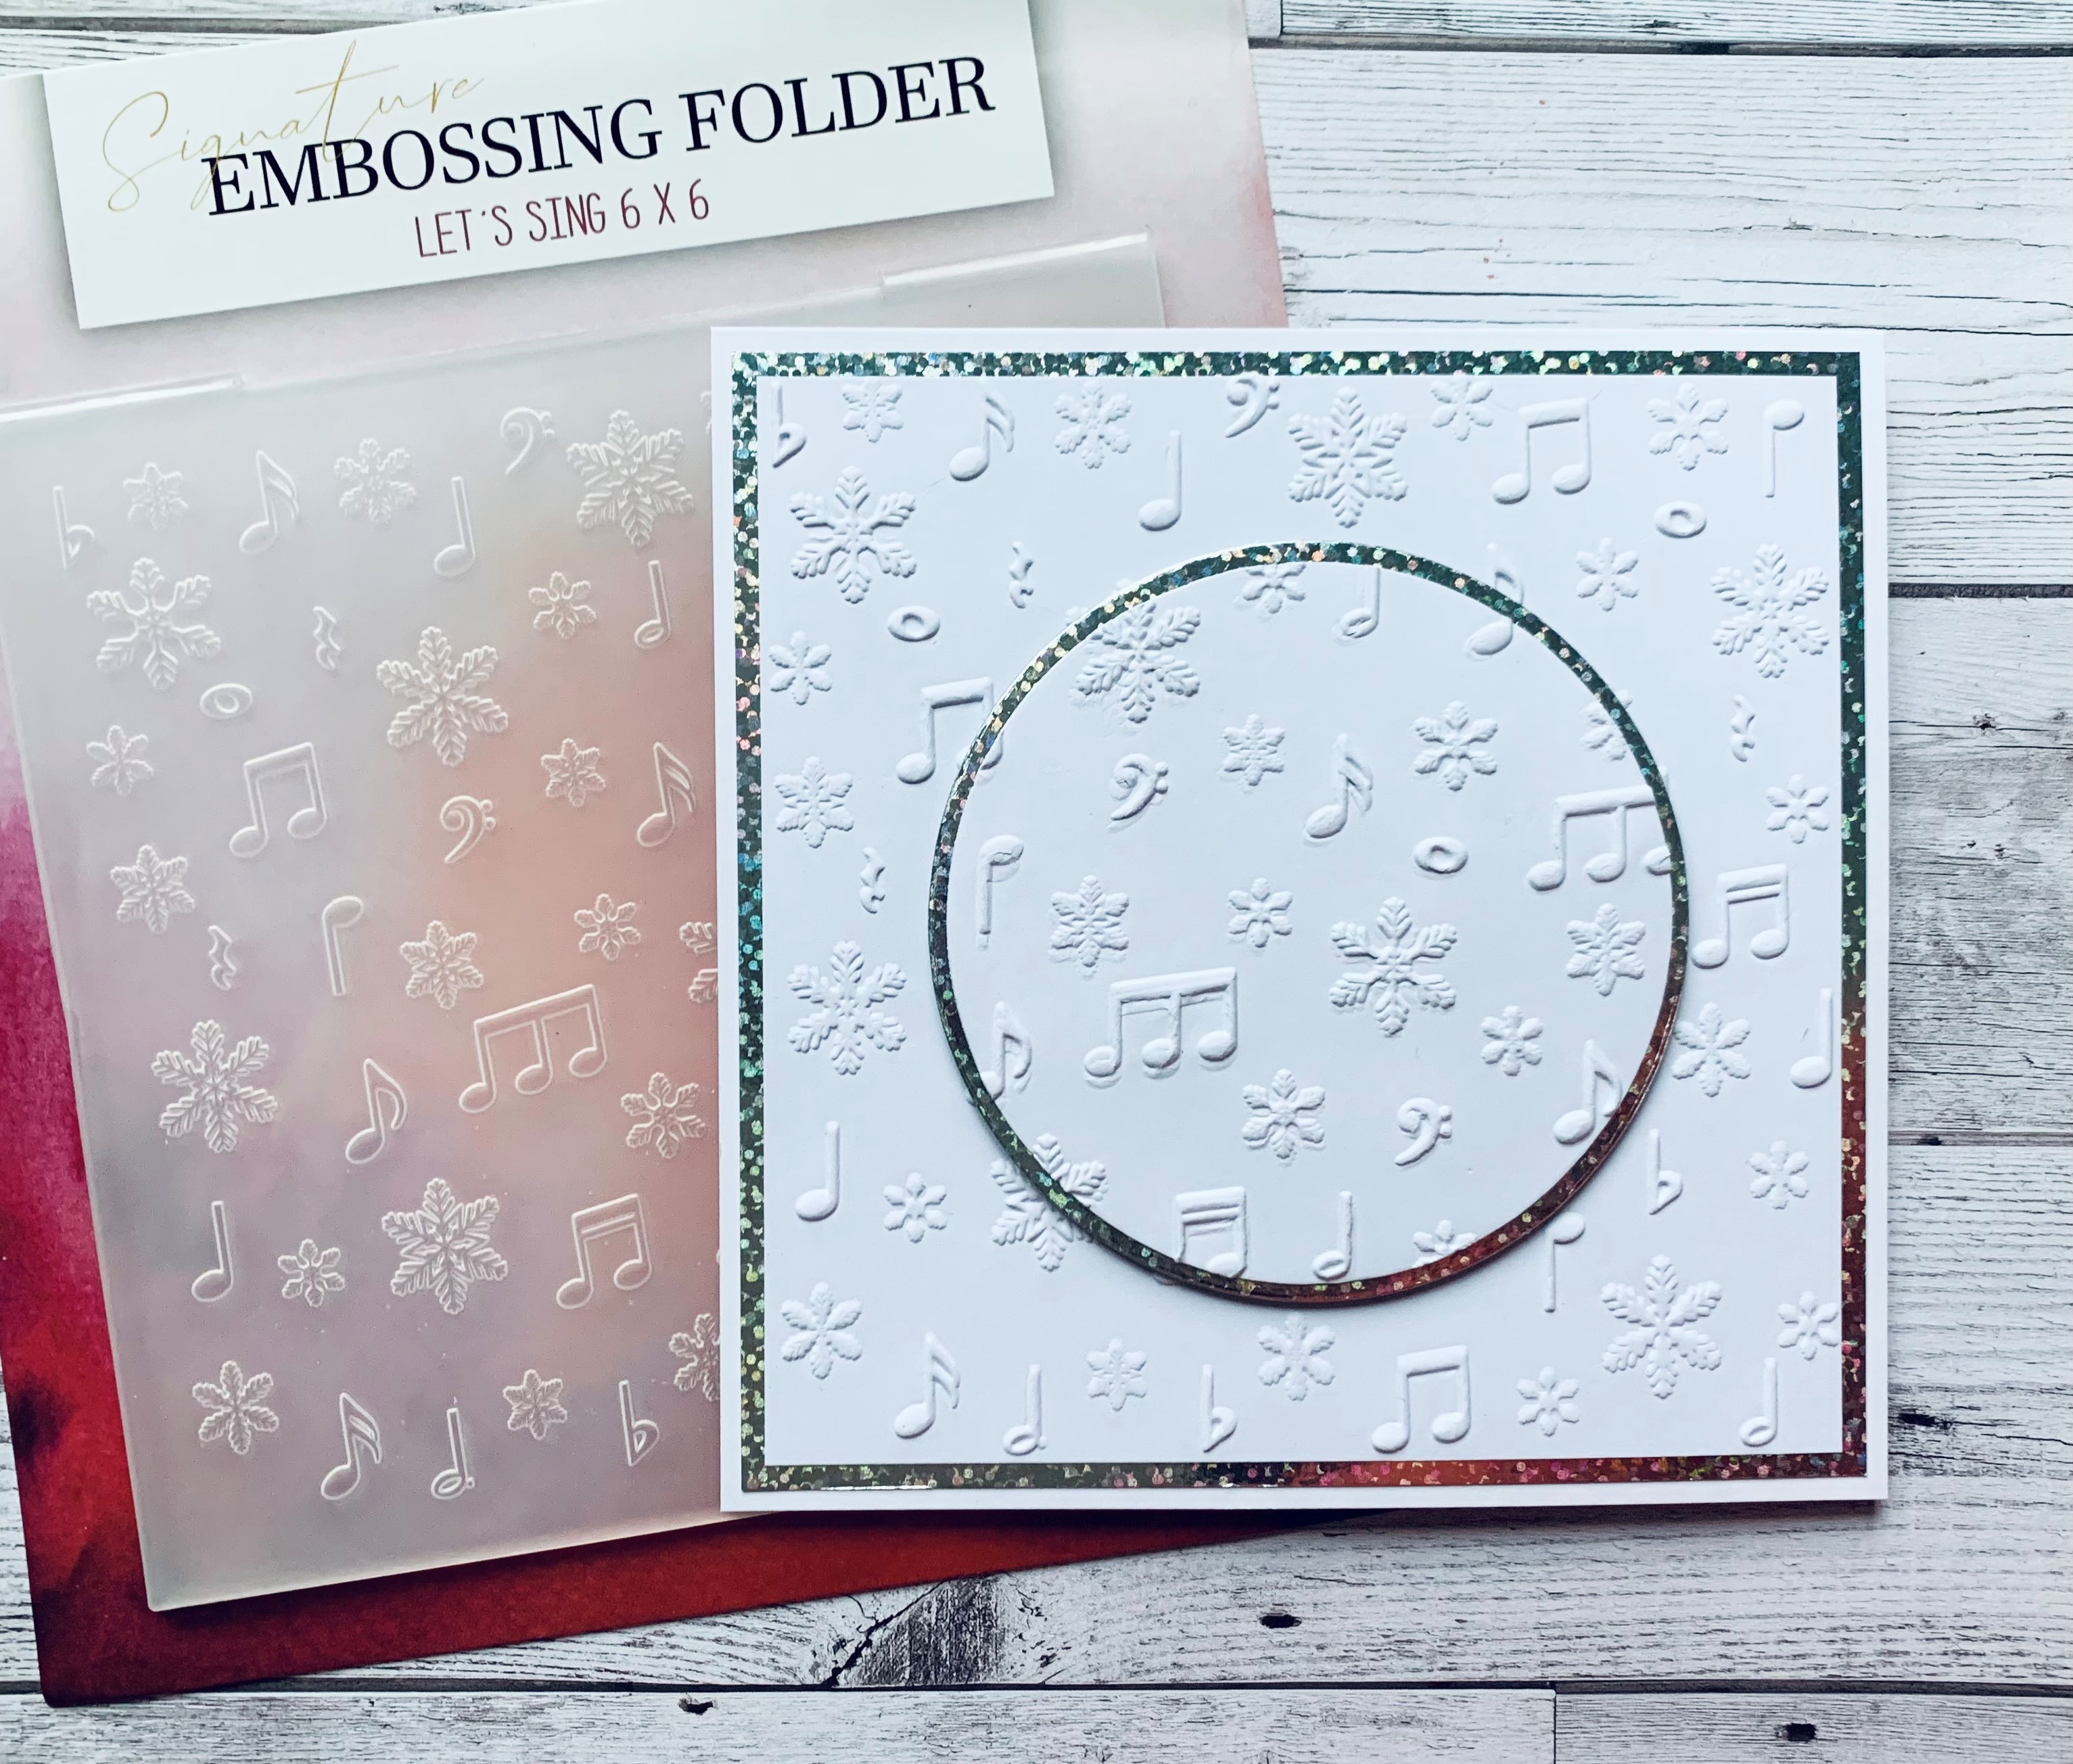
|
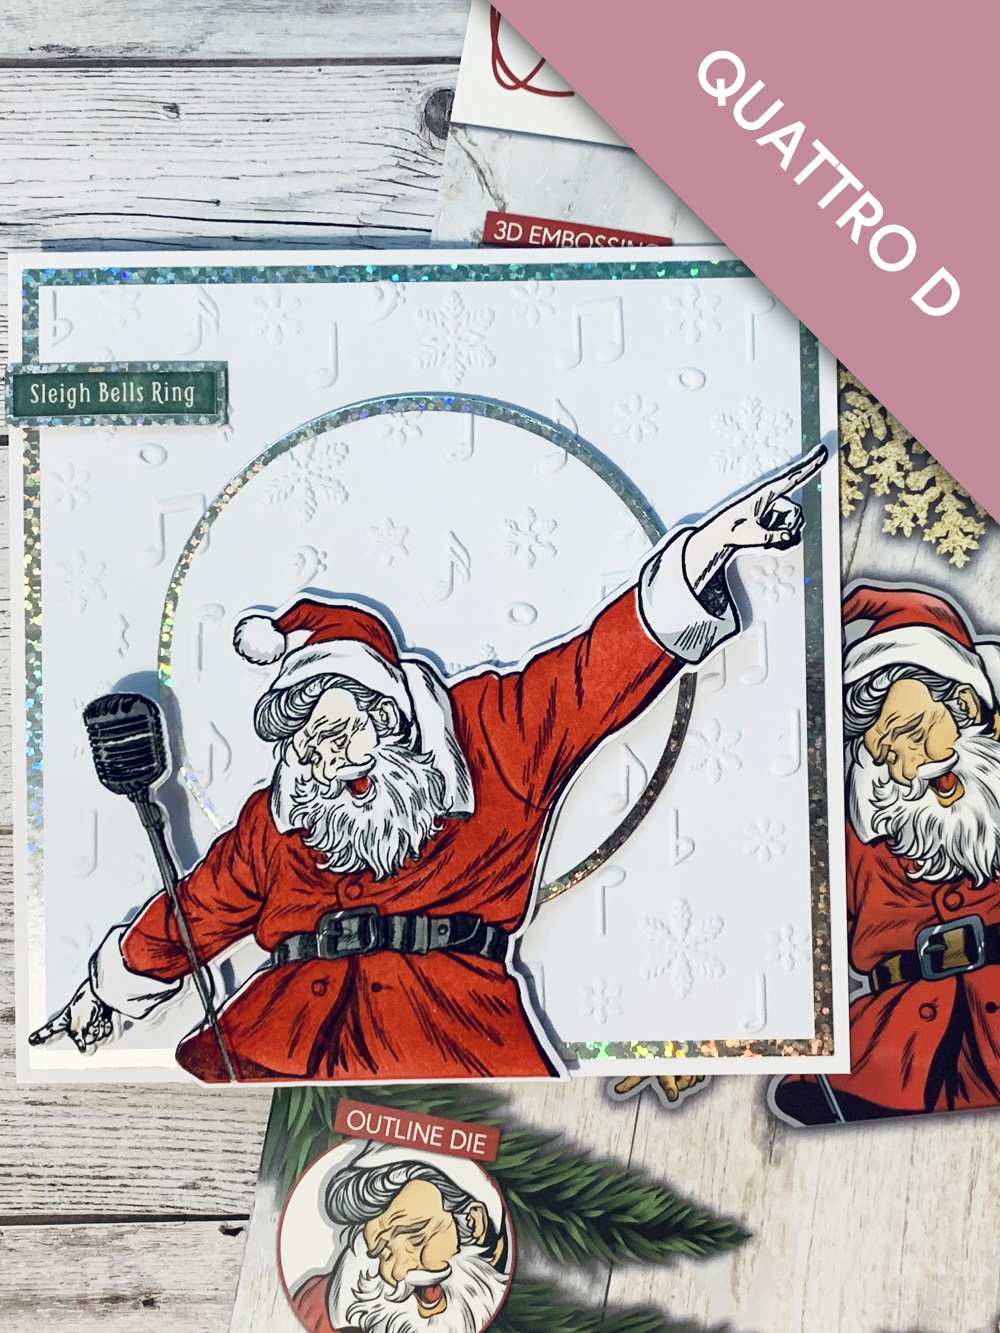
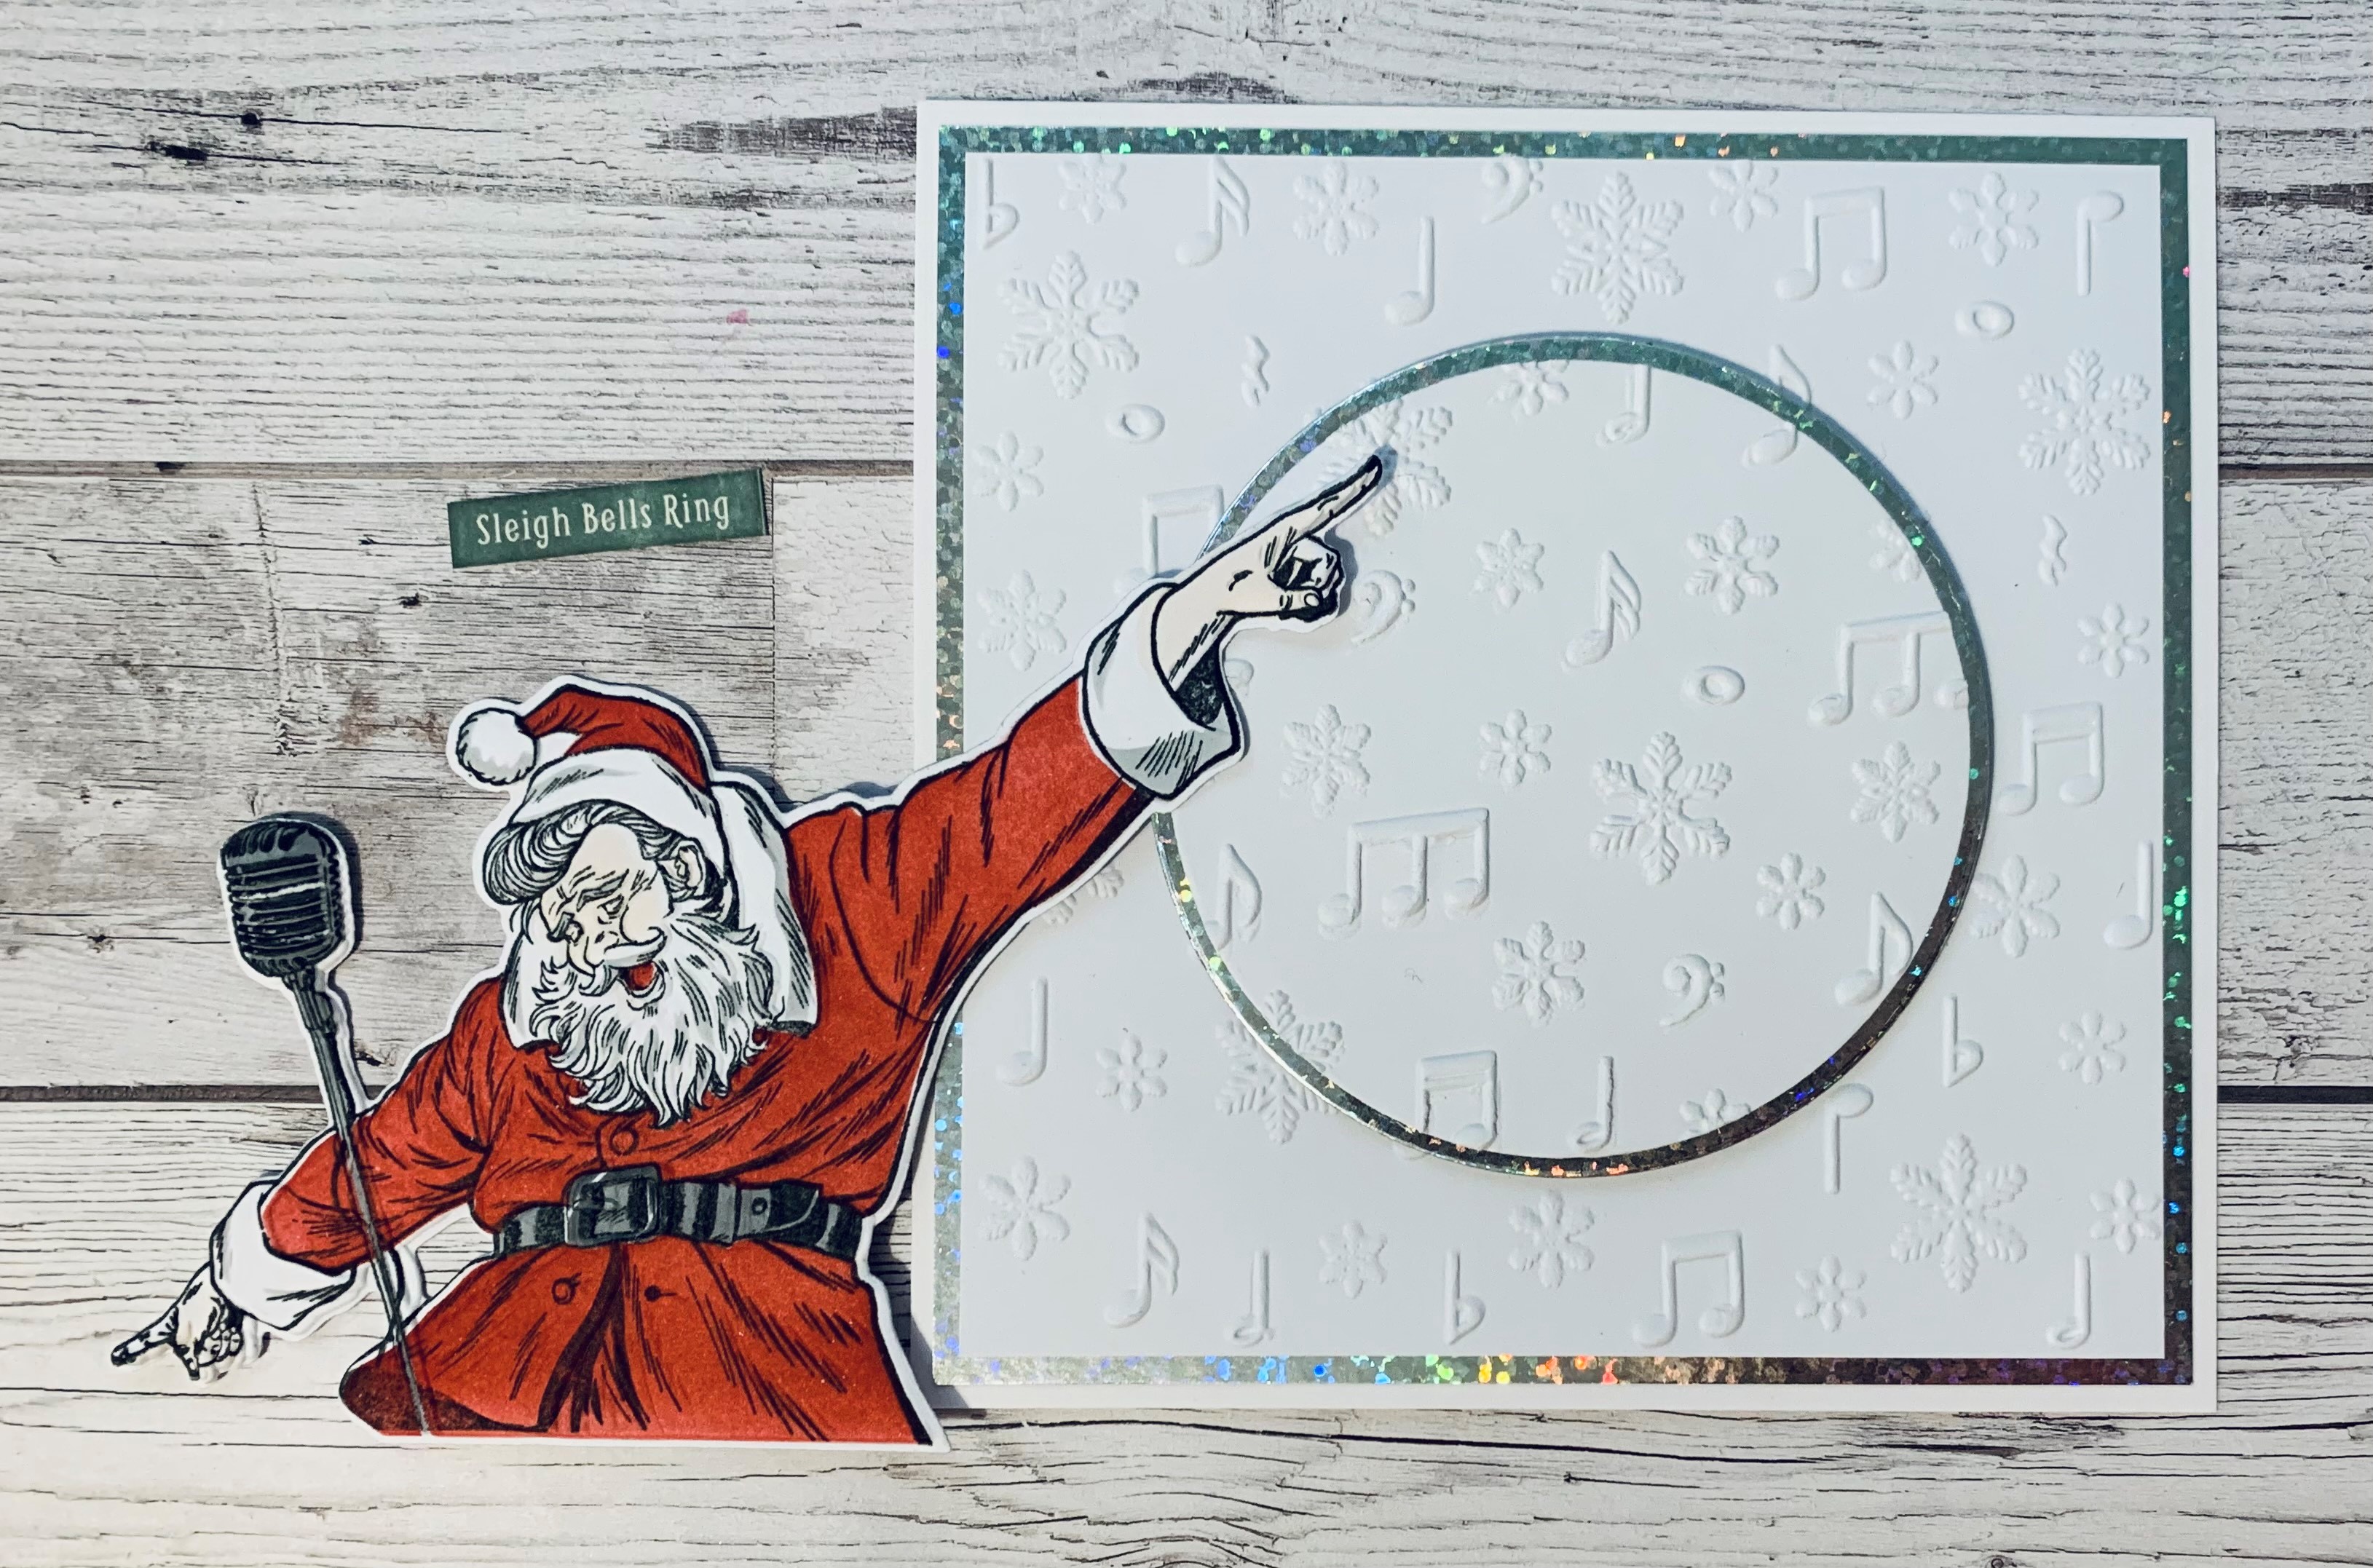
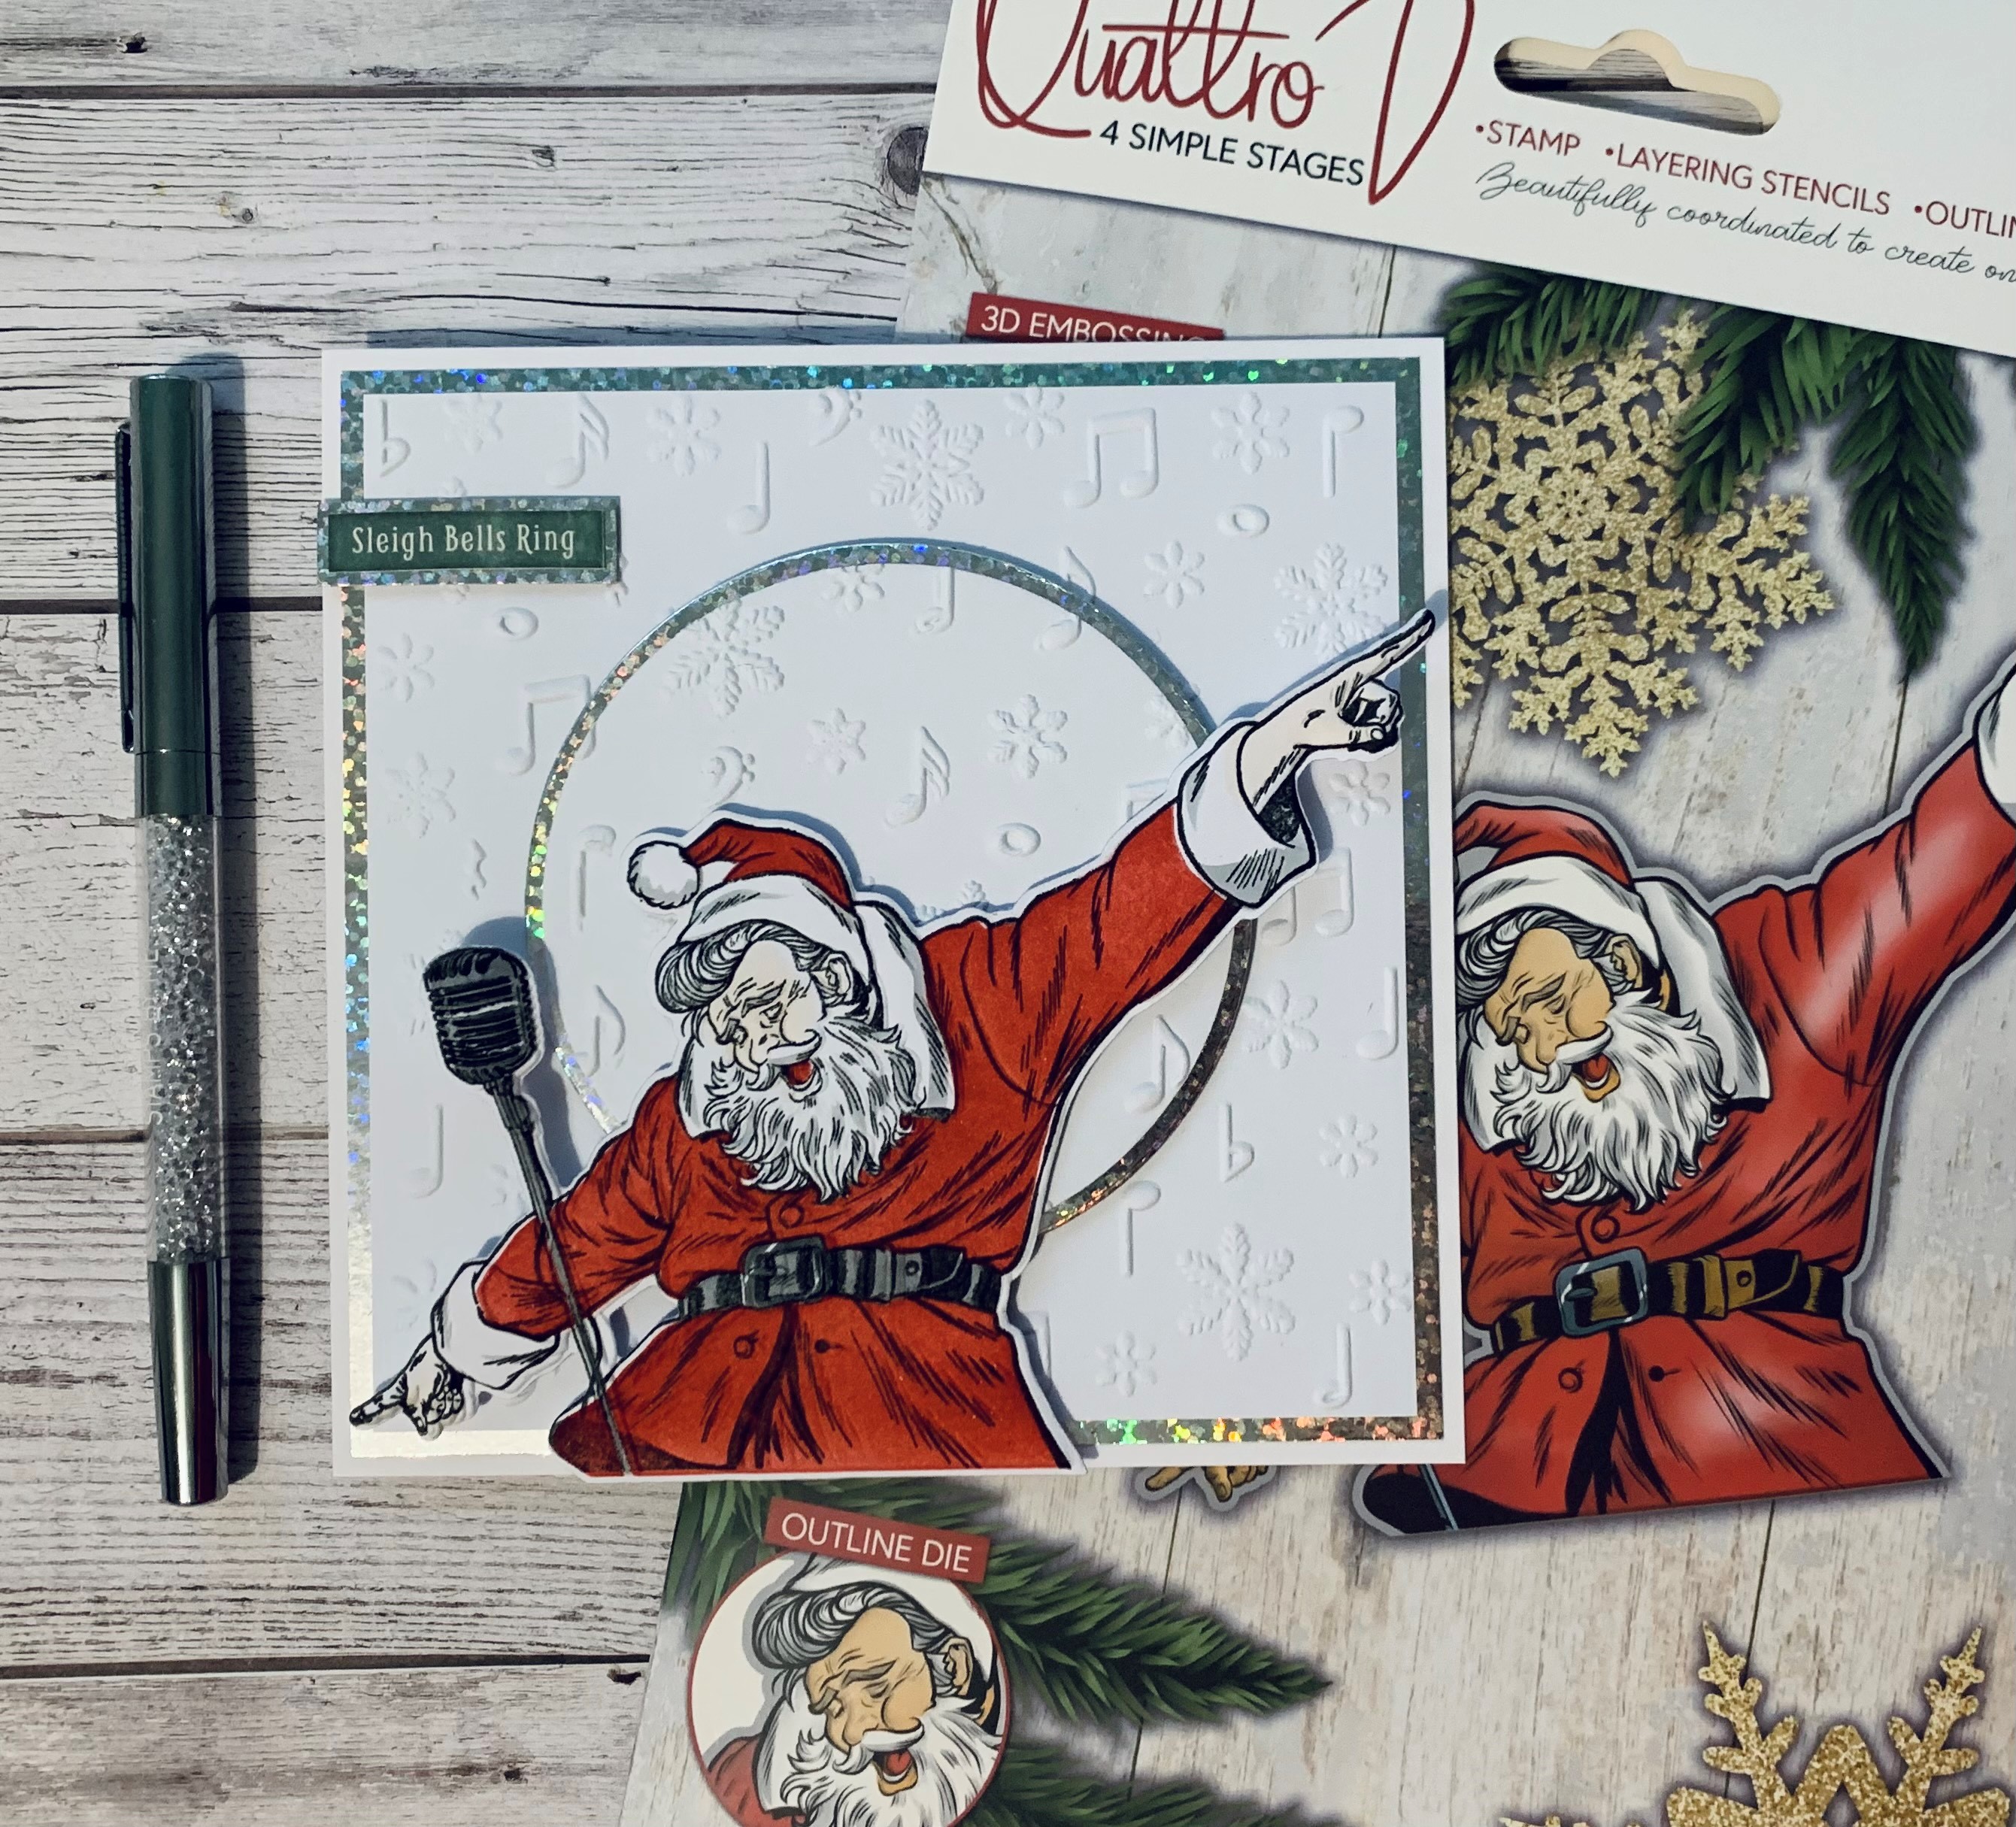
Adhere a piece of silver card measuring 5 3/4 by 5 3/4" to the front of a white 6 x 6" card blank. Emboss another piece of white card 5 1/2" square, with your Let's Sing embossing folder and adhere on the top of the silver card. Die cut a silver circle and a slightly smaller one in white card. Position the white circle card in the centre of the Let’s Sing folder and emboss. Matt and layer both circles together and stick to the card front using foam pads. |
|
Using your Distress inks, build up each of your stencilled layers from the Rockin Around Quattro D, on to a piece of white card. Stamp the Santa over the top, with your Midnight ink. |
|
Use the coordinating die to cut Santa out before lining him up, inside the embossing folder and running it through your machine. |
|
Cut out your chosen sentiment and matt onto the silver card. Using foam pads, add Santa to the front of the card and glue the sentiment, from Cotton Pines, in the top left corner to finish. |