Give your friends $10 off their first order!
Refer a FRIEND


WHAT YOU WILL NEED:
White card blank 7 1/4" square
Vellum
All Surfaces Perfect Day 8 x 8" Paper Pad
All Surfaces Holographic 8 x 8" Paper pad
Christmas Poinsettias Embossing Folder
Special Wishes Stamp and Die
Funky Fossil Snowflakes Stencil
Distress Ink/Oxide Ink Pad: Kitsch Flamingo
Blending brush
SBM Pigment Ink Pad: Cotton
WOW embossing ink pad
WOW heat tool
WOW white embossing powder
Anti-static bag
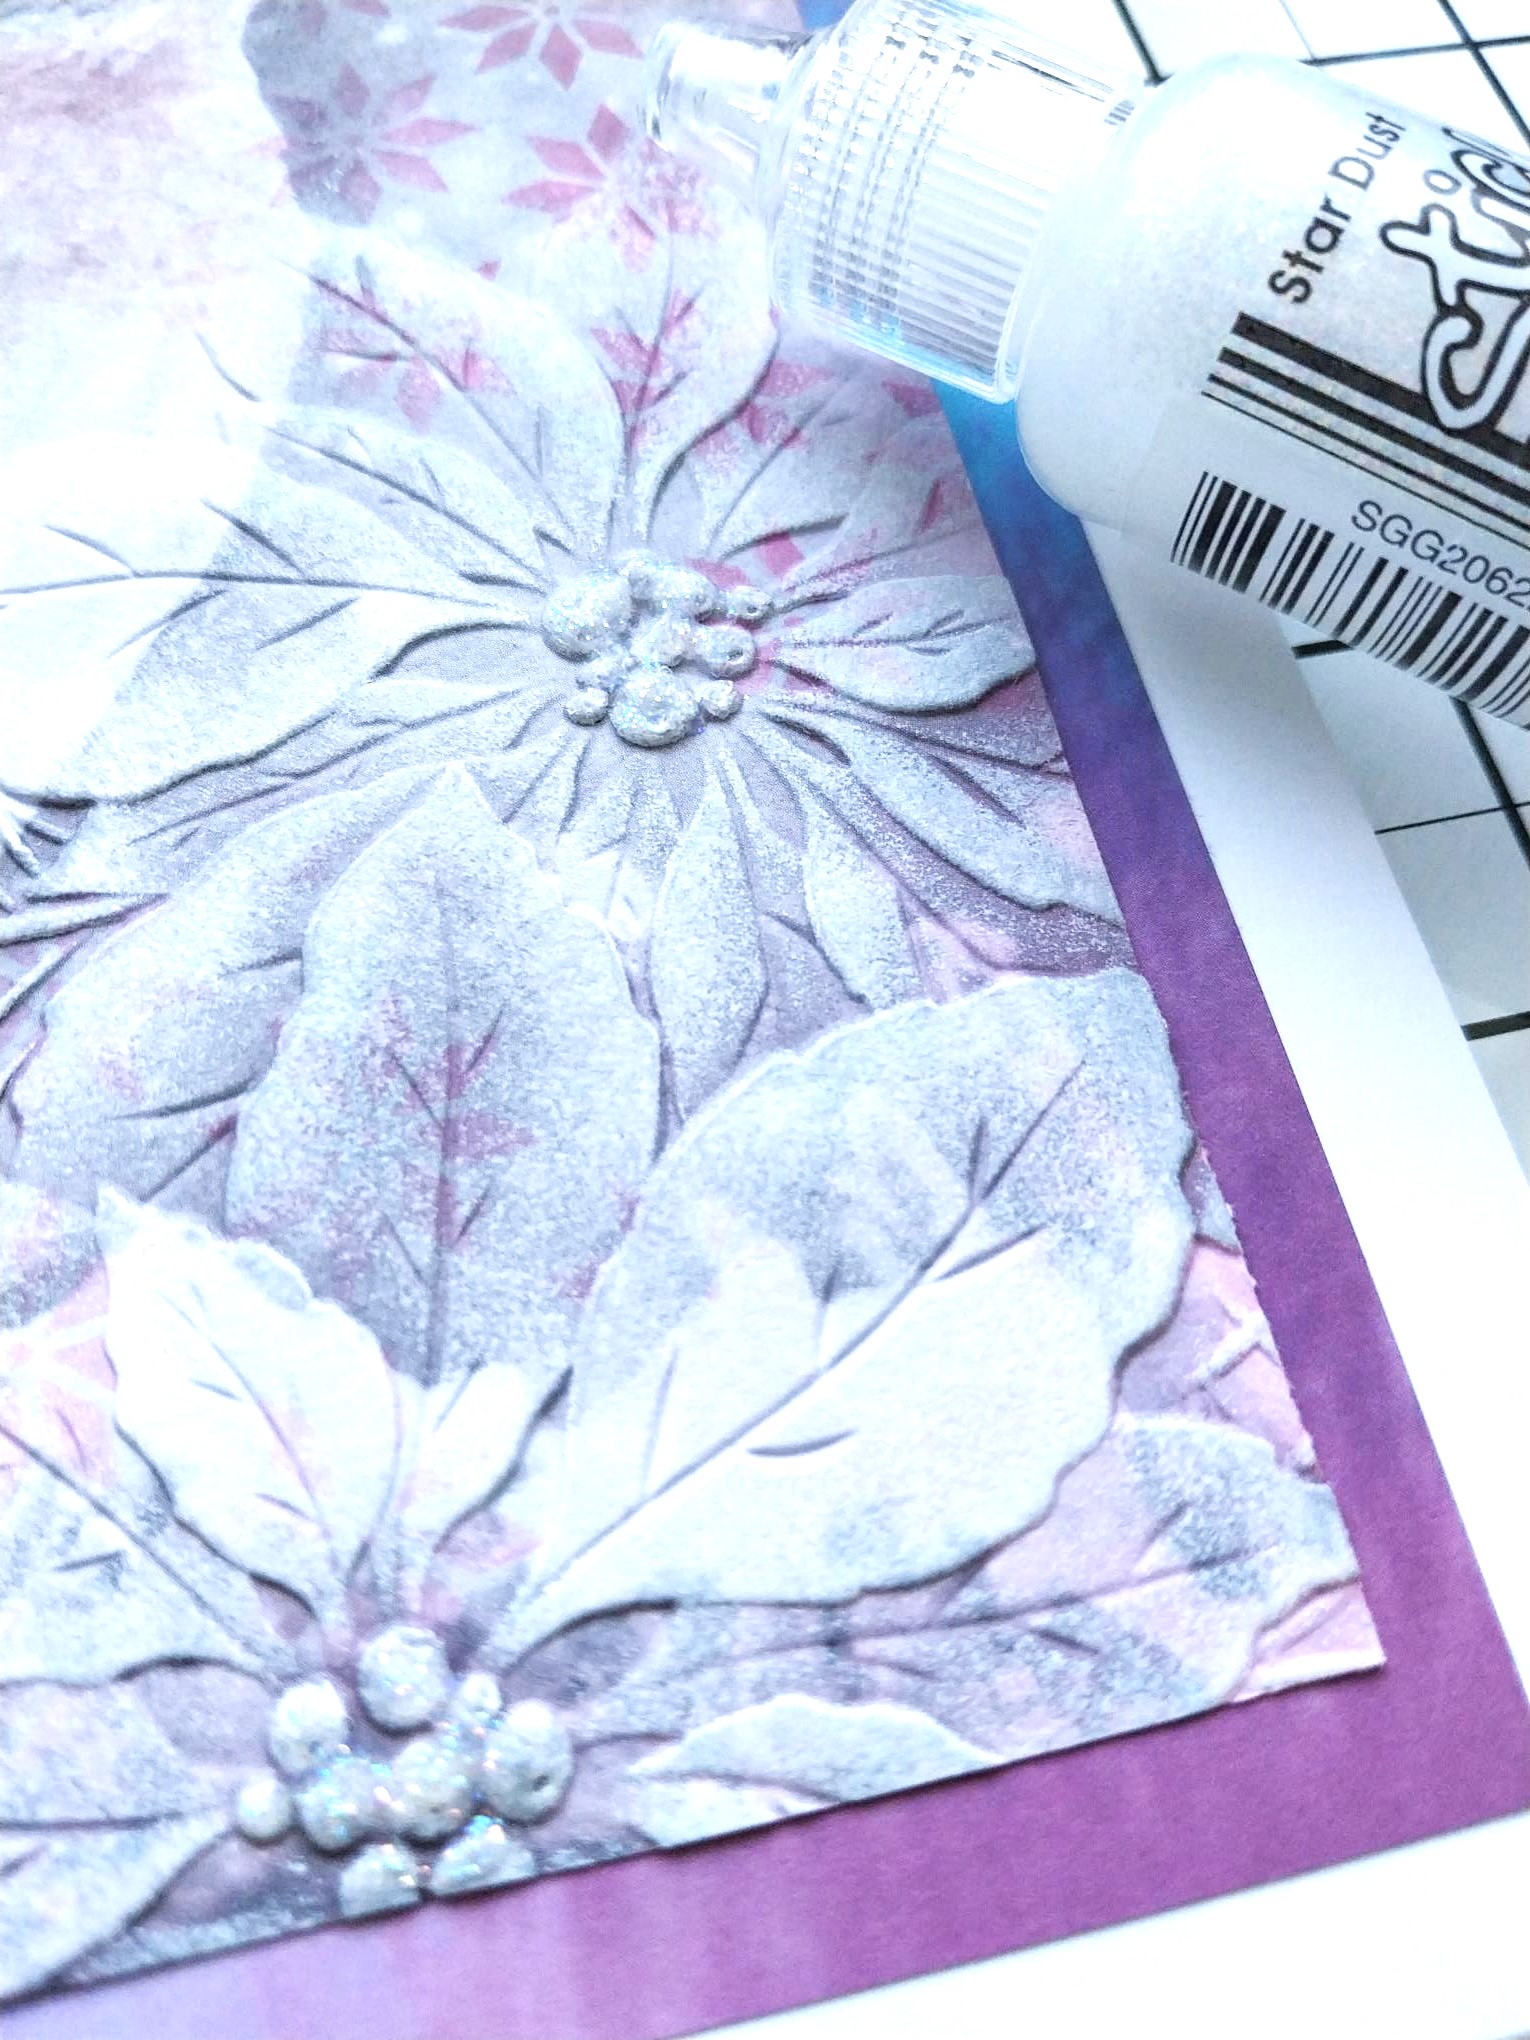
Stickles: Star Dust
Eureka 101 Watercolour Tablet
SBM A3 Magnetic glass mat
Paper Trimmer
Glue
Double-sided adhesive tape
Die Cutting machine
[click image to enlarge] 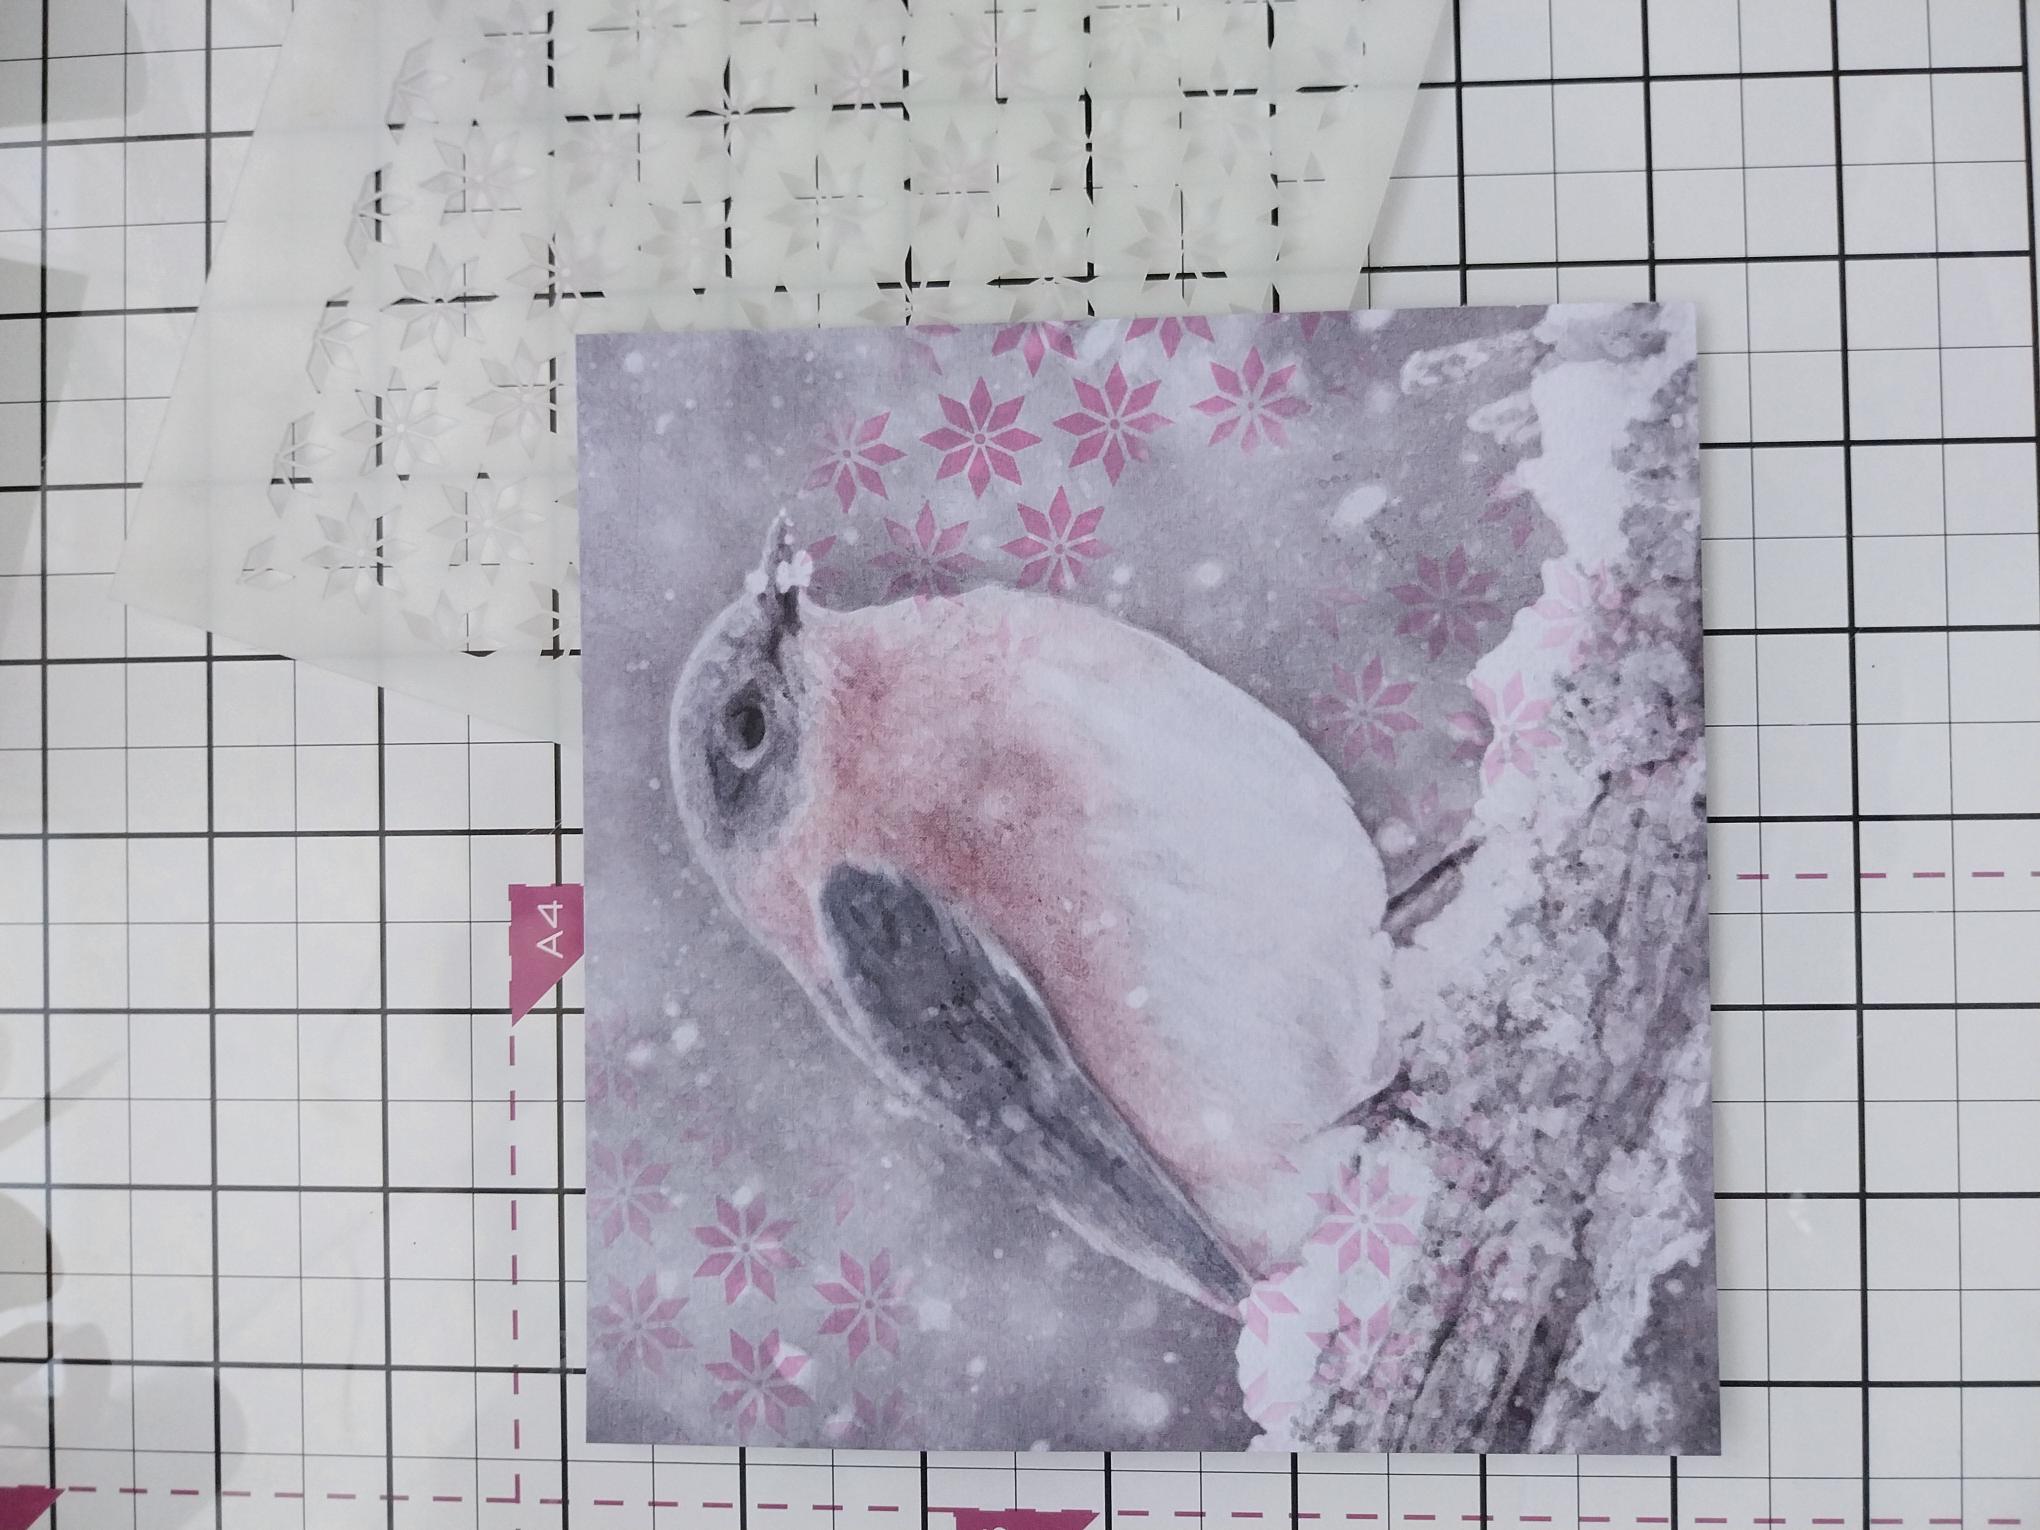
|
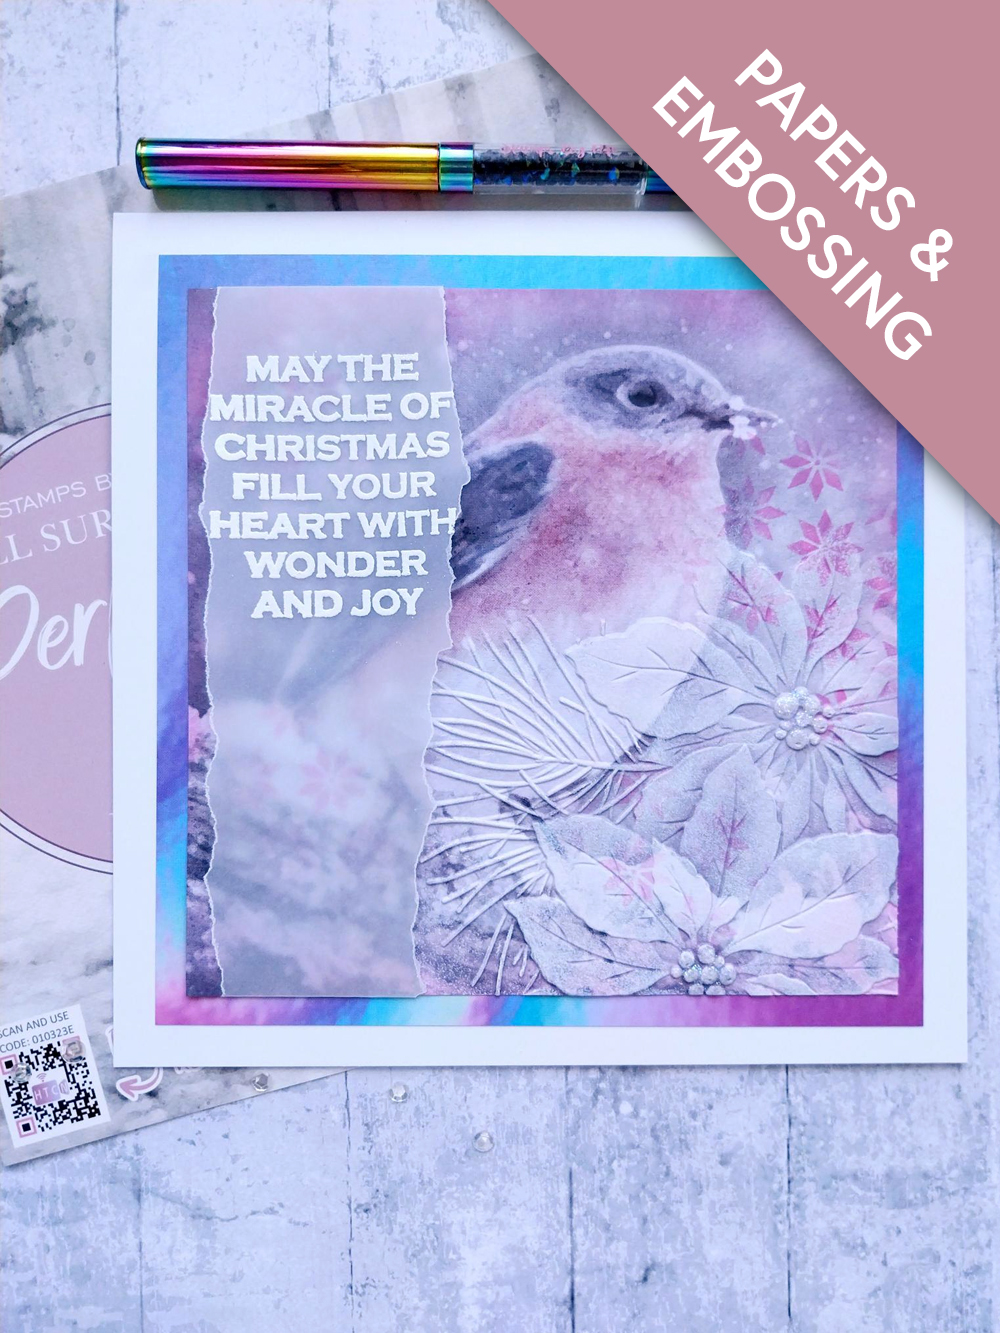
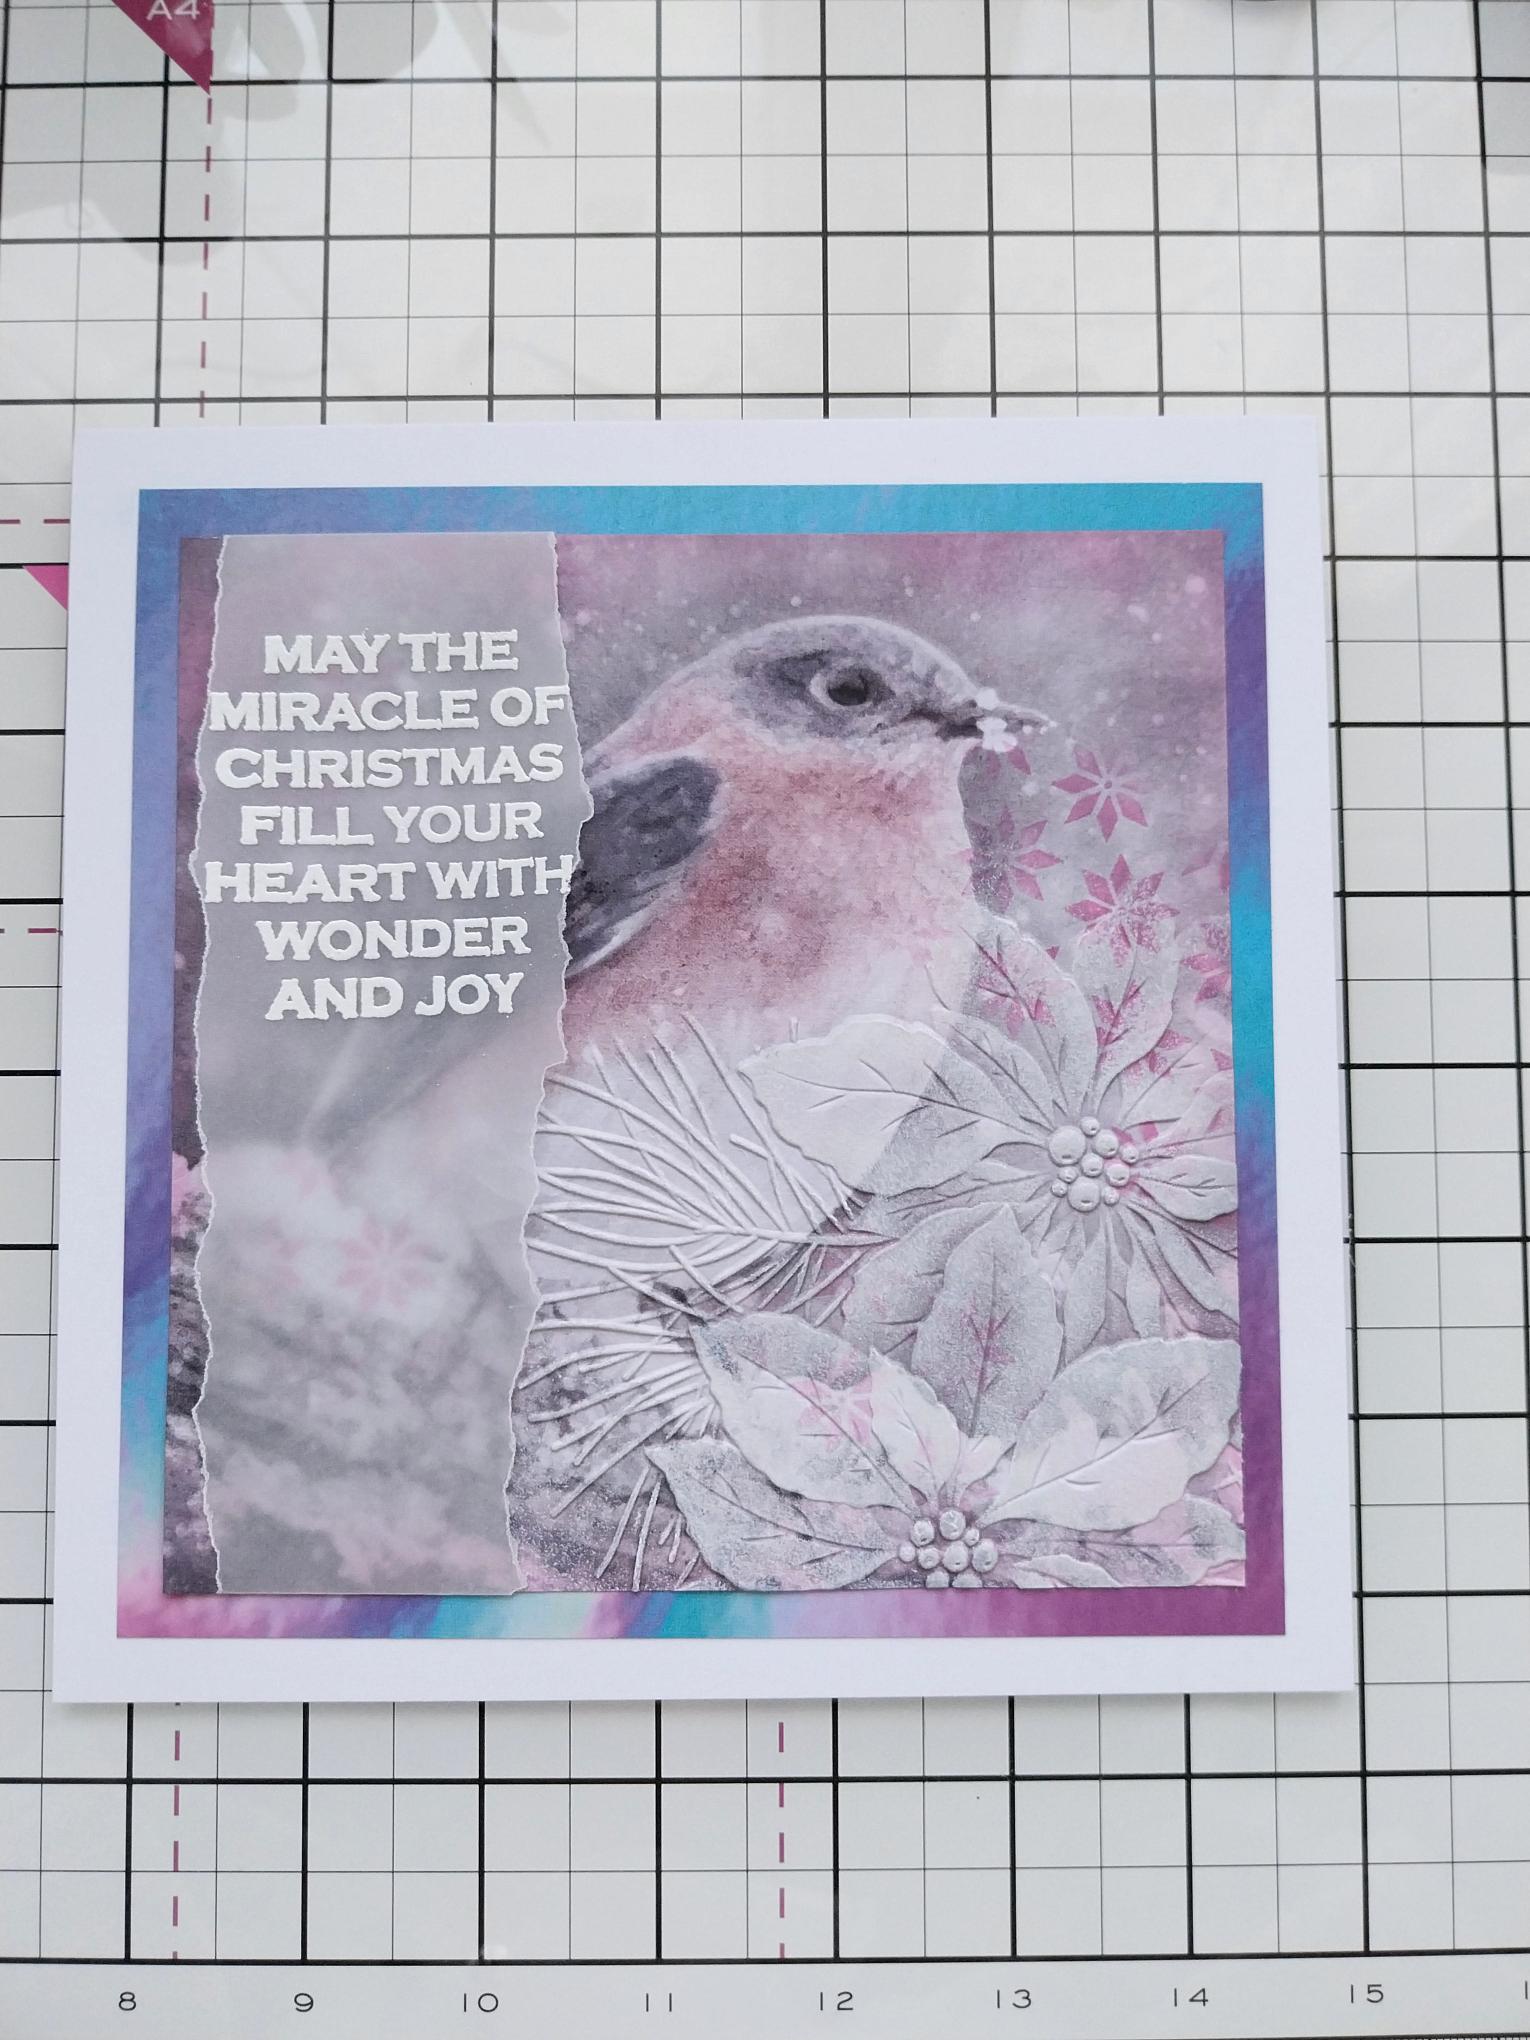
Trim this beautiful paper, from Perfect Day, to 6" square, so the Robin sits to the left of your topper. |
|
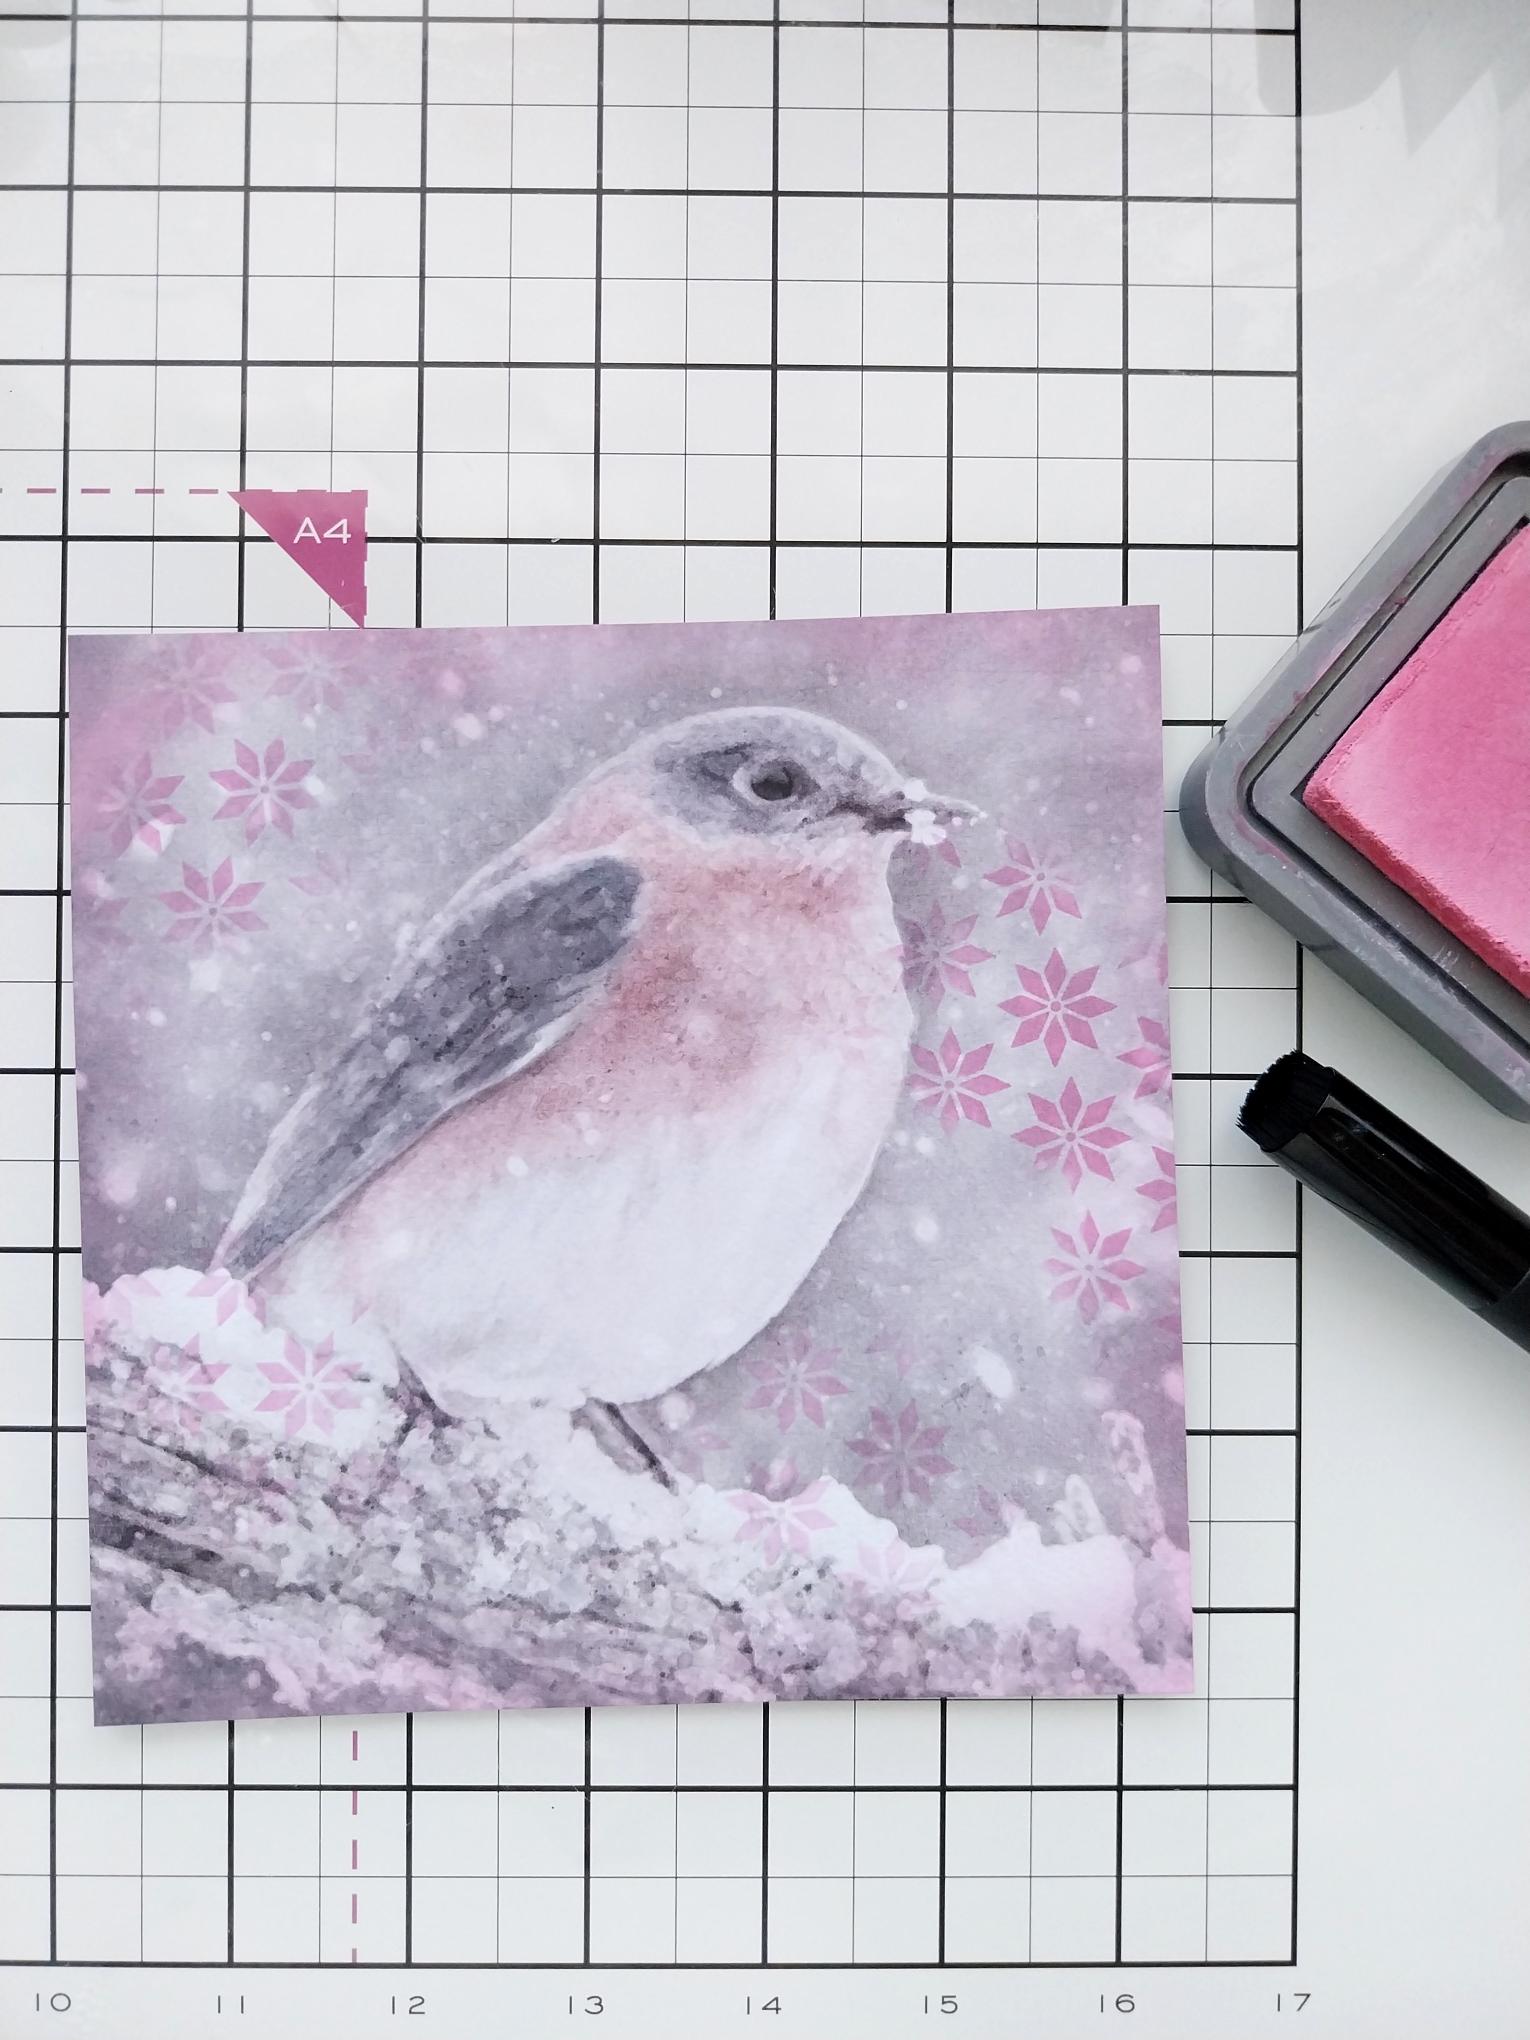
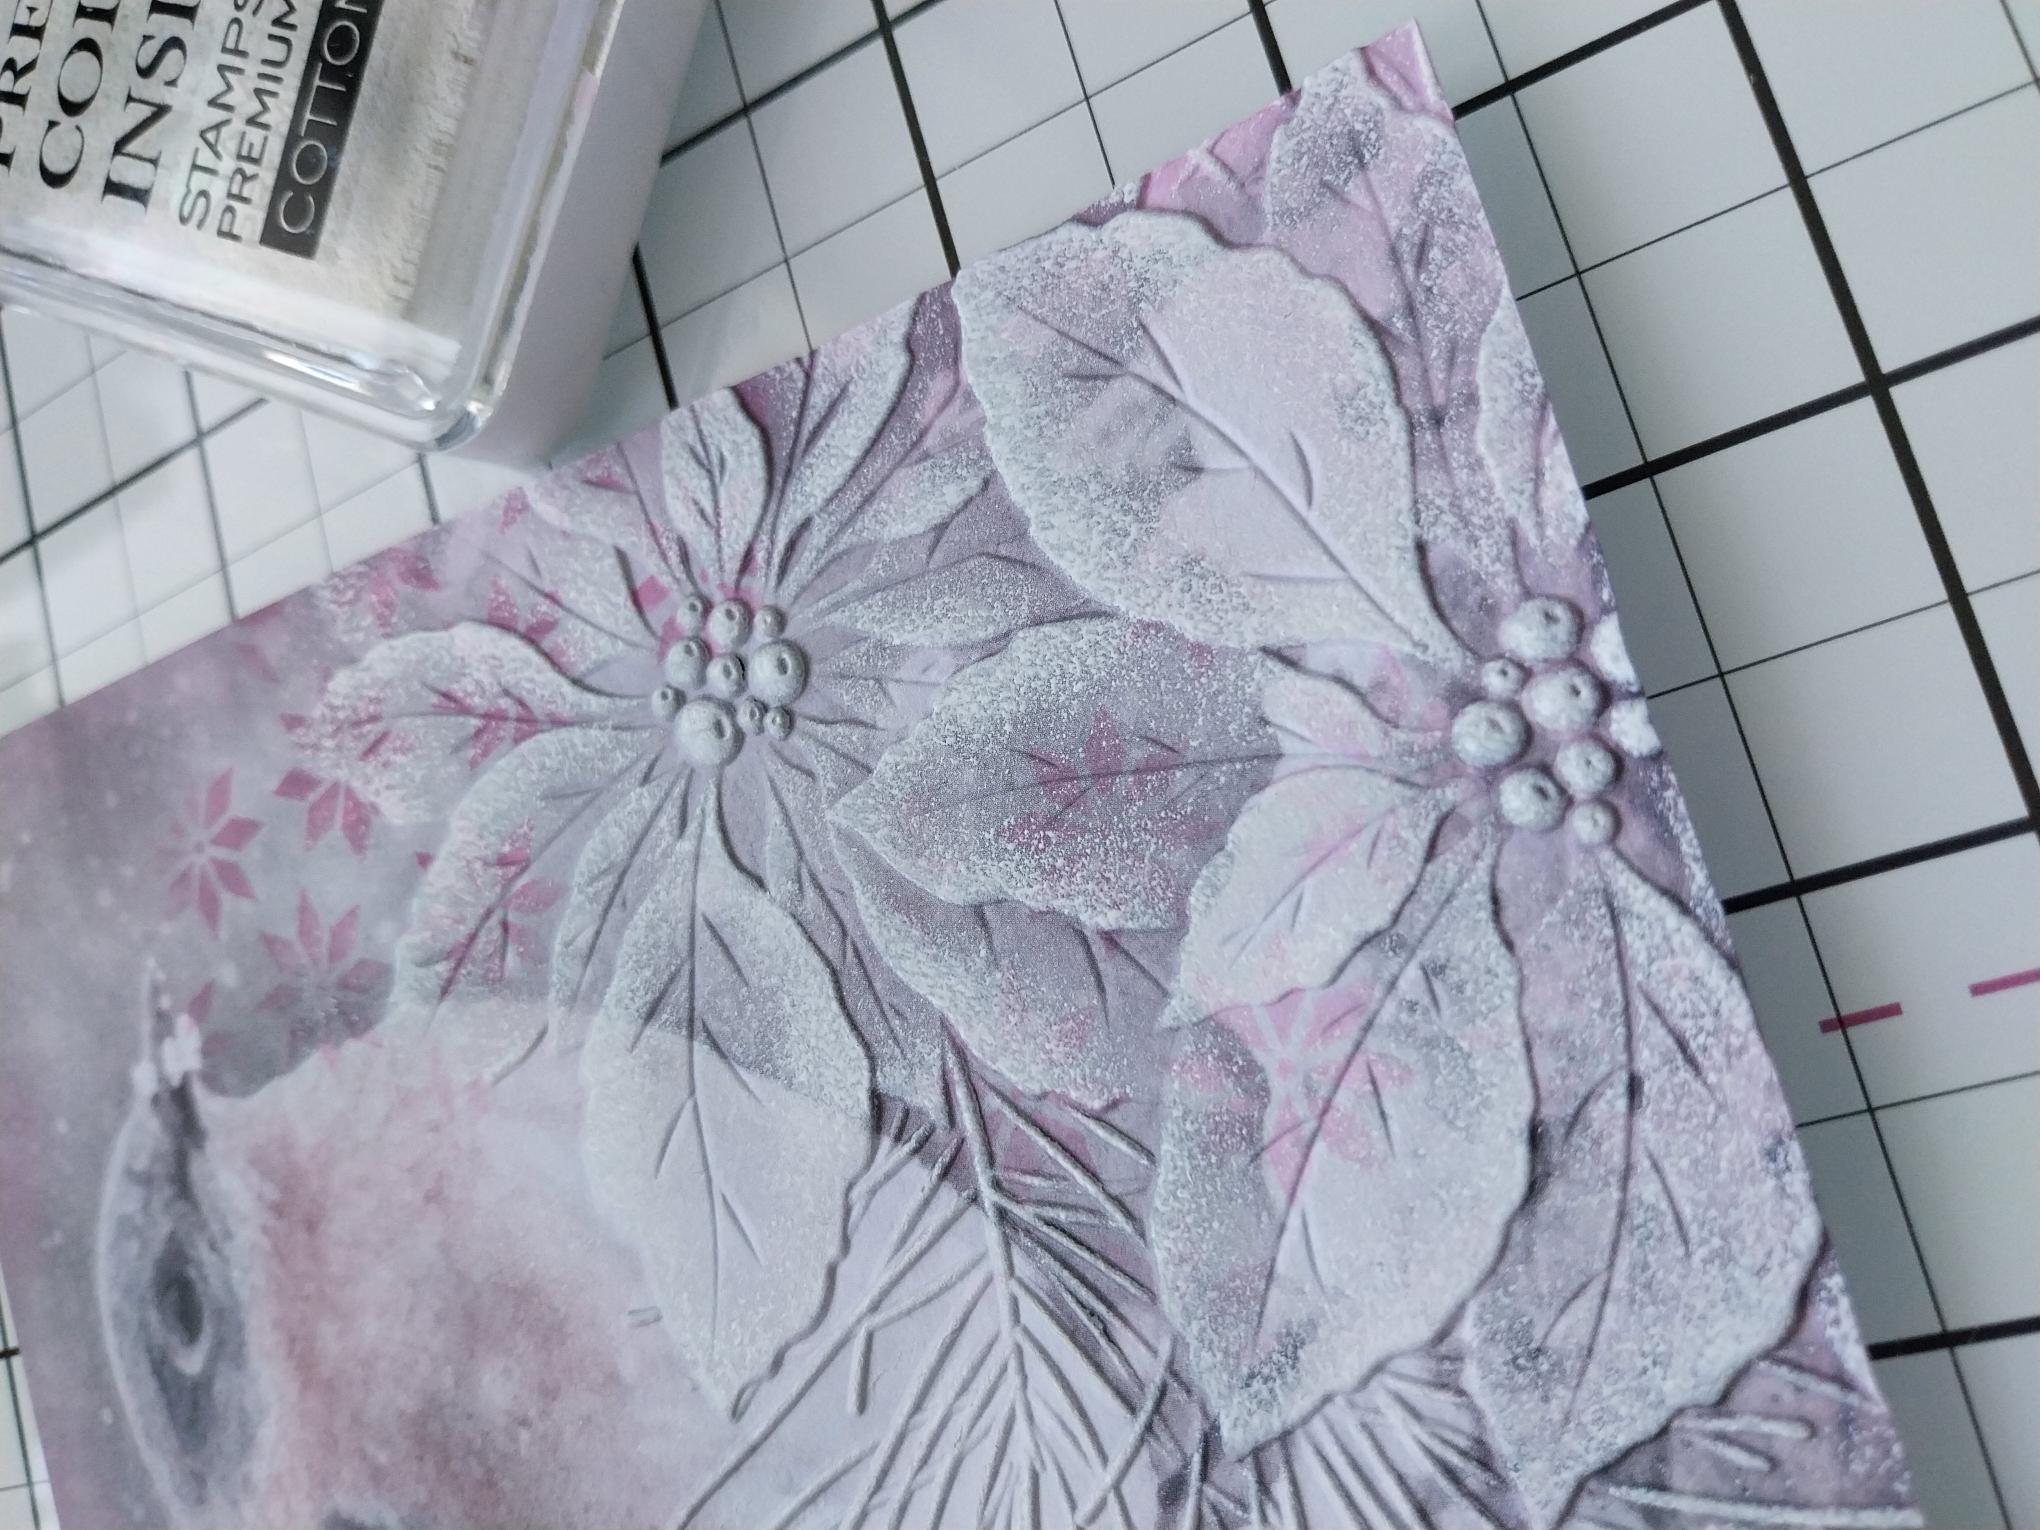
Blend Kitsch Flamingo randomly through the snowflakes stencil, creating falling snowflakes around your Robin. |
|
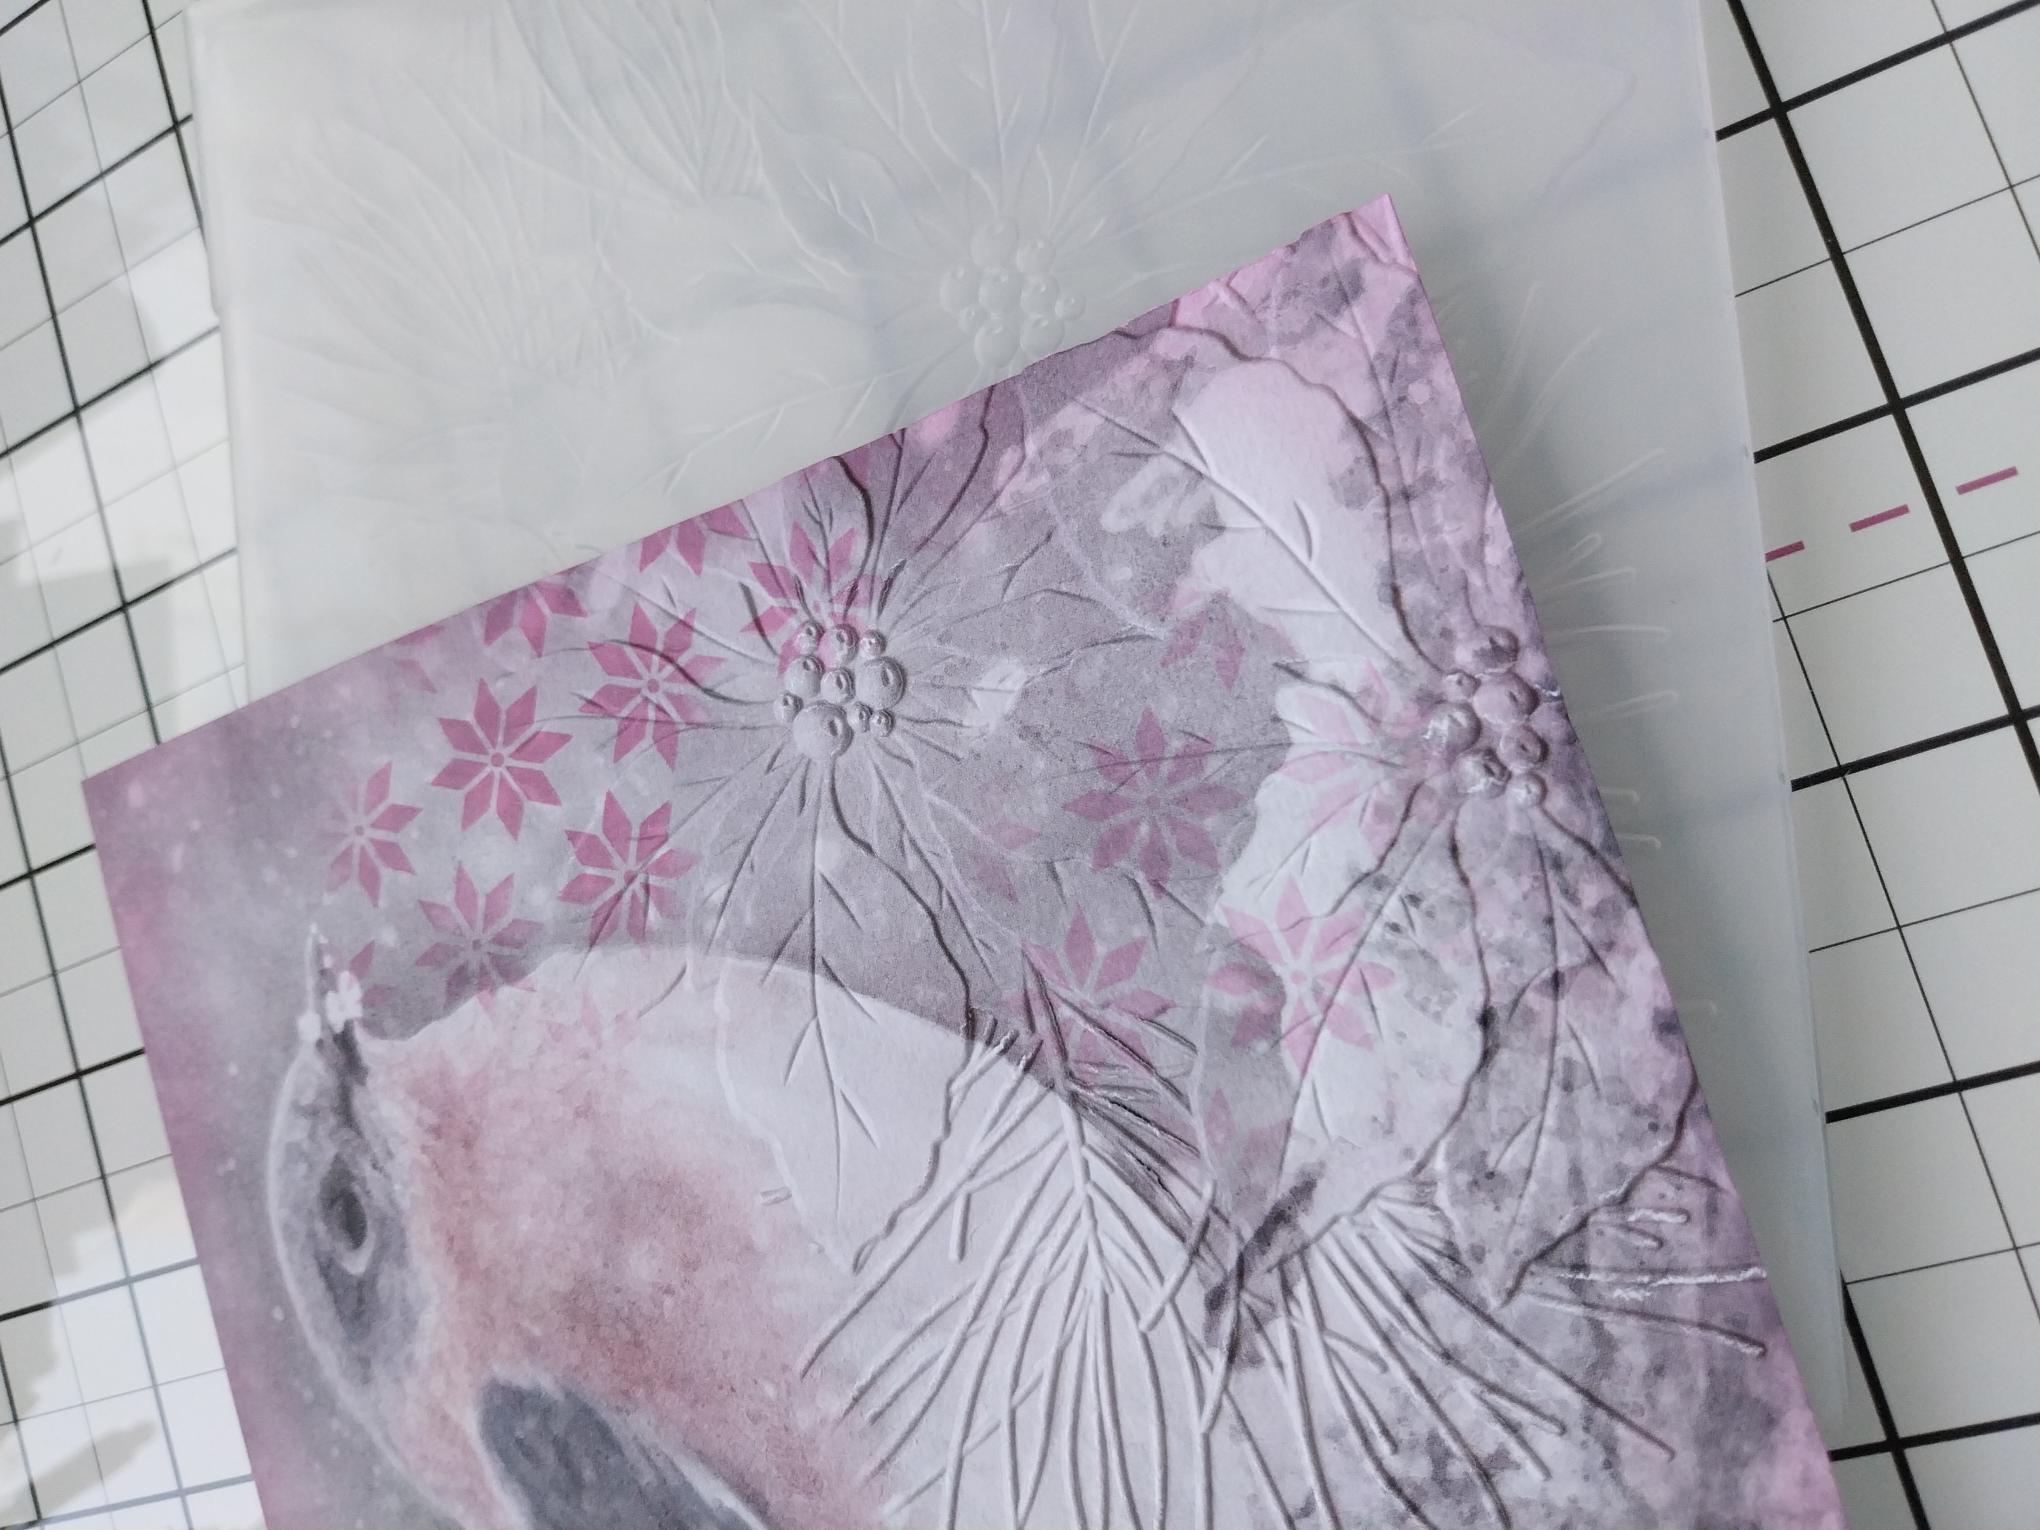
Place the topper inside the Christmas Poinsettias embossing folder, so the image goes around the bottom right corner. Run it through your machine. |
|
"Pounce" the Cotton ink pad on the raised, embossed areas of the image, to accentuate the design. NB: Pigment ink is very slow drying and will smudge, so dry the ink thoroughly, with your heat tool. |
|
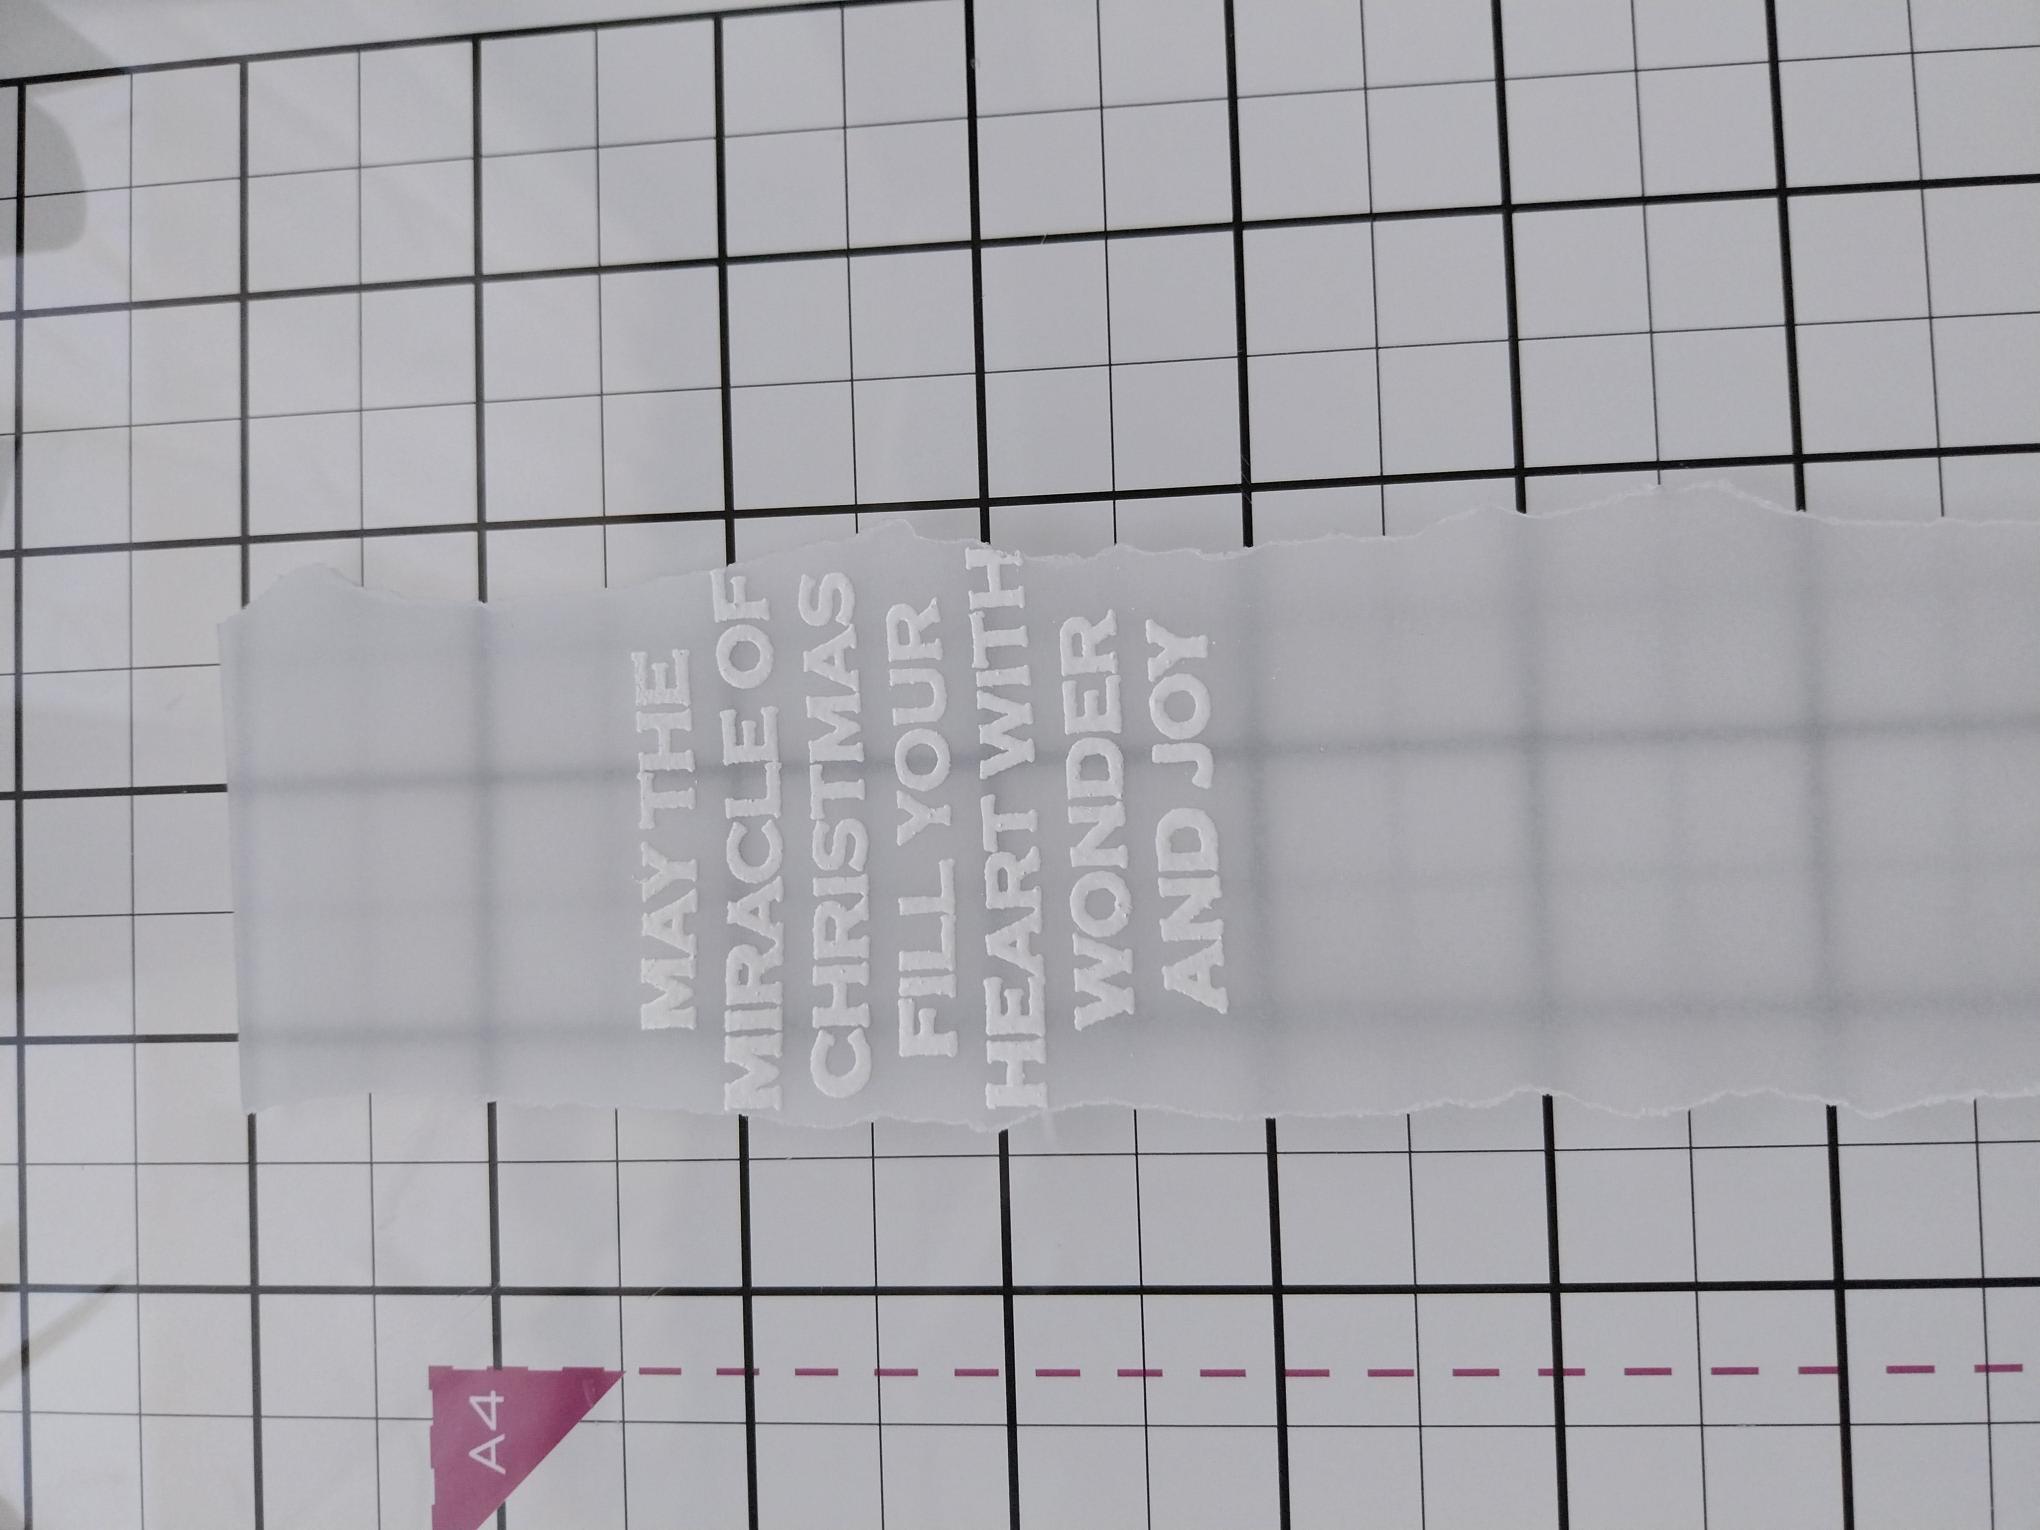
Tear a panel longer than your topper and wide enough for the sentiment to fit. Having wiped over the vellum with your anti-static bag, stamp the sentiment (from Special Wishes) in the sticky embossing ink. Apply the powder over the stamped sentiment and tip the excess powder back in the pot. Heat up your heat tool before heat setting the powder. |
|
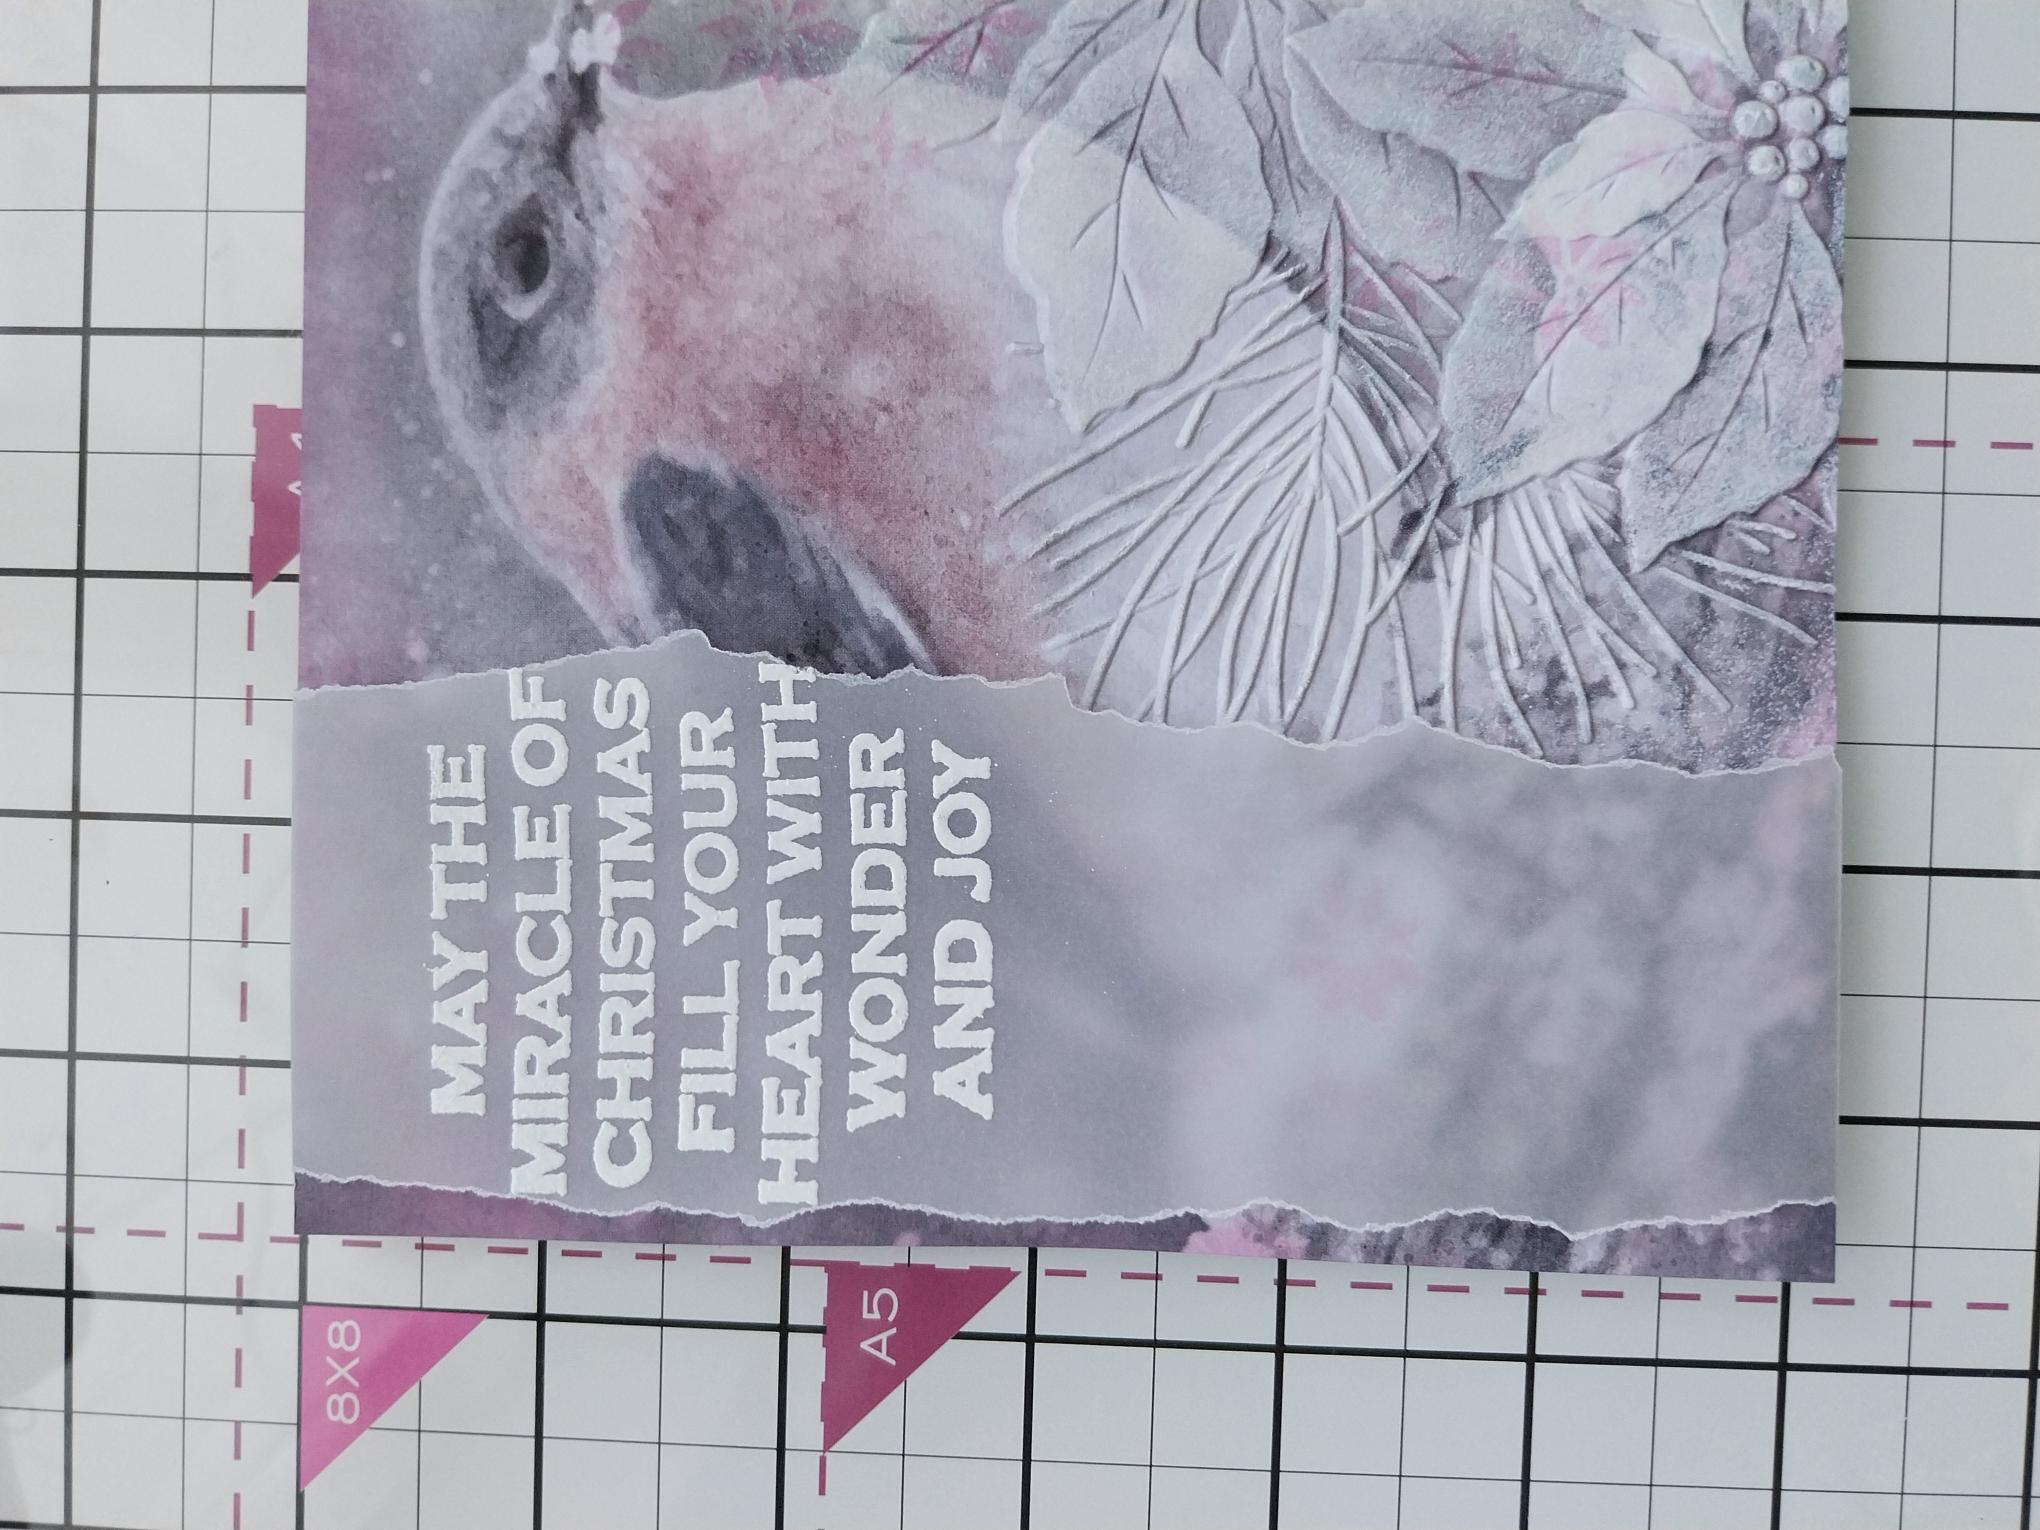
Lay the embossed vellum panel down the left side of the topper. Tuck the ends of the vellum over the edges of the paper and secure on the reverse, with double-sided tape. |
|
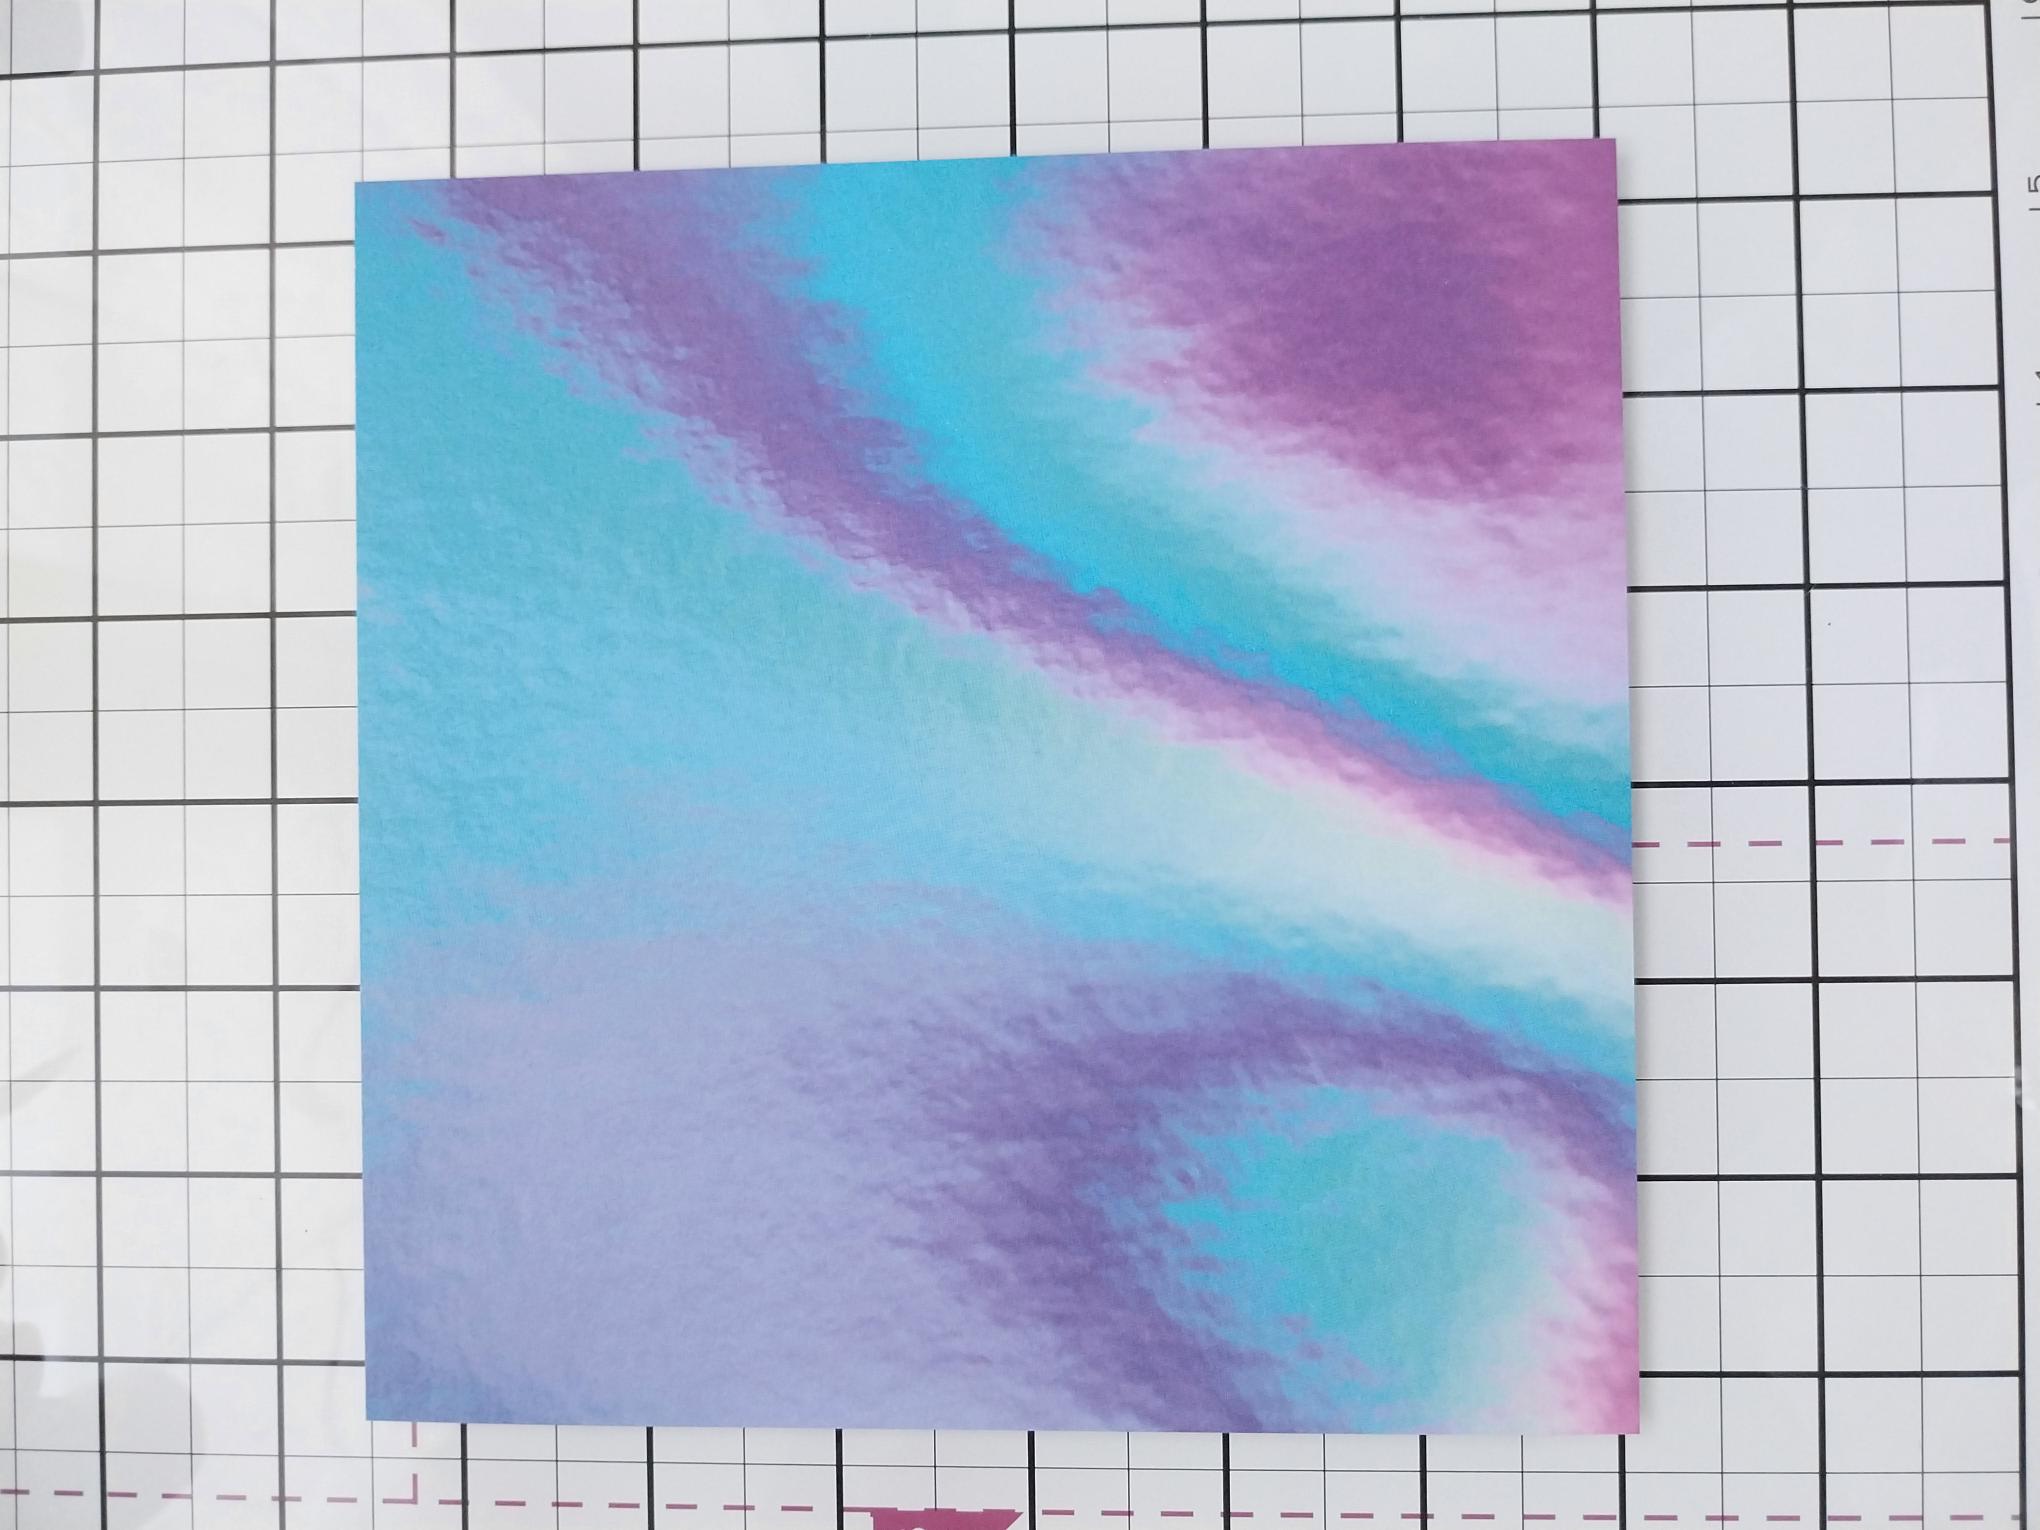
Cut this paper from the All Surfaces Holographic paper pack, to 6 1/2" square. |
|
Mat your topper on to the holographic paper and then the front of your card blank. |
|
To finish, use the Stickles to add a touch of festive sparkle to you artwork. |