Give your friends $10 off their first order!
Refer a FRIEND


WHAT YOU WILL NEED:
White card blank ( 6 x 6")
Stamps from Beautiful Lamination Stamp Collection
Izink Shiny Spray: Rose Poudre
Versafine Ink Pad: Onyx Black
Distress Oxide: Candied Apple
Black pen
Water spray bottle
Acrylic Block (approx 5 x 4")
Eureka 101
[click image to enlarge] 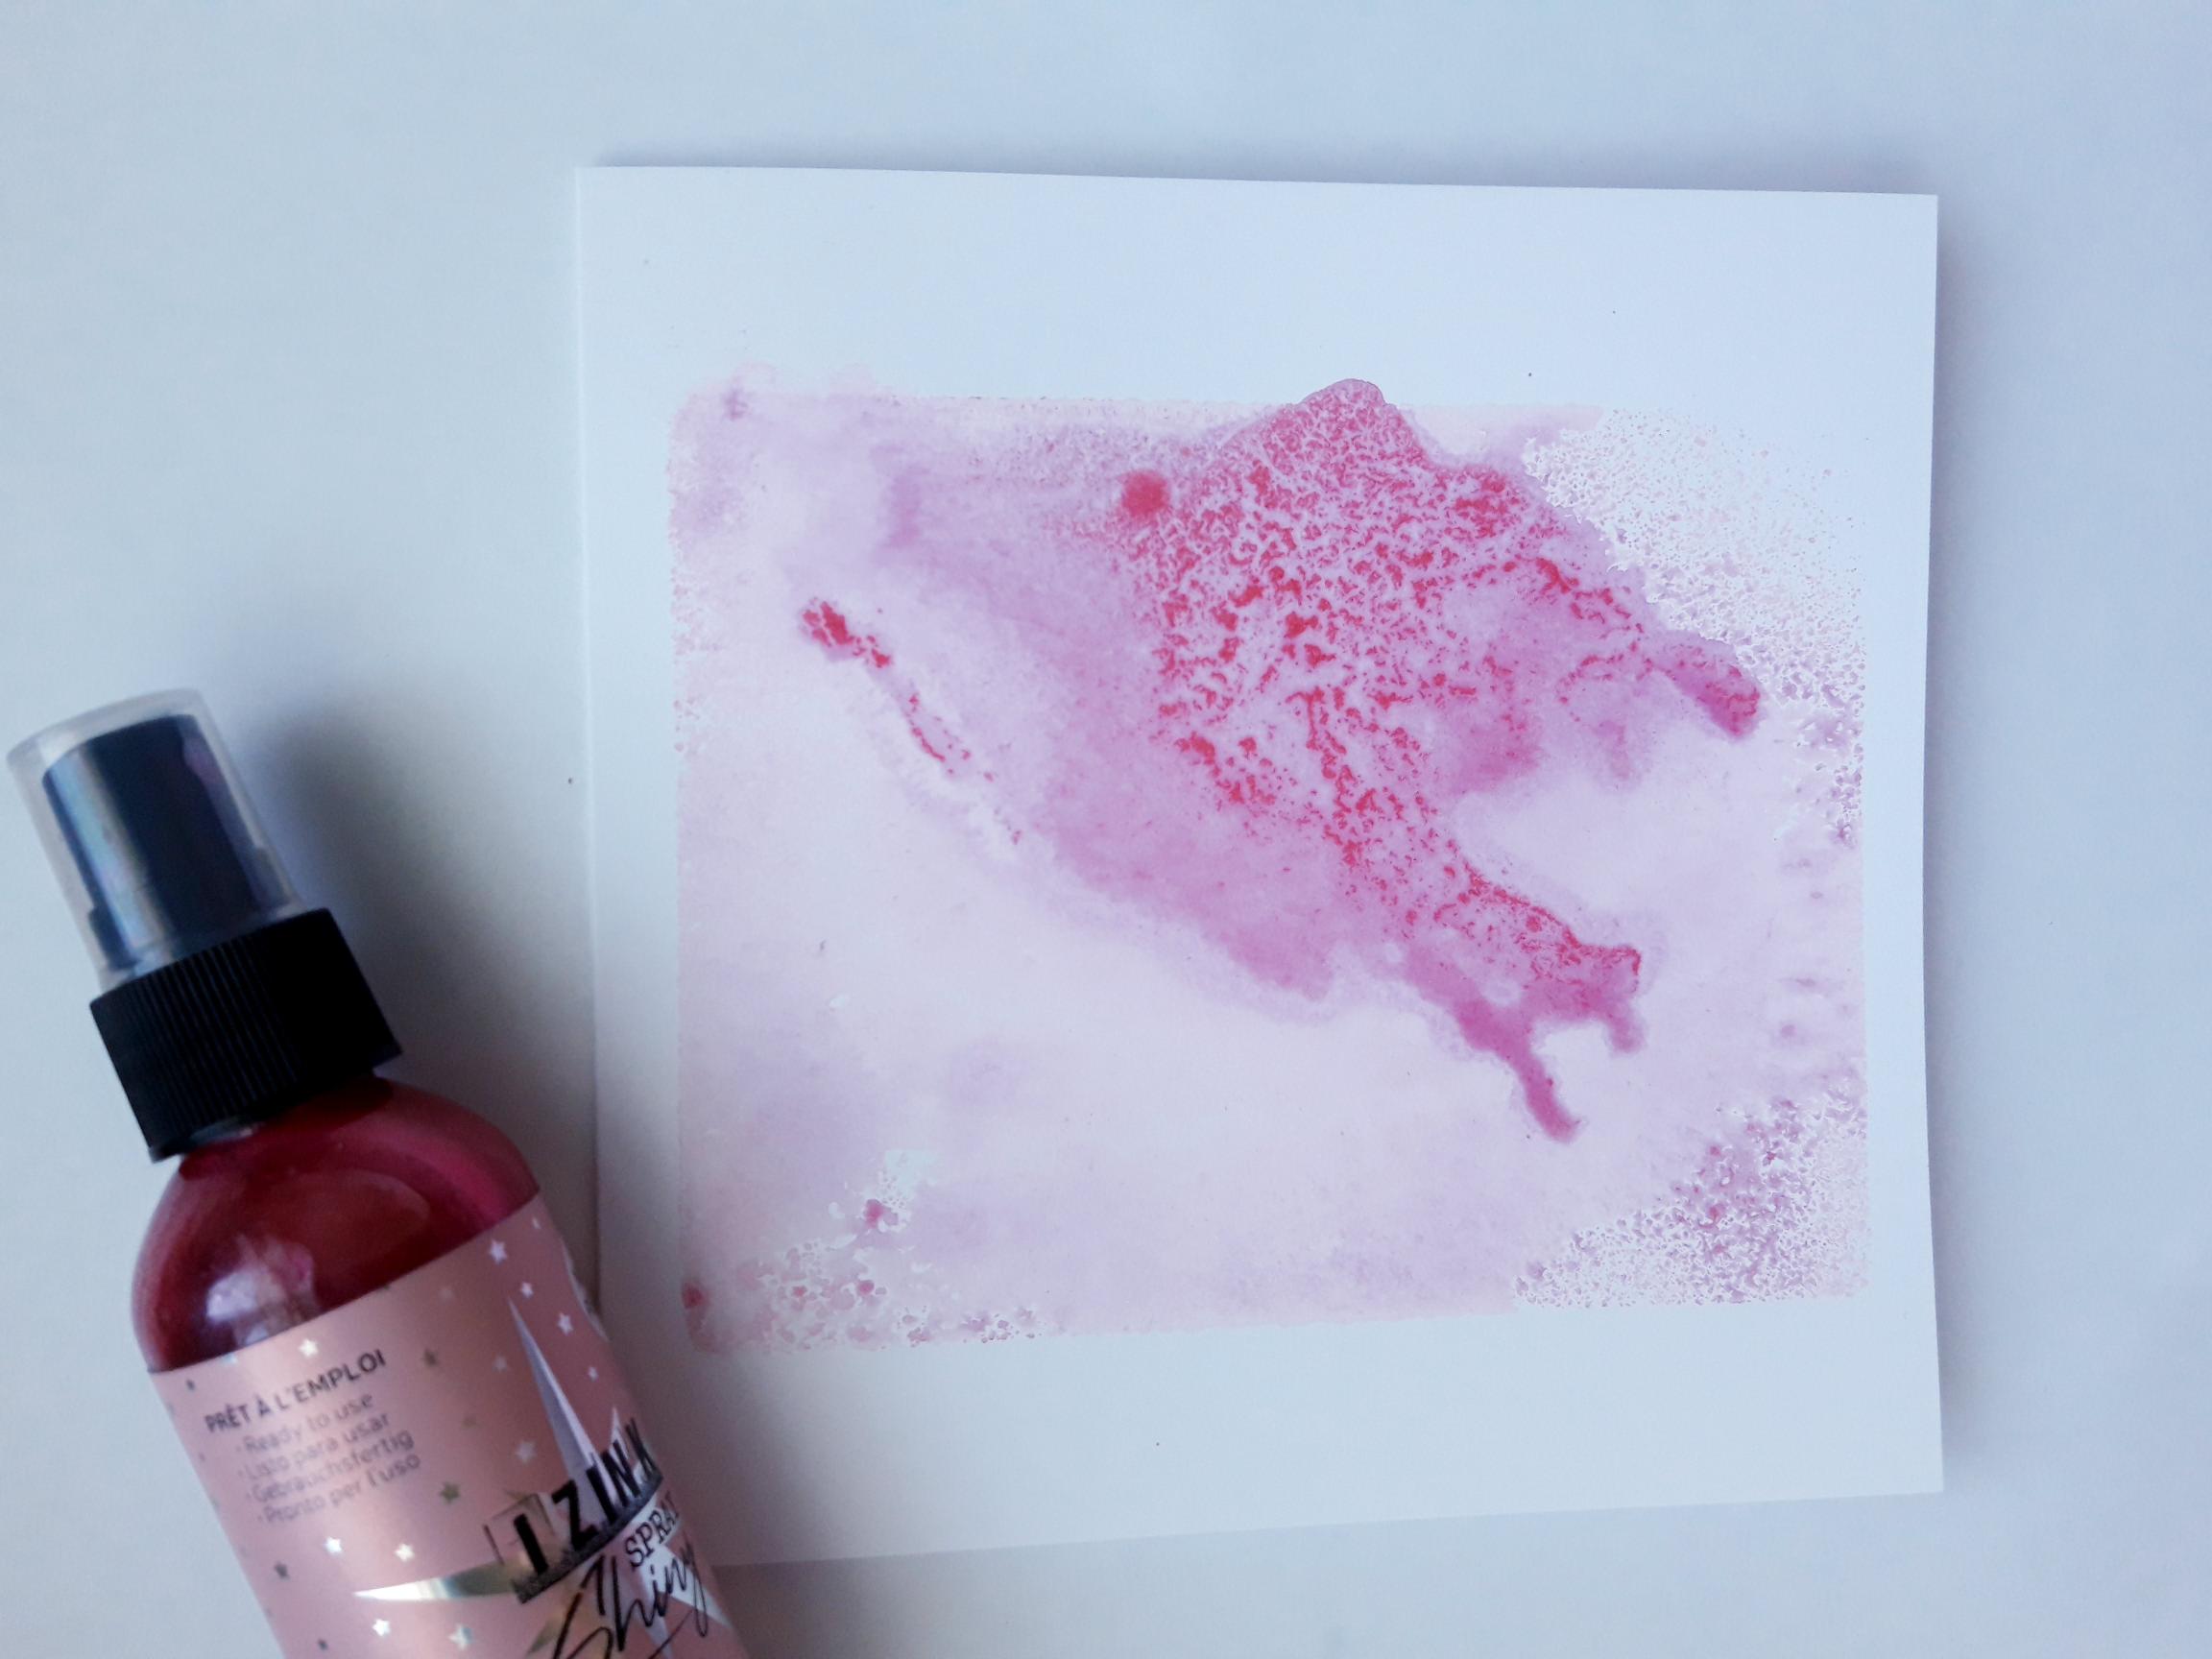
|
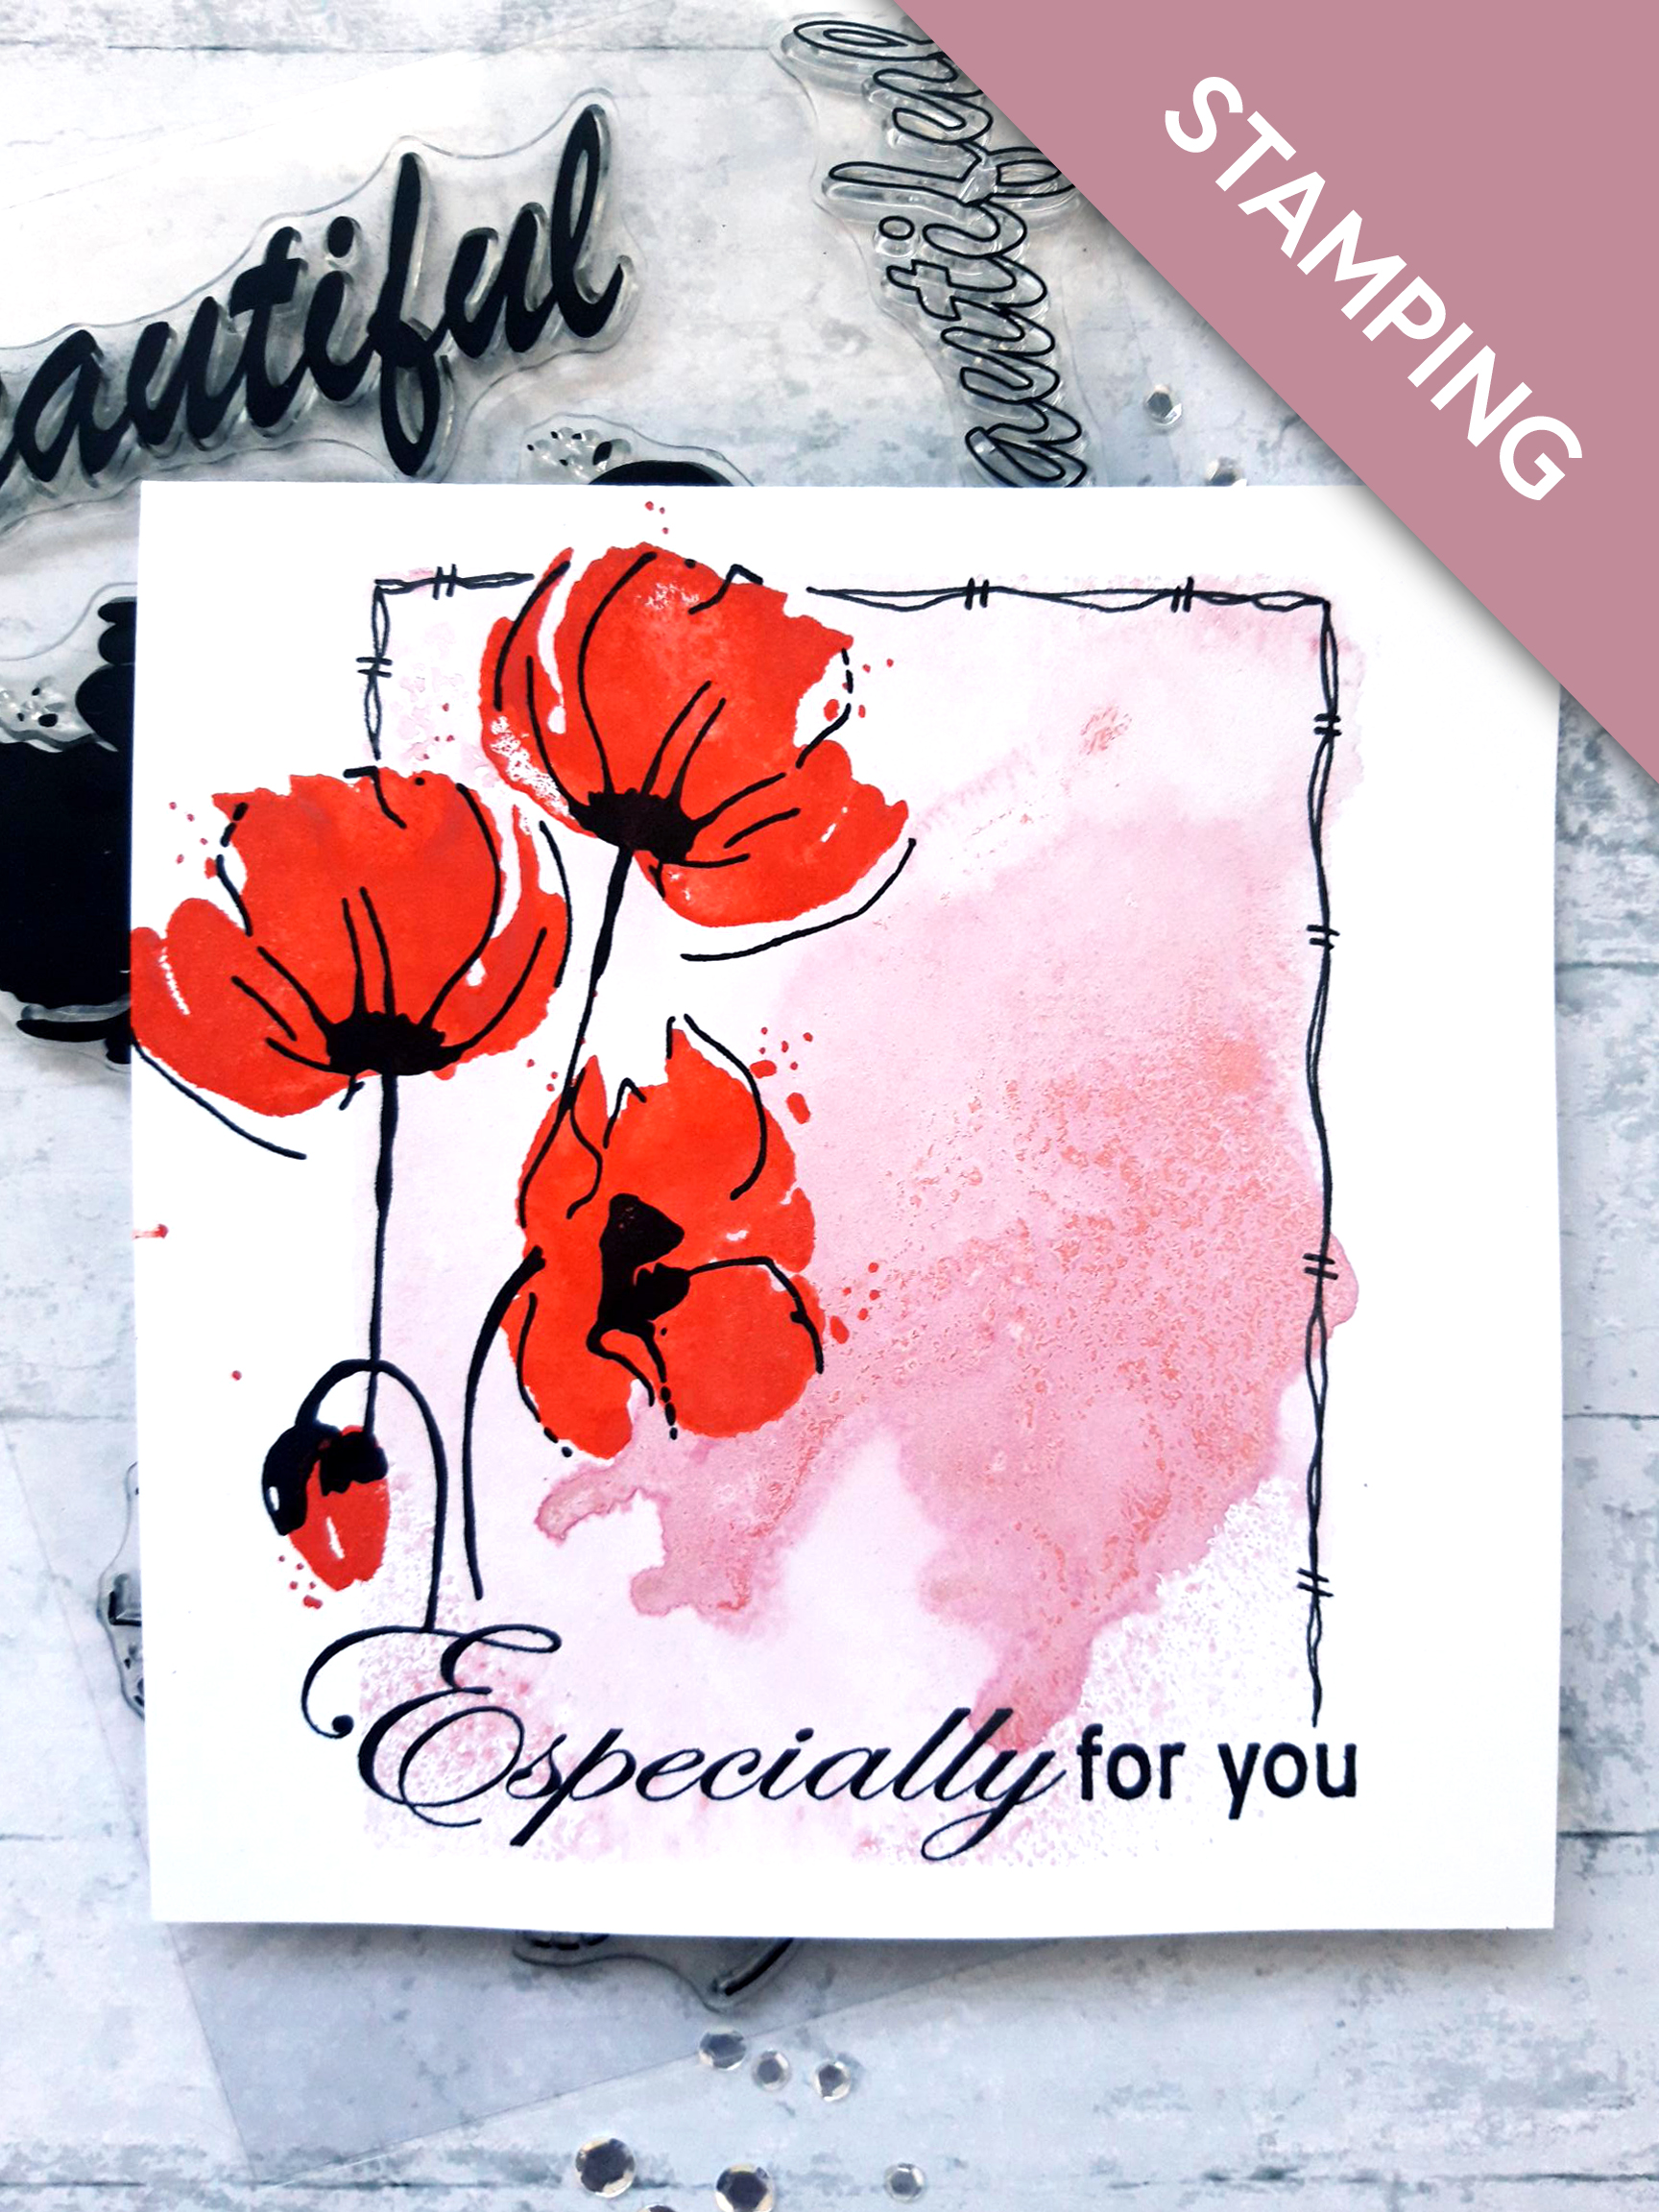
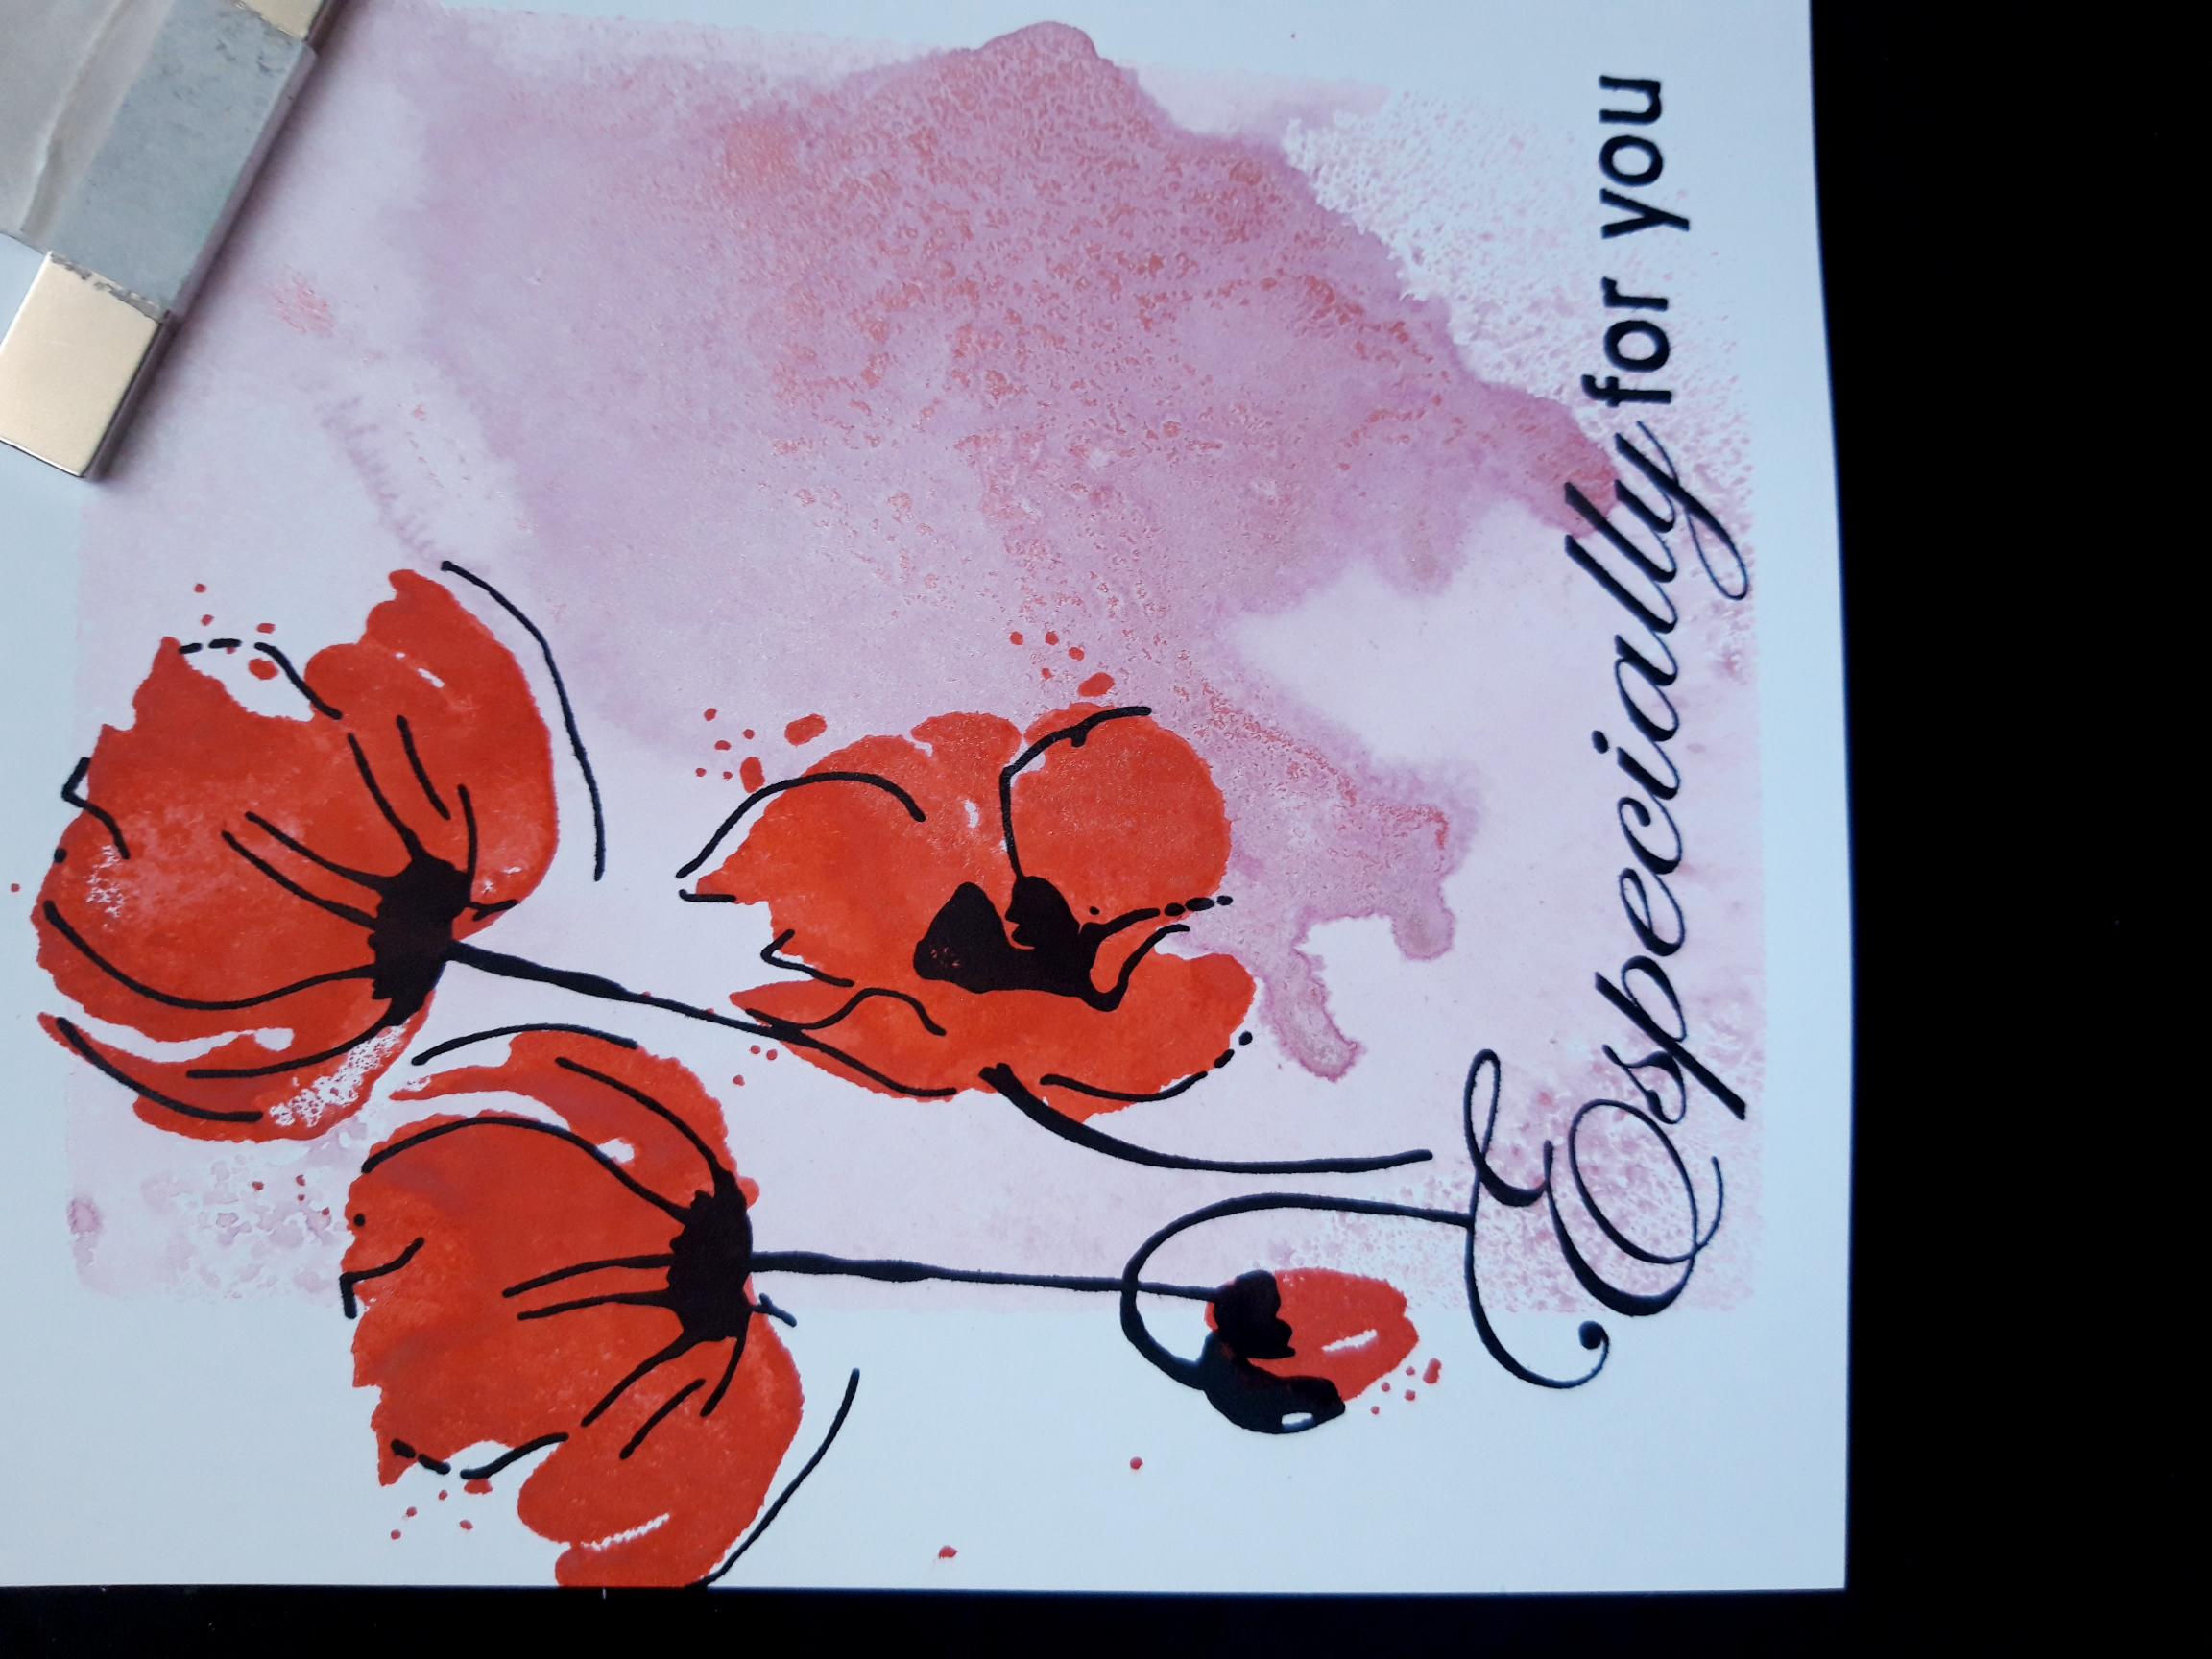
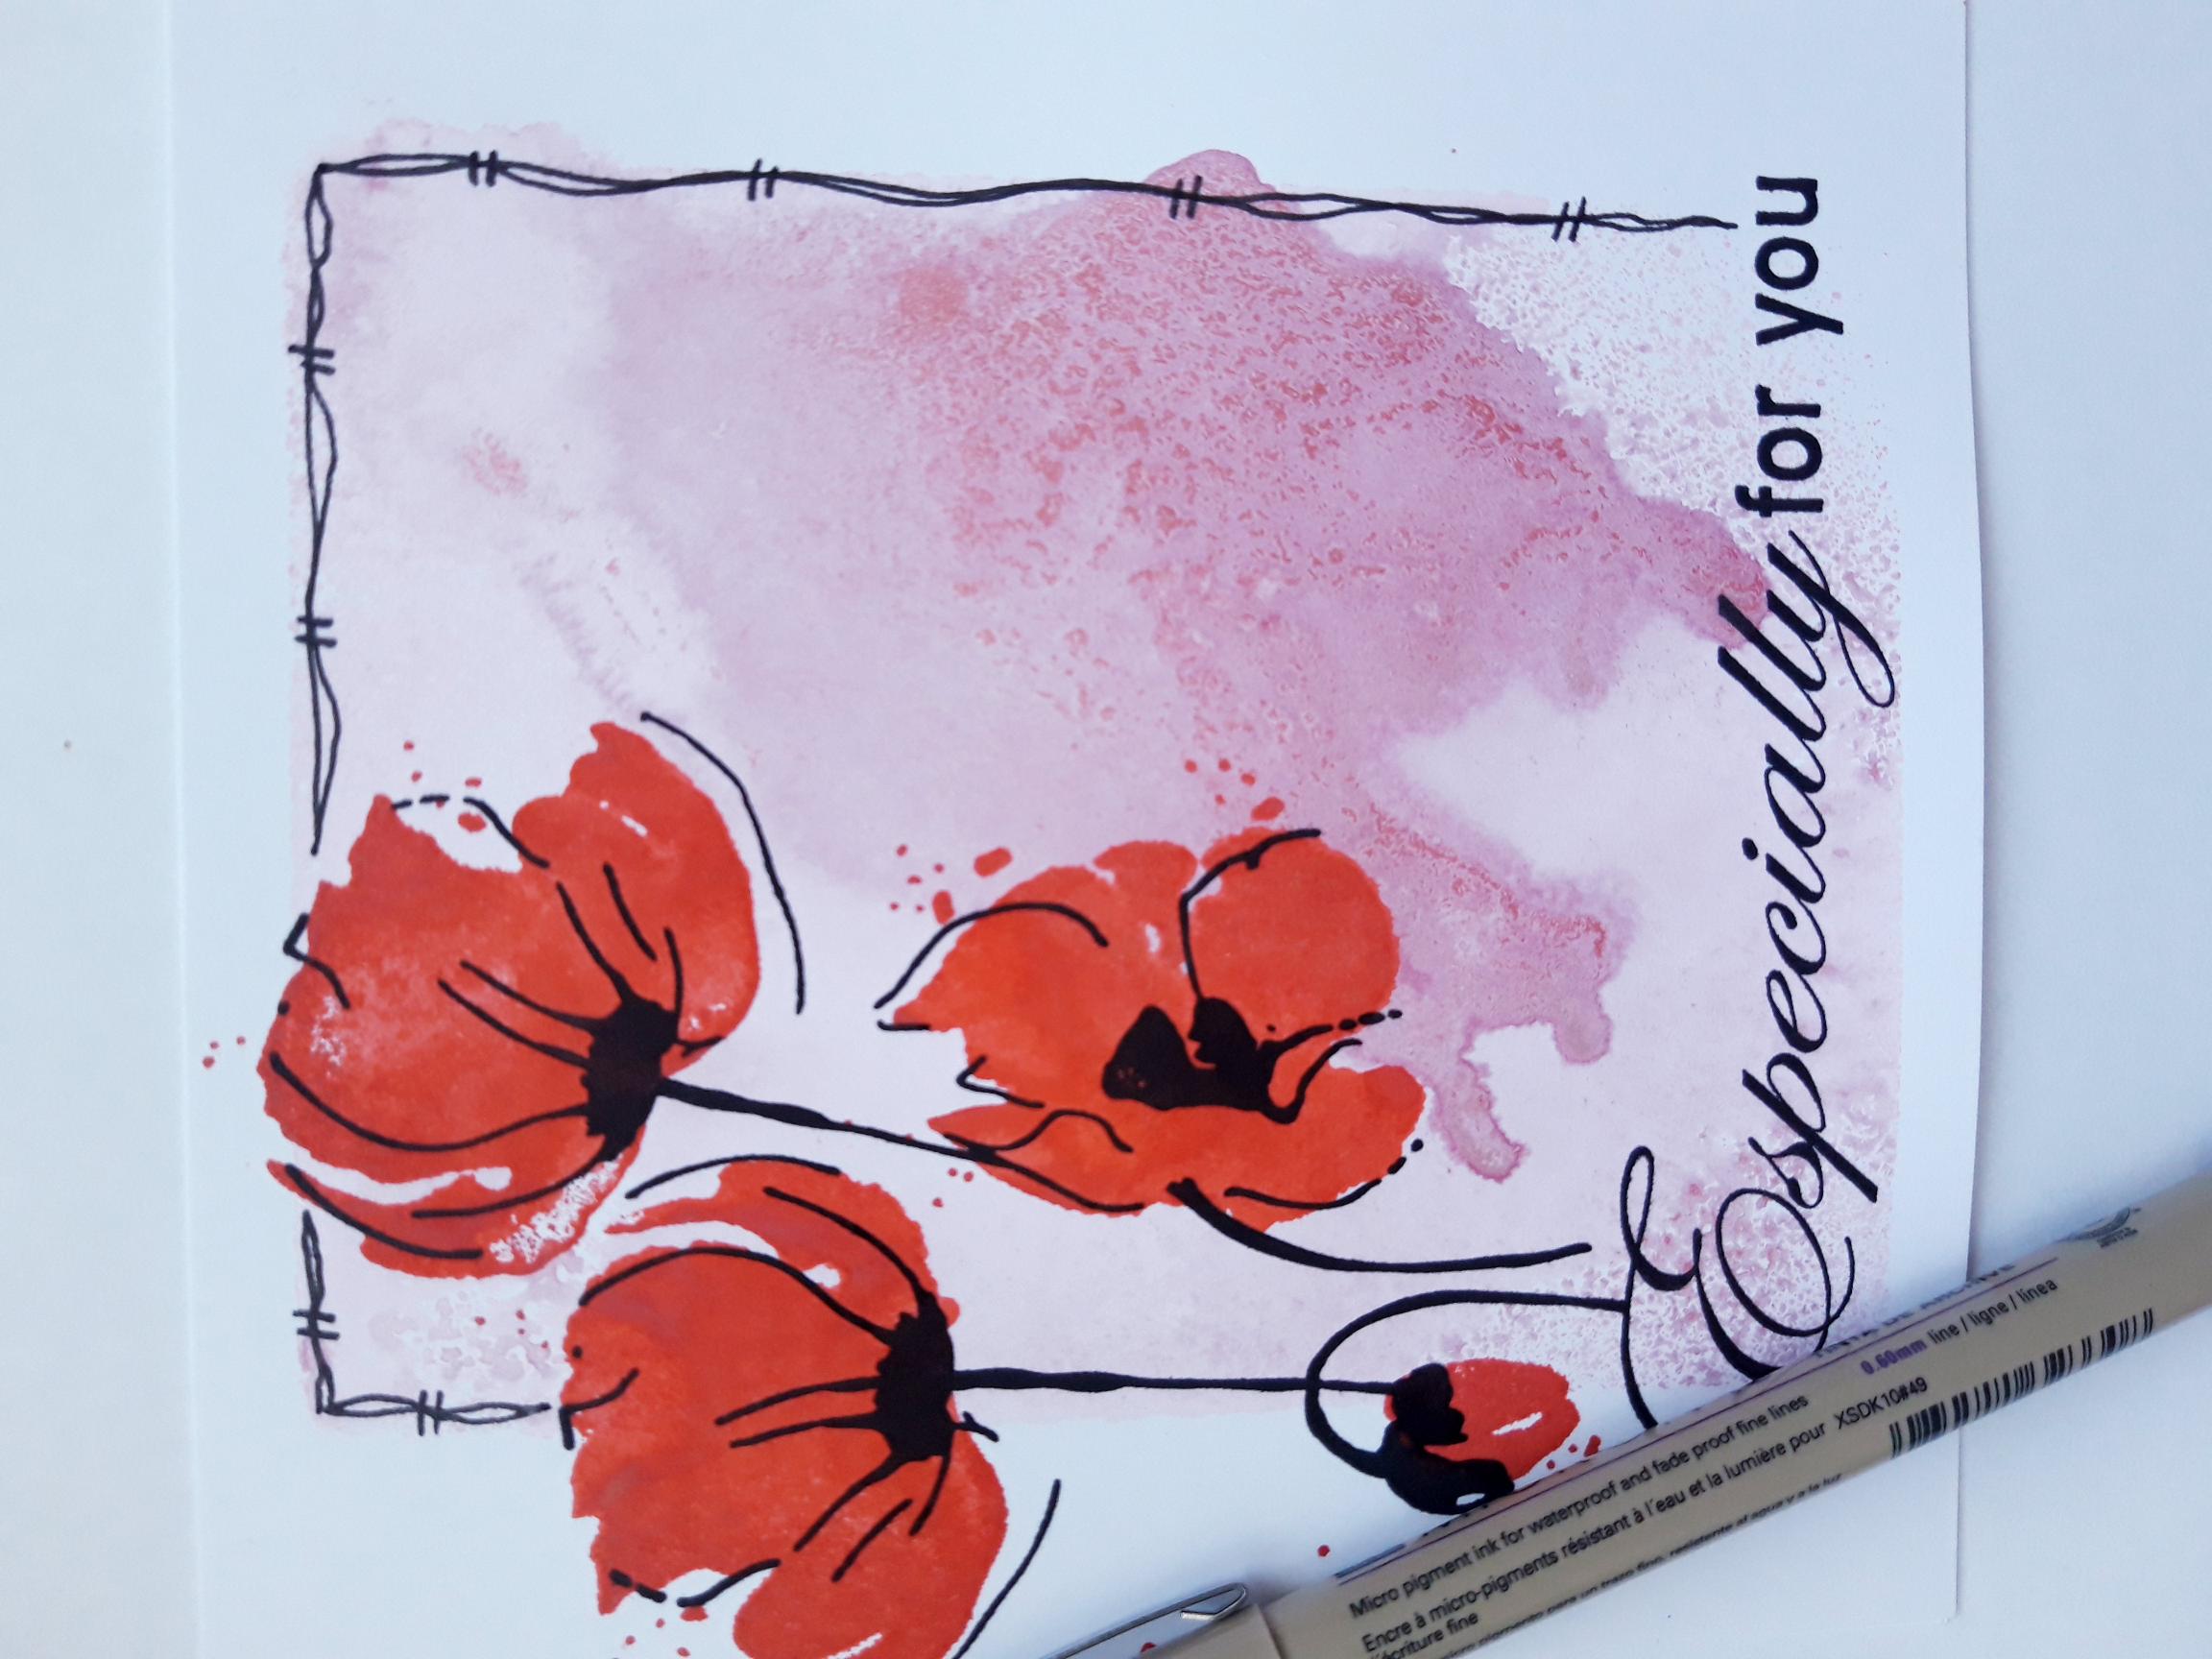
Spray the Izink Rose Poudre directly on to your acrylic block. Spritz with a little water then place the block in the centre, of the front of your card blank. Give the card time to "drink" the ink before carefully lifting up the block. Allow the ink to move and settle, and if possible, leave it to dry naturally. This will give you a more vibrant, natural background effect, and will prevent the card from warping. |
|
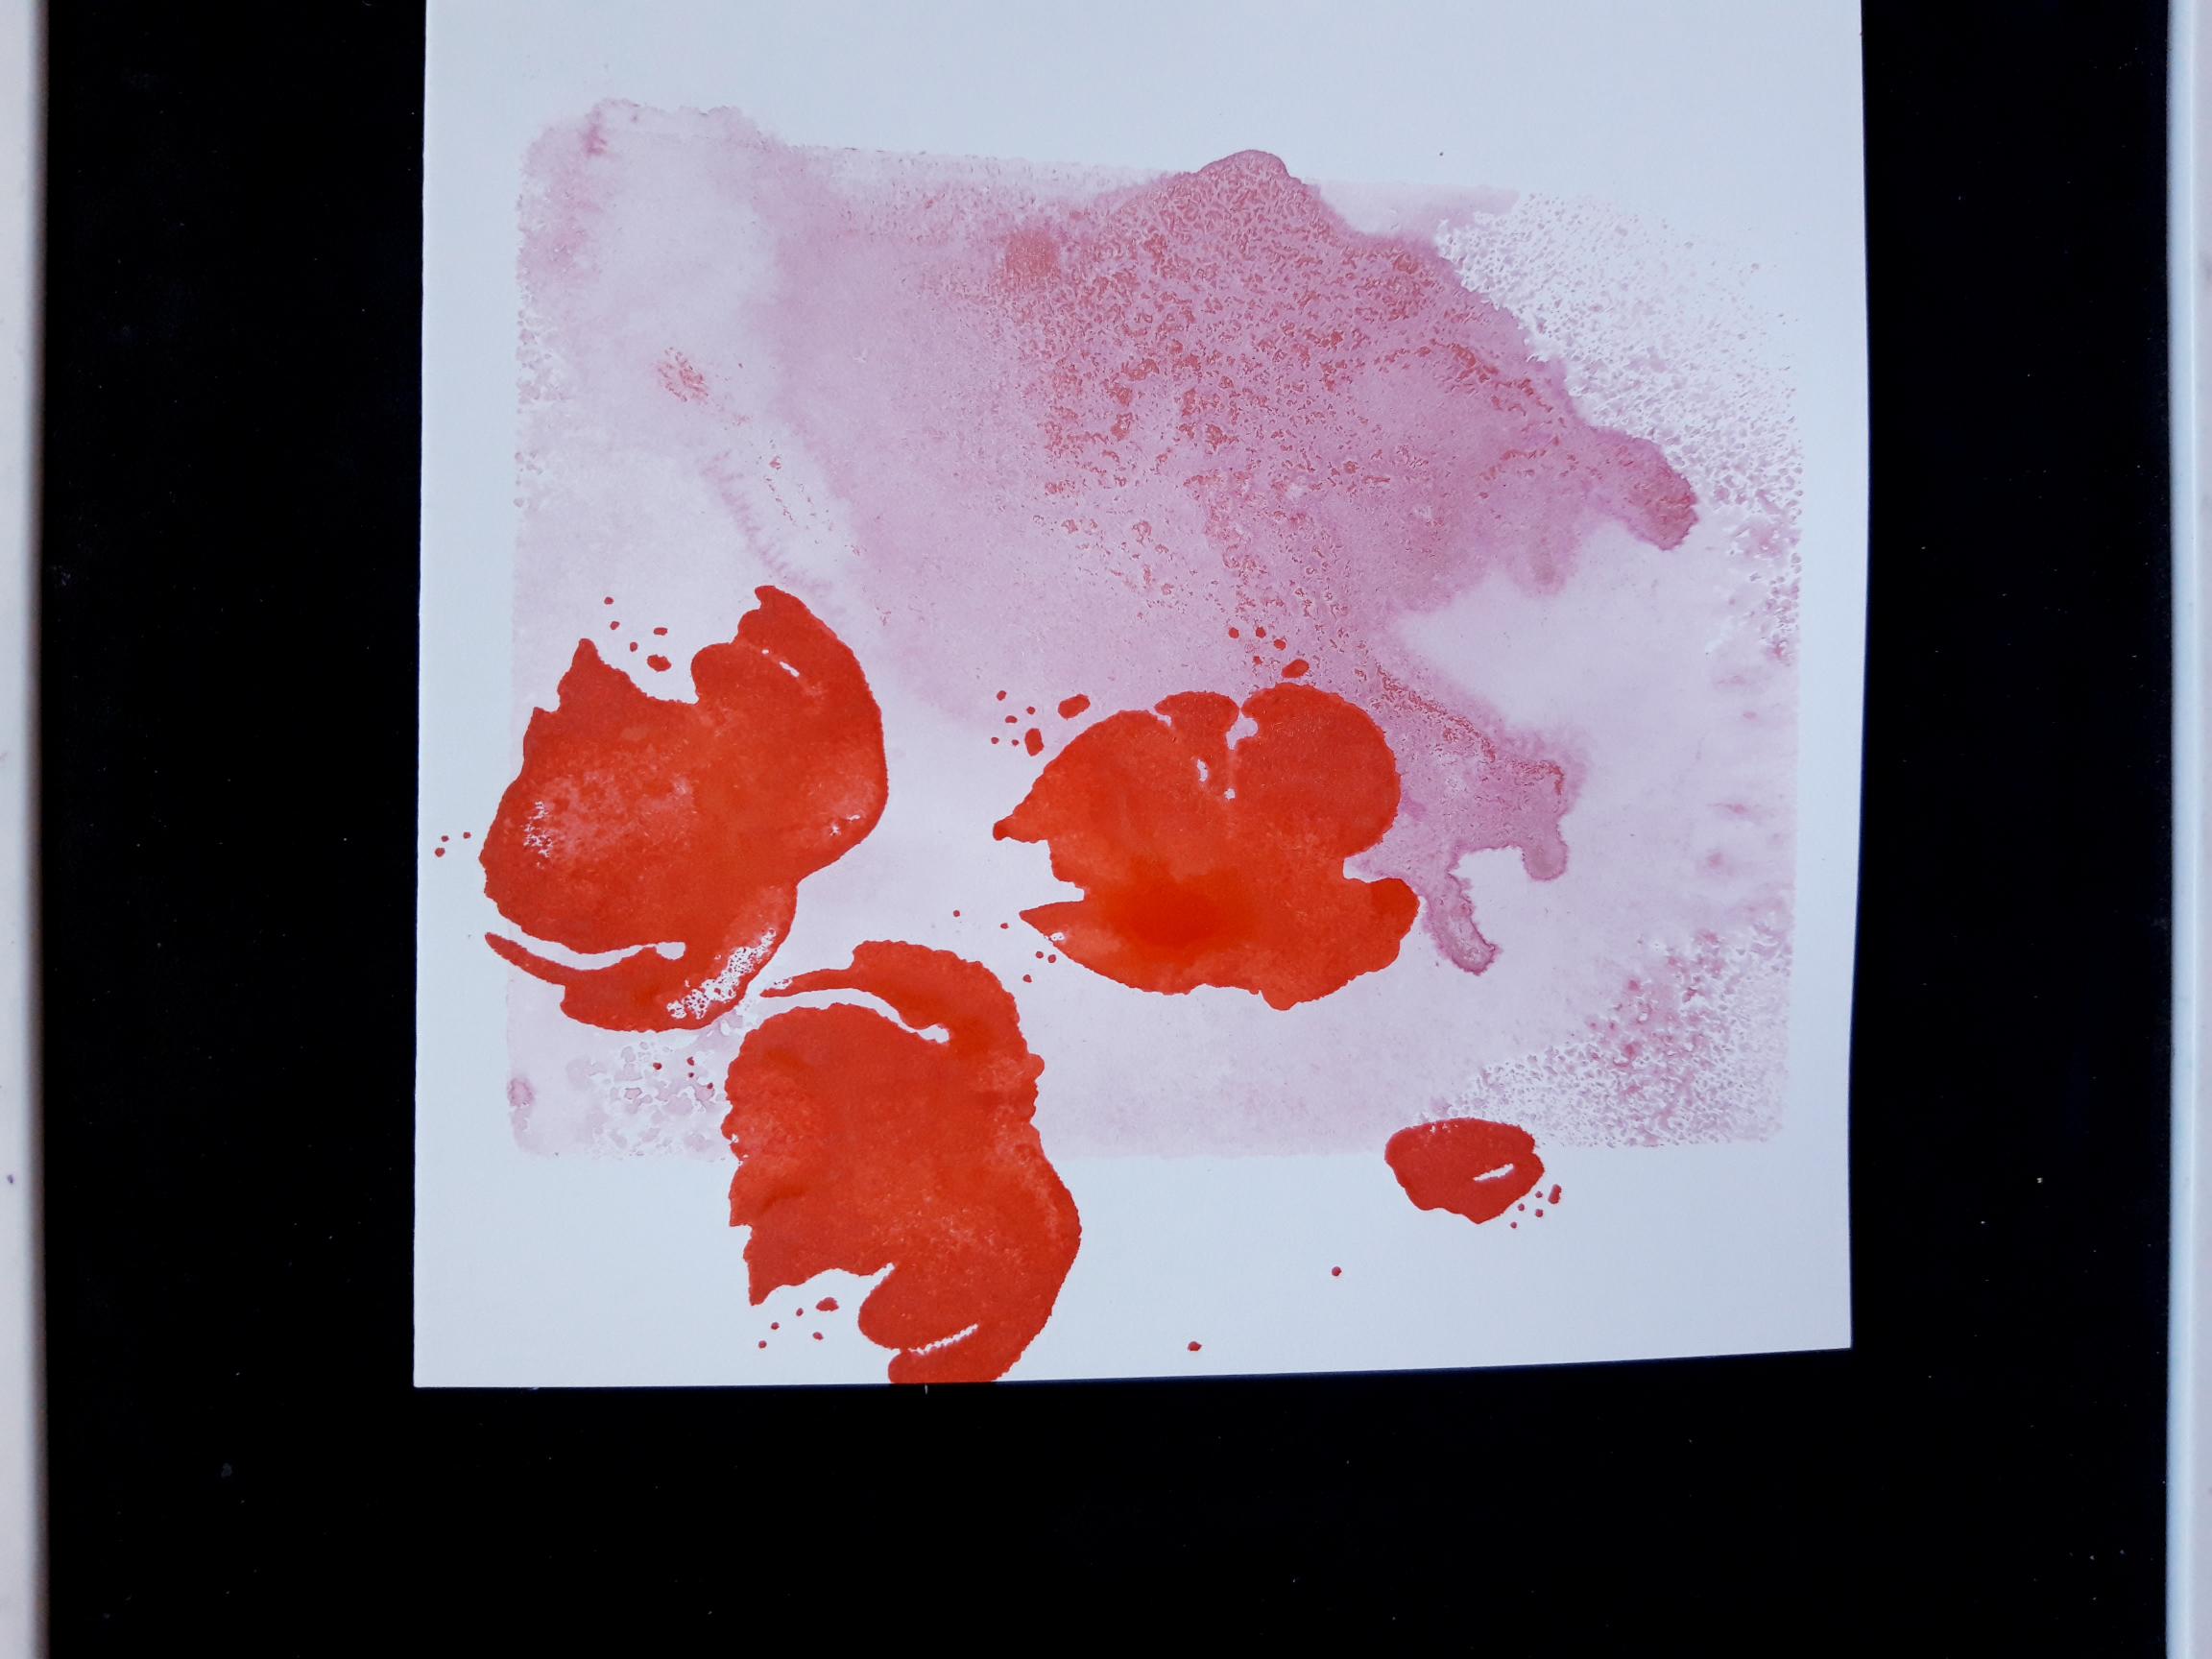
Once the inky background is completely dry, ink up the solid stamp, from the Beautiful Lamination Stamp Collection, with the Candied Apple Oxide. Spritz with water then stamp on to the left hand side of your card. TIP: You may want to use the coordinating detailed stamp, to decide where you want your image positioned. You want enough room under the bottom of the stem, to stamp the sentiment, in a later step. You can reink and stamp, with the Oxide, until you are happy with the effect. |
|
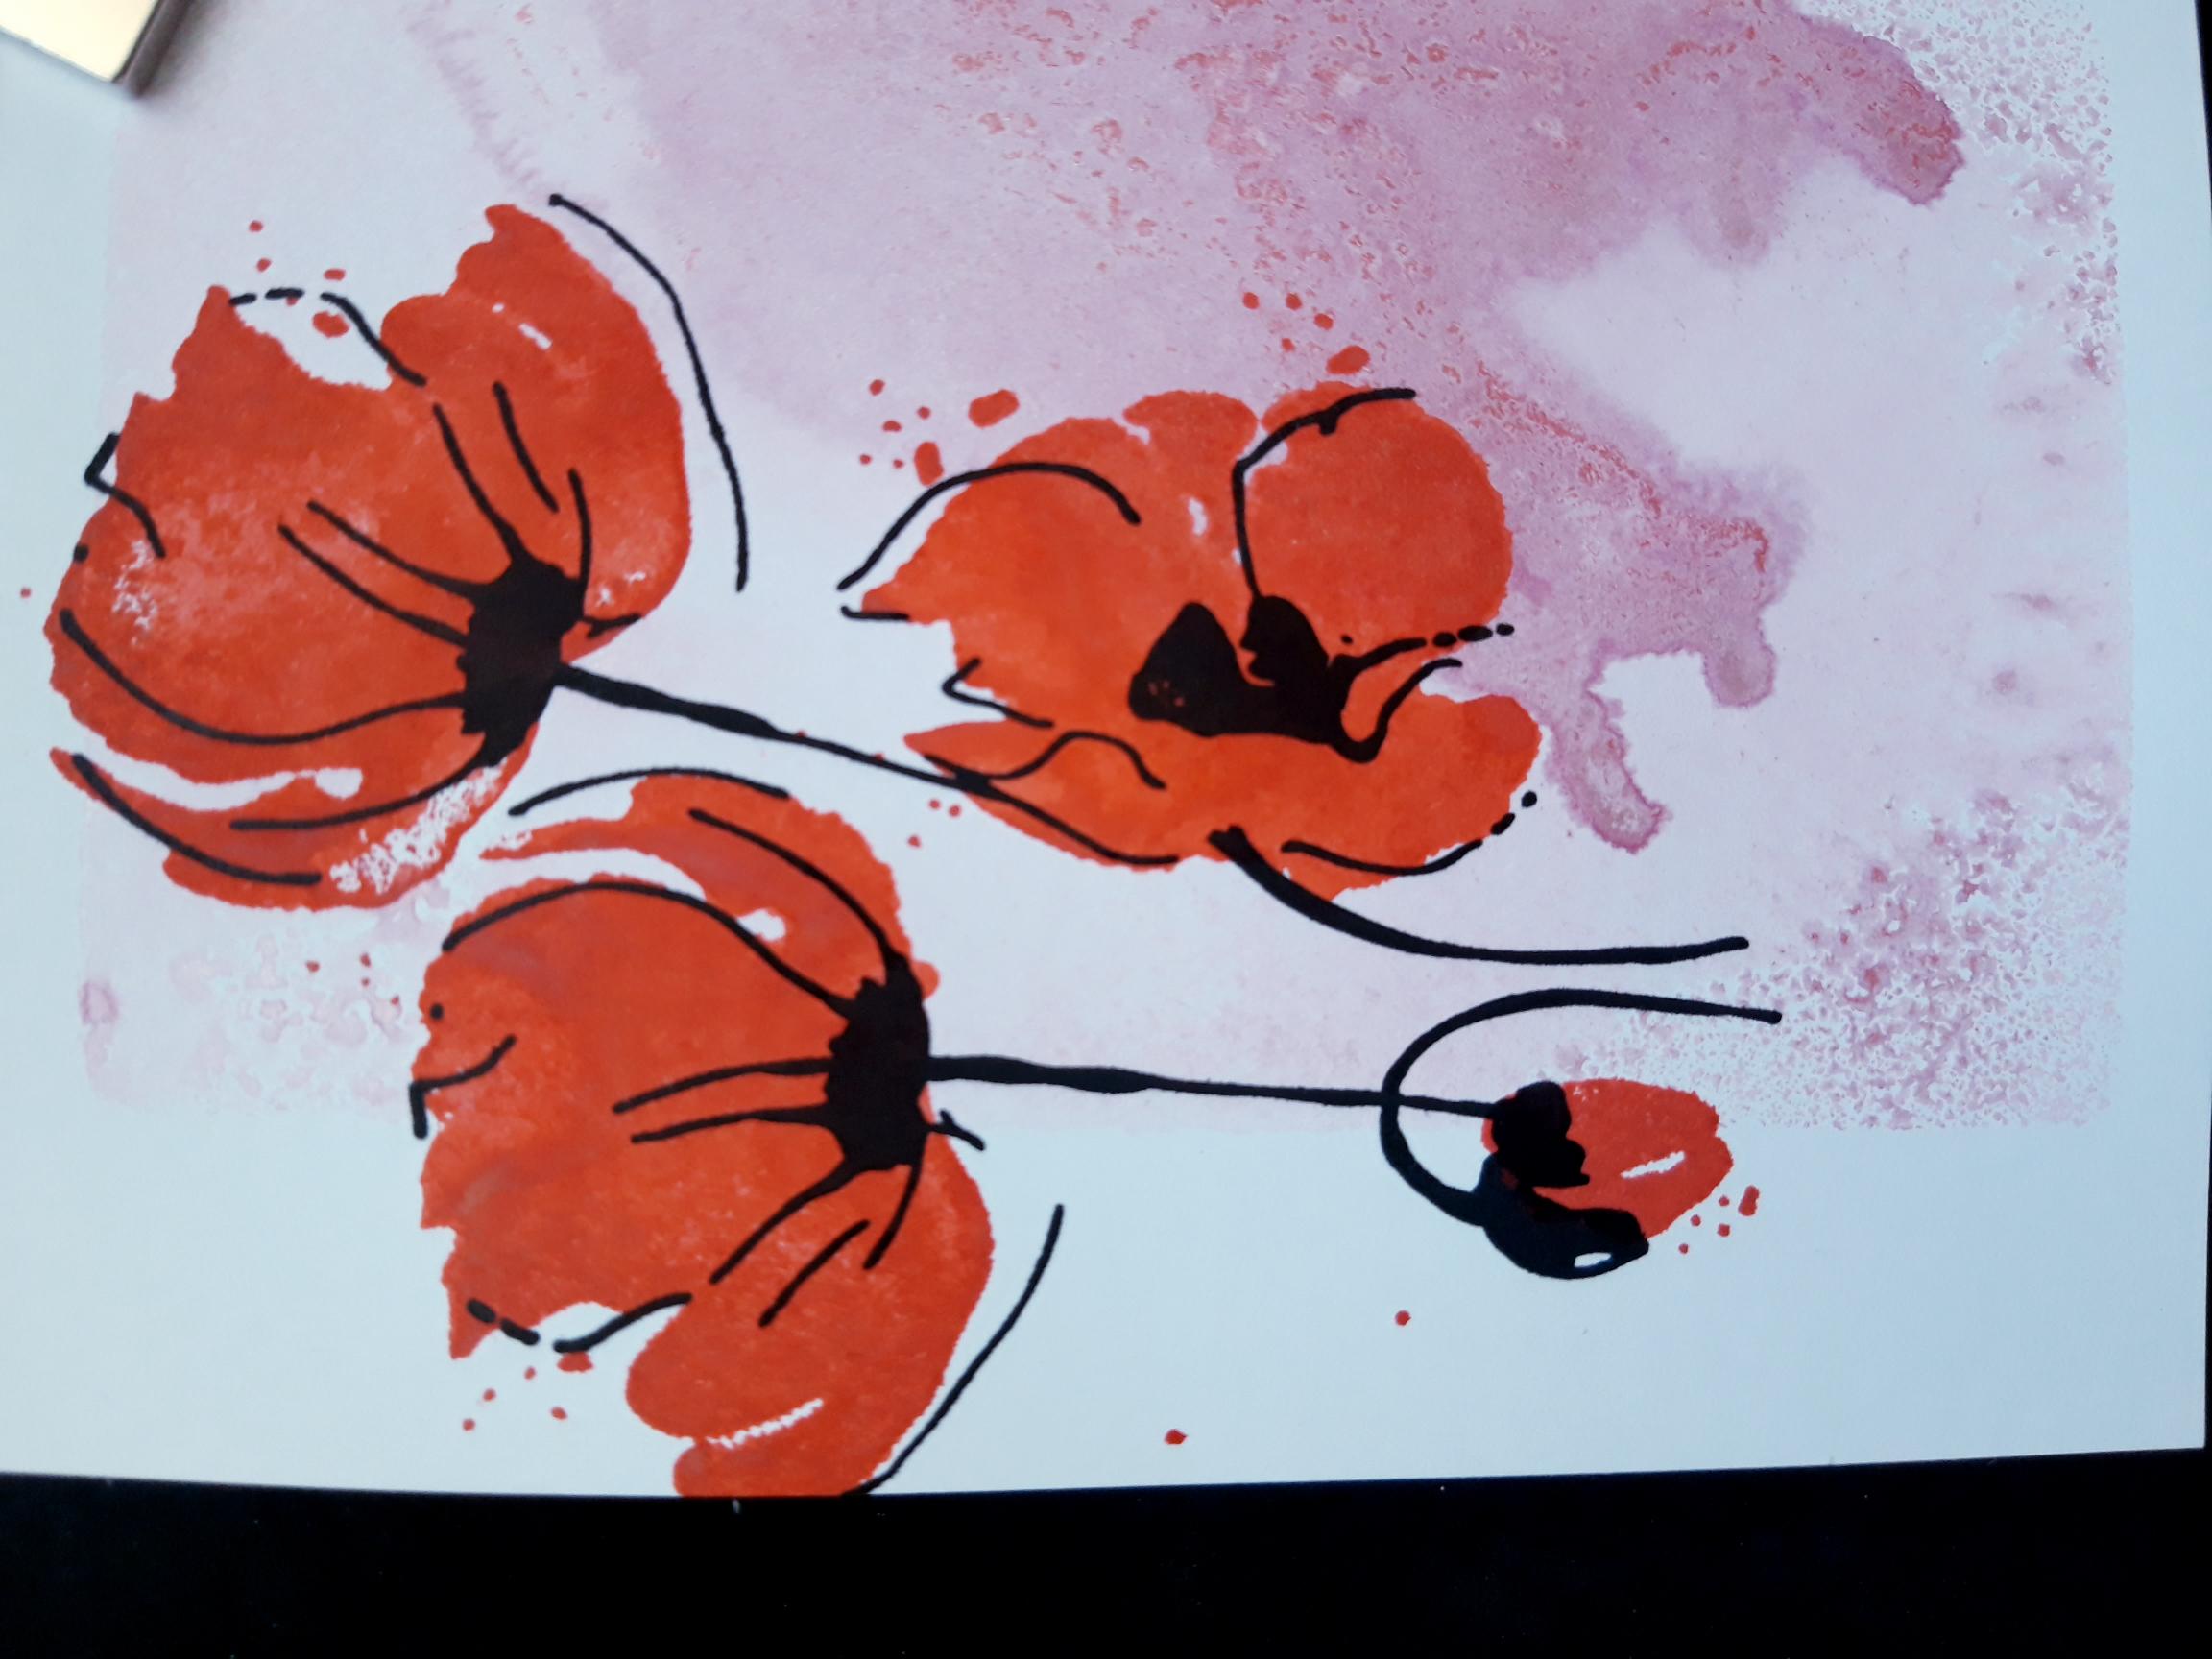
Ink up the detailed stamp with the Onyx Black Versafine. Line up and stamp over your solid stamped image. NB: These lamination designs are "loose", so do not be too particular about how they line up. The image on the packaging will give you a guide. |
|
Ink up the sentiment stamp, from the same set, in the Versafine. Stamp it so it just "kisses" the base of the stem of the flower, along the bottom edge of your inked background. |
|
Use a black pen to draw a decorative, wiggly frame, around the inked panel background. |