Give your friends $10 off their first order!
Refer a FRIEND


WHAT YOU WILL NEED:
Black card blank 8 1/4 x 5 3/4"
Kraft card
Vellum
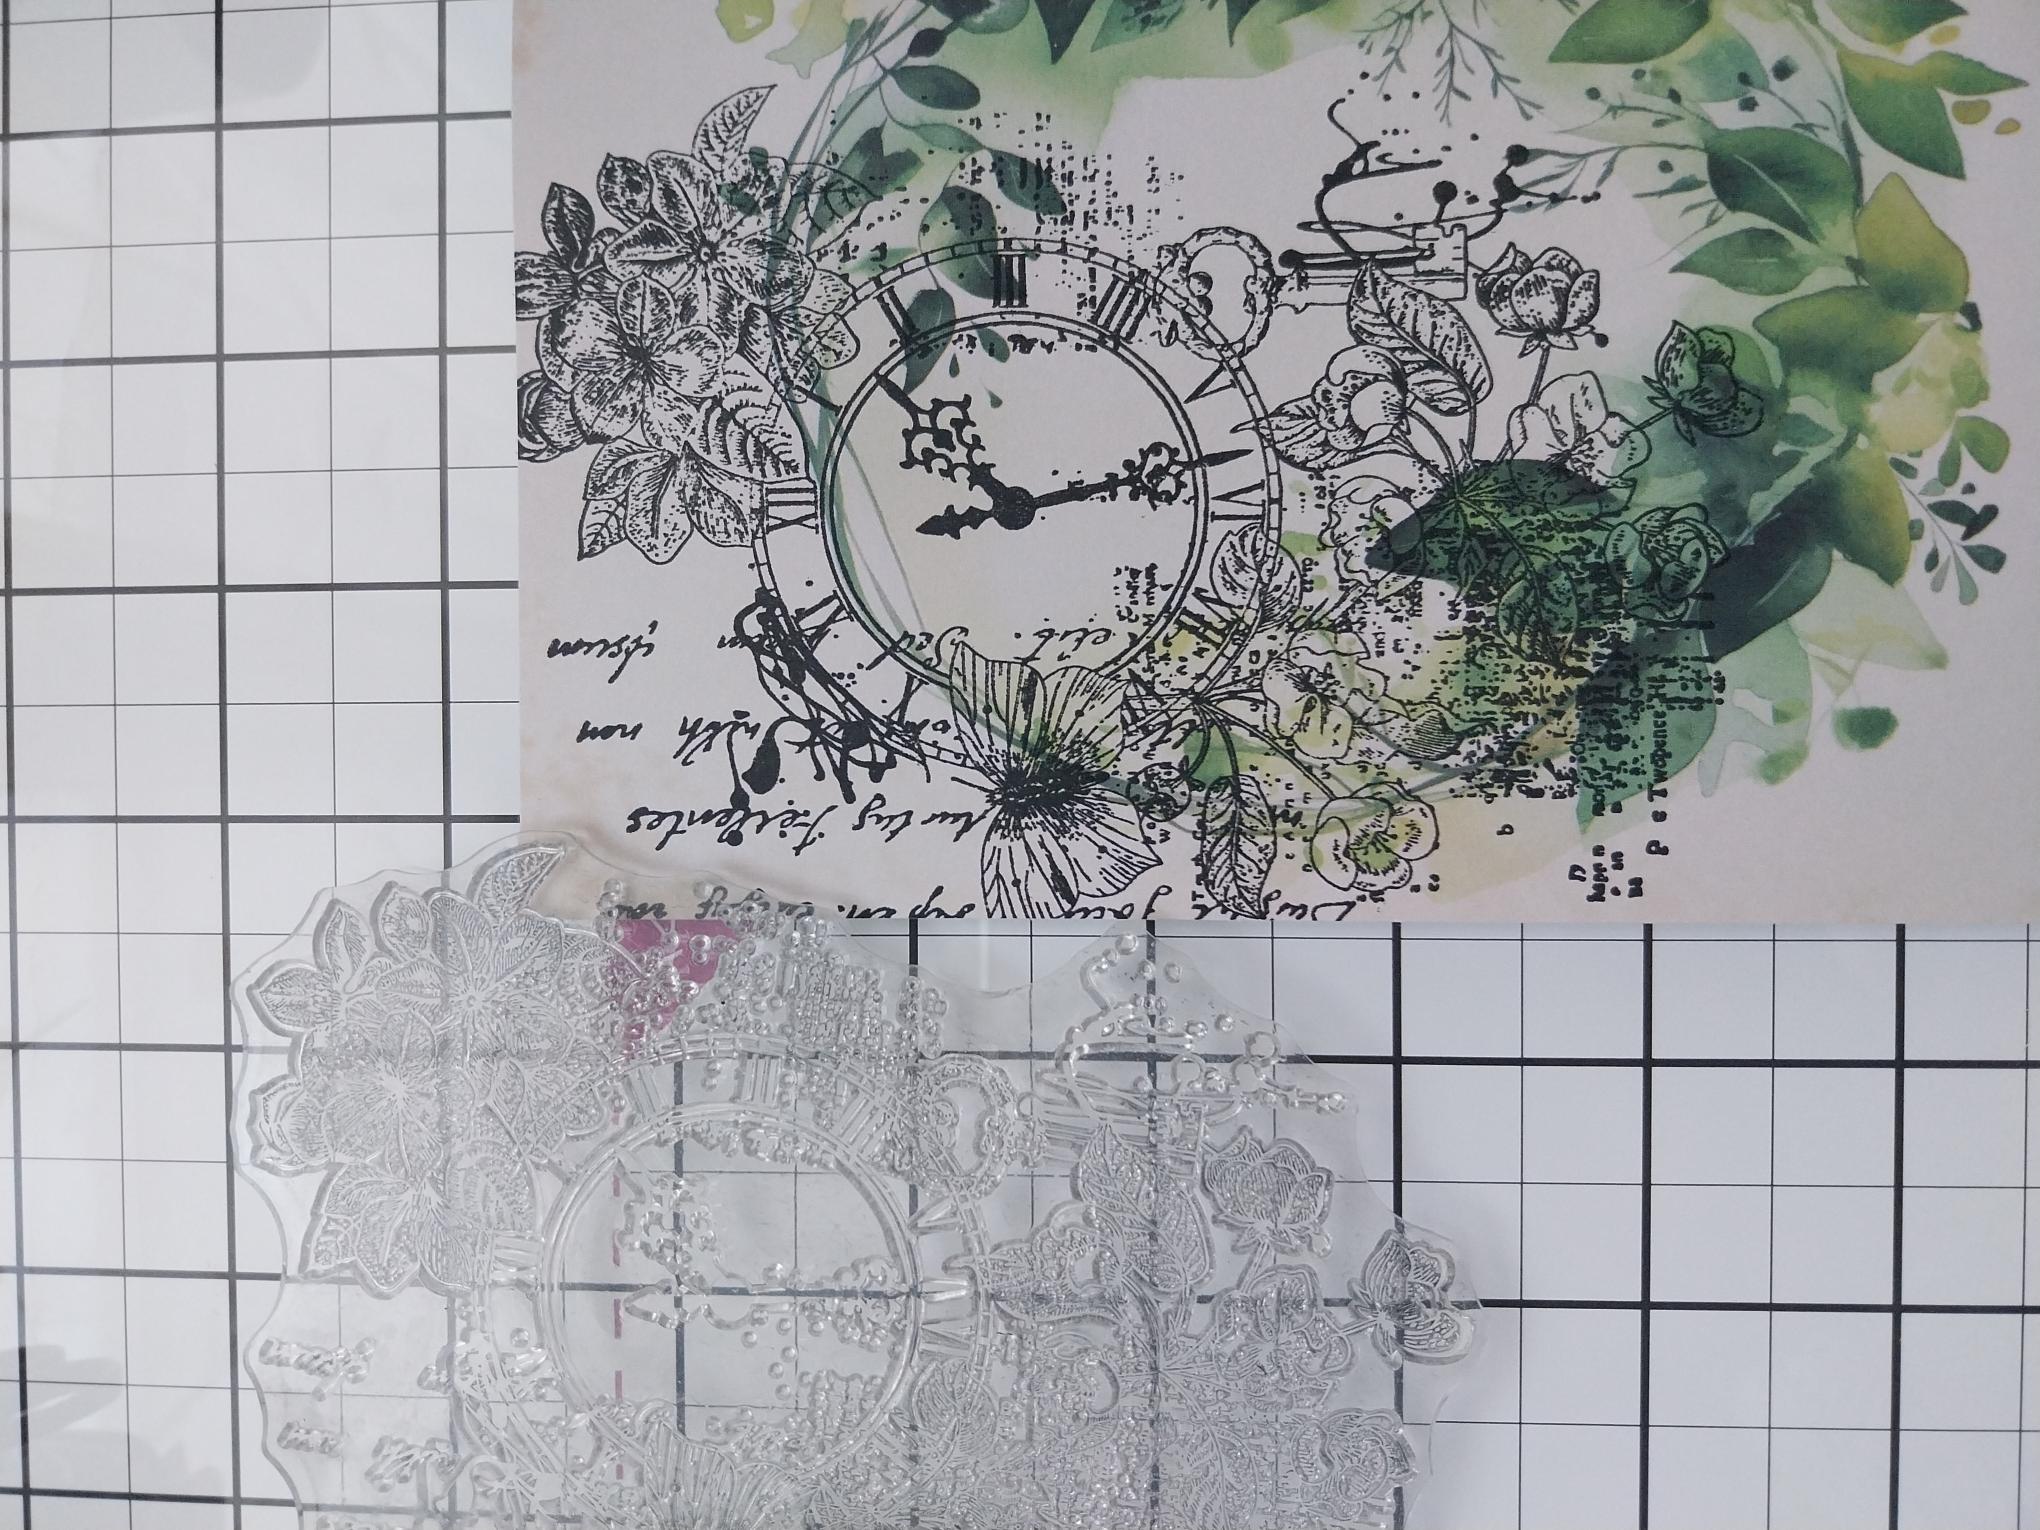
Time To Breathe Stamp and Die
Mulberry Frames Stamp and Die
Watercolour Artistry 5 x 7" Paper Pad
Watercolour Brights 5 x 7" Paper Pad
SBM Hybrid Ink Pad: Midnight
Imala white gel pen
WOW embossing ink pad
WOW white embossing powder
WOW heat tool
Anti-static bag
Eureka 101 Watercolour Tablet
SBM A3 Magnetic glass mat
Paper Trimmer
Glue/Double-sided adhesive tape
Die Cutting machine
[click image to enlarge] 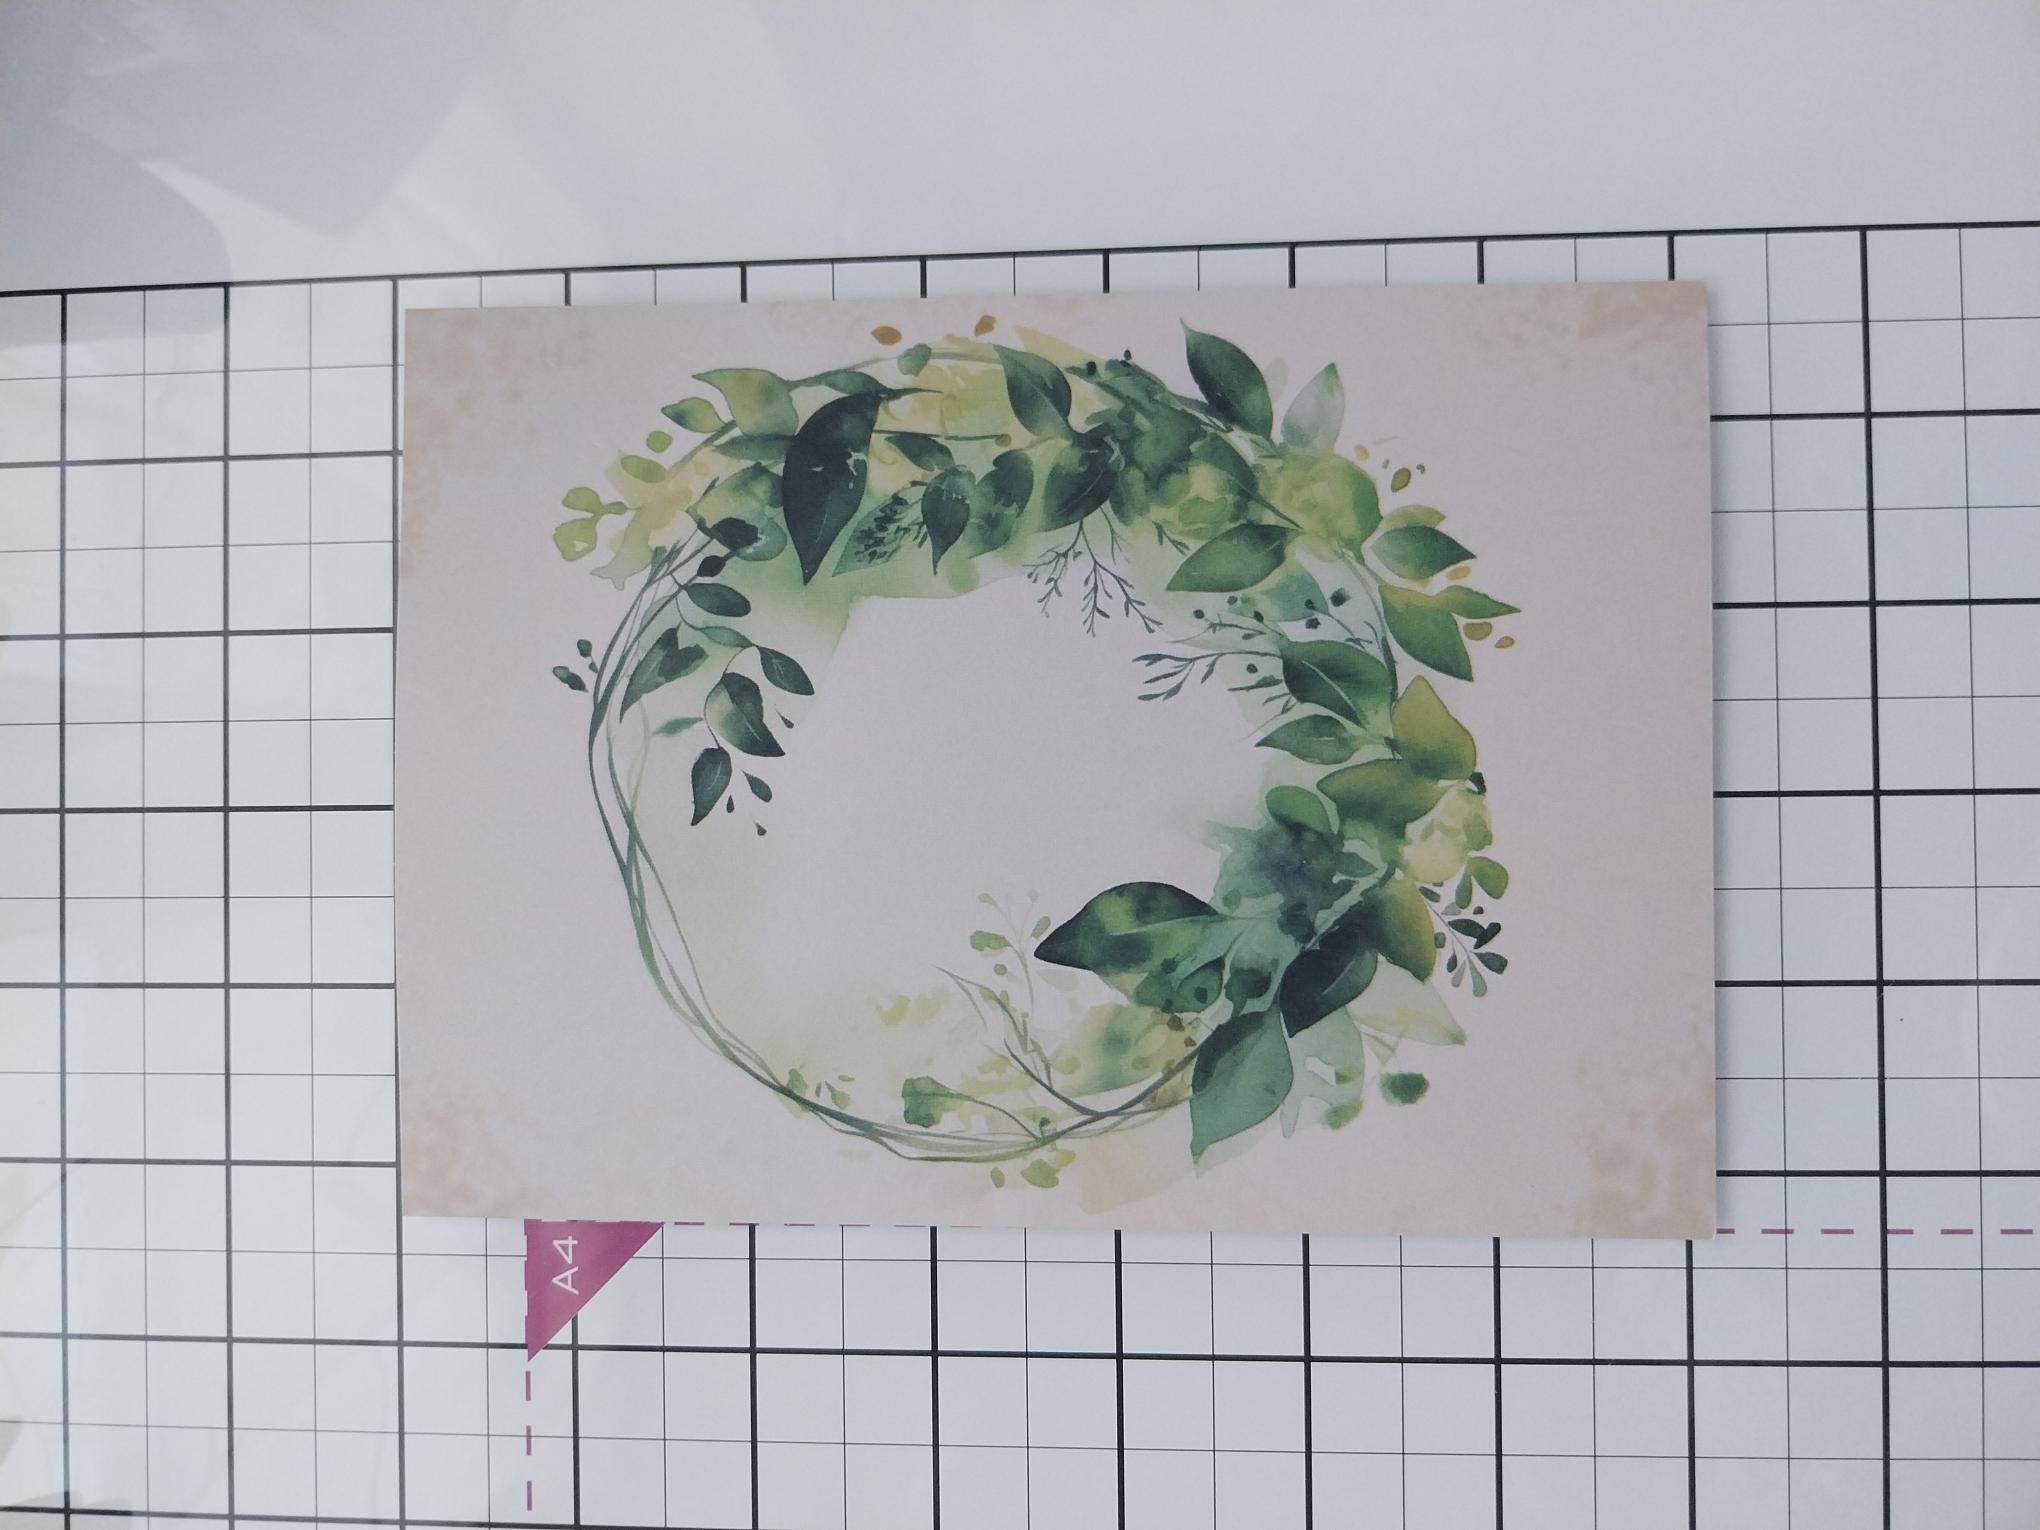
|
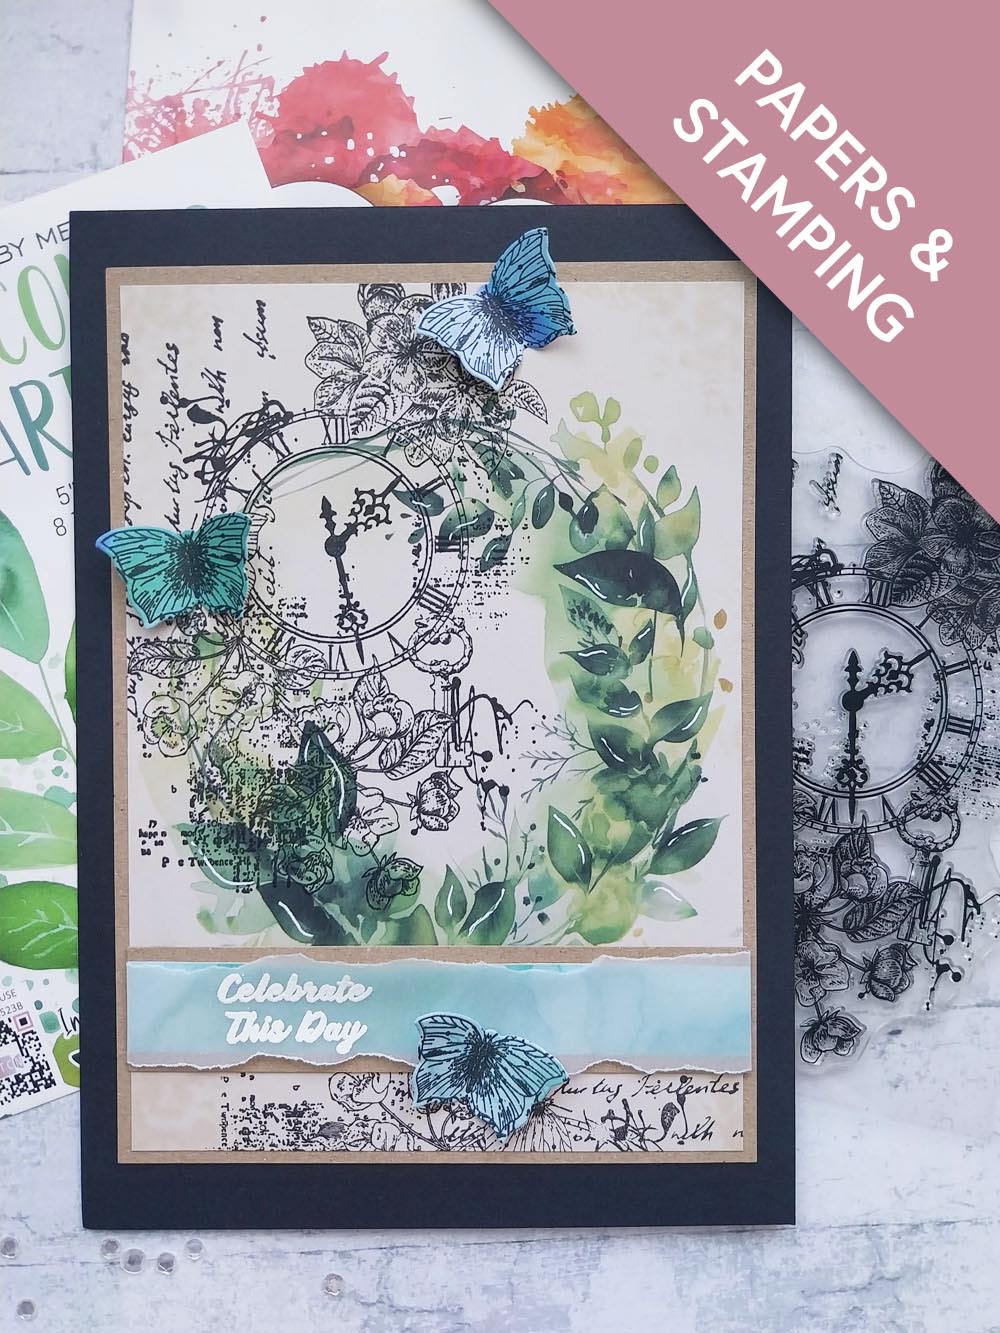
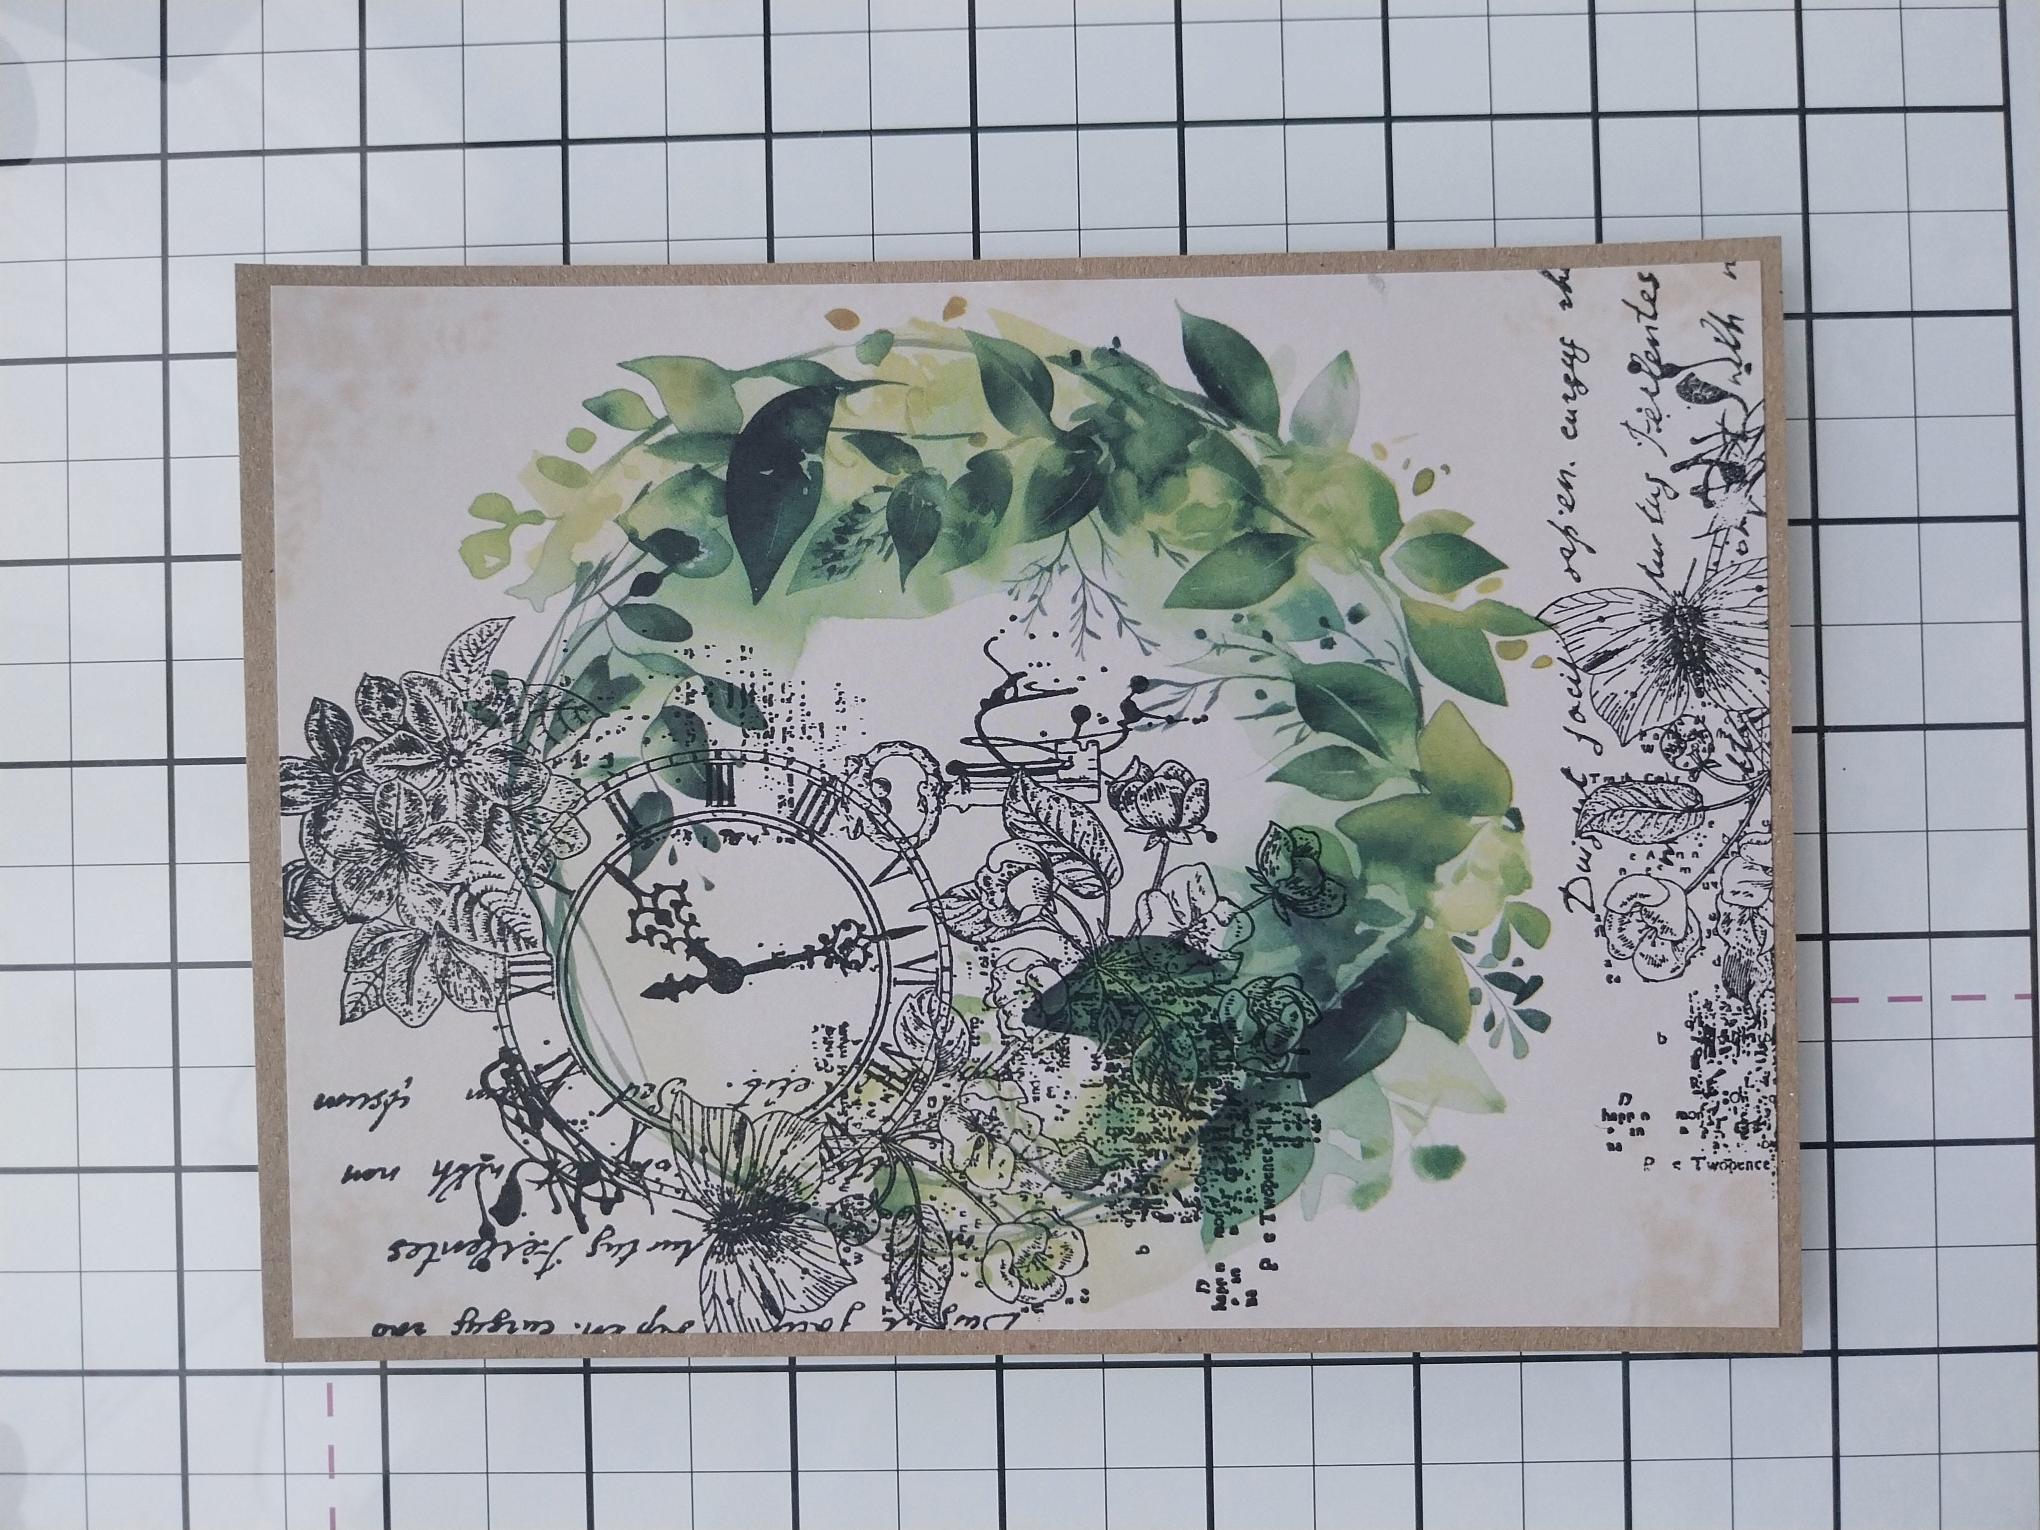
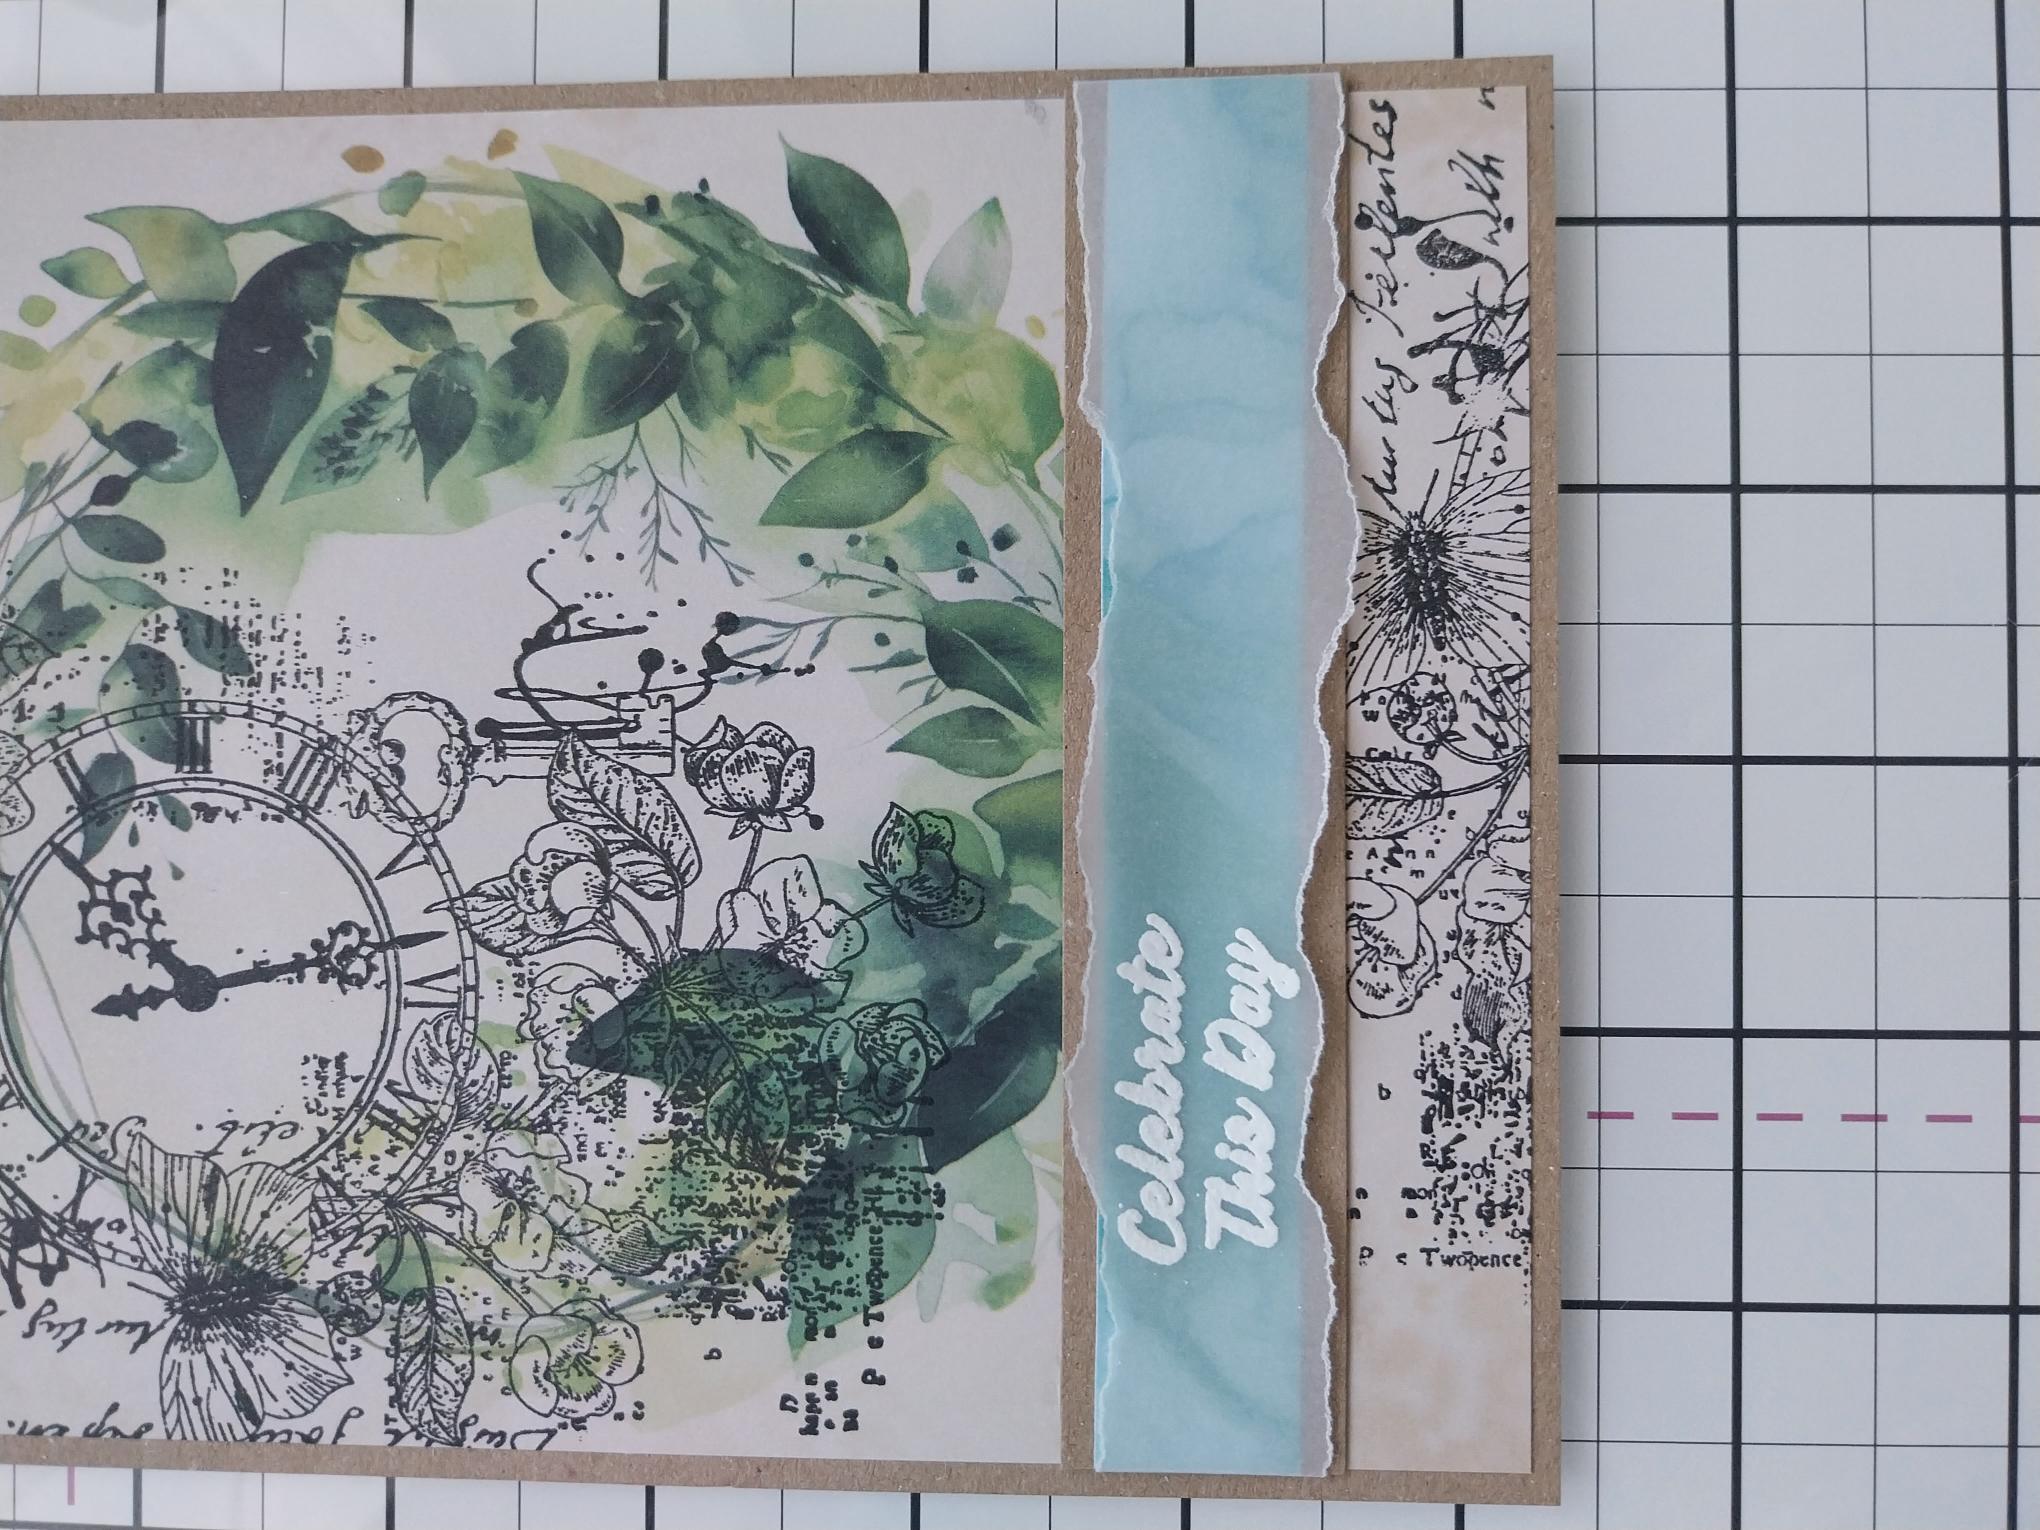
Remove this beautiful decorative paper from the Watercolour Artistry paper pad. |
|
Stamp the collage clock, from Time to Breathe, with the Midnight ink, coming down from the top left of the printed paper, emerging inside the wreath design. |

|
Re-ink and stamp a small section across the bottom right of the printed paper, then pop to one side. |
|
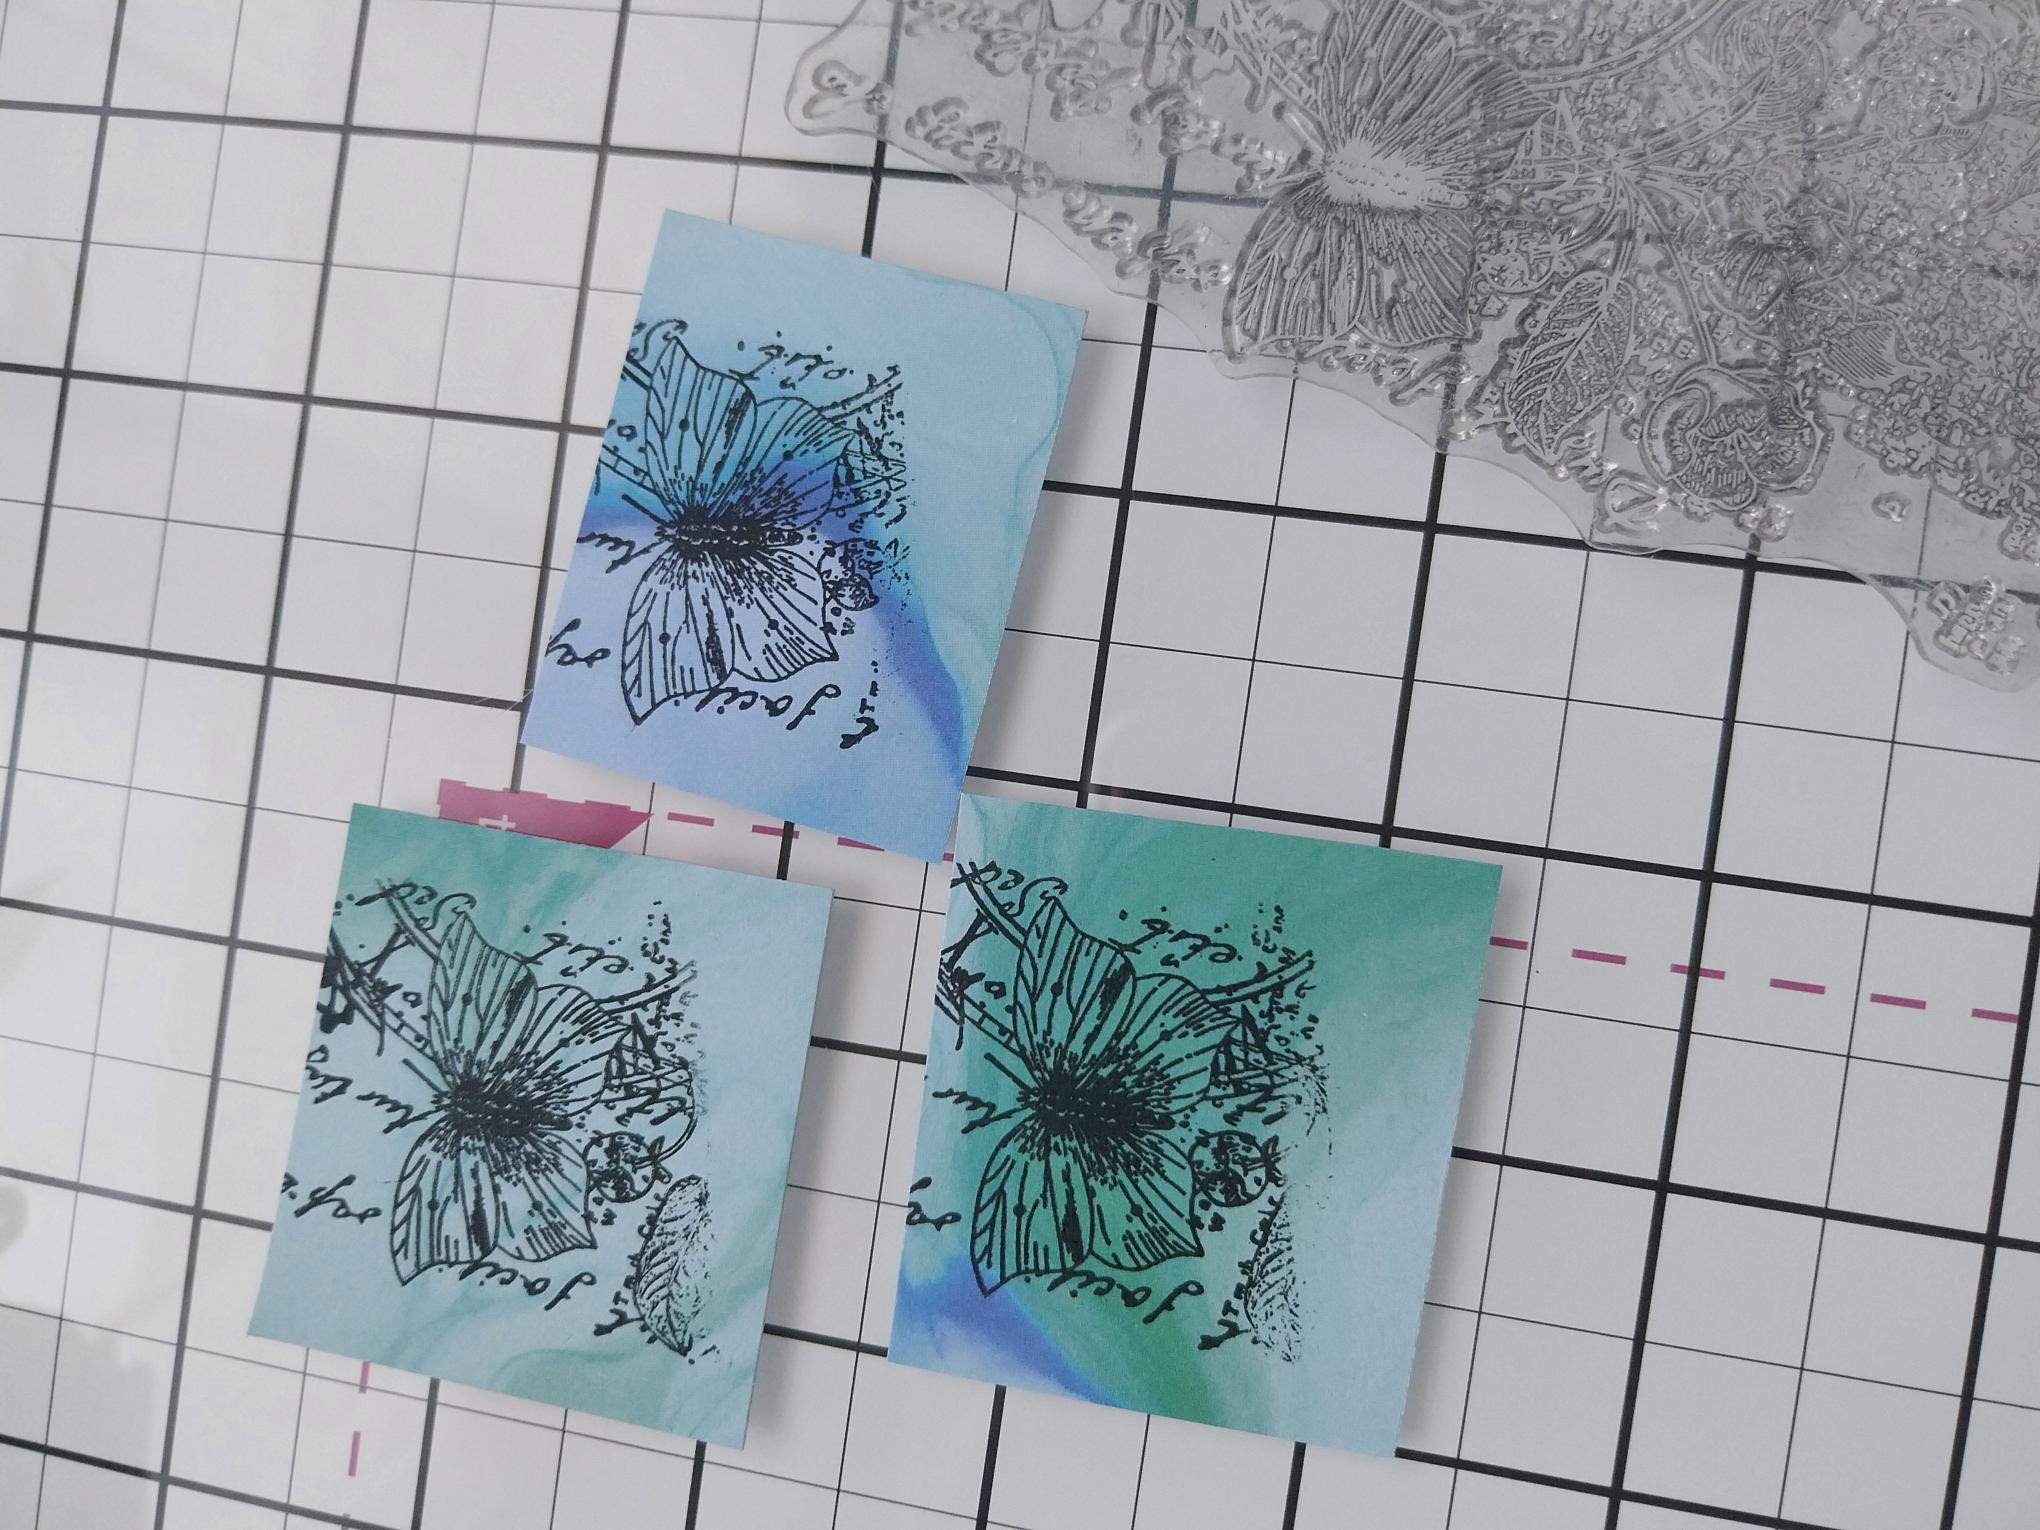
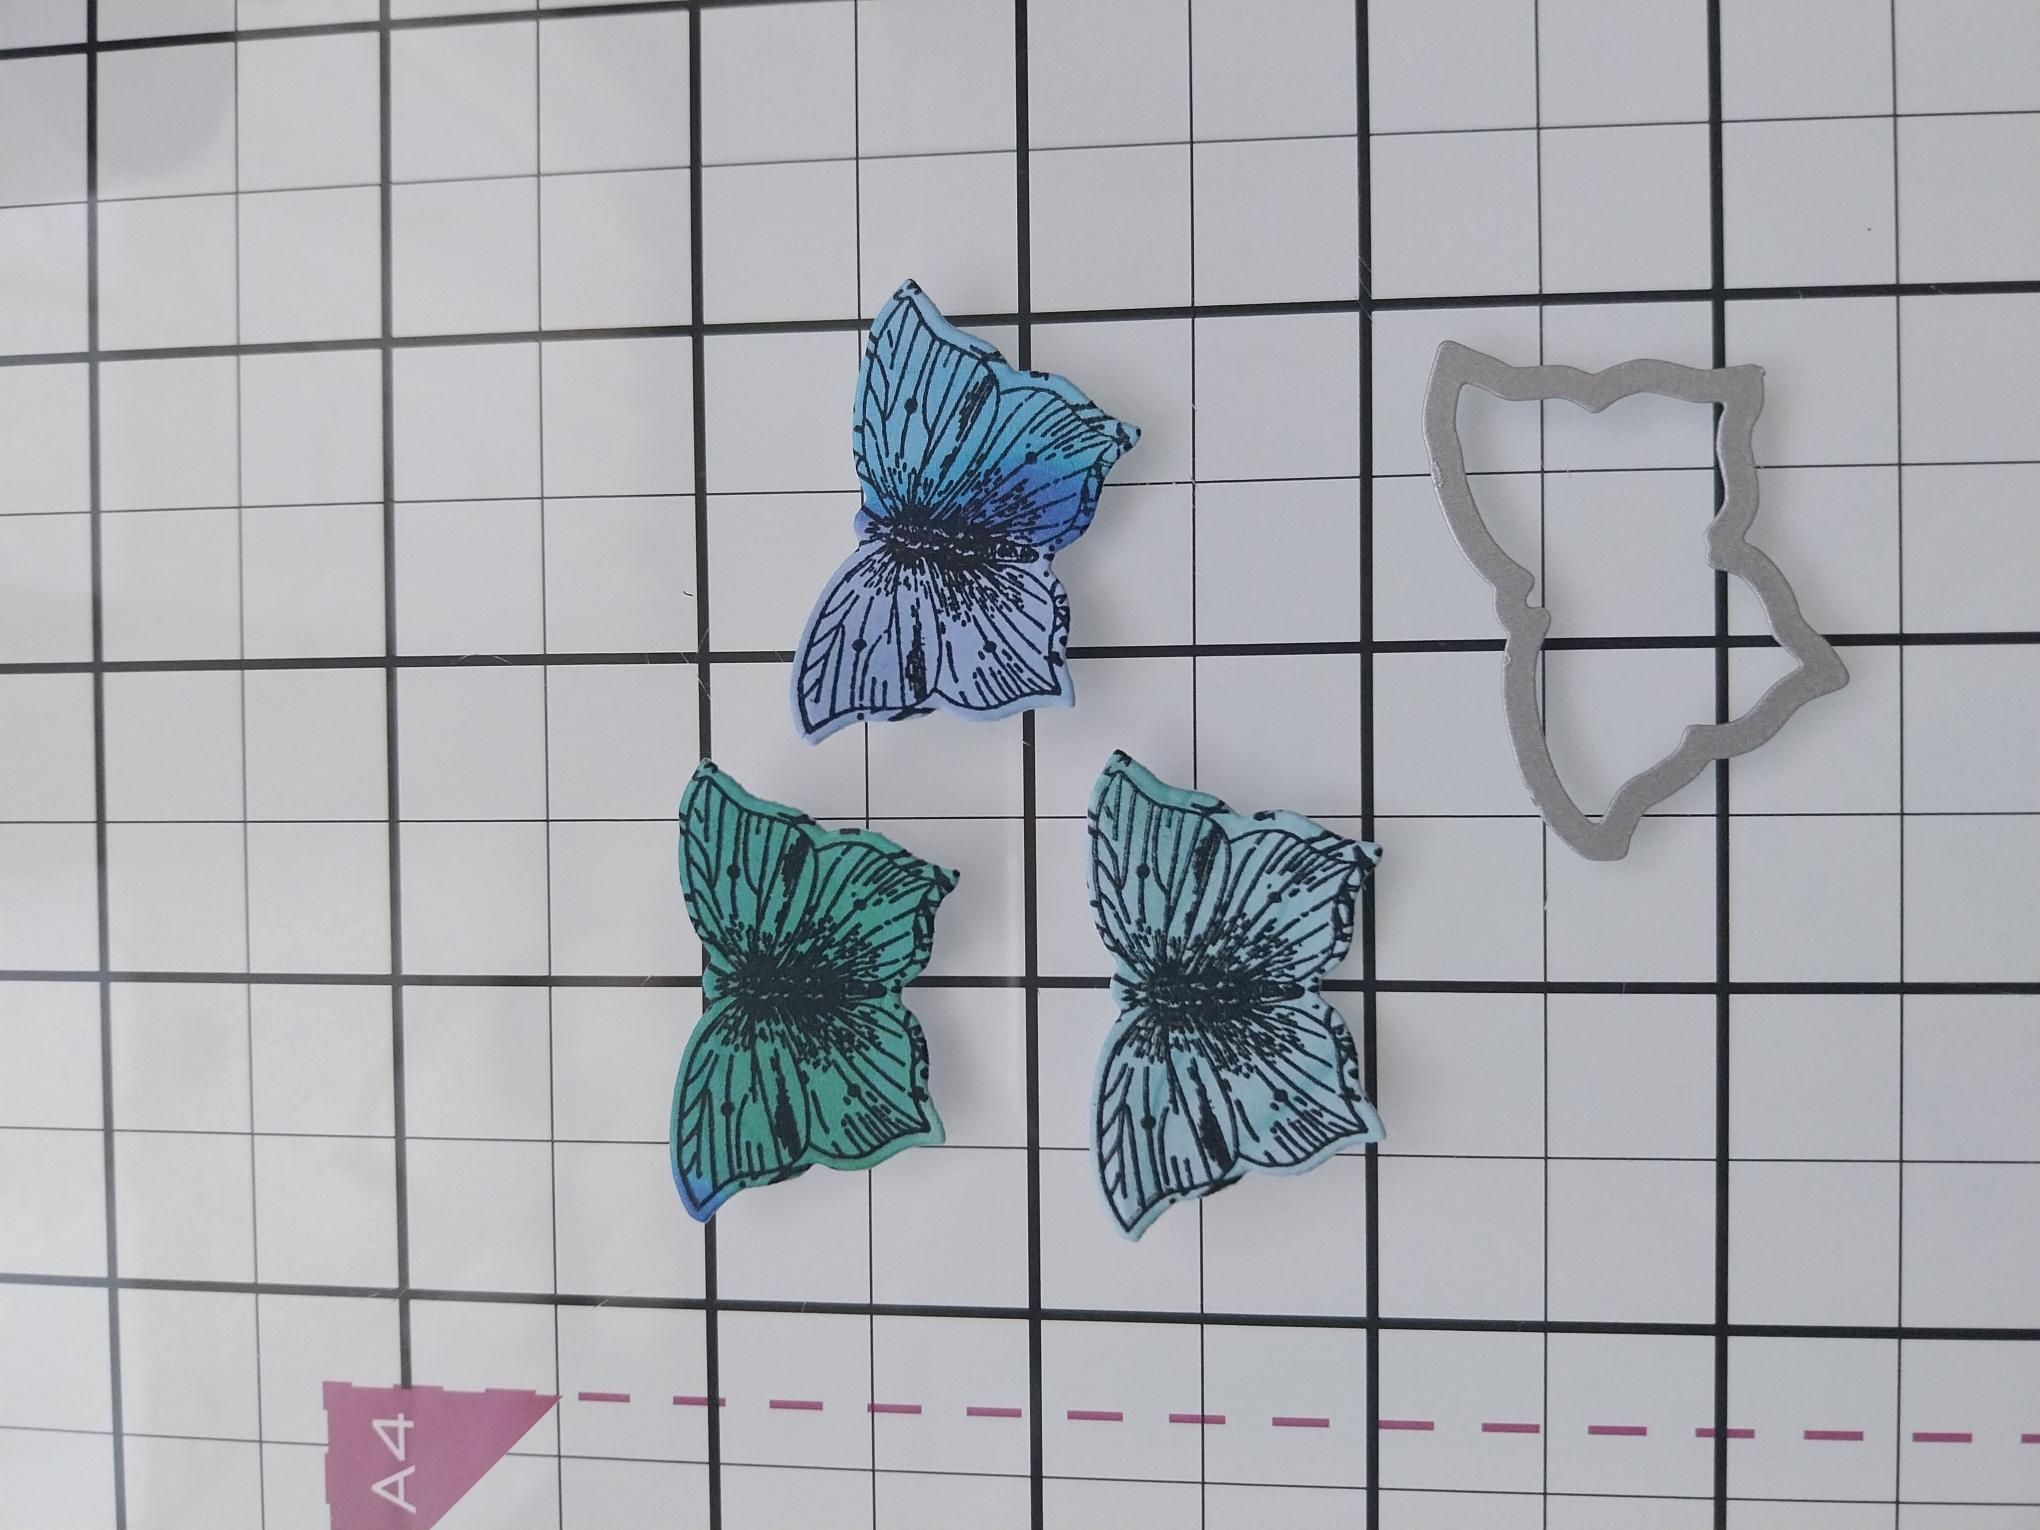
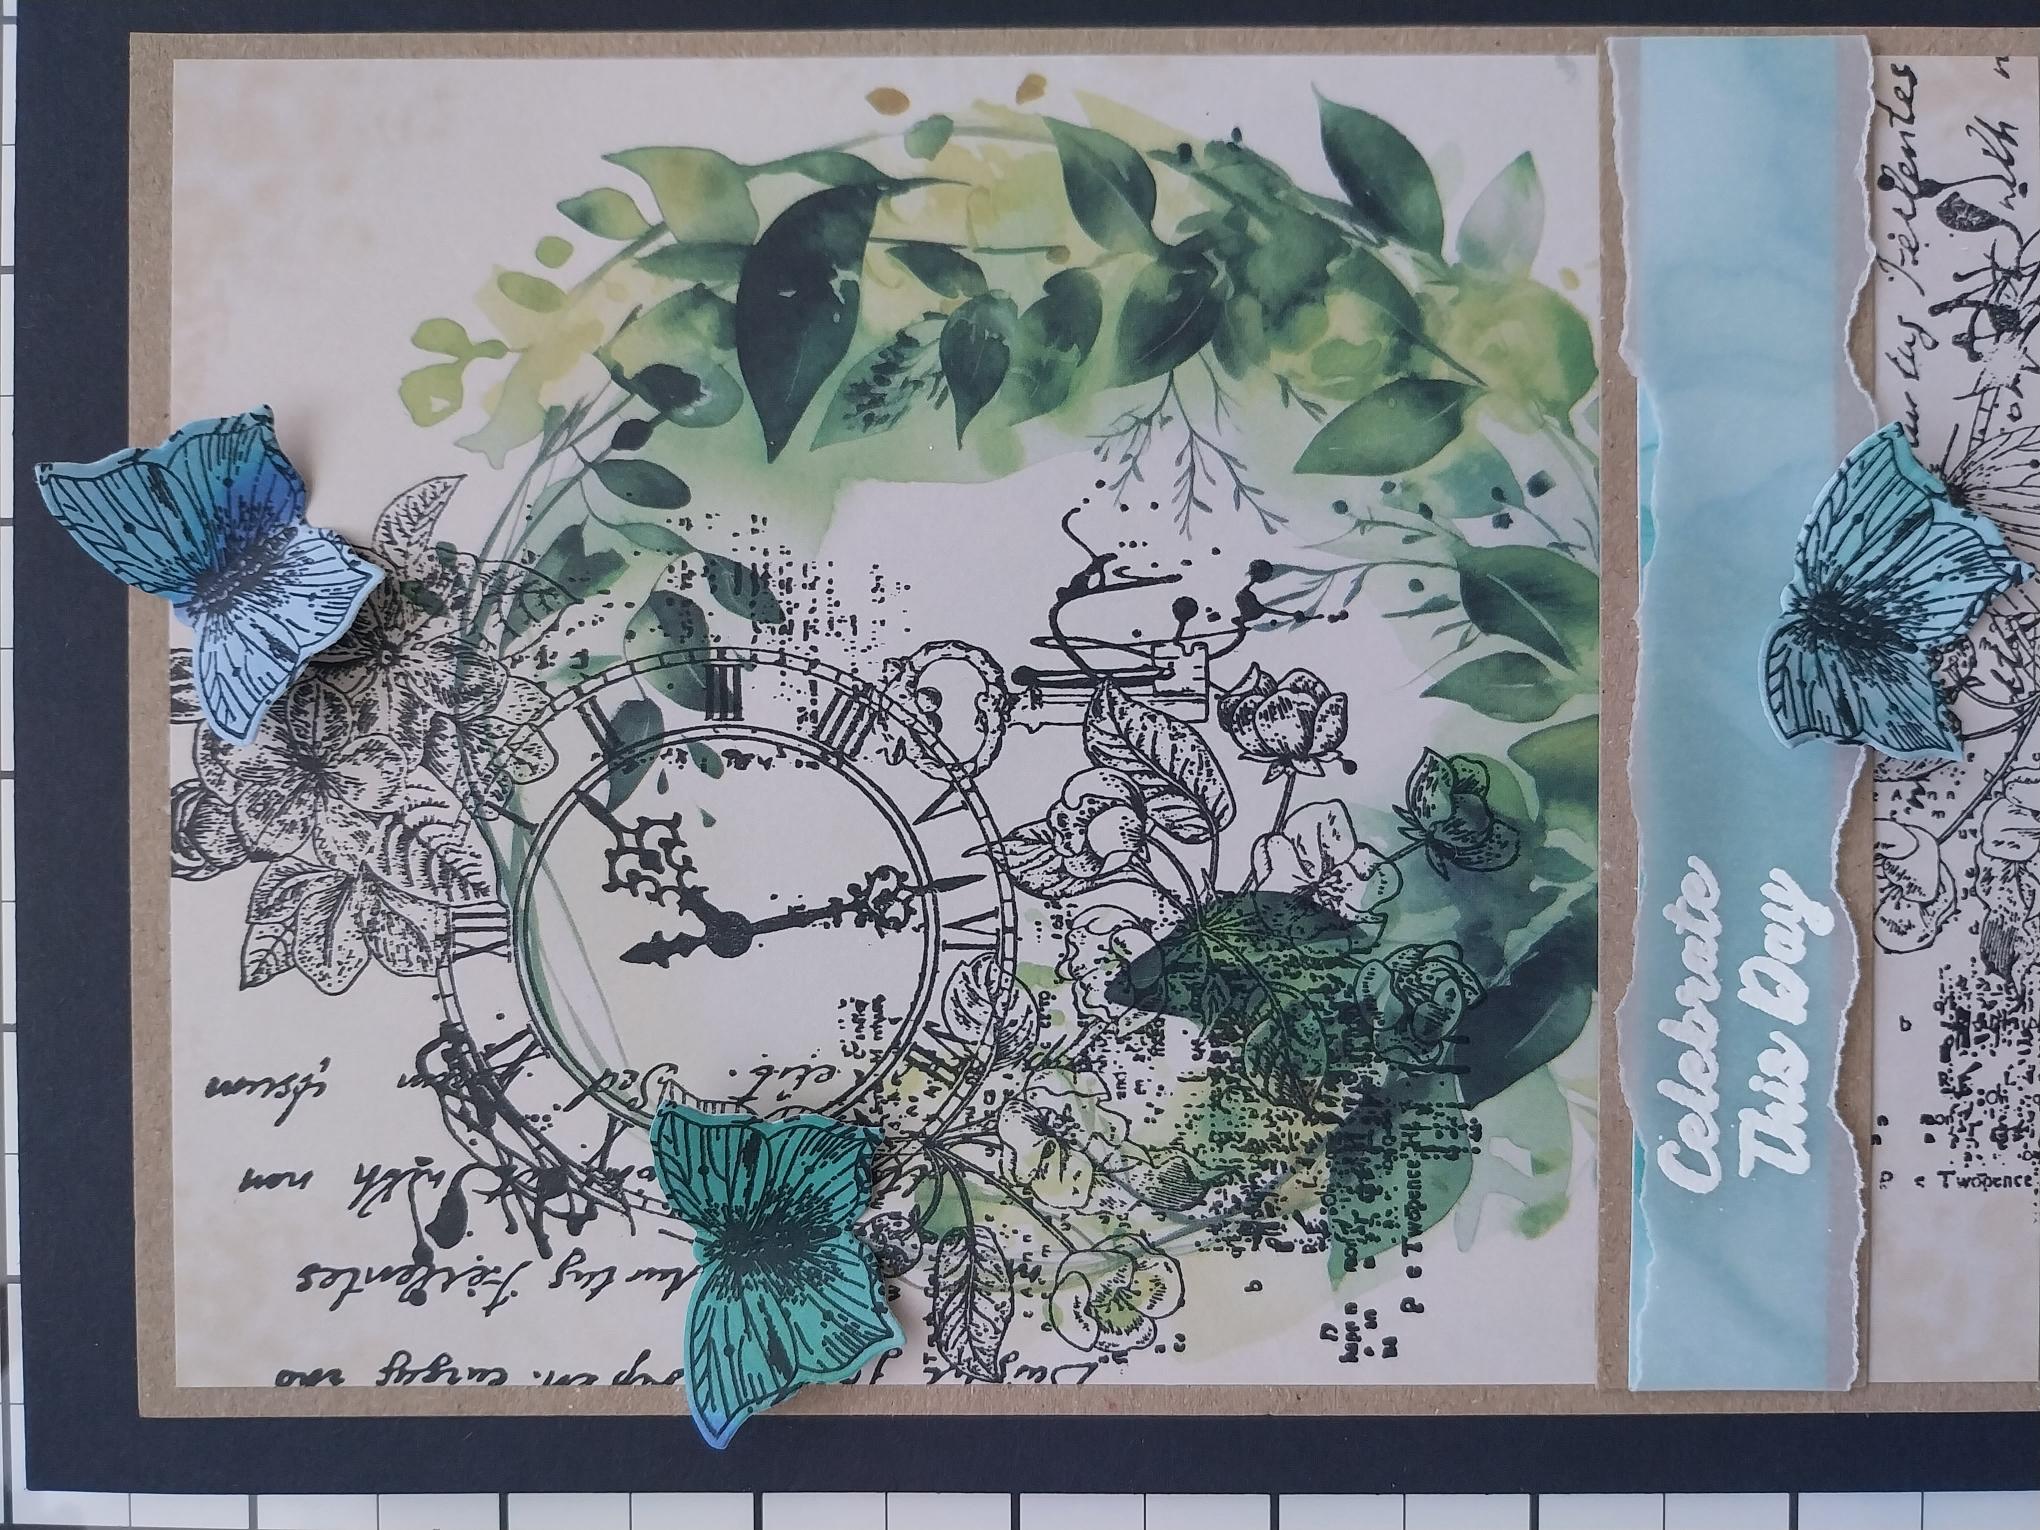
Stamp the "butterfly" area of the same image THREE times, in Midnight, on to this paper from the Watercolour Brights pad. Set the remaining paper to one side, for a later step. |
|
Use the coordinating die to cut them out, before setting to one side. |
|
Mat your stamped artwork on to kraft card trimmed to 7 1/4 x 5 1/4". |
|
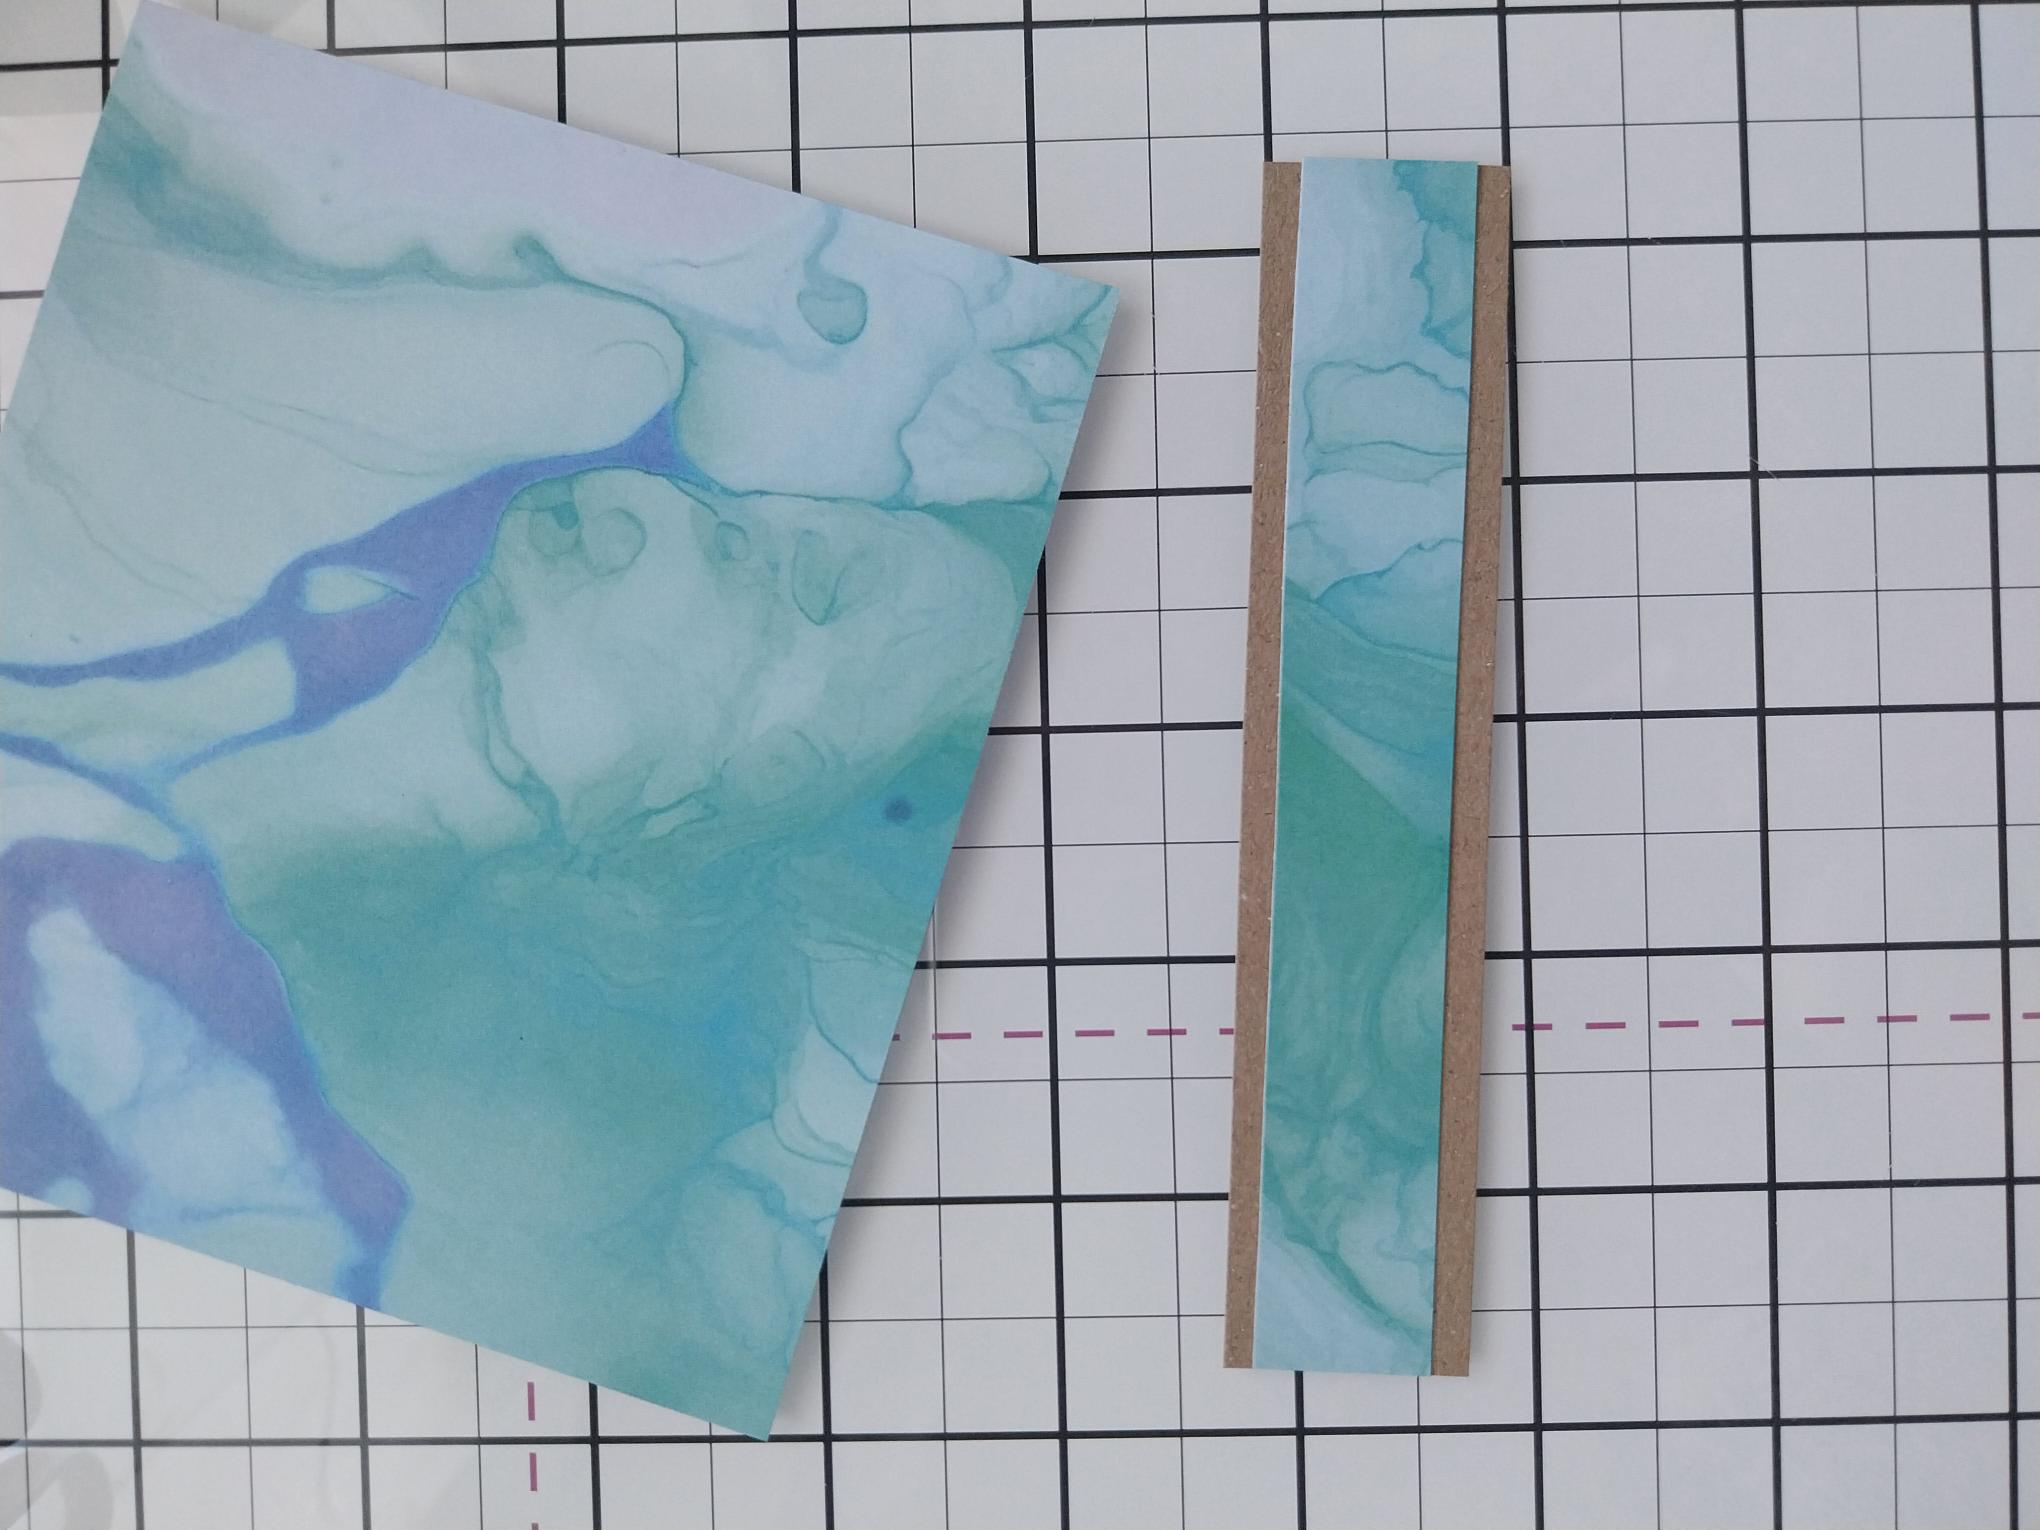
Cut a panel of the paper set aside earlier, to 5 x 3/4". Mat on to kraft card cut to 5 x 1", as seen here. |
|
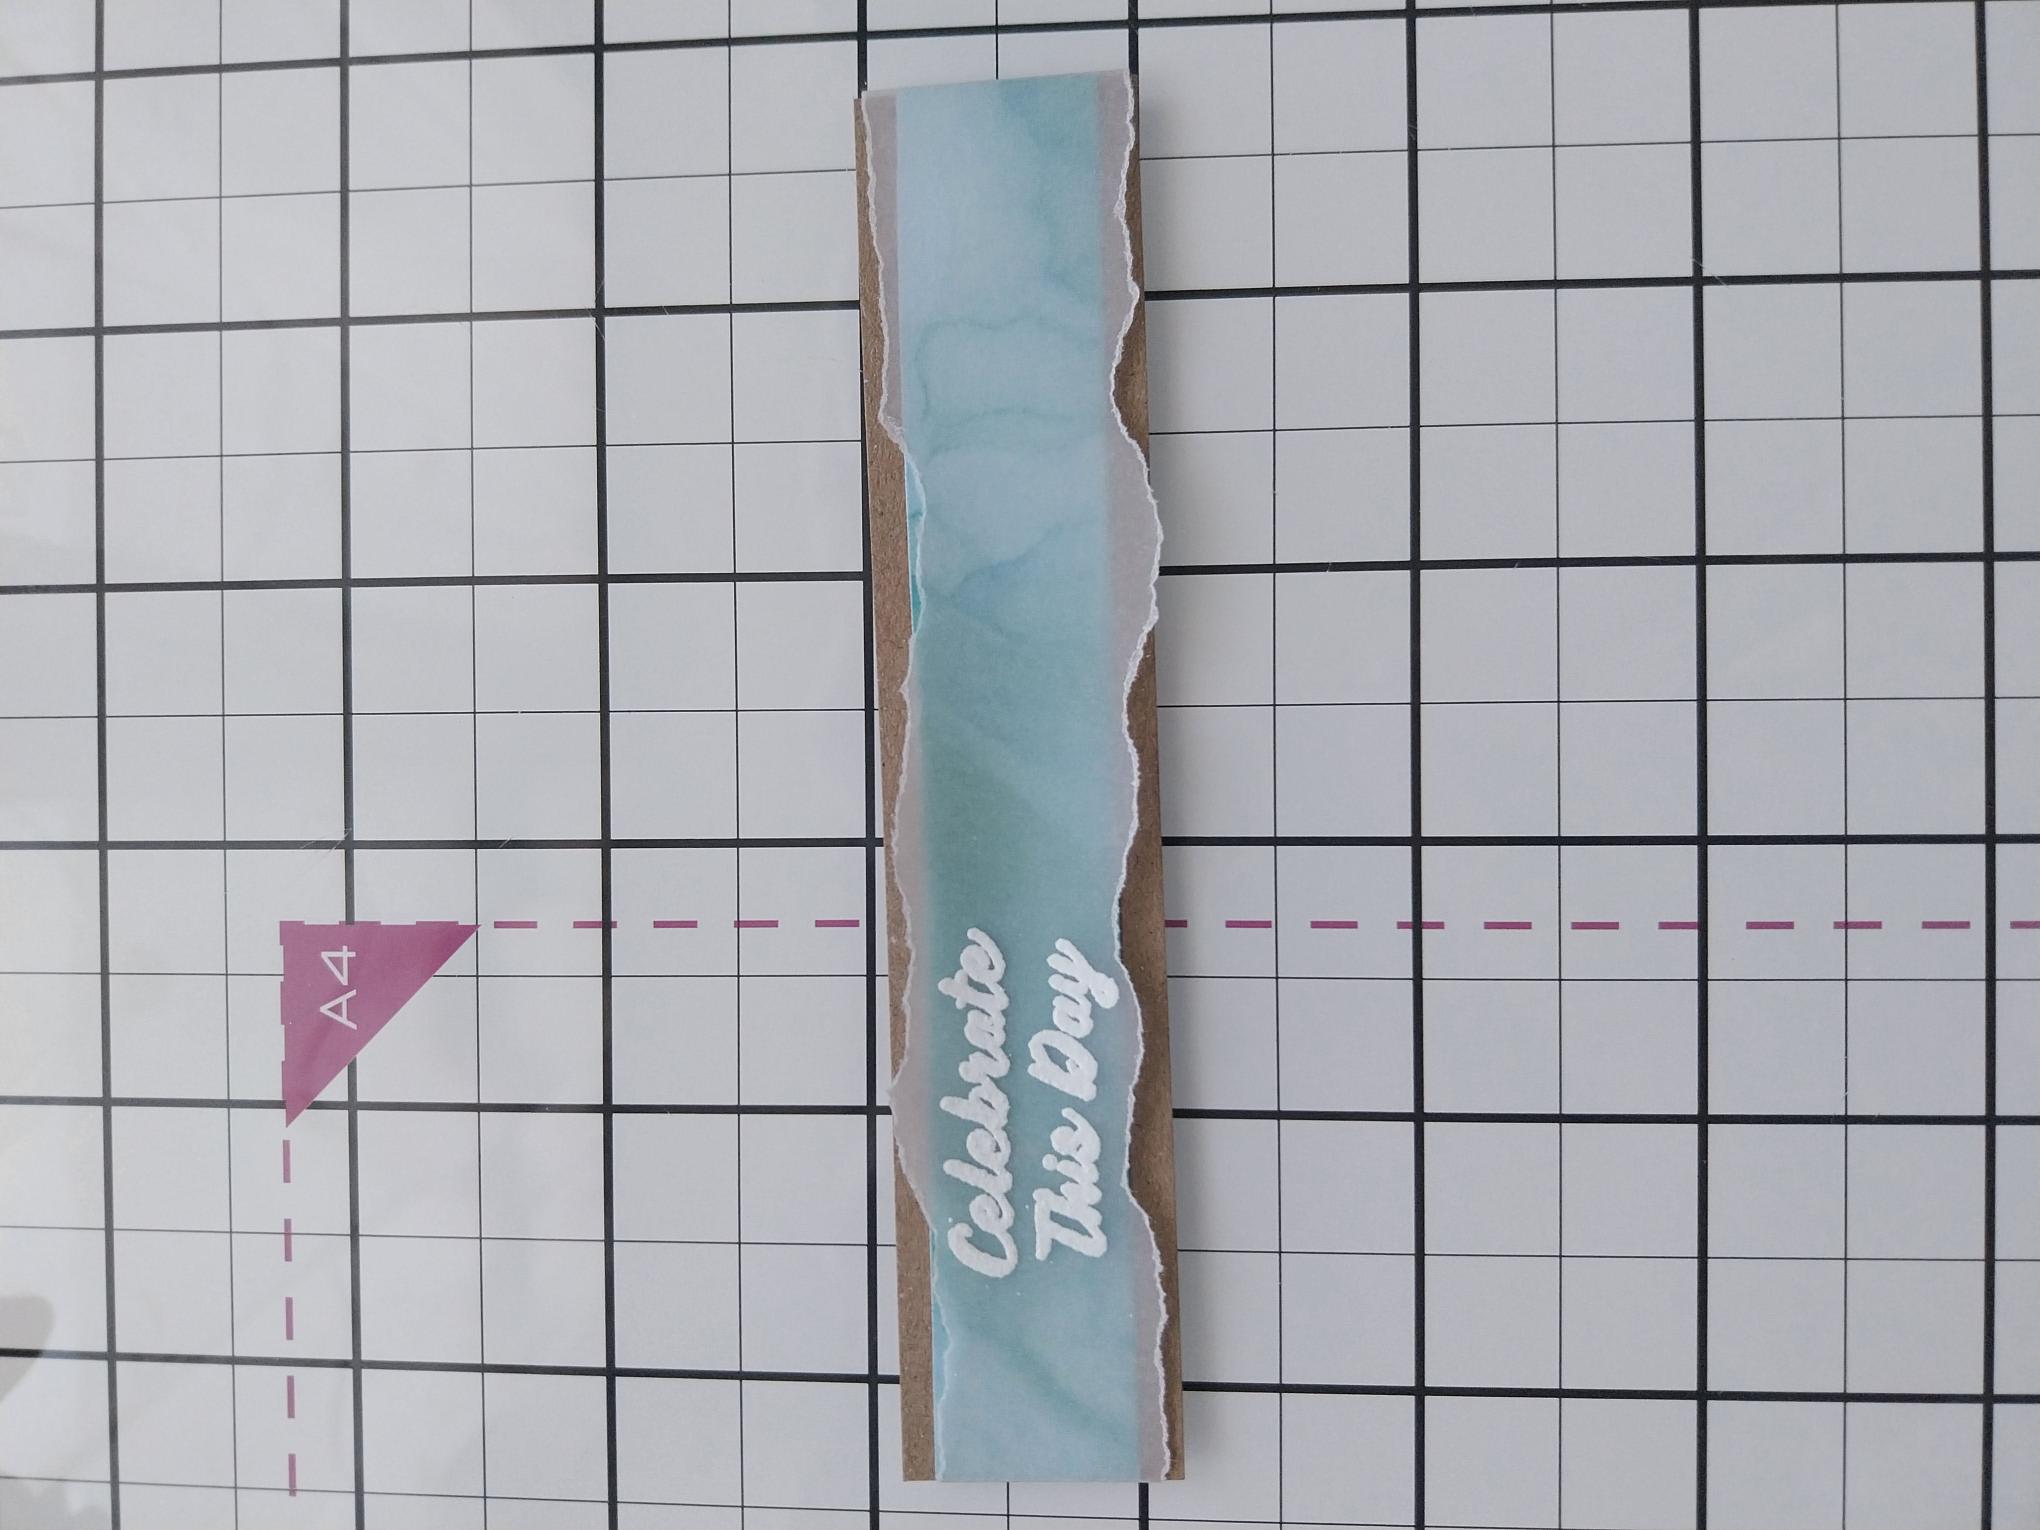
Tear a strip of vellum slightly longer than your panel. Wipe over with an anti-static bag before stamping your sentiment, from the Mulberry Frames set, with the WOW embossing ink. Apply the white embossing powder and heat set. Tuck the edges of the vellum over the ends of the panel and secure on the reverse, with double-sided adhesive tape. |
|
Adhere across the bottom third of your artwork. |

|
Adhere to the front of your black card blank. |
|
Shape the butterfly wings before affixing to your card, where required. |
|
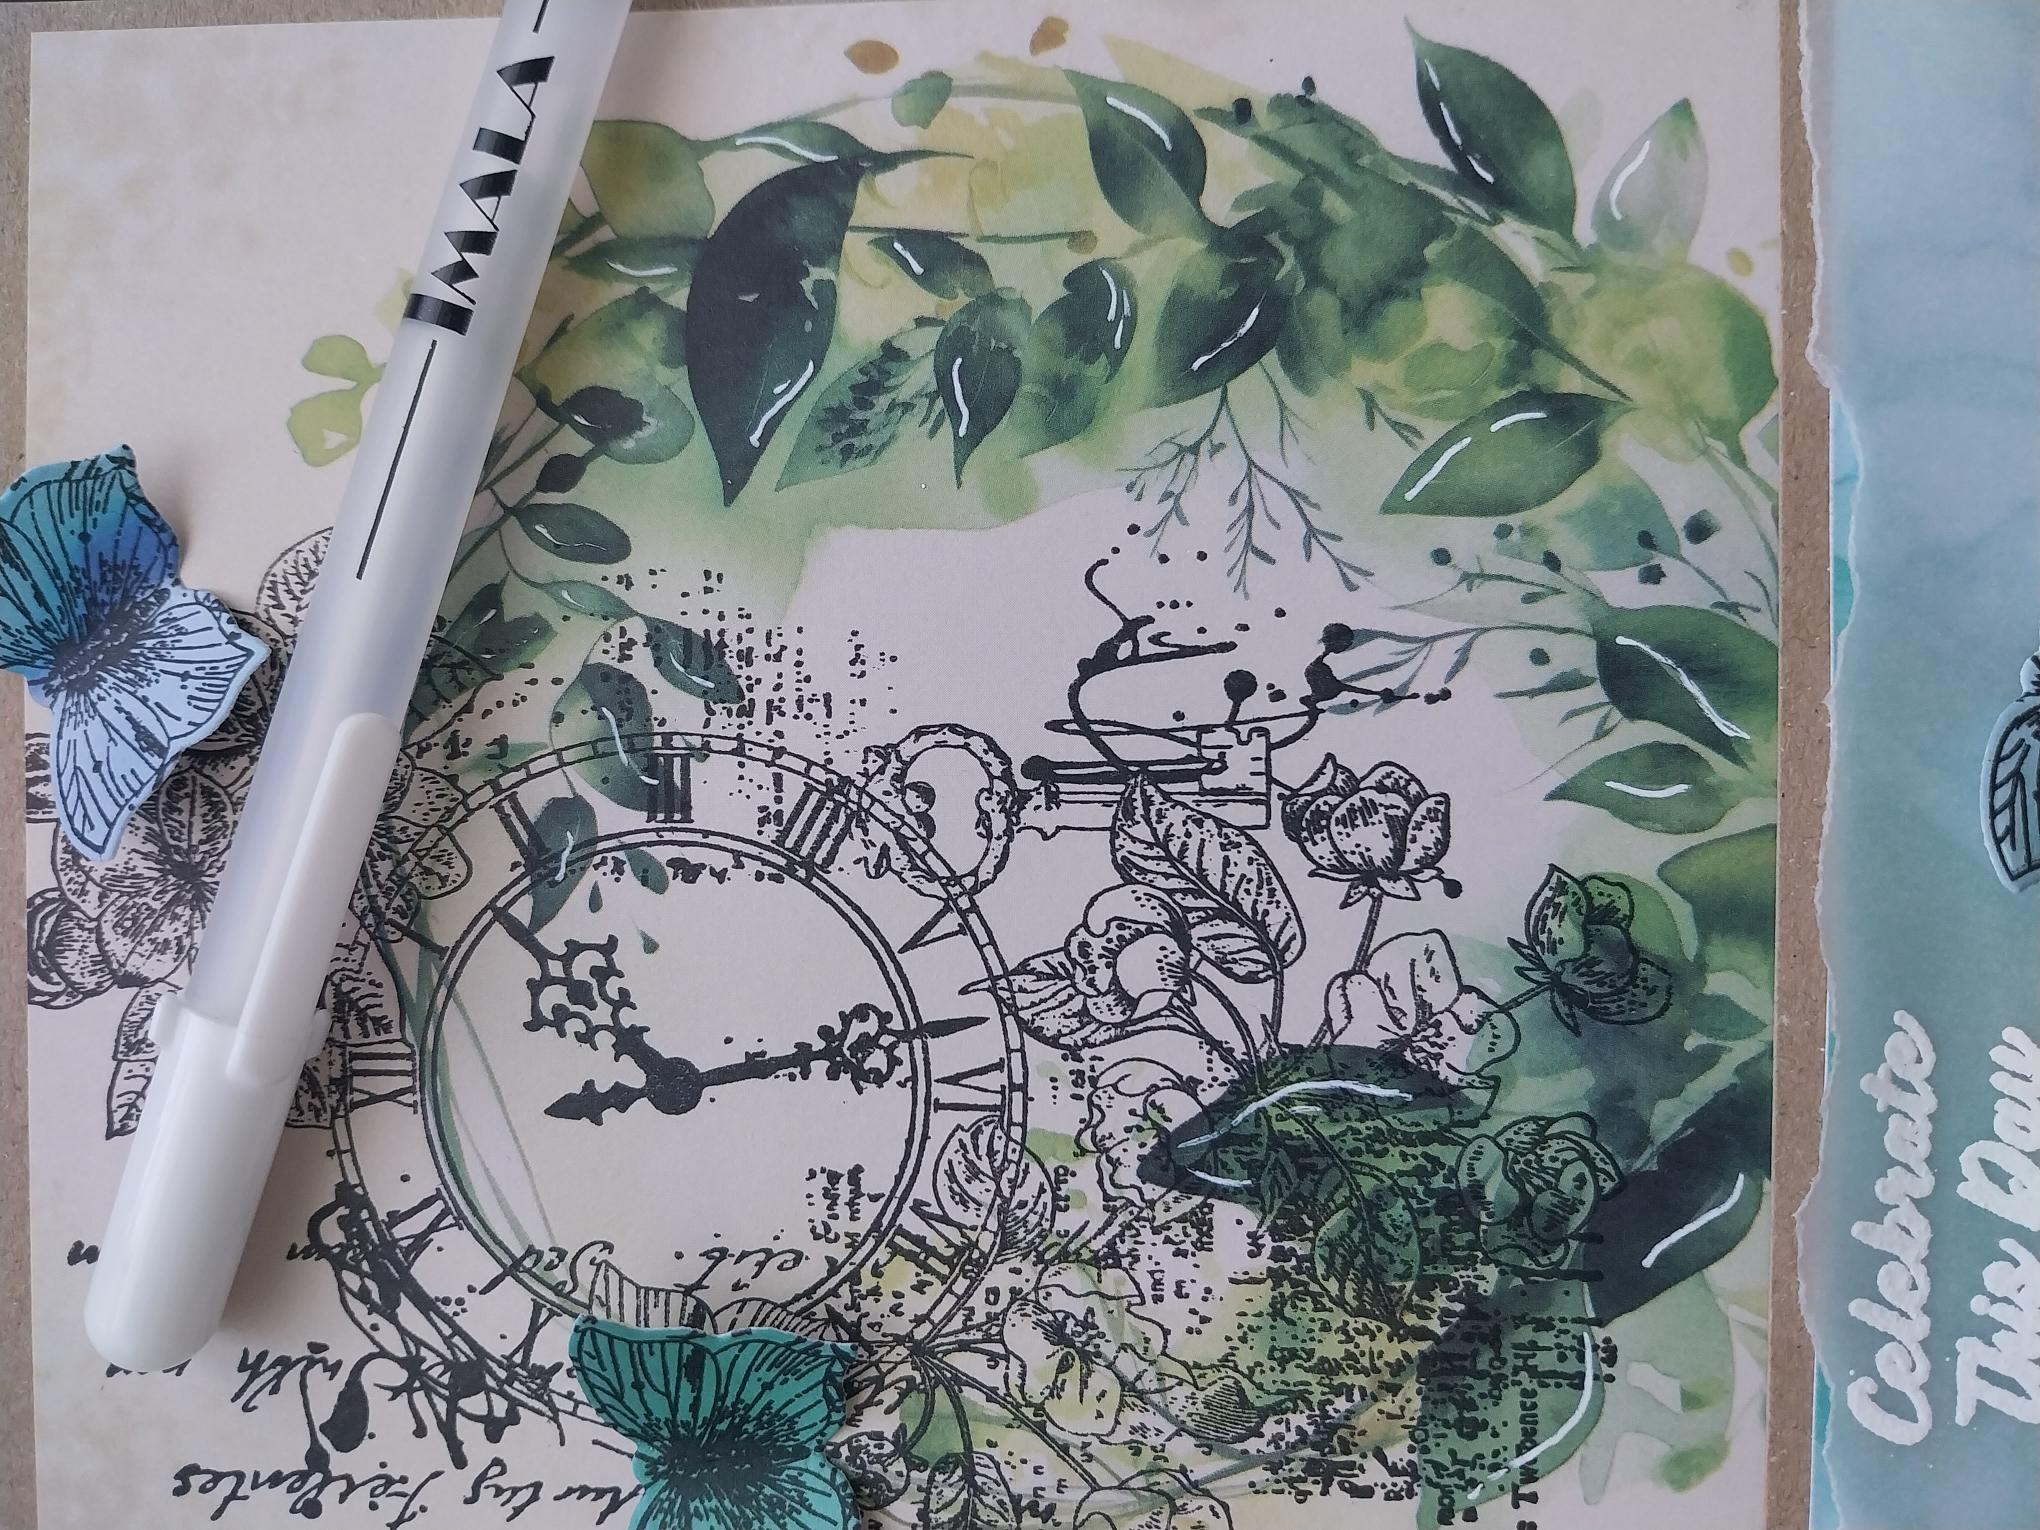
To finish, use a white gel pen to add accents and highlights to the printed image. |