Give your friends $10 off their first order!
Refer a FRIEND


WHAT YOU WILL NEED:
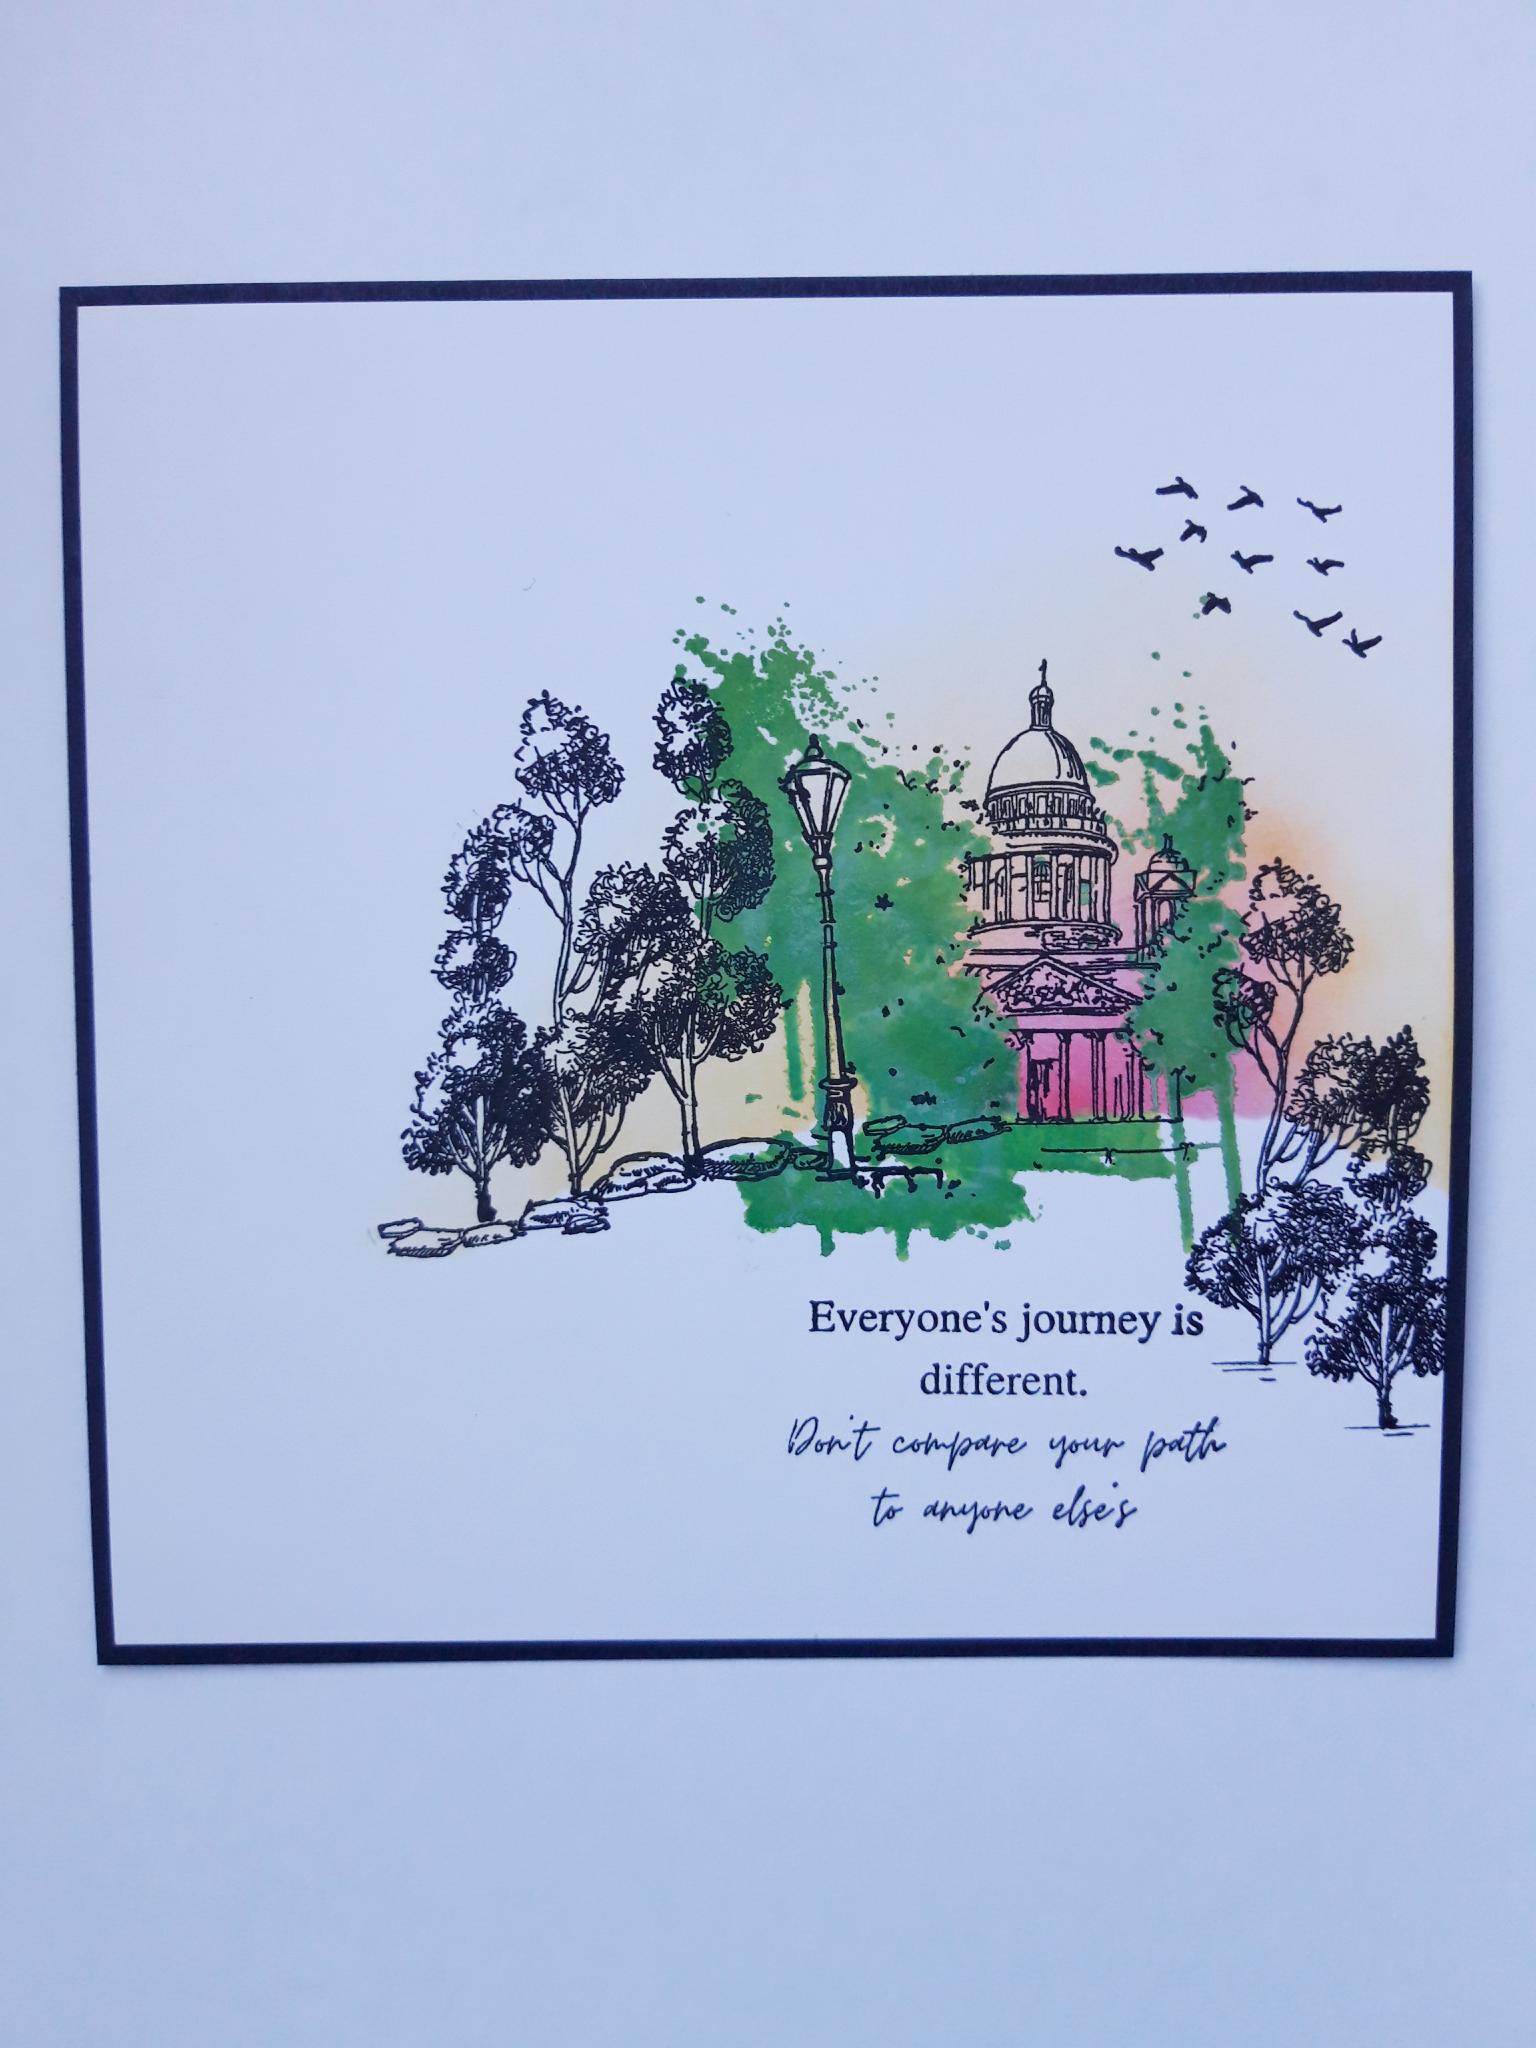
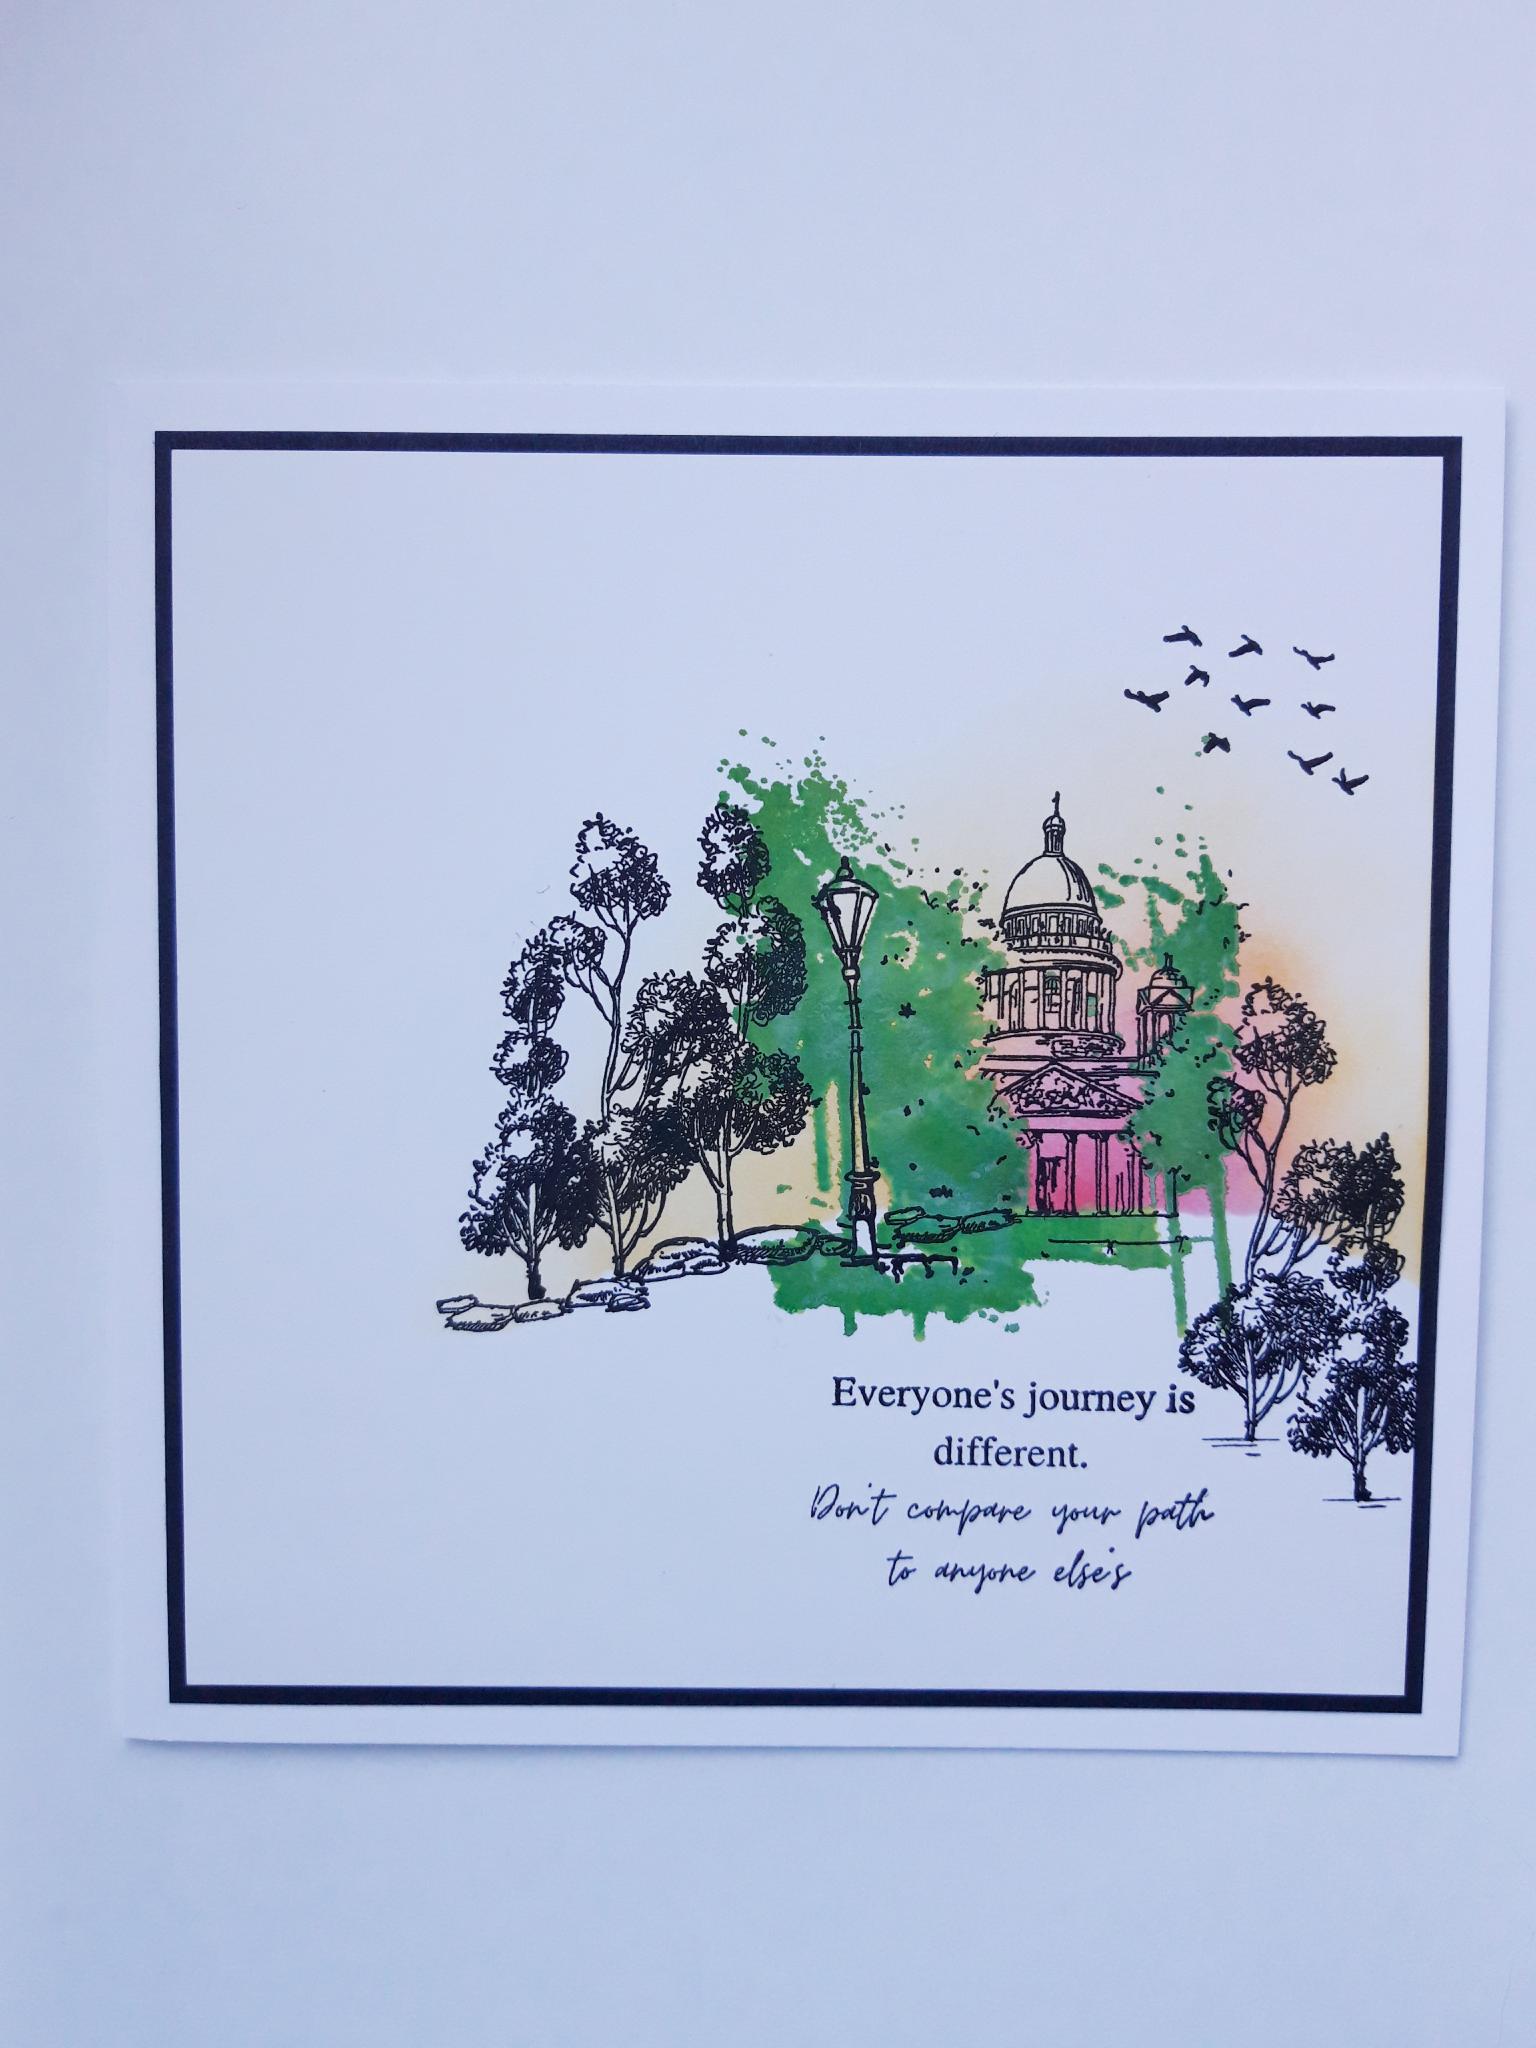
White card blank (7 x 7")
Black cardstock (6 1/4 x 6 1/4")
White cardstock (6 x 6")
Stamps from Lamination Celebrate and Create Stamp Collection
Stamps from Soulful Pencil Sketch Elements Stamp Collection
Versafine Ink Pad: Onyx Black
Distress Oxides: Fossilized Amber, Worn Lipstick, Mowed Lawn
Izink Dye Ink Pad: Emeraude
Black fine line pen
Spray water bottle
Eureka 101
Paper Trimmer
Perfect Together Glue
Low tack tape (optional)
[click image to enlarge] 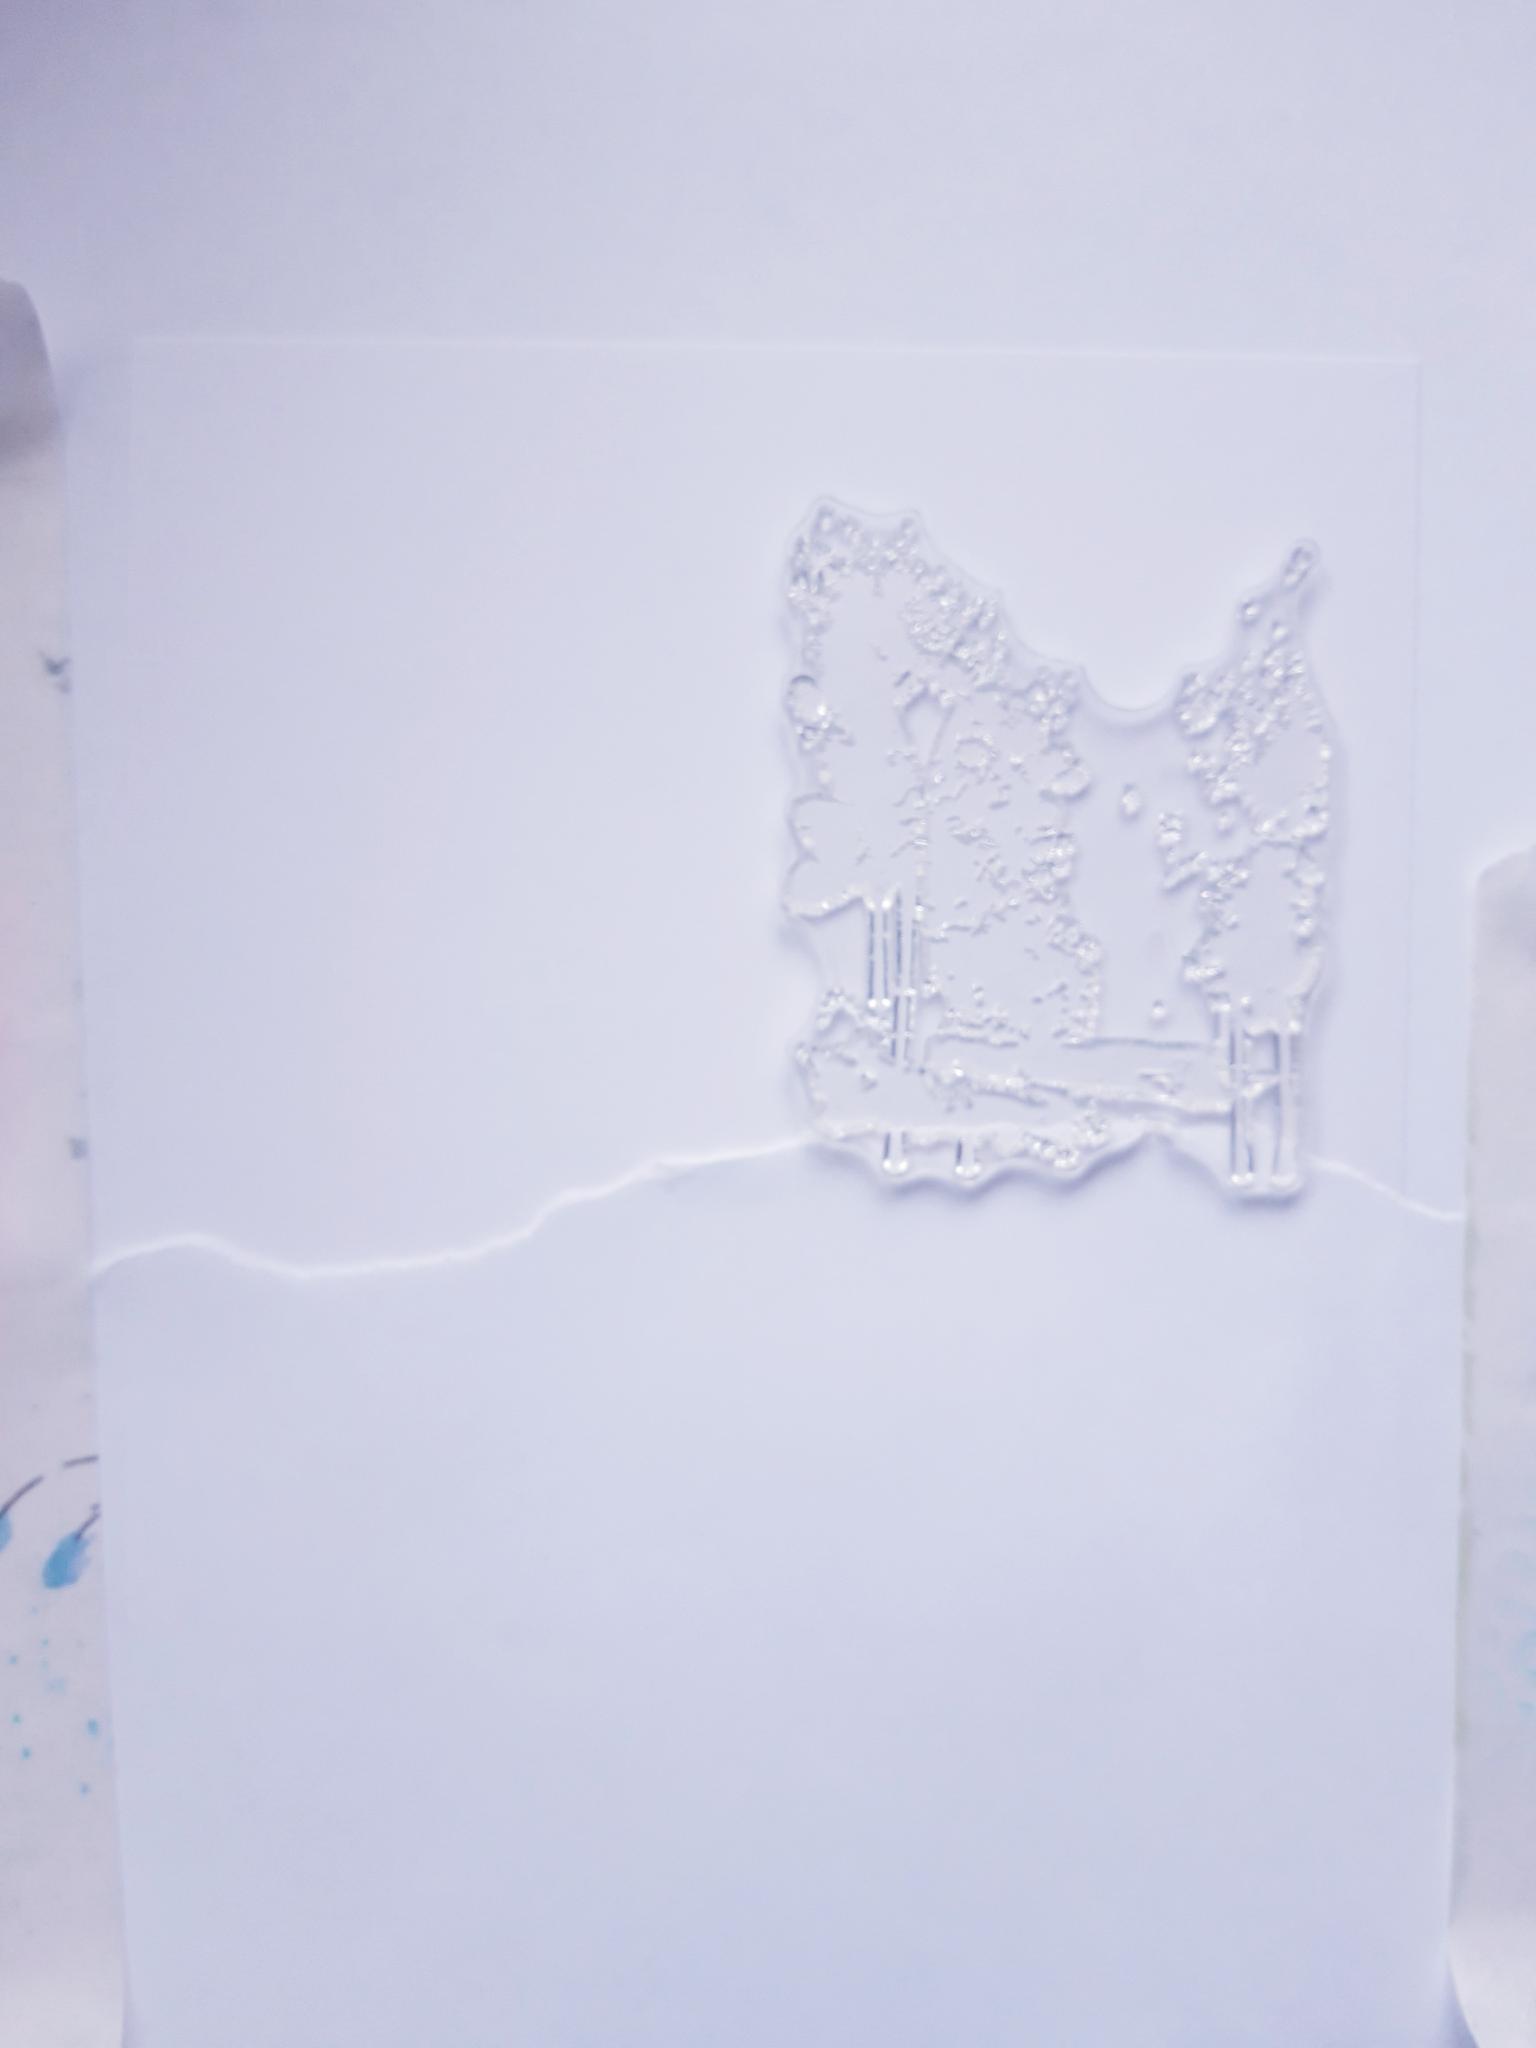
|
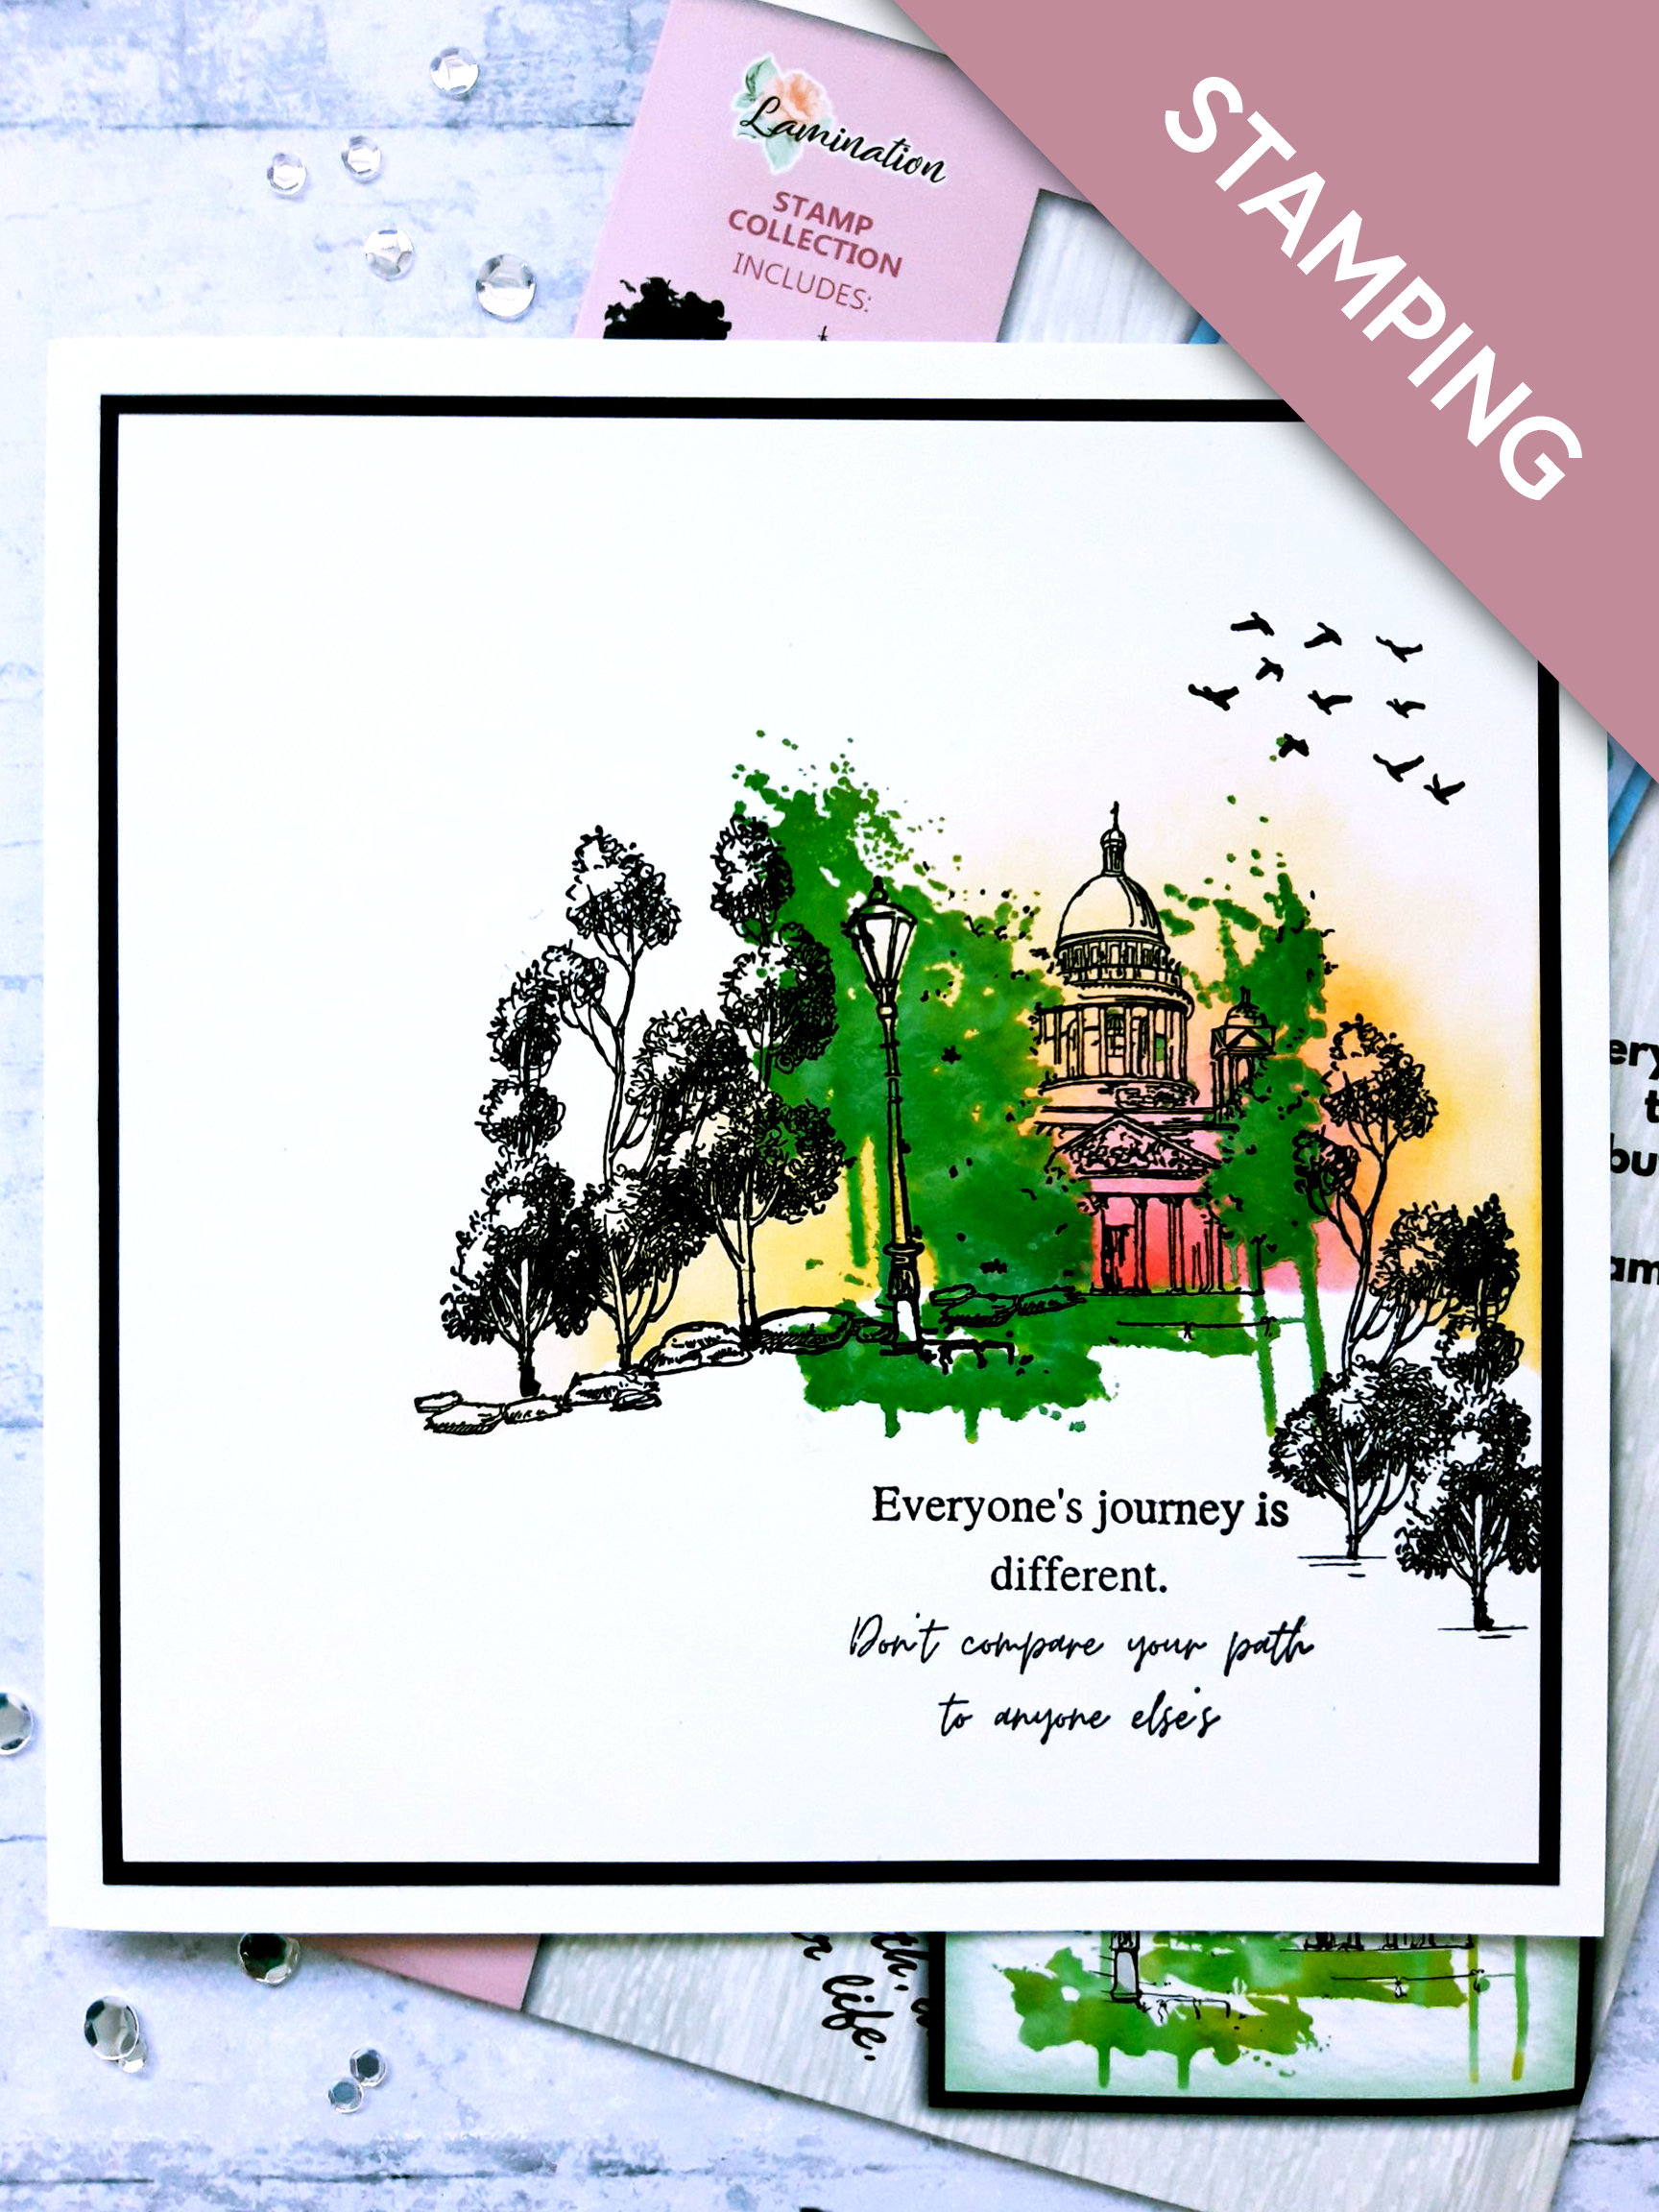
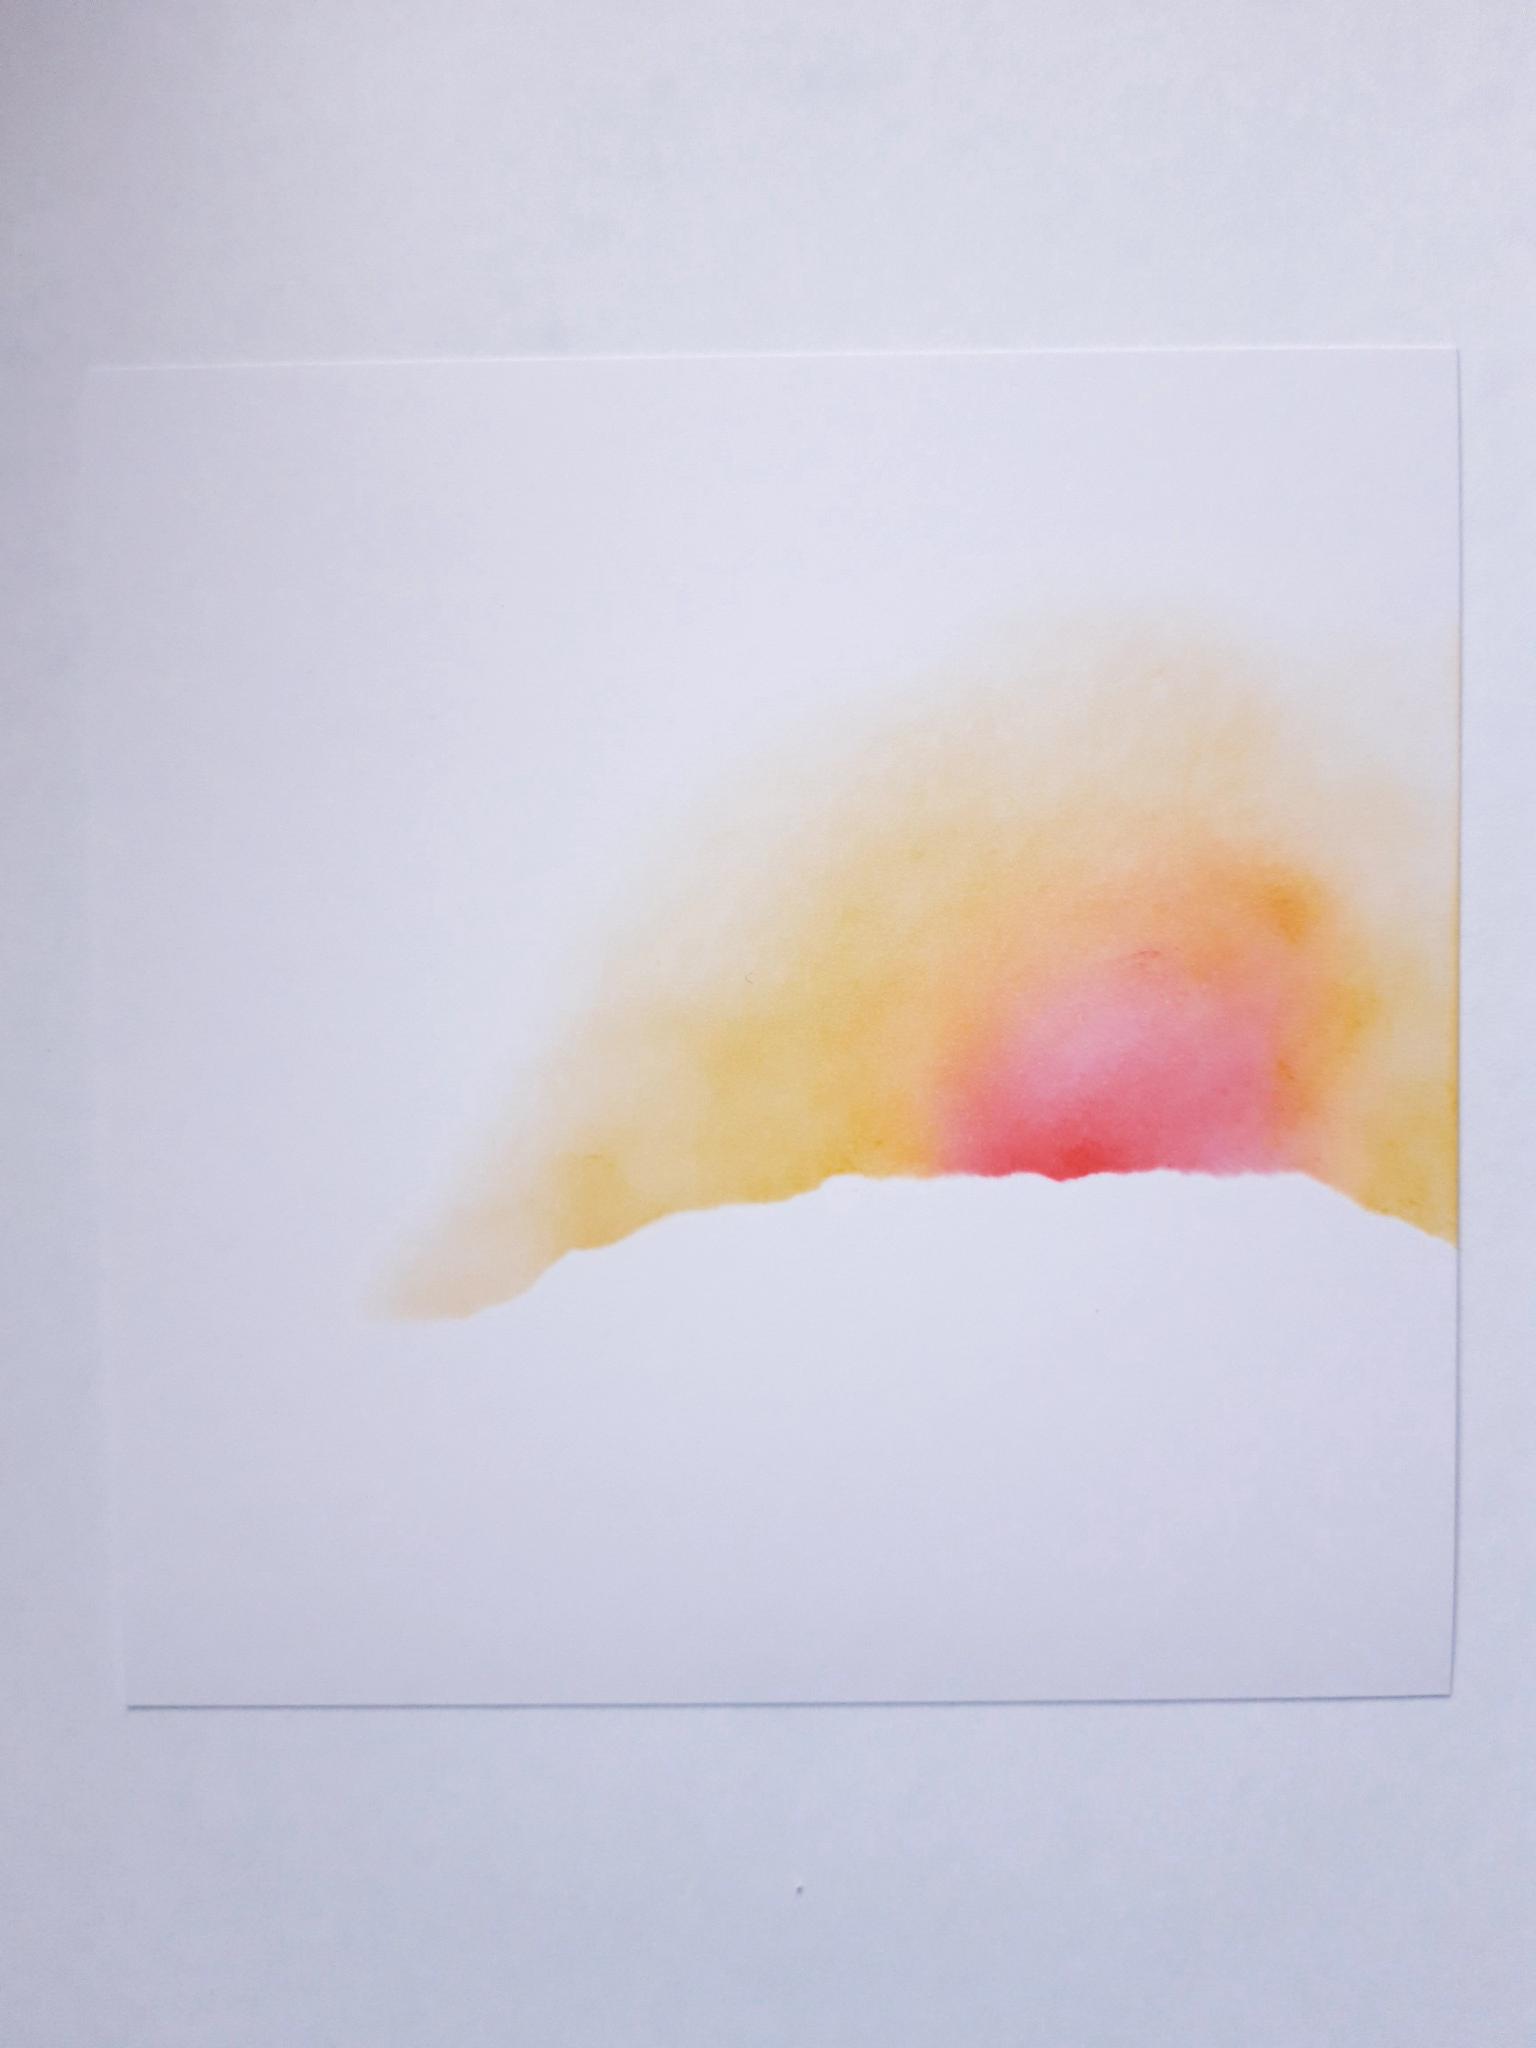
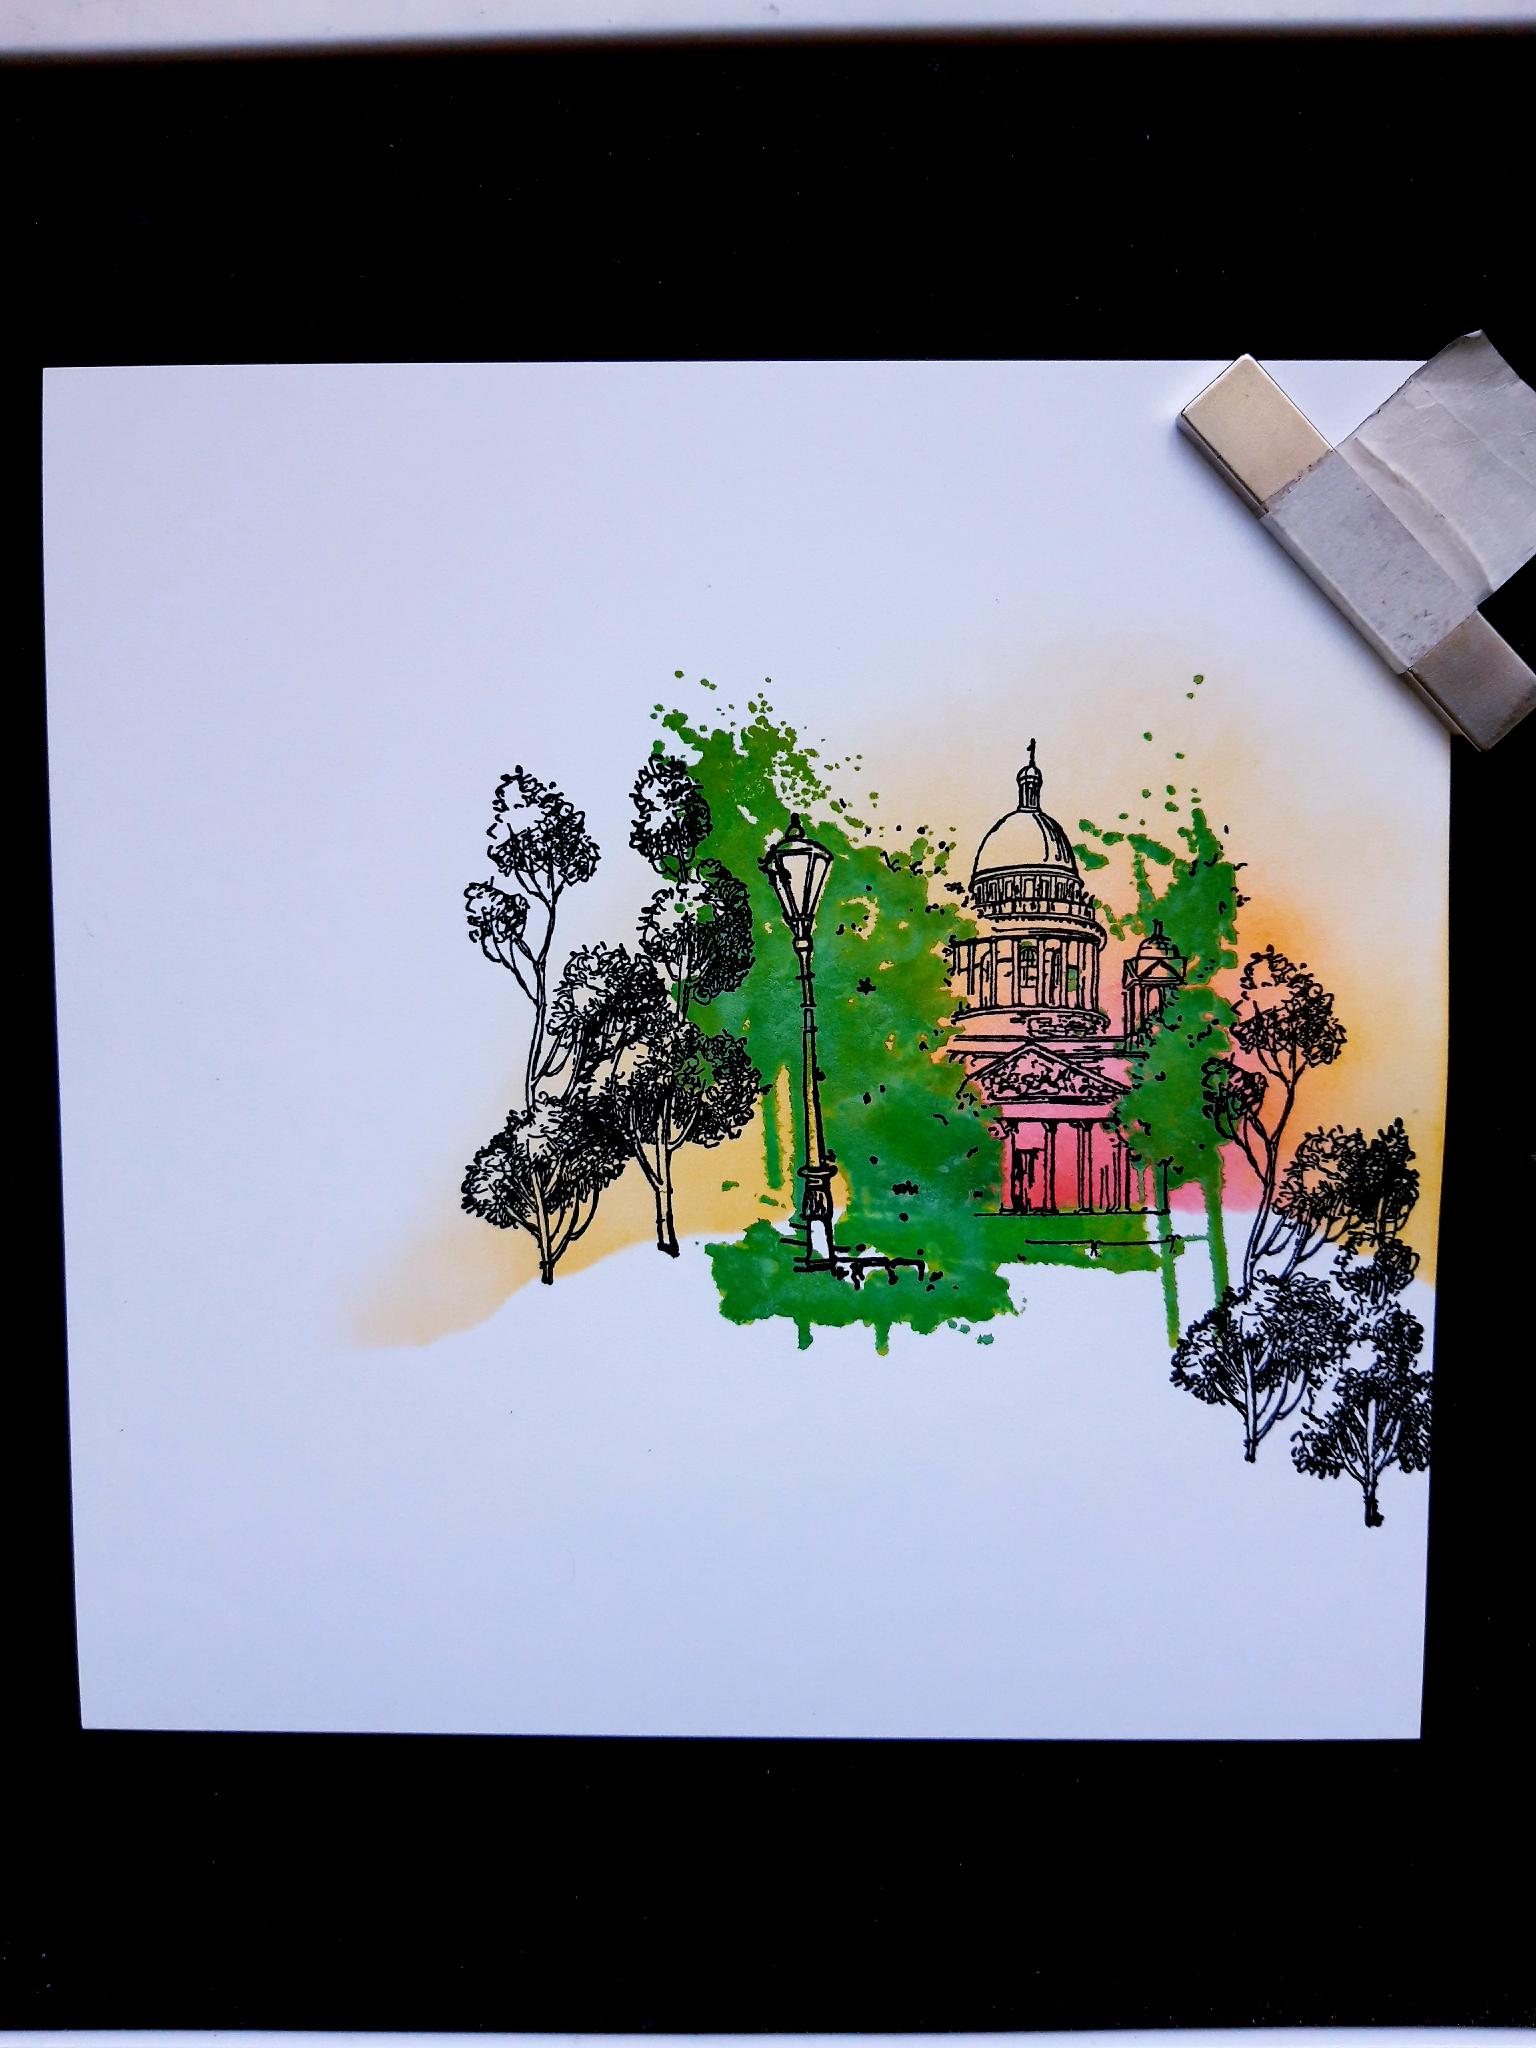
Tear across a piece of copier paper. The edge will be used to create a skyline on your artwork. Lay the 6 x 6" cardstock on your desk and use the stamps, from the Celebrate and Create set, to decide where you want your skyline to be. You want your image to "sit" on your skyline, with a gap between the top of your stamp and the top of the cardstock. Lay your torn paper in place, and if your prefer, adhere it down with low tack tape. |
|
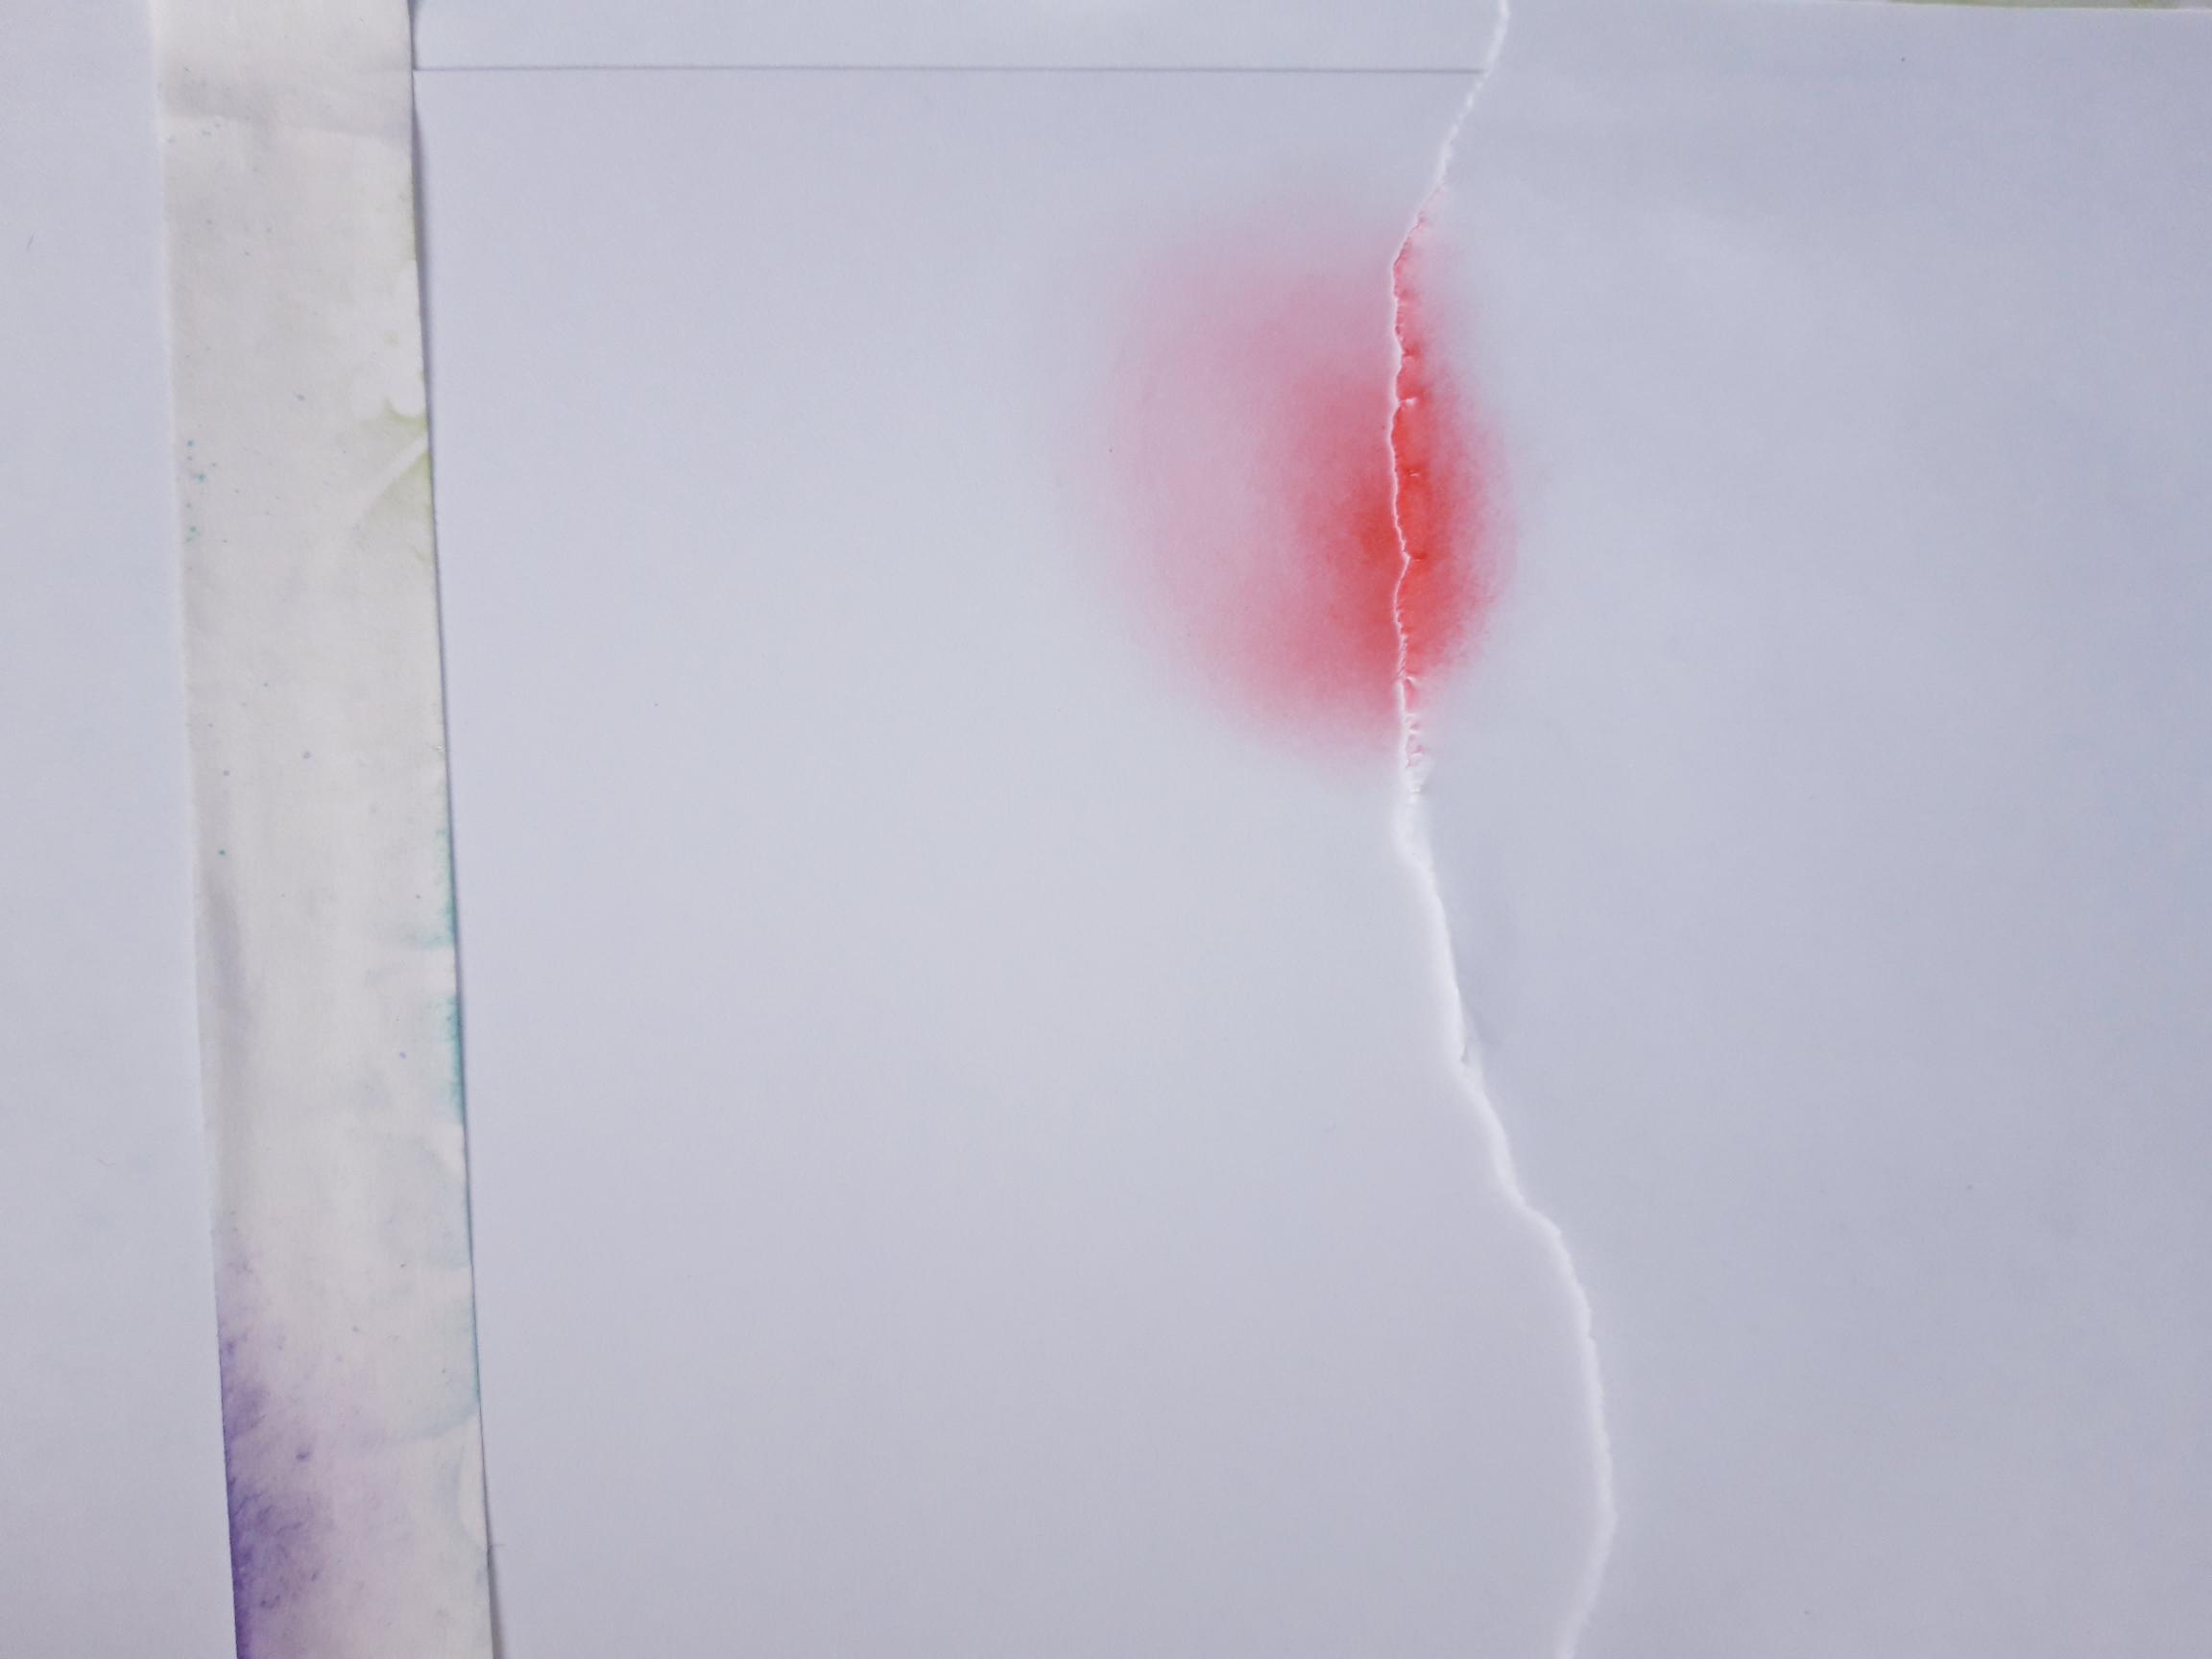
Using your stamps as a guide, decide where you want your sun to rise, and blend the Worn Lipstick Distress Oxide in this area, the darkest colour being on the skyline, blending outwards. I decided the centre of my sunrise would be behind the building area of the image. |
|
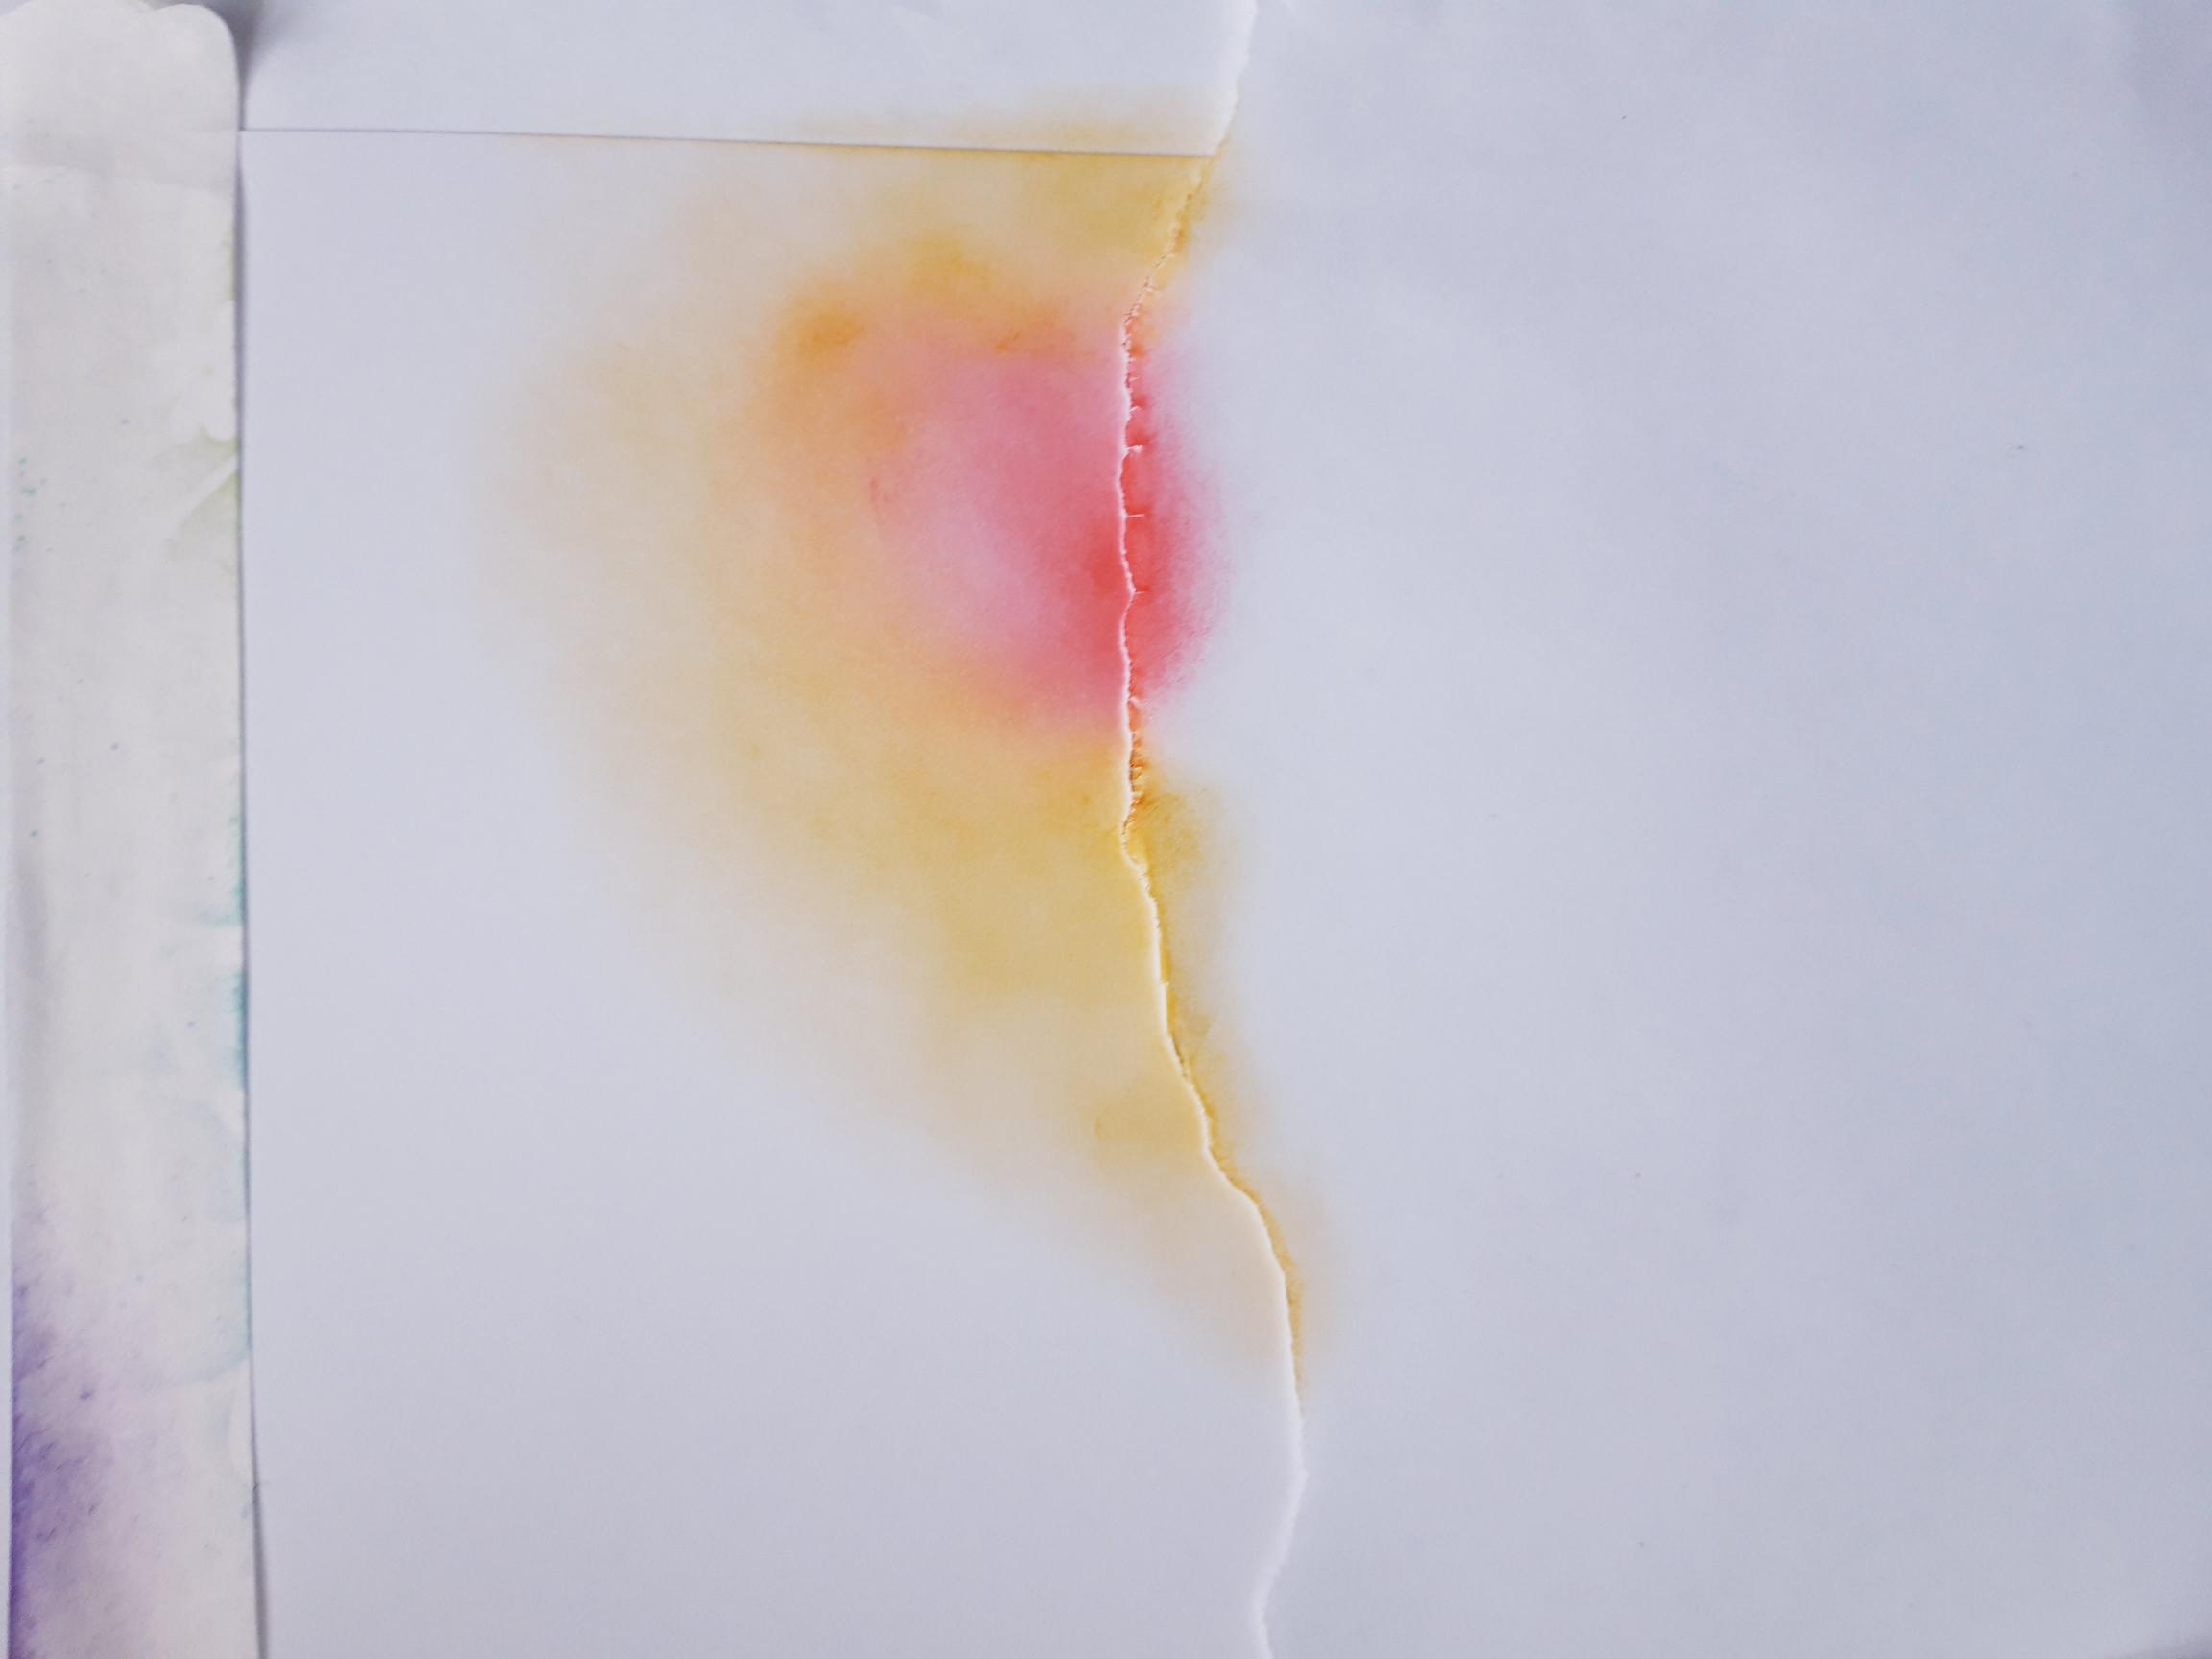
Blend the Fossilized Amber Distress Oxide out from the Worn Lipstick, blending off the right hand edge of the card, and along part of the skyline on the left. The colour should be darker on the skyline, blending out to nothing. You can reblend over both colours to get a seamless blend, although your stamped image will cover most of it. |
|
Remove your low tack tape, and copier paper, to reveal your beautiful sunrise. |
|
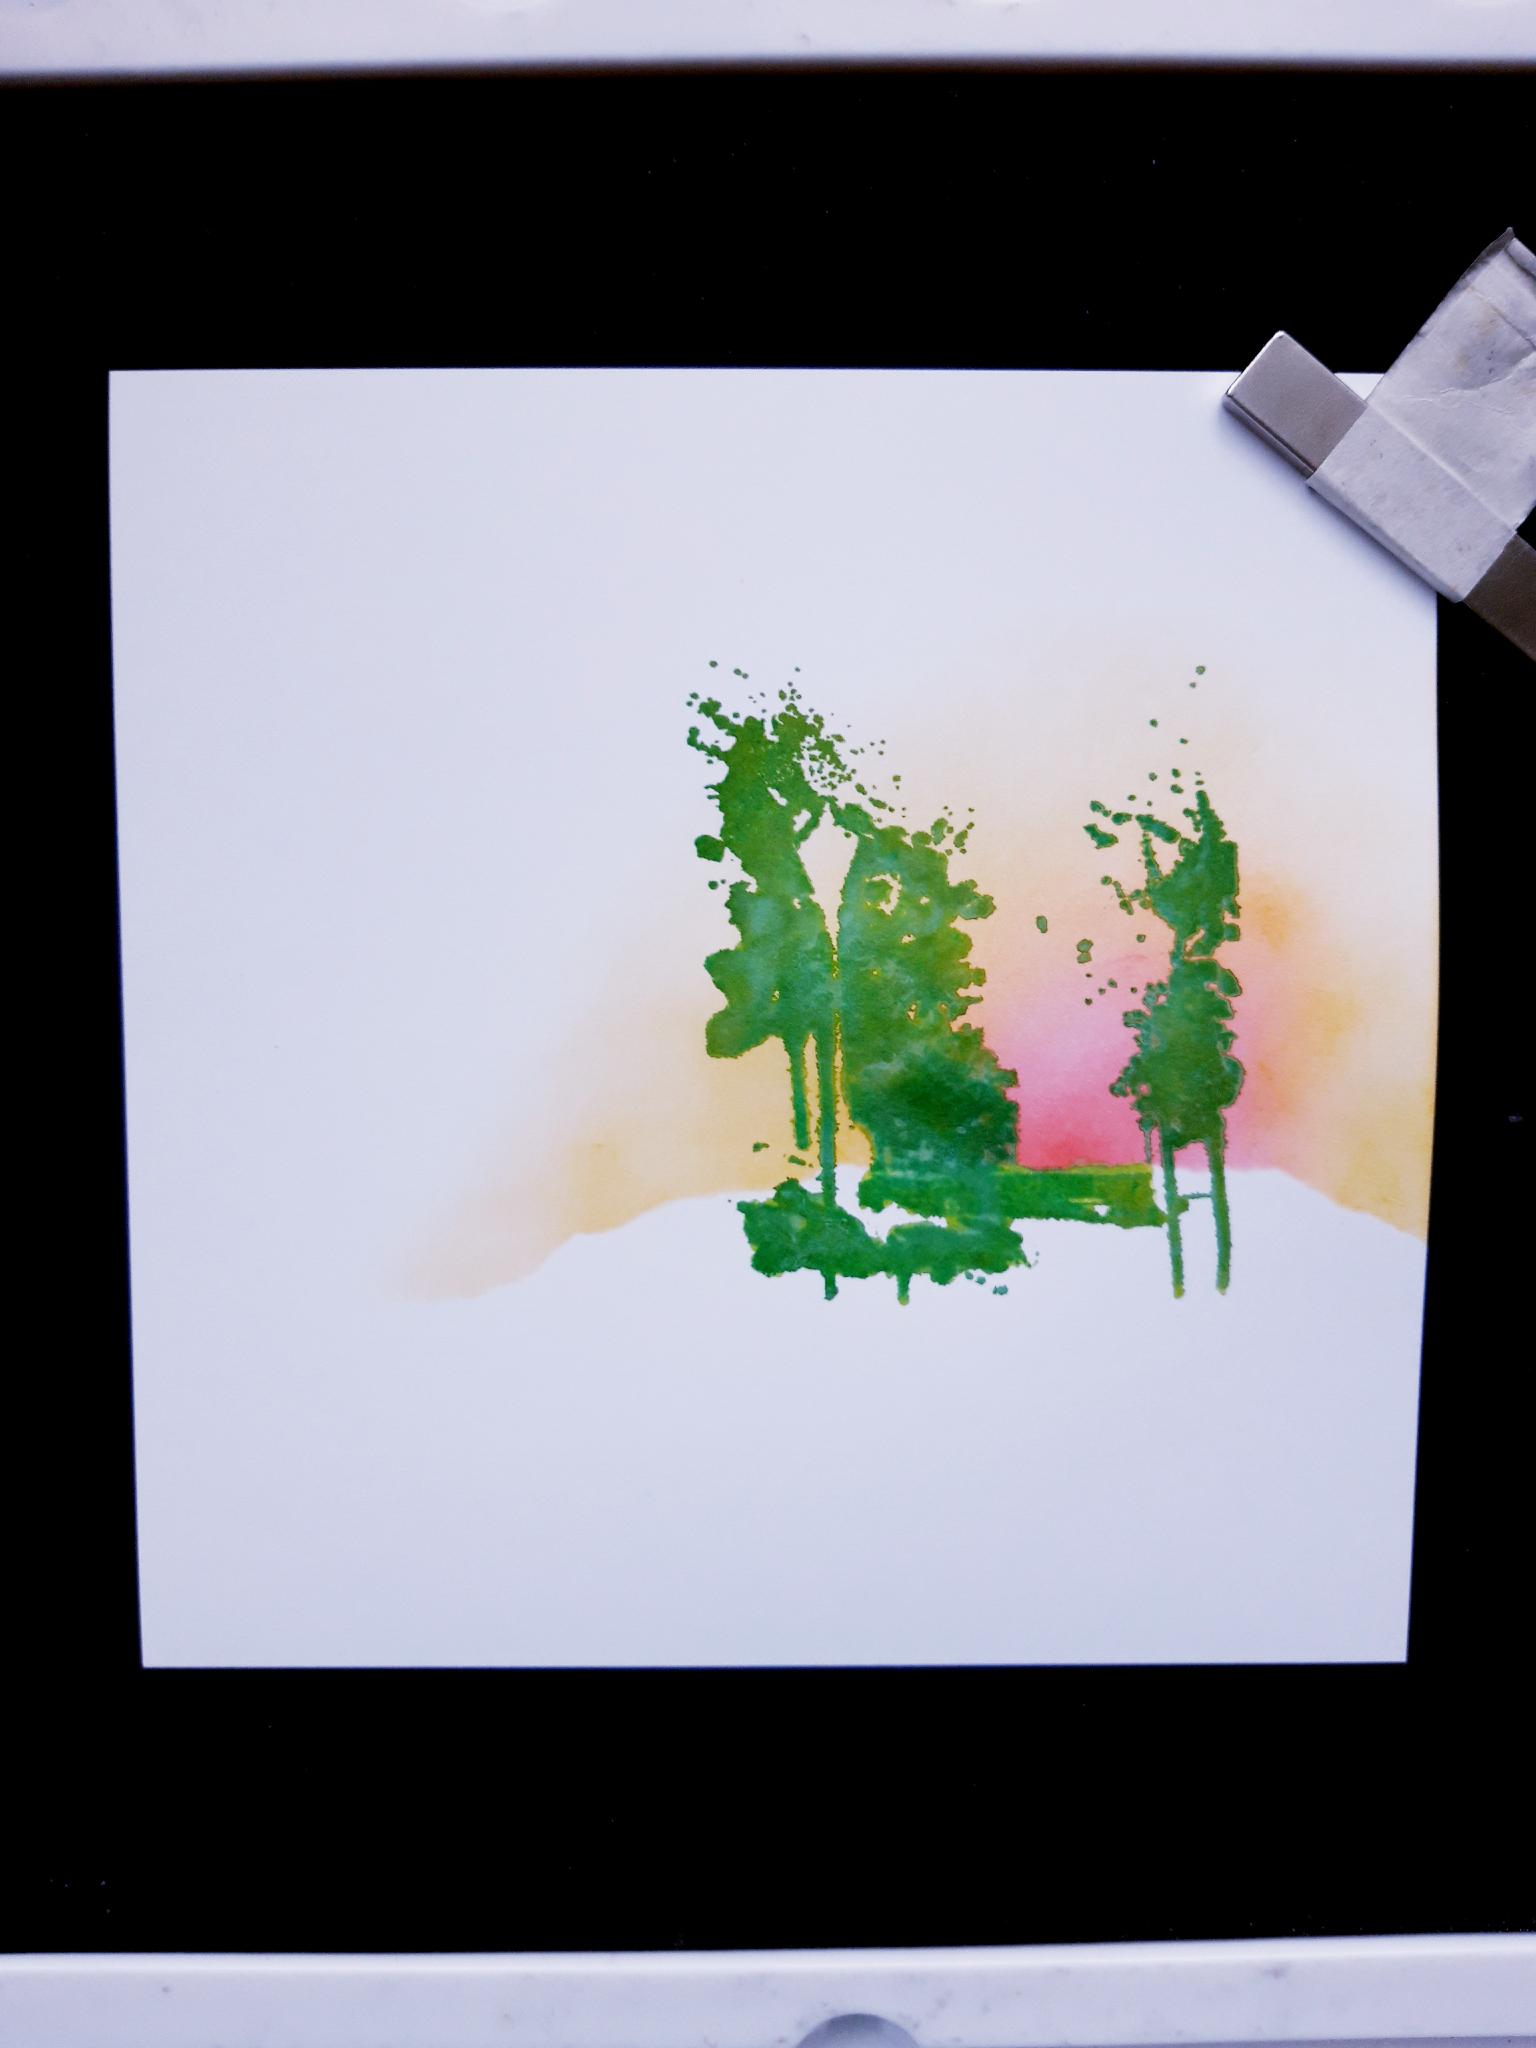
Ink up the solid stamp with the Mowed Lawn Distress Oxide and Izink Emeraude ink. Spritz with water and stamp in place on your skyline. Think about where your skyline is, and the perspective and placement of your image, in relation to the skyline. You can reink the stamp as needed, to get more light and shade in the colours. Dry off the ink thoroughly, before moving on to the next step. |
|
Ink up the detailed coordinating stamp with the Onyx Black Versafine. Line up and stamp over the top of the inked image. If you are unsure where it goes, the images on the packaging will help you. |
|
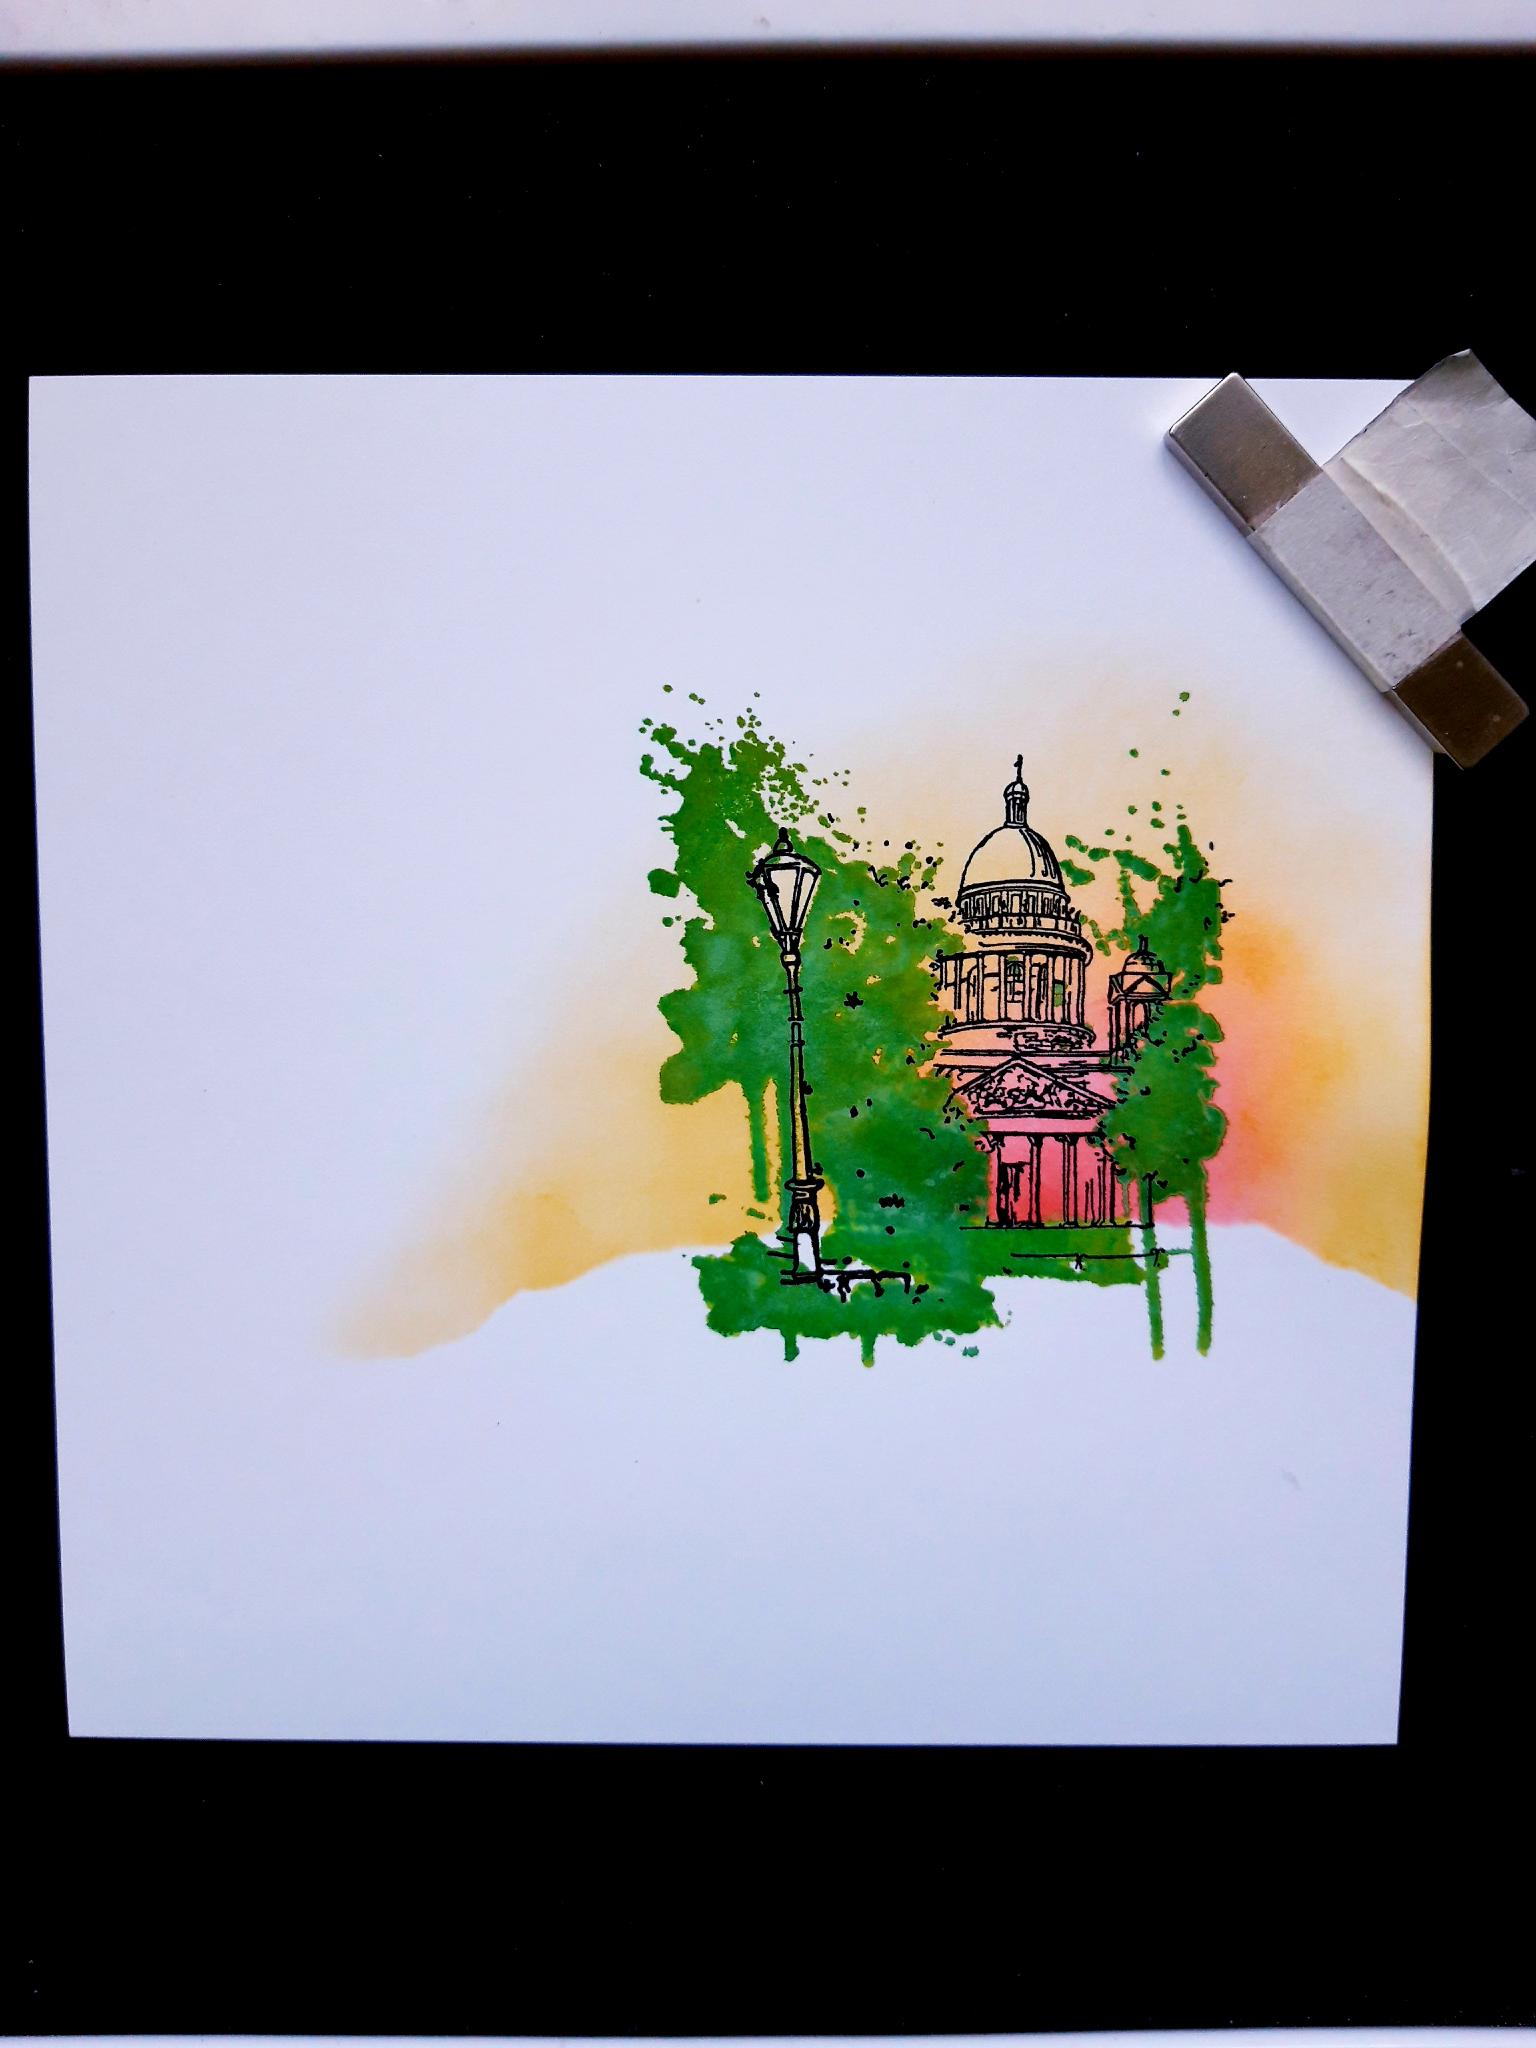
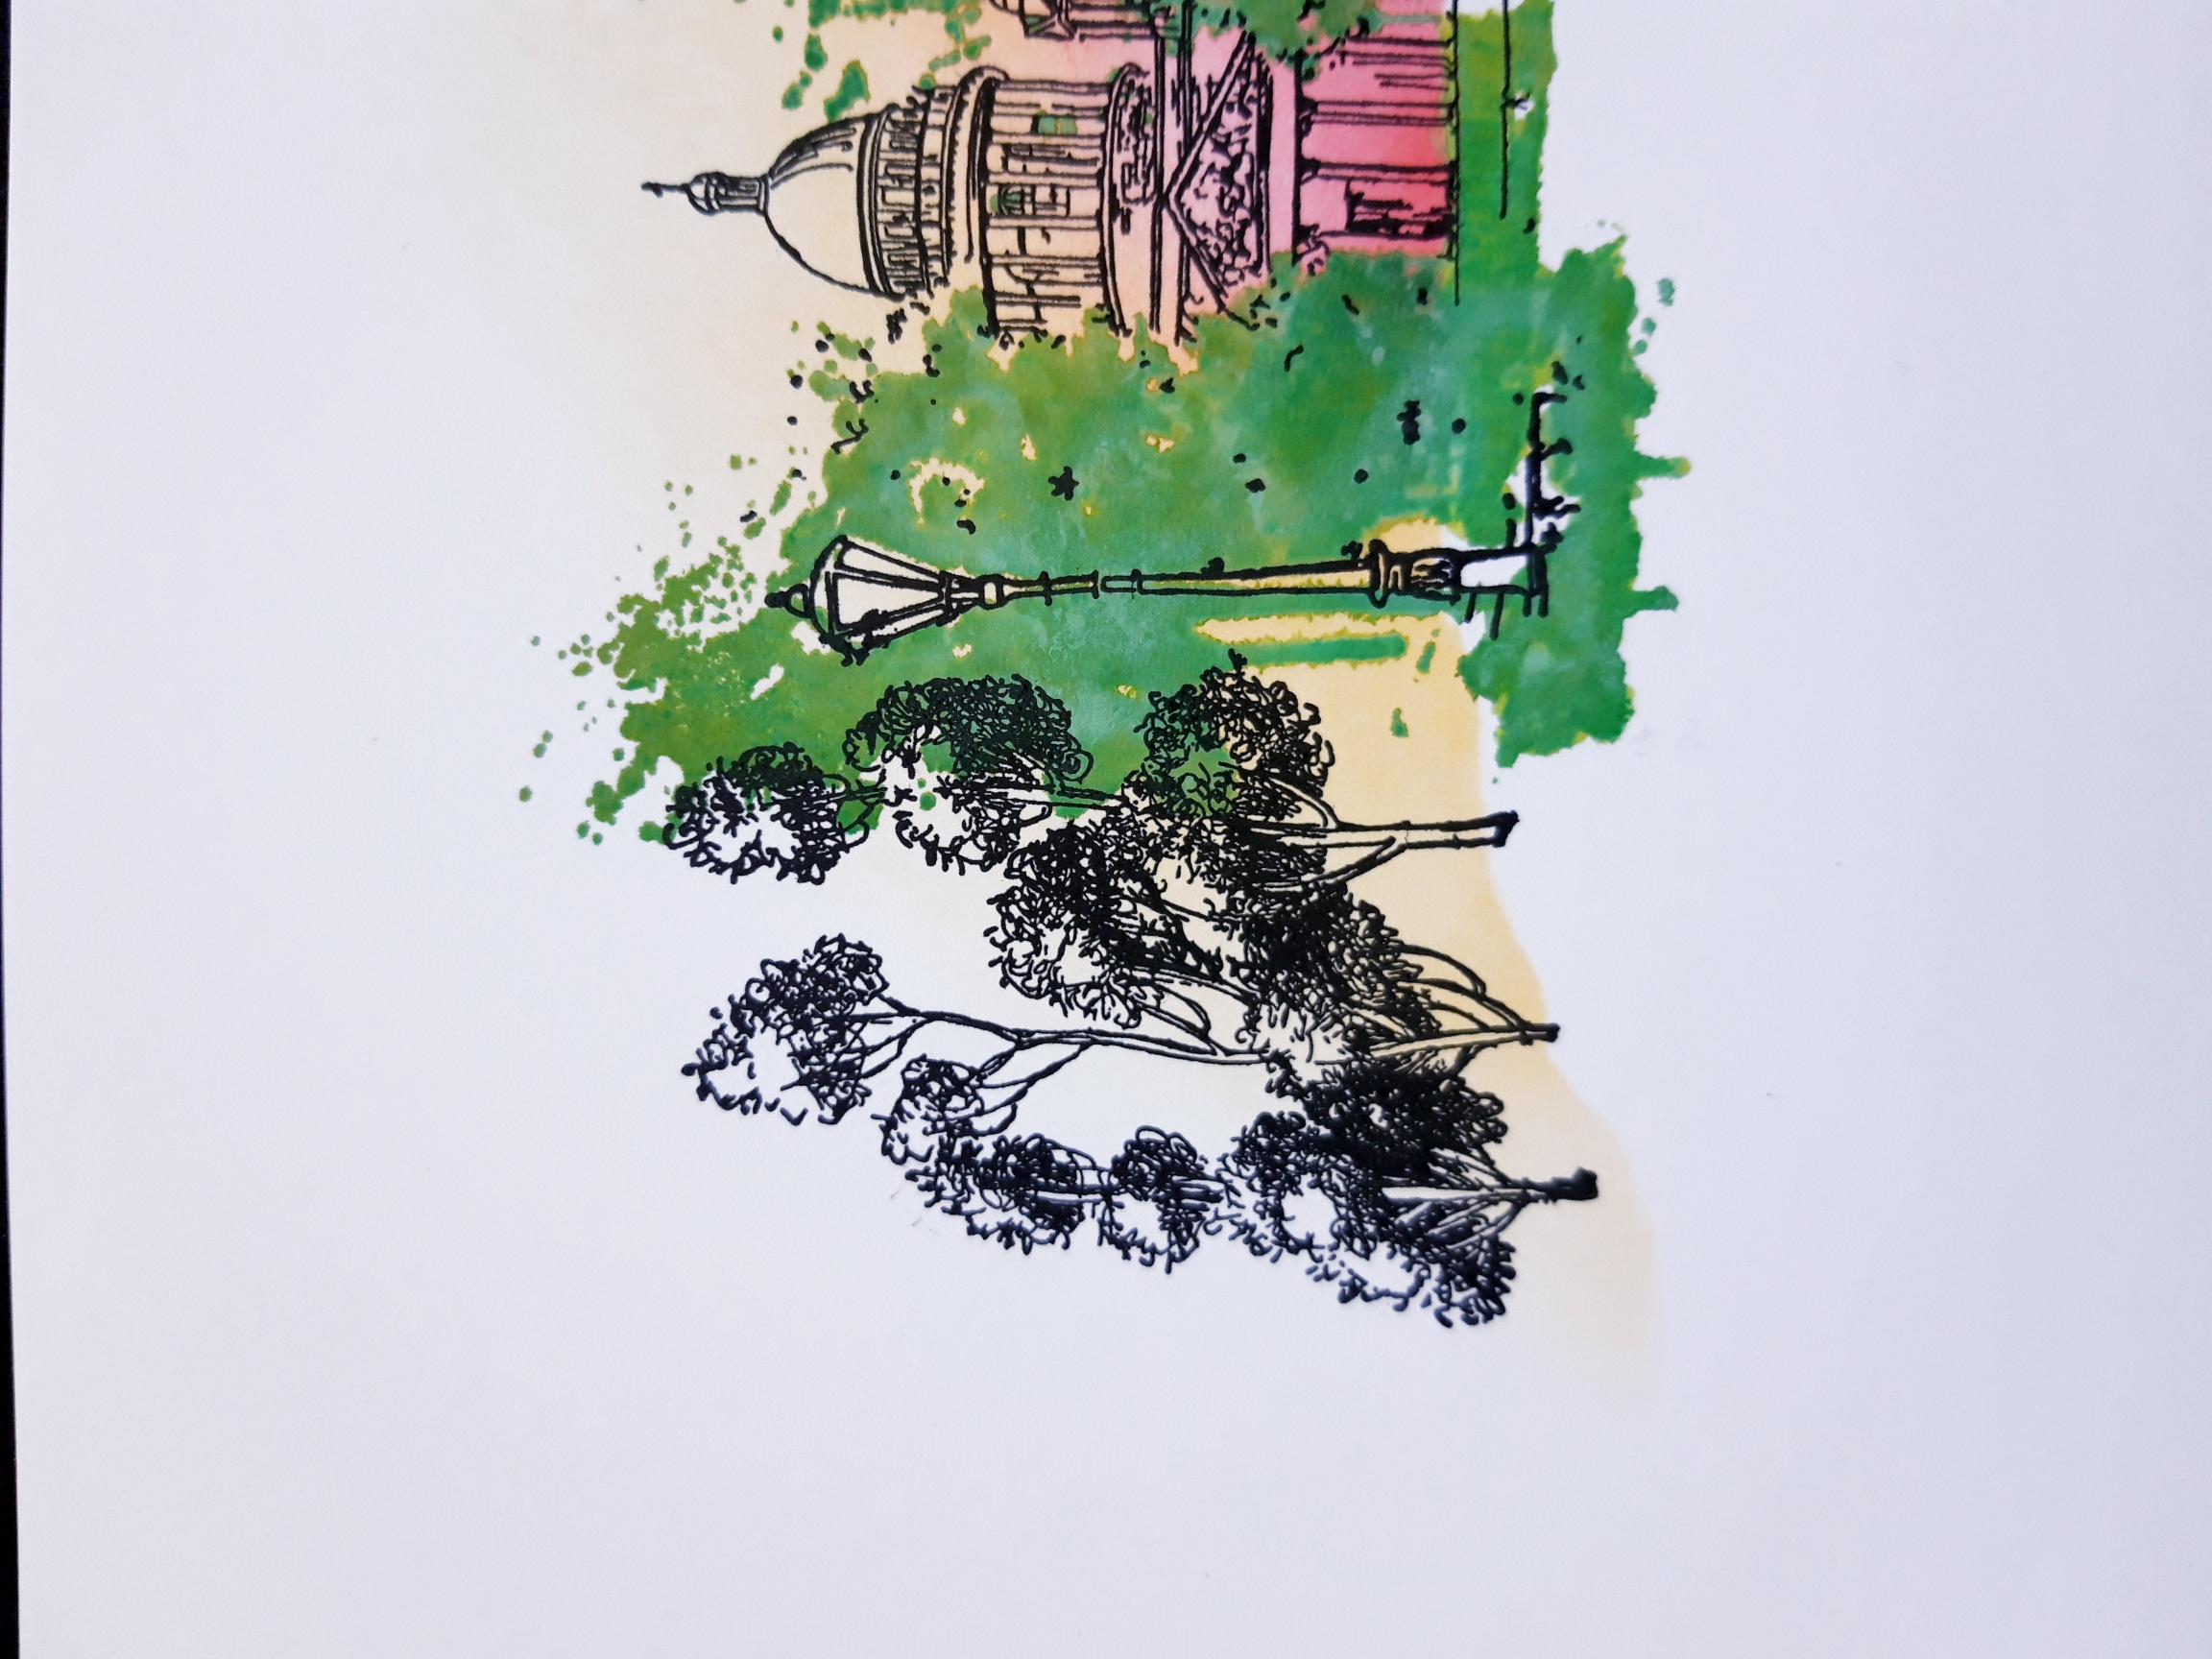
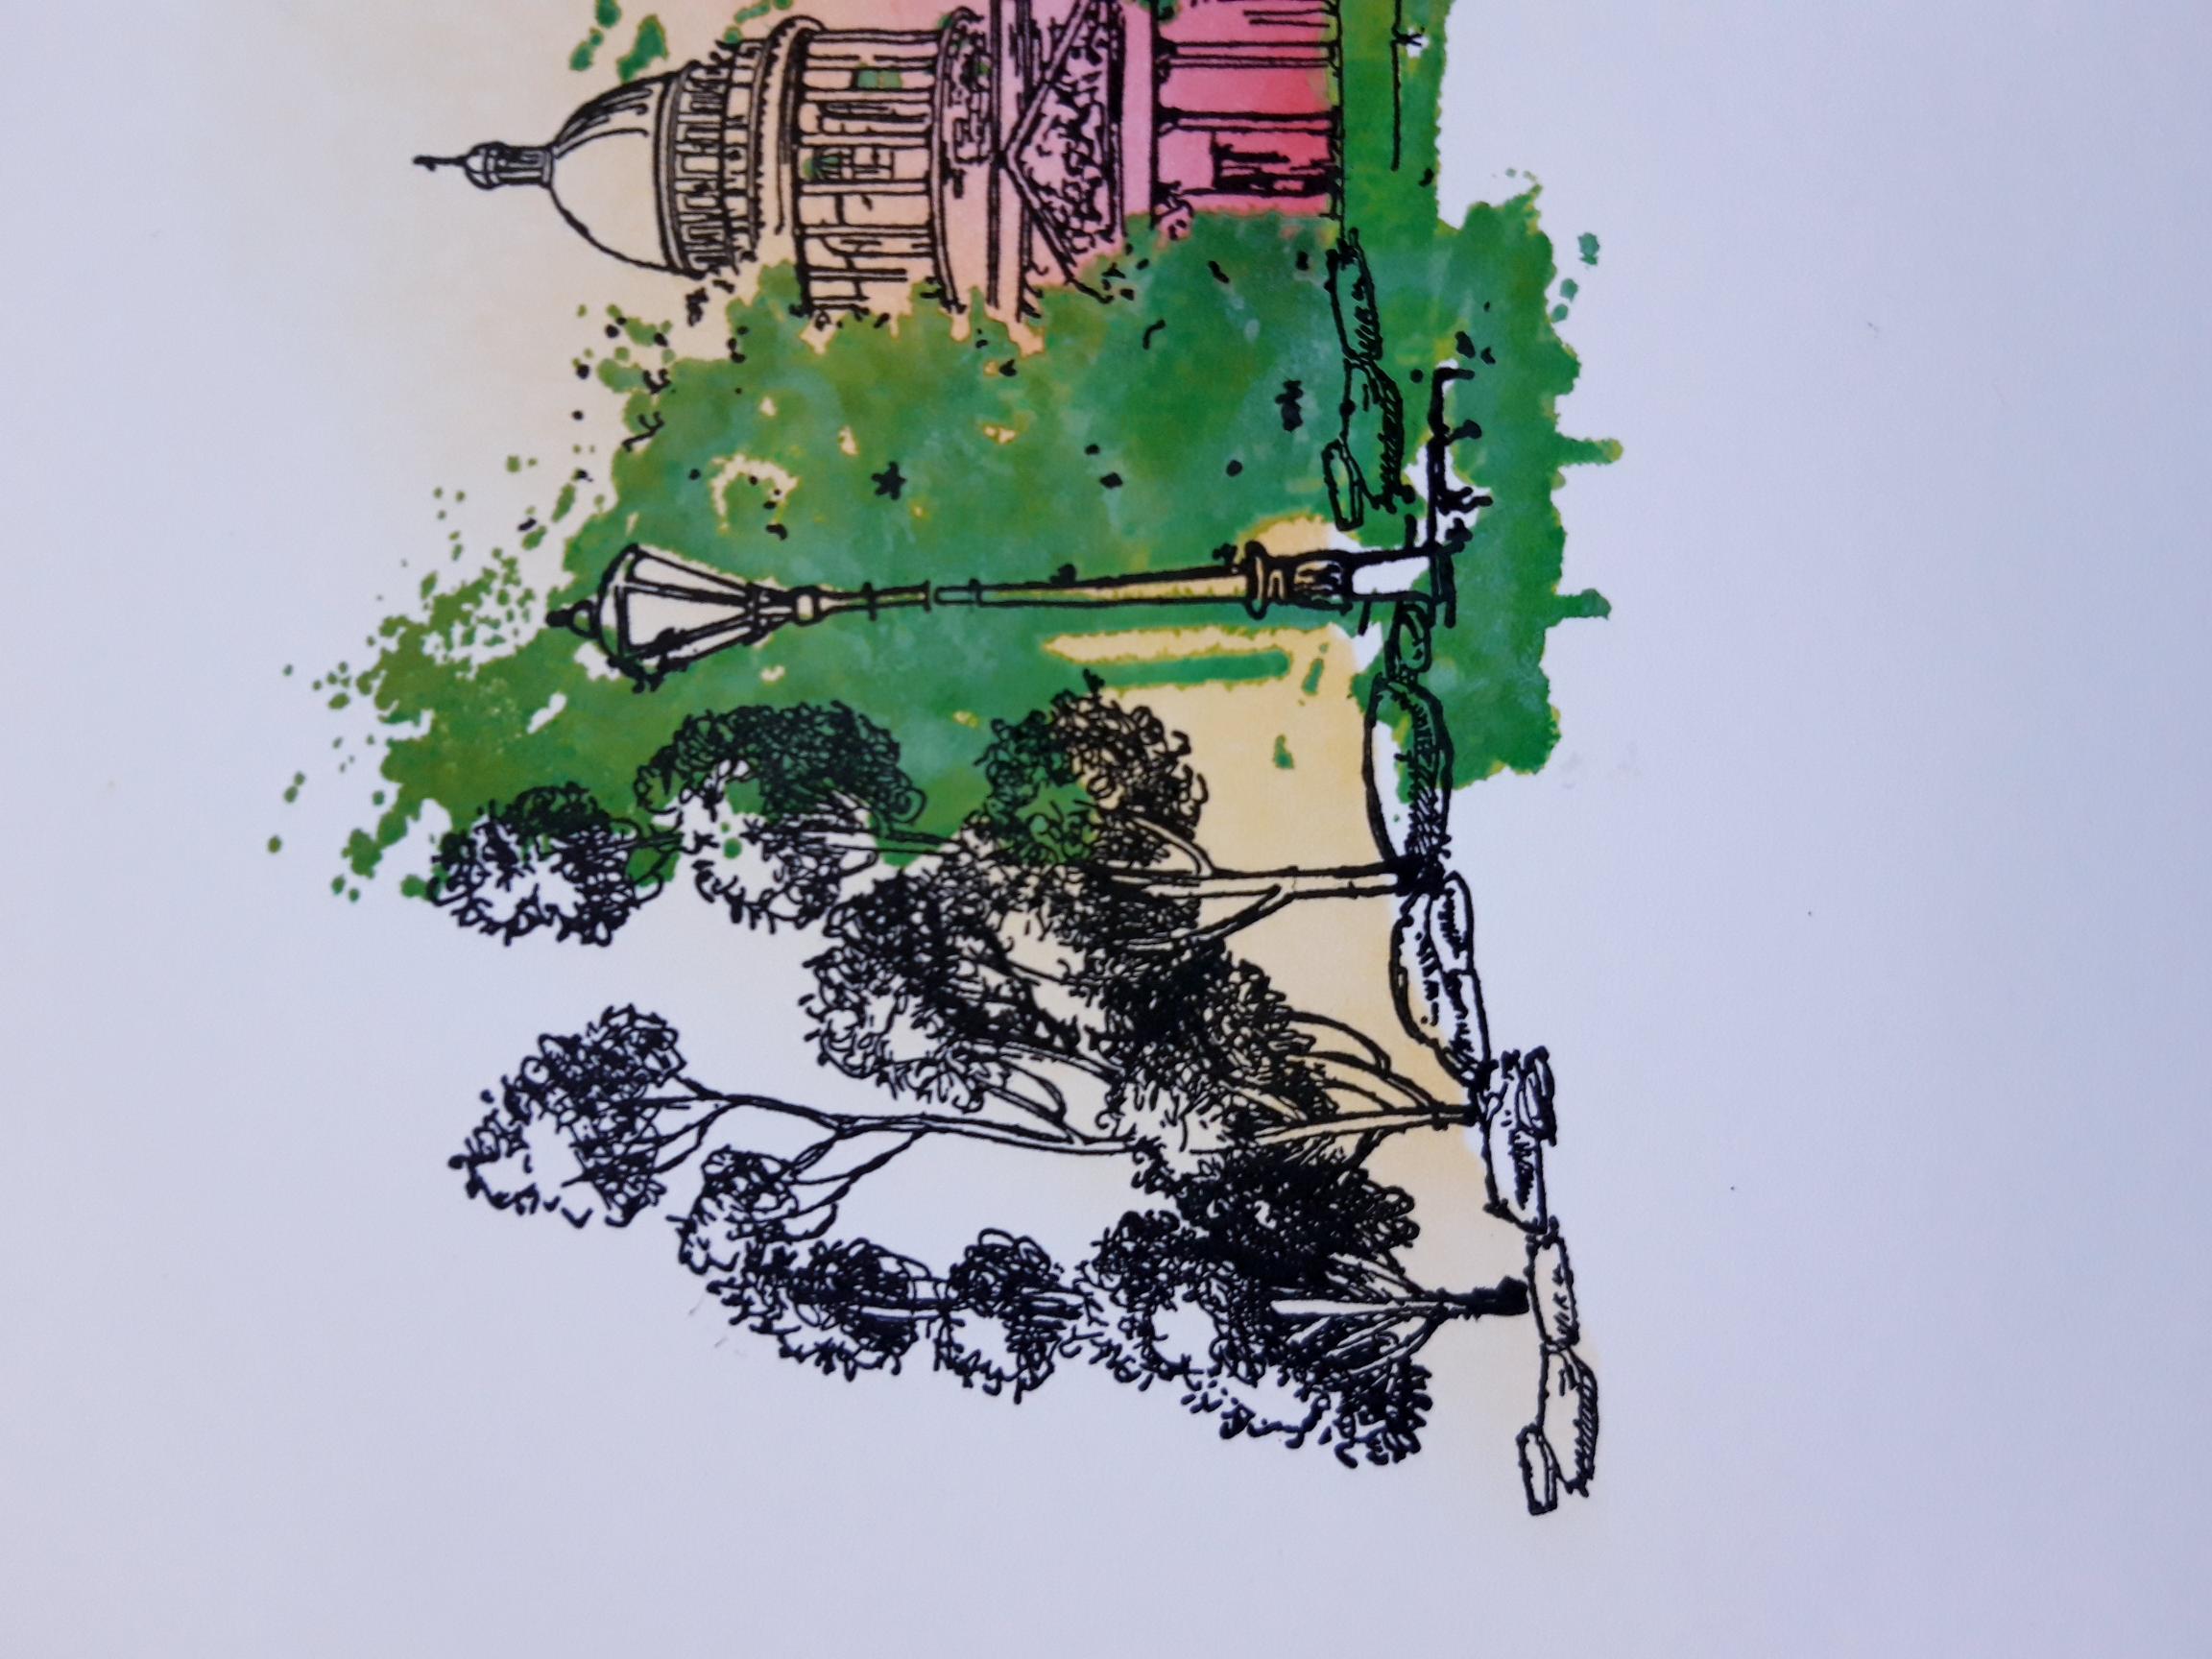
Ink up a couple of the trees, from the Soulful Pencil Sketch Elements Stamp Collection, with the Versafine. Stamp one to the left of the lampost, and the second to the right of the building. TIP: When stamping the elements be aware of where your skyline is, and the perspective of your overall design. |
|
Ink up two more trees with the Versafine. They can be the same ones as before, or different. Stamp one on the right, to the lower right of the other tree, stamping it off the right hand edge of the card. Stamp the other to the left, of the left hand tree. |
|
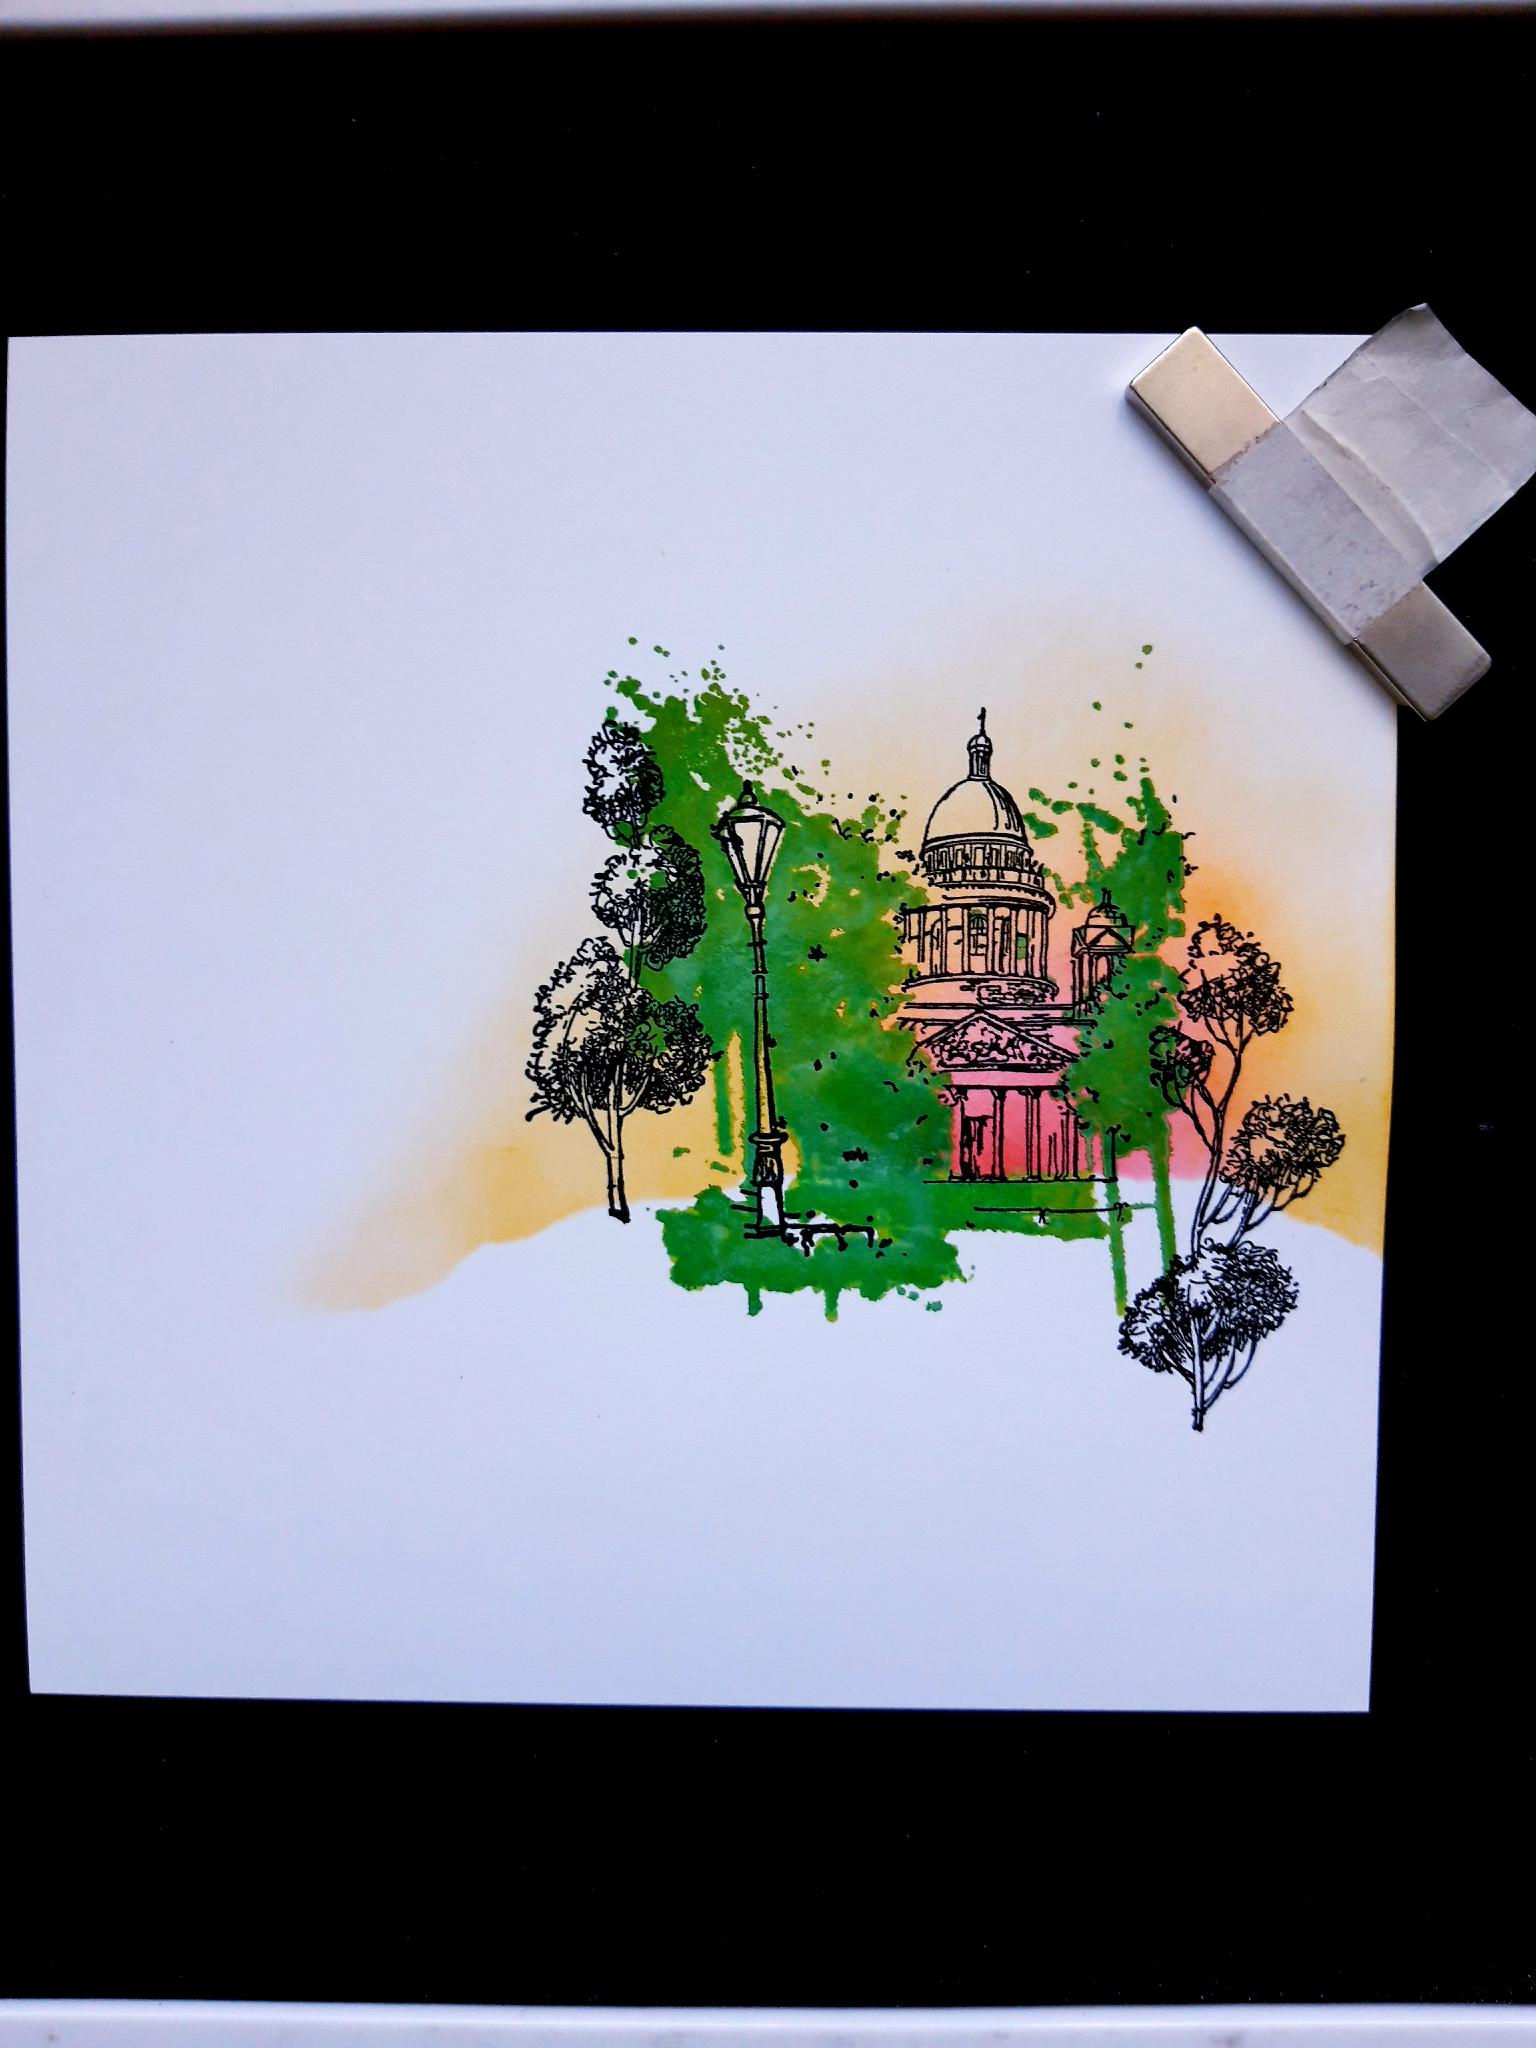
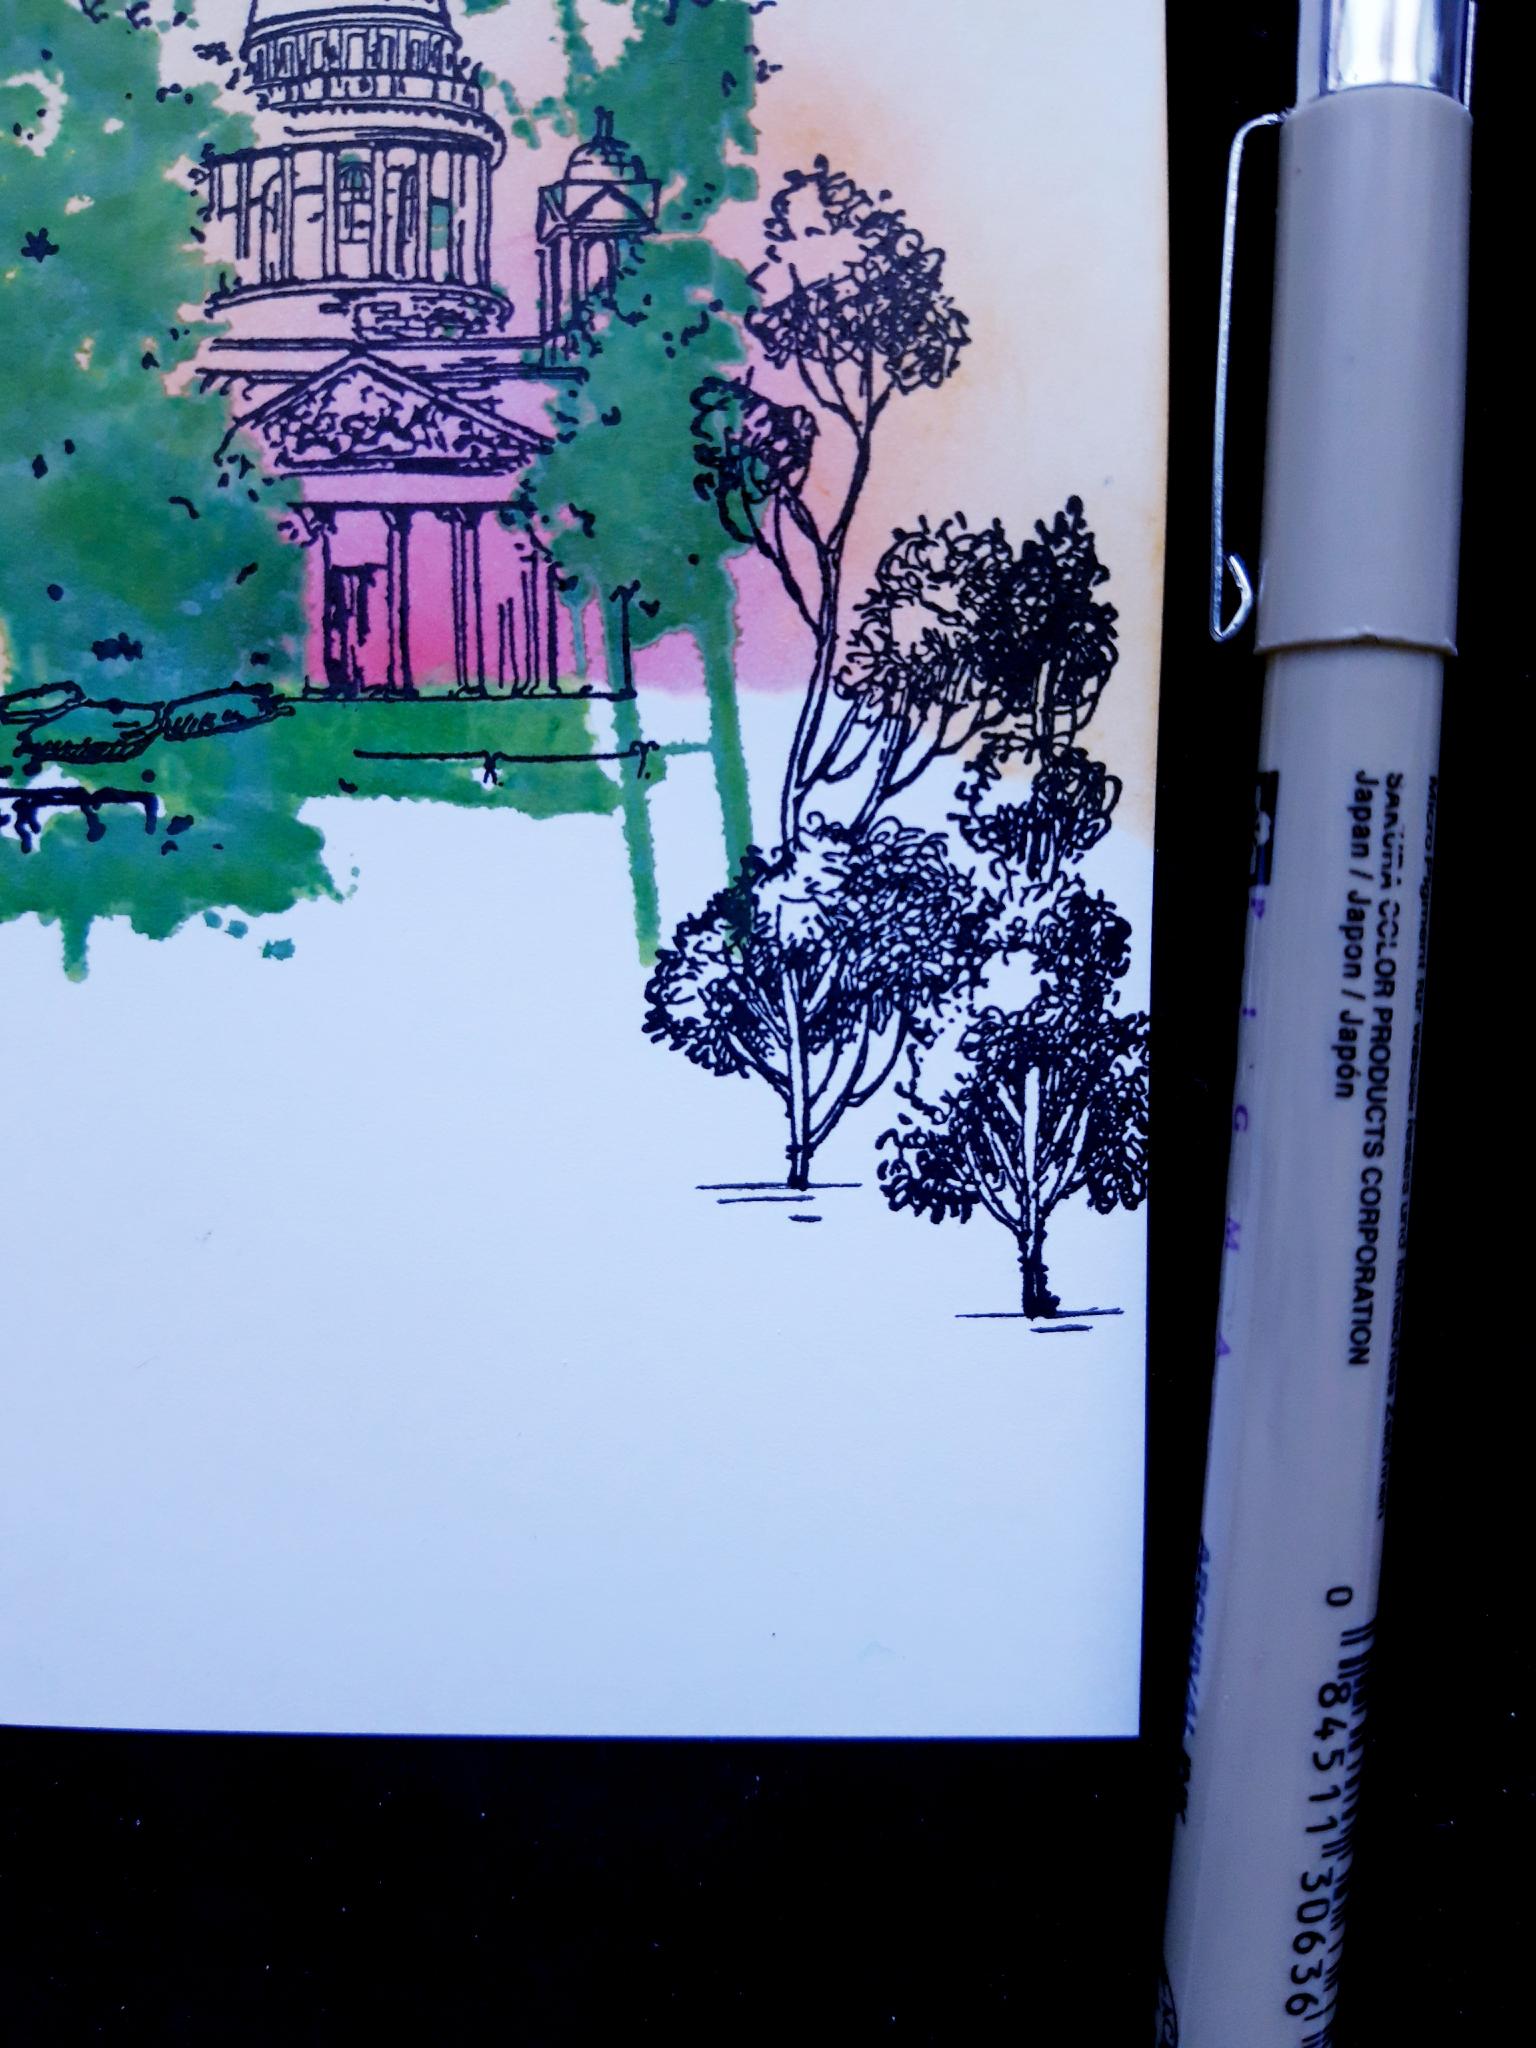
Ink up one last tree, with the Versafine, and stamp to the left your scene. |
|
Ink up the various stones and rocks, from the same stamp set, with the Versafine. Stamp them on, and around the base of your trees, and lampost. |
|
Use your black fine line pen to "ground" your trees, to the right of your artwork, so they are not "floating". |
|
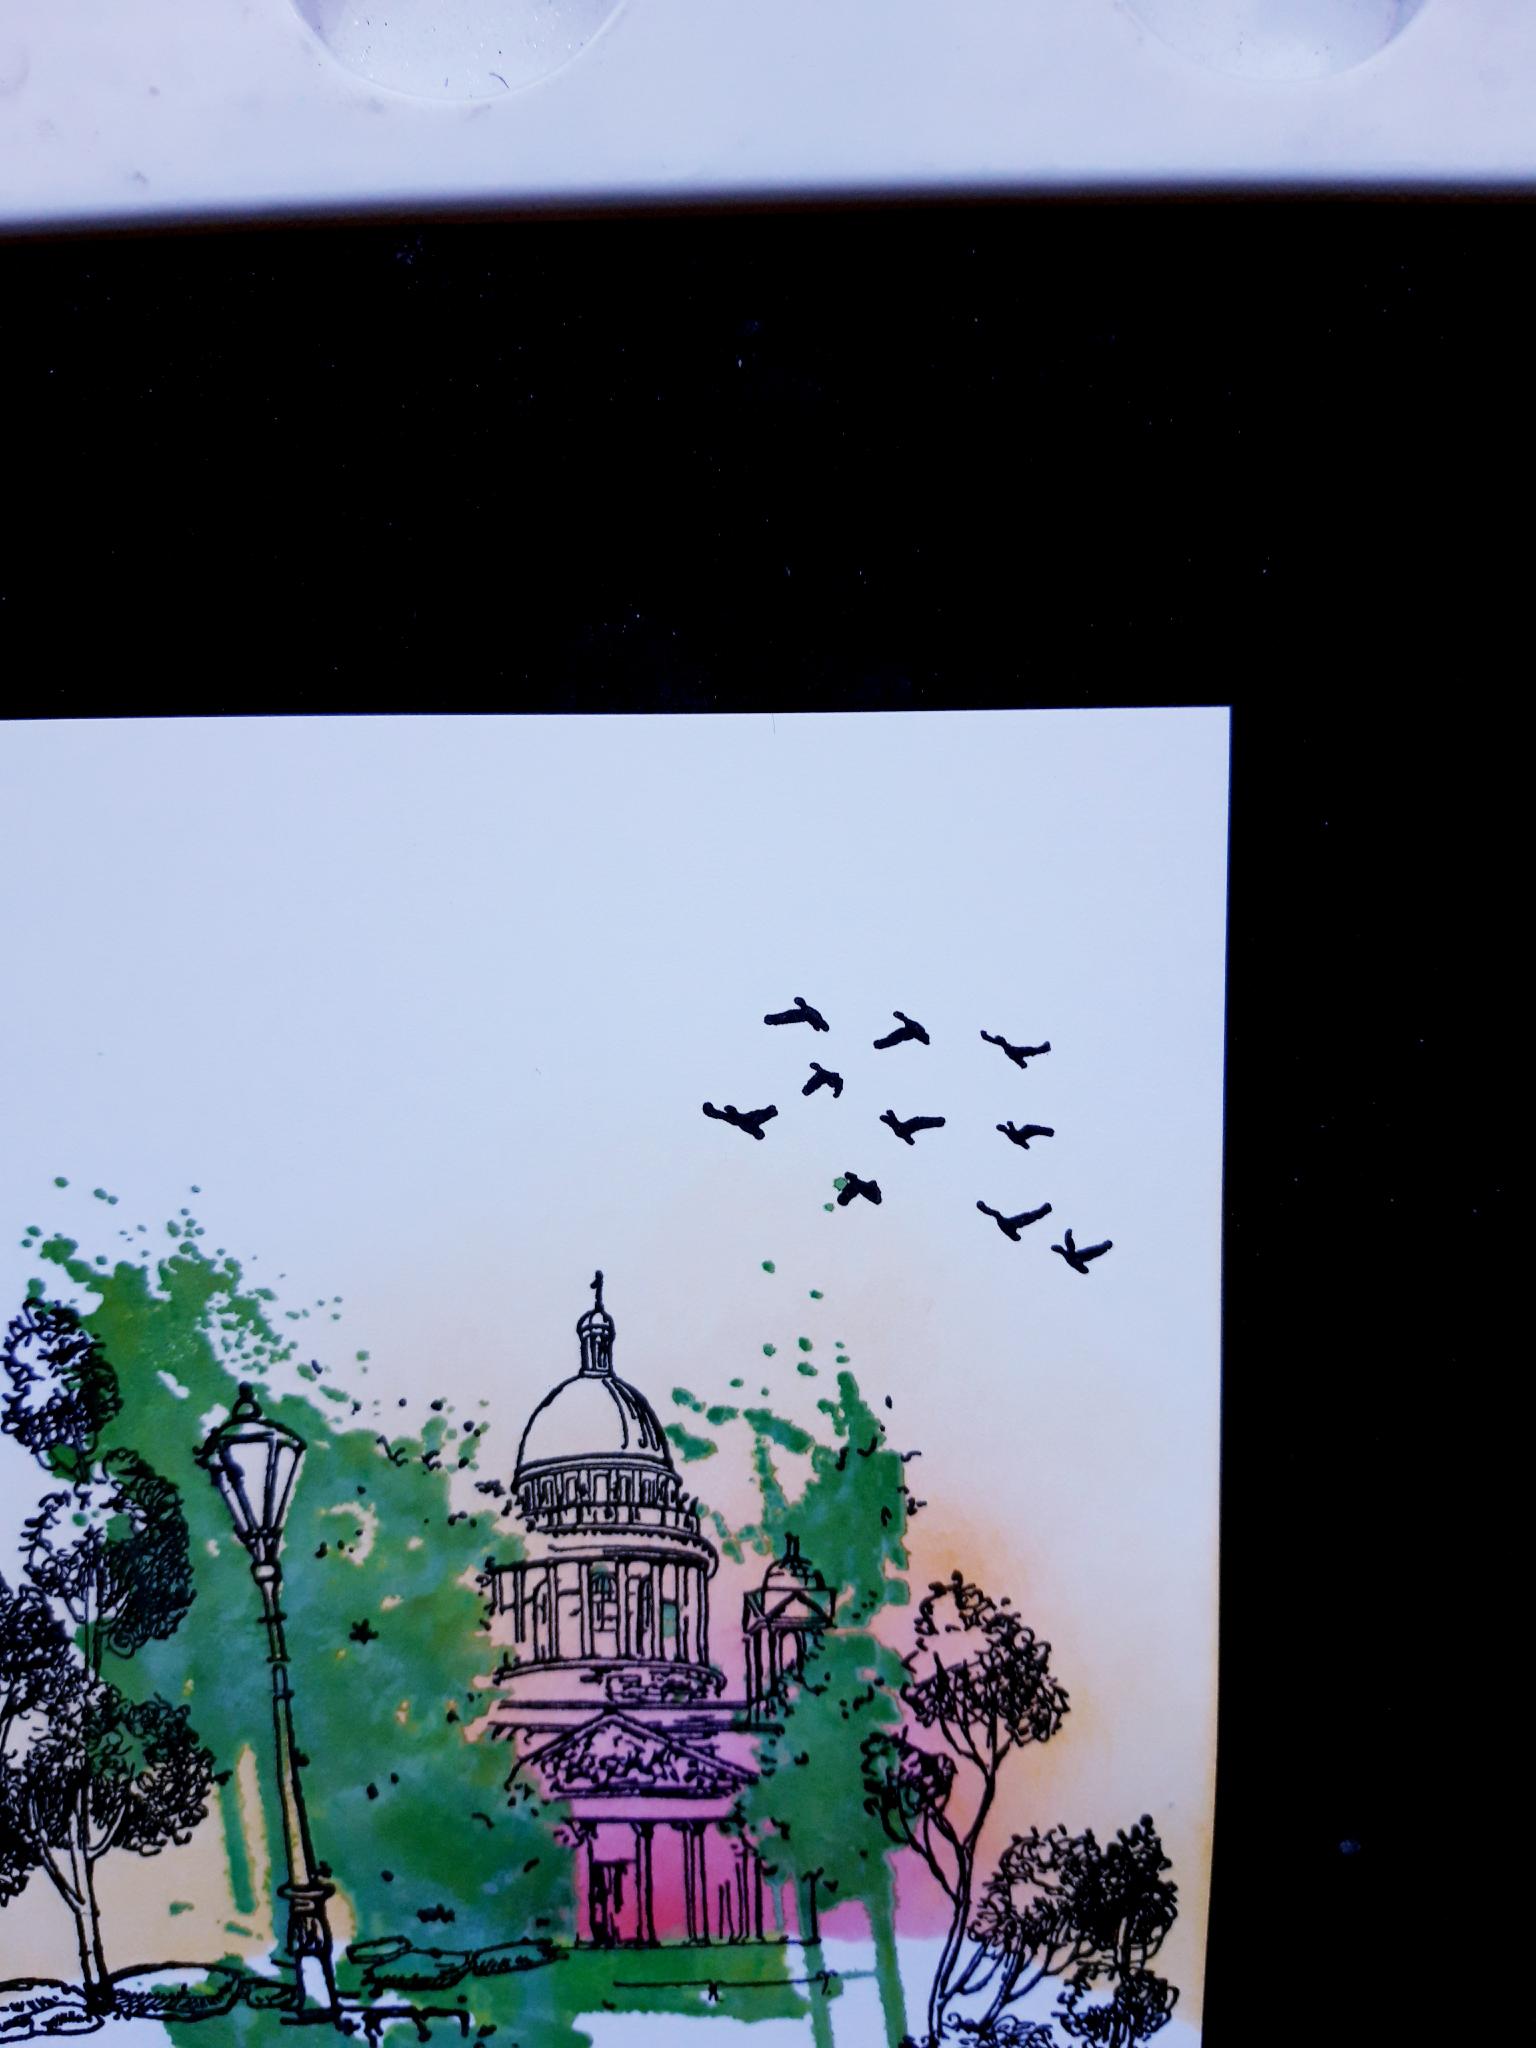
Ink up the flock of birds stamp, from the same stamp set, with the Versafine. Stamp above, and to the right, of the stamped building. |

|
Ink up the sentiment from the Celebrate and Create Stamp Collection, with the Versafine. Stamp bottom right of your artwork. |
|
Mat your artwork on top of the black cardstock. |
|
To finish, mat your artwork on top of your card blank. |