Give your friends $10 off their first order!
Refer a FRIEND


WHAT YOU WILL NEED:
White card blank 8 x 8"
White/black cardstock
Paperchain Magical Elegance I Can and I Will Stamp and Die Set
Paperchain Magical Elegance 8 x 8" Foundation Paper Pack
SBM Hybrid Ink Pad: Midnight
SBM Premium Dye Ink Pad: Tiffany, Heather
Paint brush
Eureka 101 Watercolour Tablet
SBM A3 Magnetic glass mat
Paper Trimmer
Glue/foam pads
Die Cutting machine
[click image to enlarge] 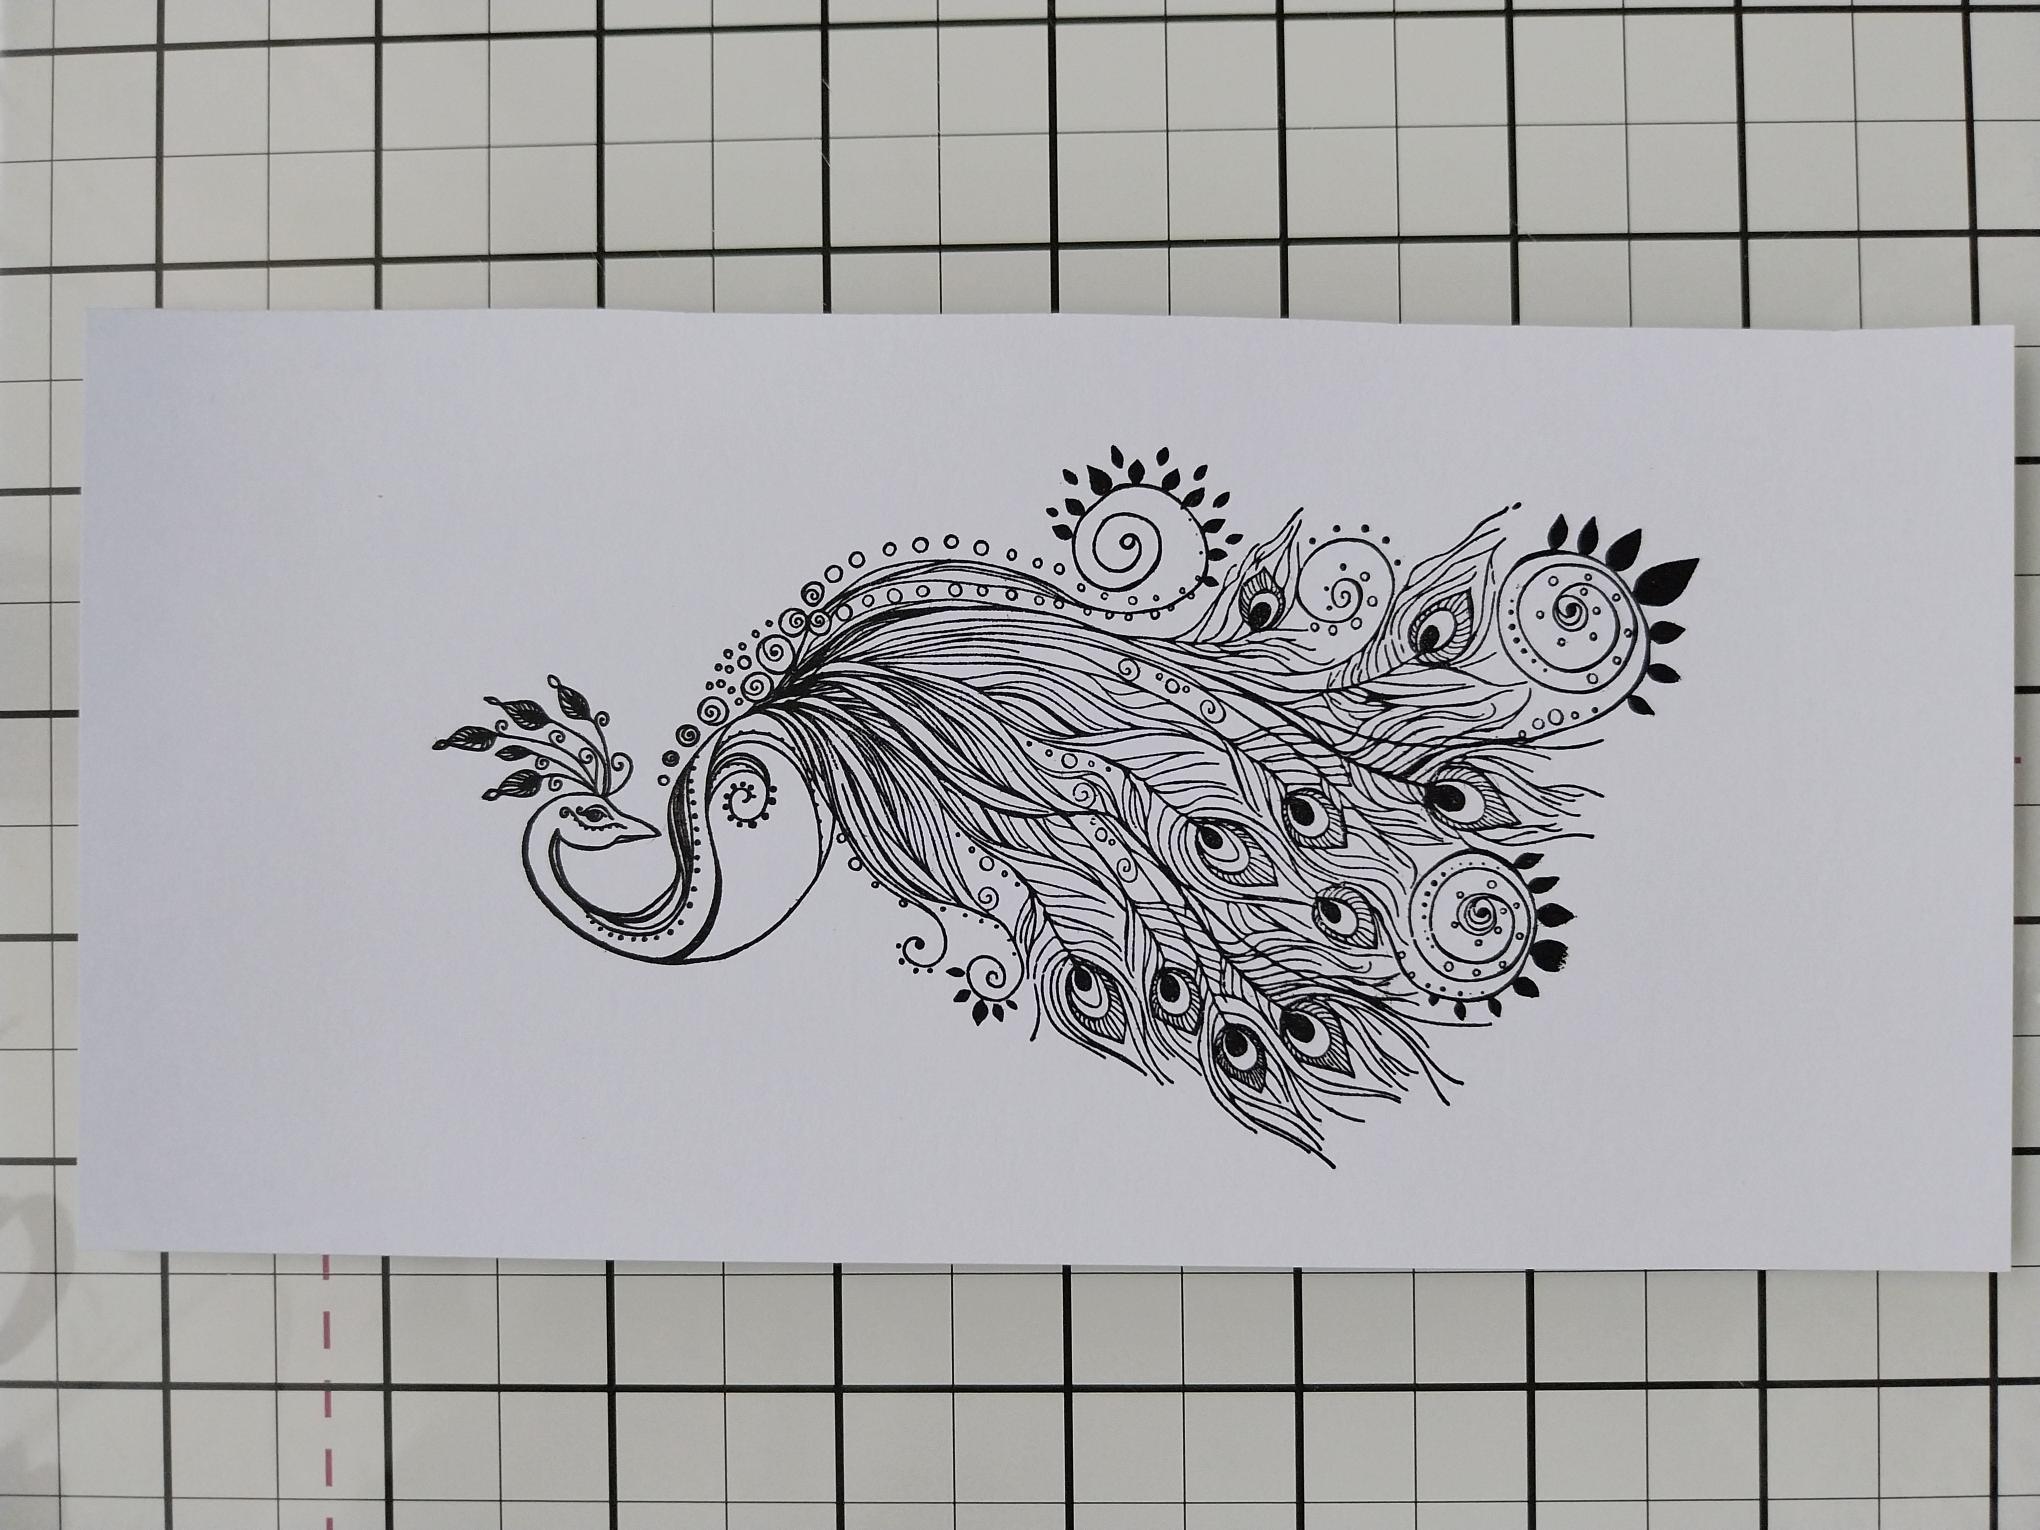
|
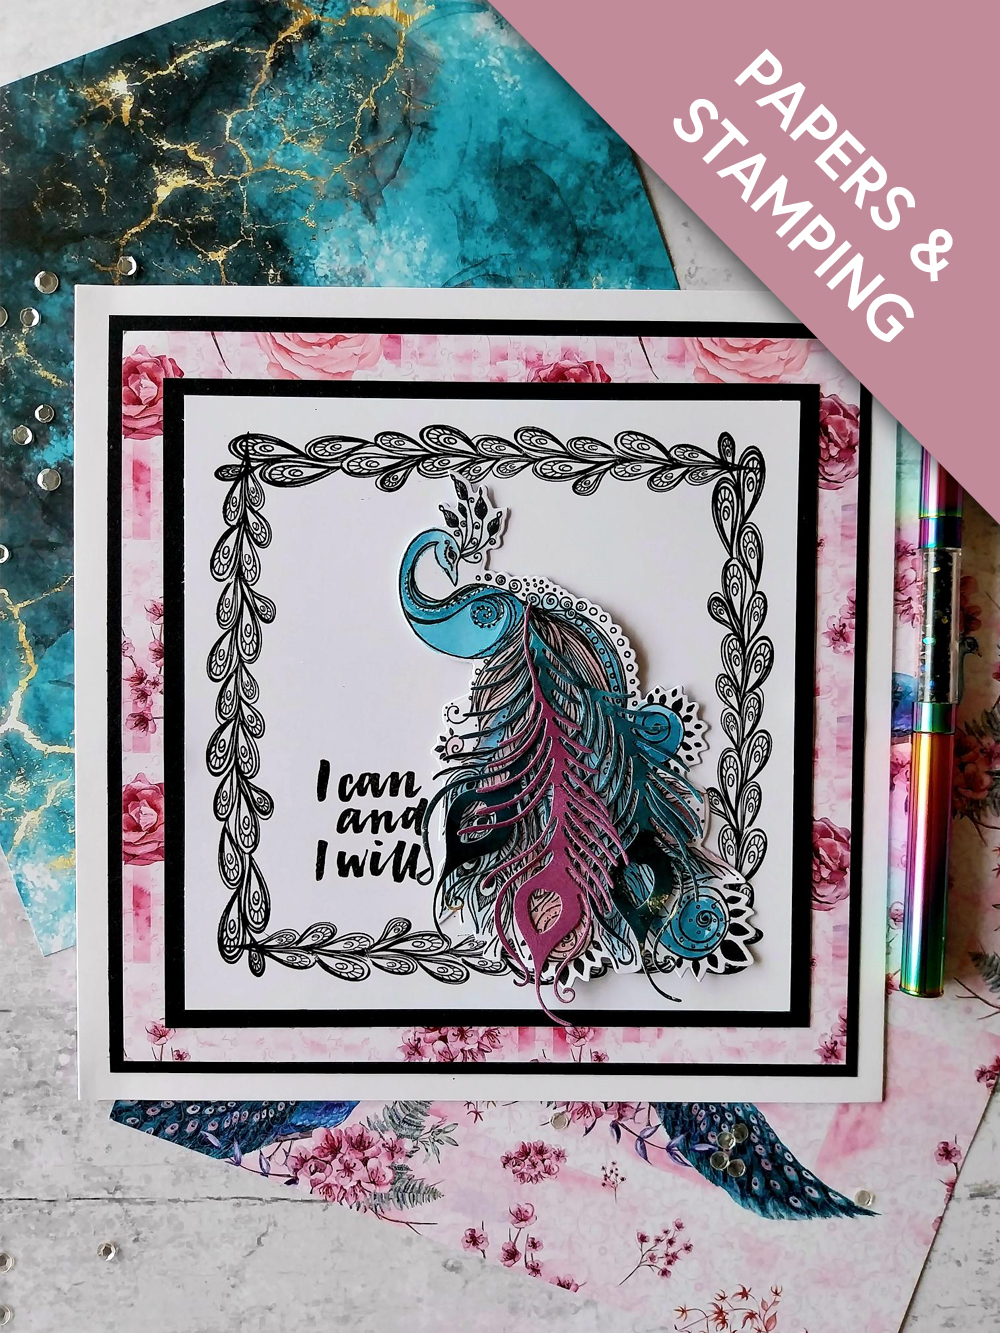
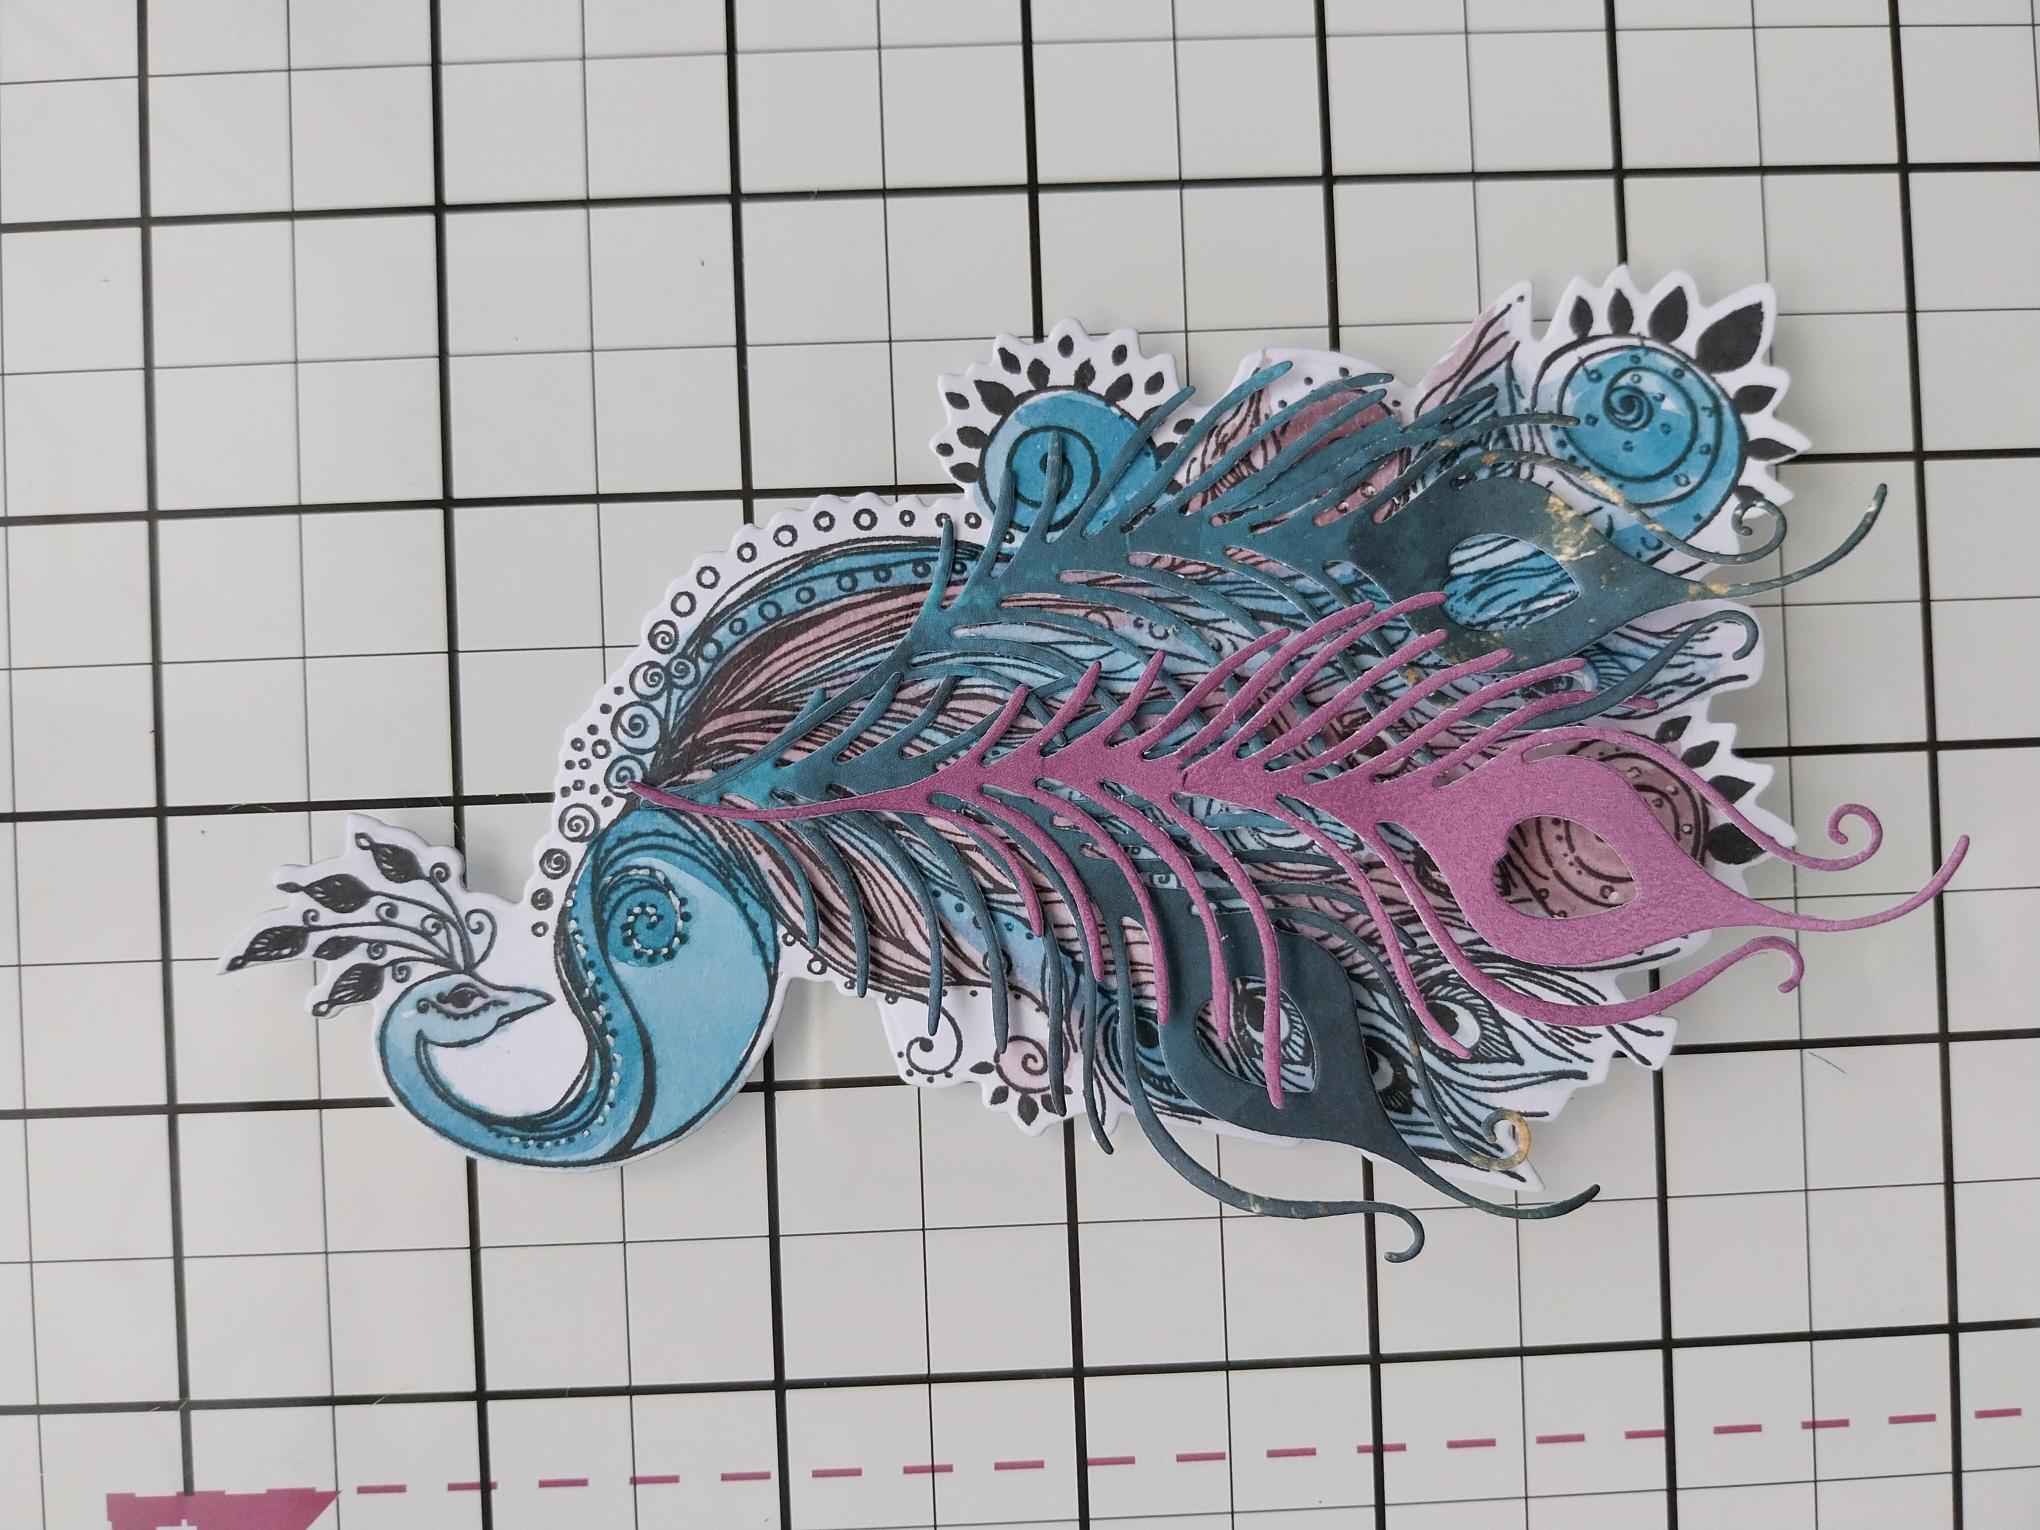
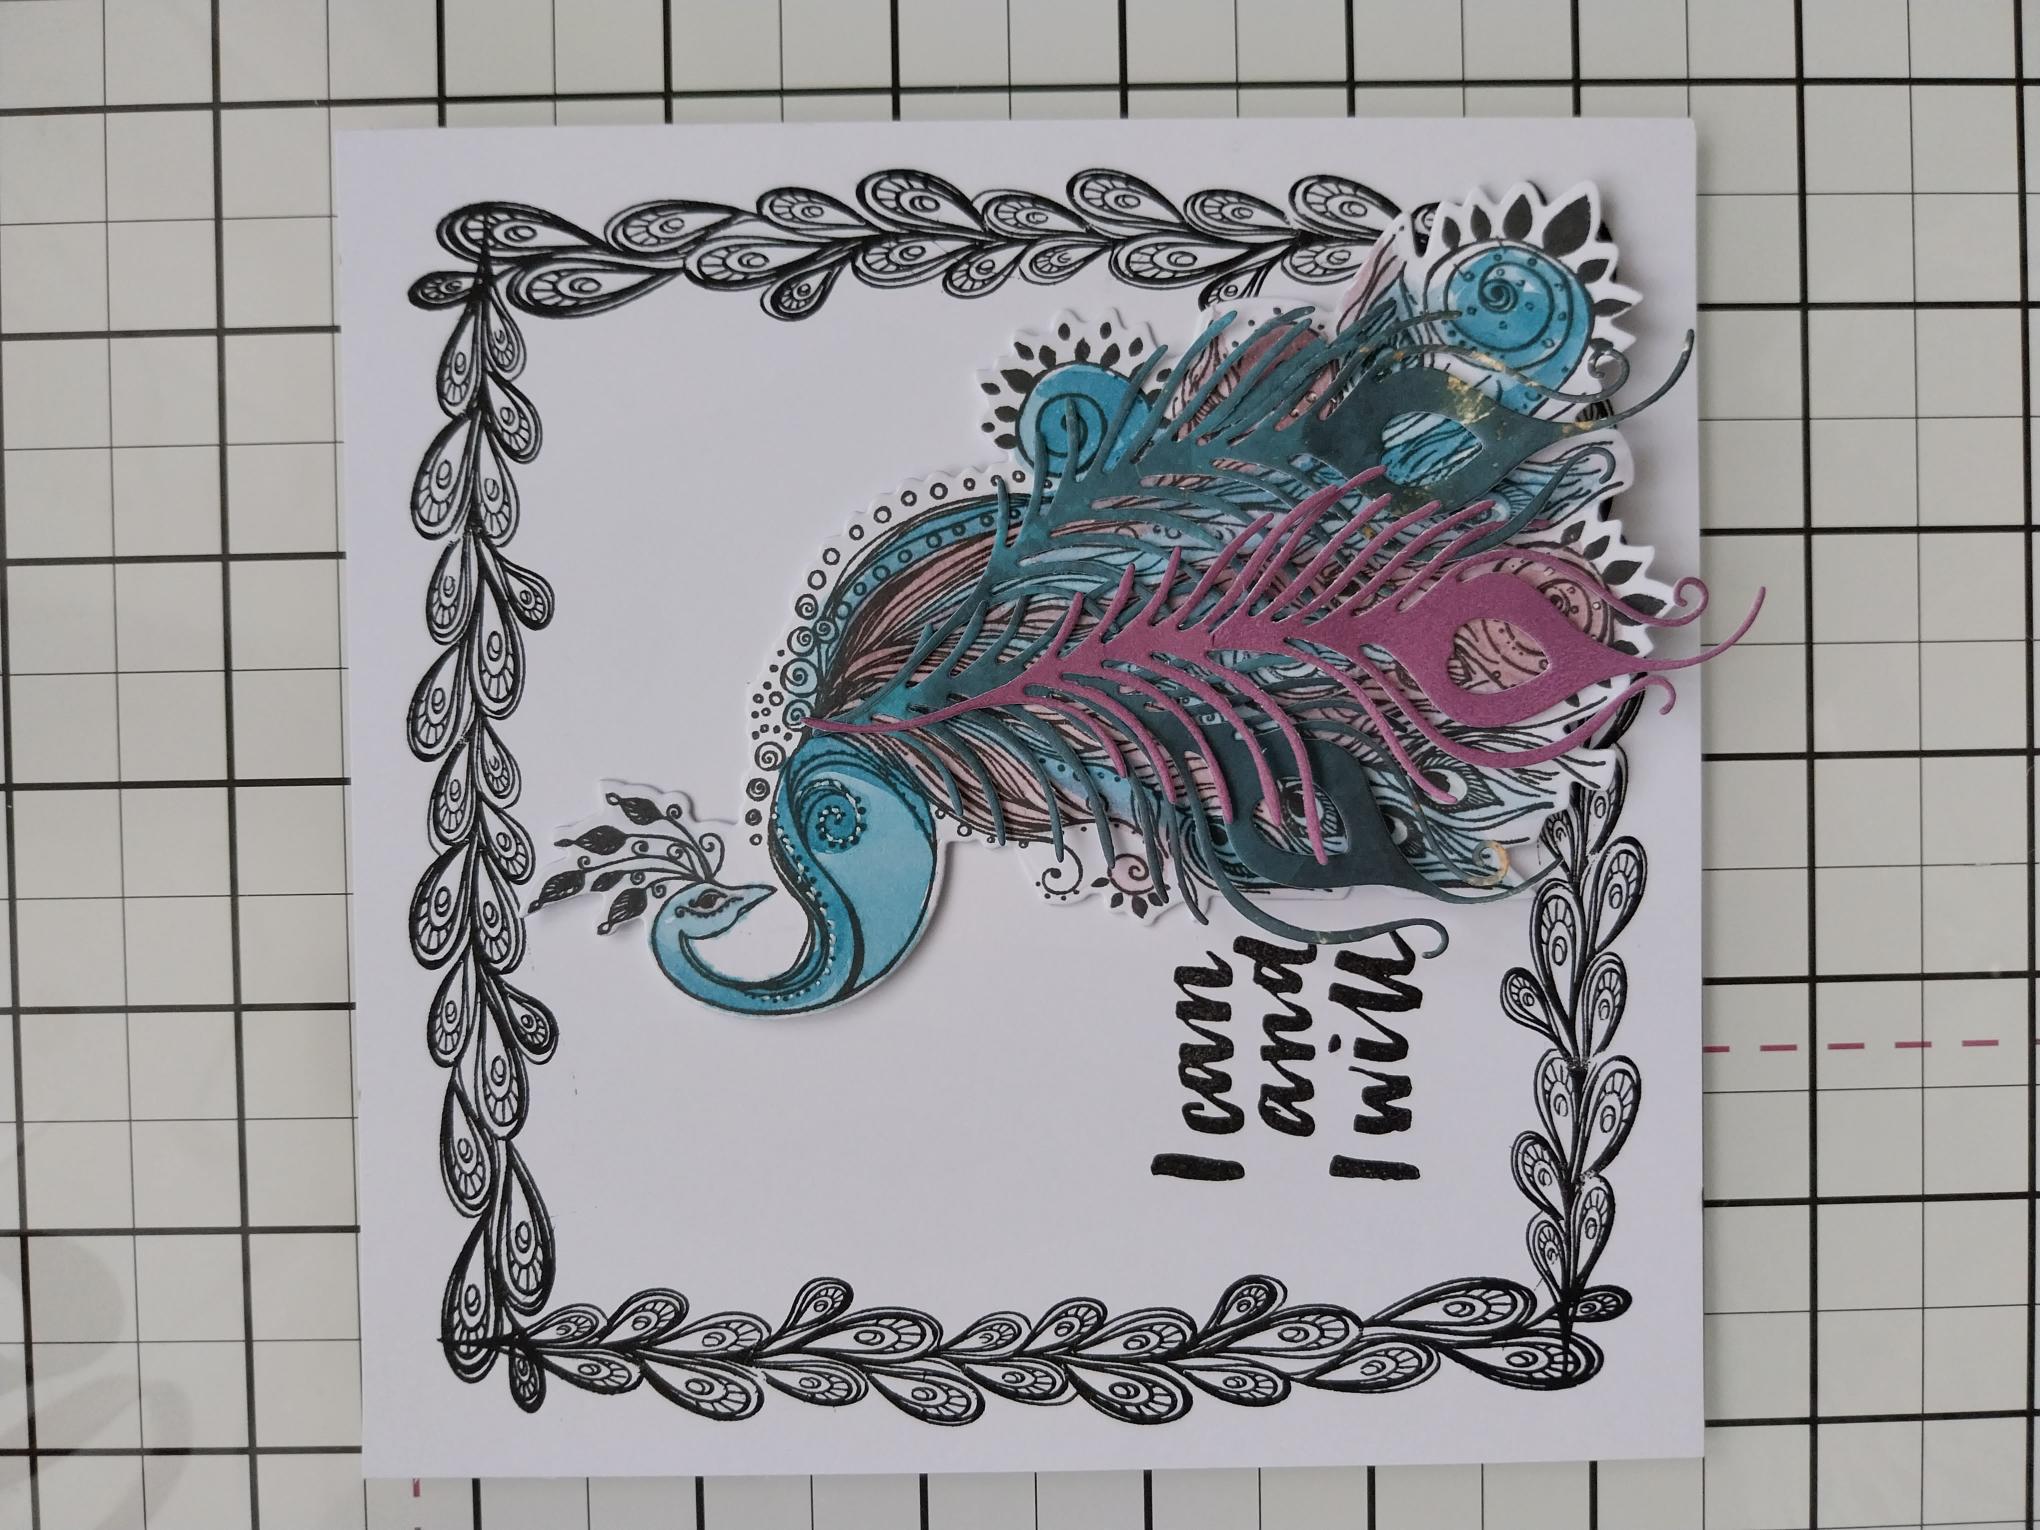
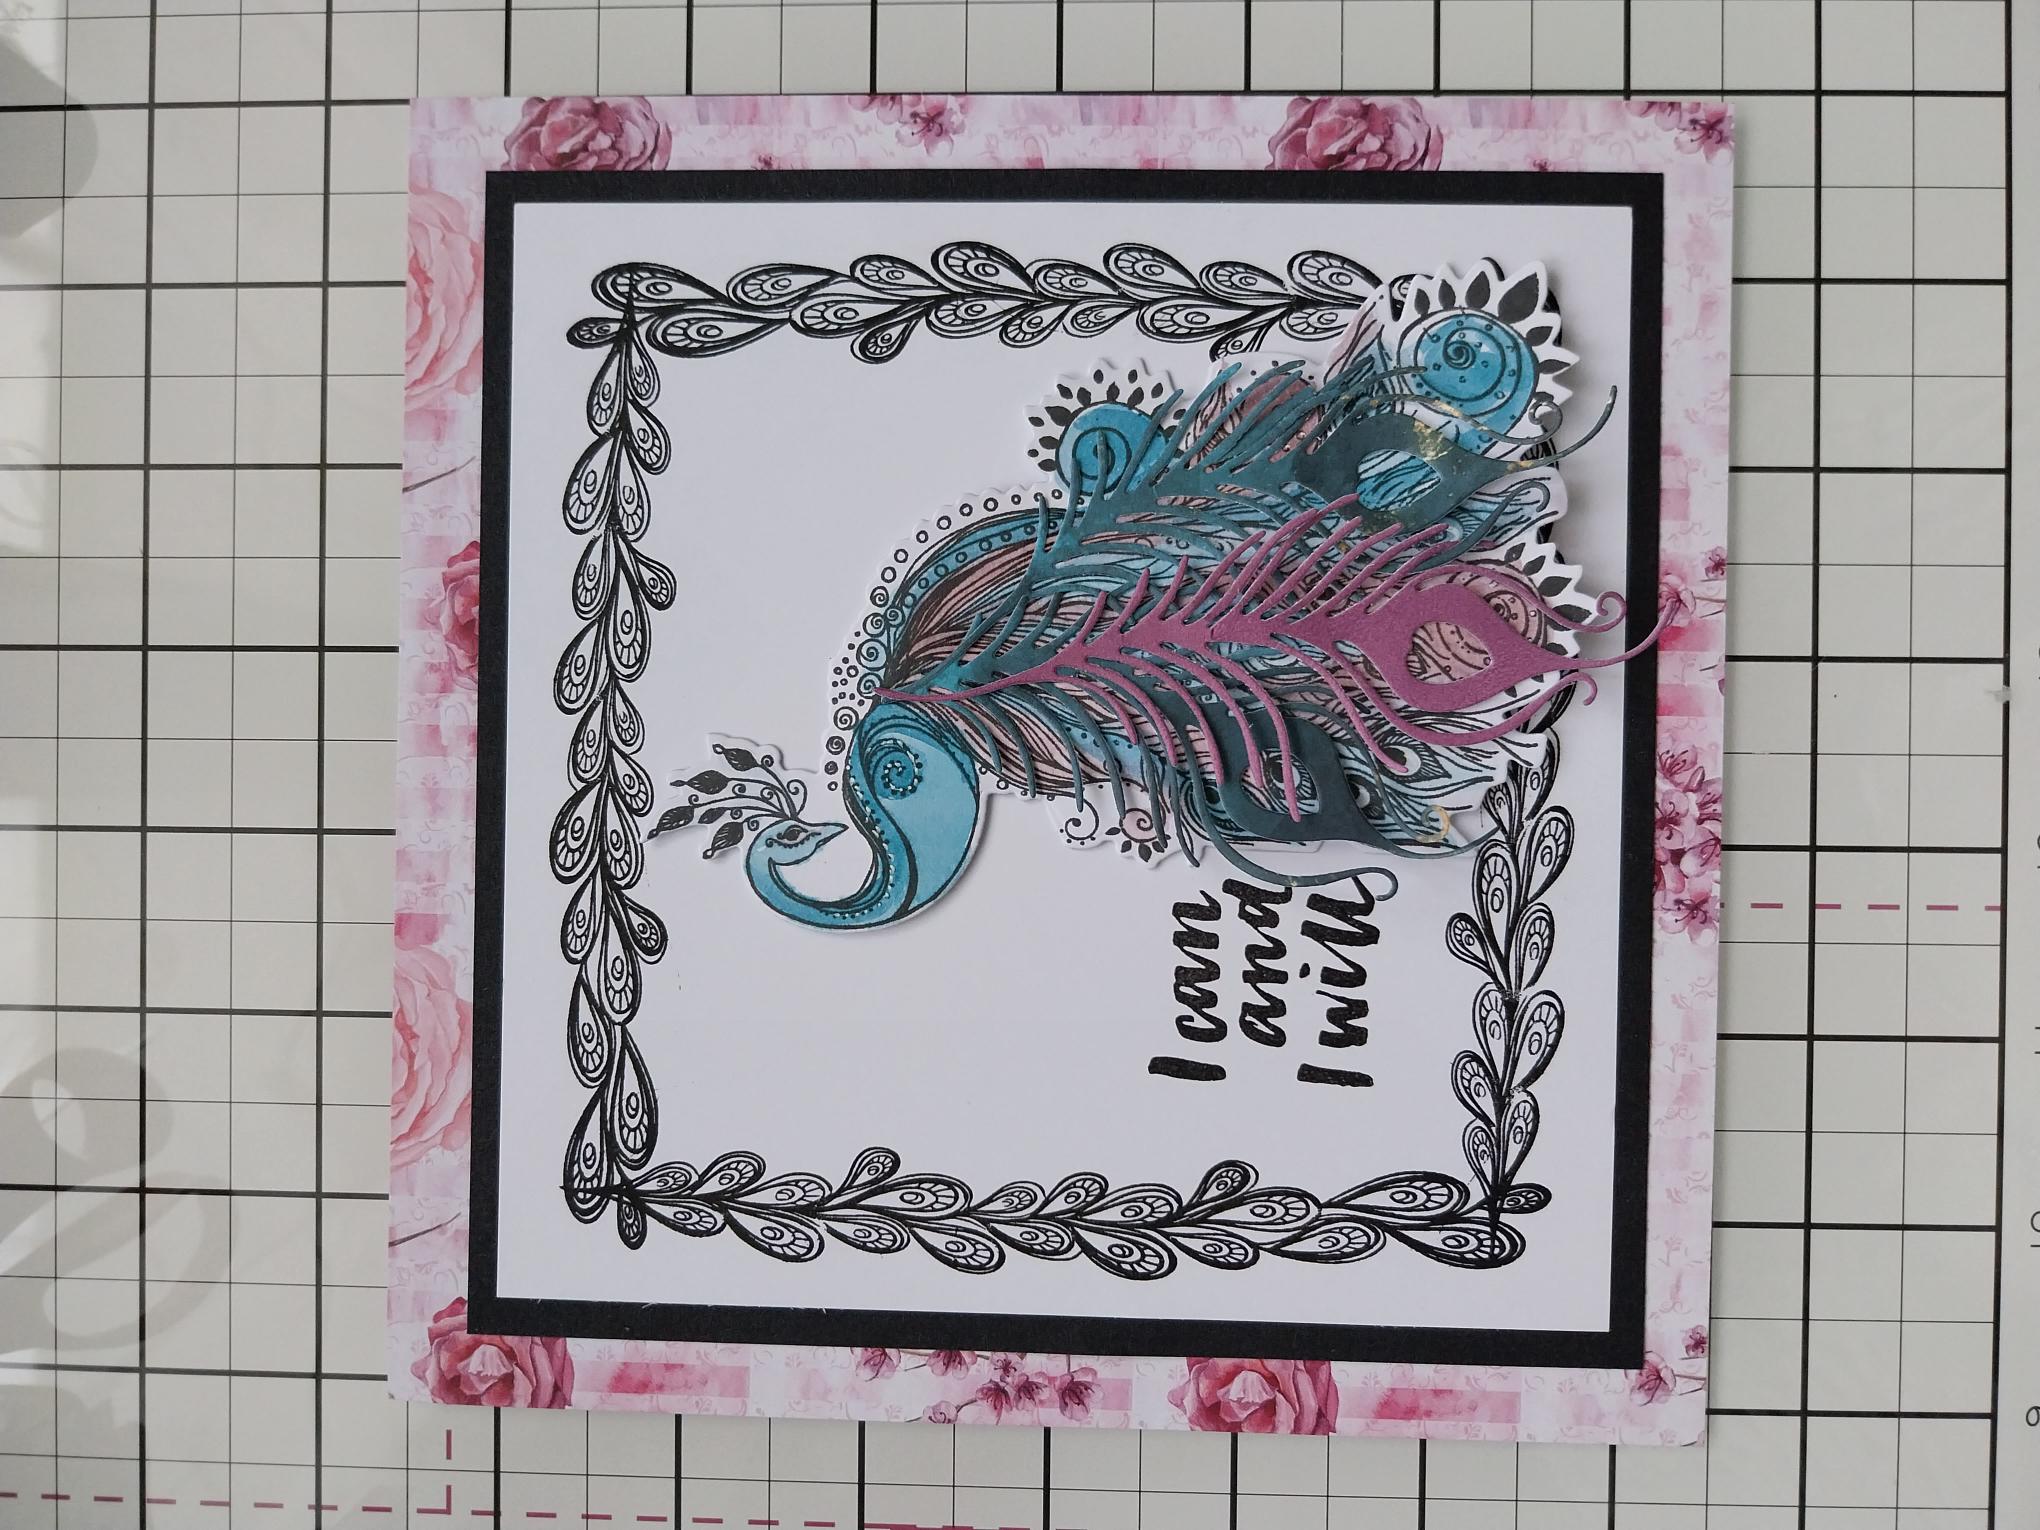
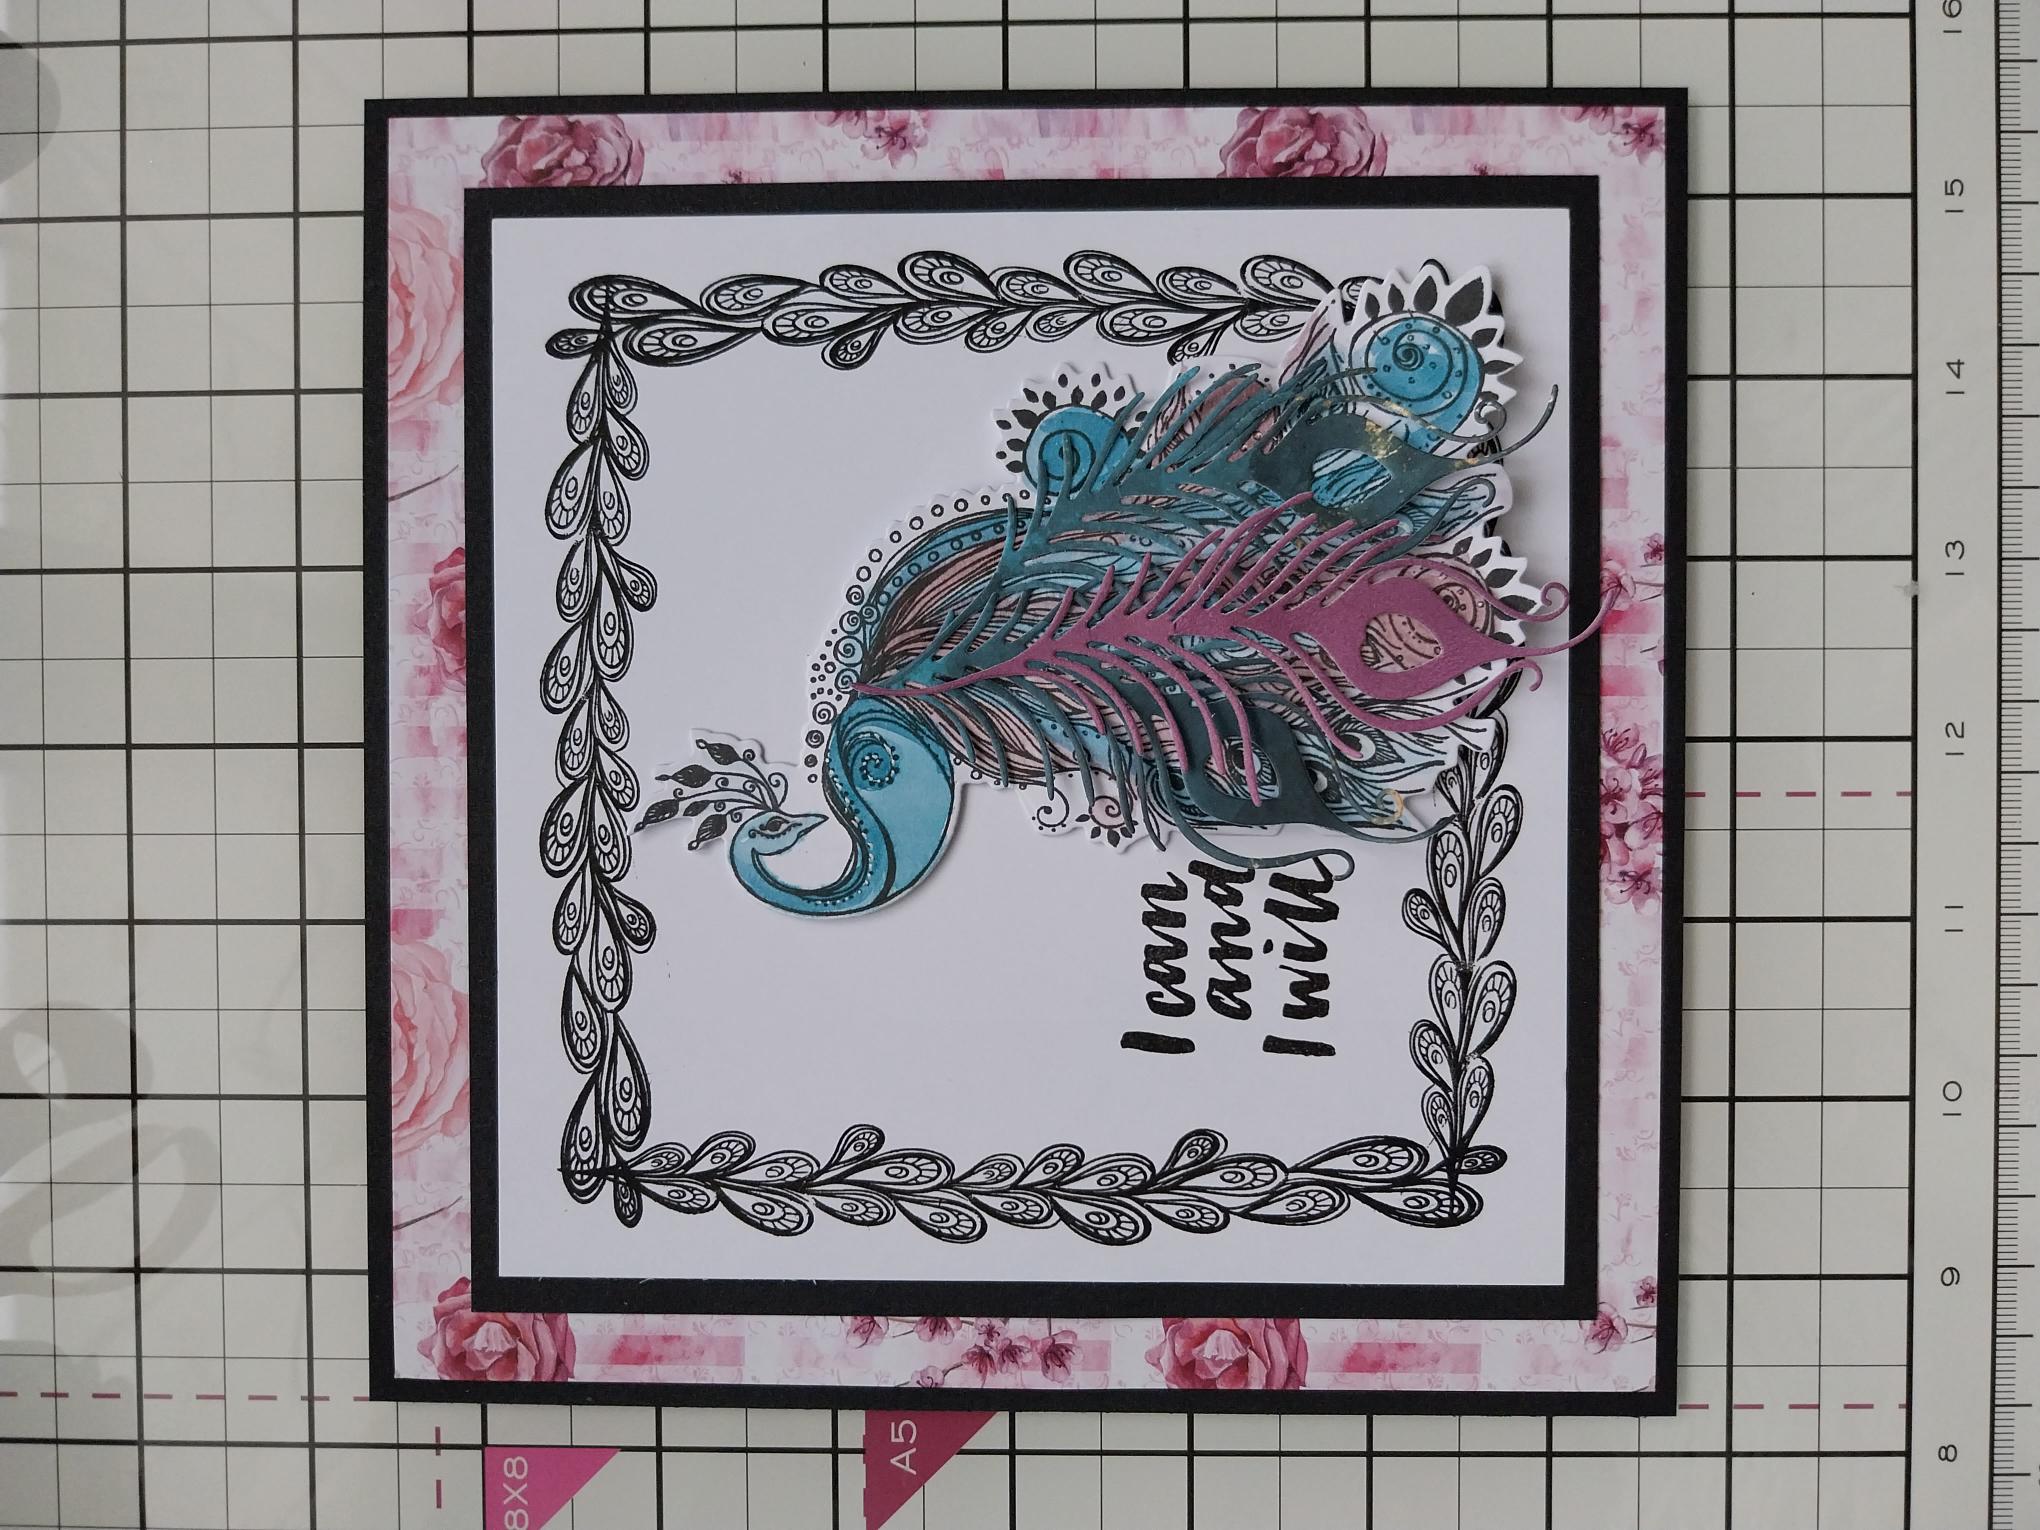
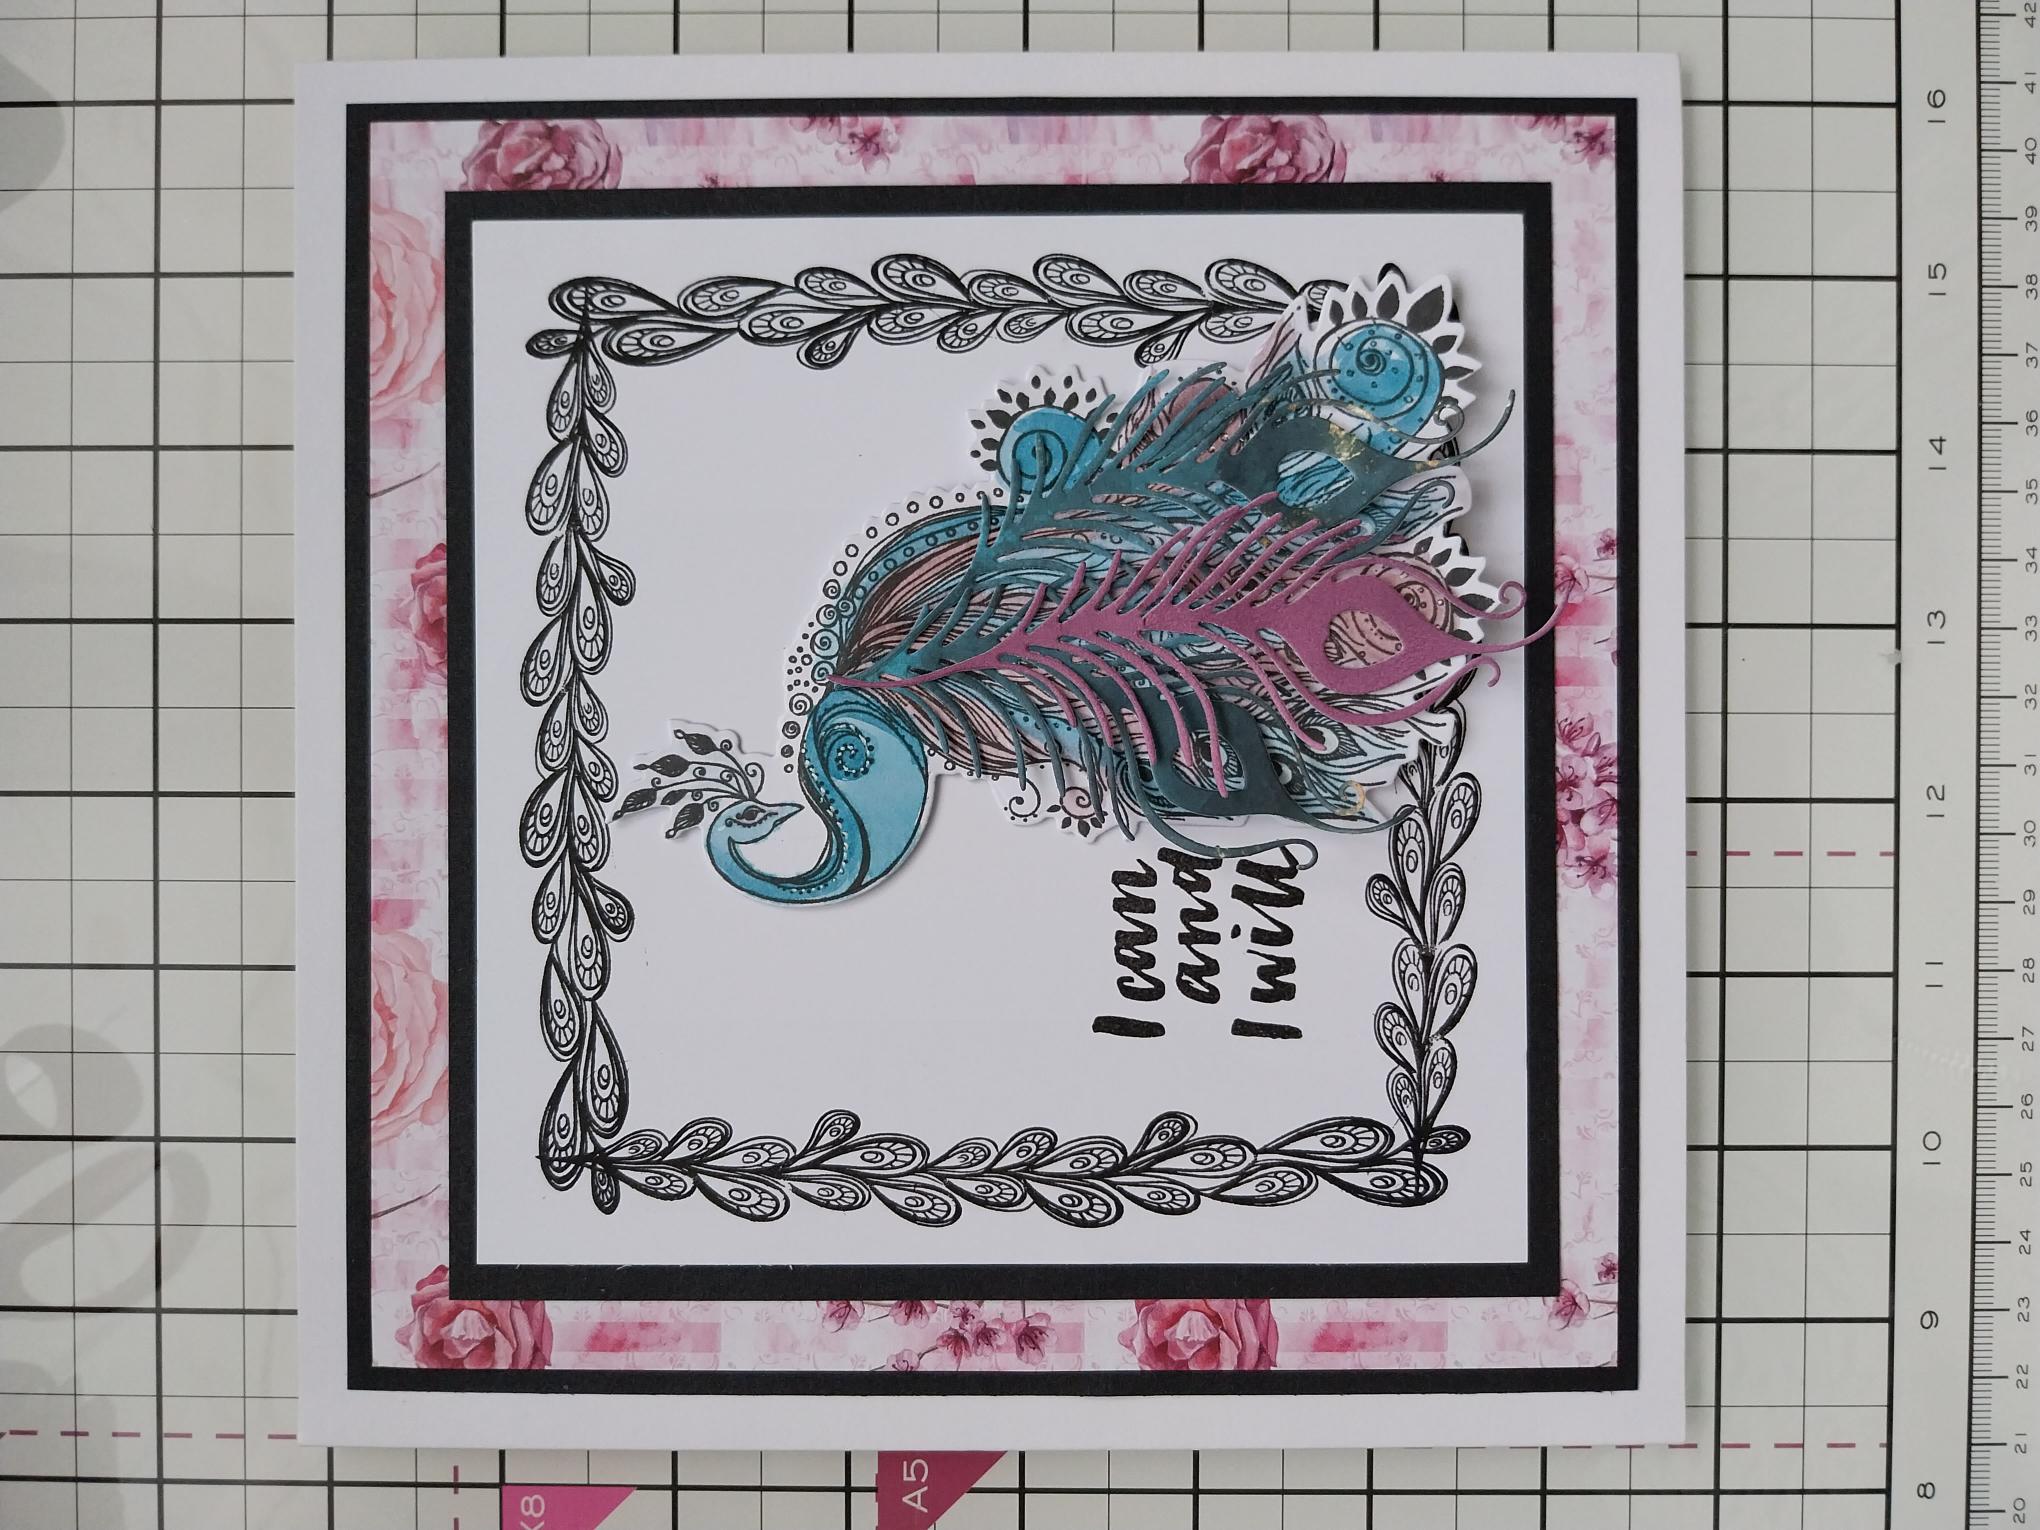
Stamp this beautiful Peacock, in the Midnight ink, on to white card. |
|
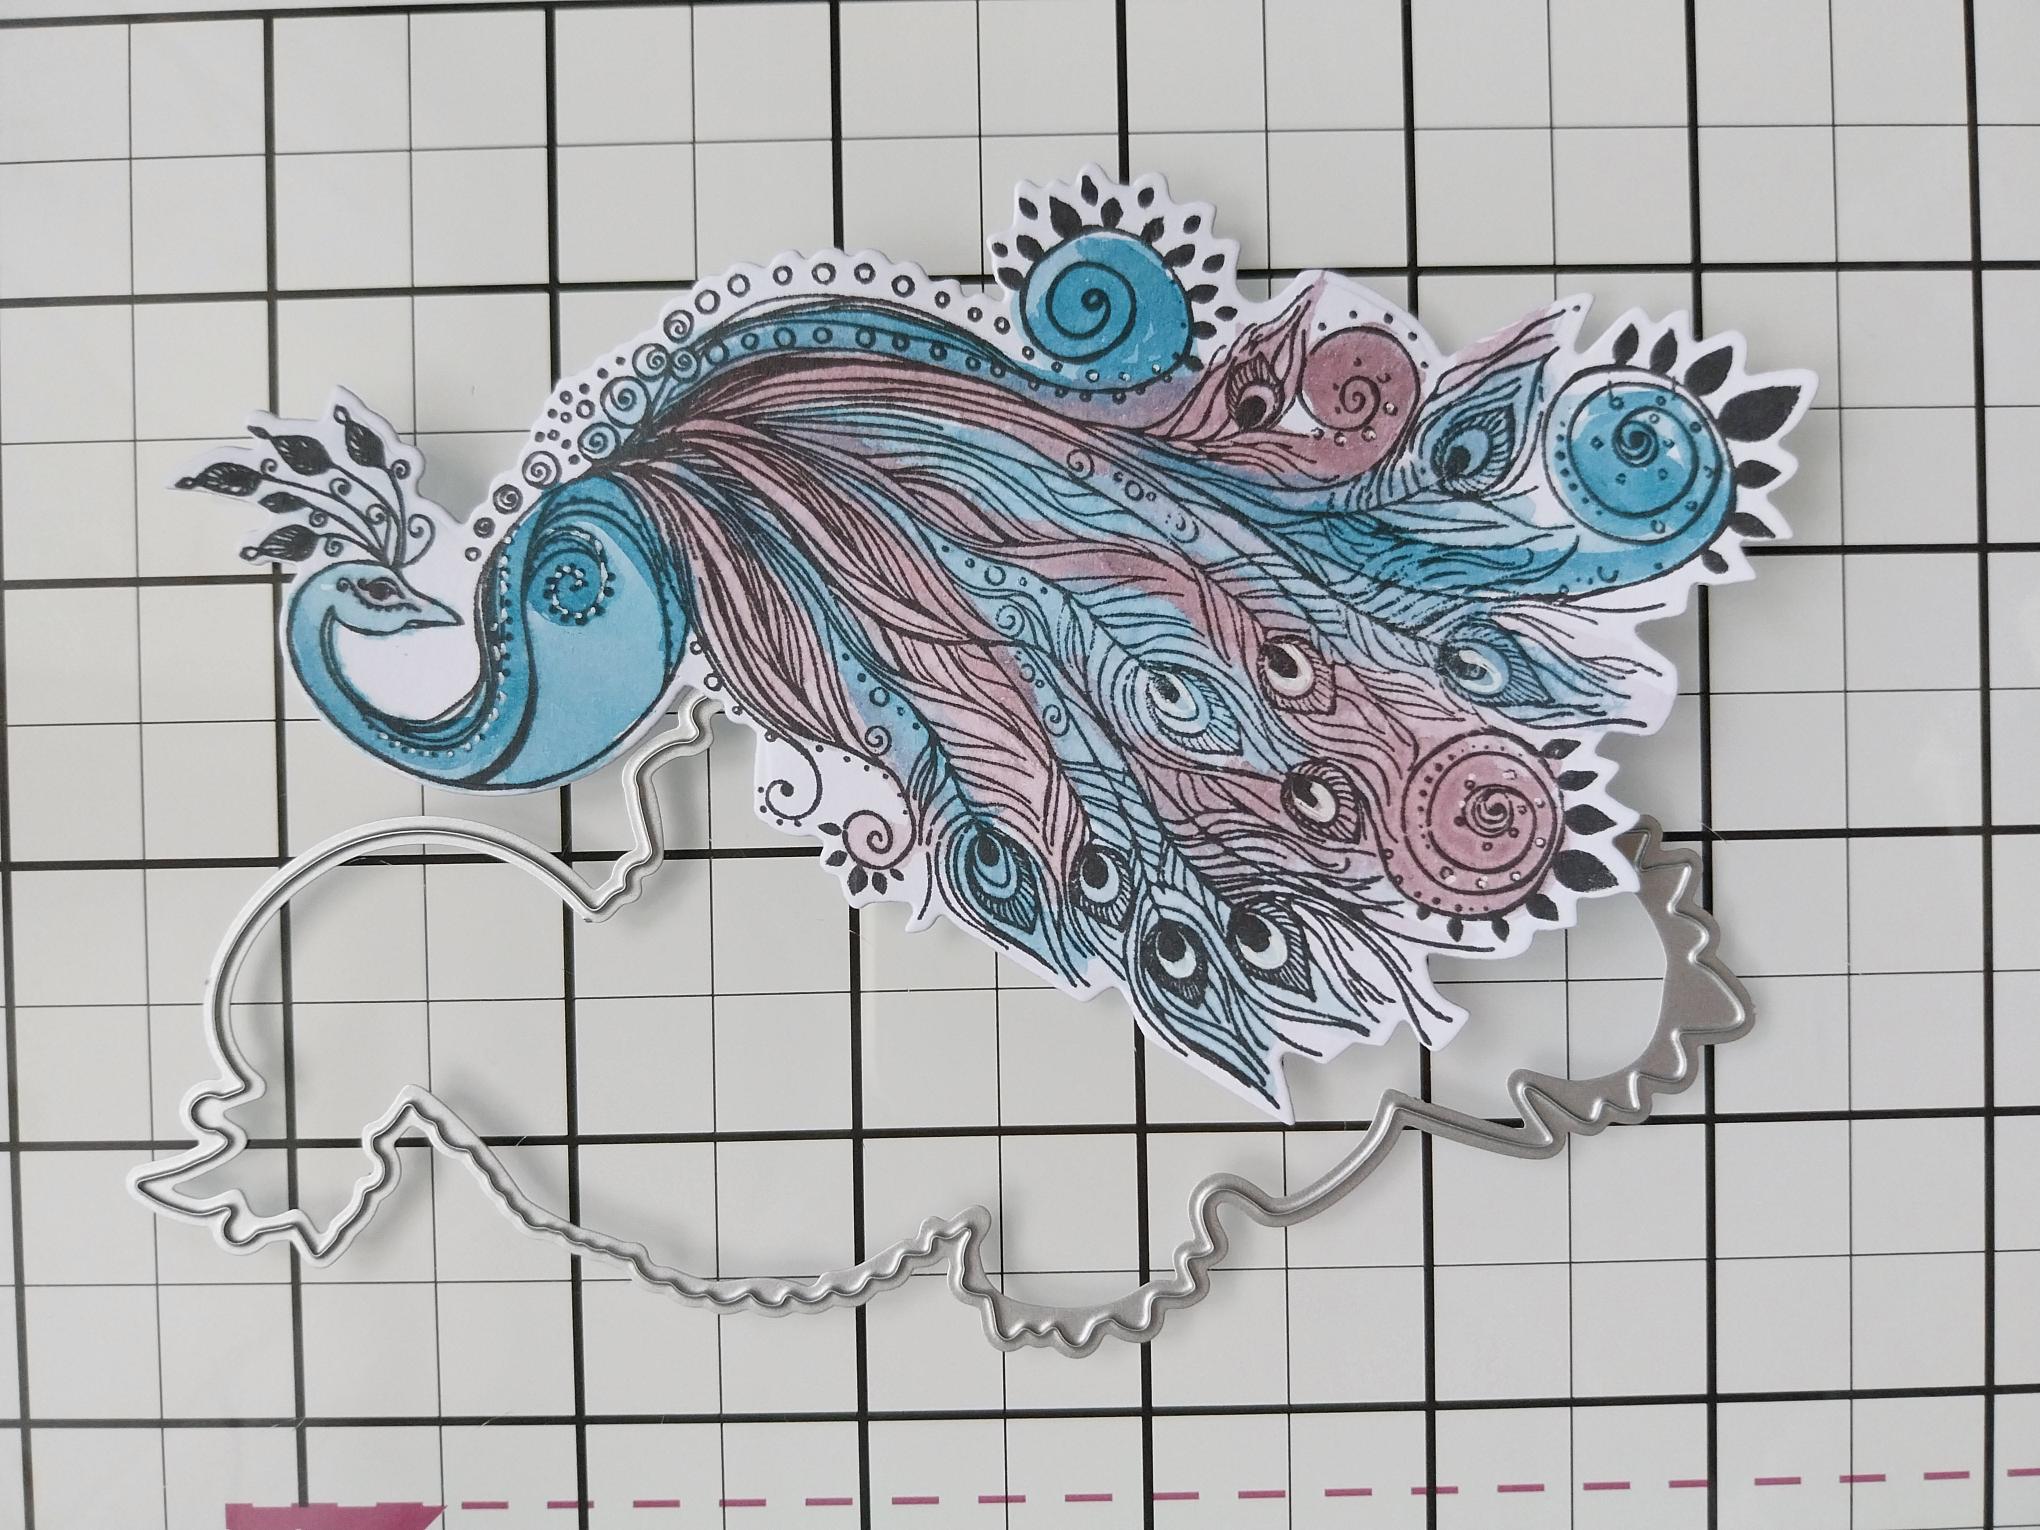
Use the coordinating die to cut it out before painting it with your Tiffany and Heather inks, mixed with a little water. |
|
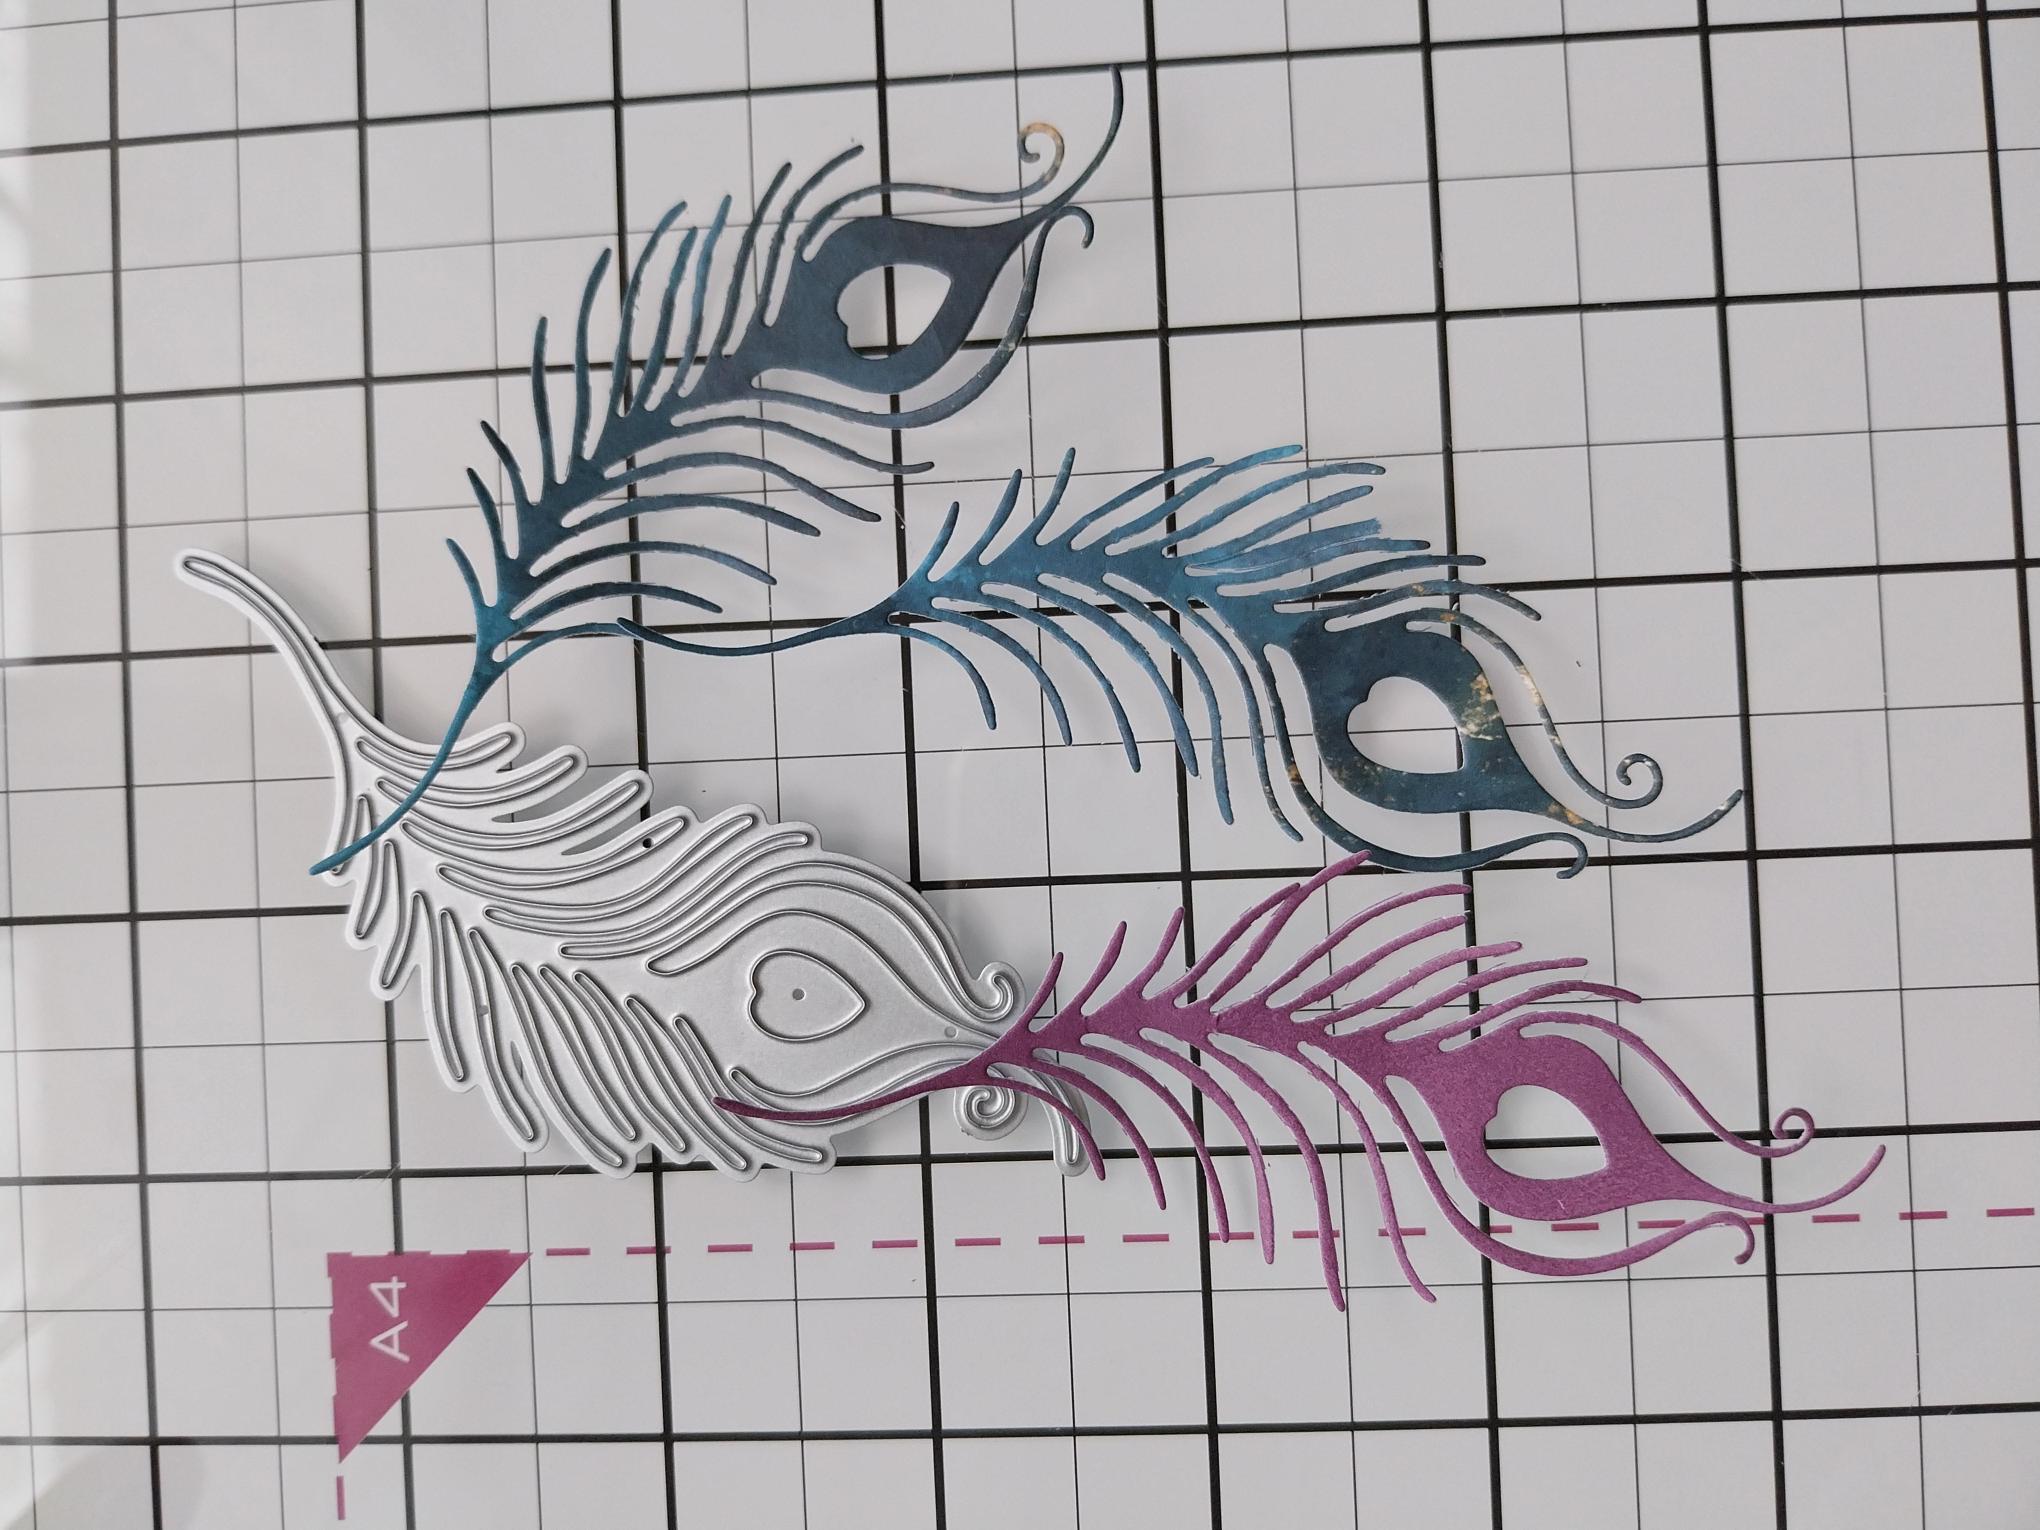
Die cut THREE feathers, using the die in the same set, from the papers in the Magical Elegance Foundation pack. |
|
Adhere the die cut tail feathers to your Peacock before popping it aside. |
|
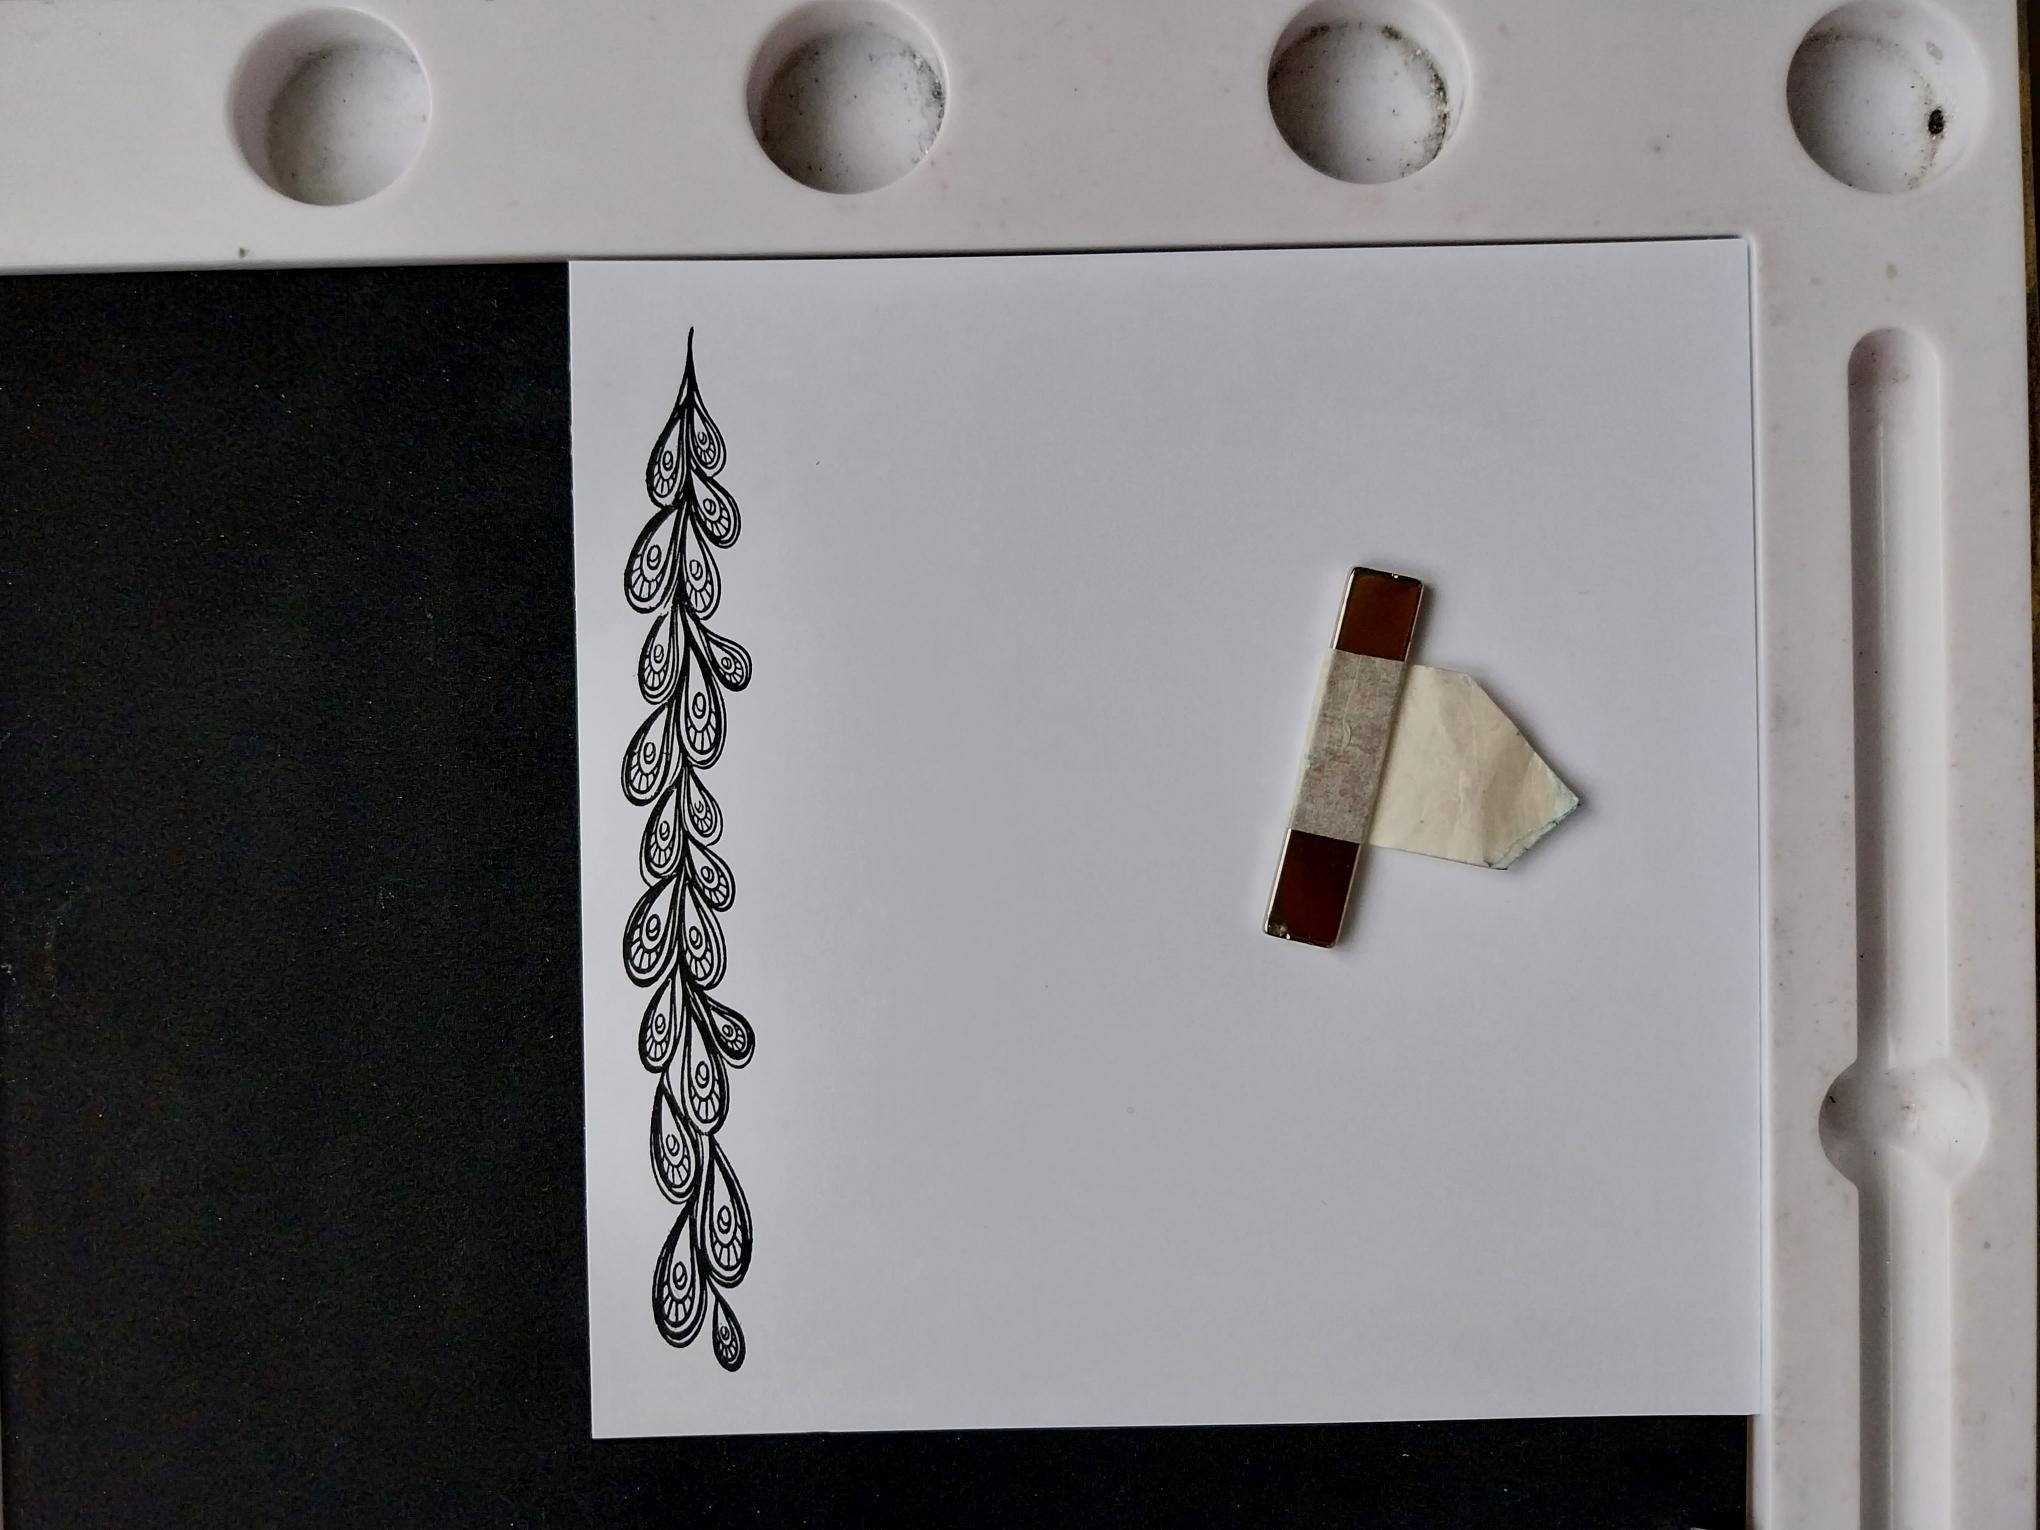
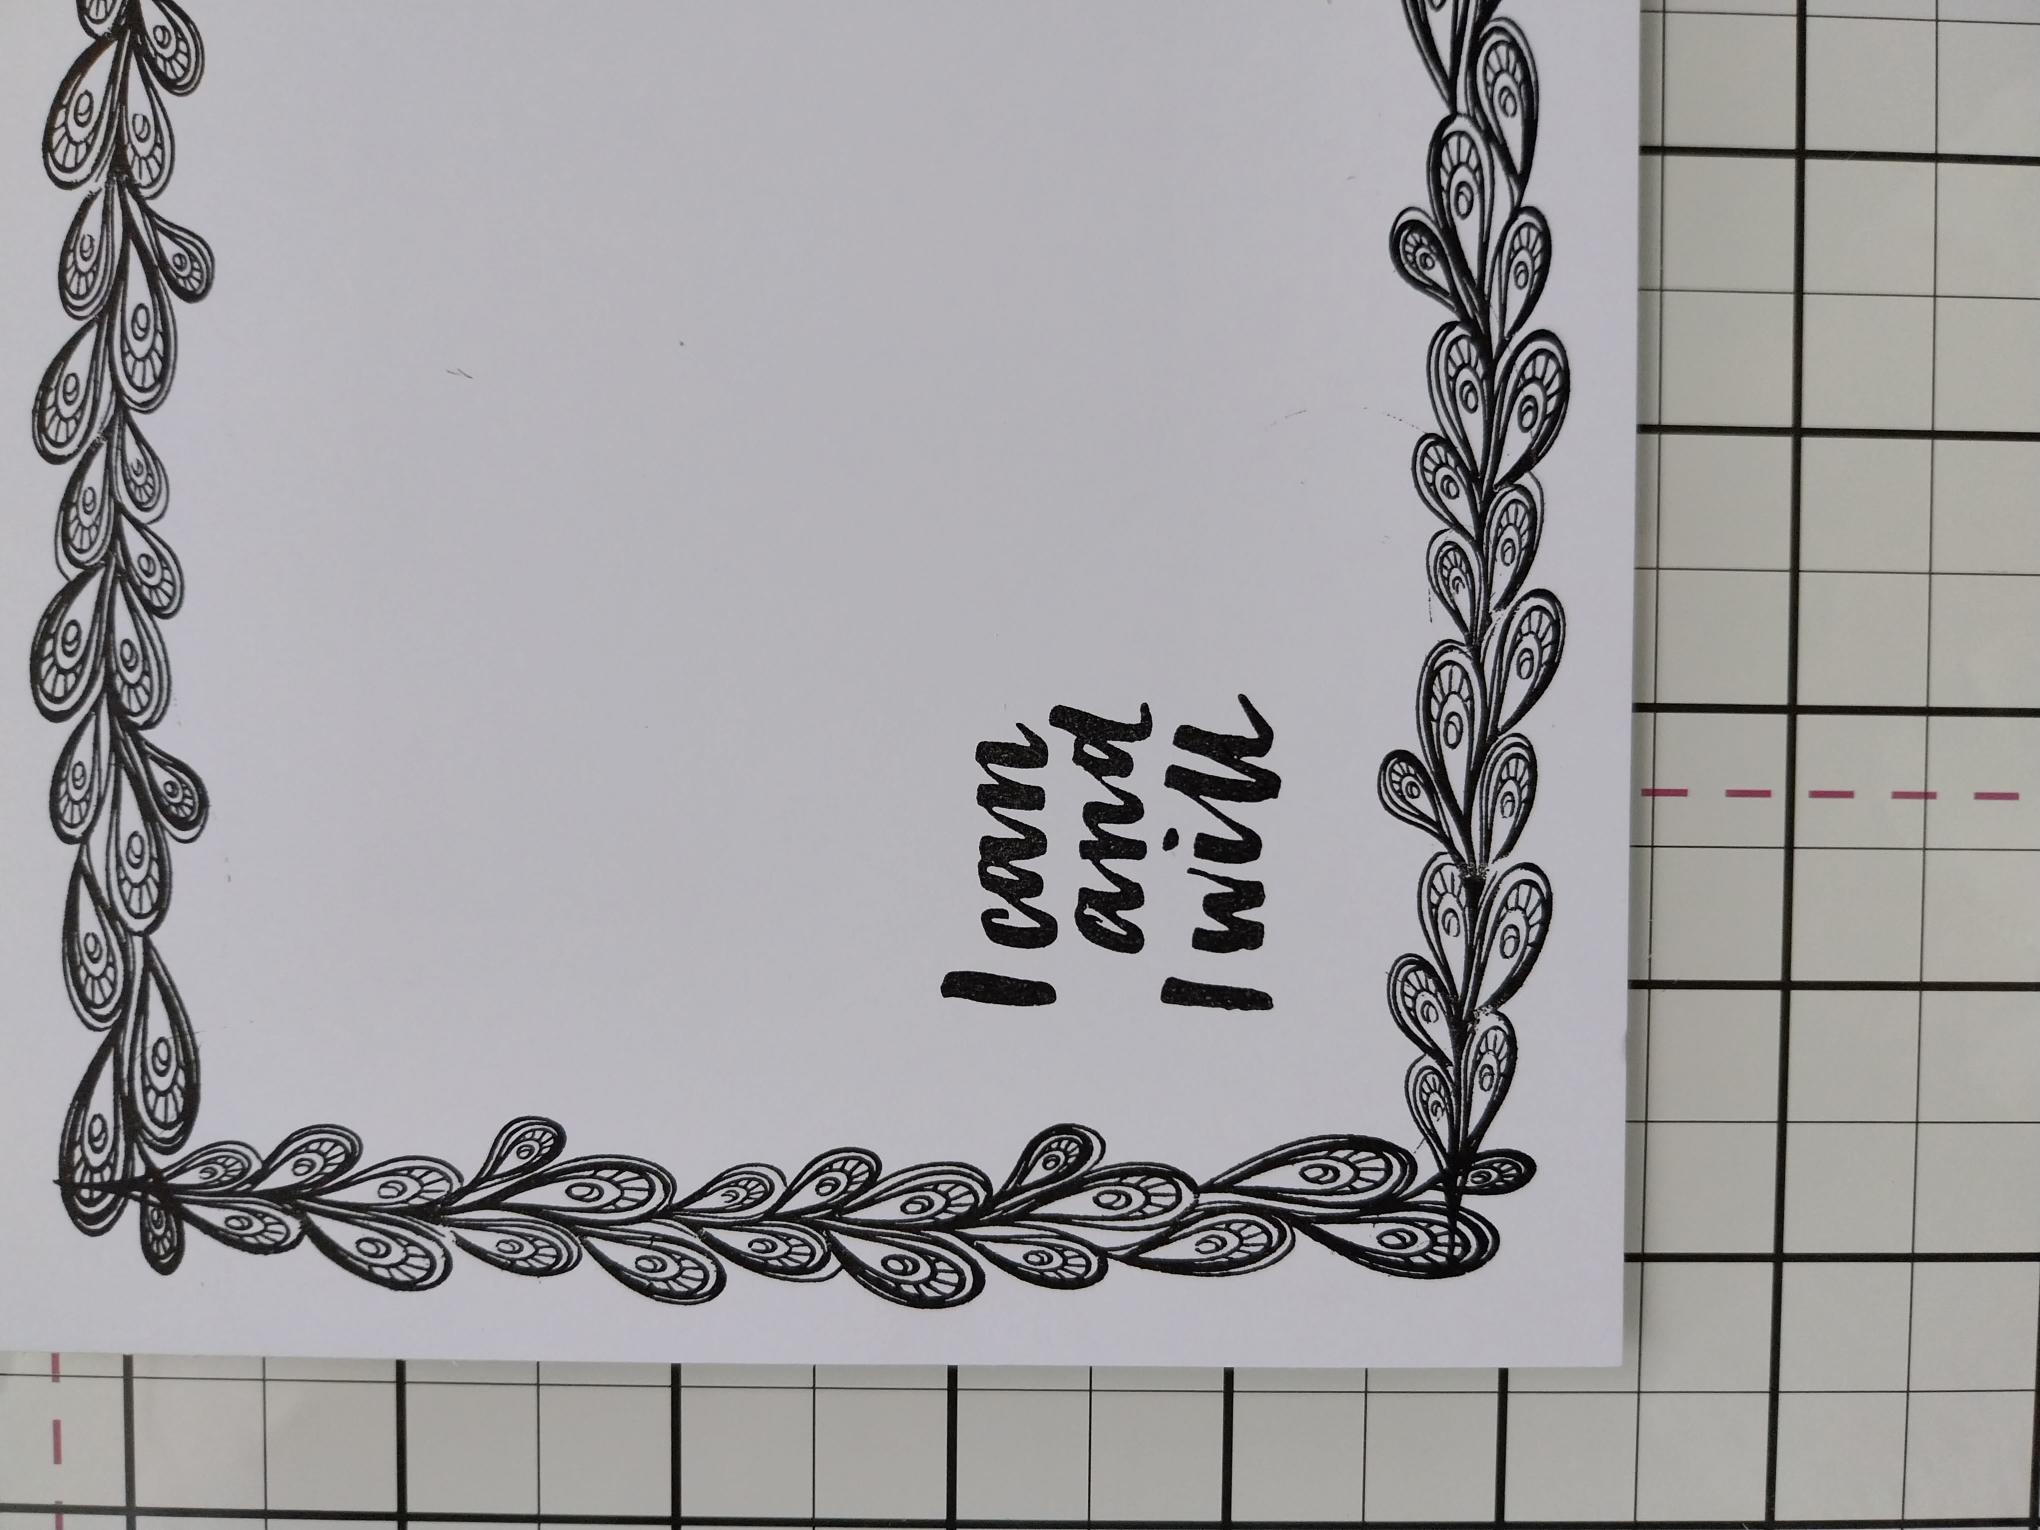
Cut a piece of white card 6 x 6". Place in the bottom right corner of your Eureka 101 and secure in place with your magnet. Stamp the beautiful feather border, in the Midnight ink, across the top of the card, as seen here. DO NOT MOVE YOUR STAMP AT THIS STAGE! |
|
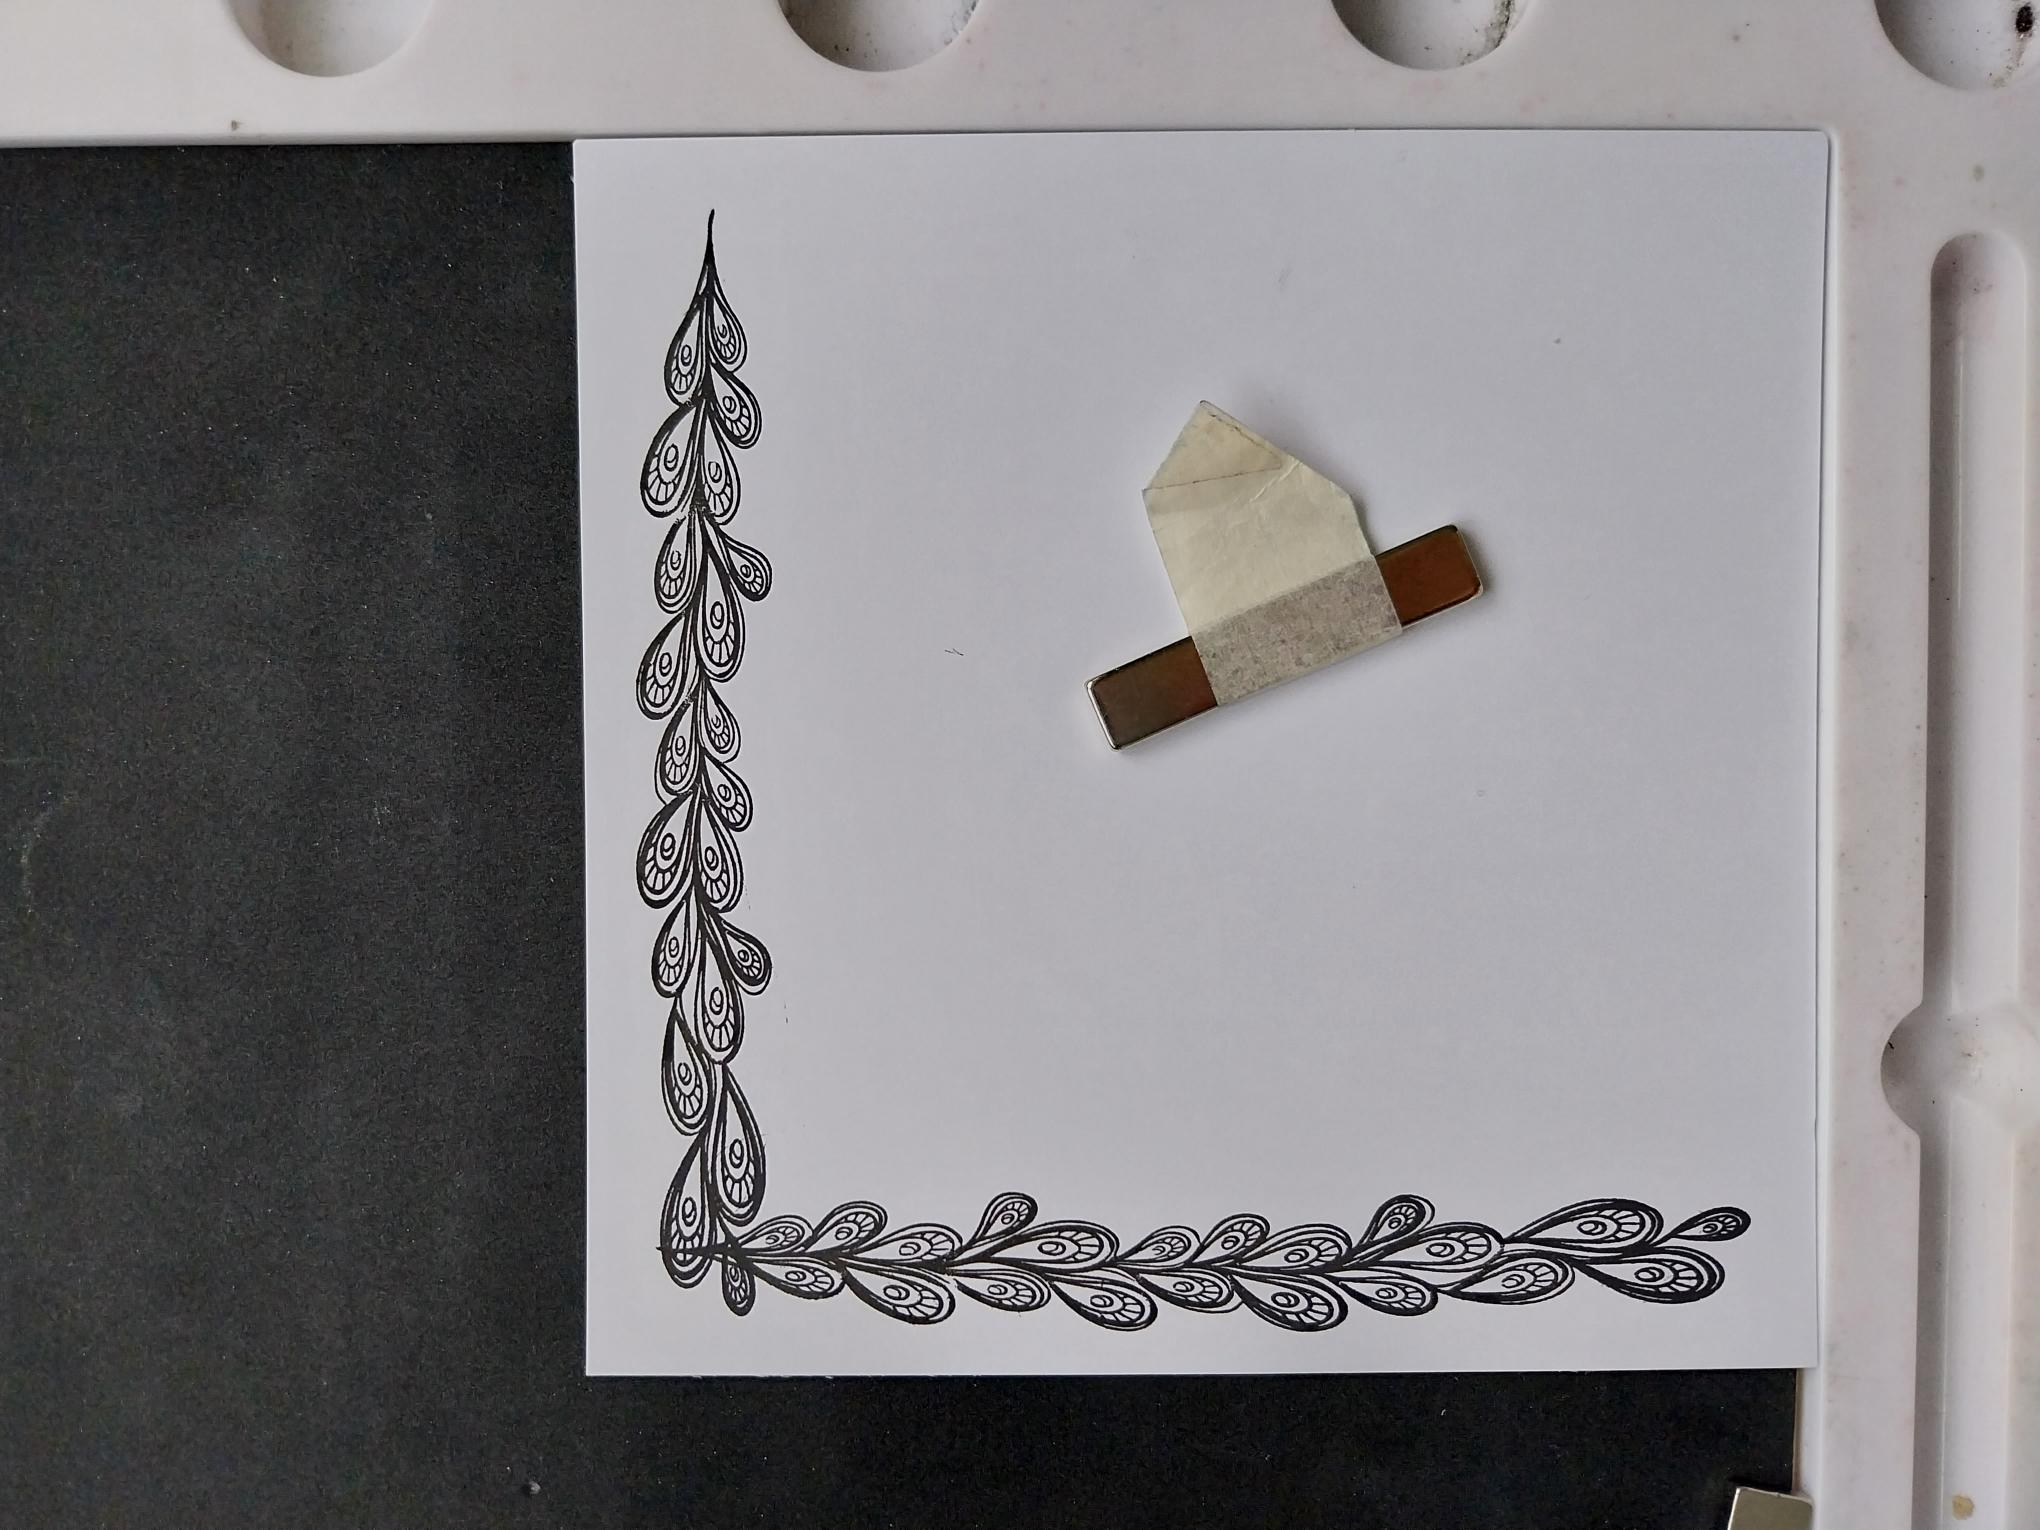
Turn your card 45 degrees and secure back in the bottom right corner with your magnet. Leaving the stamp exactly where it was, re-ink and stamp it across the top again, as shown here. You now have 2 sides of a stamped frame.....DO NOT MOVE THE STAMP. |
|
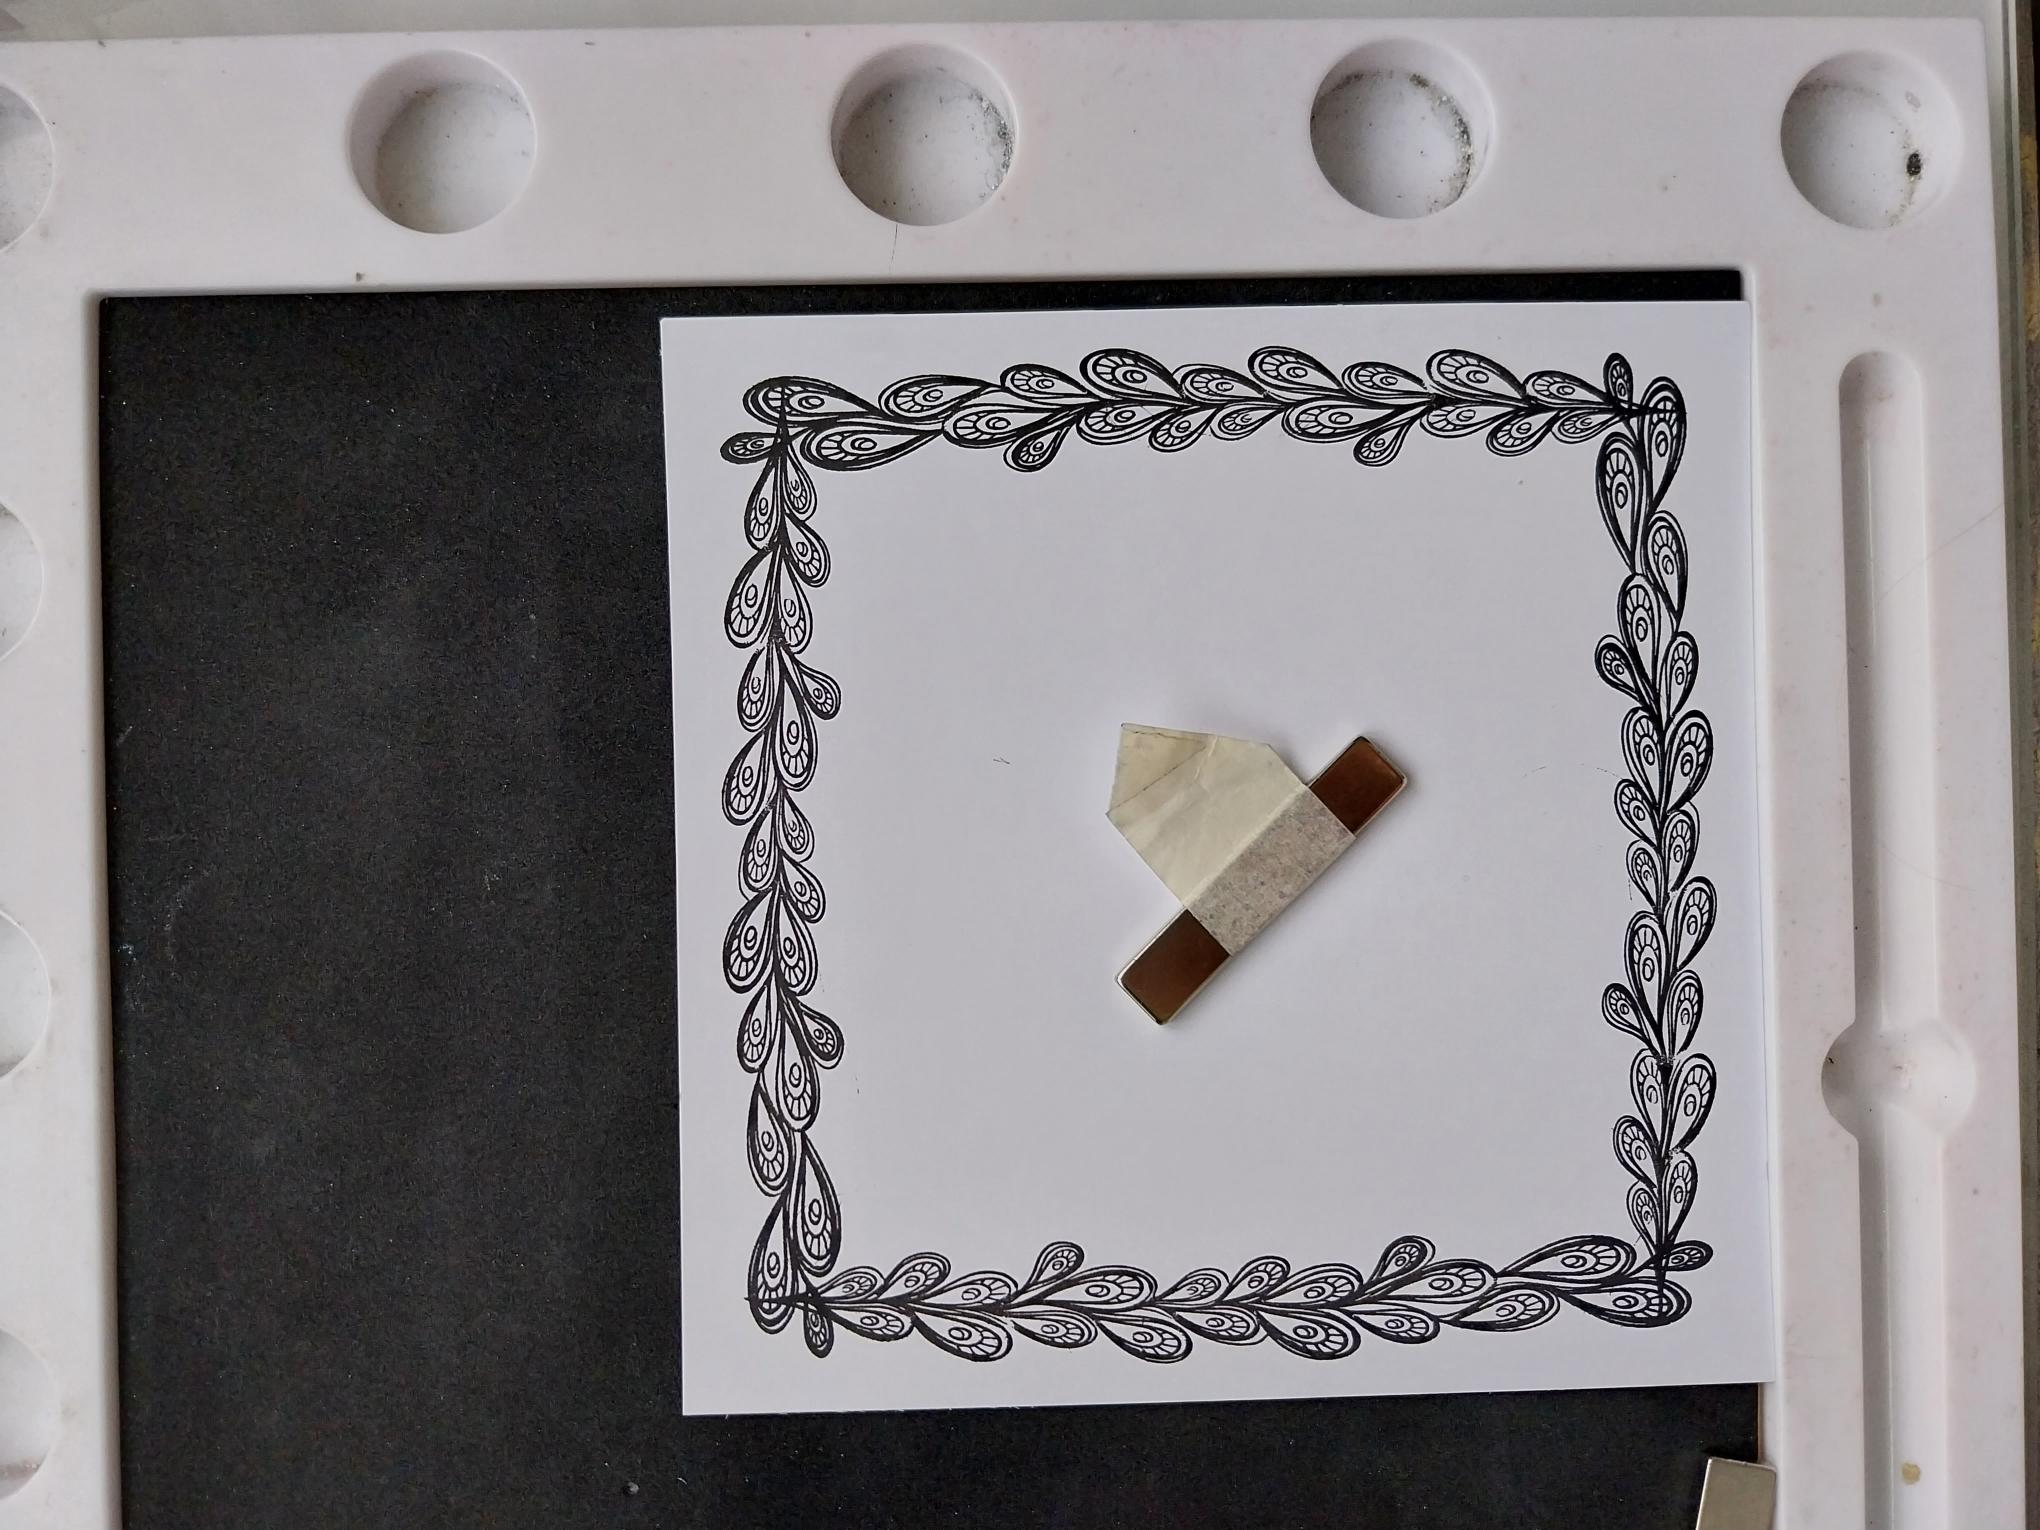
Turn the card 45 degrees again, secure in the bottom right corner, re-ink the stamp and stamp it again, to create the third side. Repeat this to stamp the final side of your beautiful feathered frame. |
|
Stamp the sentiment, in Midnight, in the bottom left corner of your feathered frame. |
|
Use foam pads to adhere your die cut Peacock in place. |
|
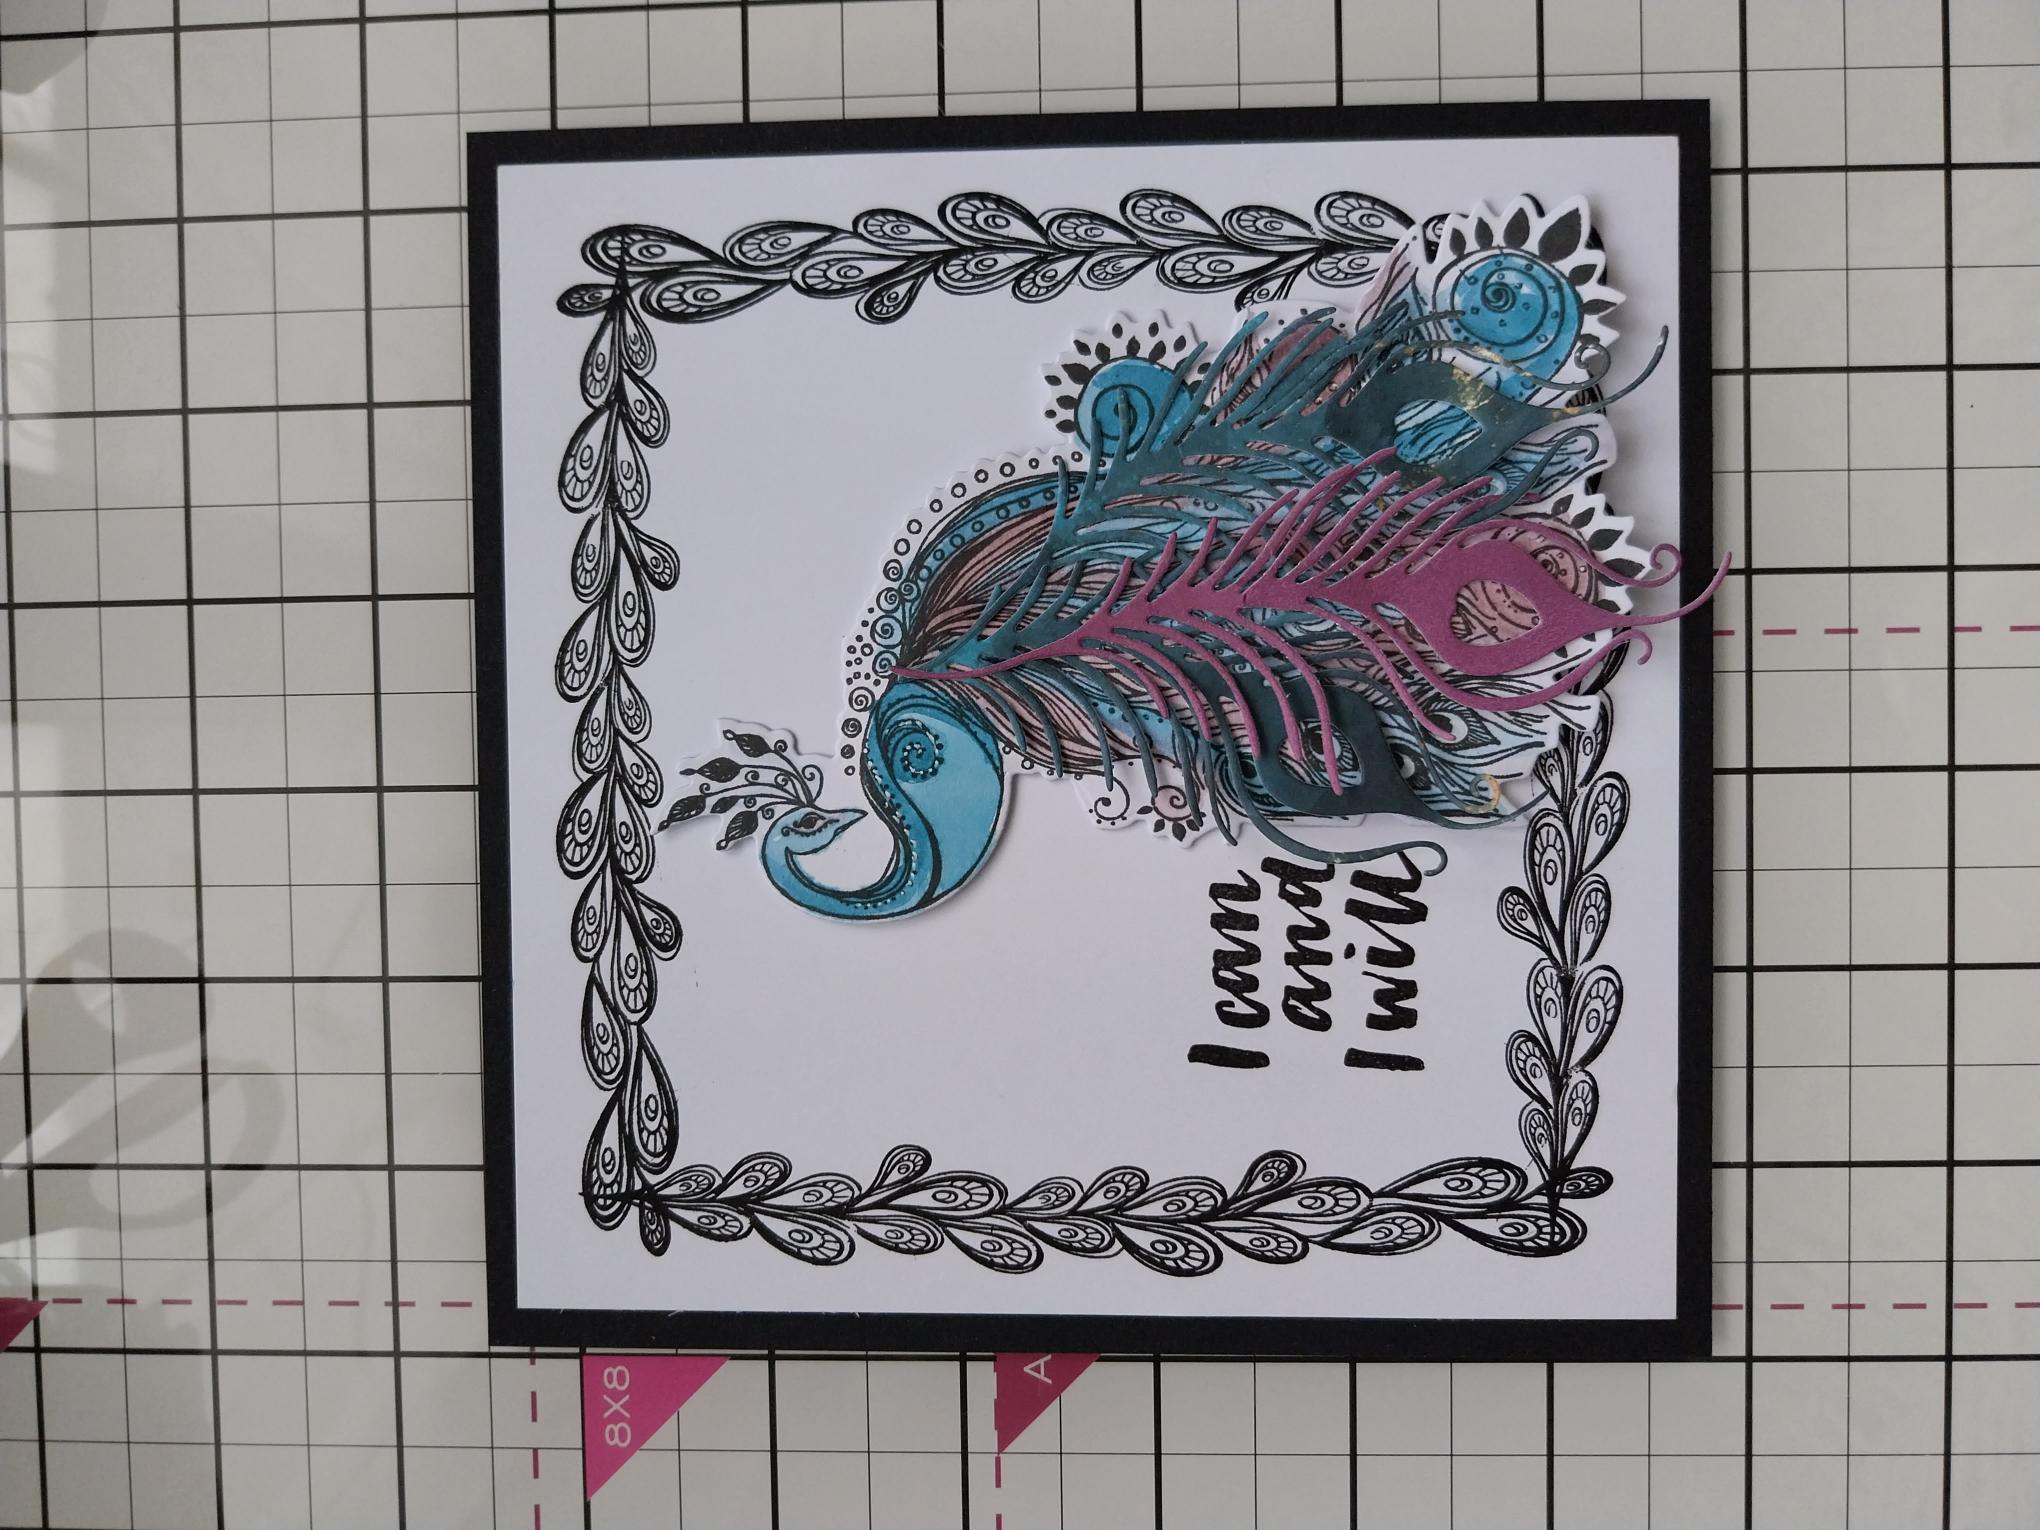
Mat your artwork on to black card cut to 6 1/4" square. |
|
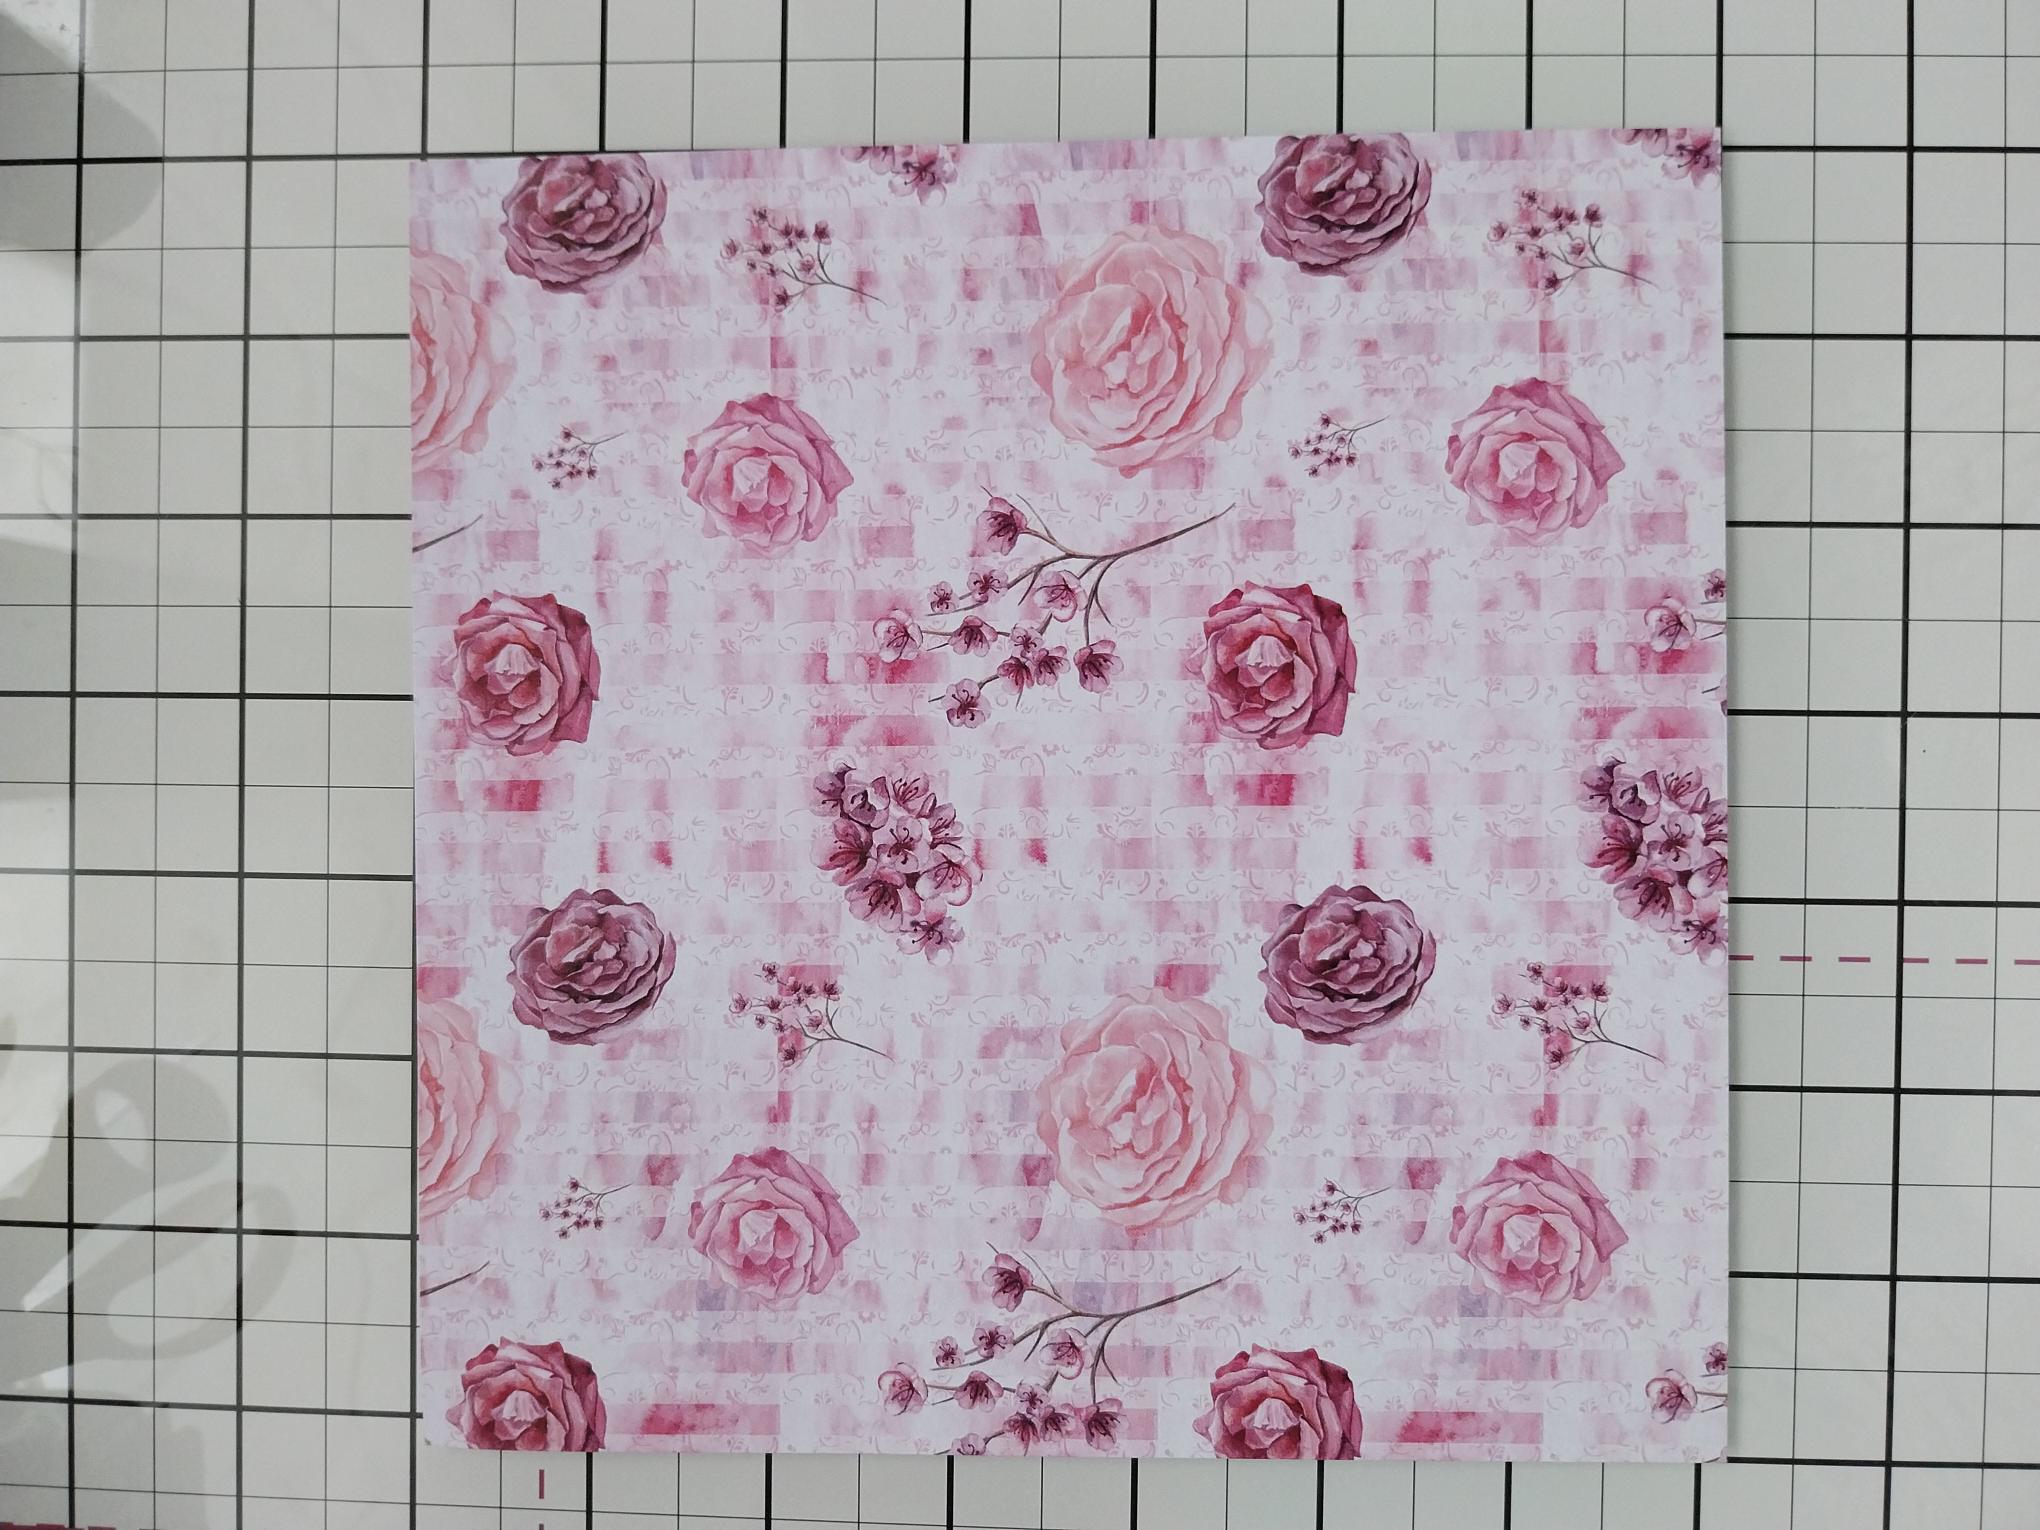
Cut this decorative paper to 7 " square. |
|
Adhere your project on to the decorative paper. |
|
Adhere on to black card cut to 7 1/4" square. |
|
Adhere on to your 8" square white card blank to finish. |