Give your friends $10 off their first order!
Refer a FRIEND


WHAT YOU WILL NEED:
Grey top folding card blank (8 1/4 x 5 3/4")
Black cardstock (8 x 5 1/2")
White cardstock (7 3/4 x 5 1/2")
A4 white cardstock
A4 black cardstock
Dies from Thirsty Brush UnLtd Journal Journey Winged Page Creative Dies
Stamps from Thirsty Brush UnLtd Winged Dreams Creative Stamps
Stamps from Thirsty Brush UnLtd Petal Power Creative Stamps
Stamps from Thirsty Brush UnLtd Blooming Foliage Creative Stamps
Dies from Thirsty Brush UnLtd Fancy Flowers Creative Dies
Sentiment die from Thirsty Brush UnLtd Build A Bloom Creative Dies
Versafine Ink Pad: Onyx Black Versafine
Izink Shiny Spray: Jaune, Vert D'Eau
Izink Pigments: Wet Meadow, Mimosa, Burnt Orange, Purple Haze, Ultramarine
Spray water bottle
Paint brush
Black pen
White gel pen
Sequins: Glistening Waves
Eureka 101
Paper Trimmer
Perfect Together Glue
Foam Pads
Die Cutting machine
[click image to enlarge] 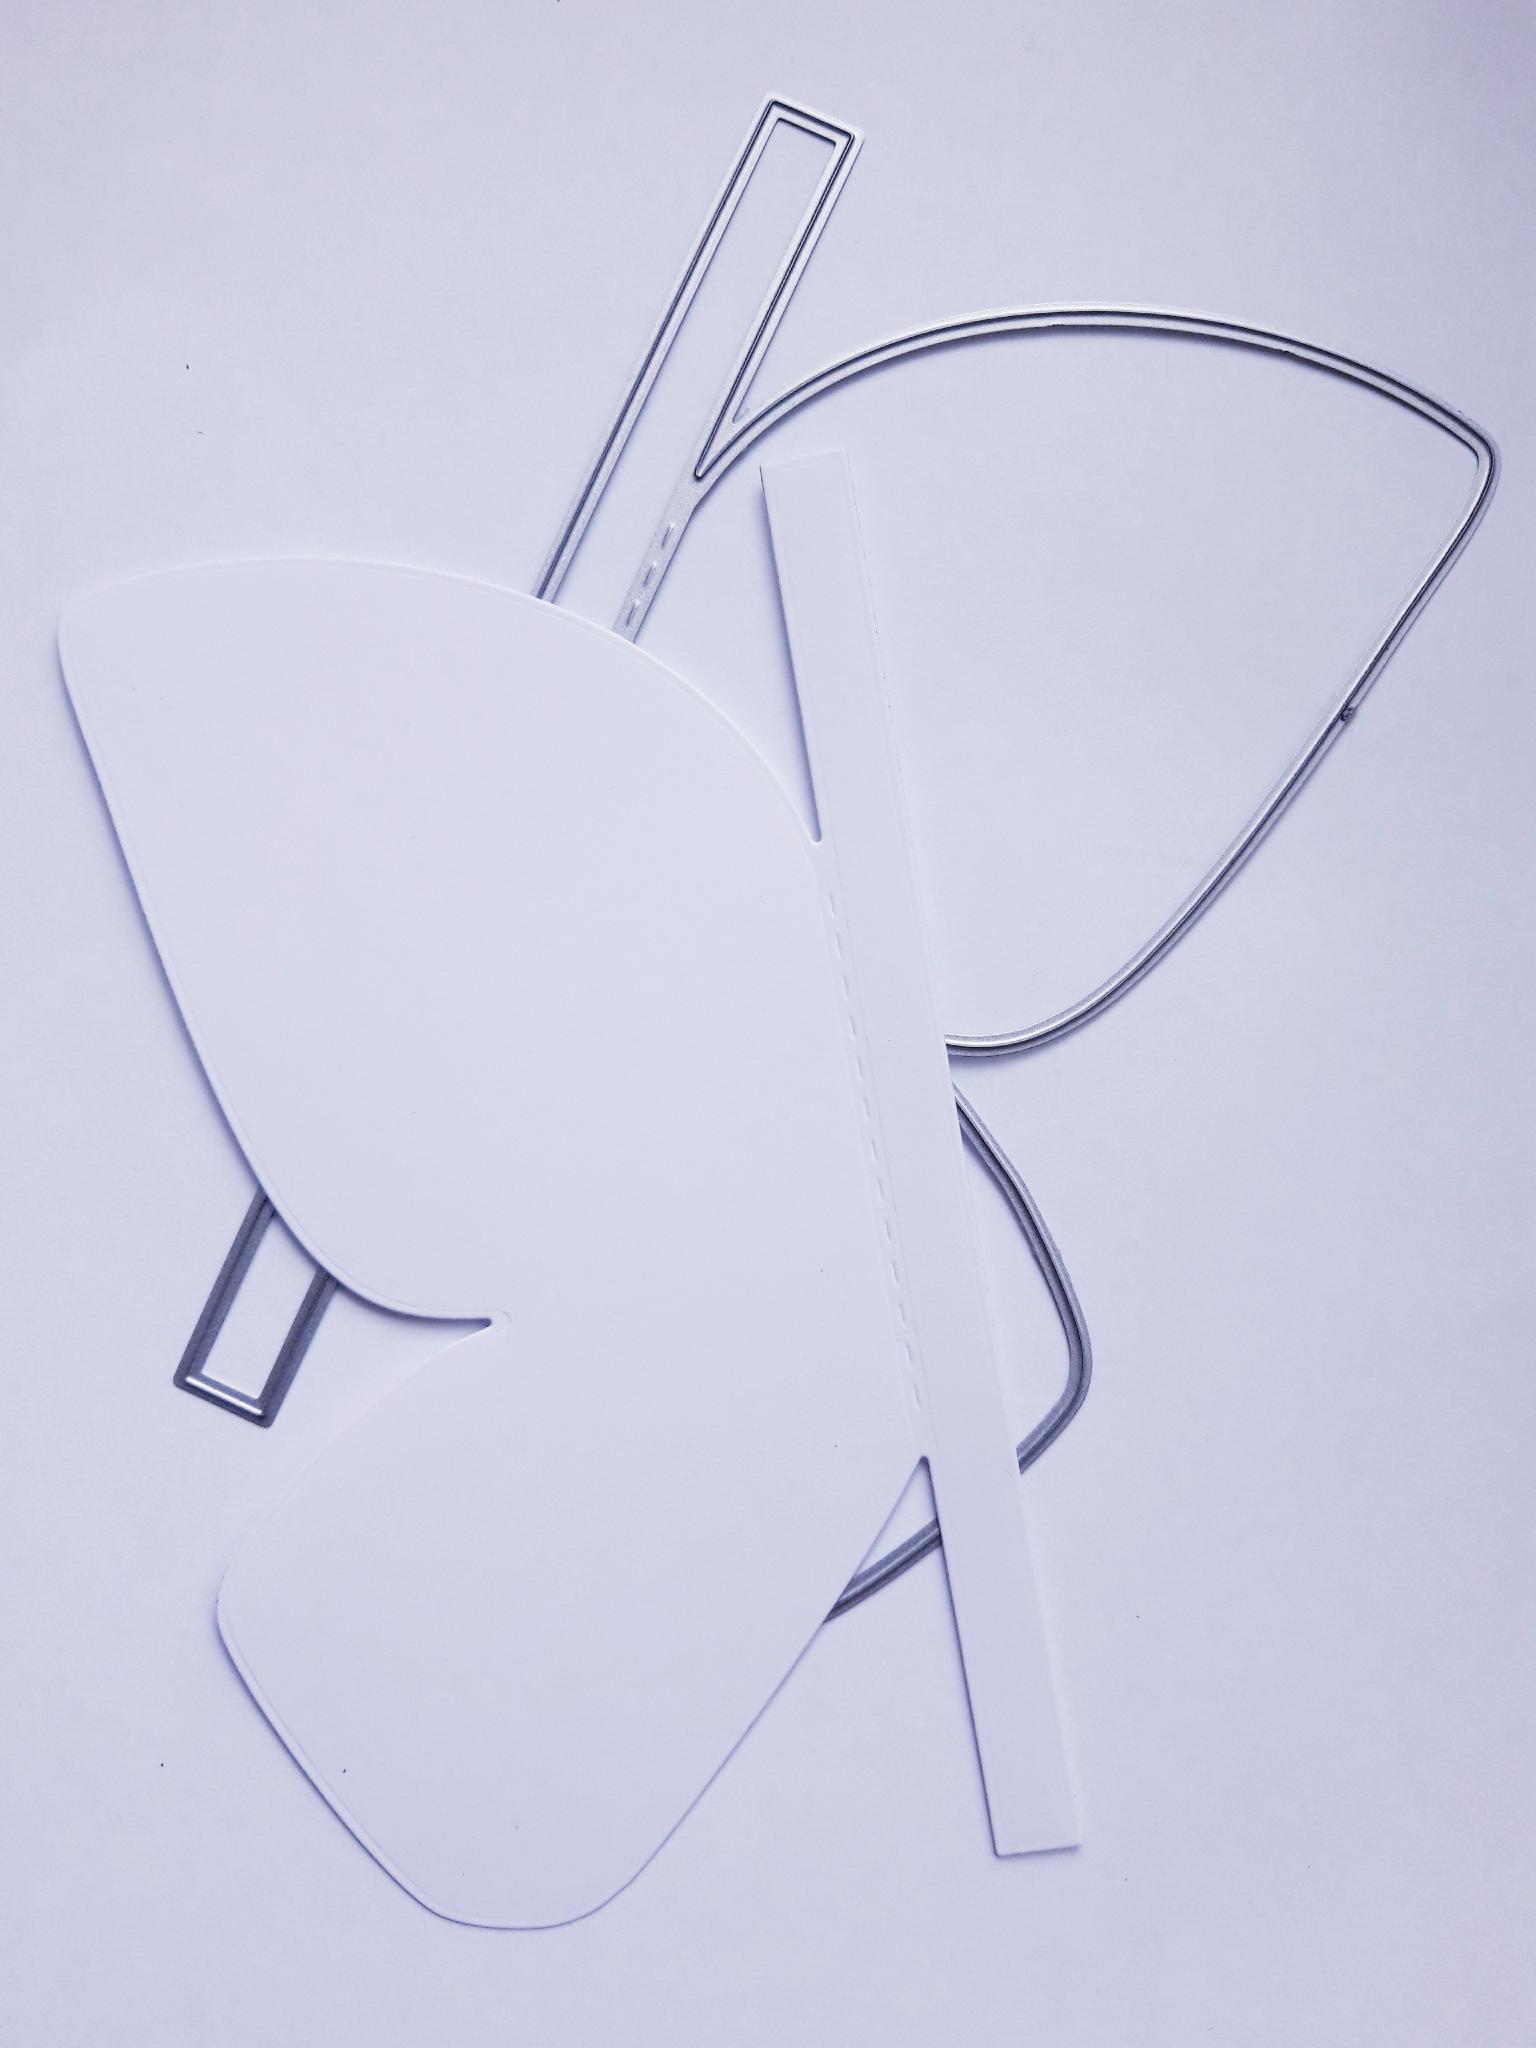
|
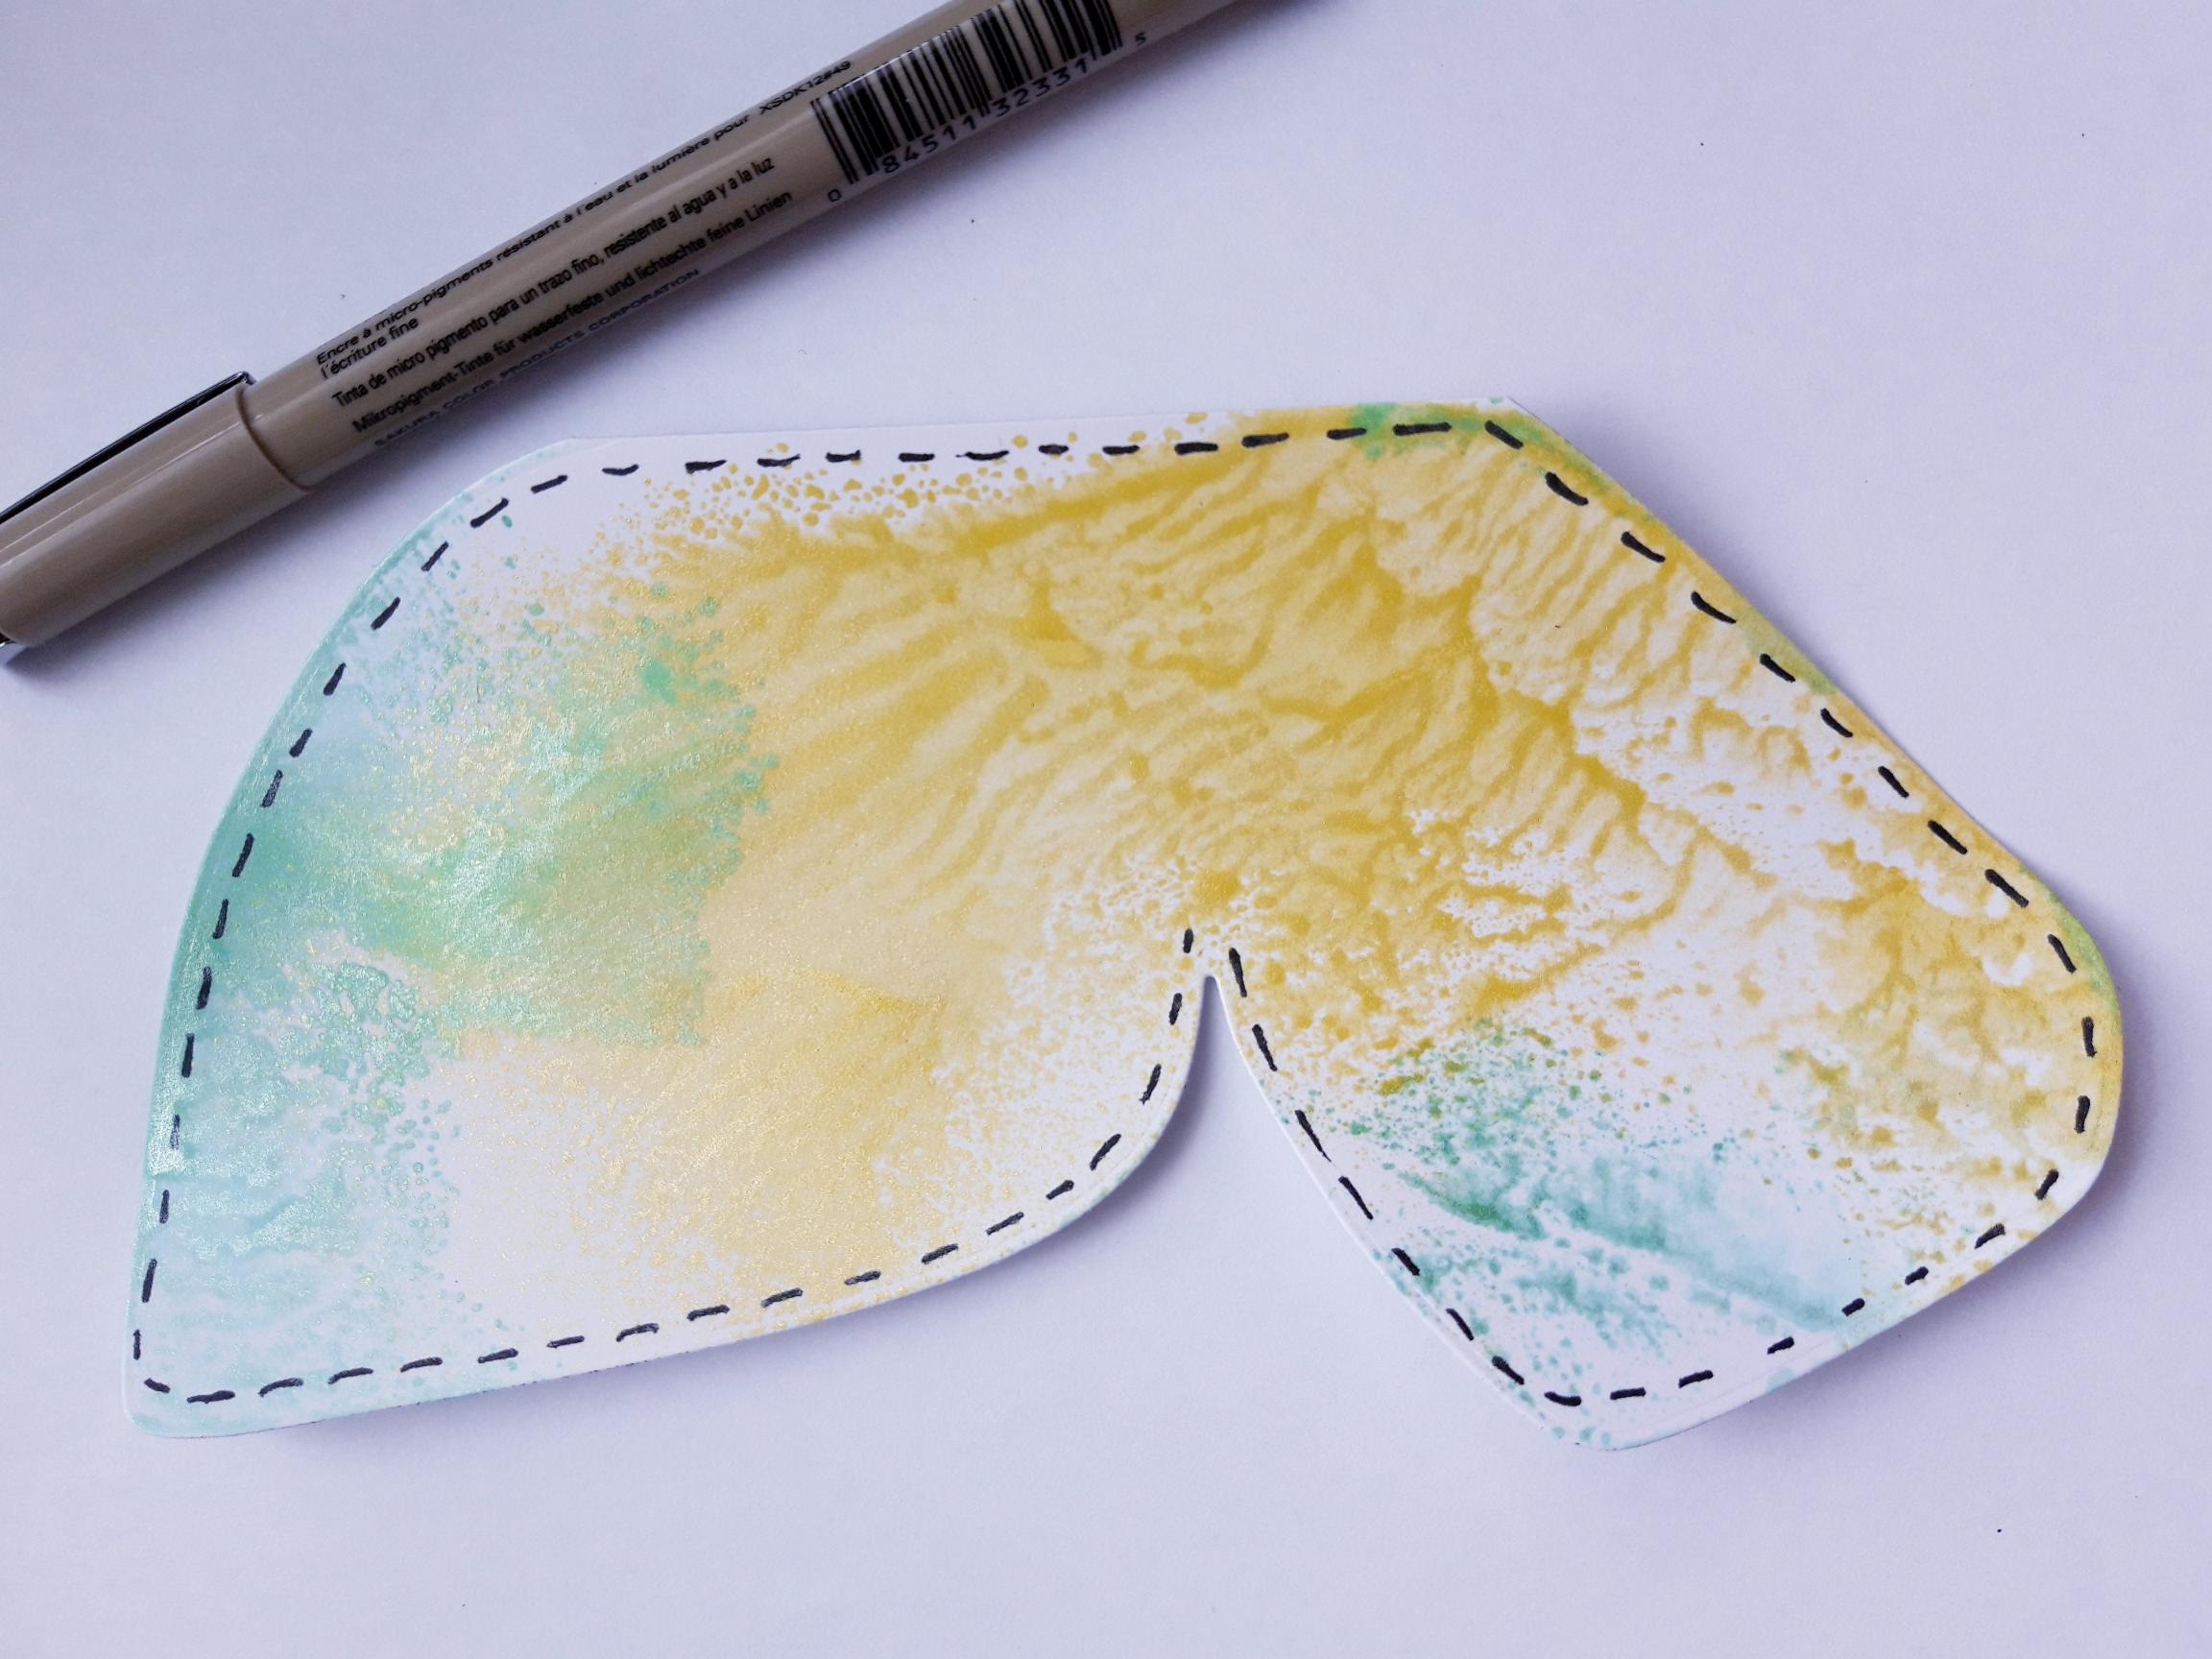
Place the butterfly wings die, from the Journal Journey Winged Page Creative Dies, on to one corner of the A4 white cardstock. Cut off the amount of card needed, and set the rest to one side, to be used later. Run the butterfly die through your die cutting machine. |
|
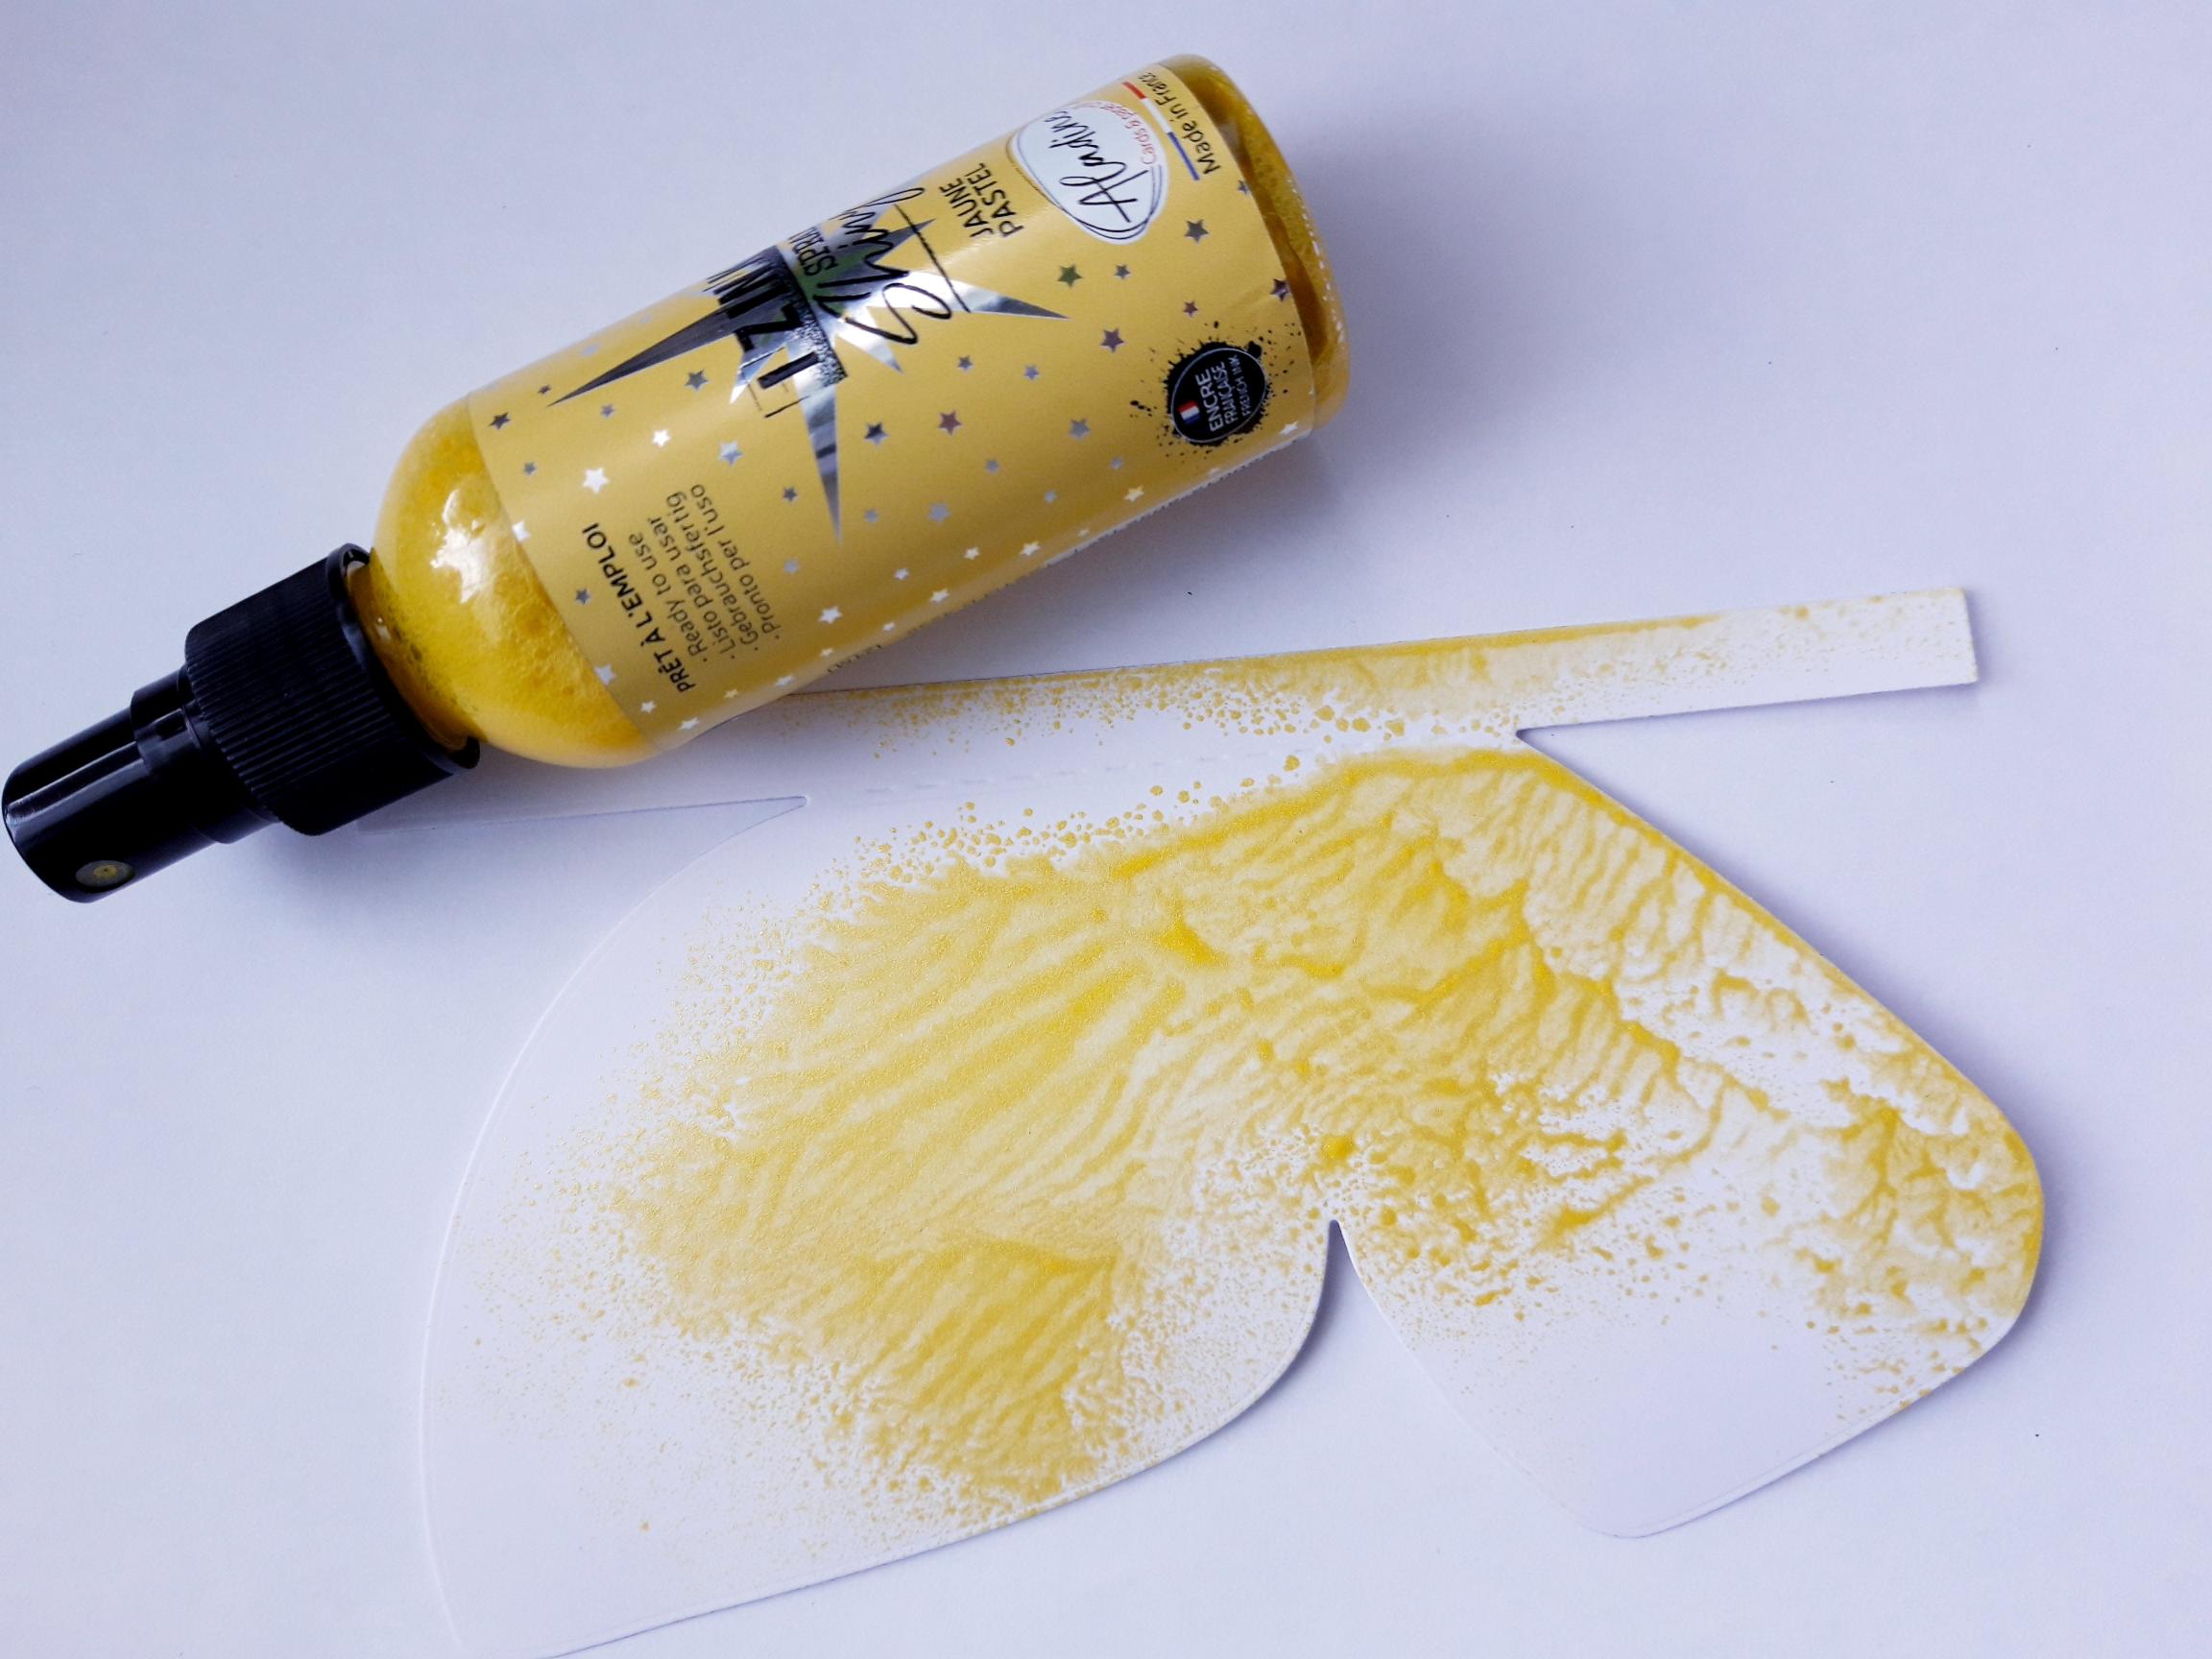
Spray a little of the Izink Jaune Shiny Spray on to a craft or glass mat. Add a little water, then mop up the ink on to your die cut butterfly wings. |
|
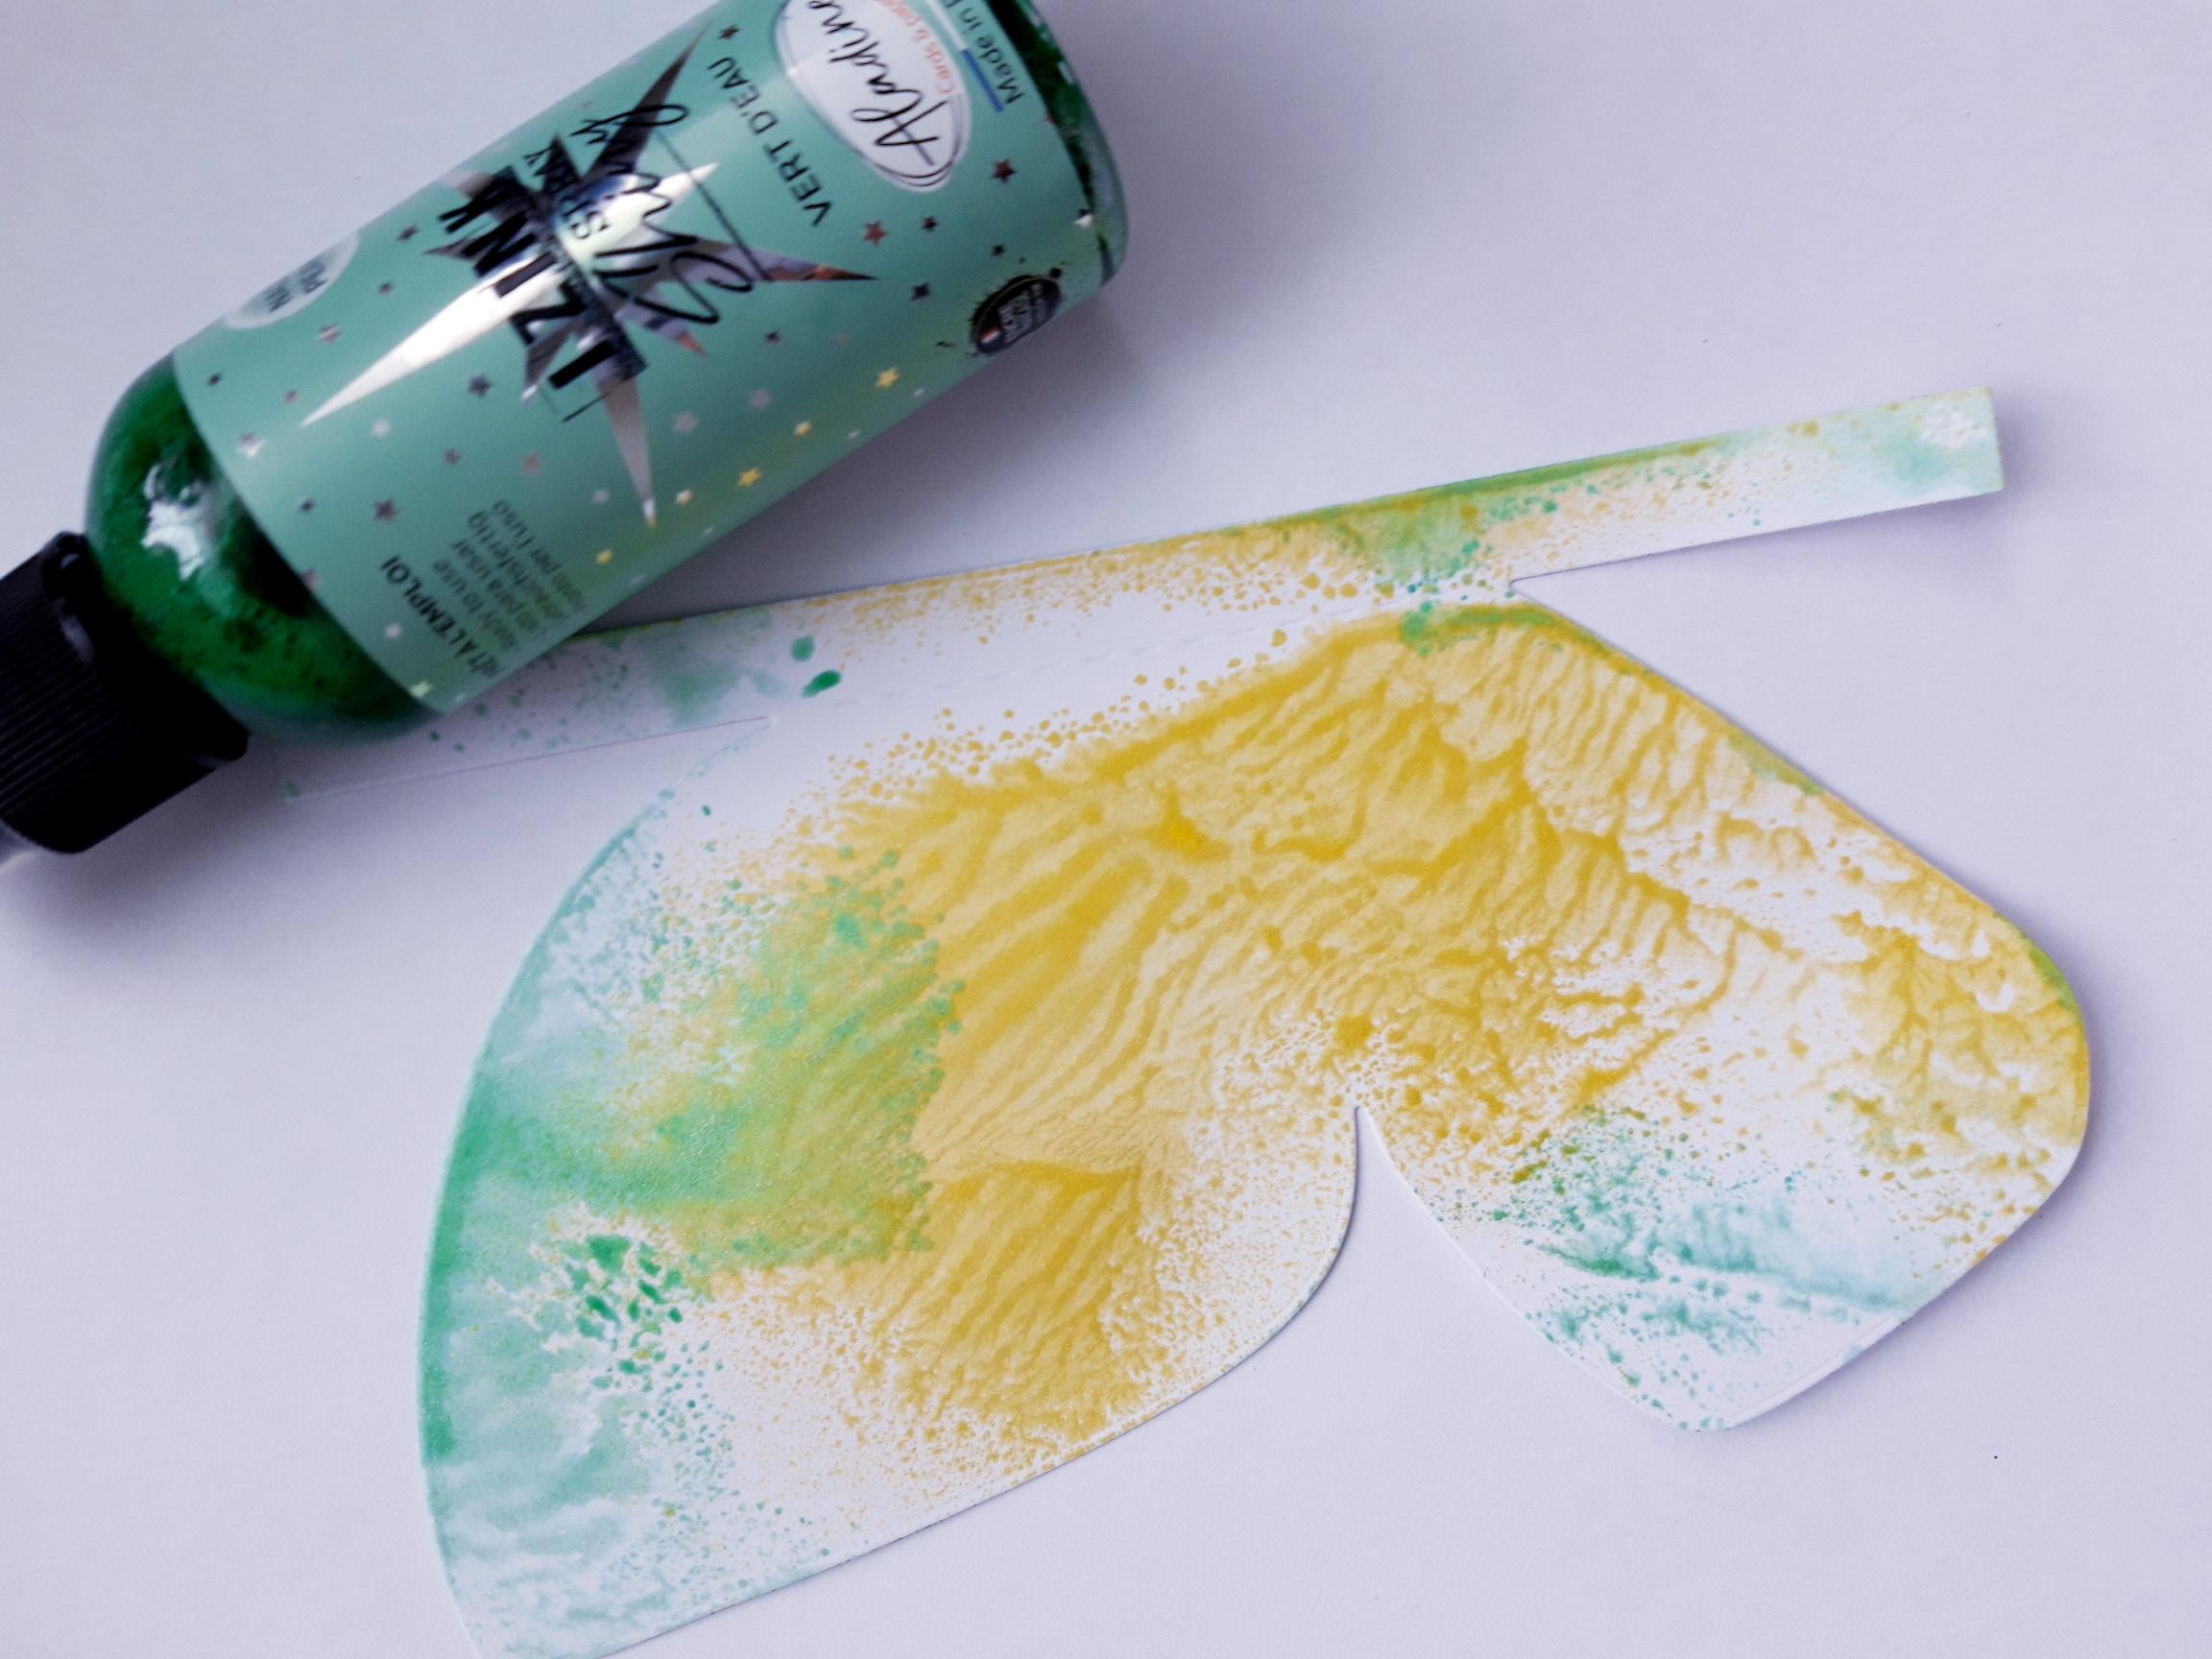
Spray a little of the Izink Vert D'Eau Shiny Spray on to the mat, add a little water and mop up the ink on to the butterfly wings. |
|
Cut off the hinged strip from the edge of your butterfly. Use your black pen to draw a stitched line around the edges. Set to one side. |
|
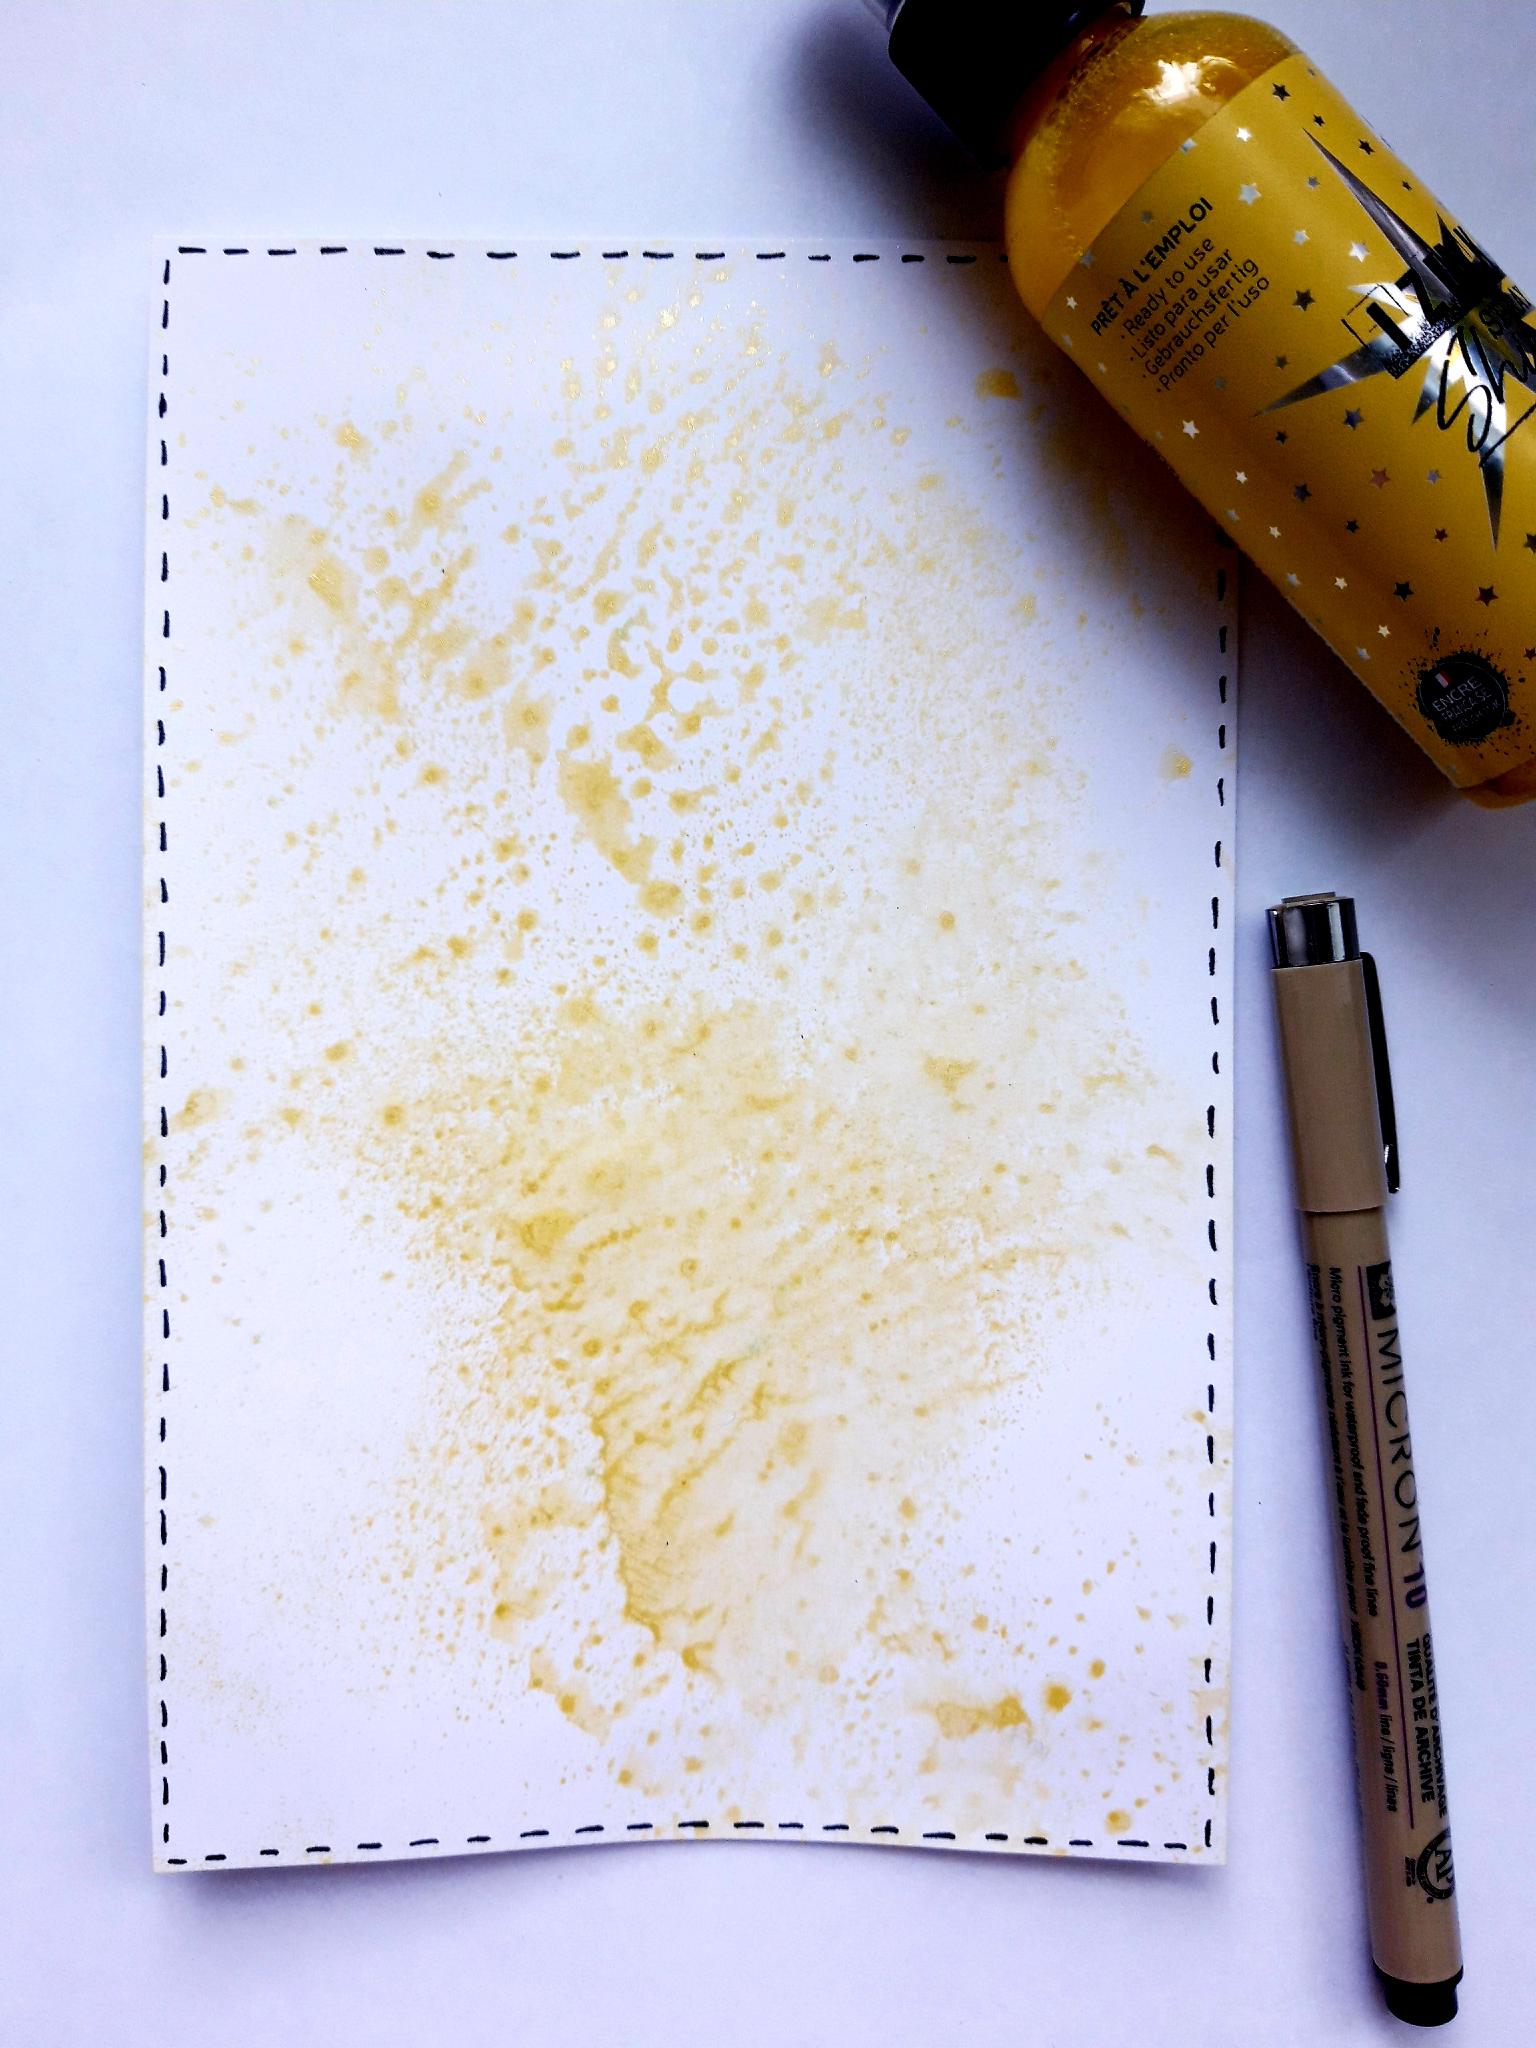
Spray a little of the Izink Jaune Shiny Spray on to your mat. Add a little water and pick up the ink on to the white cardstock (7 3/4 x 5 1/4"). Dry off the ink before adding a stitched frame with your black pen. |
|
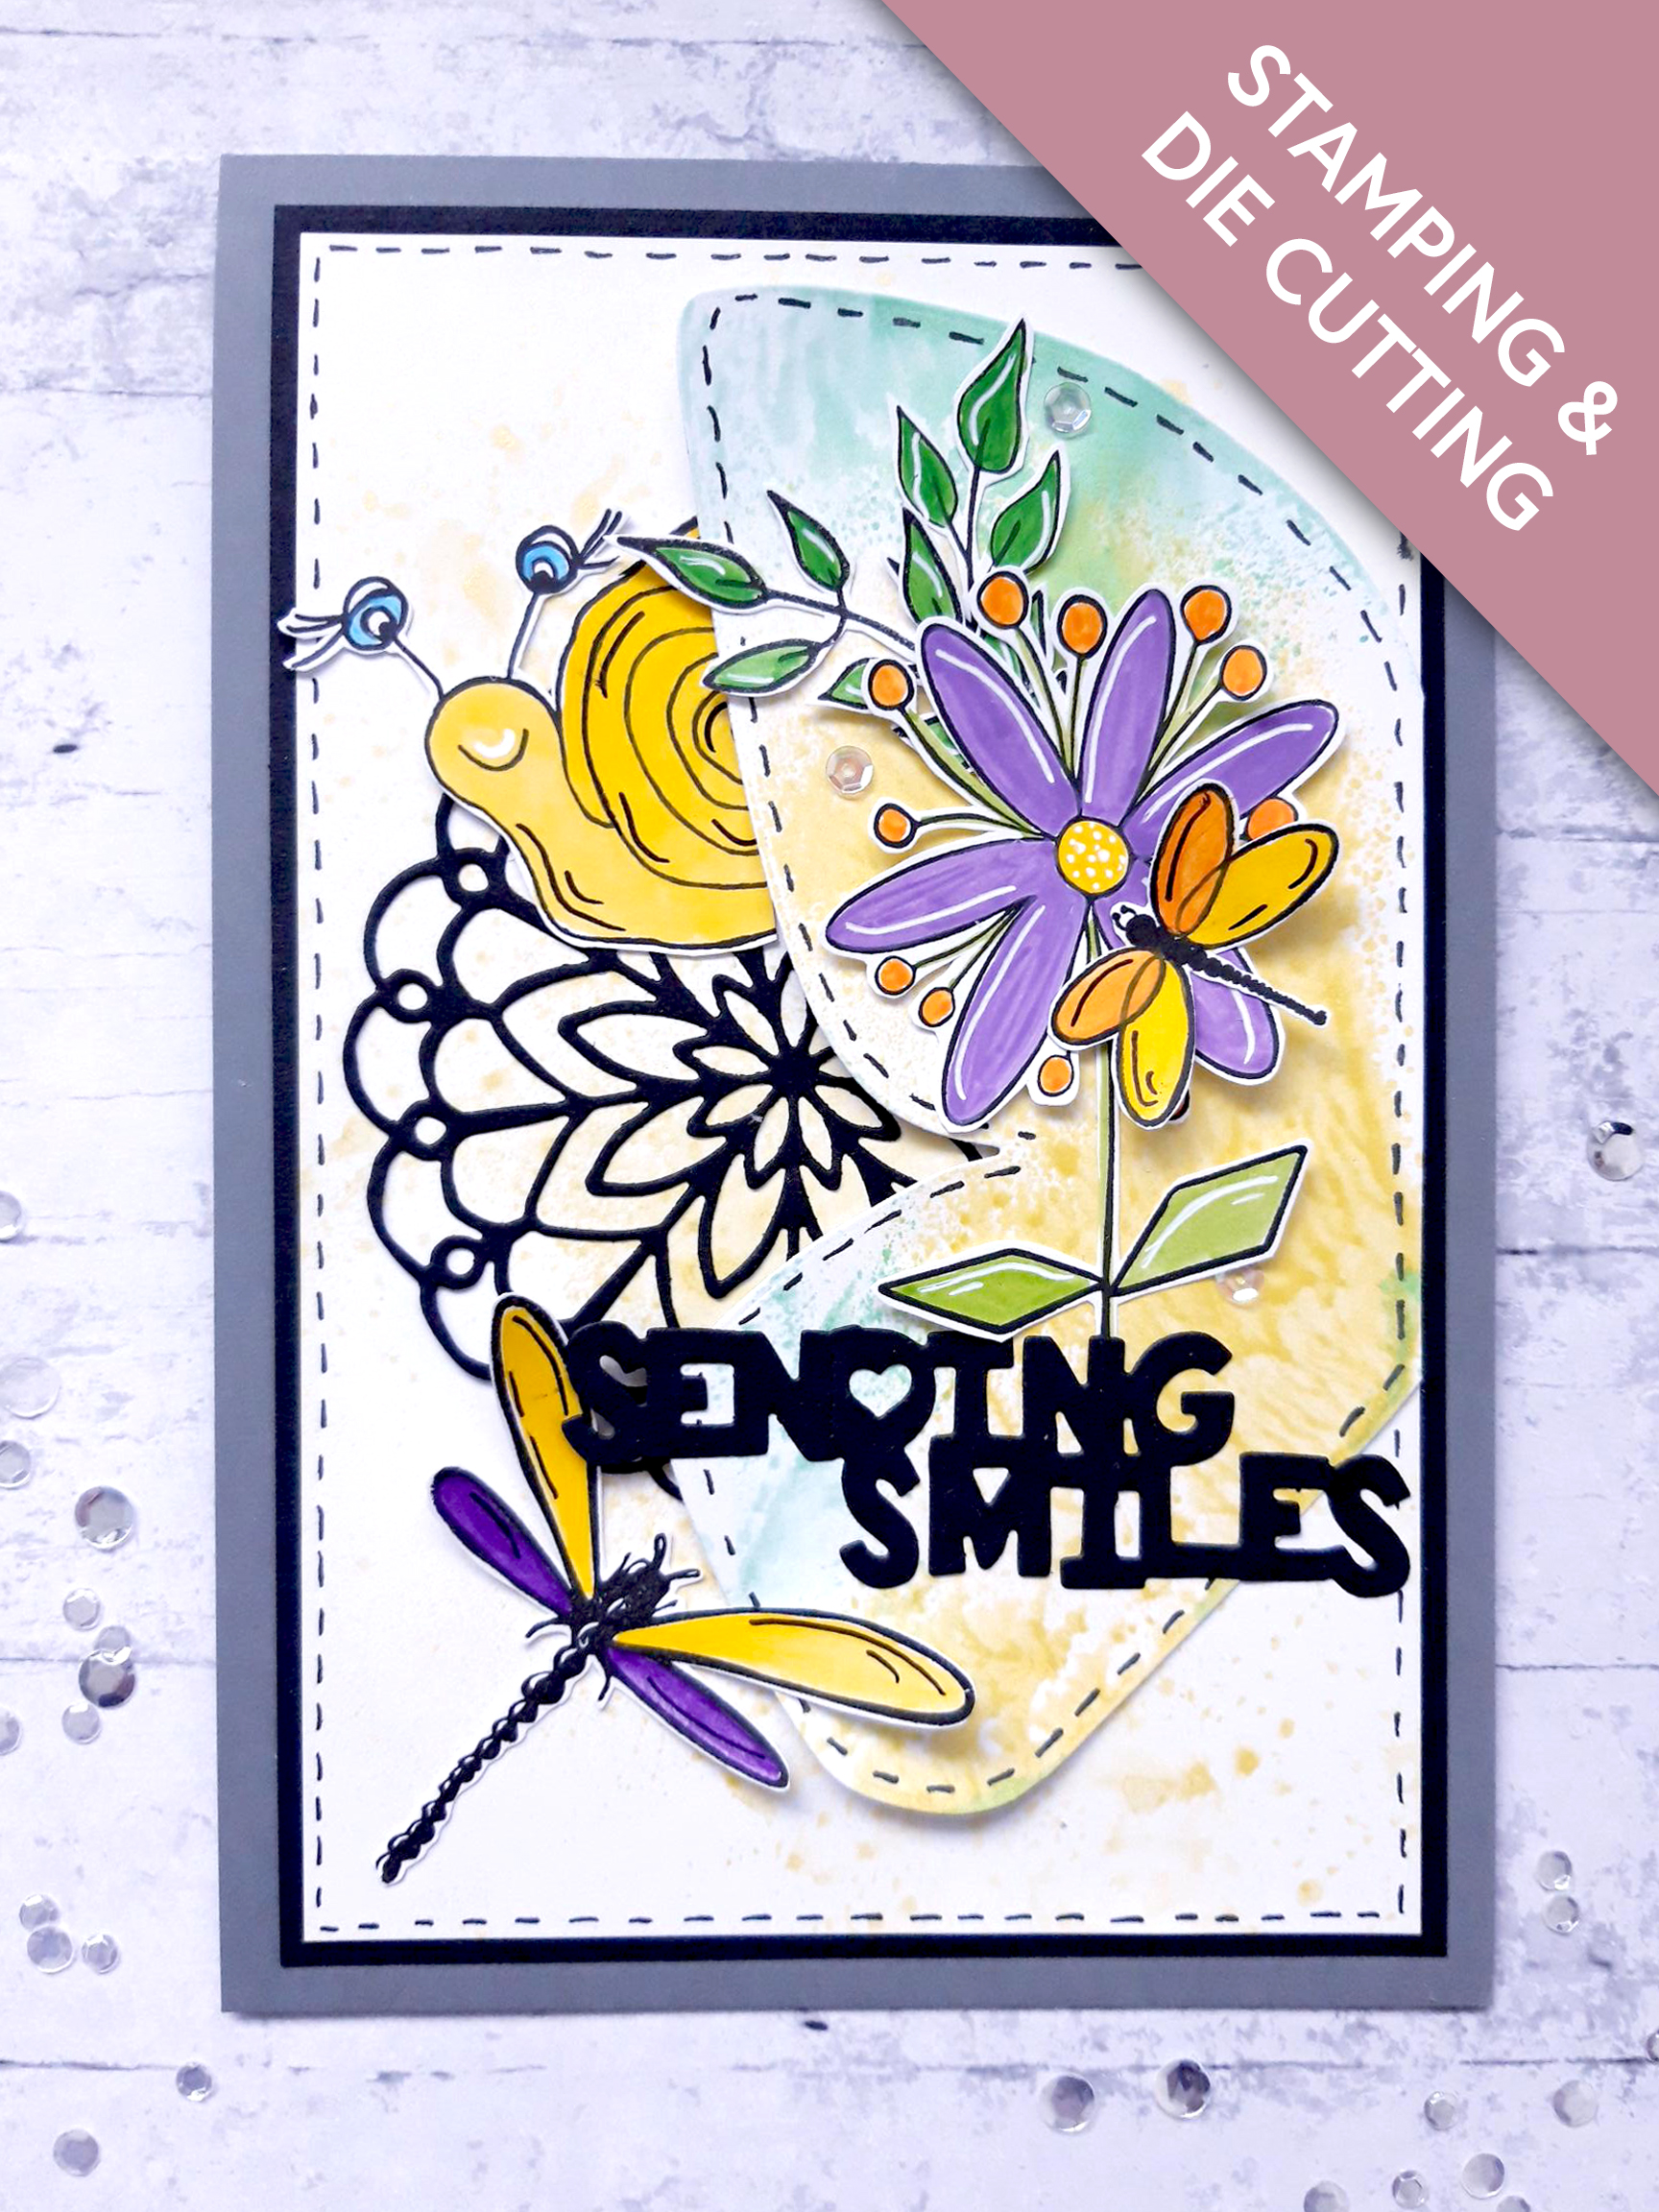
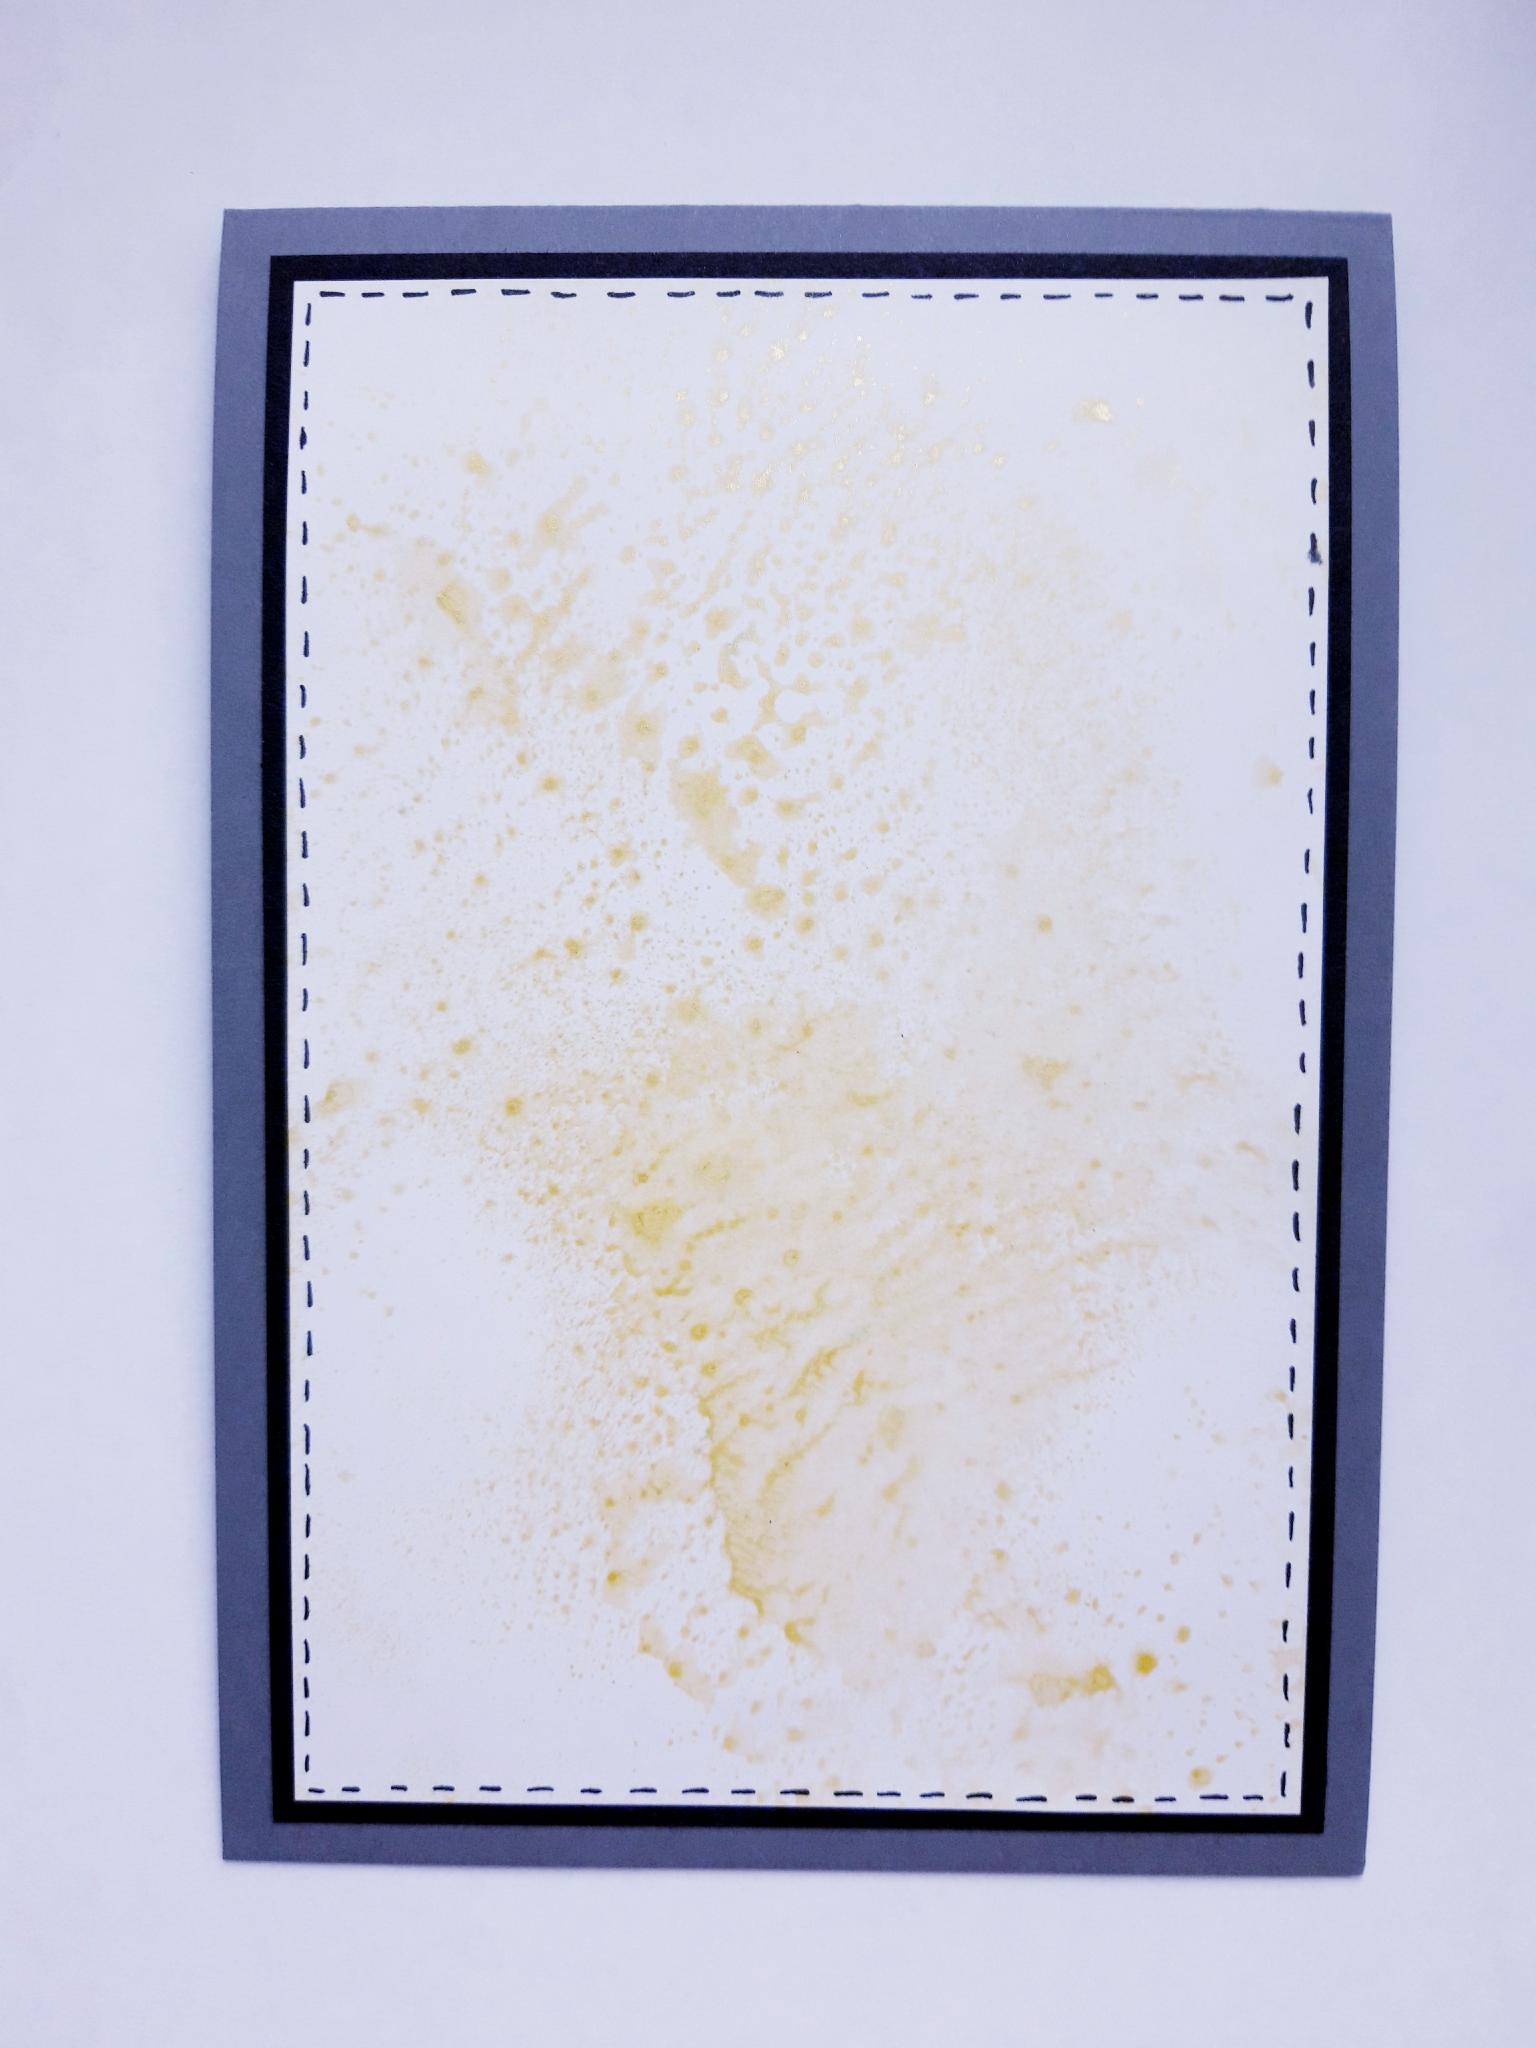
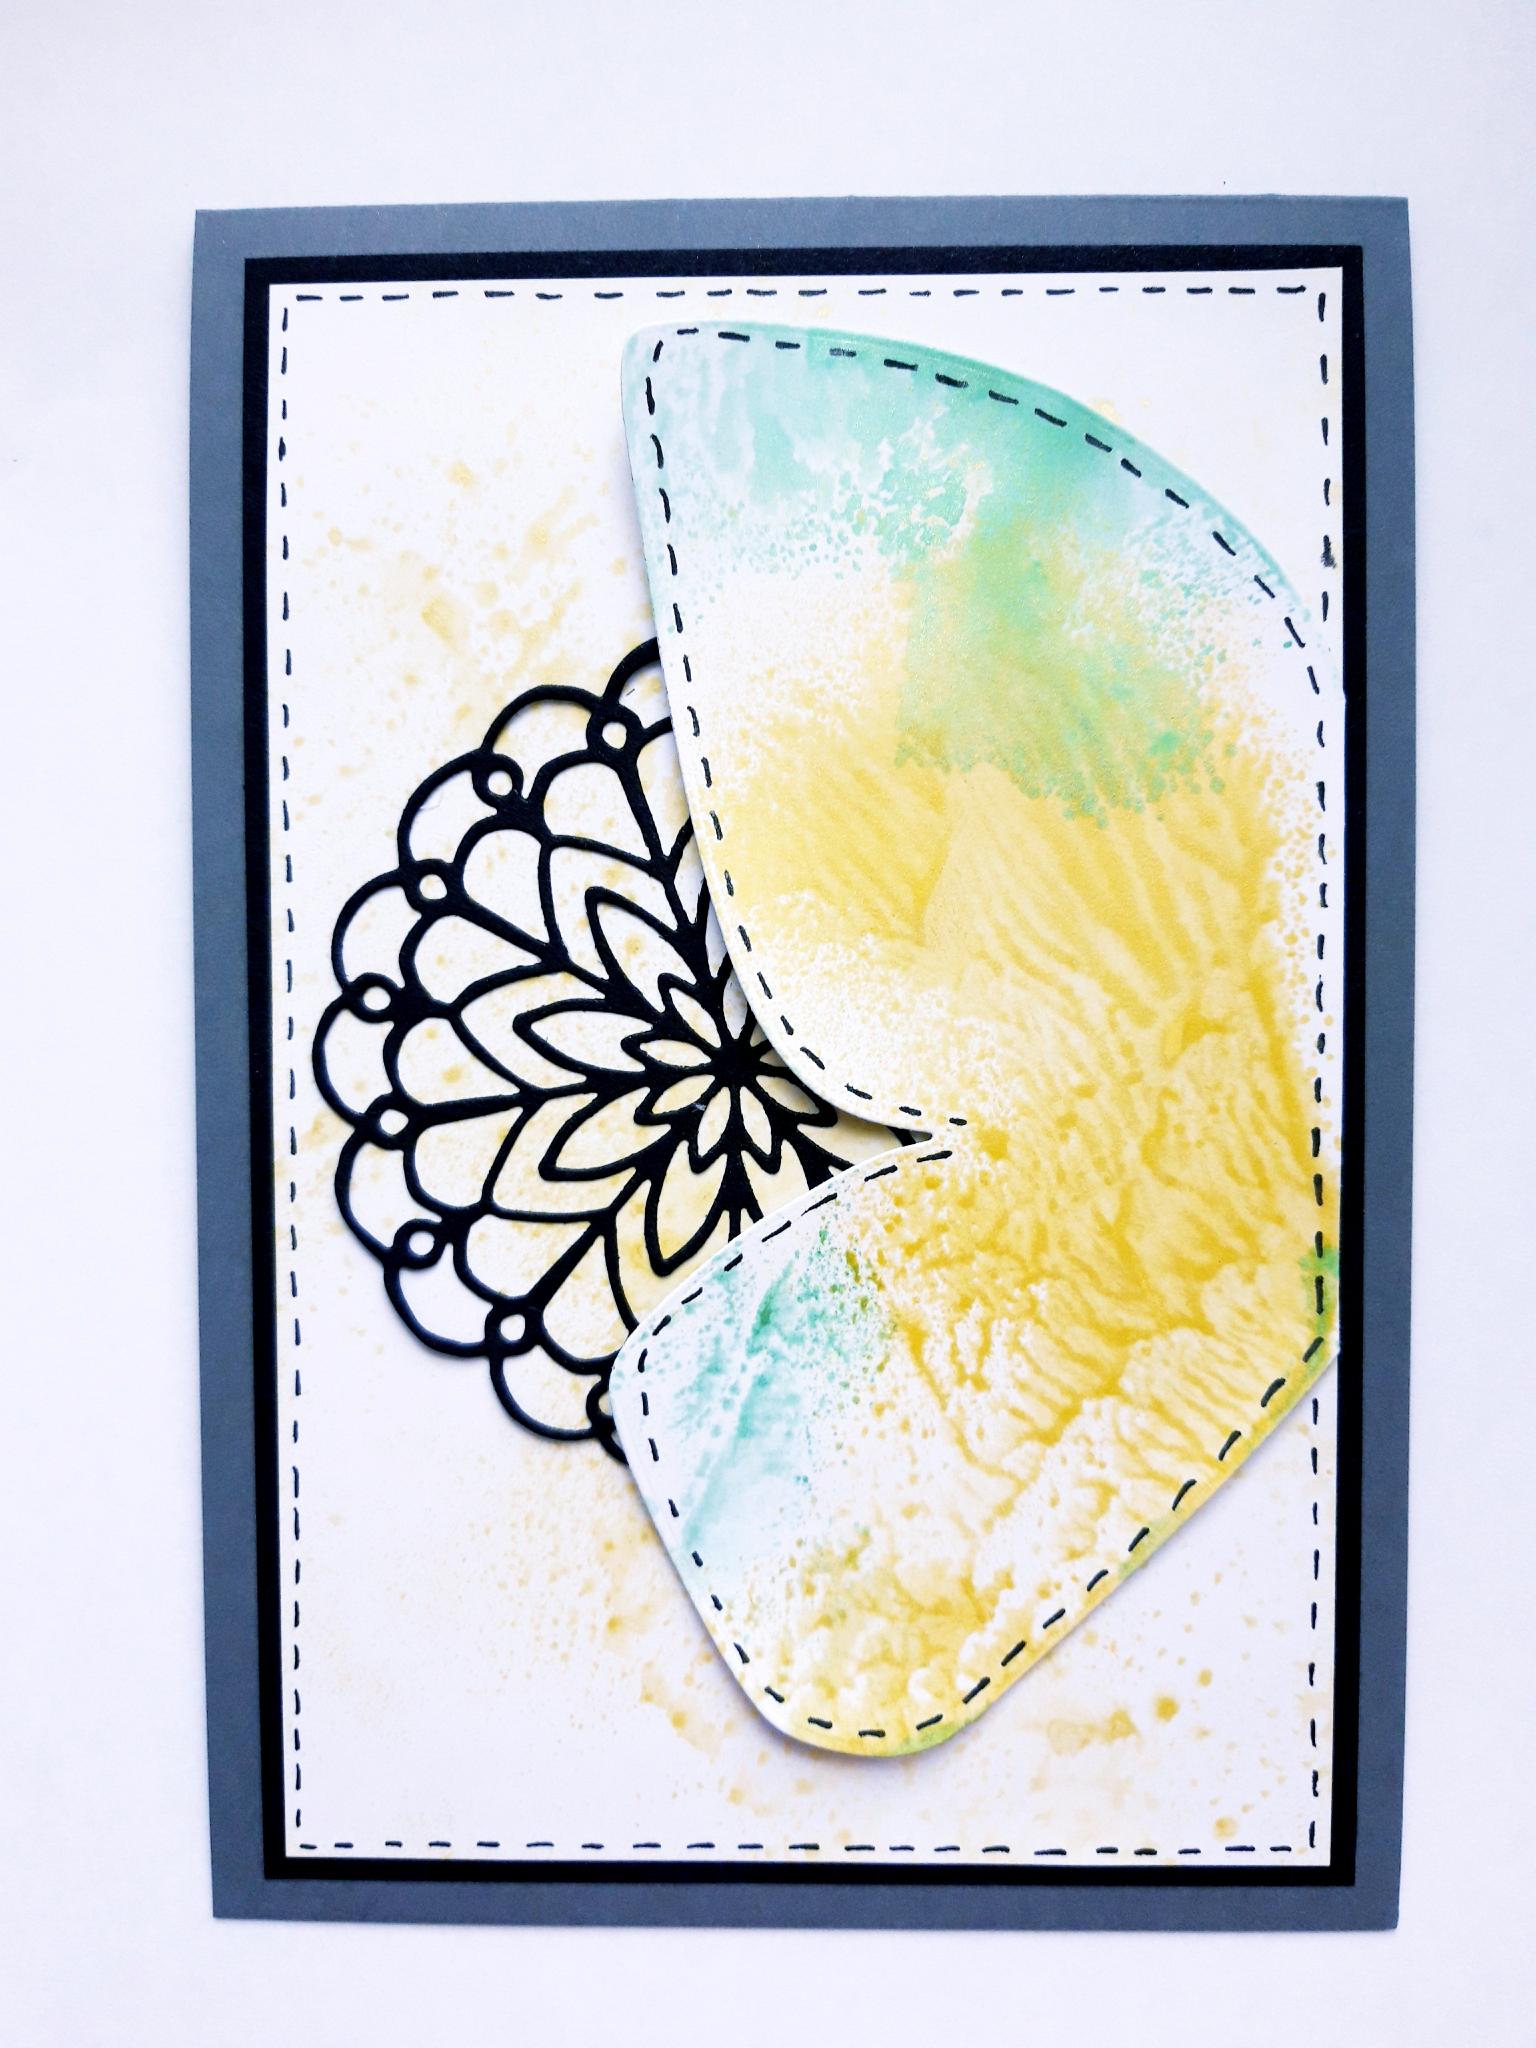
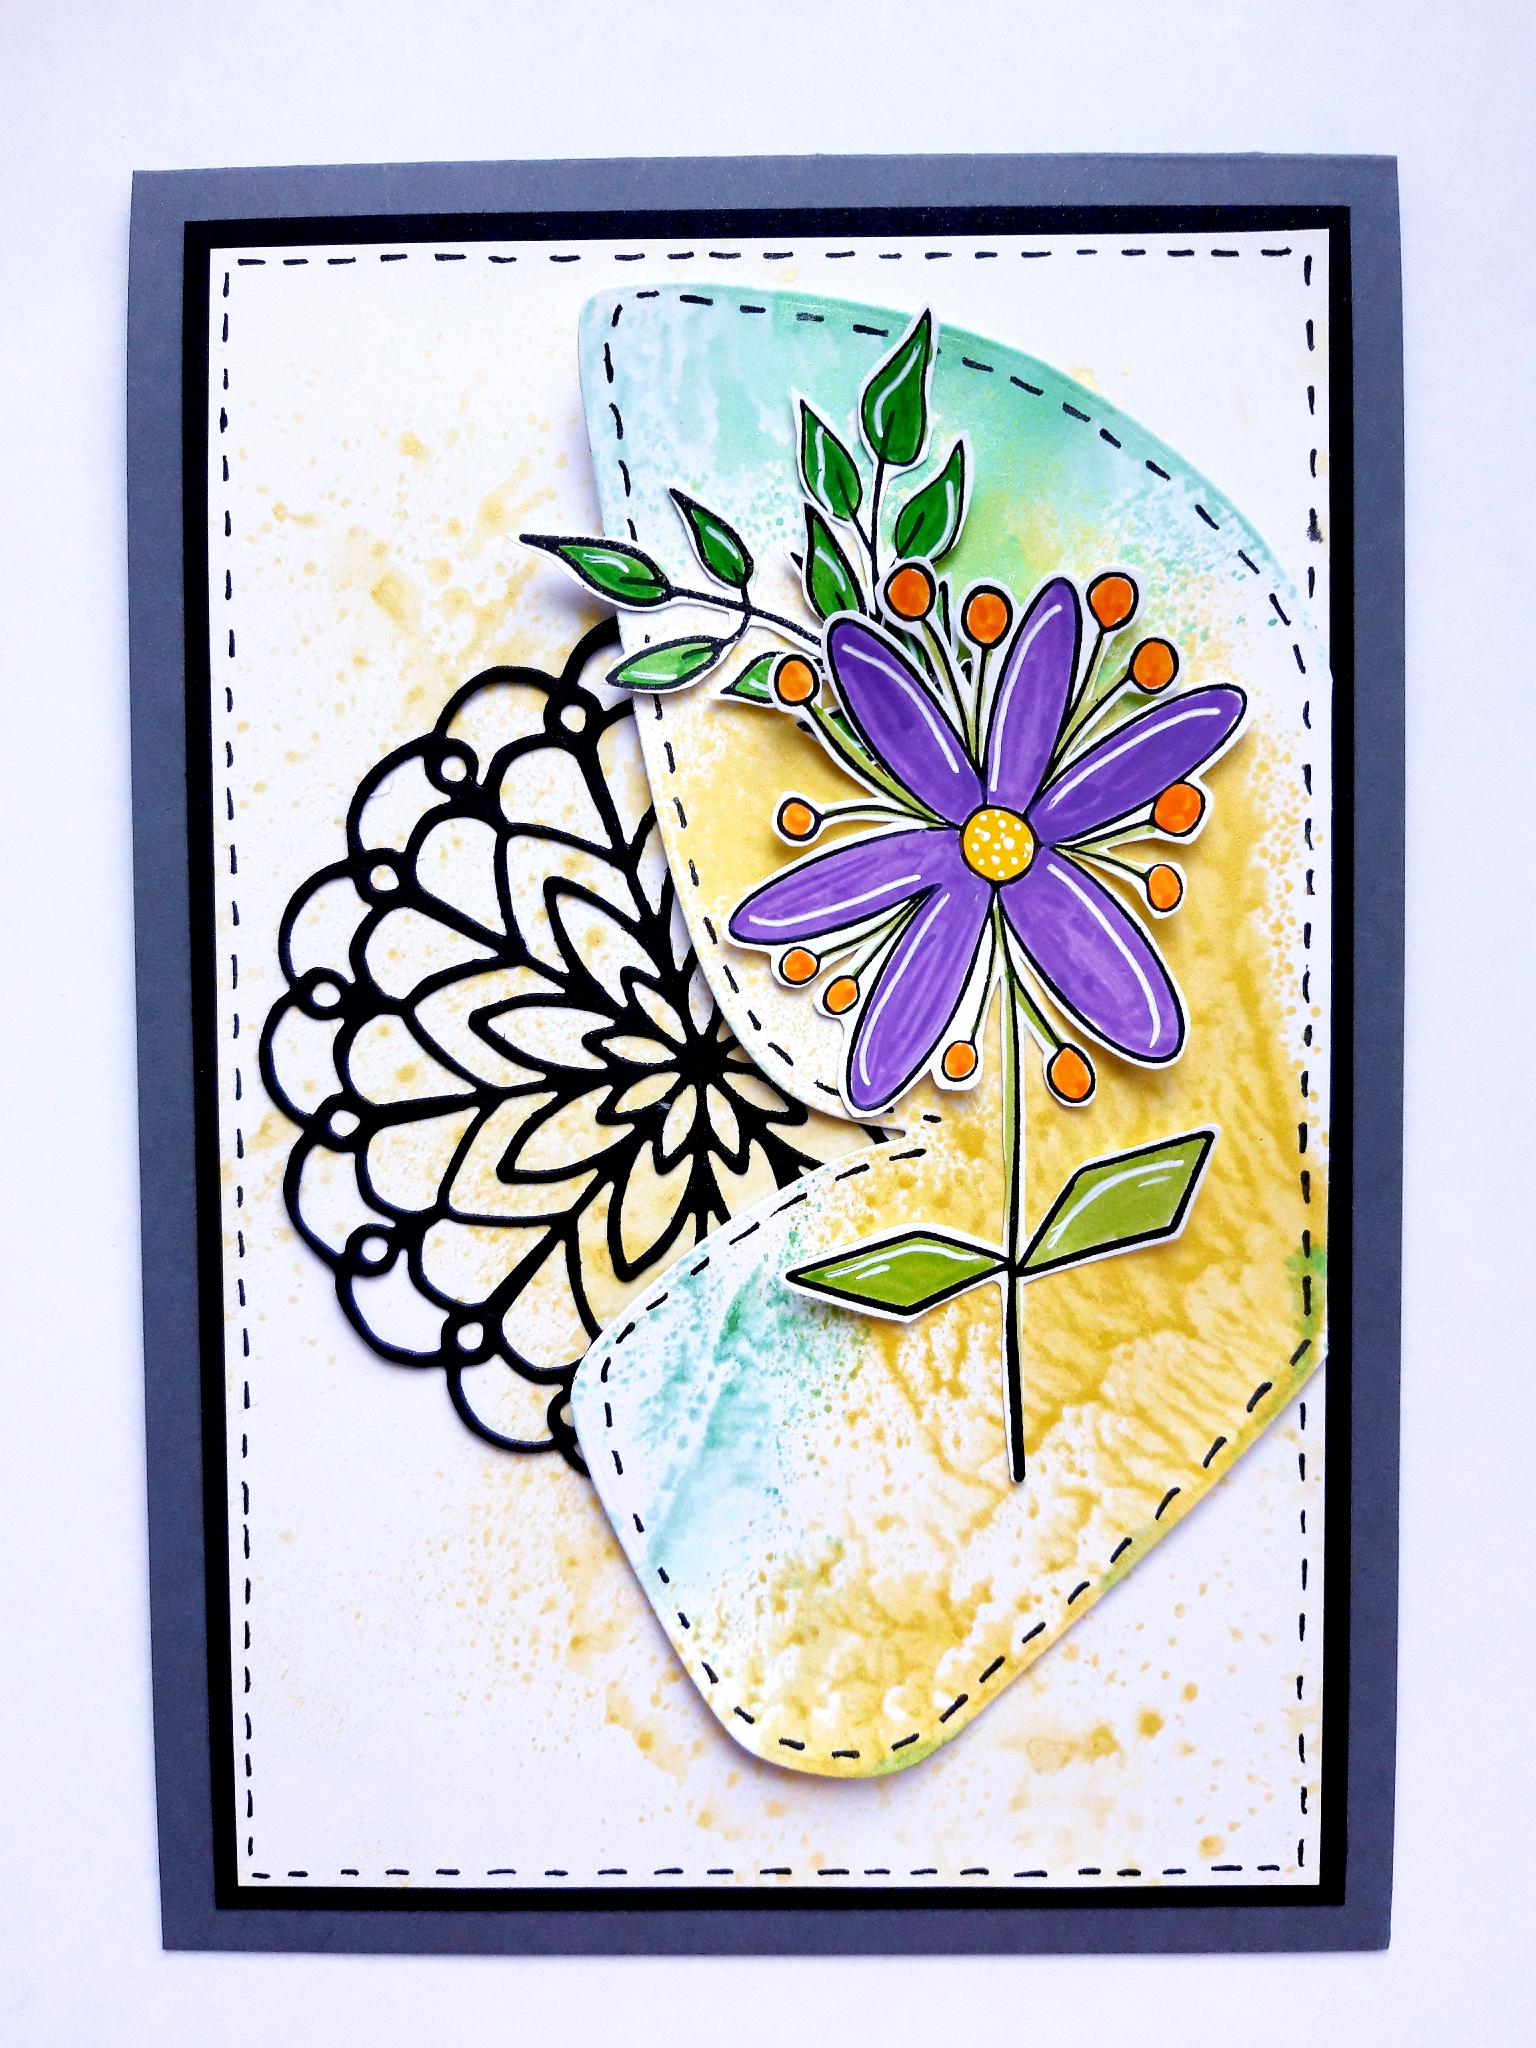
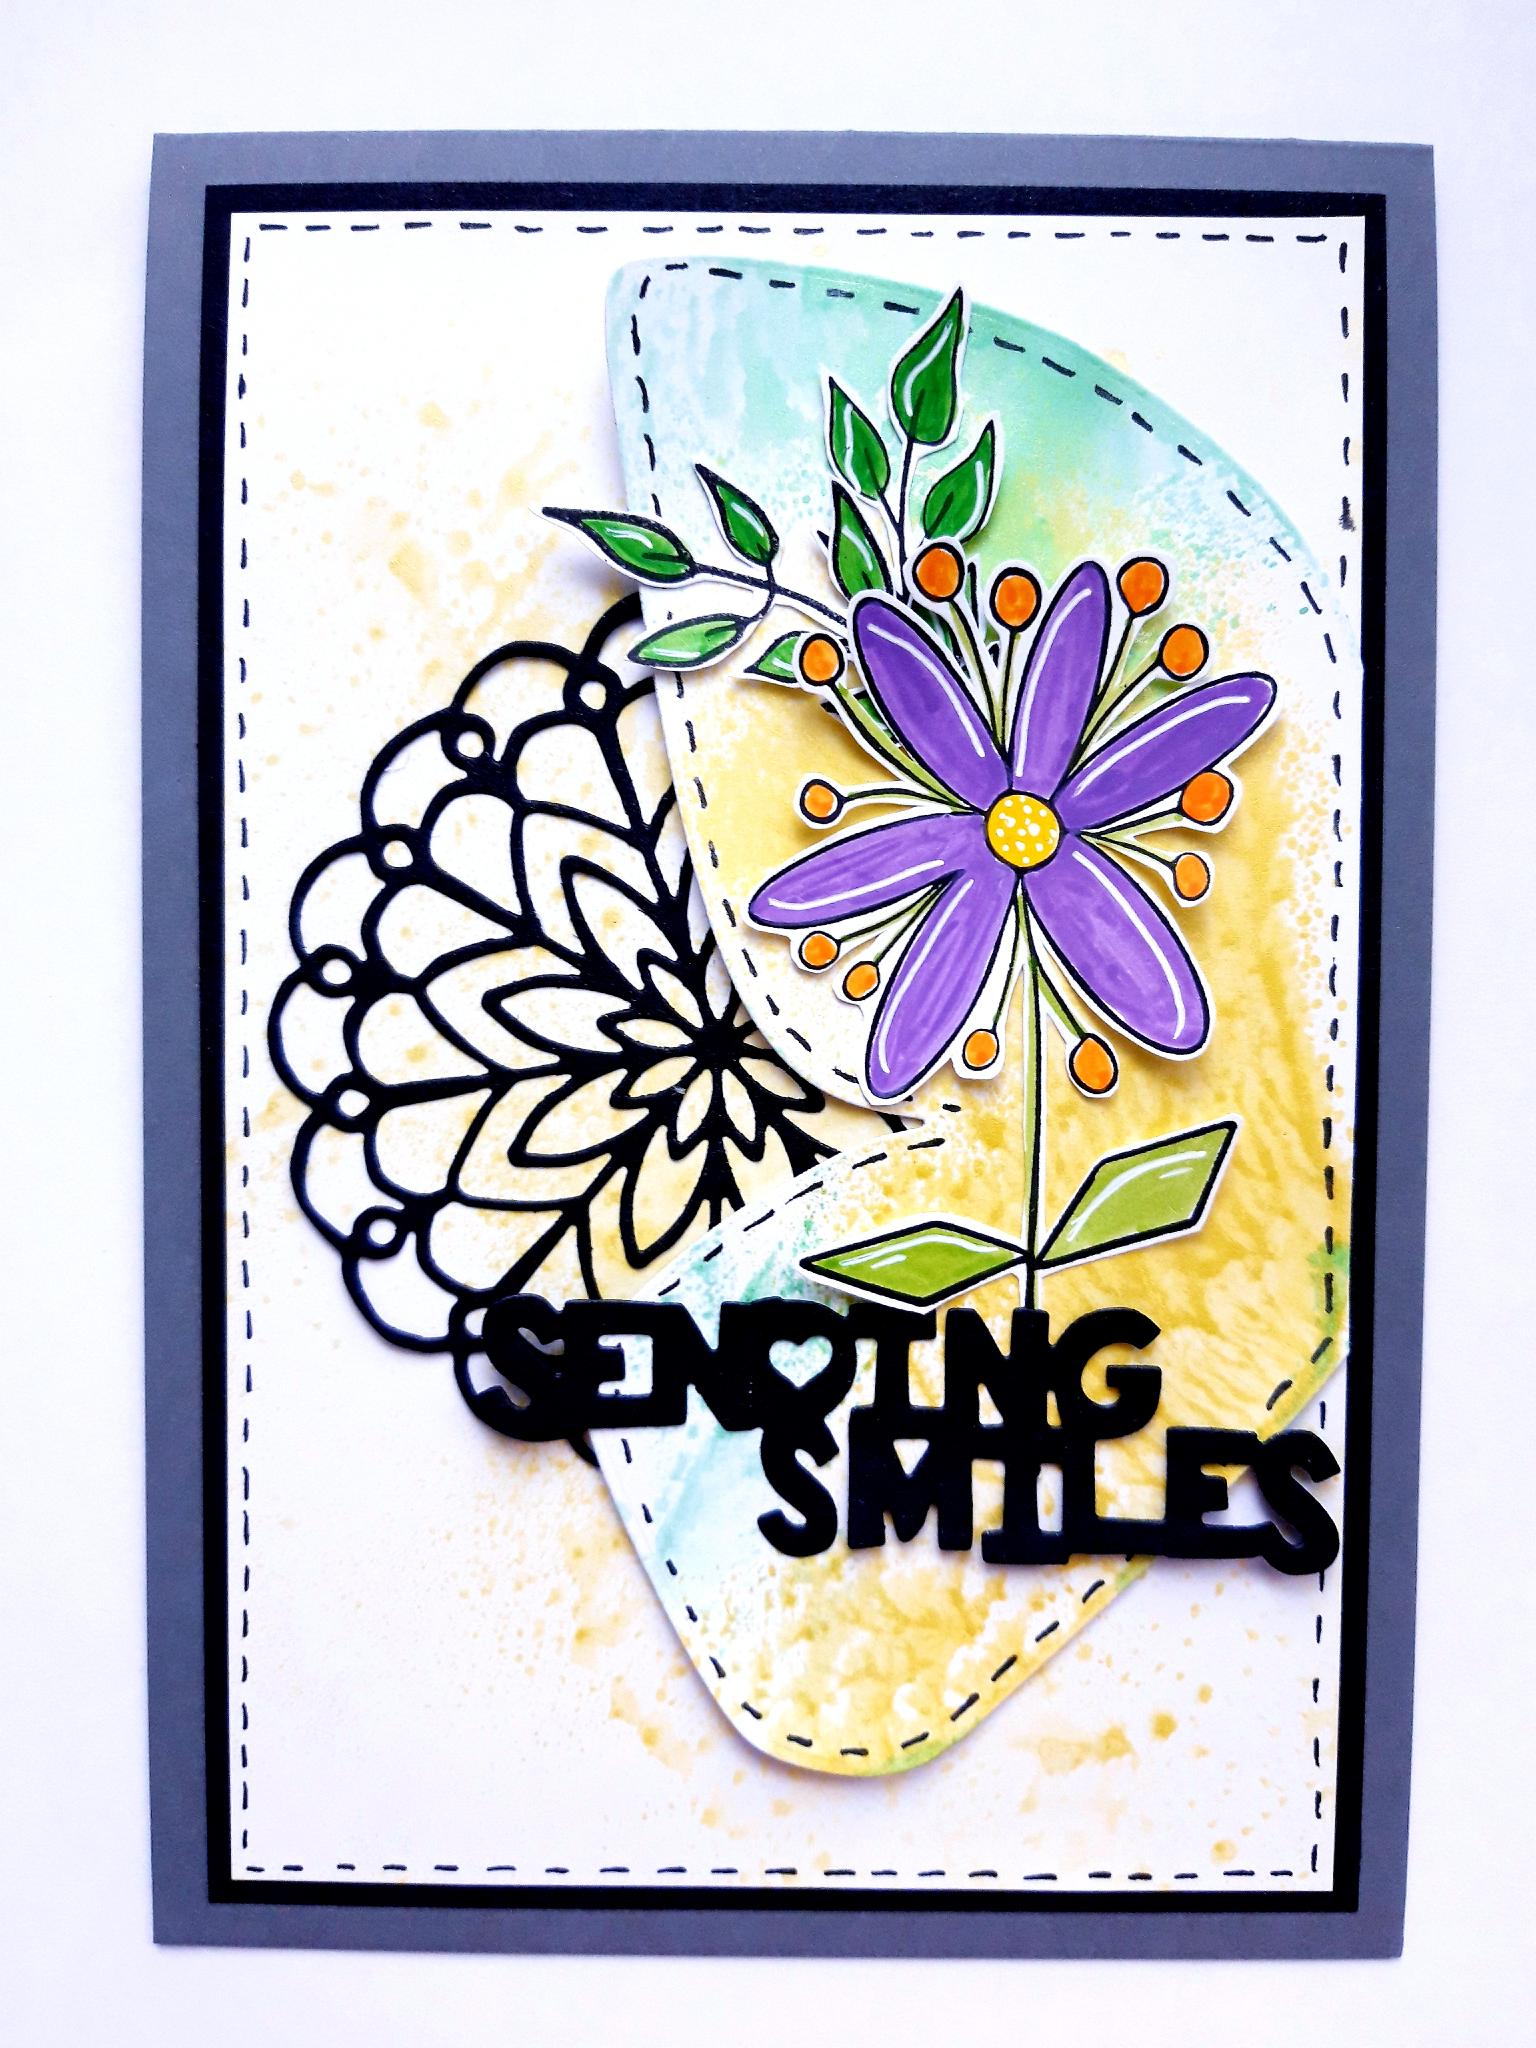
Glue your inked background on to the black cardstock. Glue this on to the front of your top folding grey card blank. |
|
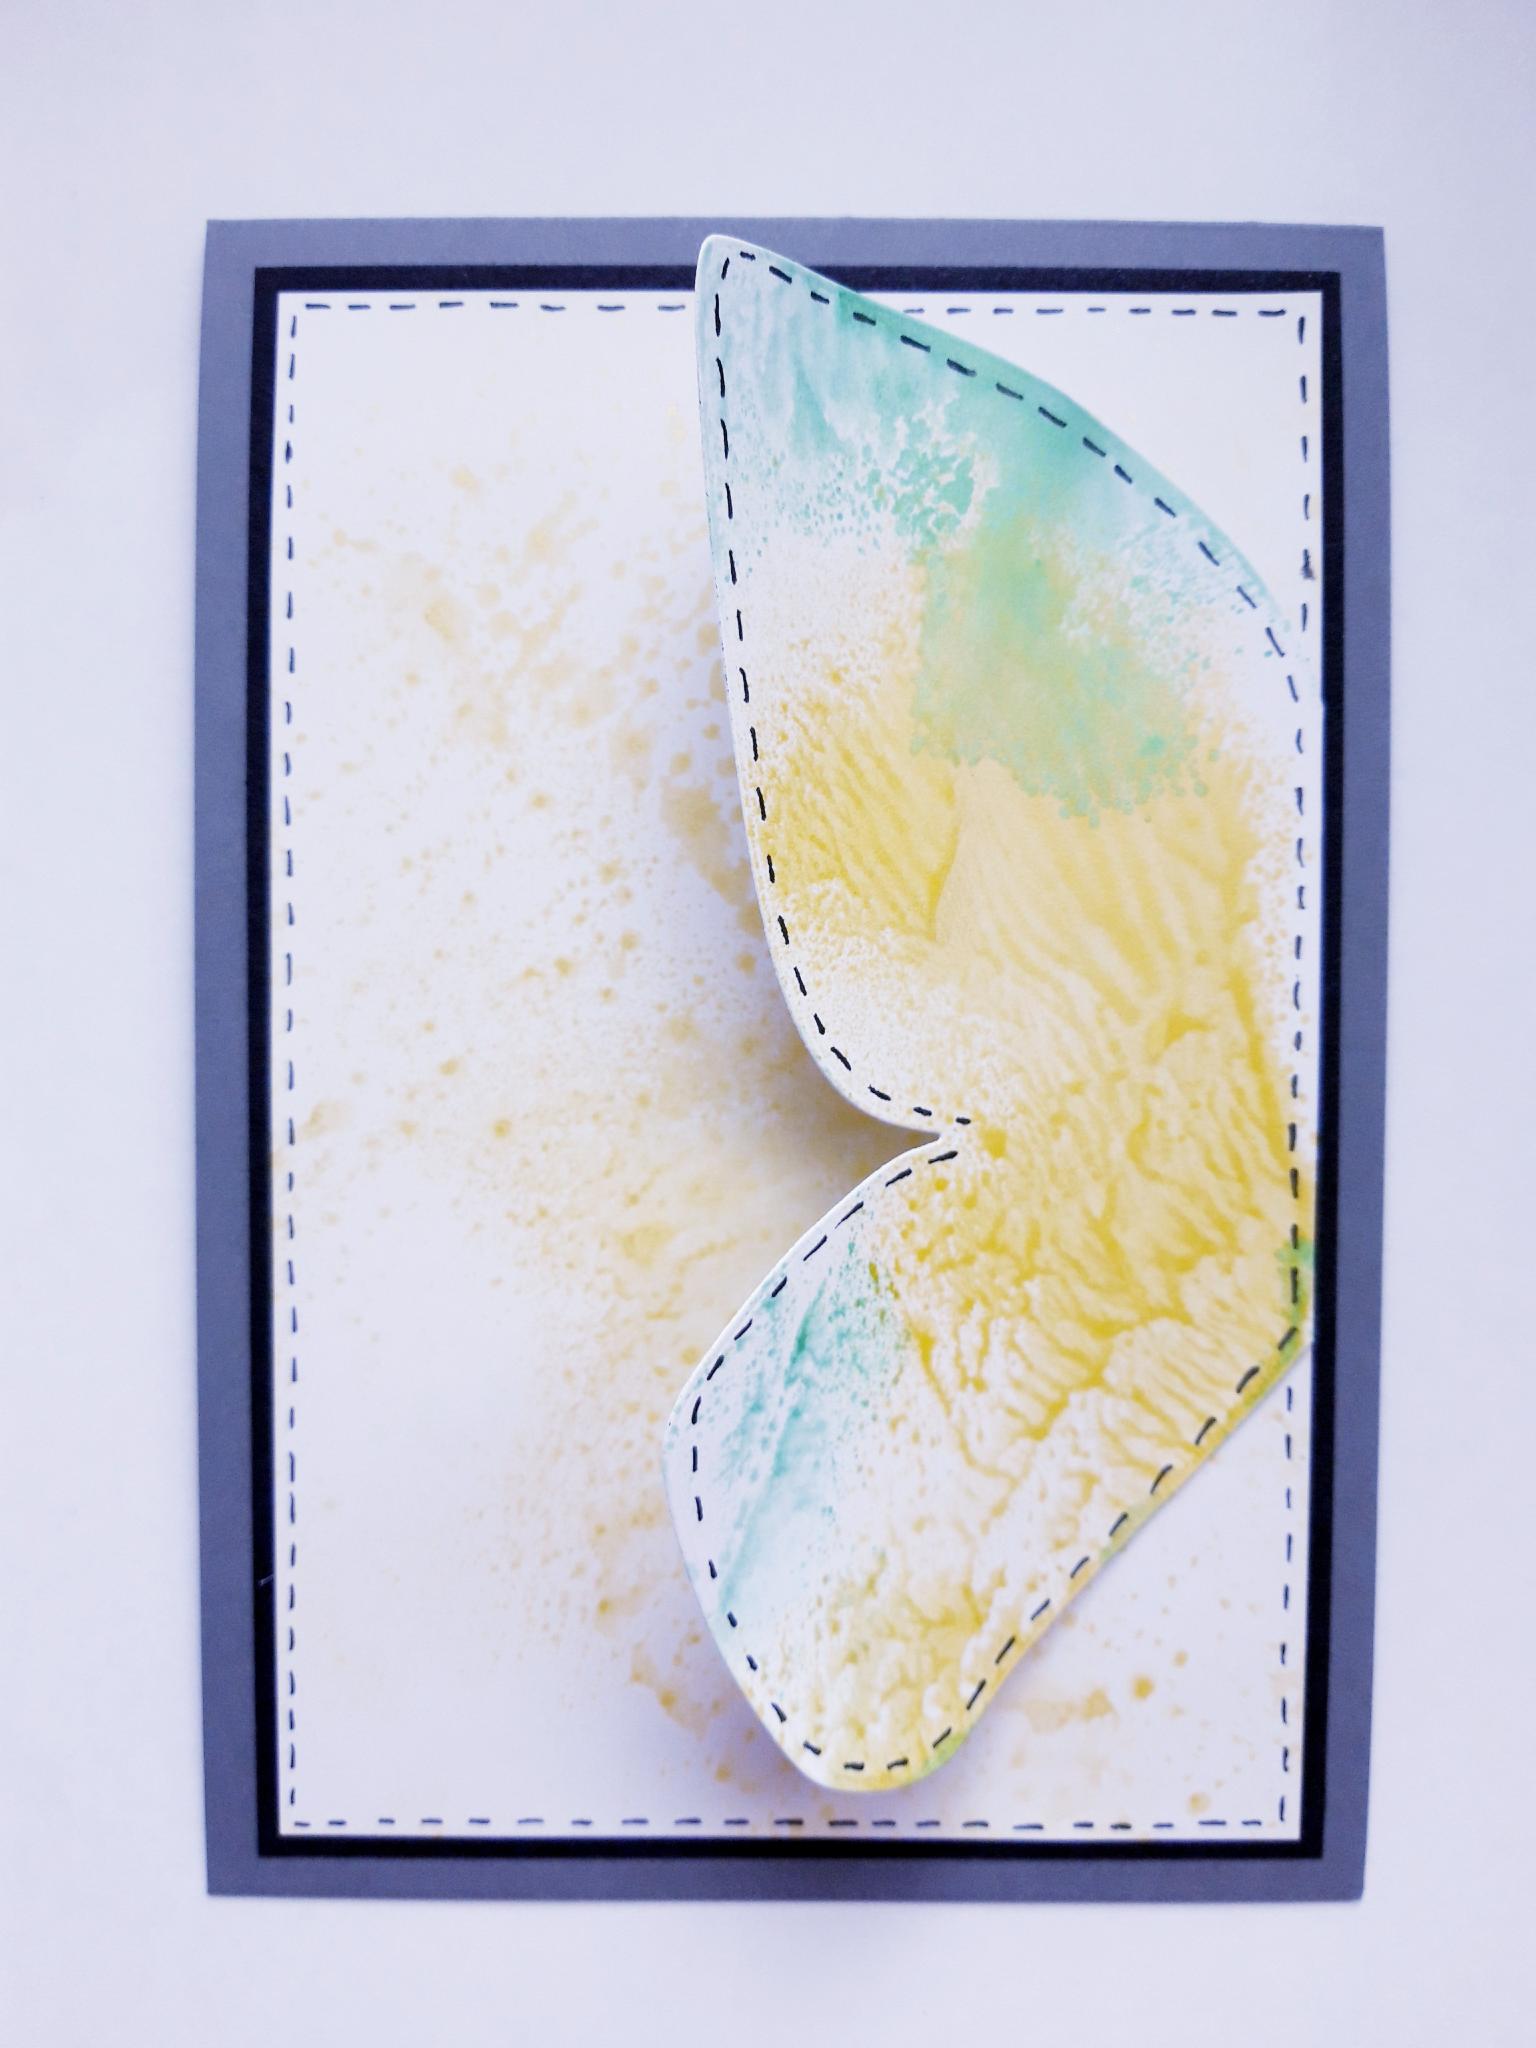
Apply glue along the straight edge ONLY, of your inked butterfly wings. Adhere flush with the right hand edge of your inked background, allowing the wings to lift up (you can curl the wings slightly, before gluing down, if you wish). |
|
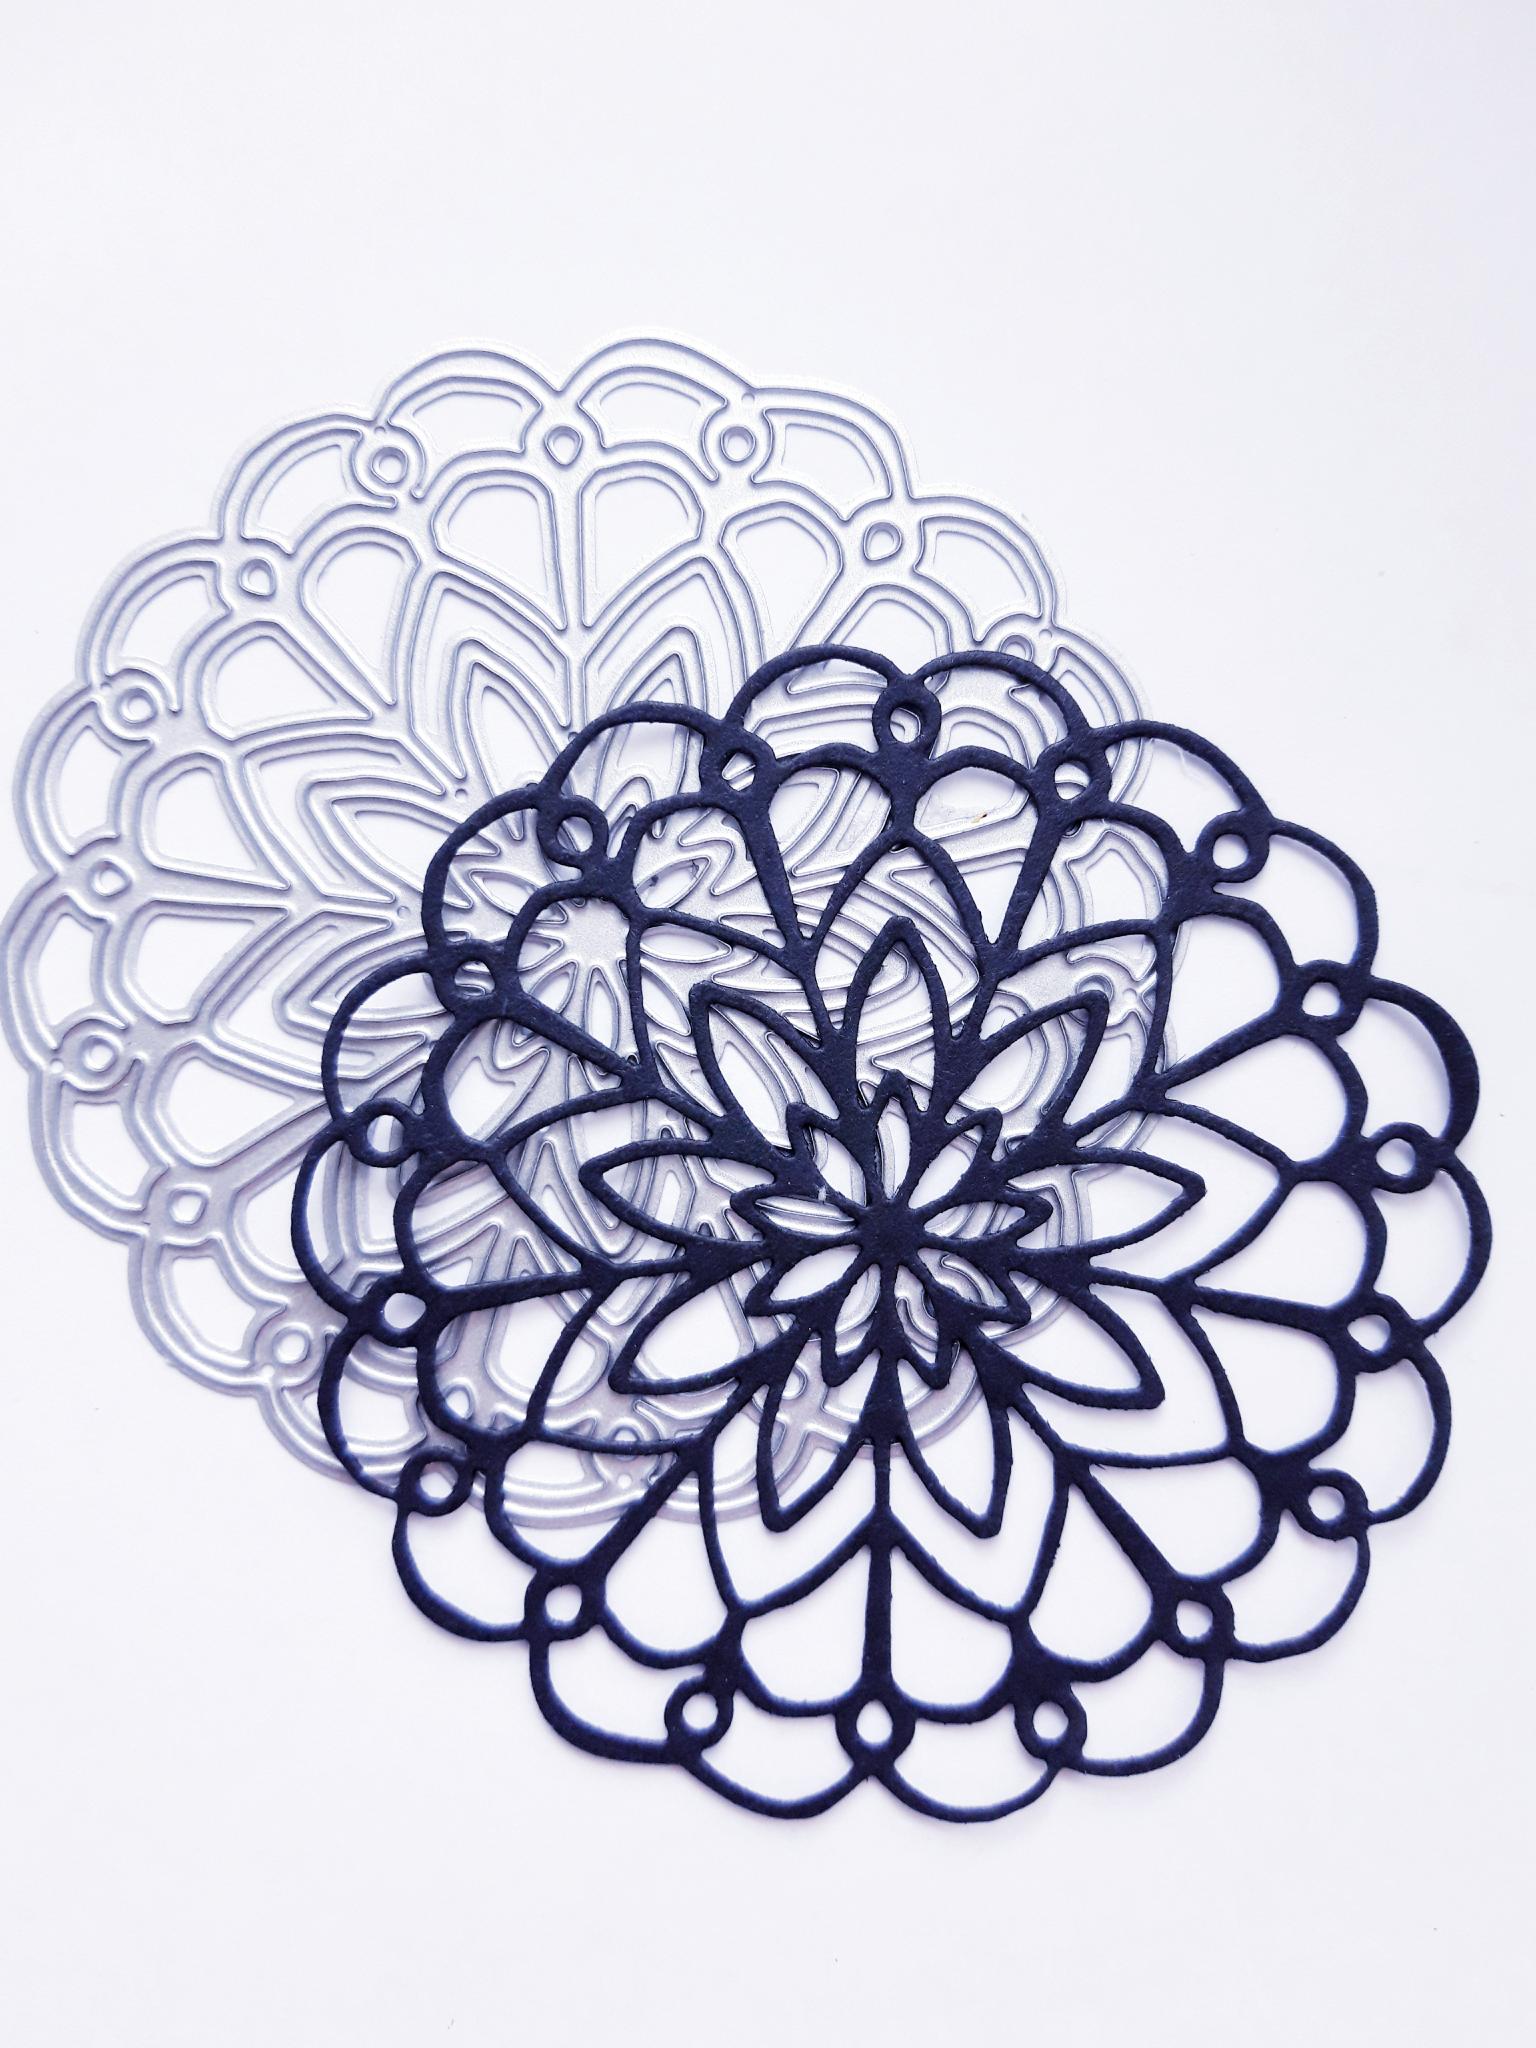
Place the large fancy die, from the Fancy Flowers Creative Dies, on to one corner of the A4 black cardstock. Cut off the amount of card needed, and set the rest to one side, to be used later. Run the die through your die cutting machine. |
|
Glue the die cut fancy flower tucked under the butterfly's wings, using wet glue. |
|
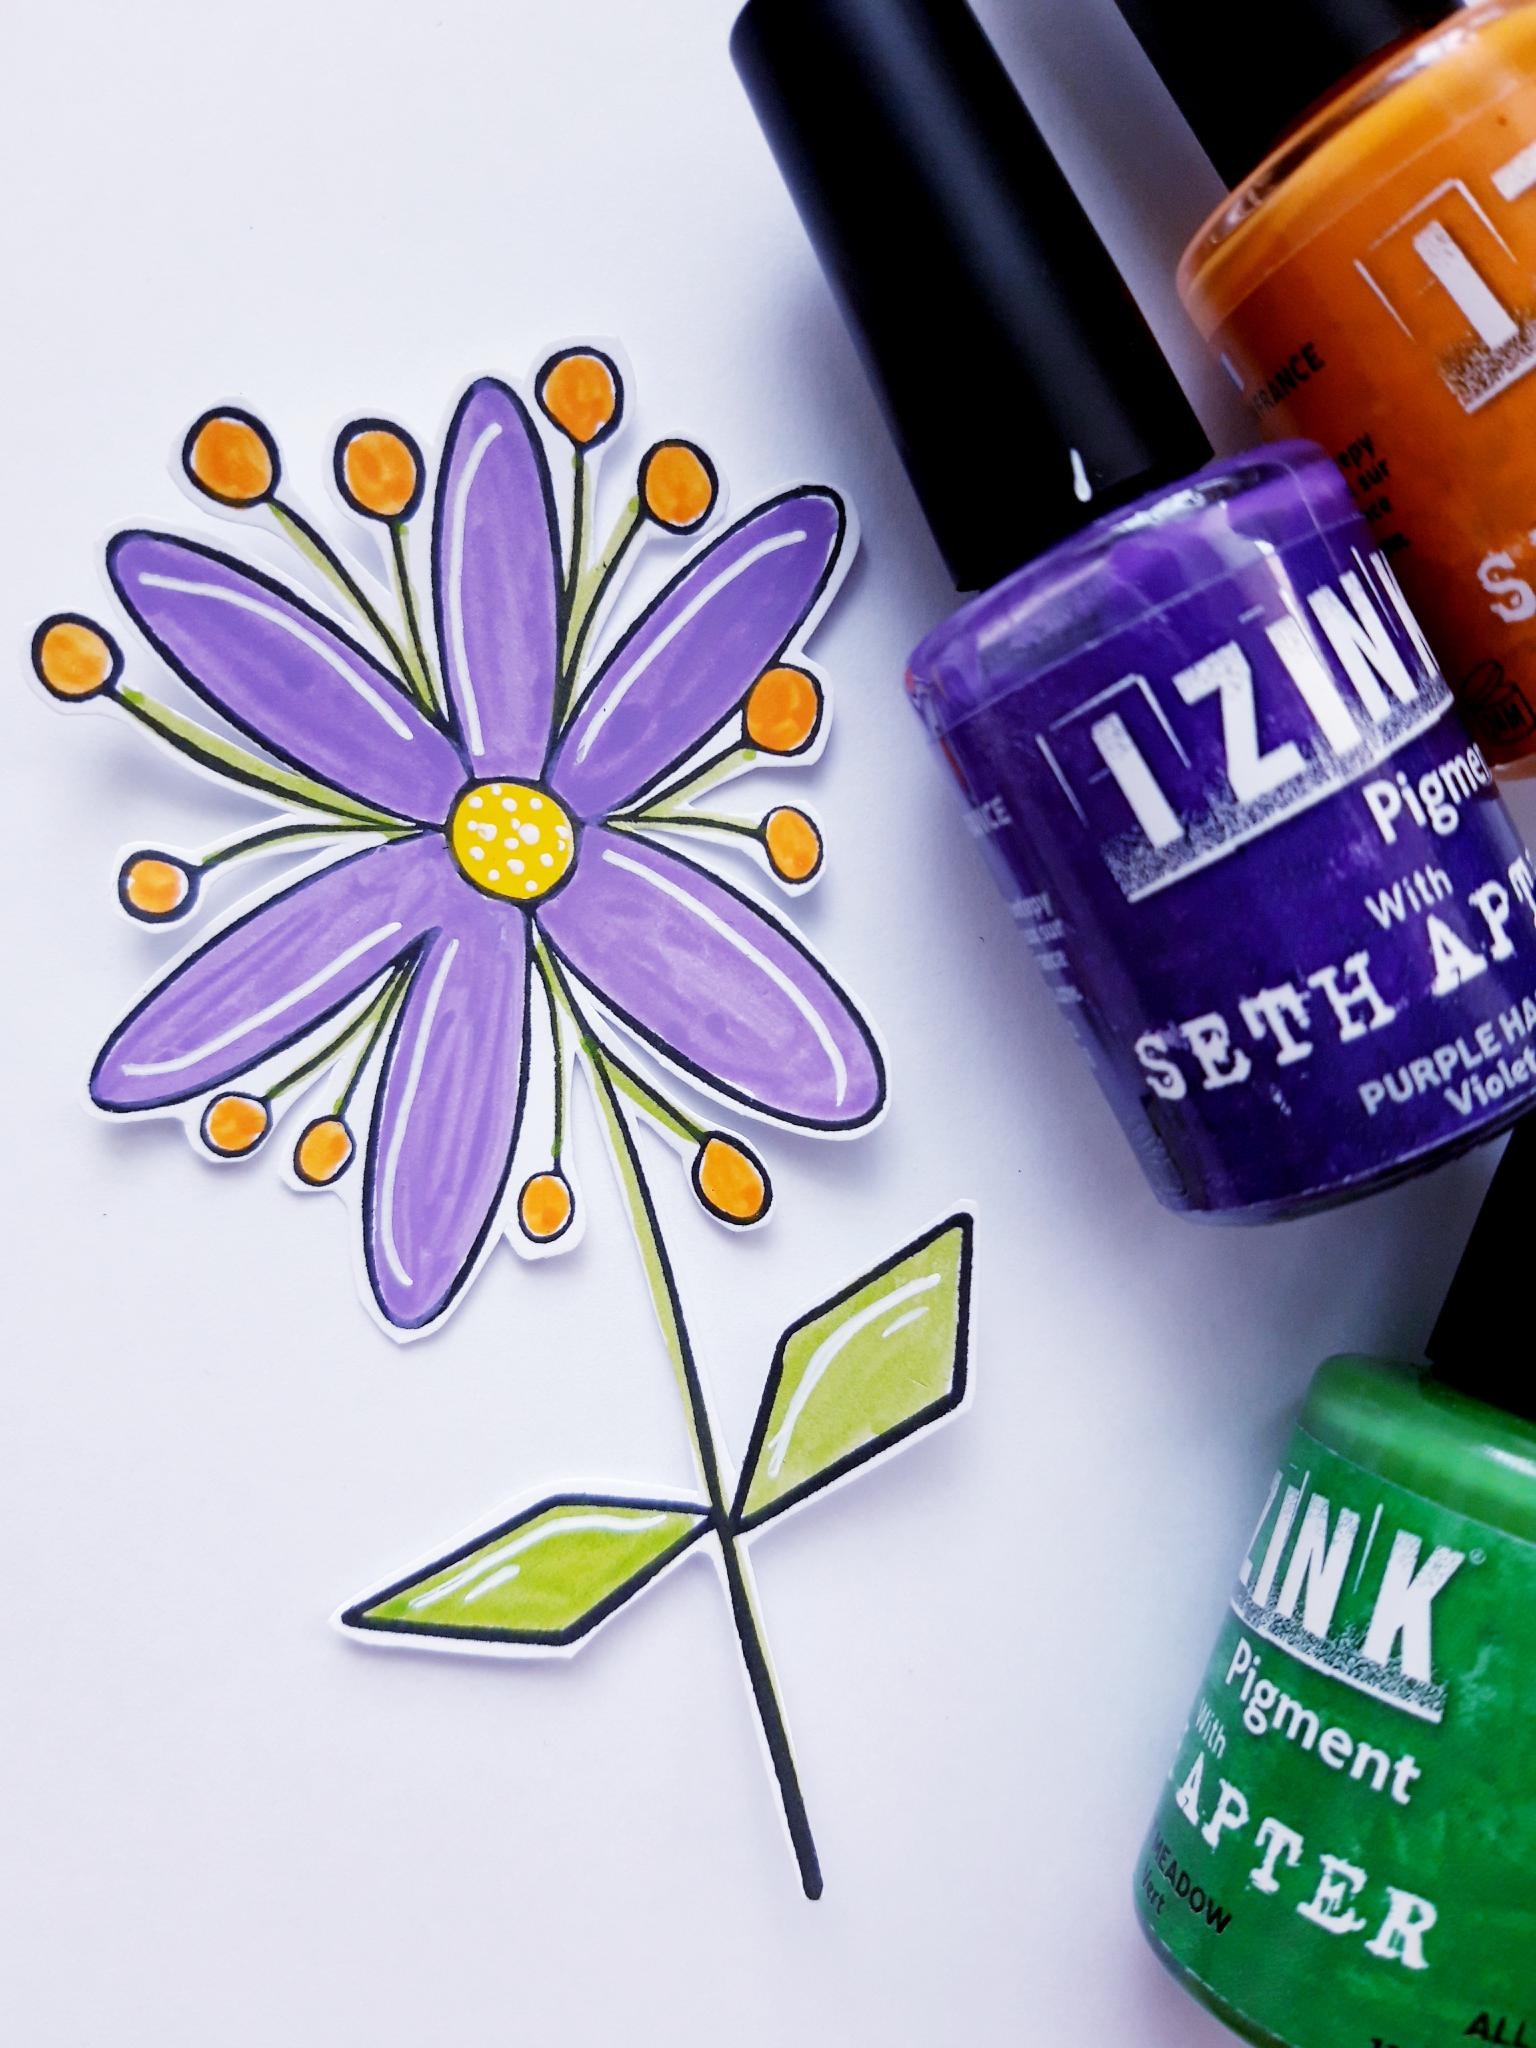
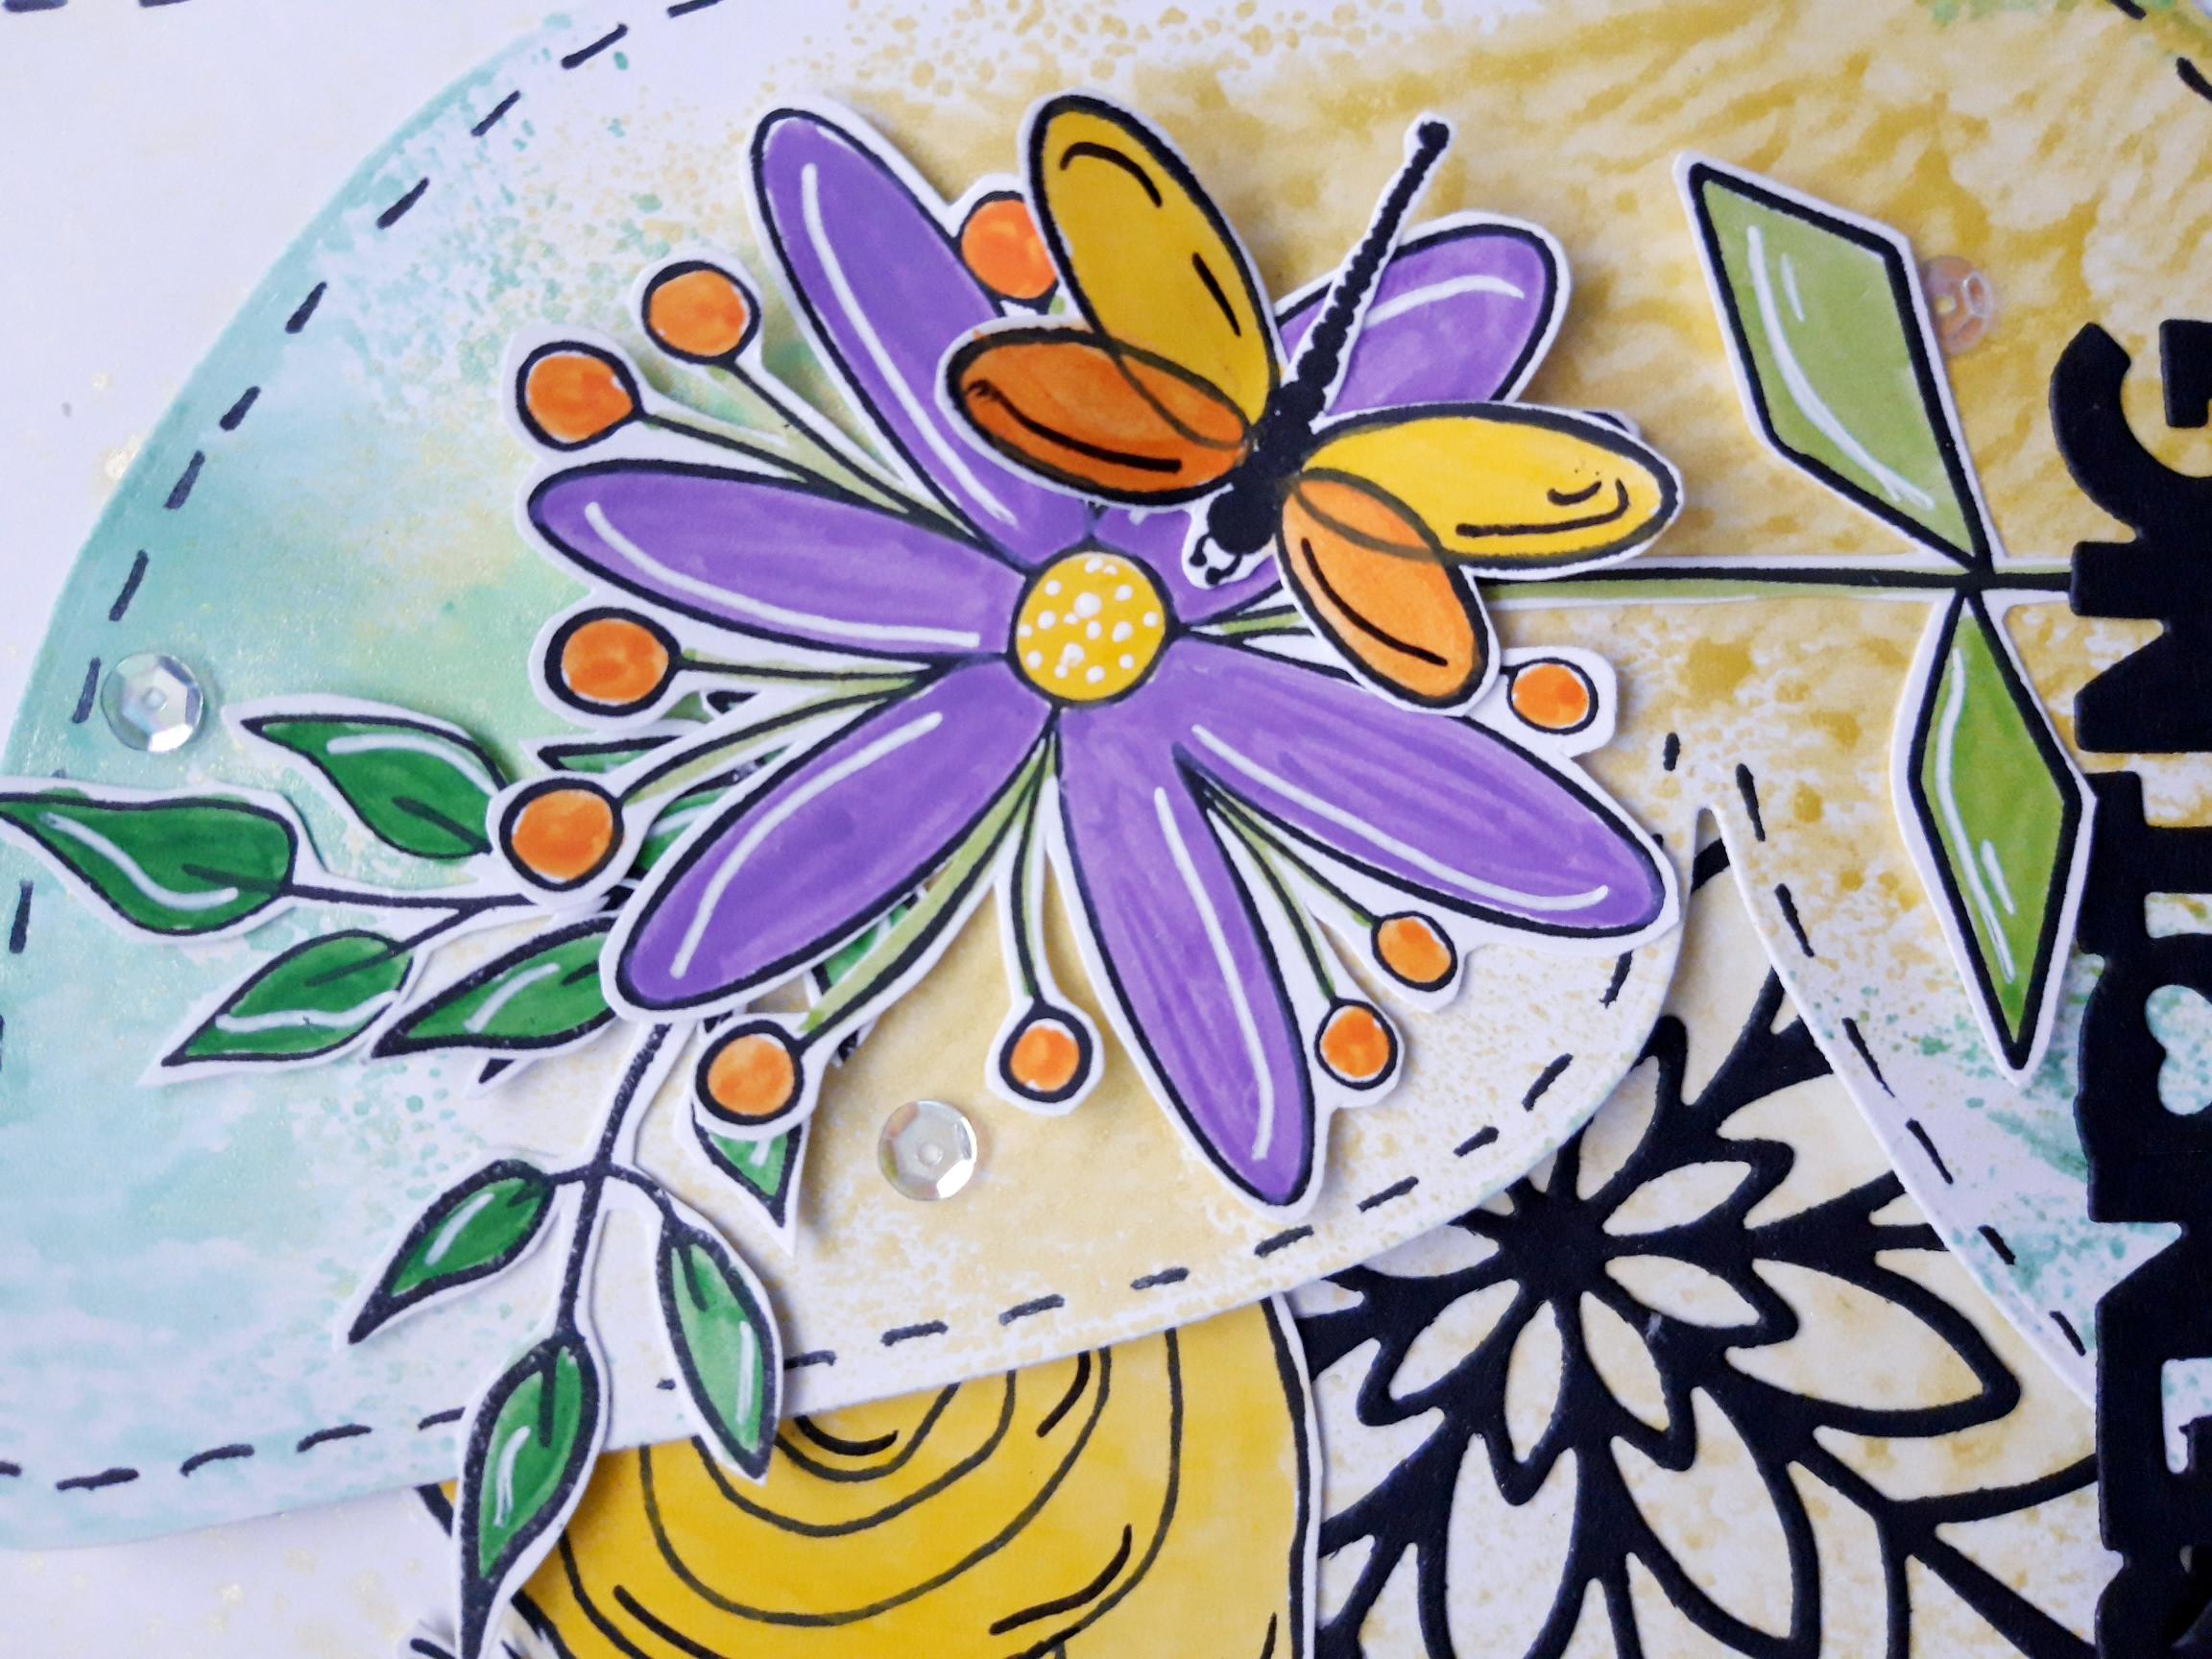
Ink up the flower stamp from the Thirsty Brush UnLtd Petal Power Creative Stamps, with the Onyx Black Versafine. Stamp on to part of the white cardstock that you set to one side earlier. Cut out the flower, setting the rest of the cardstock to one side again. Add a little of the Izink Wet Meadow, Burnt Orange and Purple Haze Pigments on to a craft or glass mat. Add a little water and paint your flower. Once the Pigments are completely dry, add white highlights with your white gel pen. Set to one side. |
|
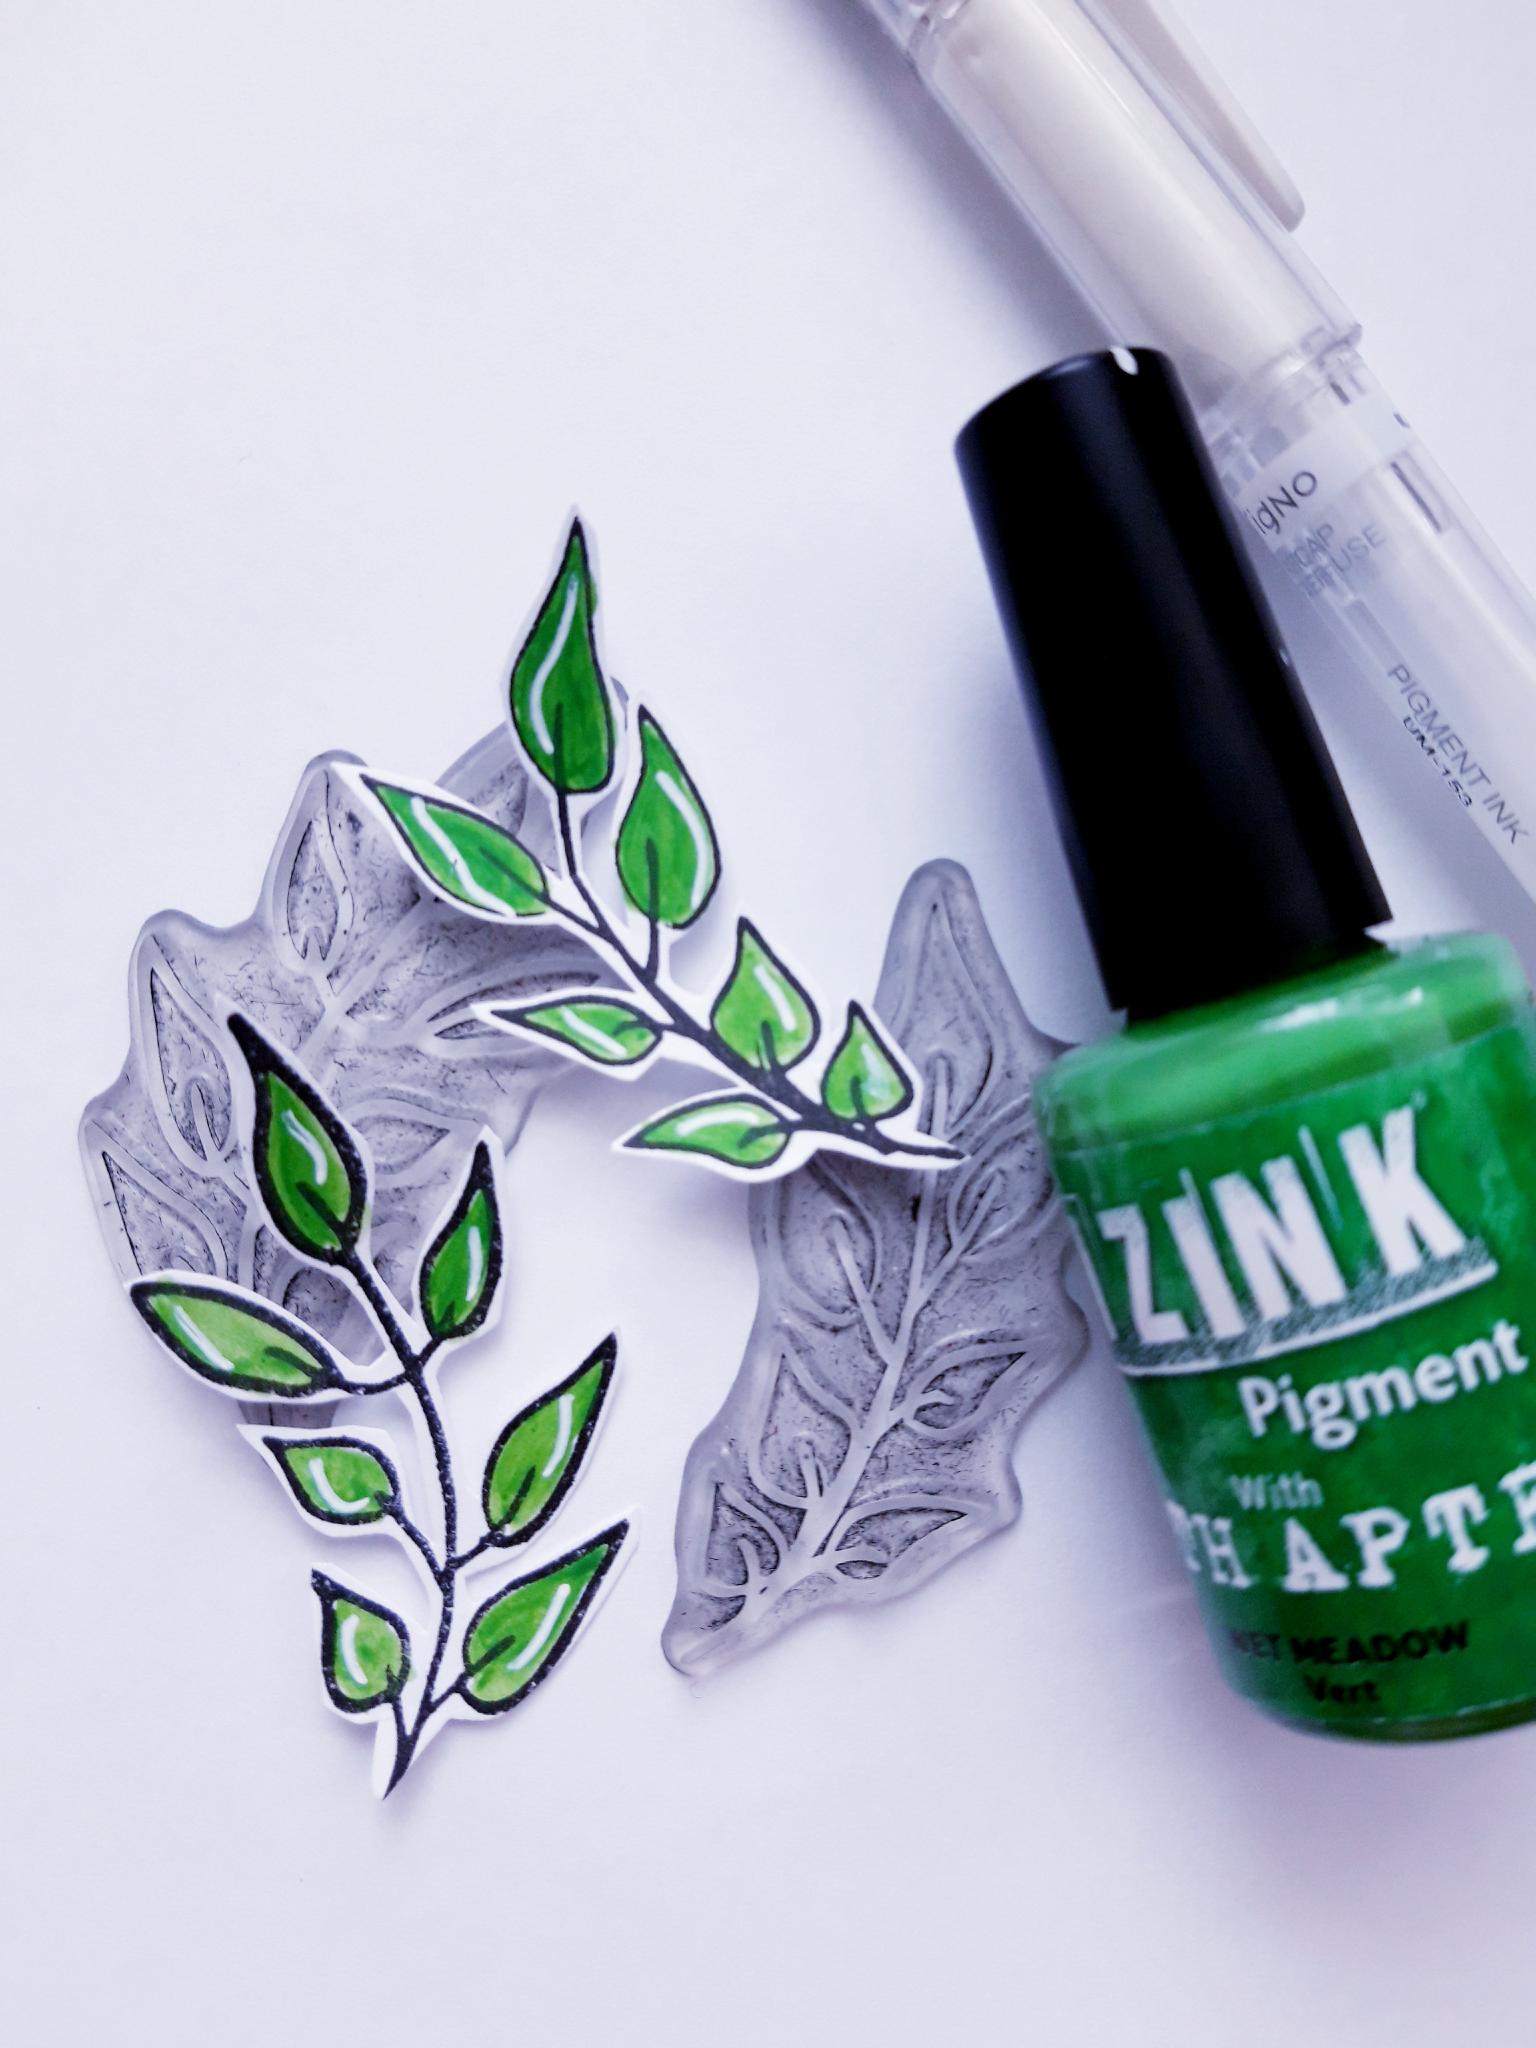
Ink up the little foliage stamps, from the Thirsty Brush UnLtd Blooming Foliage Creative Stamps, with the Onyx Black Versafine. Stamp on to the remaining white card, cut out and set rest of card to one side. Add a little of the Izink Wet Meadow Pigment on to your mat. Add a little water and paint your foliage. Once the Pigment is dry, add highlights with the white gel pen. Set to one side. |
|
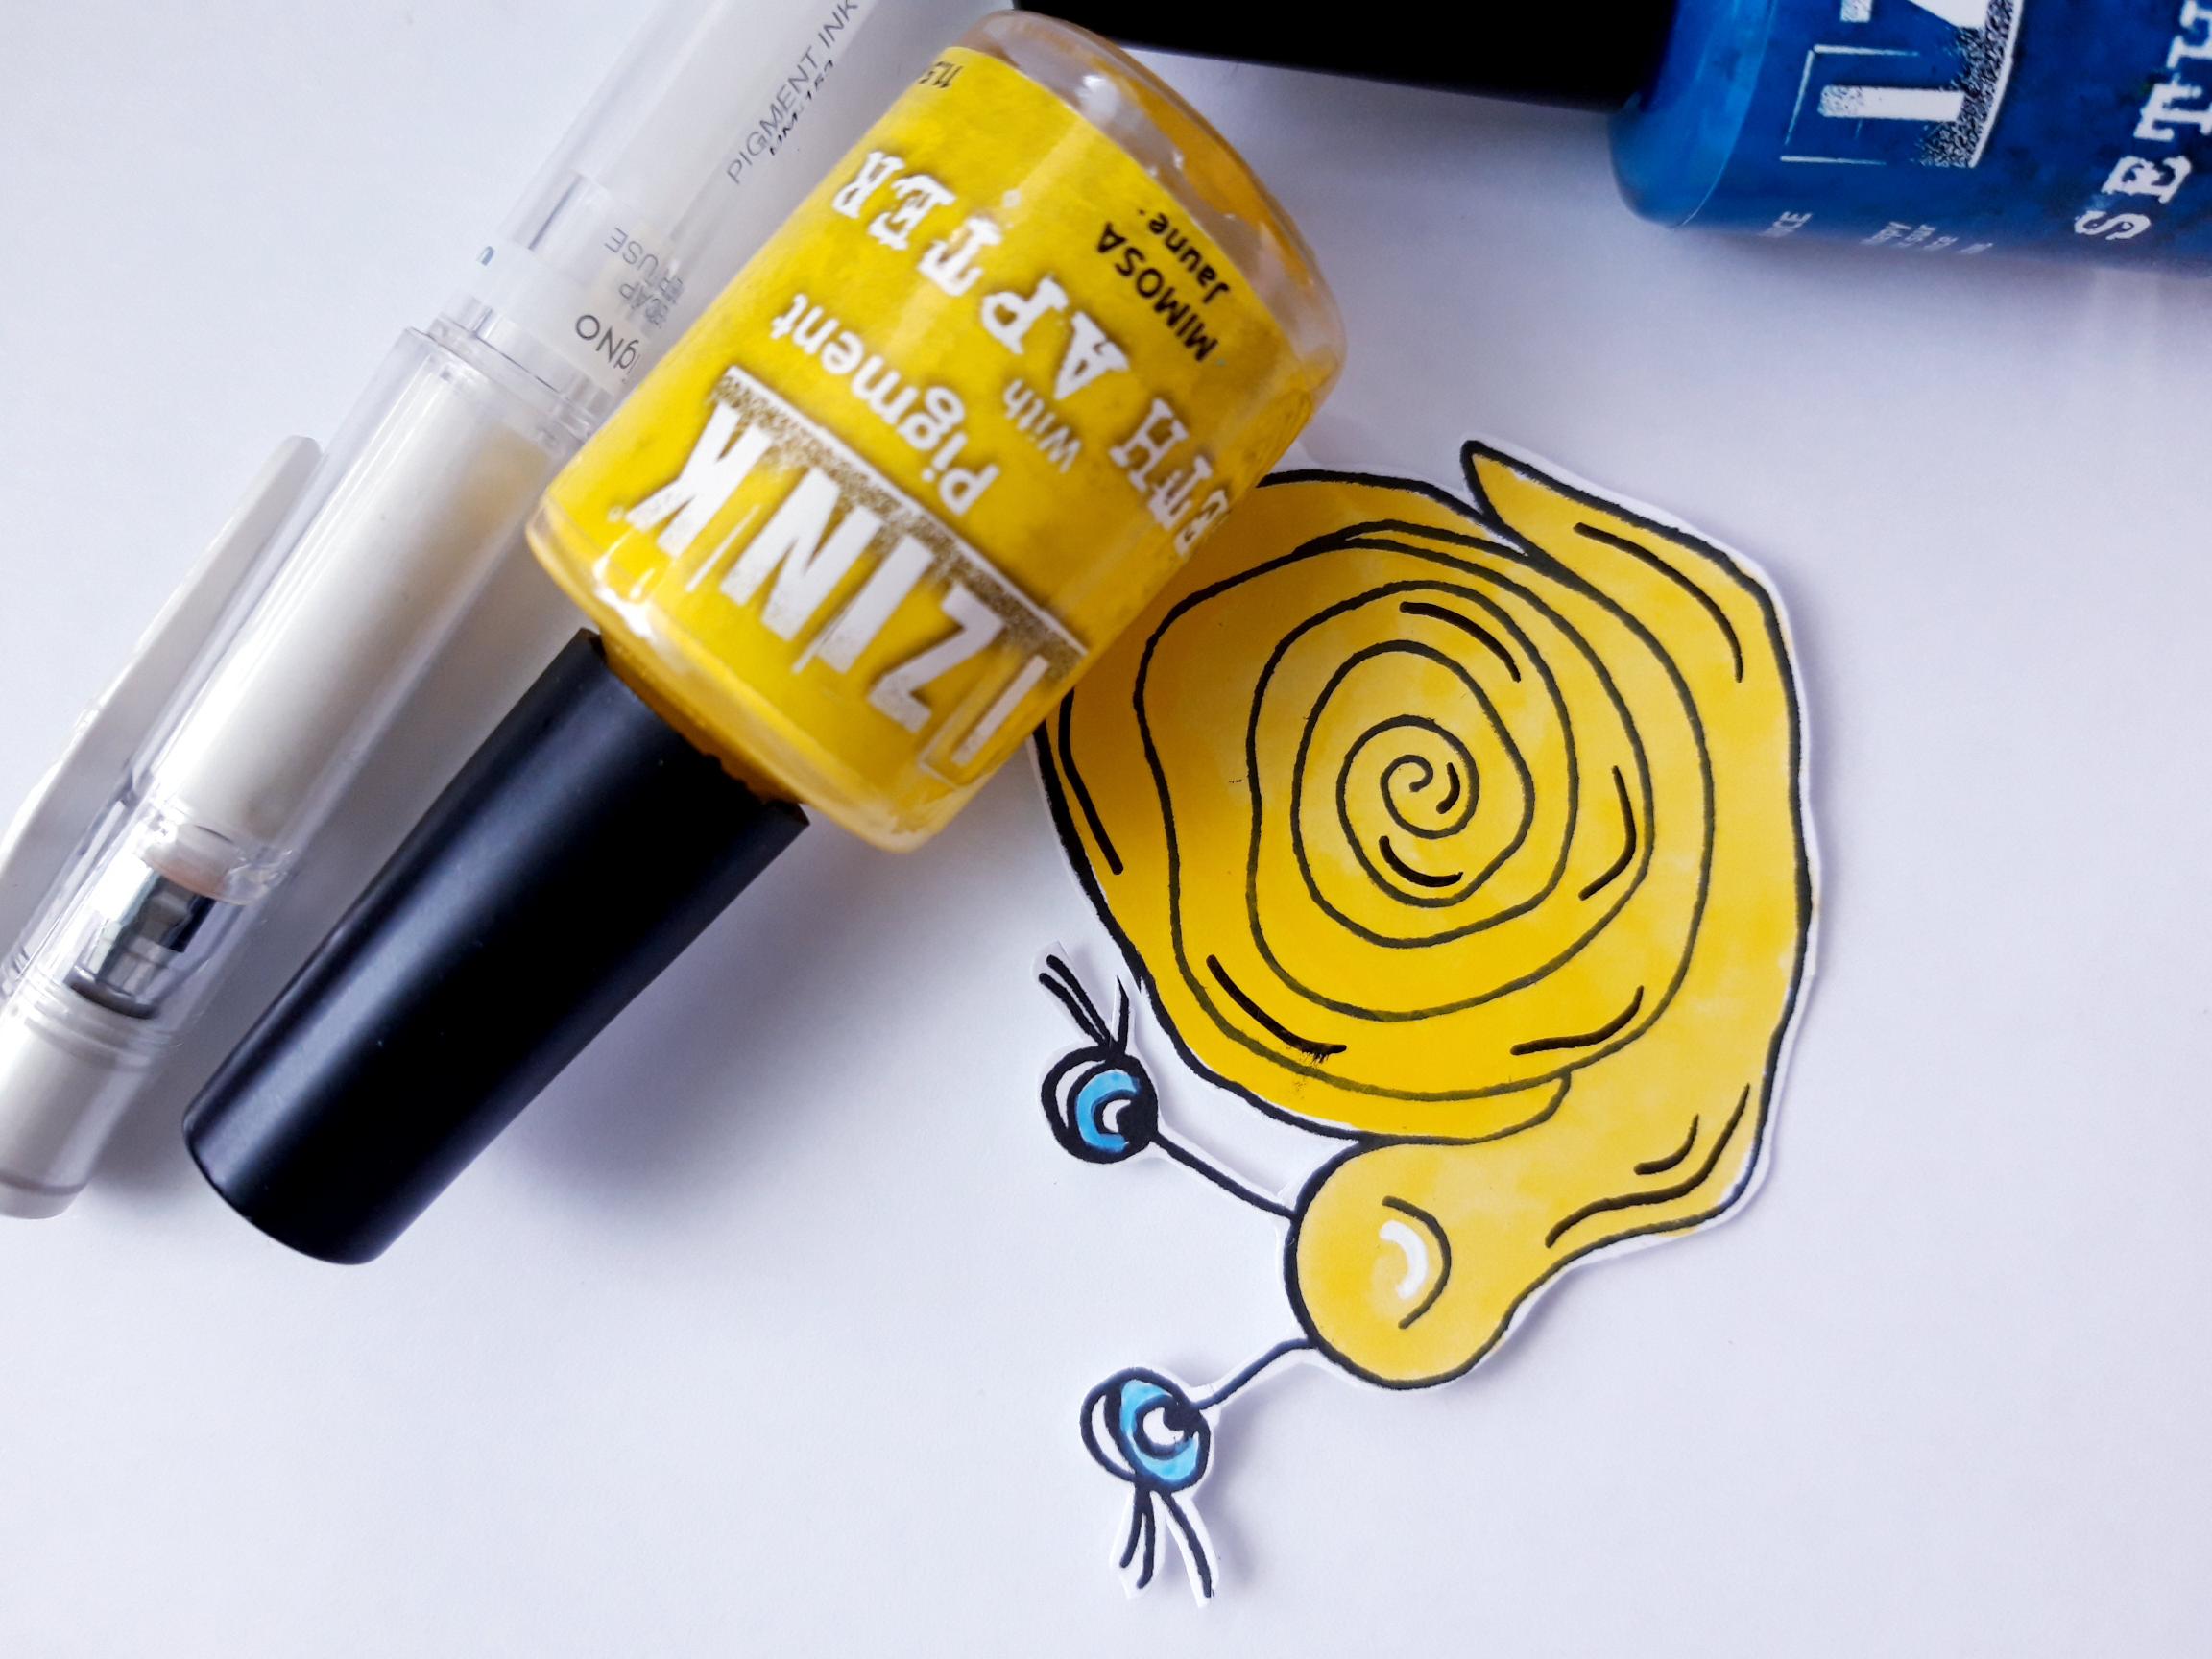
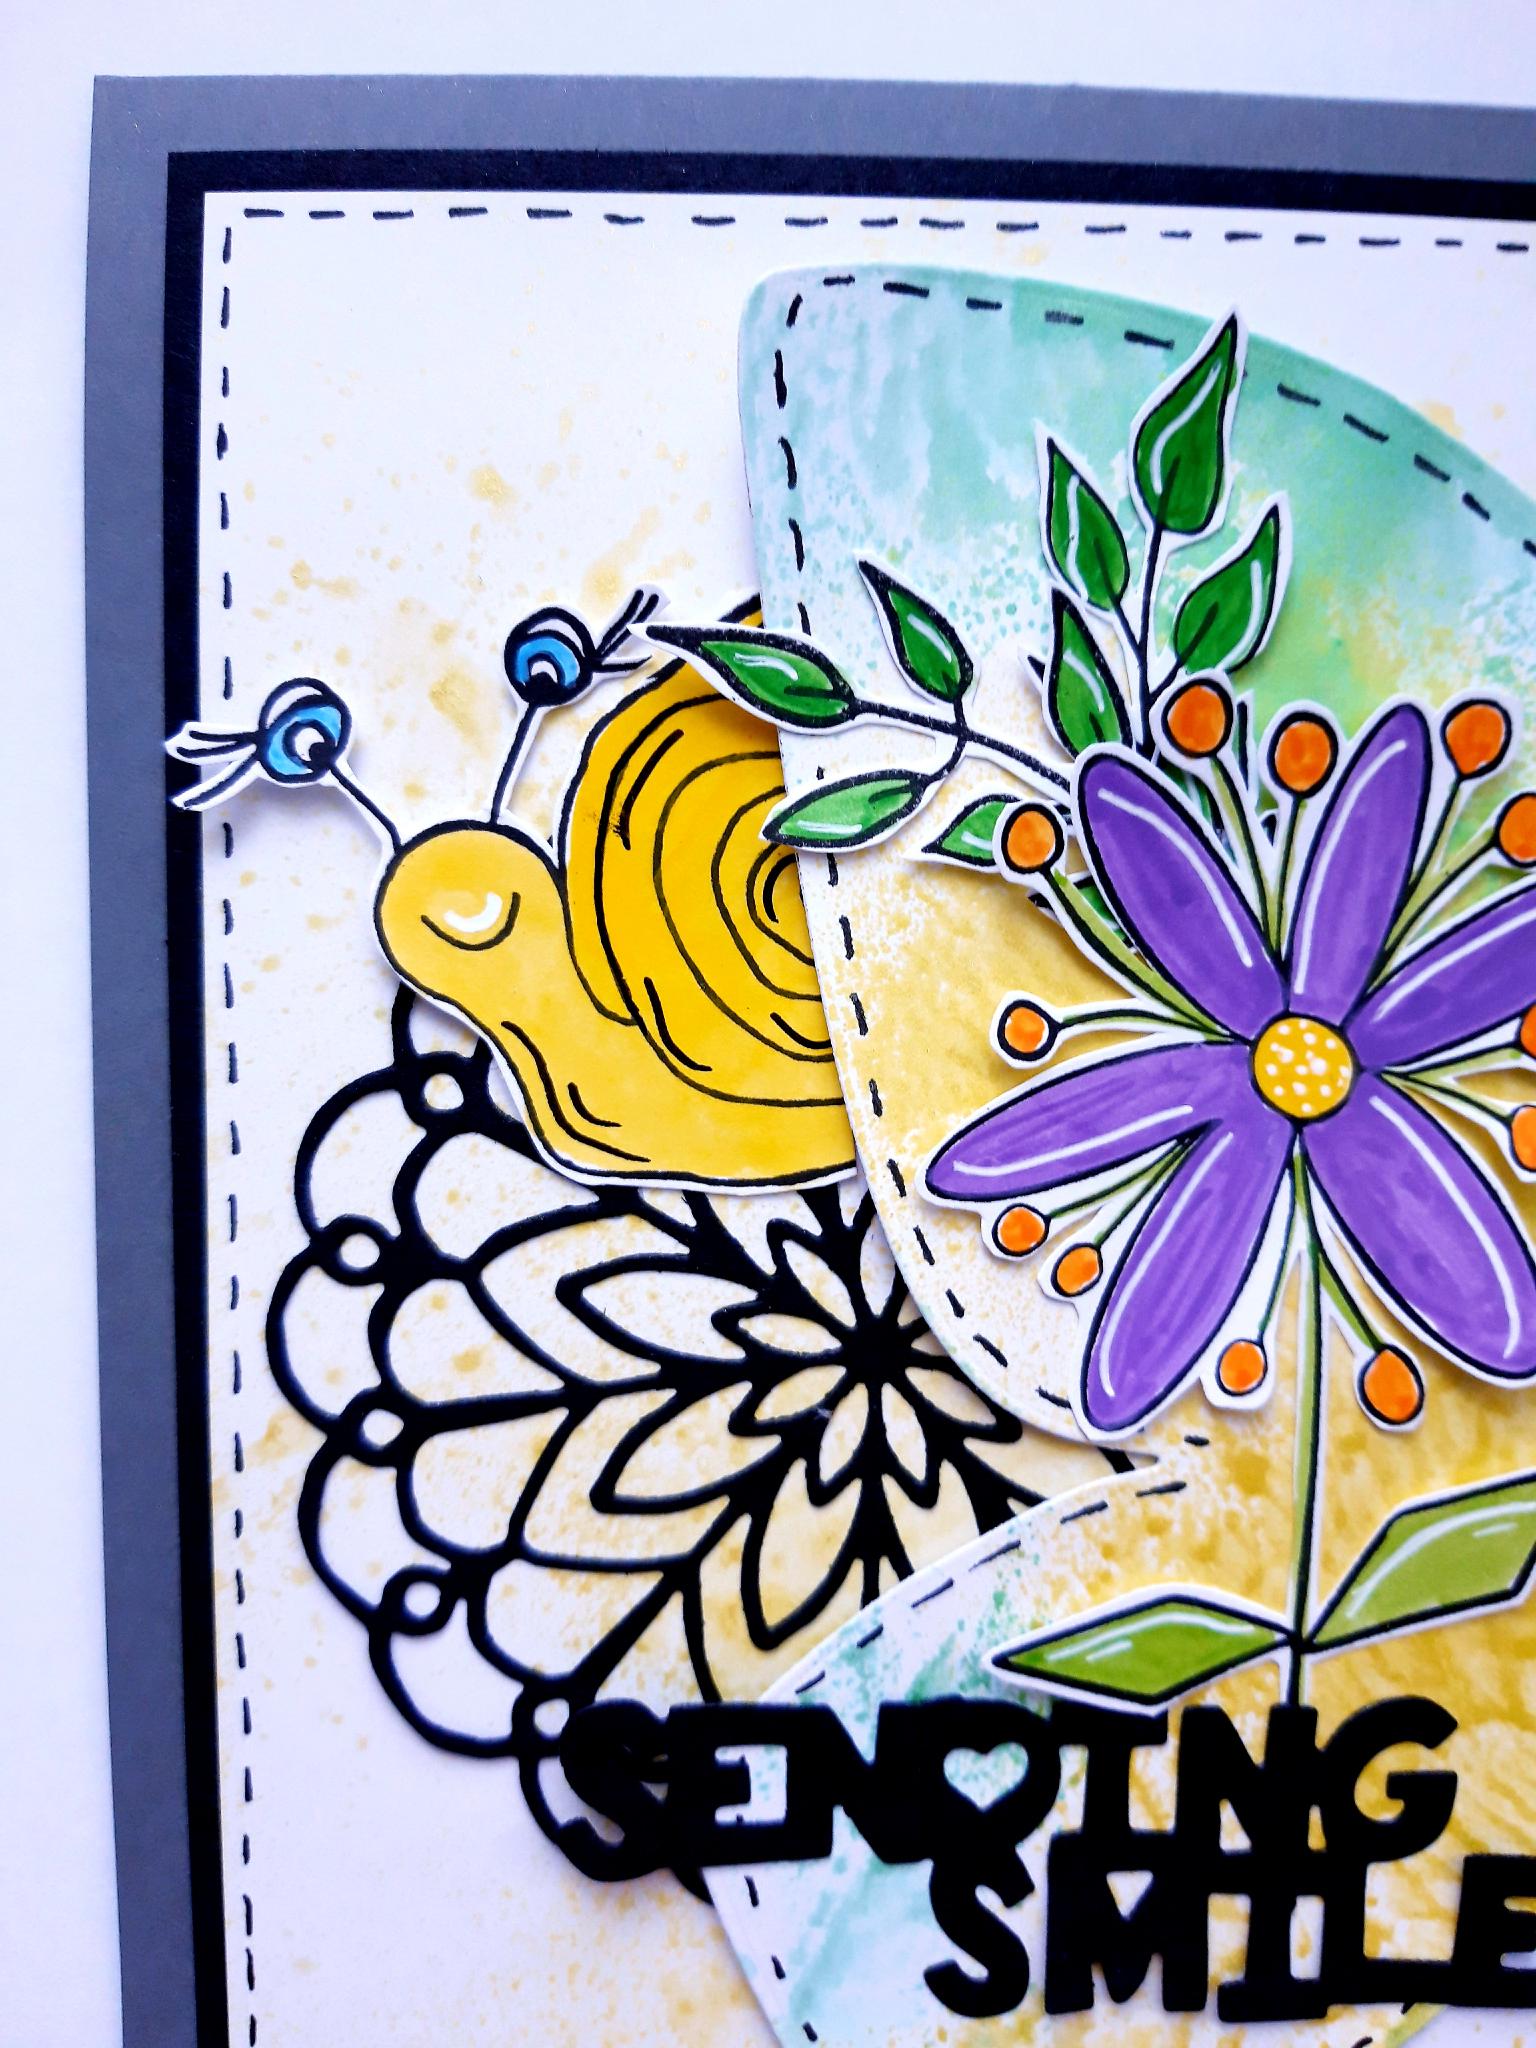
Ink up the snail stamp from the Thirsty Brush UnLtd Petal Power Creative Stamps, with the Onyx Black Versafine. Stamp on to the leftover white cardstock, and cut out, setting the remaining card to one side. Pop a little of the Izink Mimosa and Ultramarine Pigments on to your glass or craft mat. Add a little water to the Mimosa, and paint your snail, using the Ultramarine for the eyes. Once the Pigments are completely dry use the black and white pens to add accents and highlights. Set to one side.
|
|
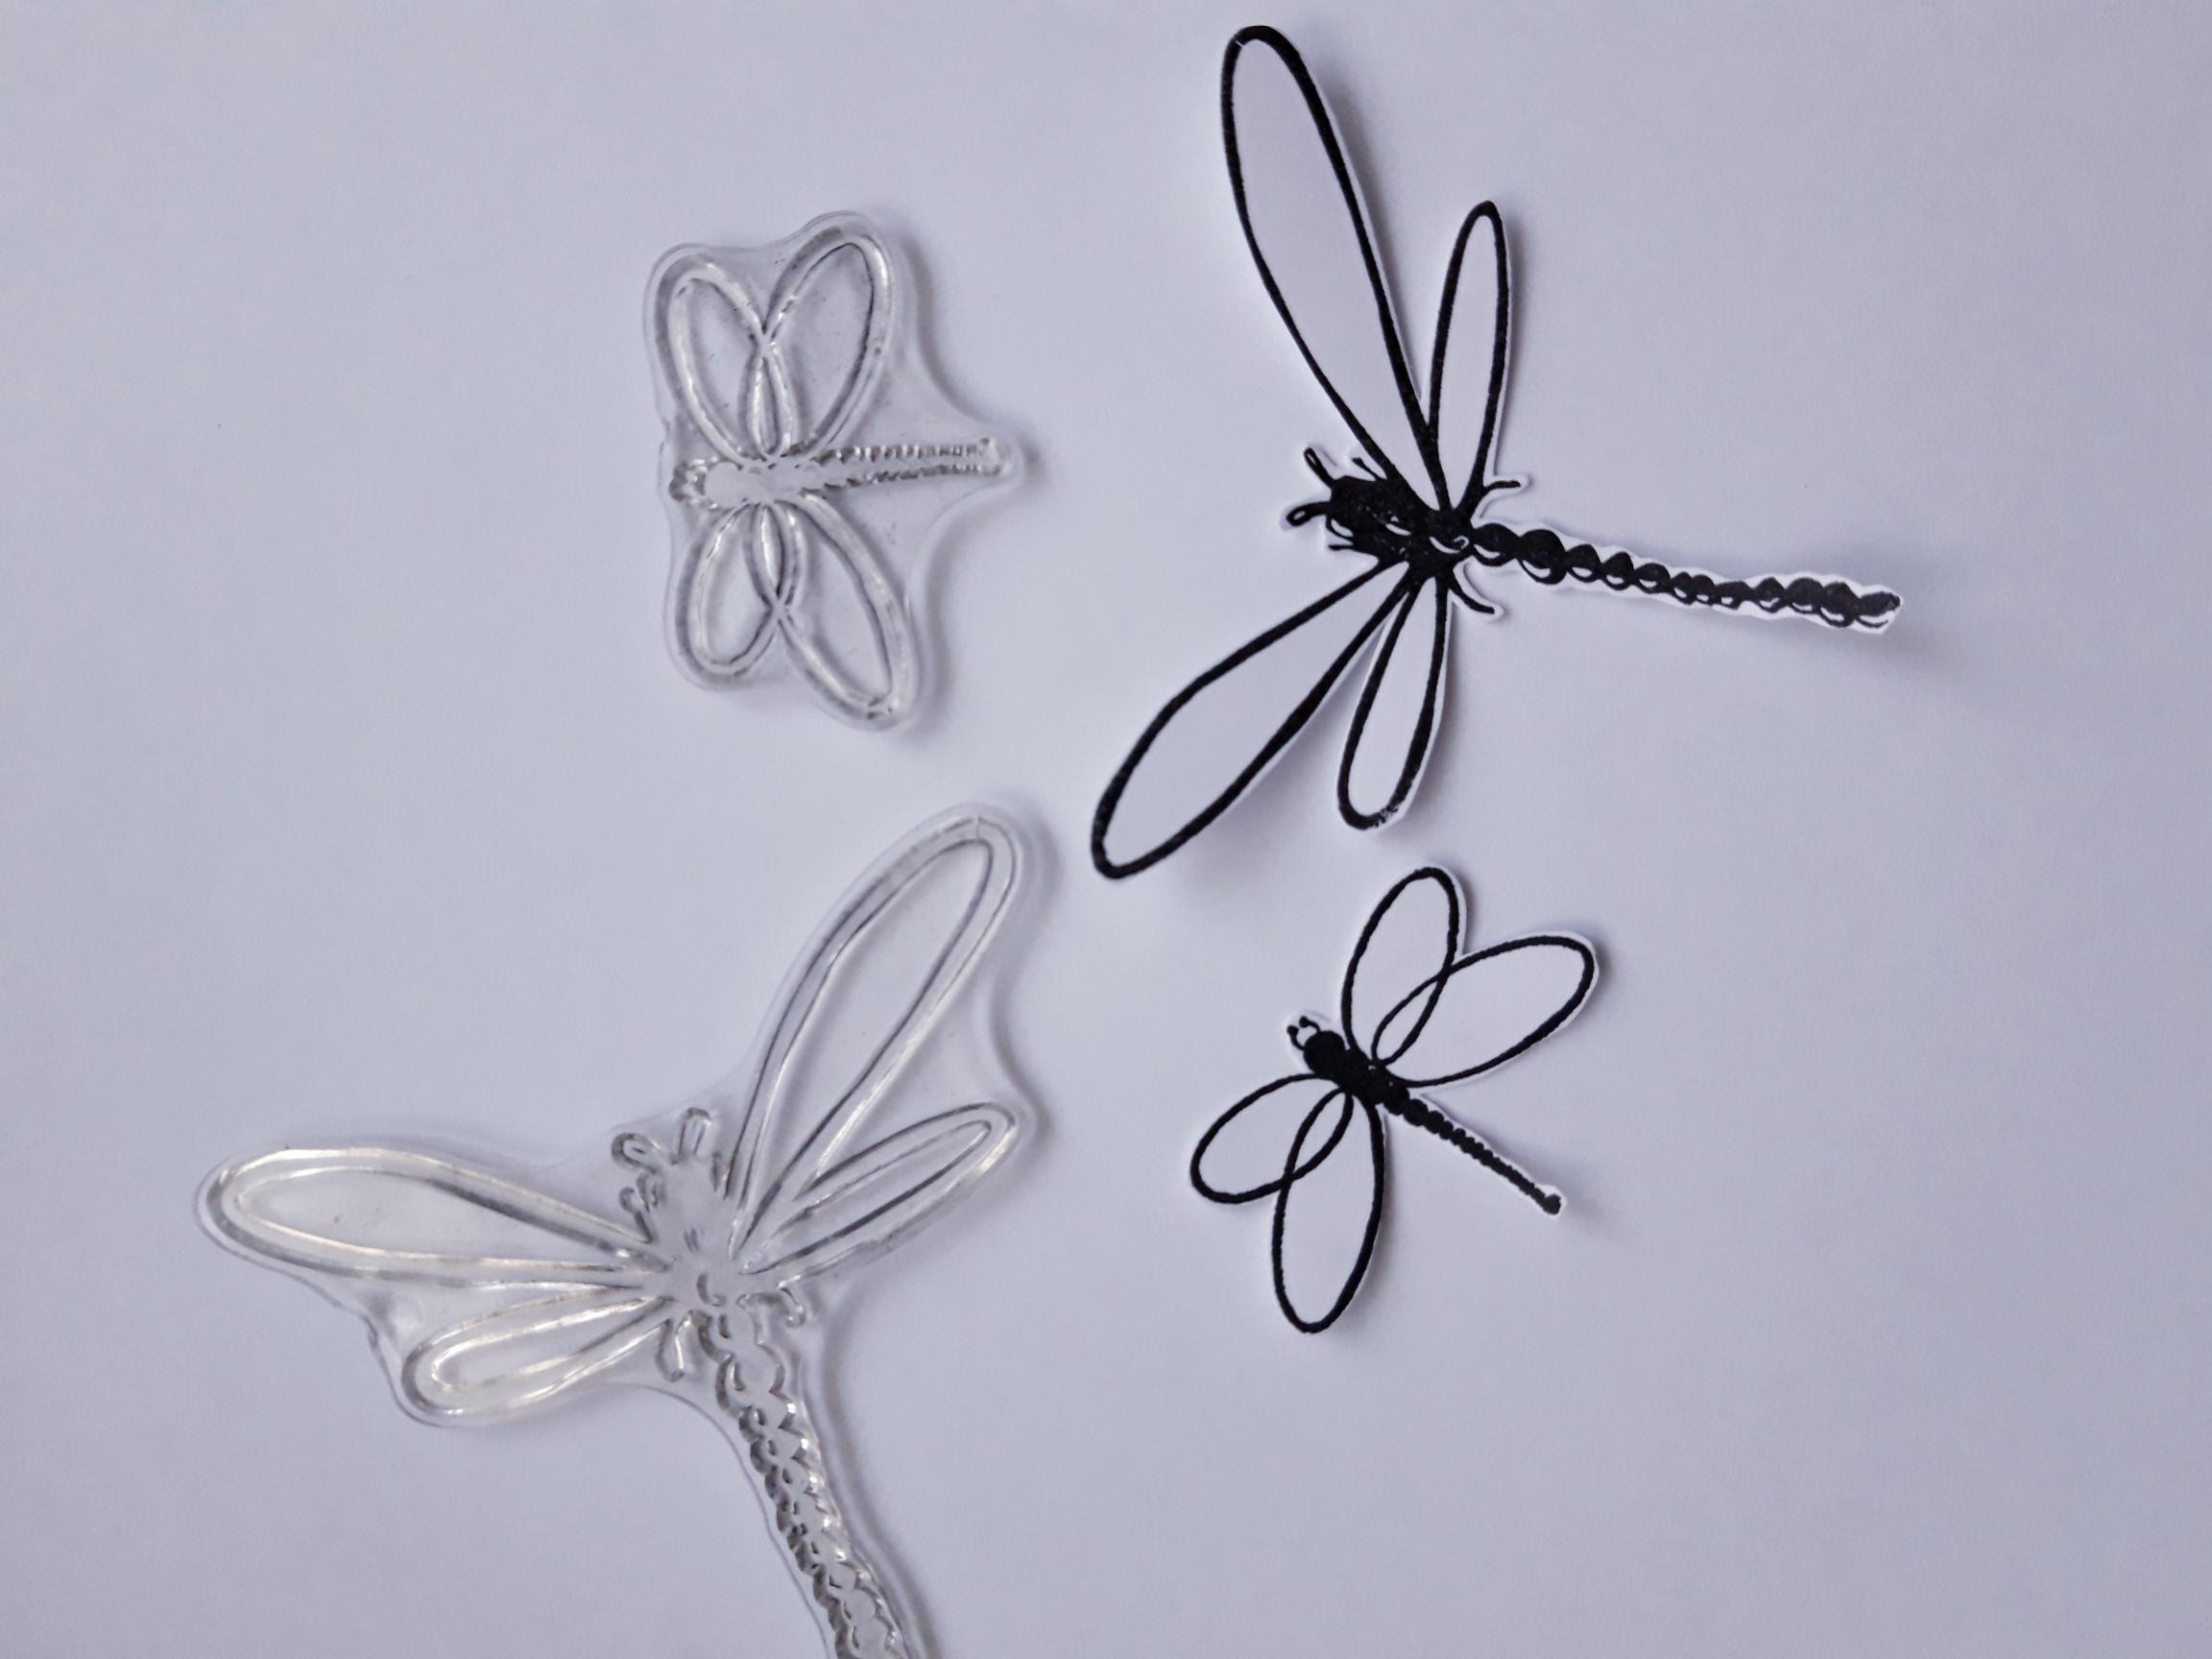
Ink up a couple of the dragonfly stamps, from the Thirsty Brush UnLtd Winged Dreams Creative Stamps, with the Onyx Black Versafine. Stamp on to the remaining white cardstock, and cut out. |
|
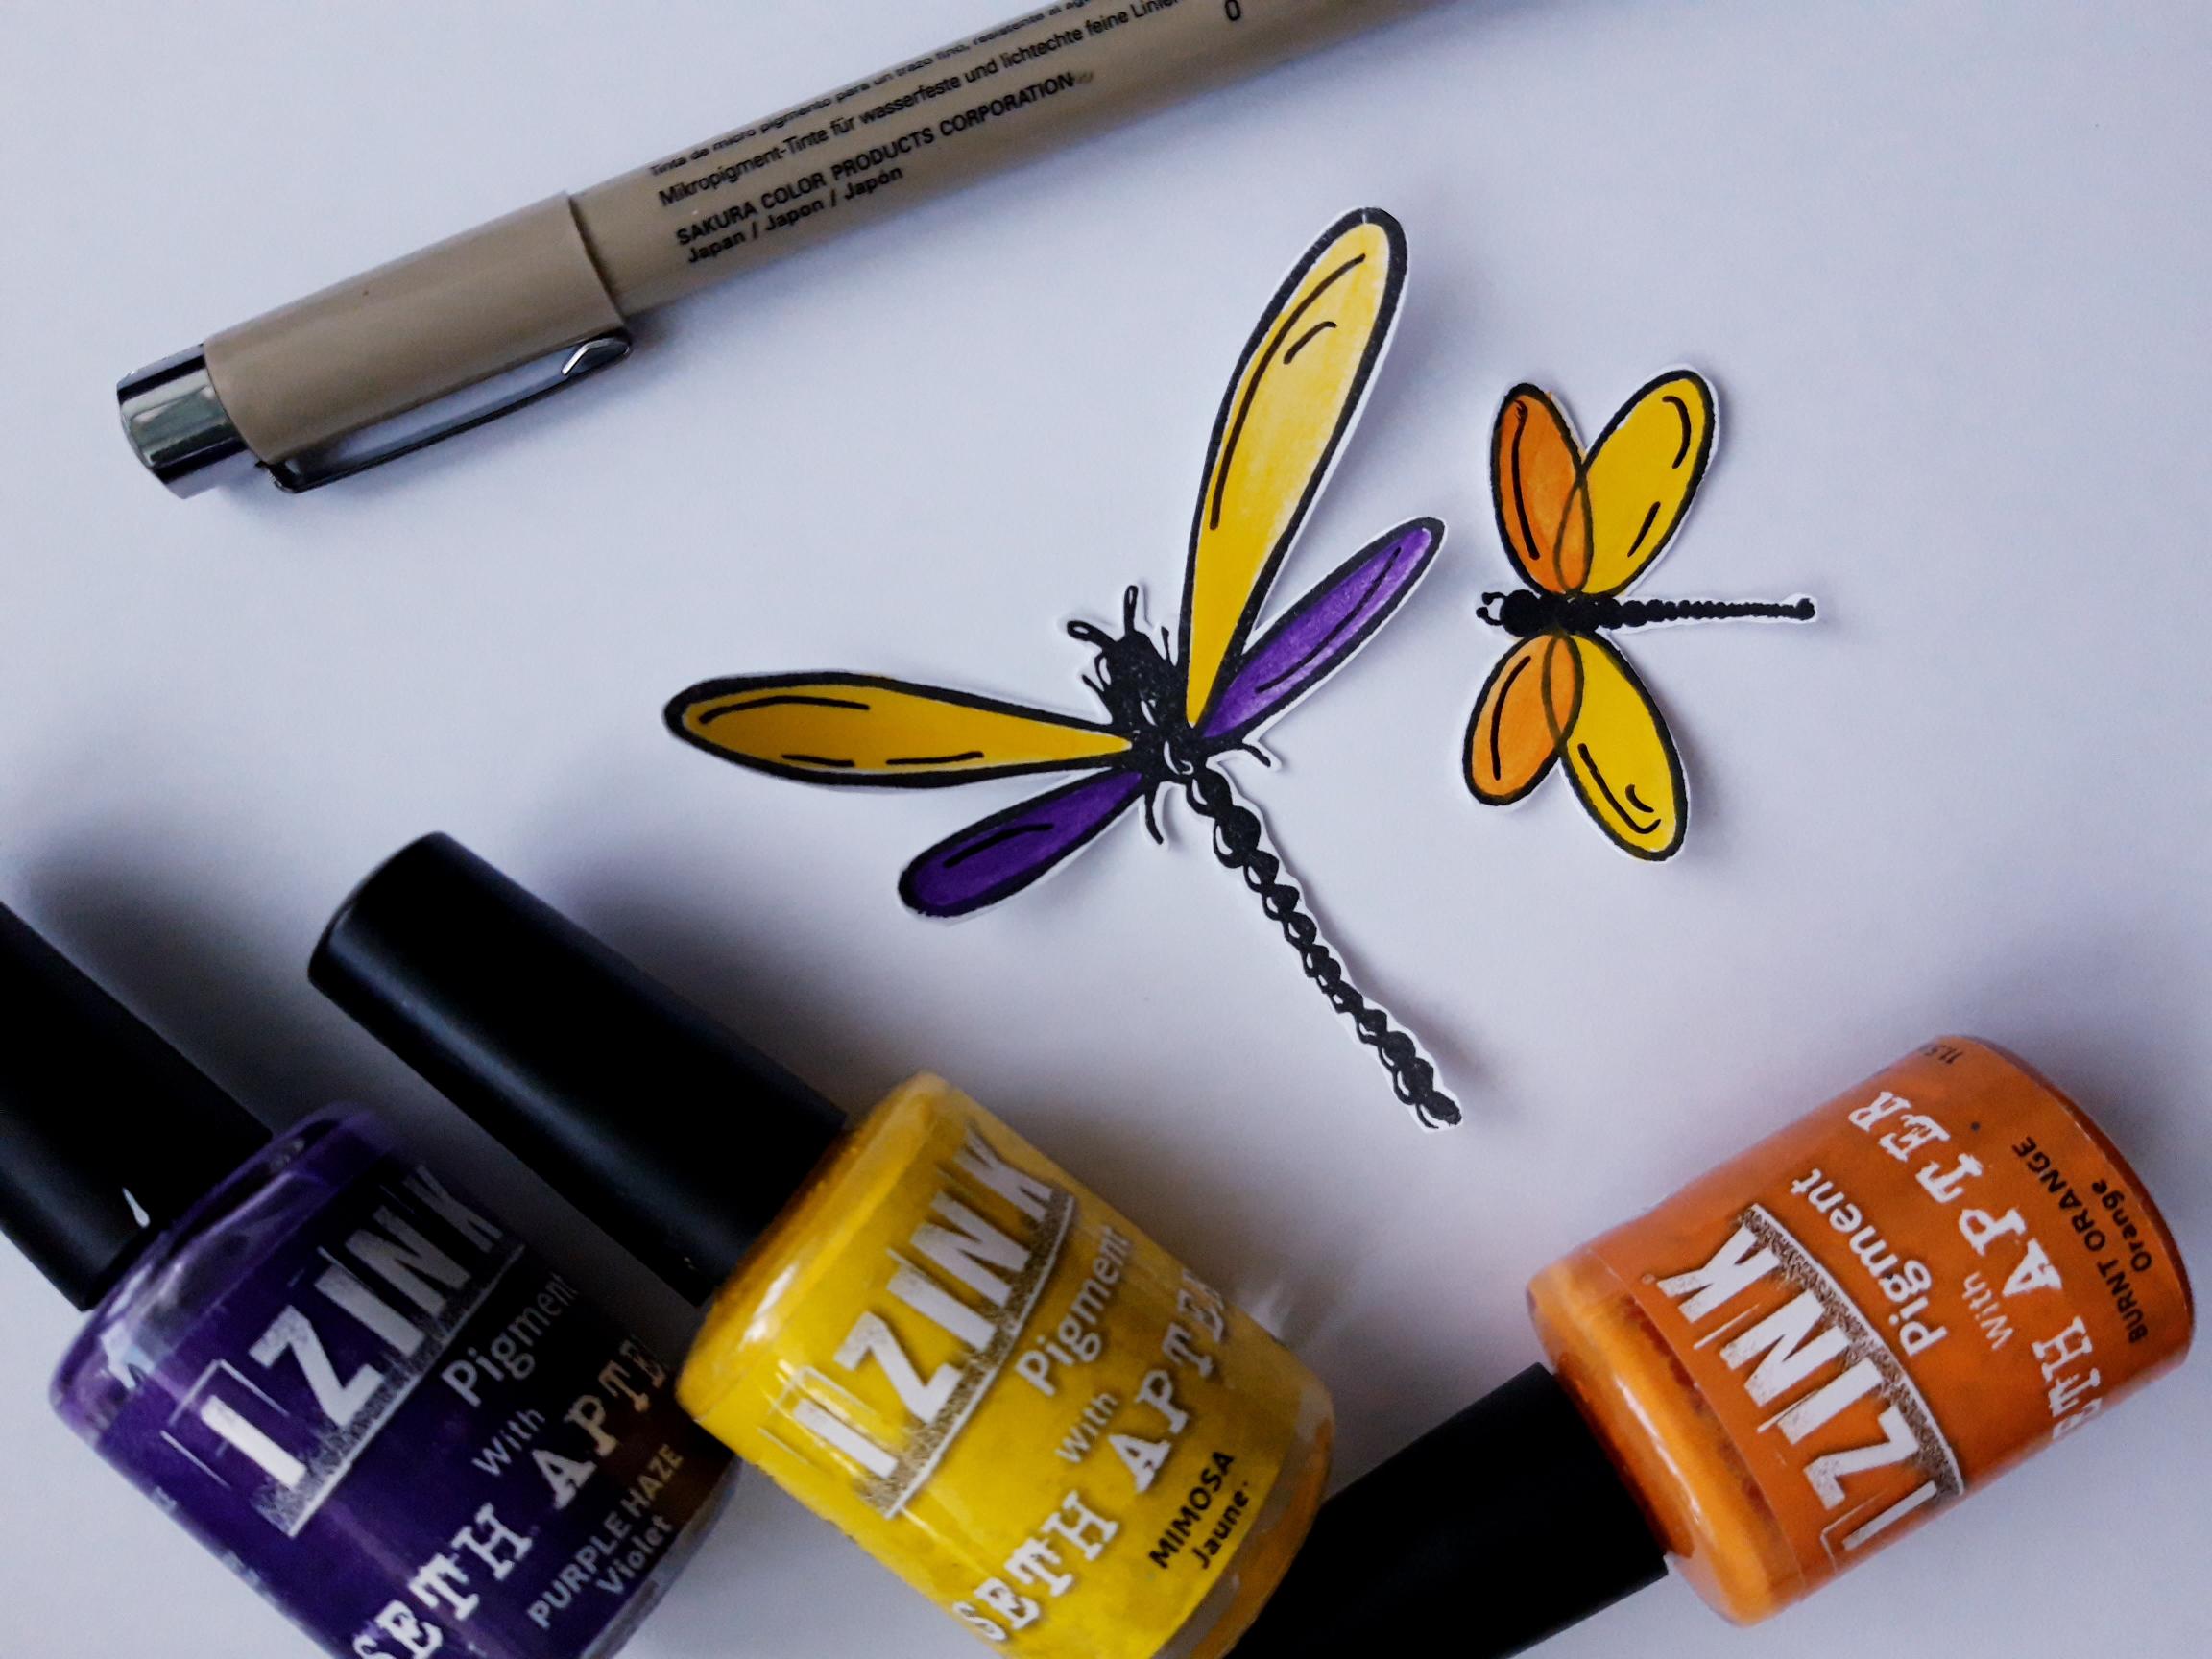
Add some of the Izink Mimosa, Burnt Orange and Purple Haze Pigments, on to your mat. Add a little water and paint your dragonflies. Once the pigments are dry, add accents with your black pen. Set to one side. |
|
Adhere the flower and foliage embellishments, with wet glue and/or foam pads, on to the inked butterfly wings, on your card blank. |
|
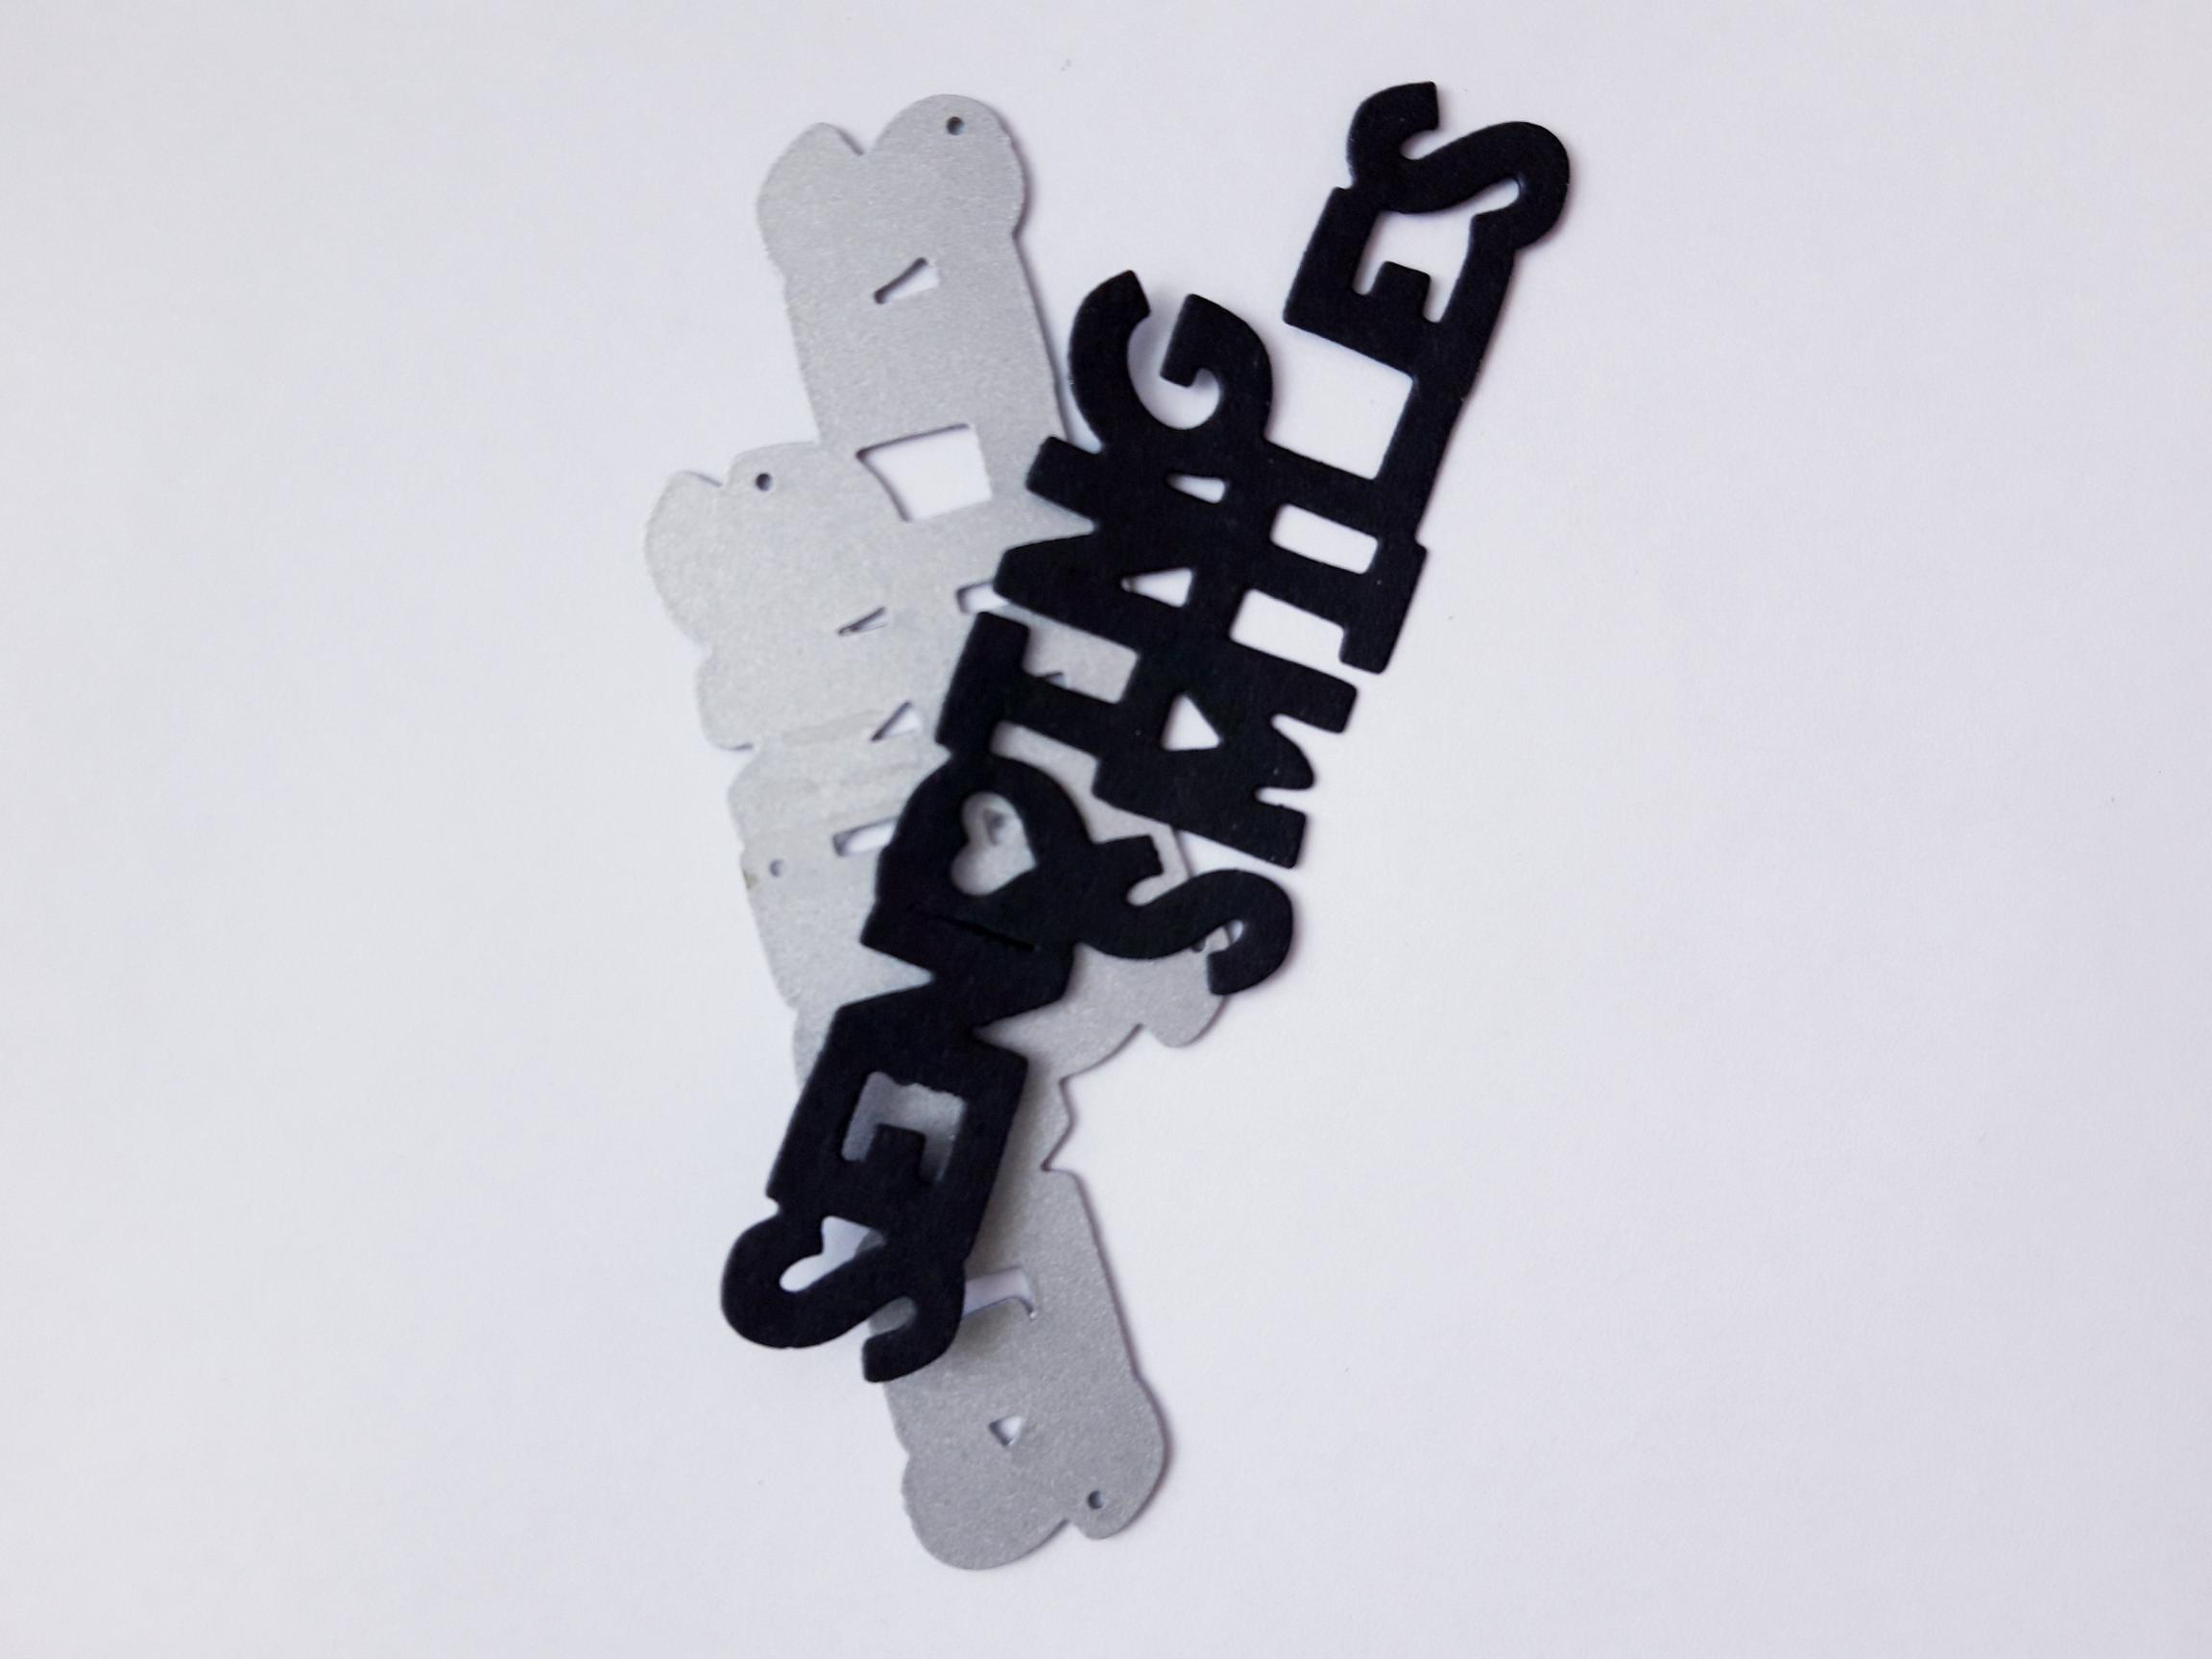
Use the sentiment die, from the Thirsty Brush UnLtd Build A Bloom Creative Dies, to cut out TWO sentiments, from the black cardstock you set to one side. Glue one die cut on top of the other, to create a more substantial die cut sentiment. |
|
Glue the sentiment in place, across your artwork, where desired. |
|
Glue your painted snail on to your artwork, so it sits peeking out from the top left of the butterfly wings. |

|
Glue your dragonflies in place, as required, around your die cut artwork. |
|
To finish off your card, glue the sequins around, and tucked under your artwork. |