Give your friends $10 off their first order!
Refer a FRIEND


WHAT YOU WILL NEED:
Teal 7 x 7" card blank
Kraft/white cardstock
Vellum
Snow Burst 6 x 6" Embossing Folder
Quattro D Christmas Is Coming Collection
In The Countryside 6 x 6" Painted Mounts
Winter Solstice A5 Stamp Set
SBM Hybrid Ink Pad: Midnight
SBM Premium Dye ink Pad: Sherbet, Limeade
Versafine ink Pad: Smoky Grey
Distress Ink/Oxide ink Pad: Walnut Stain, Fossilized Amber, Lost Shadow, Tattered Rose
Gold Gilding Wax
Blending tool
WOW Heat Tool
Eureka 101 Watercolour Tablet
SBM A3 Magnetic glass mat
Paper Trimmer
Glue
Foam pads
Double-sided tape
Die Cutting machine
[click image to enlarge] 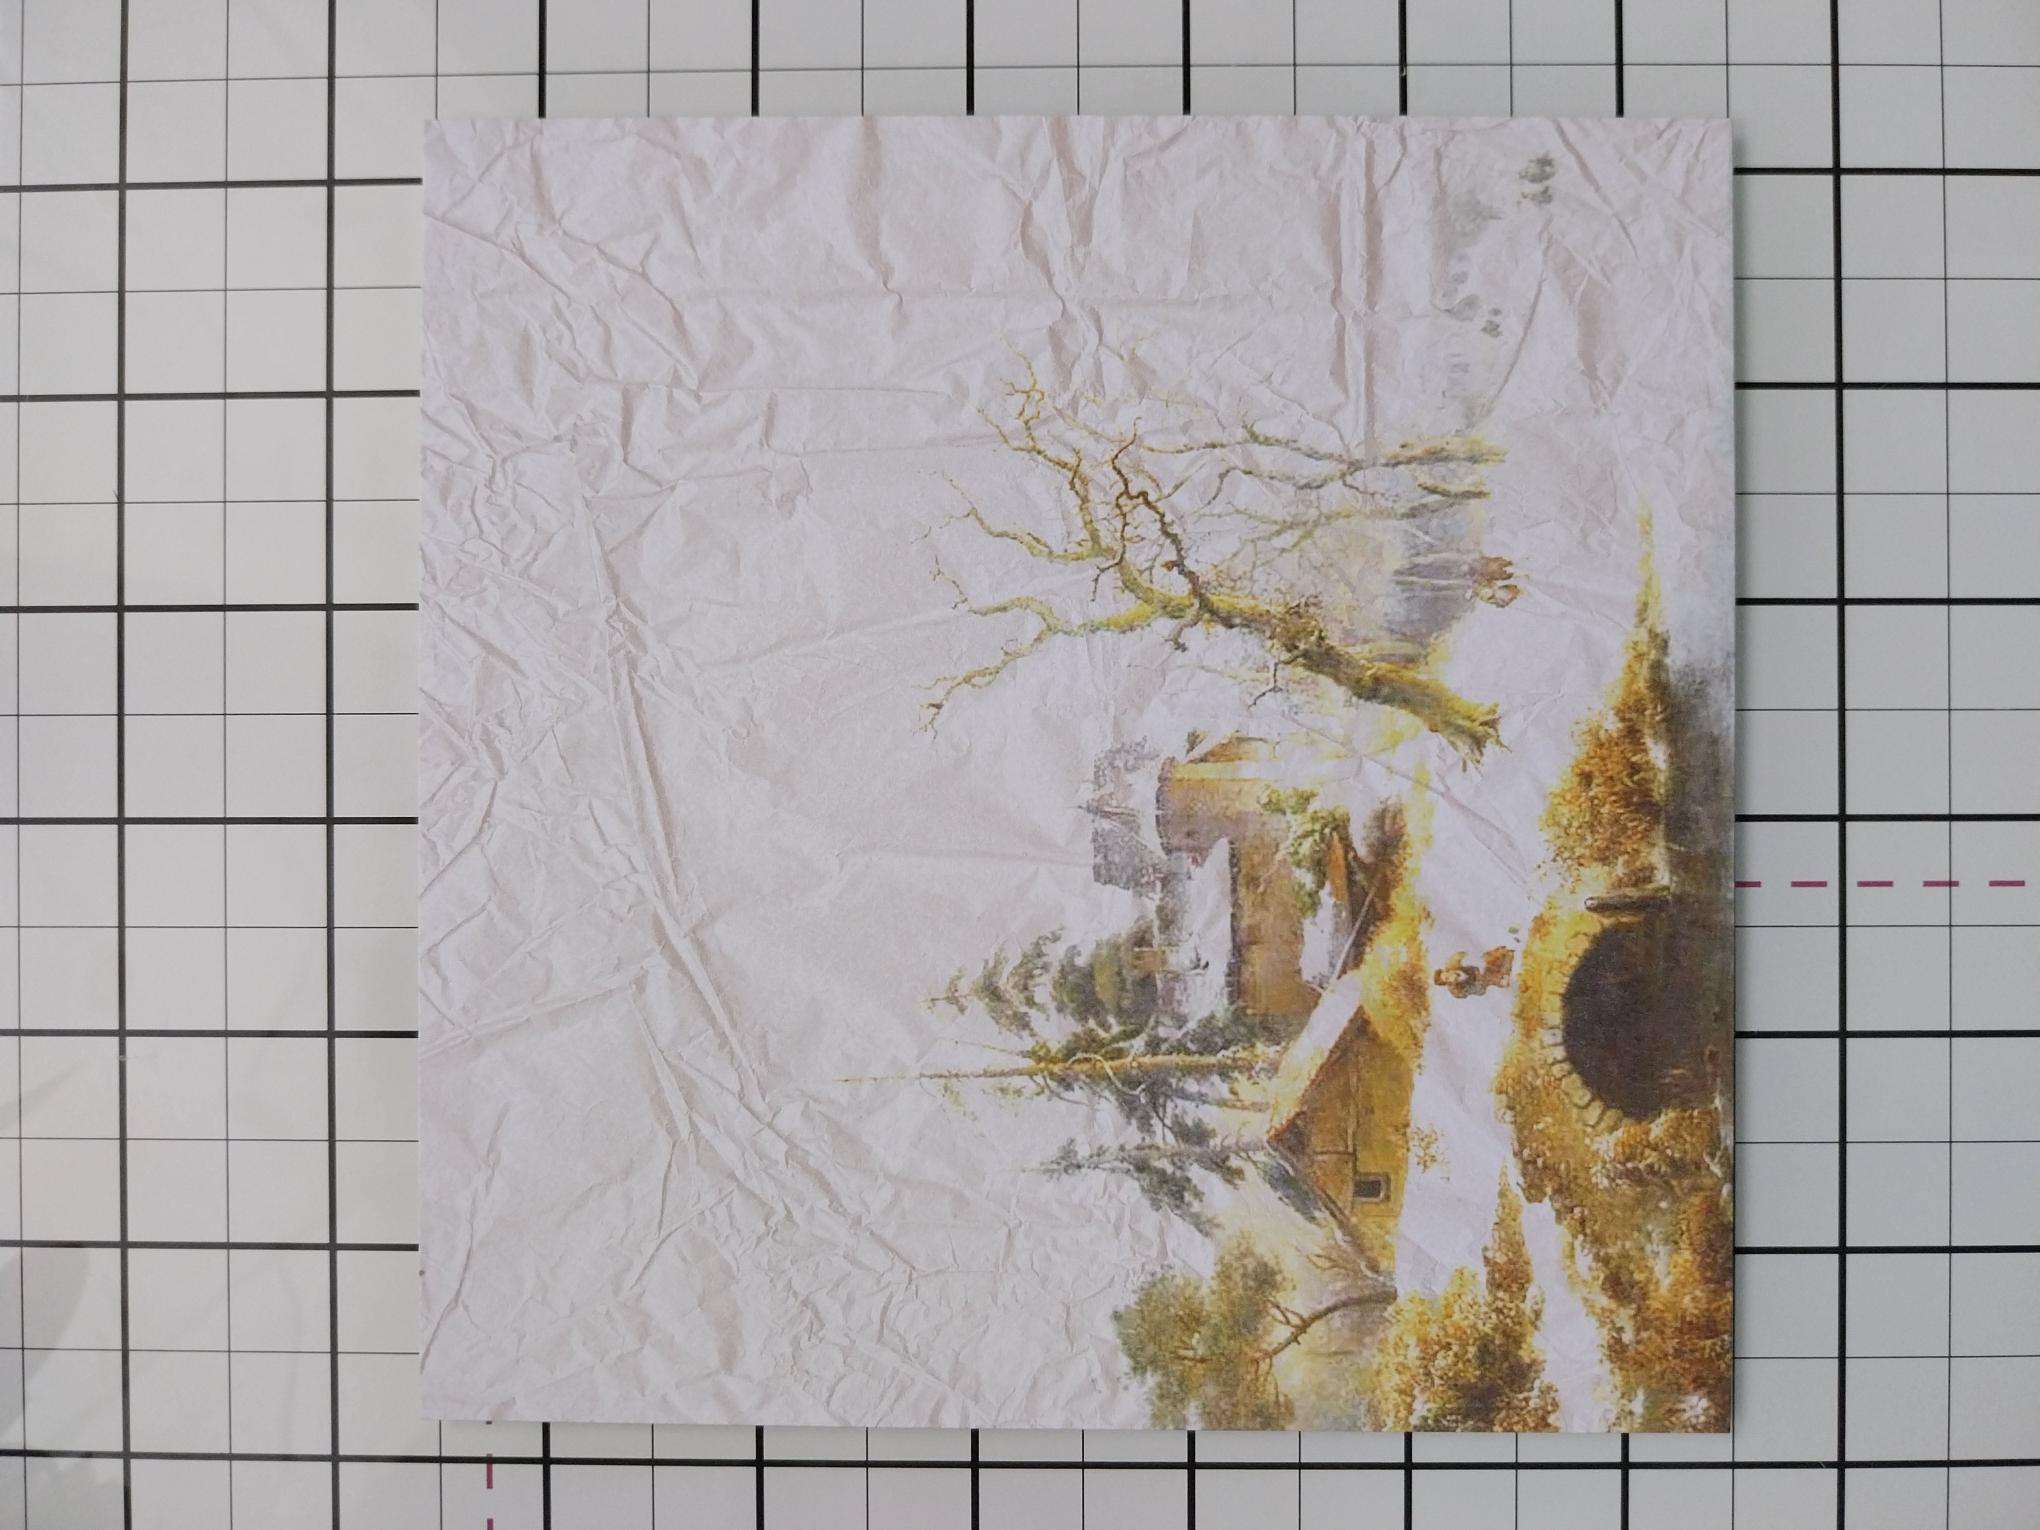
|
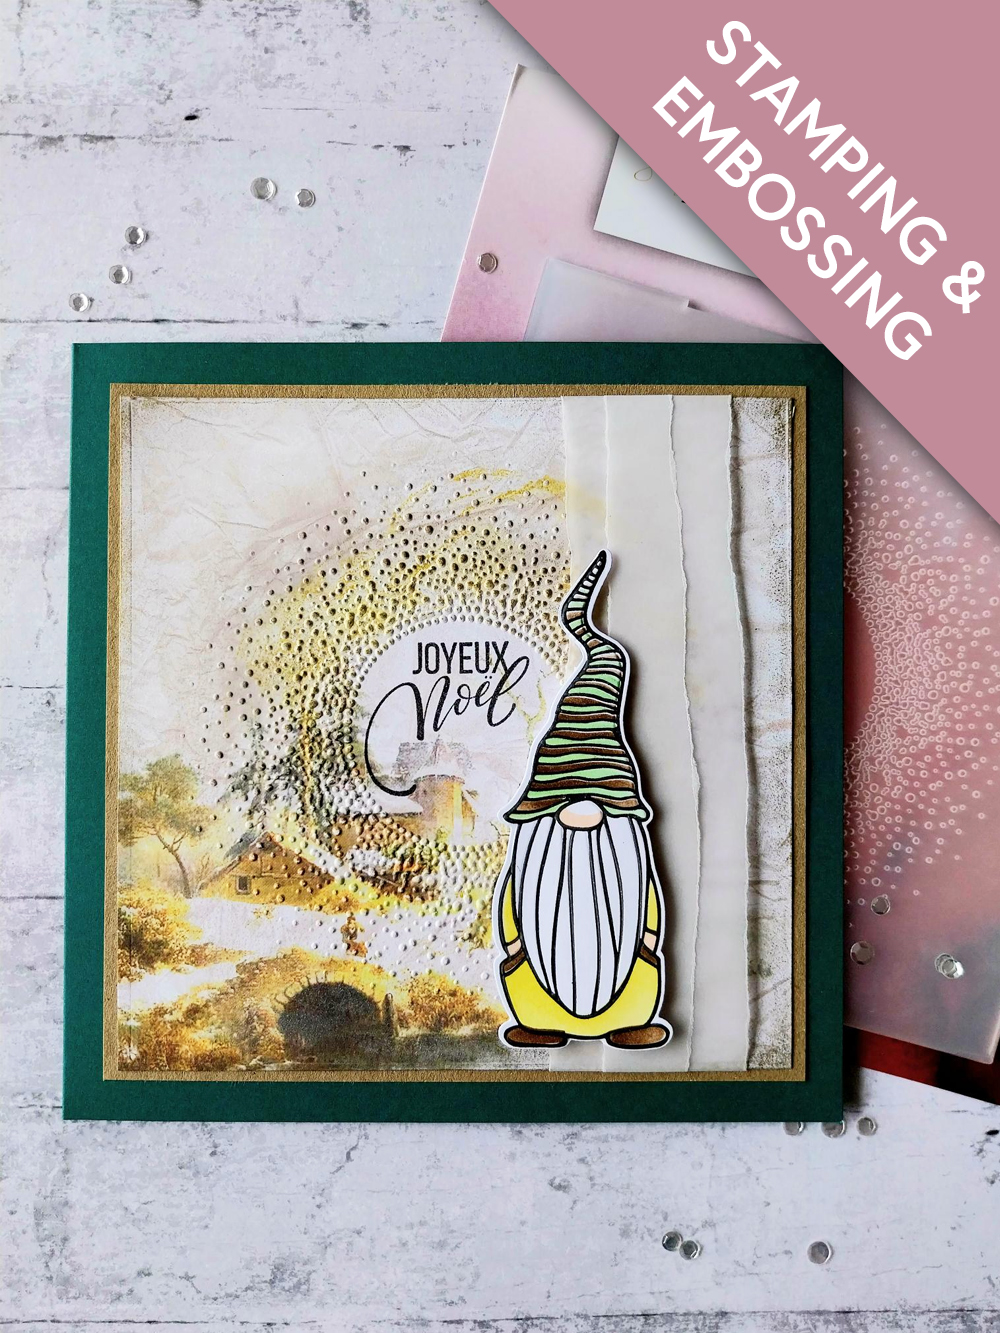
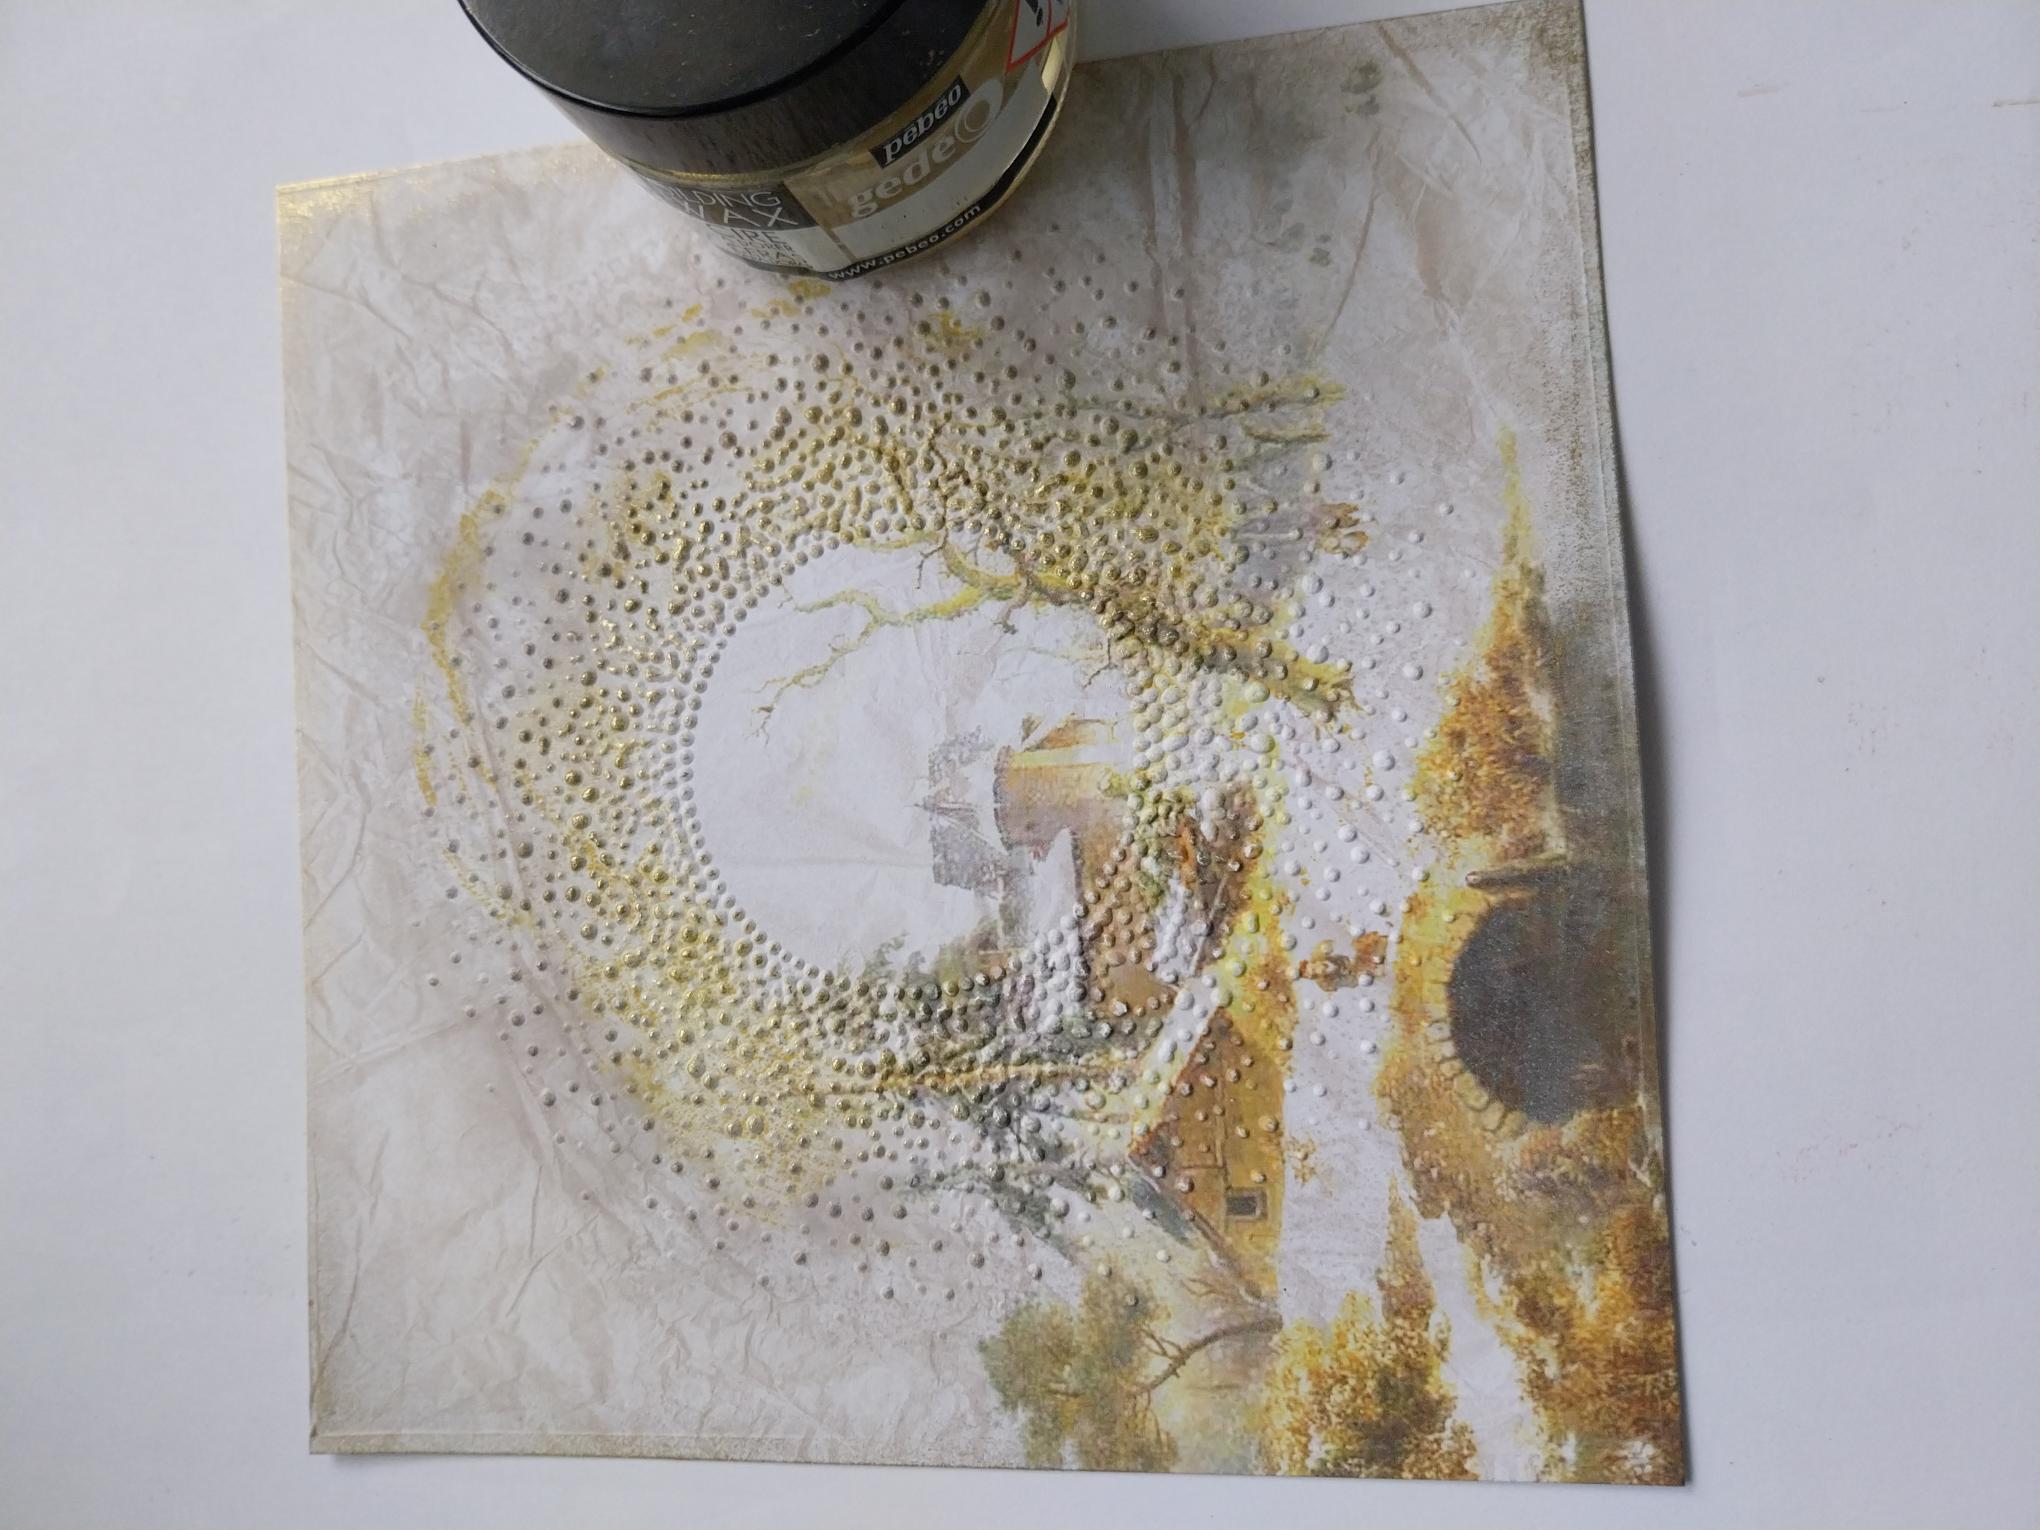
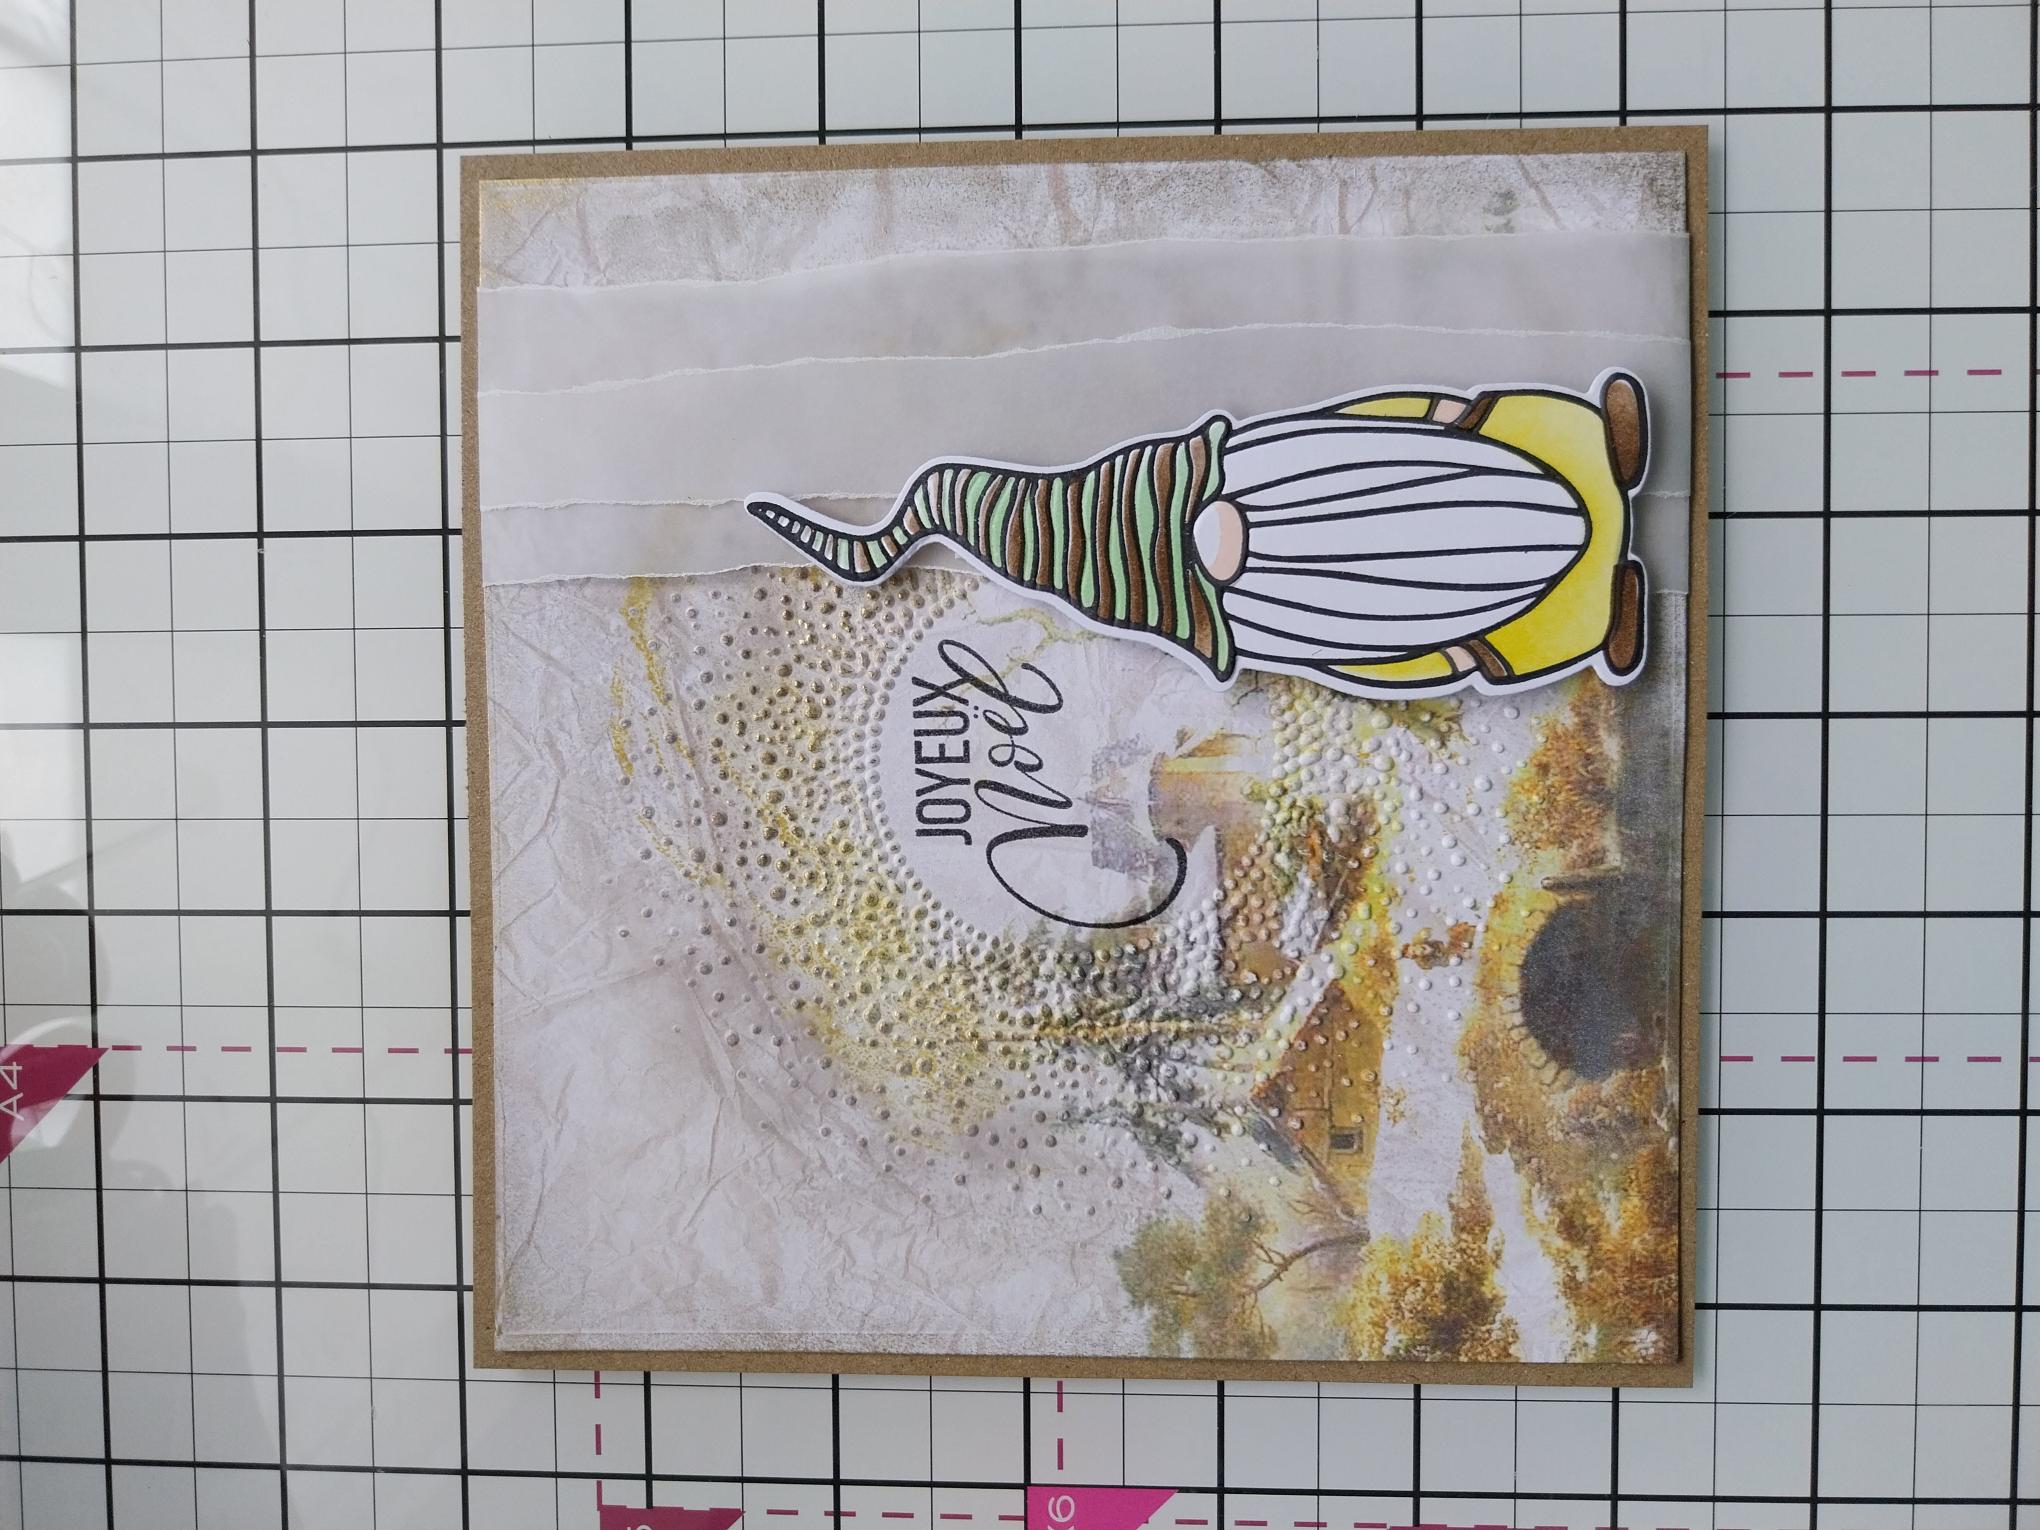
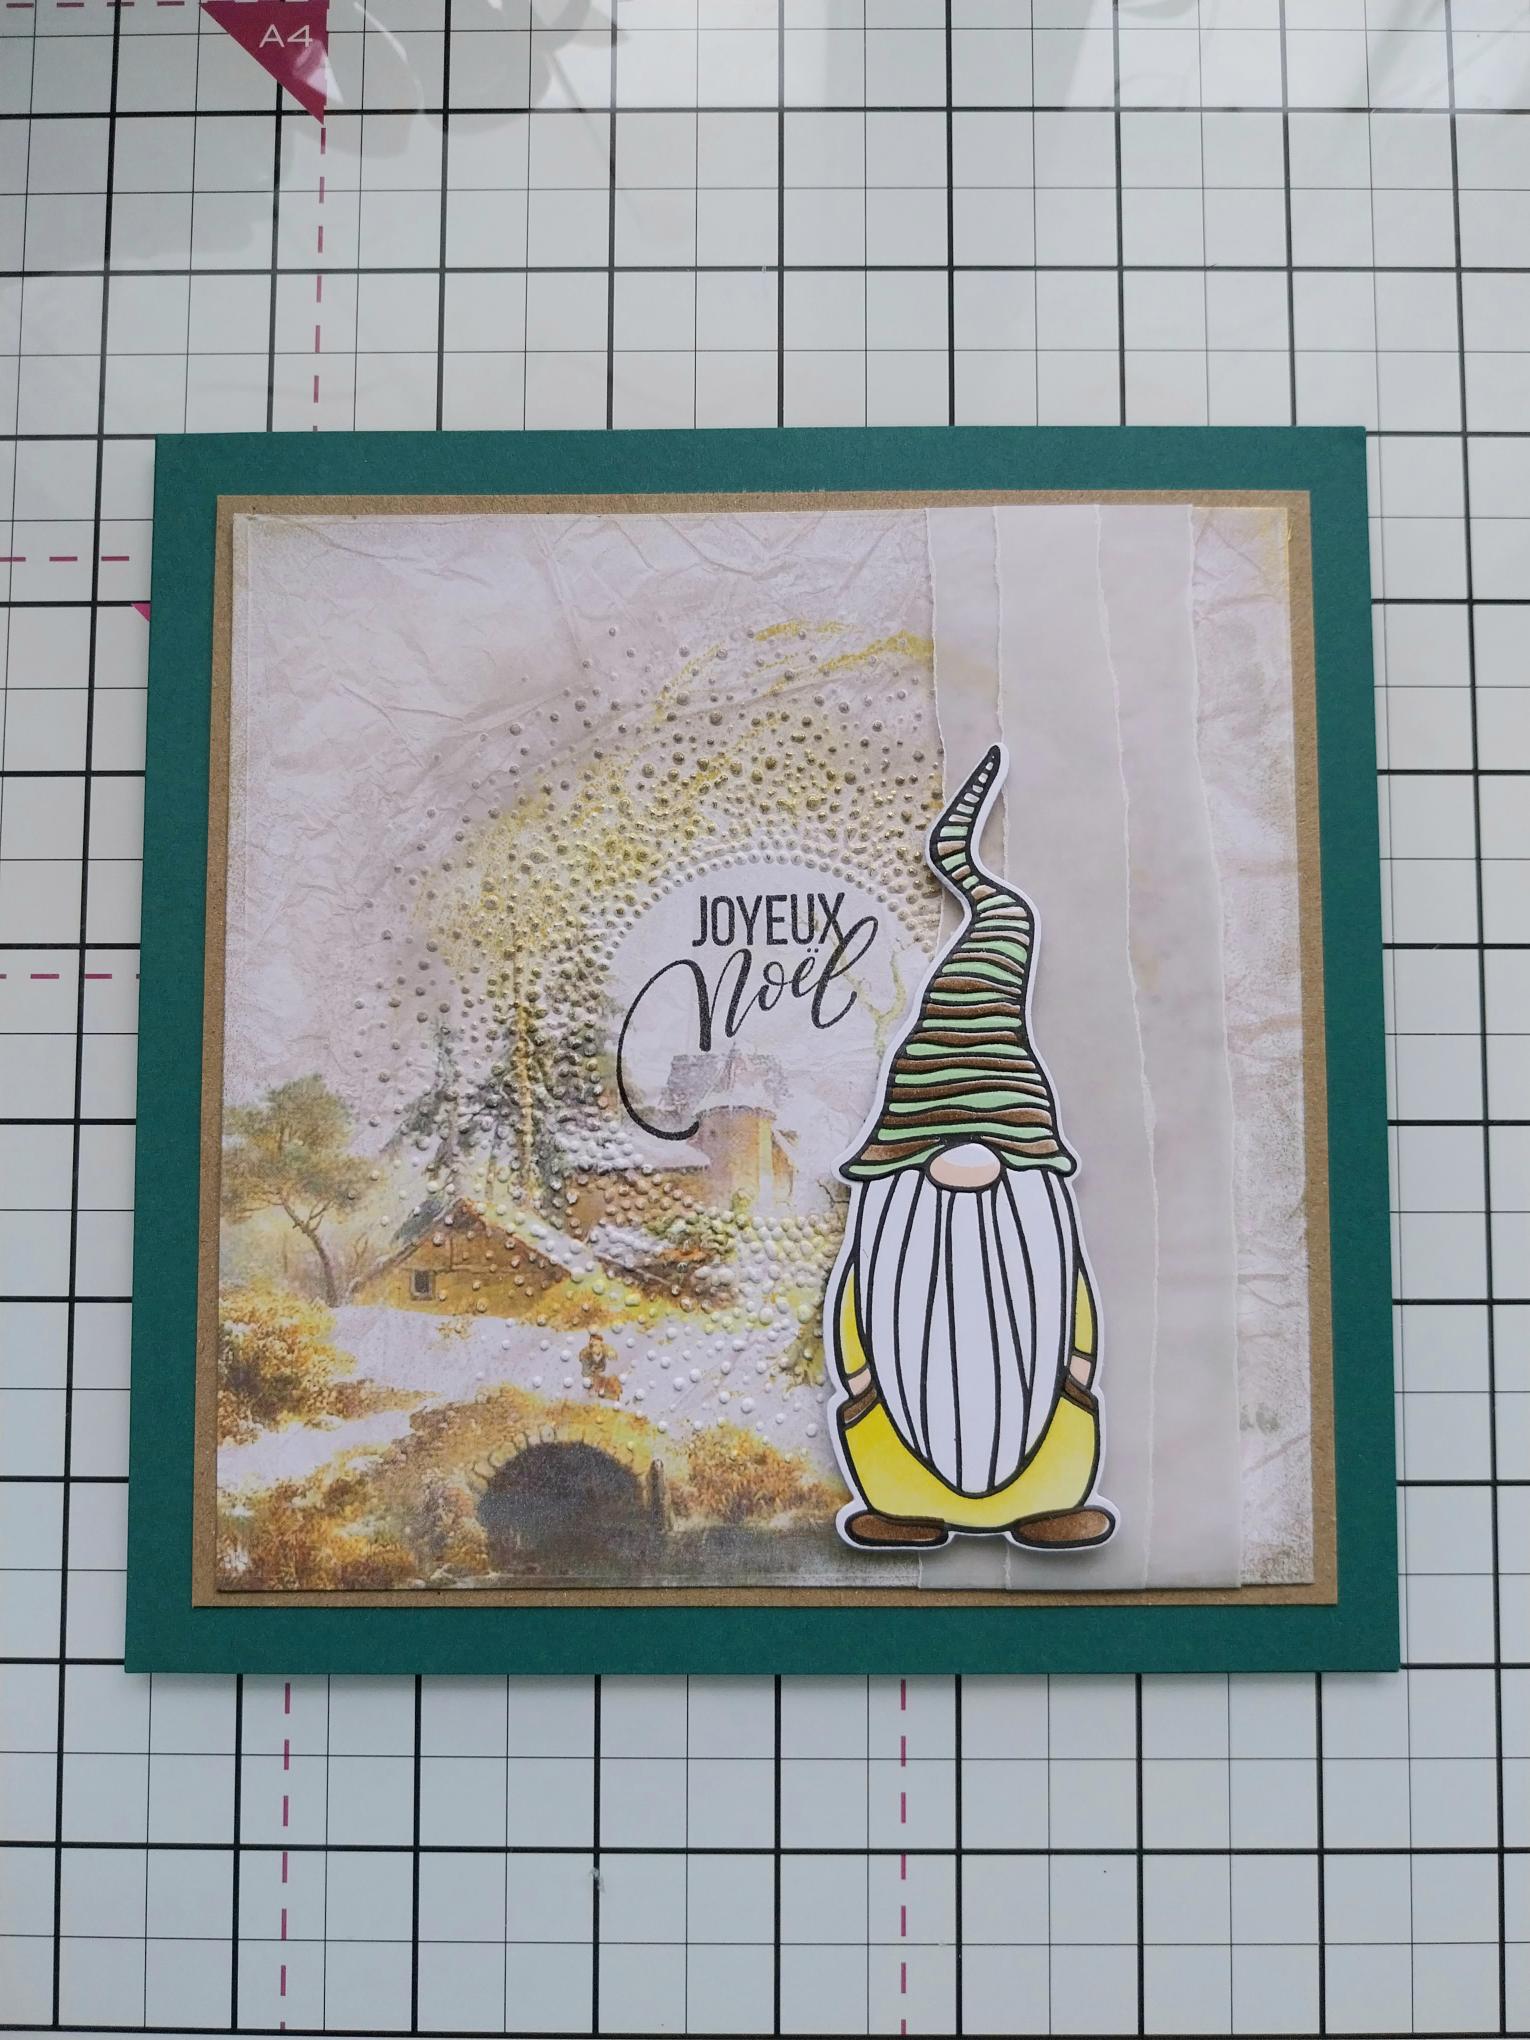
You will need this beautiful painted mount from In The Countryside. |
|
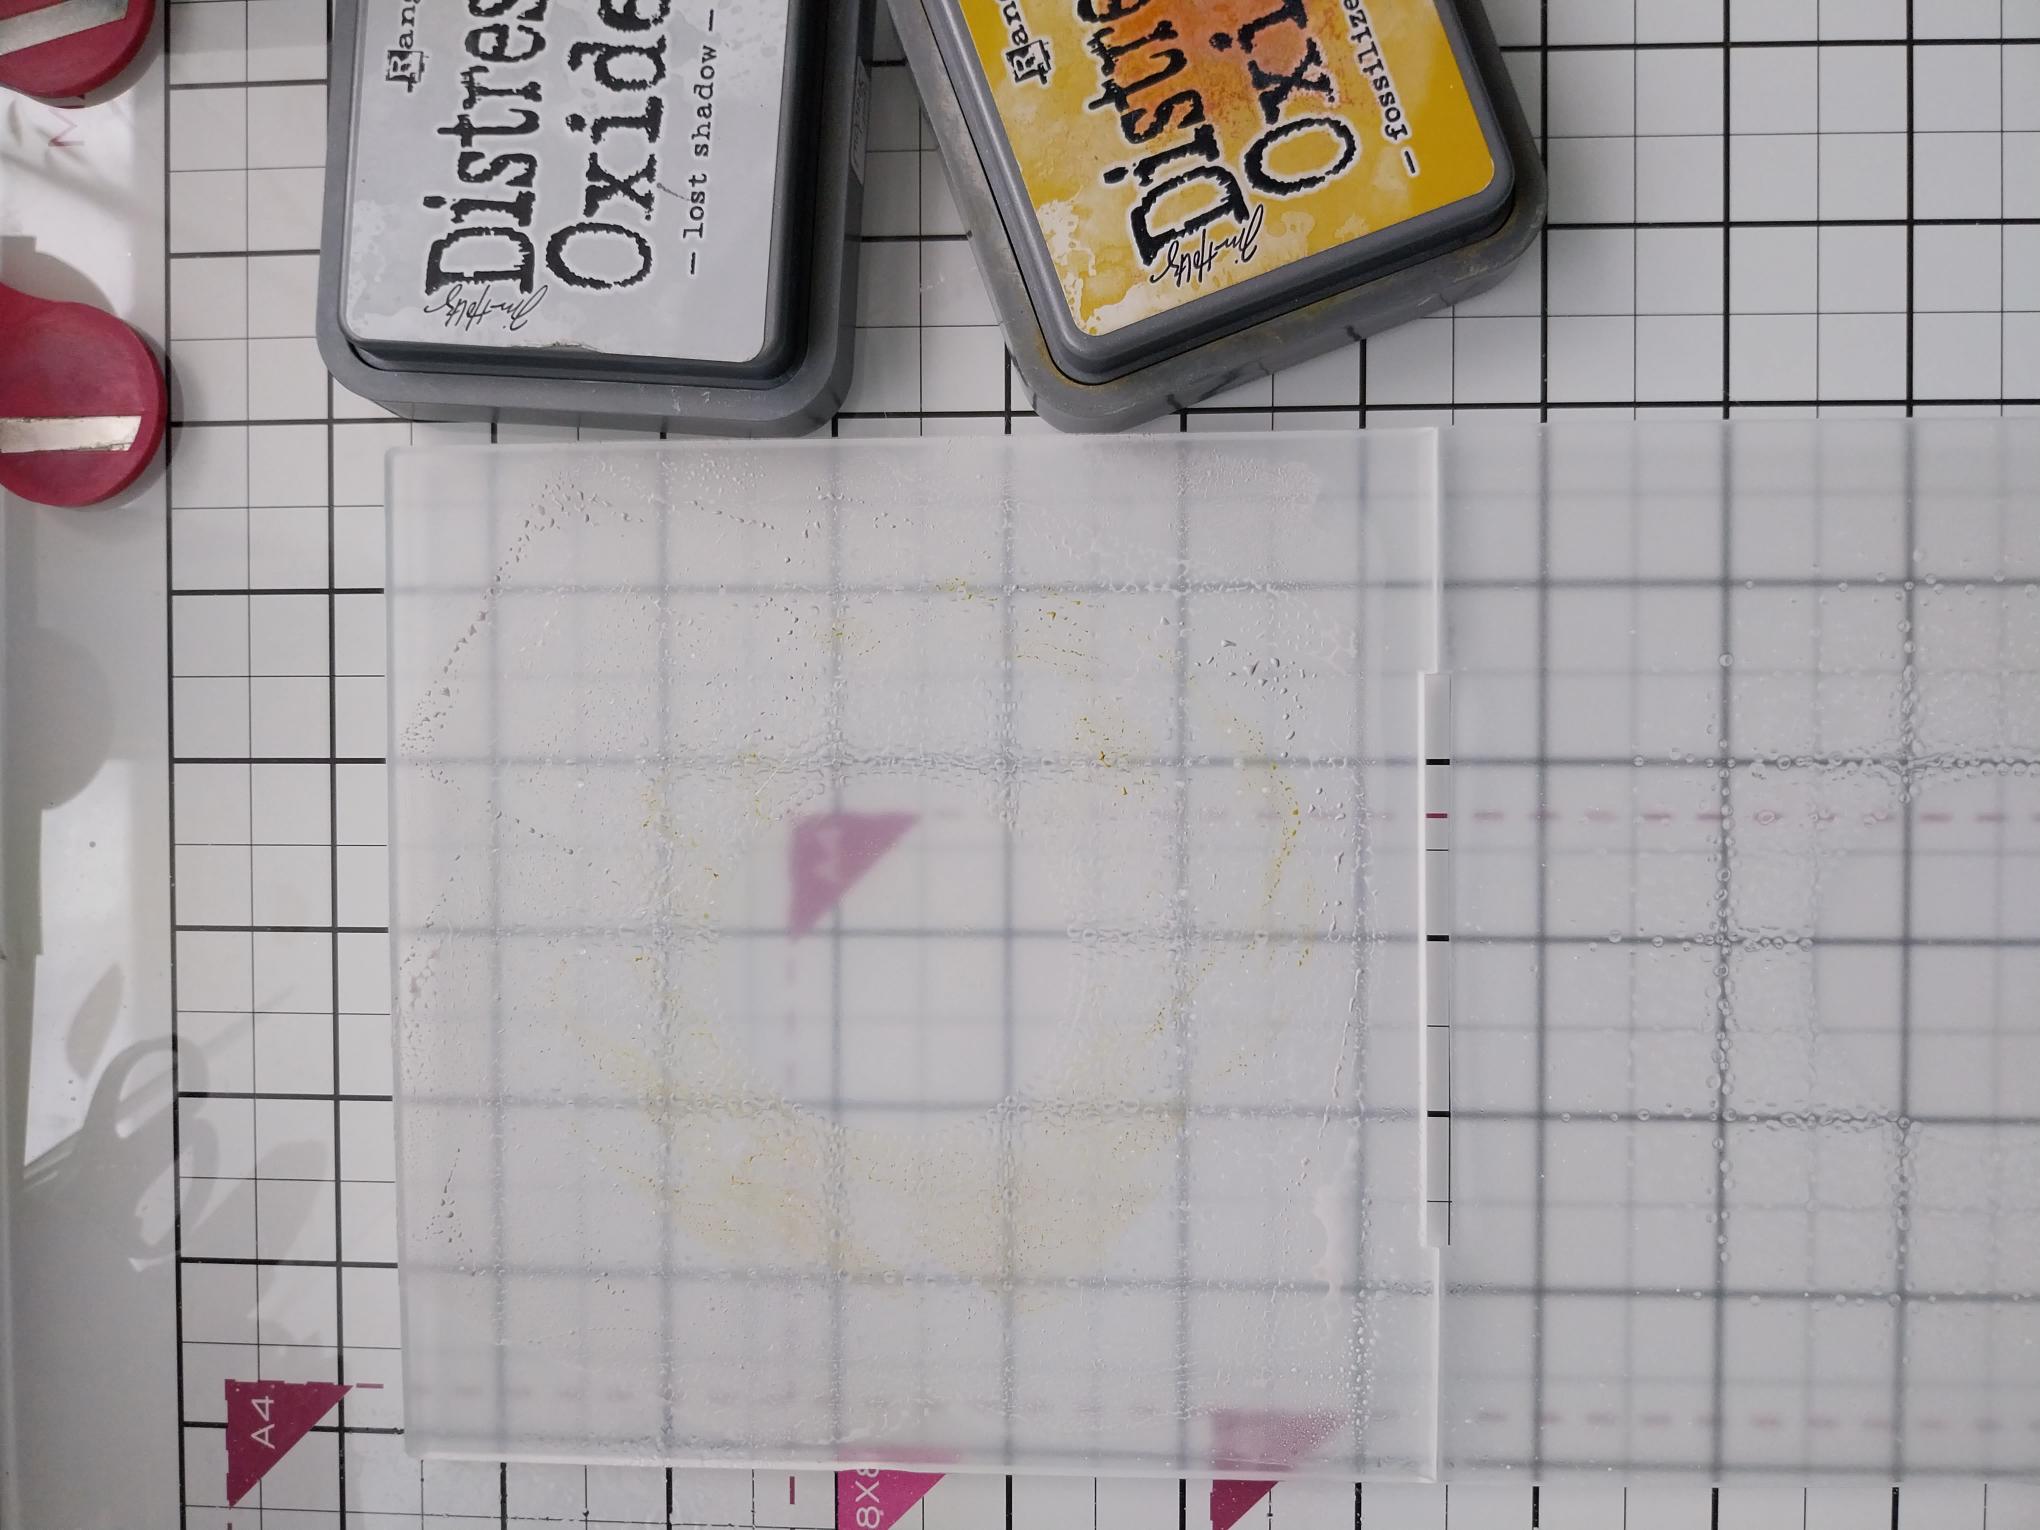
Ink up the folder with the Fossilized Amber and Lost Shadow ink pads and spritz lightly with water. |

|
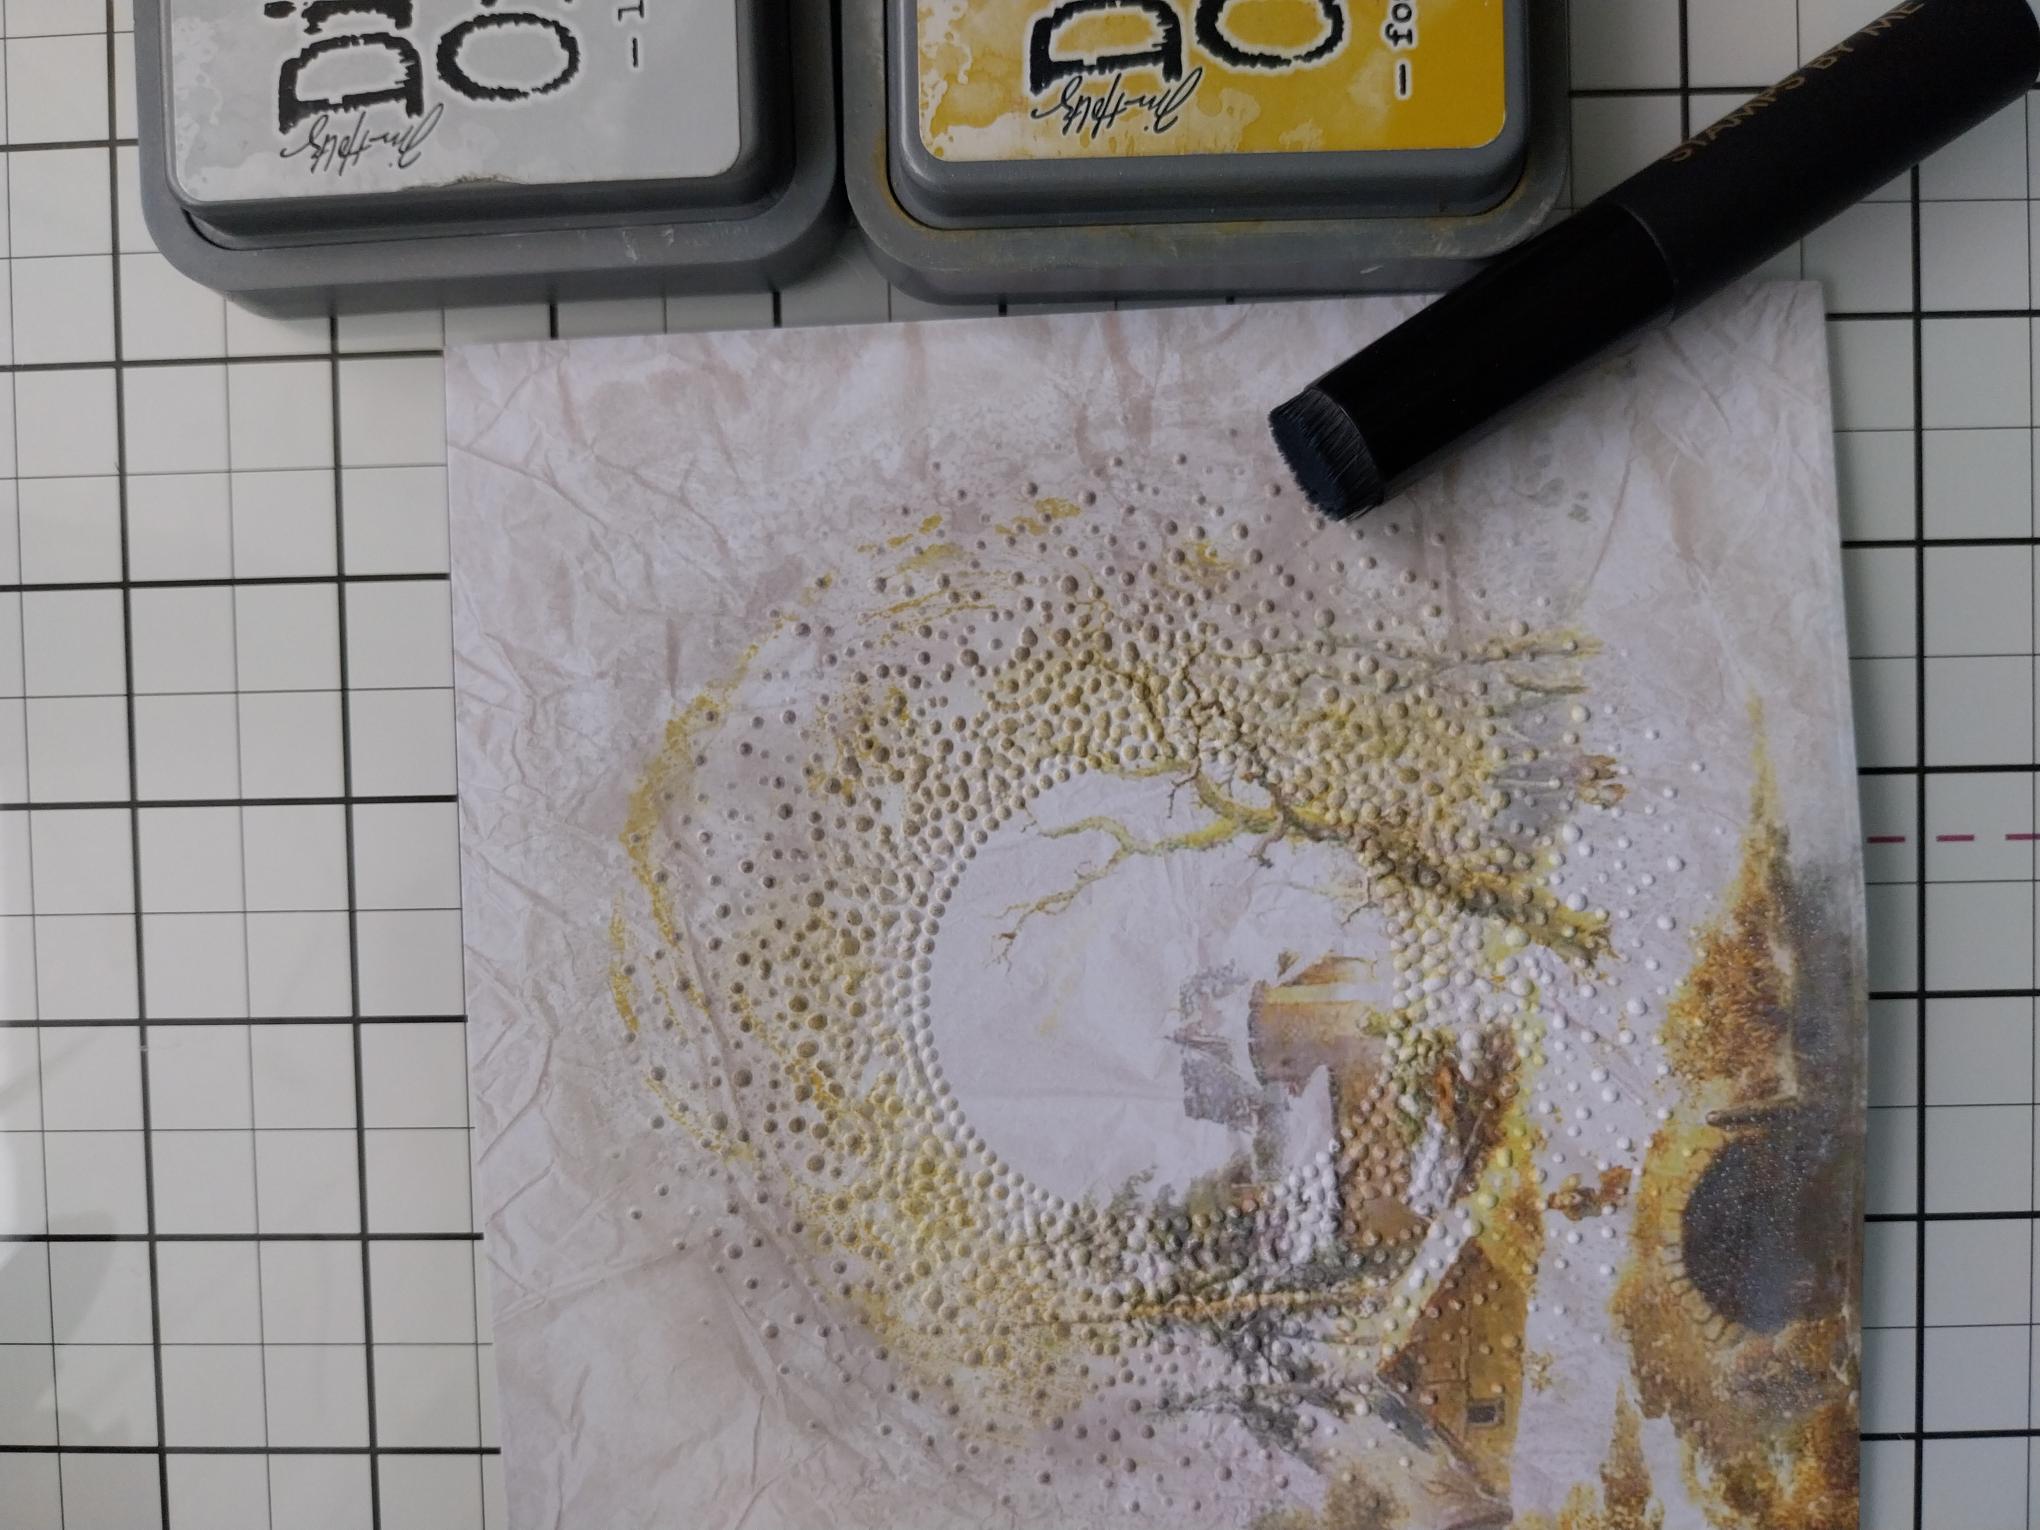
Place the painted mount inside and run it through your embossing machine. |
|
Using a blending tool, apply the Fossilized Amber around the outside of the inner embossed circle, blending out from there with the Lost Shadow. Dry off the ink with your heat tool. |
|
Lightly apply Gold gilding wax around the centre, embossed areas of your Snow Burst...or in this case a Sunburst! Buff with a soft cloth, to bring out the shine!! |
|
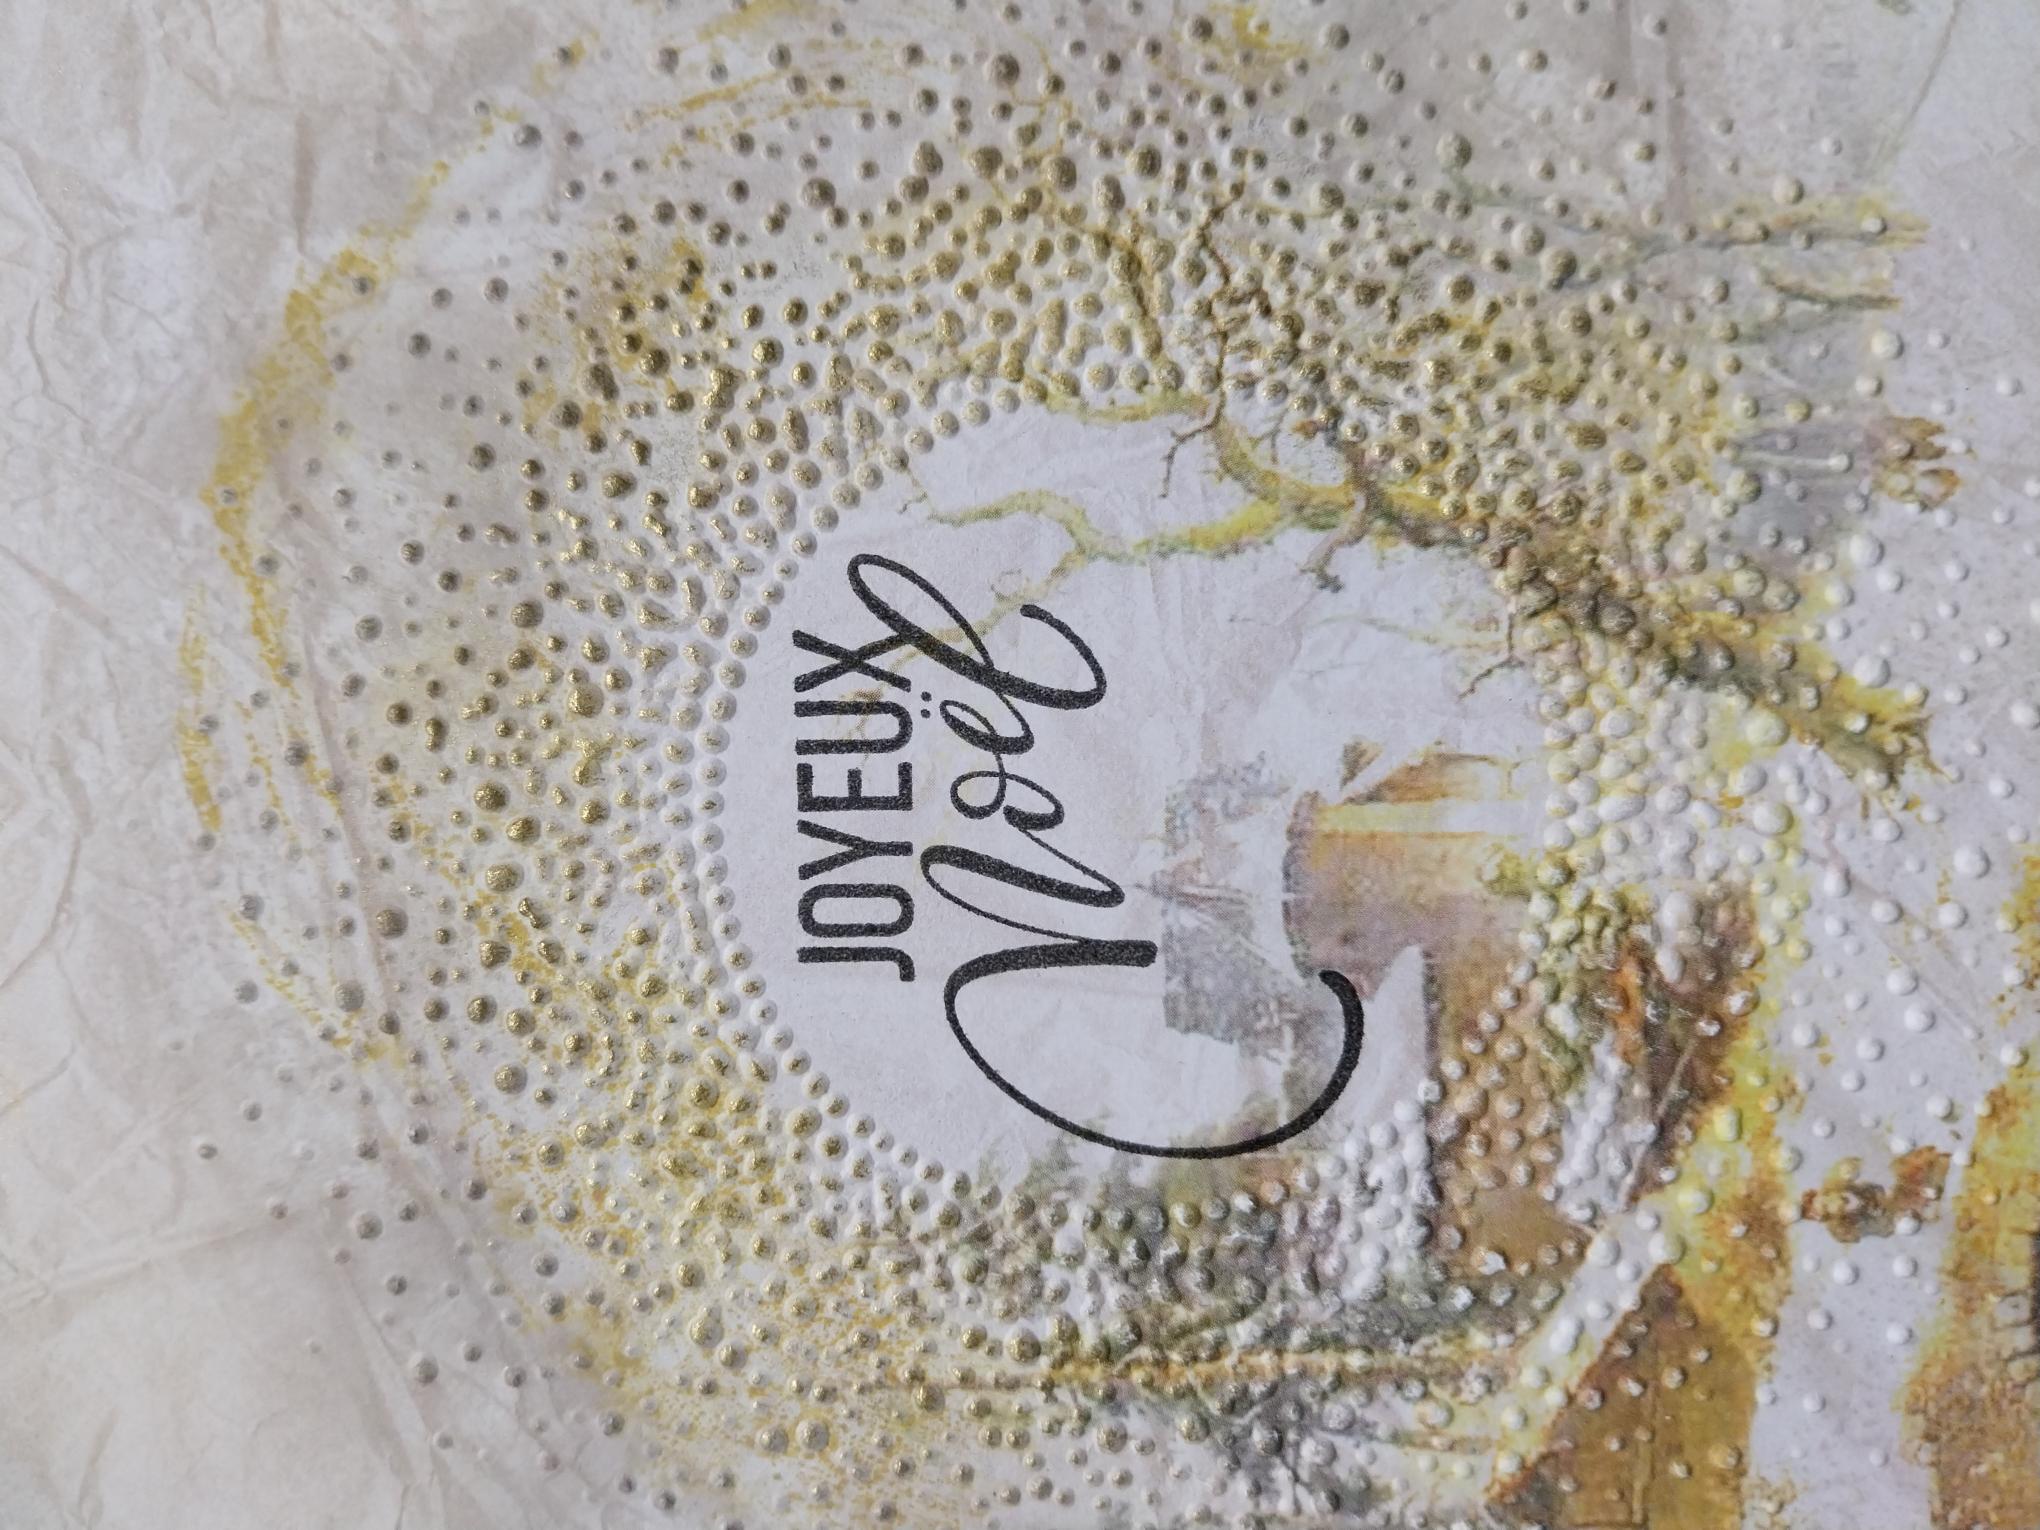
Stamp the sentiment, from the Winter Solstice stamp set, with Smoky Grey Versafine, in the centre of your Snow Burst. |
|
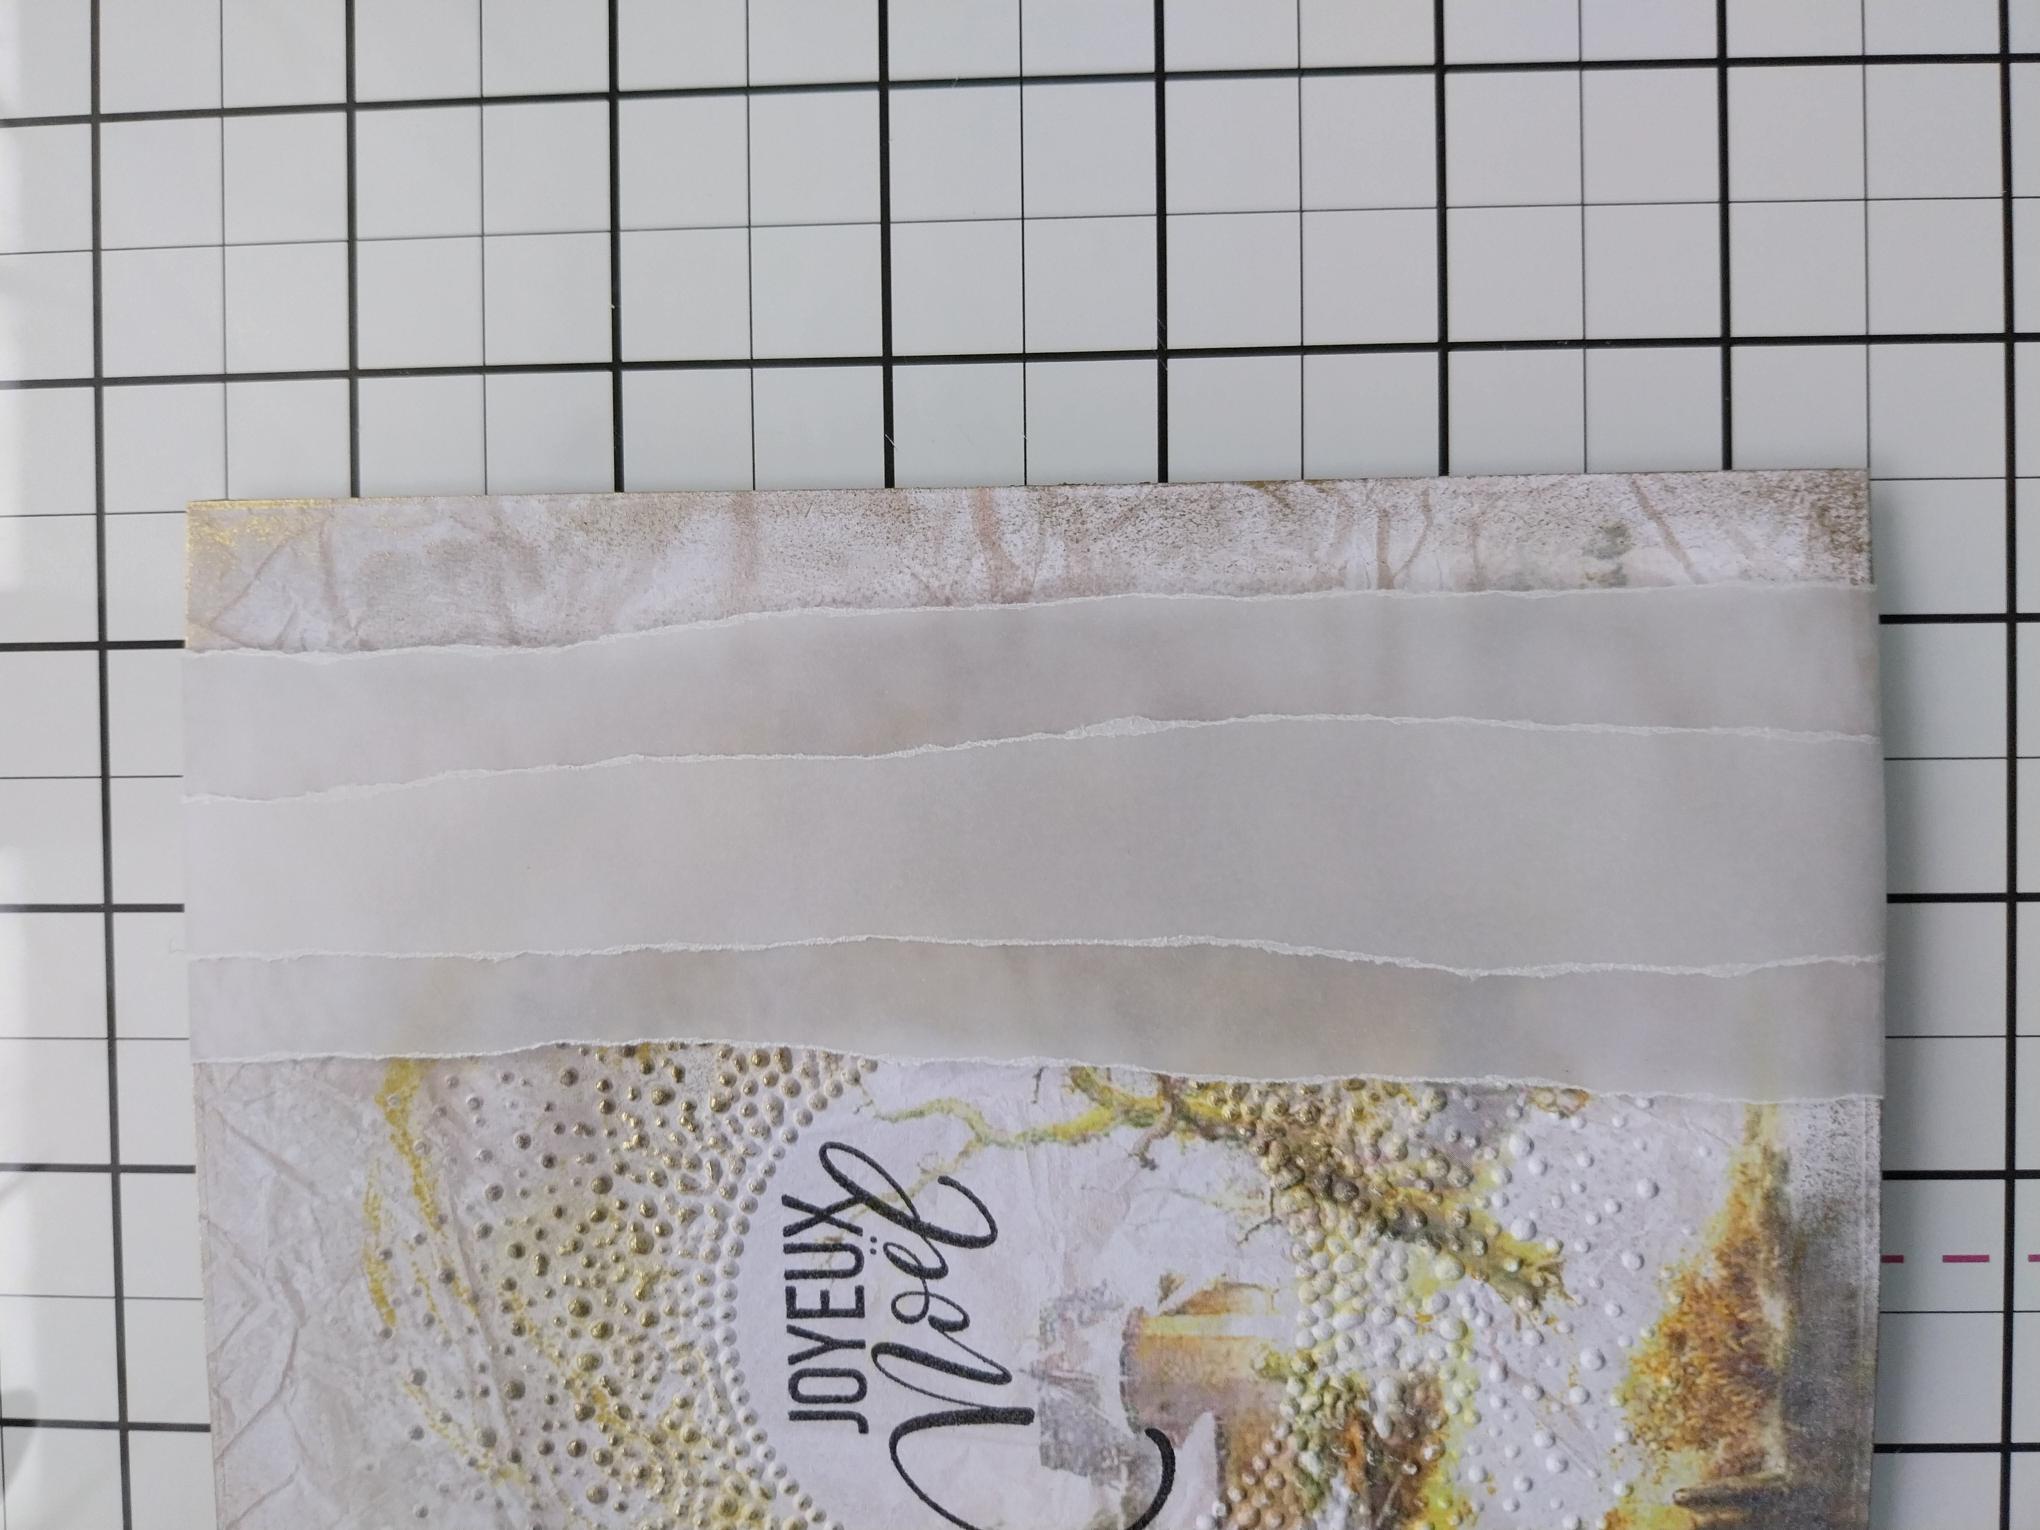
Tear TWO strips of vellum, one wider than the other. Lay them down the right side of your artwork, tuck over the edges and secure on the reverse with double-sided tape. Pop your artwork to one side. |
|
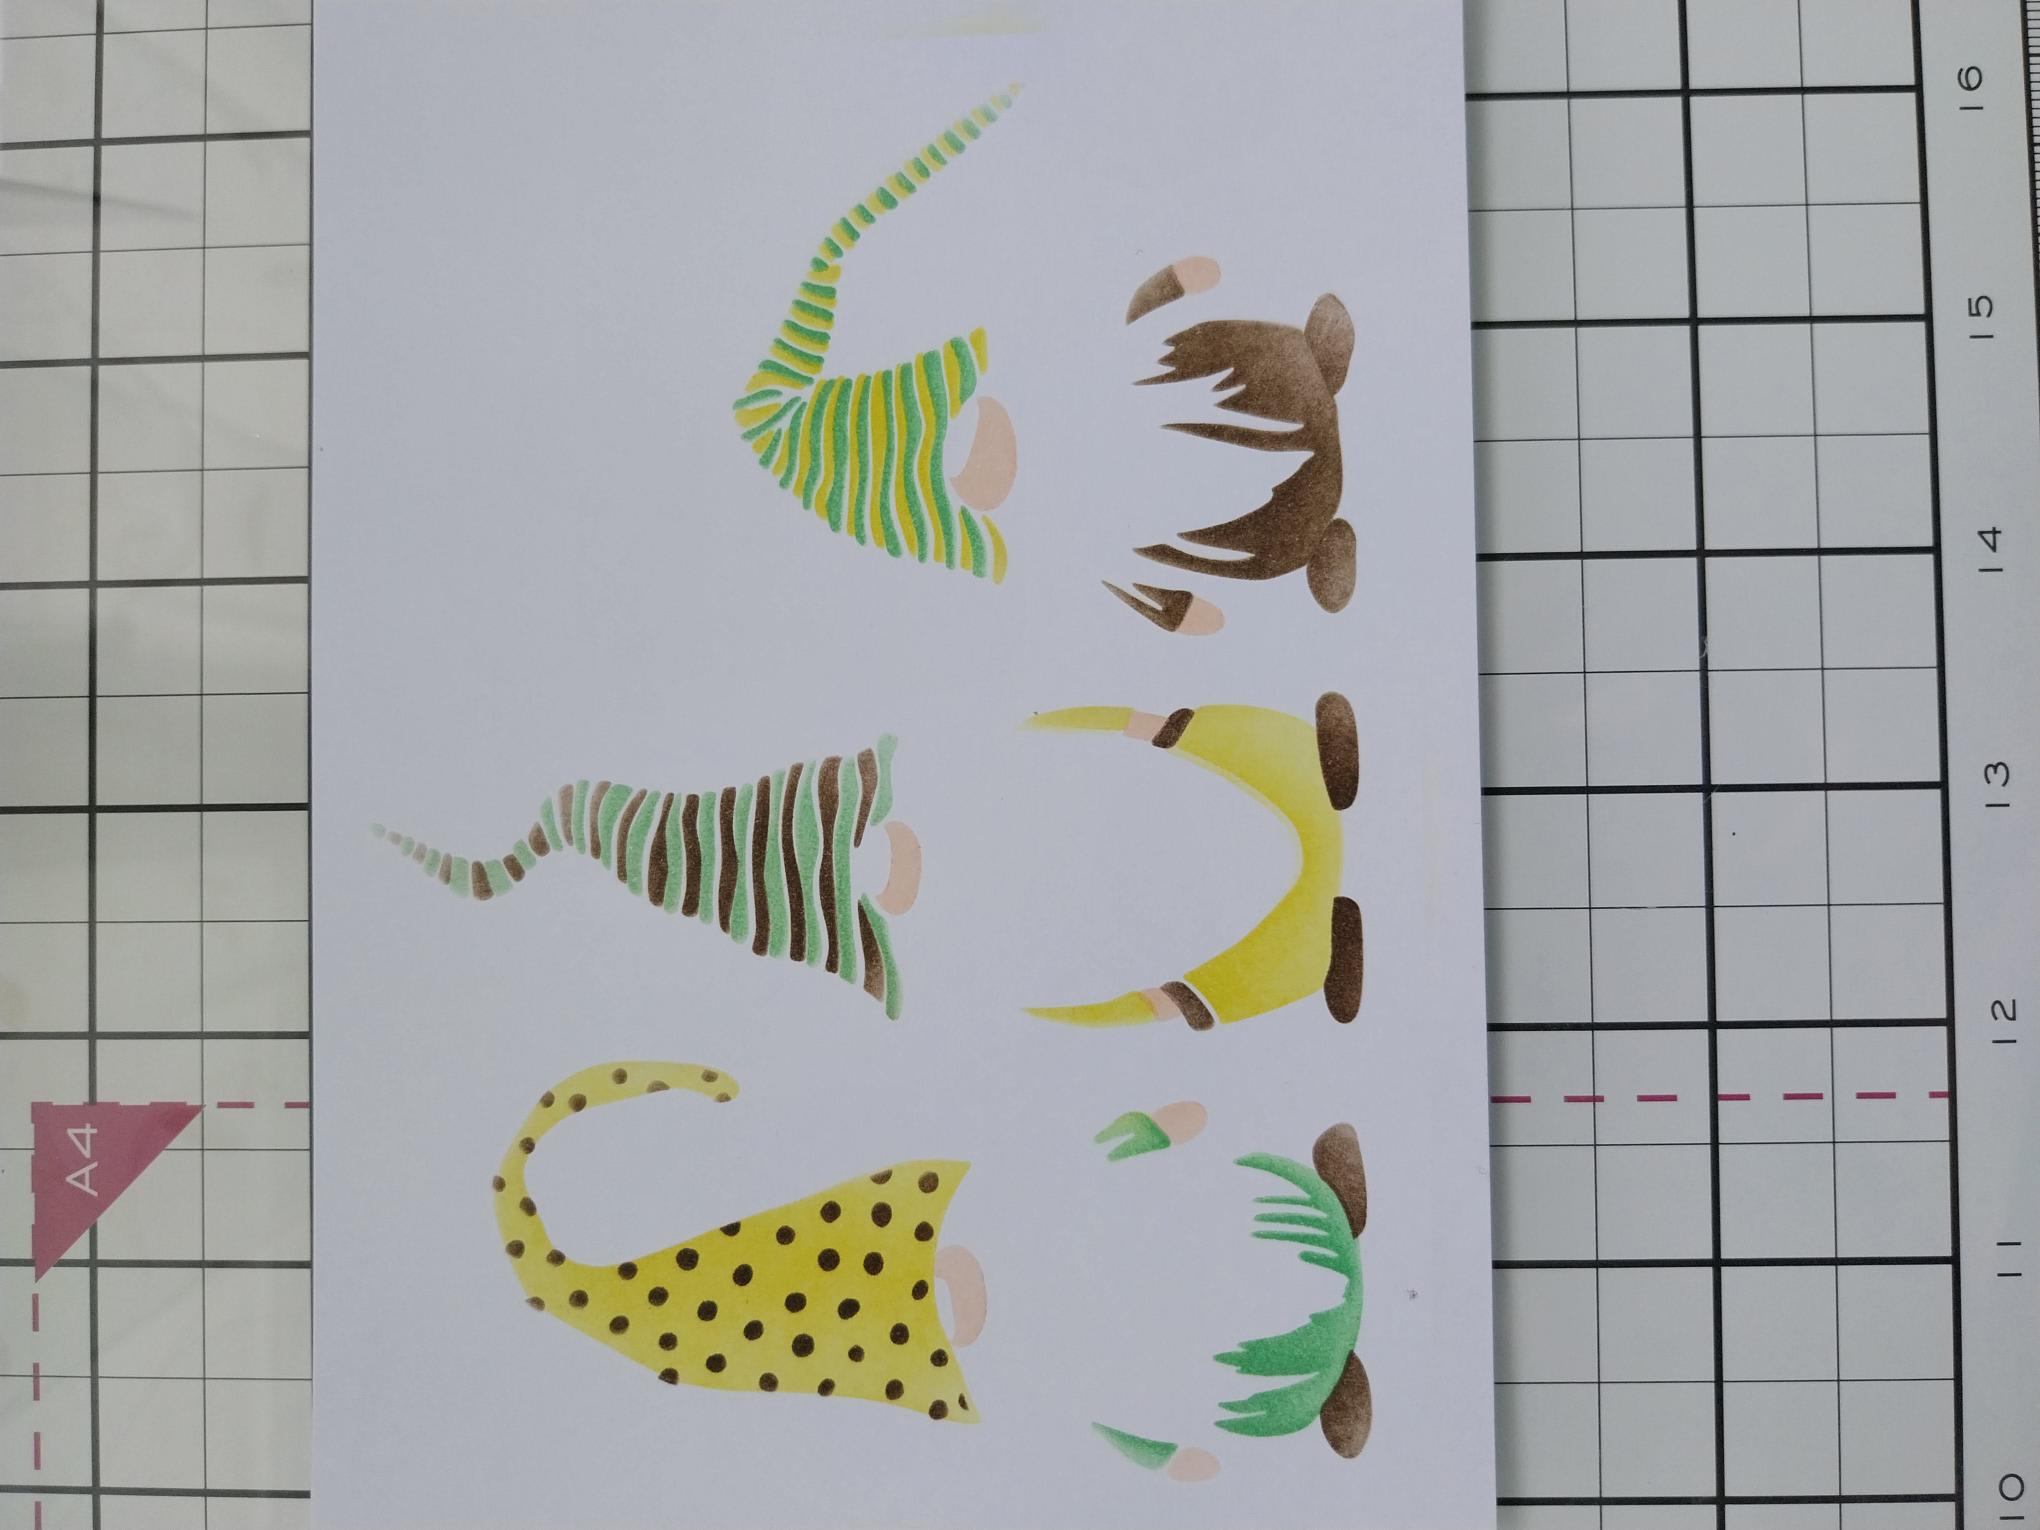
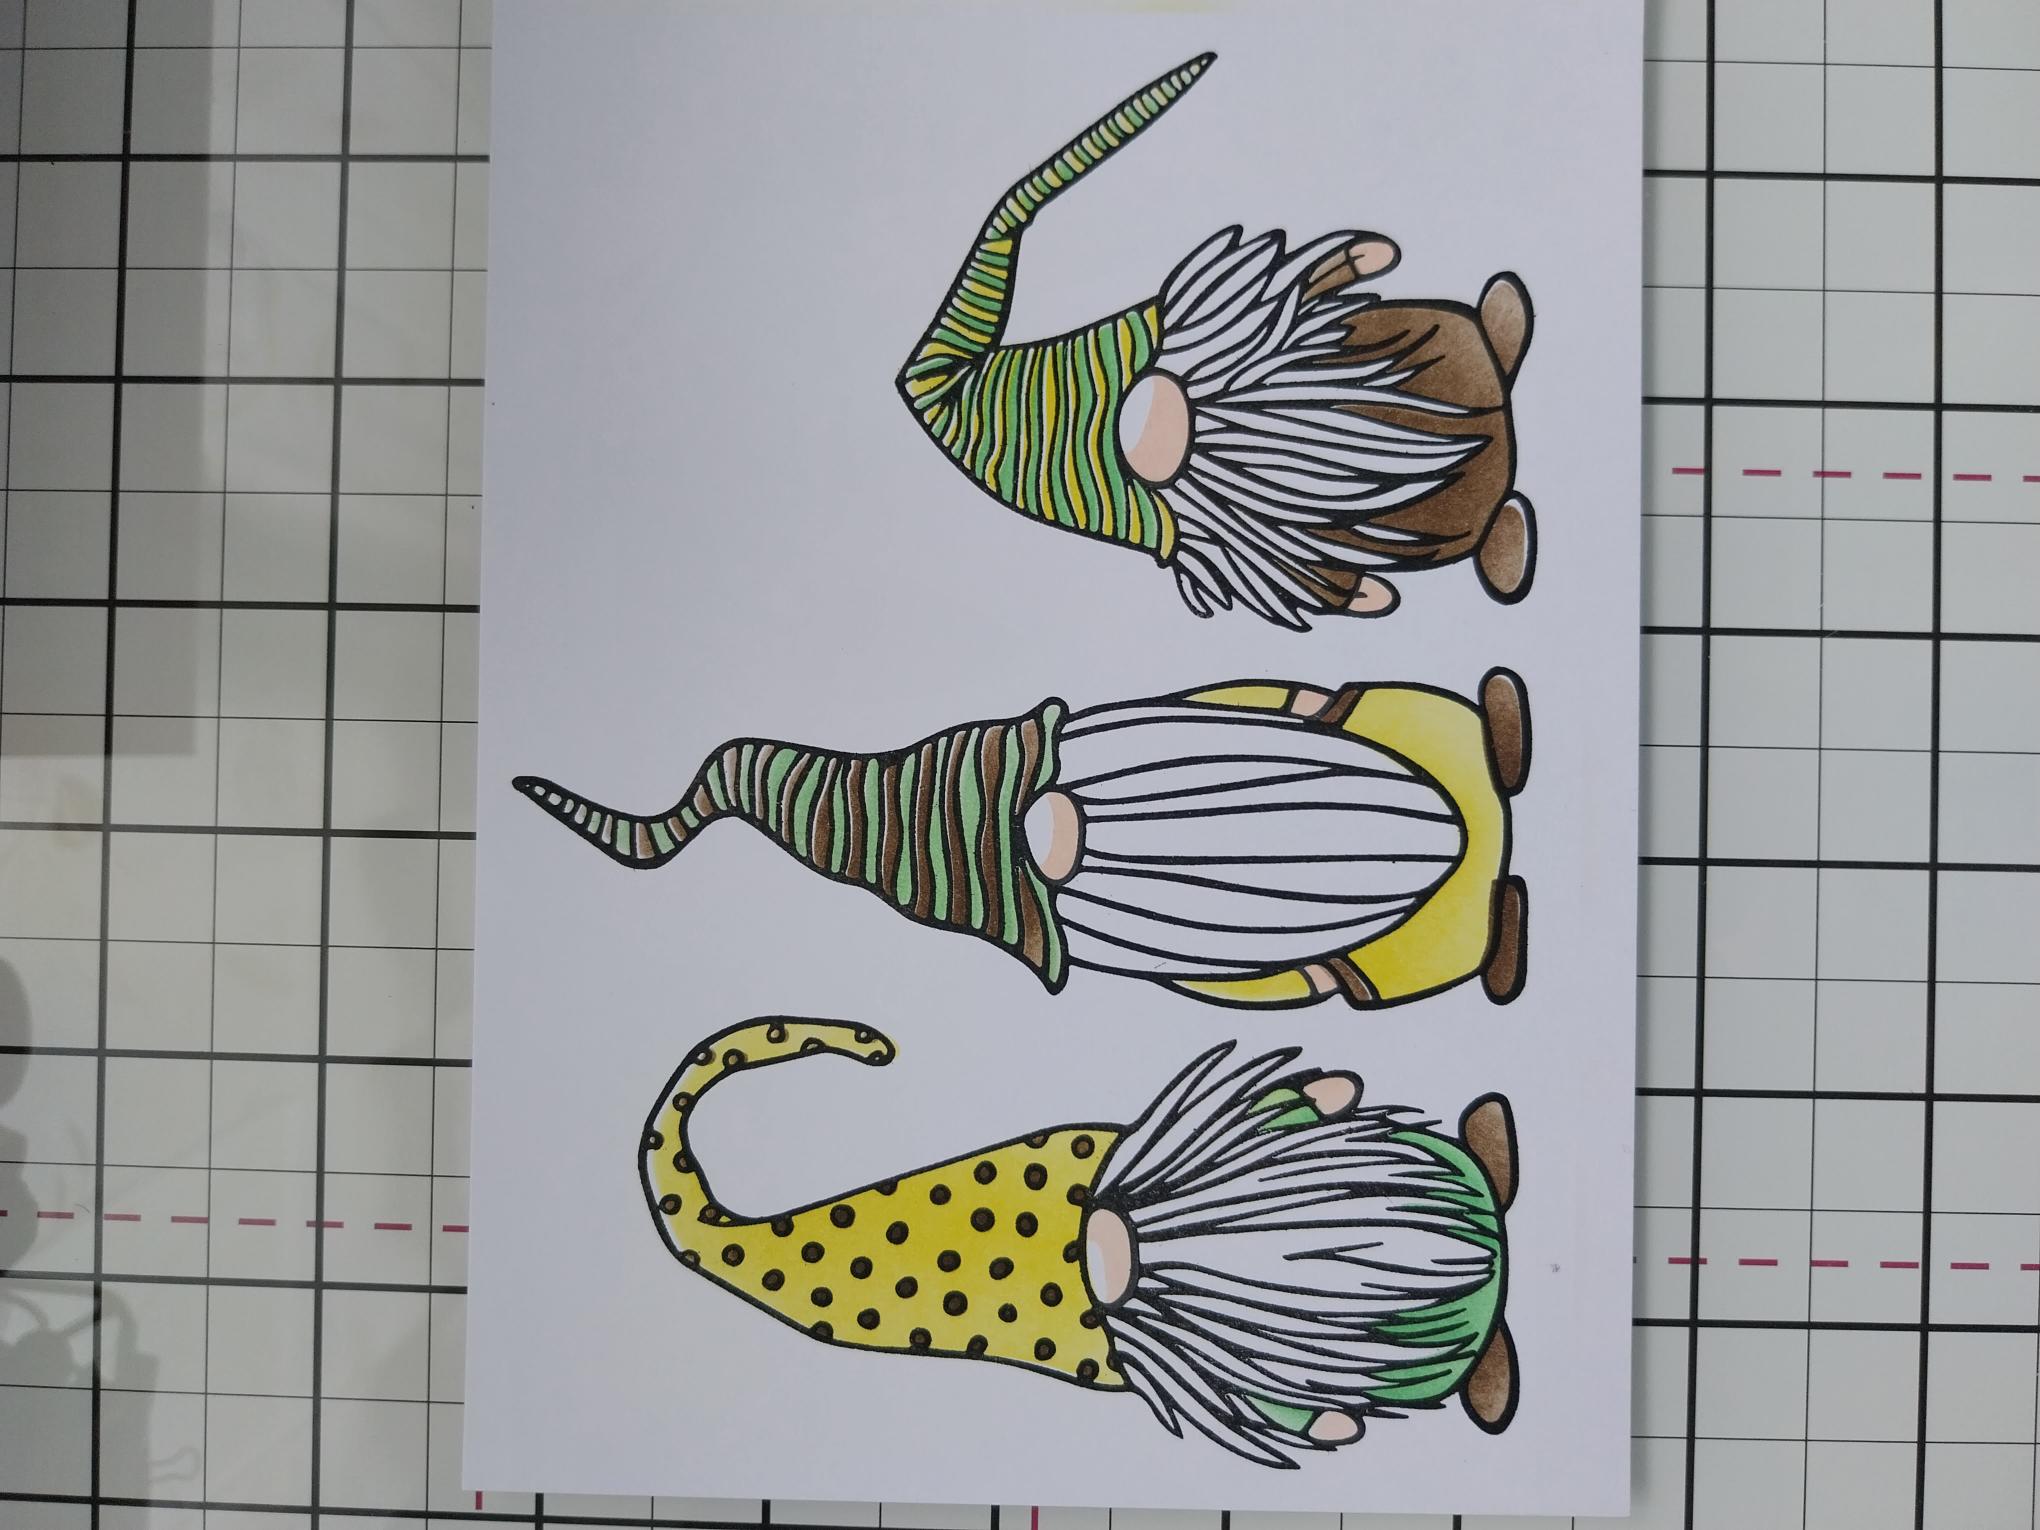
Each of the stencils in the Quattro D Christmas Is Coming collection are numbered and have hearts in the corner to help you line each one up, if required. Use your blending tool to apply ink through each stencil, on to white card trimmed to 7 x 5", as follows: Stencil 1 Sherbet, Walnut Stain, Limeade where desired. Stencil 2 Use the same colours but alternate the placement of each, for their clothing. Stencil 3 Tattered Rose
|
|
Use the coordinating stamp to stamp over your stencilled images, with the Midnight hybrid ink. |
|
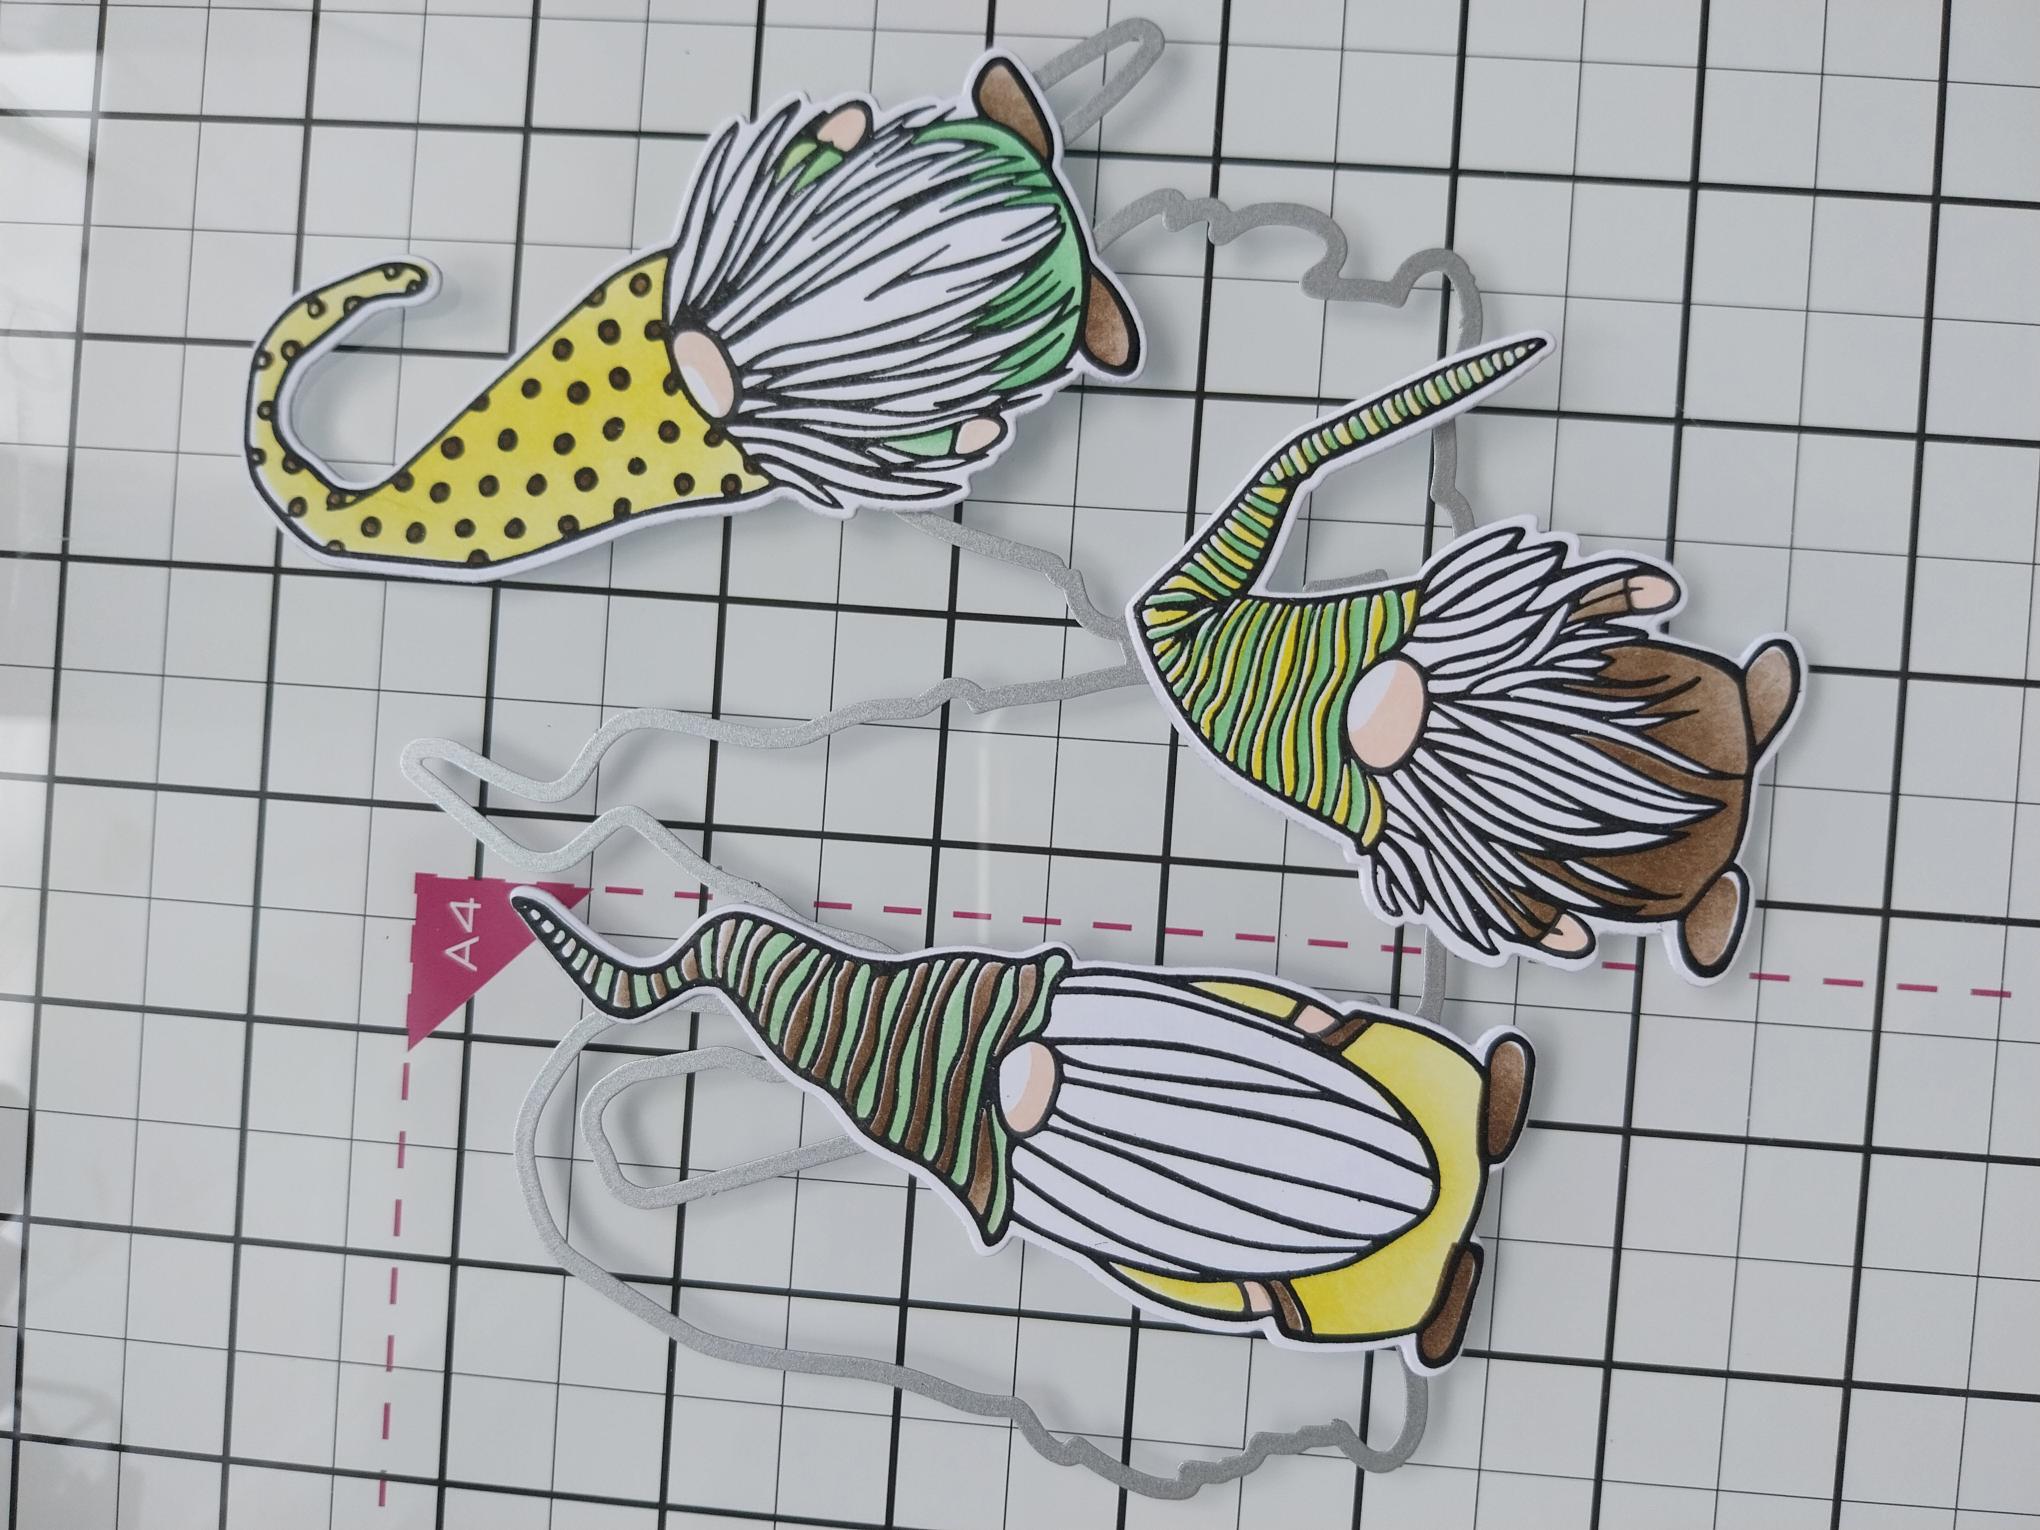
Die cut your Gnomes using the dies in the collection. You can die cut together but secure the dies down with low tack tape!! I find it easier to die cut one at a time. |

|
Line up the Gnomes inside the embossing folder and run through your machine. Again you can emboss all 3 together but I prefer to do one at a time. |
|
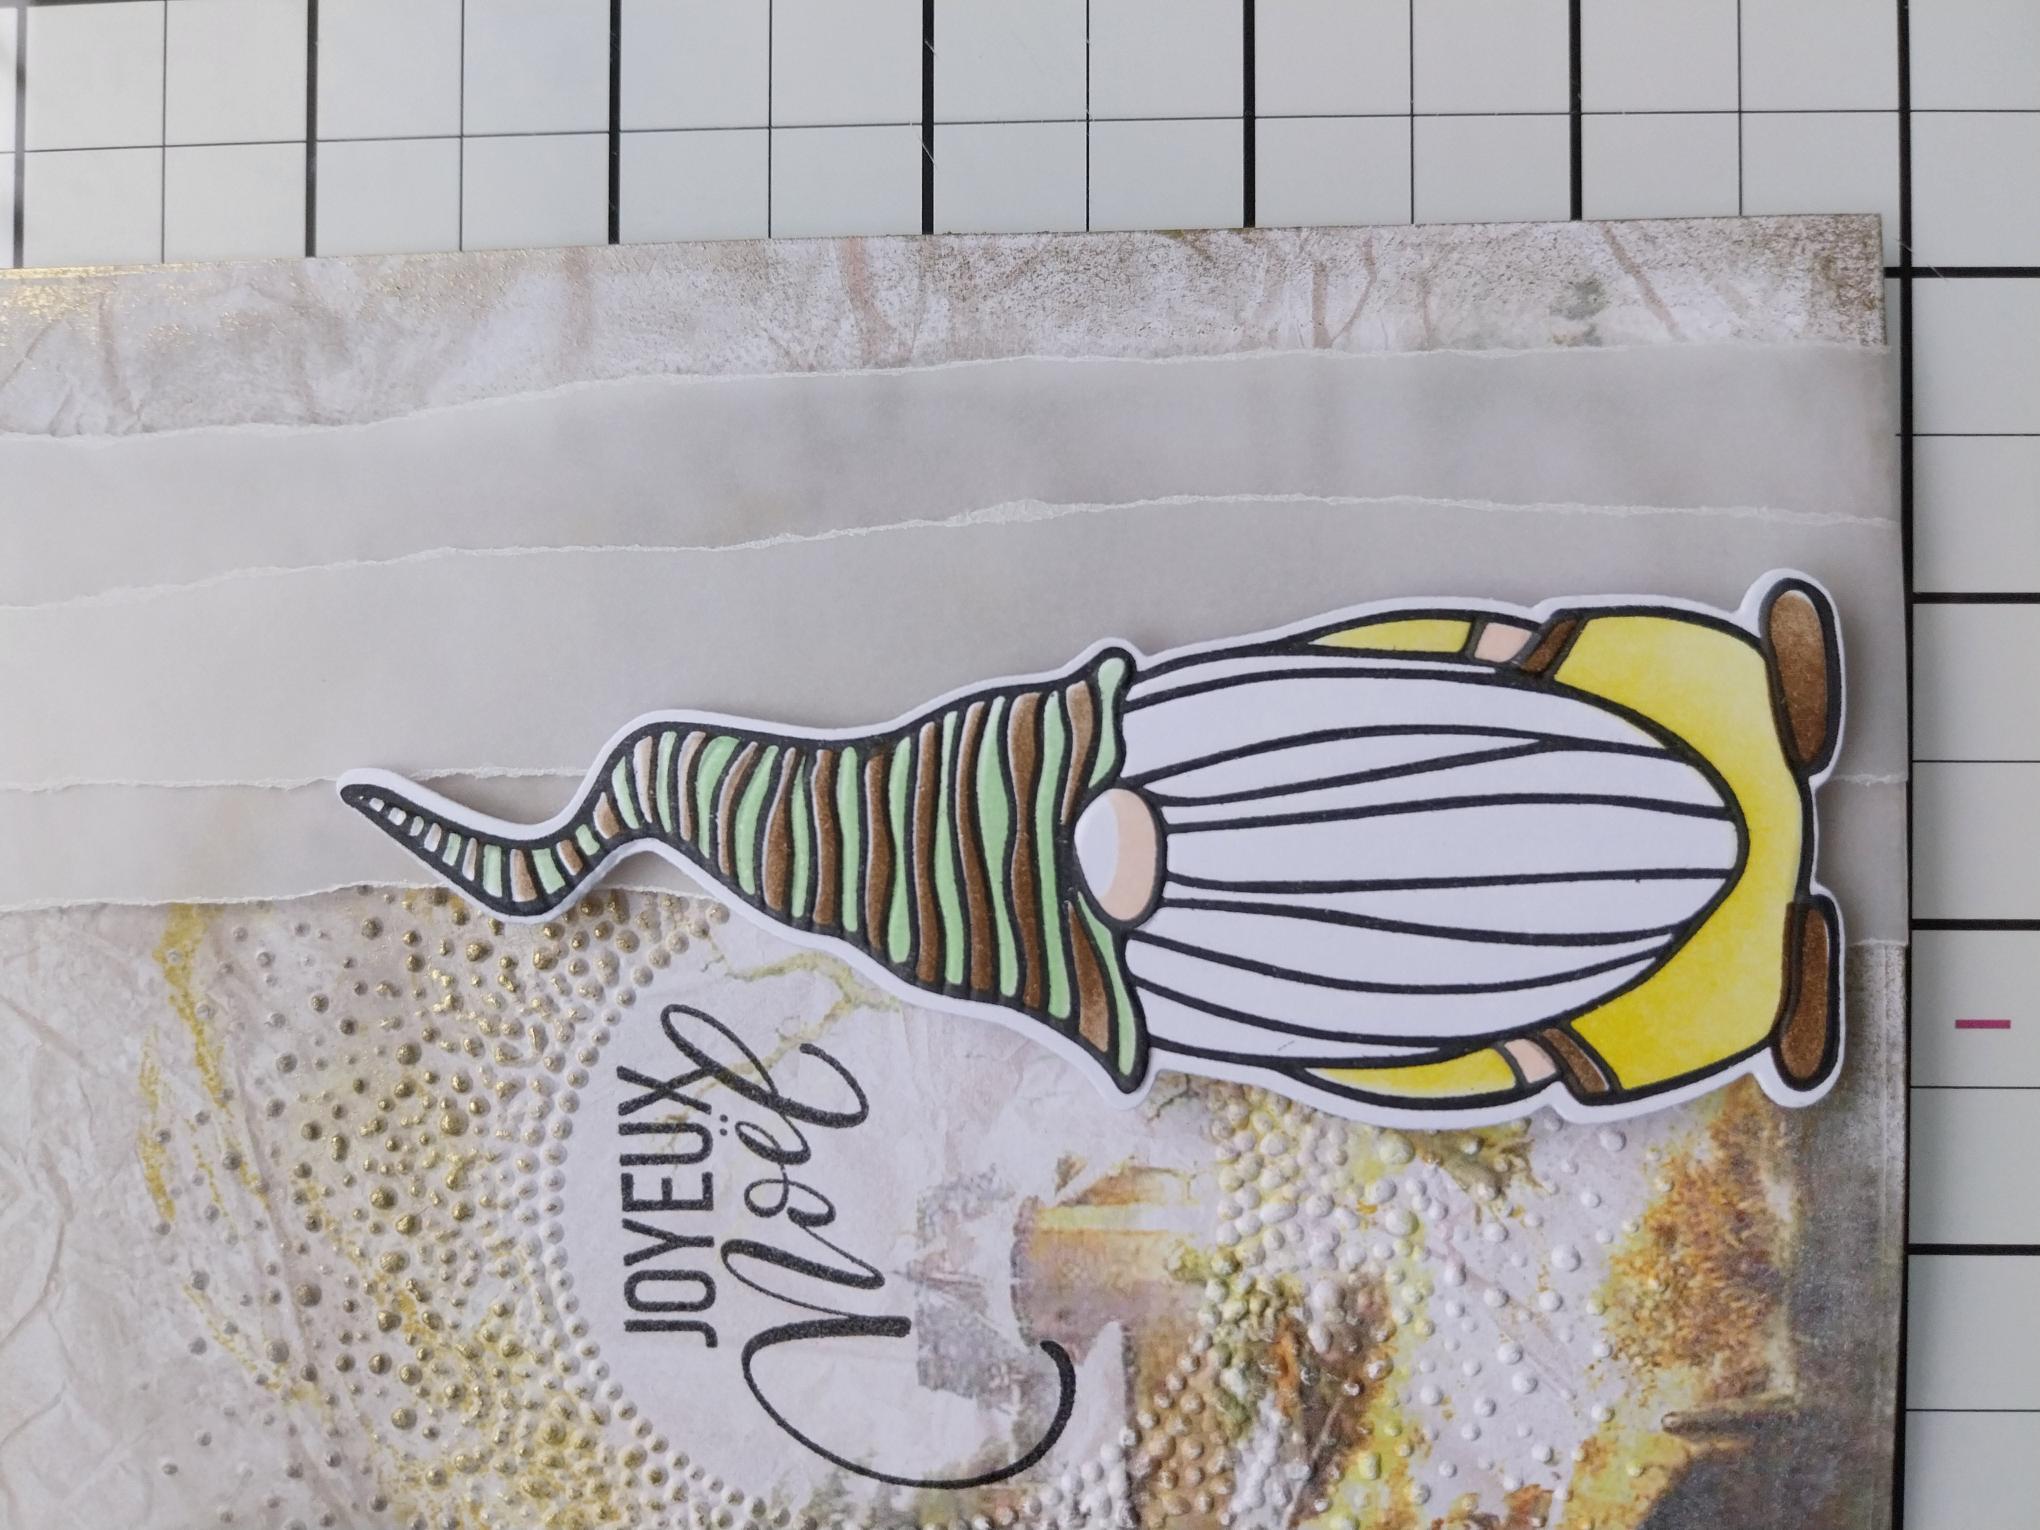
Adhere this lovely Gnome, with foam pads, on the bottom right side of your artwork. You can use the other 2 Gnomes on another project. |
|
Mat your artwork on to kraft card cut to 6 1/4" square. |
|
Mat on to your teal card blank to finish. |