Give your friends $10 off their first order!
Refer a FRIEND


WHAT YOU WILL NEED:
White card blank (7x7")
Black cardstock (4 3/4 x 2 1/2")
White cardstock A4
Black cardstock (4x4")
Book page (4 3/4 x 2 1/2")
Stamps from Thirsty Brush Unltd Petal Power Creative Stamps
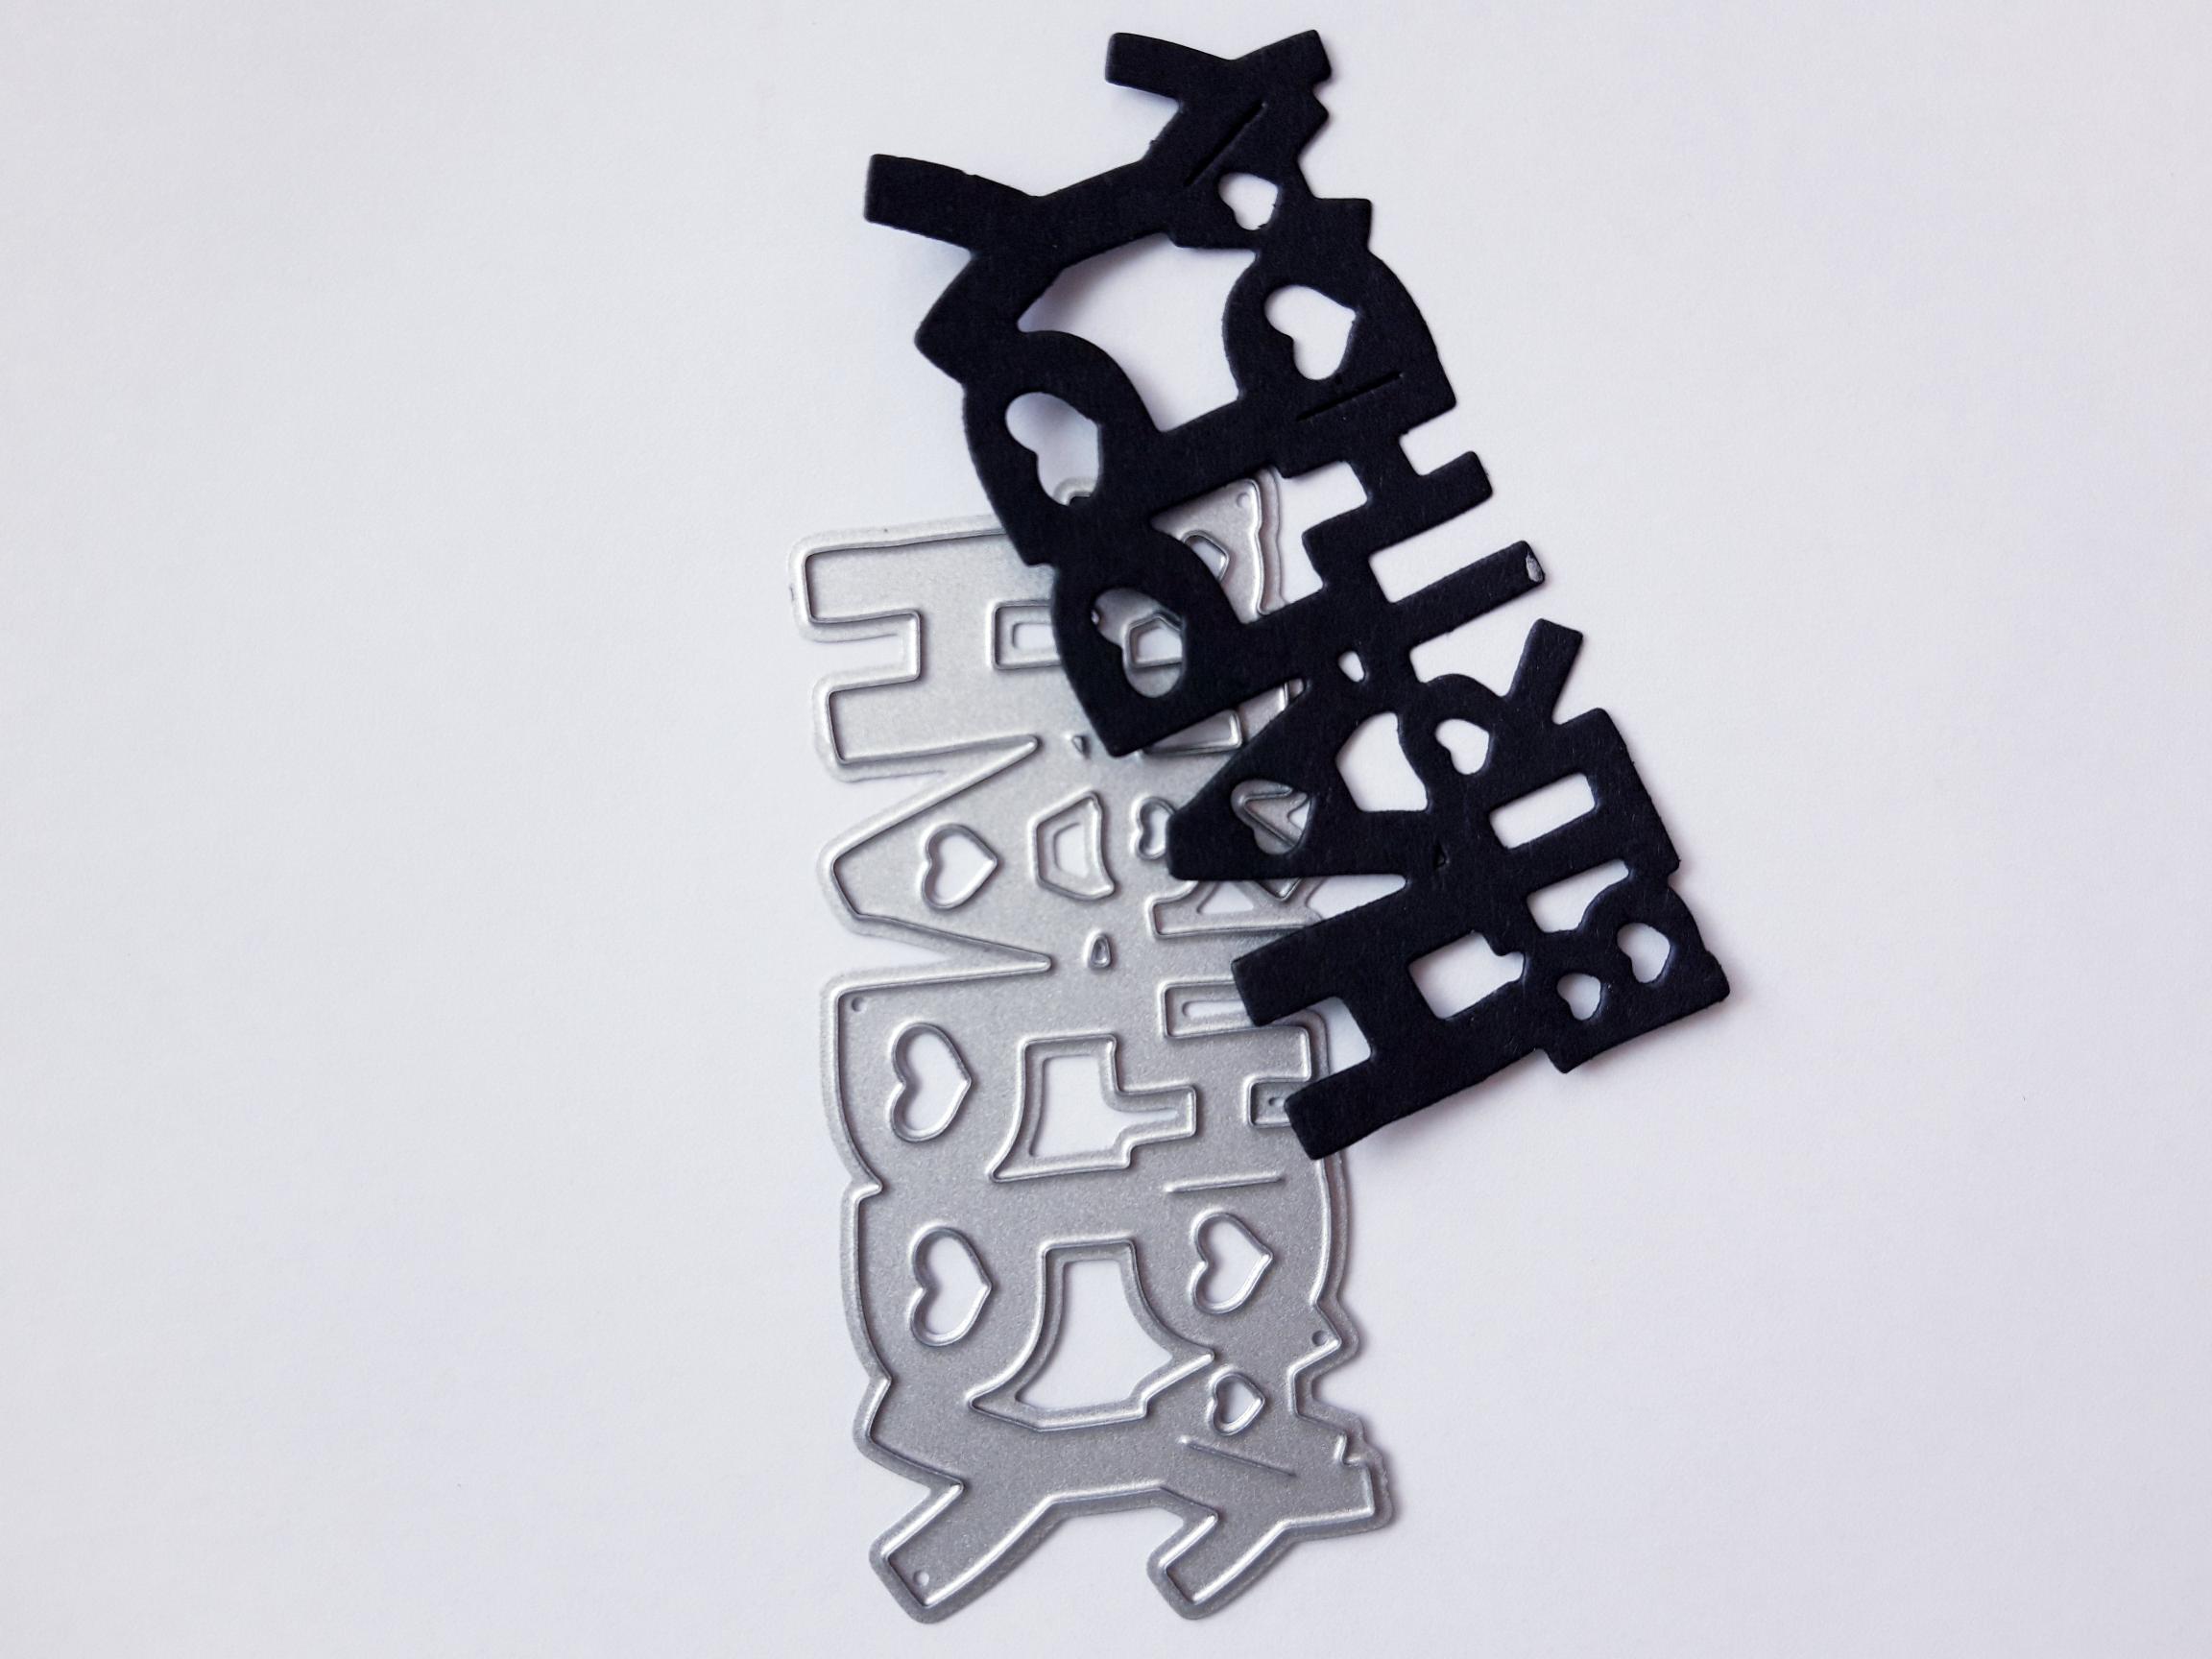
Sentiment Die from Thirsty Brush Unltd Build A Bloom Creative Dies
Versafine Ink Pad: Onyx Black
Izink Dye Ink pad: Cerise
Izink Pigments: Mimosa, Purple Haze, Lychee, Wet Meadow, Ultramarine, Avalanche
Black pen
White gel pen
Sequins: Glistening Waves
Tag Punch
Bakers twine
Paint brush
Spray water bottle
Eureka 101
Paper Trimmer
Perfect Together Glue
Foam Pads
[click image to enlarge] 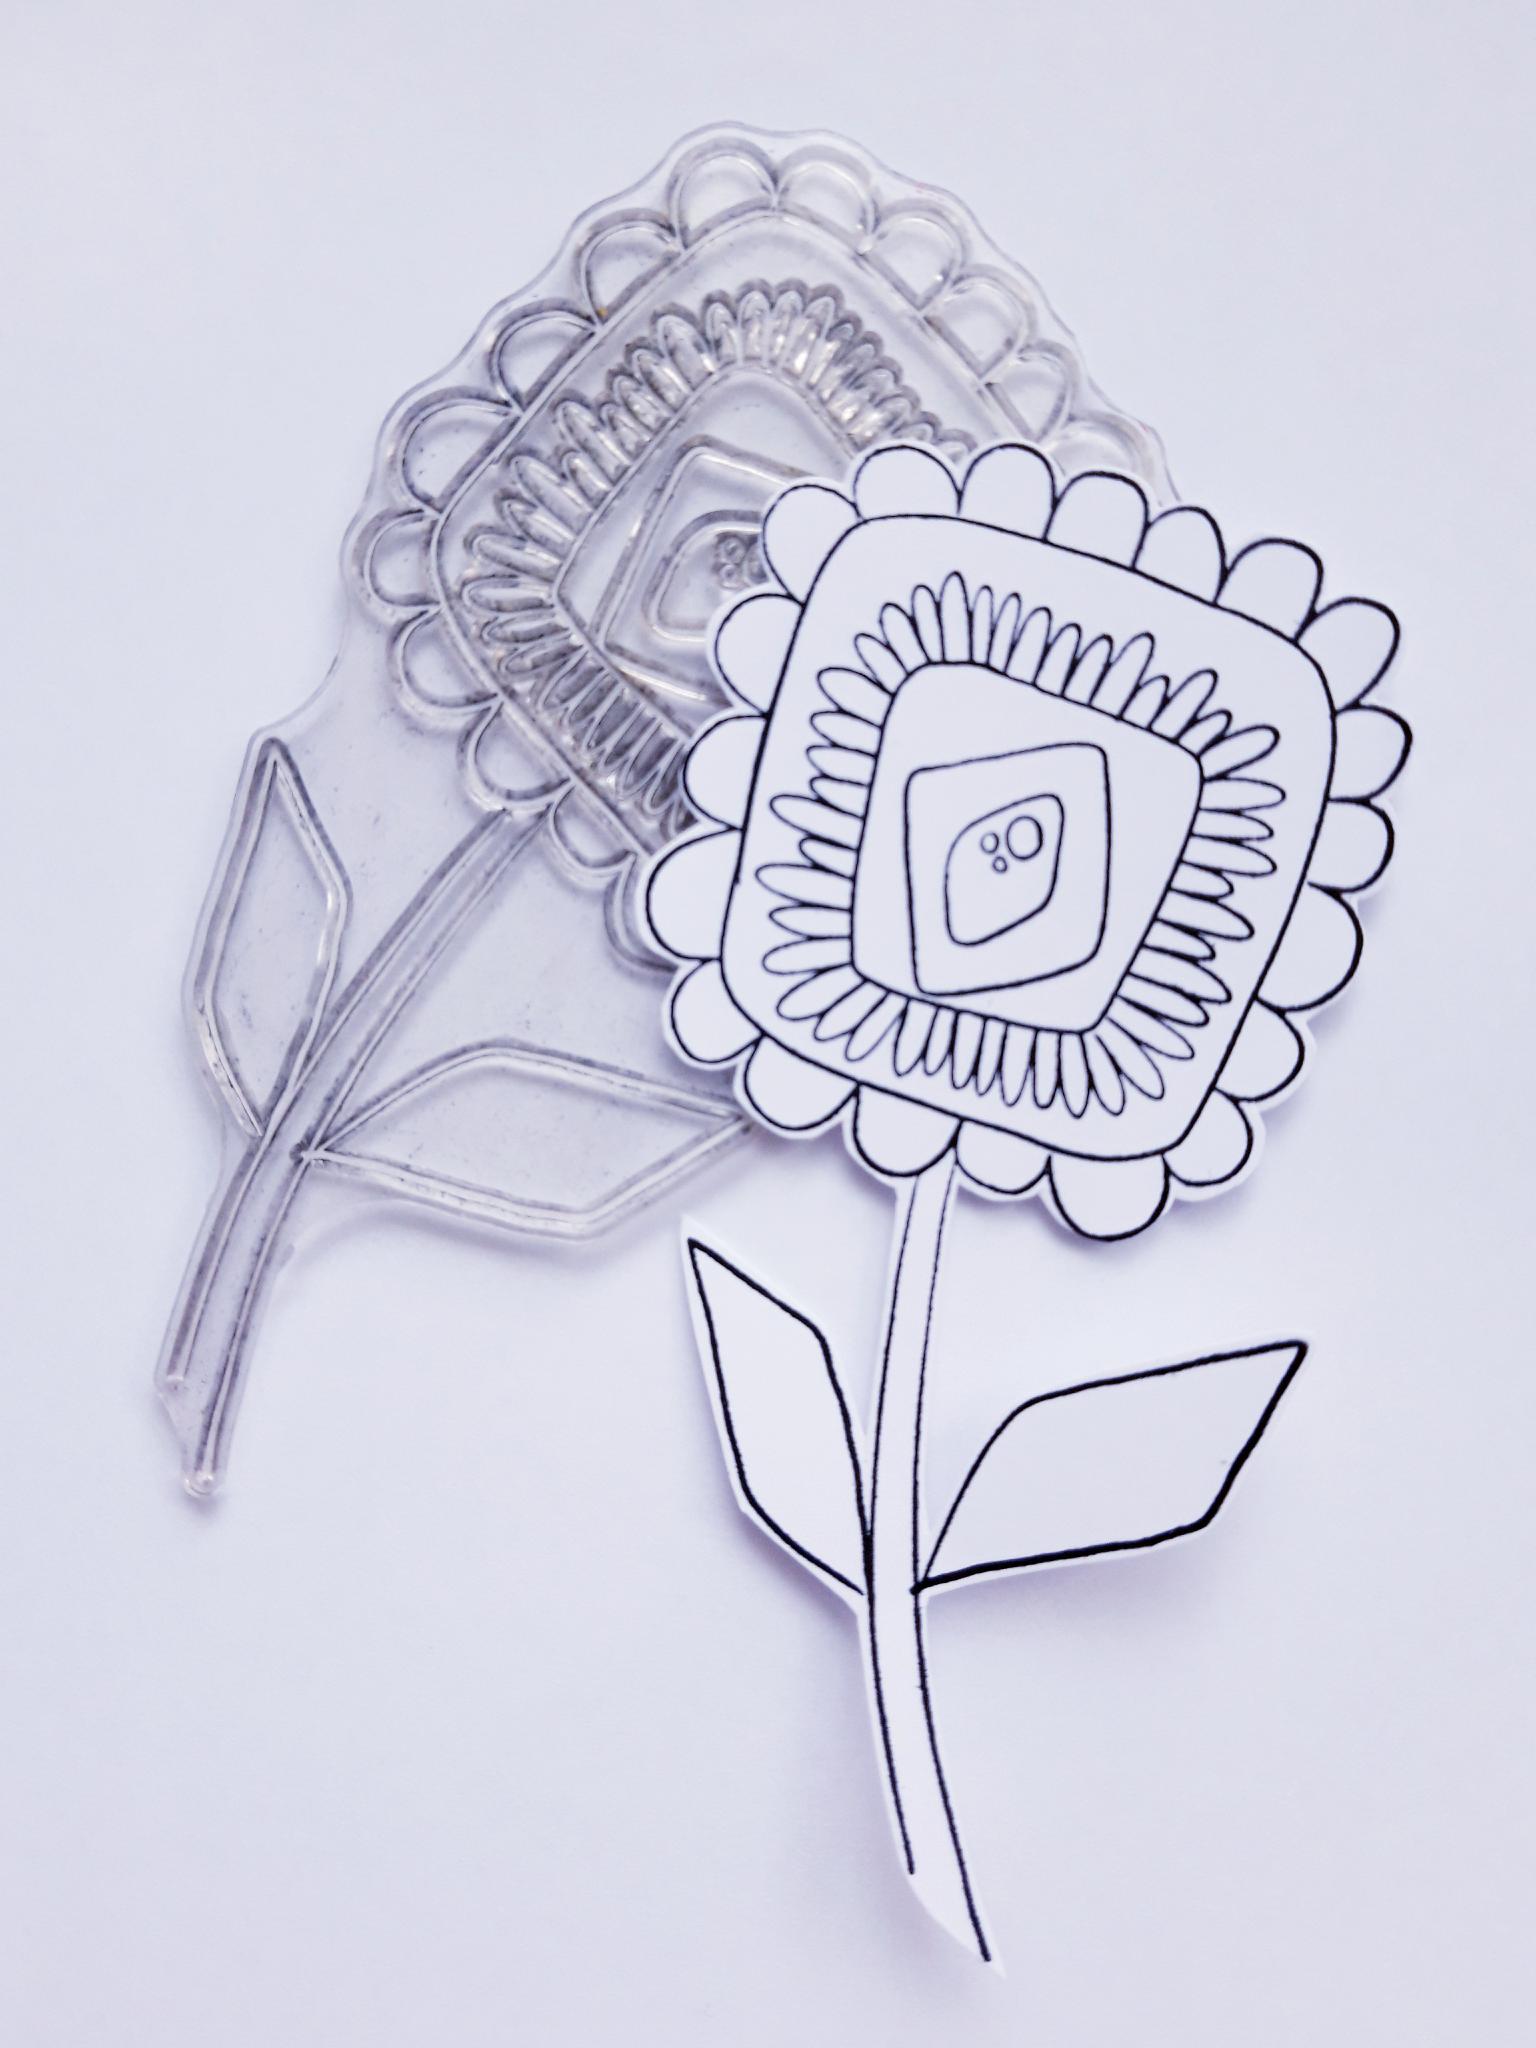
|
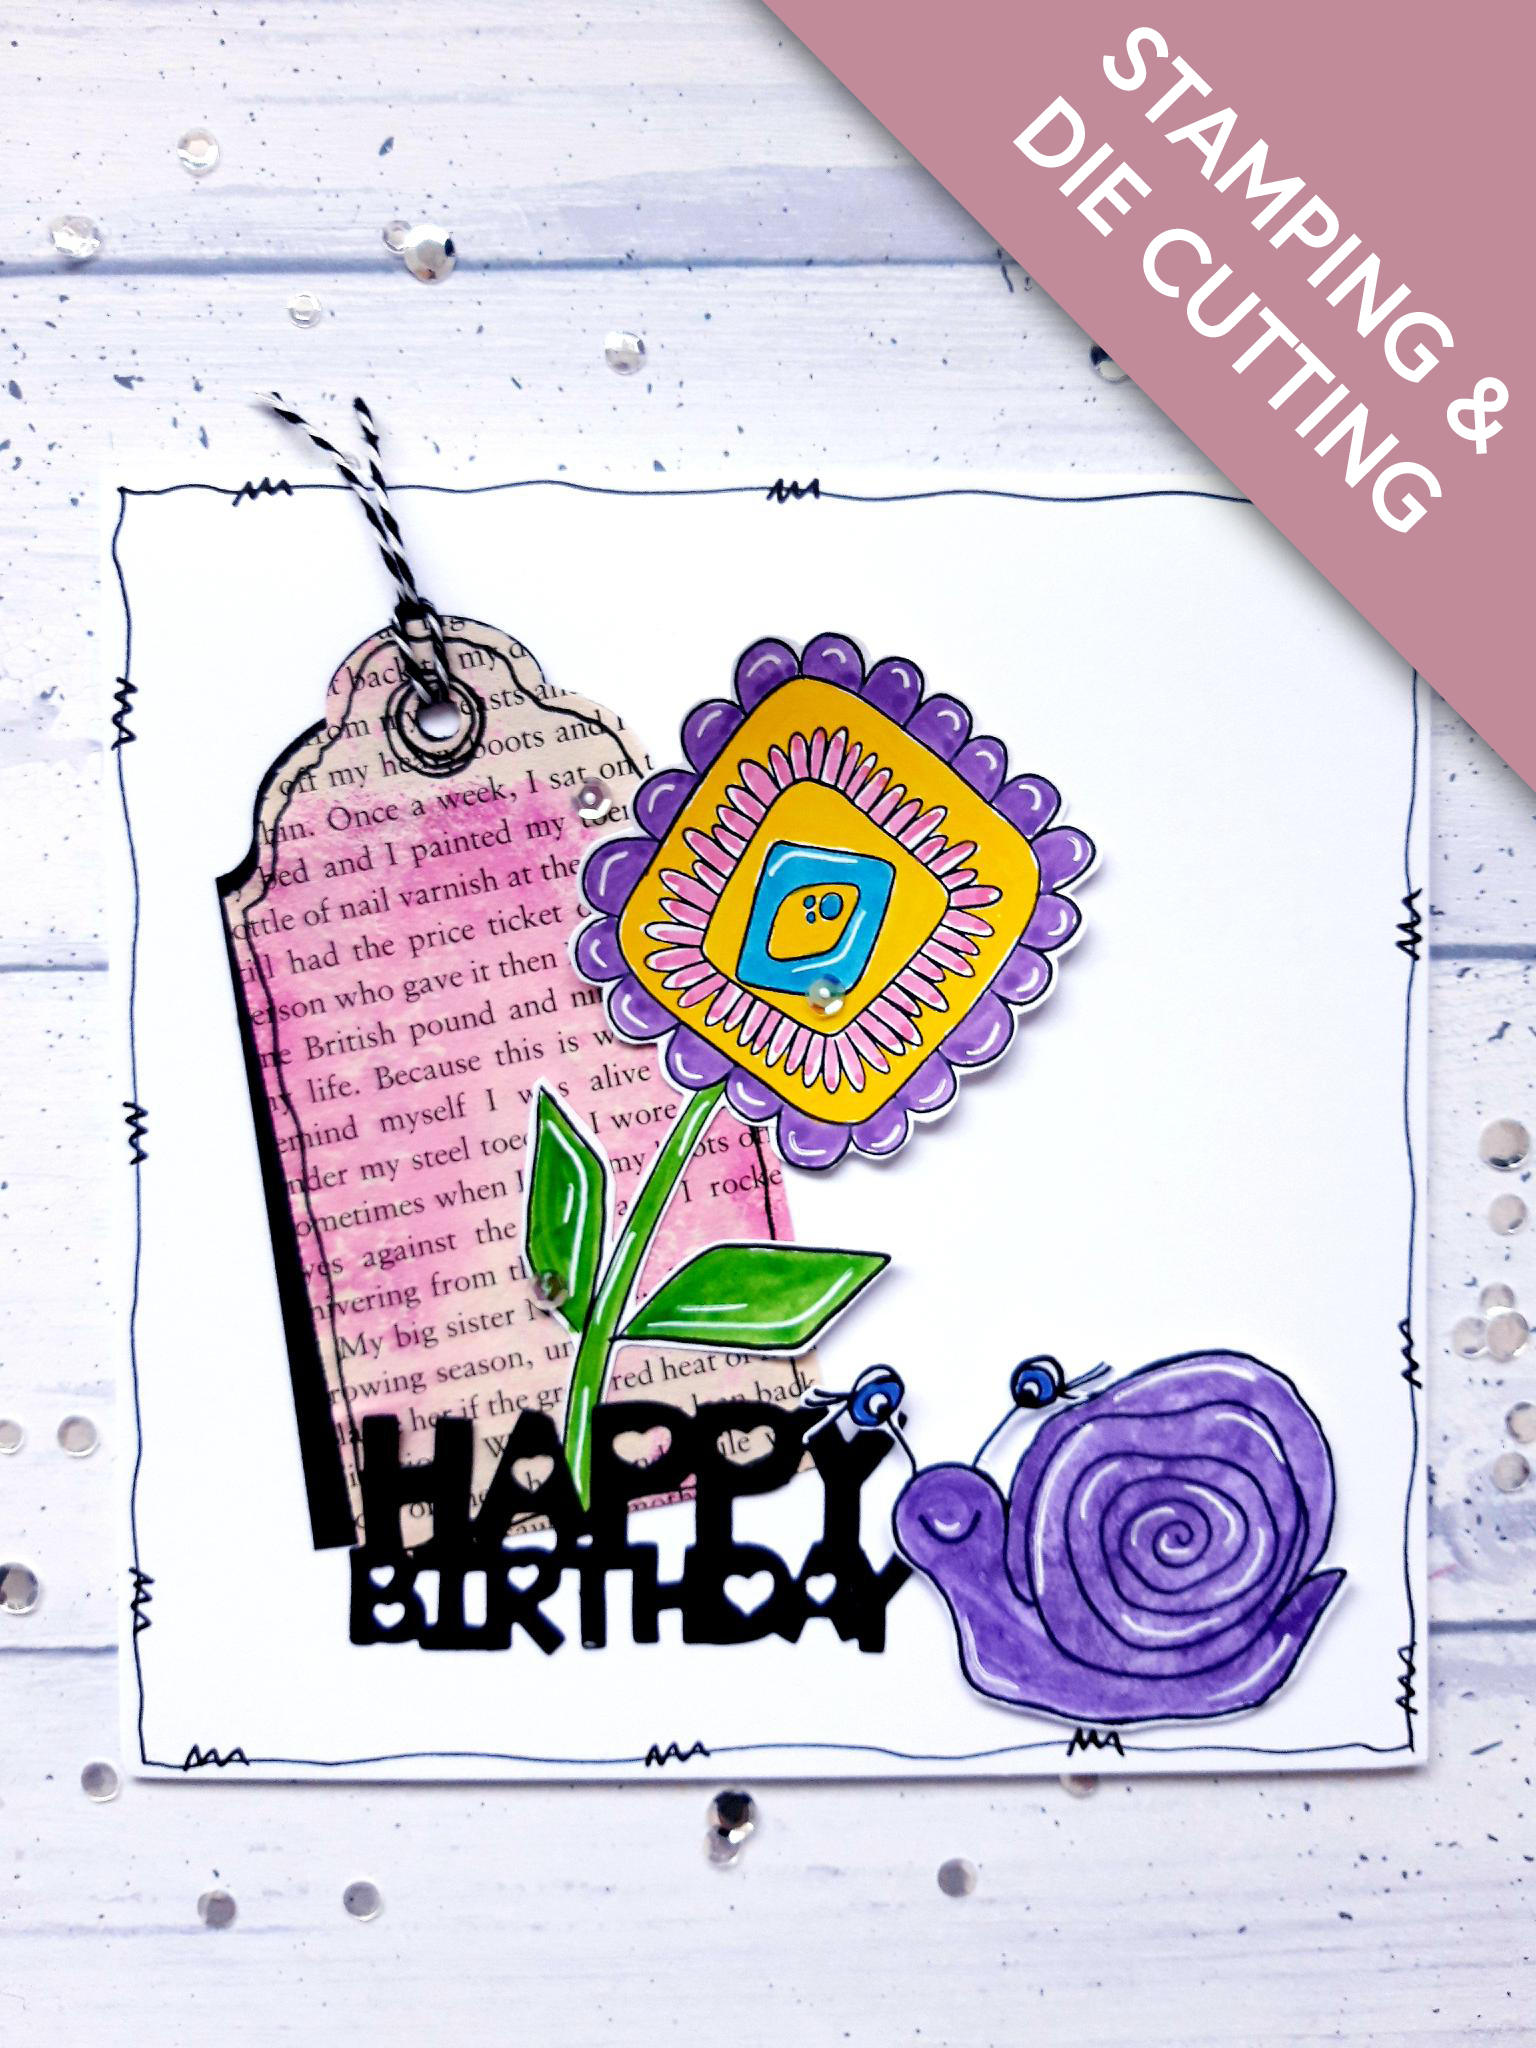
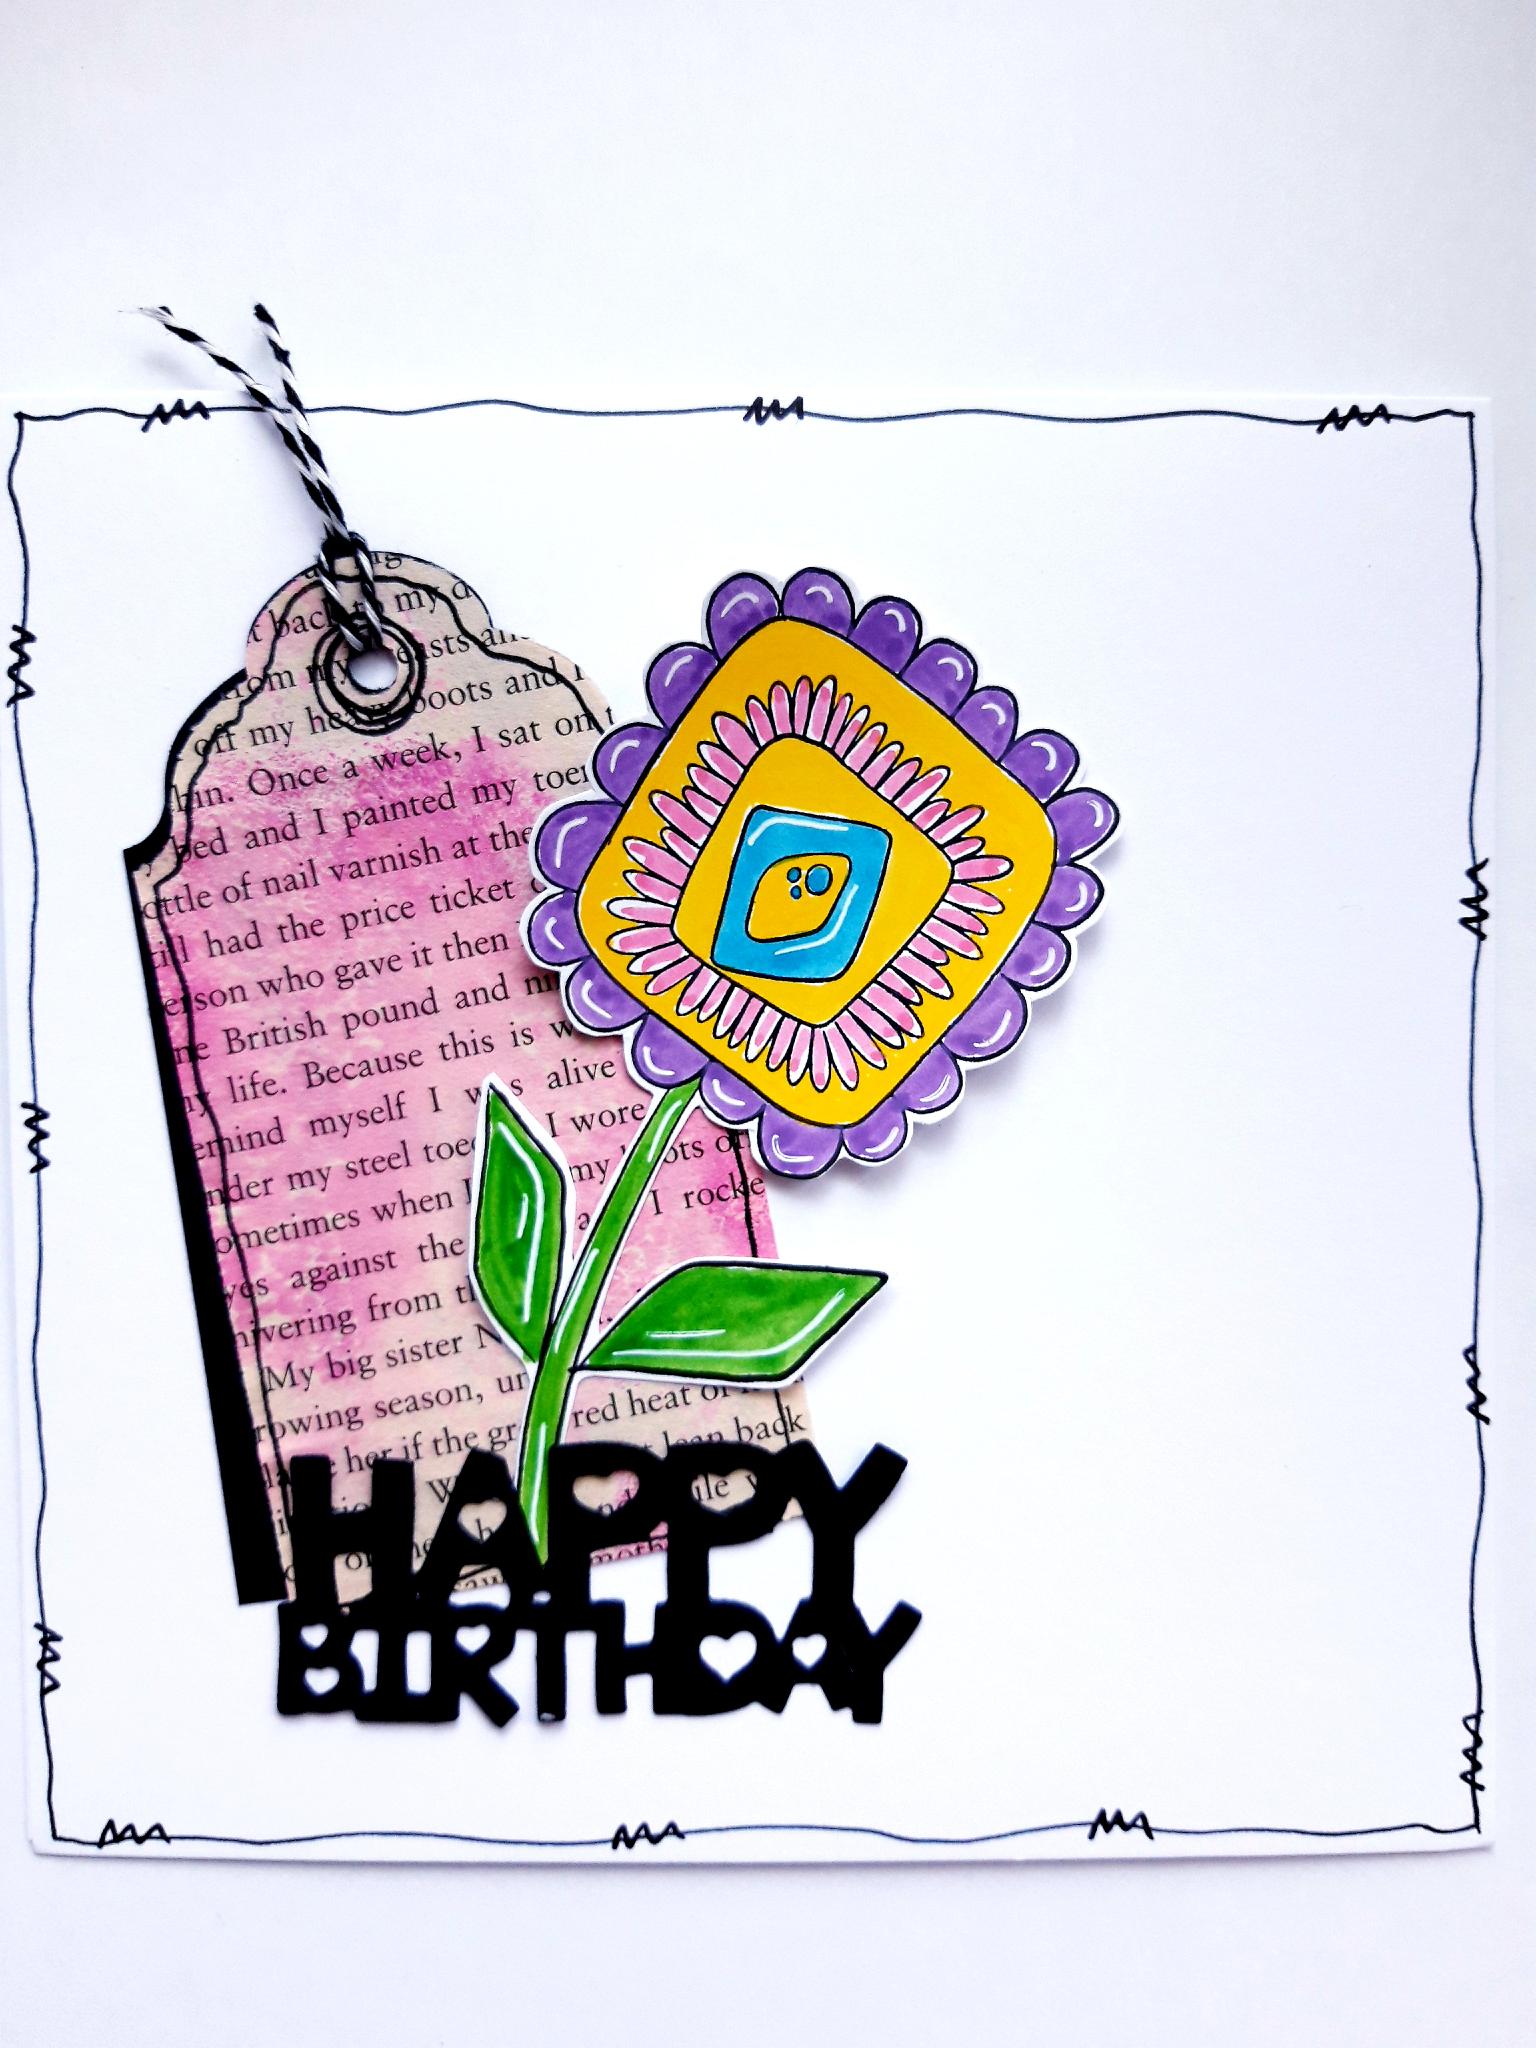
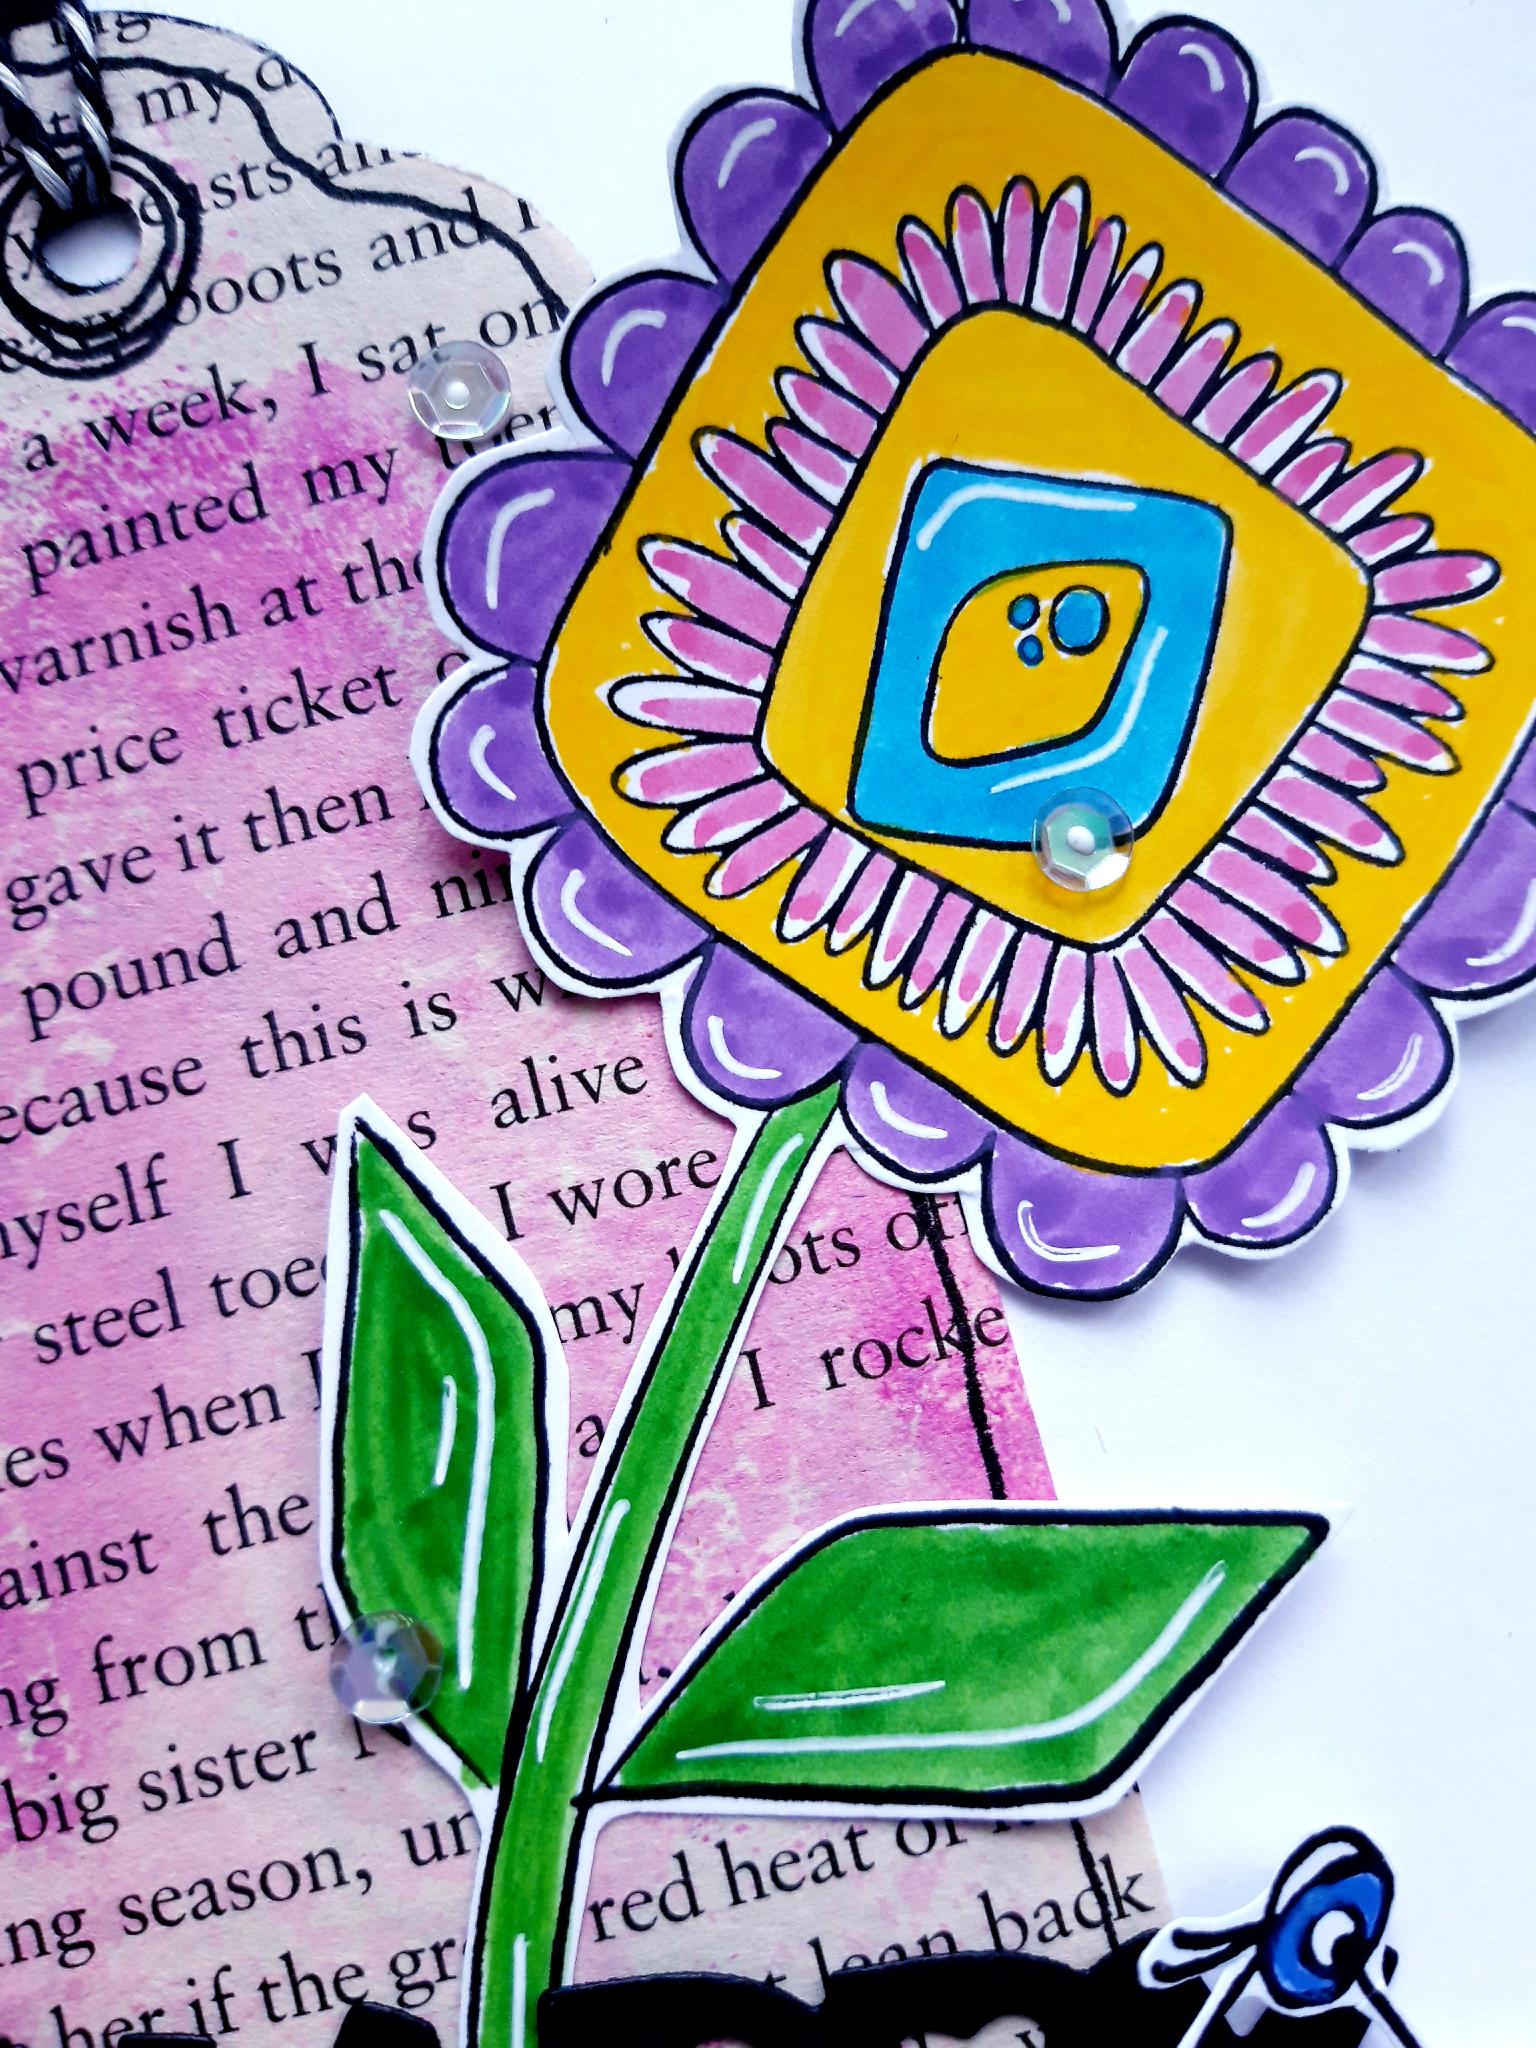
Ink up the floral stamp from the Petal Power Creative Stamps set, with Onyx Black Versafine. Stamp on to the A4 white card, and cut it out, putting the remaining white card to one side for later. |
|
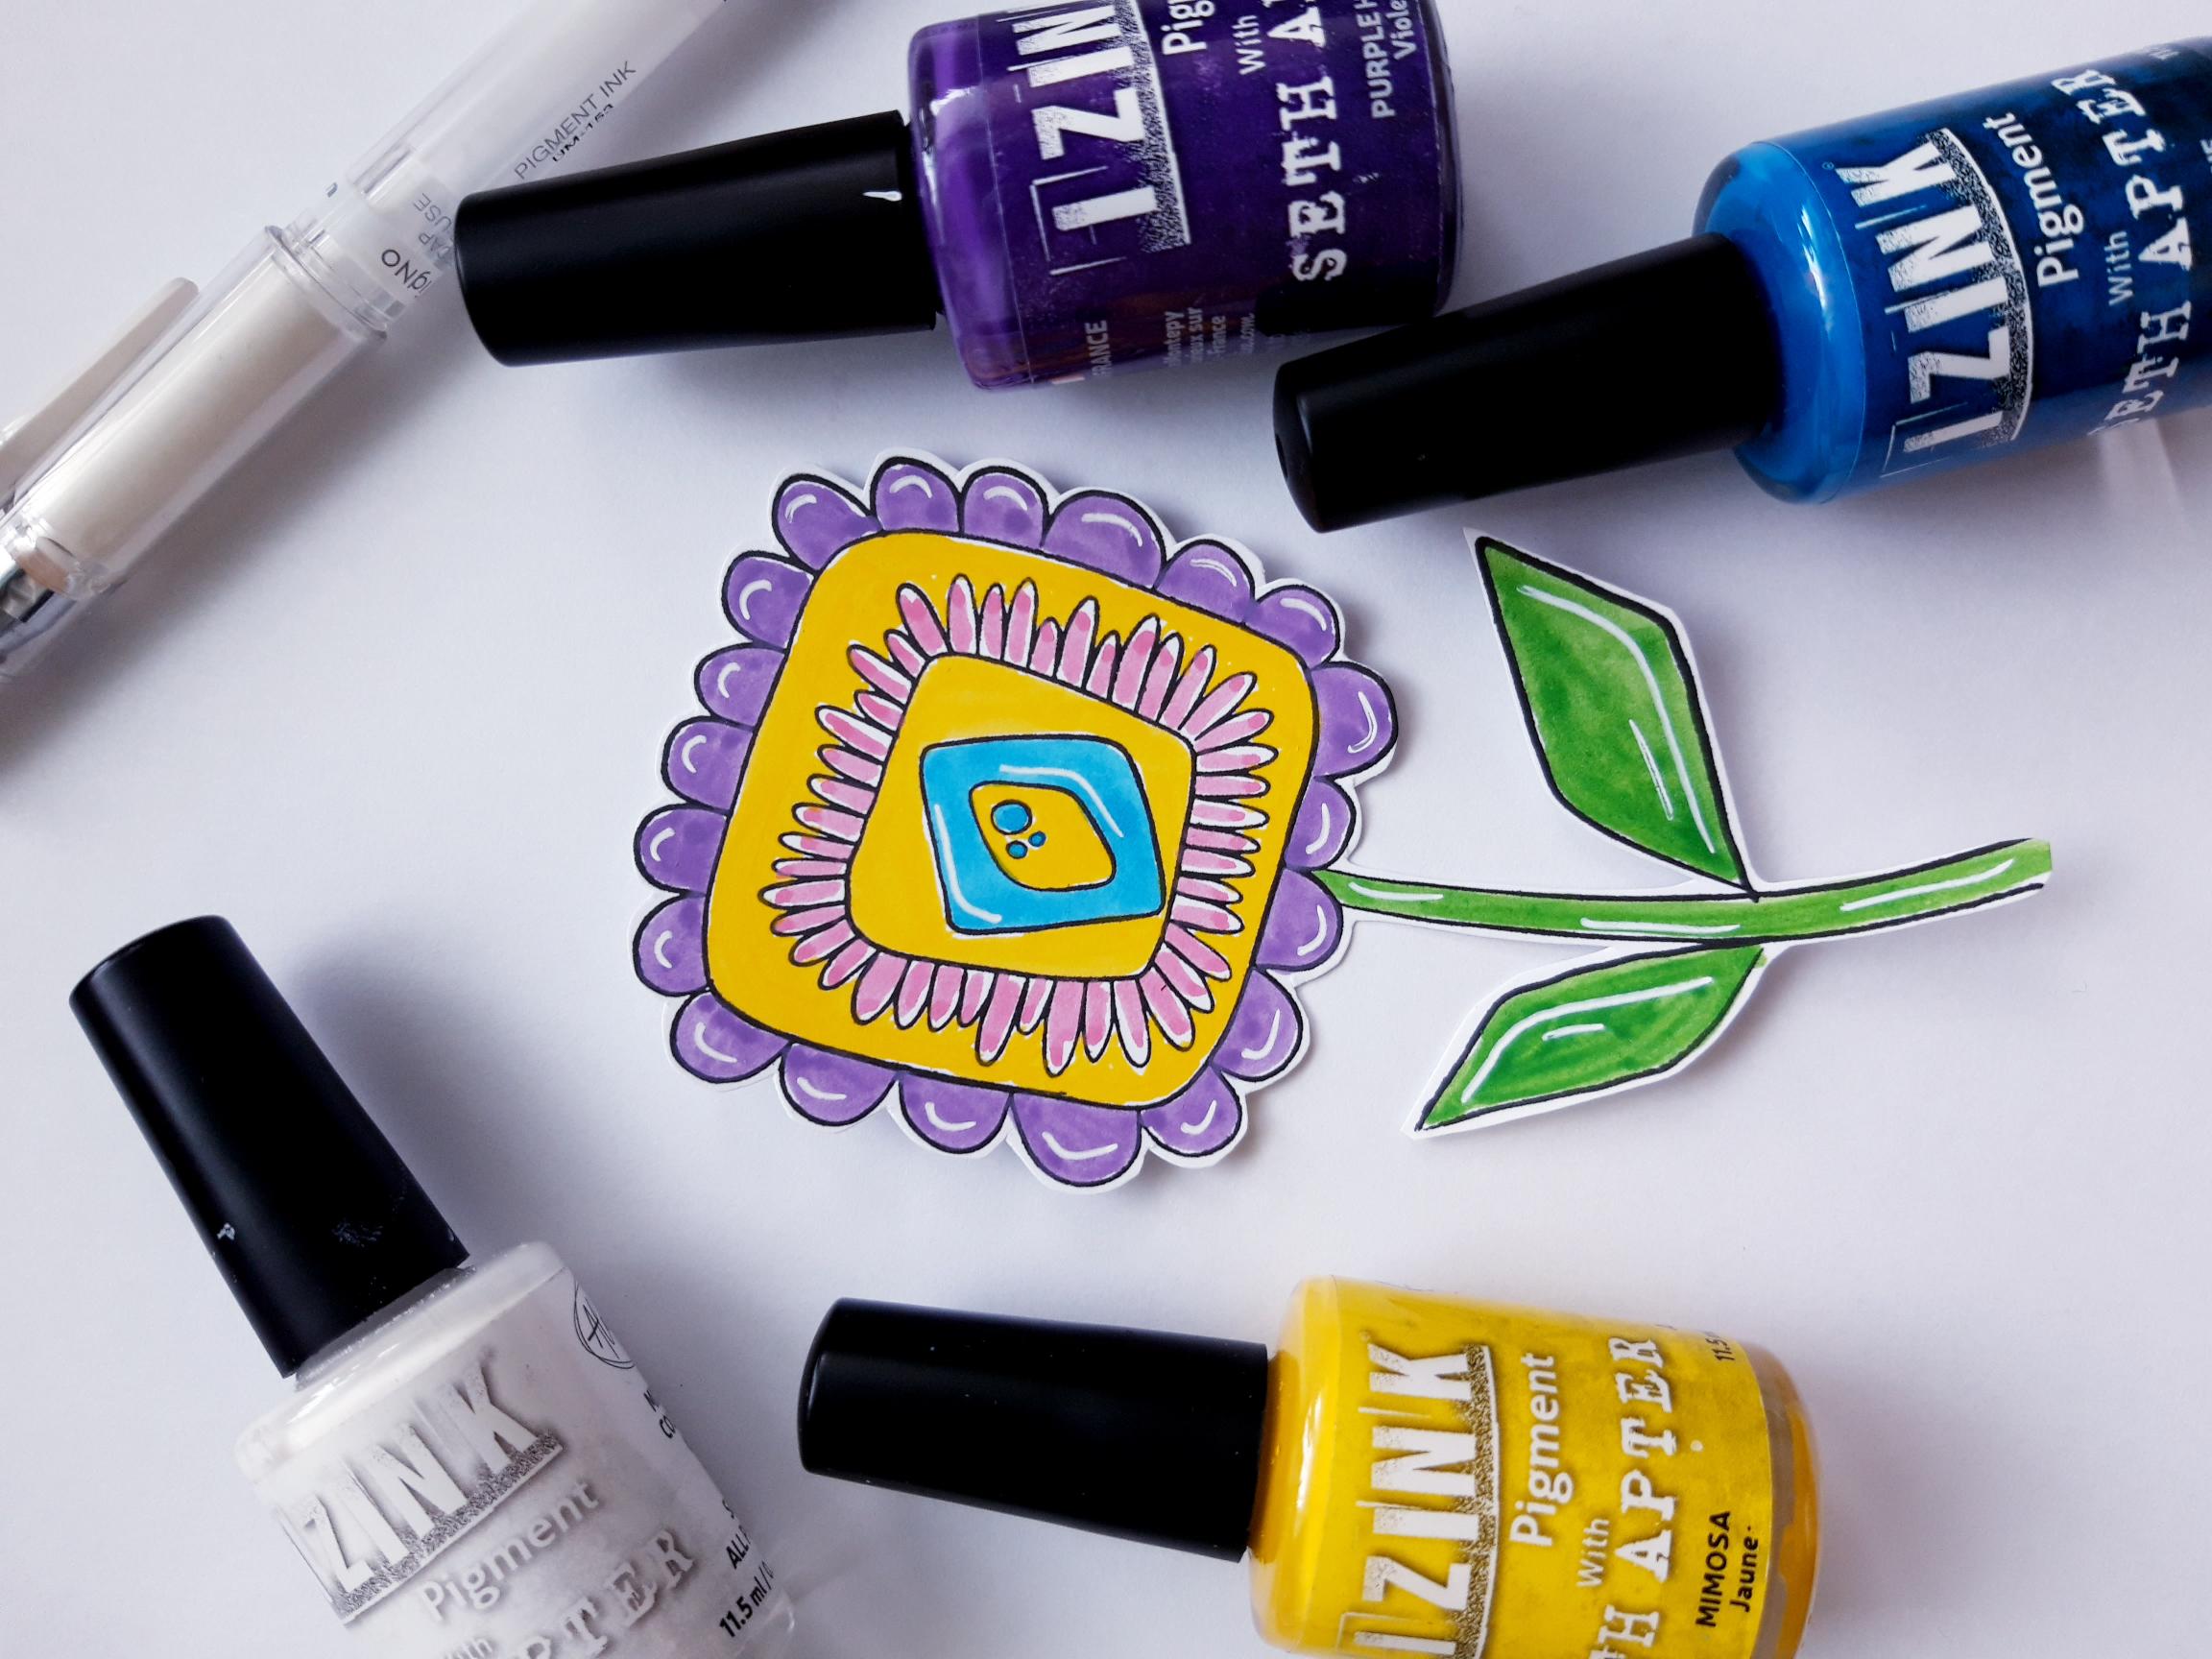
Add a small amount of the Avalanche, Mimosa, Purple Haze and Ultramarine Izink Pigments, on to a craft or glass mat. Adding a tiny bit of water, use a paint brush to paint your flower. I mixed the Ultramarine and Avalanche, to create a lighter turquoise. Once the Pigments are completely dry, use a white gel pen to add highlights to your image. Set your flower to one side. |
|
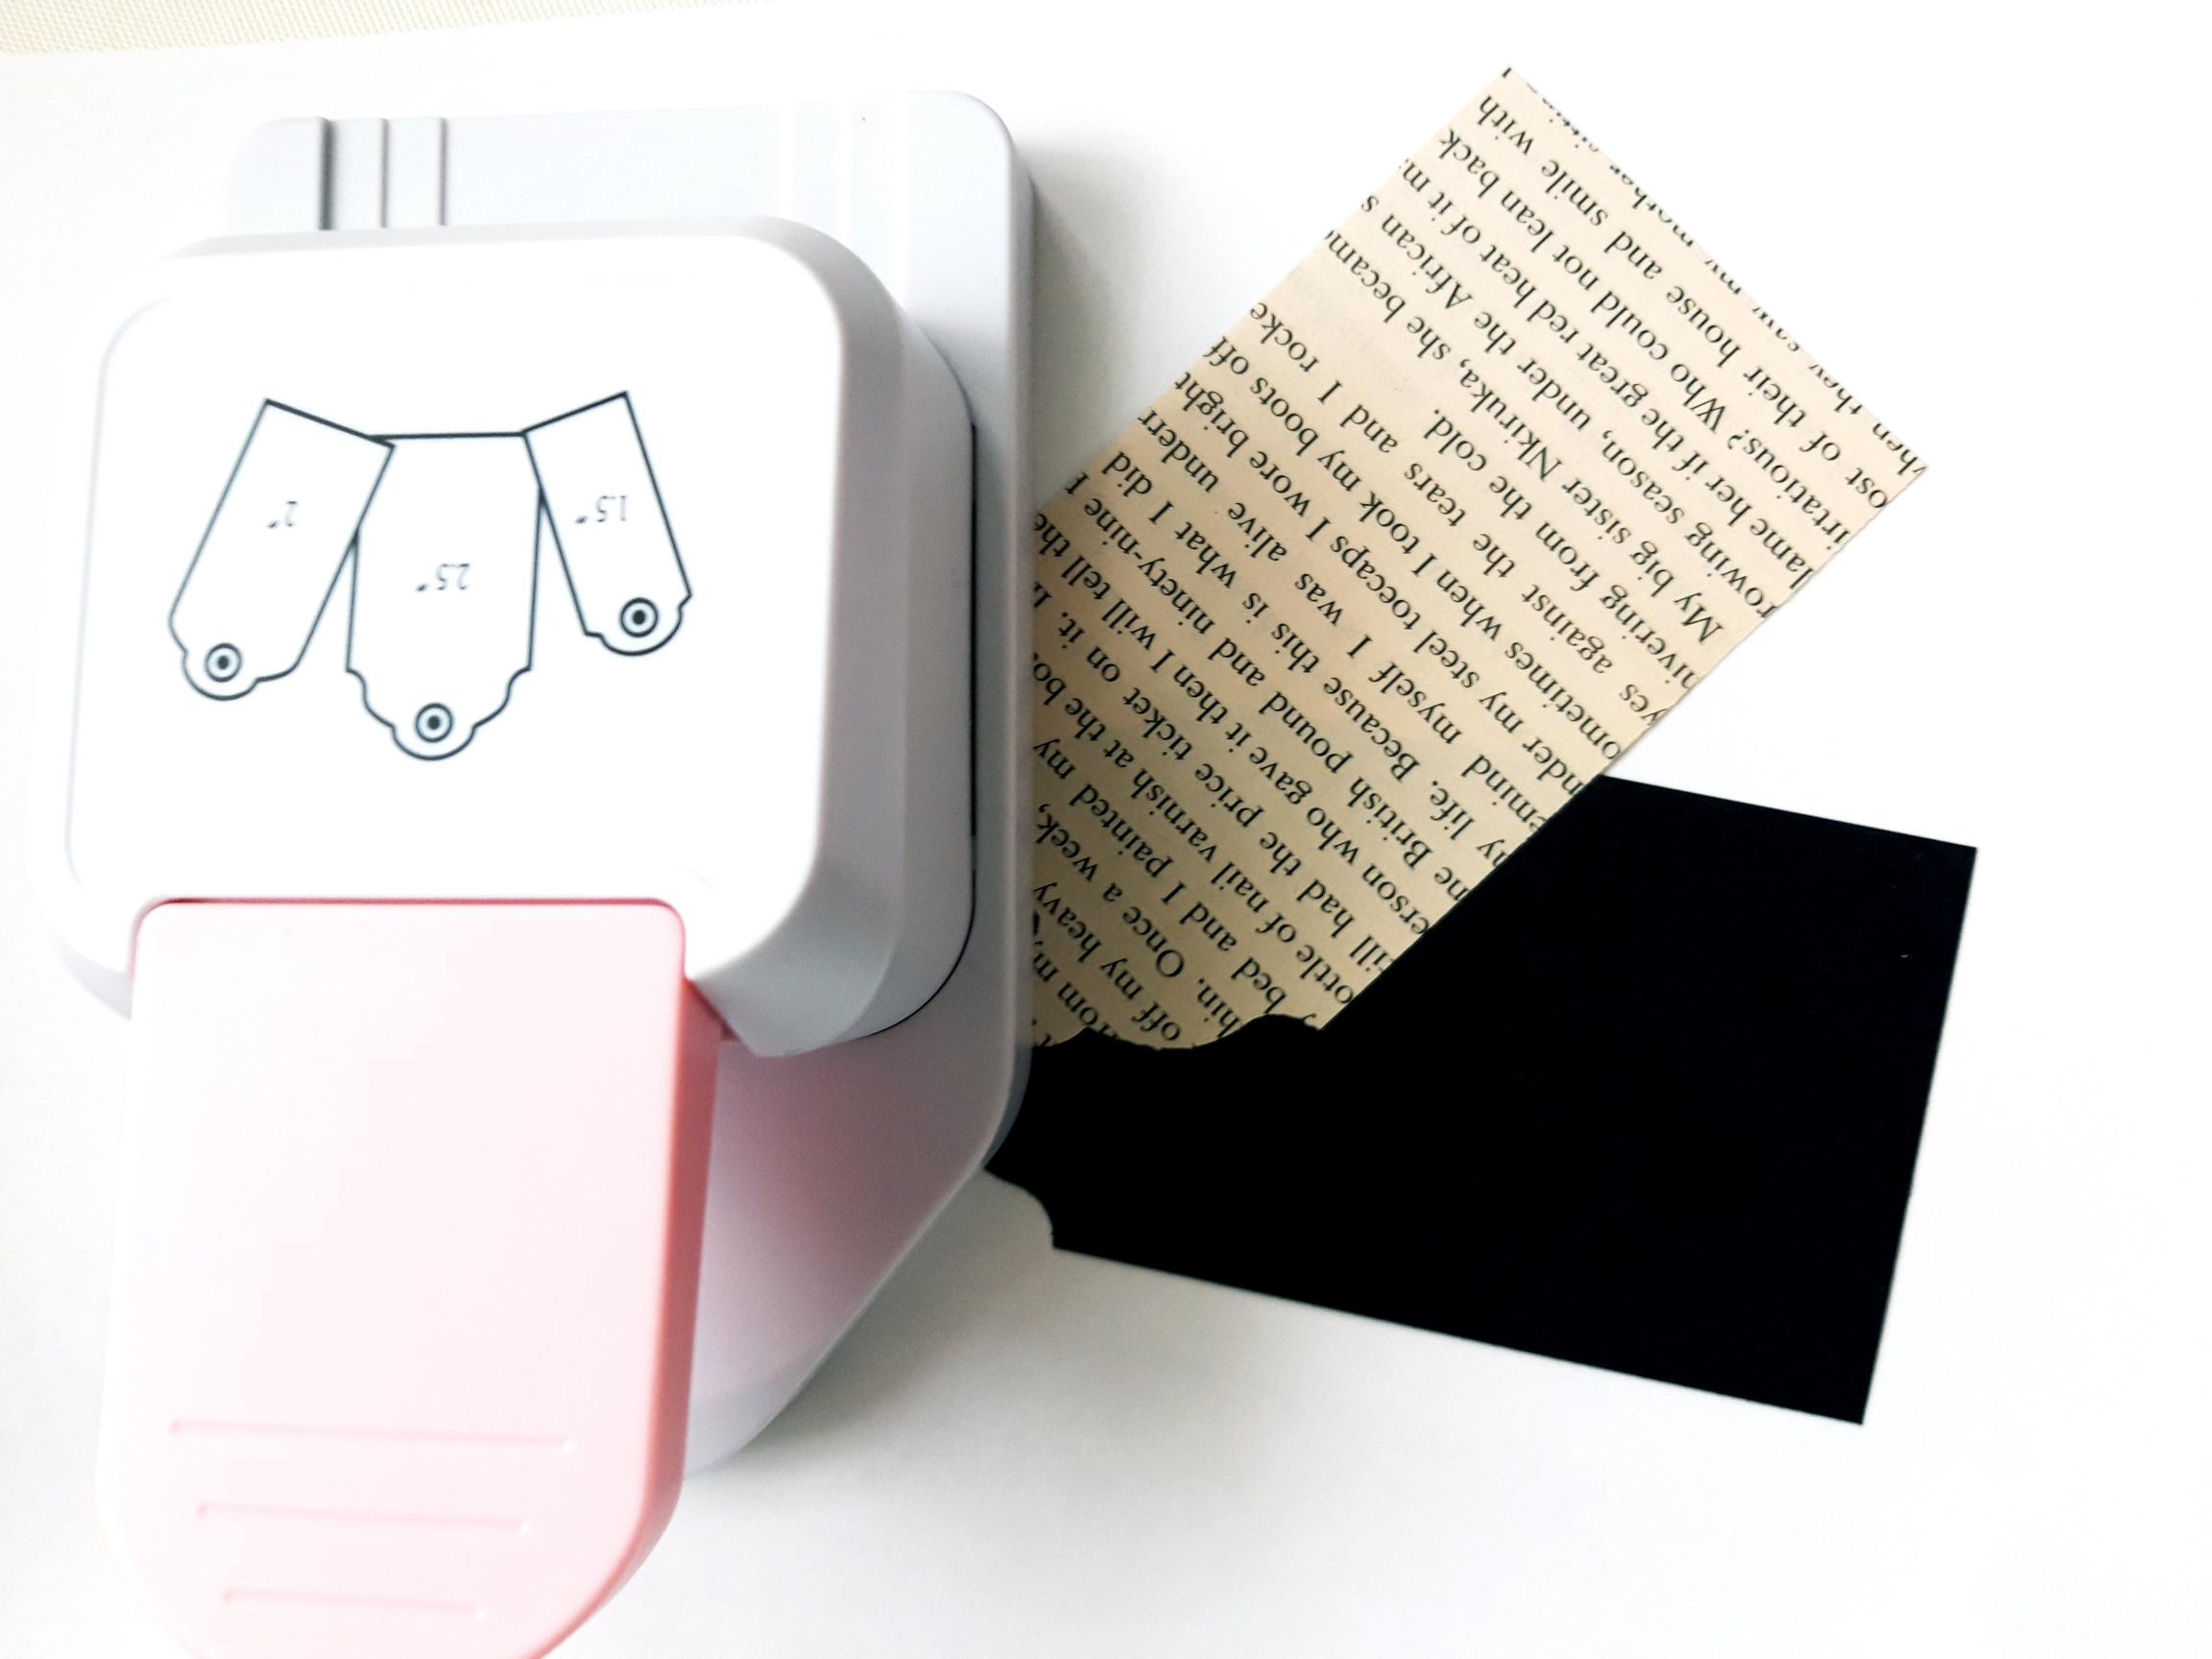
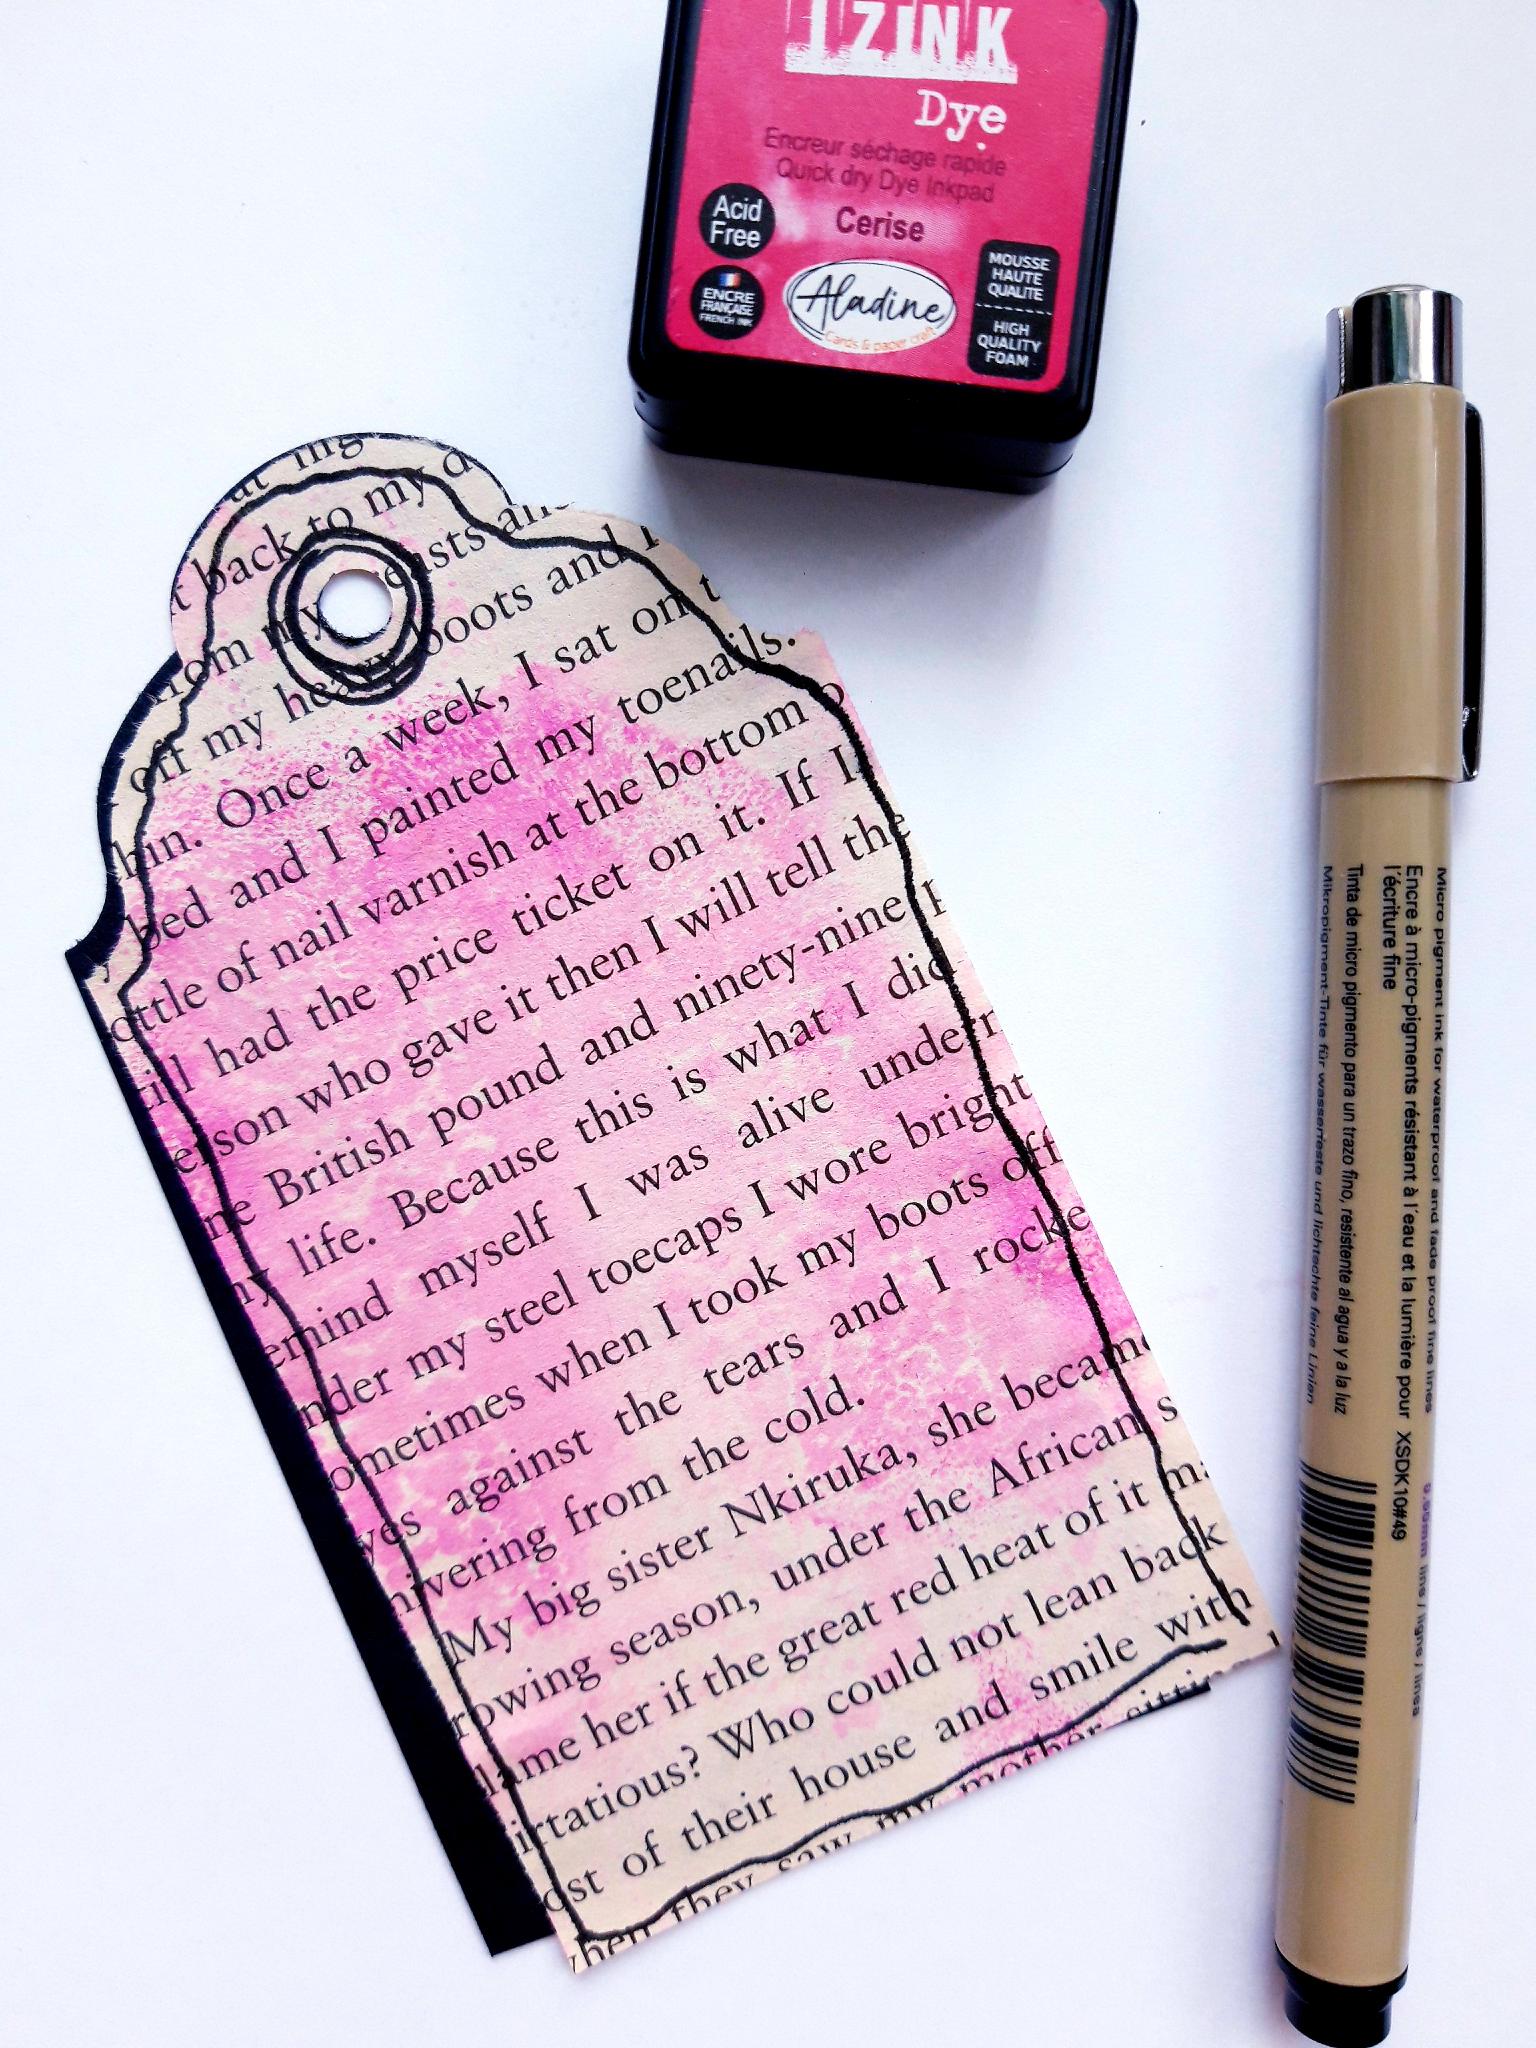
Use your tag punch to cut out 2 tags, from the book page, and the black card (4 3/4 x 2 1/2") |
|
Apply a little of the Izink Cerise Dye Ink on to a craft or glass mat. Spritz with a little water, then pick up some of the ink on to the book page tag. Dry off the ink, before gluing just the top of the book page tag, to the top of the black tag, at a slight angle. Use a black pen to draw a wiggly frame around the tag, and the punched hole. |
|
Use the black pen to draw a decorative wiggly frame around your card blank. |
|
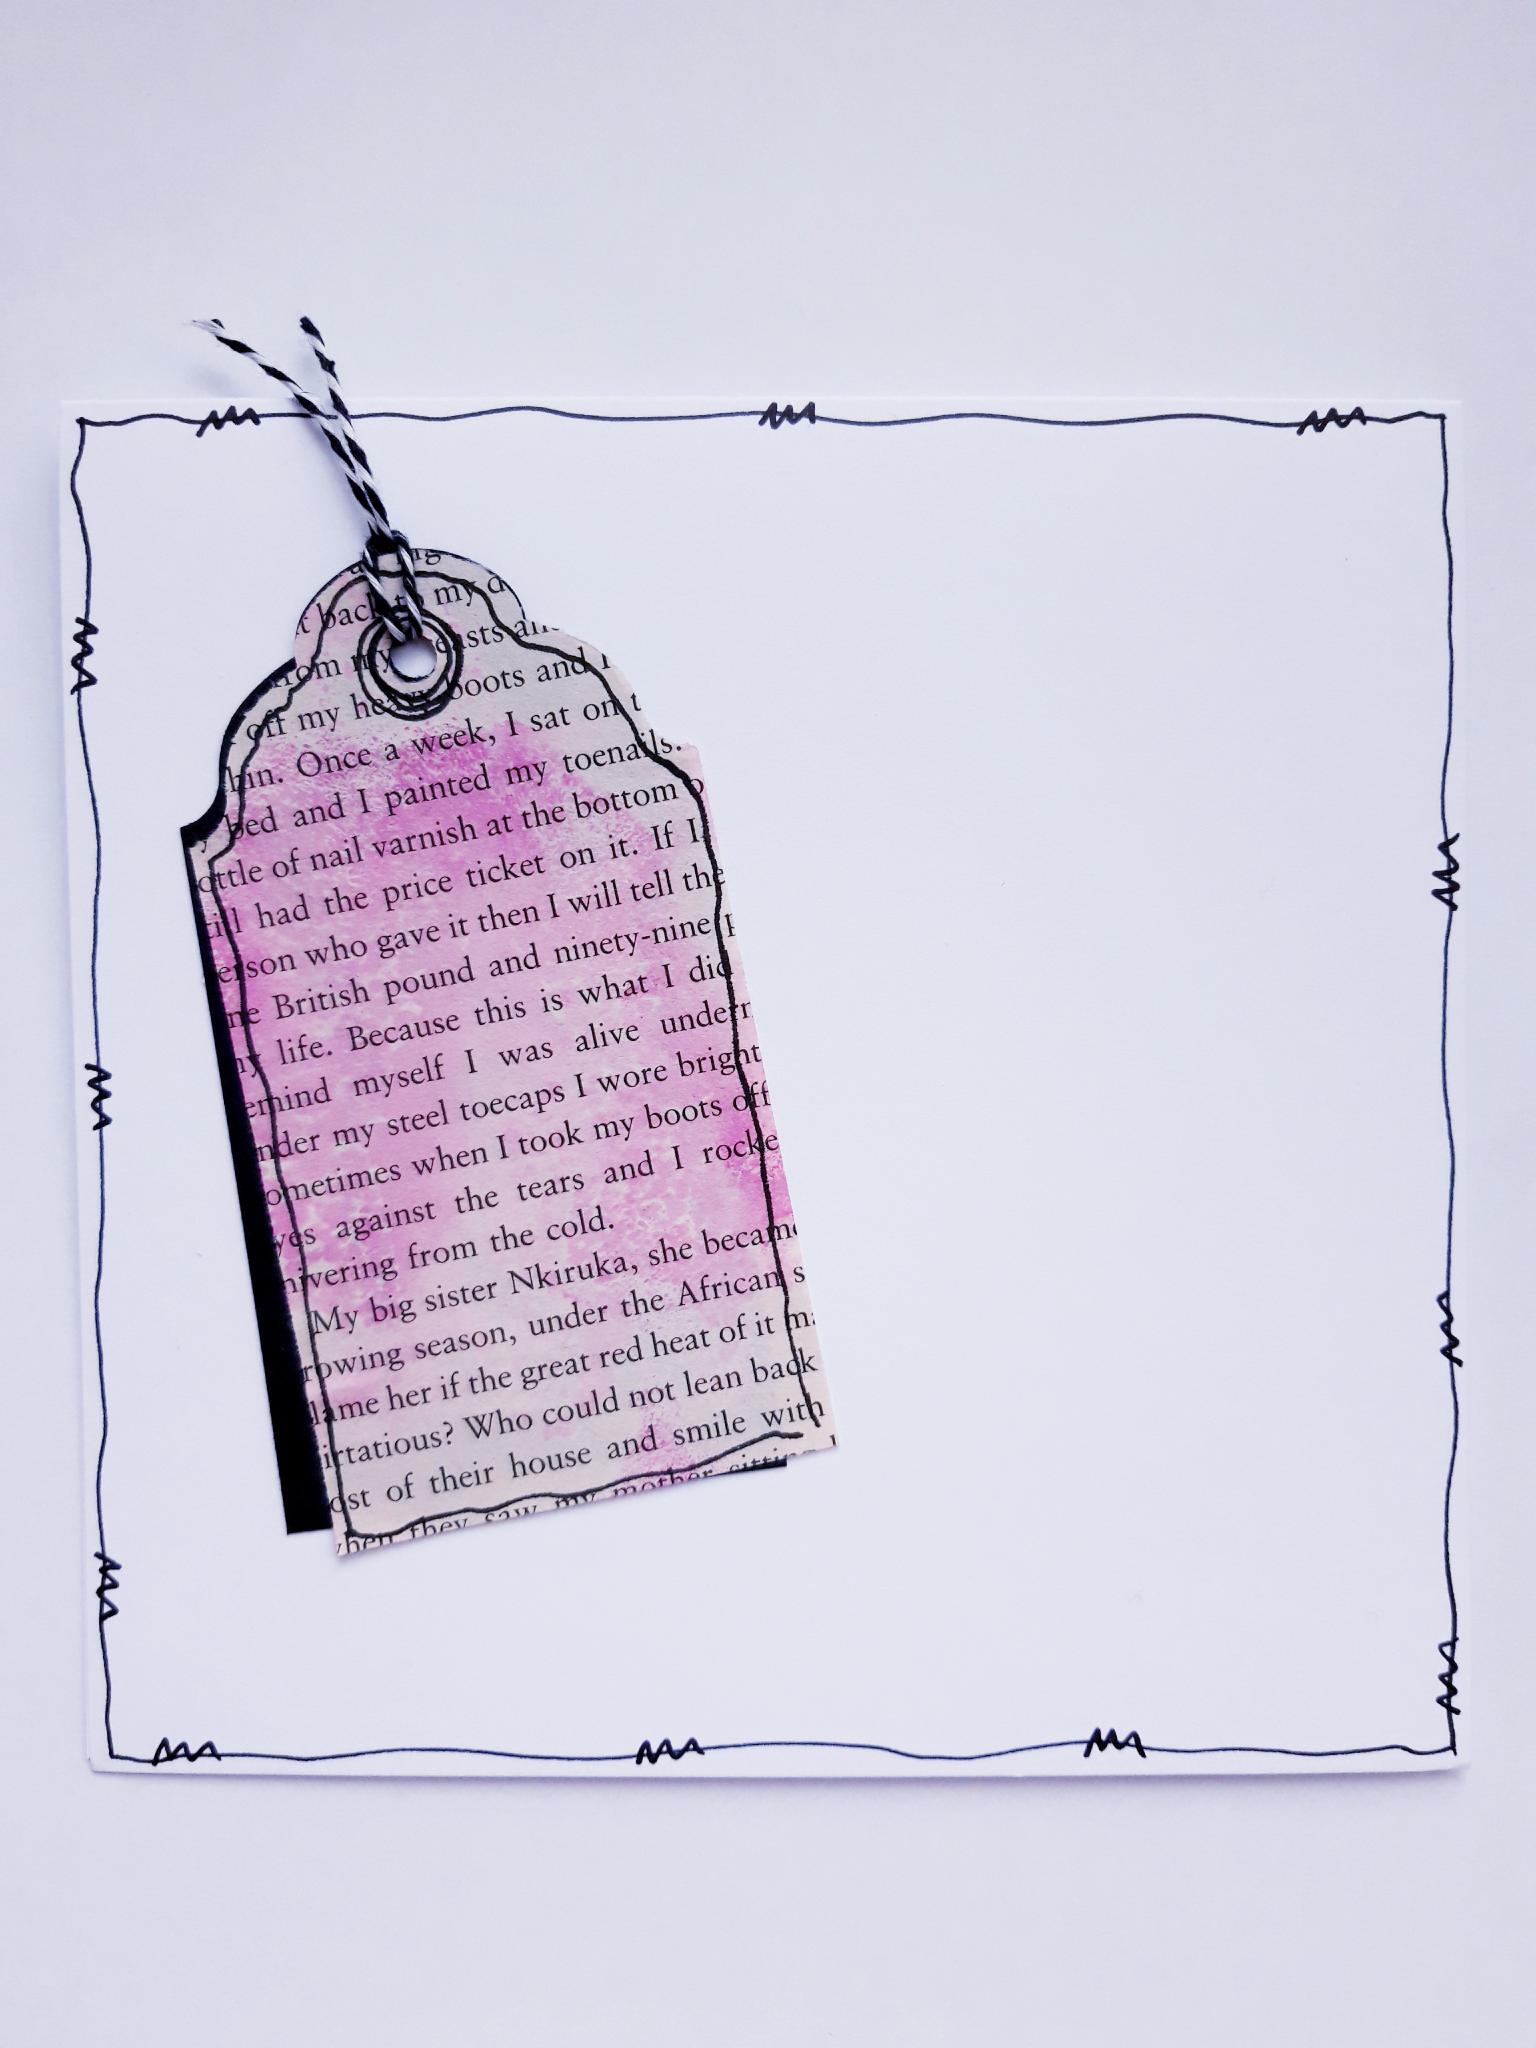
Add some Bakers Twine to your tag, before gluing the top of the tag on to the left hand side of your card blank. |
|
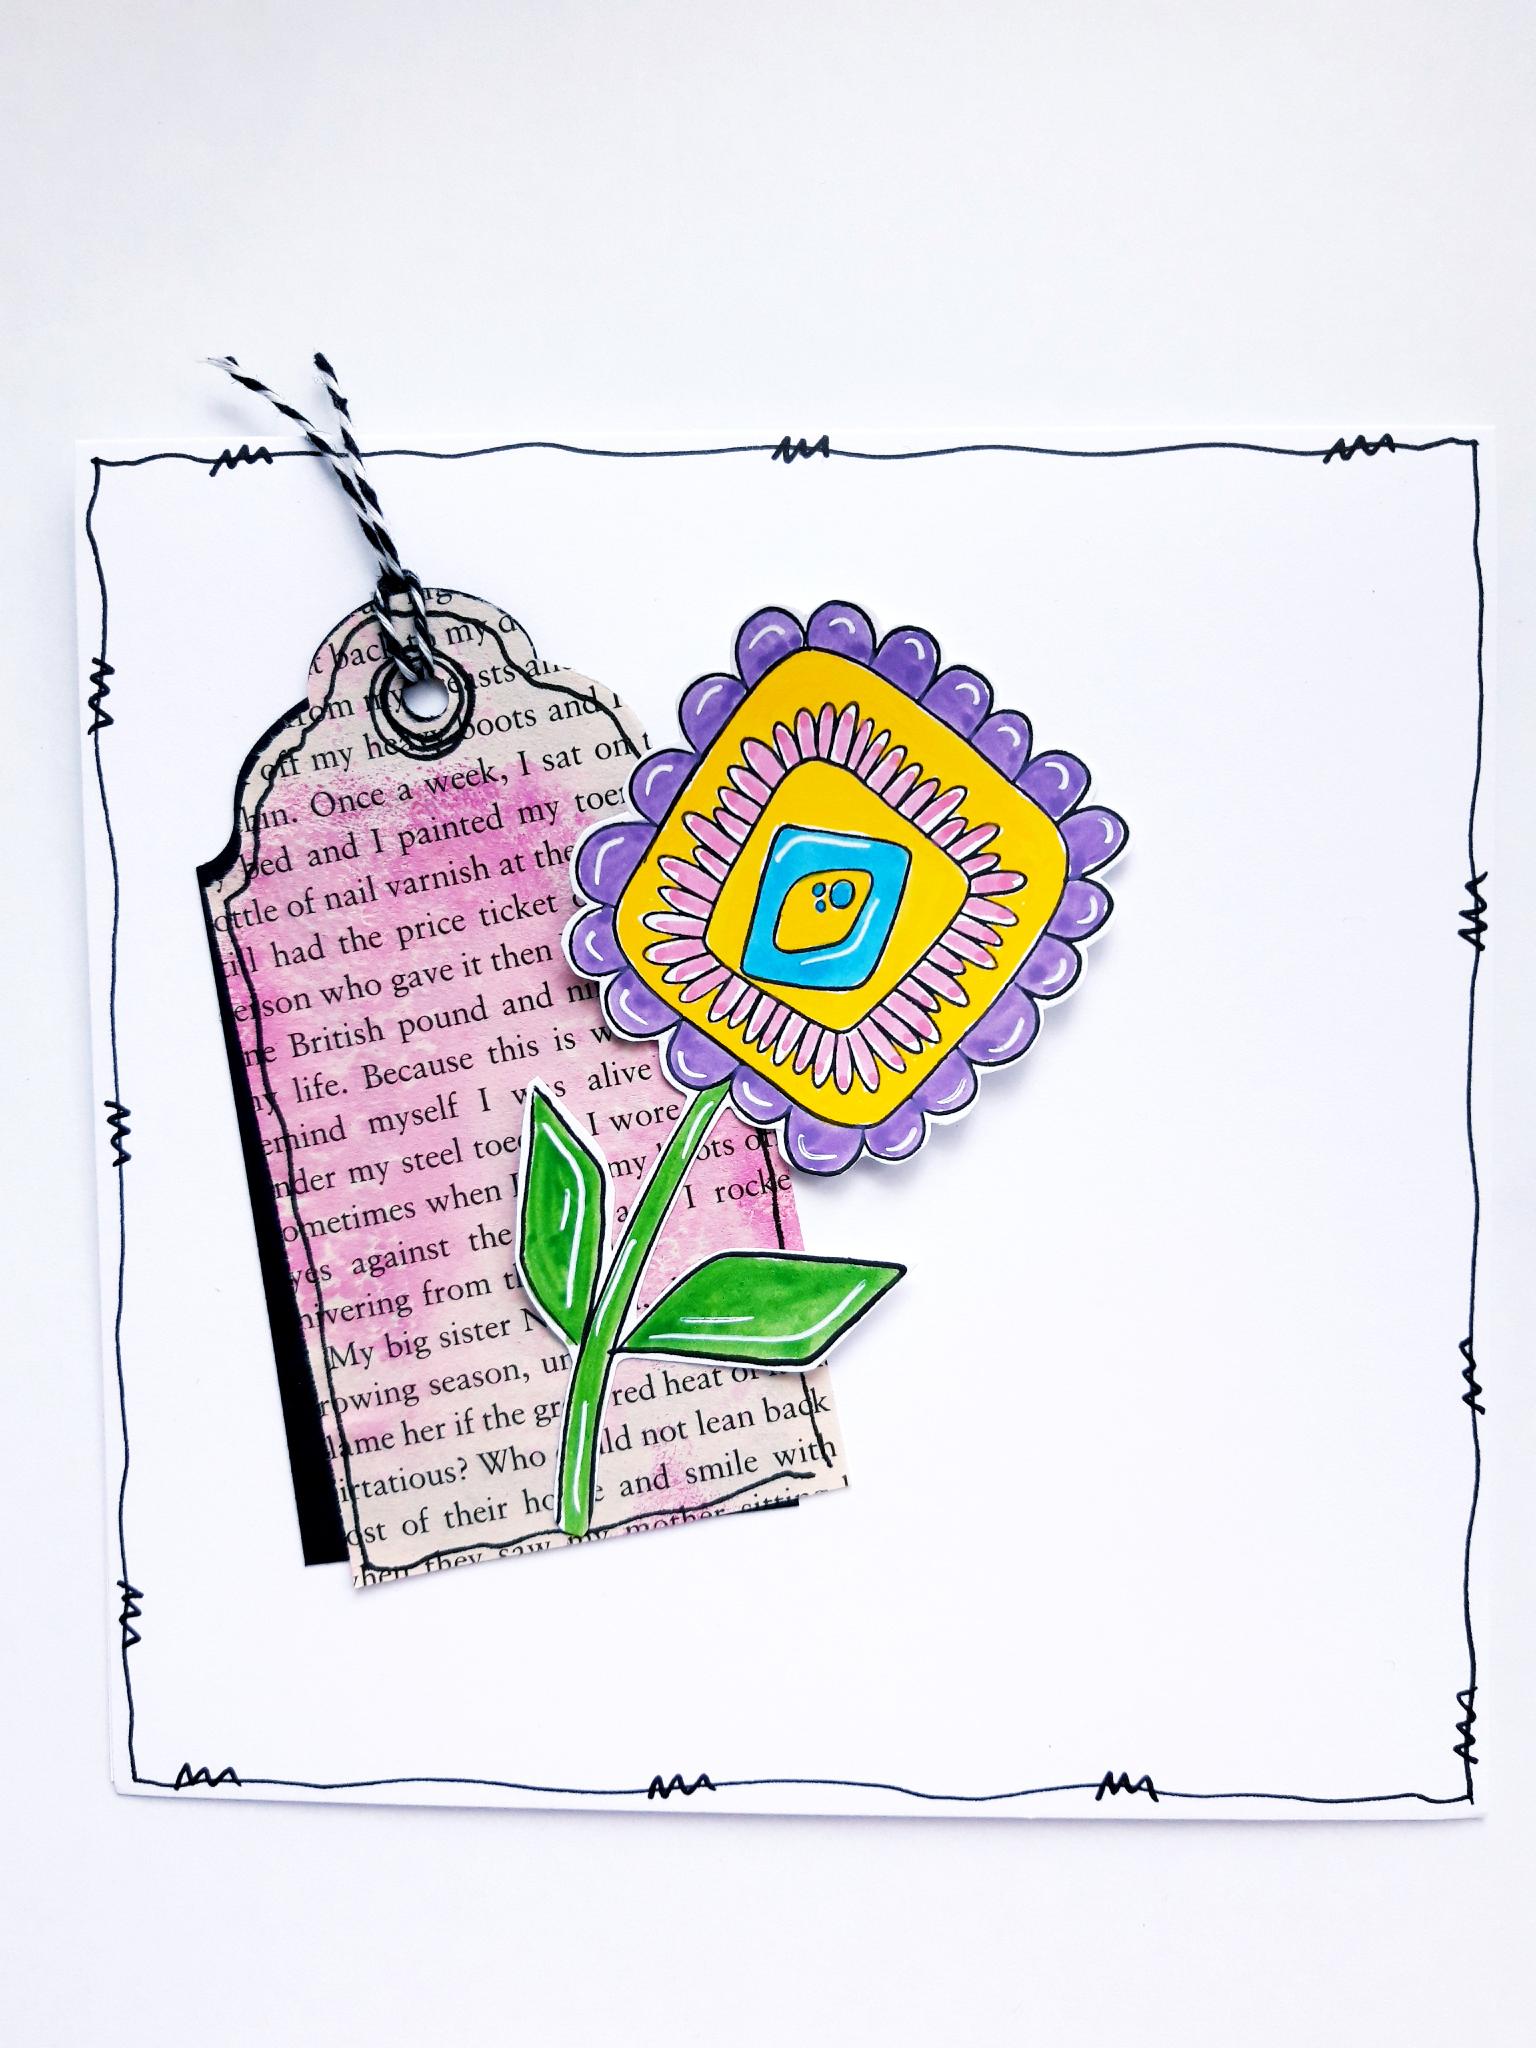
Glue your painted flower on to your card, using wet glue, and/or foam pads, to add more dimension to your artwork. |
|
Use the Happy Birthday die, from the Build A Bloom Creative Dies set, to cut out TWO sentiments, from the black cardstock (4x4"). Glue one on top of the other, to create a sturdier sentiment embellishment. |
|
Glue the sentiment on to your artwork, with wet glue. |
|
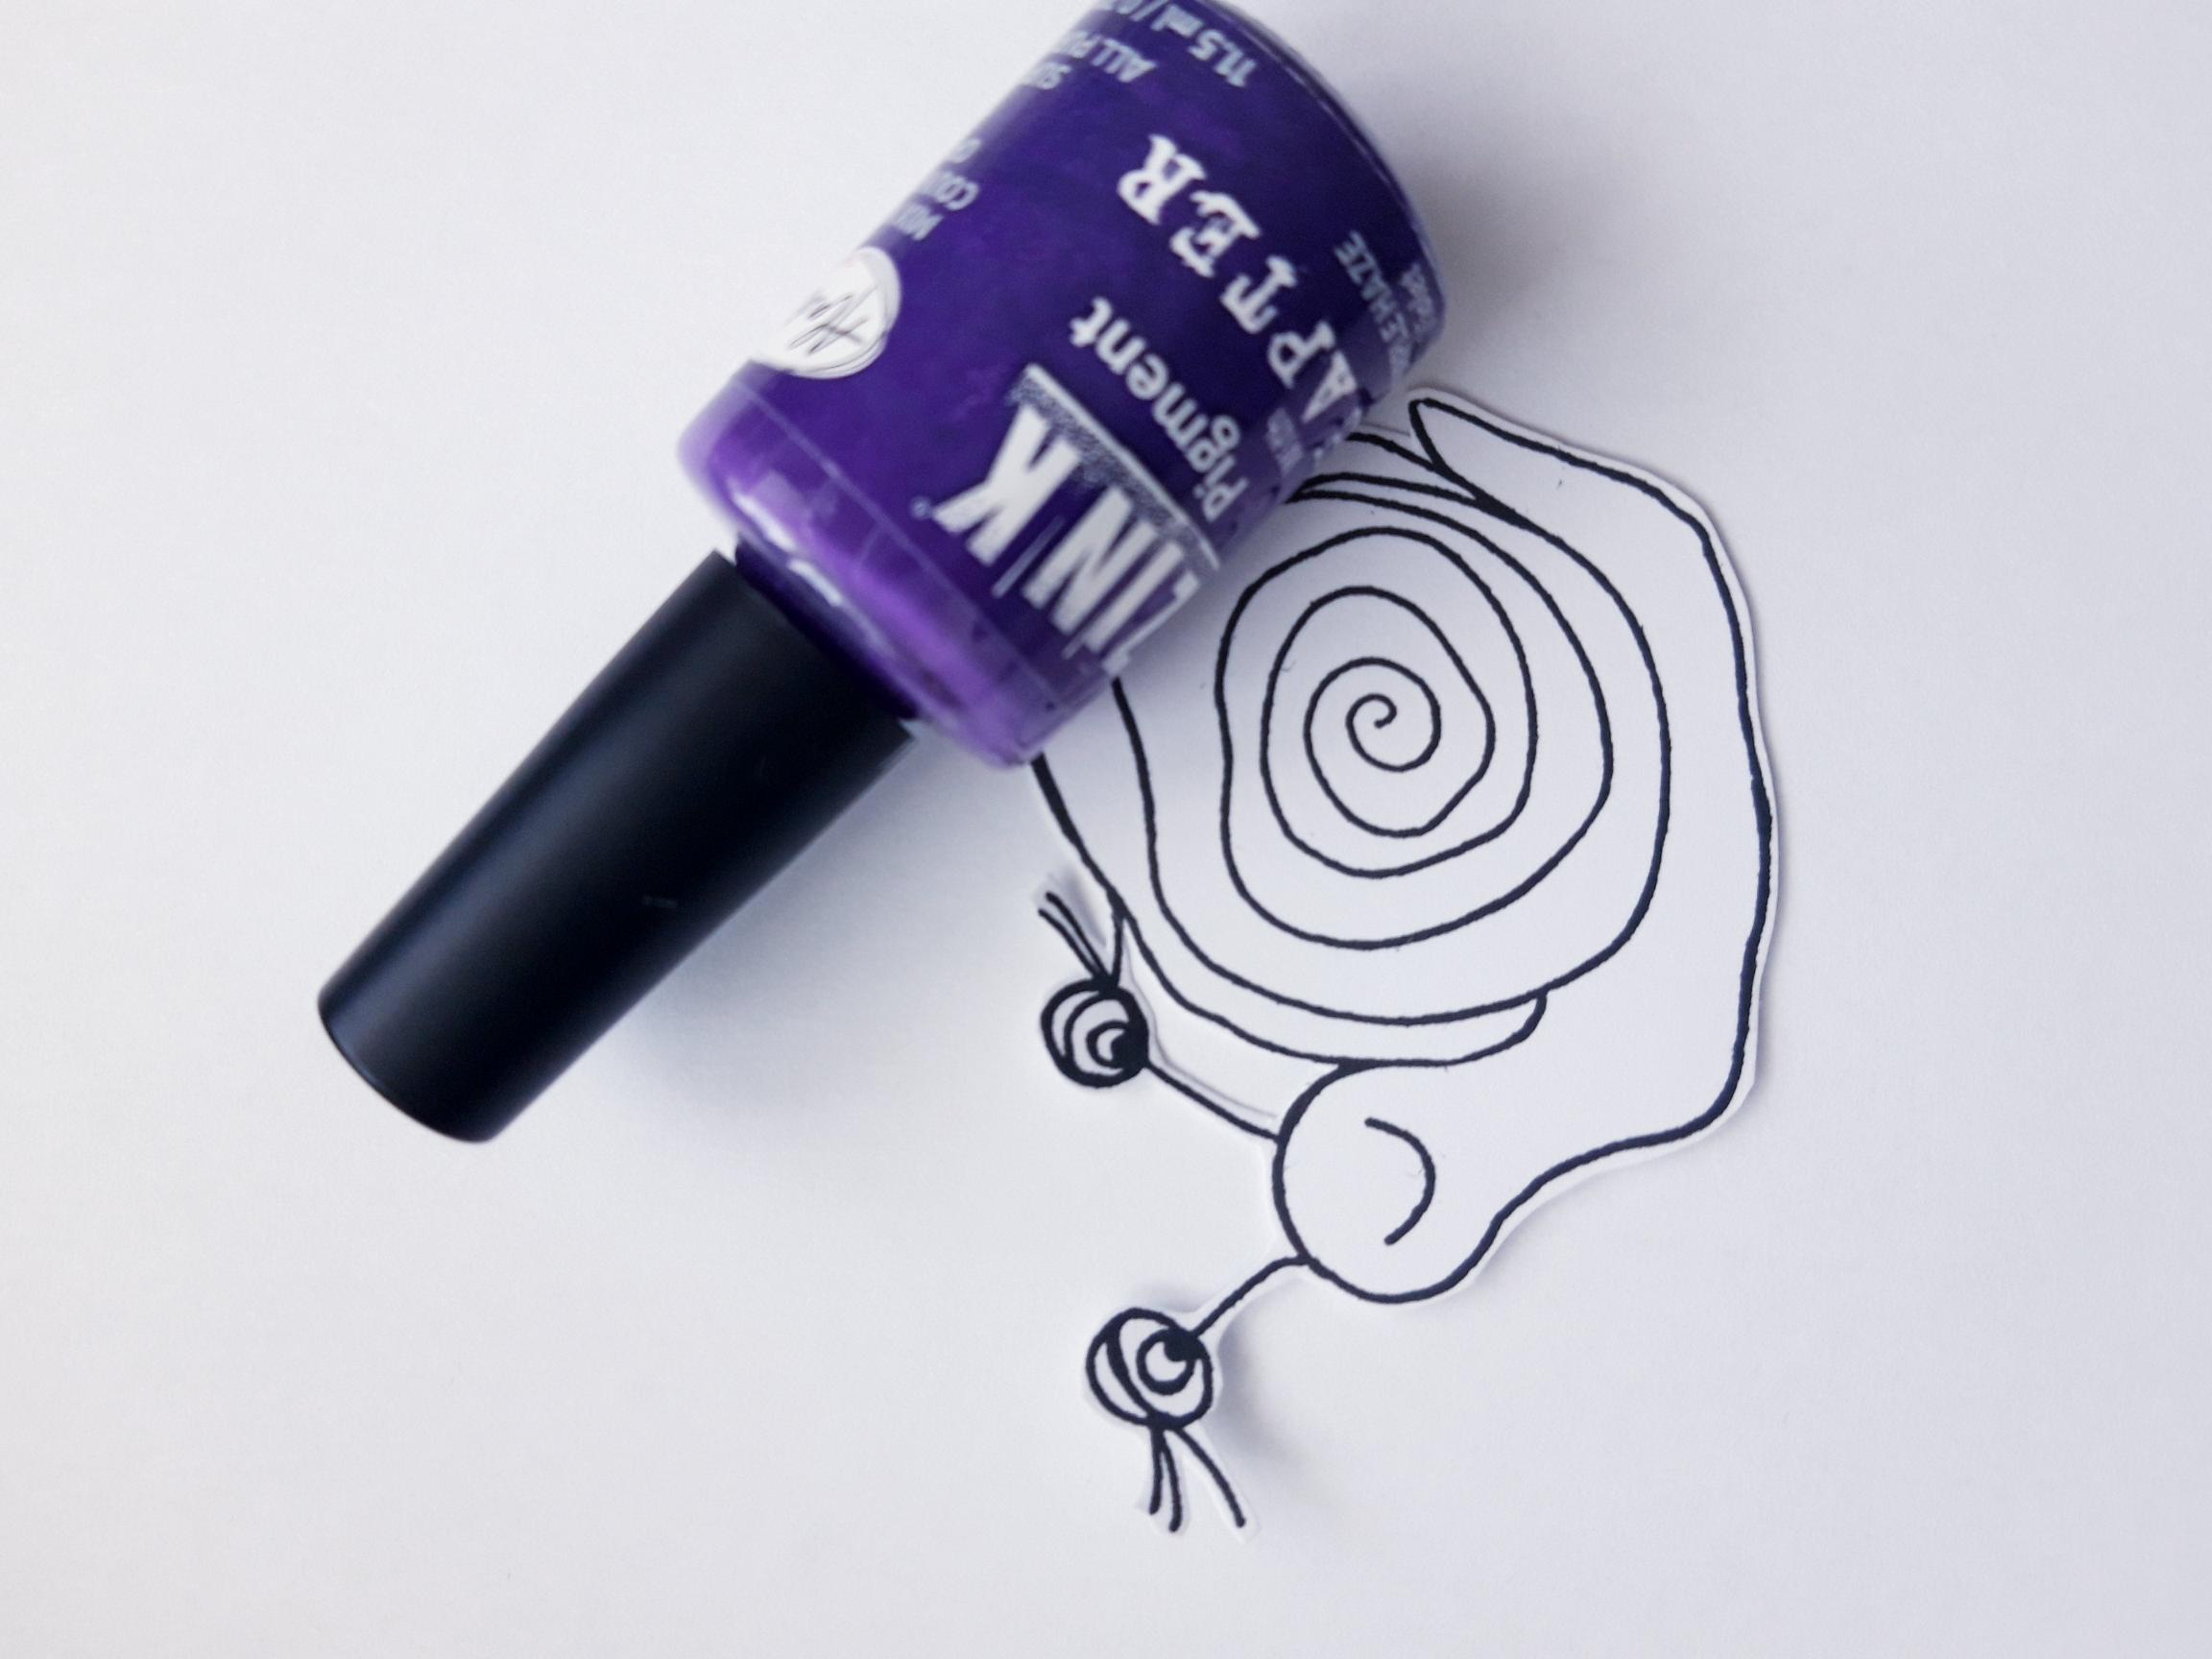
Ink up the snail stamp, from the Petal Power Creative Stamps set, with the Onyx Black Versafine. Stamp on to the white cardstock, that you set to one side earlier. Cut out your snail. Apply a little of the Izink Purple Haze Pigment to a craft or glass mat, add a little water and paint your snail. Once the Pigment is completely dry, use the white gel pen to add highlights as required. |
|
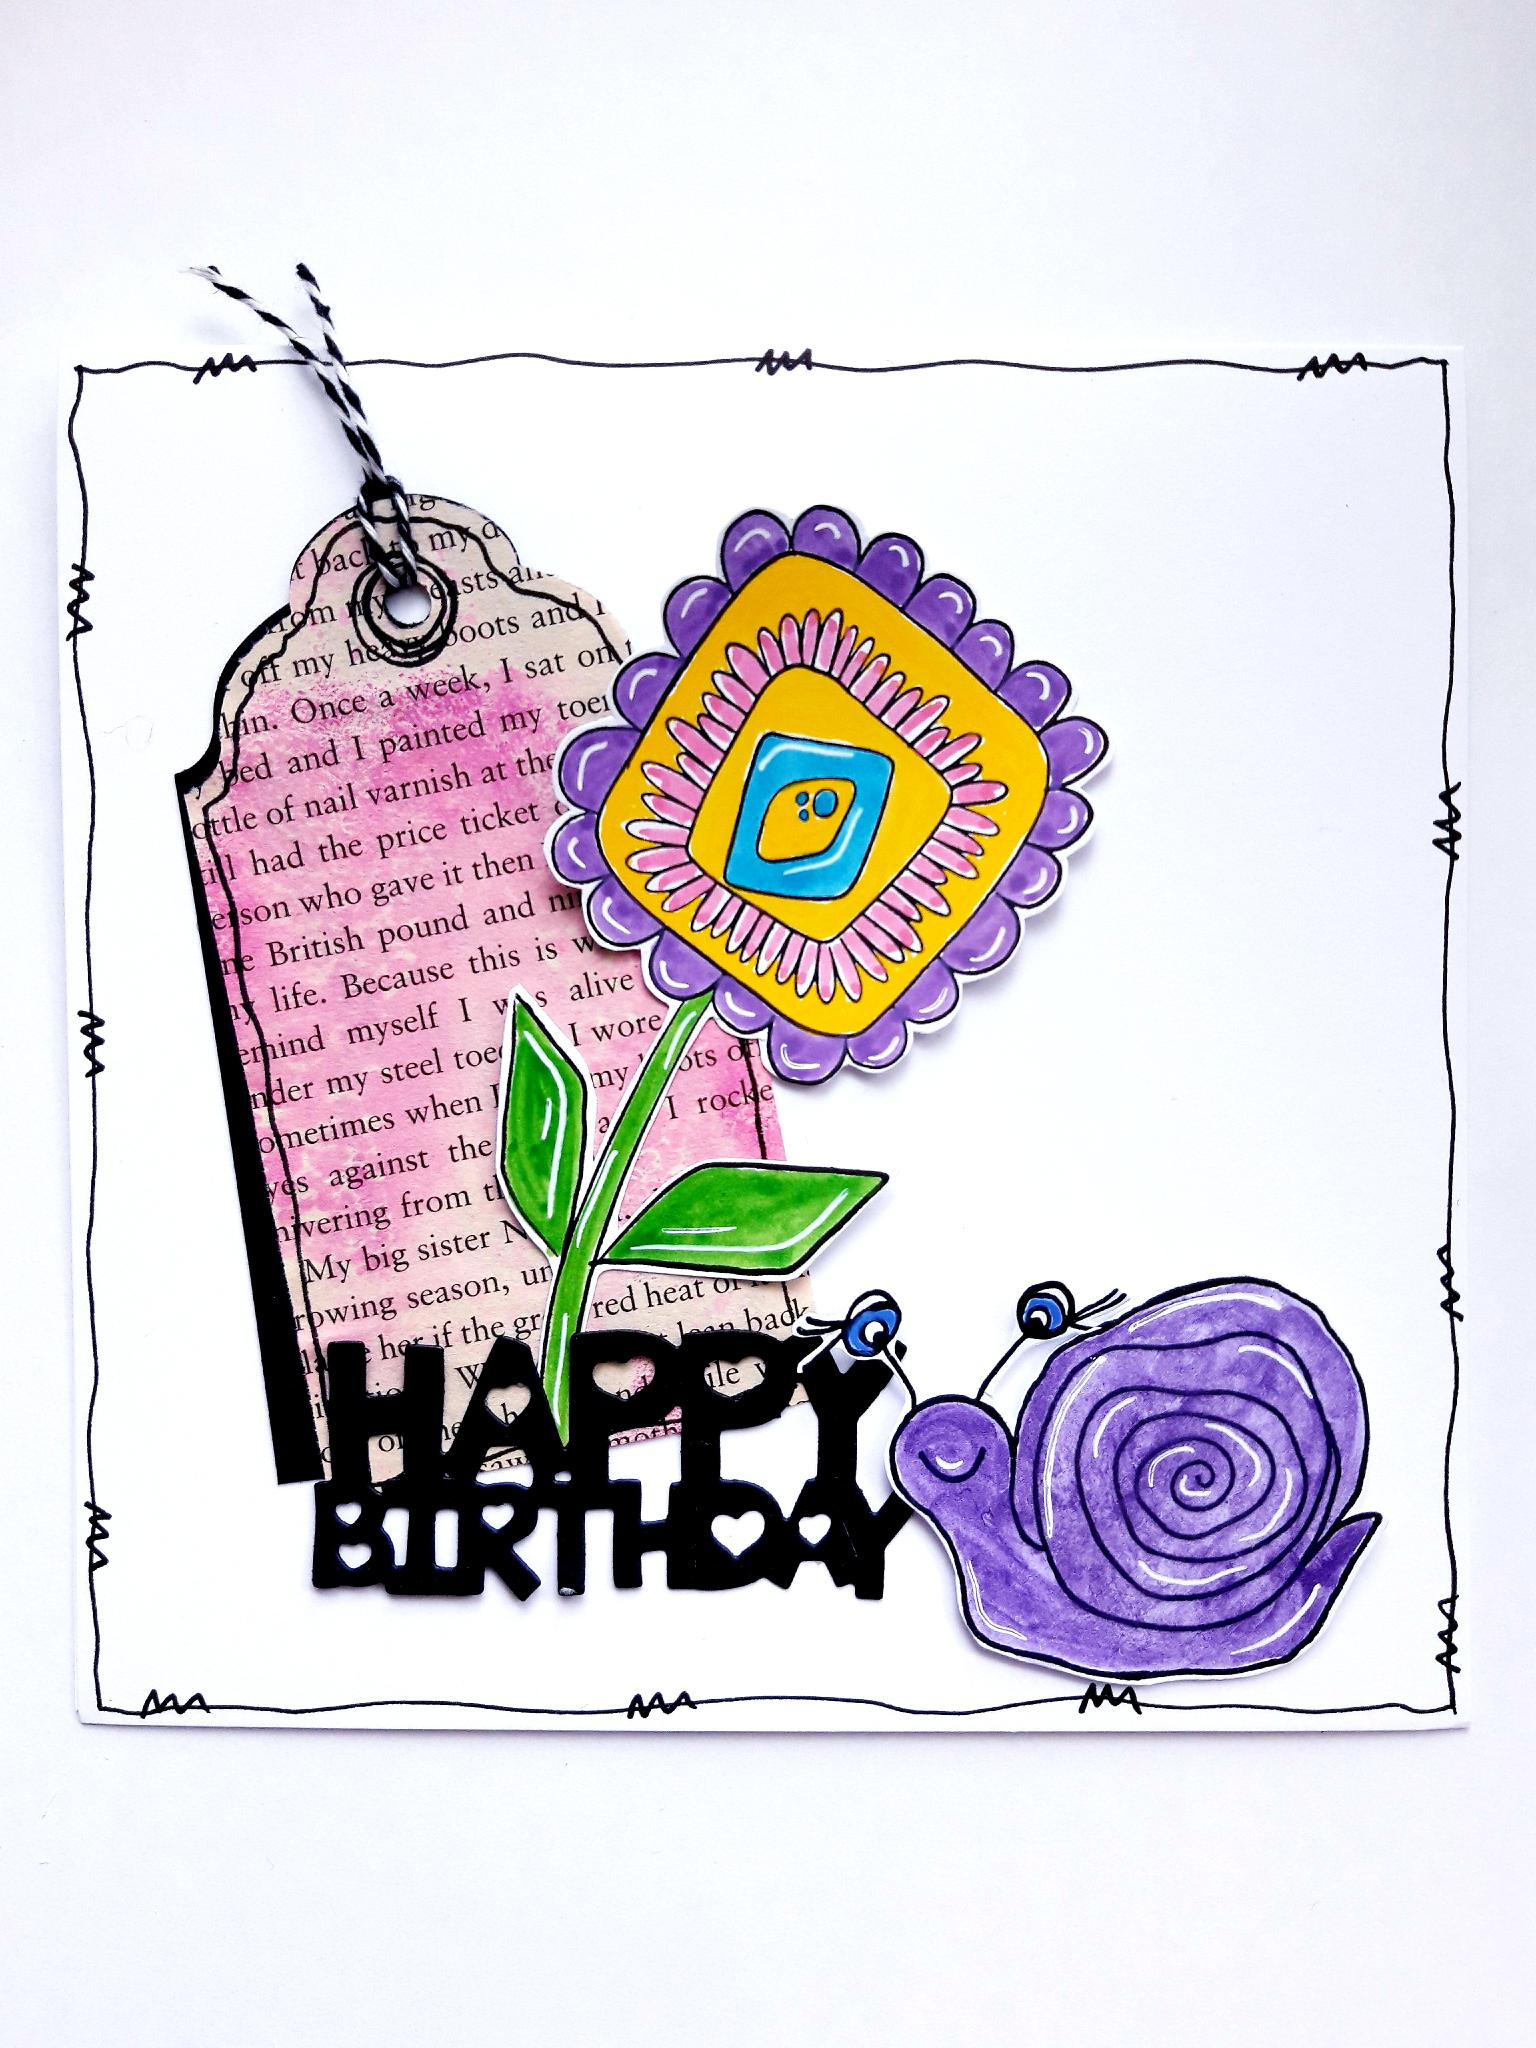
Use foam pads to adhere your snail in place, on your artwork. |
|
To finish off your card, add sequins around, and tucked under, your artwork. |