Give your friends $10 off their first order!
Refer a FRIEND


WHAT YOU WILL NEED:
Pink top folding card blank
Black/white card
Perfect Pinecones A5 Die Set
Merry & Bright Lamination Set
Your Only Limit Is You Stamp Set
Versafine: Smoky Grey
Distress Oxide: Kitsch Flamingo
Izink Dye Spray: Morning Mist, Butterscotch
Stickles: Diamond
Water Spray bottle
Paint brush
Heat tool
Pokey tool
Pearlywinks Pearl Mist Spray: Diamond Pearl
Eureka 101 Watercolour Tablet
SBM Magnetic glass mat
Paper Trimmer
Perfect Together Glue
Foam pads
Die Cutting machine
[click image to enlarge] 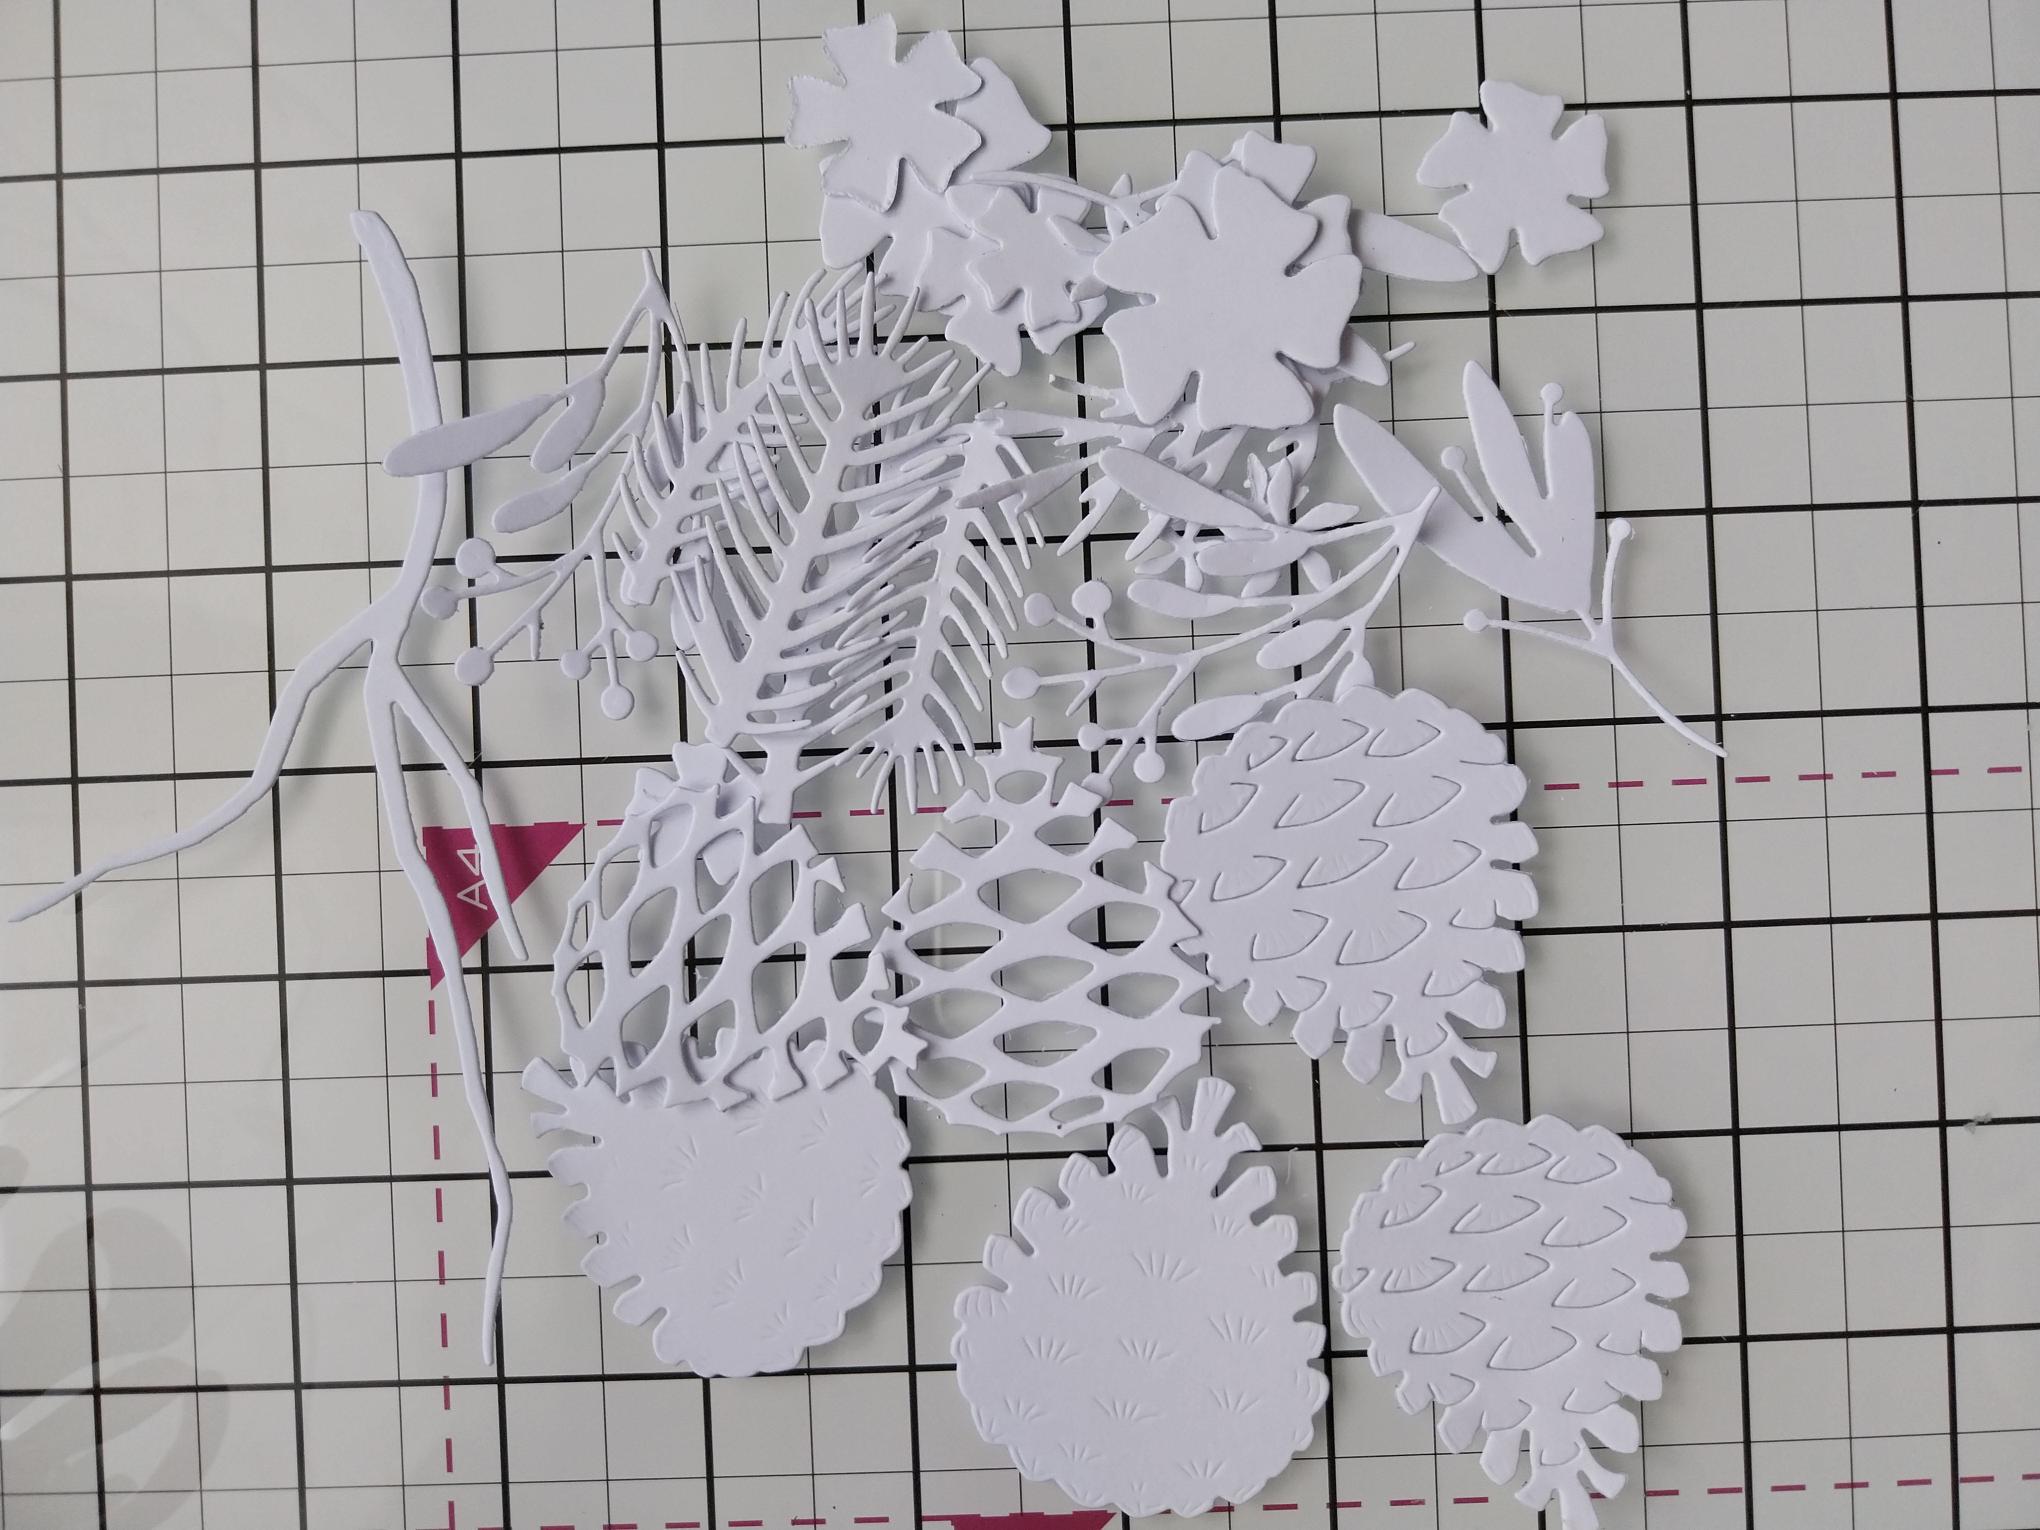
|
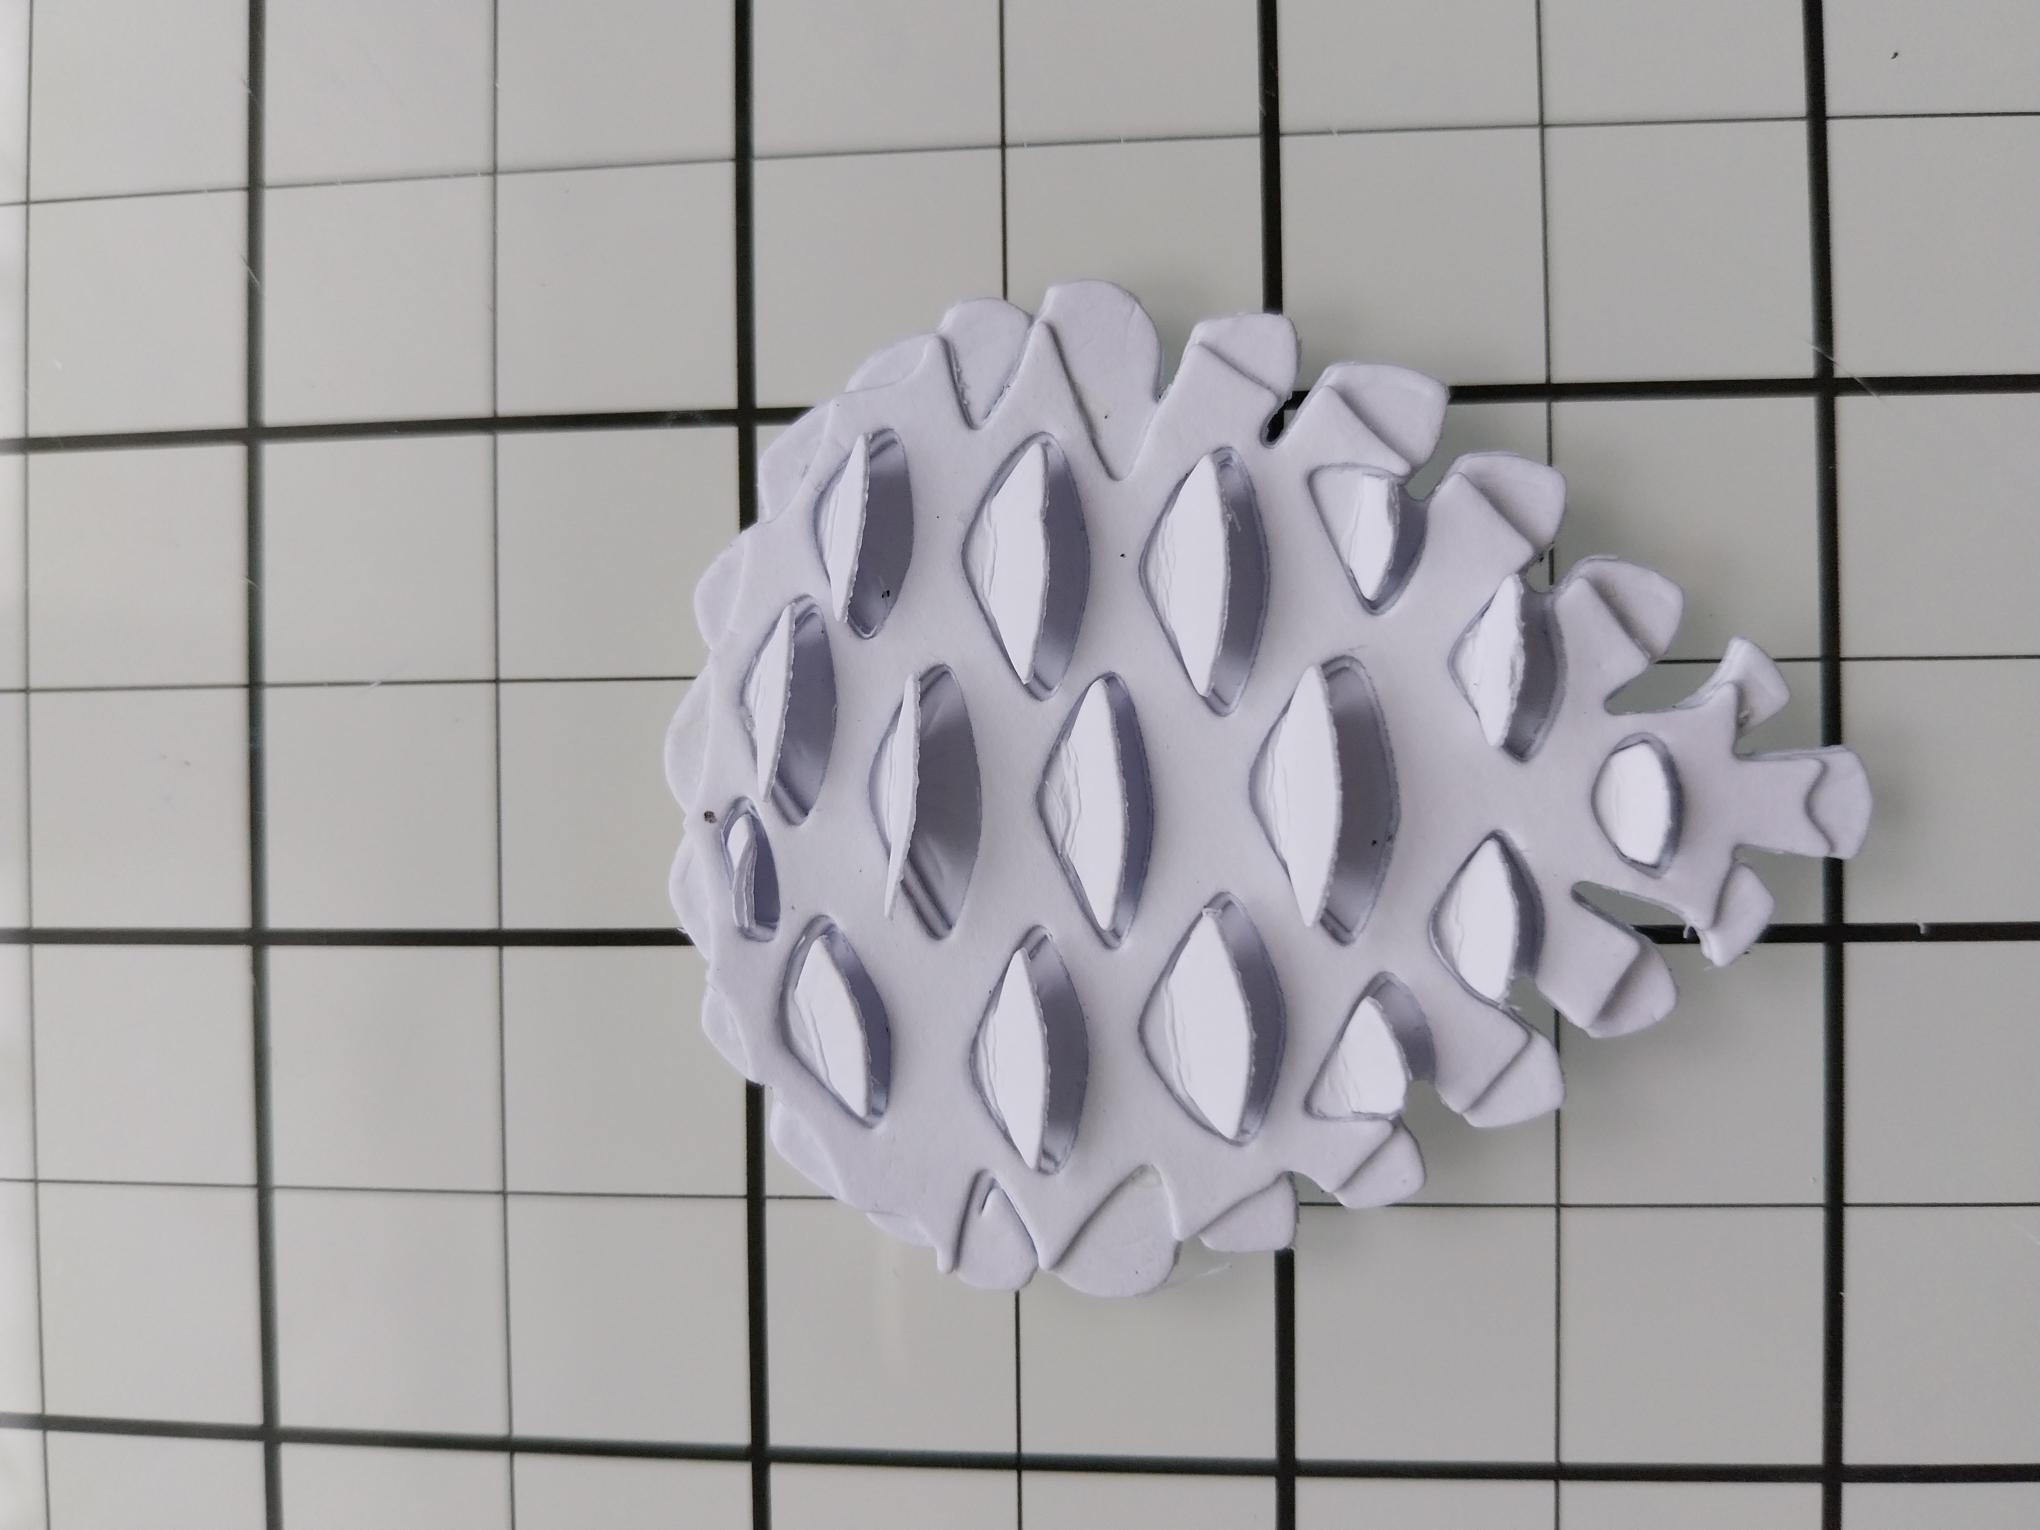
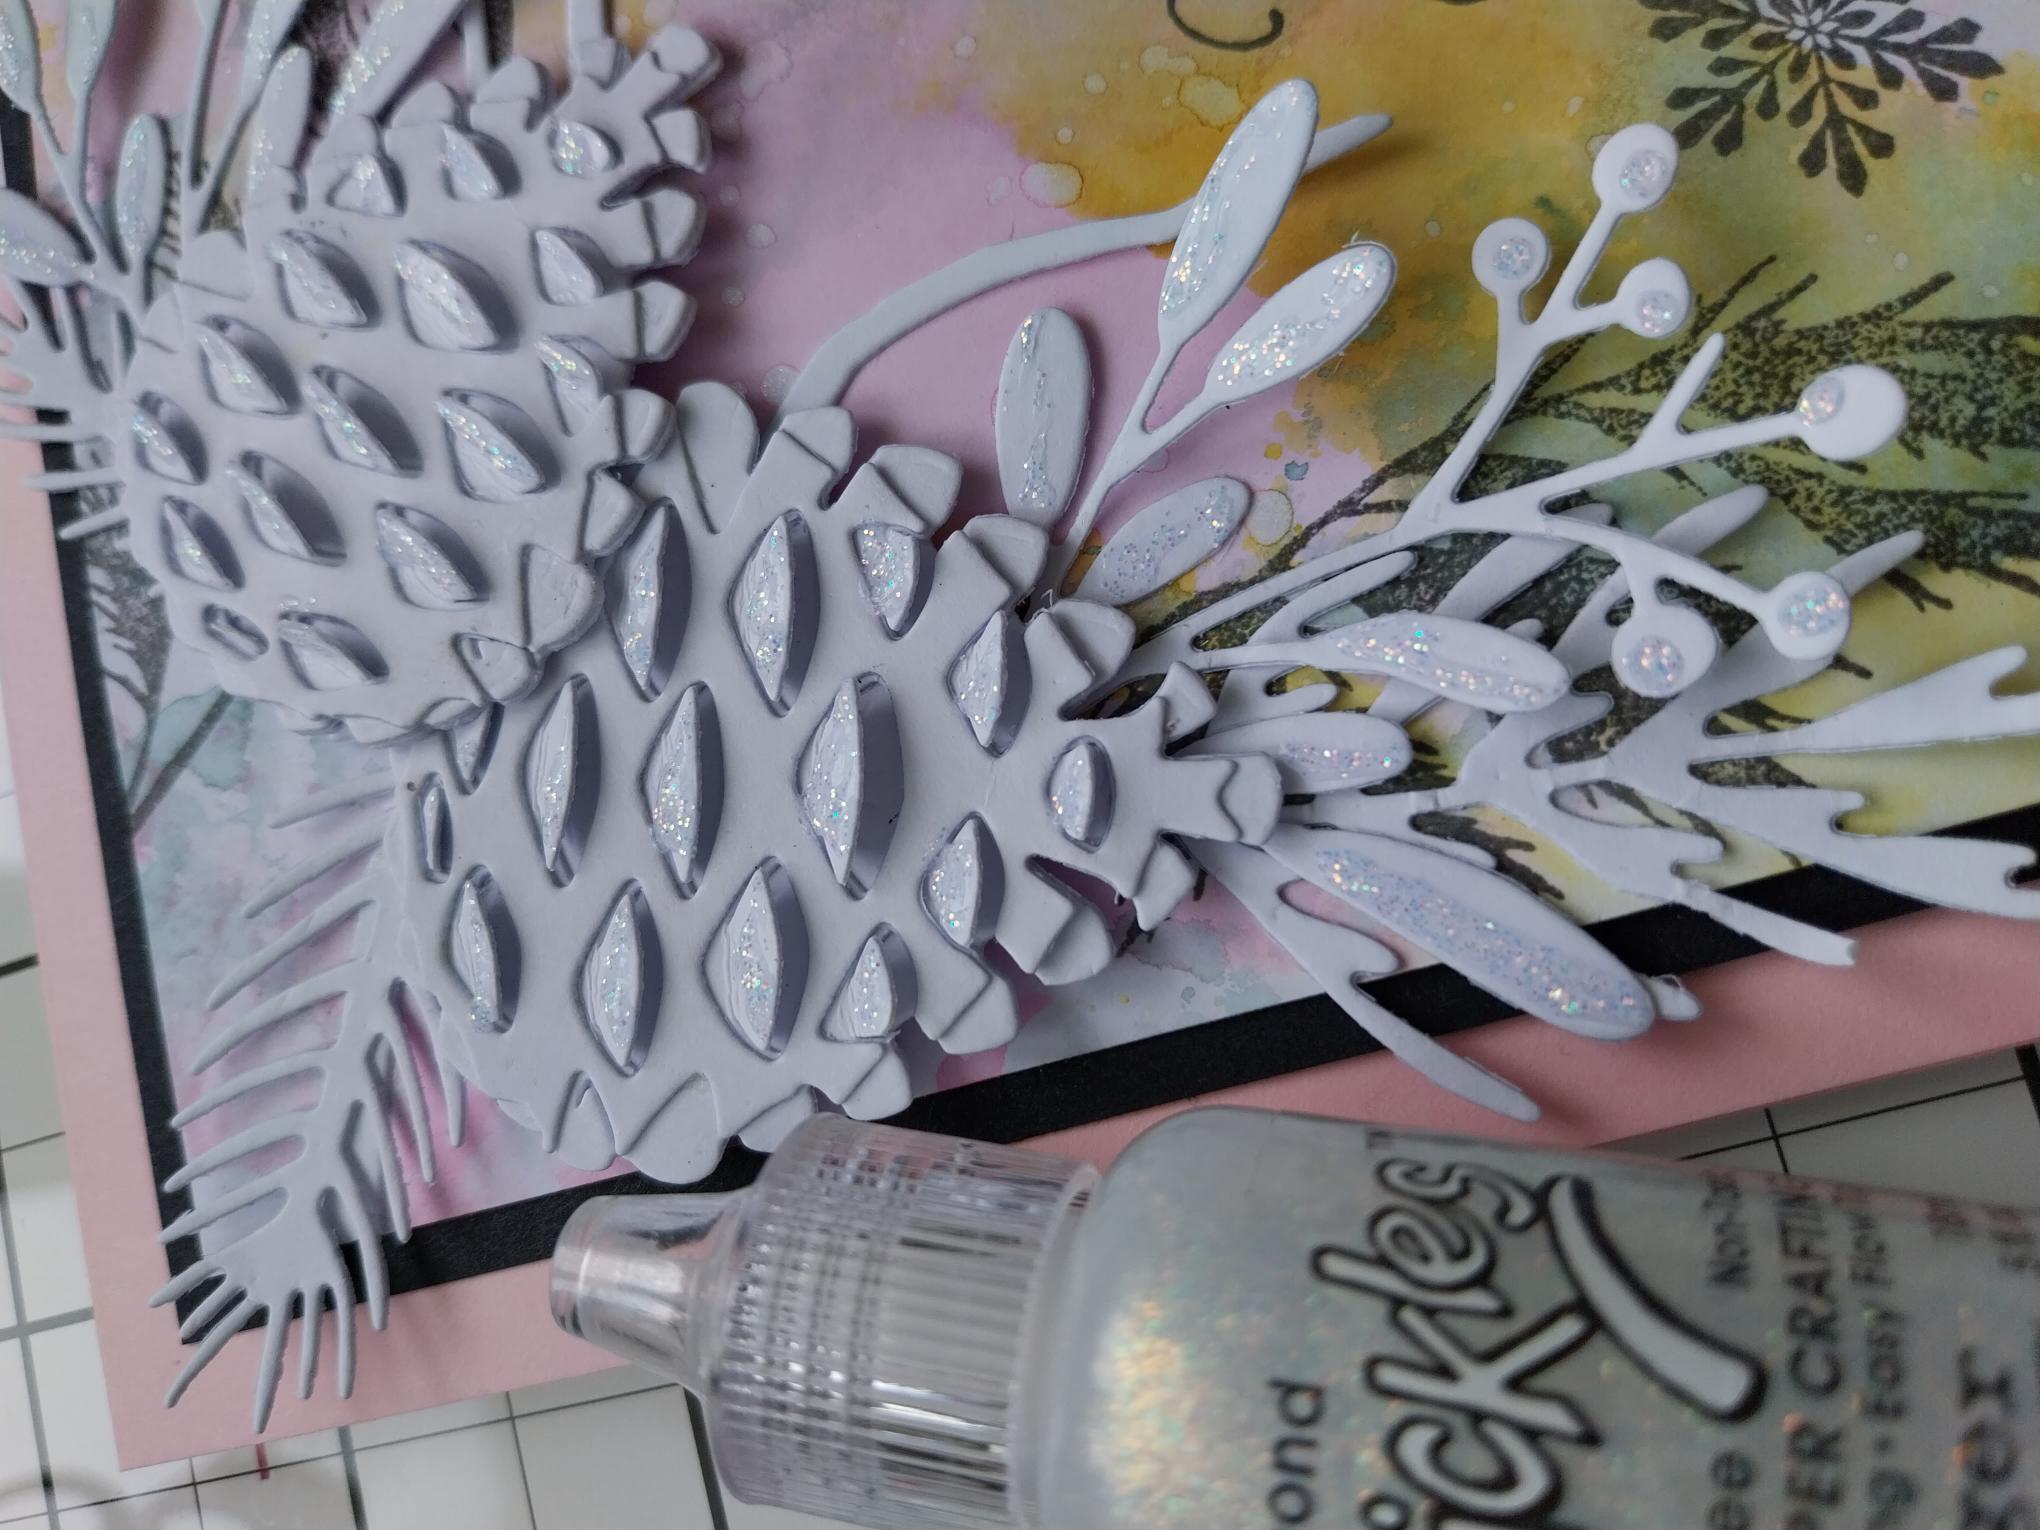
Using the plates, die cut all the Pine Cone elements from white cardstock. Set the foliage elements to one side. NB: If you are adding colour to your Pine Cones, do so at this stage. |
|
There are 2 sizes of cones so sort in to 2 piles. You can lift the flaps on this element now or after the next step. Once you've made a few, you'll find your own way of assembling the Pine Cones. |
|
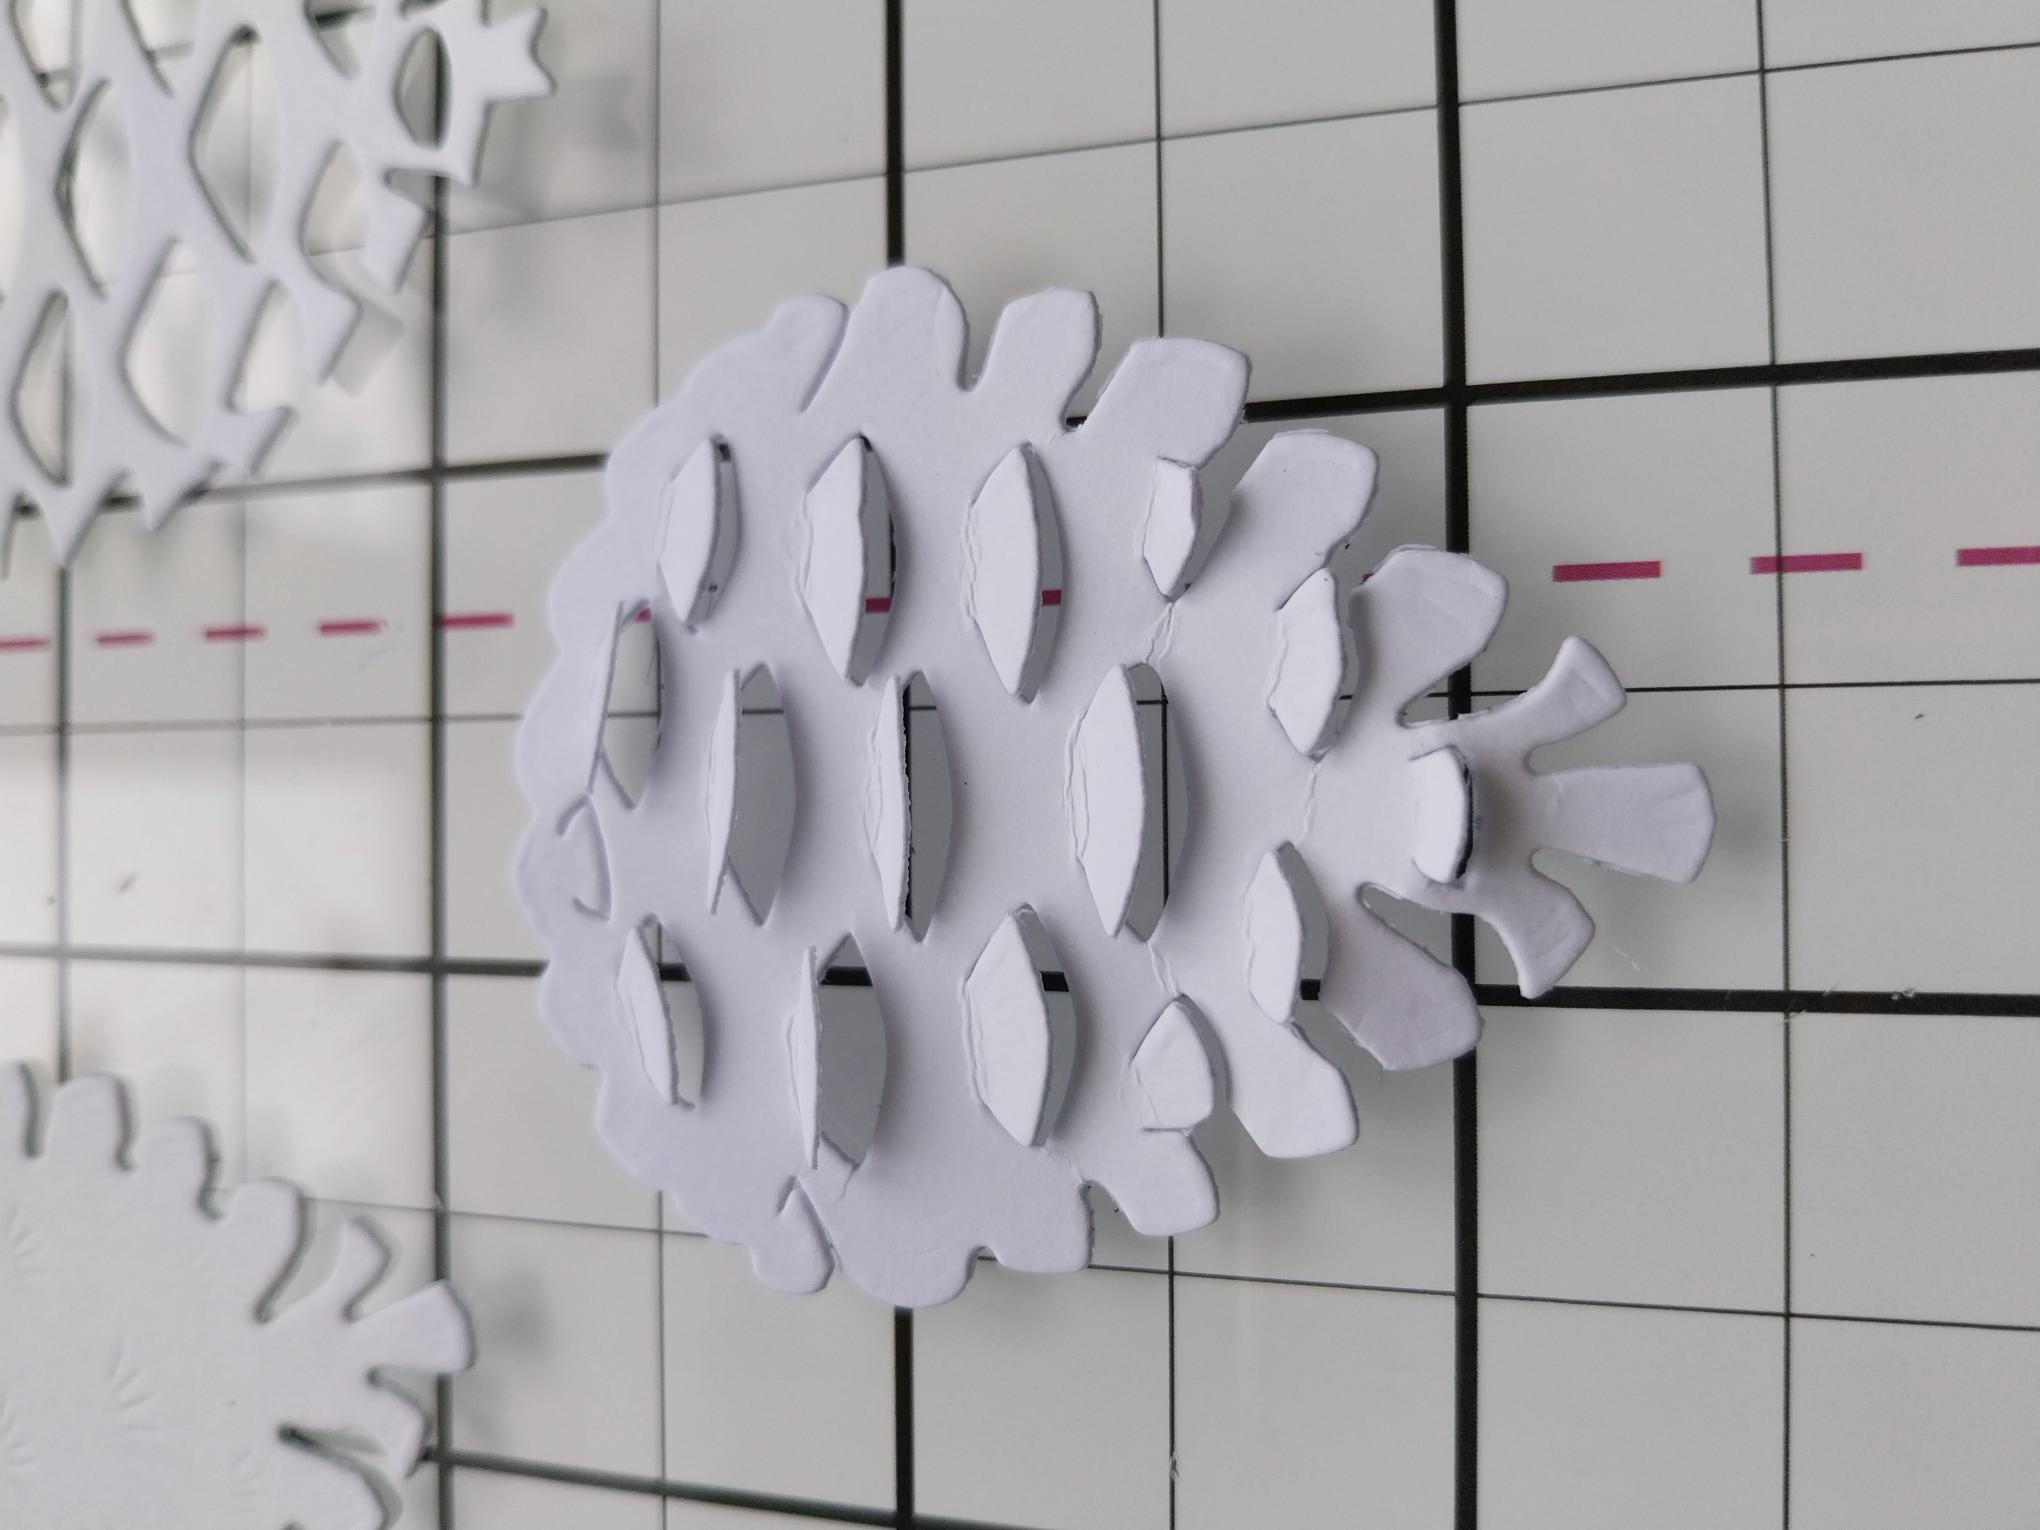
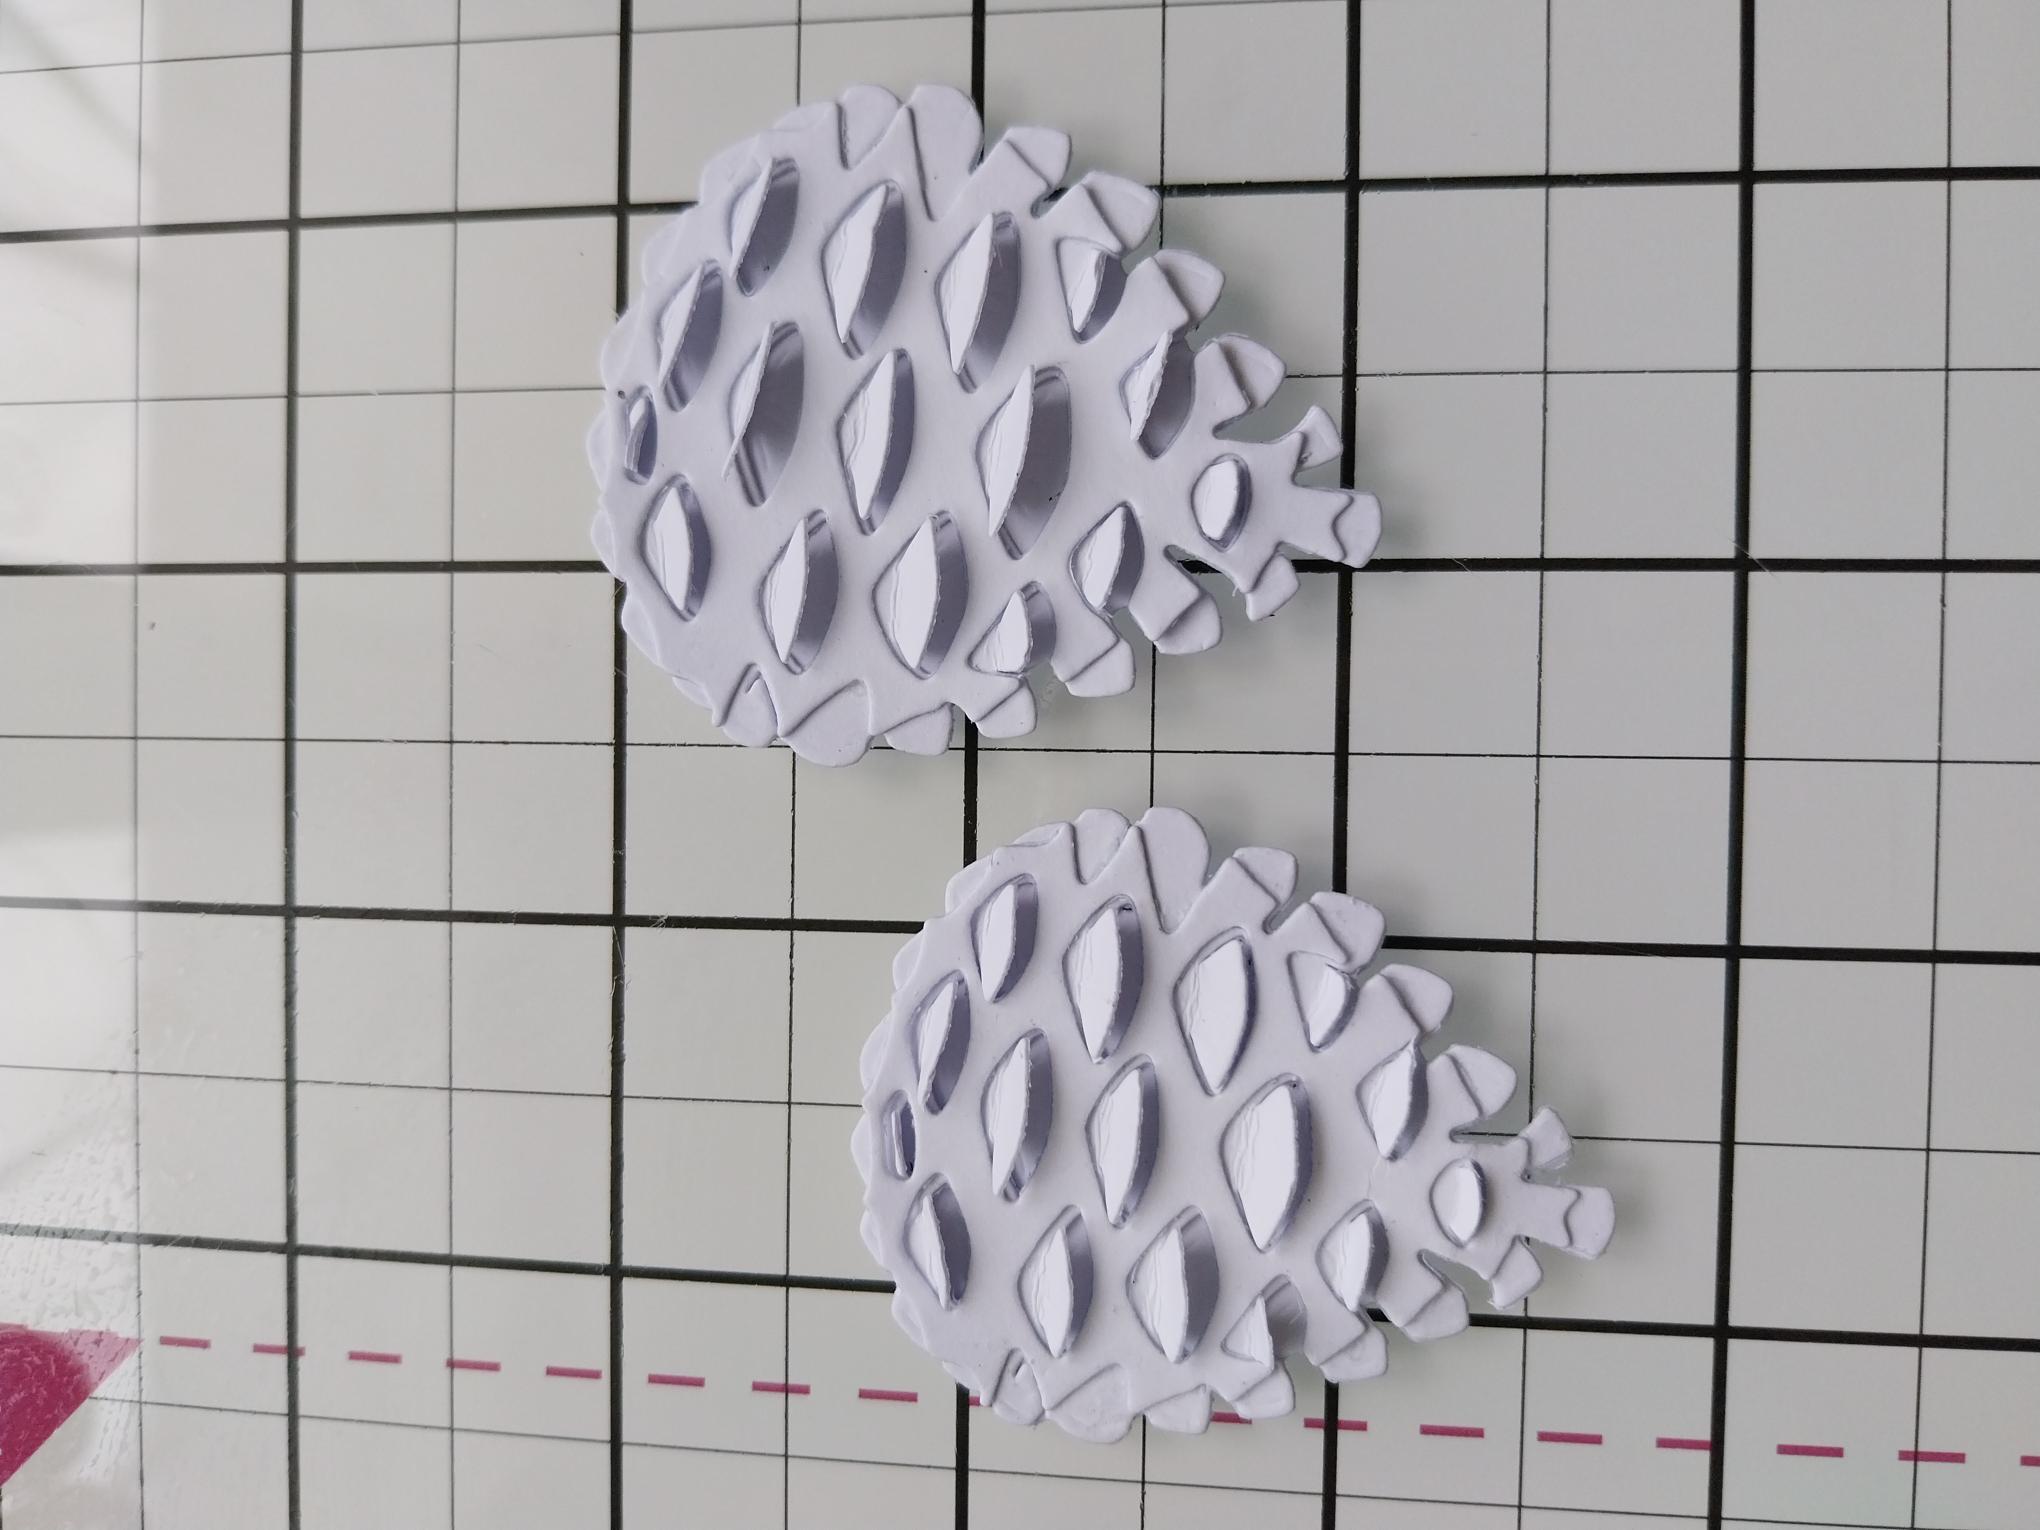
Glue the die cut with the " open gaps" on top of the "flap" element, then poke them through the holes. I find a pokey tool is great for this step. |
|
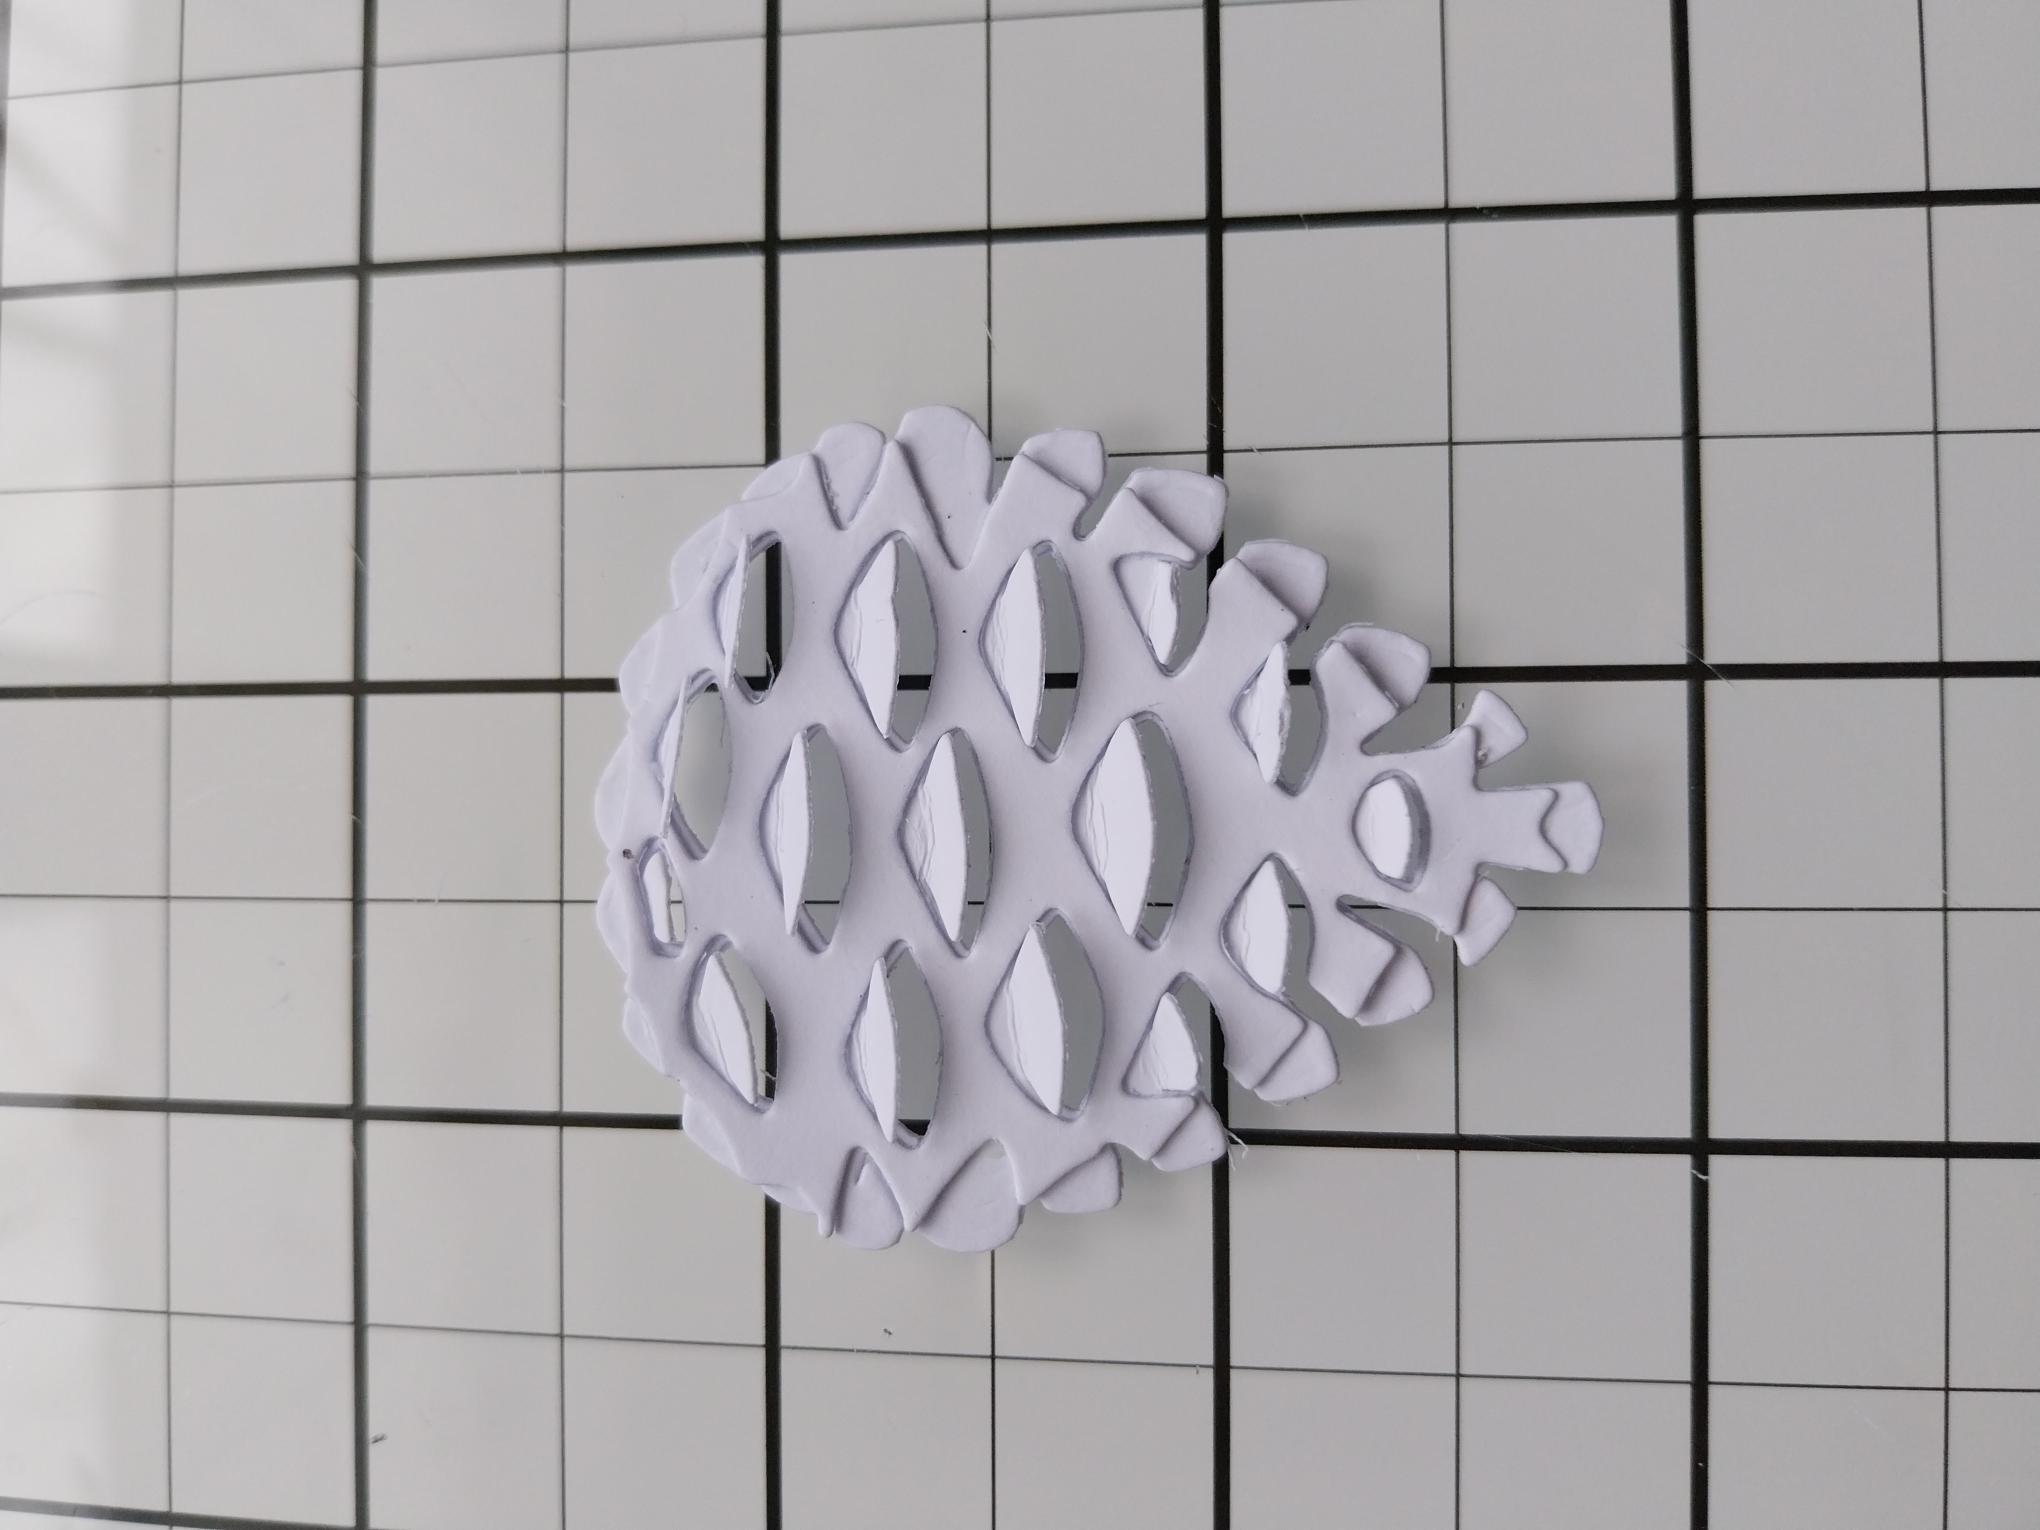
Adhere the solid element on the back and voila!! A very realistic Pine Cone. |
|
Repeat these steps to assemble your second Pine Cone, then pop them to one side. |
|
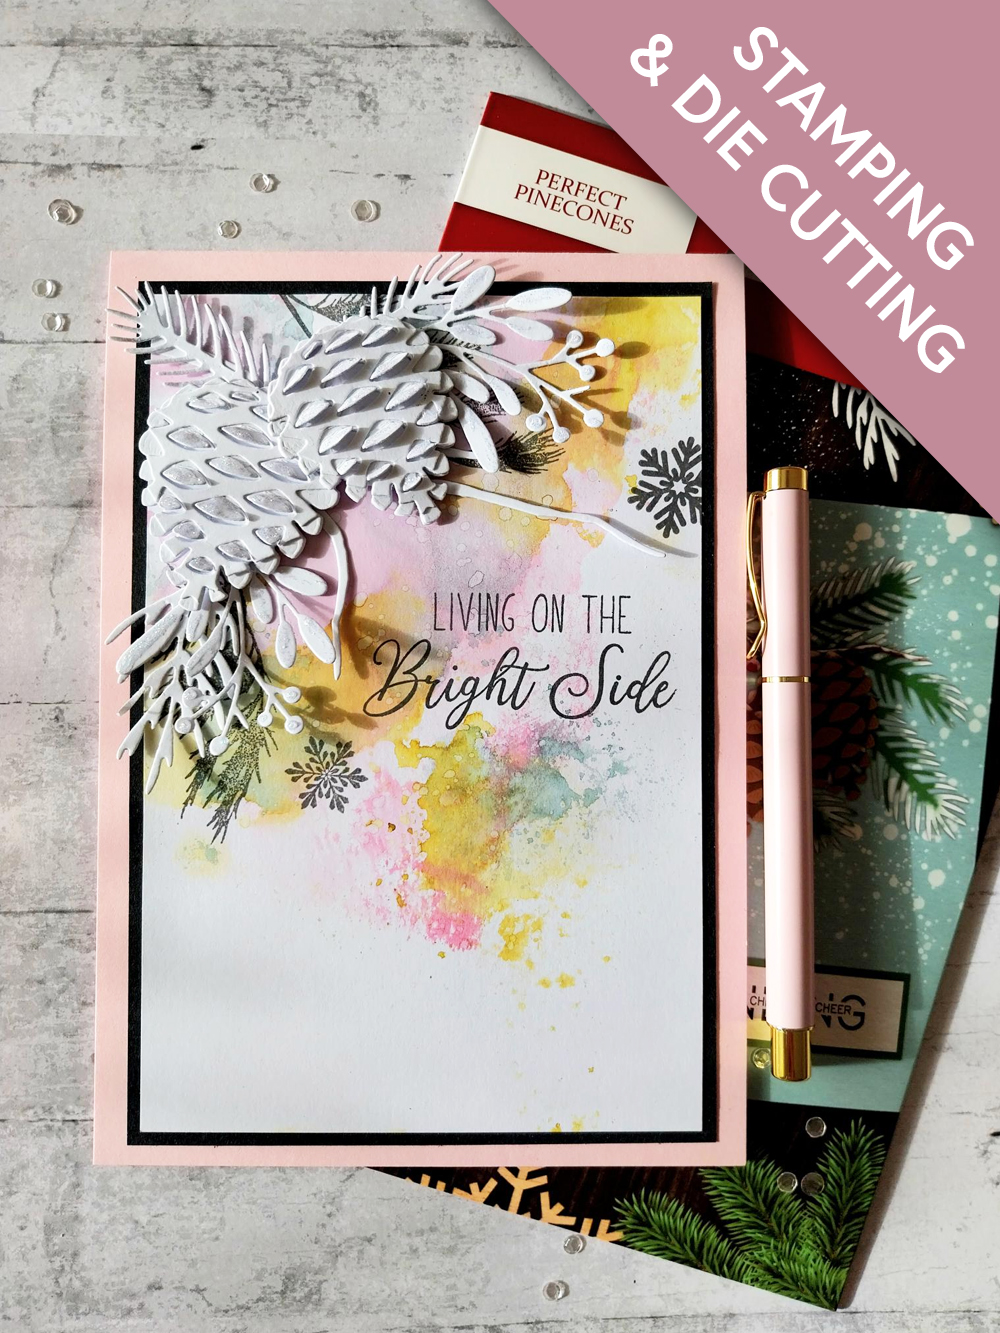
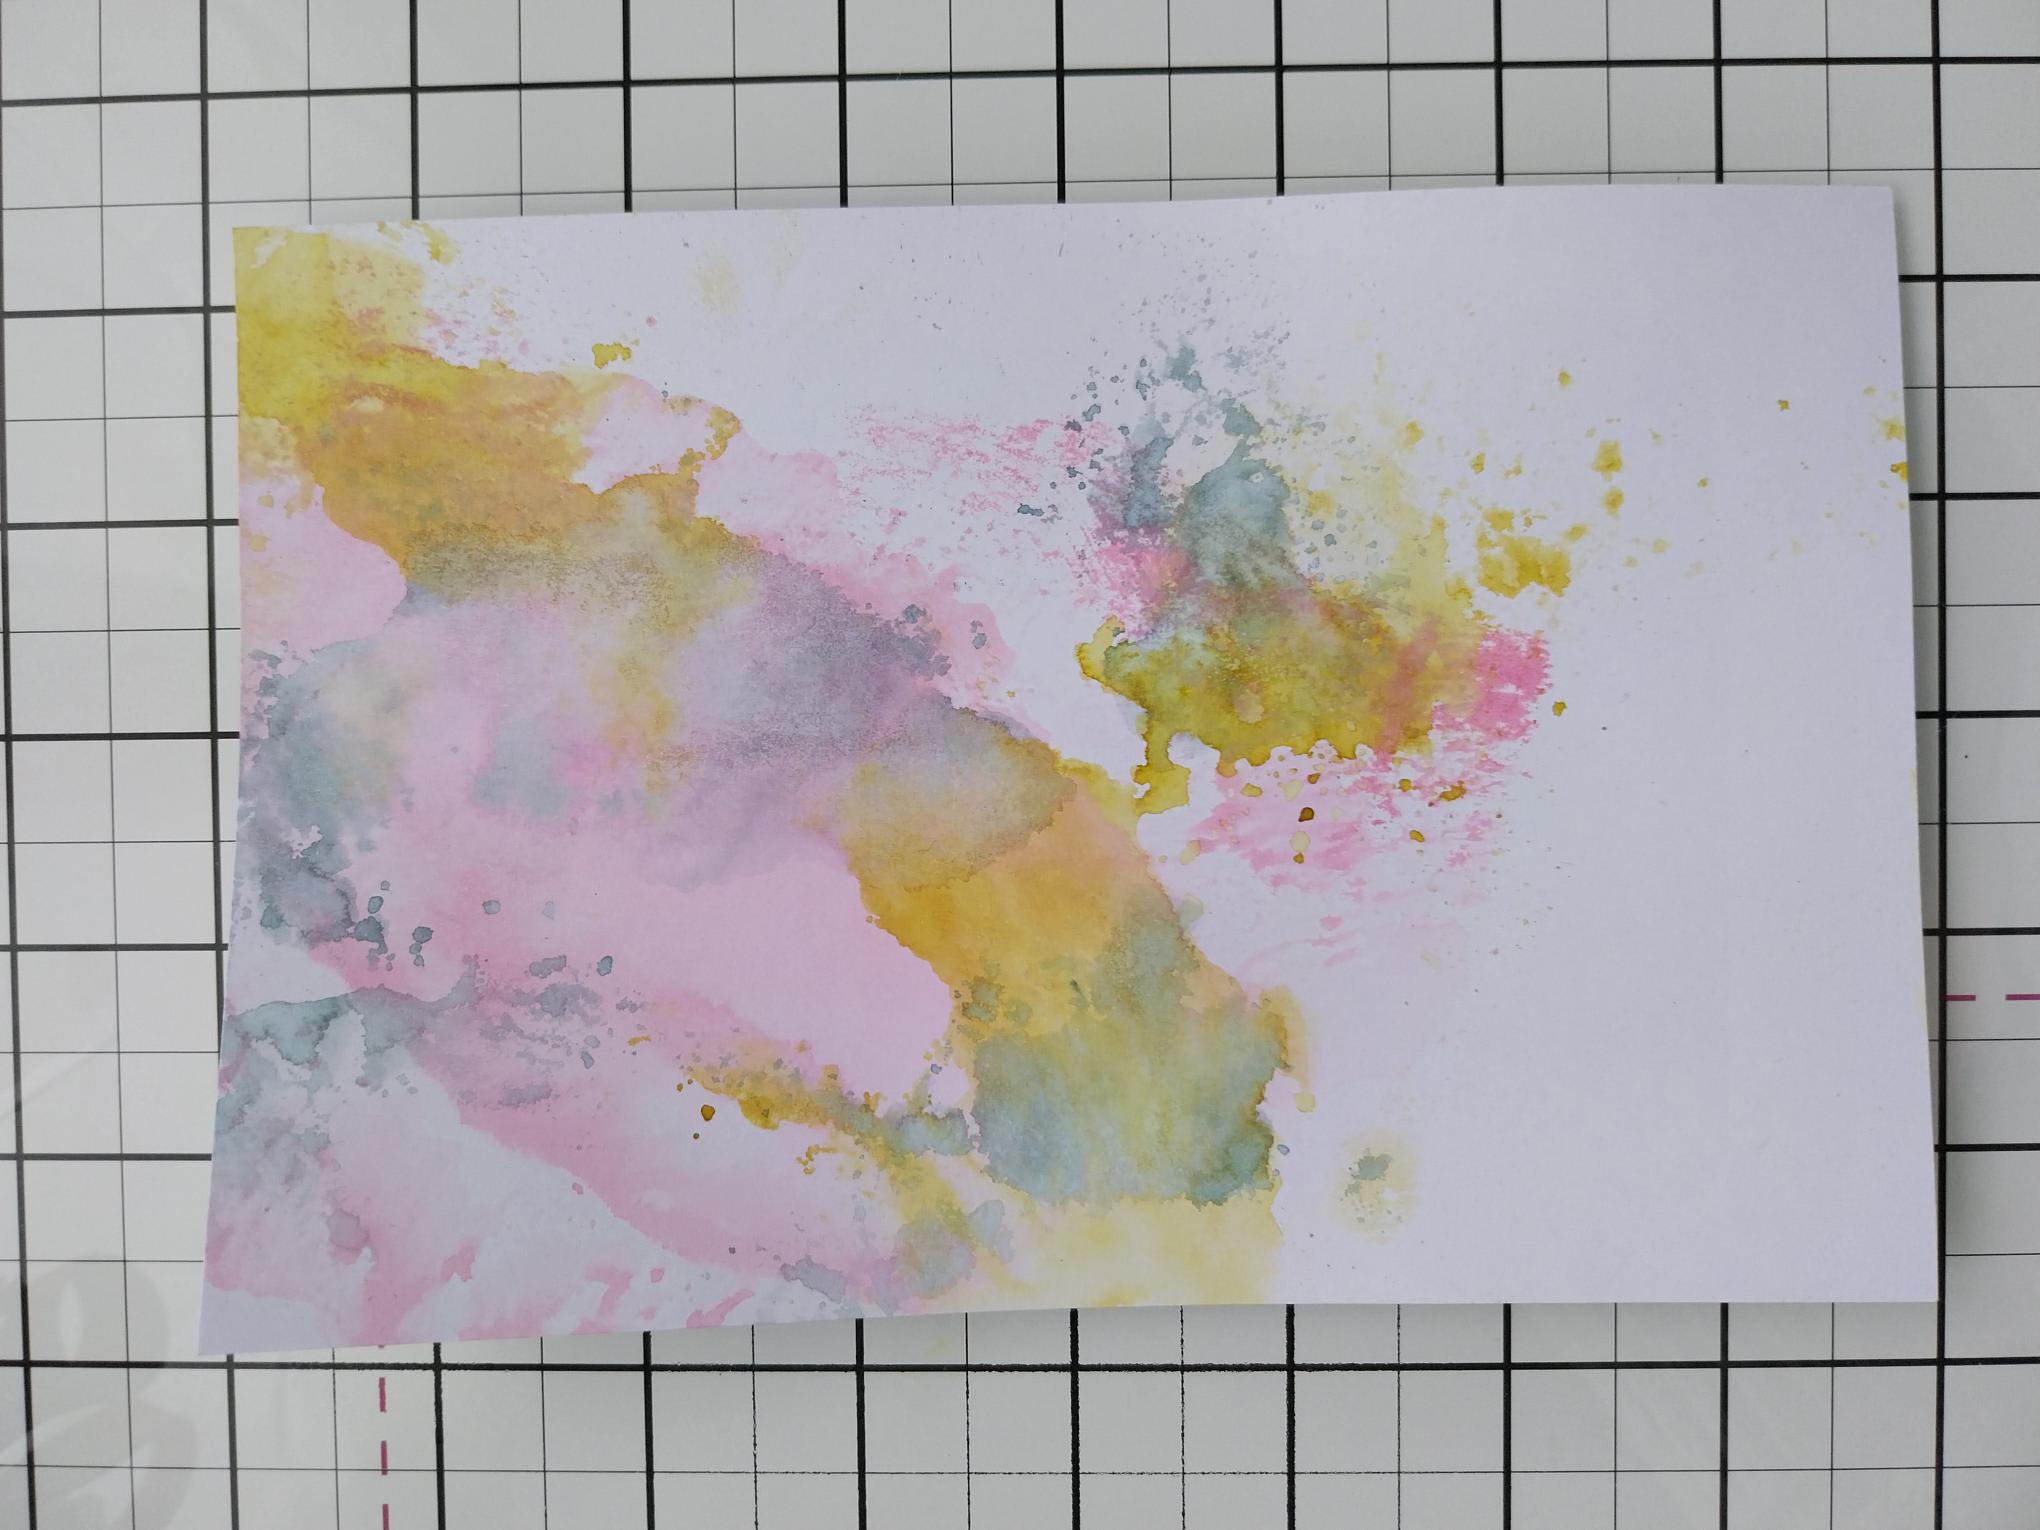
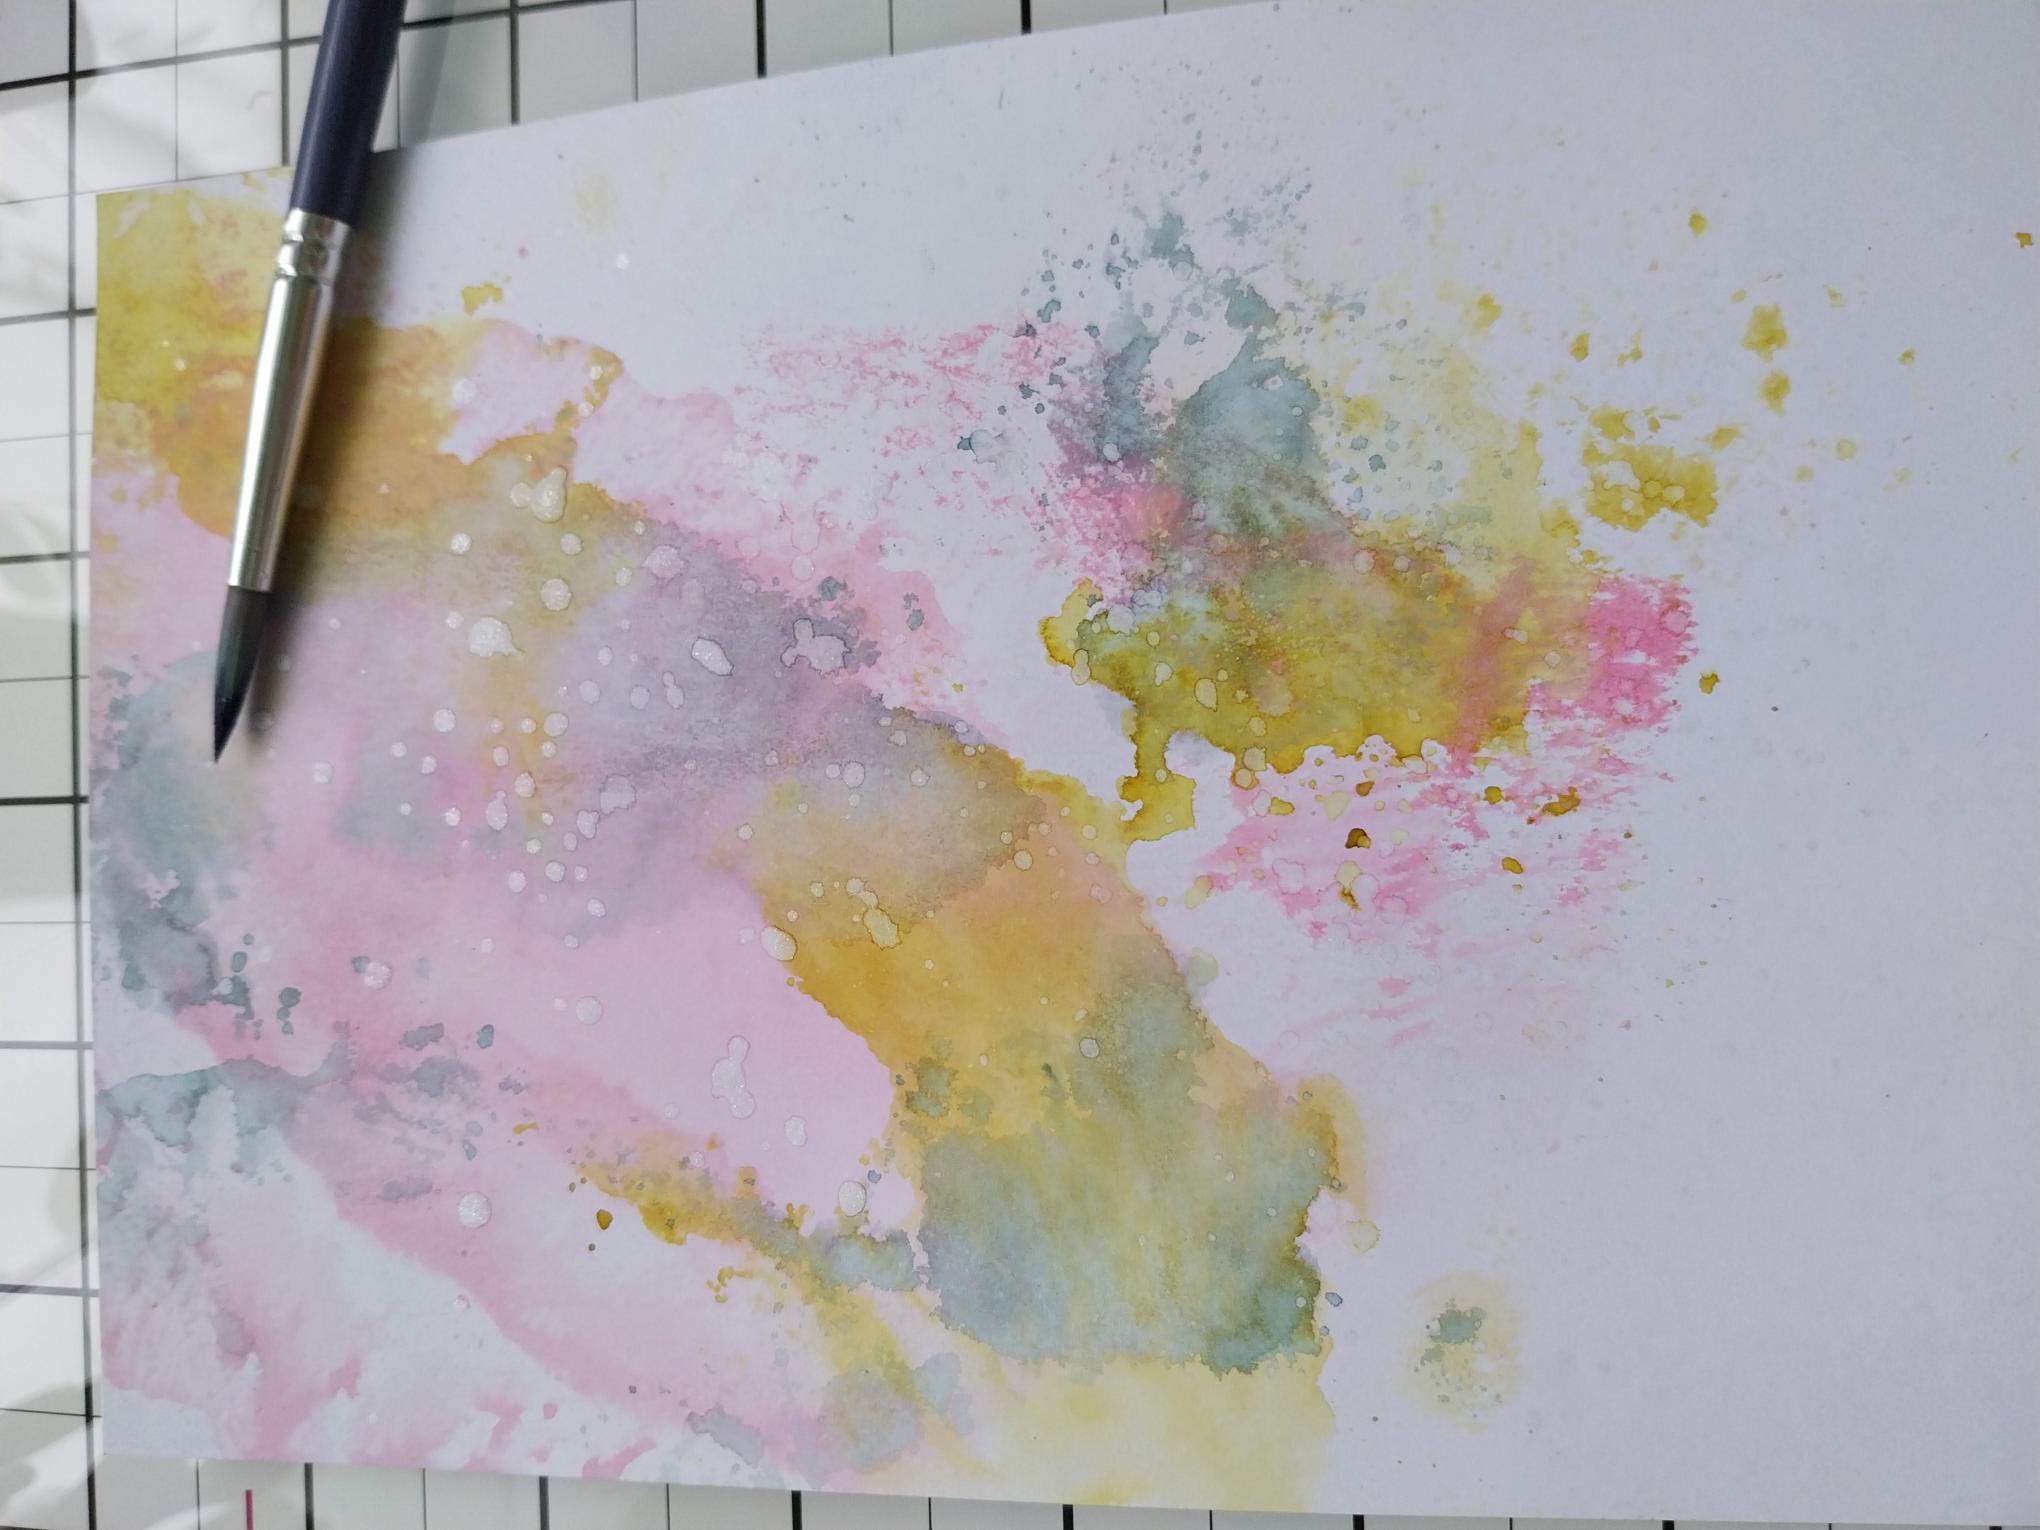
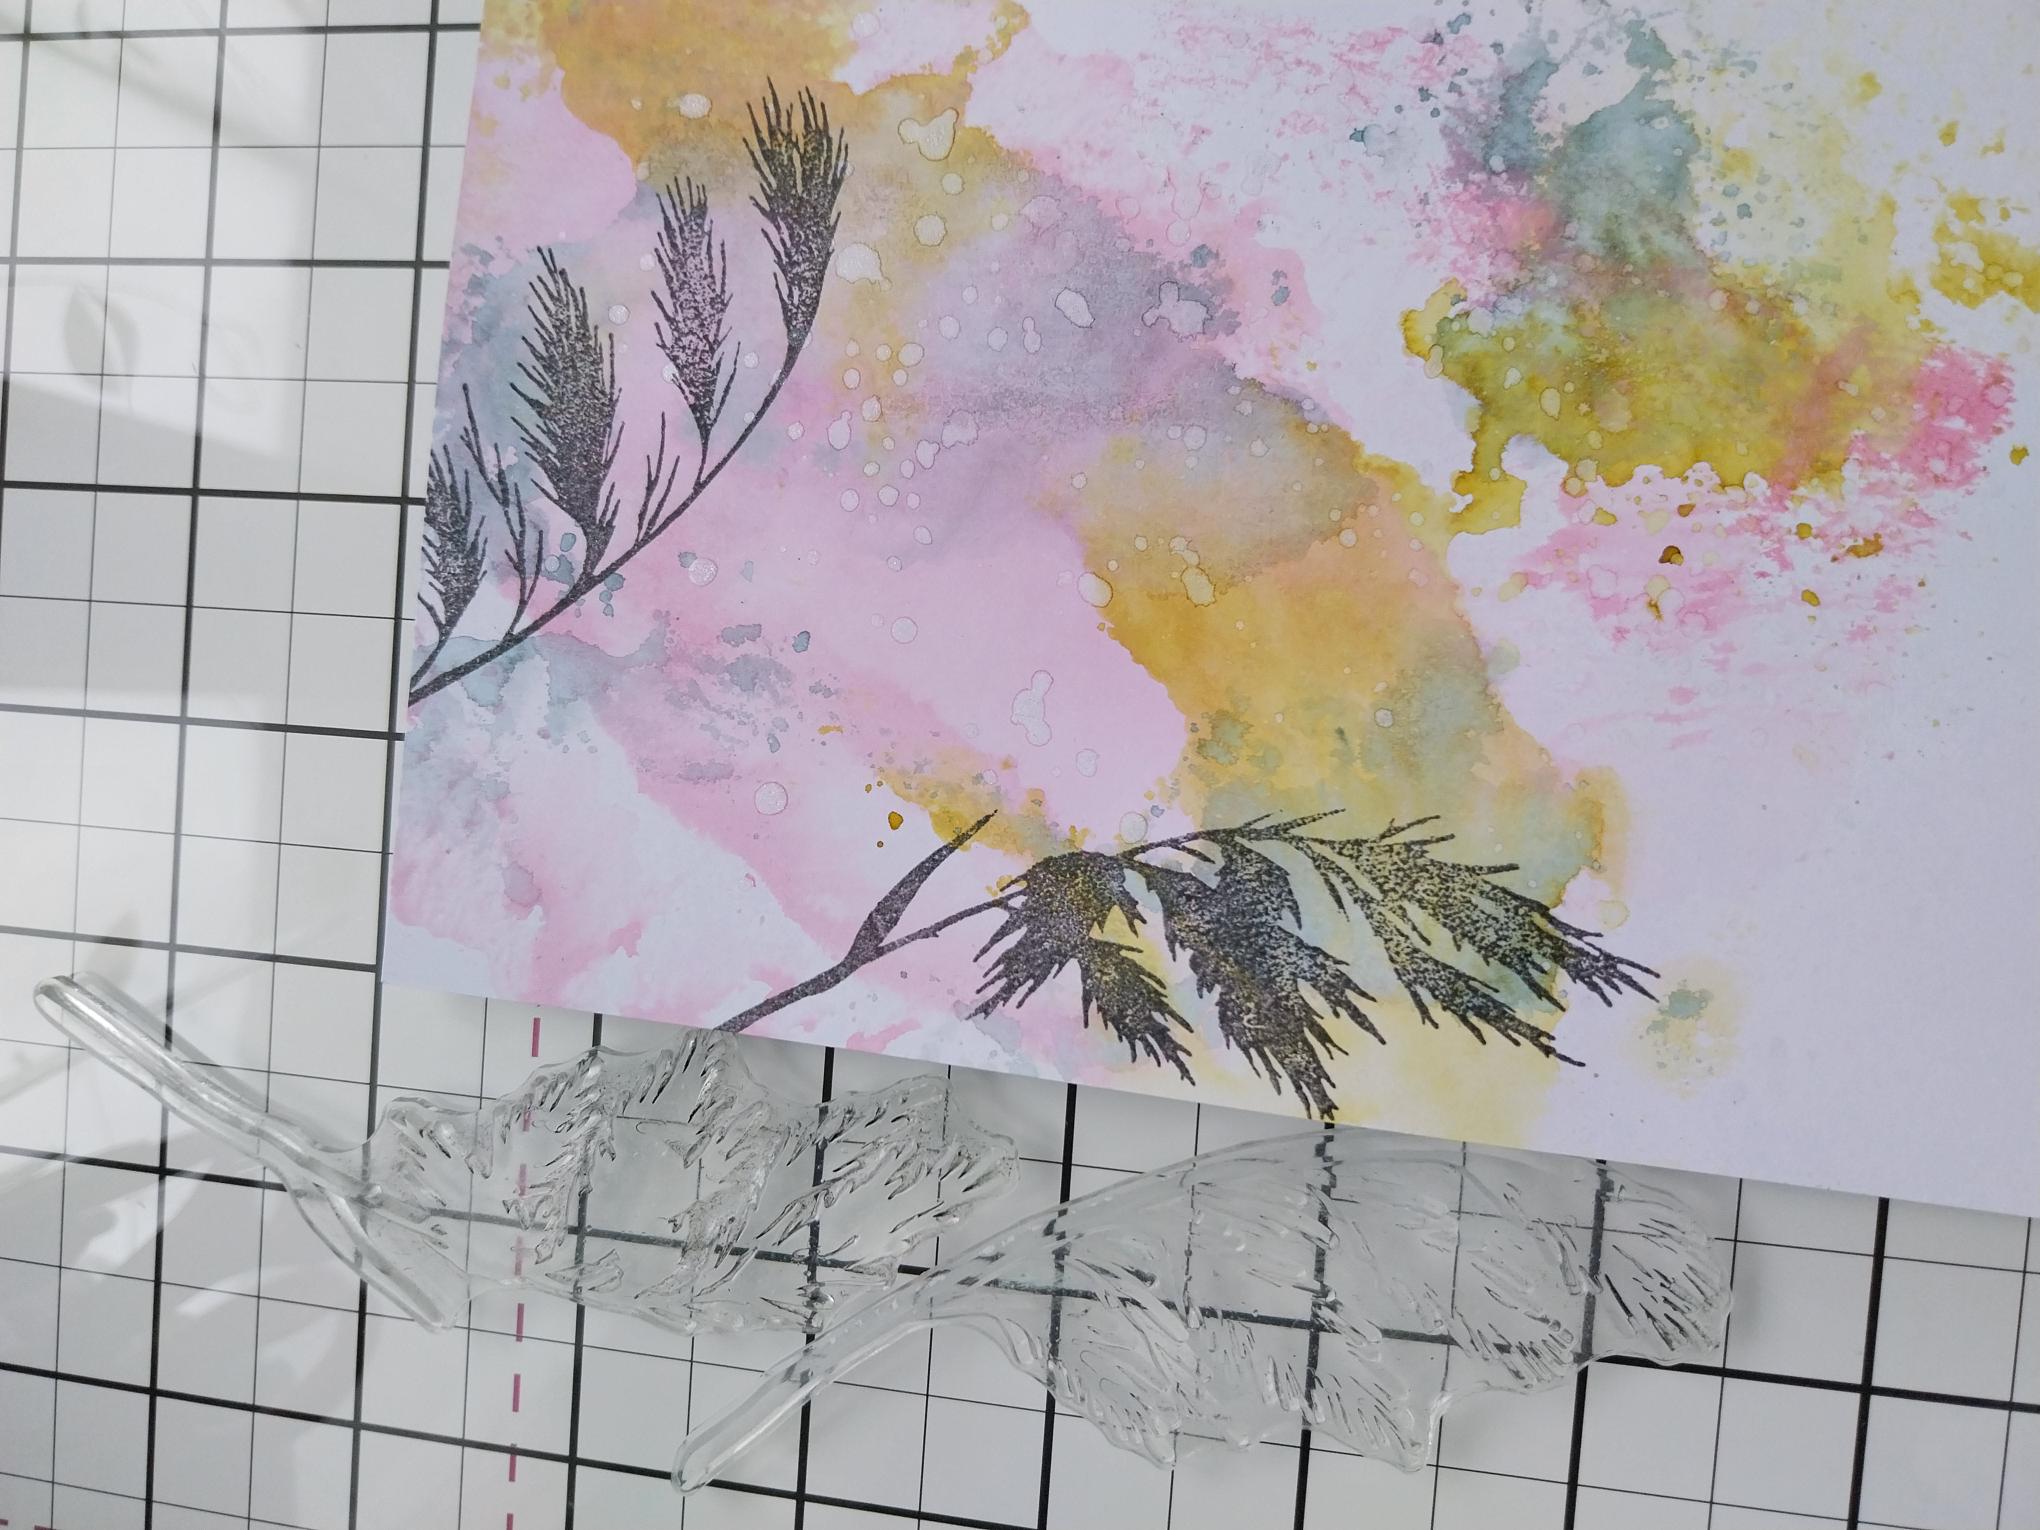
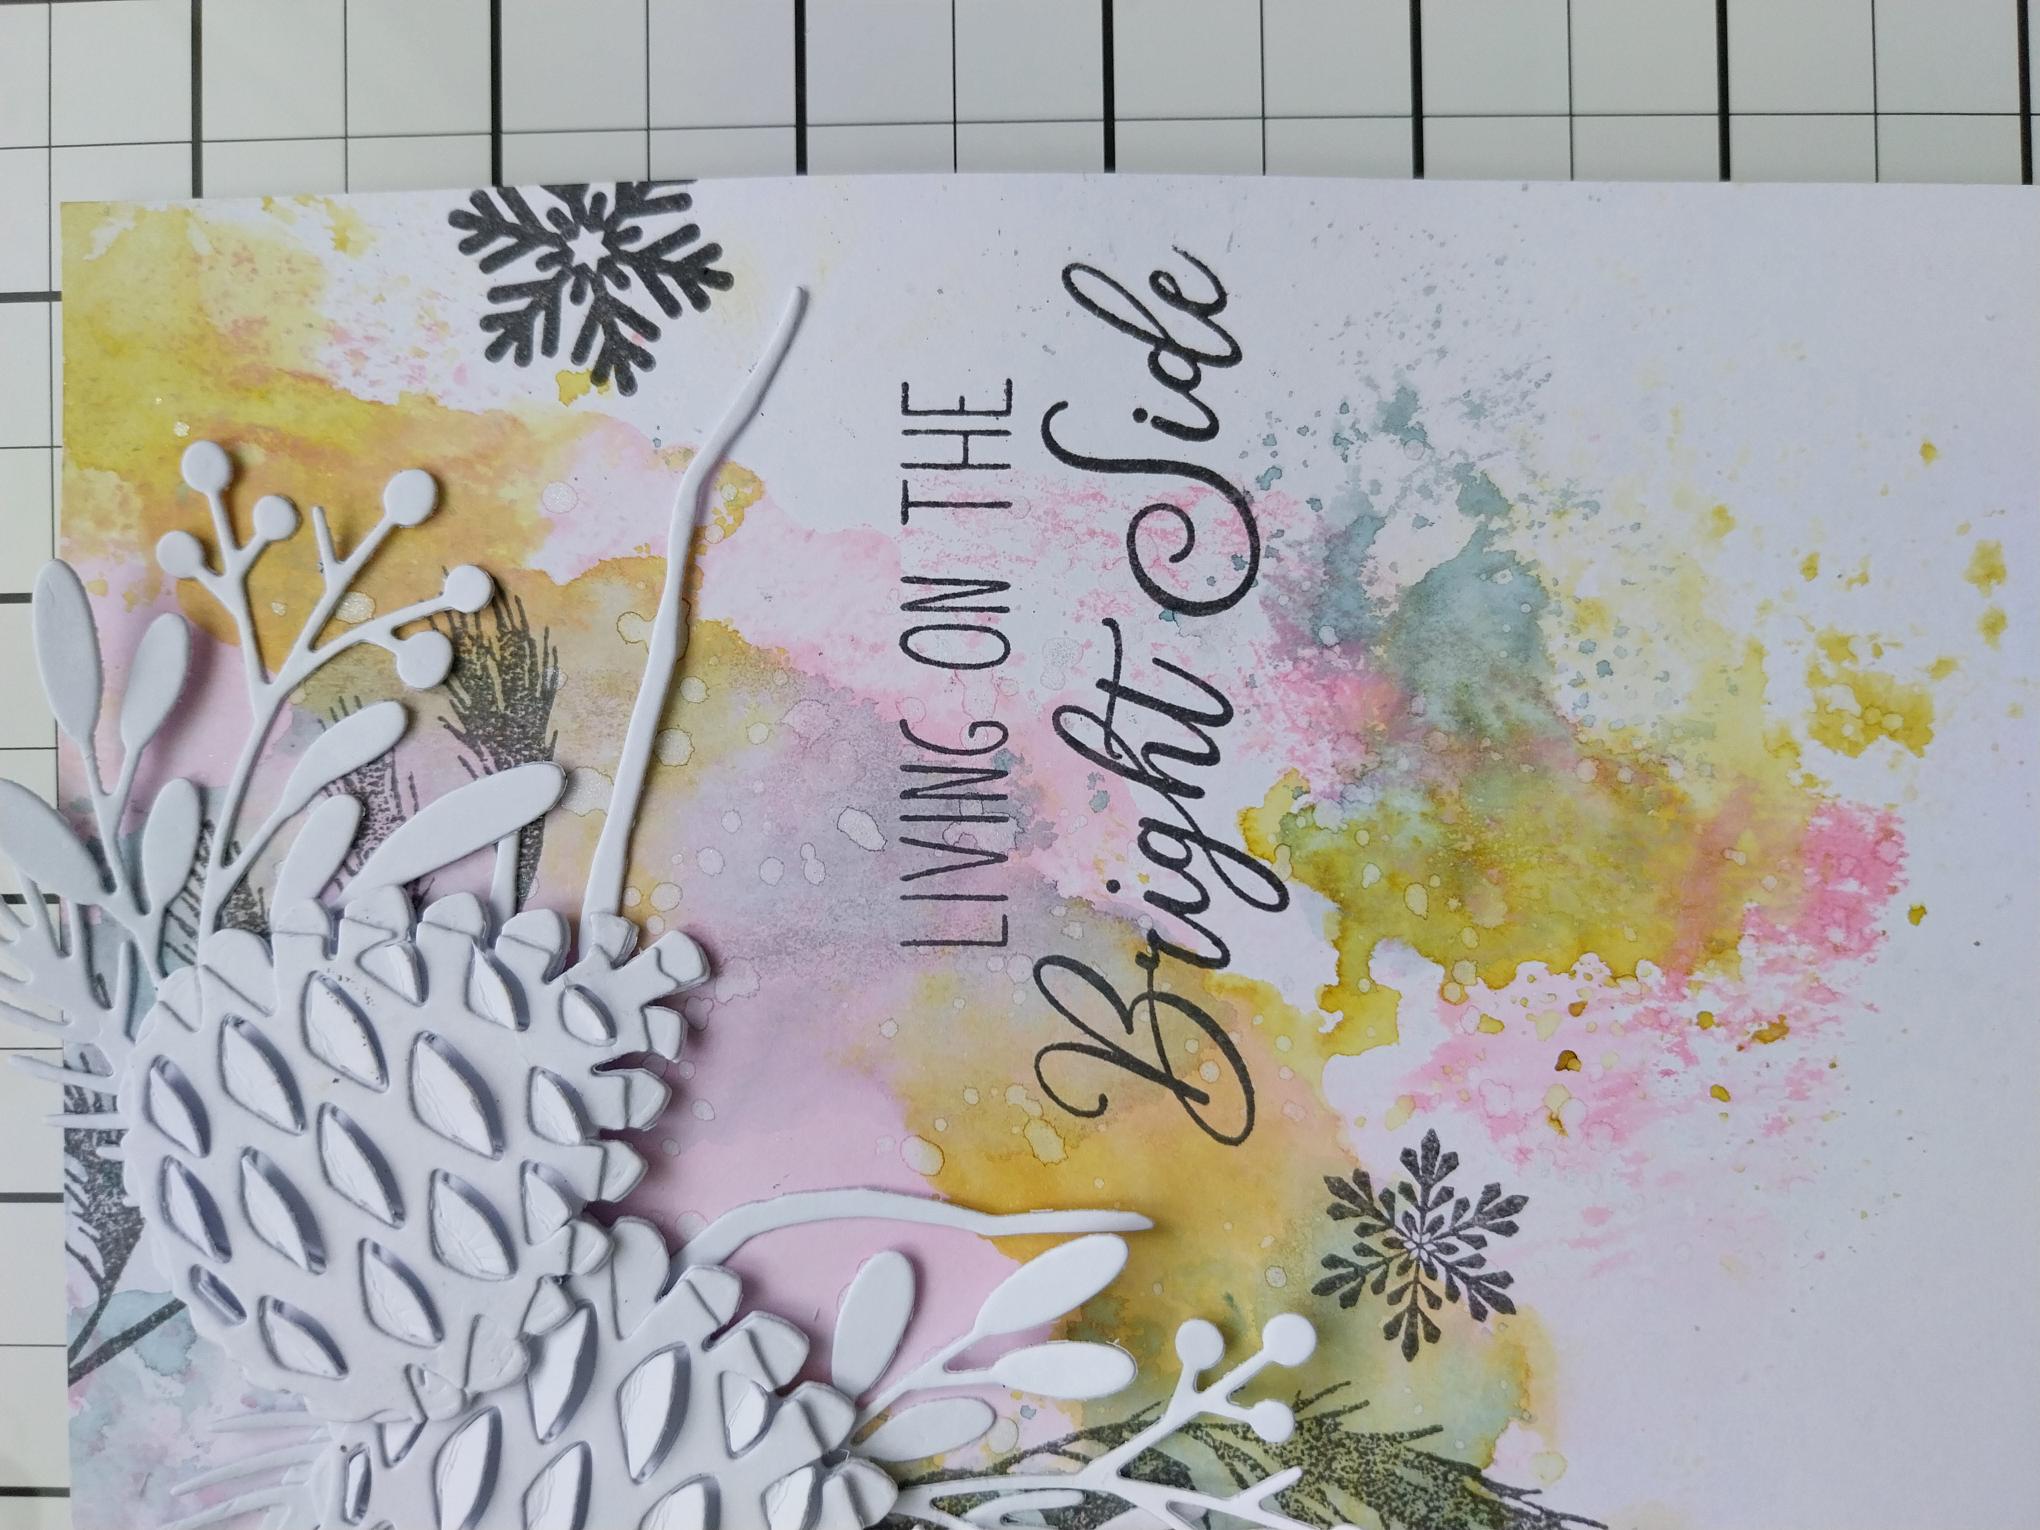
Trim white card to 7 1/2" x 5". Spray your Izink's on to your glass mat, add a touch of water then "smoosh" your card in to the ink, thus creating your background. Blast dry with your heat tool. |
|
Swirl the Pearlywinks Pearl Mist to activate the mica and spray on to your glass mat. Use a paint brush to splatter over your background. Again, blast dry. |
|
Ink up the foliage stamps, from Your Only Limit Is You set, with the Smoky Grey Versafine and stamp coming down from the top left corner. |
|
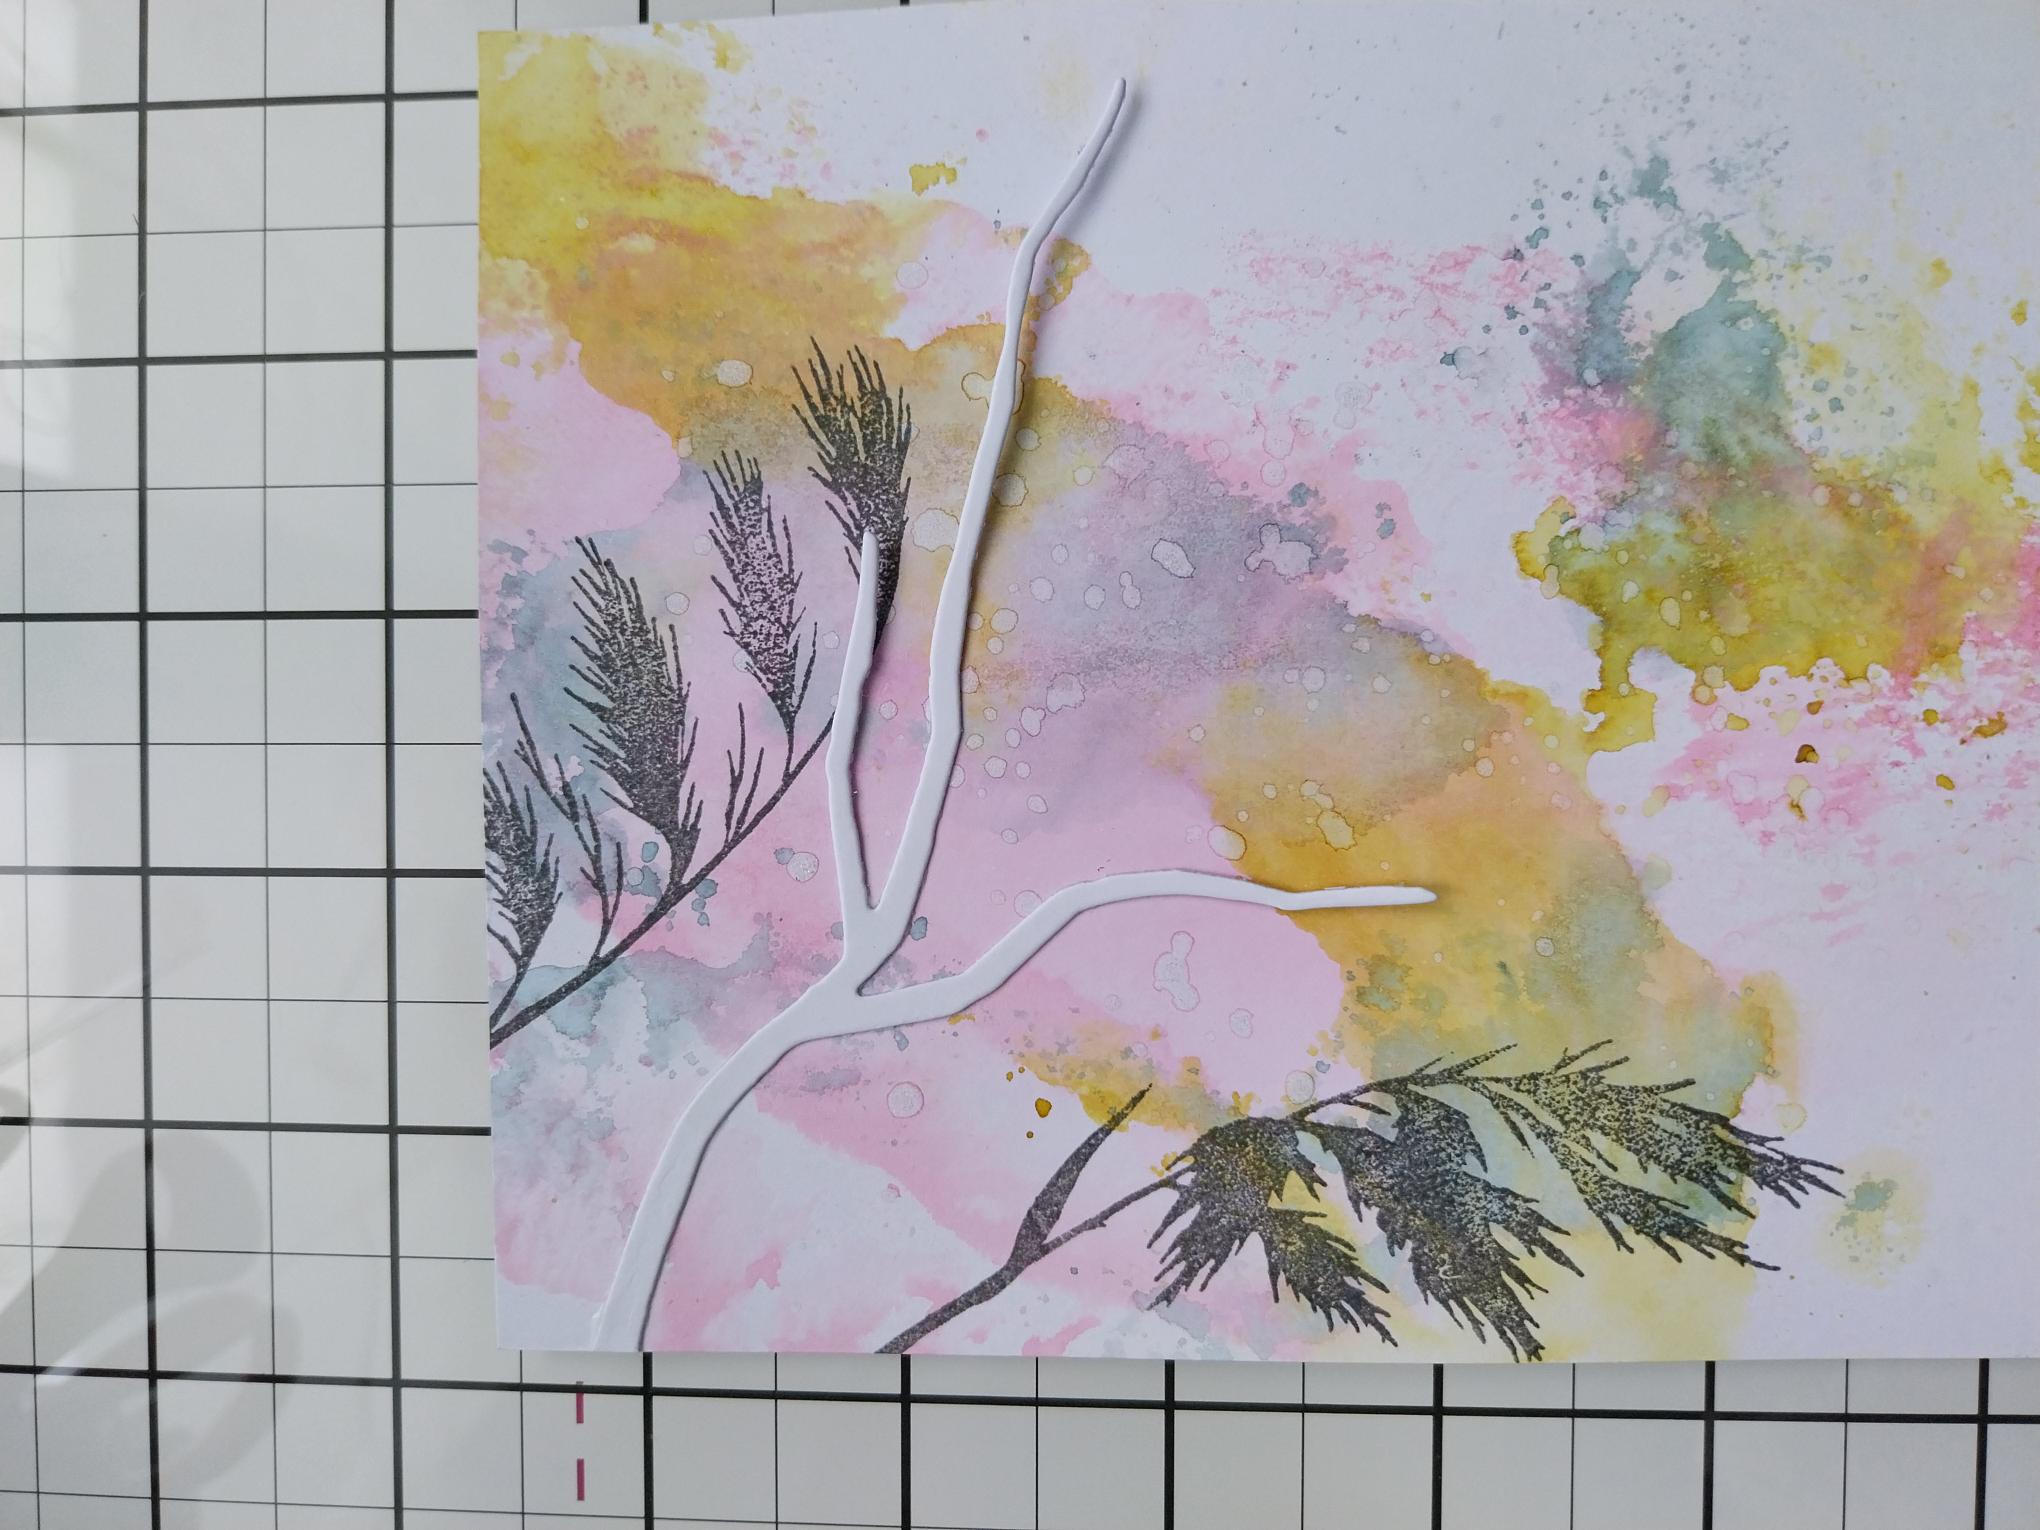
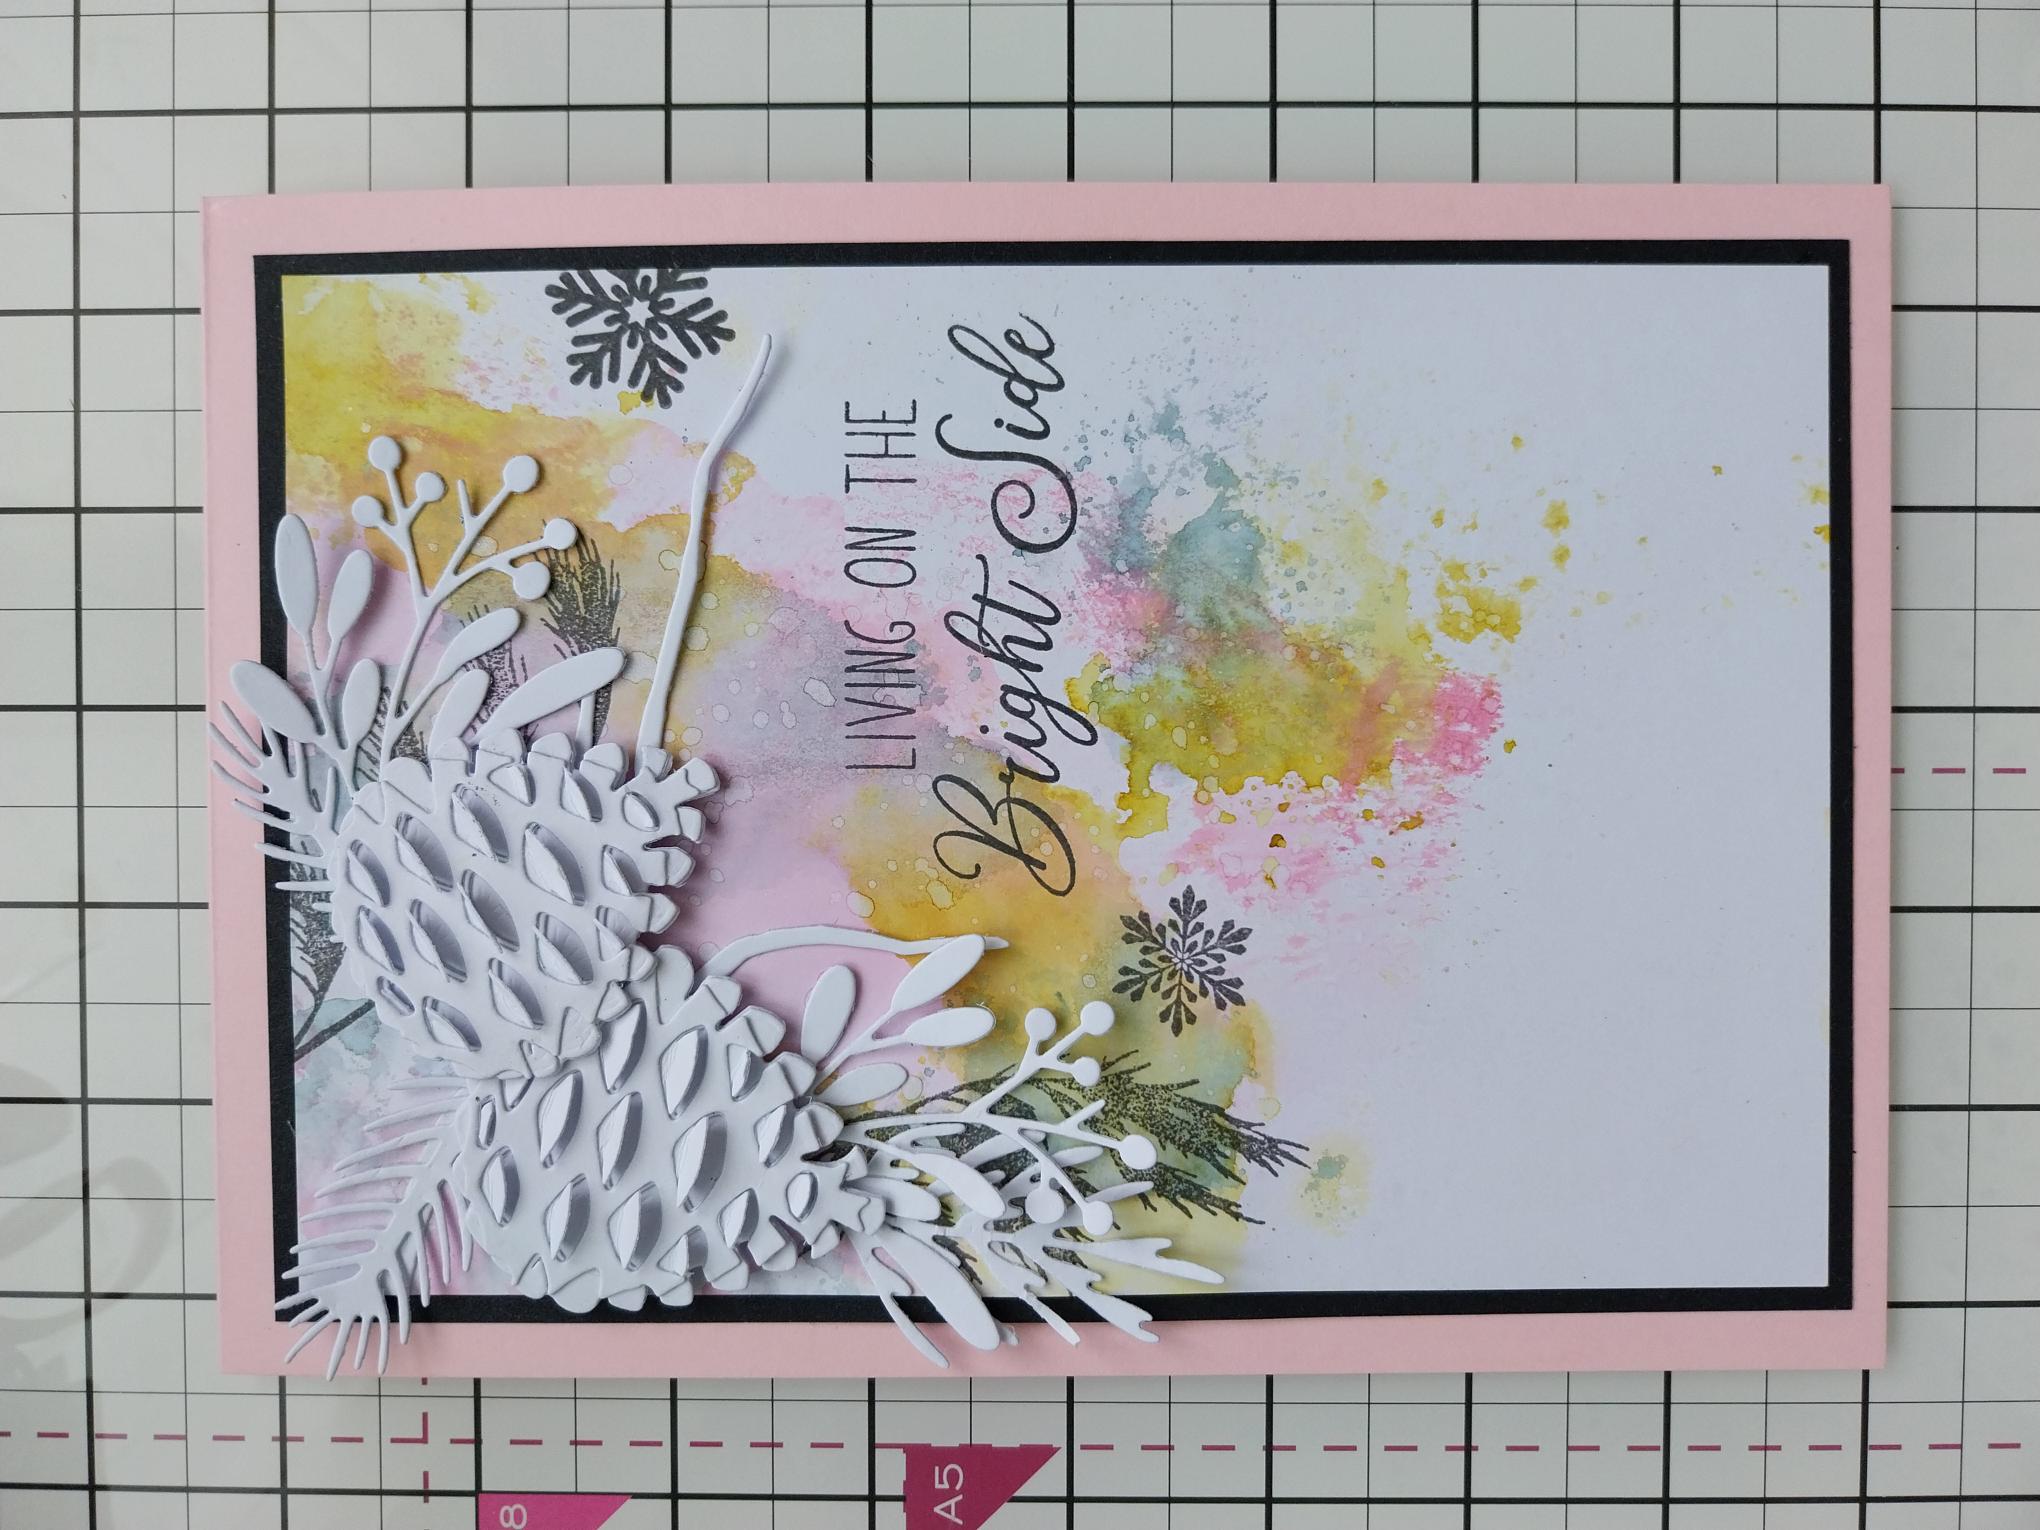
Adhere the long branch die cut as seen here. |
|
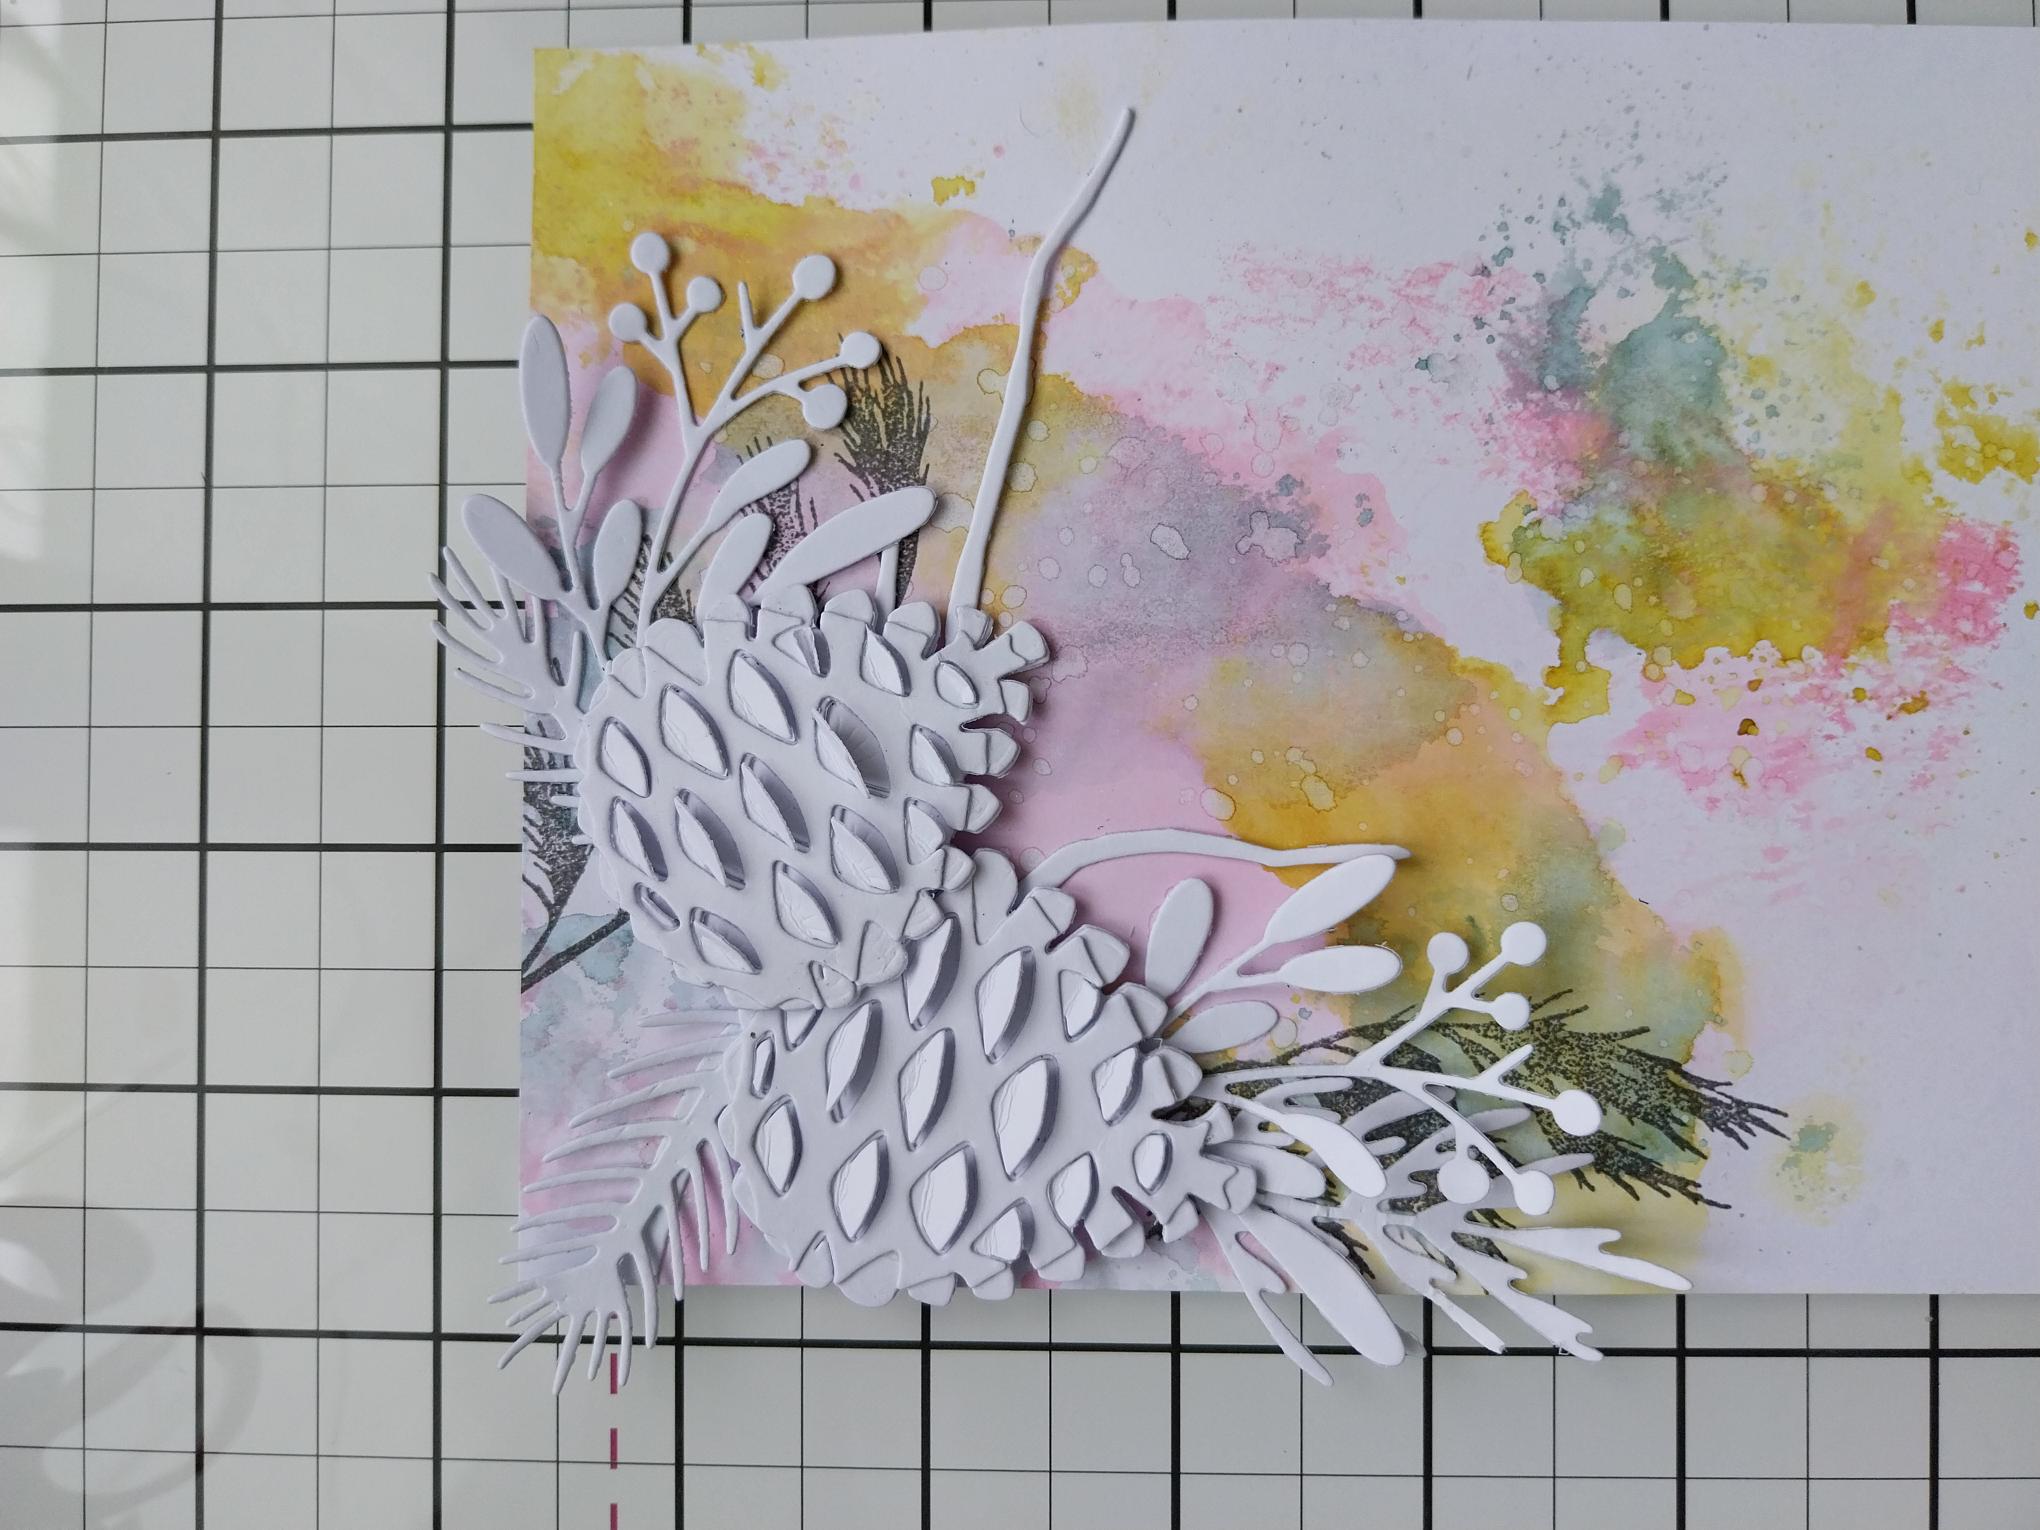
Adhere your Pine Cones in place with foam pads, then add all your foliage elements where required. |
|
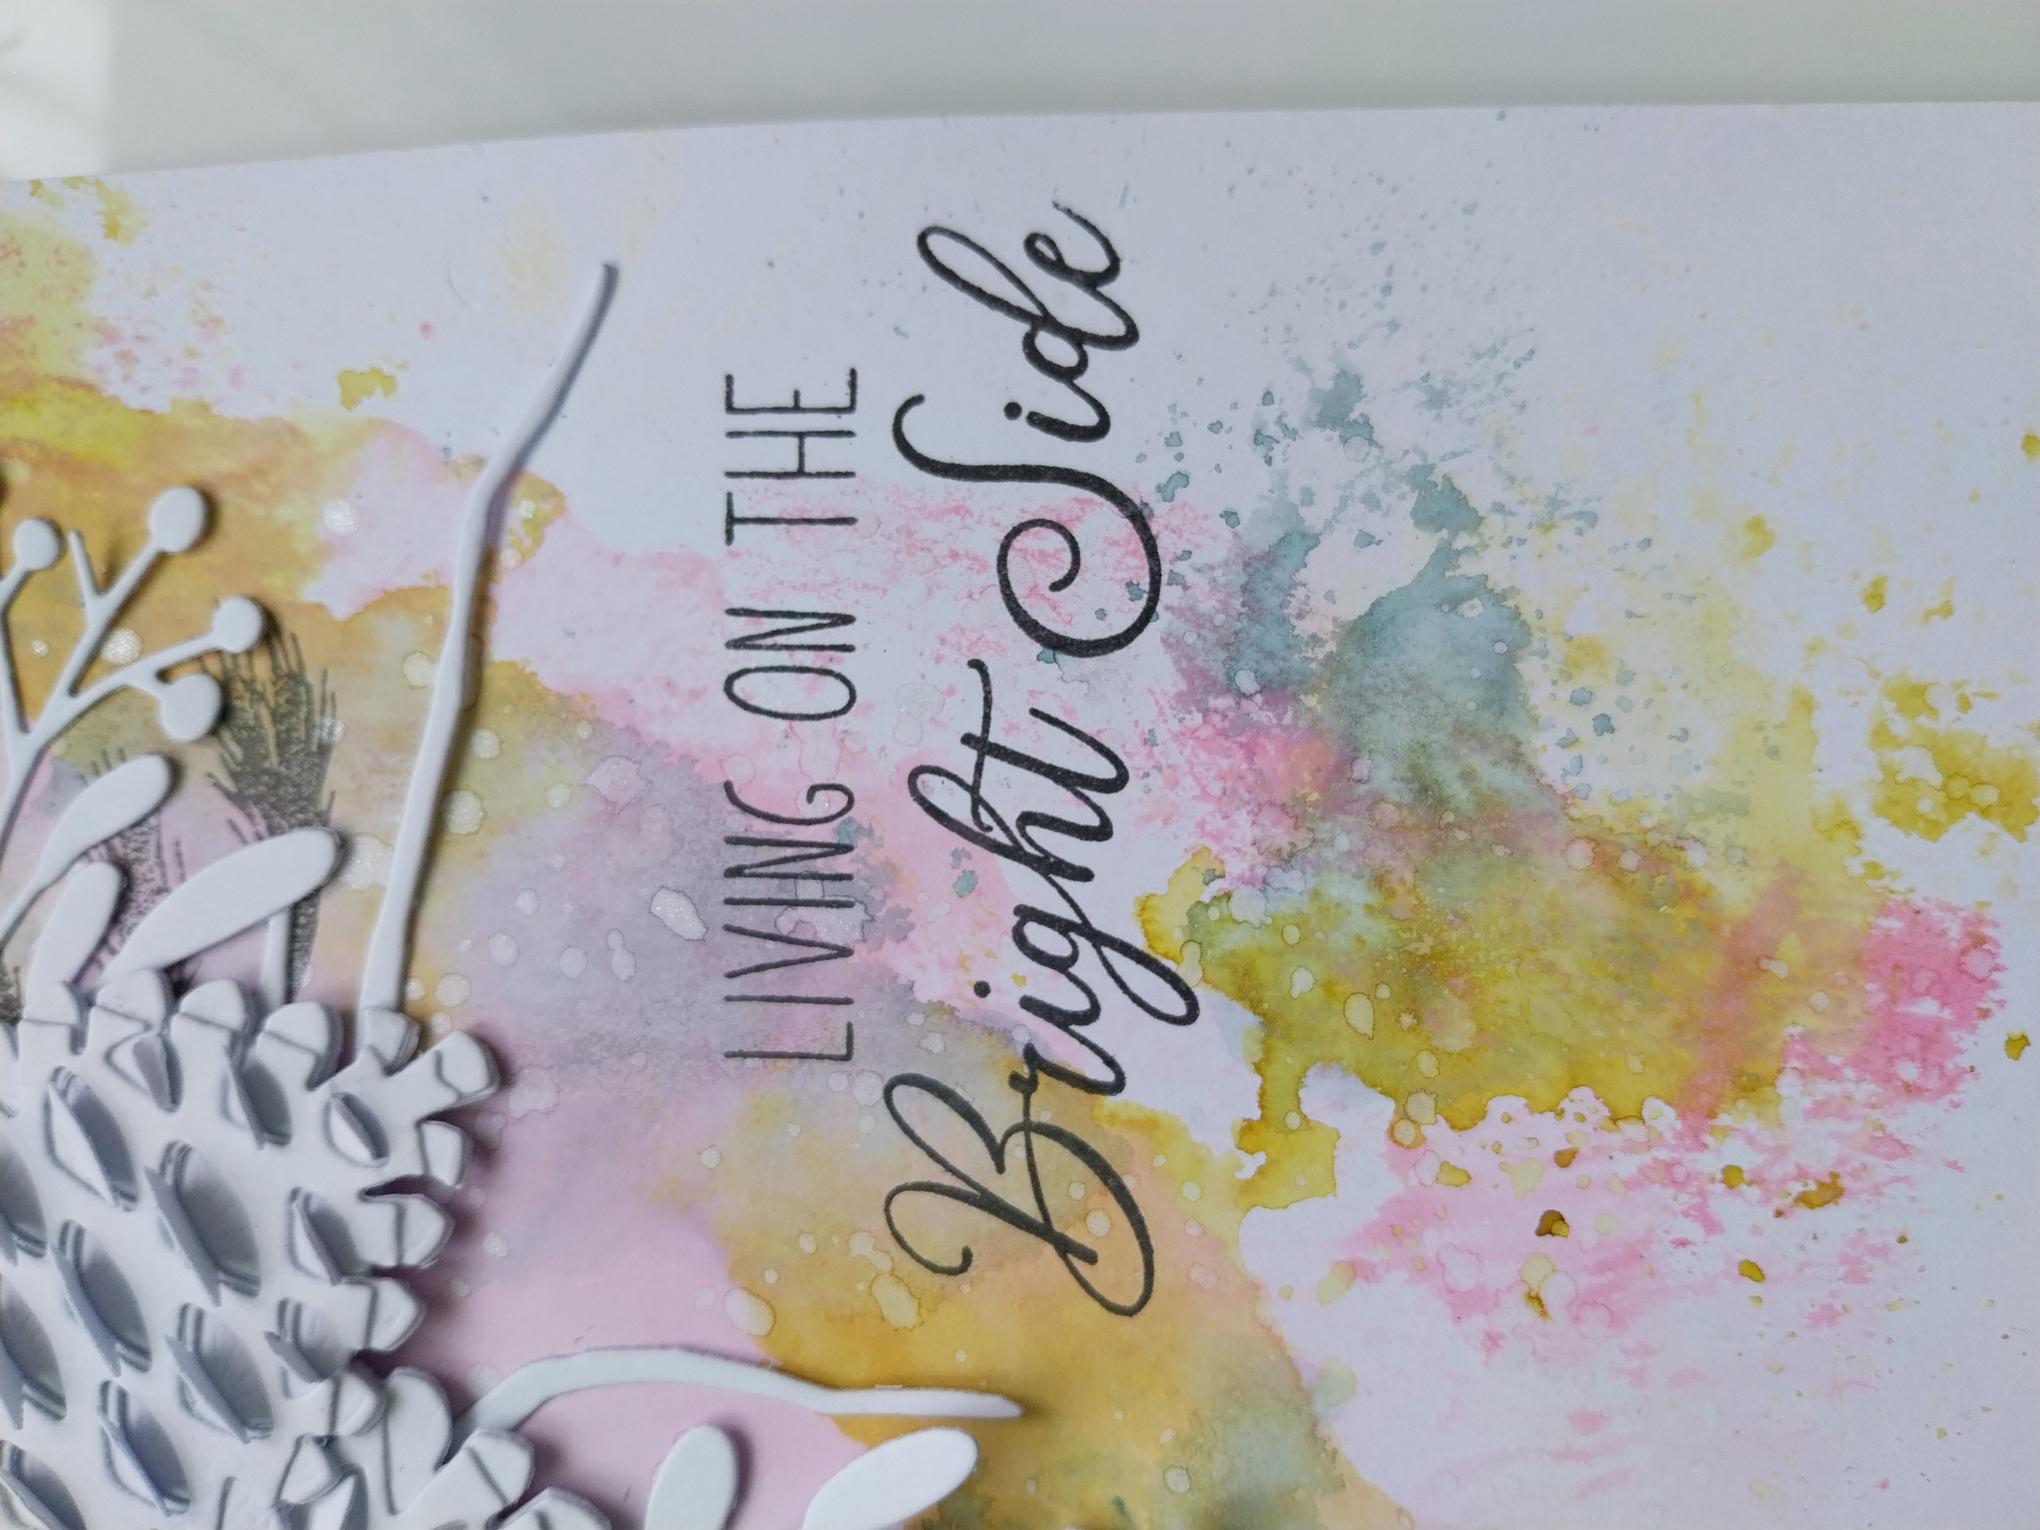
Stamp the sentiment, from the Merry & Bright Lamination set, in the Versafine, to the right of your 3D display. |
|
Stamp a few snowflakes around your sentiment. |
|
Adhere your artwork on to black card trimmed to 7 3/4 x 5 1/4" and then on to your pink card blank. |
|
To complete your project, use Stickles to add a touch of festive sparkle to your 3D elements. |