Give your friends $10 off their first order!
Refer a FRIEND


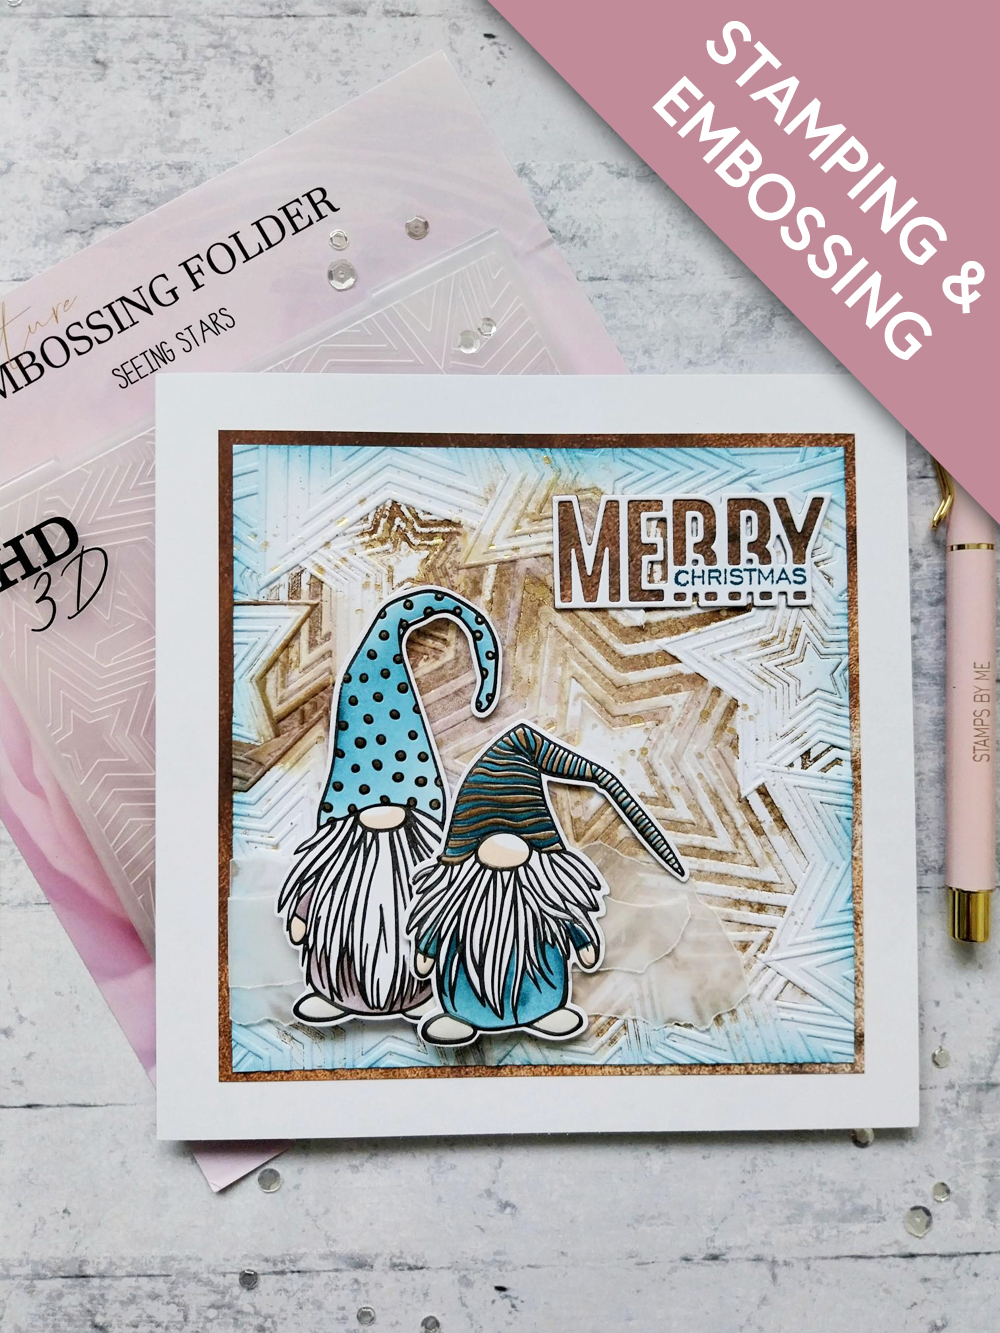
WHAT YOU WILL NEED:
White card blank 7 x 7"
White card
Vellum
High Definition 3D Seeing Stars Embossing Folder
Quattro D Christmas Is Coming
Special Wishes Stamp and Die Collection
All Surfaces Bronze Paper Pack
SBM Hybrid Ink Pad: Midnight
SBM Premium Dye Ink Pad: Tiffany, Heather
Distress Ink Pad: Walnut Stain, Lost Shadow, Tattered Rose
Blending tool
Pearlywinks Pearl Mist Spray: Golden Shimmer
Paint brush
Water spray bottle
Eureka 101 Watercolour Tablet
SBM Magnetic glass mat
Paper Trimmer
Perfect Together Glue
Foam pads
Die Cutting machine
[click image to enlarge] 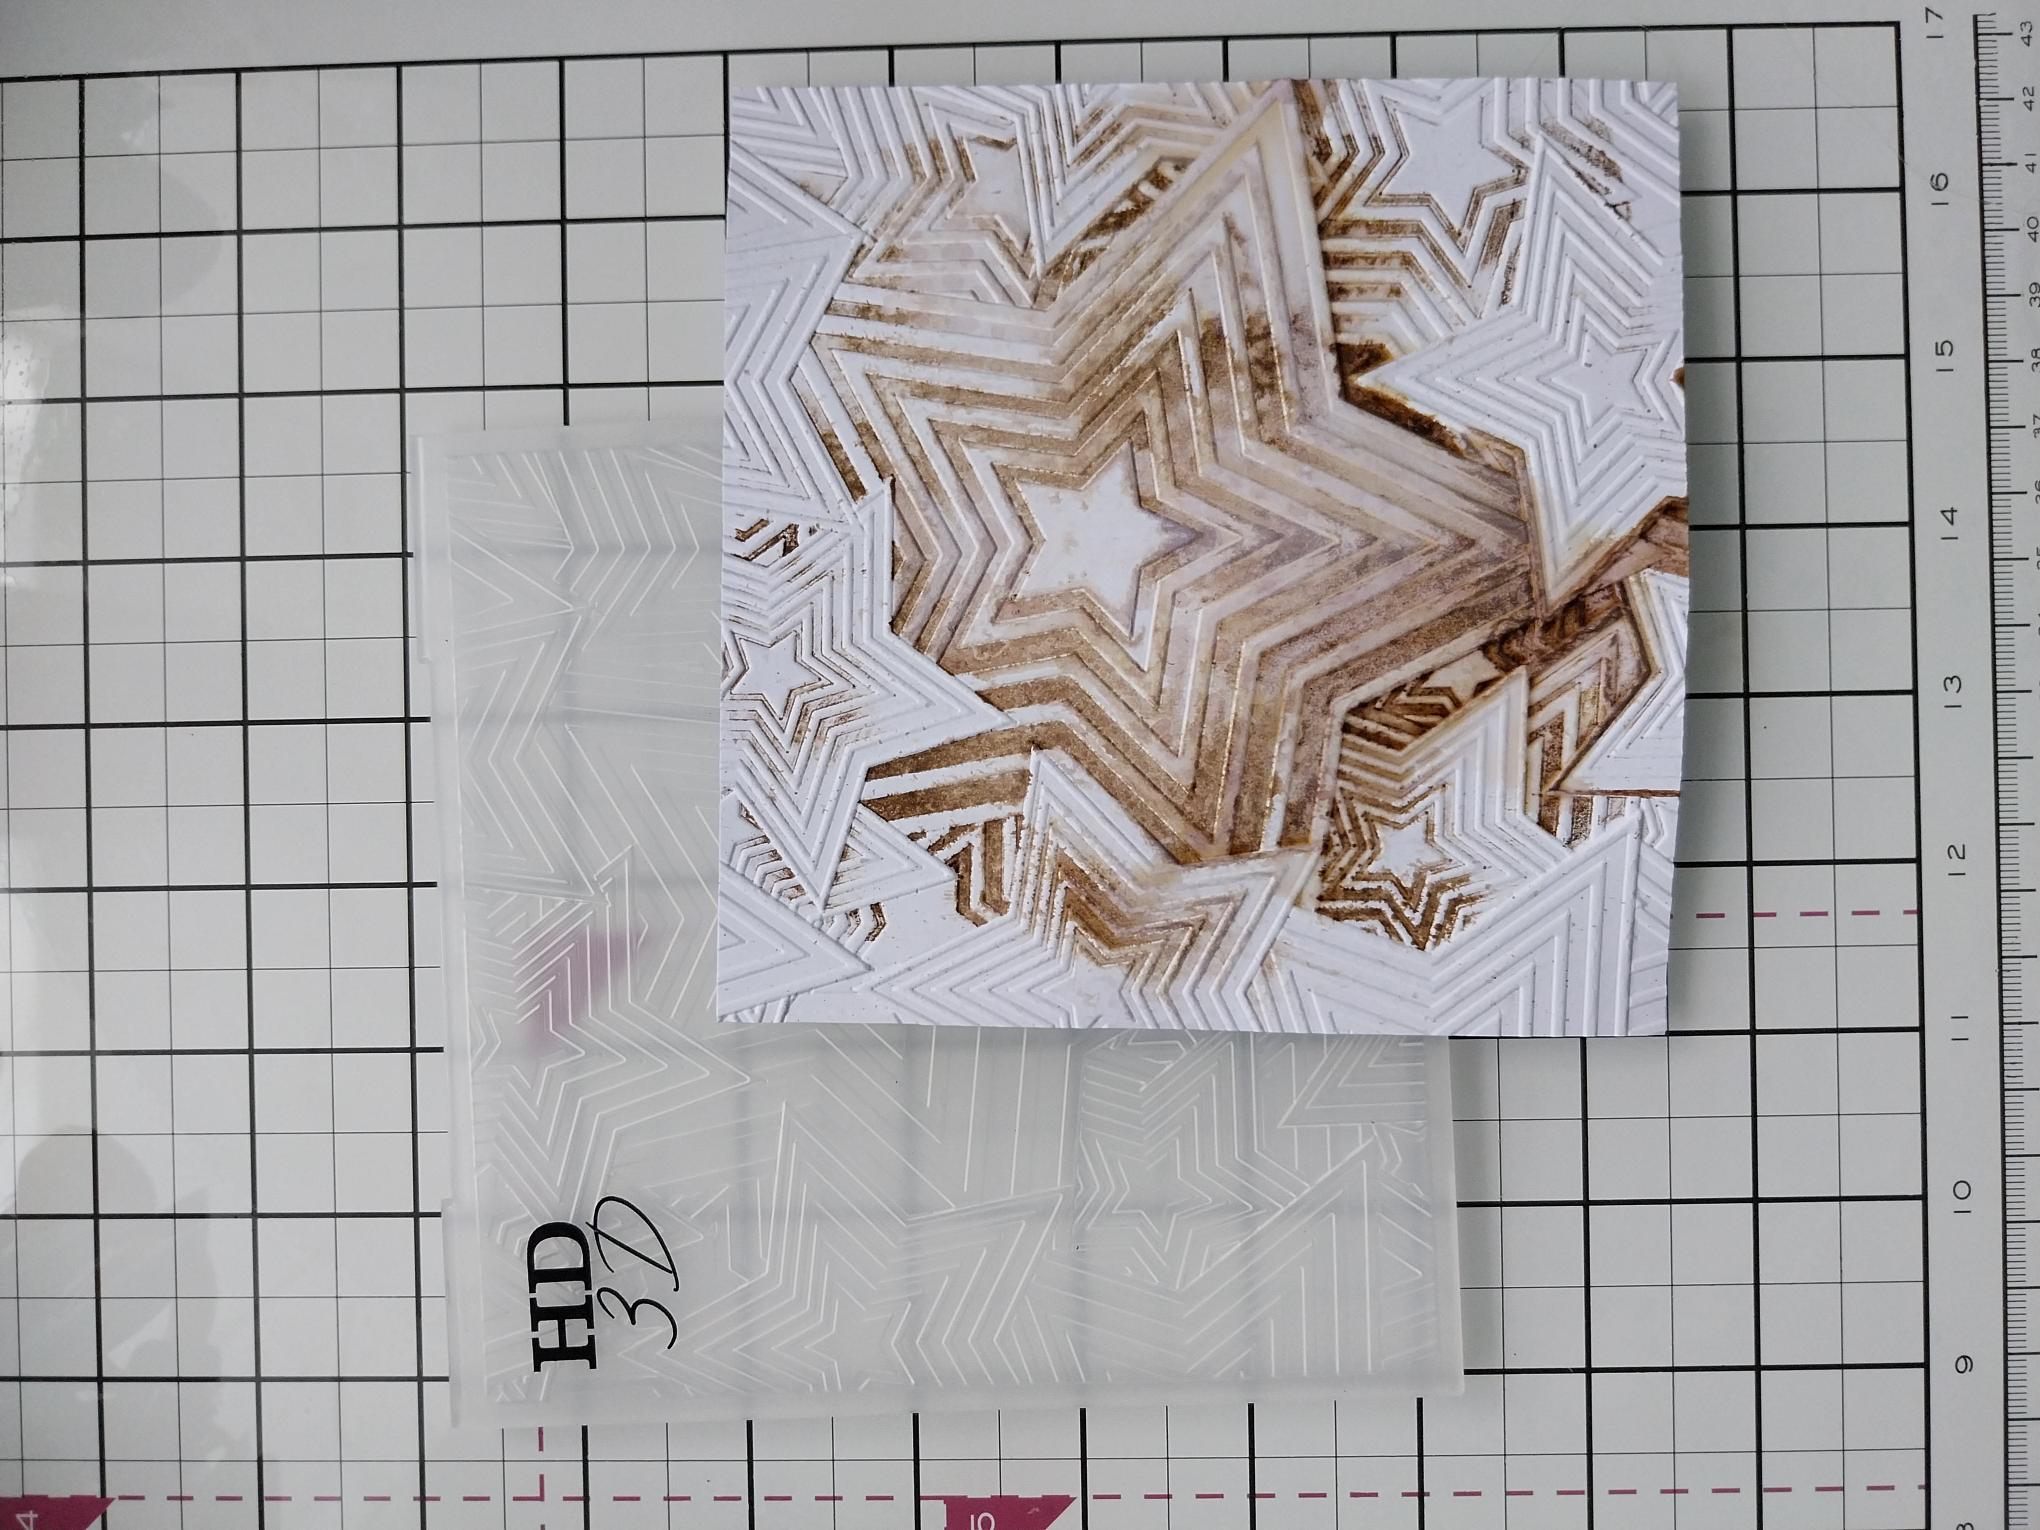
|
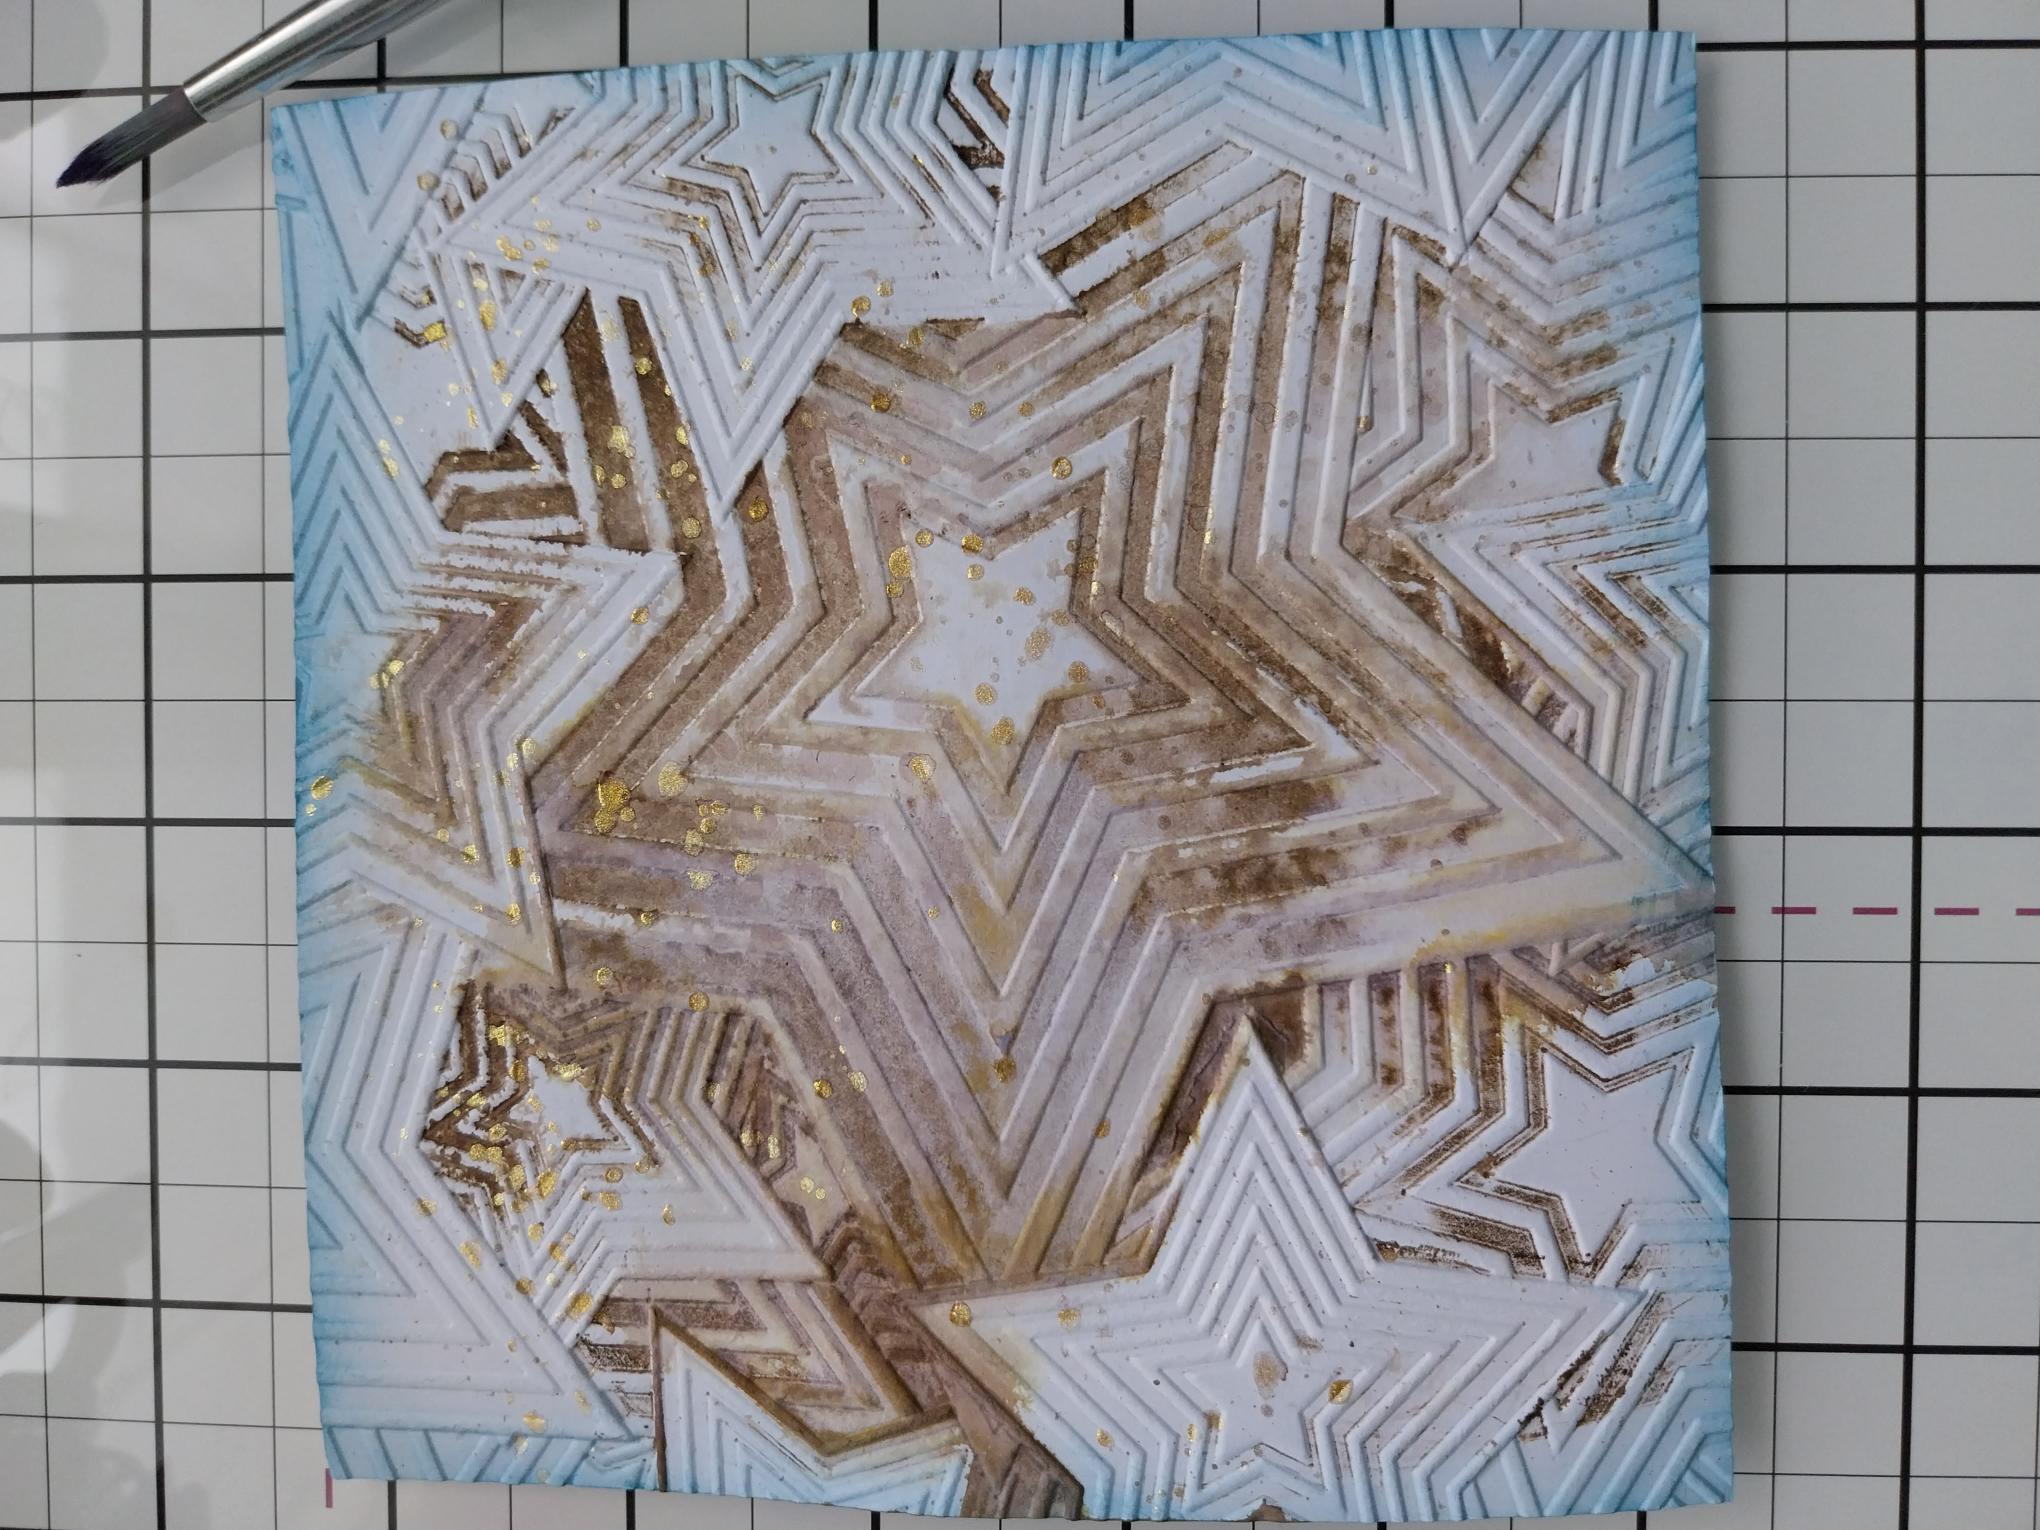
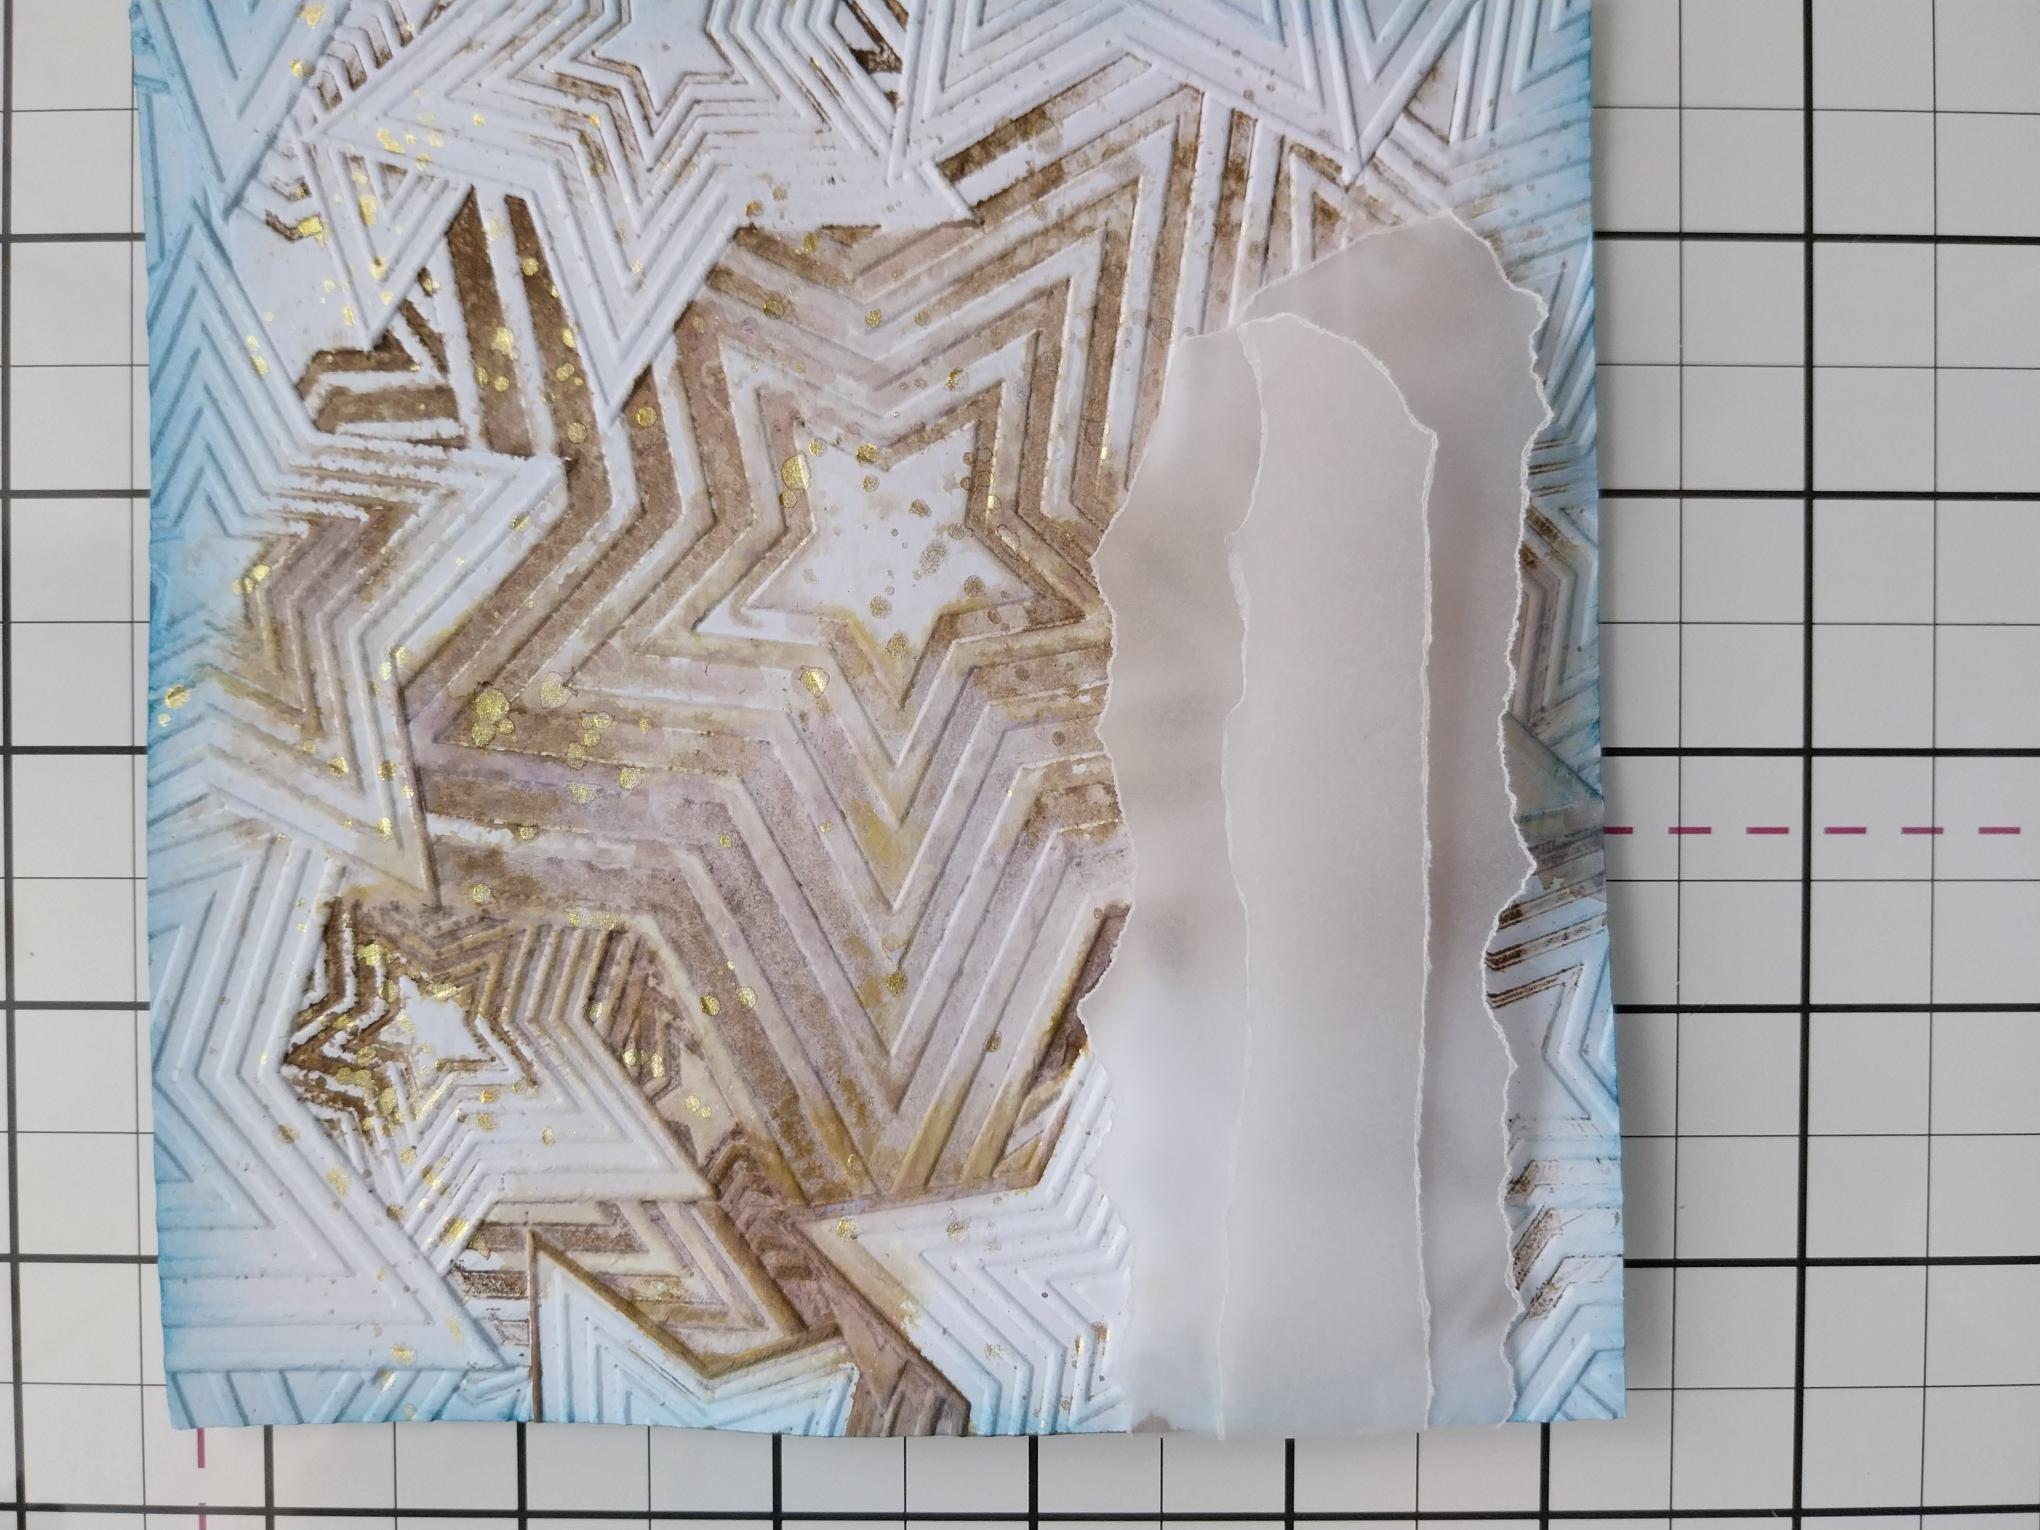
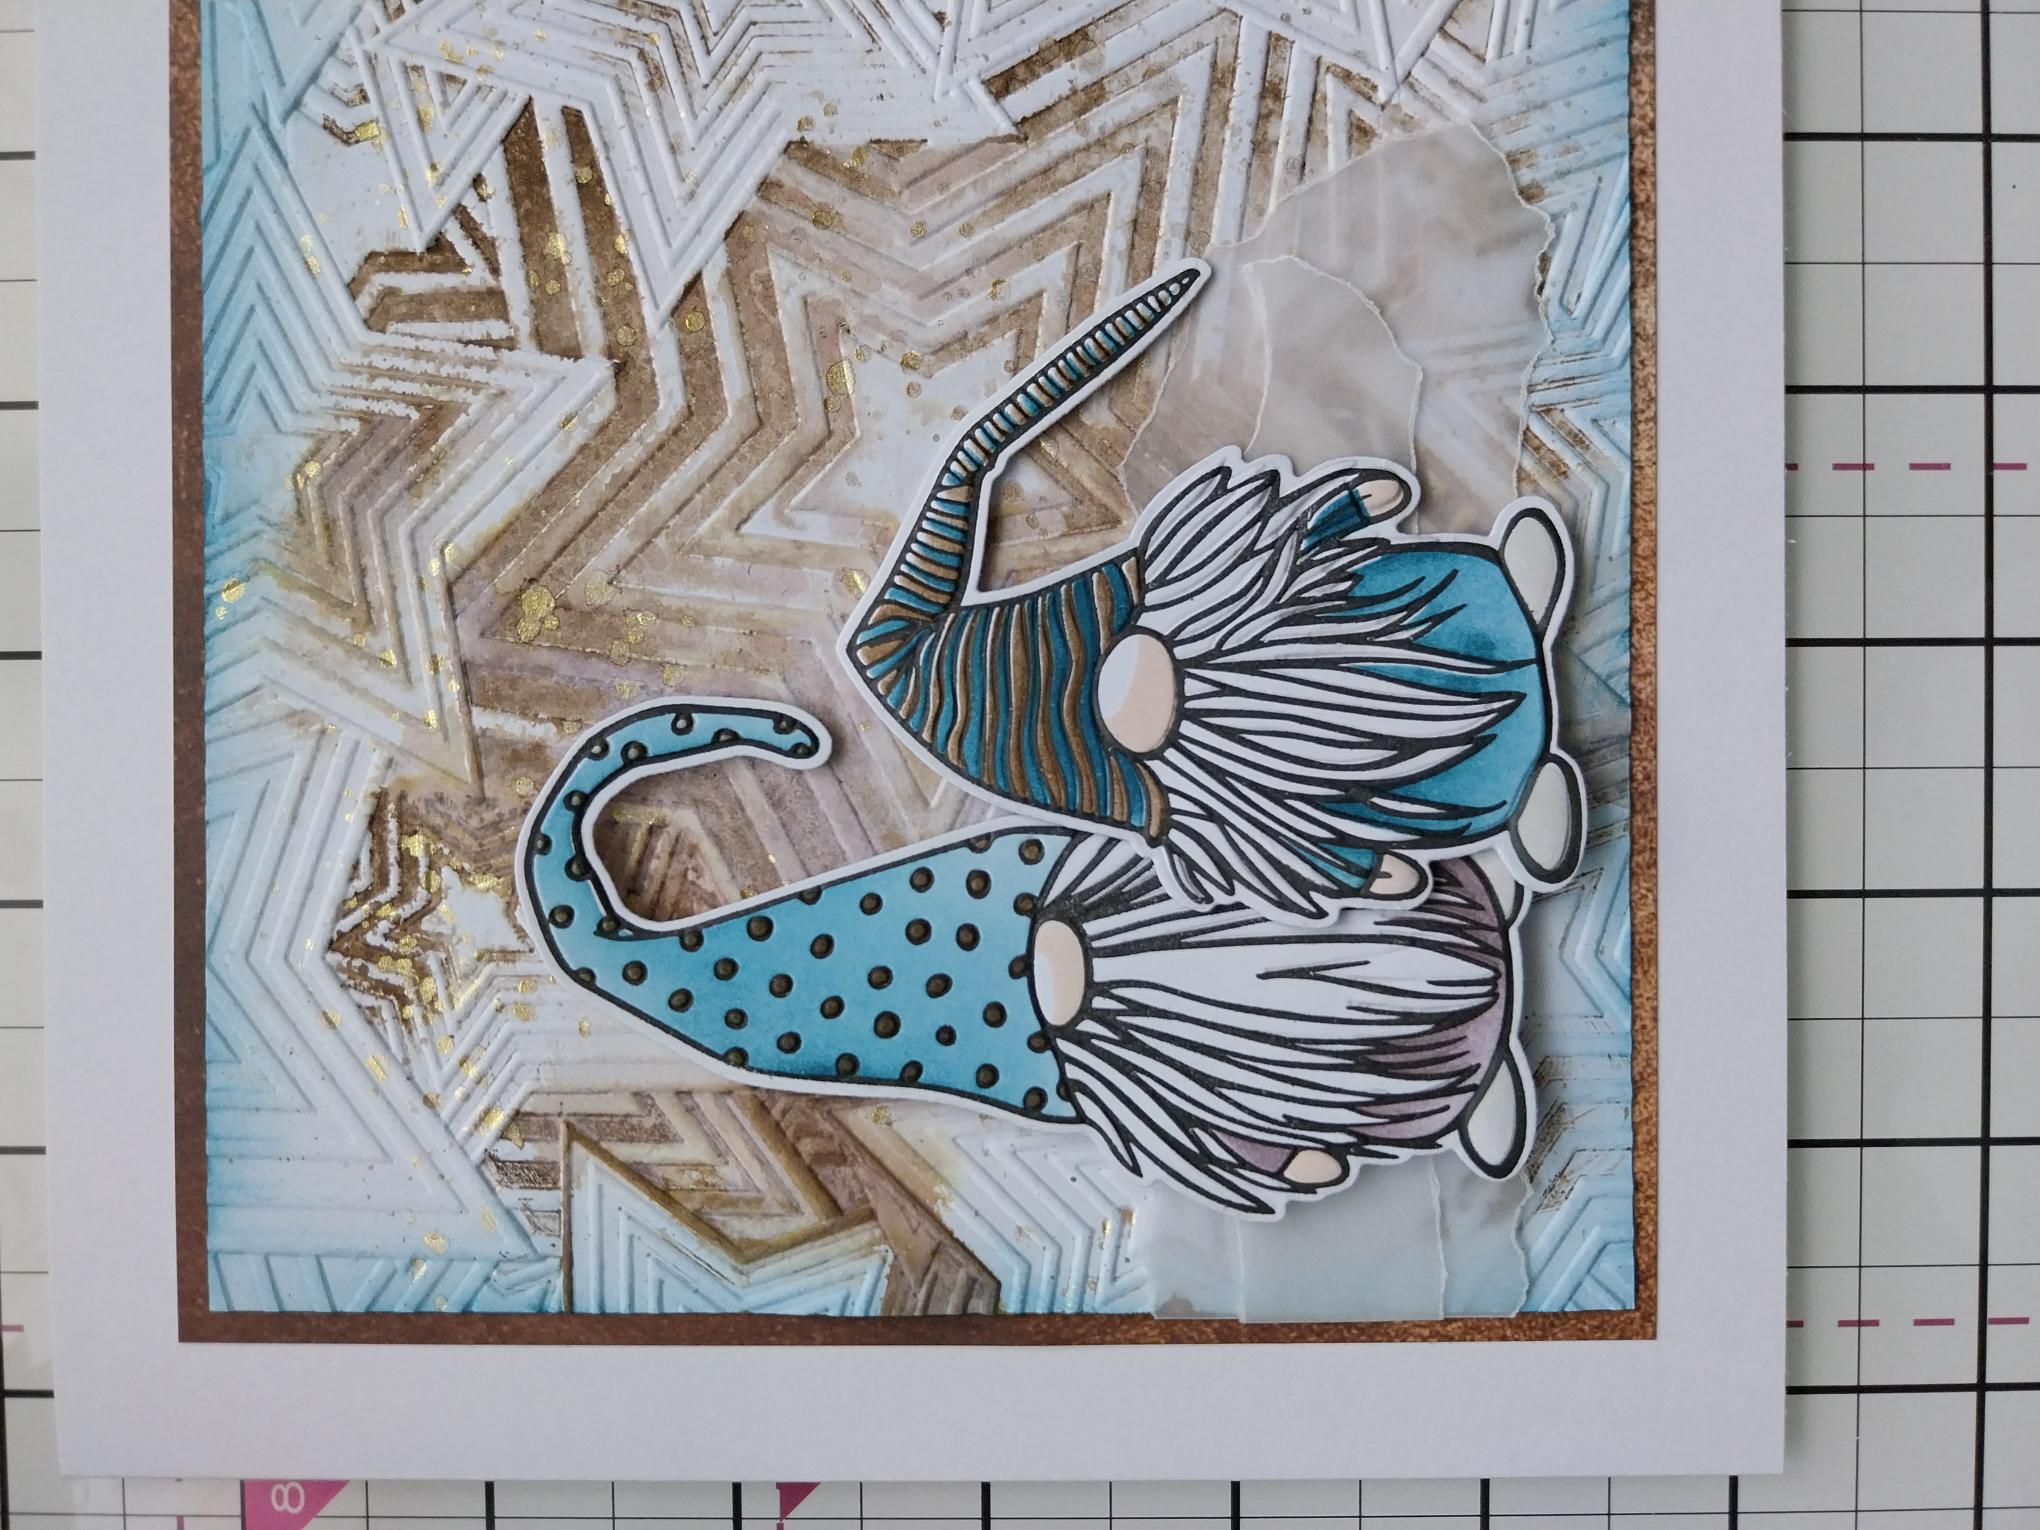
Smoosh your Walnut Stain ink pad on the DEBOSSED side of the Seeing Stars folder and spritz with water. Place a piece of white card, trimmed to 5 1/2" square, inside the folder and run it through your machine. |

|
Lightly blend Tiffany around the edges of the card with your blending tool. |
|
Swirl the Pearlywinks bottle, to activate the mica before spraying some on to your glass mat. Use a paint brush to splatter it over your background. |
|
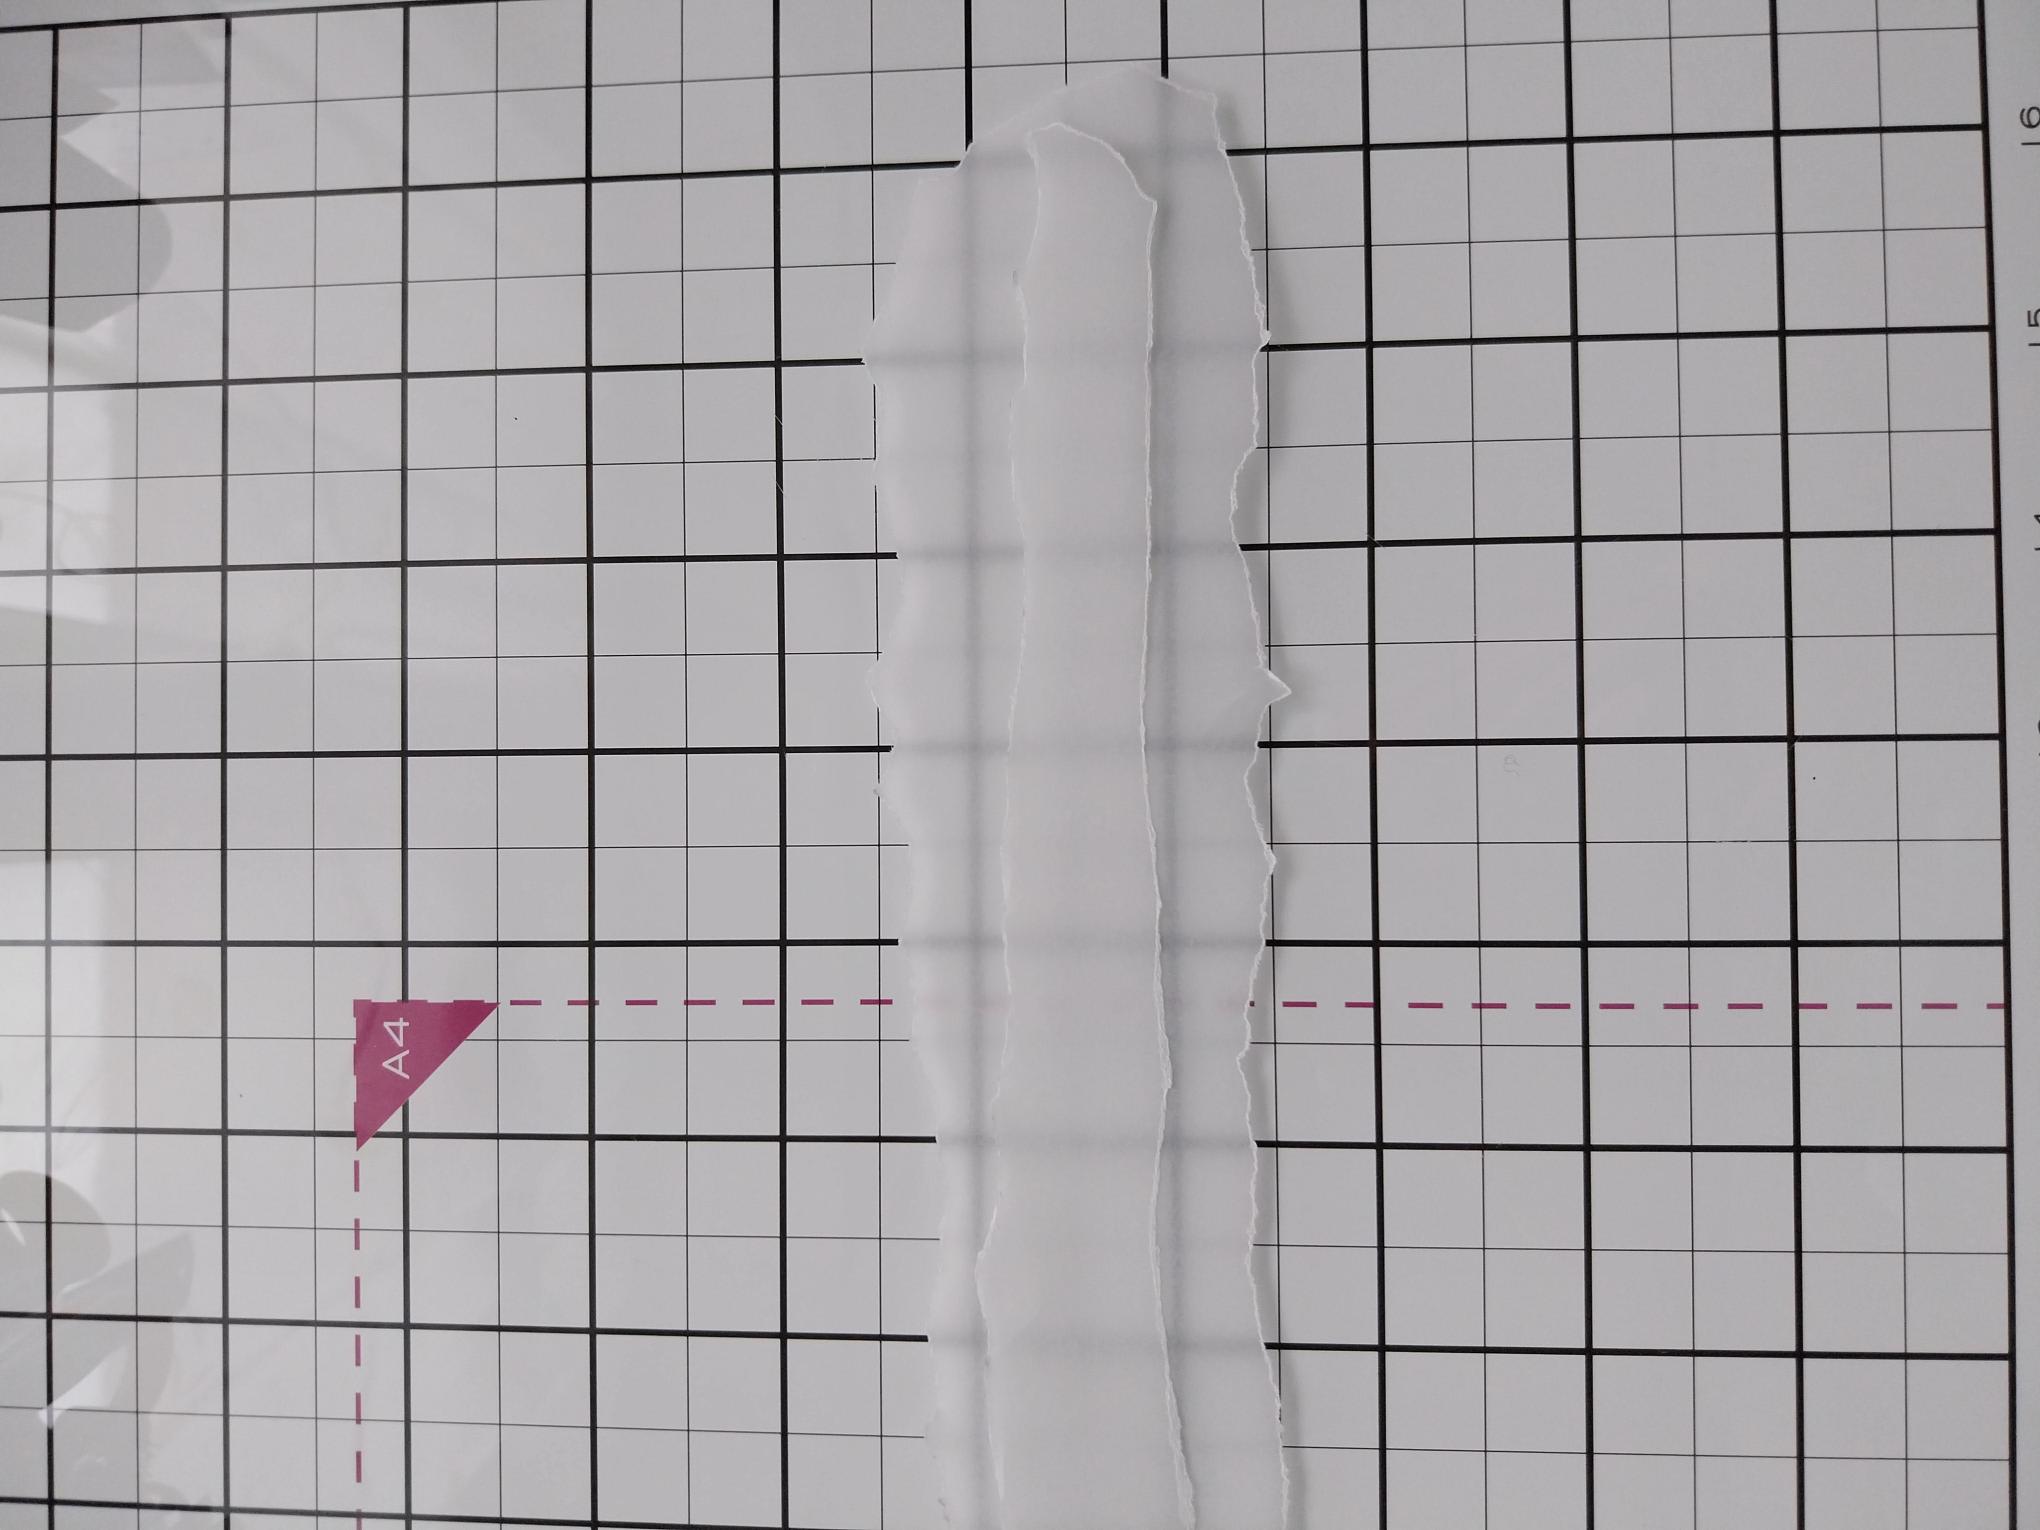
Tear 2 strips of vellum, one wider than the other. |
|
Once your background is completely dry, lay the torn vellum strips, one on top of the other, so they reach just over half way across the bottom of the background. Tuck the overhang over the left side edge of the card and secure on the reverse with double-sided tape. You can either leave the vellum loose for now or pop a little glue underneath, to hold it in place. Your Gnomes will cover any visible glue. |
|
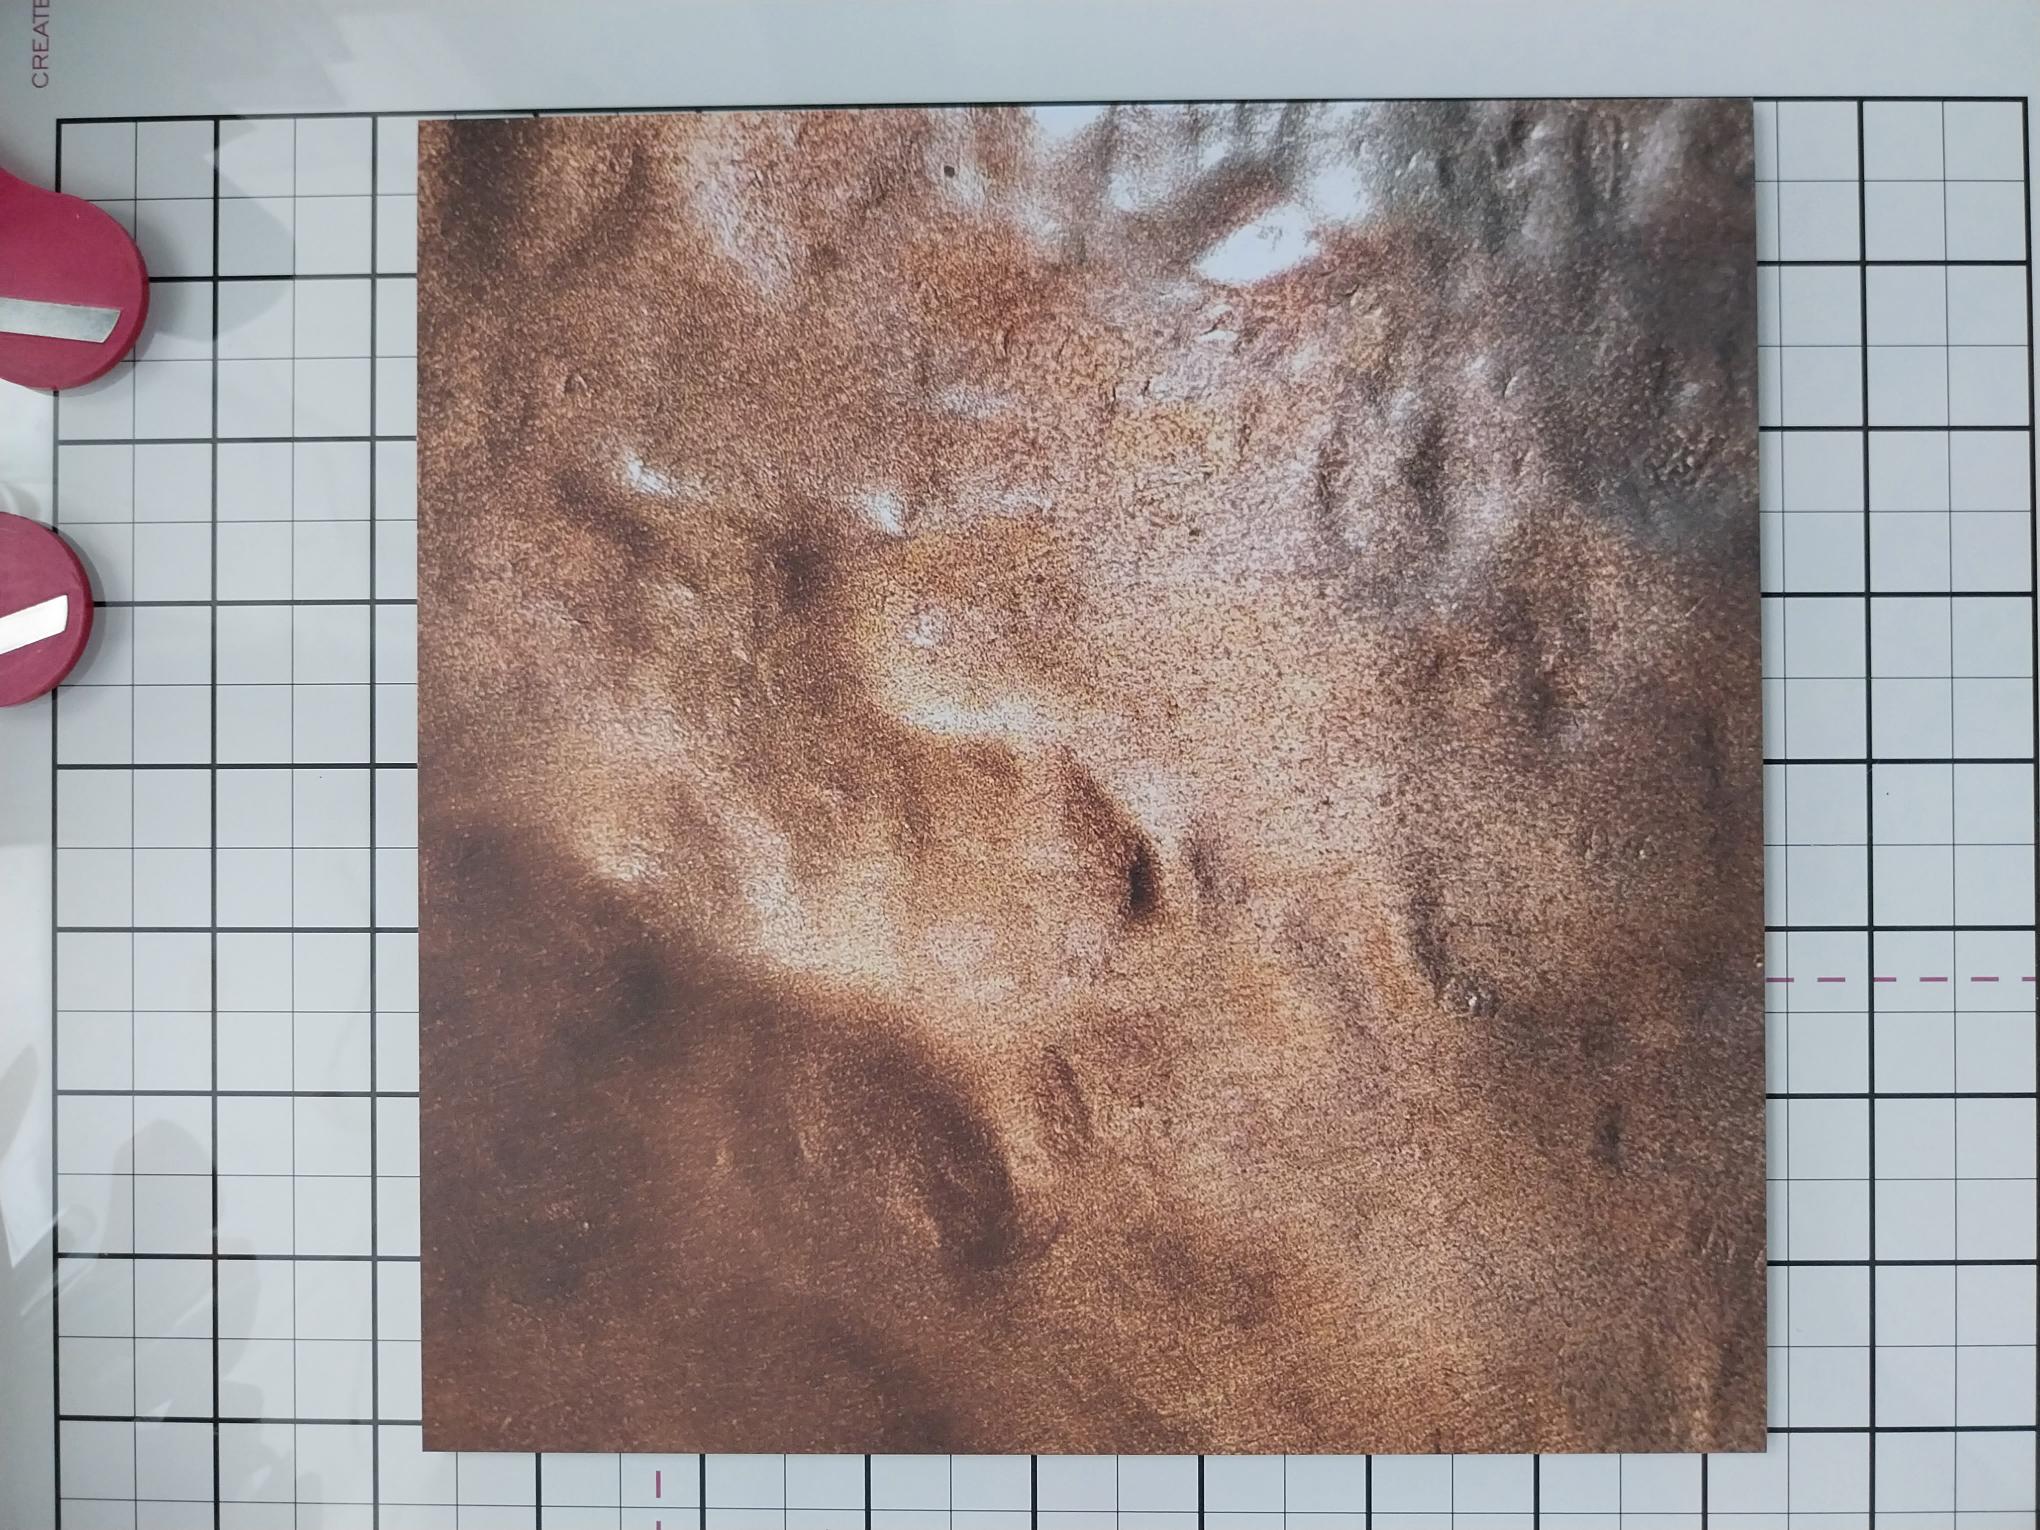
Choose a paper from the Bronze All Surfaces paper pack and trim to 5 3/4" square. Set the leftover paper aside, for a later step. |
|
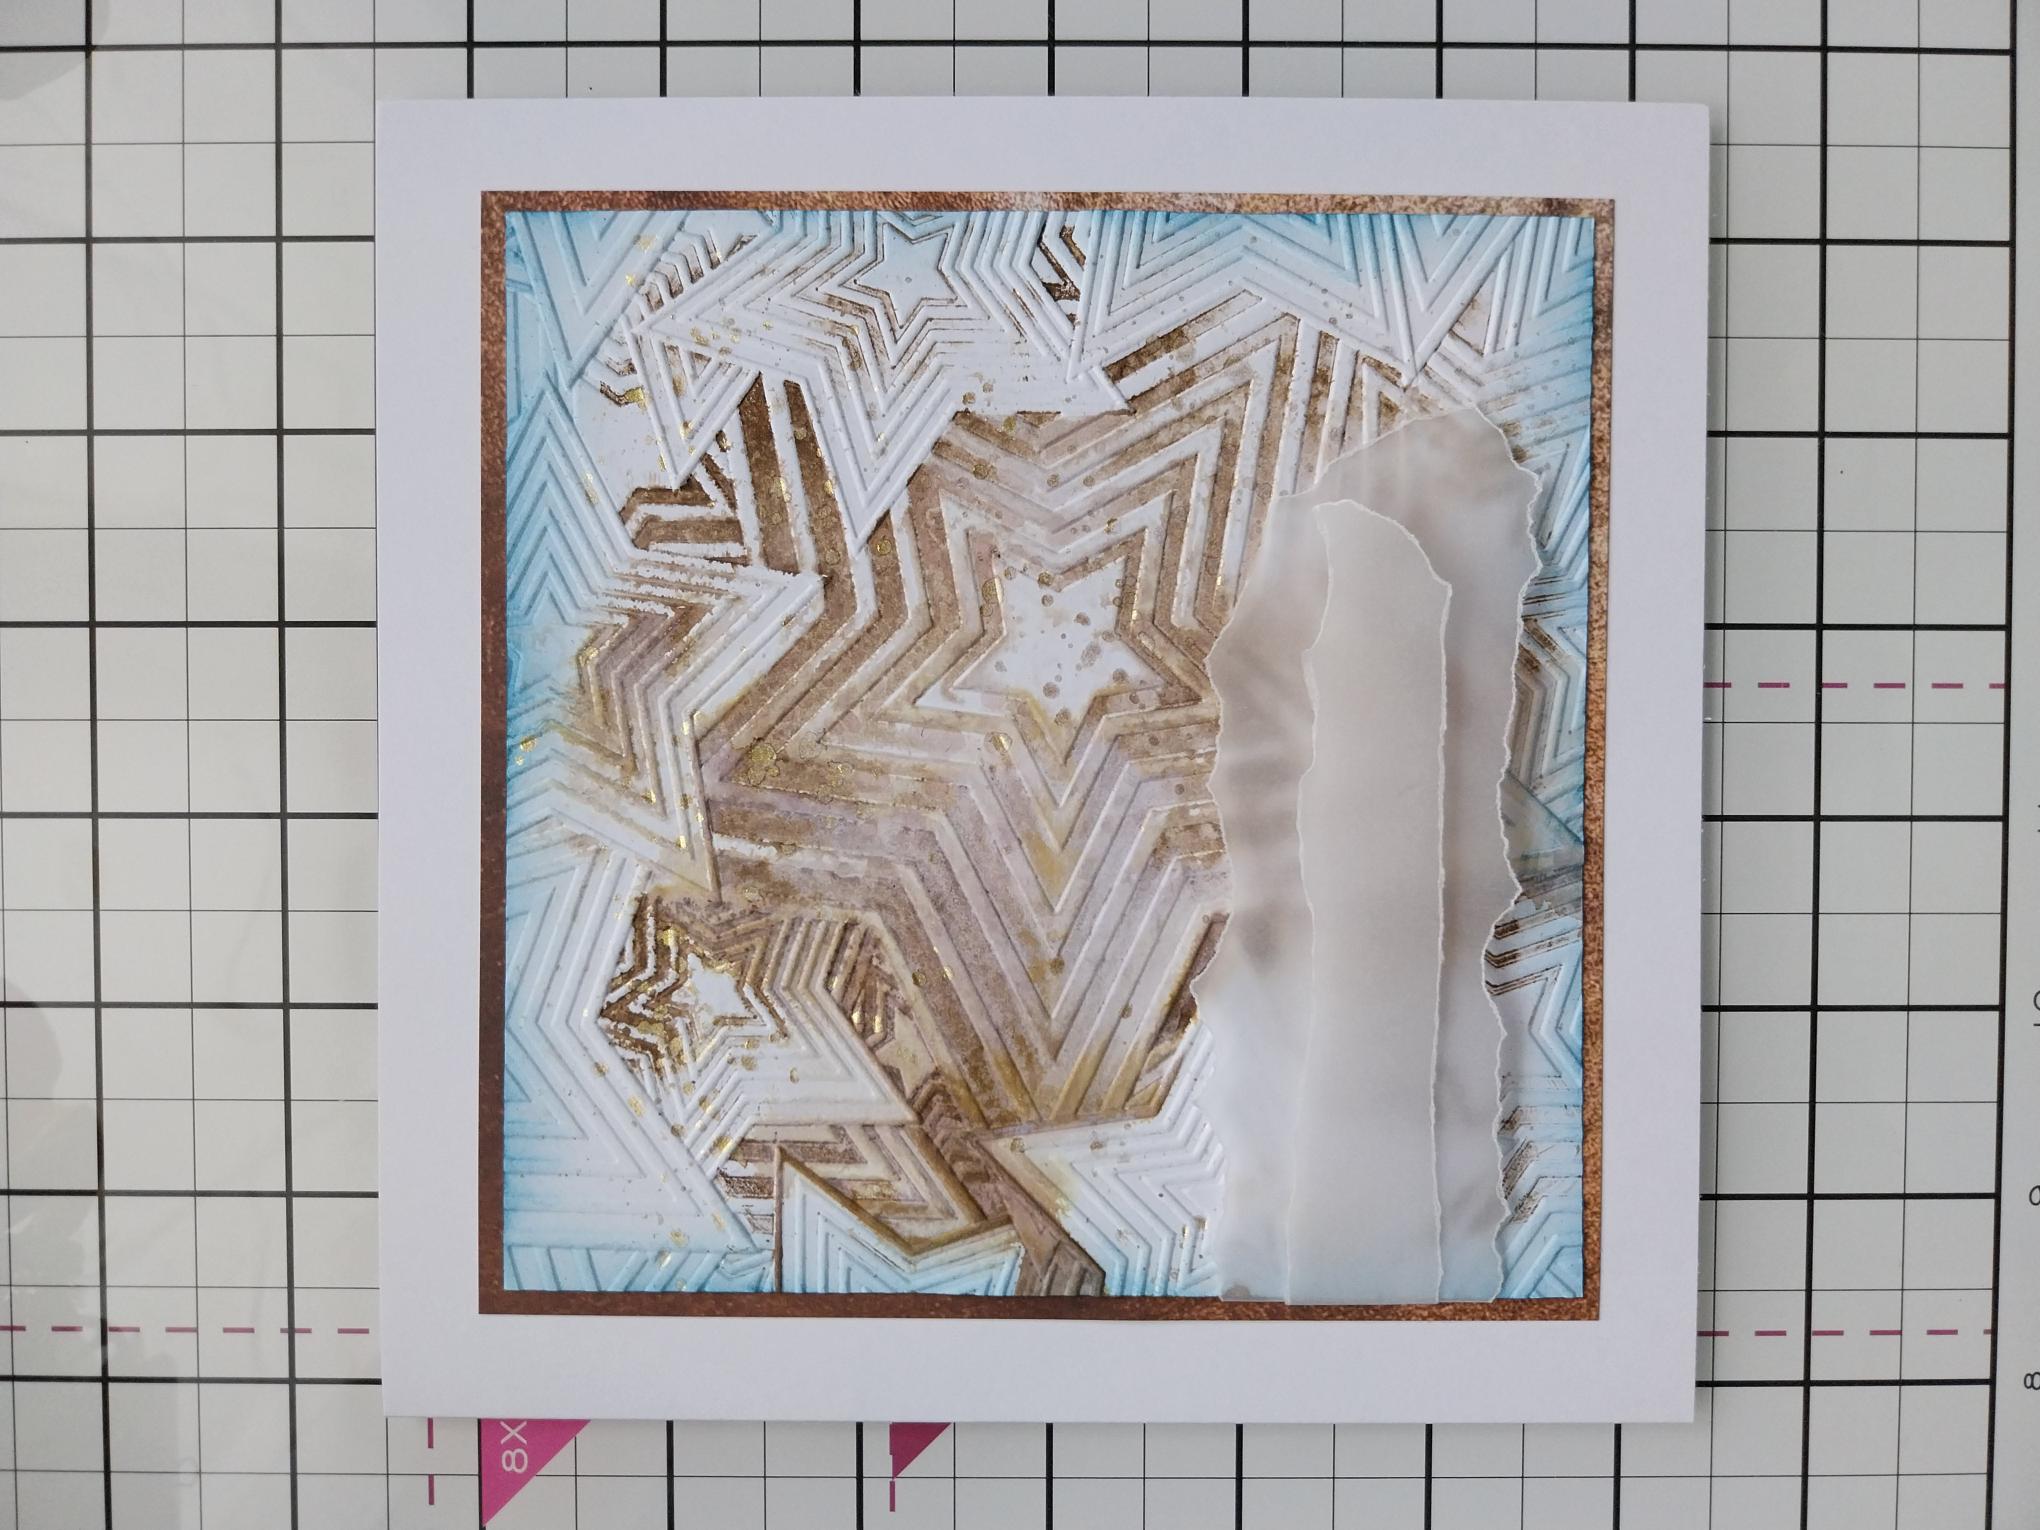
Adhere your embossed background on to the decorative paper and then on to your 7" square, white card blank. Pop to one side. |
|
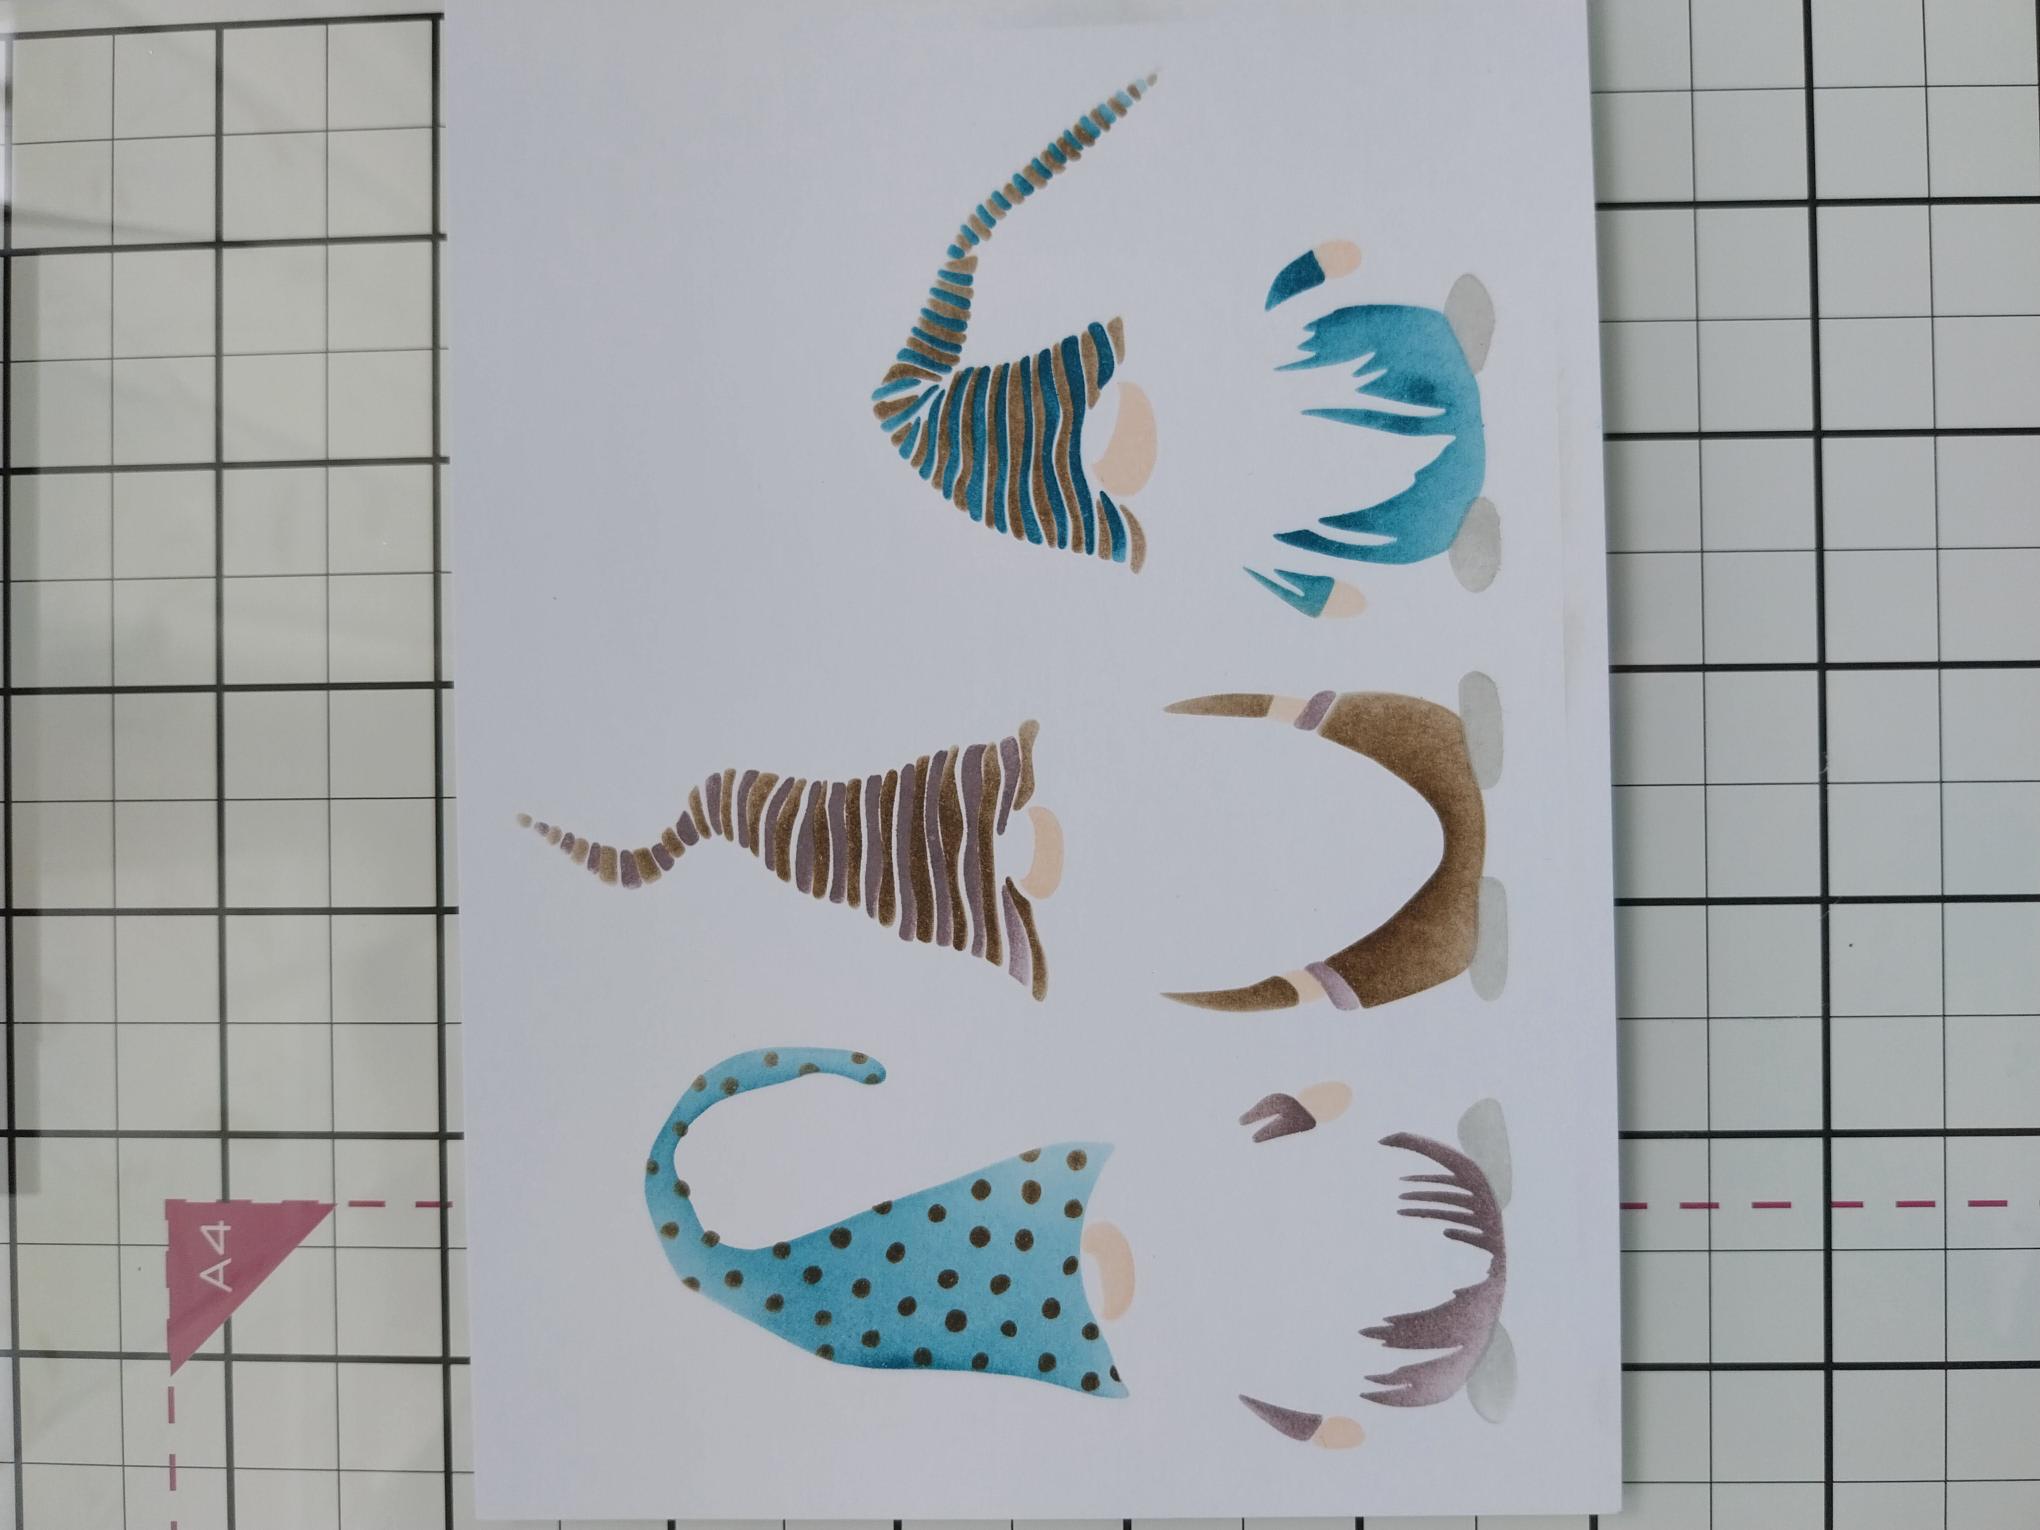
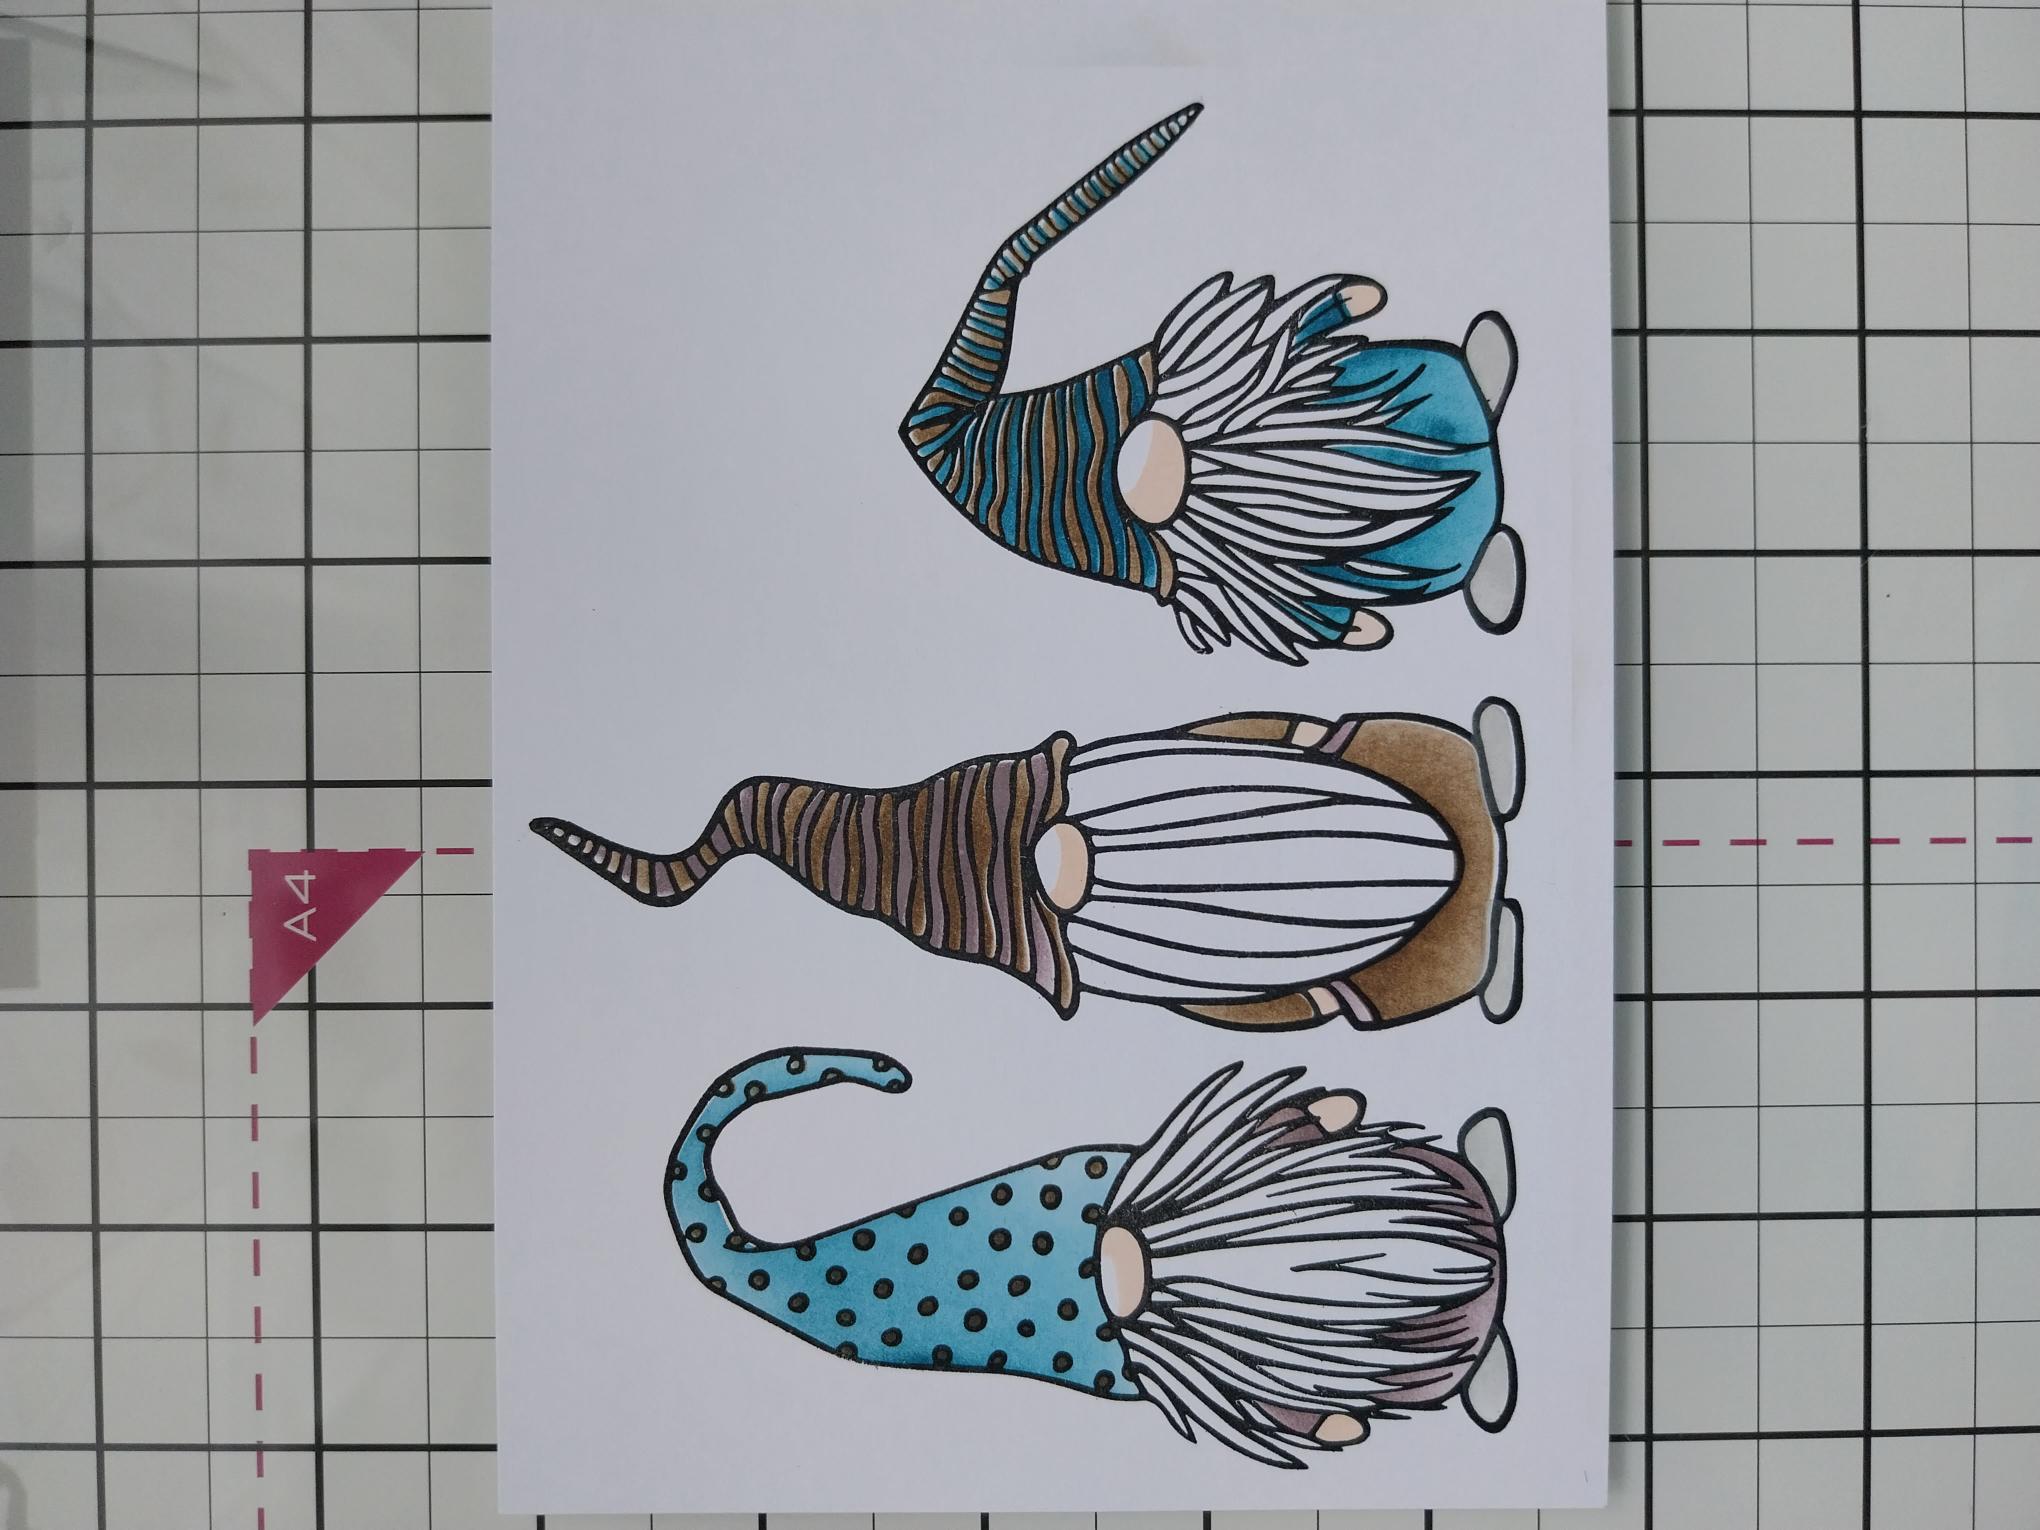
Each of the stencils in the Quattro D Christmas Is Coming collection are numbered and have hearts in the corner to help you line each stencil up, if required. Use your blending tool to apply ink through each stencil, on to white card trimmed to 7 x 5", as follows: Stencil 1 Tiffany, Heather and Walnut Stain, in whatever combination your prefer Stencil 2 Same colours where desired, then use Lost Shadow for their shoes Stencil 3 Tattered Rose
|
|
Stamp in Midnight over your stencilled images. |
|
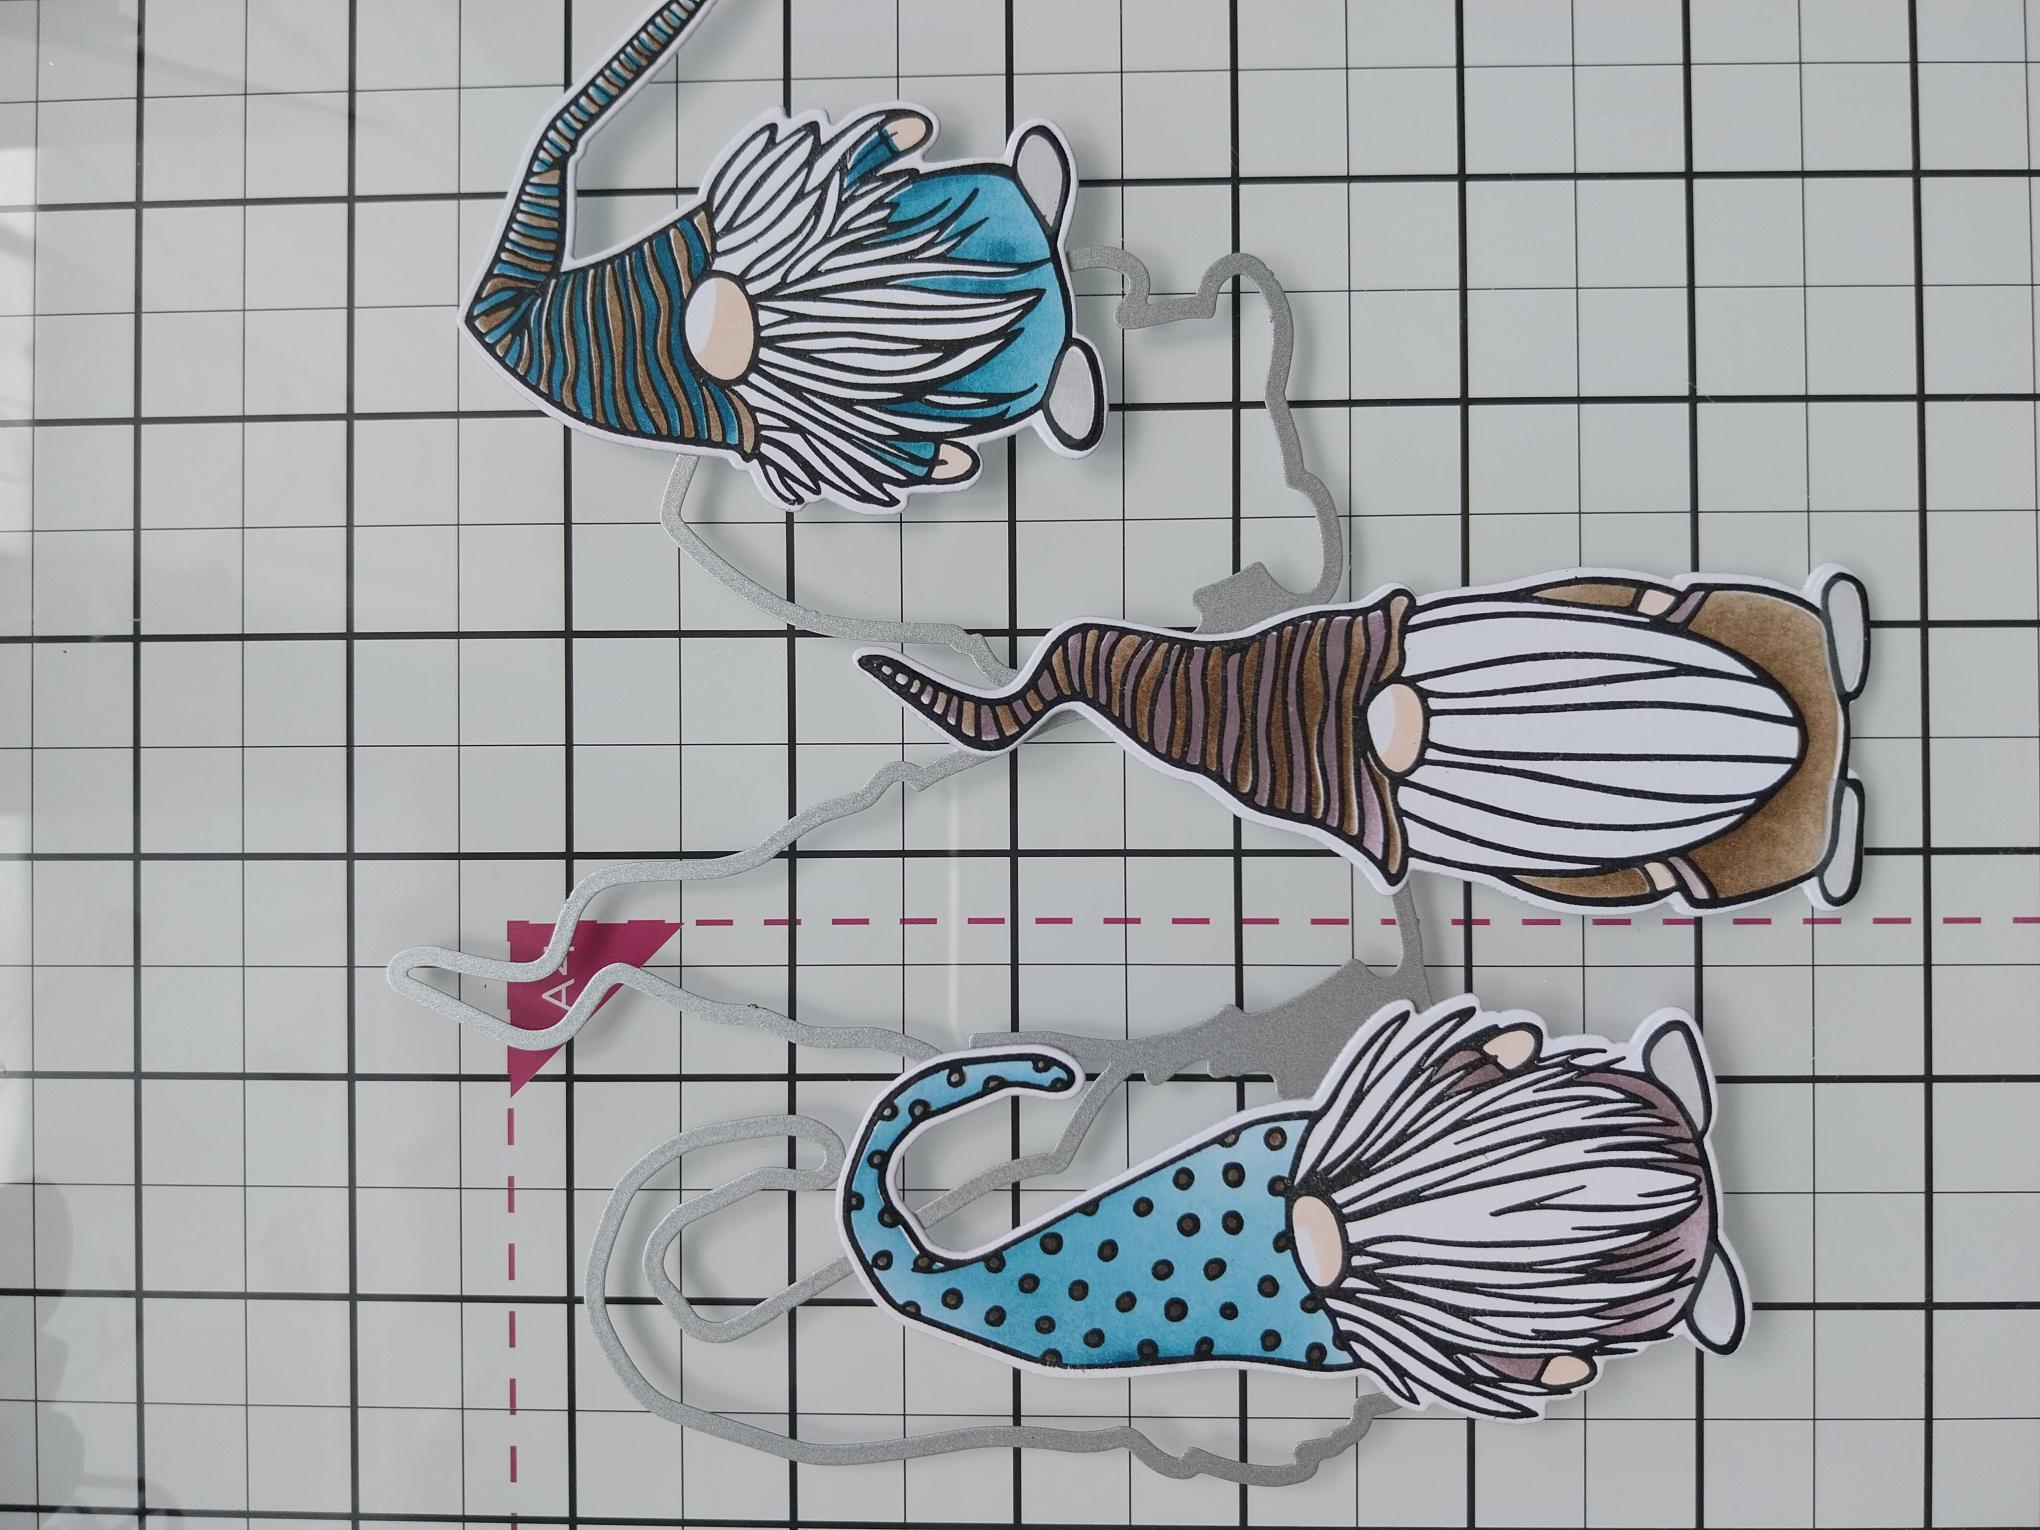
Use the coordinating dies to cut them out. |
|
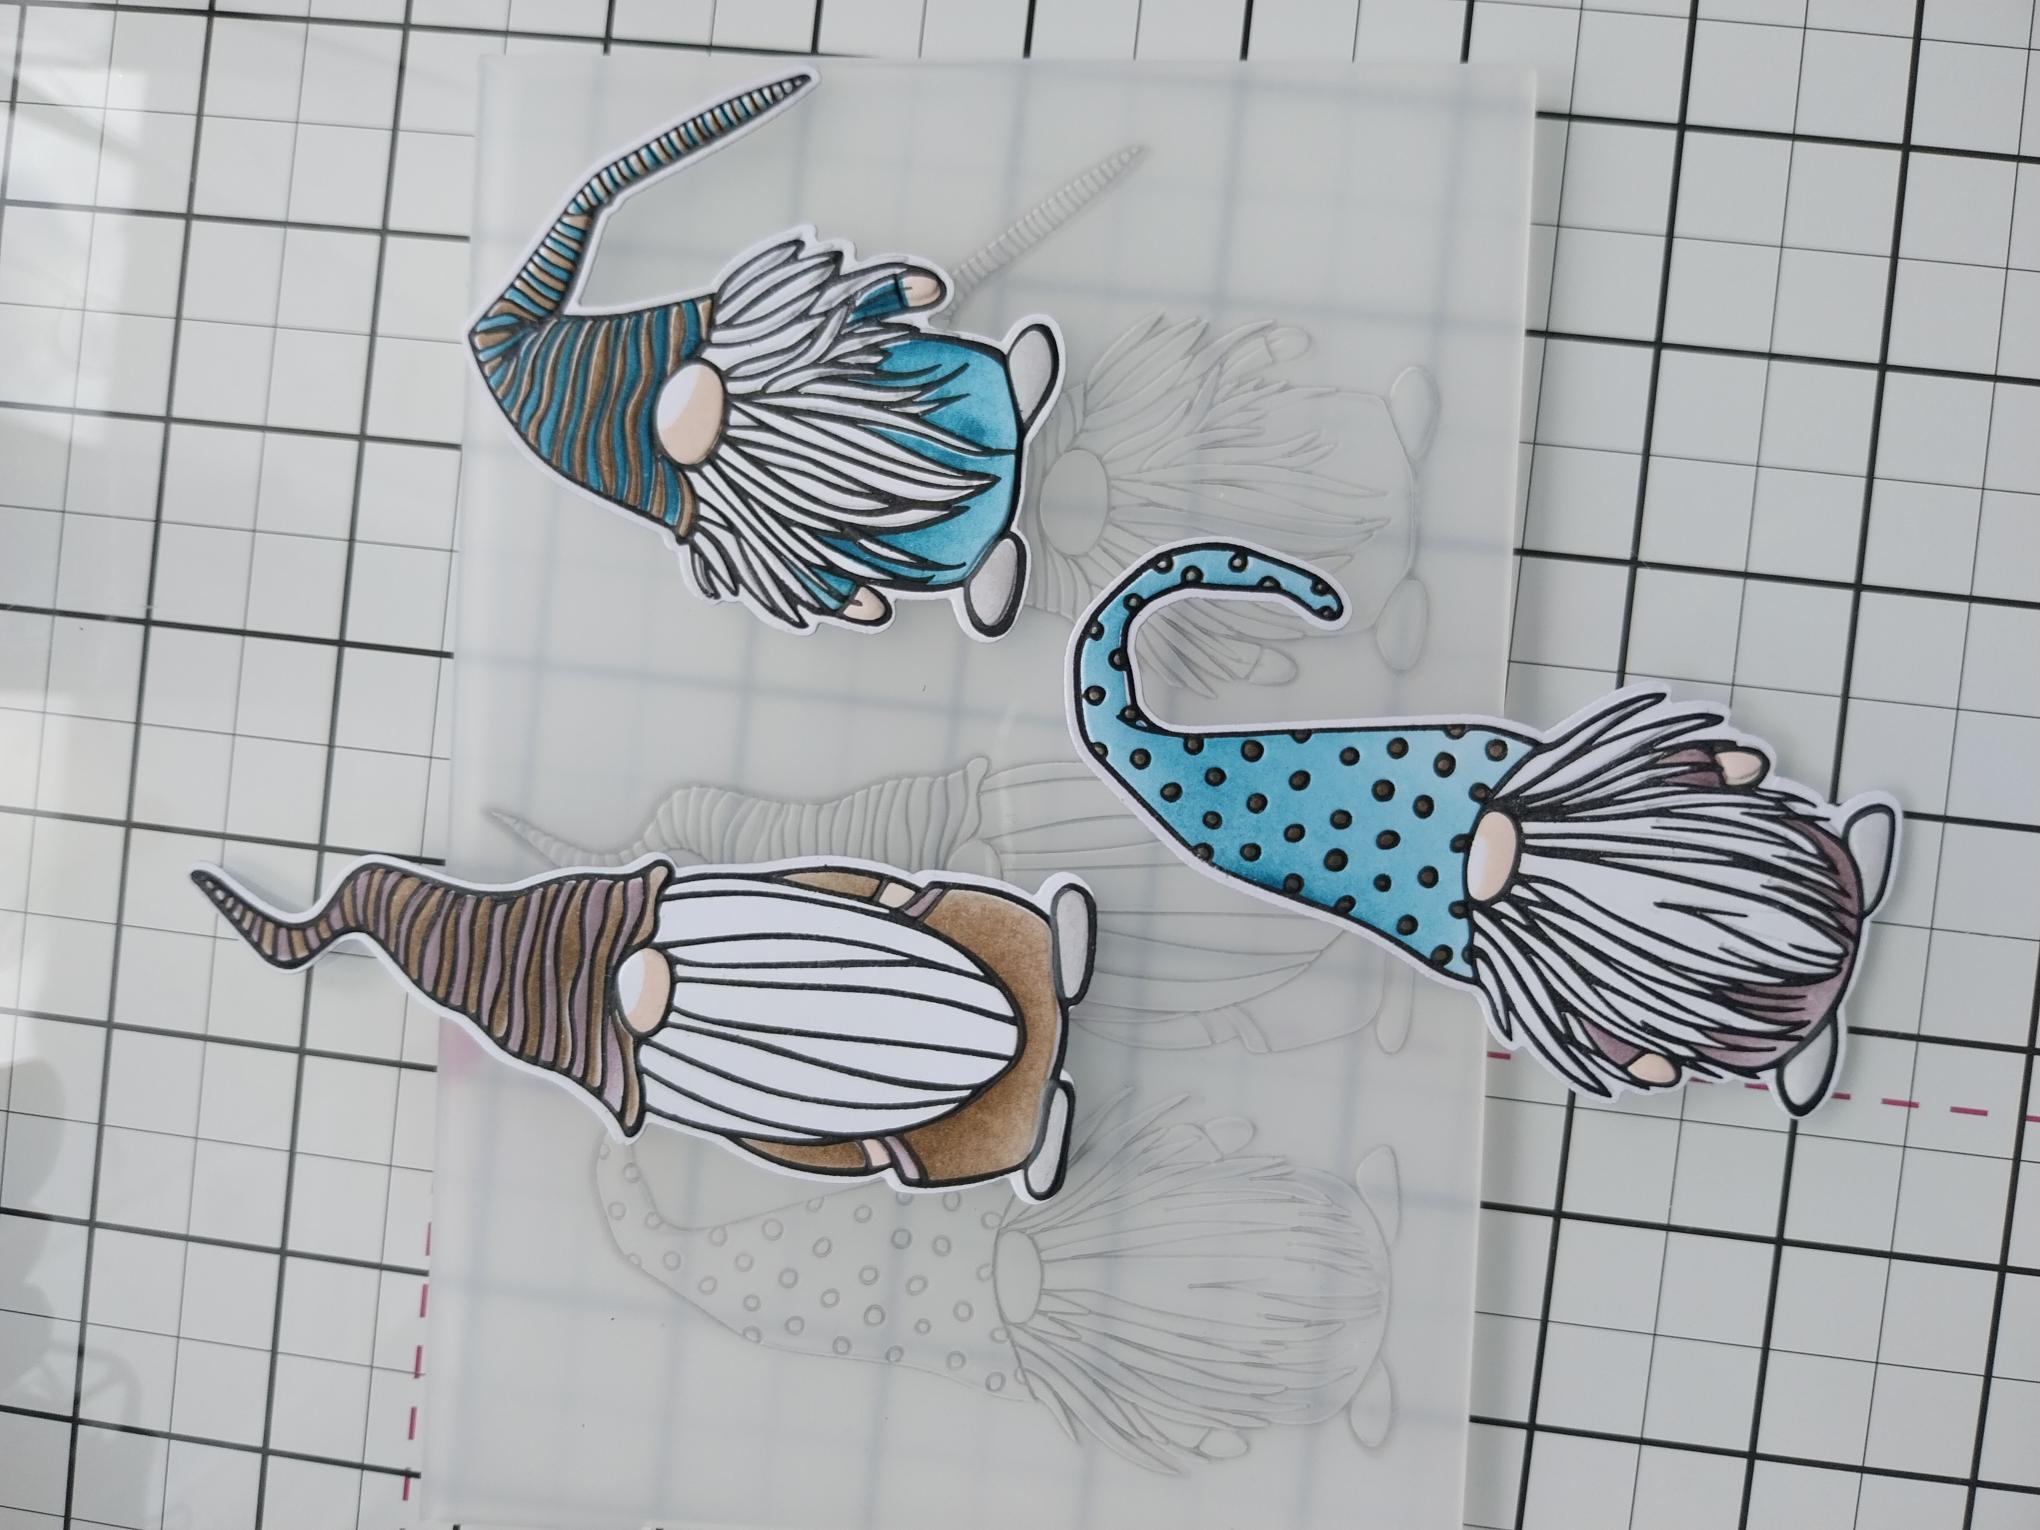
Line up each Gnome inside the embossing folder (I did one at a time) and run them through your machine. |
|
Adhere two of the Gnomes to the left of your card using a combination of wet glue and foam pads, for perspective. Keep the other Gnome for a later project. |
|
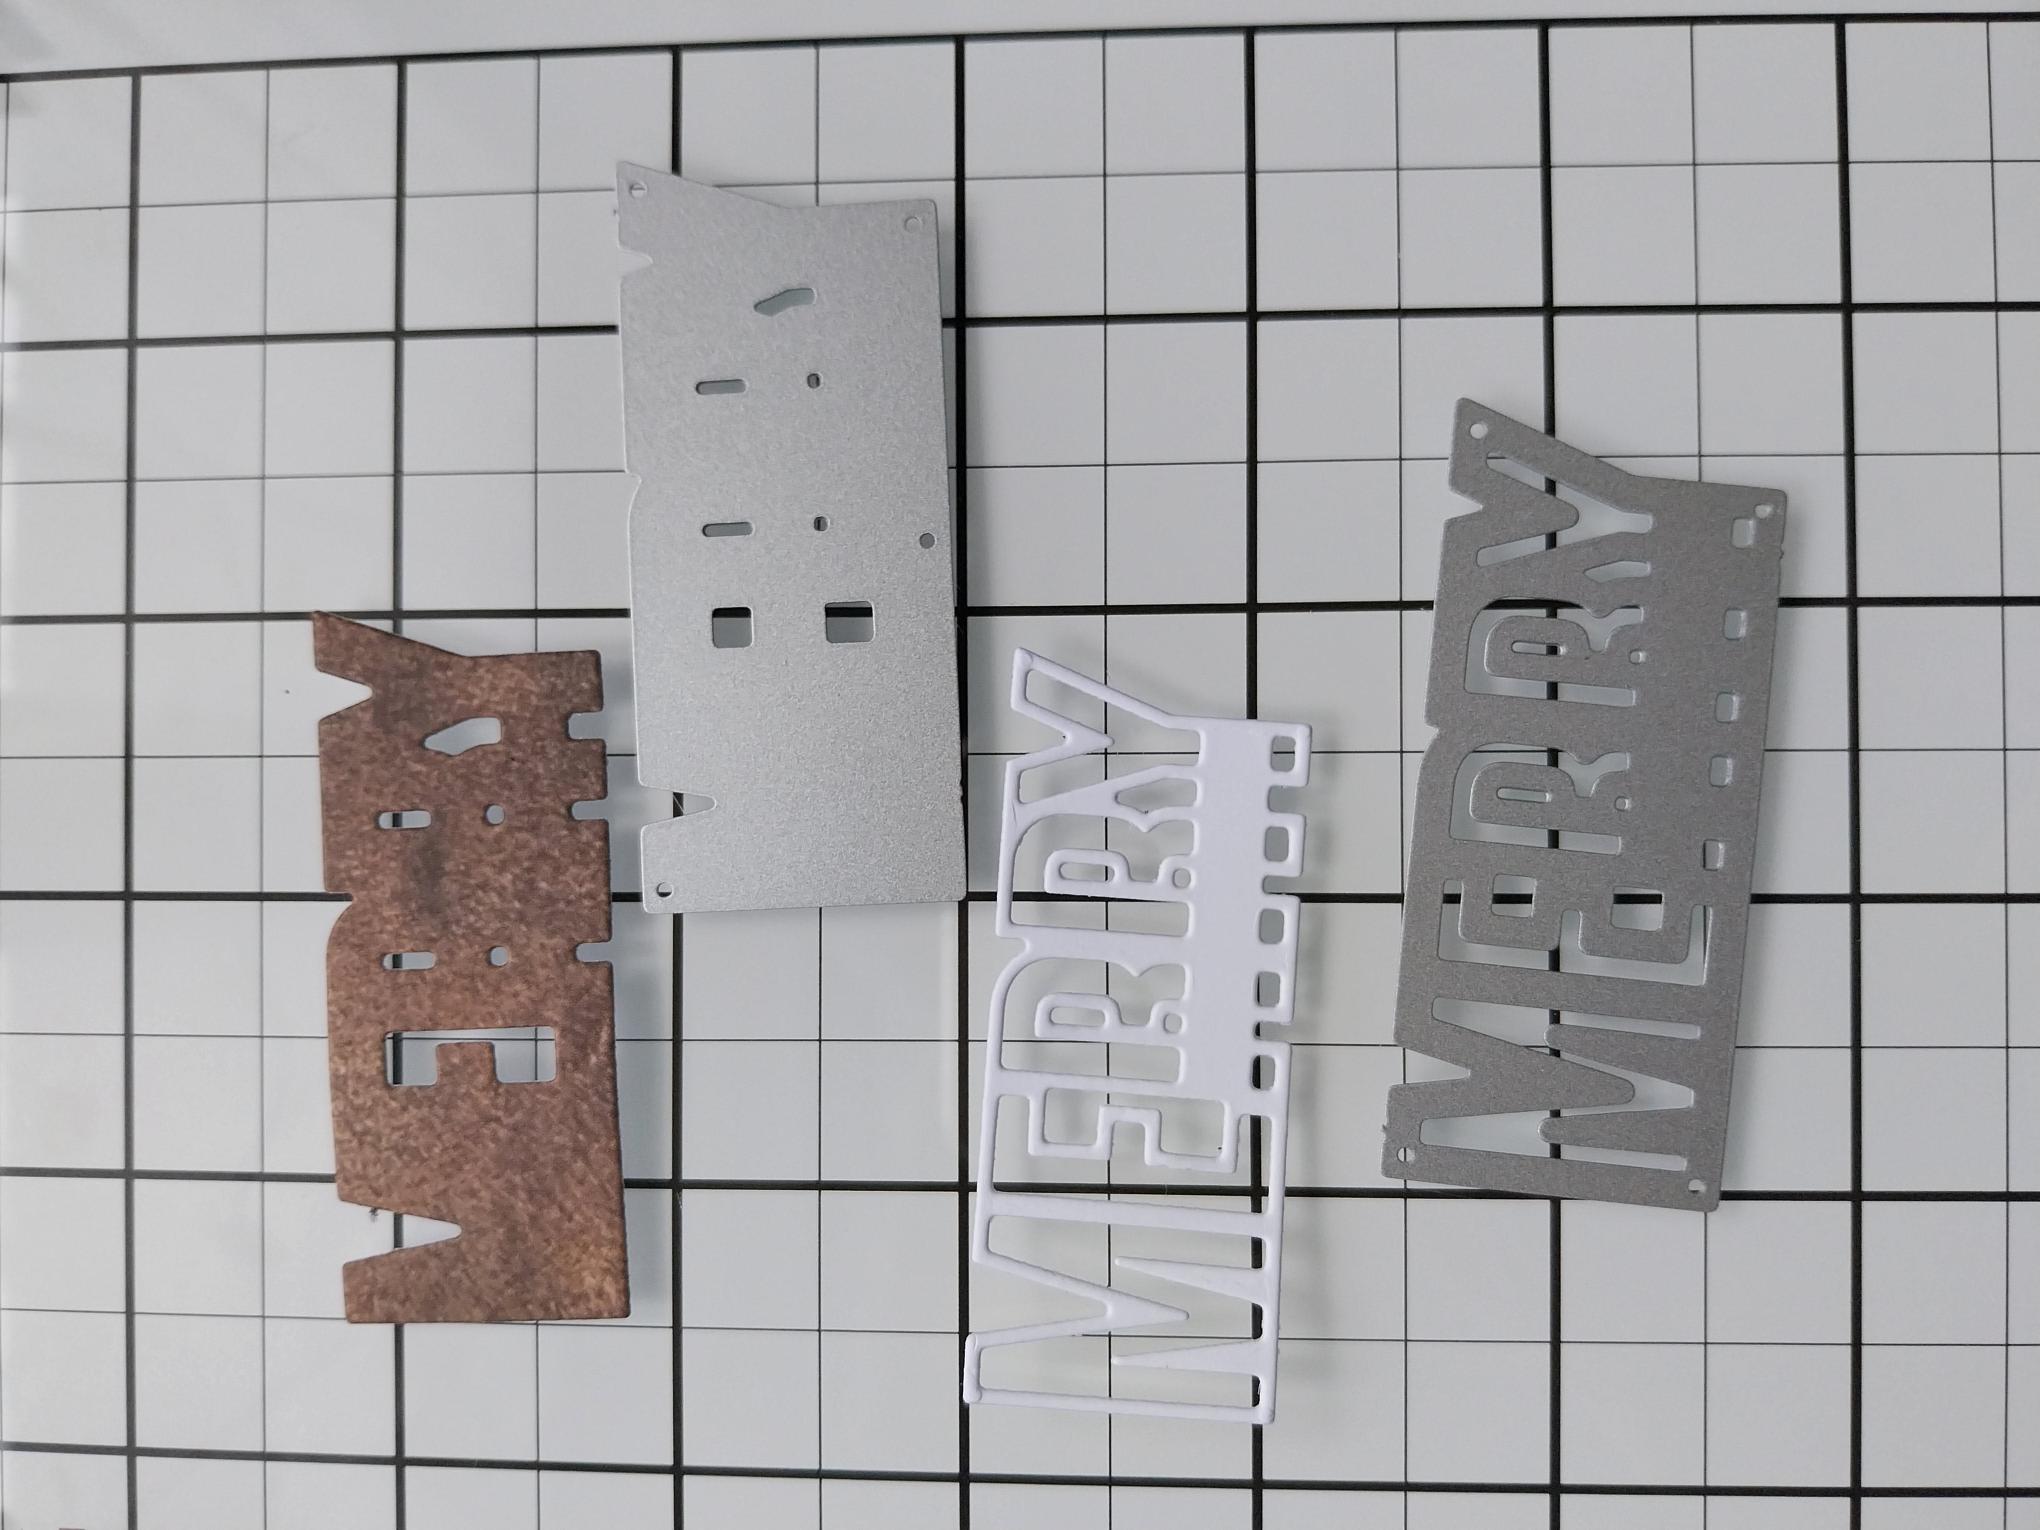
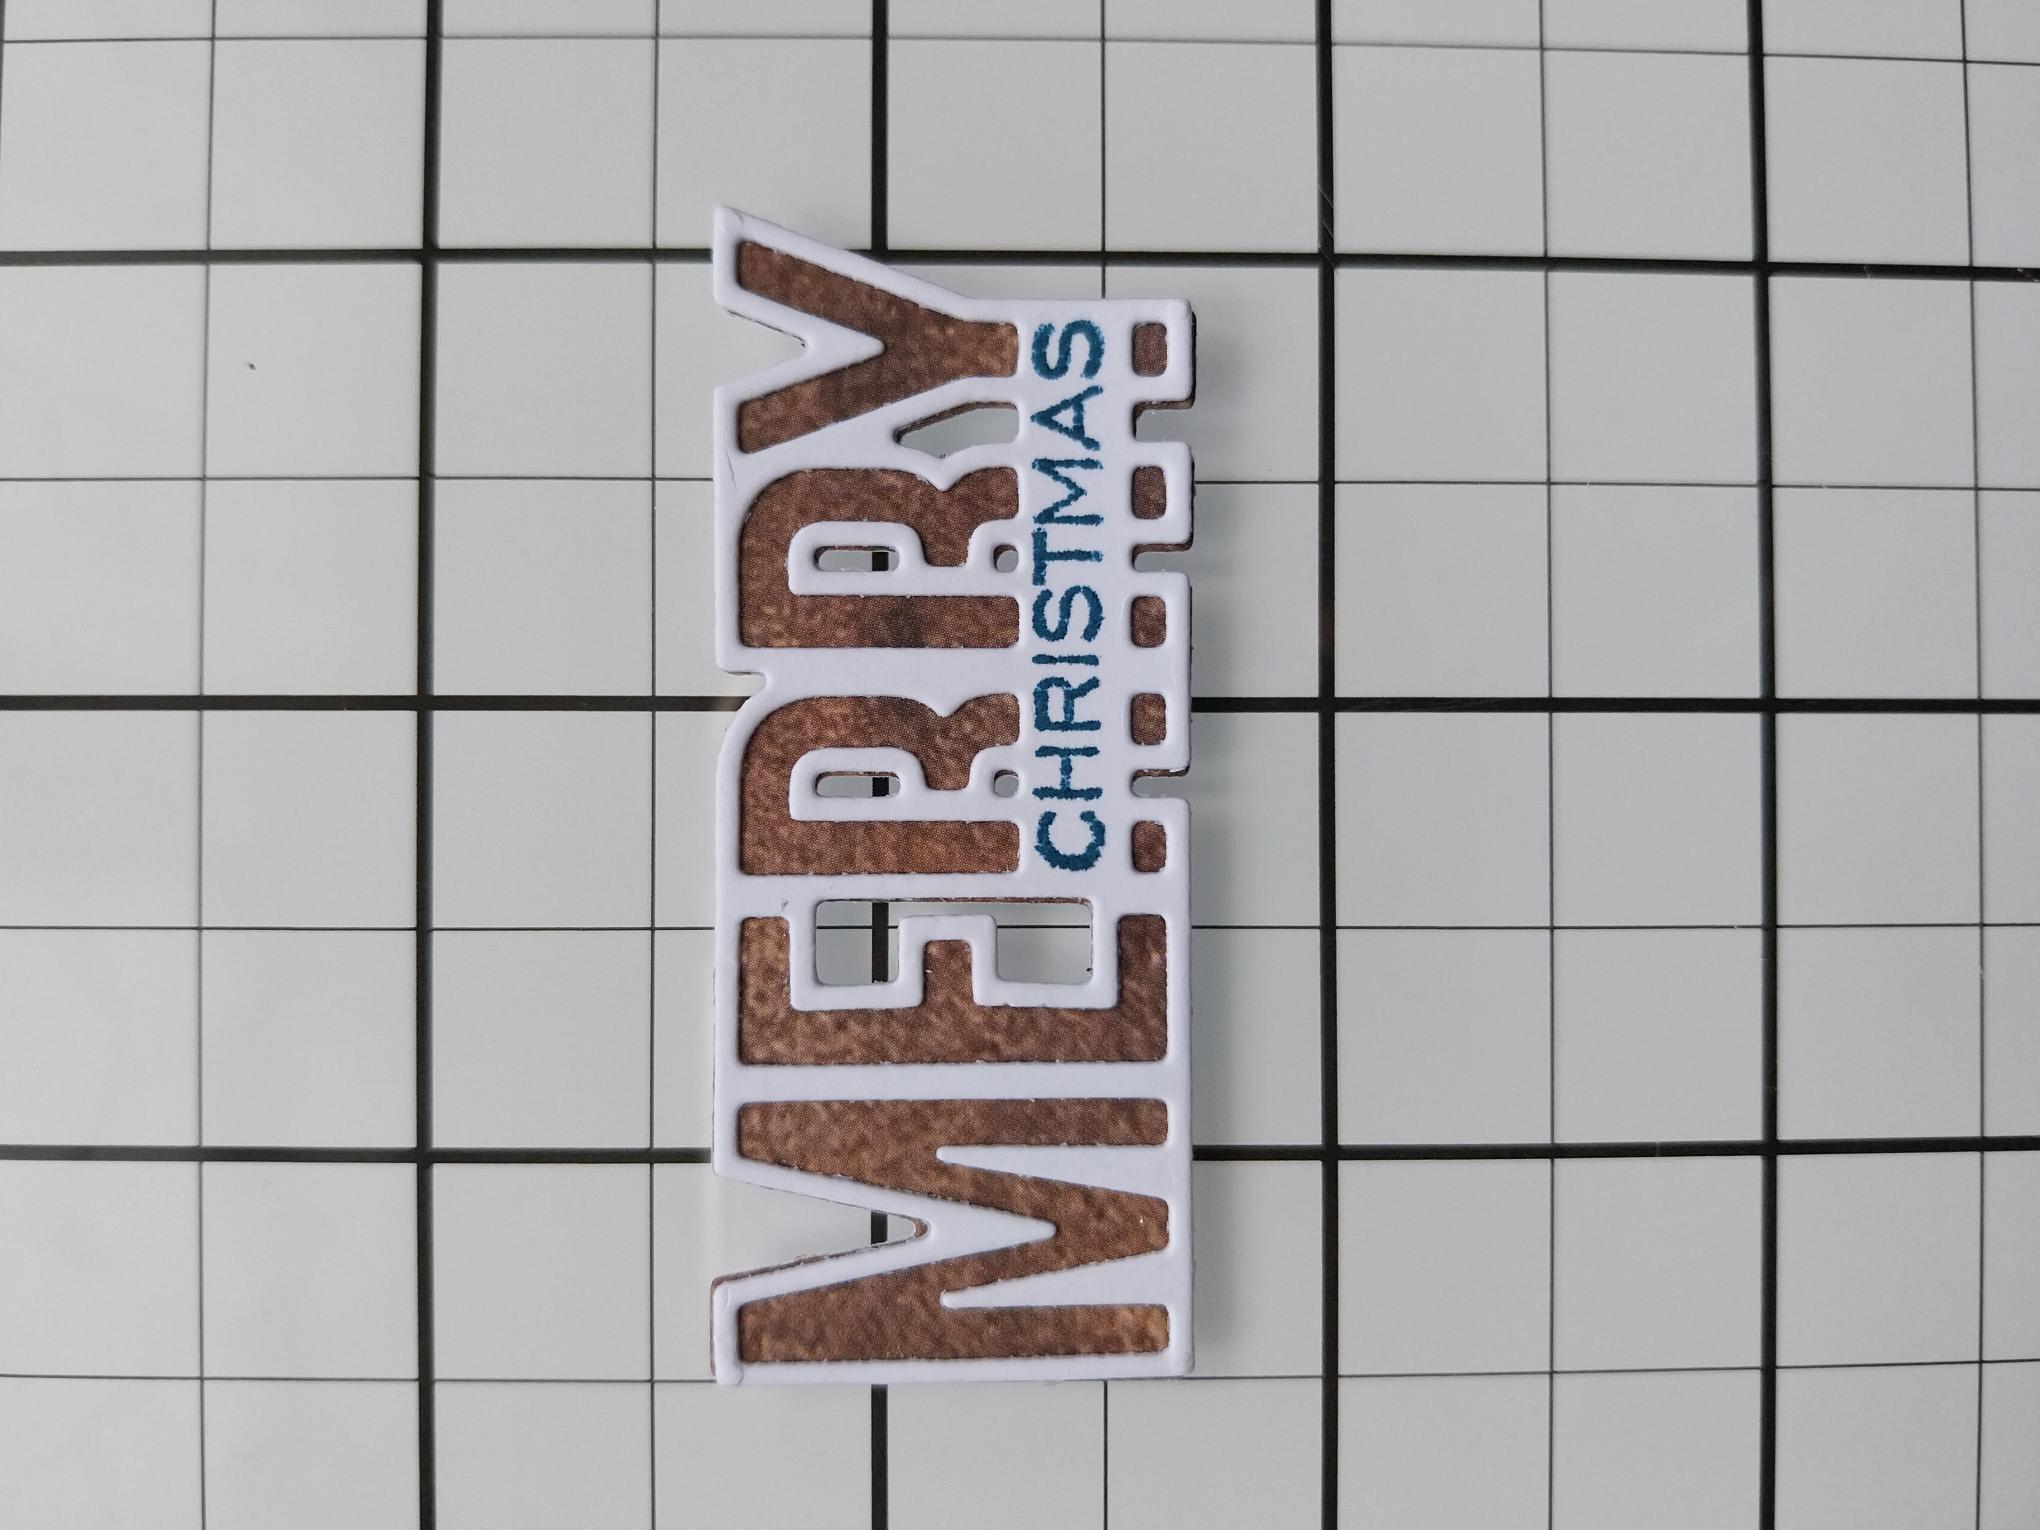
Place the "MERRY" detailed die, from the Special Wishes collection, on to a scrap of white card and the solid die on to the Bronze paper set aside earlier. Run them both through your machine. |
|
Adhere the detailed die cut sentiment on to the die cut paper mat. Stamp the "CHRISTMAS" add-along stamp, in Midnight, on to the panel on your die cut sentiment. |
|
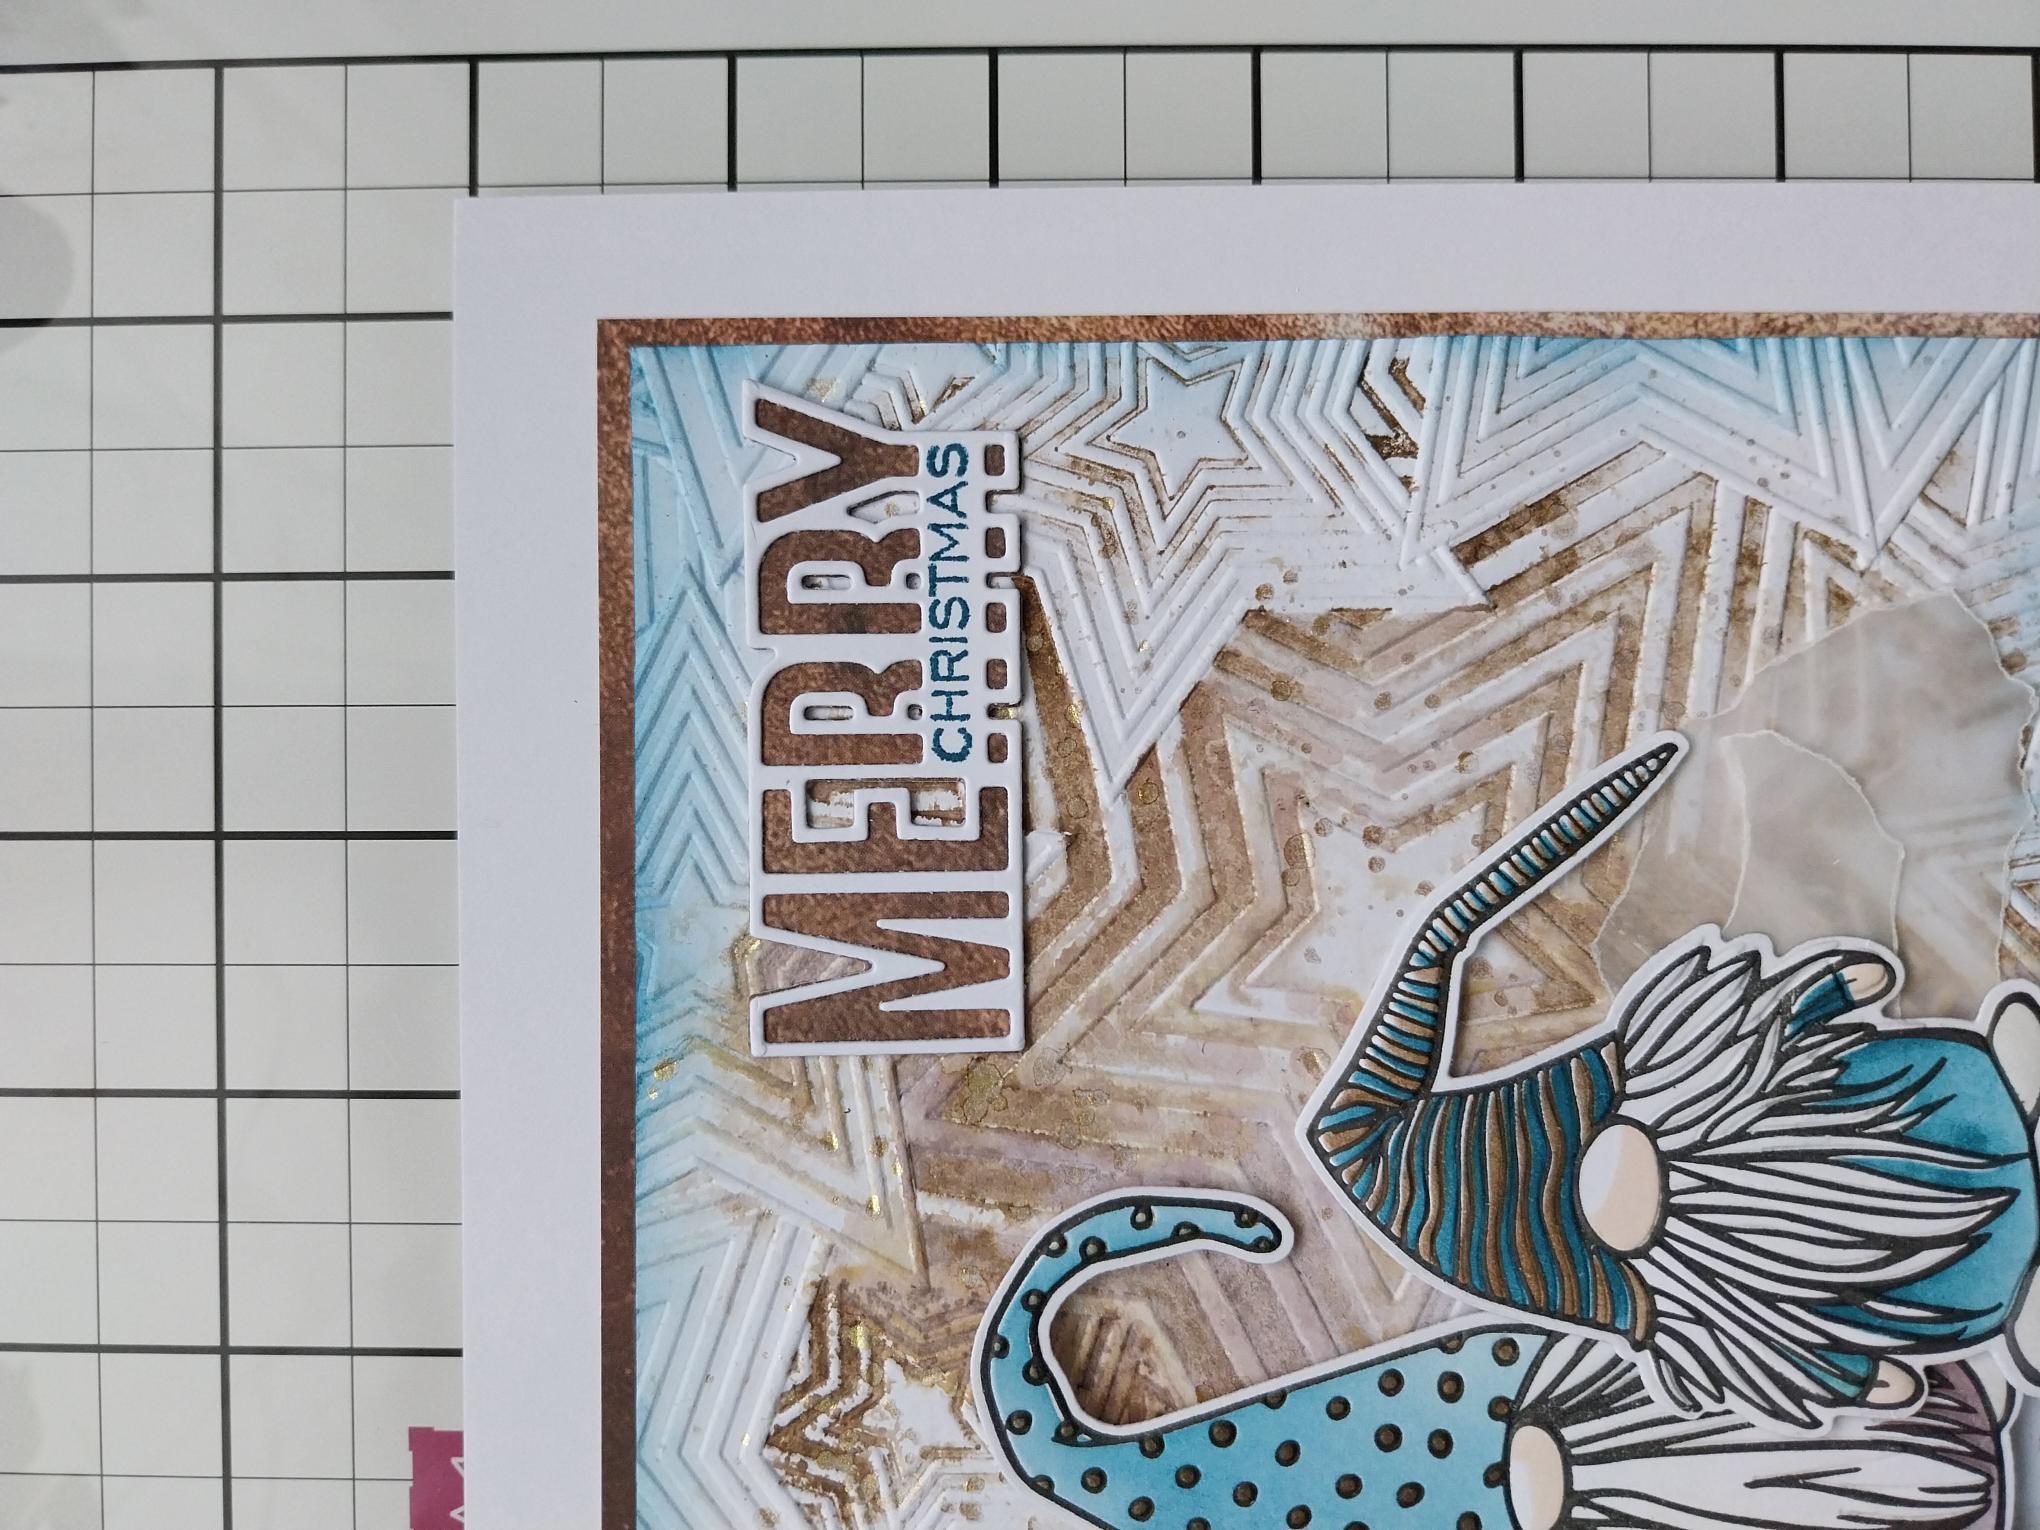
Finally, adhere with foam pads, to the top right of your project. |