Give your friends $10 off their first order!
Refer a FRIEND


WHAT YOU WILL NEED:
White DL card blank 8 1/4 x 4"
Kraft card
Paperchain Ruby Blooms 8 x 8" Paper Pad
Paperchain Ruby Blooms Stamp Set
Paperchain Ruby Blooms 5 x 7" Vellum Pack
SBM Hybrid Ink Pad: Midnight
Banner Tag Punch
Stickles: Star Dust
Black pen
Sequins/Pearl drops (optional)
Eureka 101 Watercolour Tablet
SBM Magnetic glass mat
Paper Trimmer
Perfect Together Glue
Tape runner
[click image to enlarge] 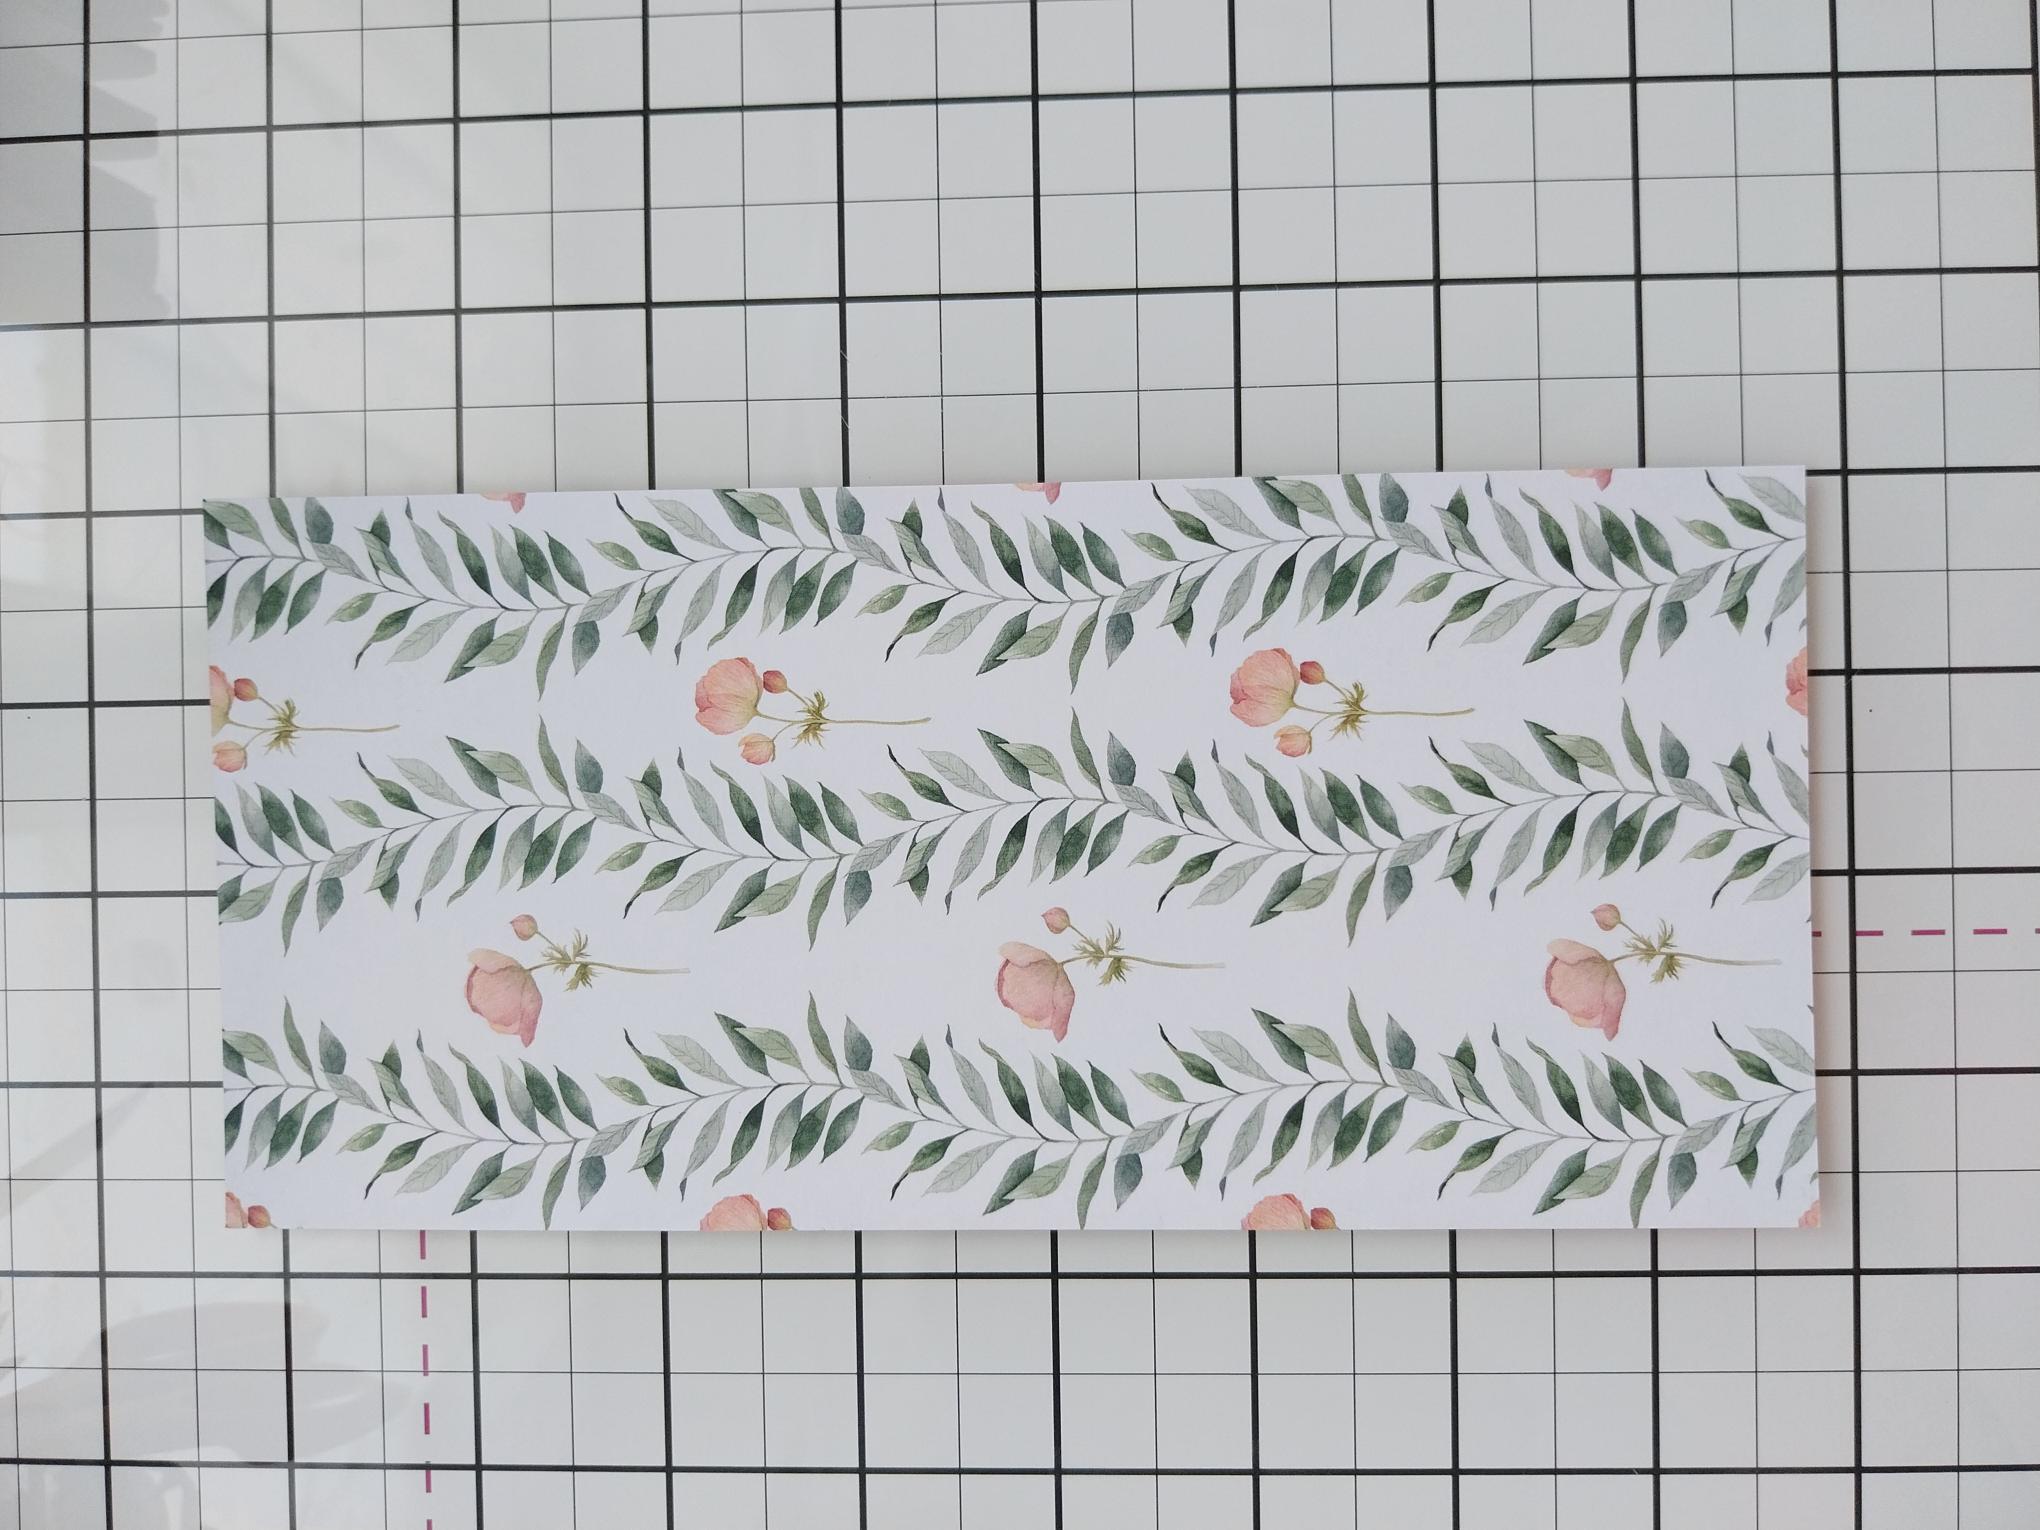
|
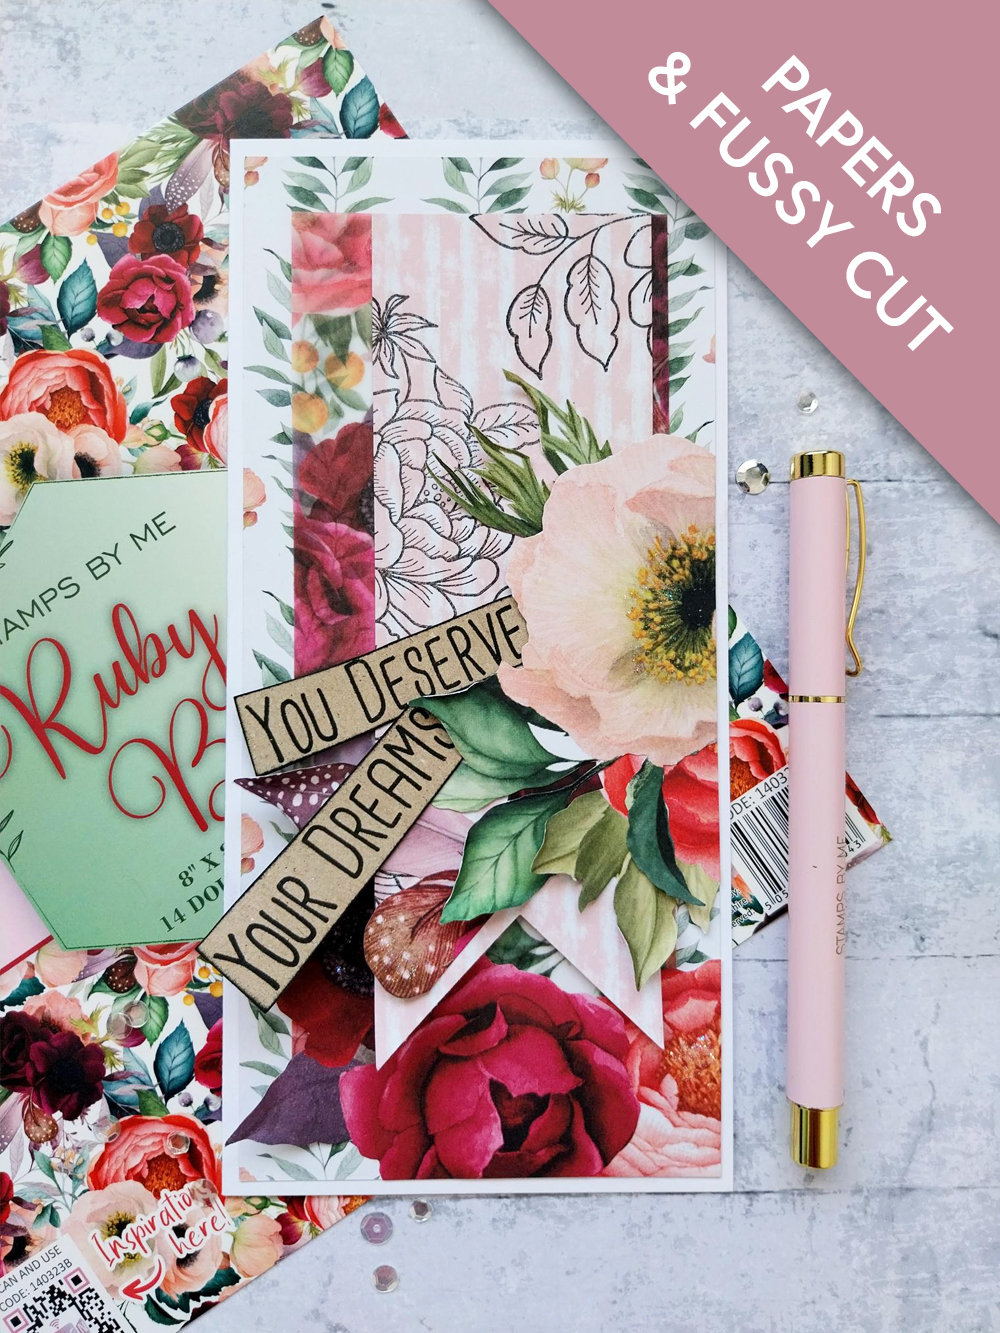
Take this beautiful decorative paper, from the Ruby Blooms paper pad and trim to 8 x 3 3/4". |
|
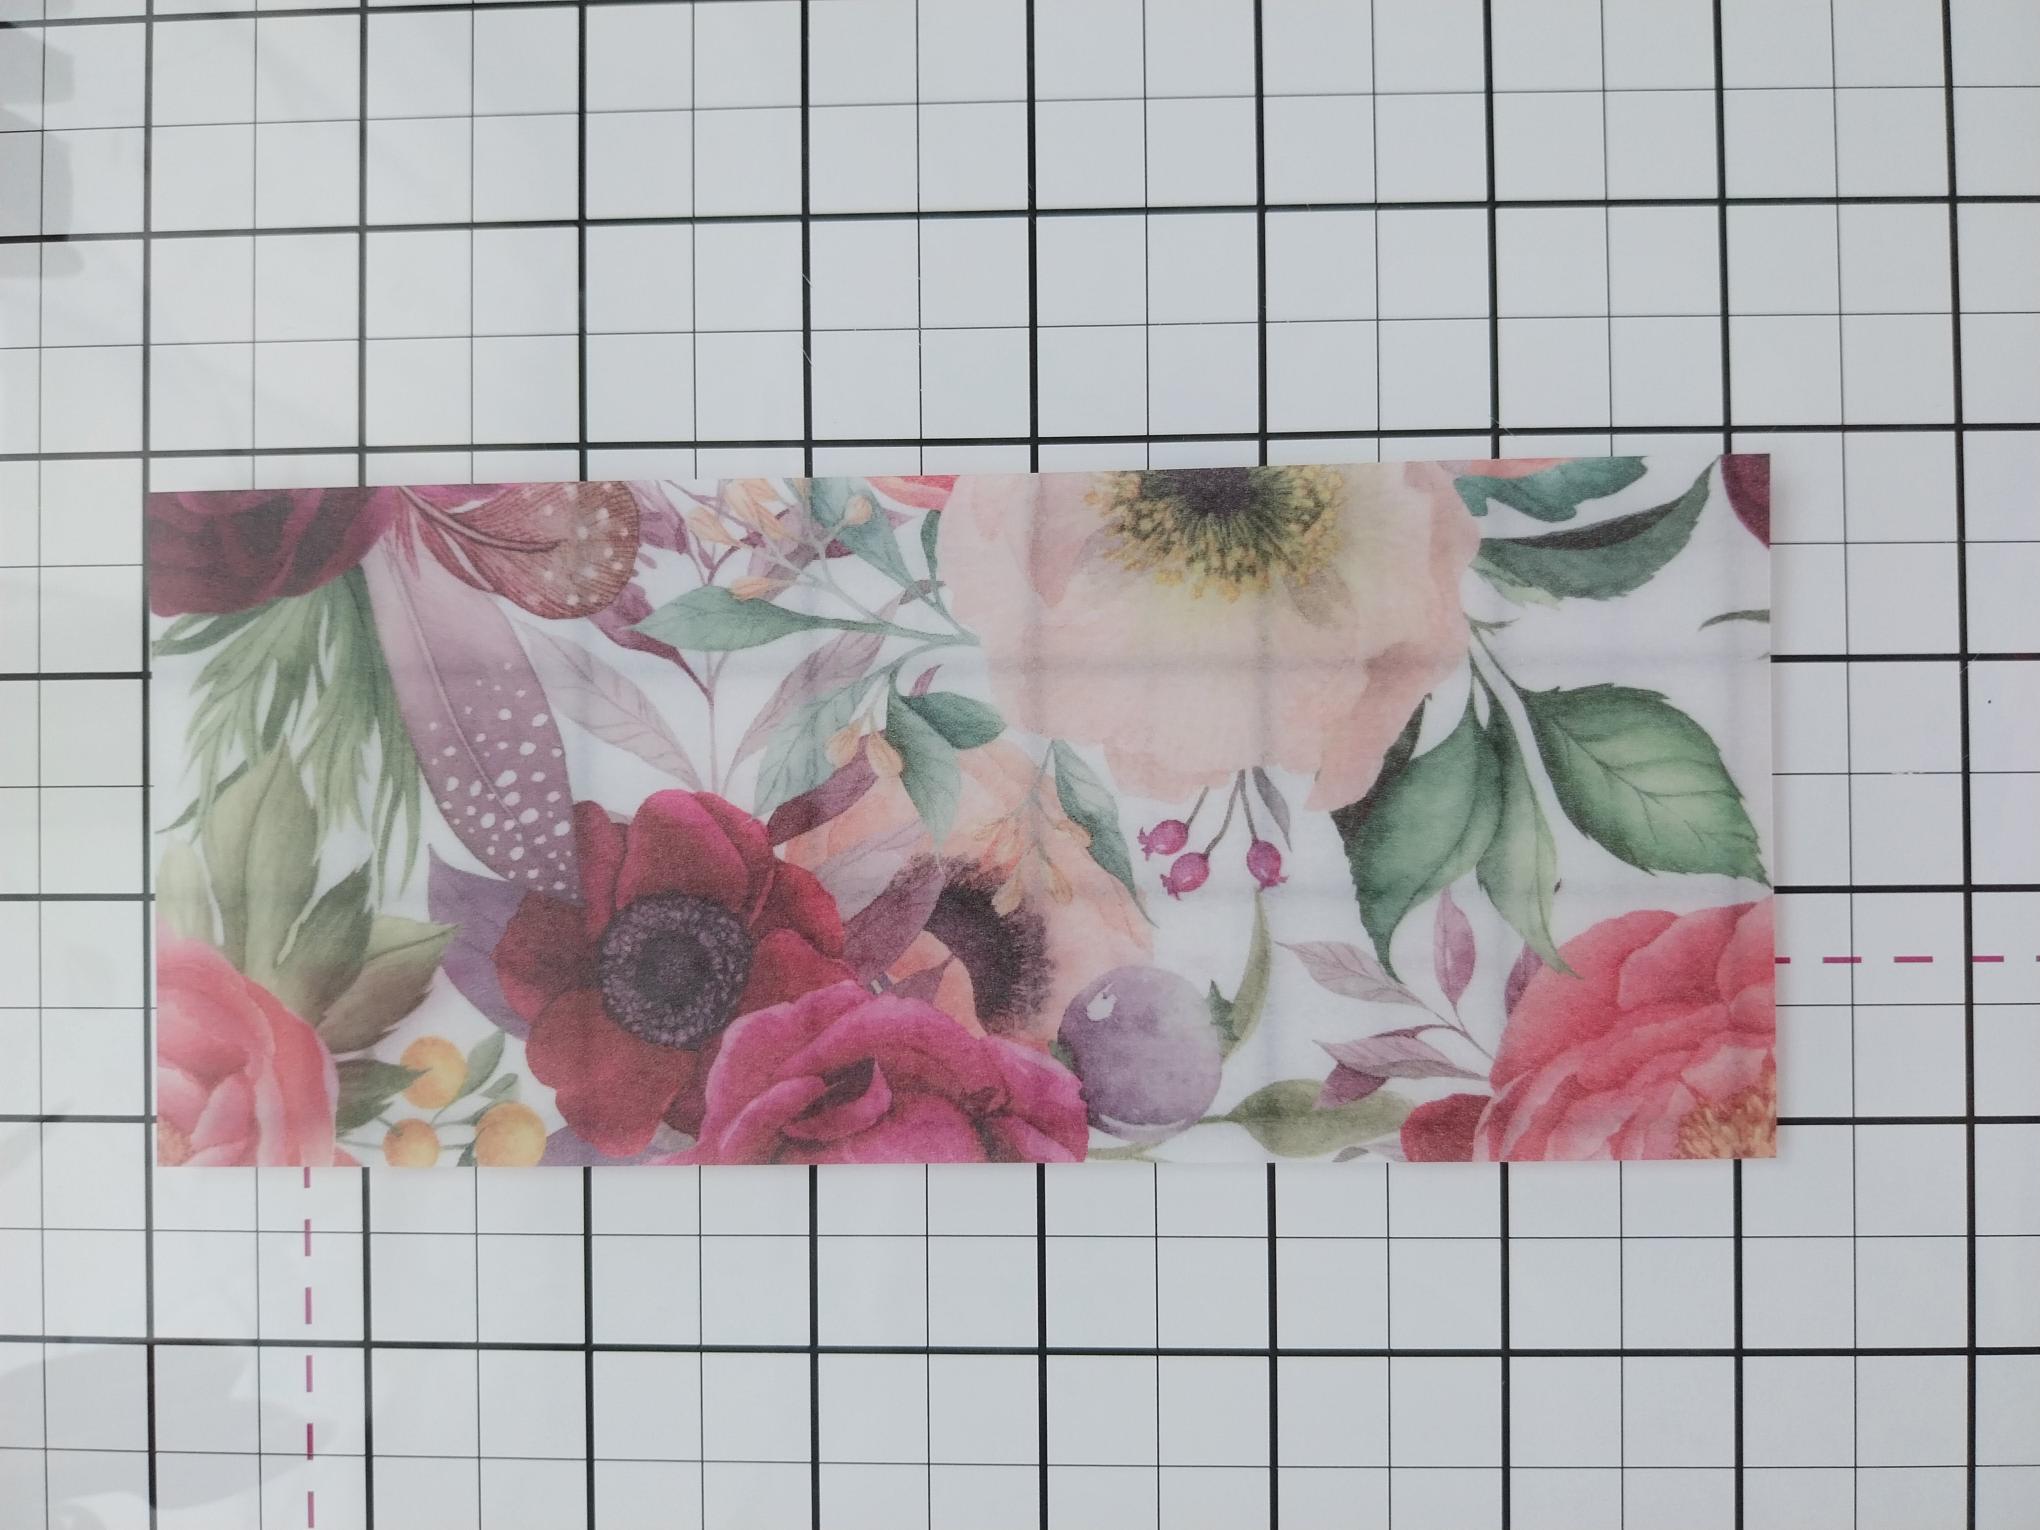
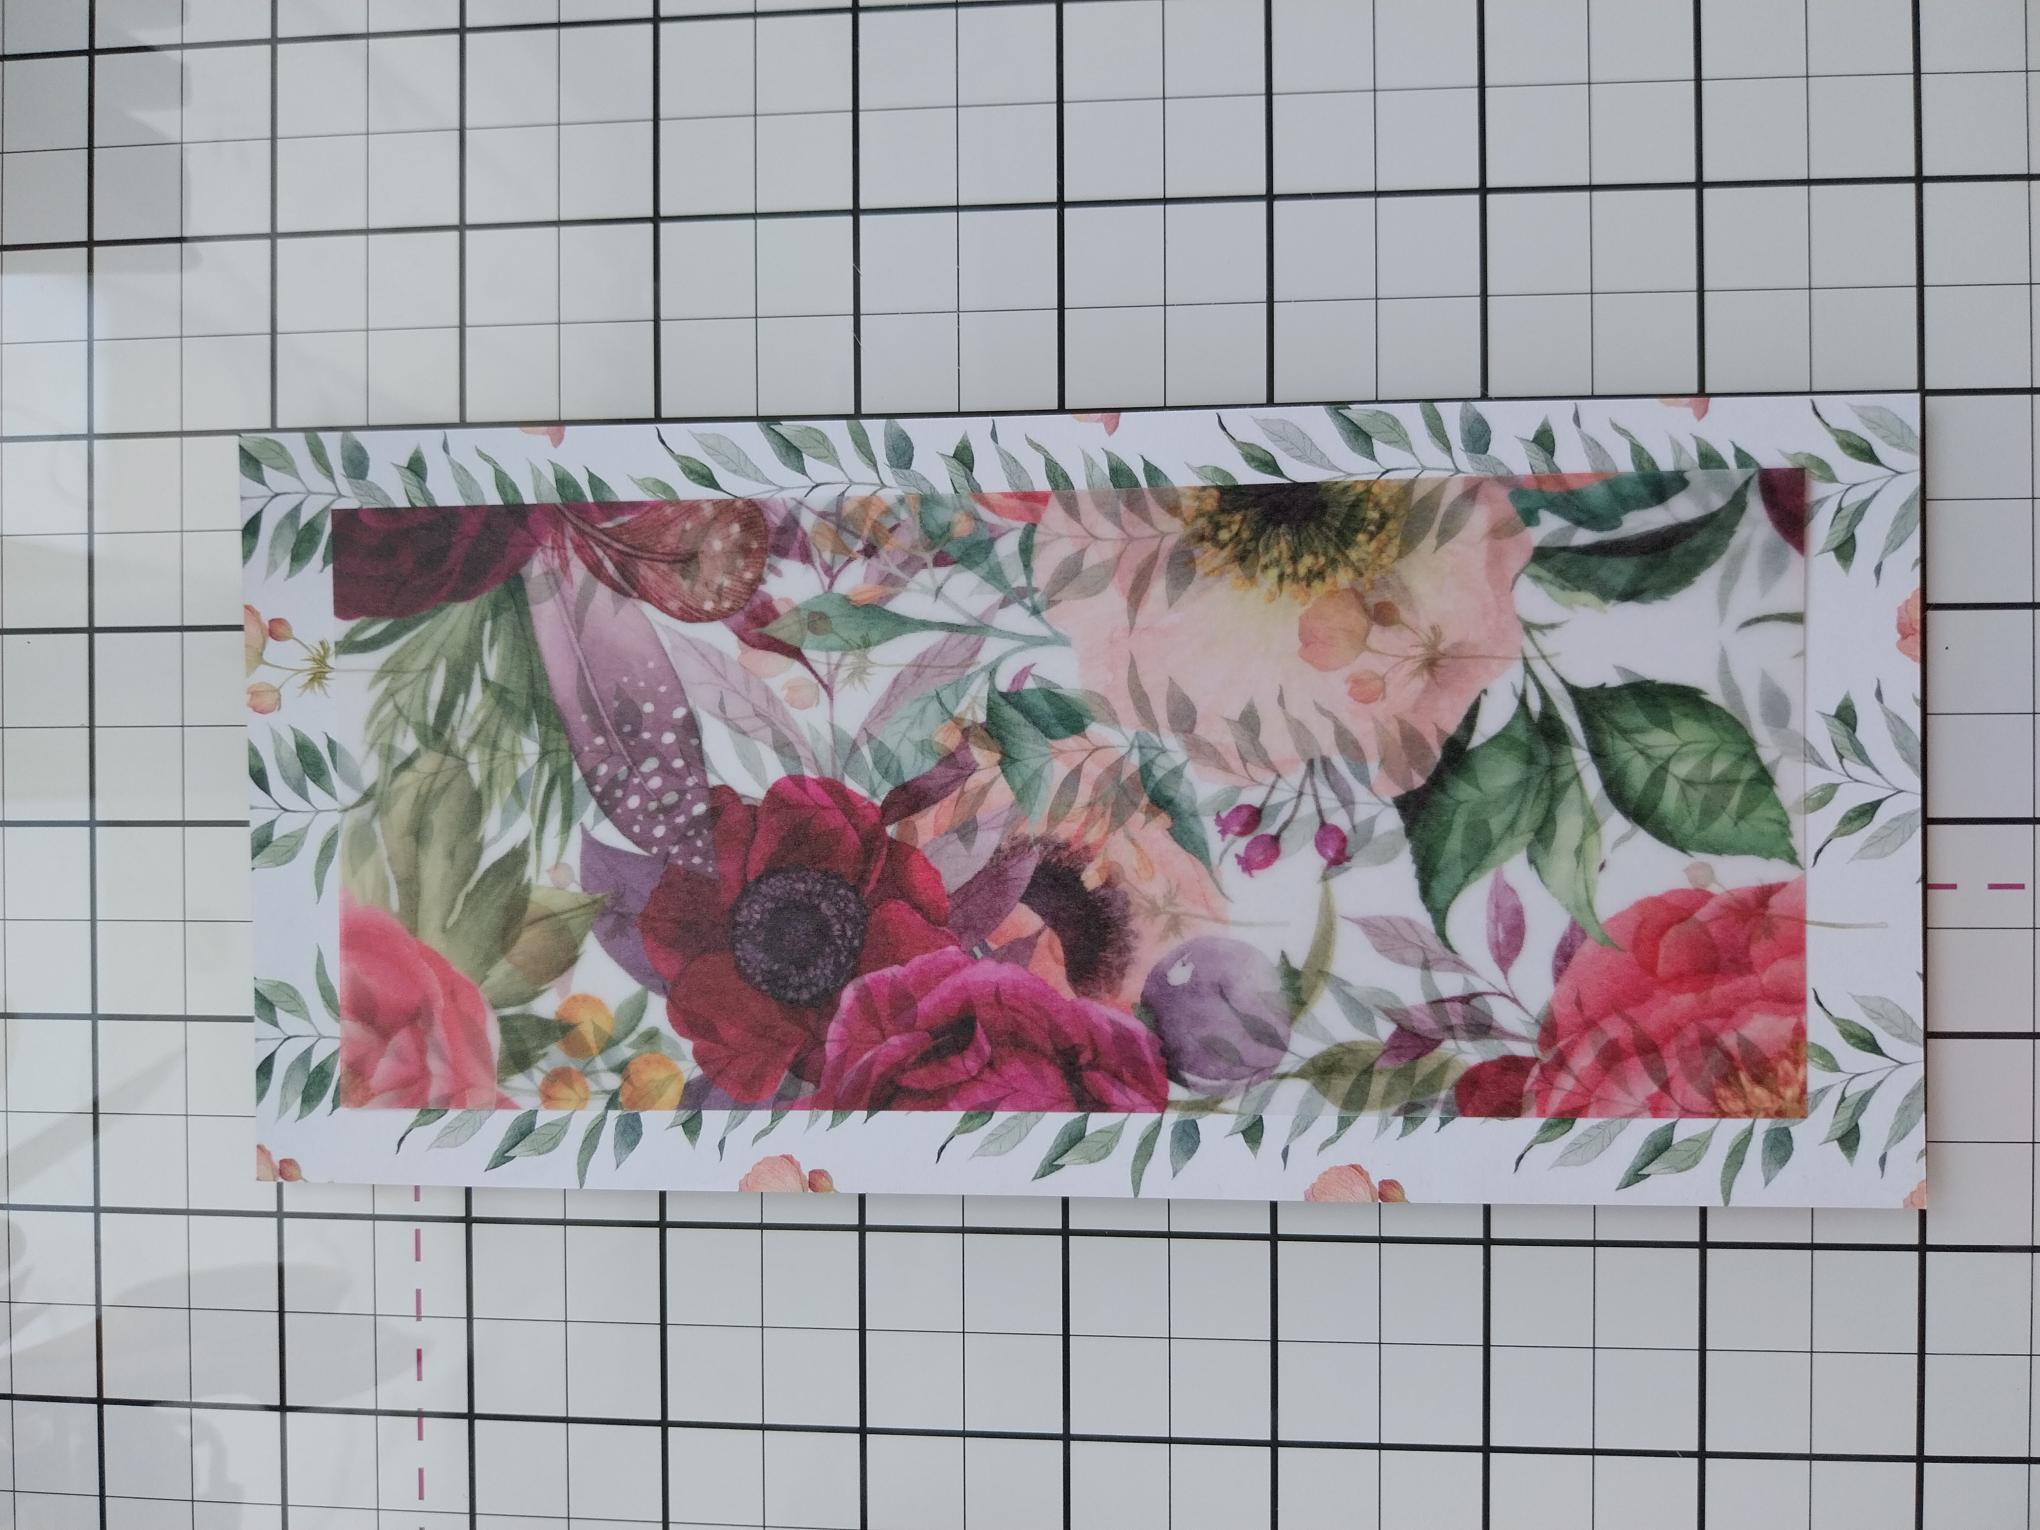
Trim this gorgeous vellum to 7 x 3". |
|
Adhere the vellum to the paper, applying the tape runner under dark patterned areas of the vellum, so as not to show through |

|
Trim this striped paper to 7 x 2 1/4", using the banner punch on one end. |
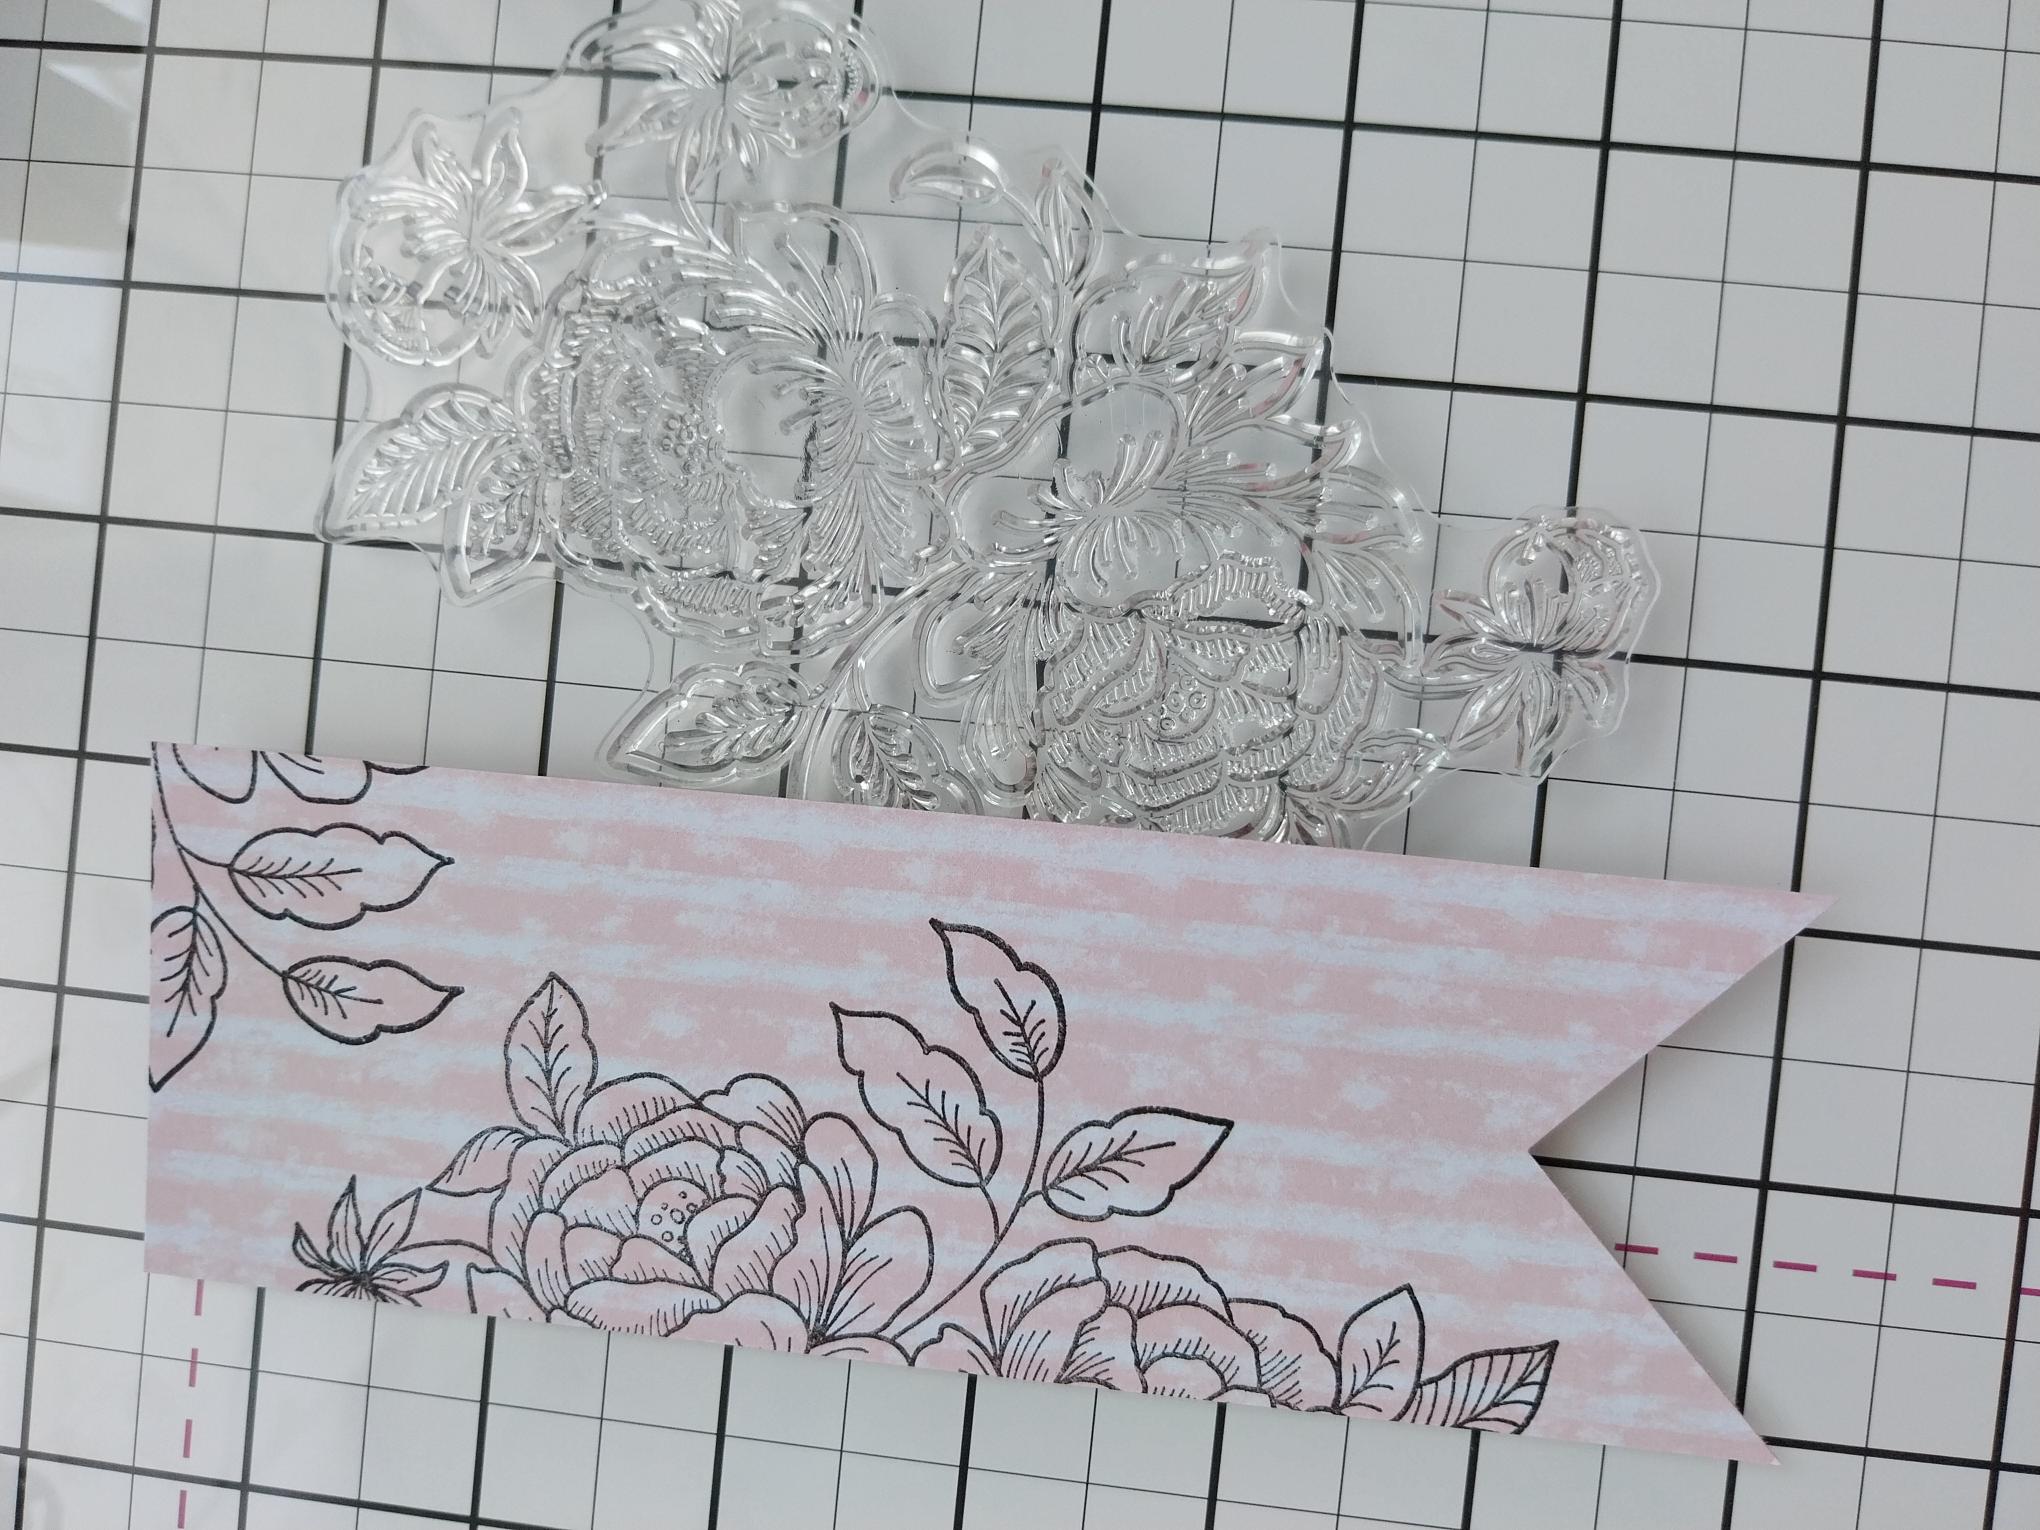
|
Ink up the floral stamp from the Rubly Blooms stamp set, with the Midnight ink and stamp randomly on to your banner. |
|
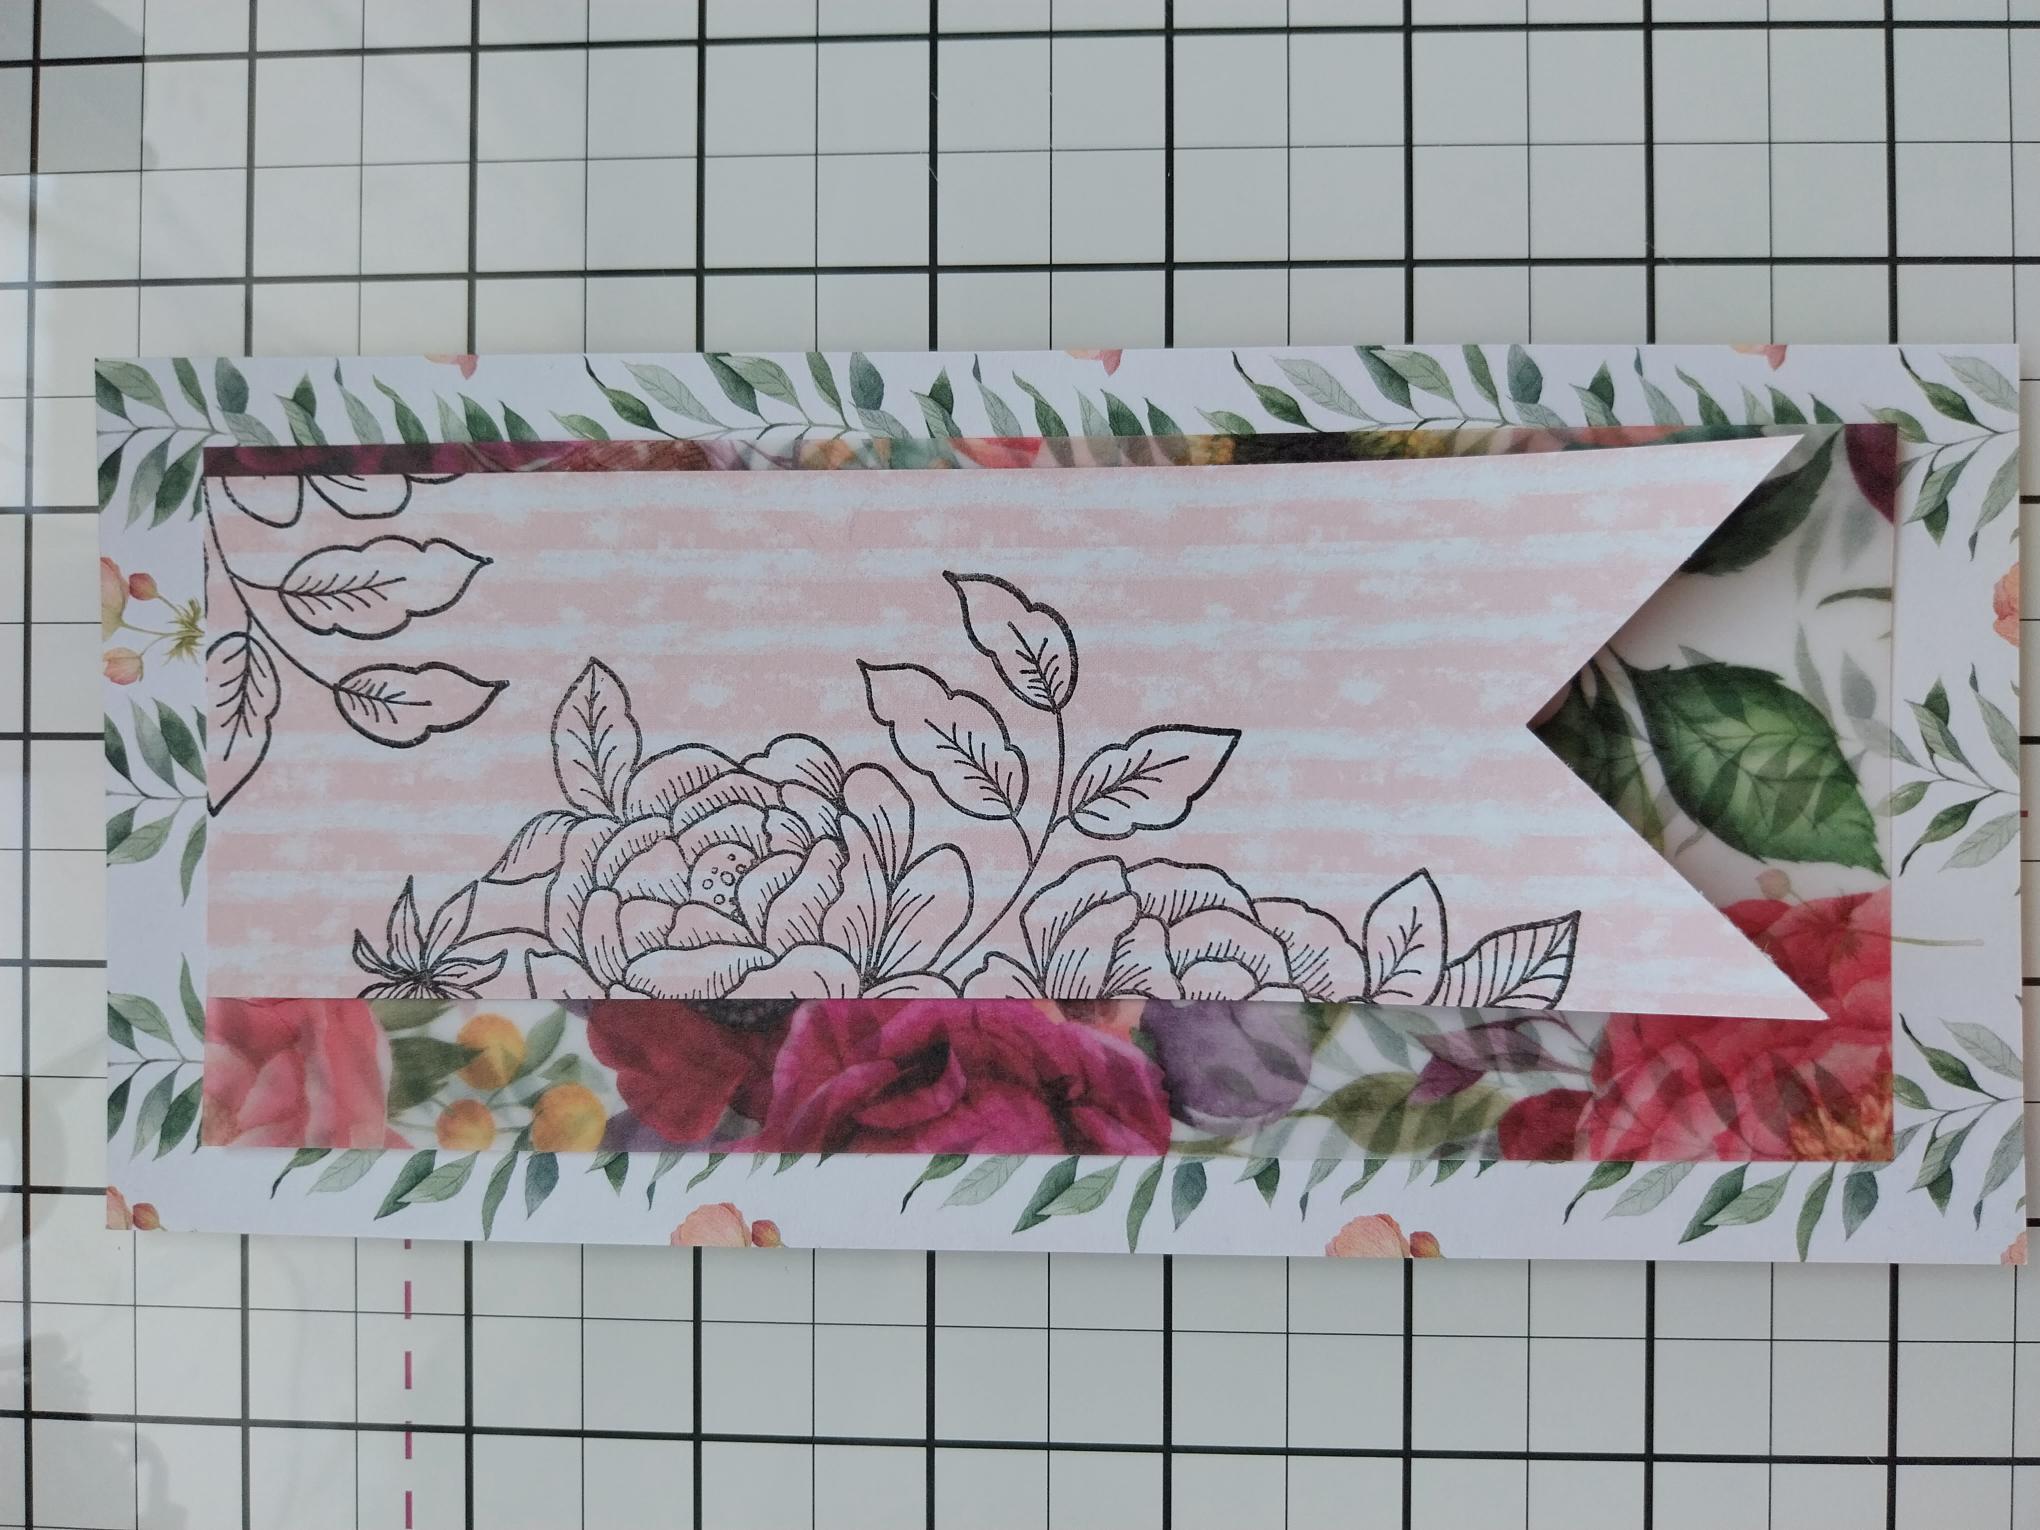
Trim down to size before adhereing to your patterned paper and vellum. |
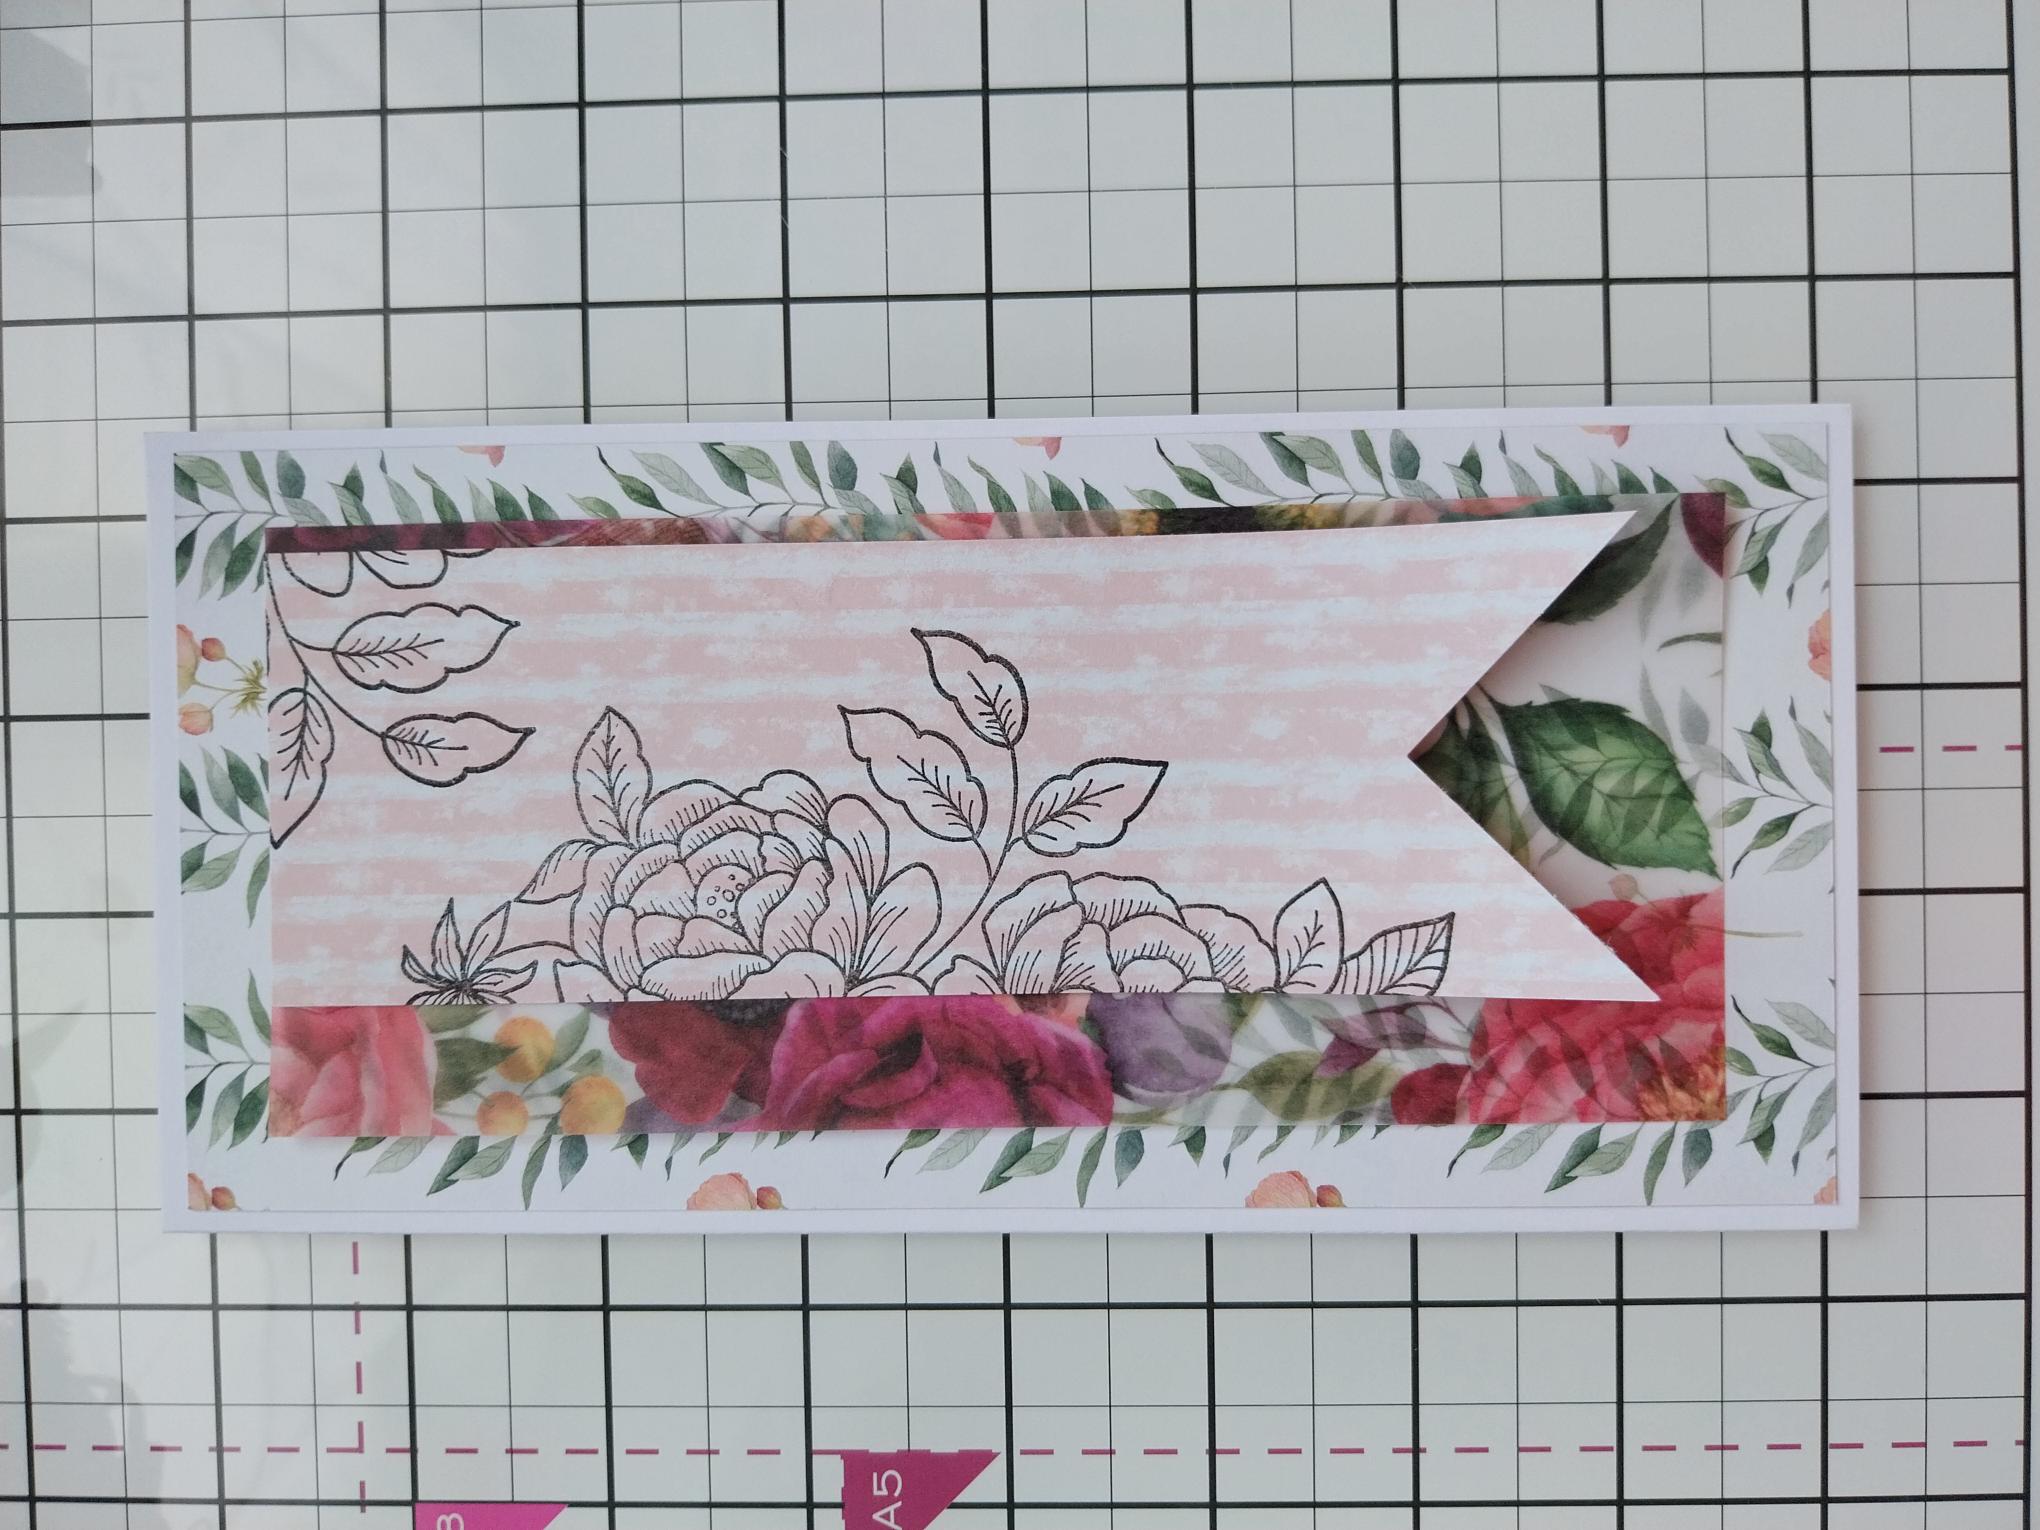
|
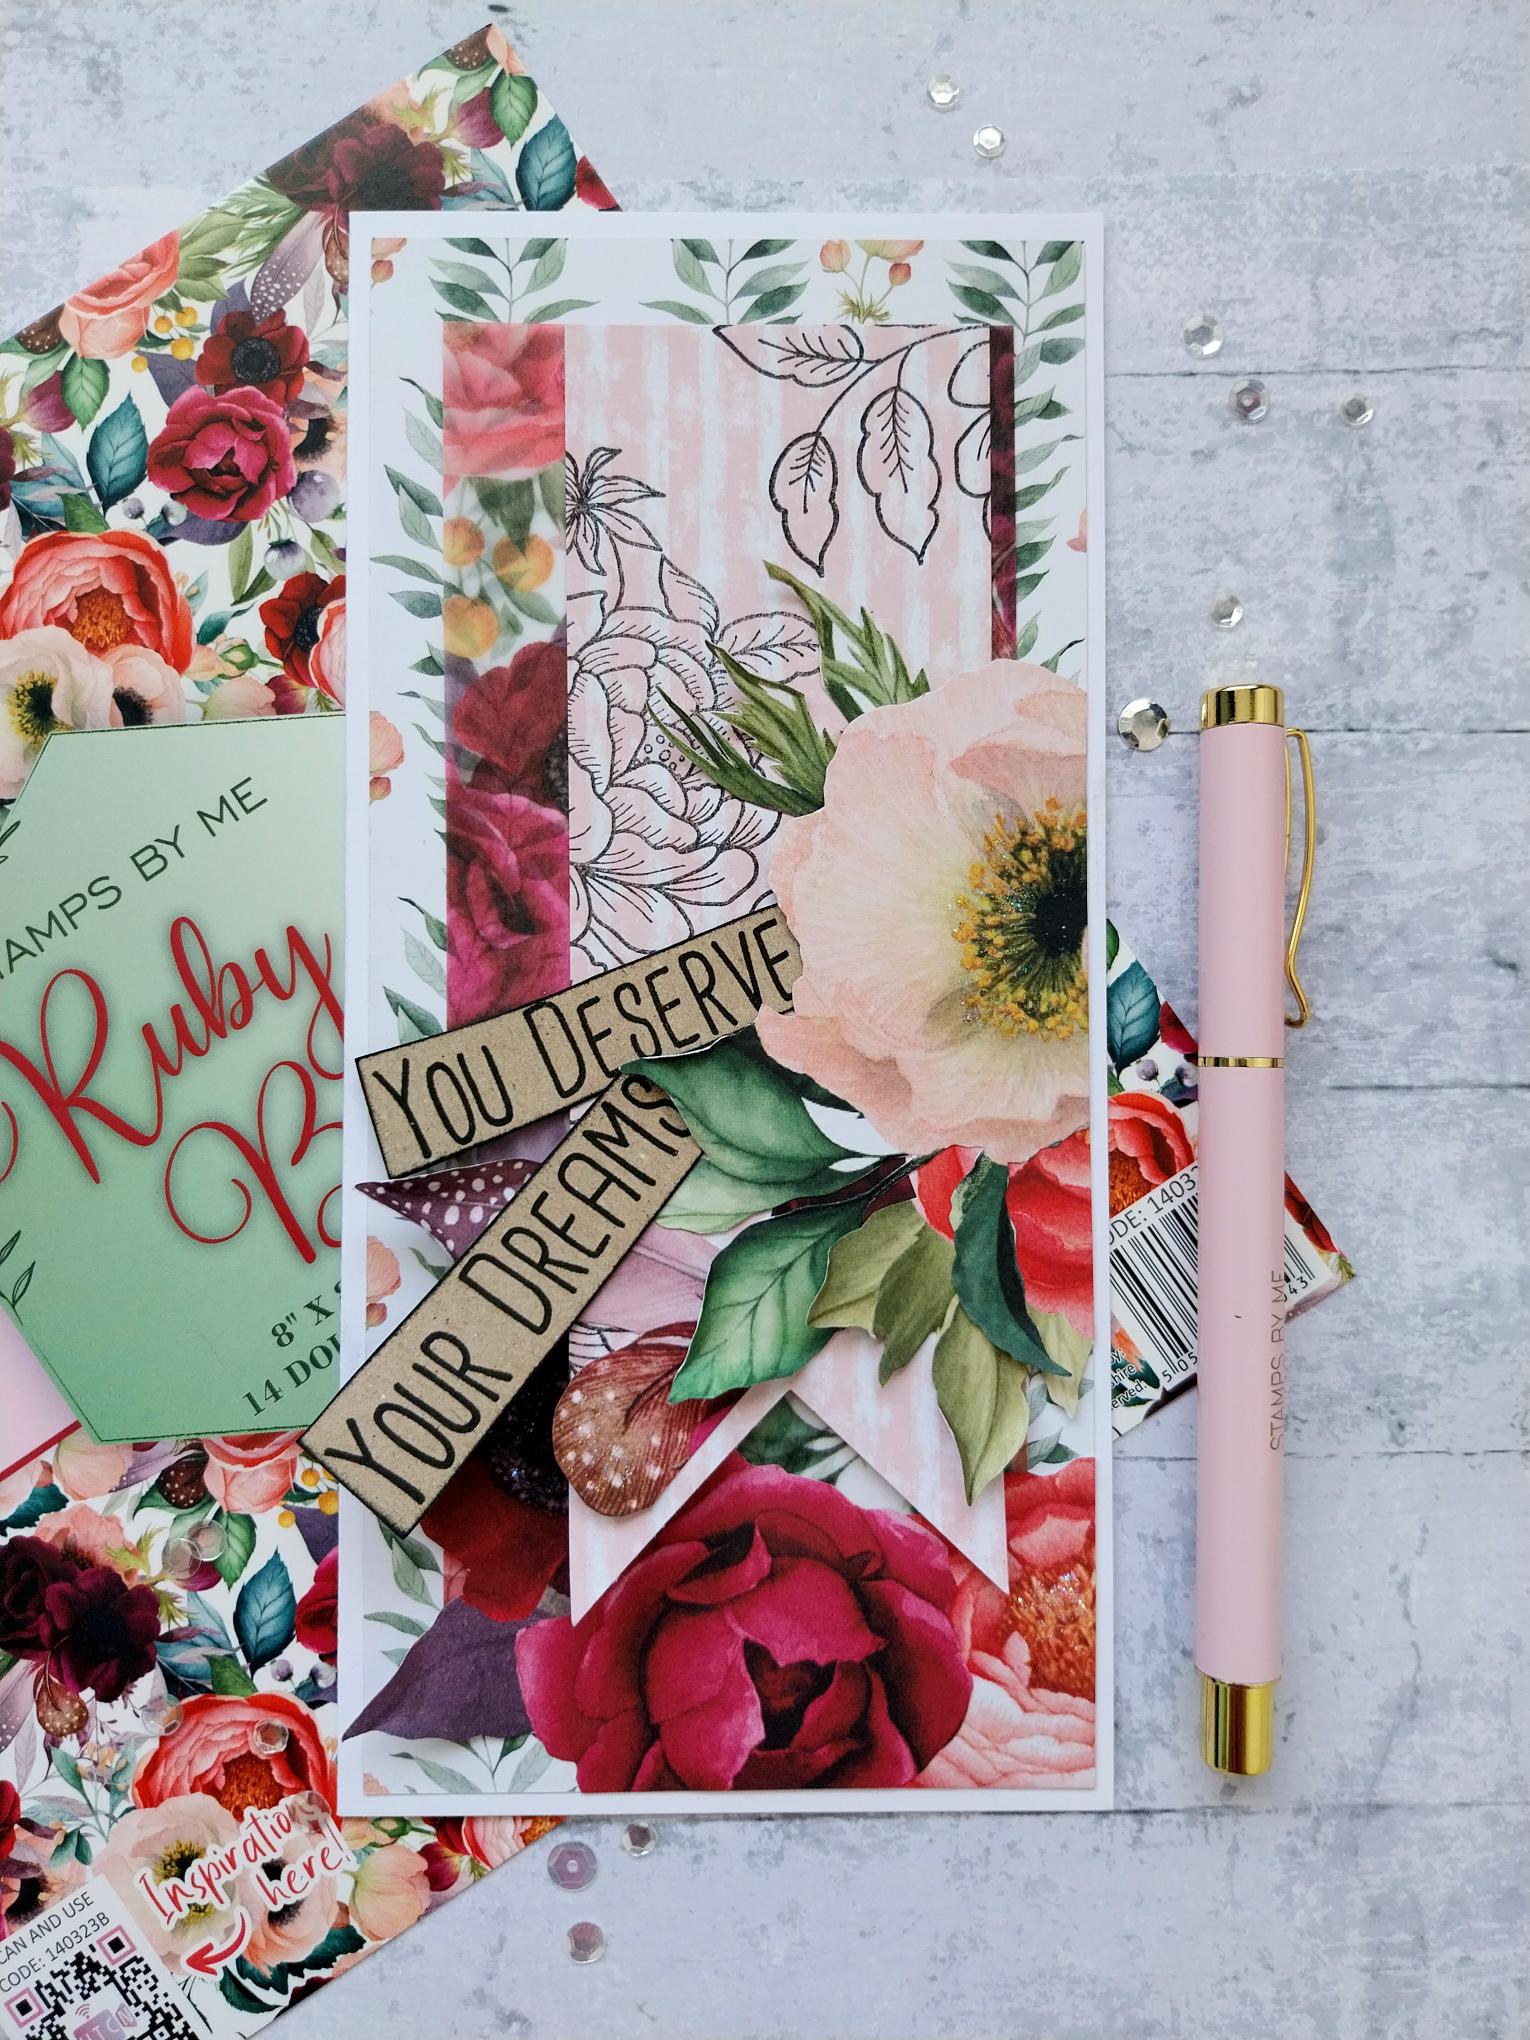
Adhere to the front of your white DL card blank, before setting aside. |

|
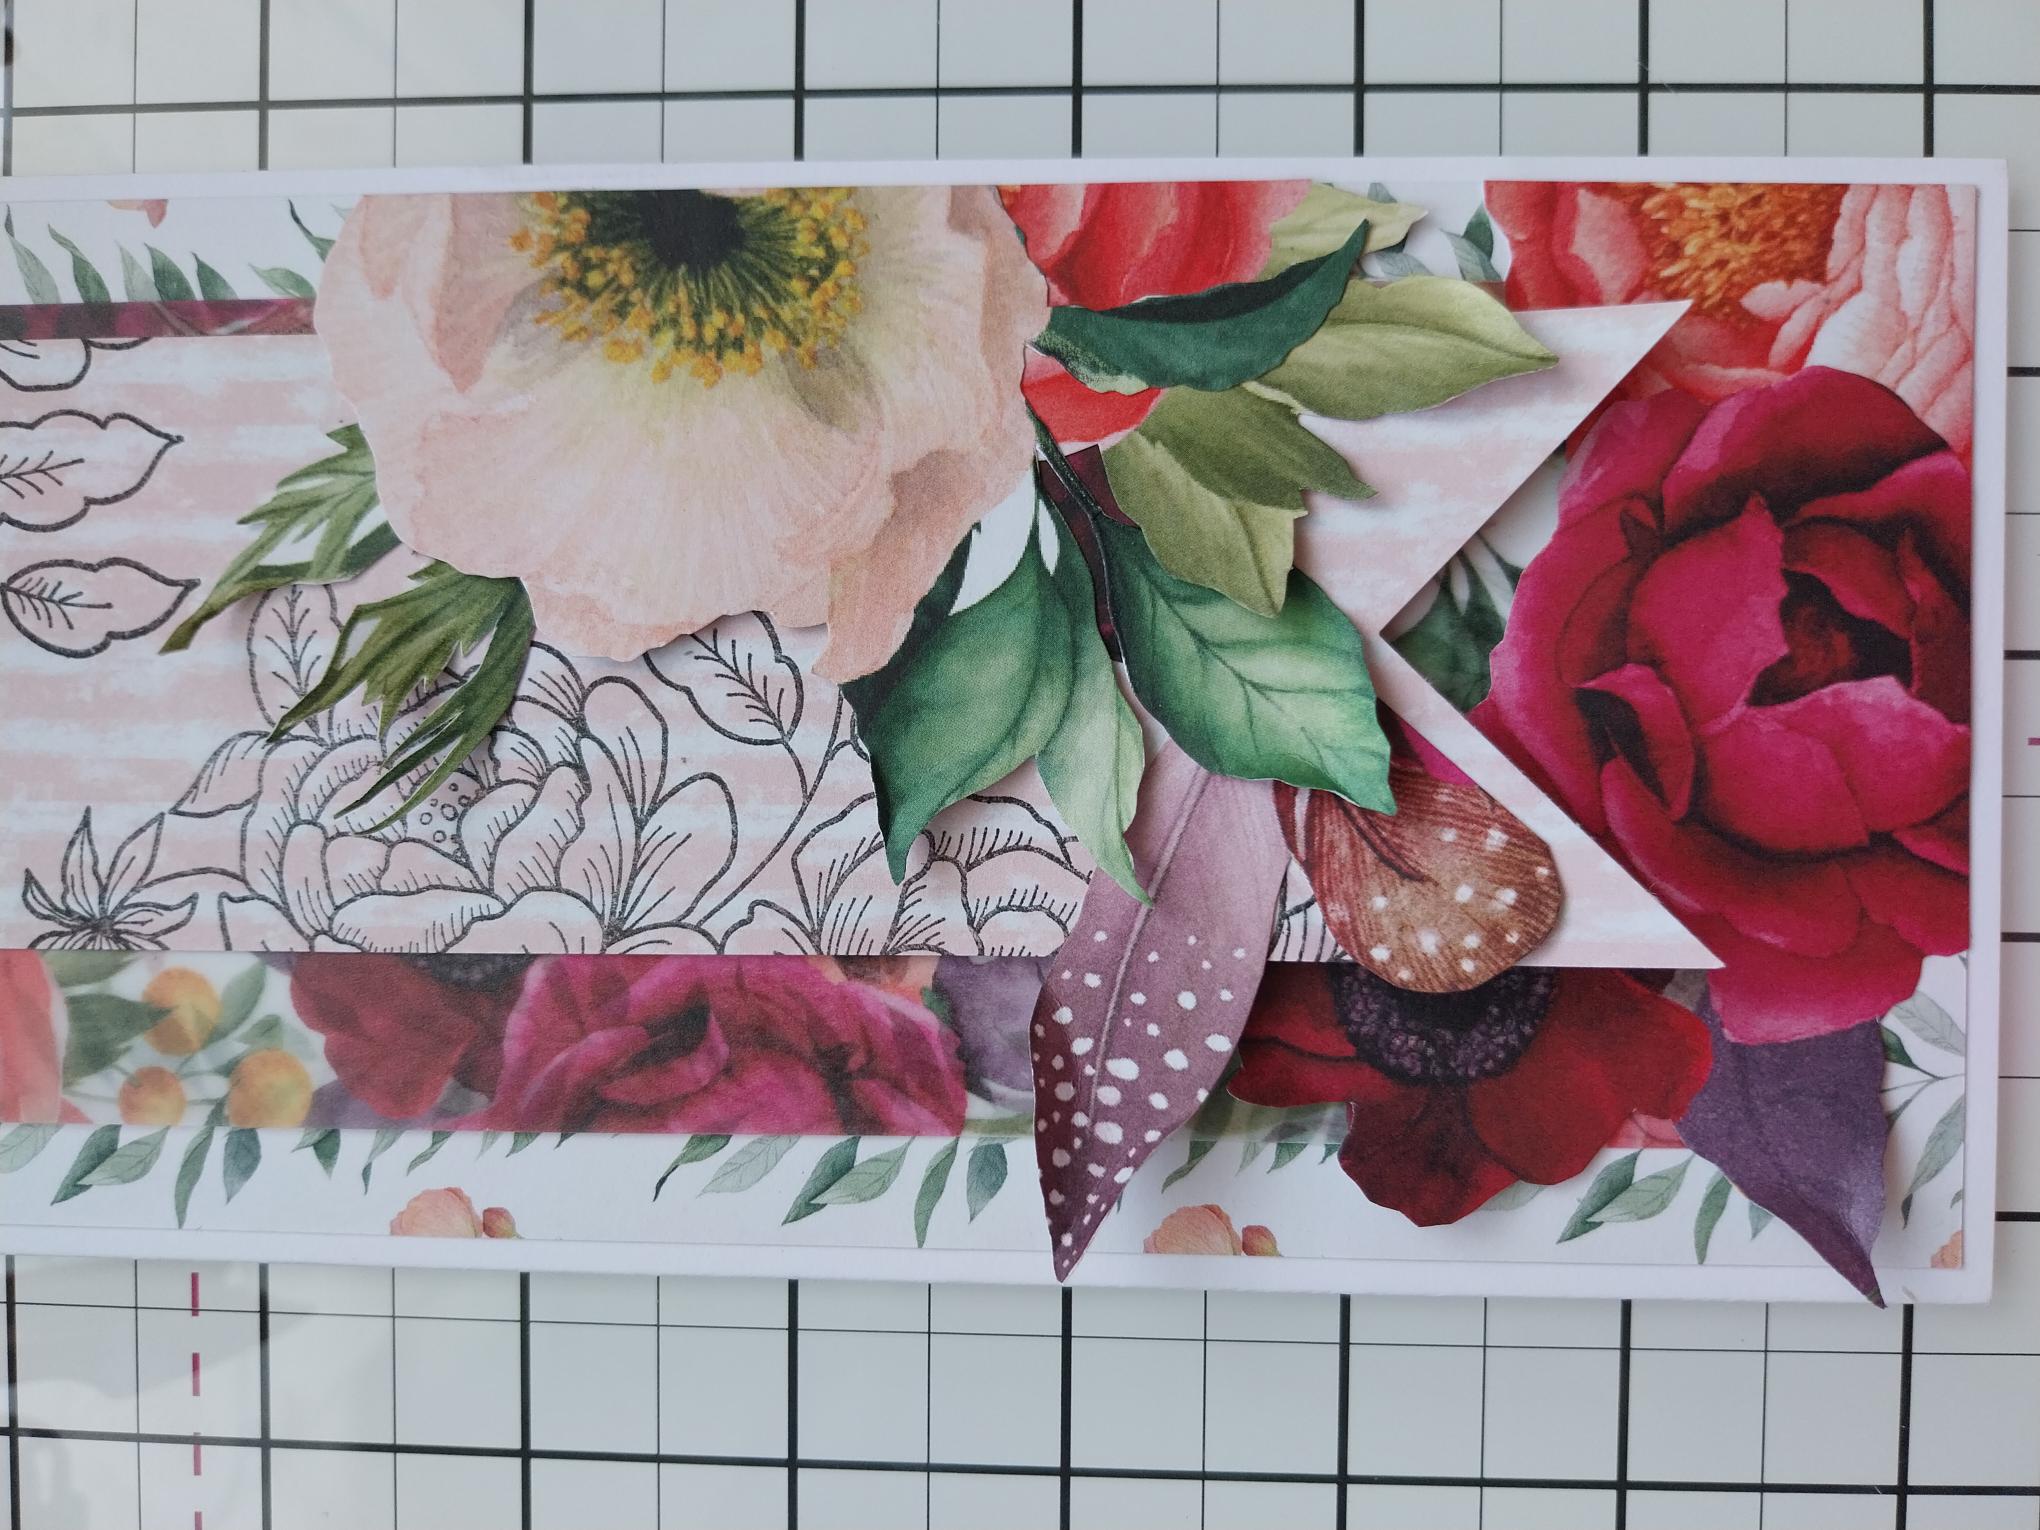
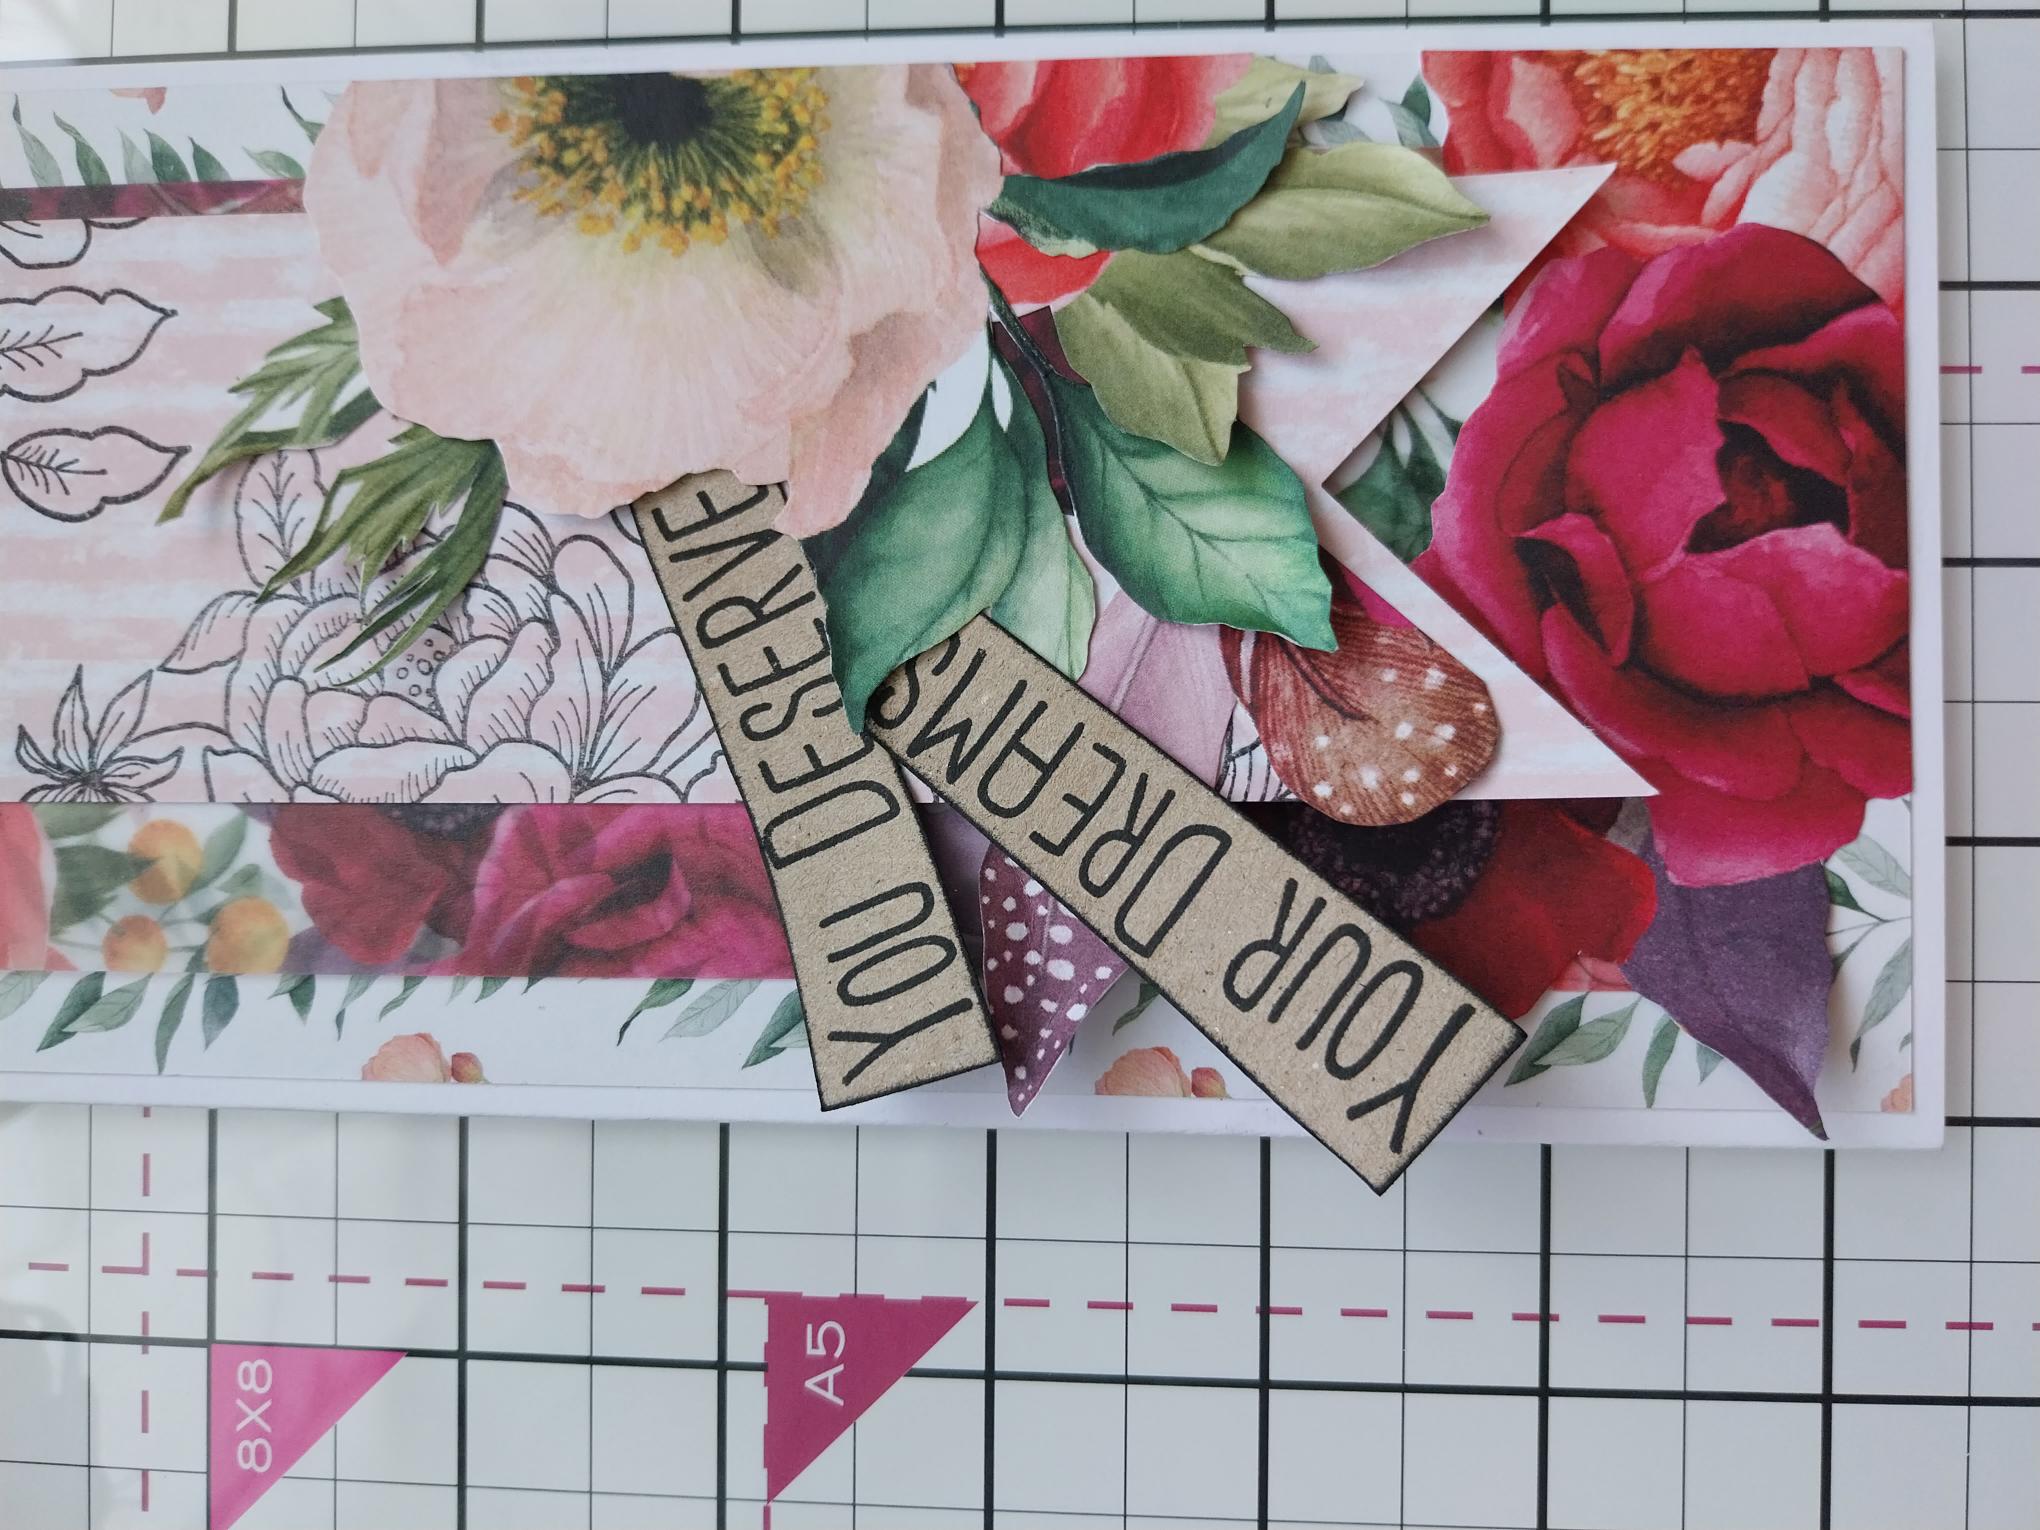
Fussy cut florals and foliage as required, from the papers. |
|
Shape the elements with your fingers, before adhering down the right side of your card. Tuck elements under others, to give dimension. |
|
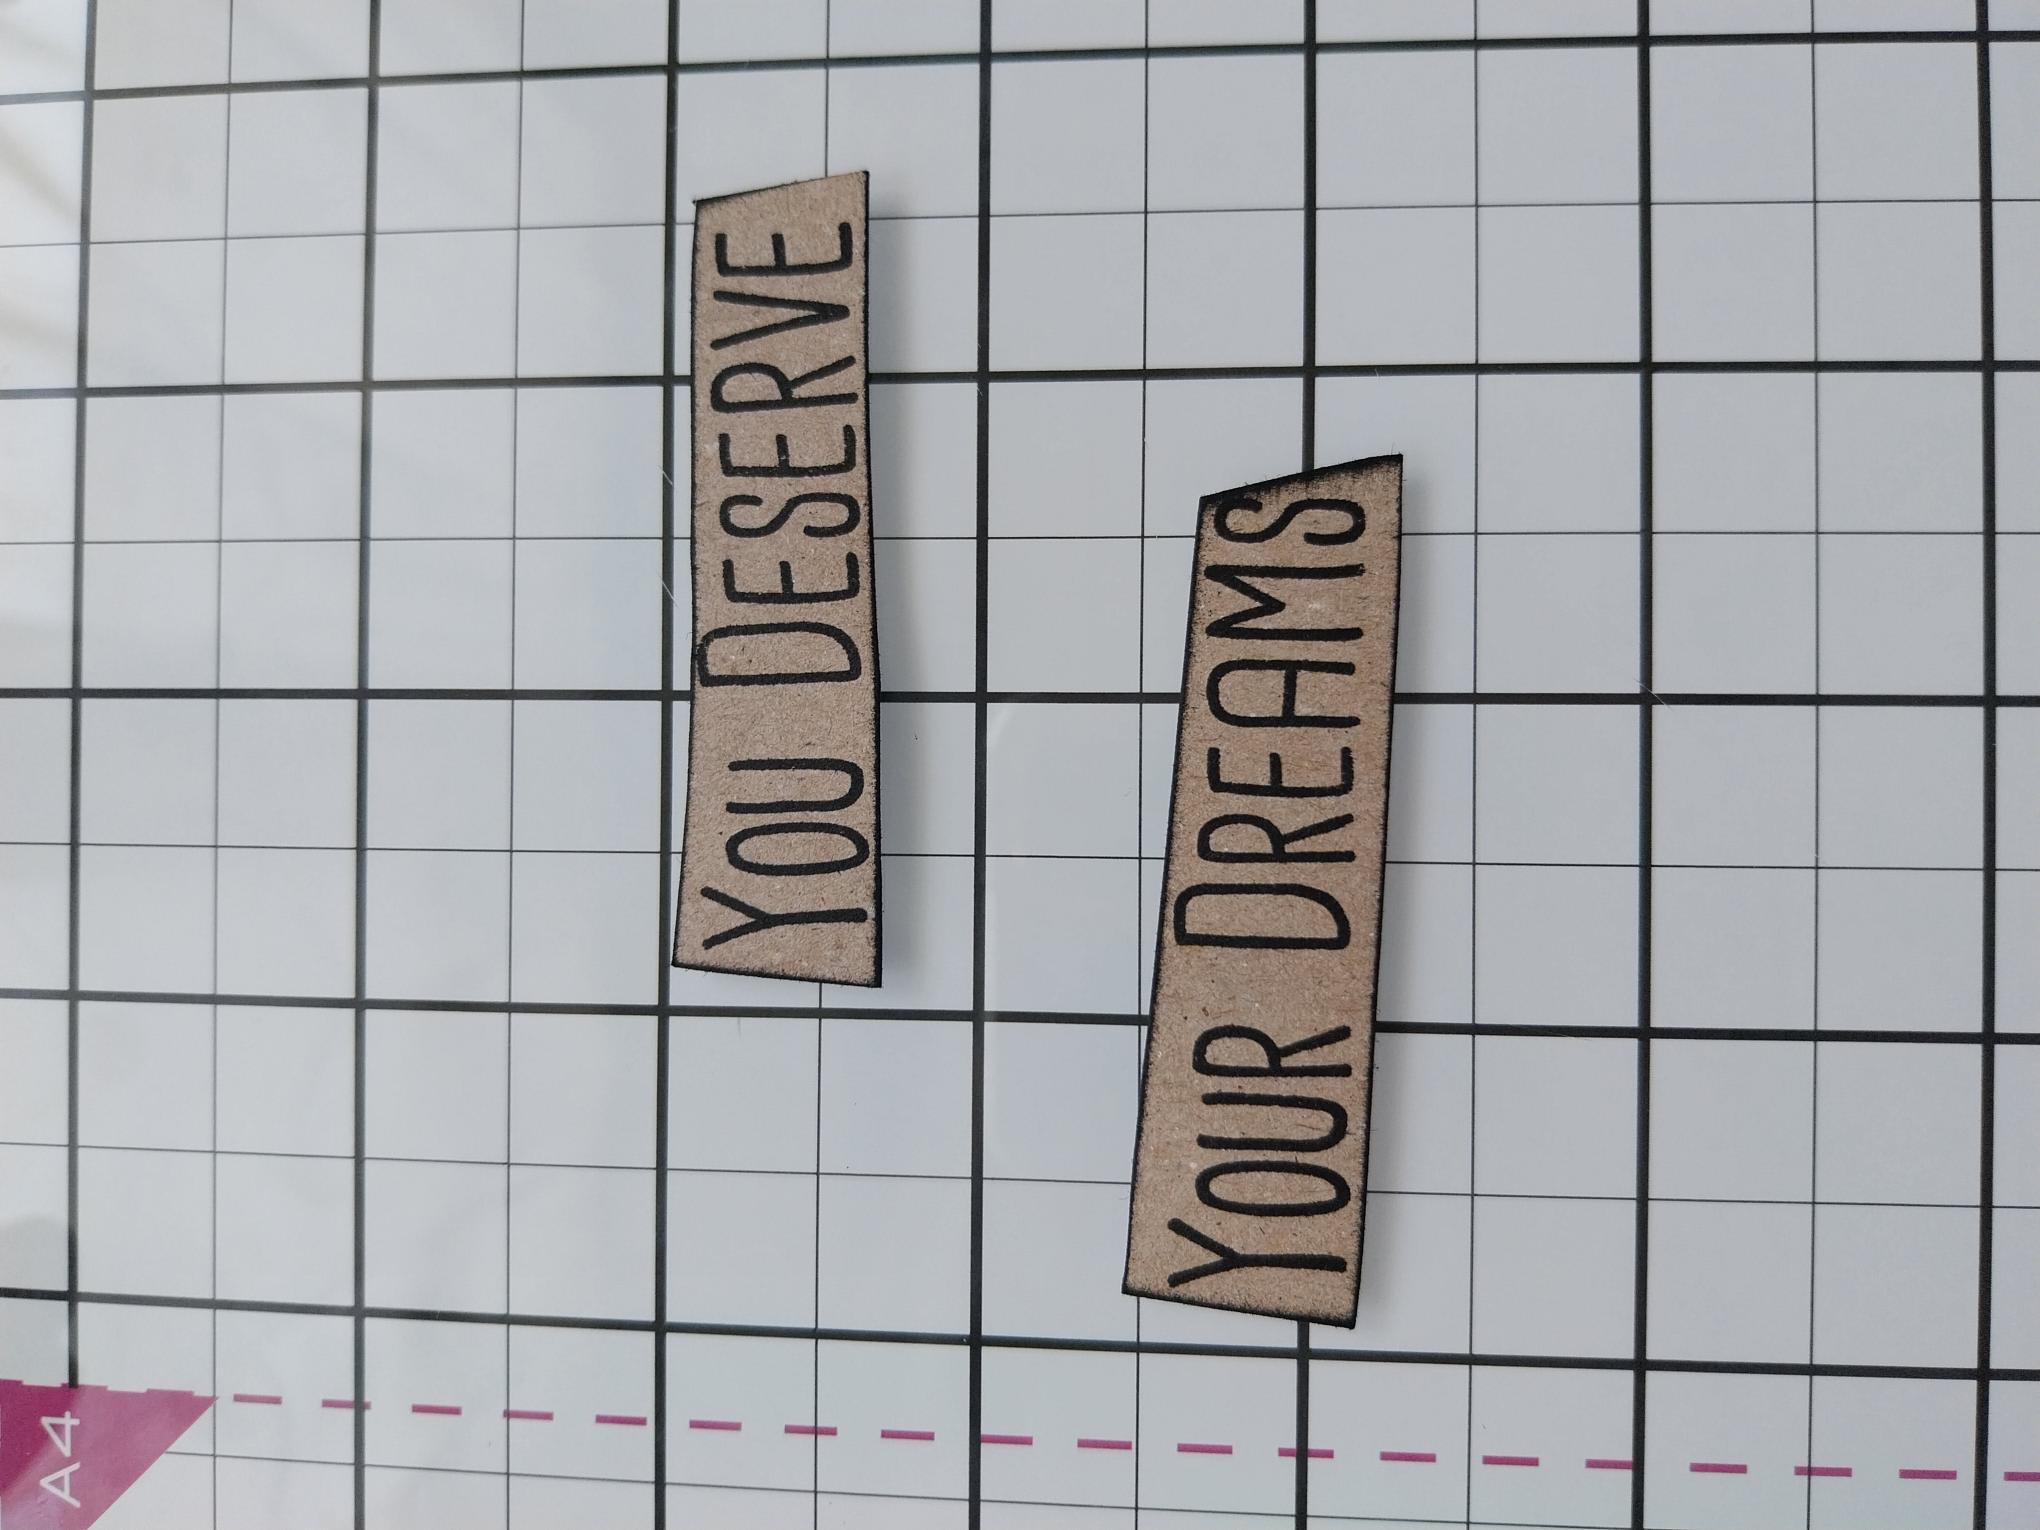
Stamp the sentiment, from the Ruby Blooms set, on to kraft card. Cut in to two parts, using a black pen to add a frame around each. |
|
Adhere on to your card, tucking them just under your 3D floral elements. |
|
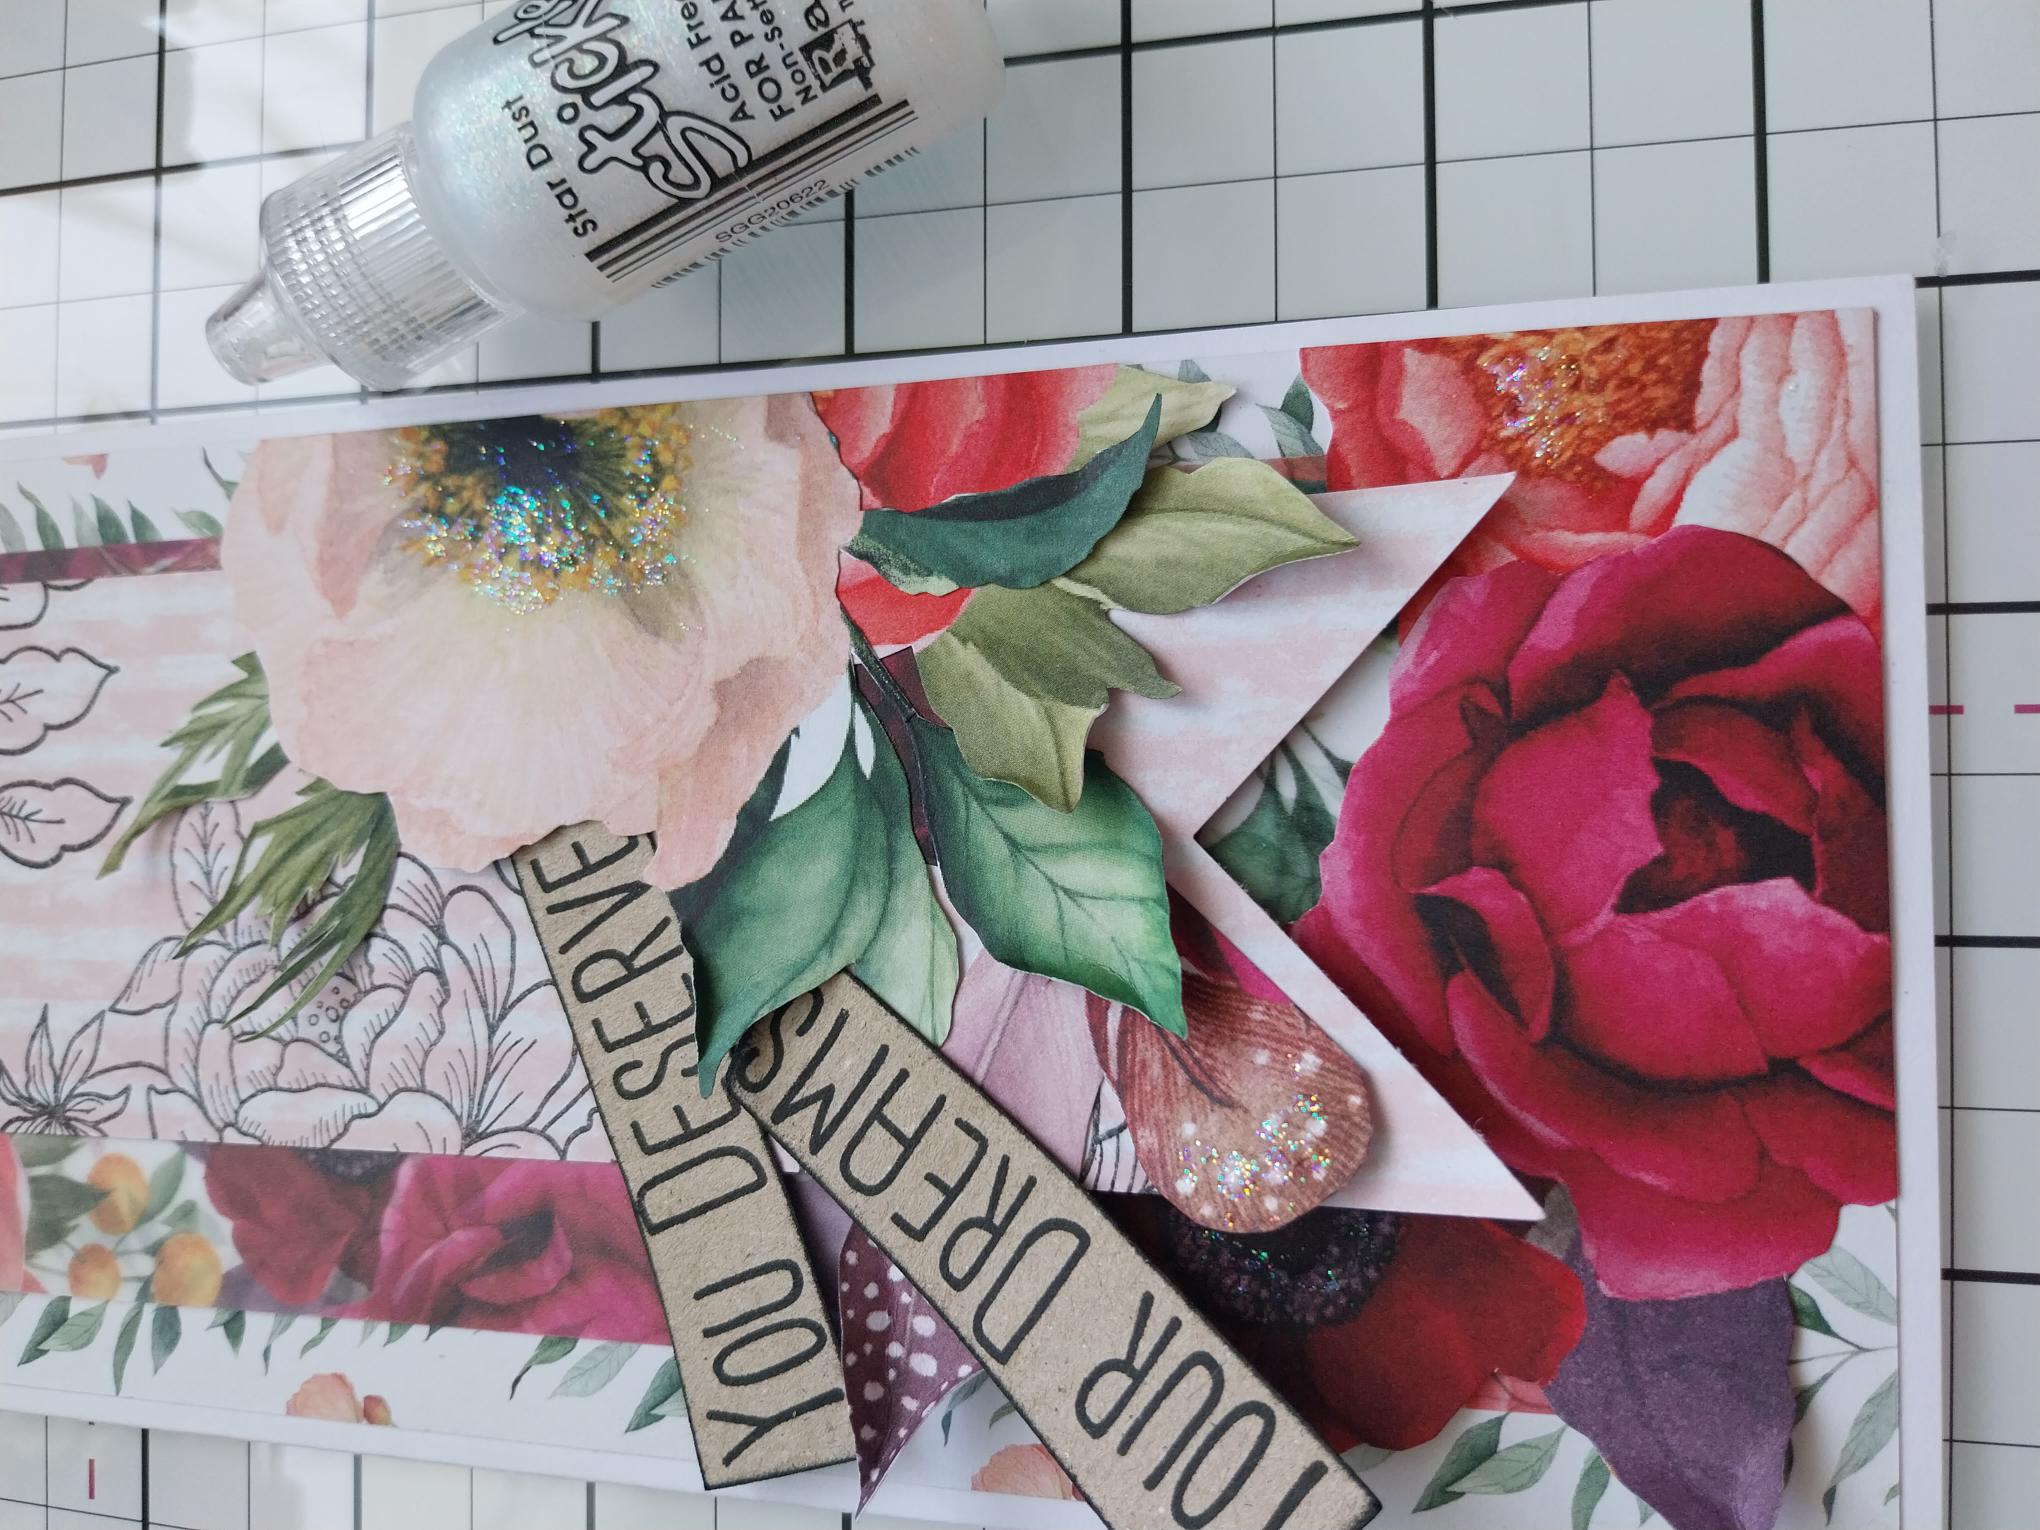
Use the Stickles to add a touch of sparkle to your artwork. |
|
To finish you can add sequins and/or pearl drops if required. |