Give your friends $10 off their first order!
Refer a FRIEND


WHAT YOU WILL NEED:
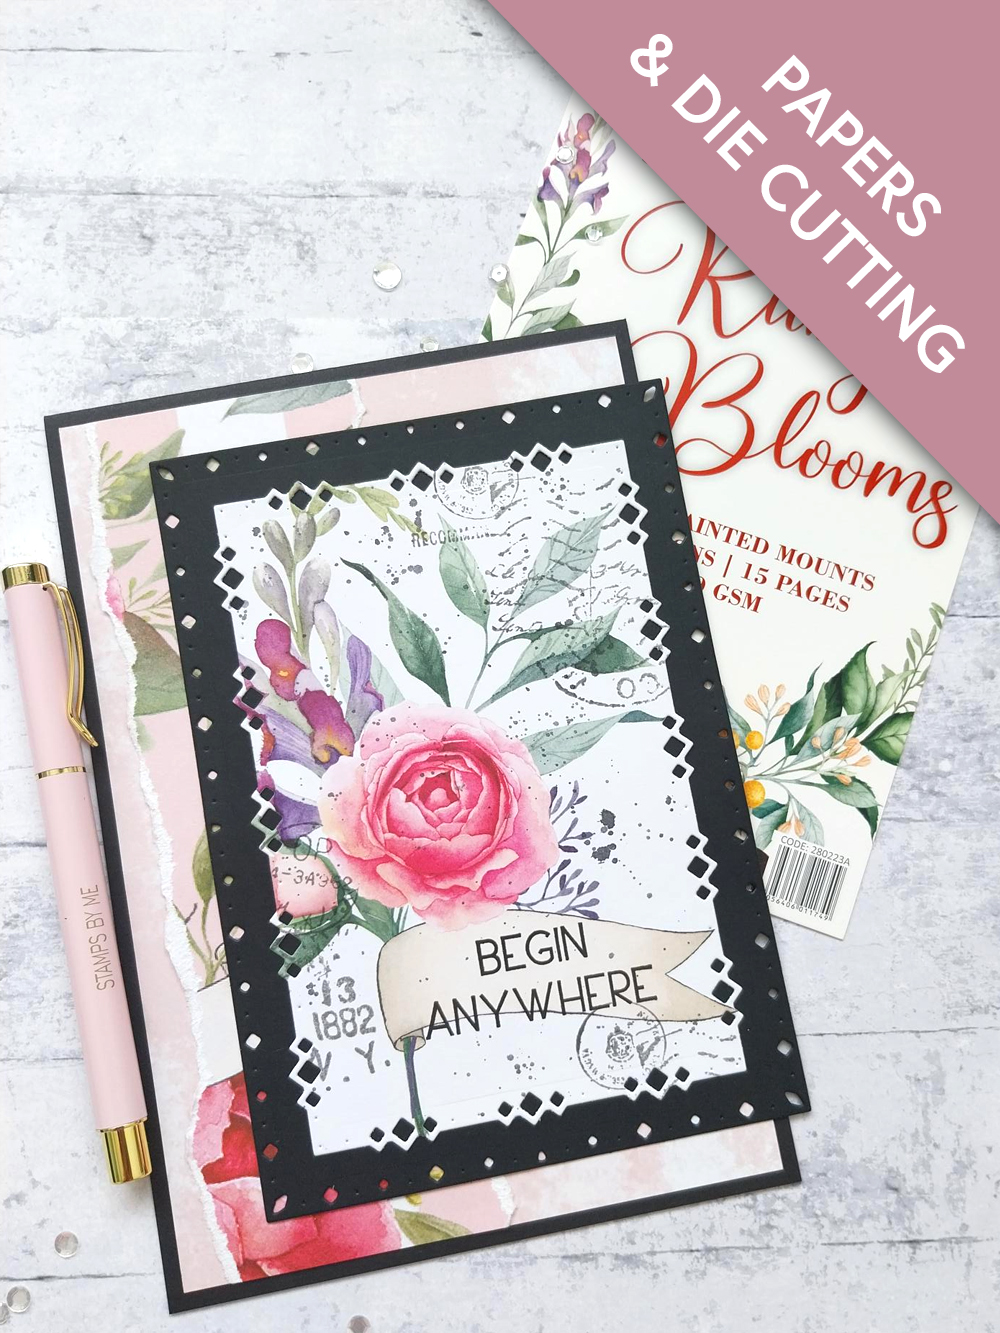
Black card blank 8 x 5 1/2"
Black card
White card
Paperchain Ruby Blooms 5 x 7" Painted Mounts
Paperchain Ruby Blooms 12 x 12" Paper Collection
Paperchain Ruby Blooms Stamp Collection
Diamond Stitching Die Collection
Retro Stamp Collection
SBM Hybrid Ink Pad: Midnight
Versafine ink Pad: Smokey Grey
Distress Ink/Oxide Ink Pad: Black Soot
Paint brush
SBM Magnetic glass mat
Paper Trimmer
Perfect Together Glue
Die Cutting machine
[click image to enlarge] 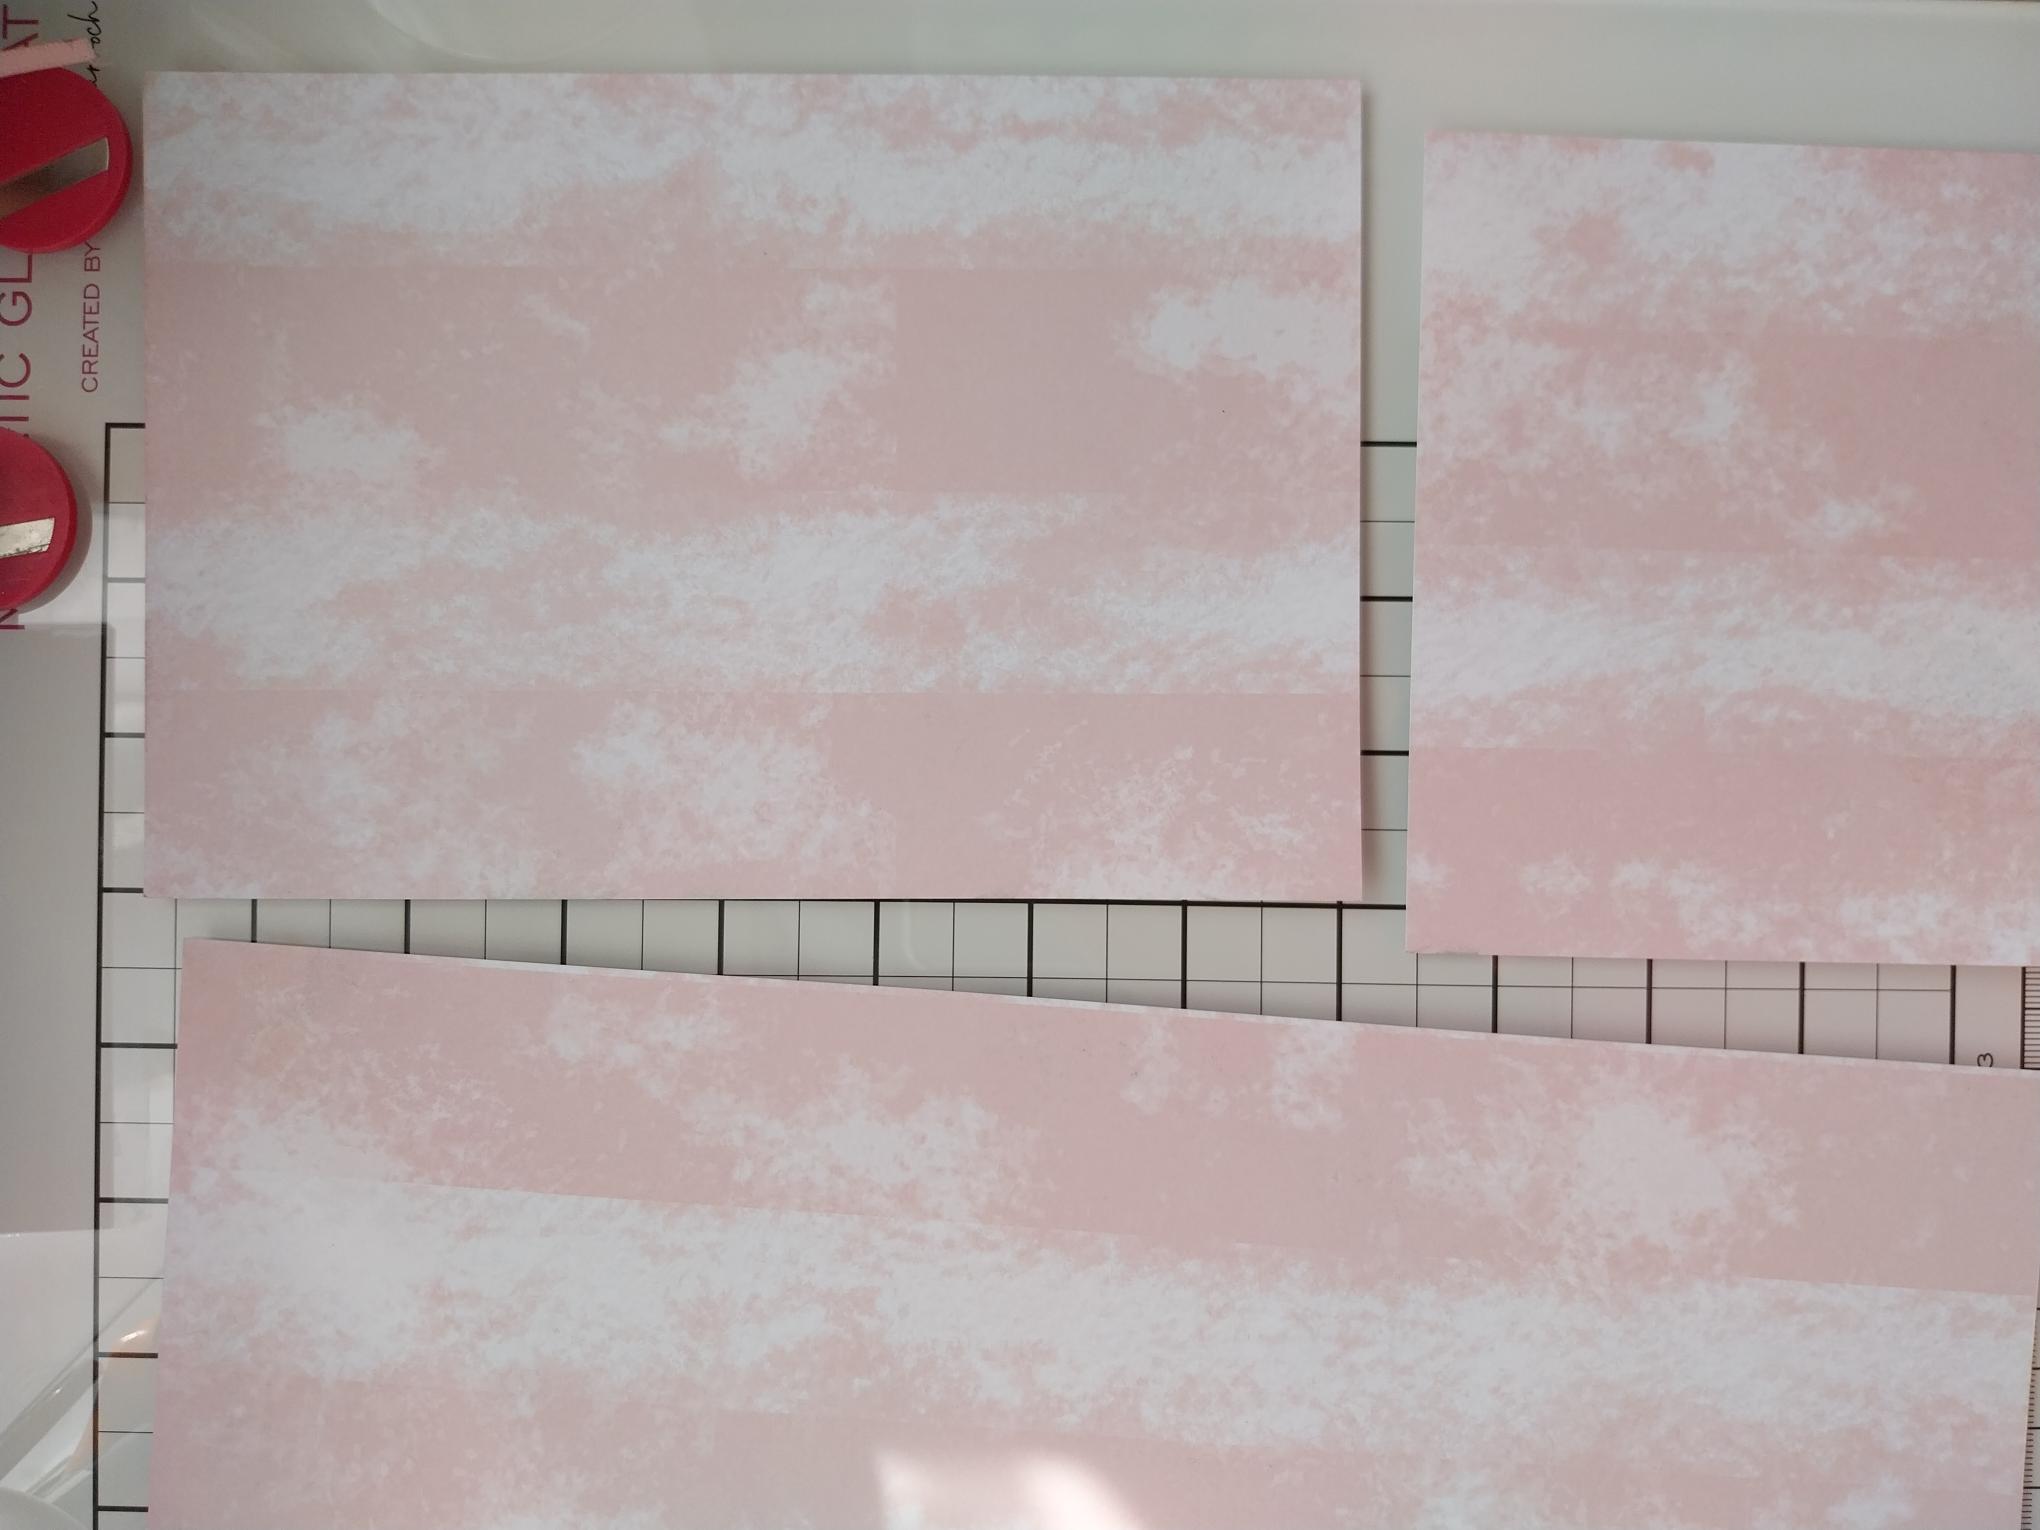
|
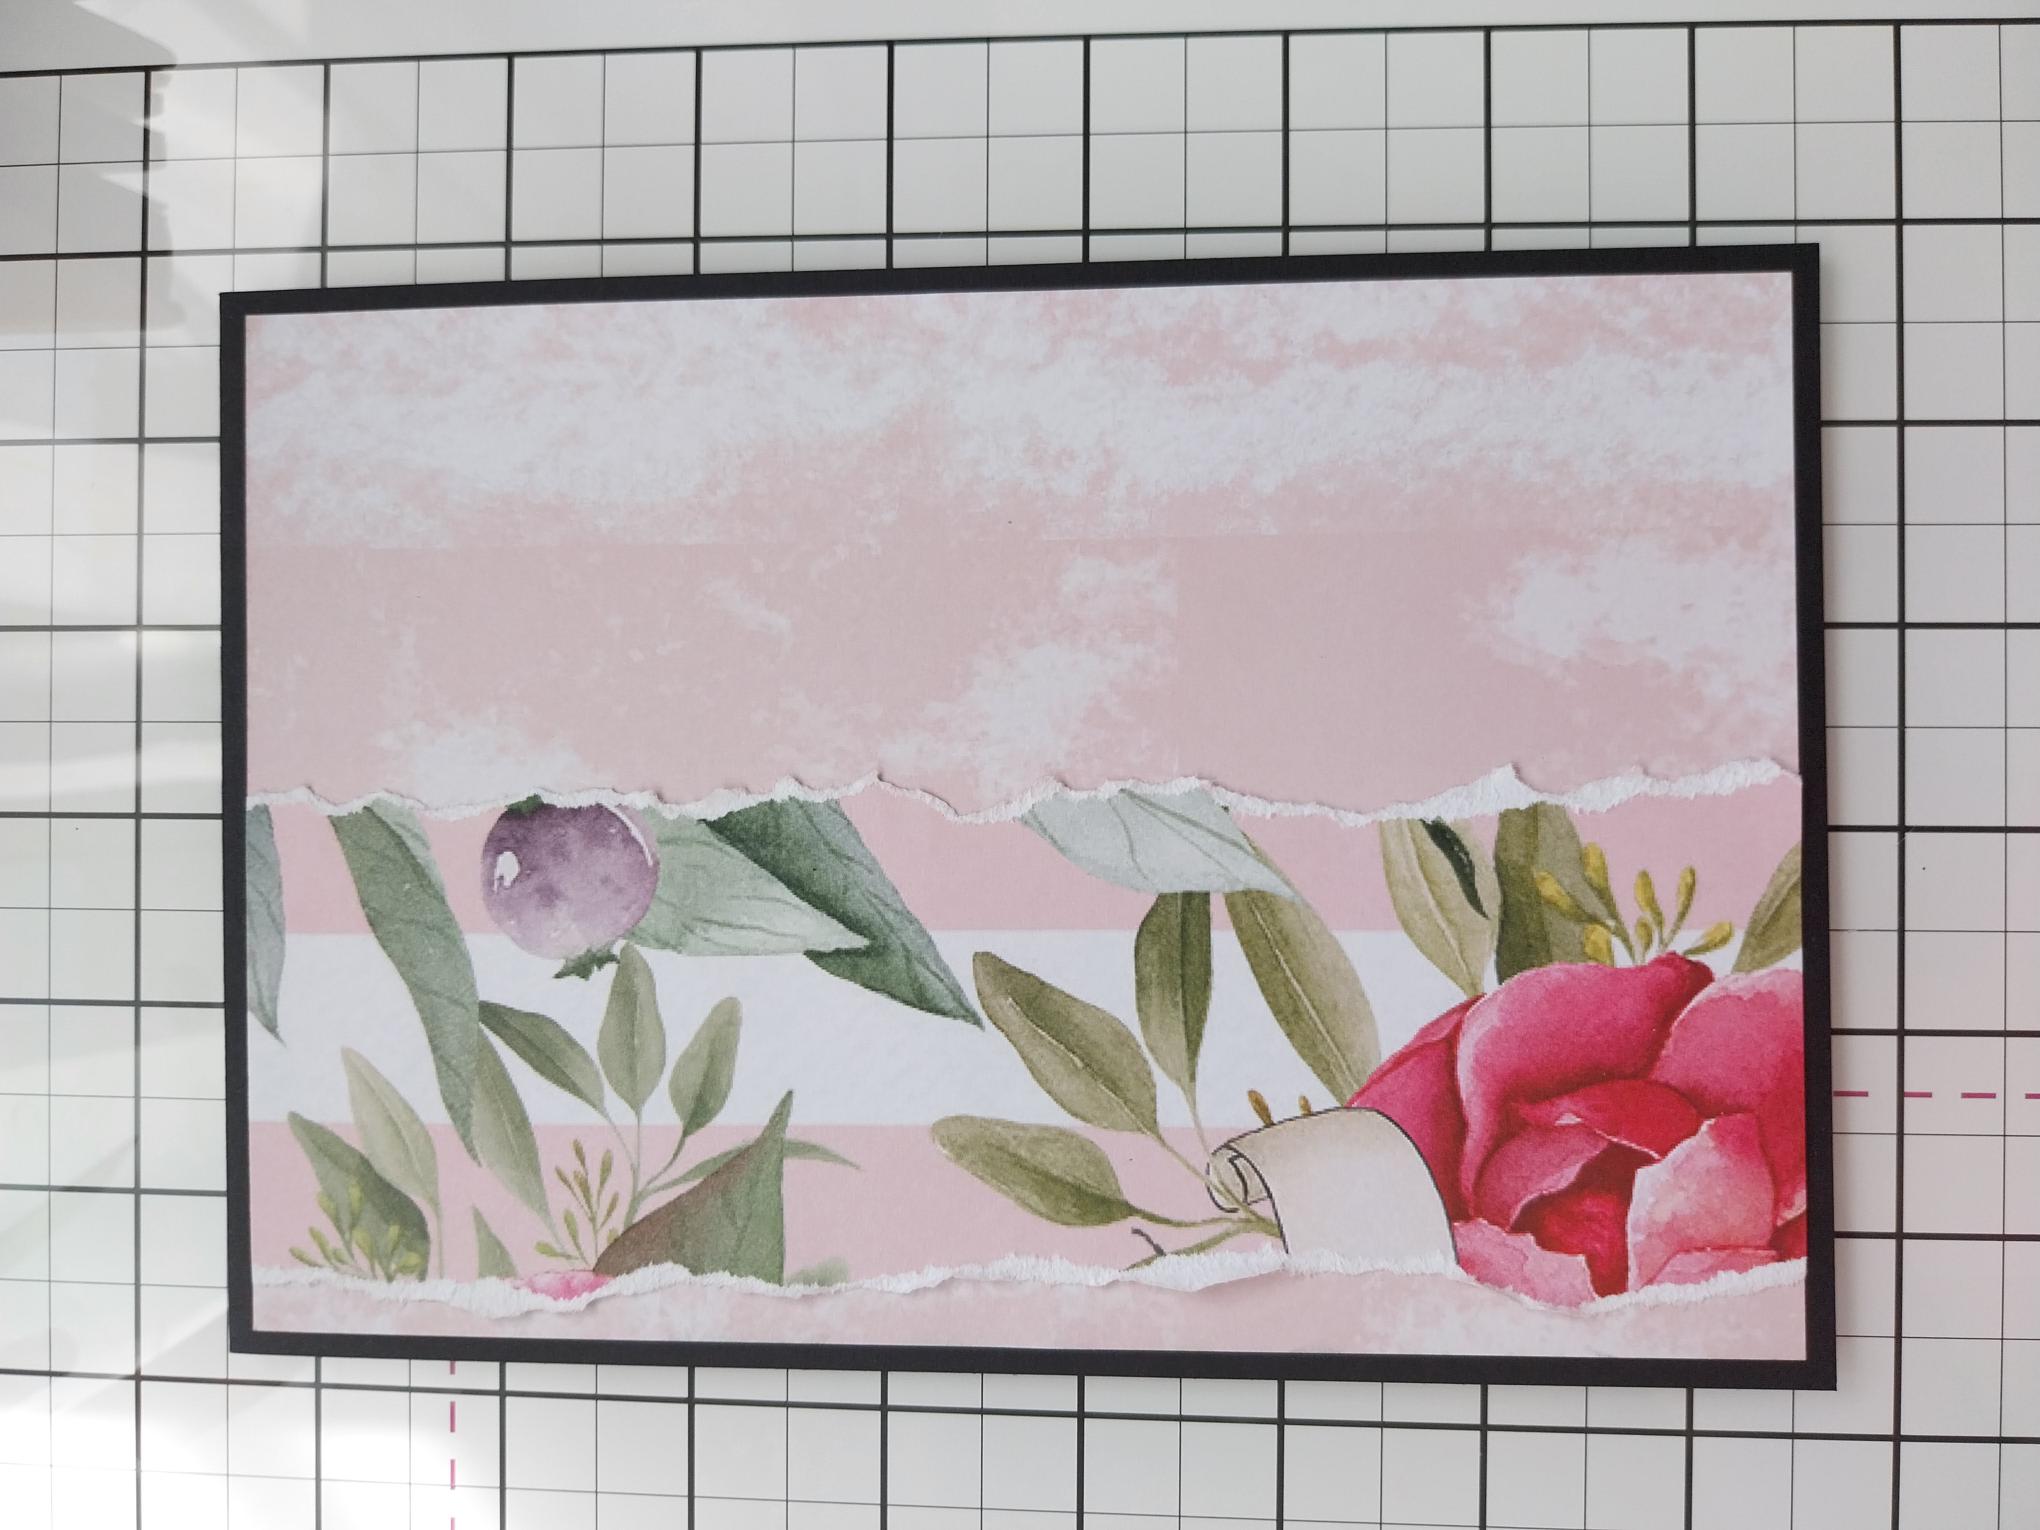
Remove this sheet from the Ruby Blooms 12 x 12" Paper Collection and trim to 7 3/4 x 5 1/4". |
|
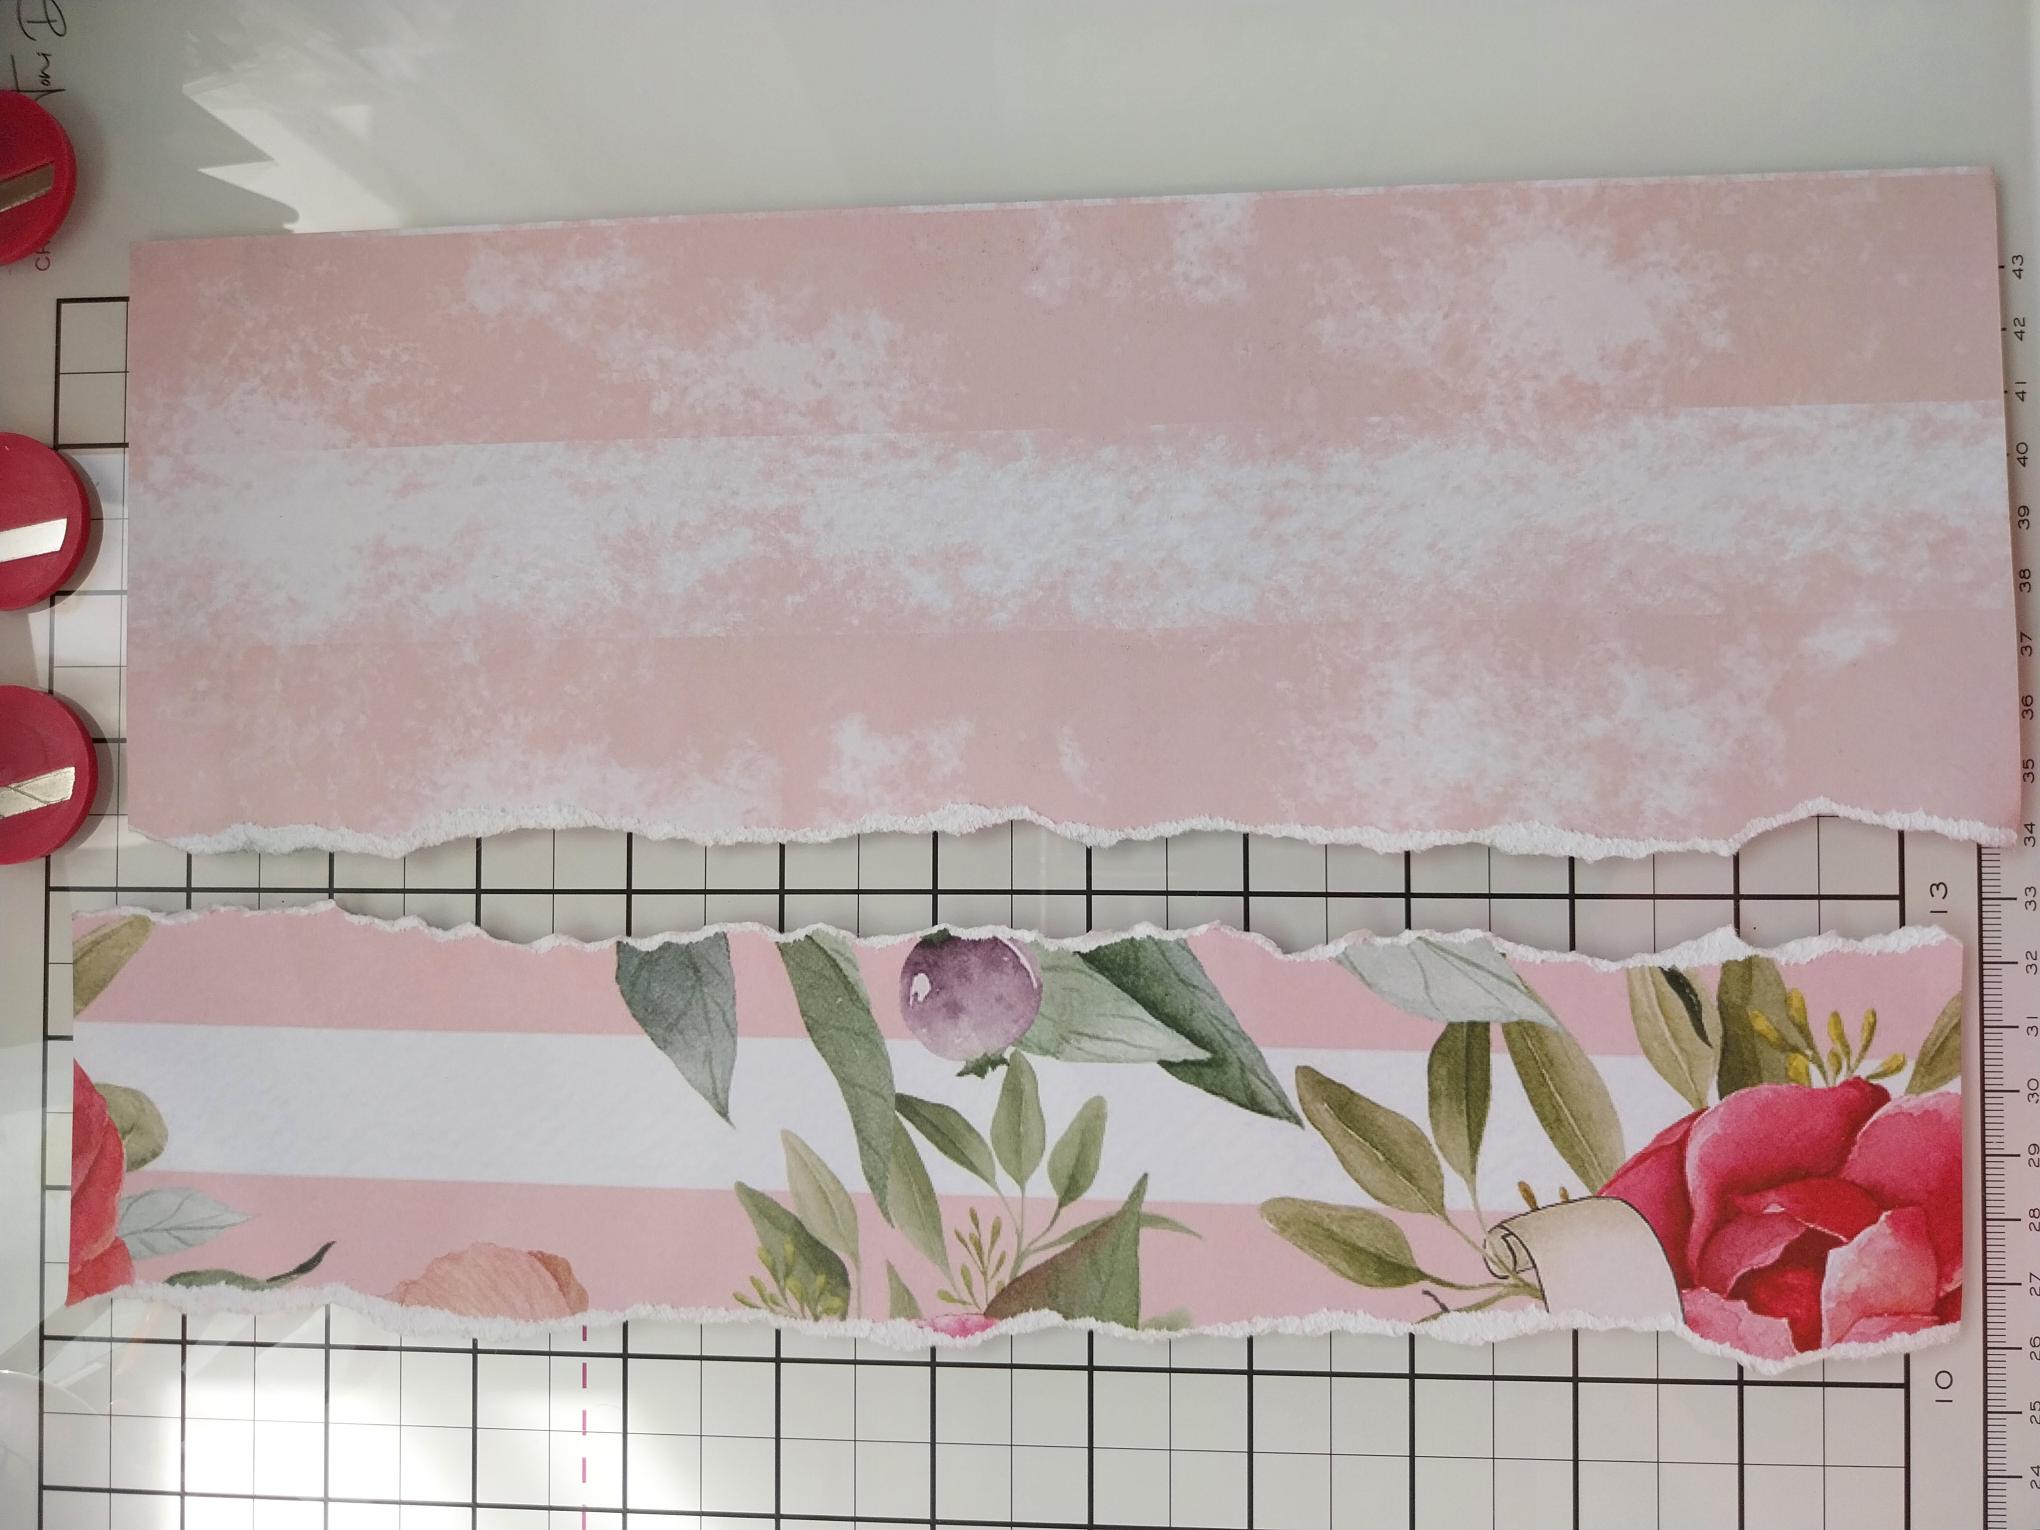
Turn the remaining paper to the other side and incorporating the beautiful floral print, tear a panel 7 3/4" in length and as wide as you want. |
|
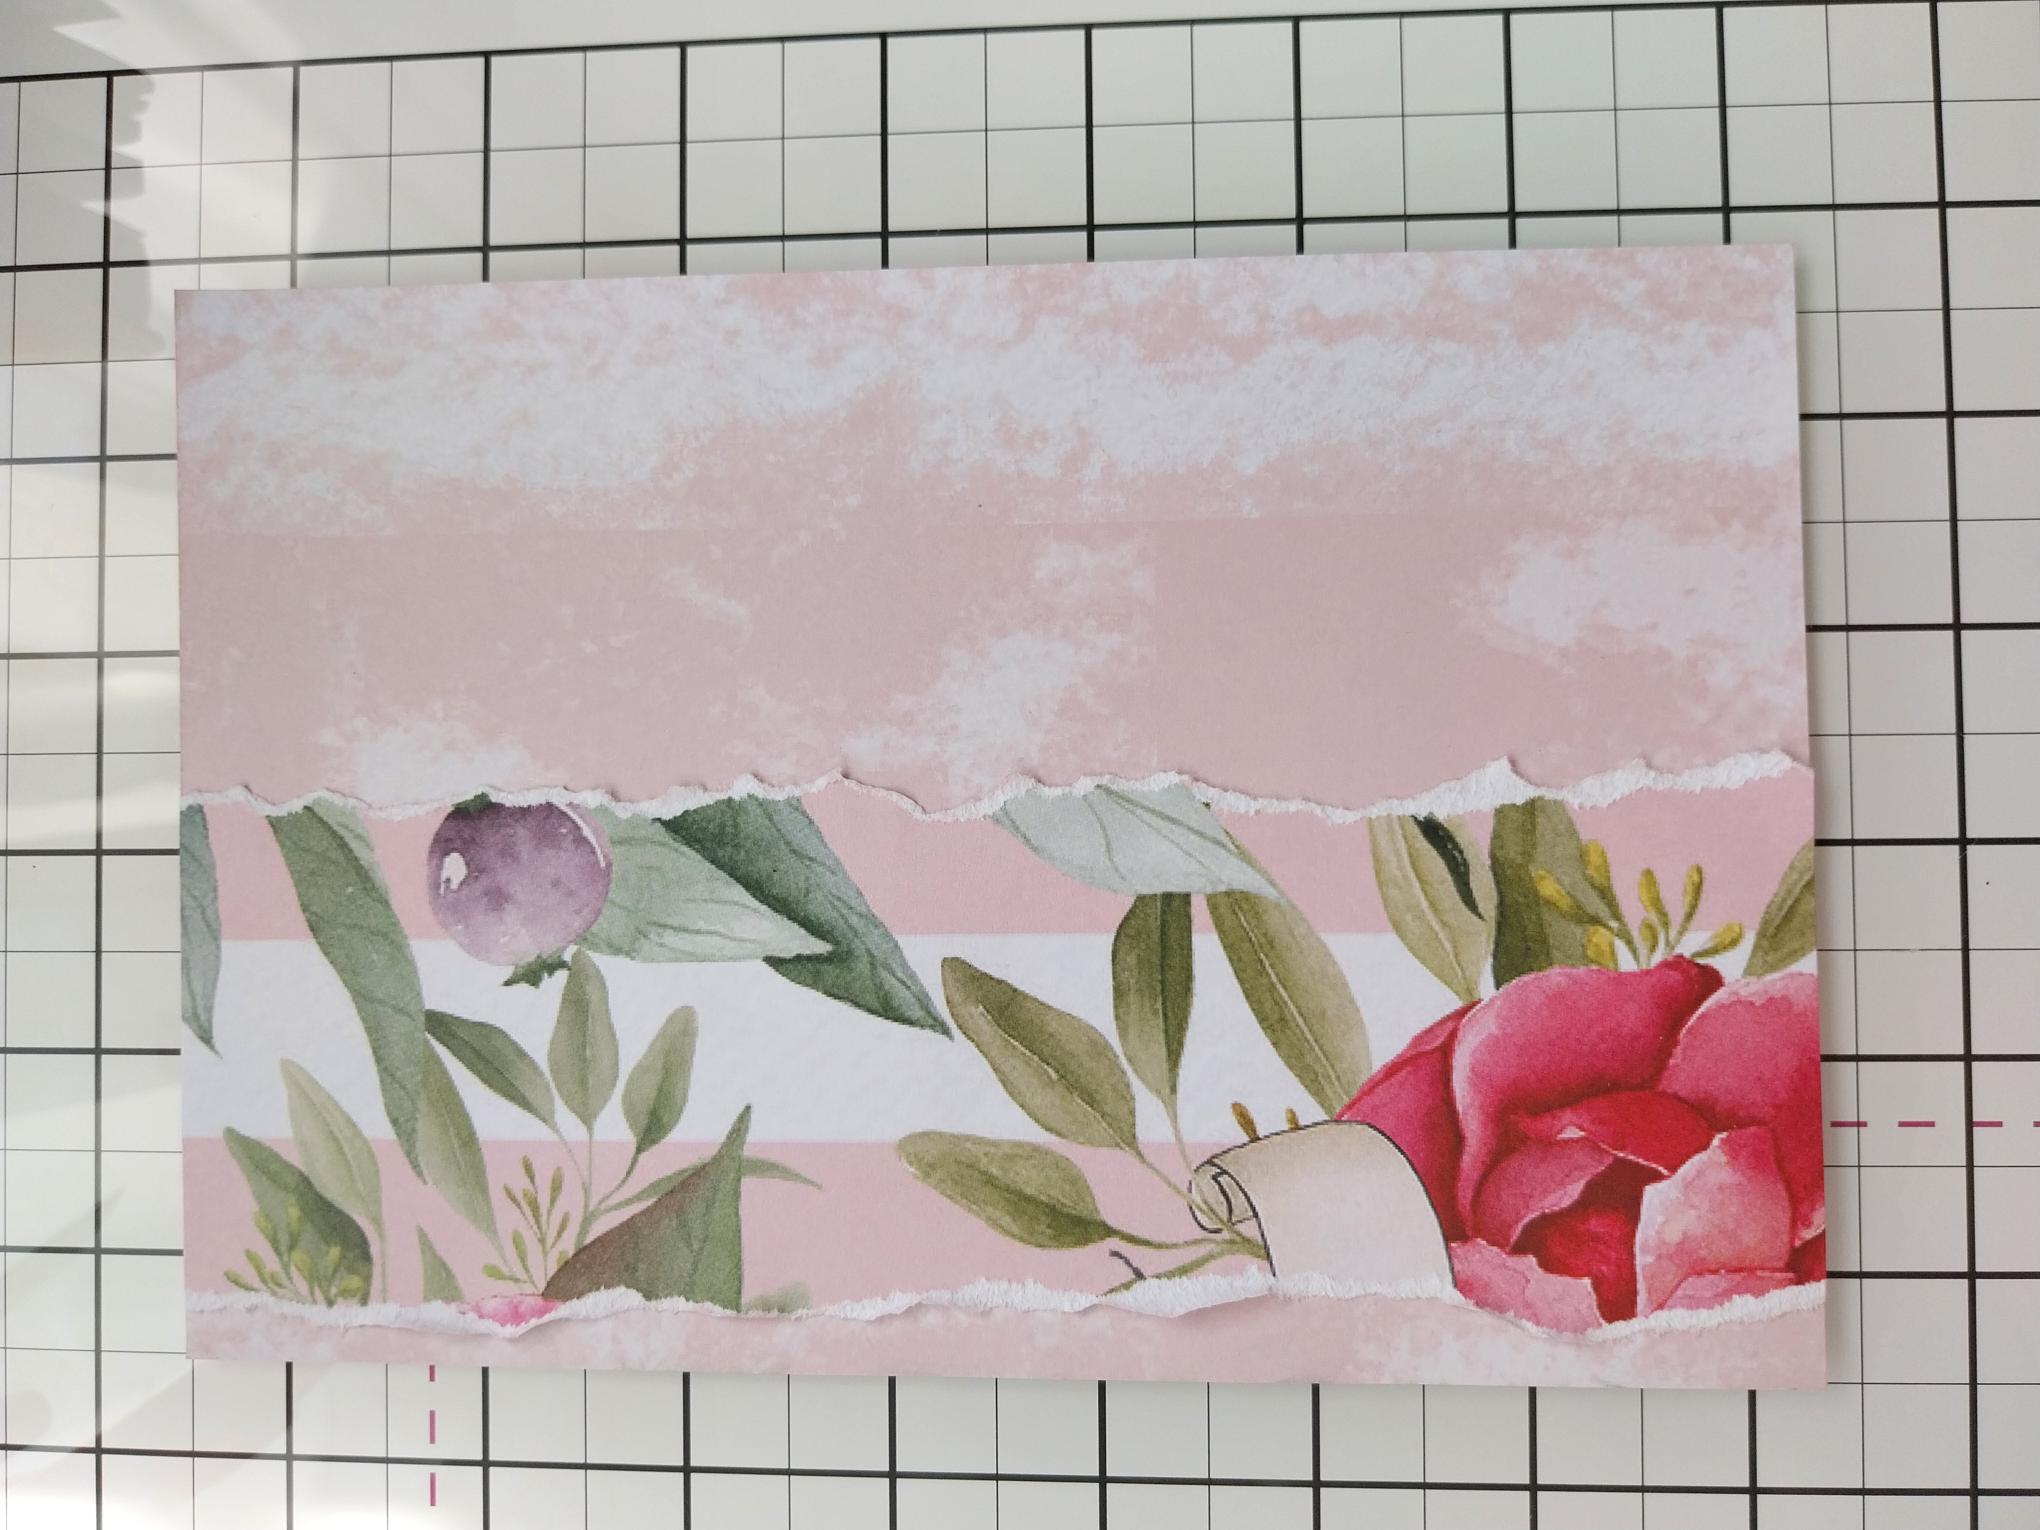
Adhere your torn floral panel down the left side of the striped paper, as shown. |
|
Adhere to your black card blank and pop to one side. |
|
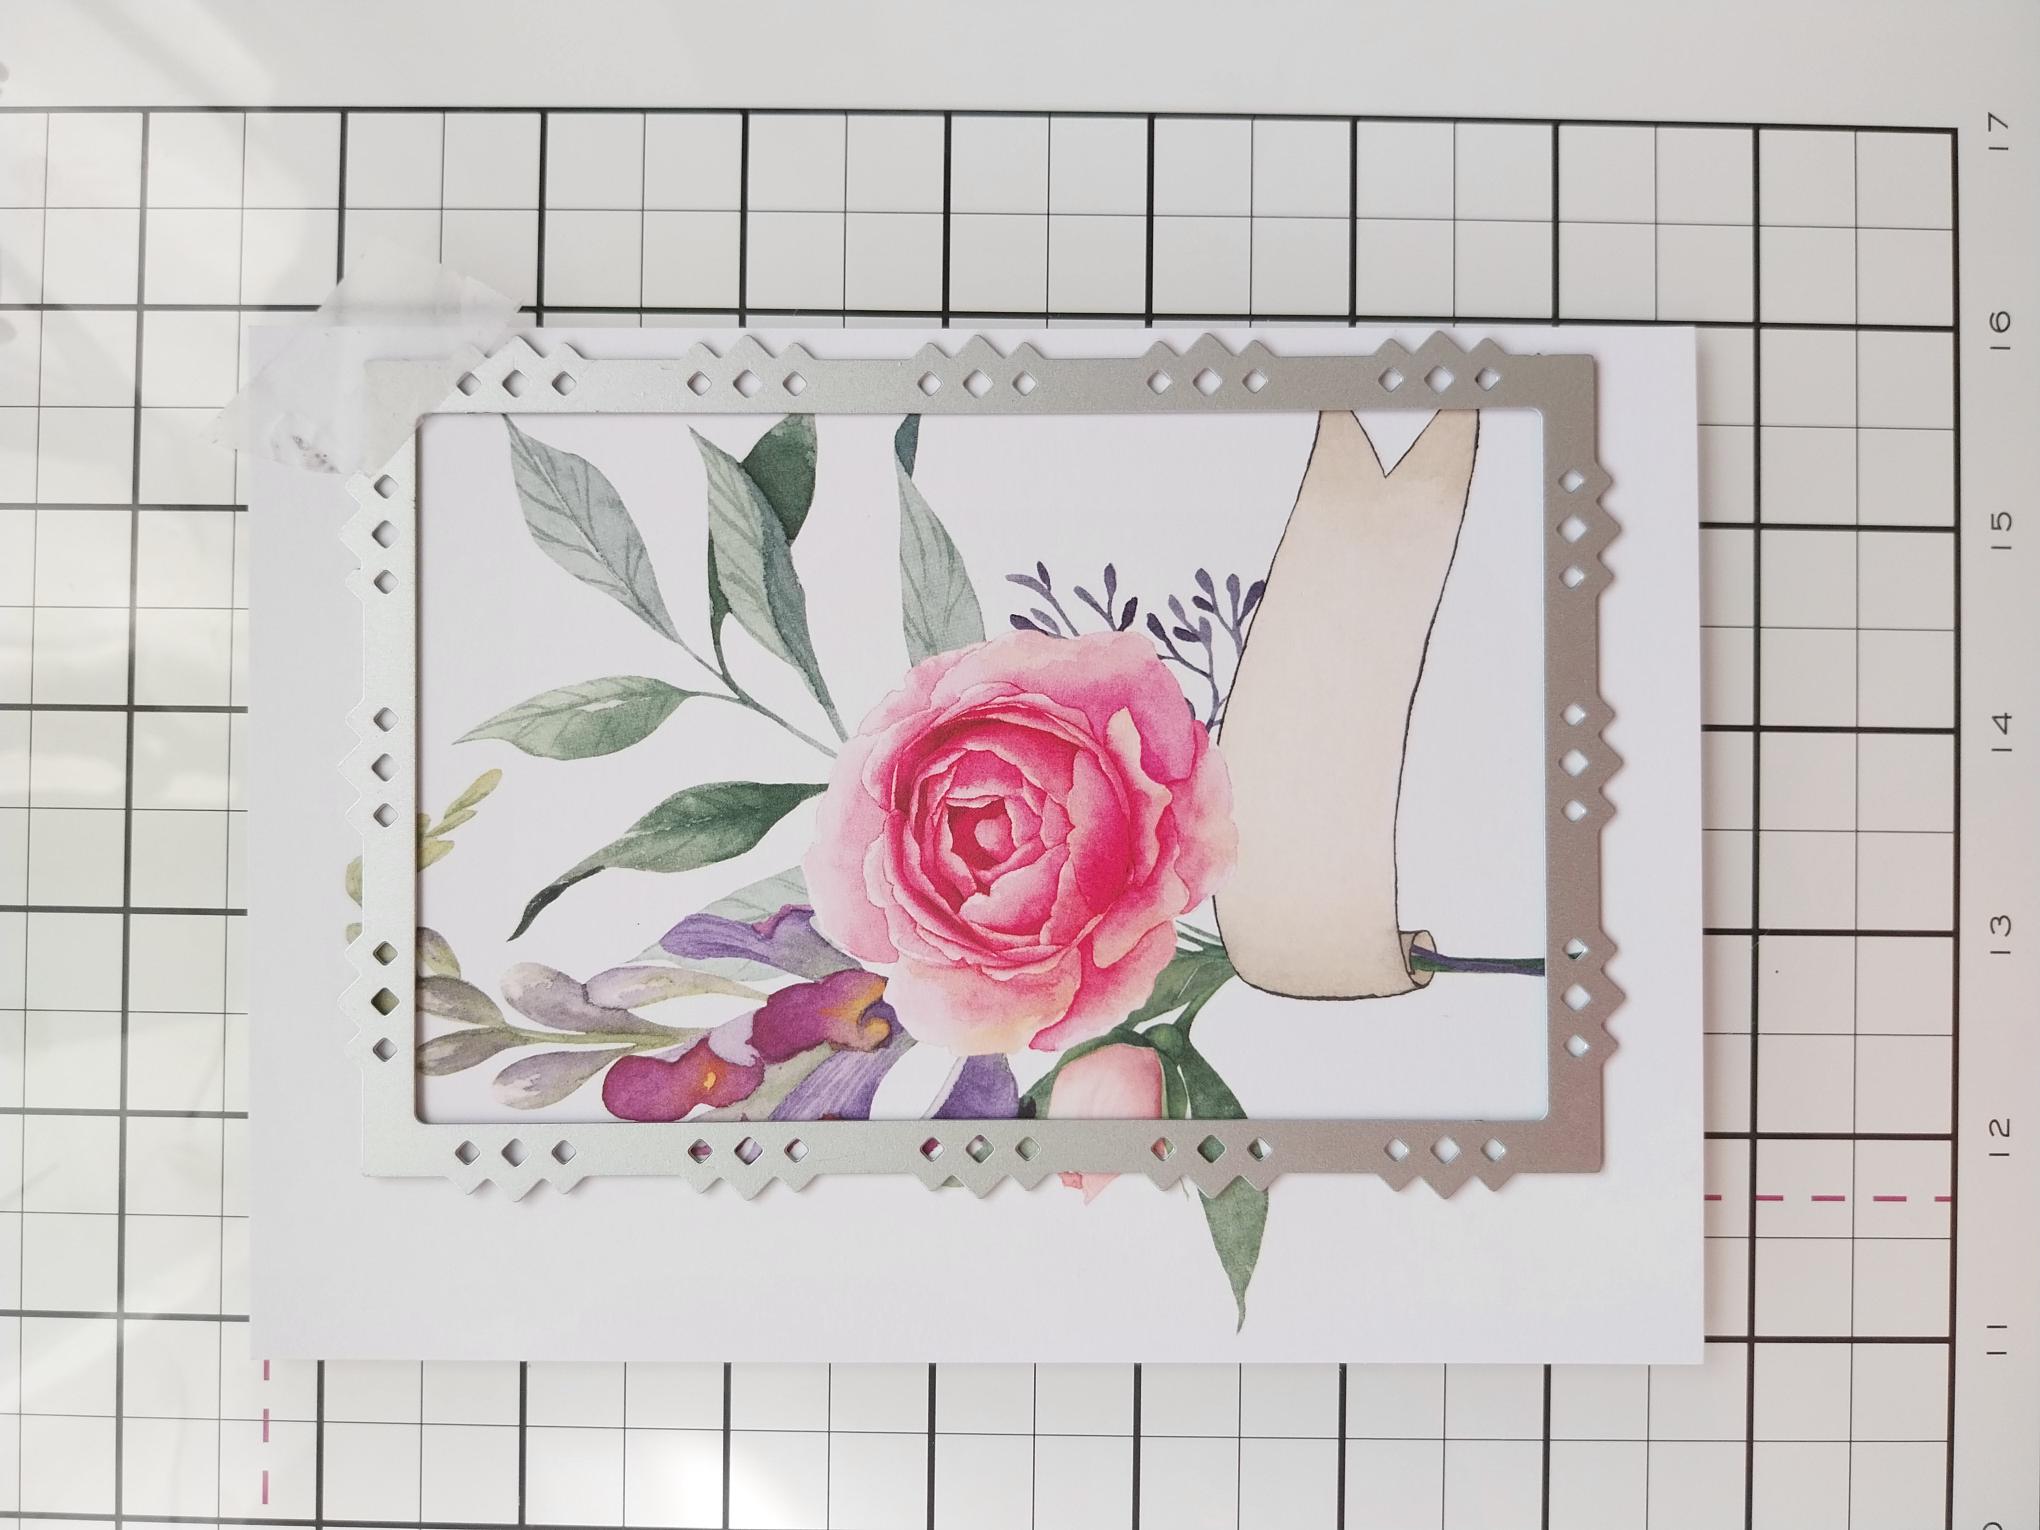
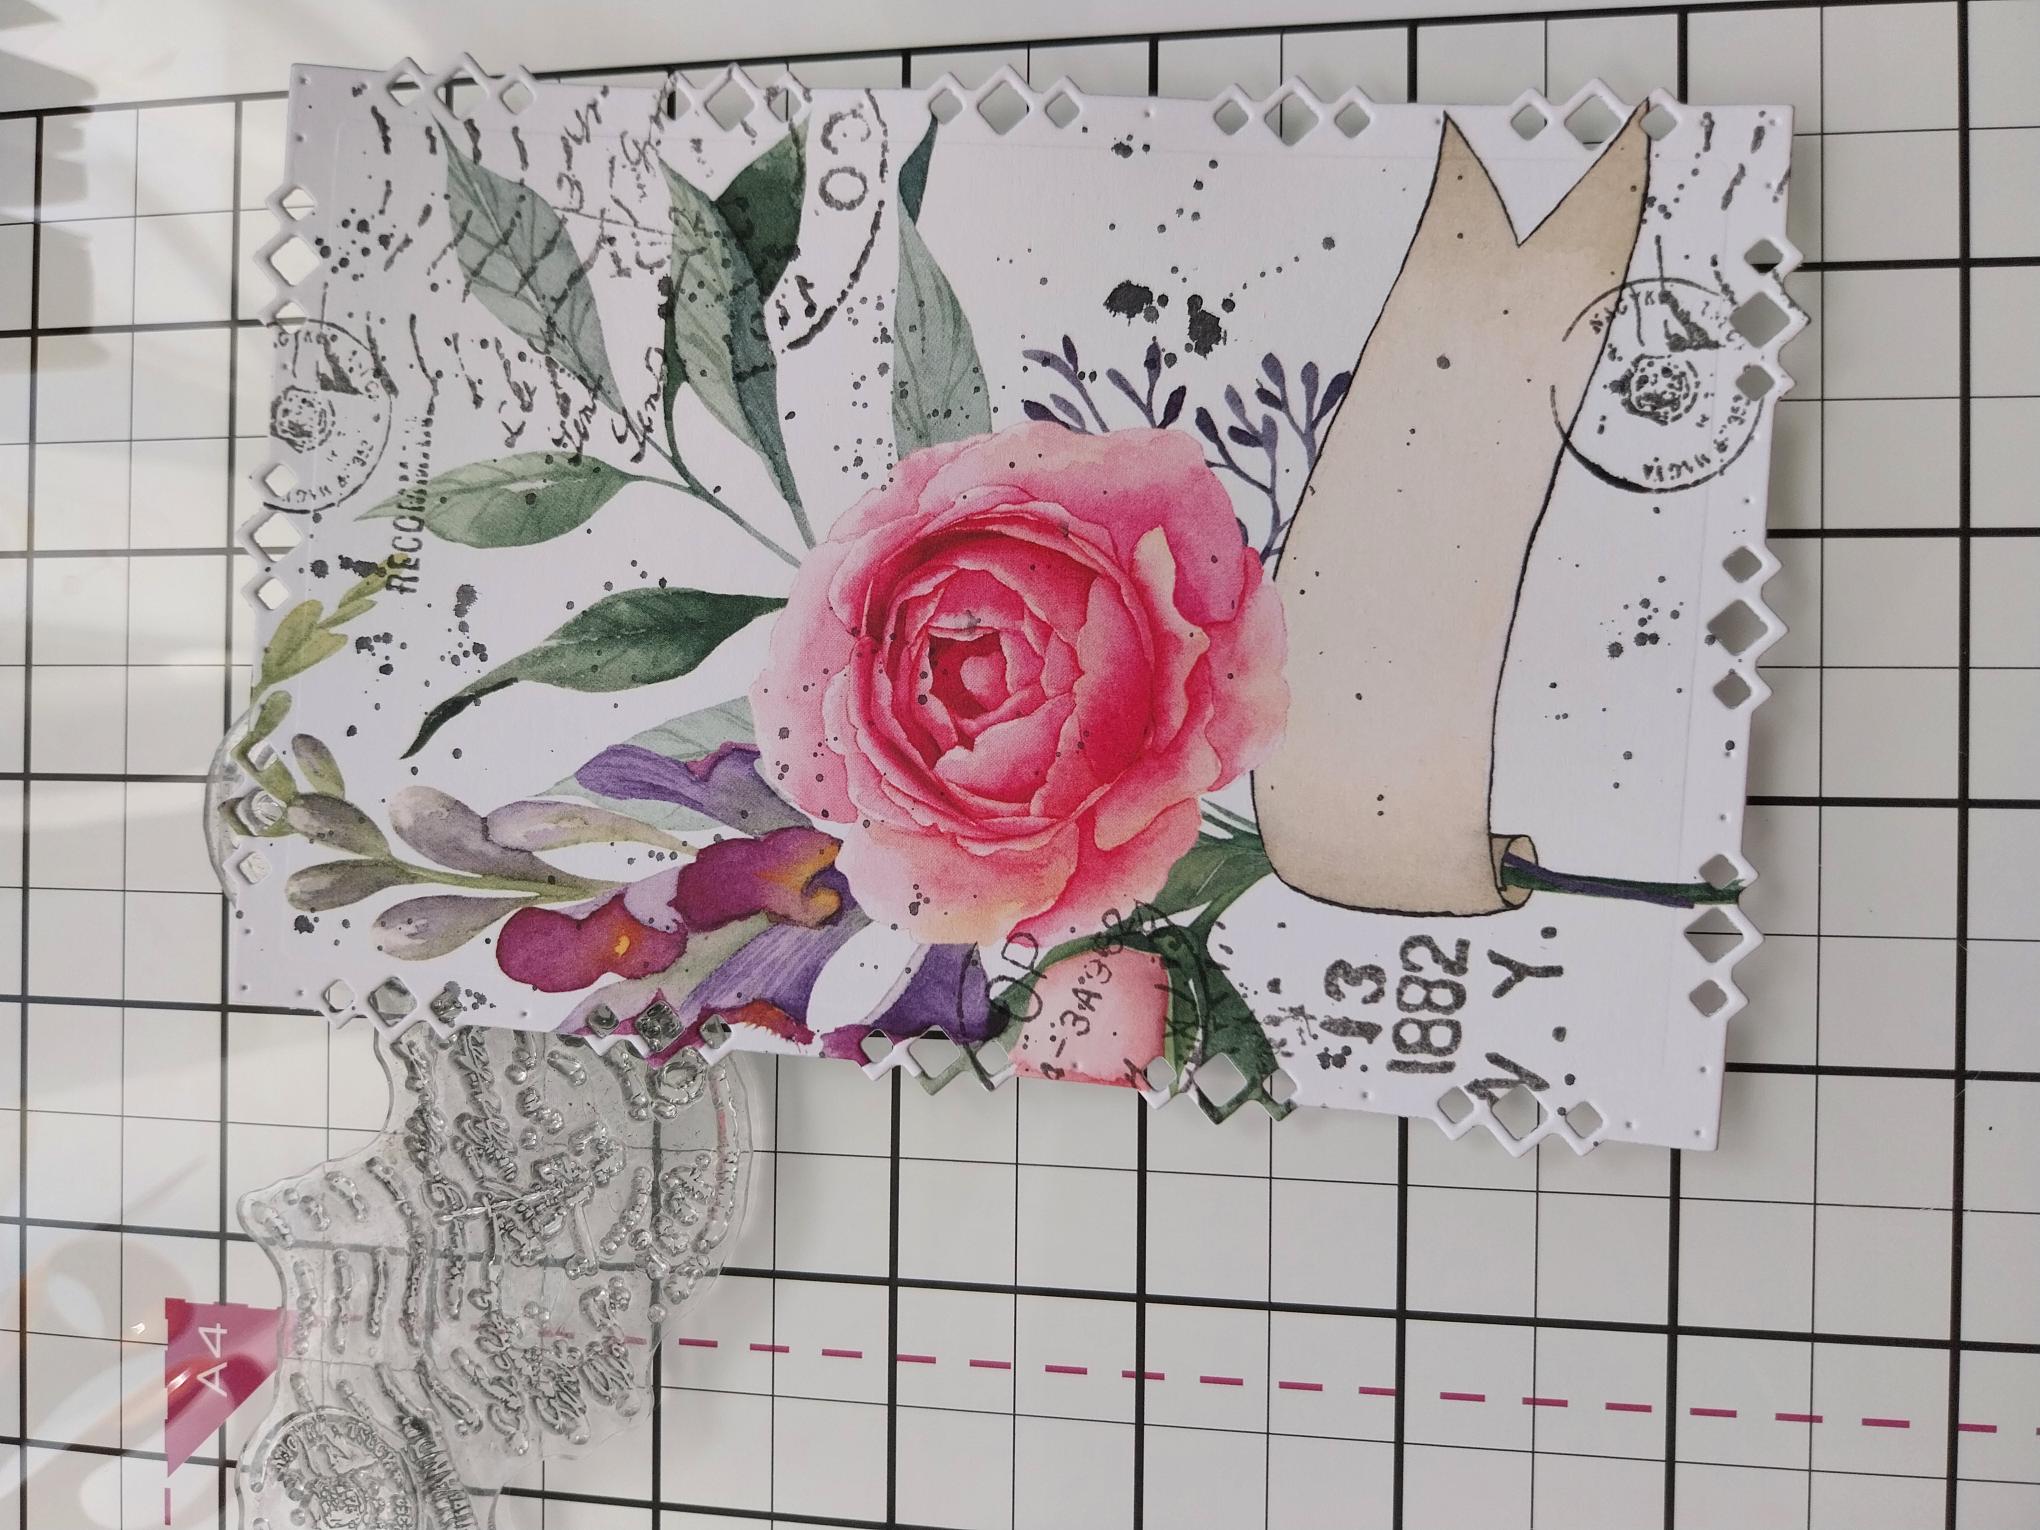
Remove this gorgeous painted mount from the pack. Place the Diamond Stitching nesting die (second size down), over the area of the printed image you want to use, then run it through your machine. |
|
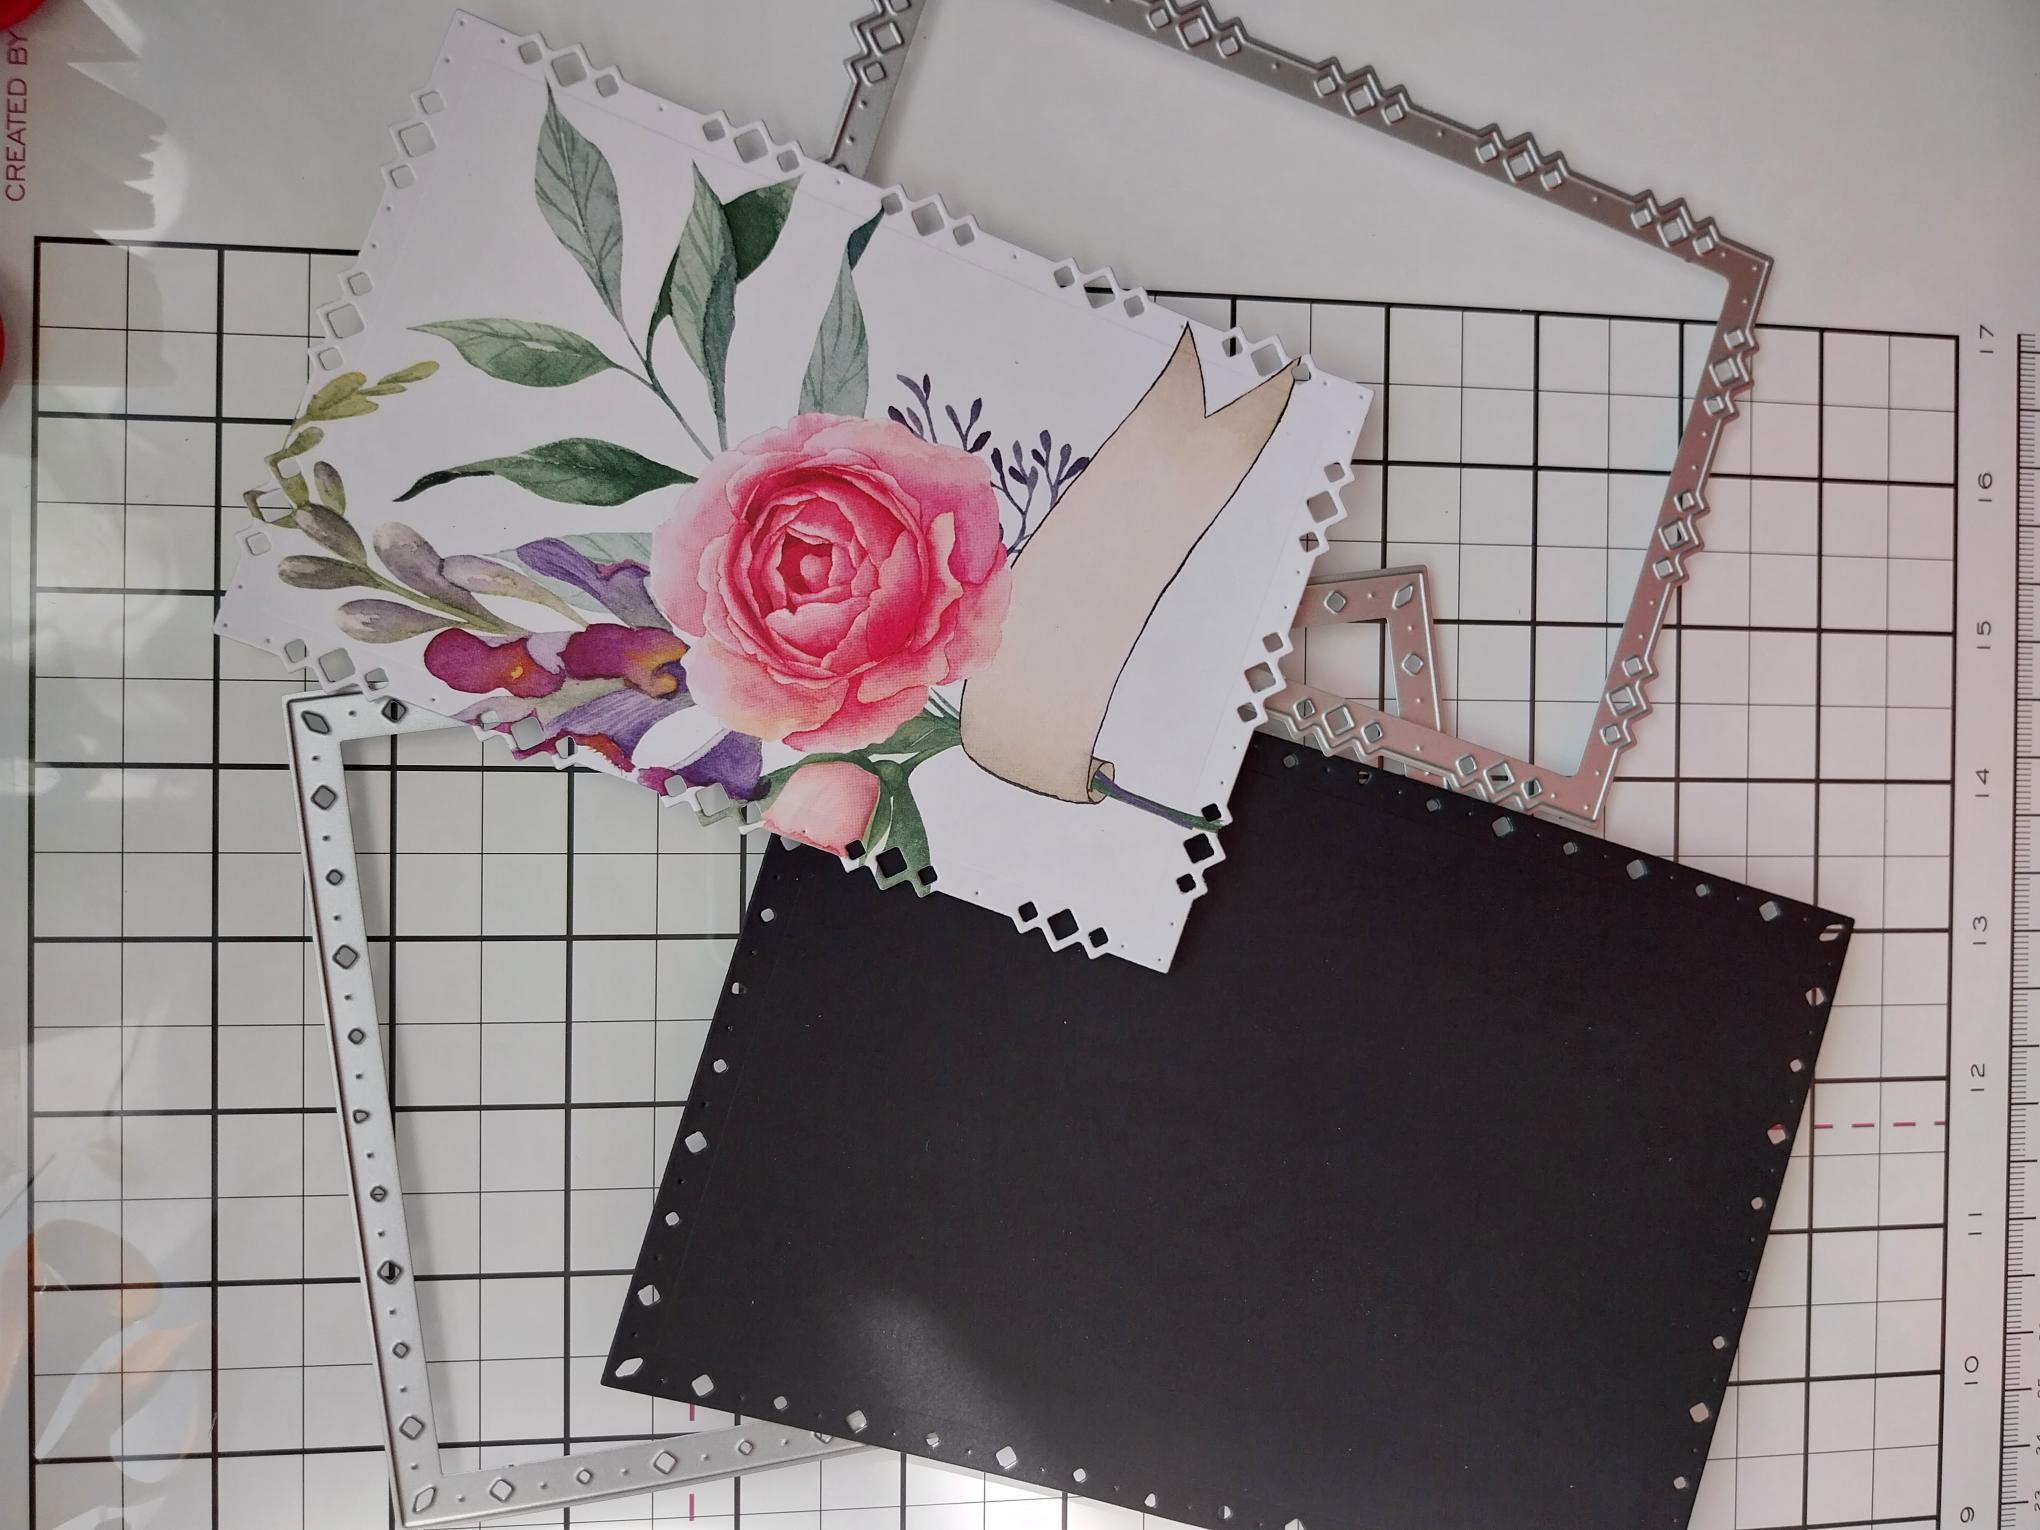
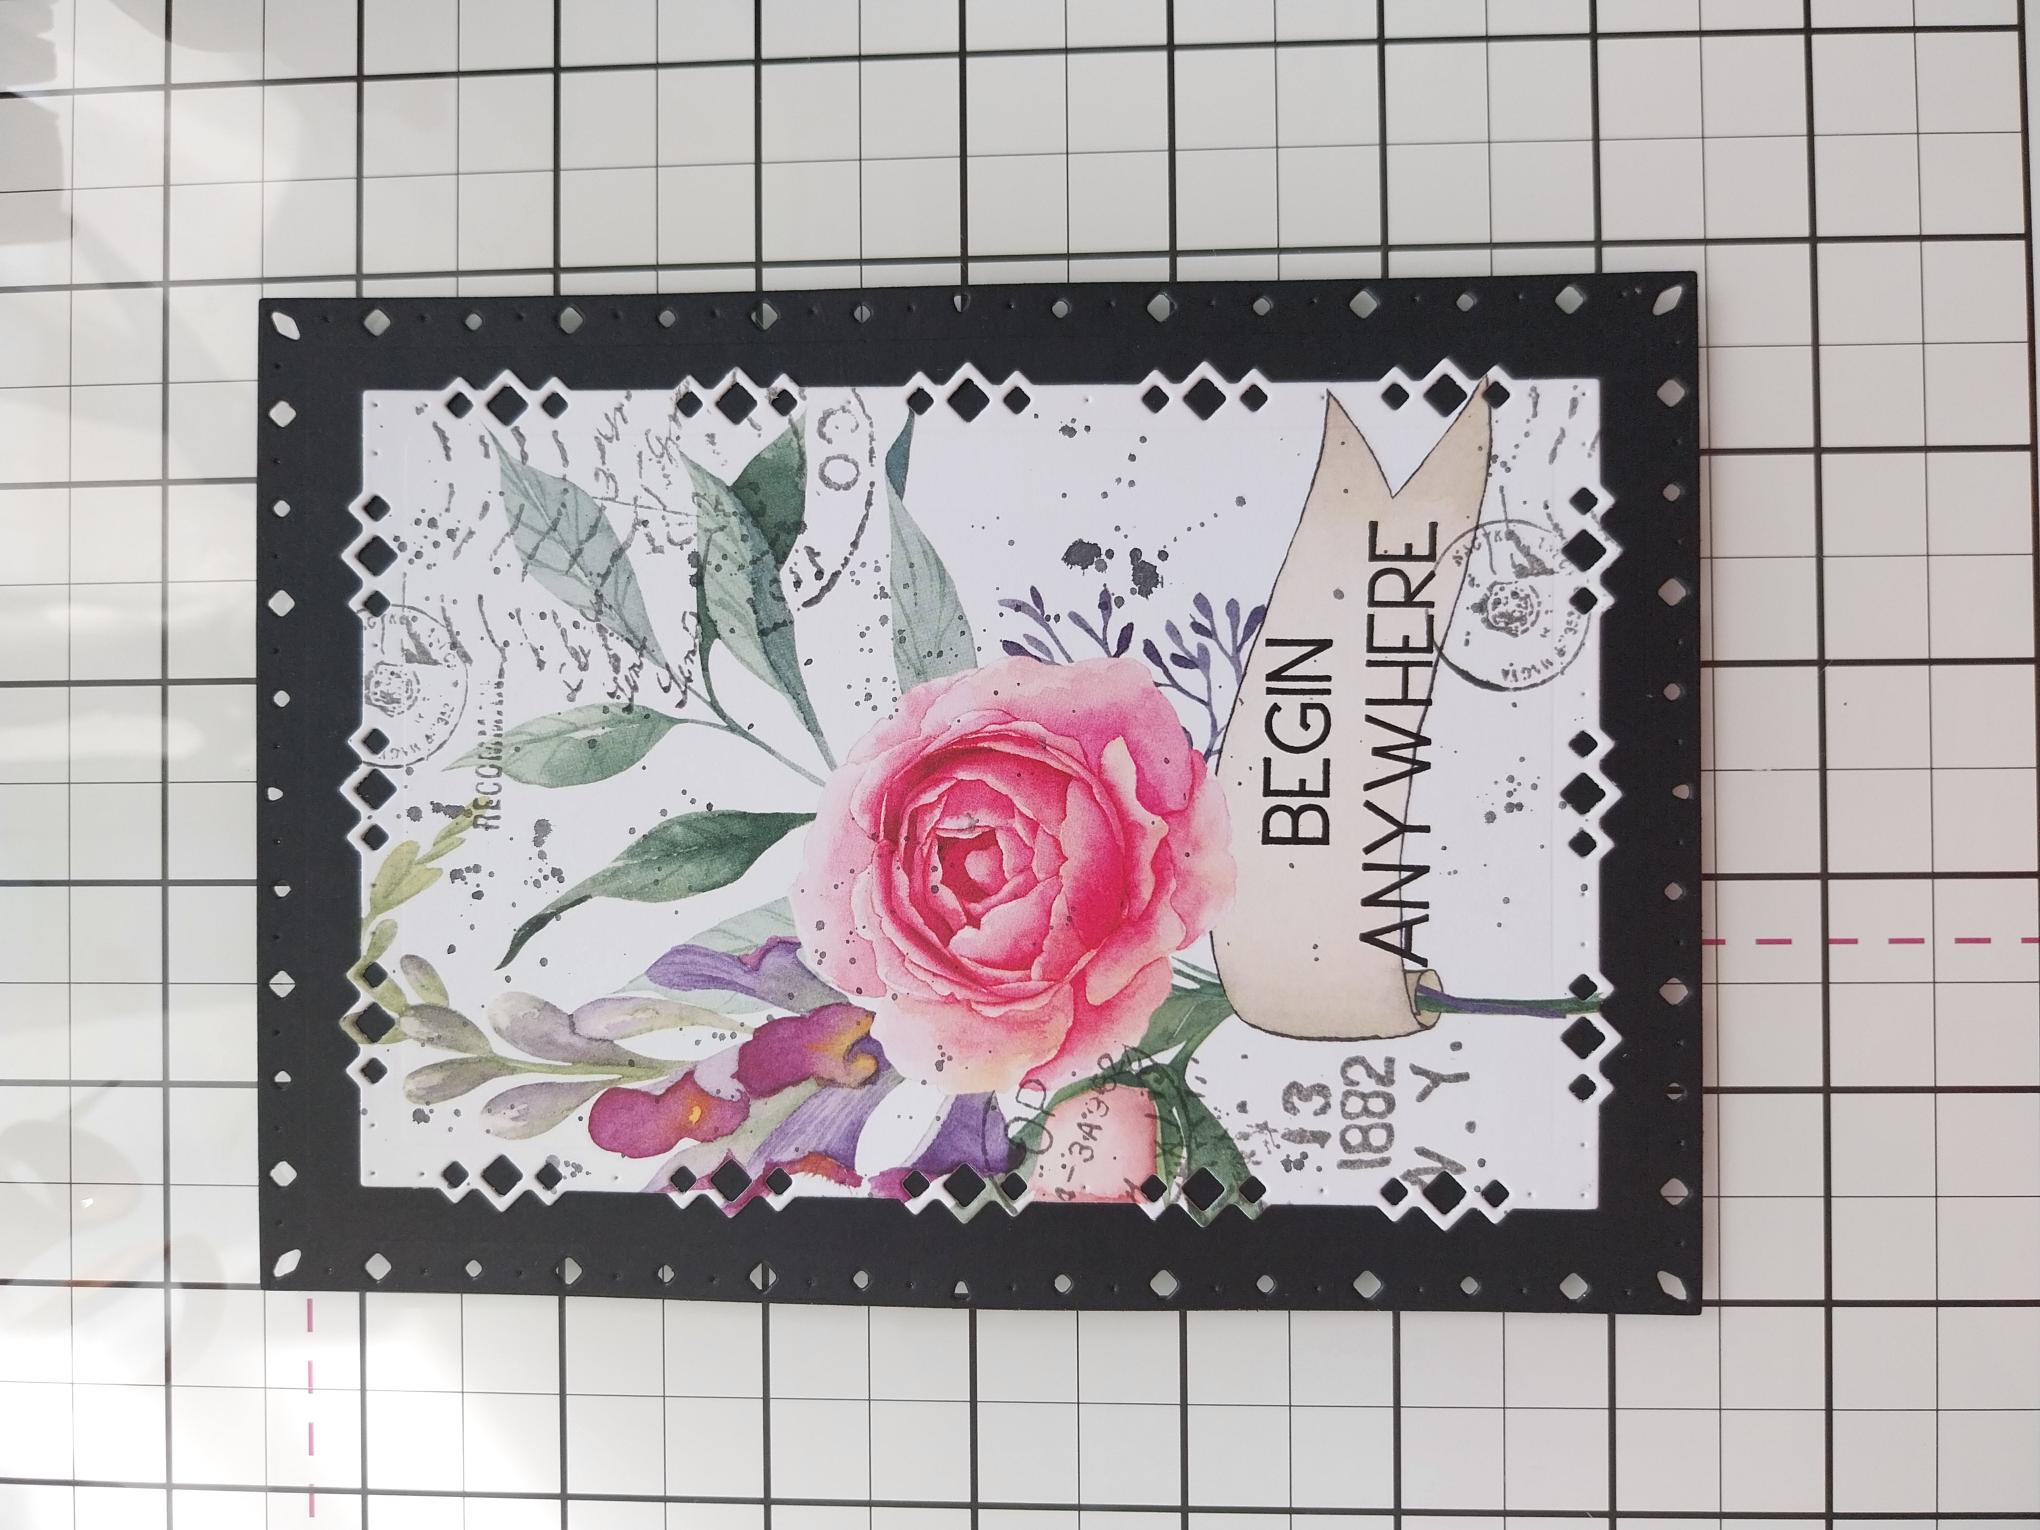
Use the largest die to cut a "mat" for your painted mount, from black cardstock. |
|
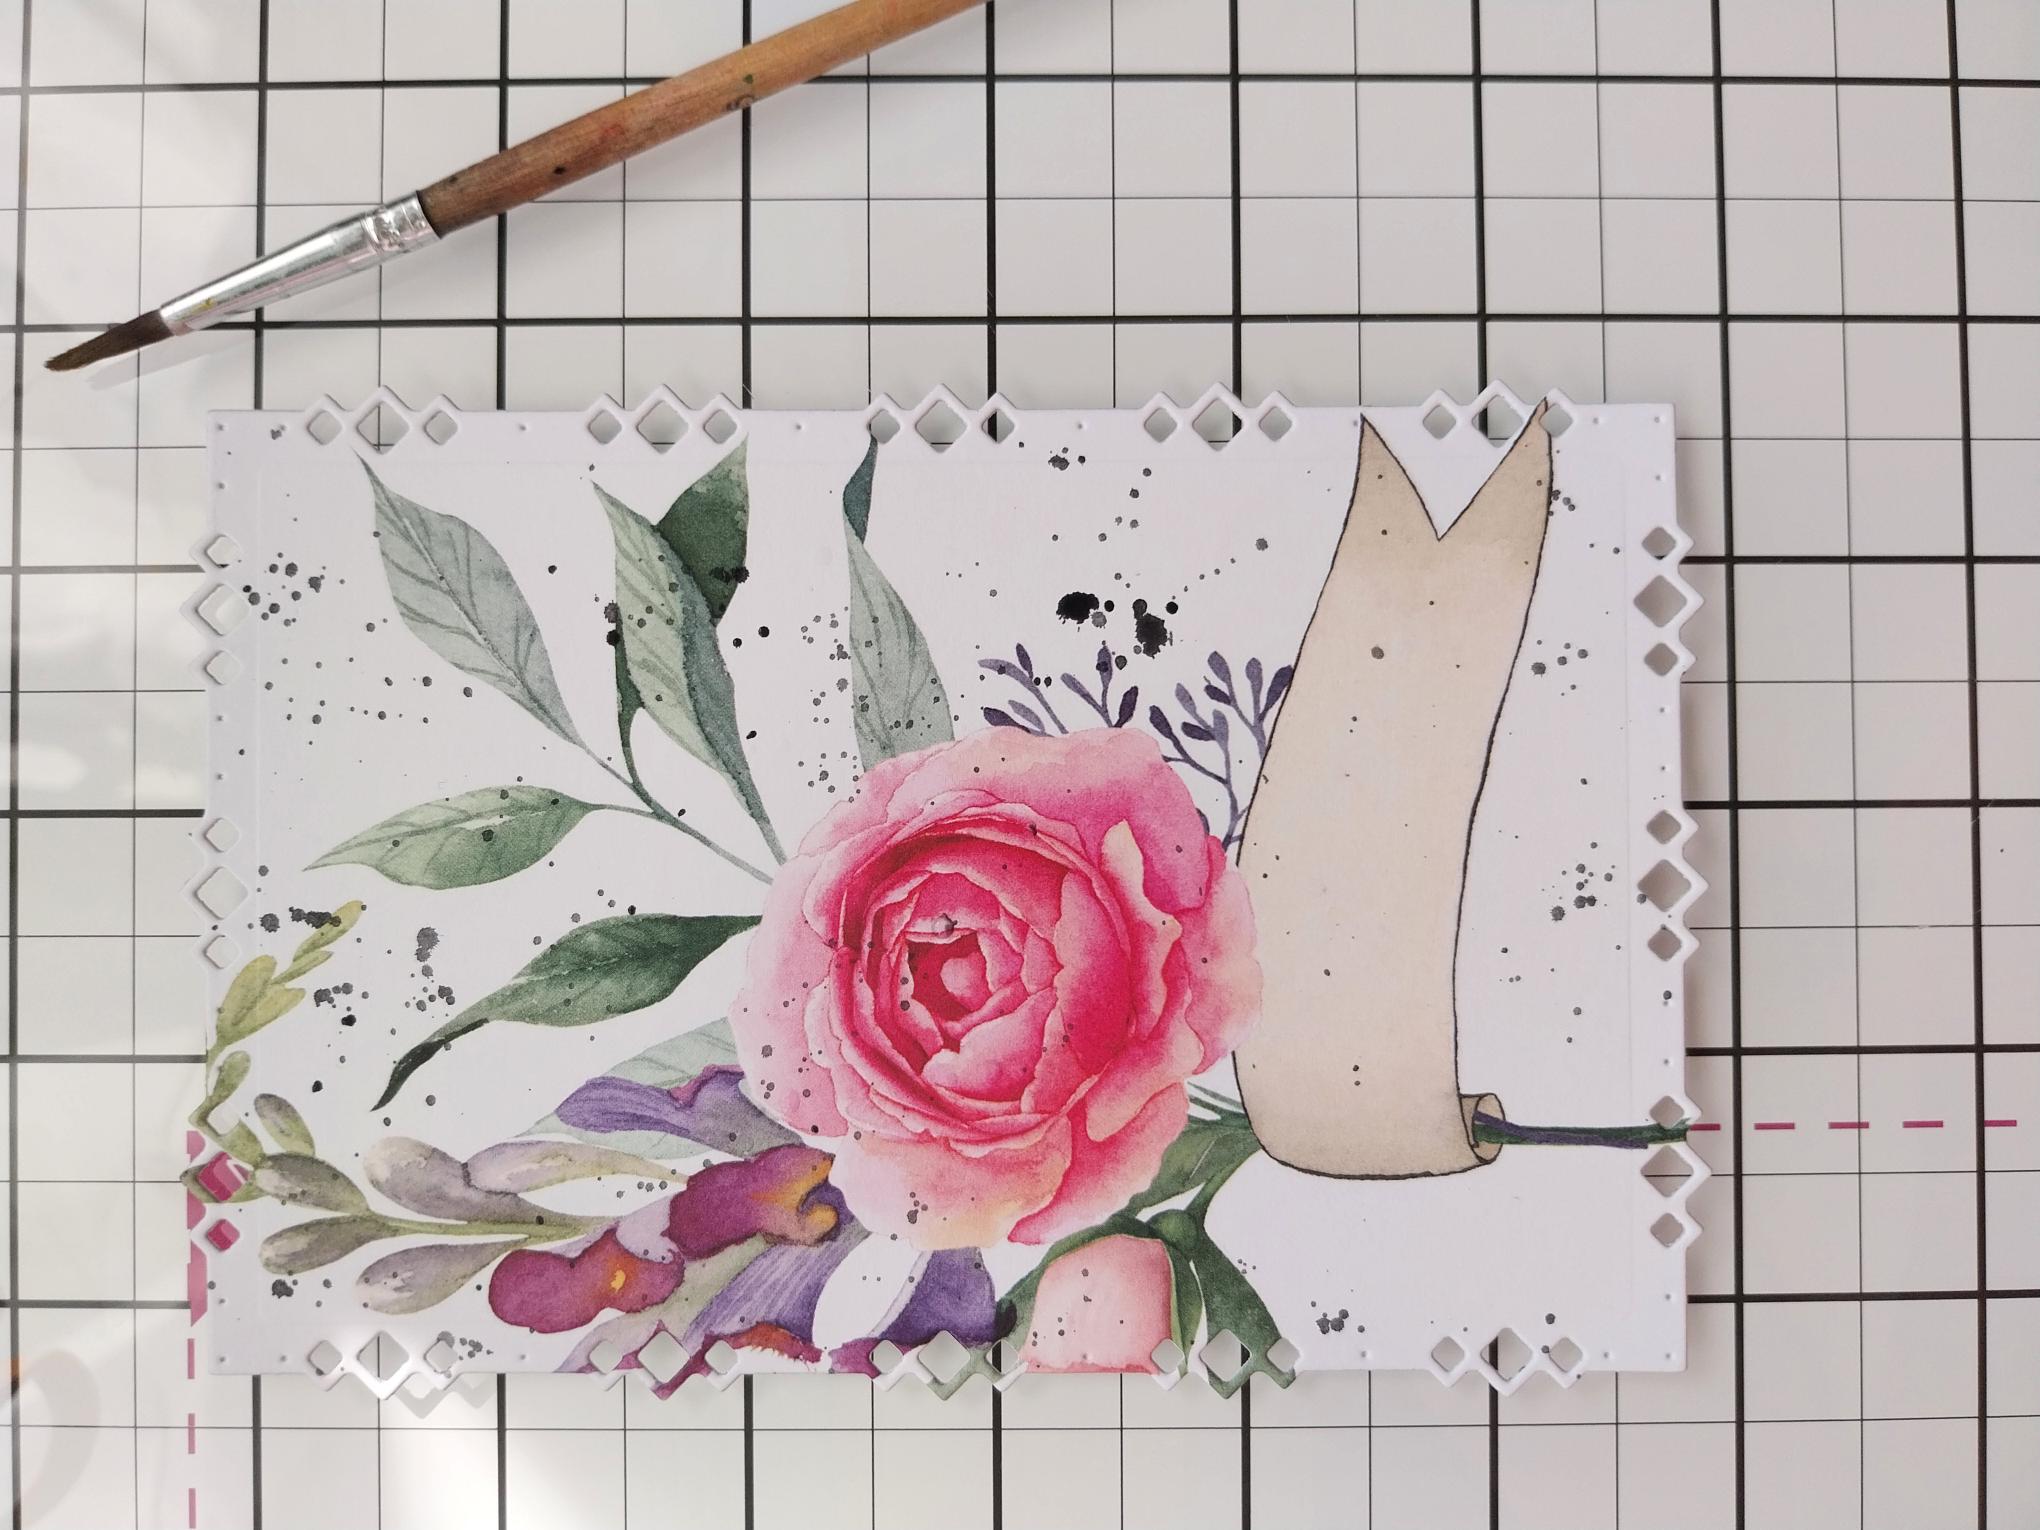
Water down a little Black Soot Distress ink and use a paint brush to splatter your floral artwork. I like lots of splats but the choice is yours!! |
|
Ink up one of the stamps from the Retro set, with Smokey Grey Versafine and randomly stamp on to your floral mount. Use first and second generation stamping for a dimensional effect. First and second generation stamping is when you re-stamp 2 or 3 times WITHOUT re-inking the stamp, giving you a delicate, watermark image. |
|
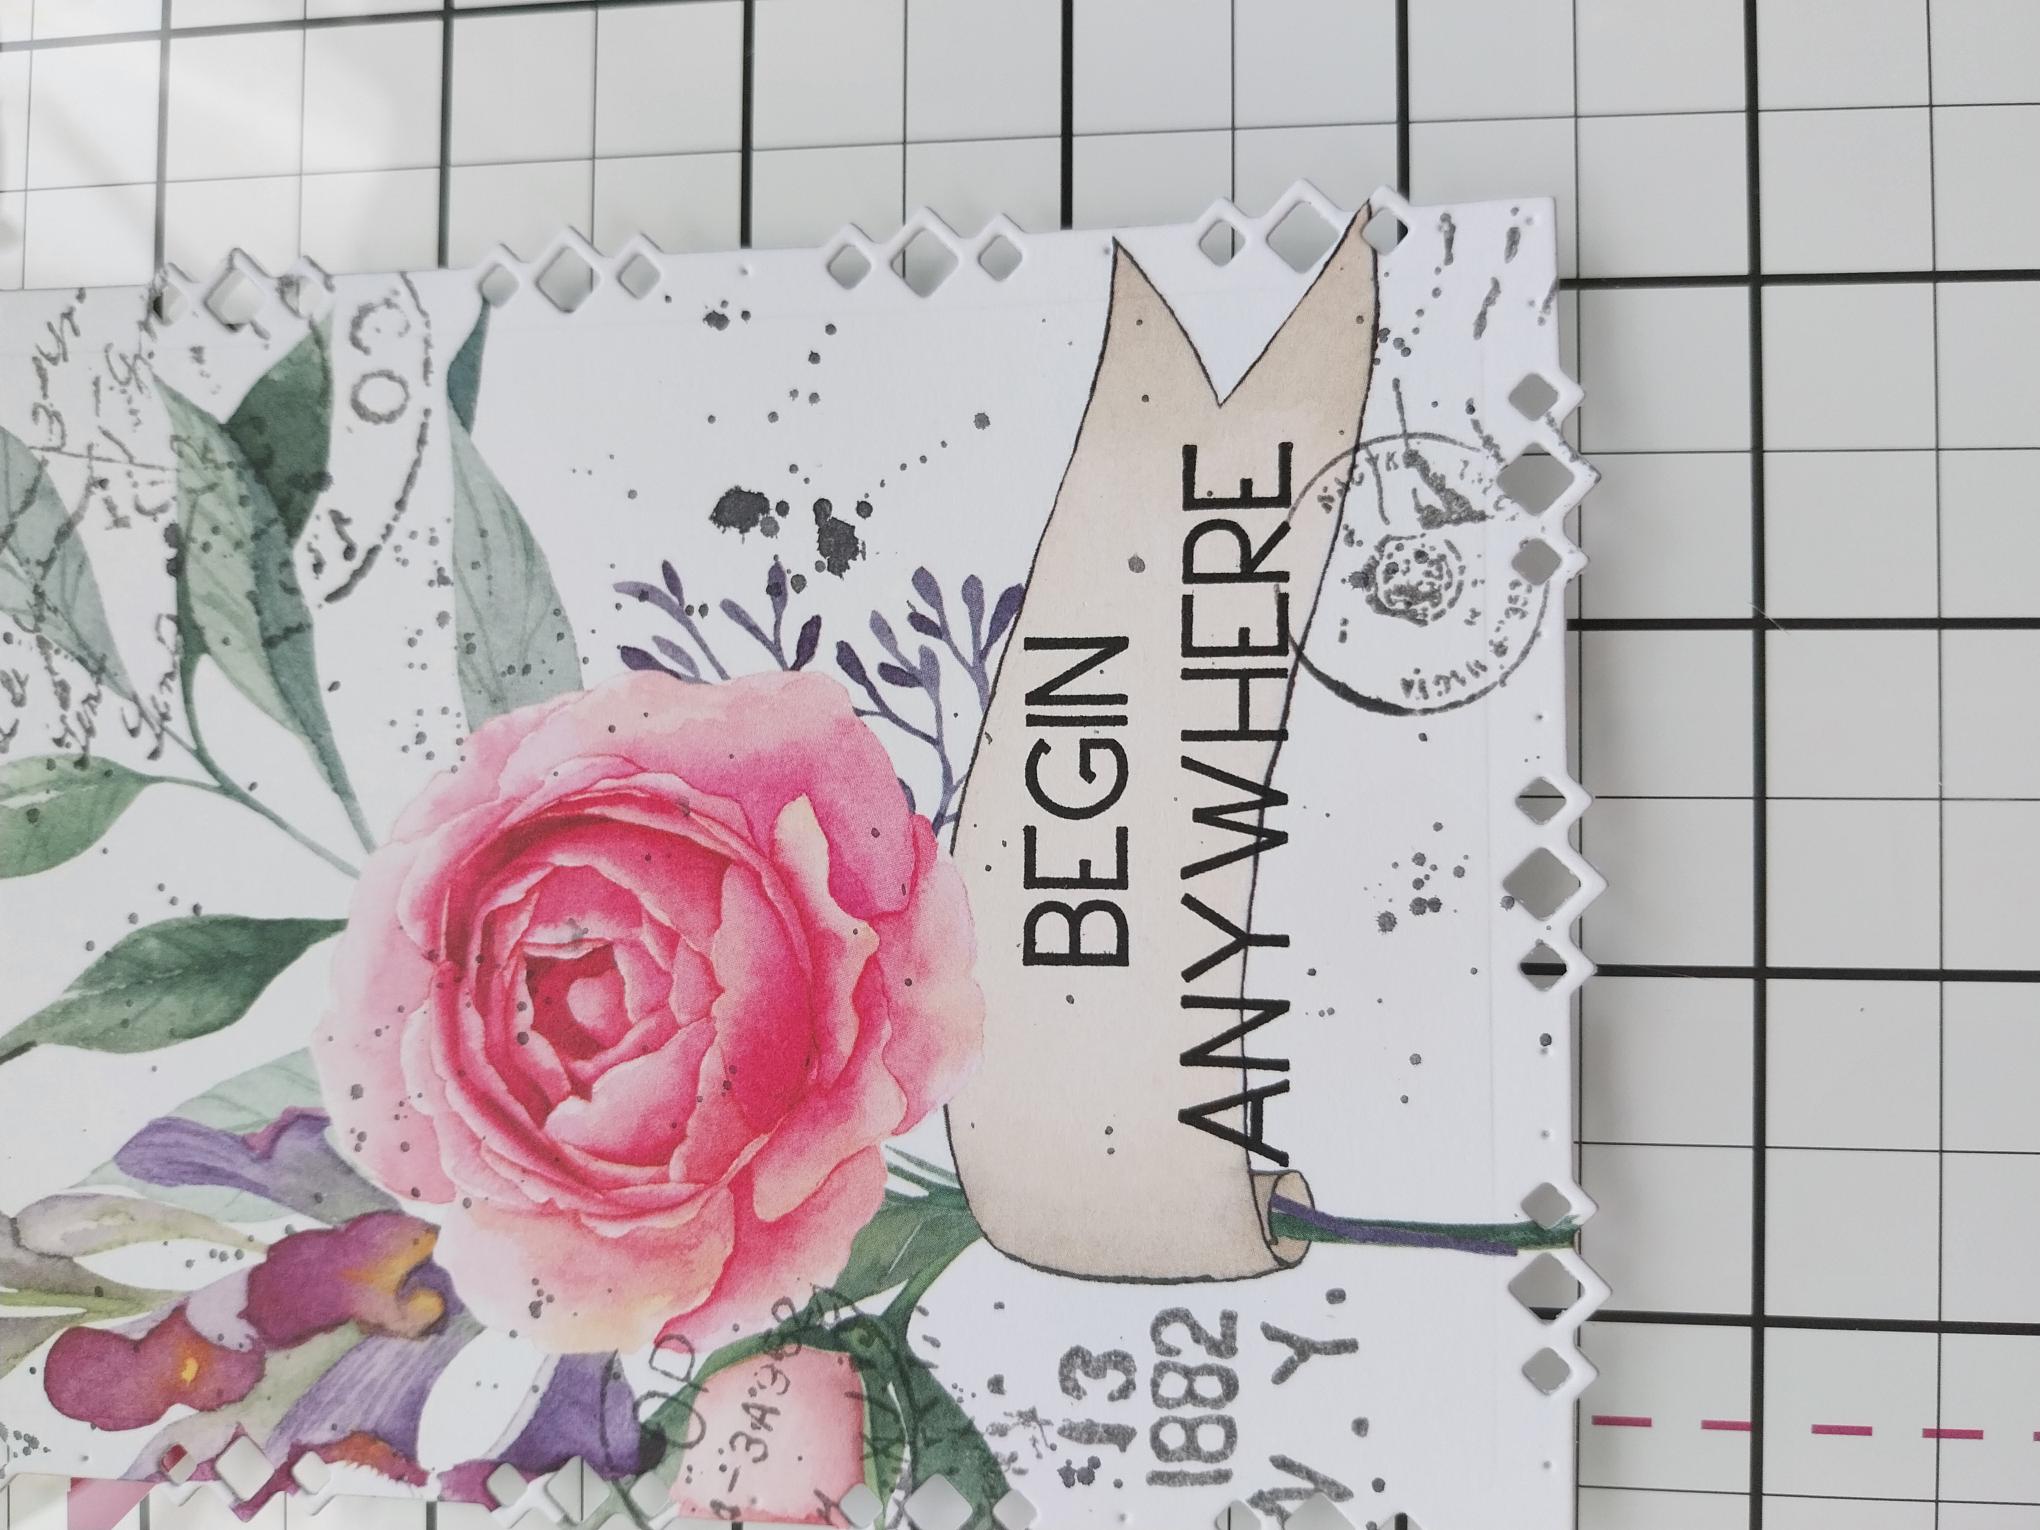
Stamp the sentiment, from the Ruby Blooms stamp set, in Midnight, across the printed banner. |
|
Adhere your printed mount on to the black, frame "mat". |
|
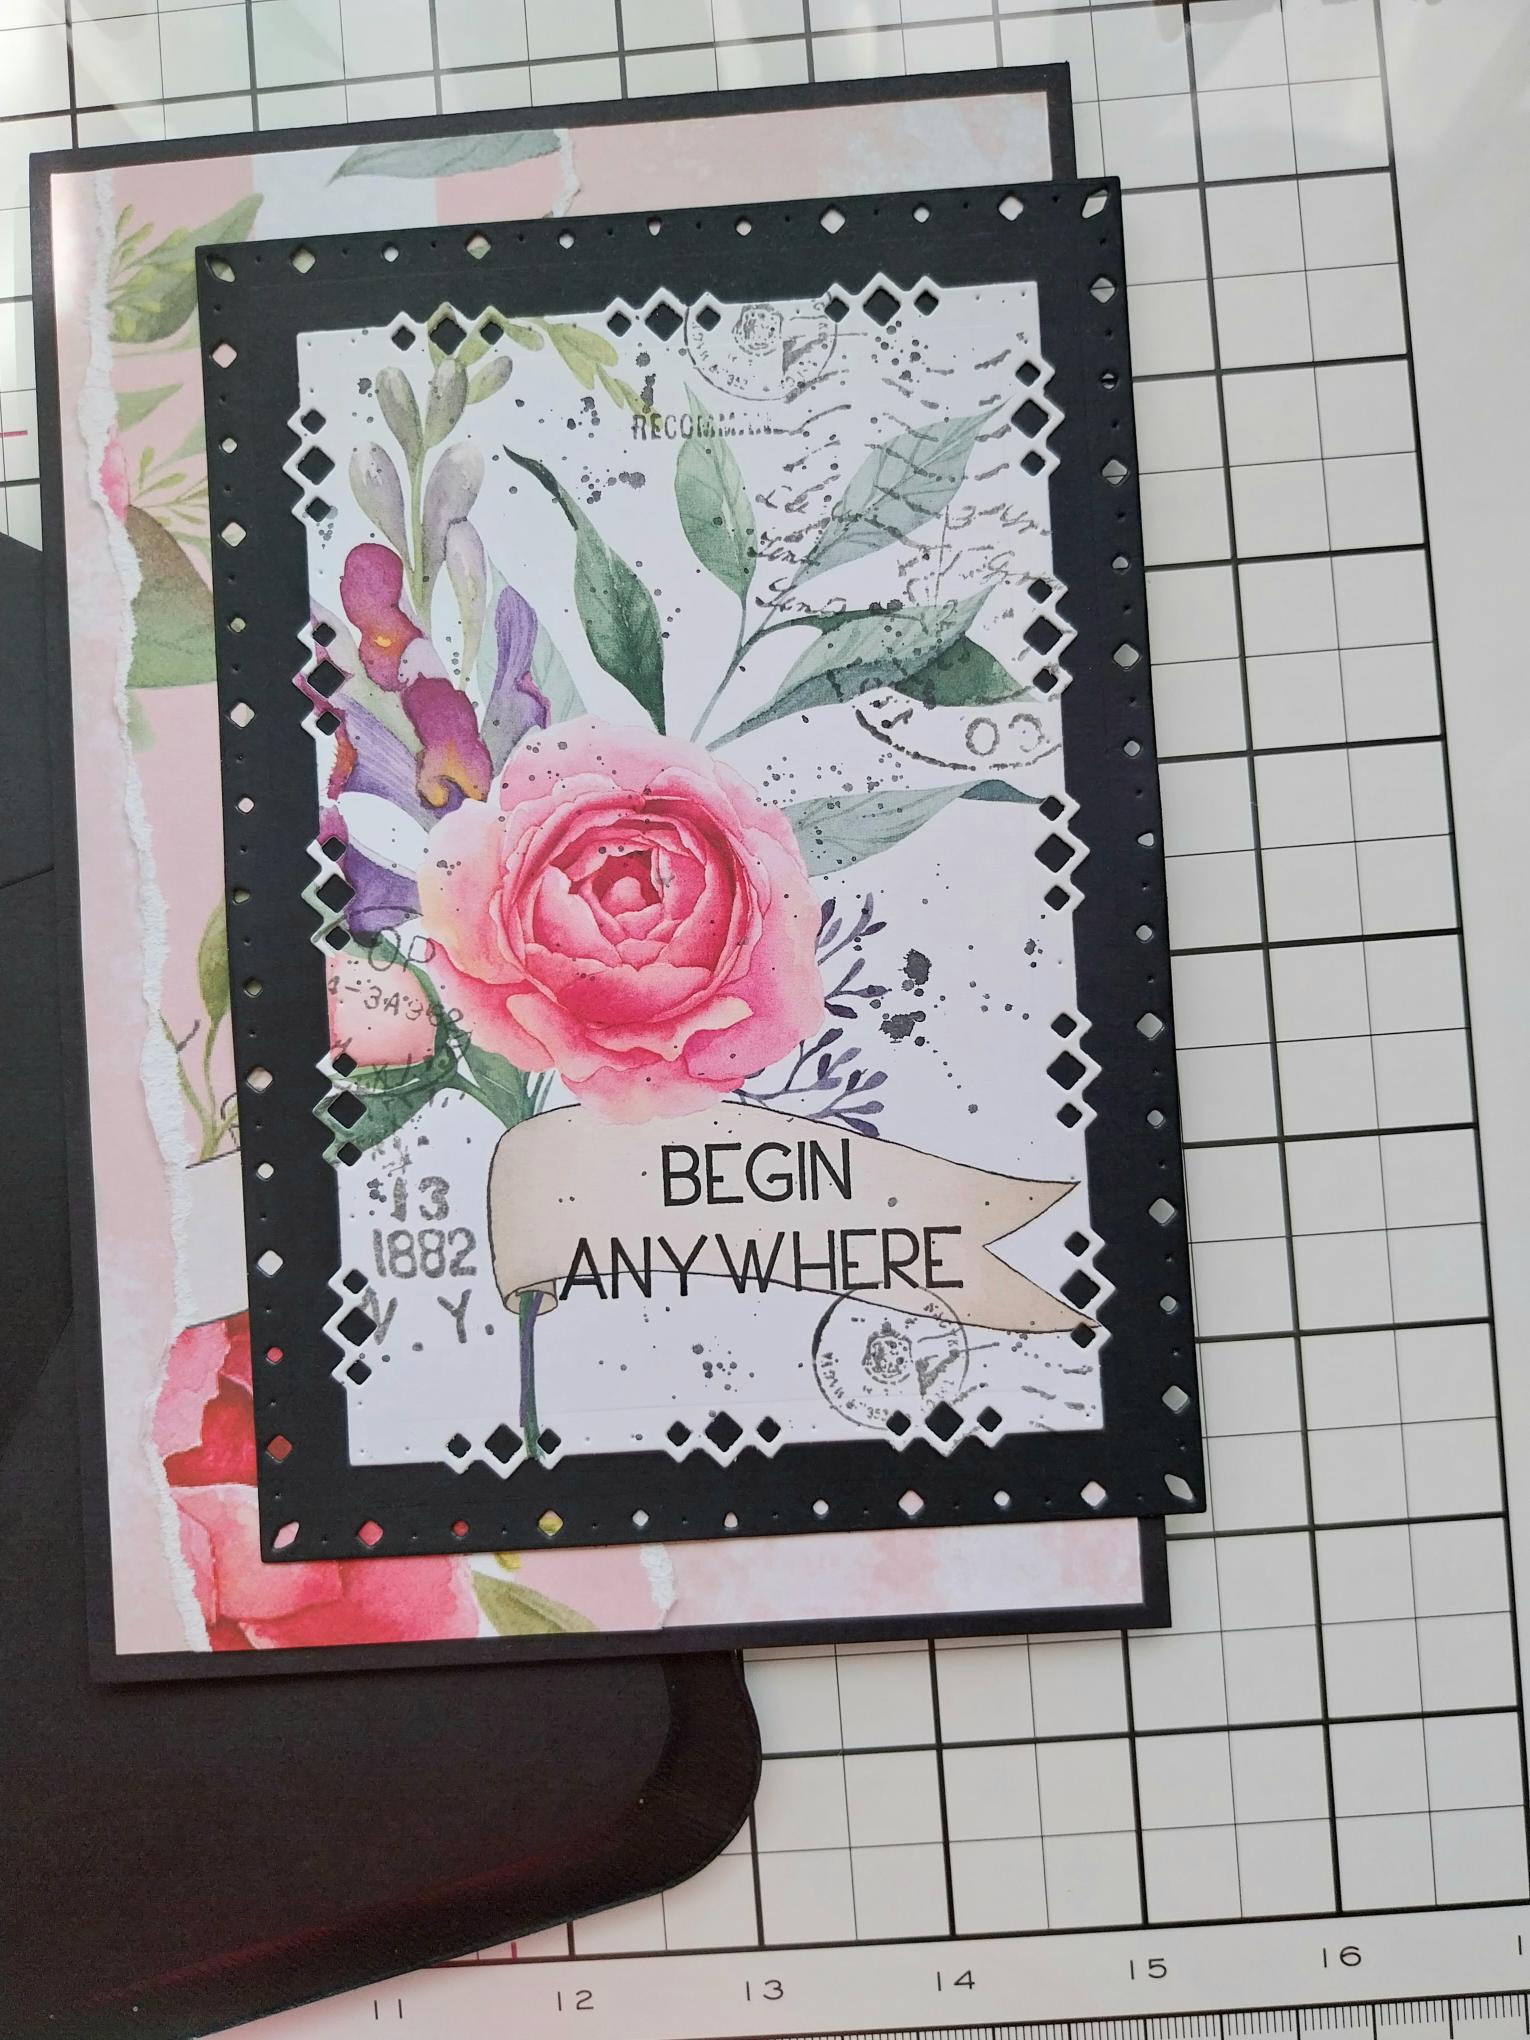
To finish, adhere this to your card, allowing a slight overhang on the right hand edge of your card. |