Give your friends $10 off their first order!
Refer a FRIEND


WHAT YOU WILL NEED:
White card blank 7 x 7"
Kraft card 6 1/4" square
White card
Quattro D Christmas Is Coming Collection
A Winter Story 12 x 12" Paper Pad
A Winter Story A4 Vellum Pack
A Winter Story 6 x 6" Embellishment Pack
Deboss Circle Nesting Dies Collection
SBM Hybrid Ink Pad: Midnight
SBM Premium Dye Ink pad: Limeade, Hedgerow, Tiffany, Sherbet
Distress Ink/Oxide Ink Pad: Tattered Rose, Lost Shadow
Blending tool
Ranger Stickles: Diamond
Eureka 101 Watercolour Tablet
SBM Magnetic glass mat
Paper Trimmer
Perfect Together Glue
Low tack tape
Foam pads
Die Cutting machine
[click image to enlarge] 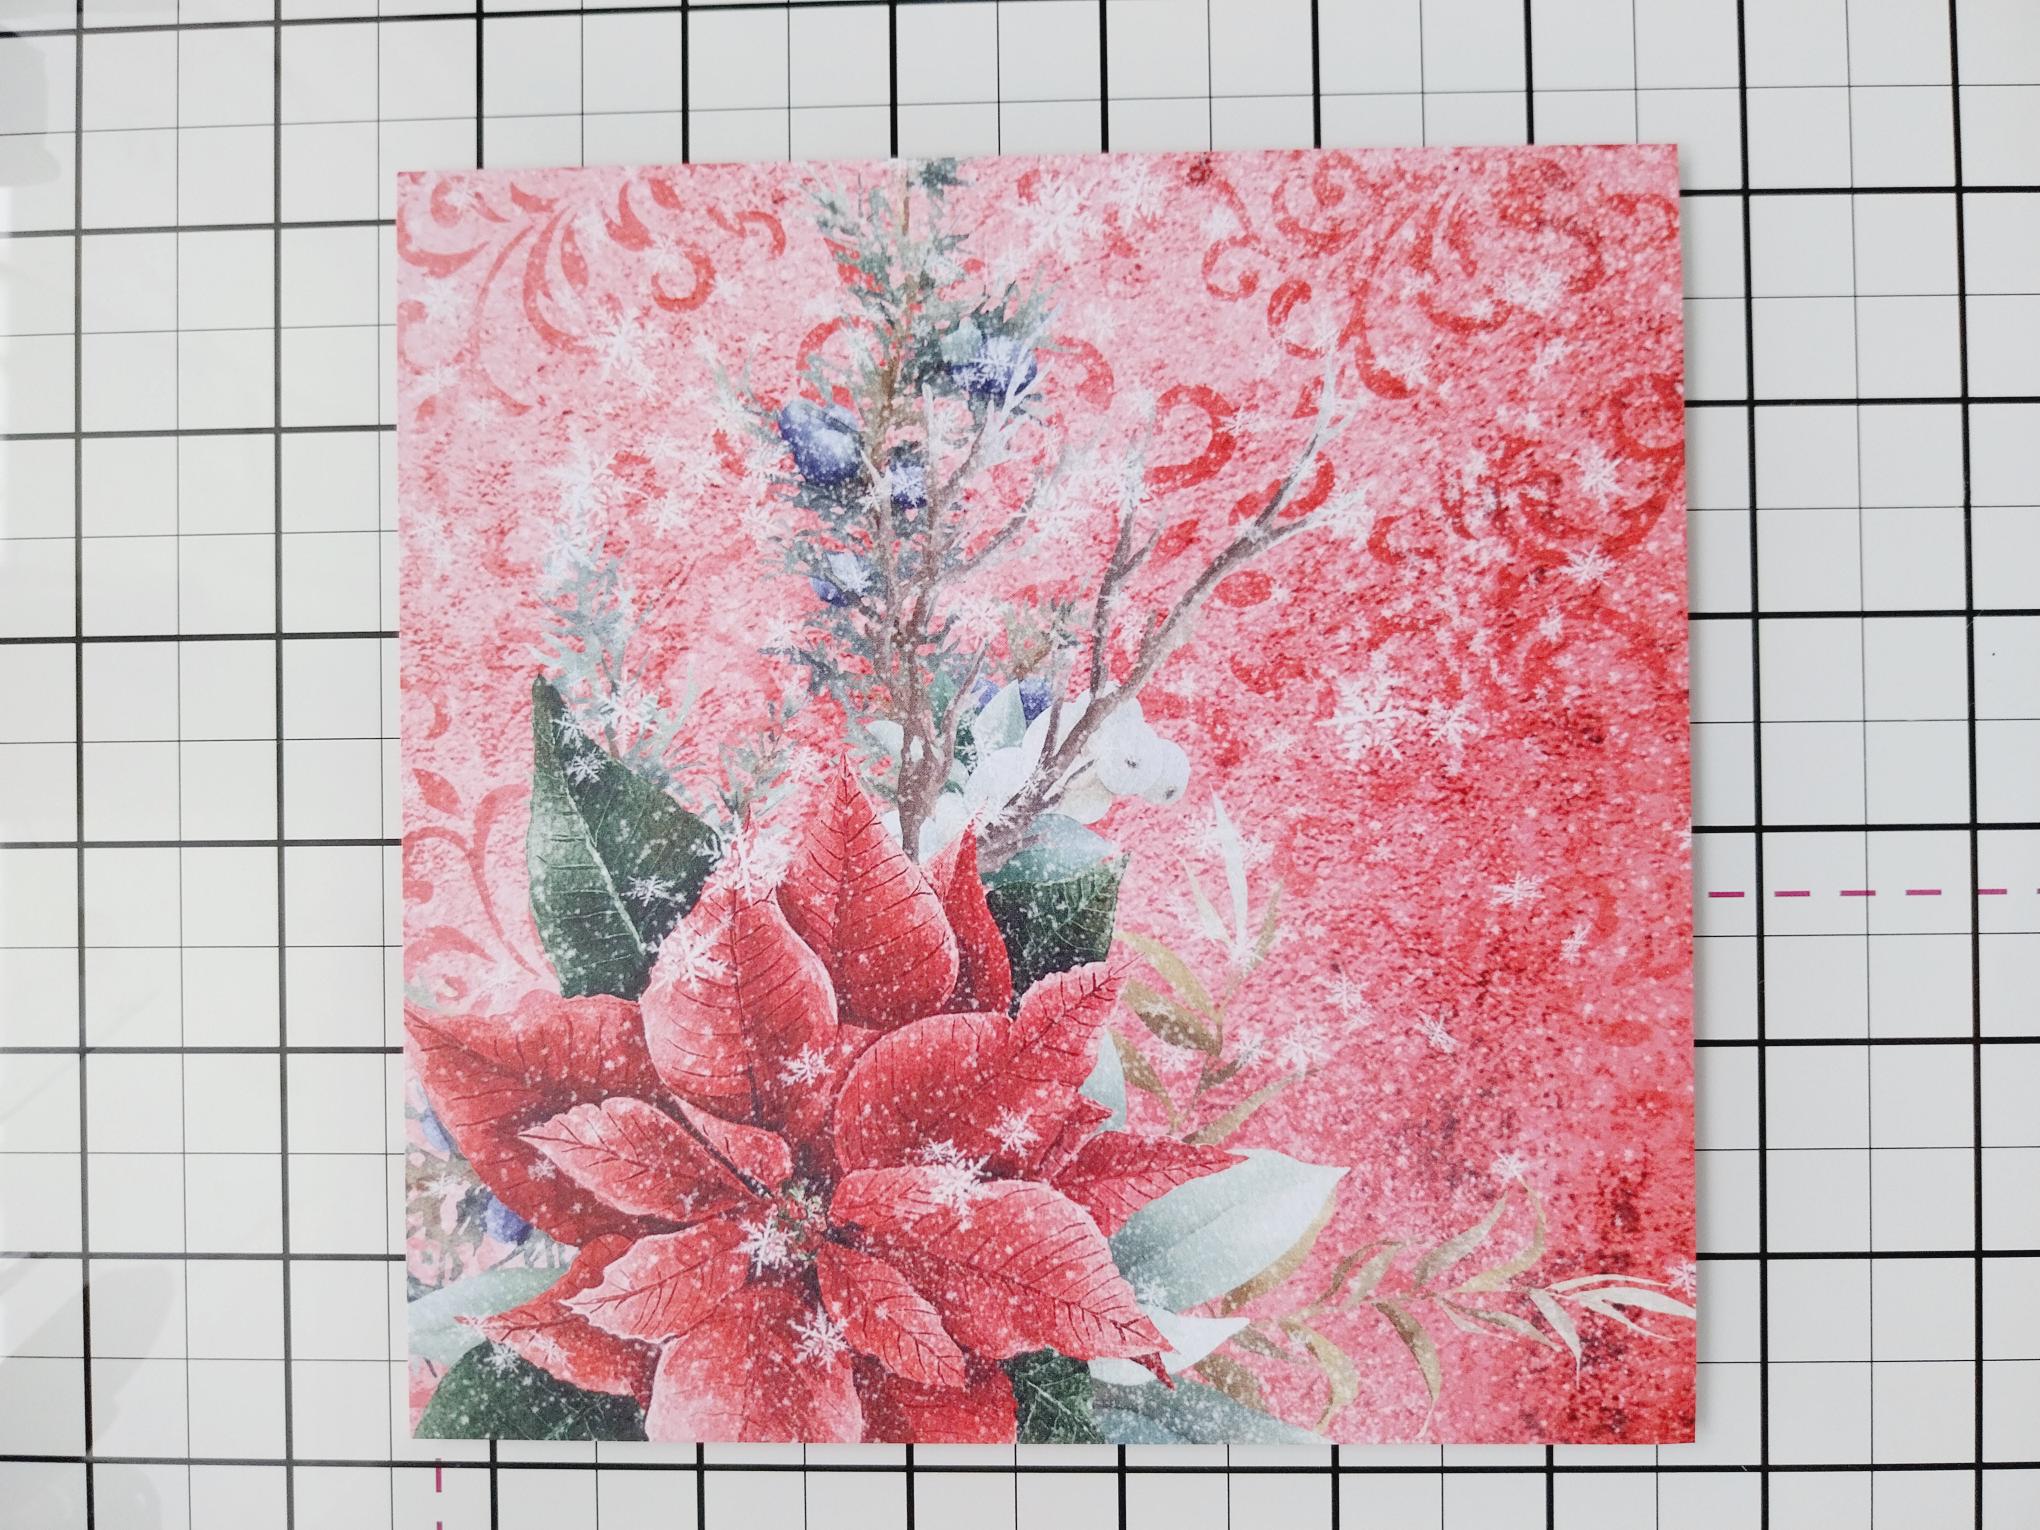
|
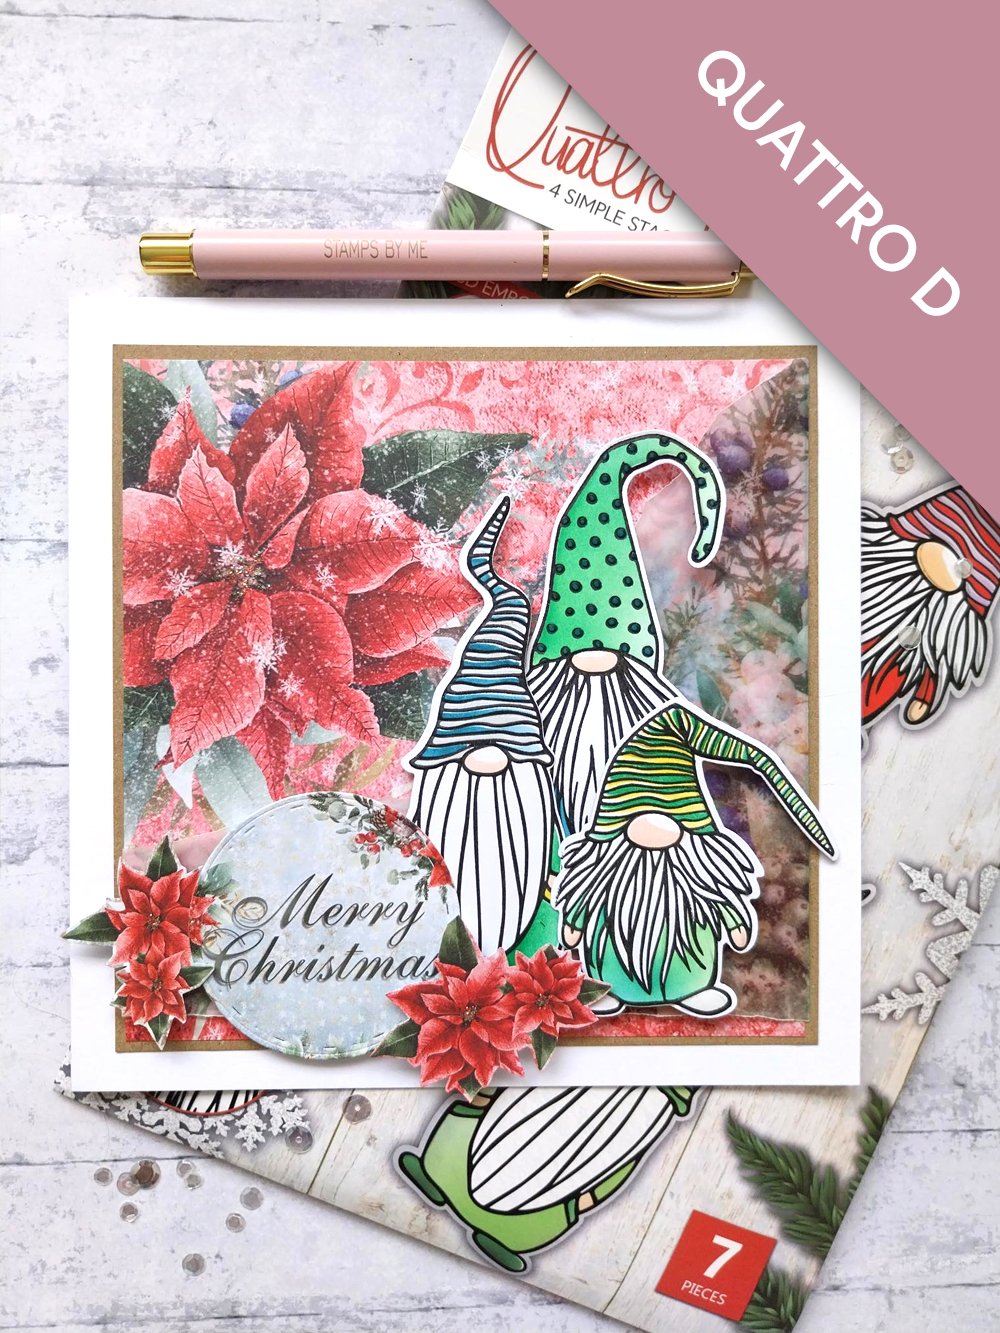
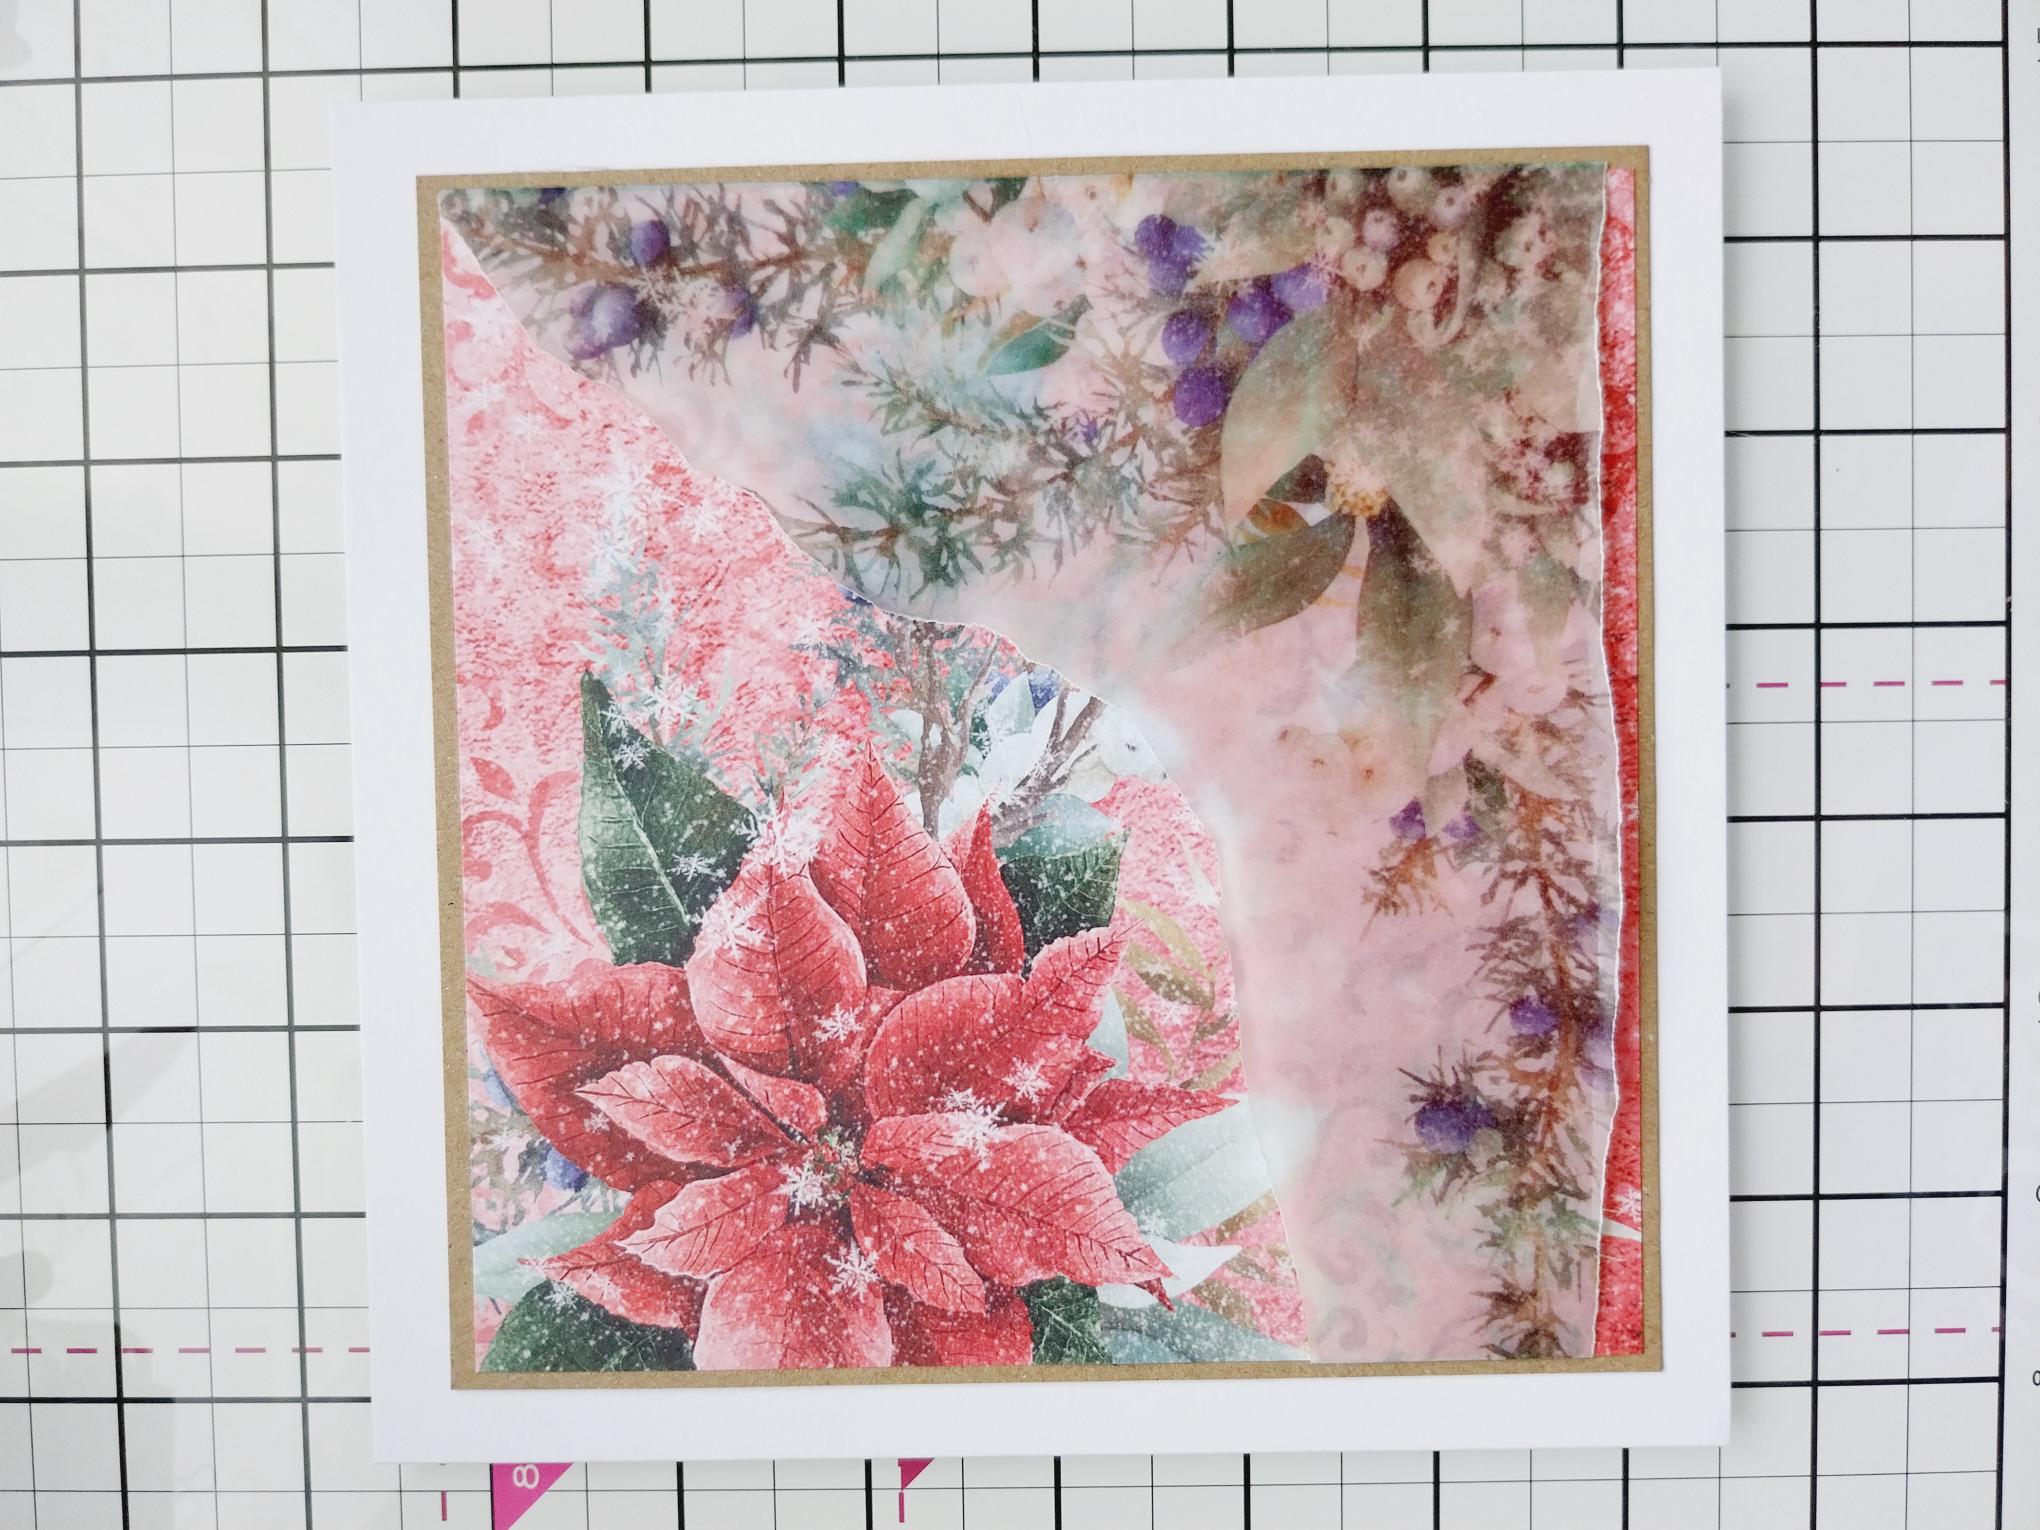
Remove this beautiful paper from the 12 x 12" paper pack and trim to 6" square, so the large Poinsettia is in the top left corner. |
|
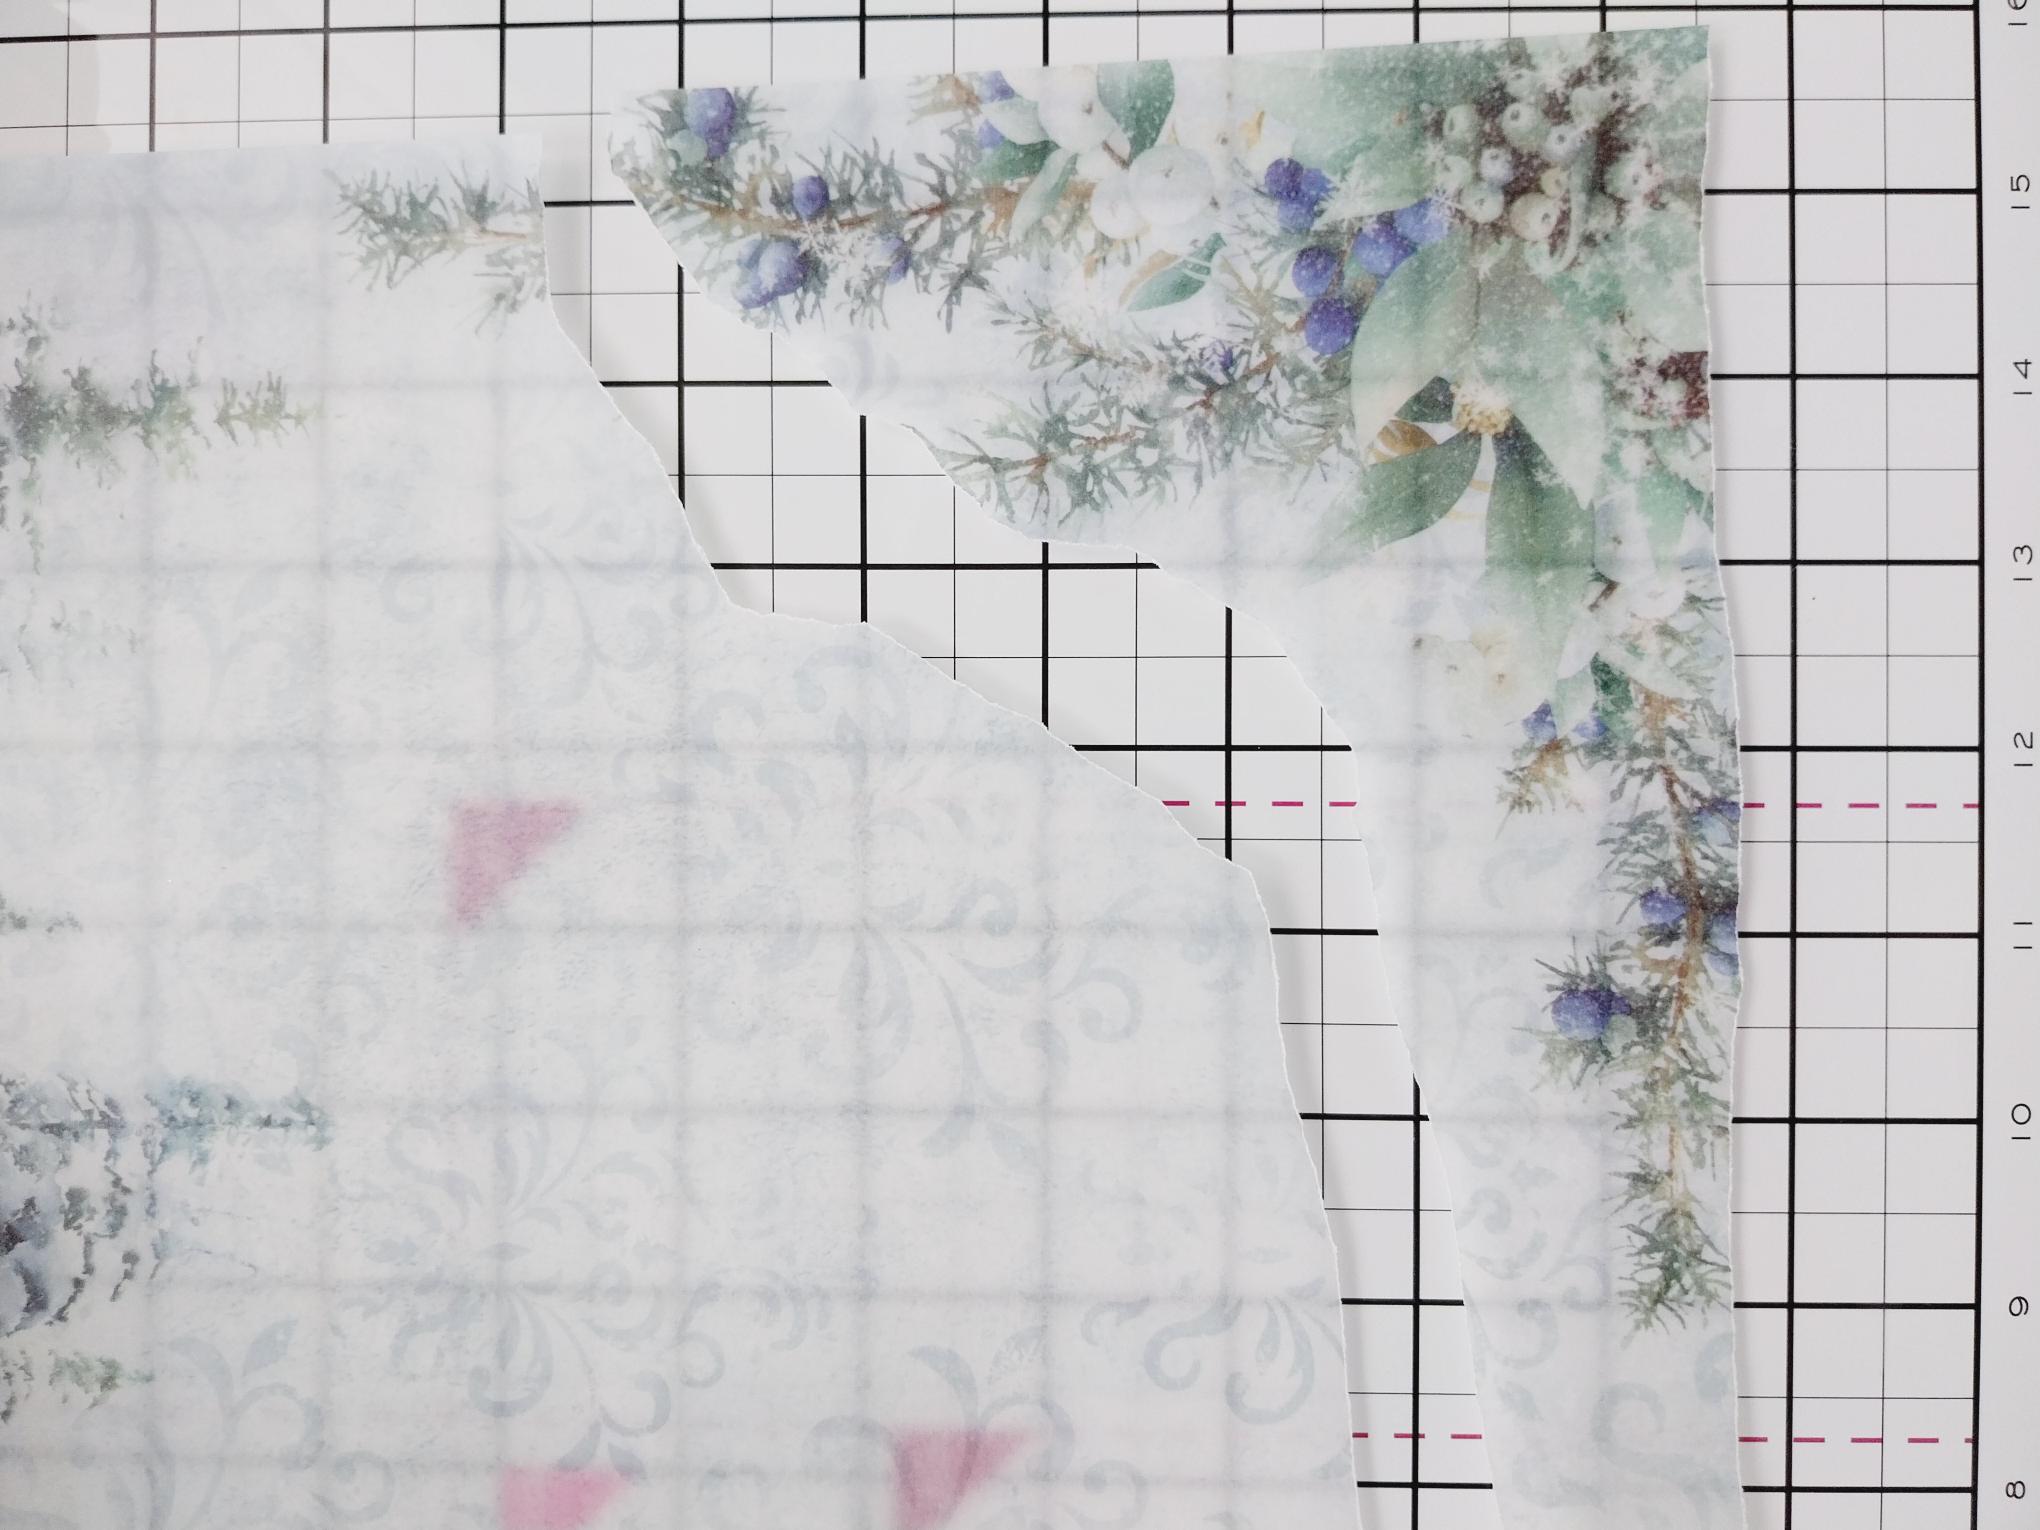
Take this gorgeous vellum sheet from the vellum pack and tear around this printed, corner floral image. |

|
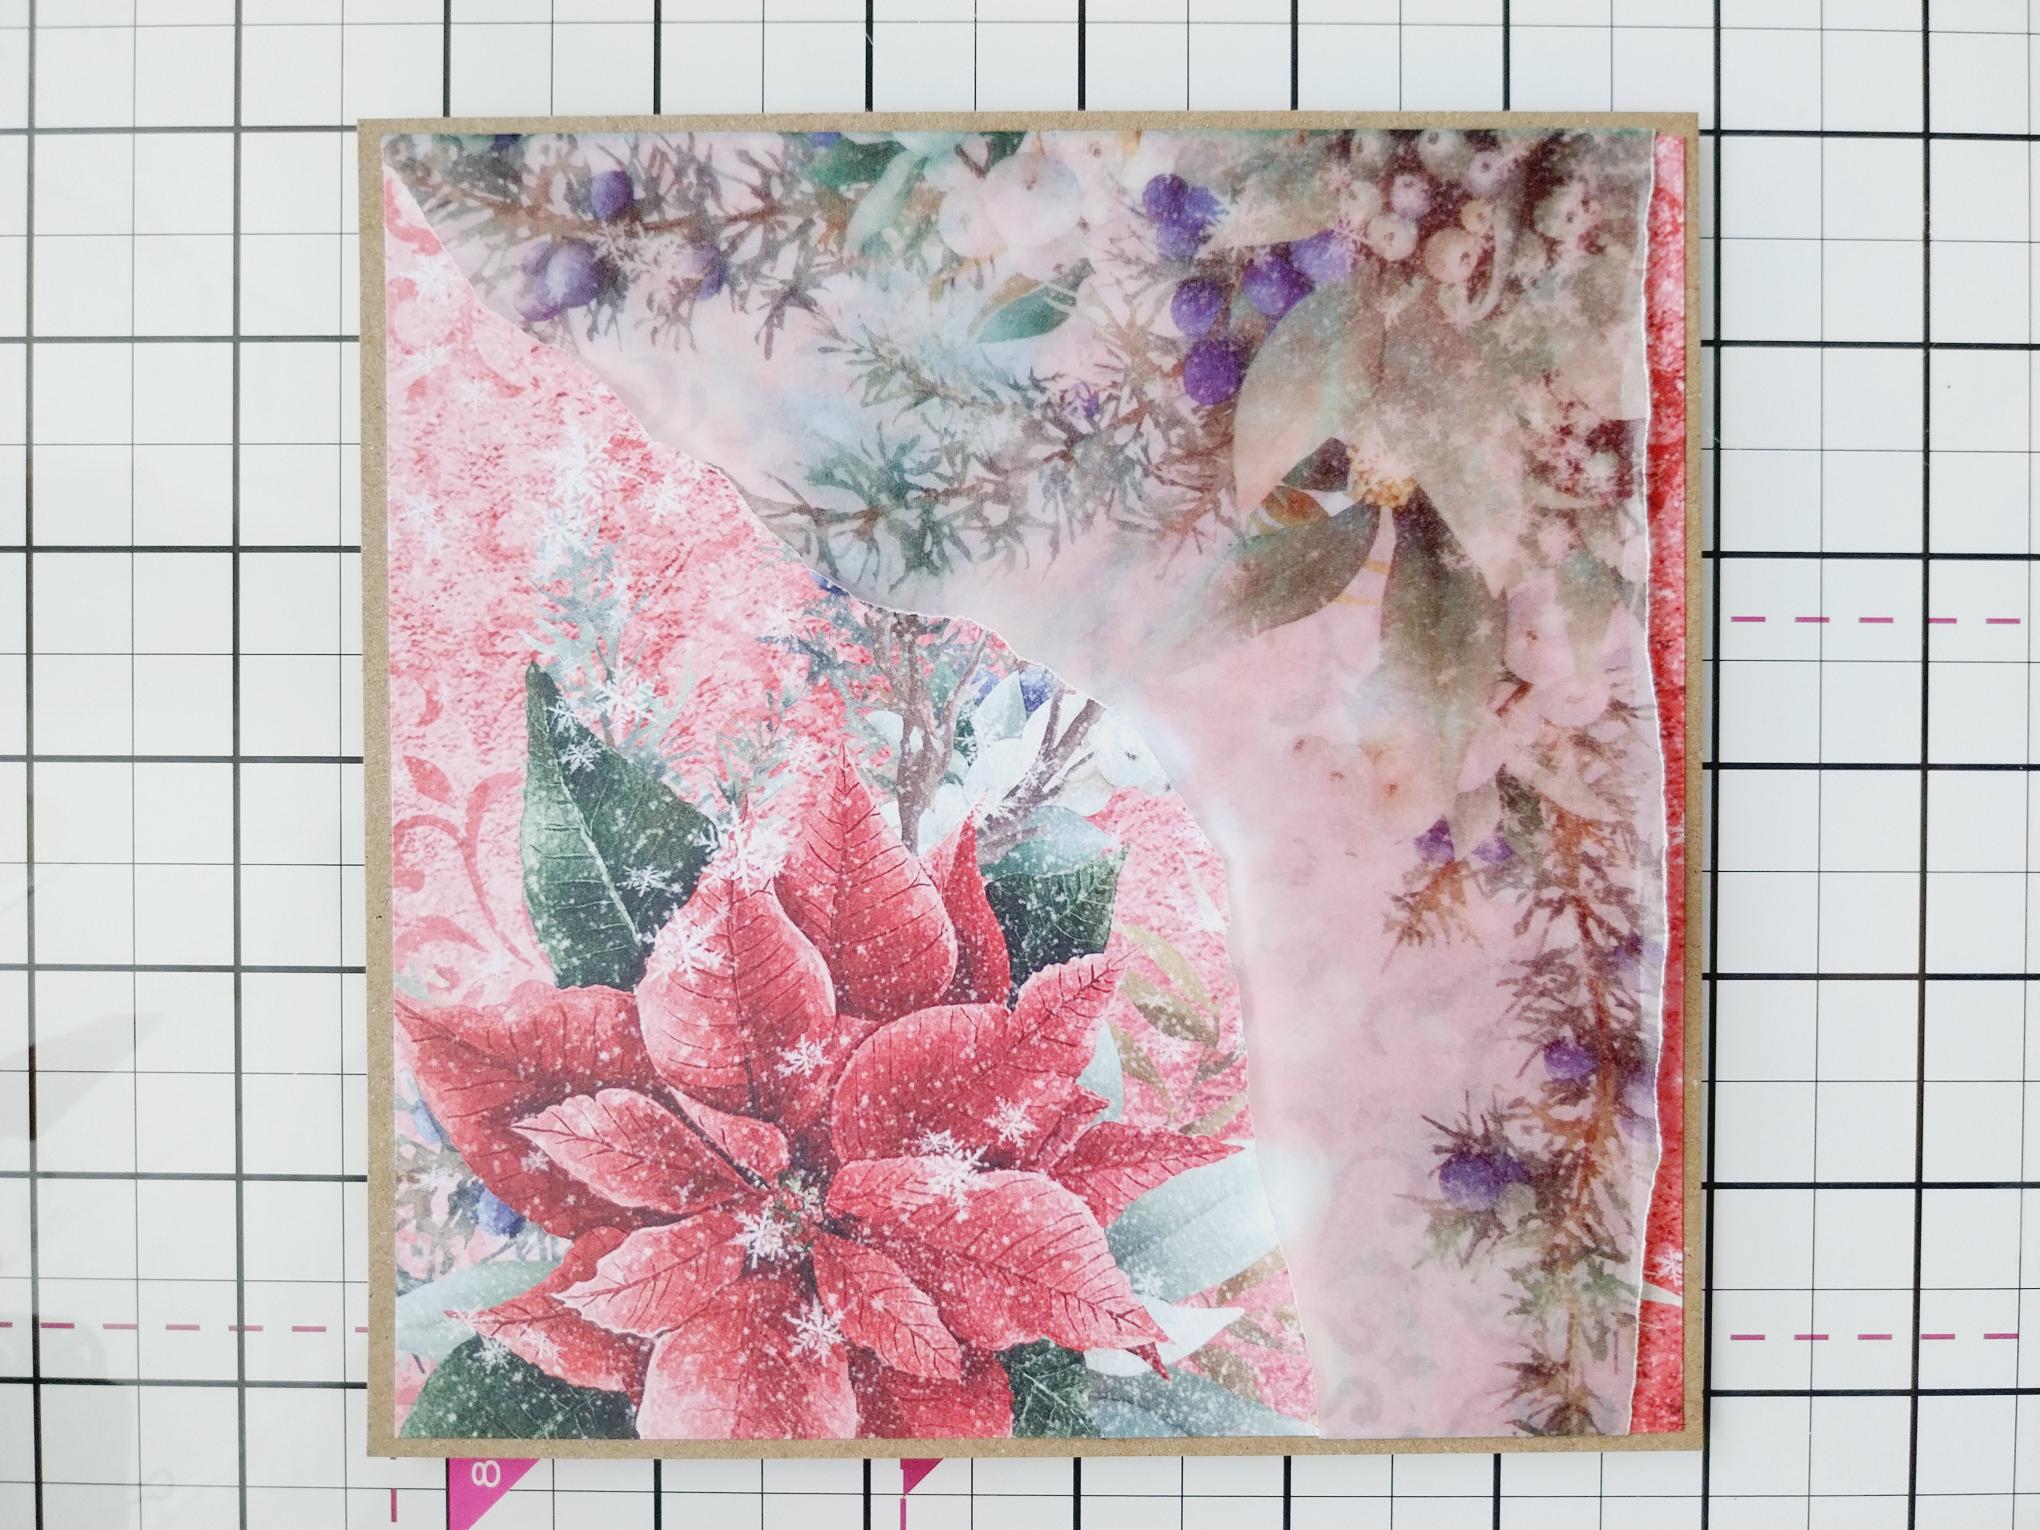
Place the torn vellum across the bottom of the patterned paper, tuck any excess vellum over the edges of the paper and secure on the reverse. |
|
Adhere to the 6 1/4" square kraft card. |
|
Adhere on to your 7 x 7" white card blank and set to one side. |
|
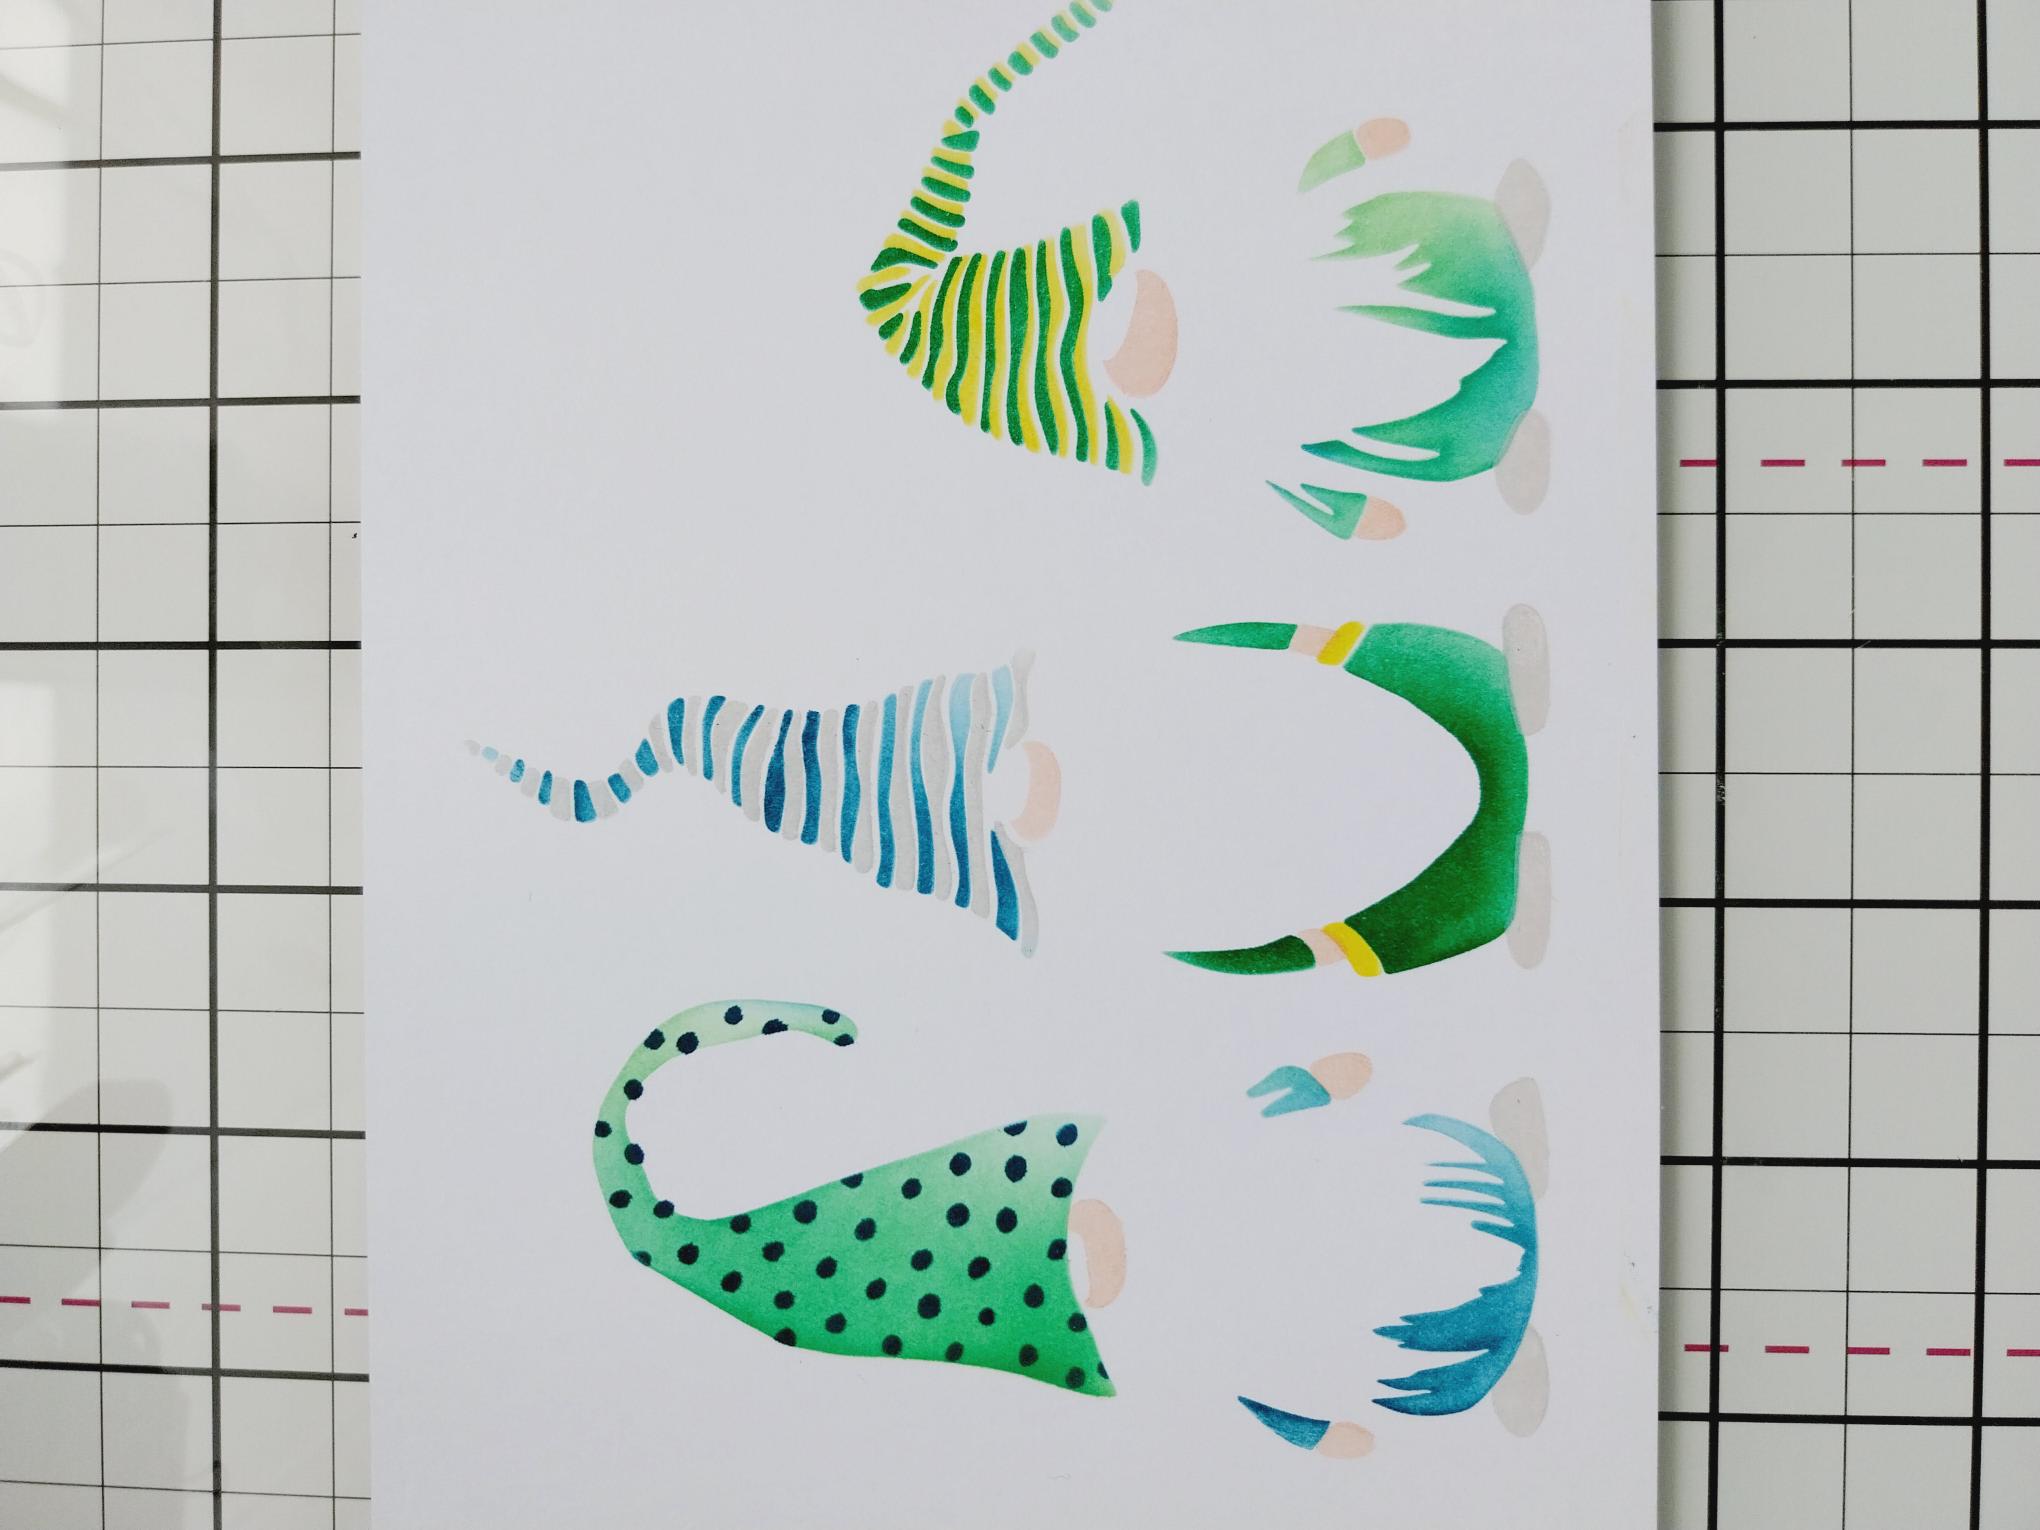
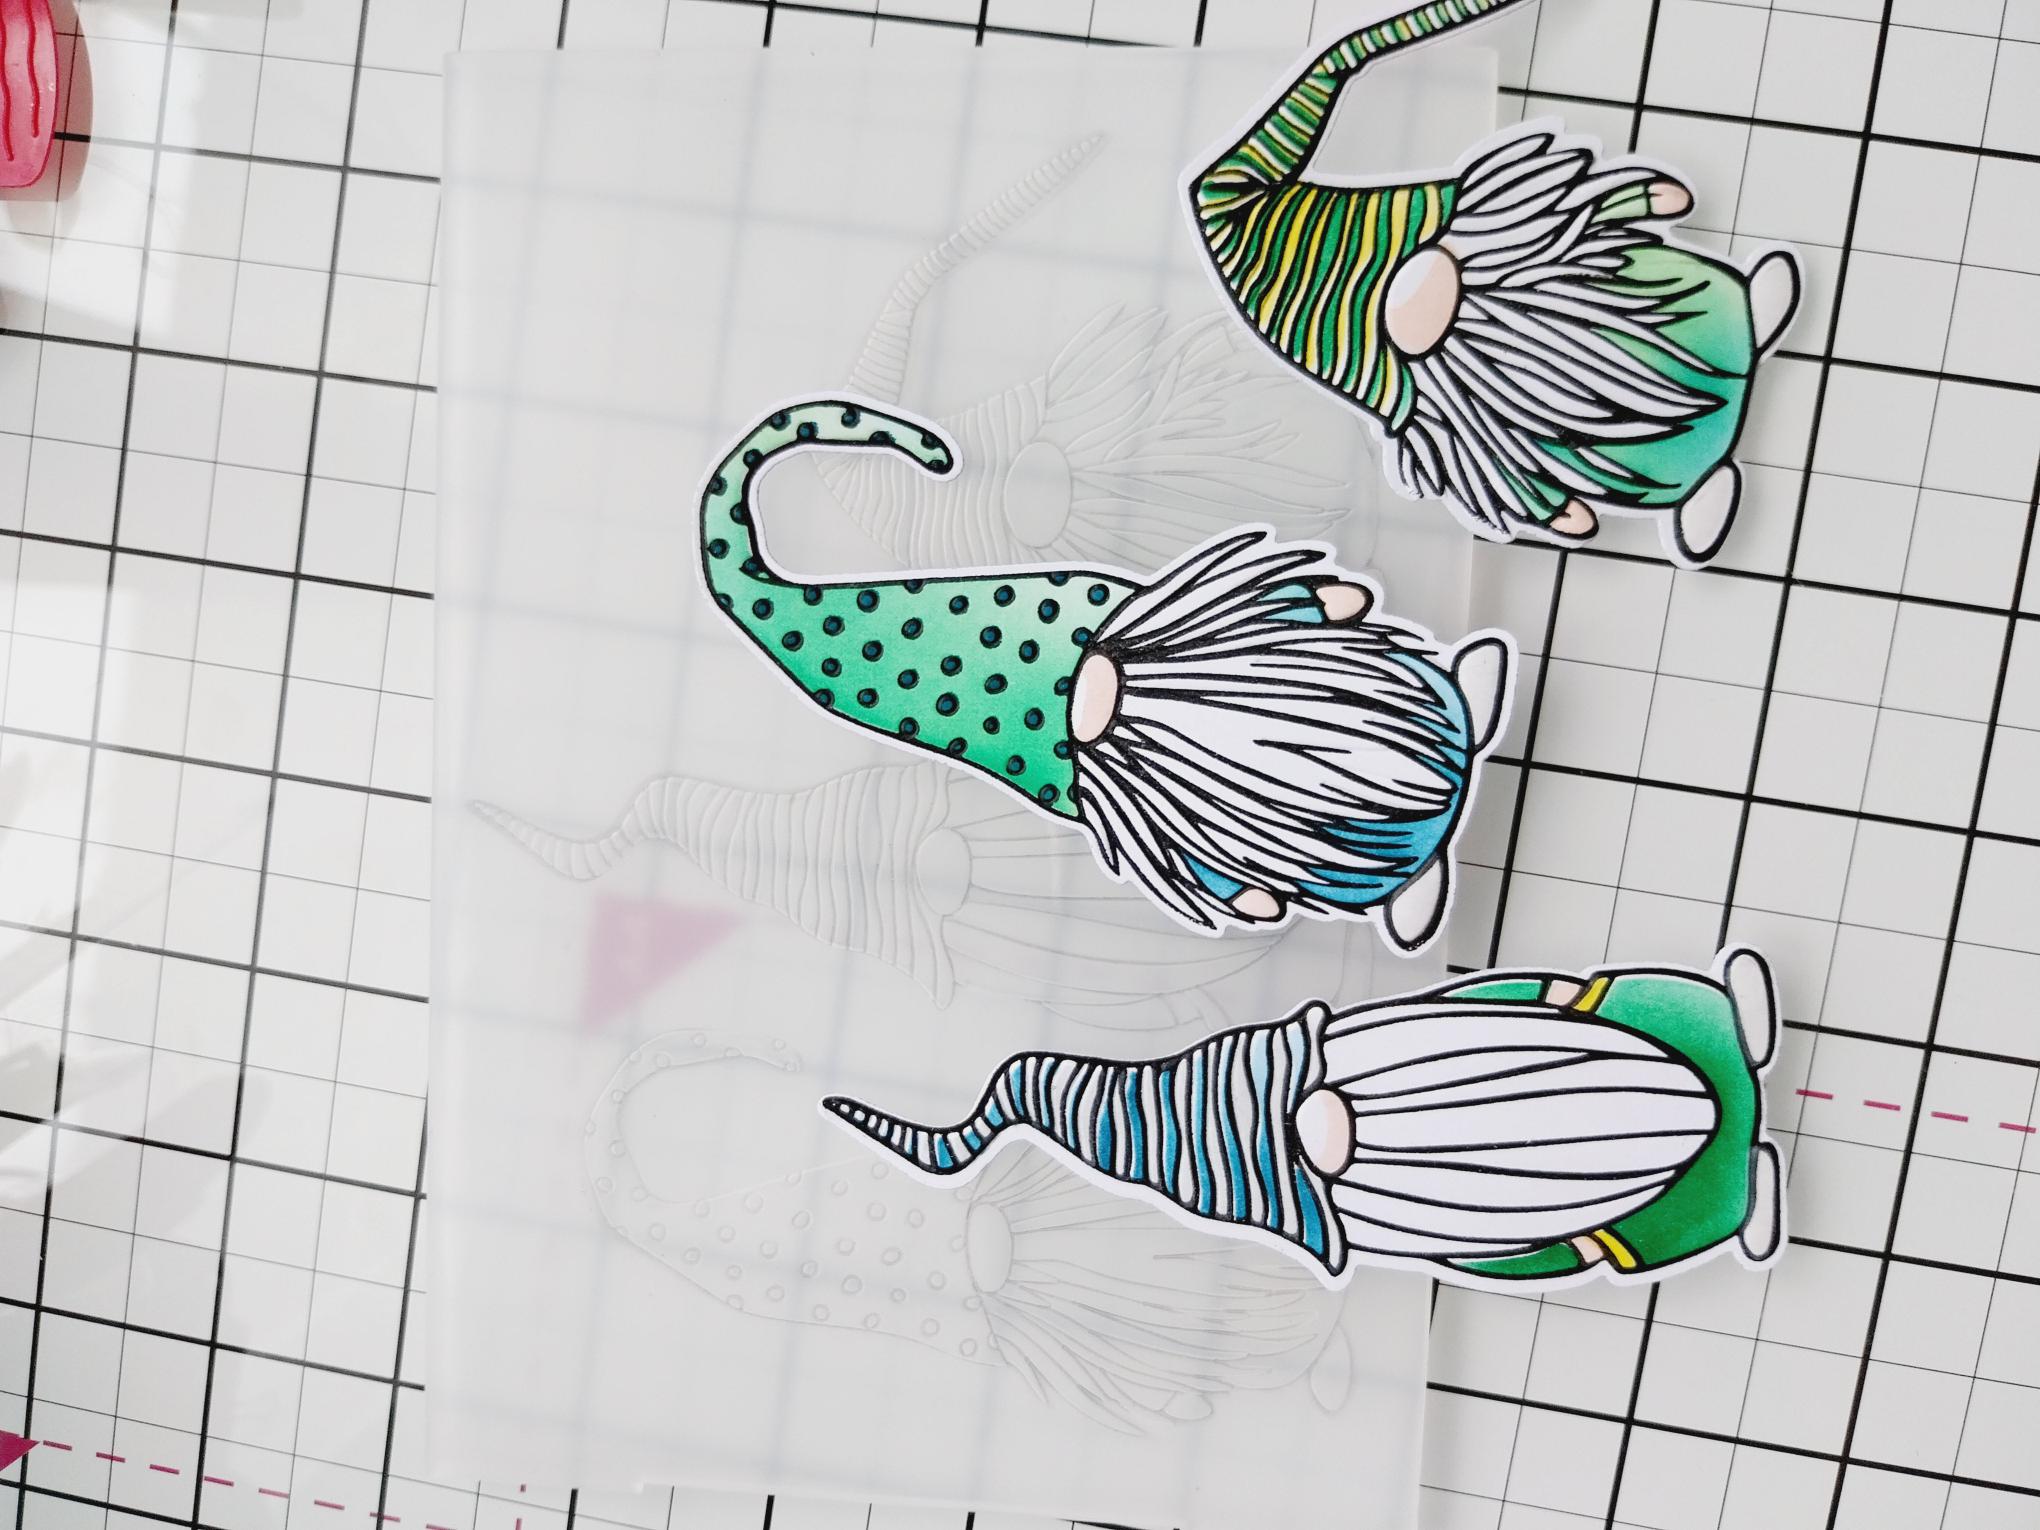
Place stencil 1, from the Quattro D collection, on to white card and use your inks to blend through as required. Line up stencil 2, using the hearts as a guide if needed and blend with the inks, swapping the colour combinations. Repeat with stencil 3. I used the Tattered Rose for the "skin" and the Lost Shadow for the shoes, but the combination of colours is up to you! |
|
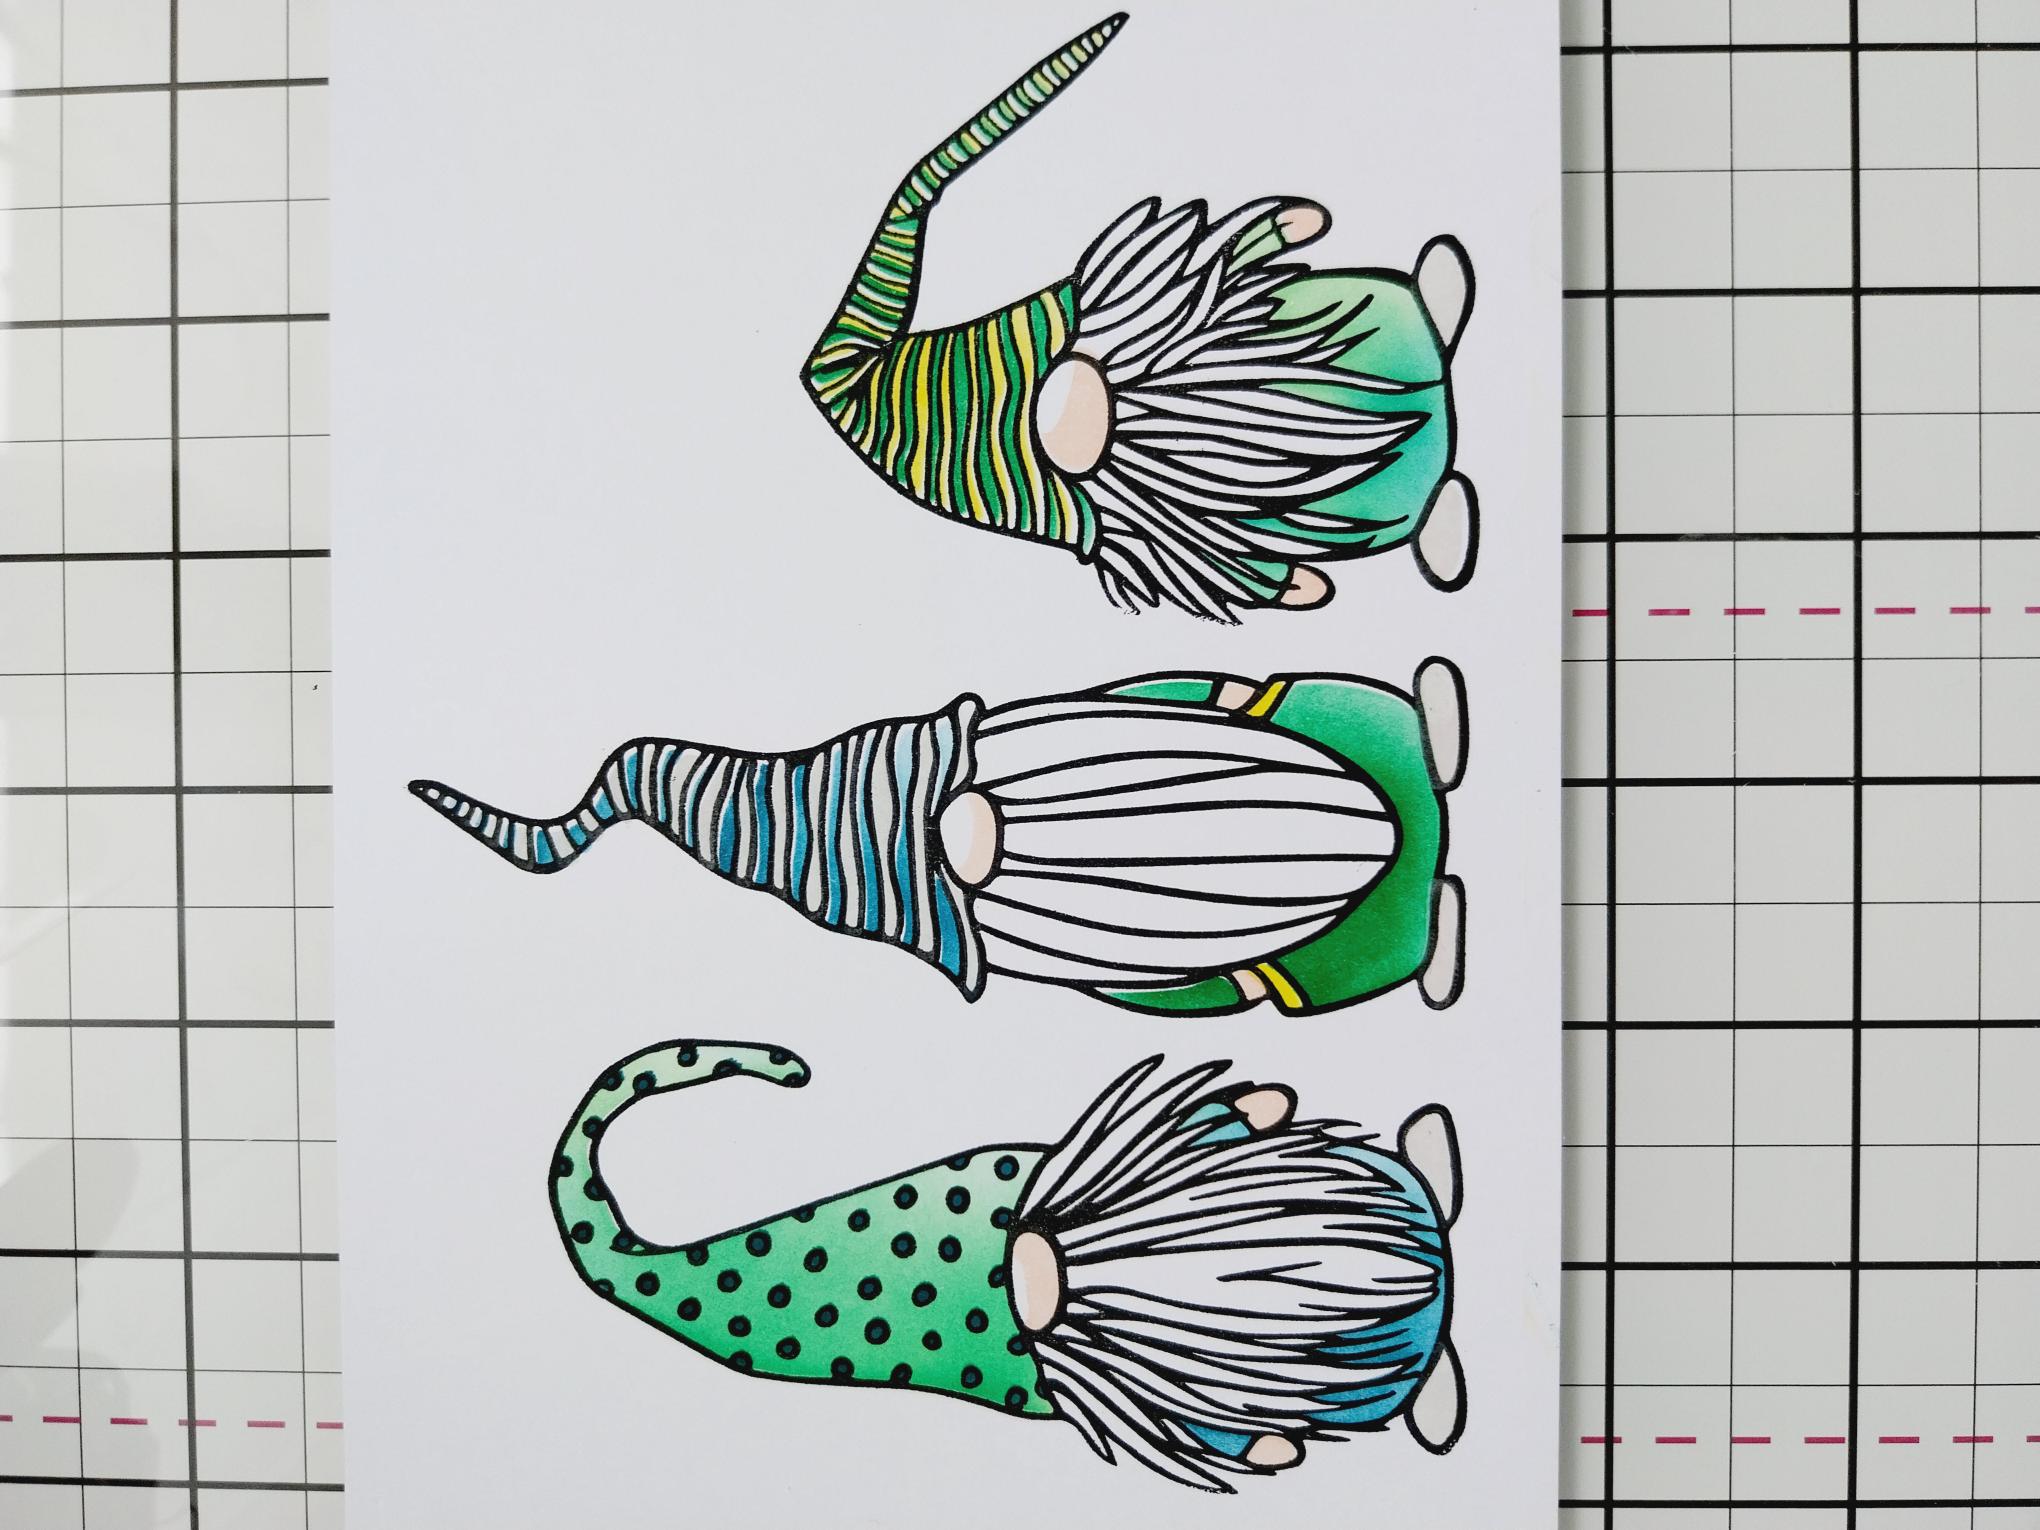
Stamp over your stencilled images with the coordinating stamp, using the Midnight ink. |
|
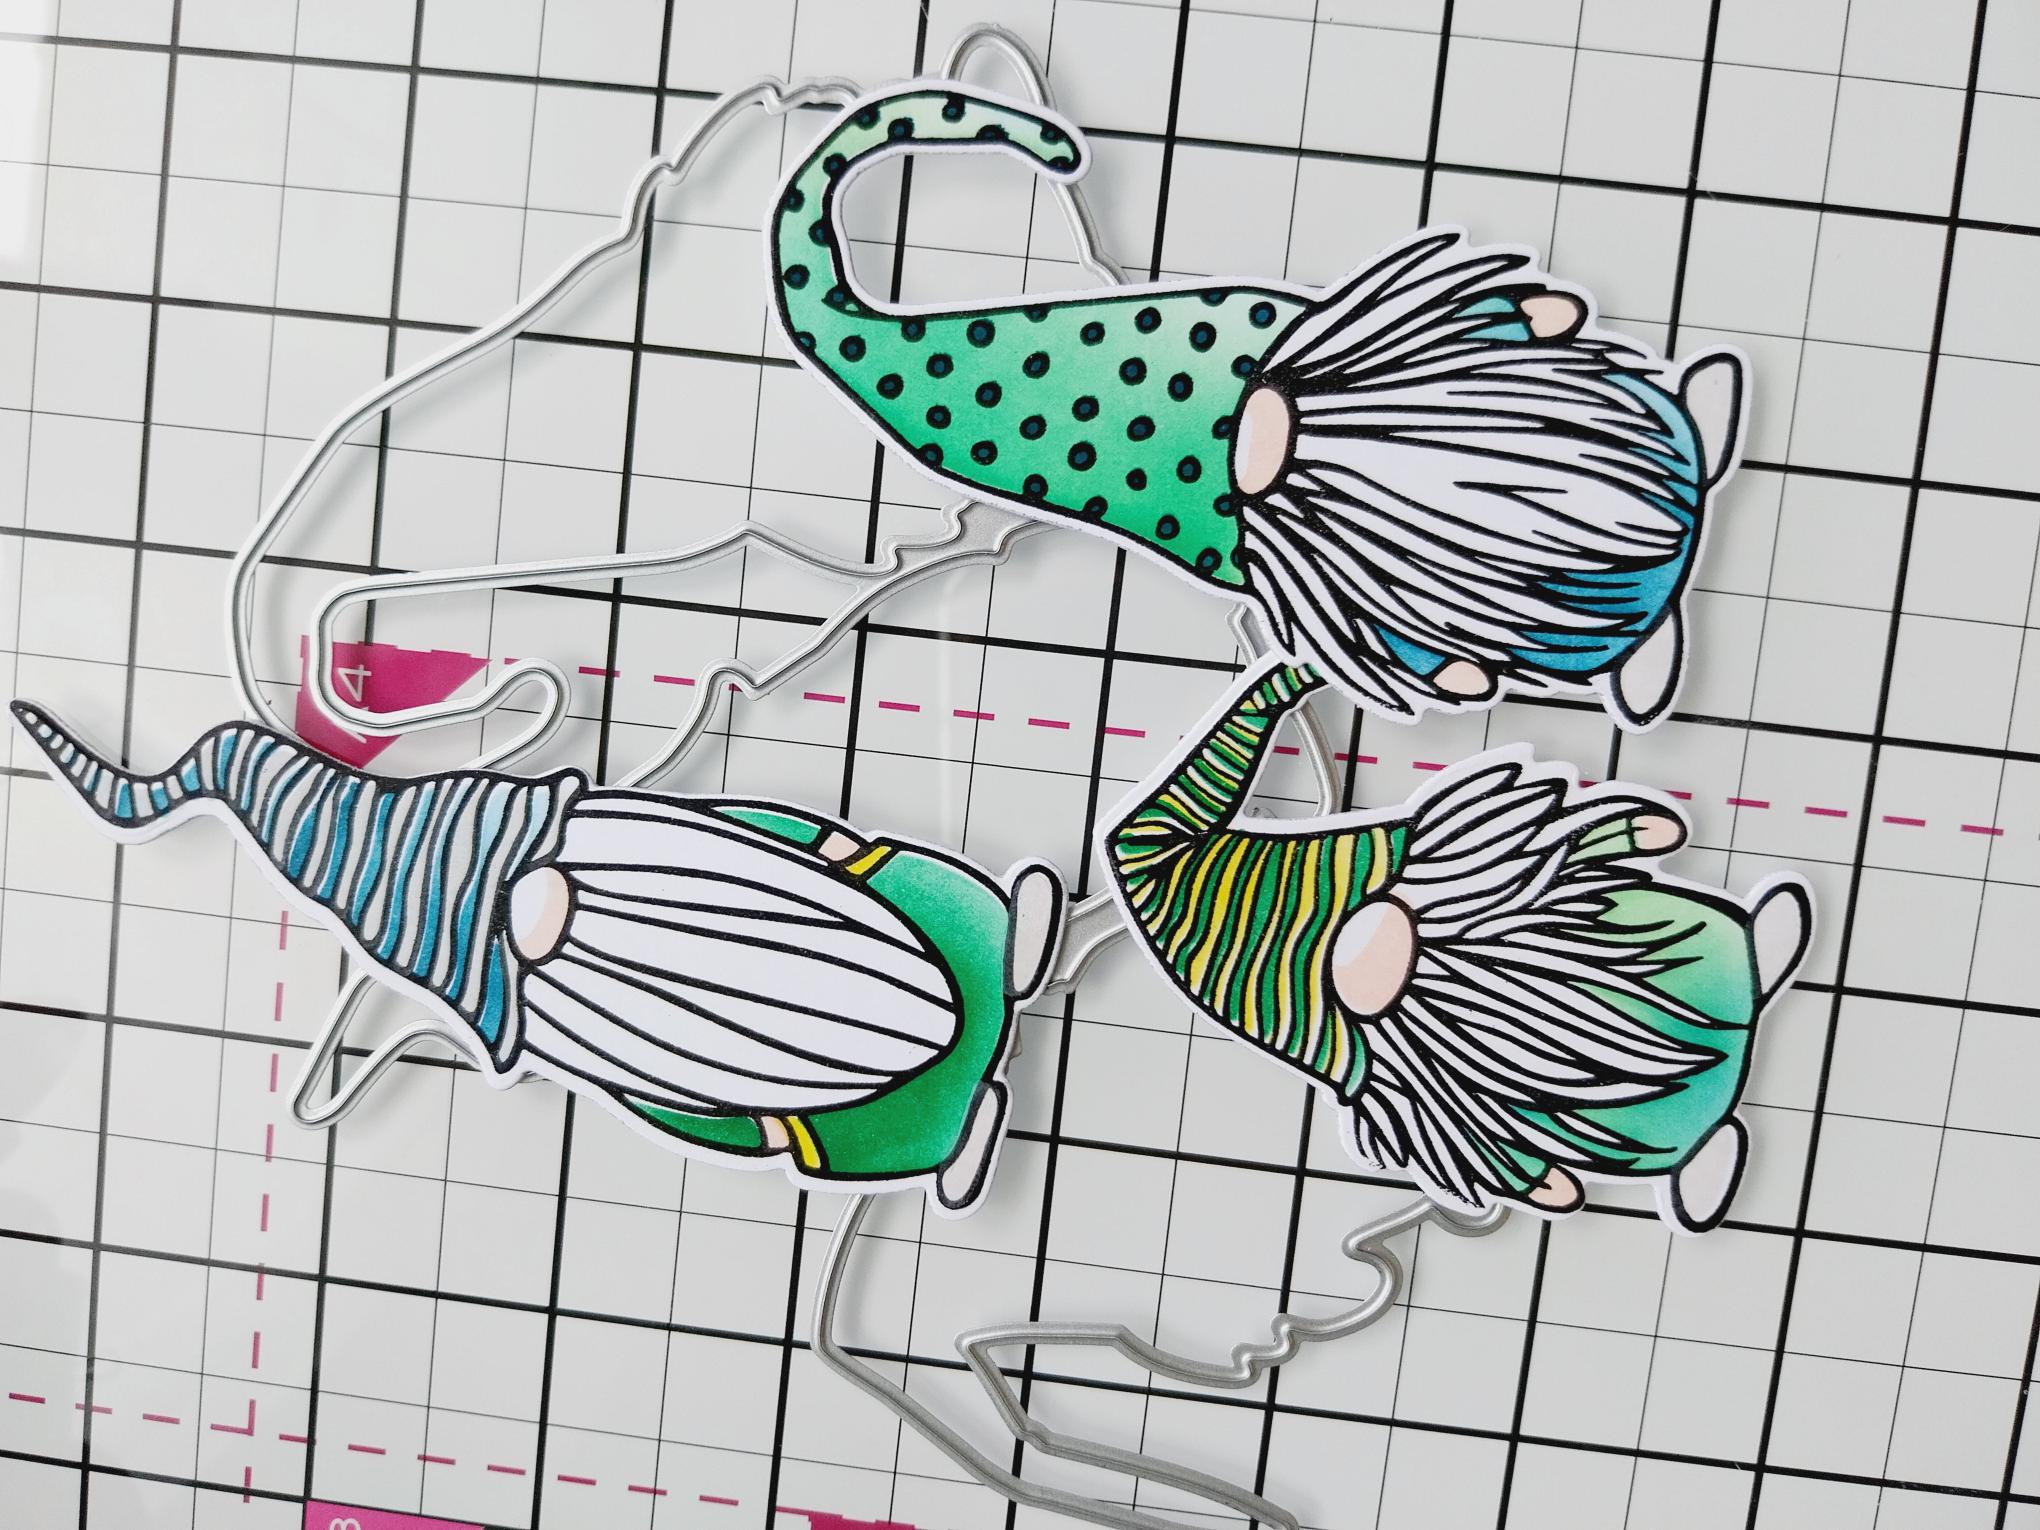
Line up each of the coordinating dies, securing with low tack tape and run through your embossing machine. TIP: Whilst you can die cut all 3 at the same time, I prefer to die cut the 2 outer ones in 1 pass and the middle one on it's own. |
|
Use the coordinating embossing folder to emboss each Gnome. Again, you can emboss all of them at the same time, securing them with low tack tape but I personally find it quicker and safer, to emboss each one separately. |
|
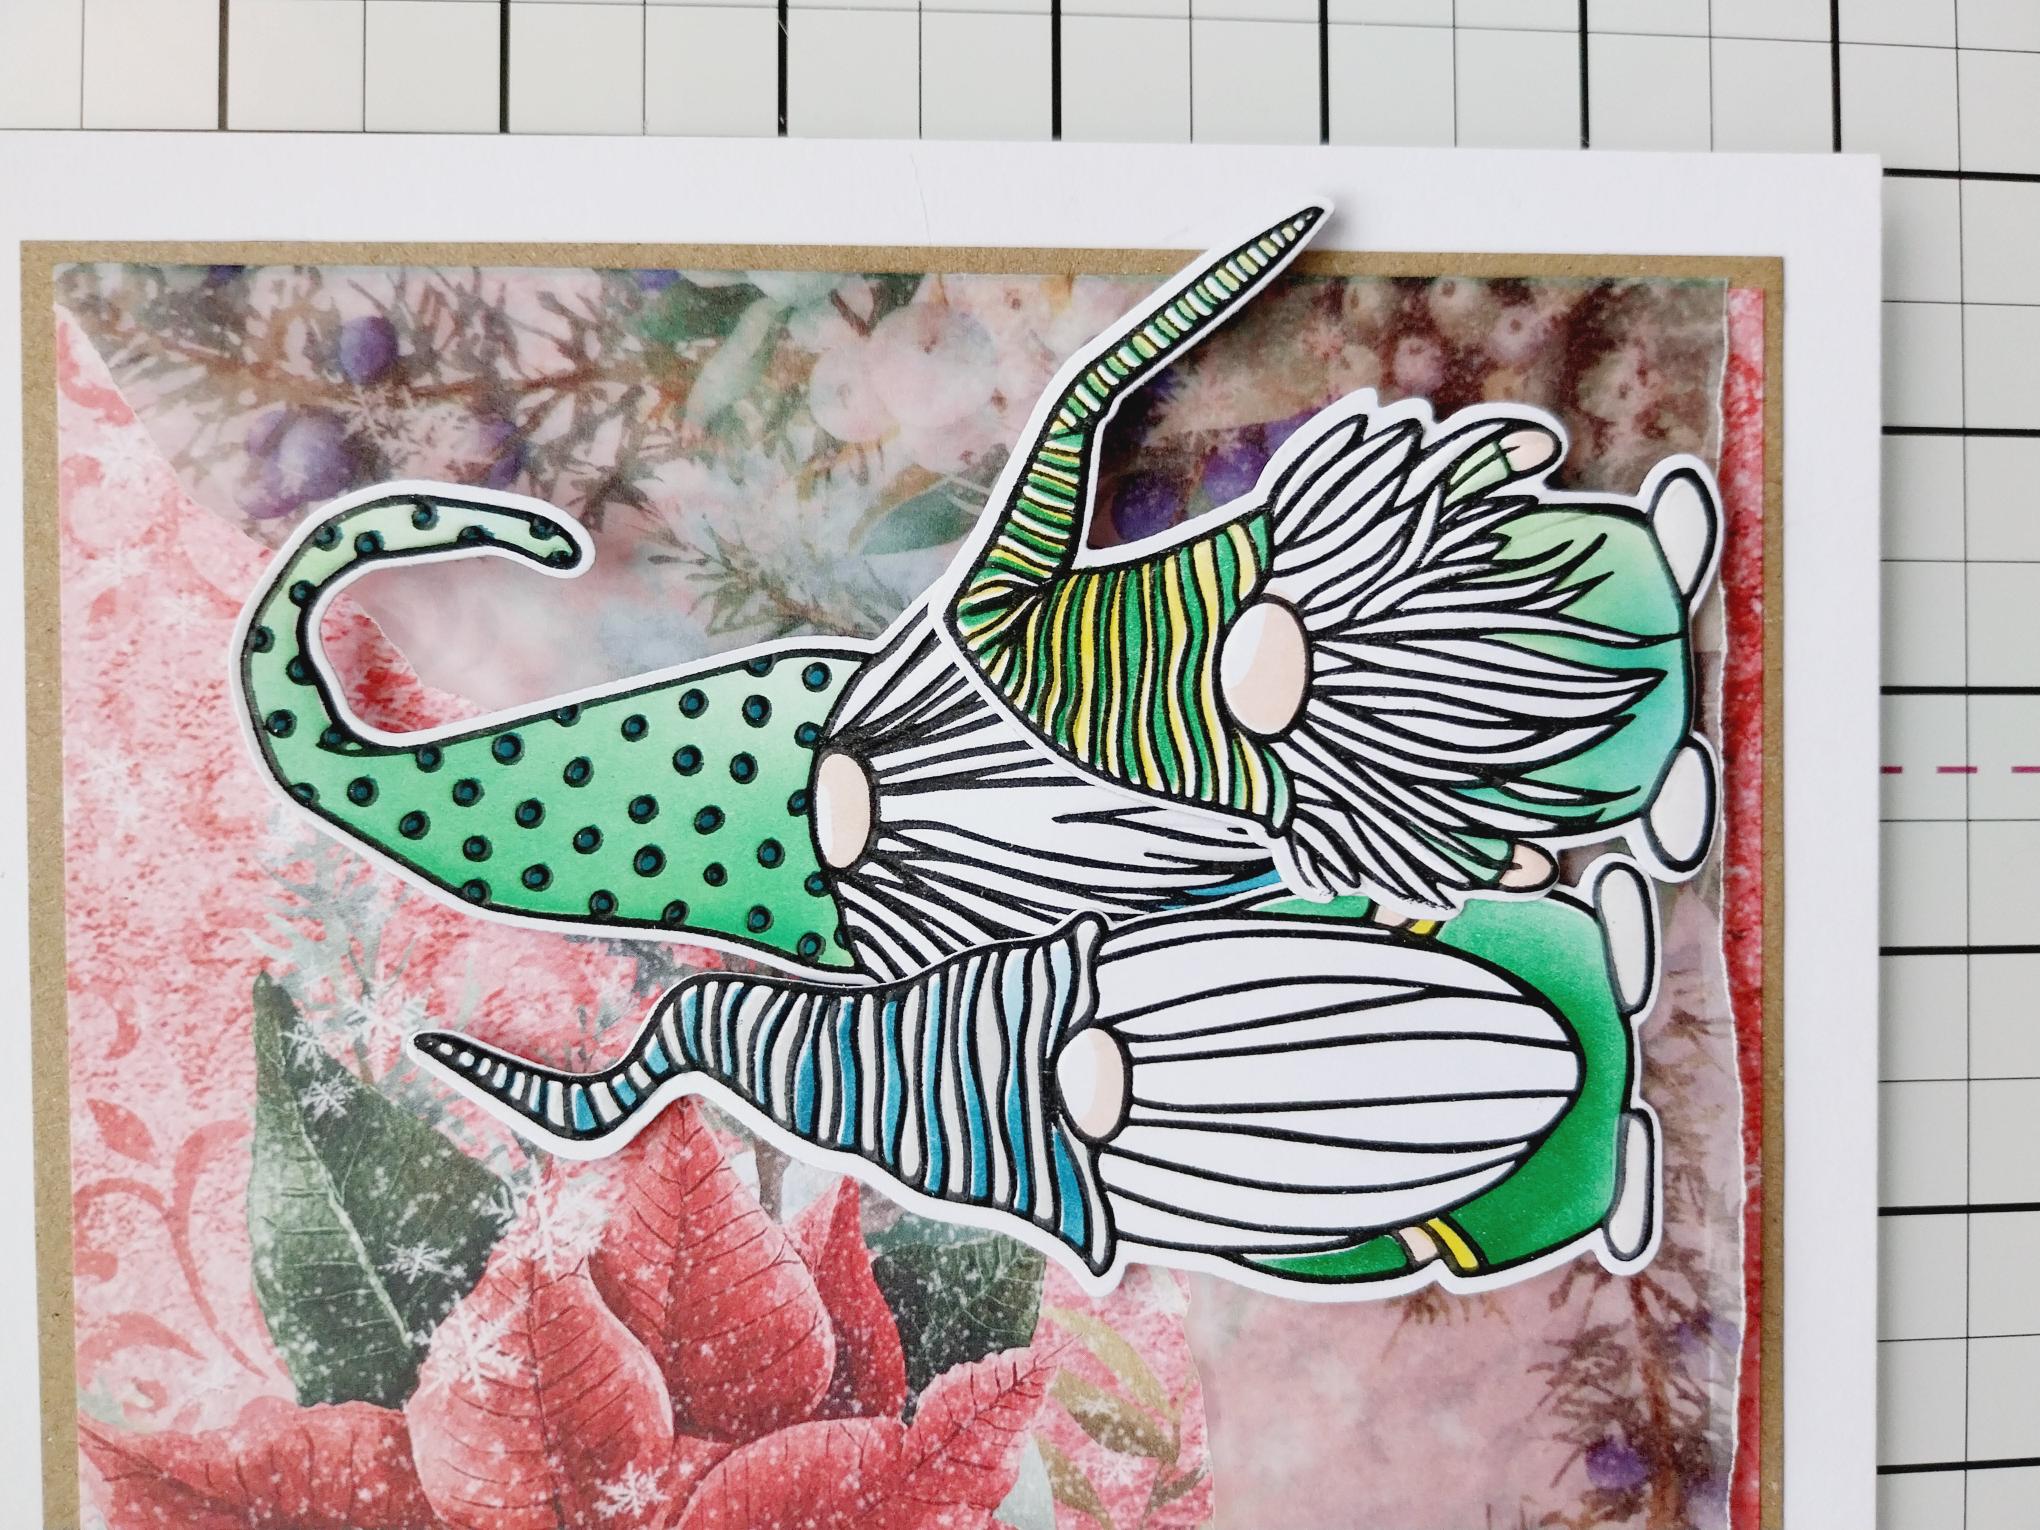
Use a combination of wet glue and foam pads to adhere your Gnomes in the bottom, right corner your card. |
|
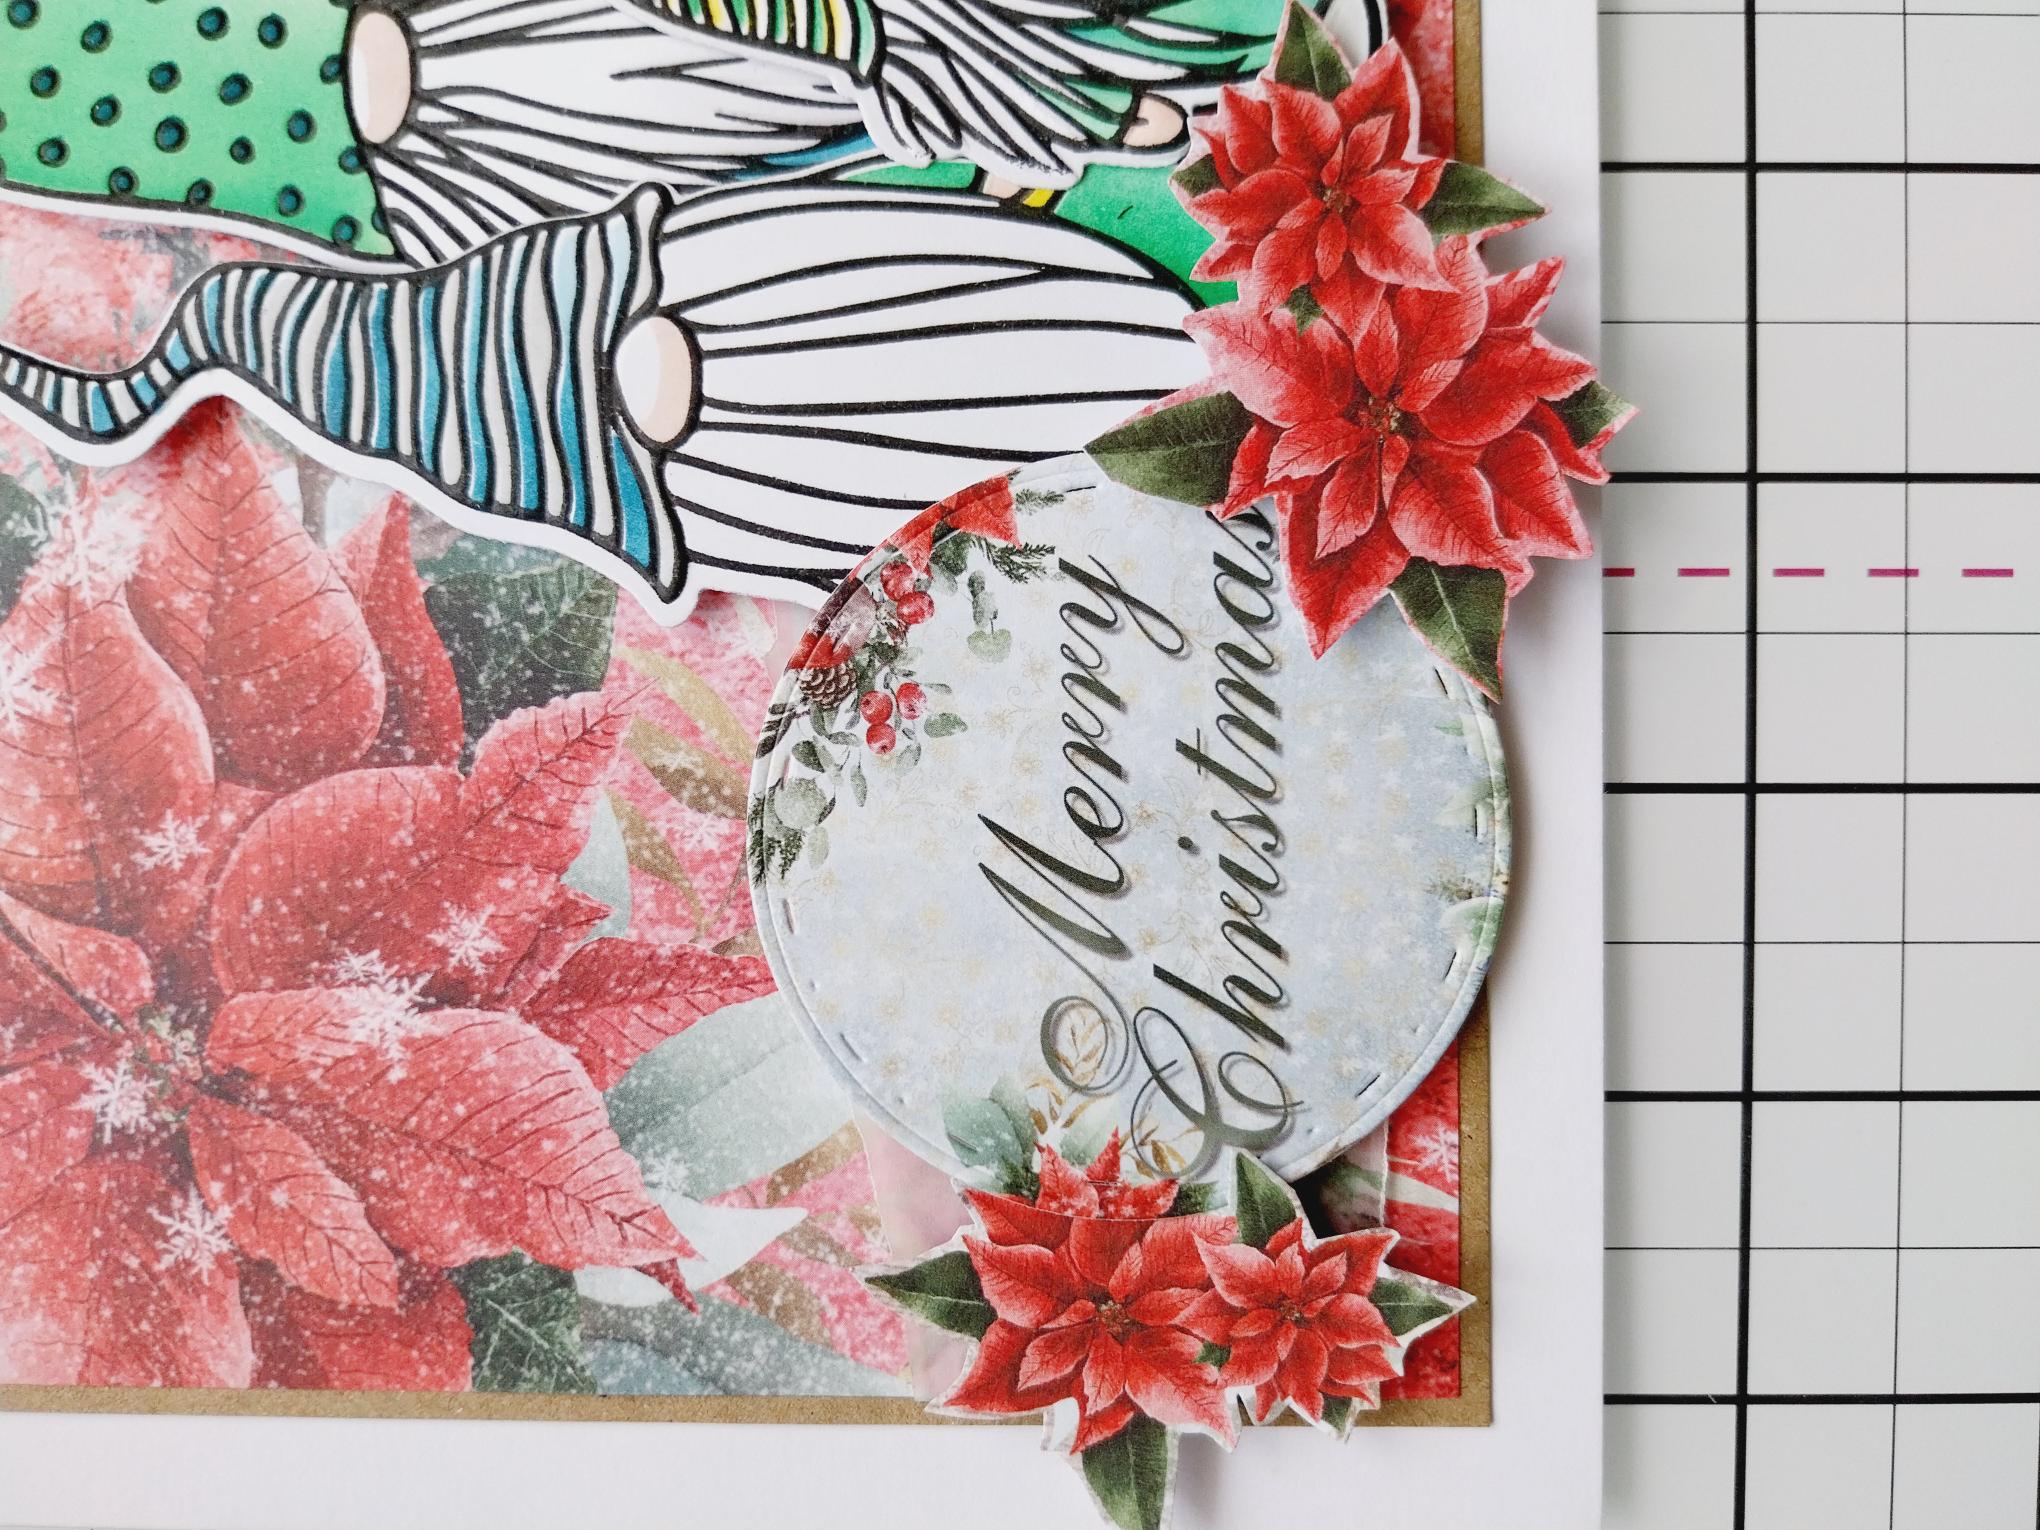
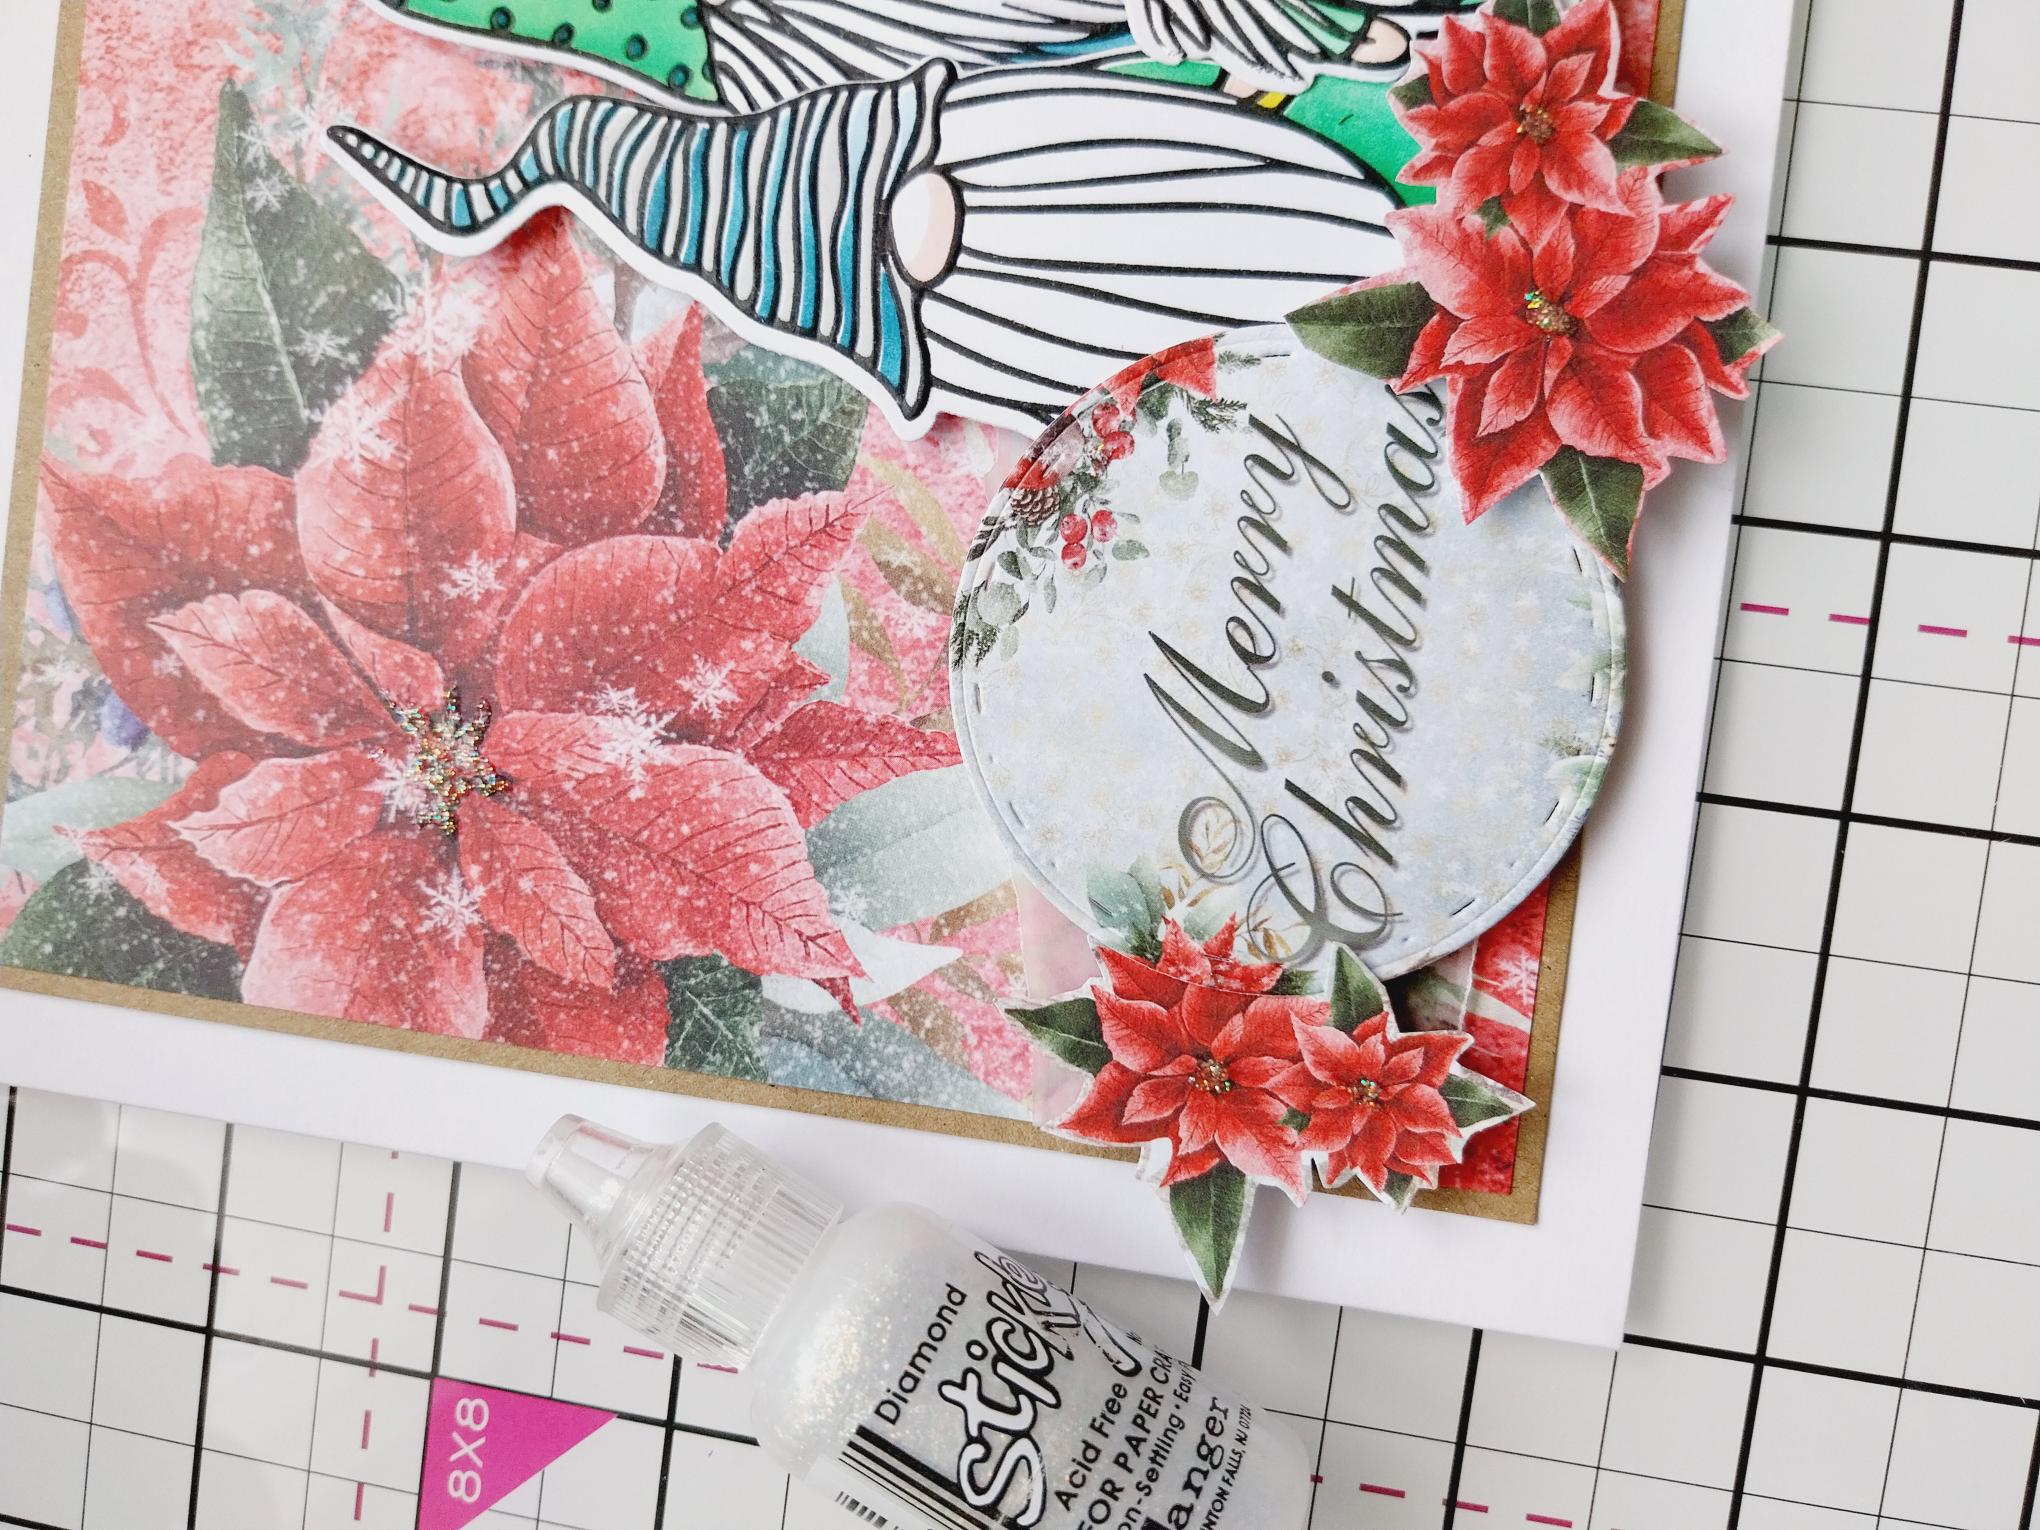
Use a circle die to die cut one of the circle sentiments from the Embellishment pack. Fussy cut a selection of Poinsettias from the same pack, then adhere to the left of your Gnomes with a combination of wet glue and foam pads. |
|
To finish, use the Stickles to add a touch of sparkle to the centres of all the floral images and 3D elements and around the edge of your circle sentiment. |