Give your friends $10 off their first order!
Refer a FRIEND


WHAT YOU WILL NEED:
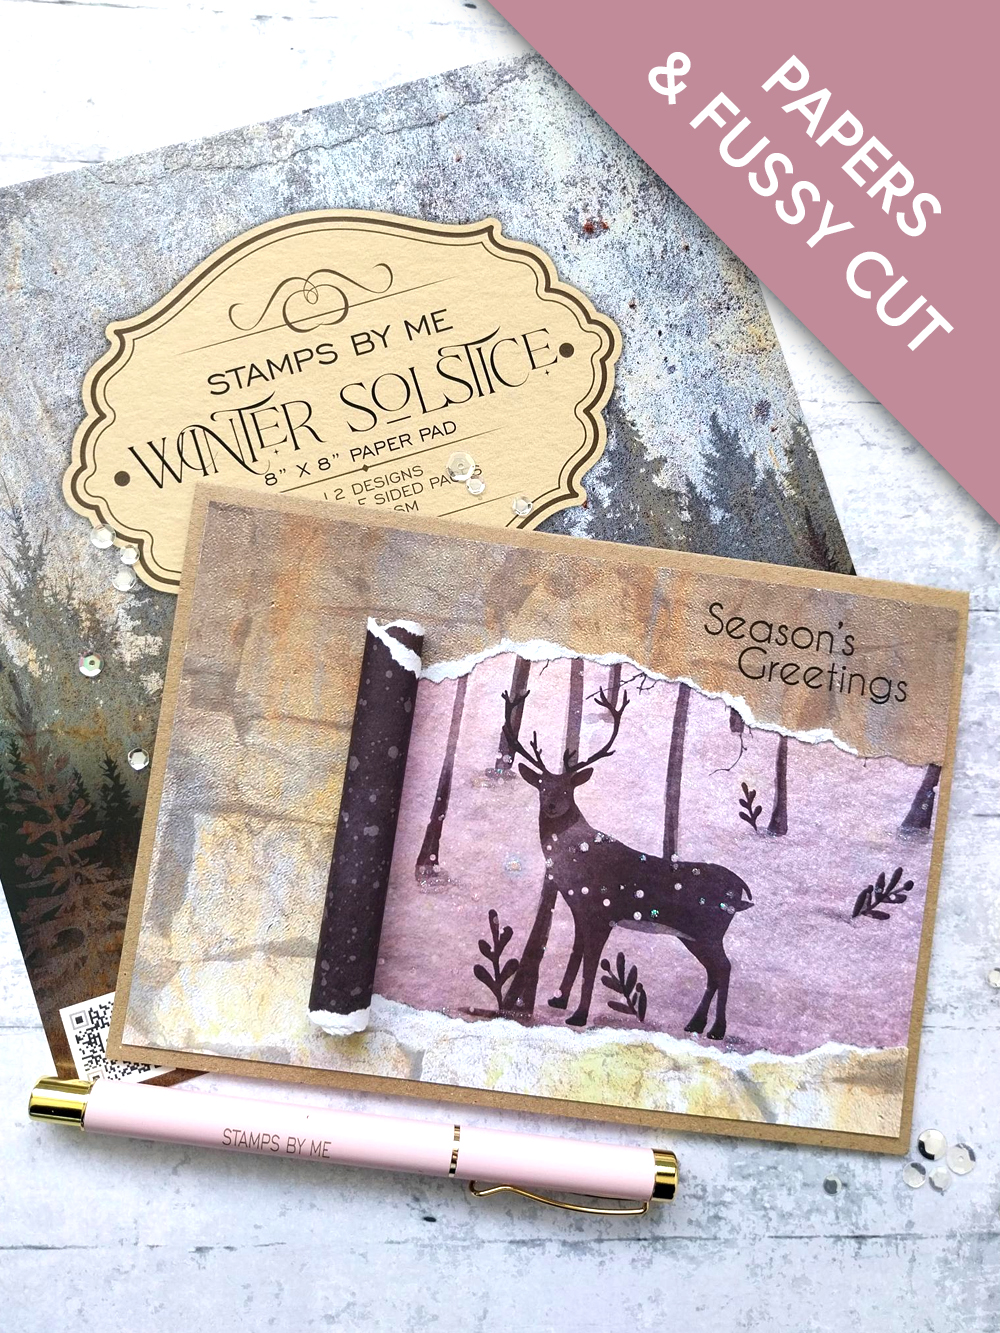
Kraft card blank 7 x 5" (landscape)
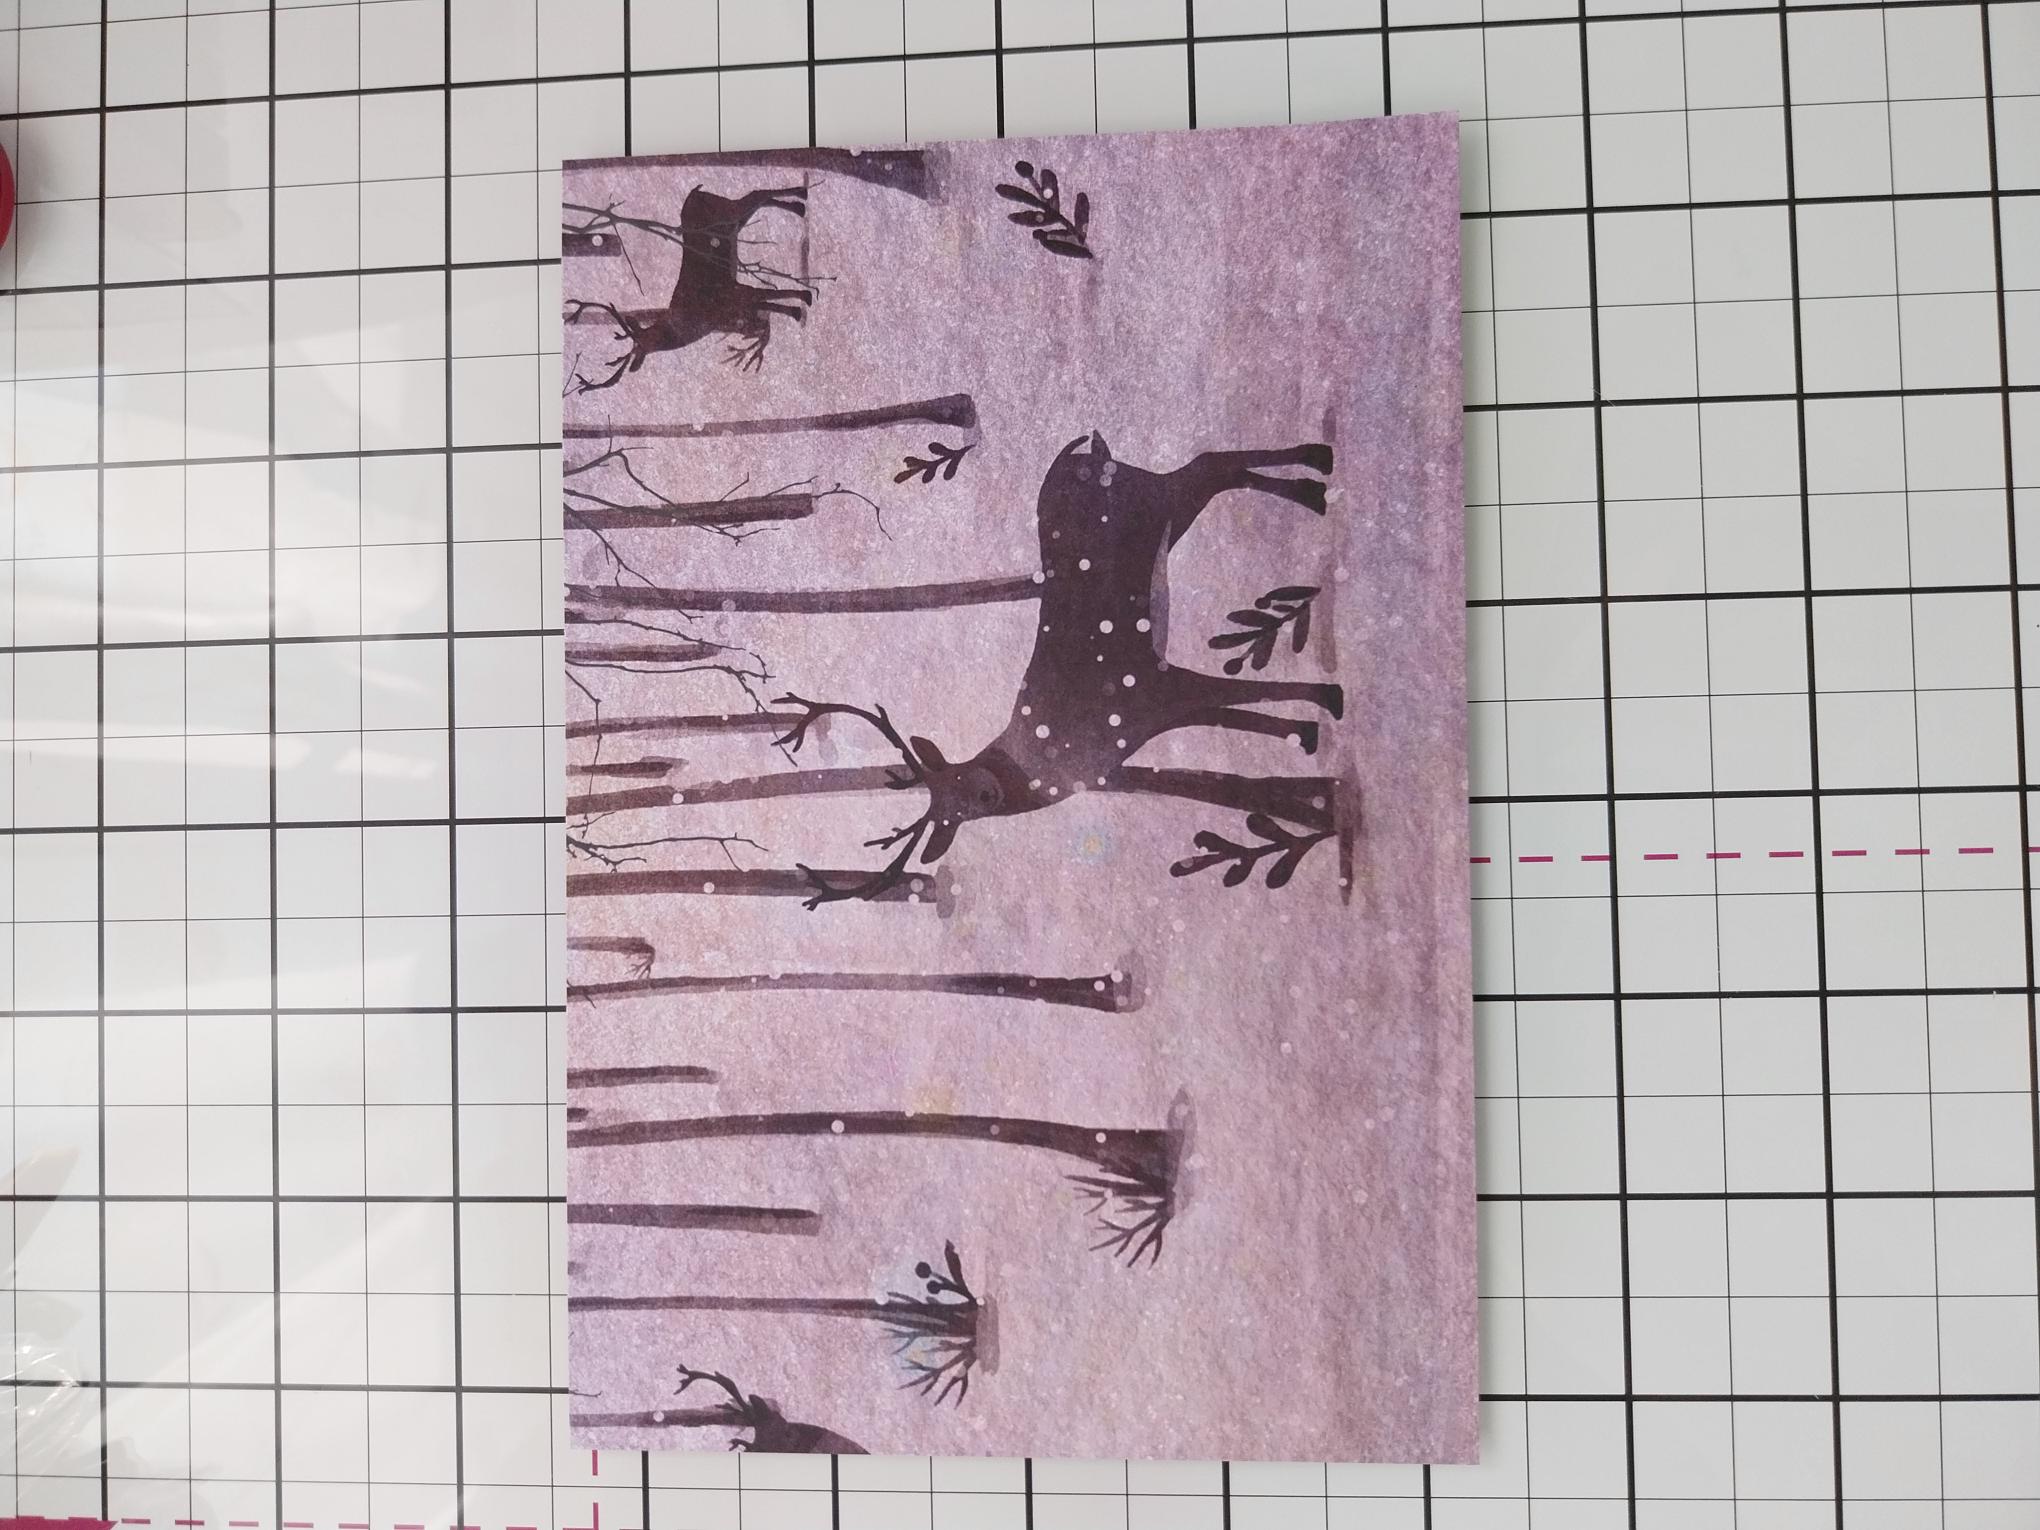
Winter Solstice 8 x 8" Paper Pad
Winter Solstice A5 Stamp Set
SBM Hybrid Ink Pad: Midnight
Ranger Stickles: Star Dust
Pencil
Eureka 101 Watercolour Tablet
SBM Magnetic glass mat
Paper Trimmer
Perfect Together Glue
Double sided adhesive tape/red liner tape
Tape runner
[click image to enlarge] 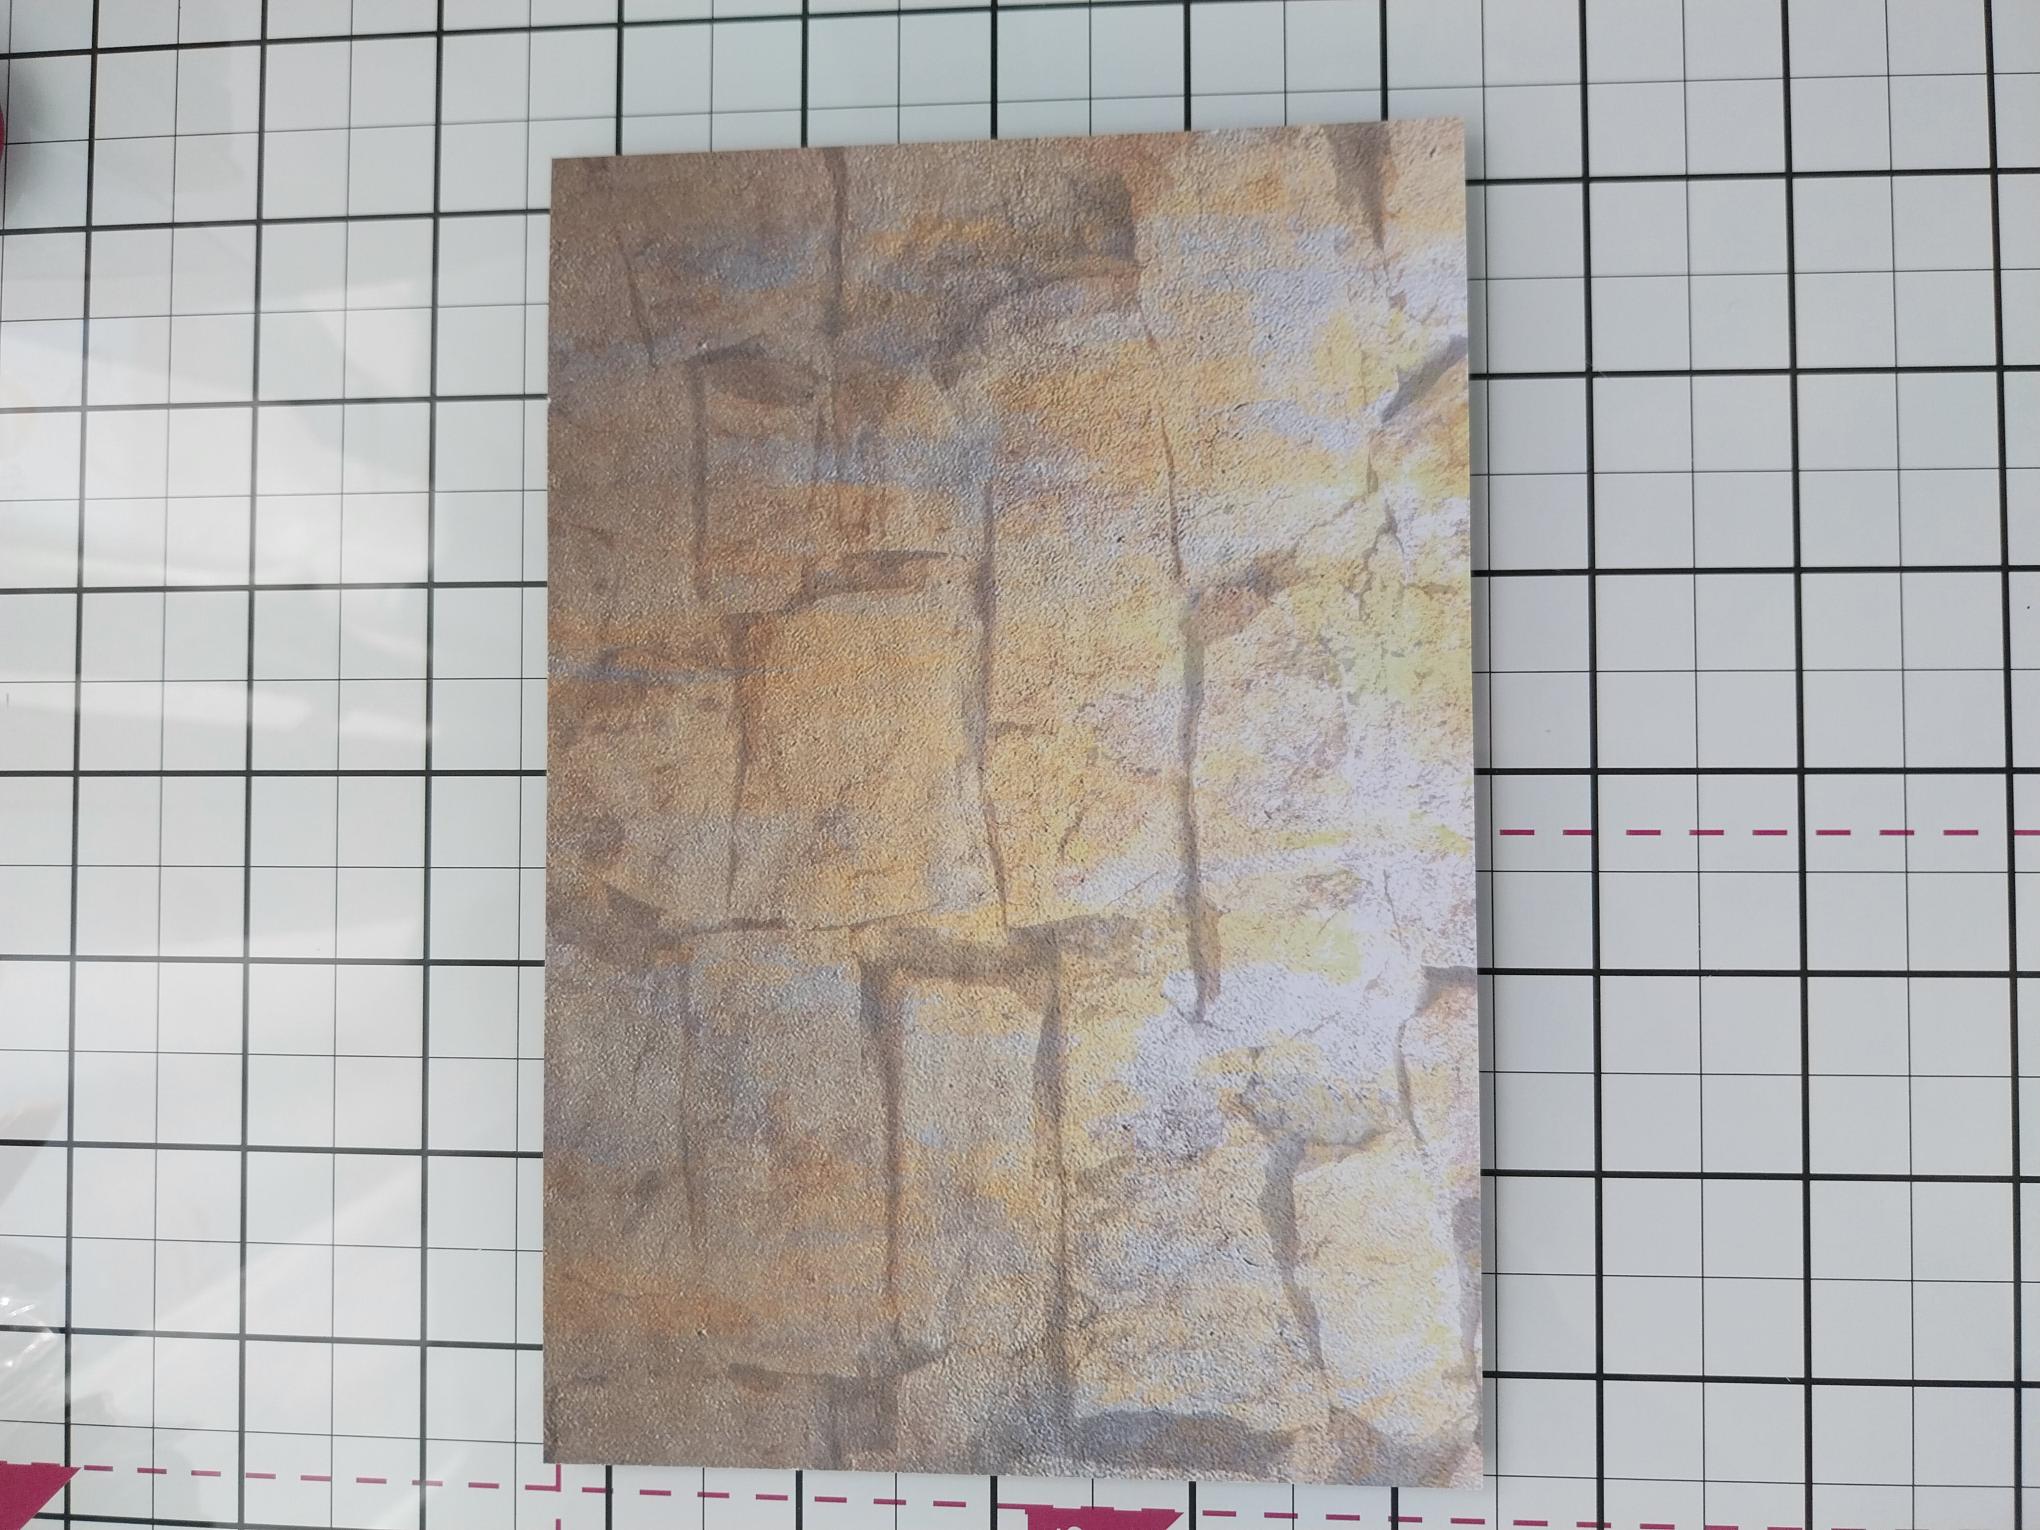
|
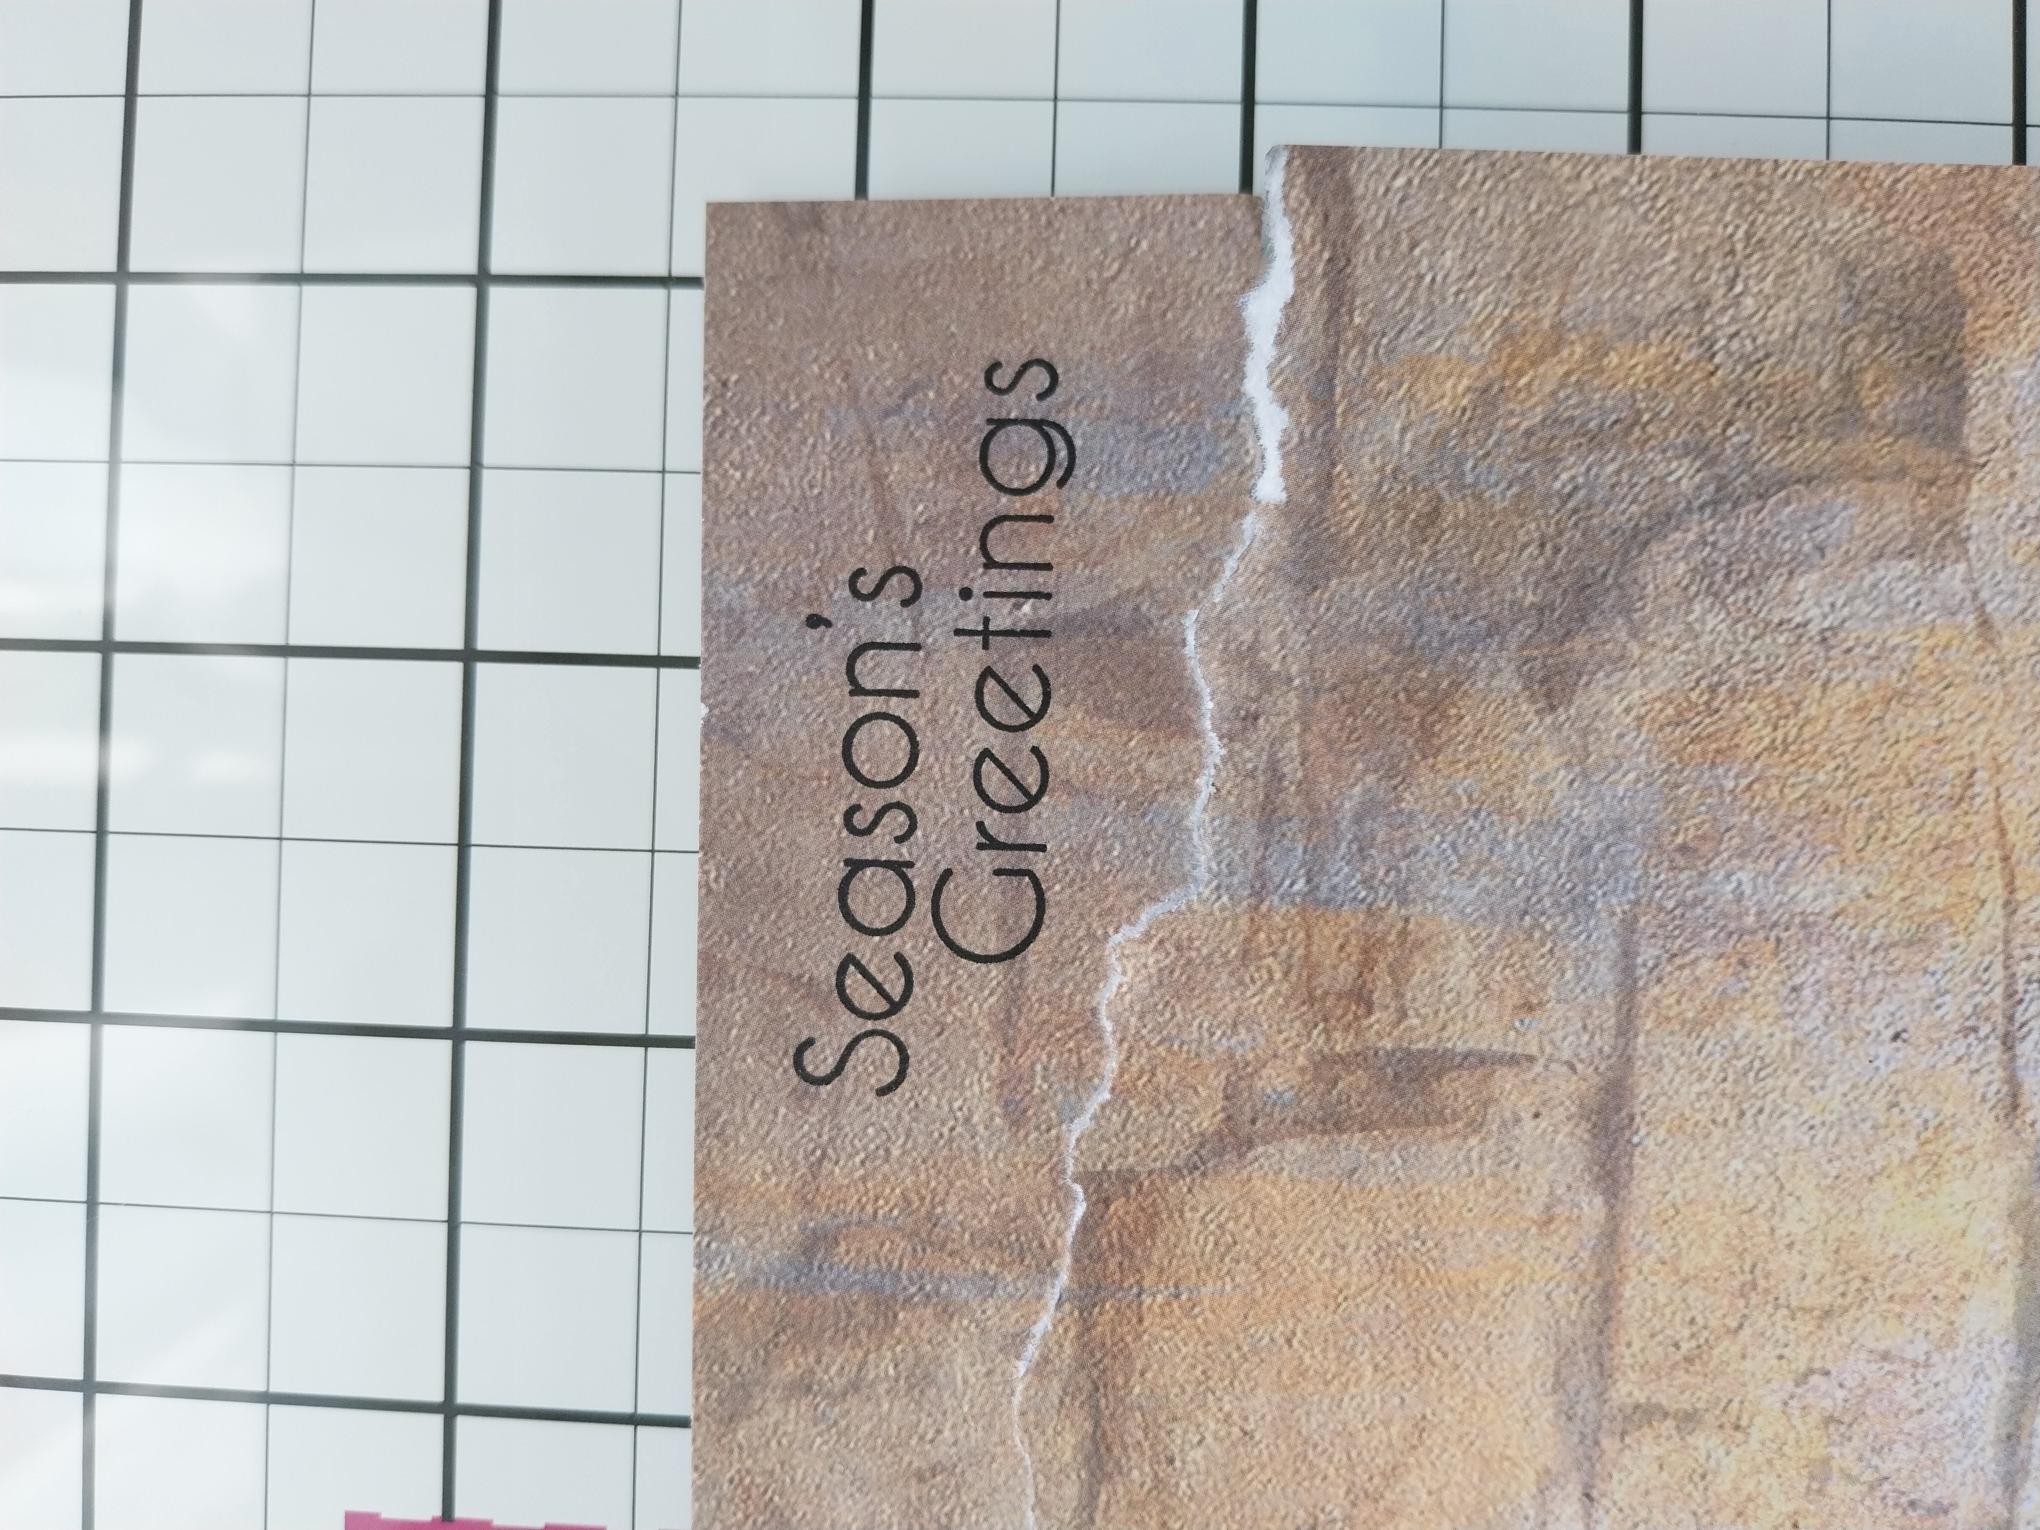
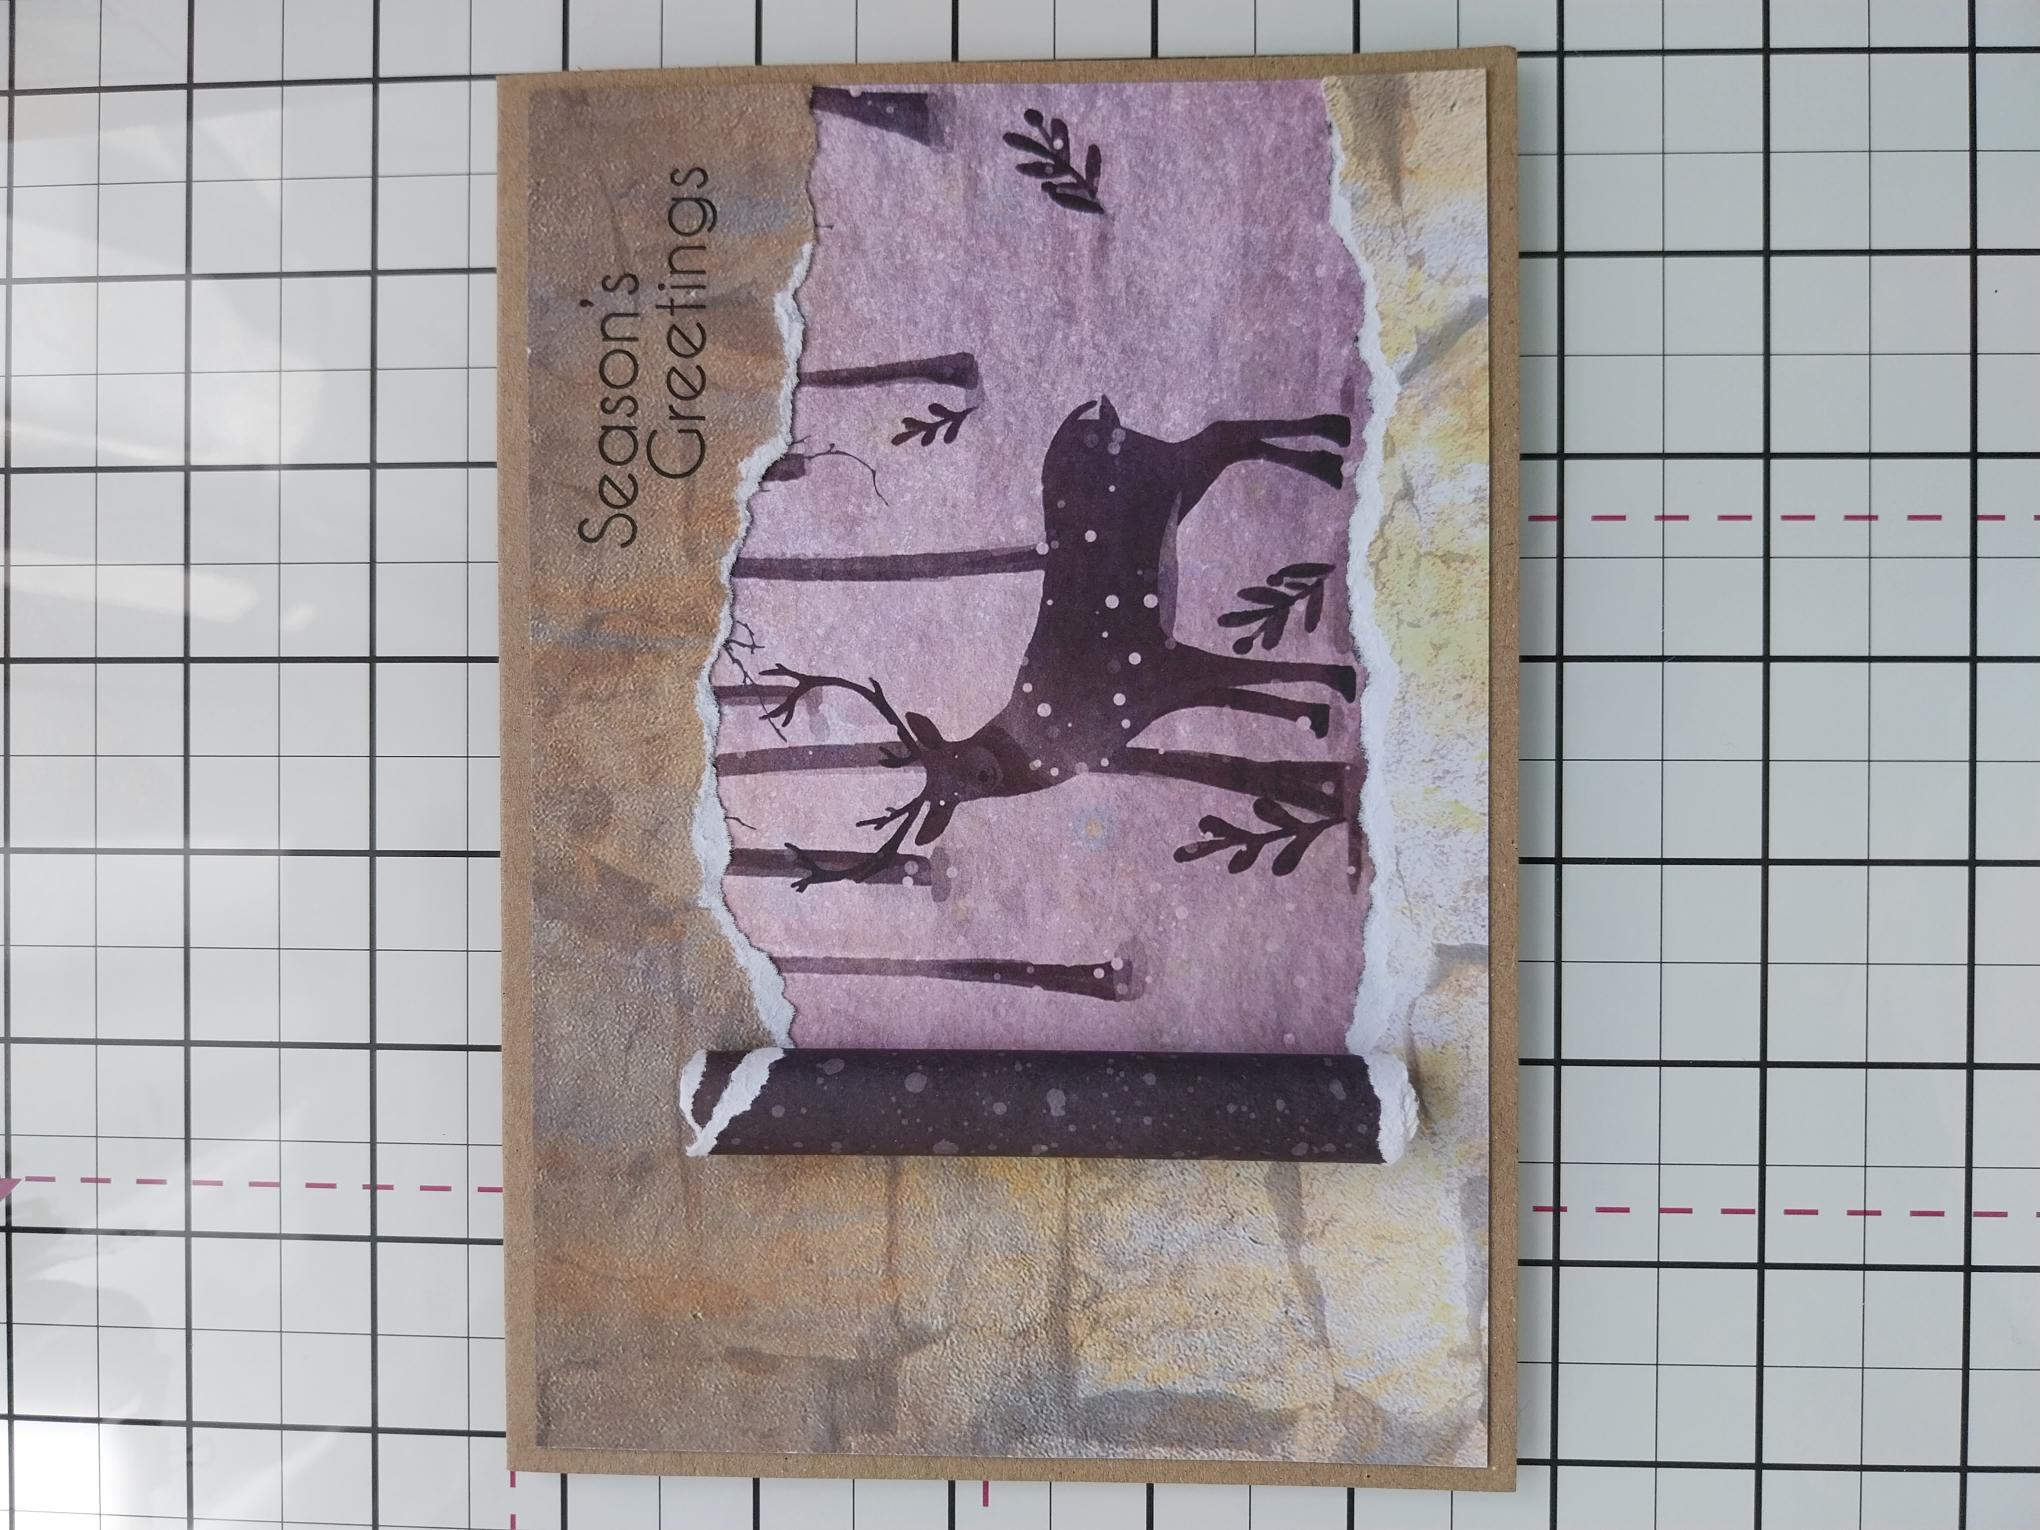
Remove this beautiful textured paper from the paper pad and trim to 6 3/4 x 4 3/4, in landscape view. |
|
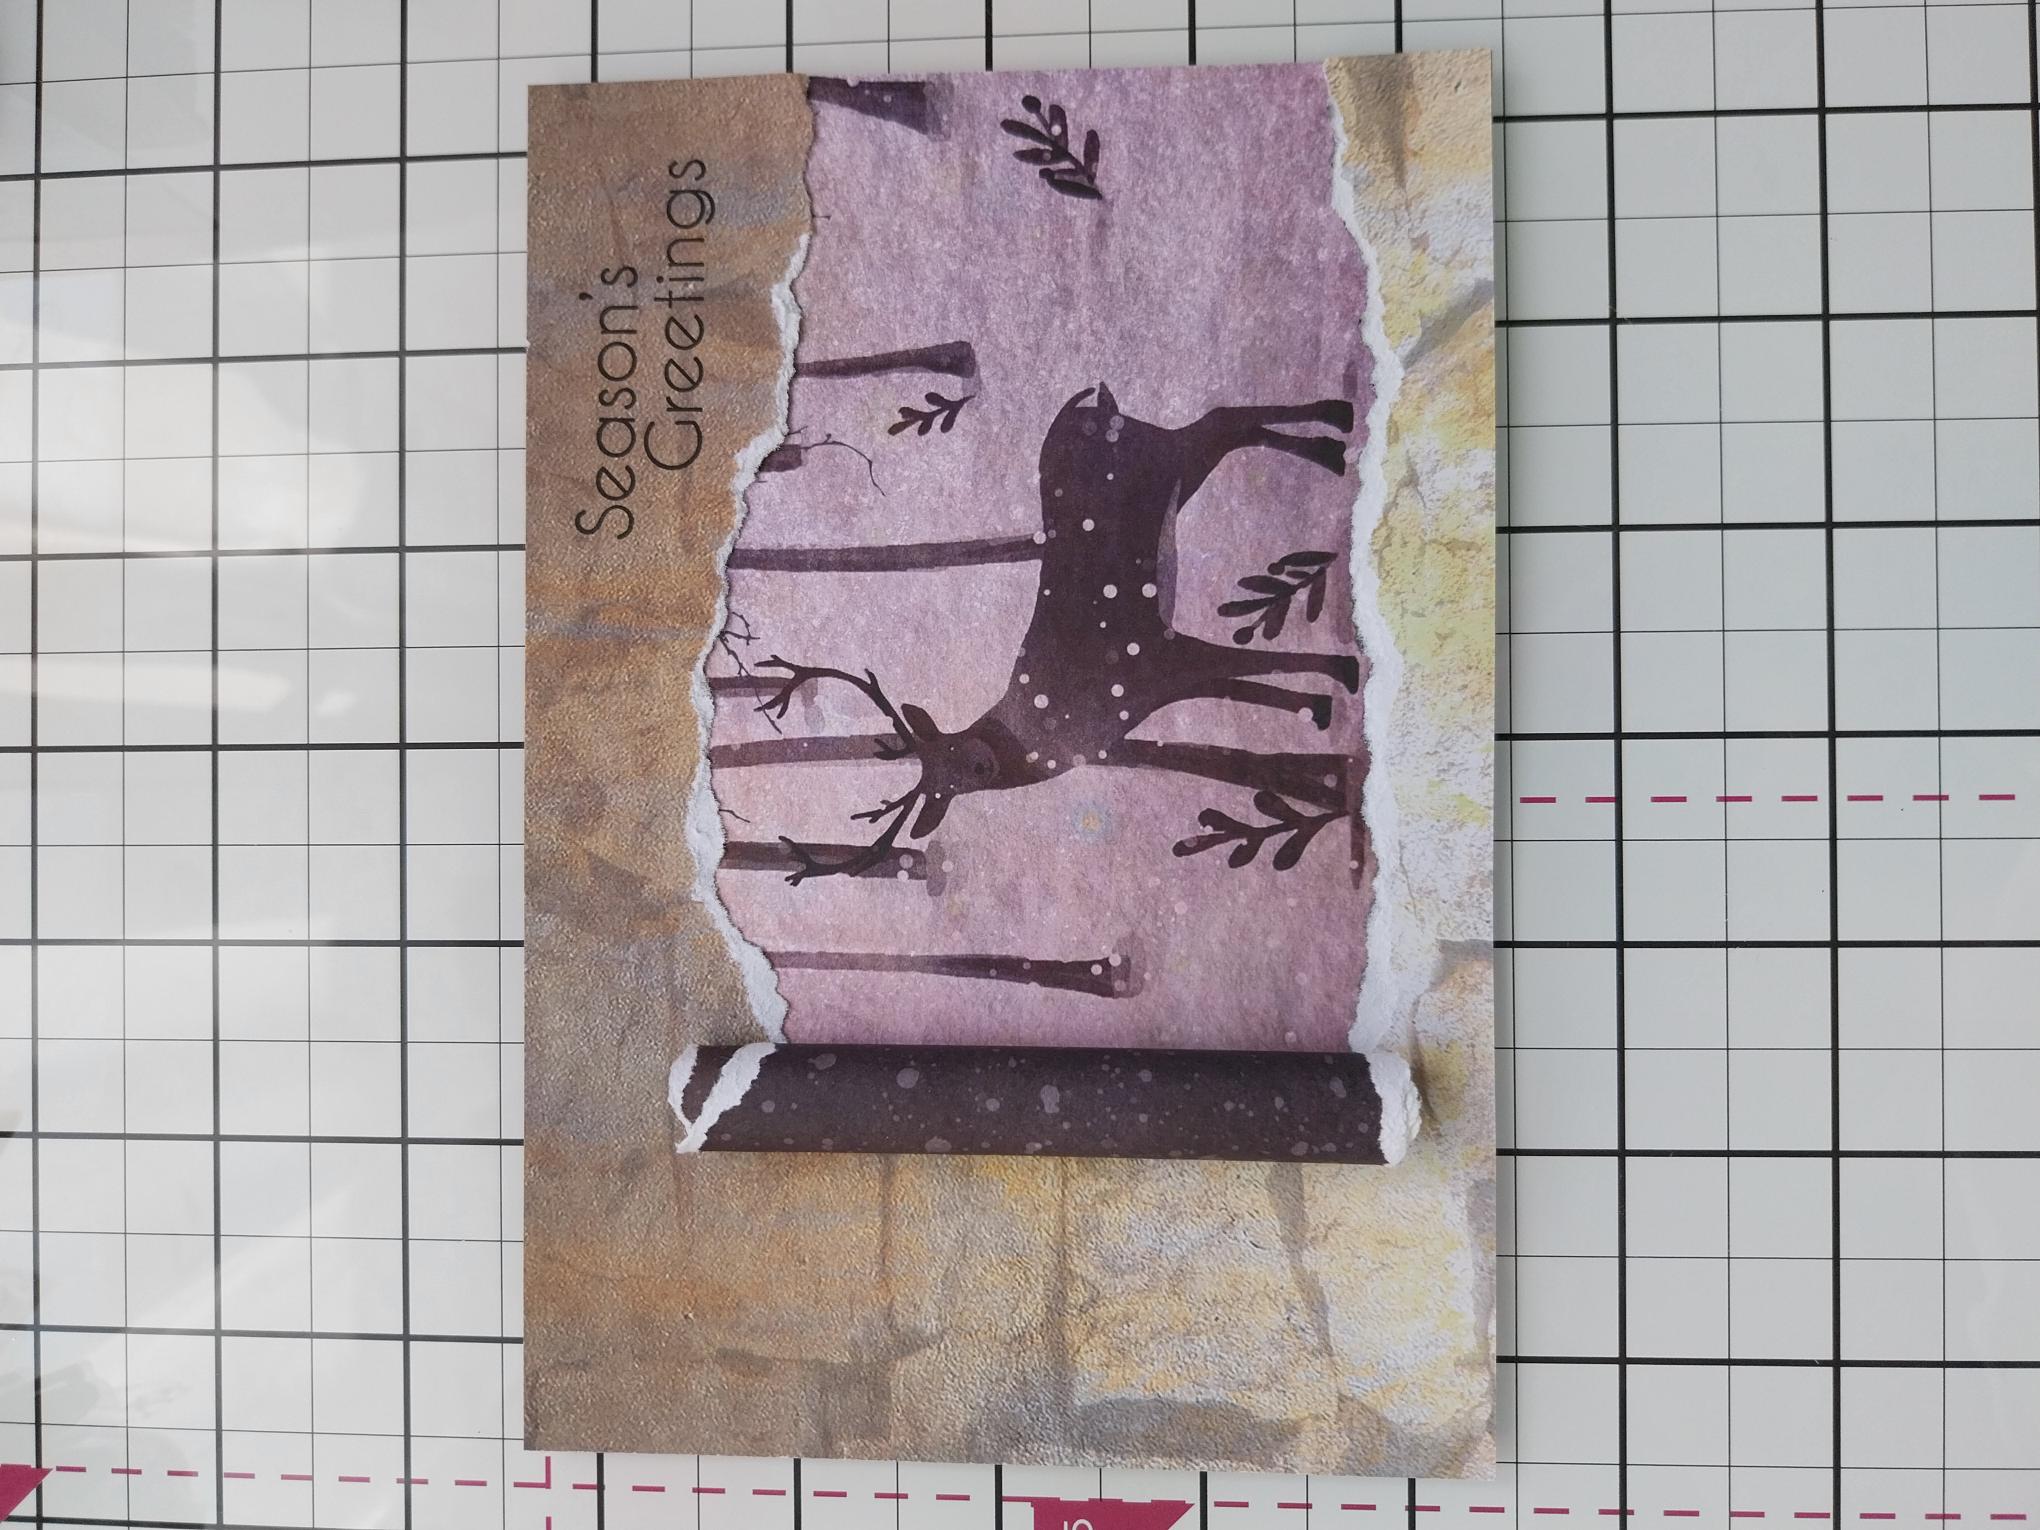
Trim this gorgeous scenery paper to the same size or a couple of mm's smaller, ensuring the main stag is in view but not right at the bottom, as seen here. |
|
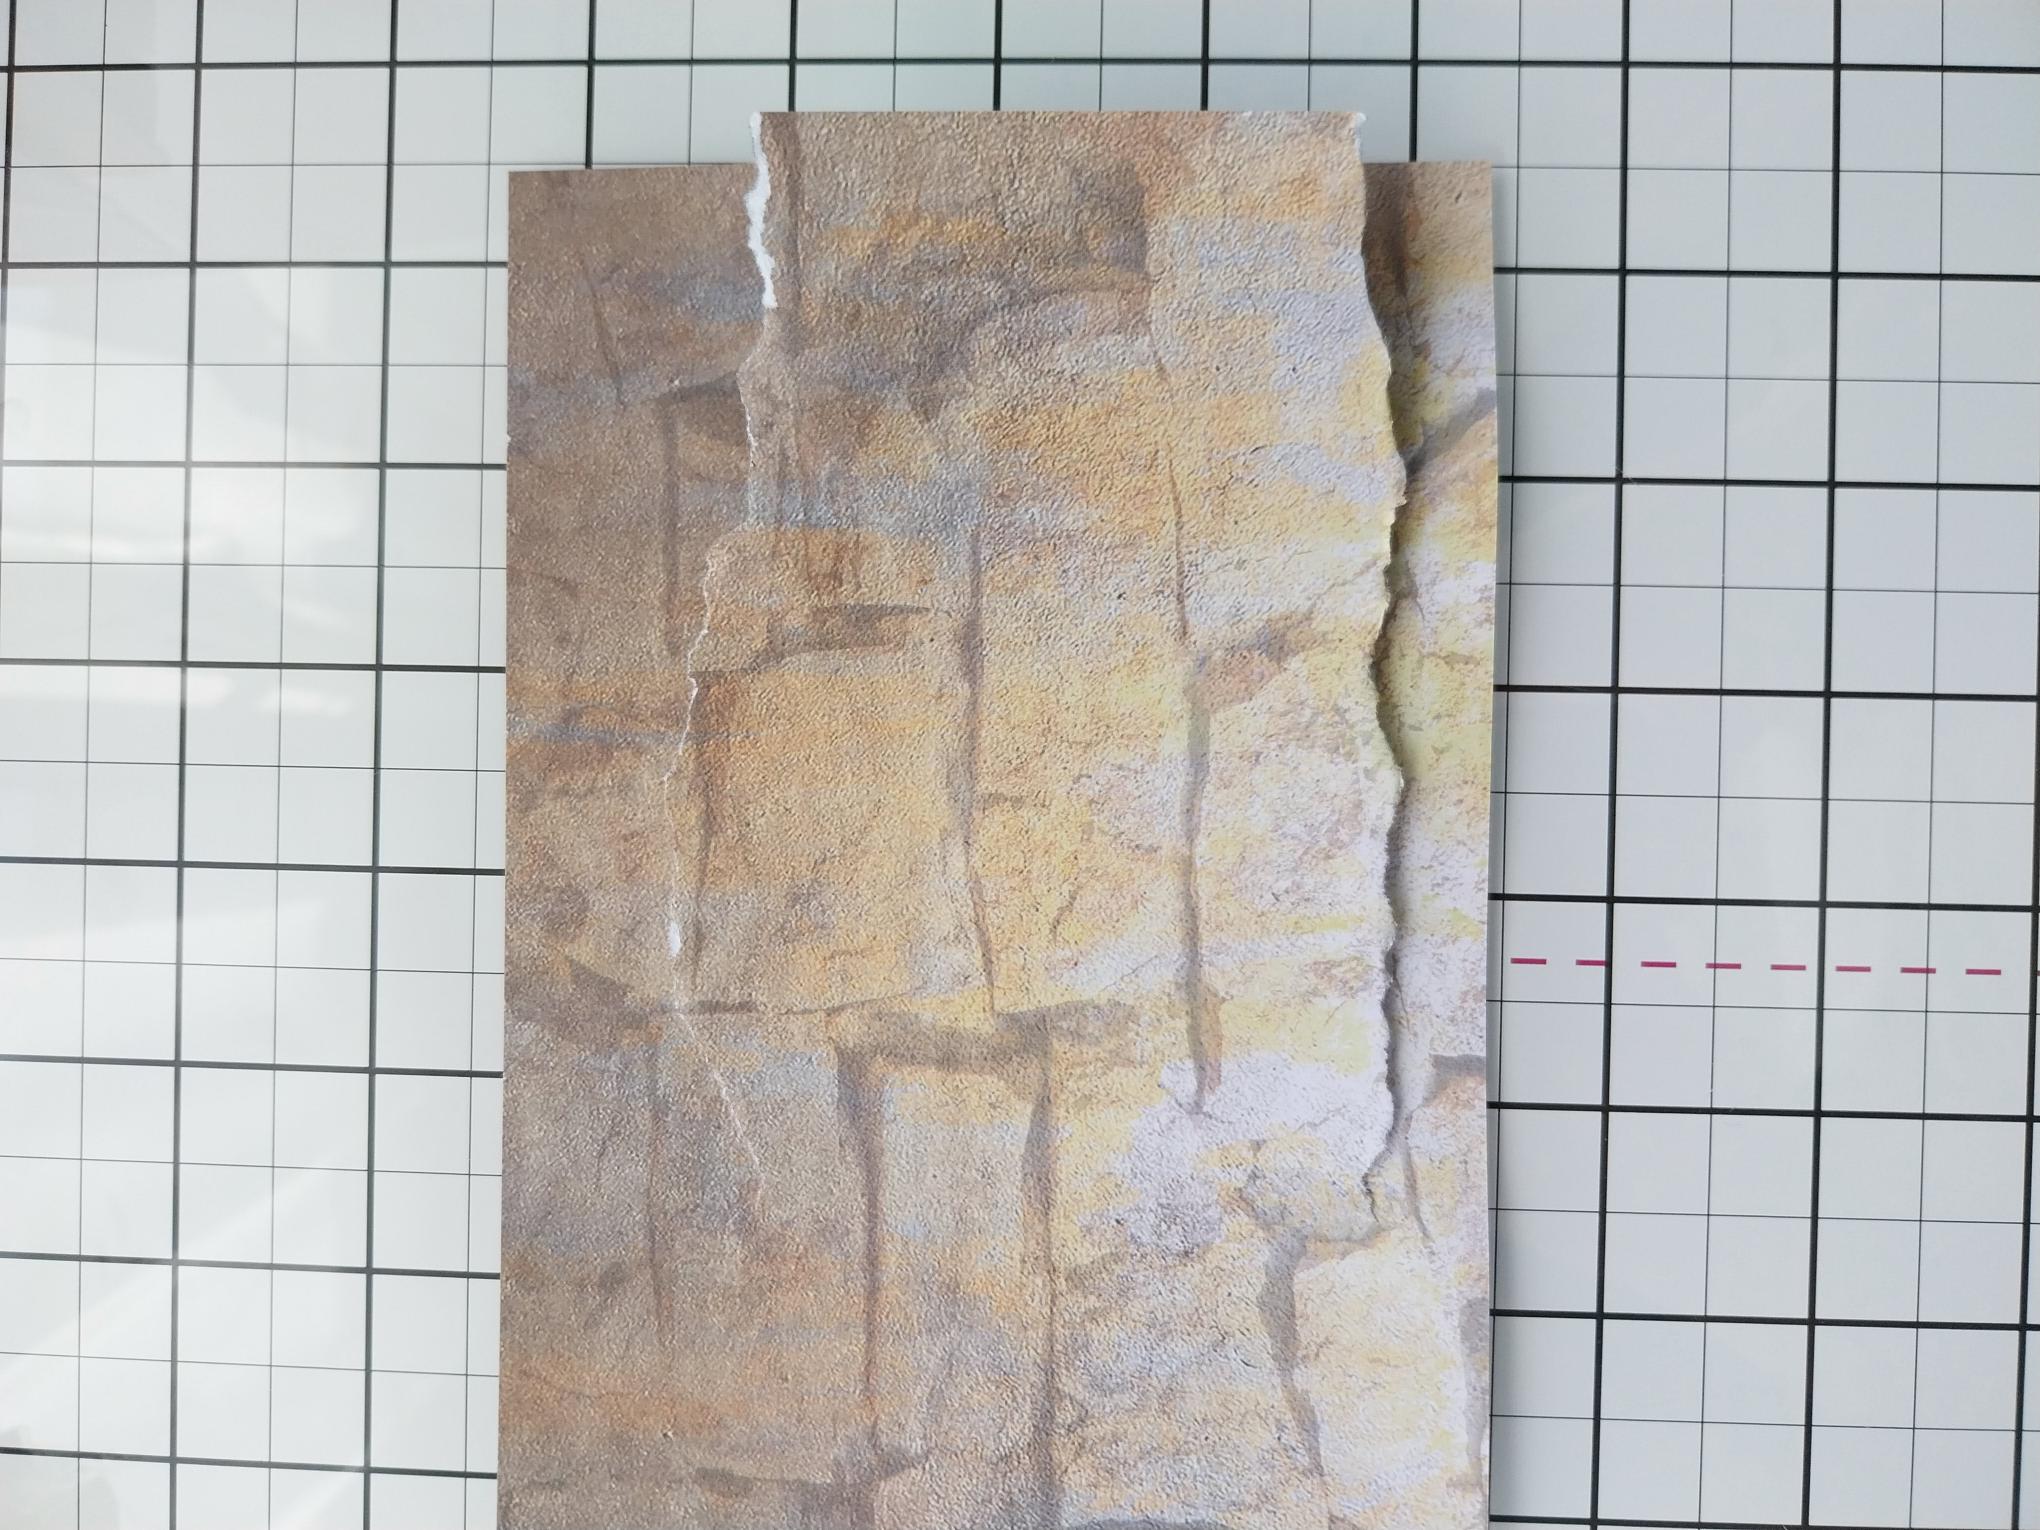
Placing the textured paper on top of the scenery paper, tear a panel partially across from the right of the textured paper, so when lifted it will "reveal" the beautiful stag. DO NOT tear all the way across, just enough to reveal the stag and some of the surrounding scenery. |
|
Stamp the sentiment in the Midnight ink, in the top right corner, above the torn panel. |
|
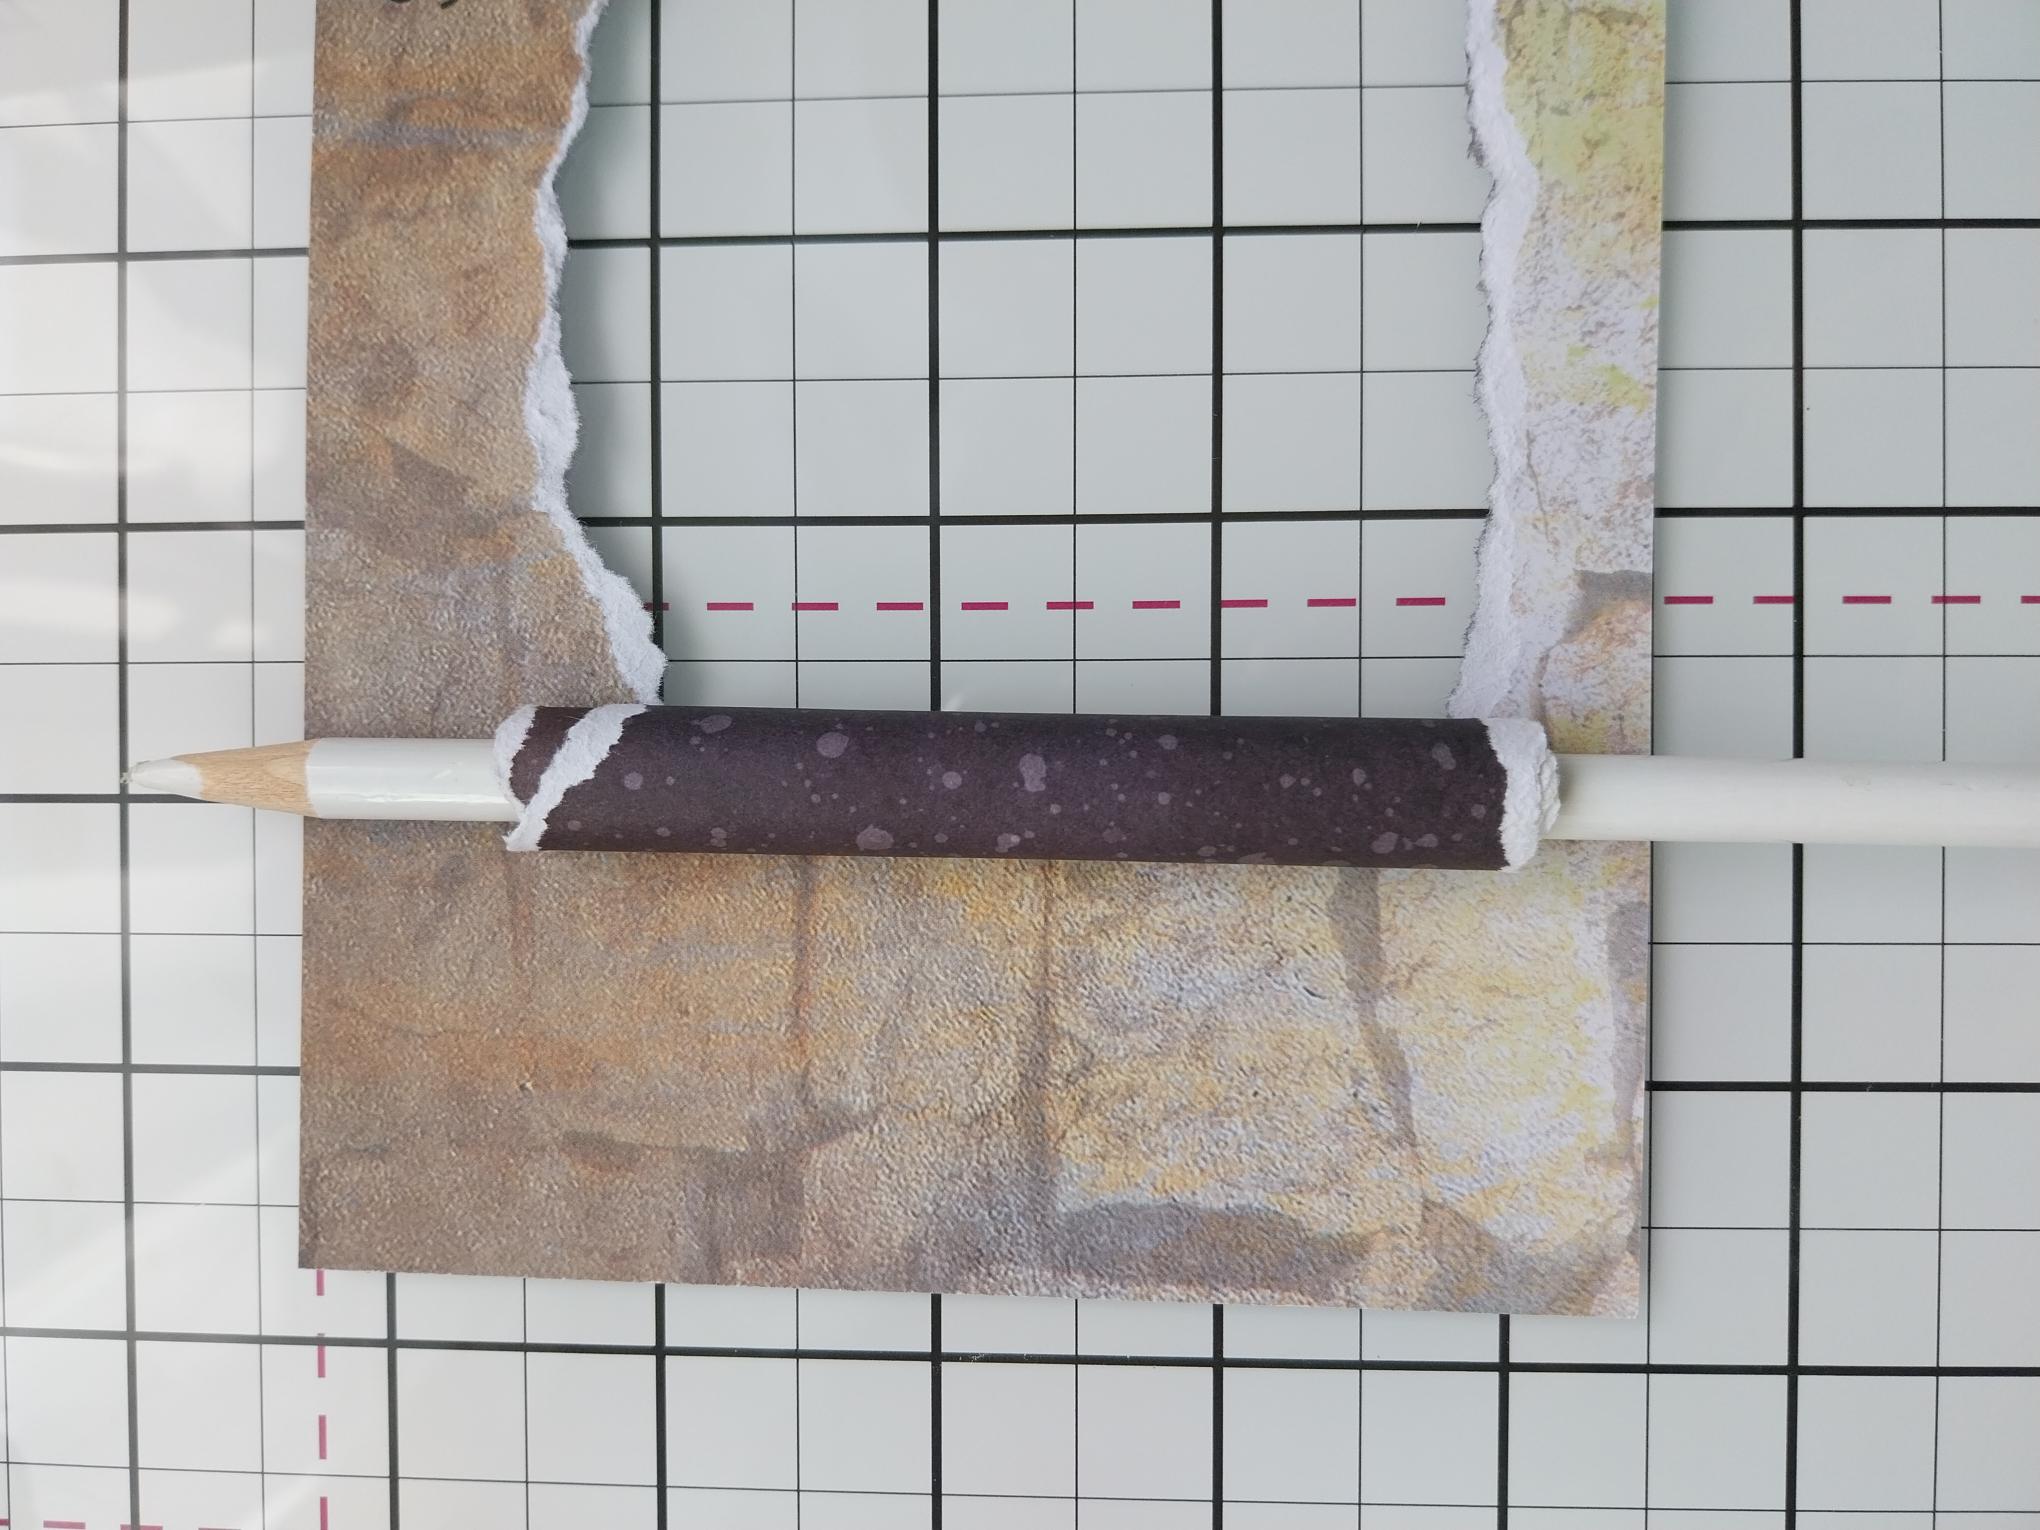
Using a pencil, roll back the torn panel. The smaller the width of pencil, the tighter the roll will be. |
|
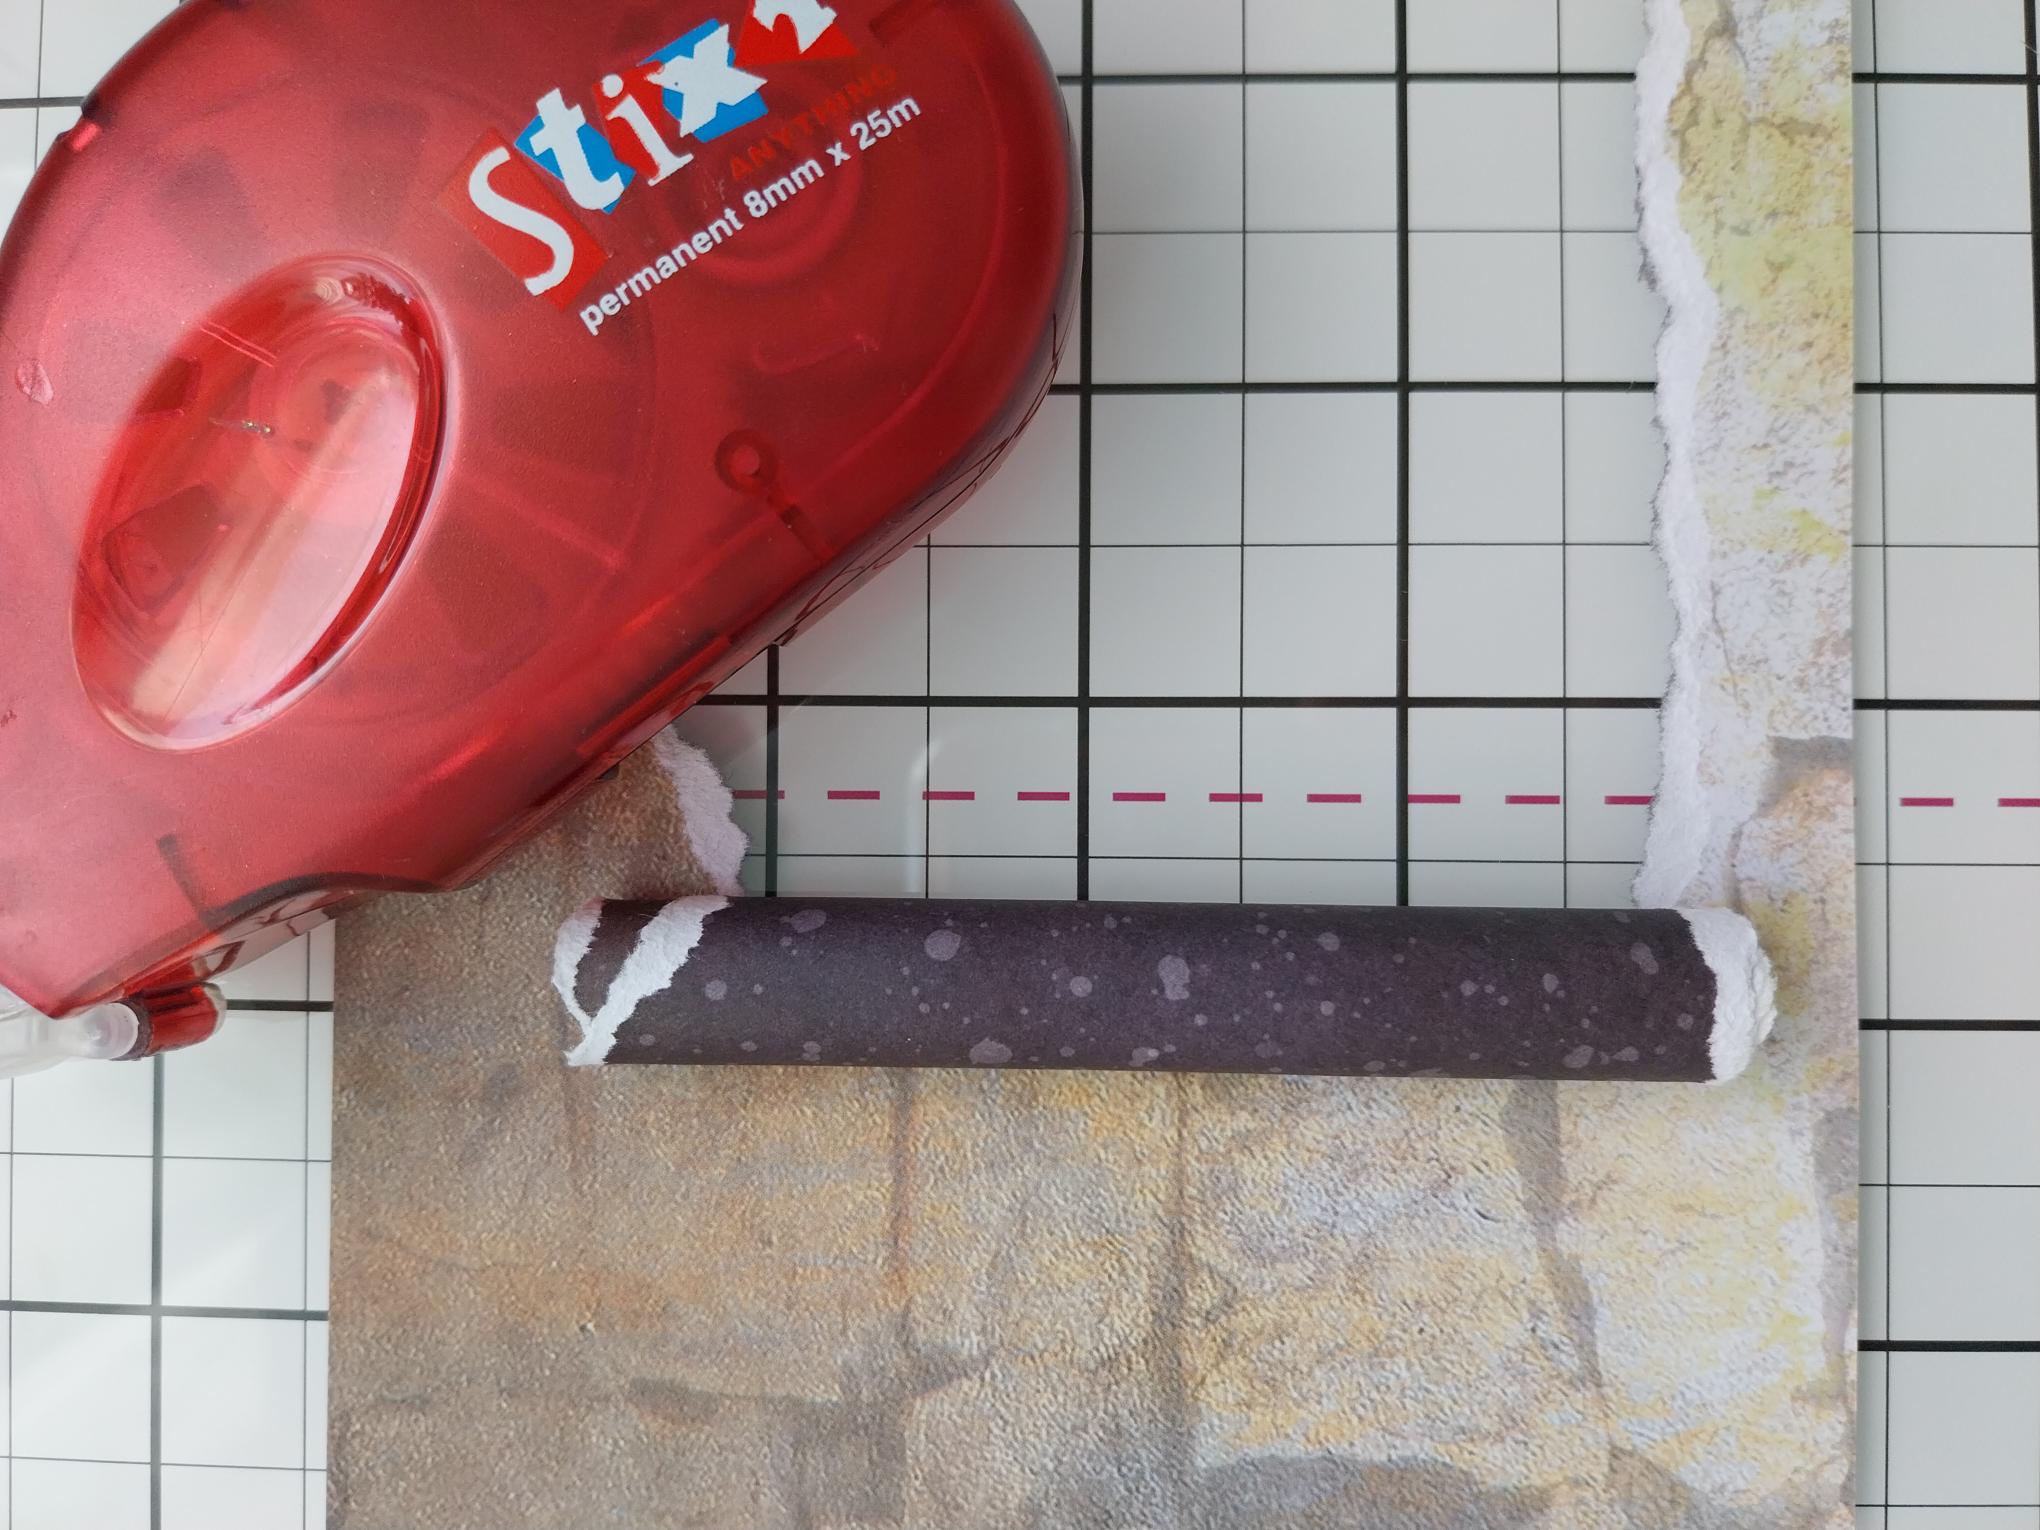
Use a tape runner to secure the paper as you "roll" it back and then secure the final roll with double sided adhesive tape/red liner tape. |
|
Adhere the rolled-back paper on top of the scenery paper. |
|
Adhere this to your 7 x 5" landscape kraft card. |

|
To finish, use your Stickles to add some festive sparkle along the torn paper edges and on the falling snow. |