Give your friends $10 off their first order!
Refer a FRIEND


WHAT YOU WILL NEED:
White card blank 7 x 7"
Kraft card 6 1/2 x 6 1/2"
Kraft card 7 1/2 x 5 1/2
White/Black card
Avago Ink Designs Graffiti Monster 8 x 8" Paper Pack
Avago Ink Designs Graffiti Monster 8 x 8" Foundation Pack
Avago Ink Designs Graffiti Monster 7 x 5" Stamp and Die Set
Avago Ink Designs Graffiti Monster 7 x 5" Die Set
Avago Ink Designs Graffiti Monster Stencil and Stamp Set
SBM Hybrid Ink Pad: Midnight
Eureka 101 Watercolour Tablet
SBM Magnetic glass mat
Paper Trimmer
Perfect Together Glue
Foam pads
Die Cutting machine
[click image to enlarge] 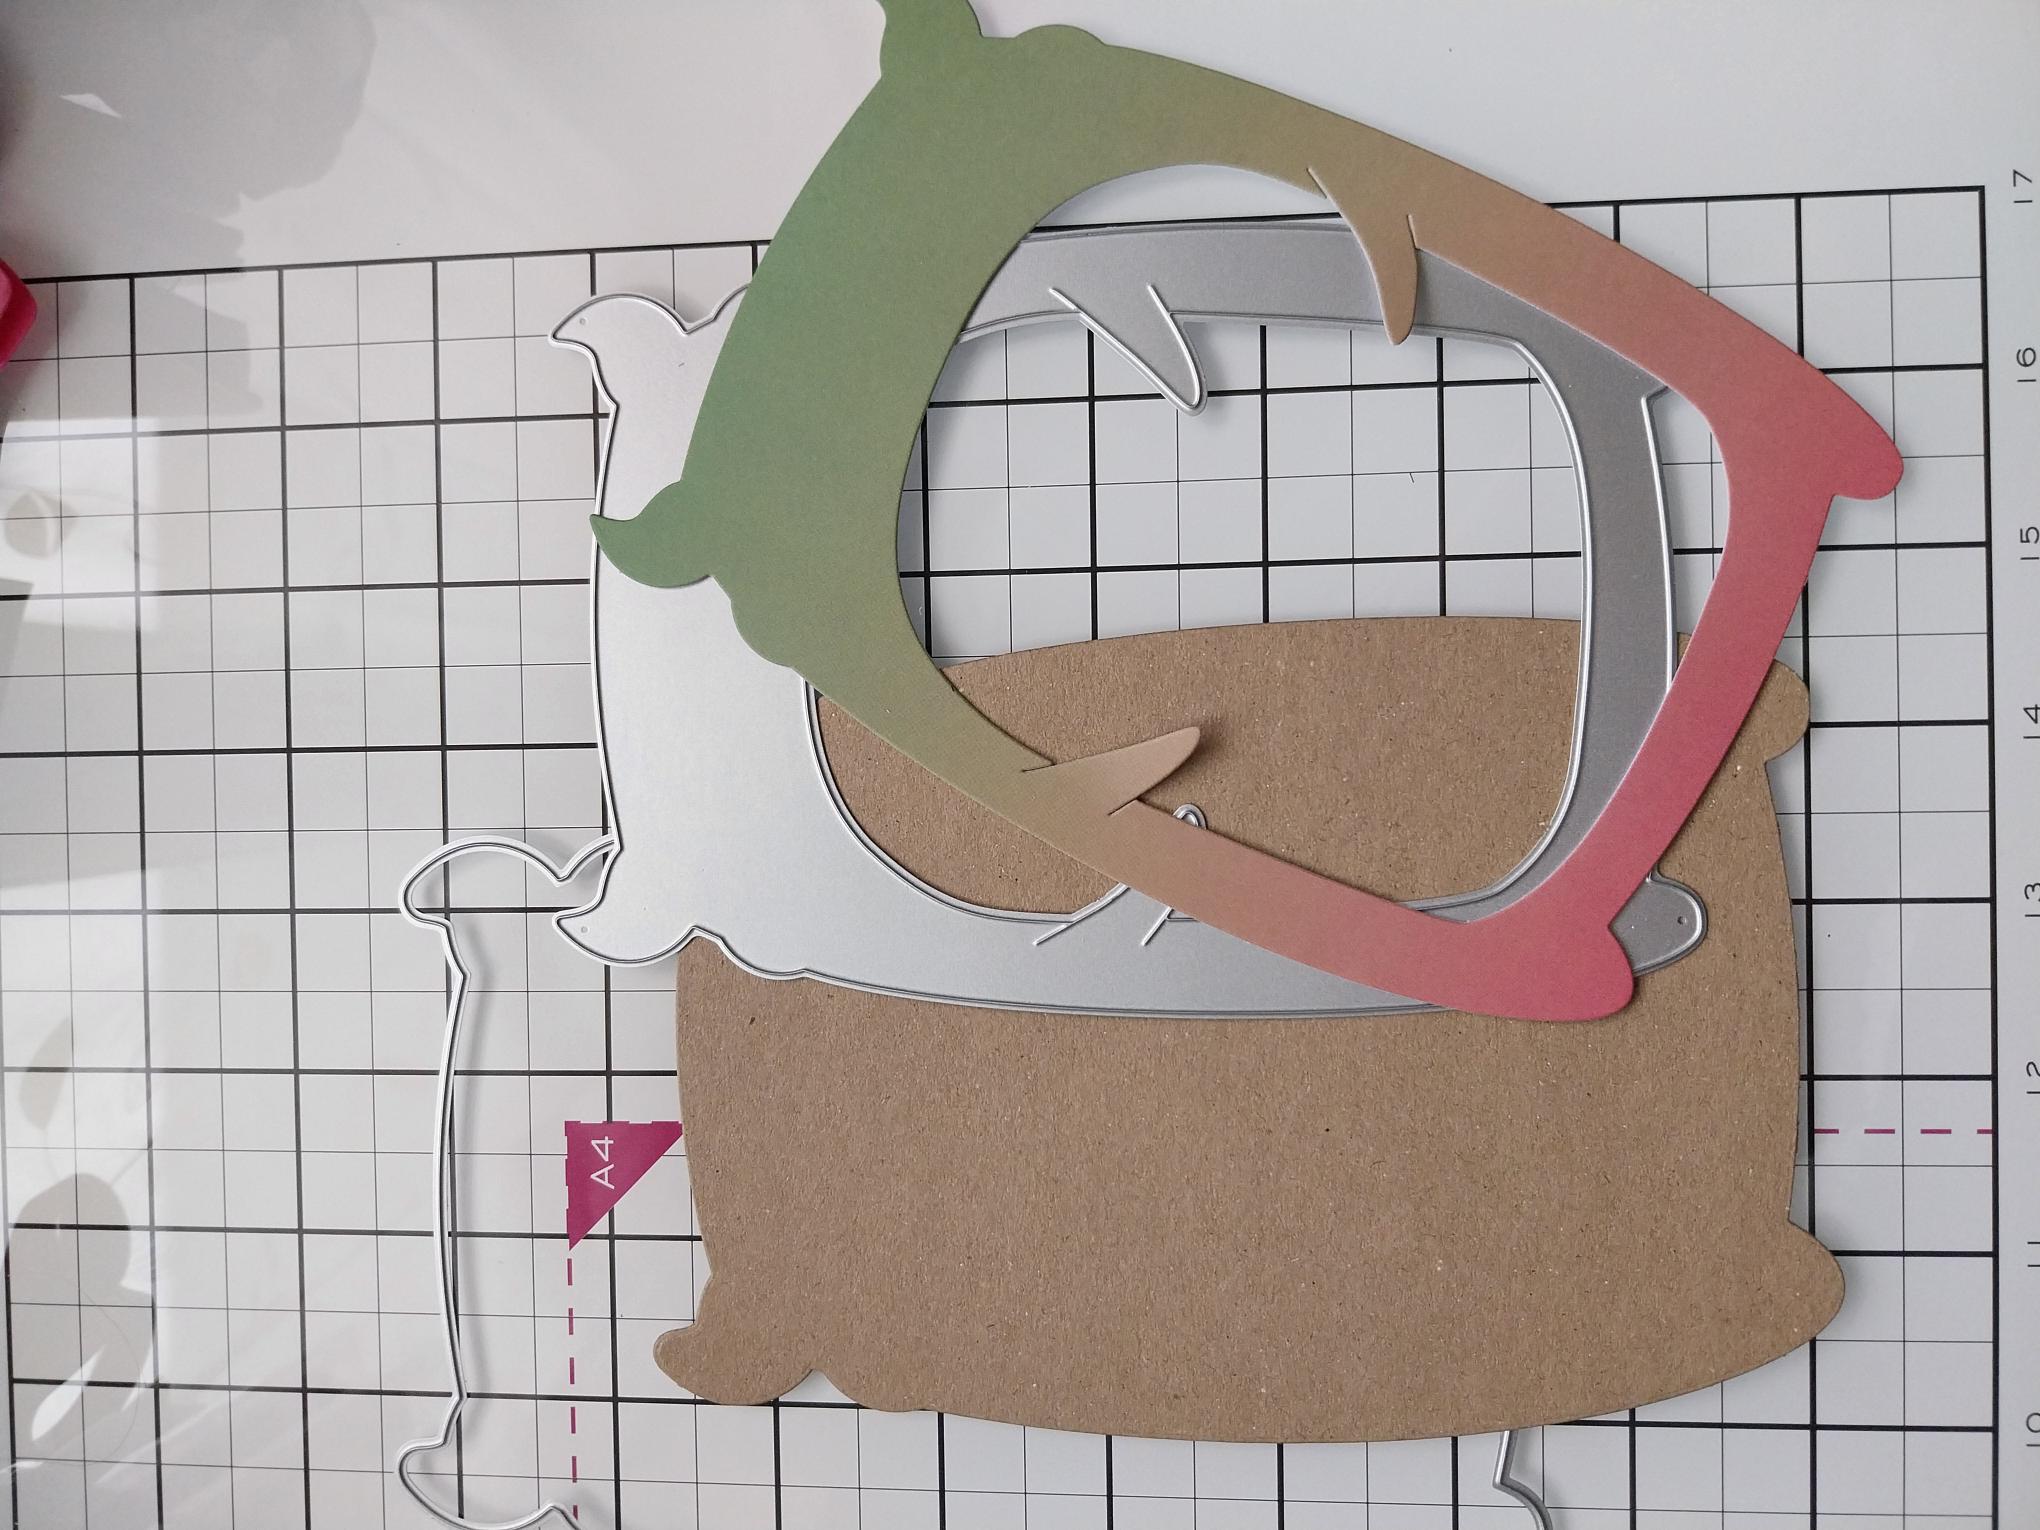
|
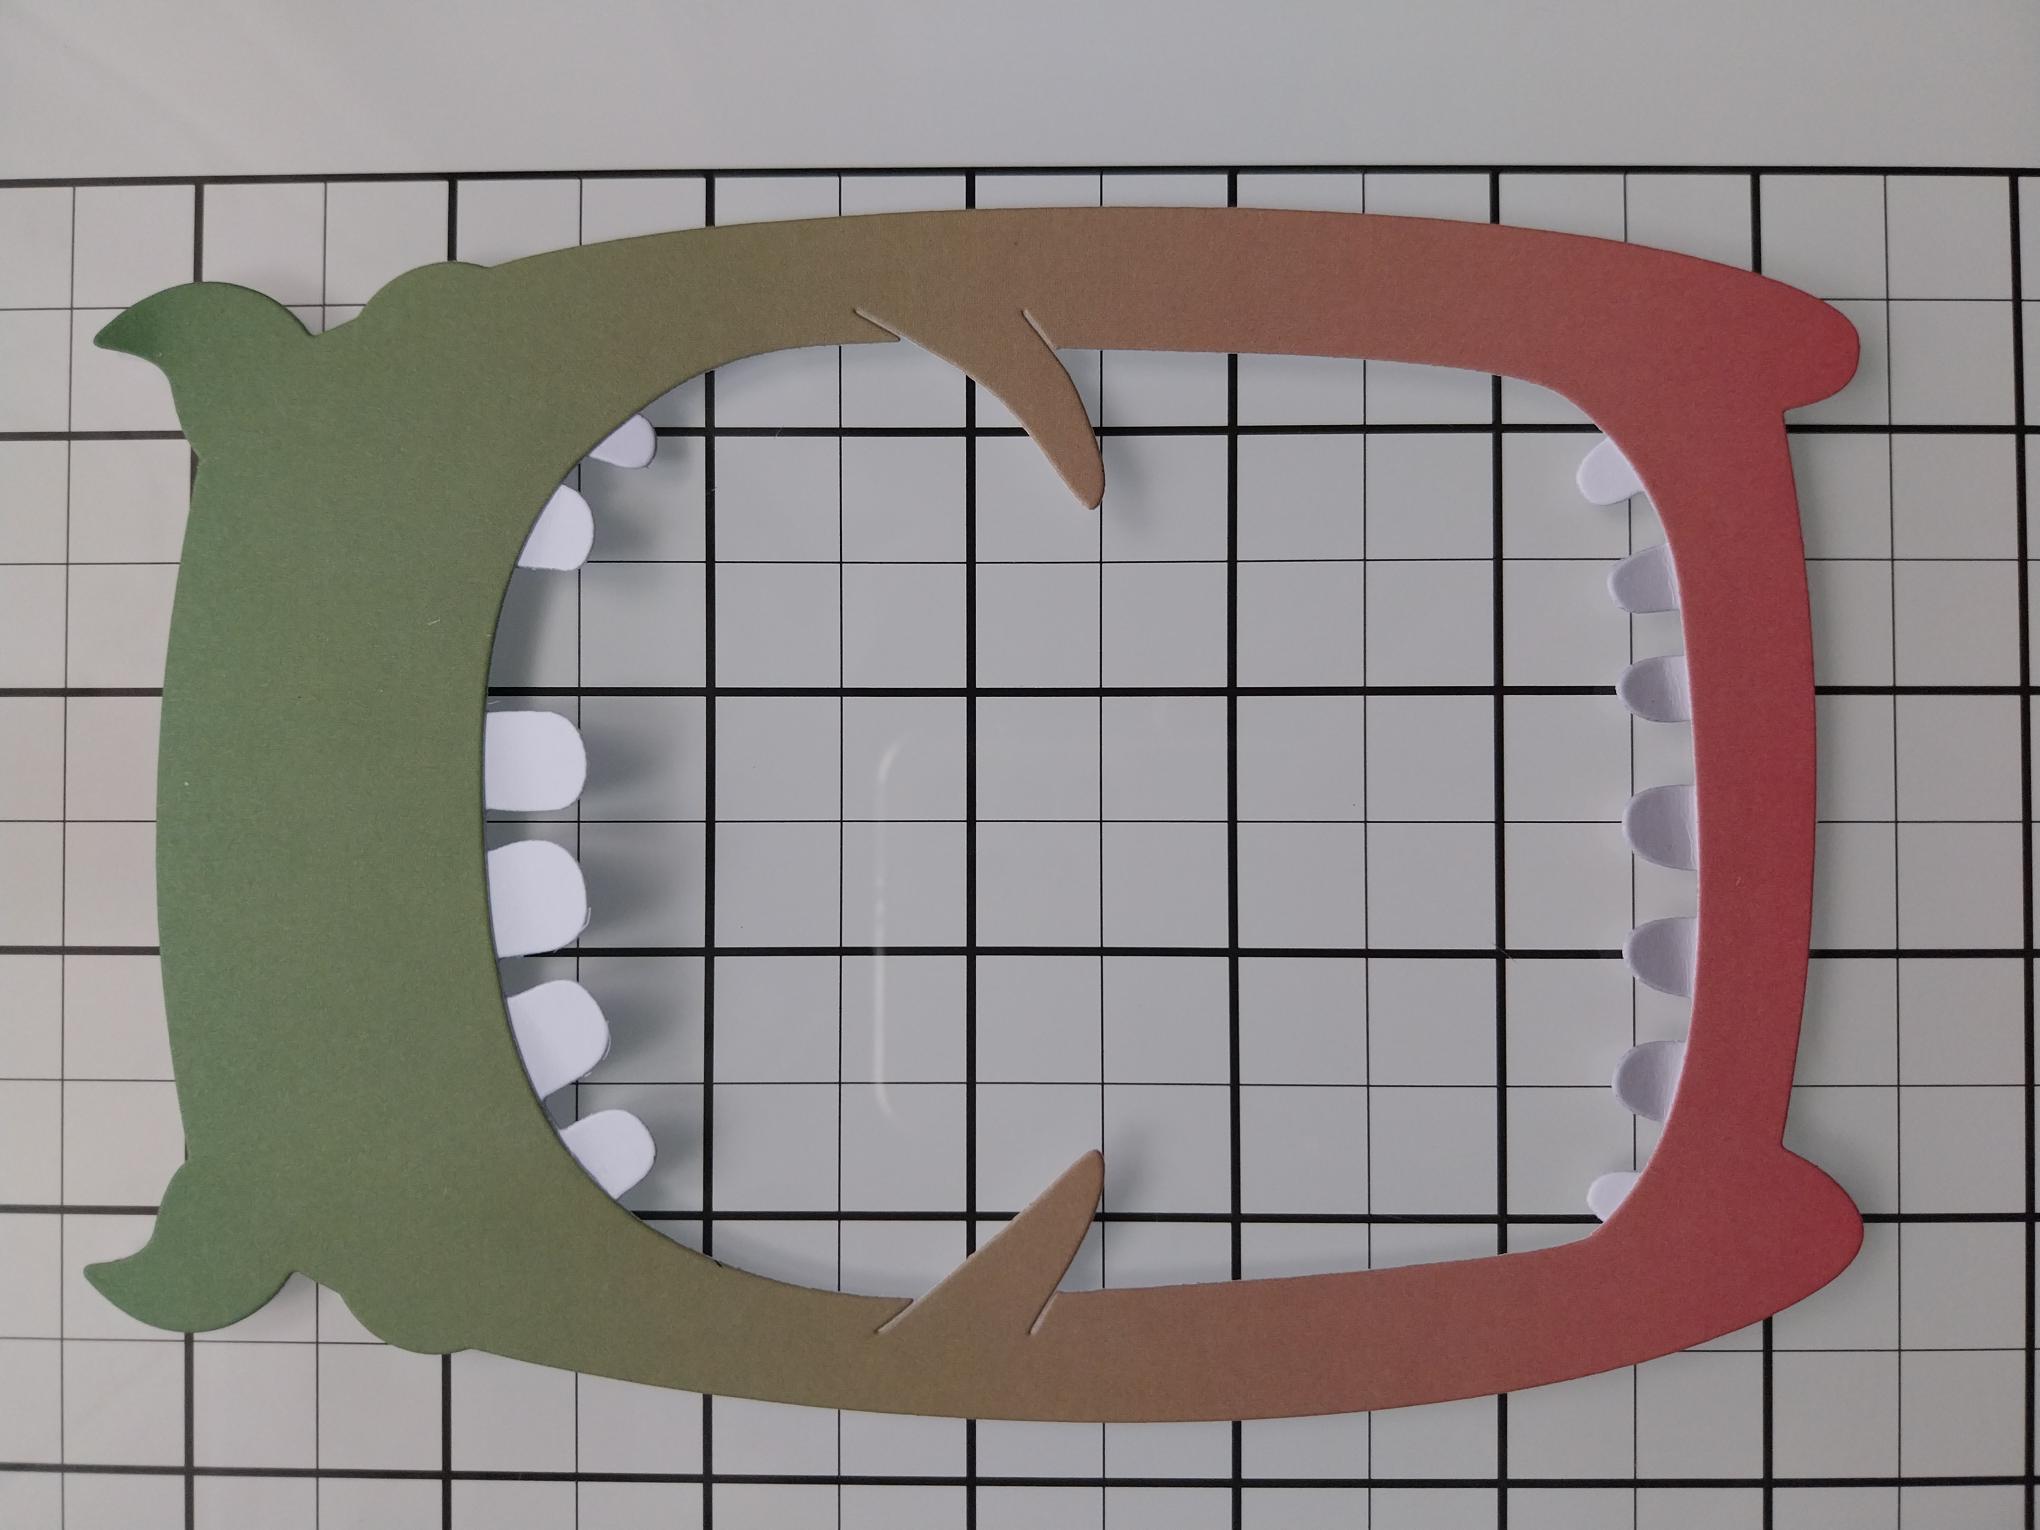
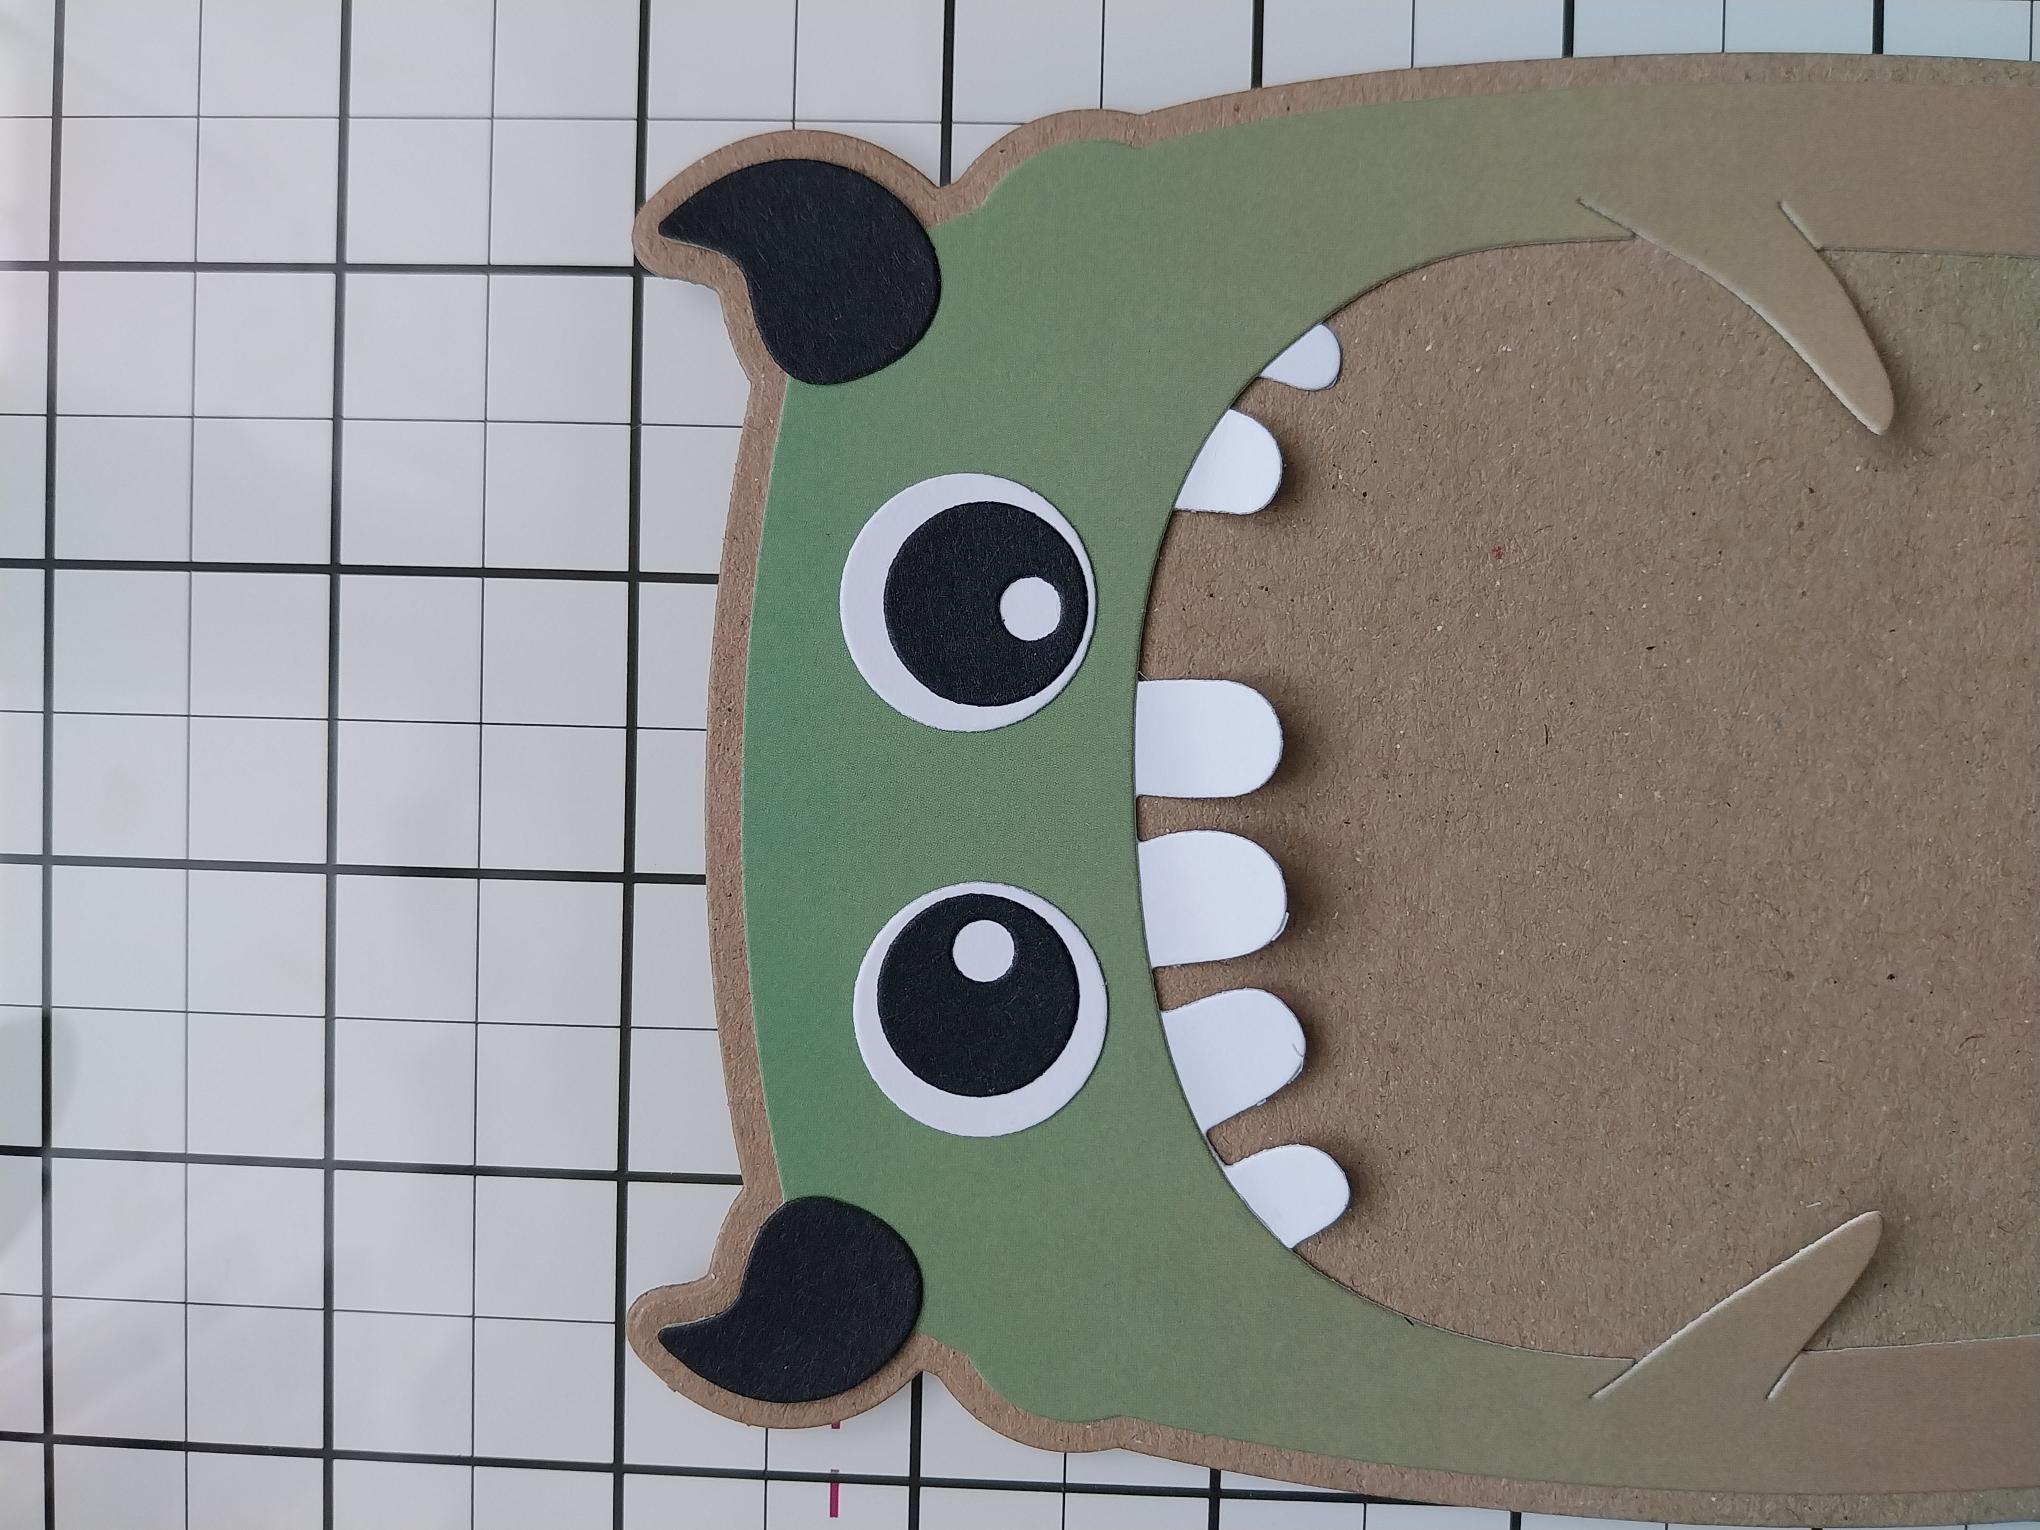
Remove this beautiful ombre paper from the Foundation Pack and place the detailed monster die on top. Secure the coordinating outline die on to the kraft card, cut to 7 1/2 x 5 1/2" and run both through your die cutting machine. |
|
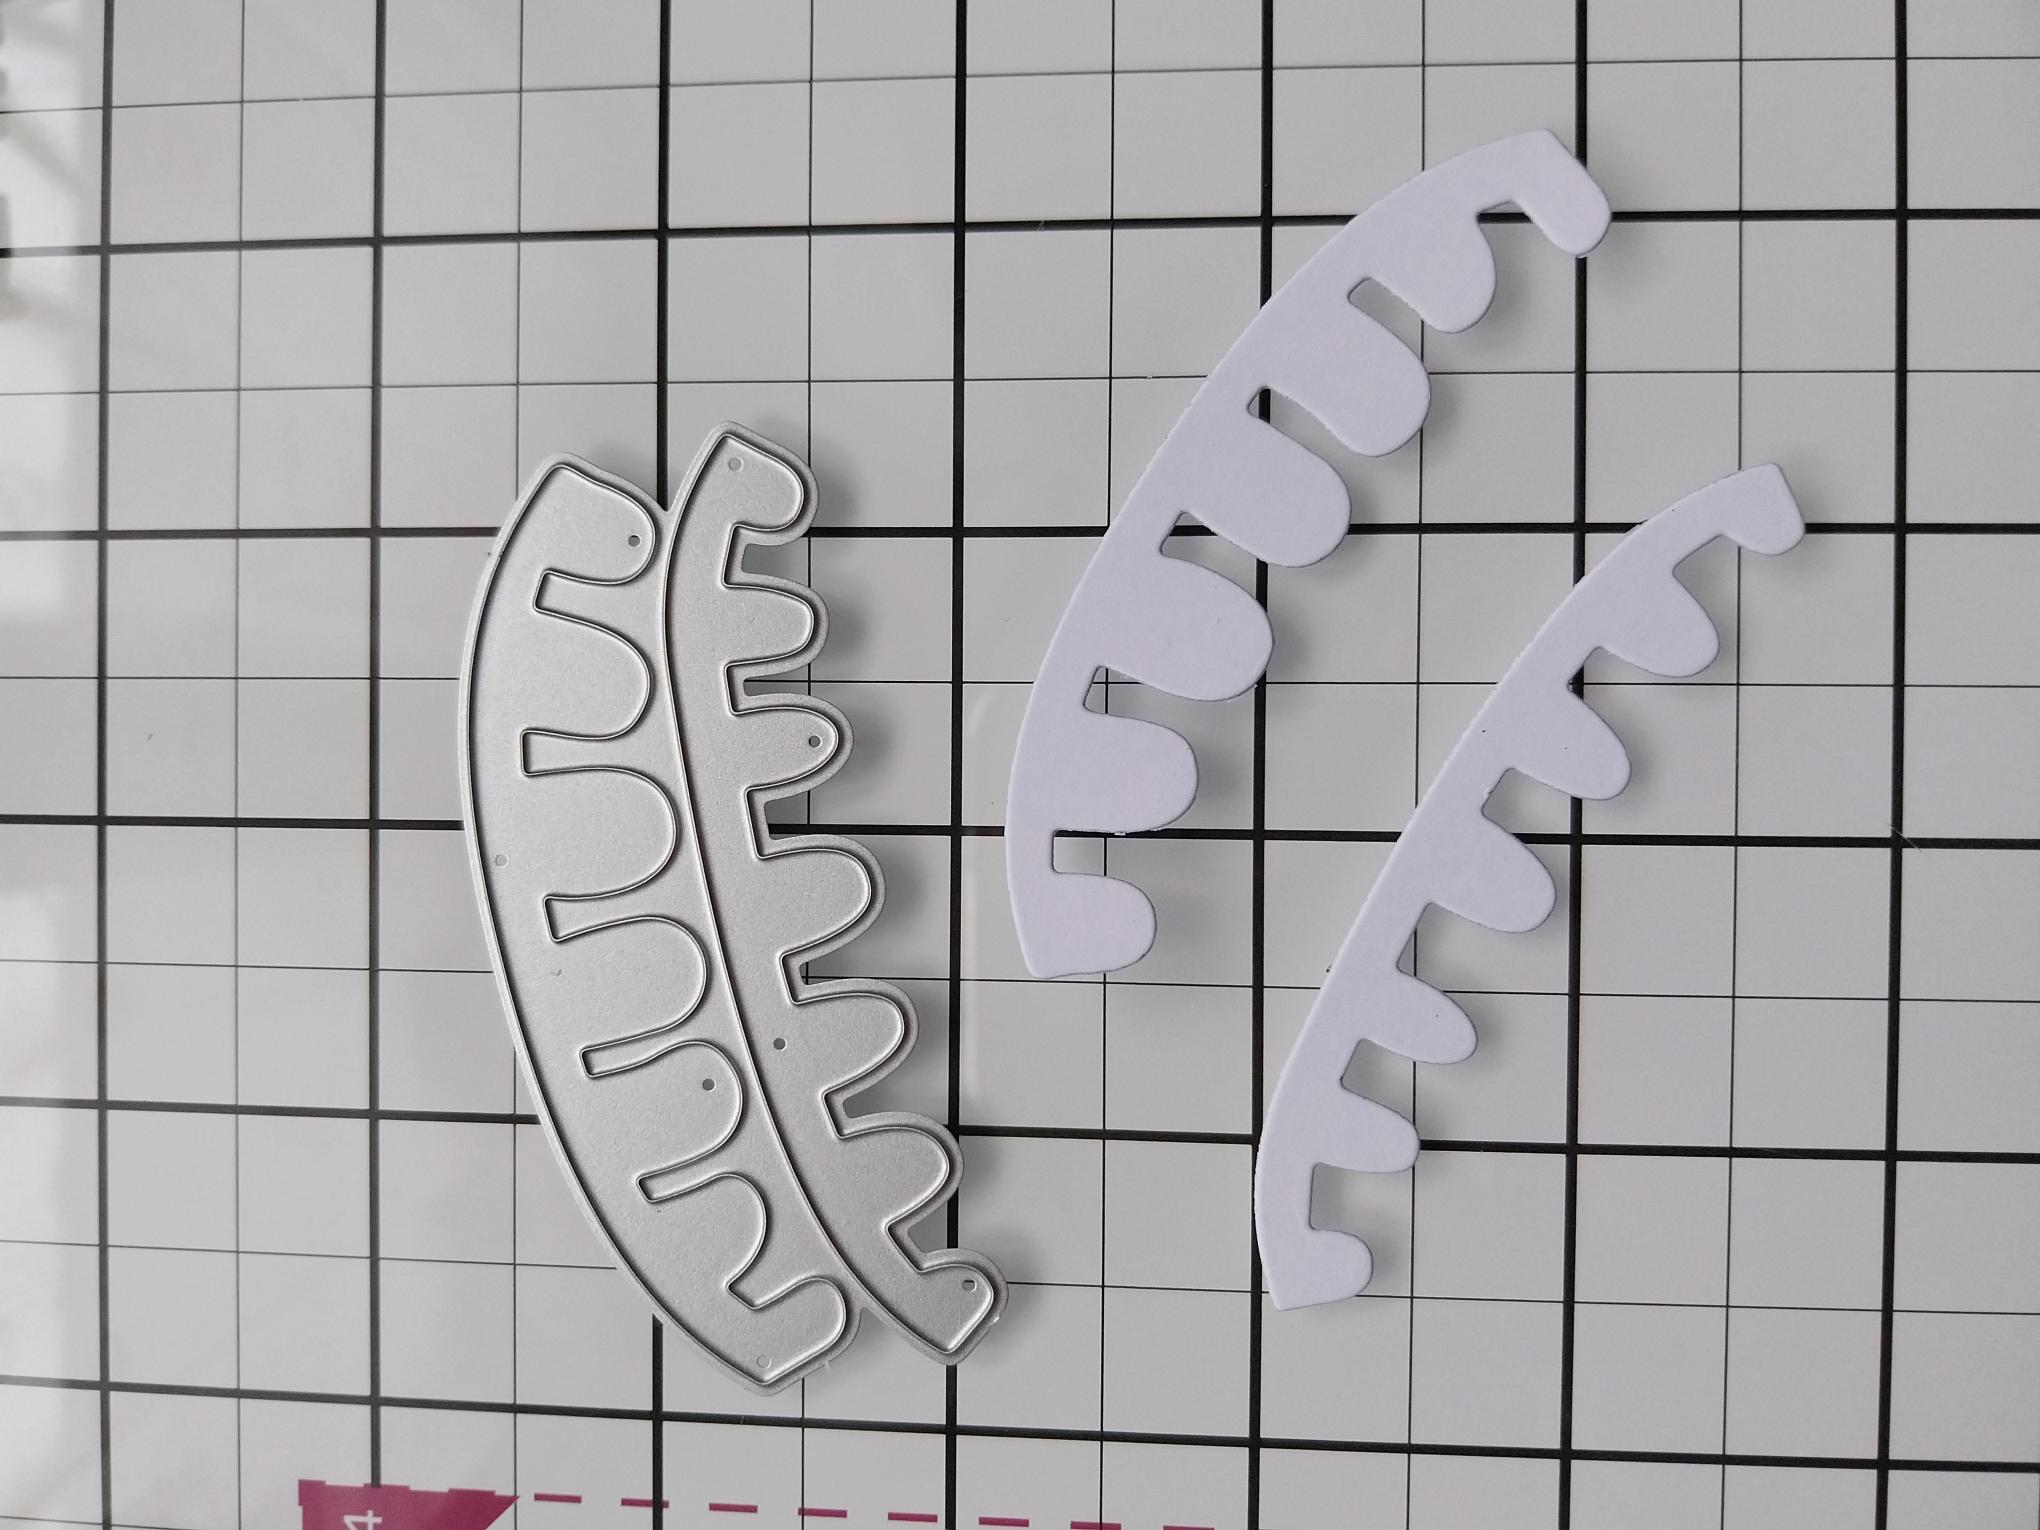
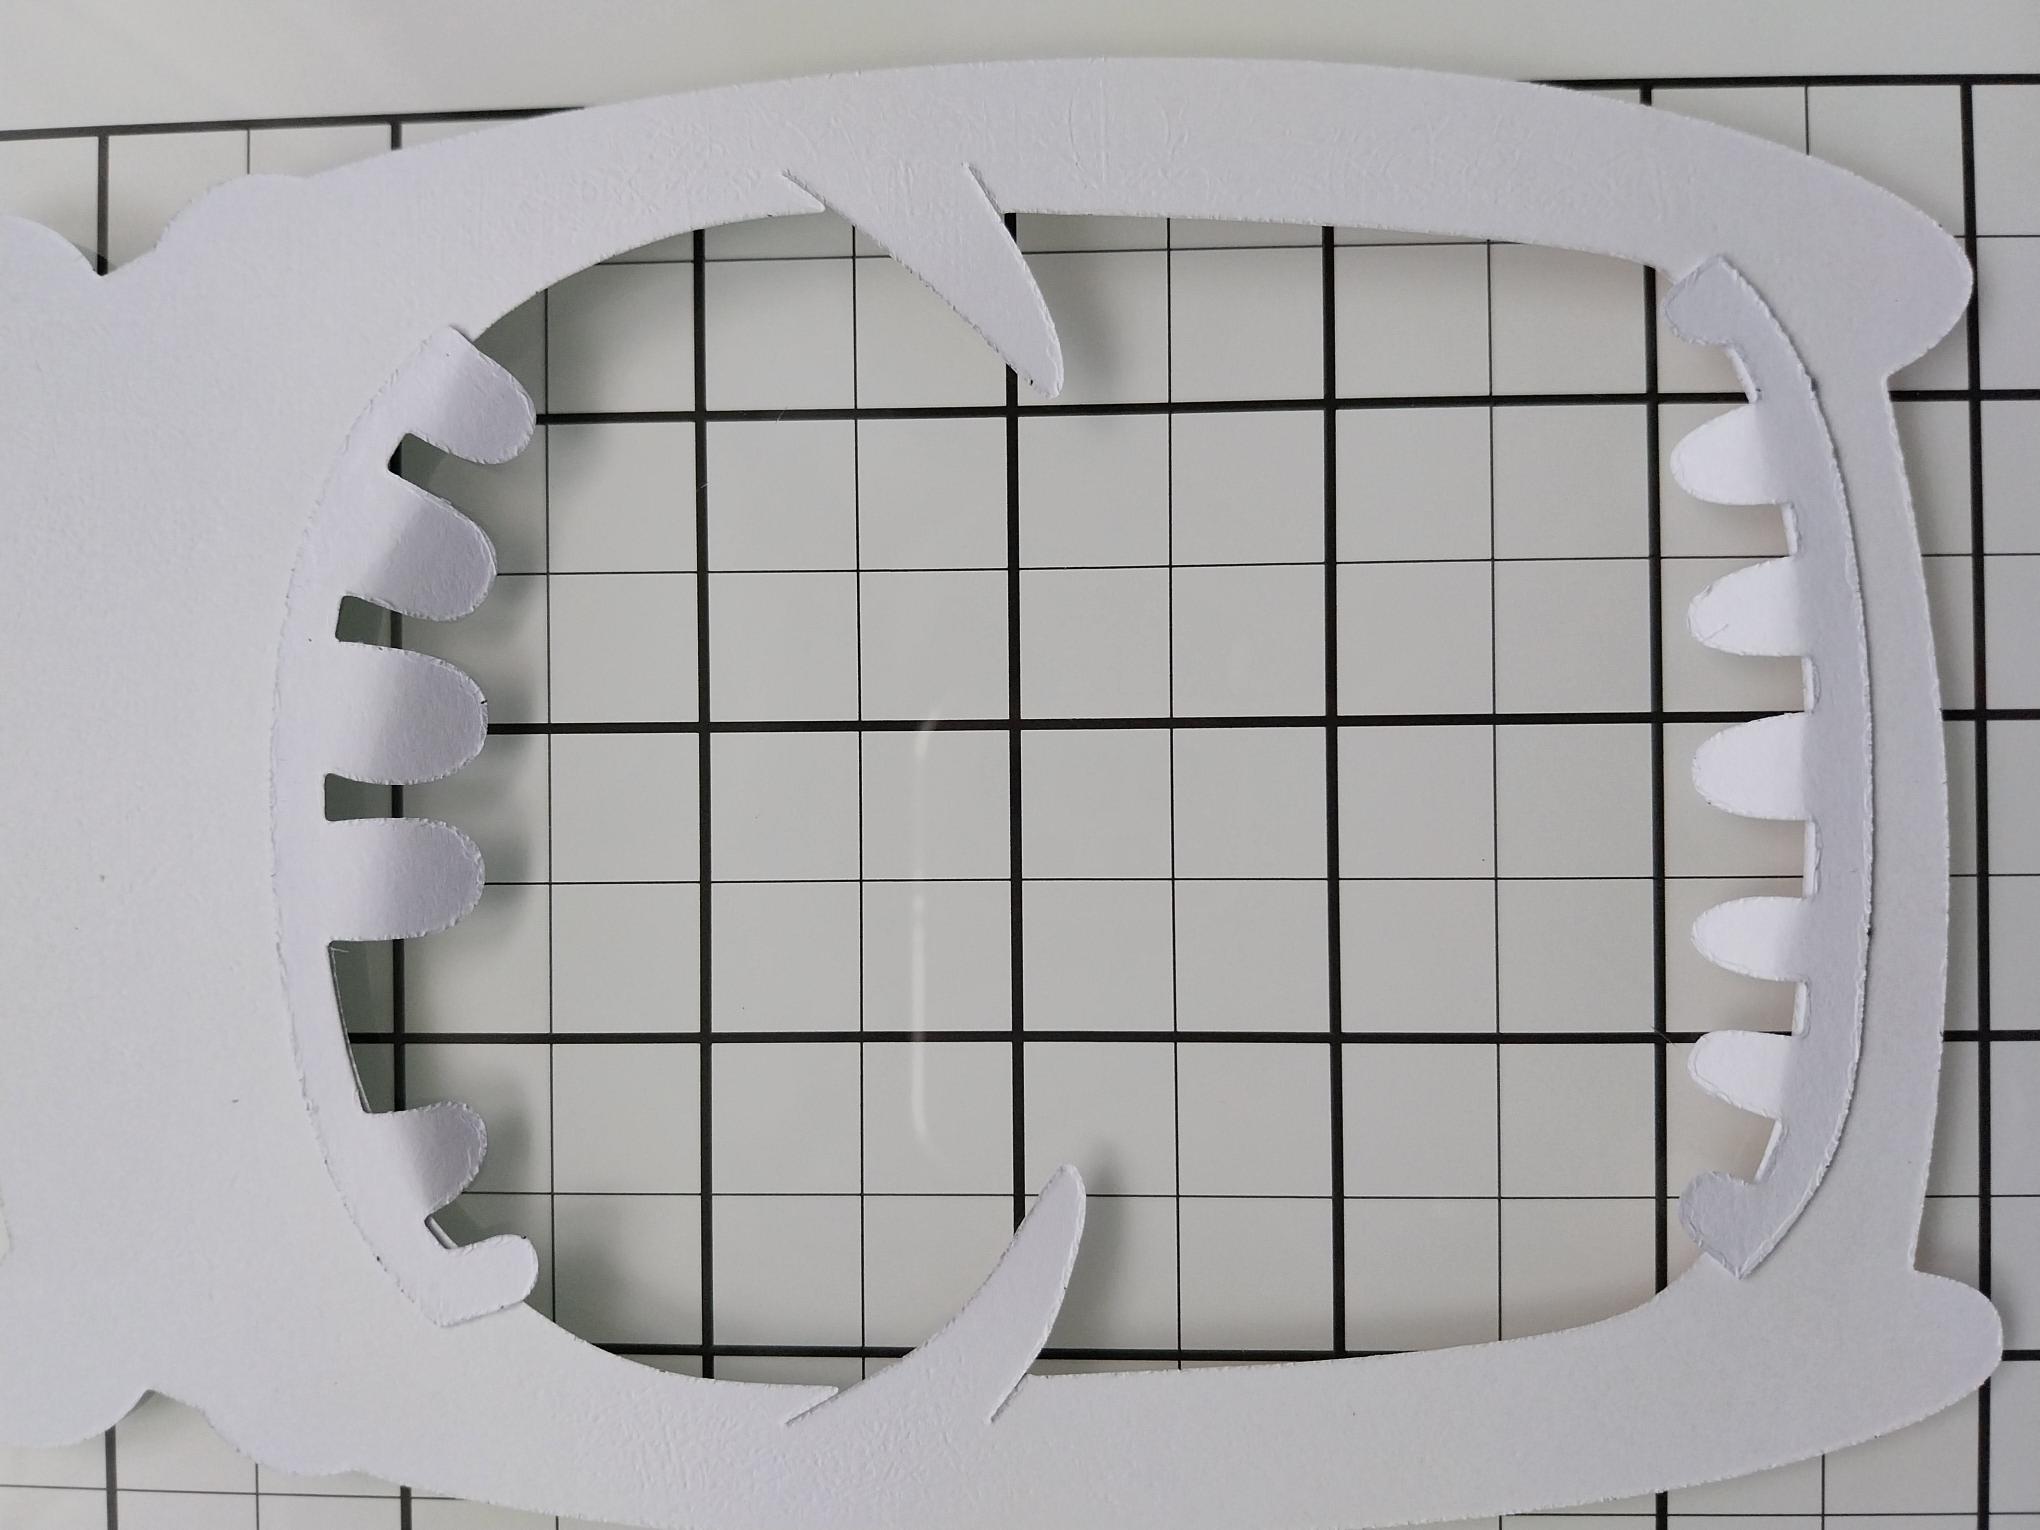
Die cut the teeth from white card. |
|
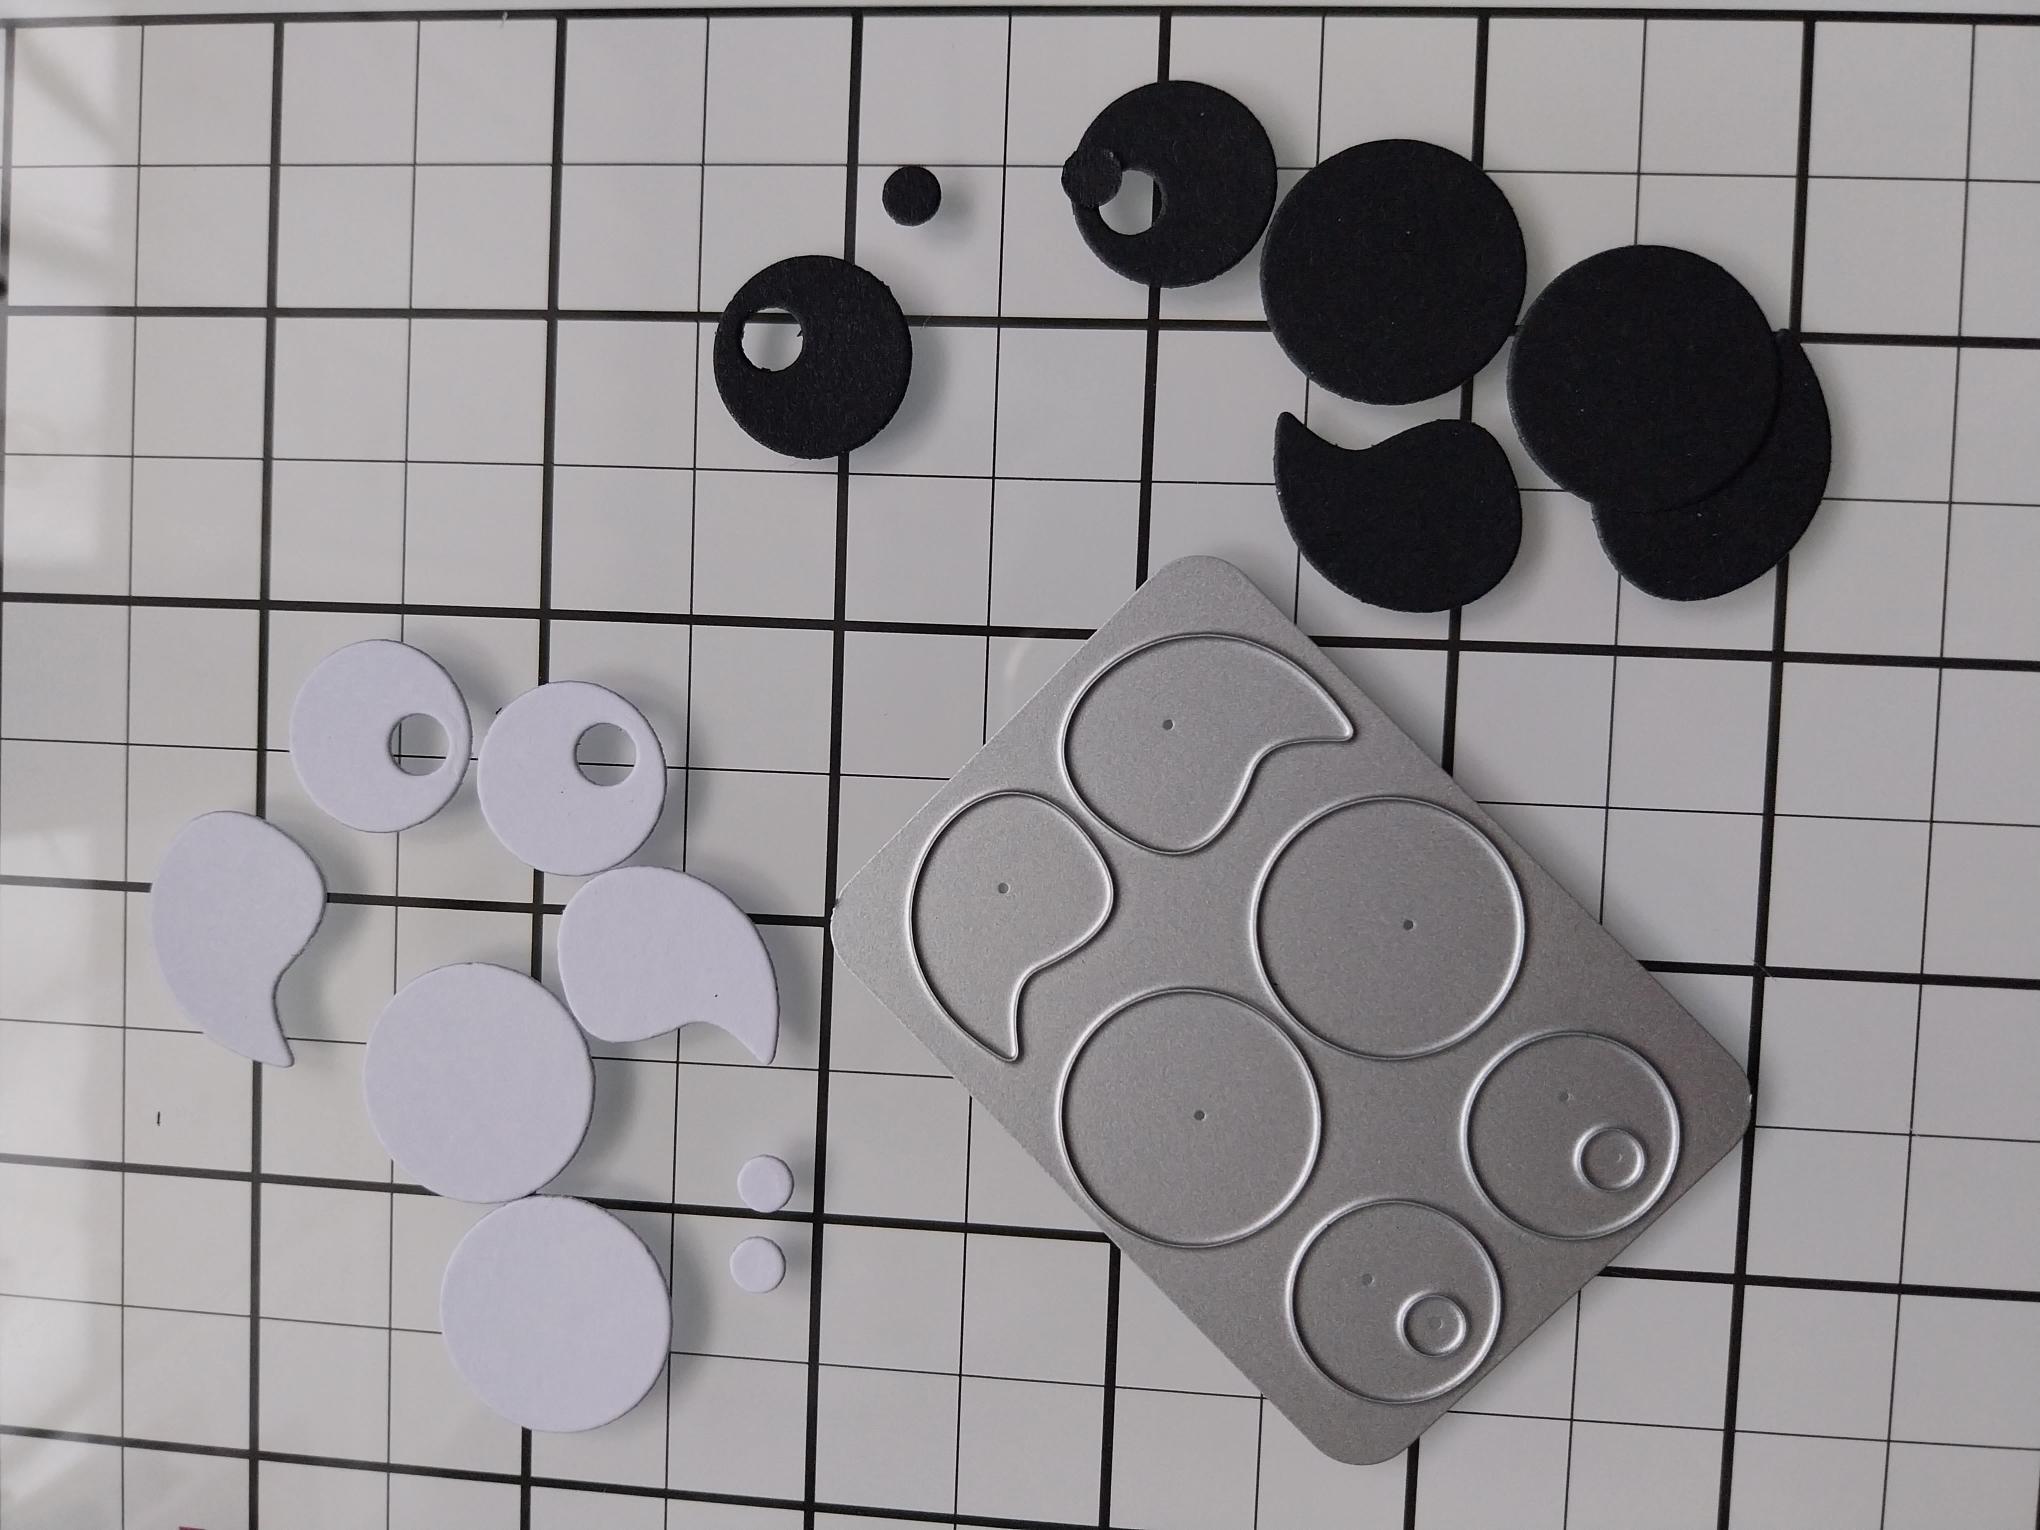
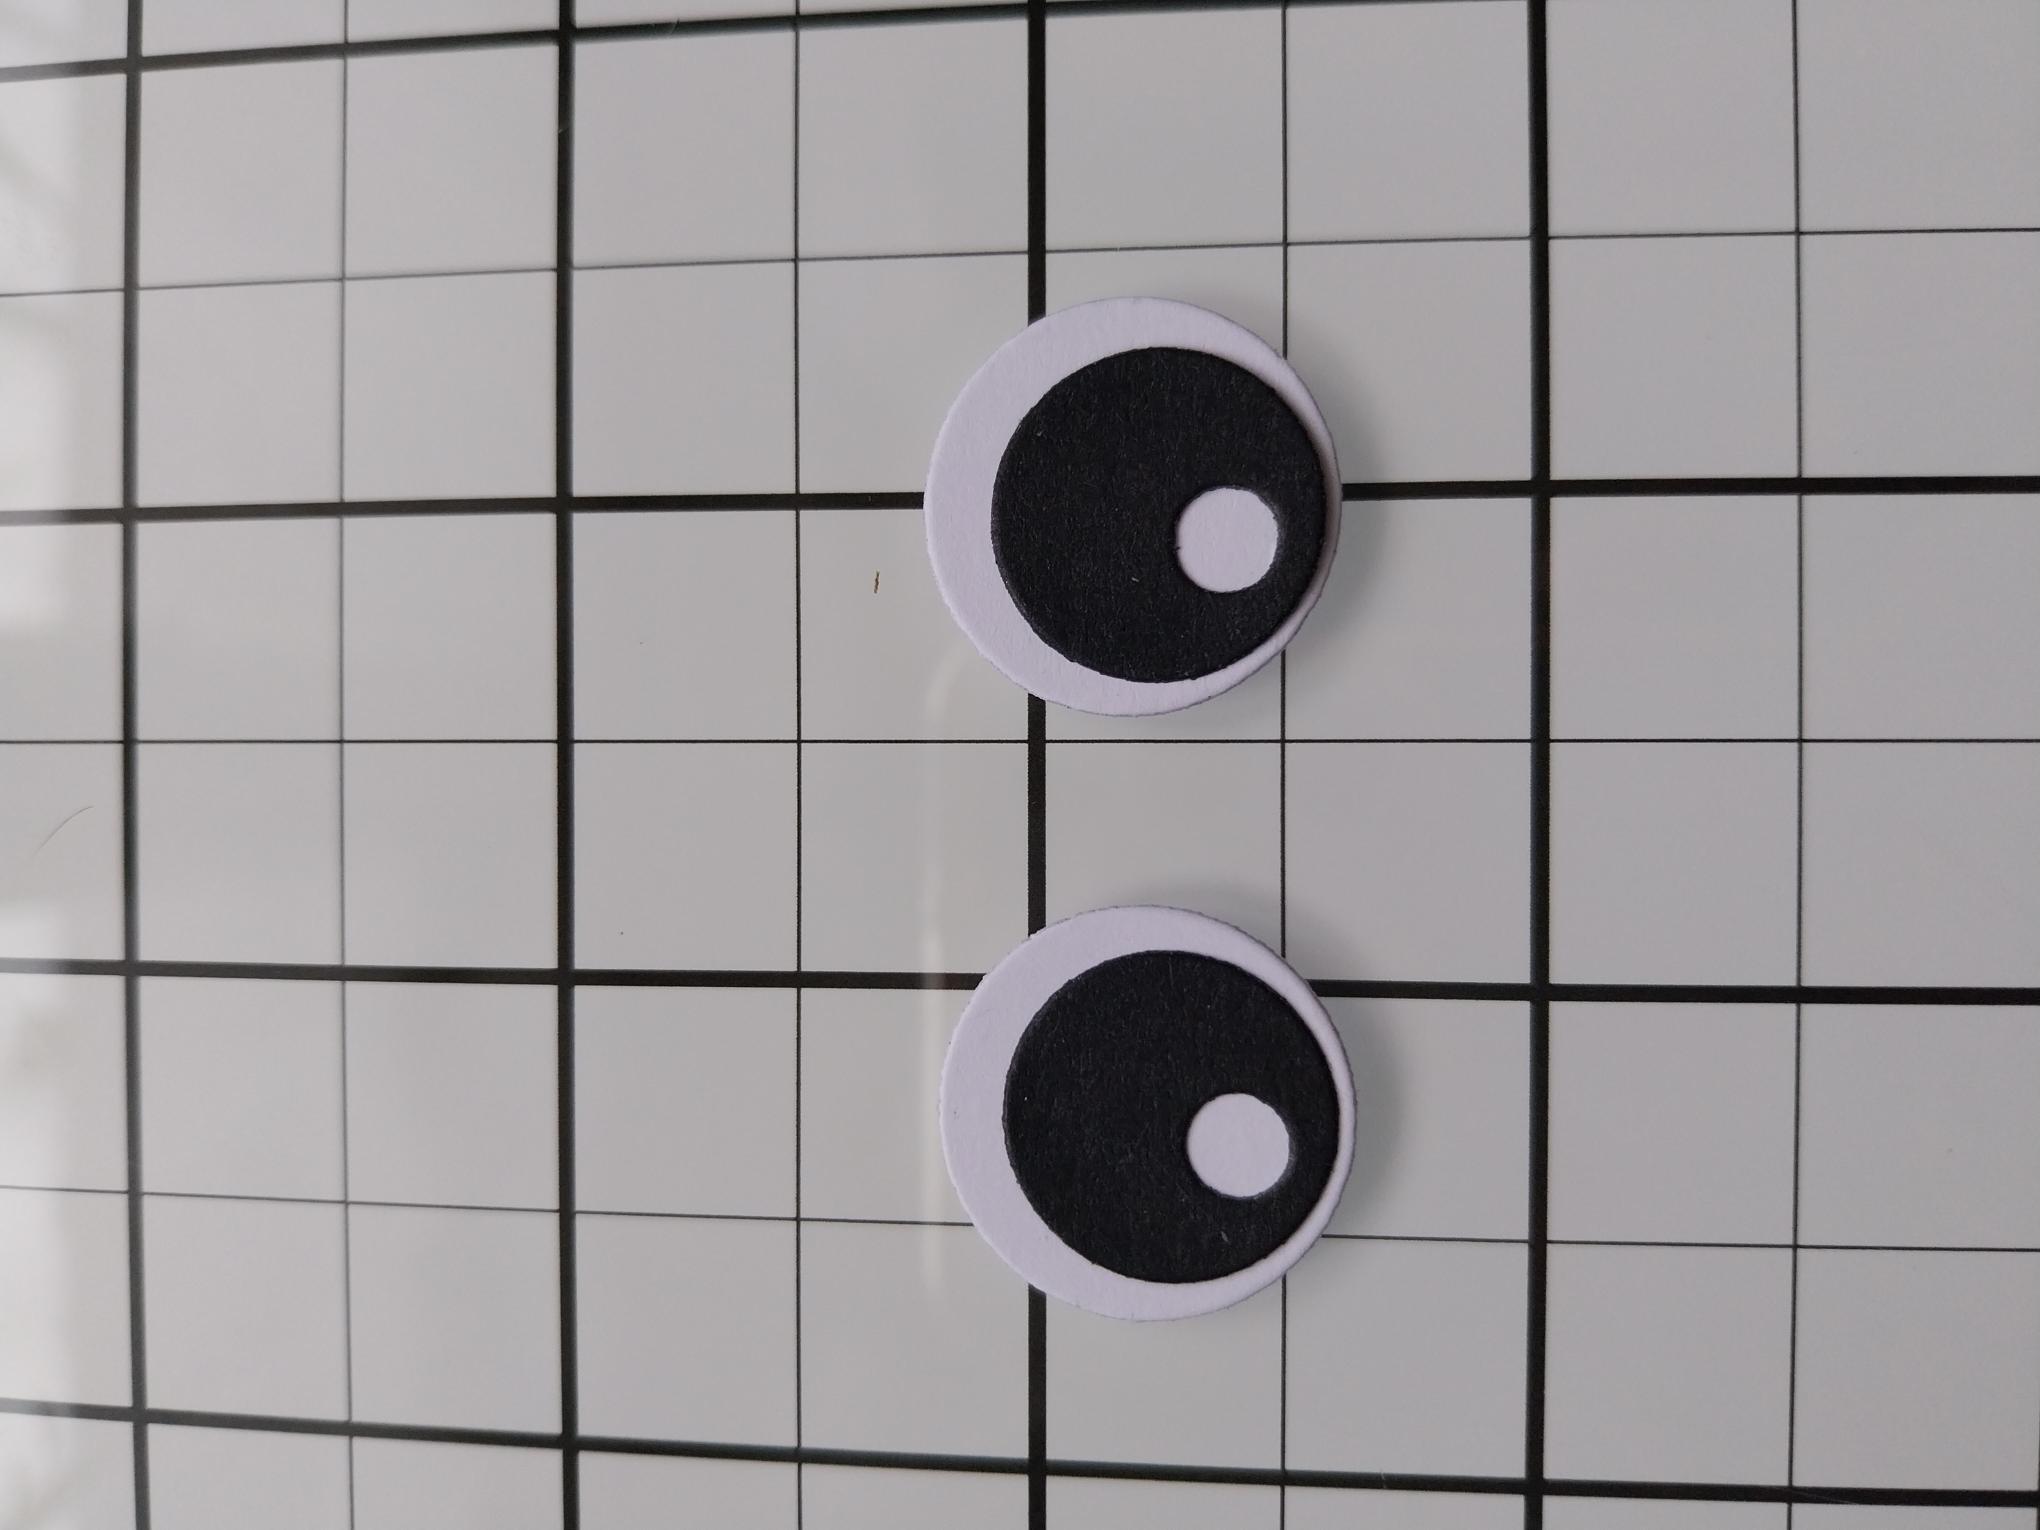
Die cut the eyes and horns from both white and black card. |
|
Adhere the die cuts together to create your monster eyes. |
|
Secure the teeth in place, on the reverse of the die cut ombre monster. I chose to cut off one of the teeth, to create a "gap". |
|
Manipulate and mould the teeth, to give dimension, as required. |
|
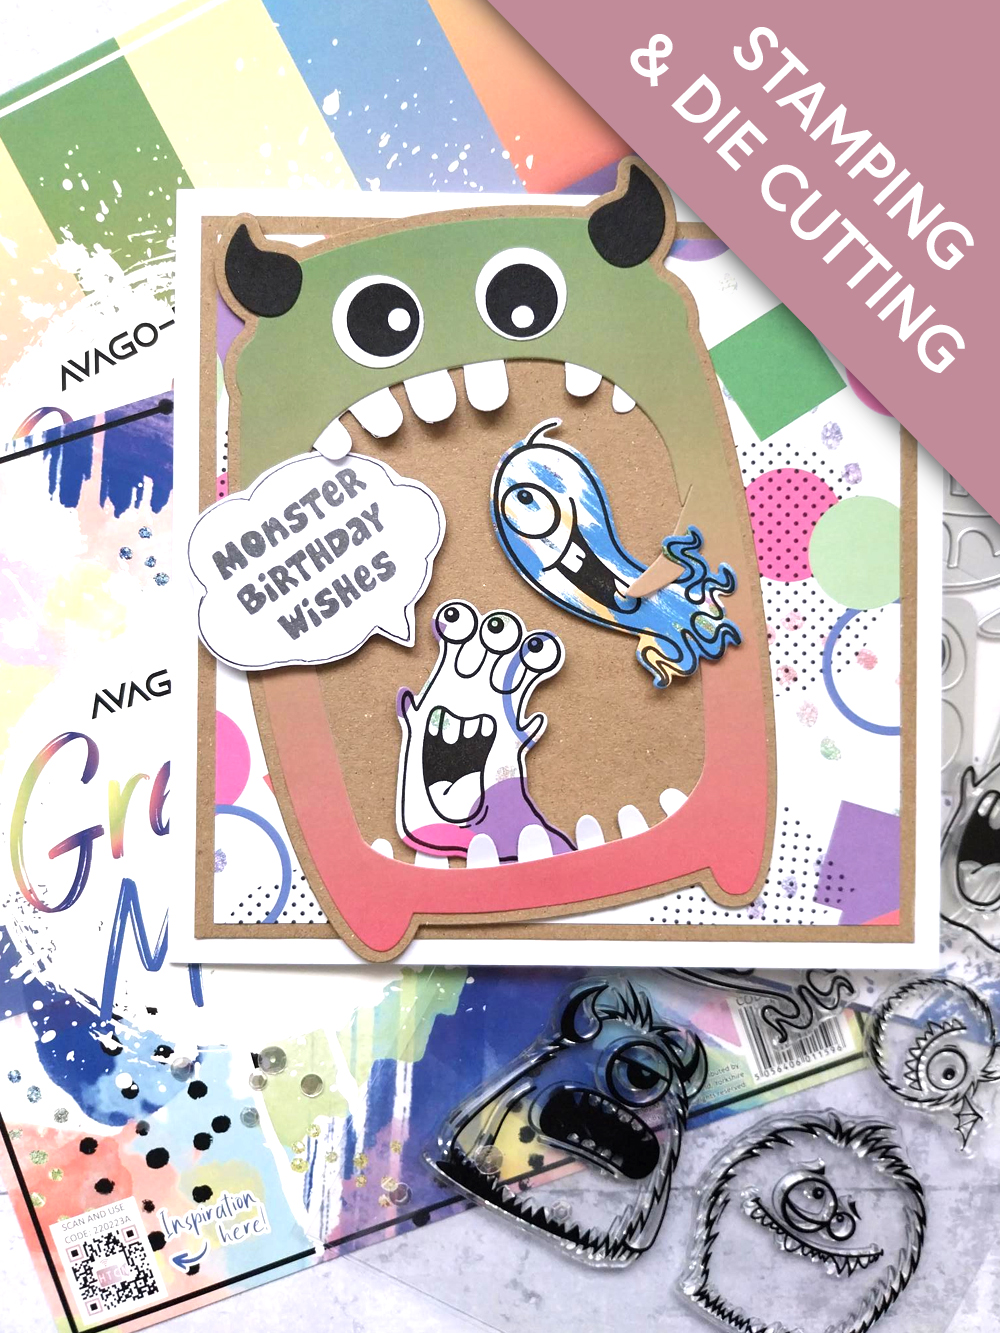
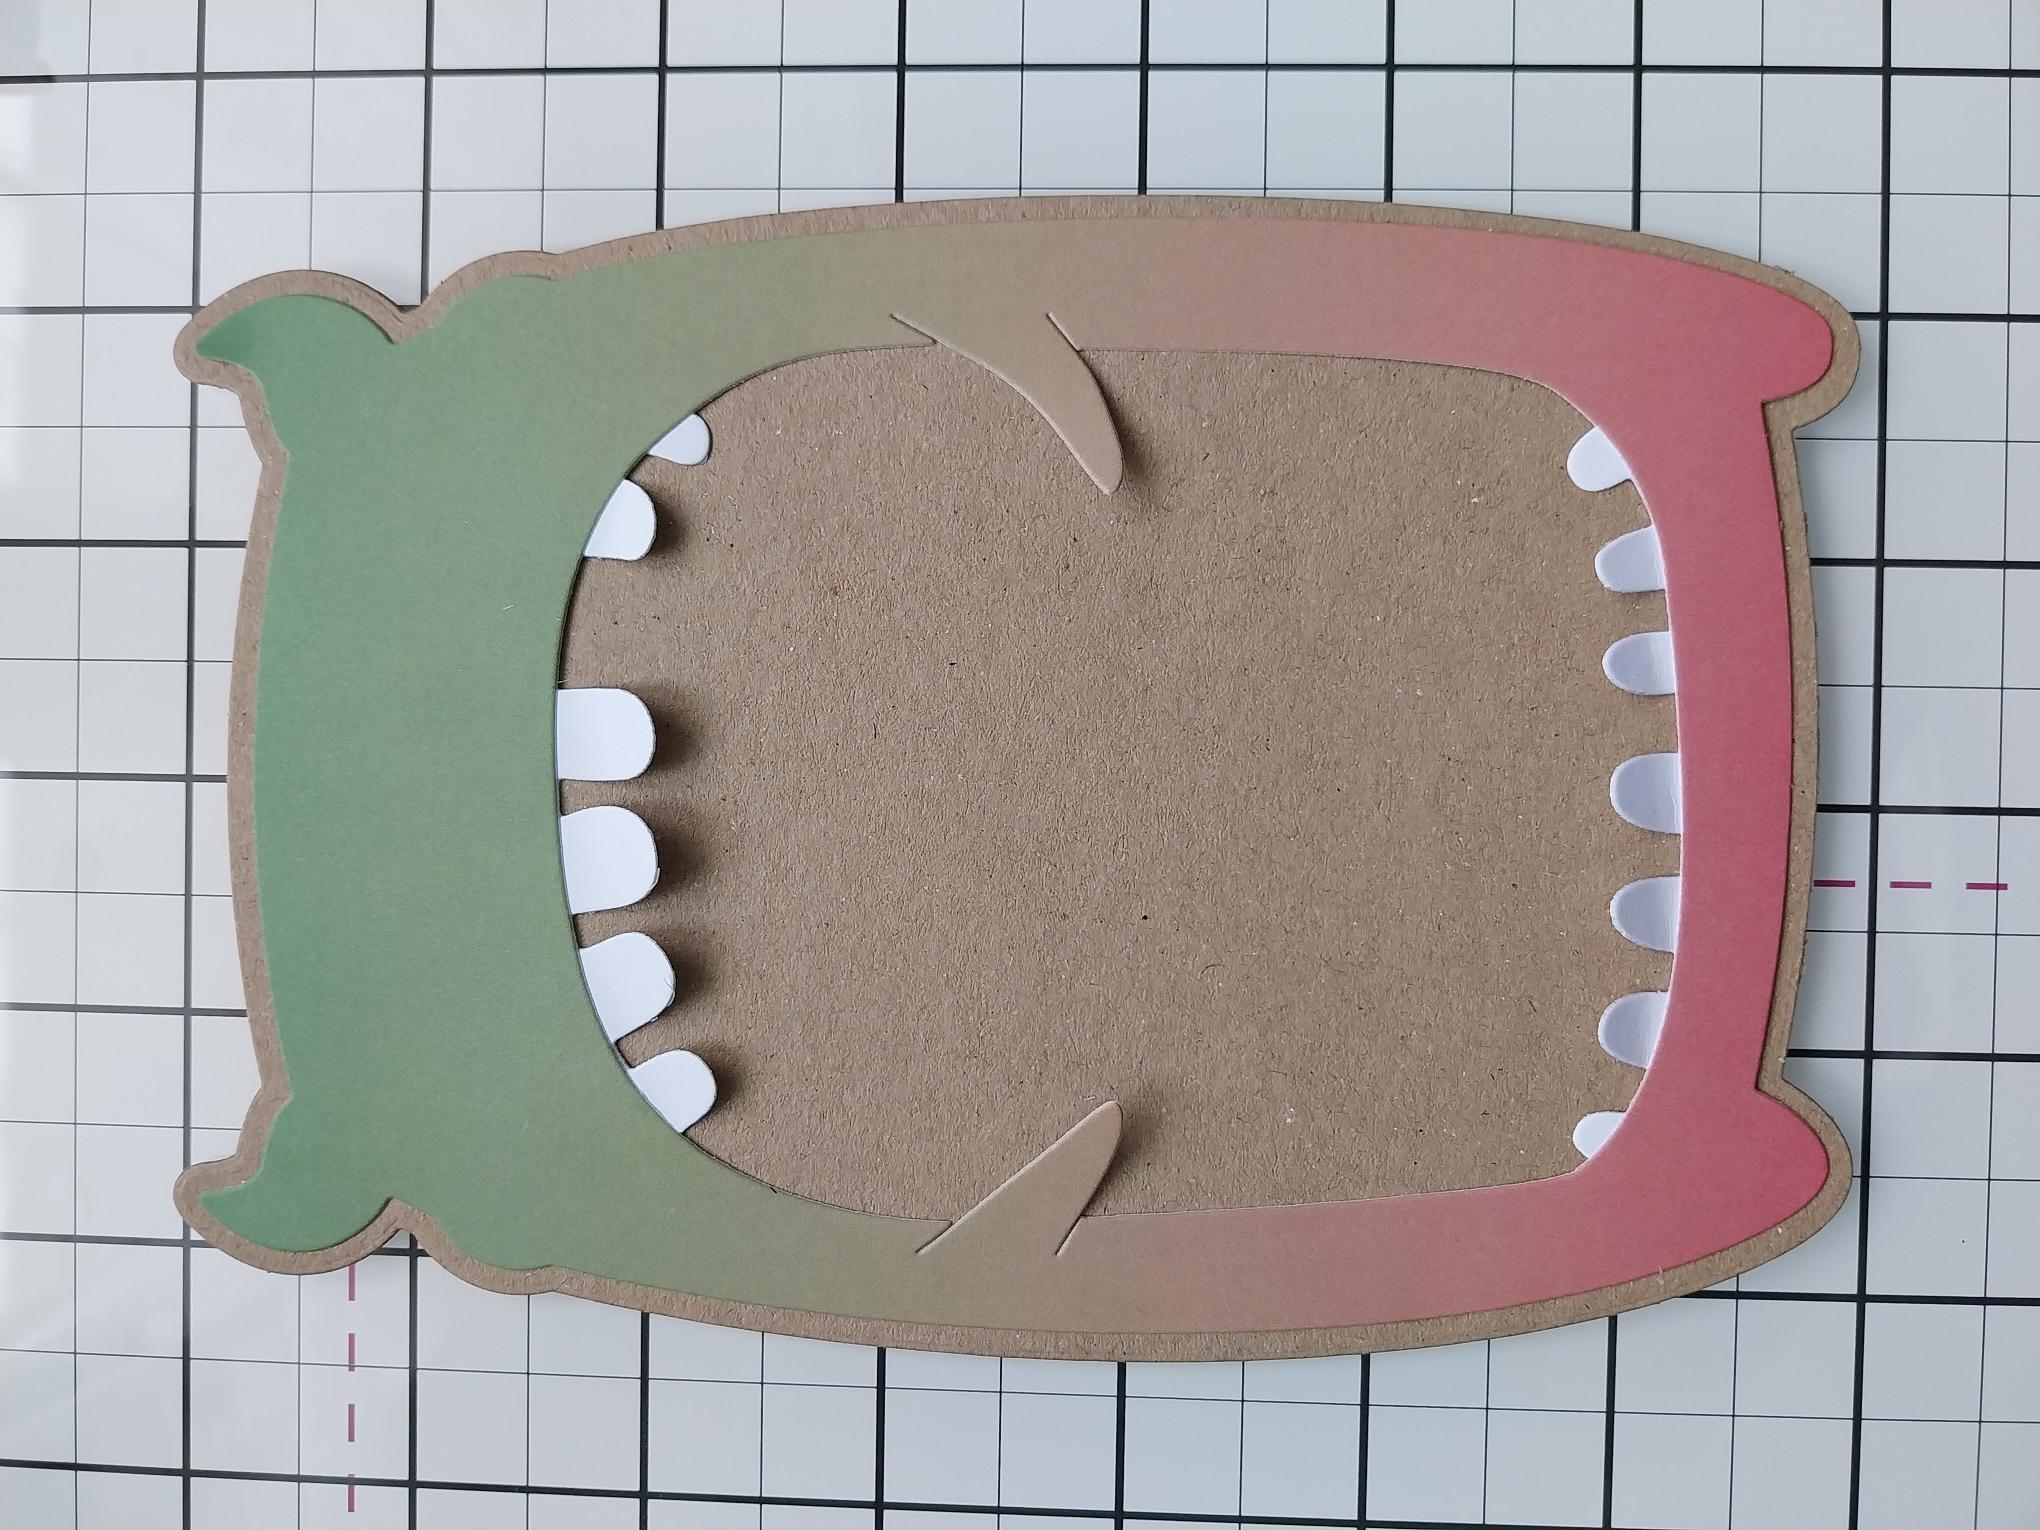
Secure the monster on to the kraft card layer, lifting and leaving the arms and teeth free. |
|
Adhere the eyes and horns in place, then pop your monster to one side. |

|
Draw around one of the speech bubbles, on to white card and fussy cut. Stamp your sentiment in the Midnight ink and pop aside. |
|
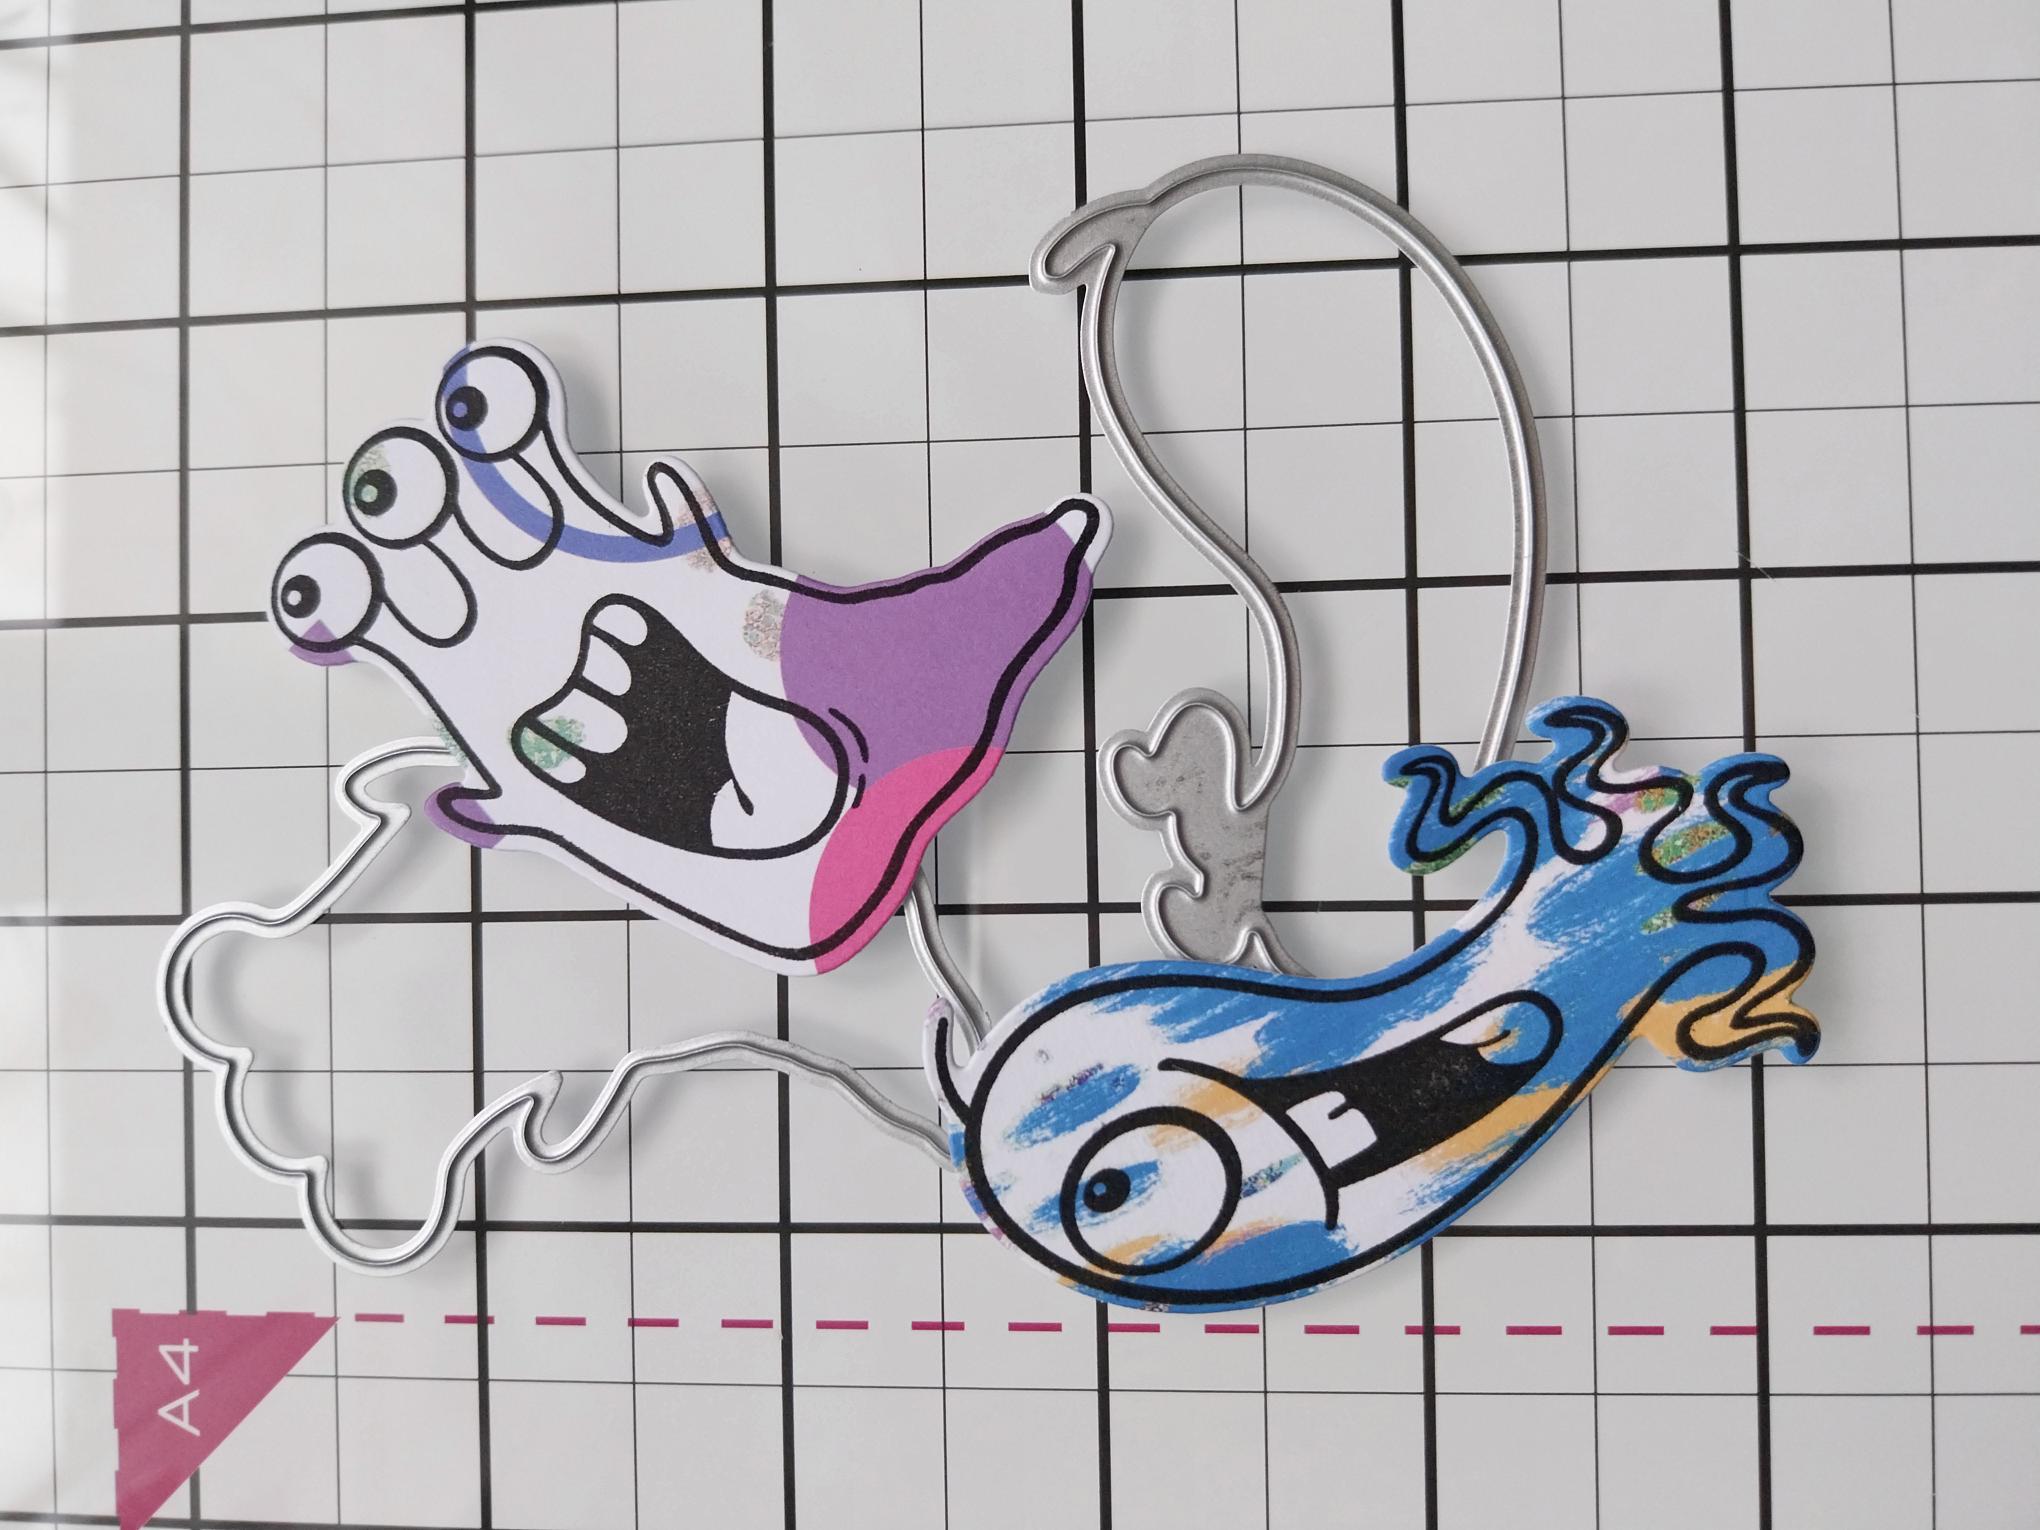
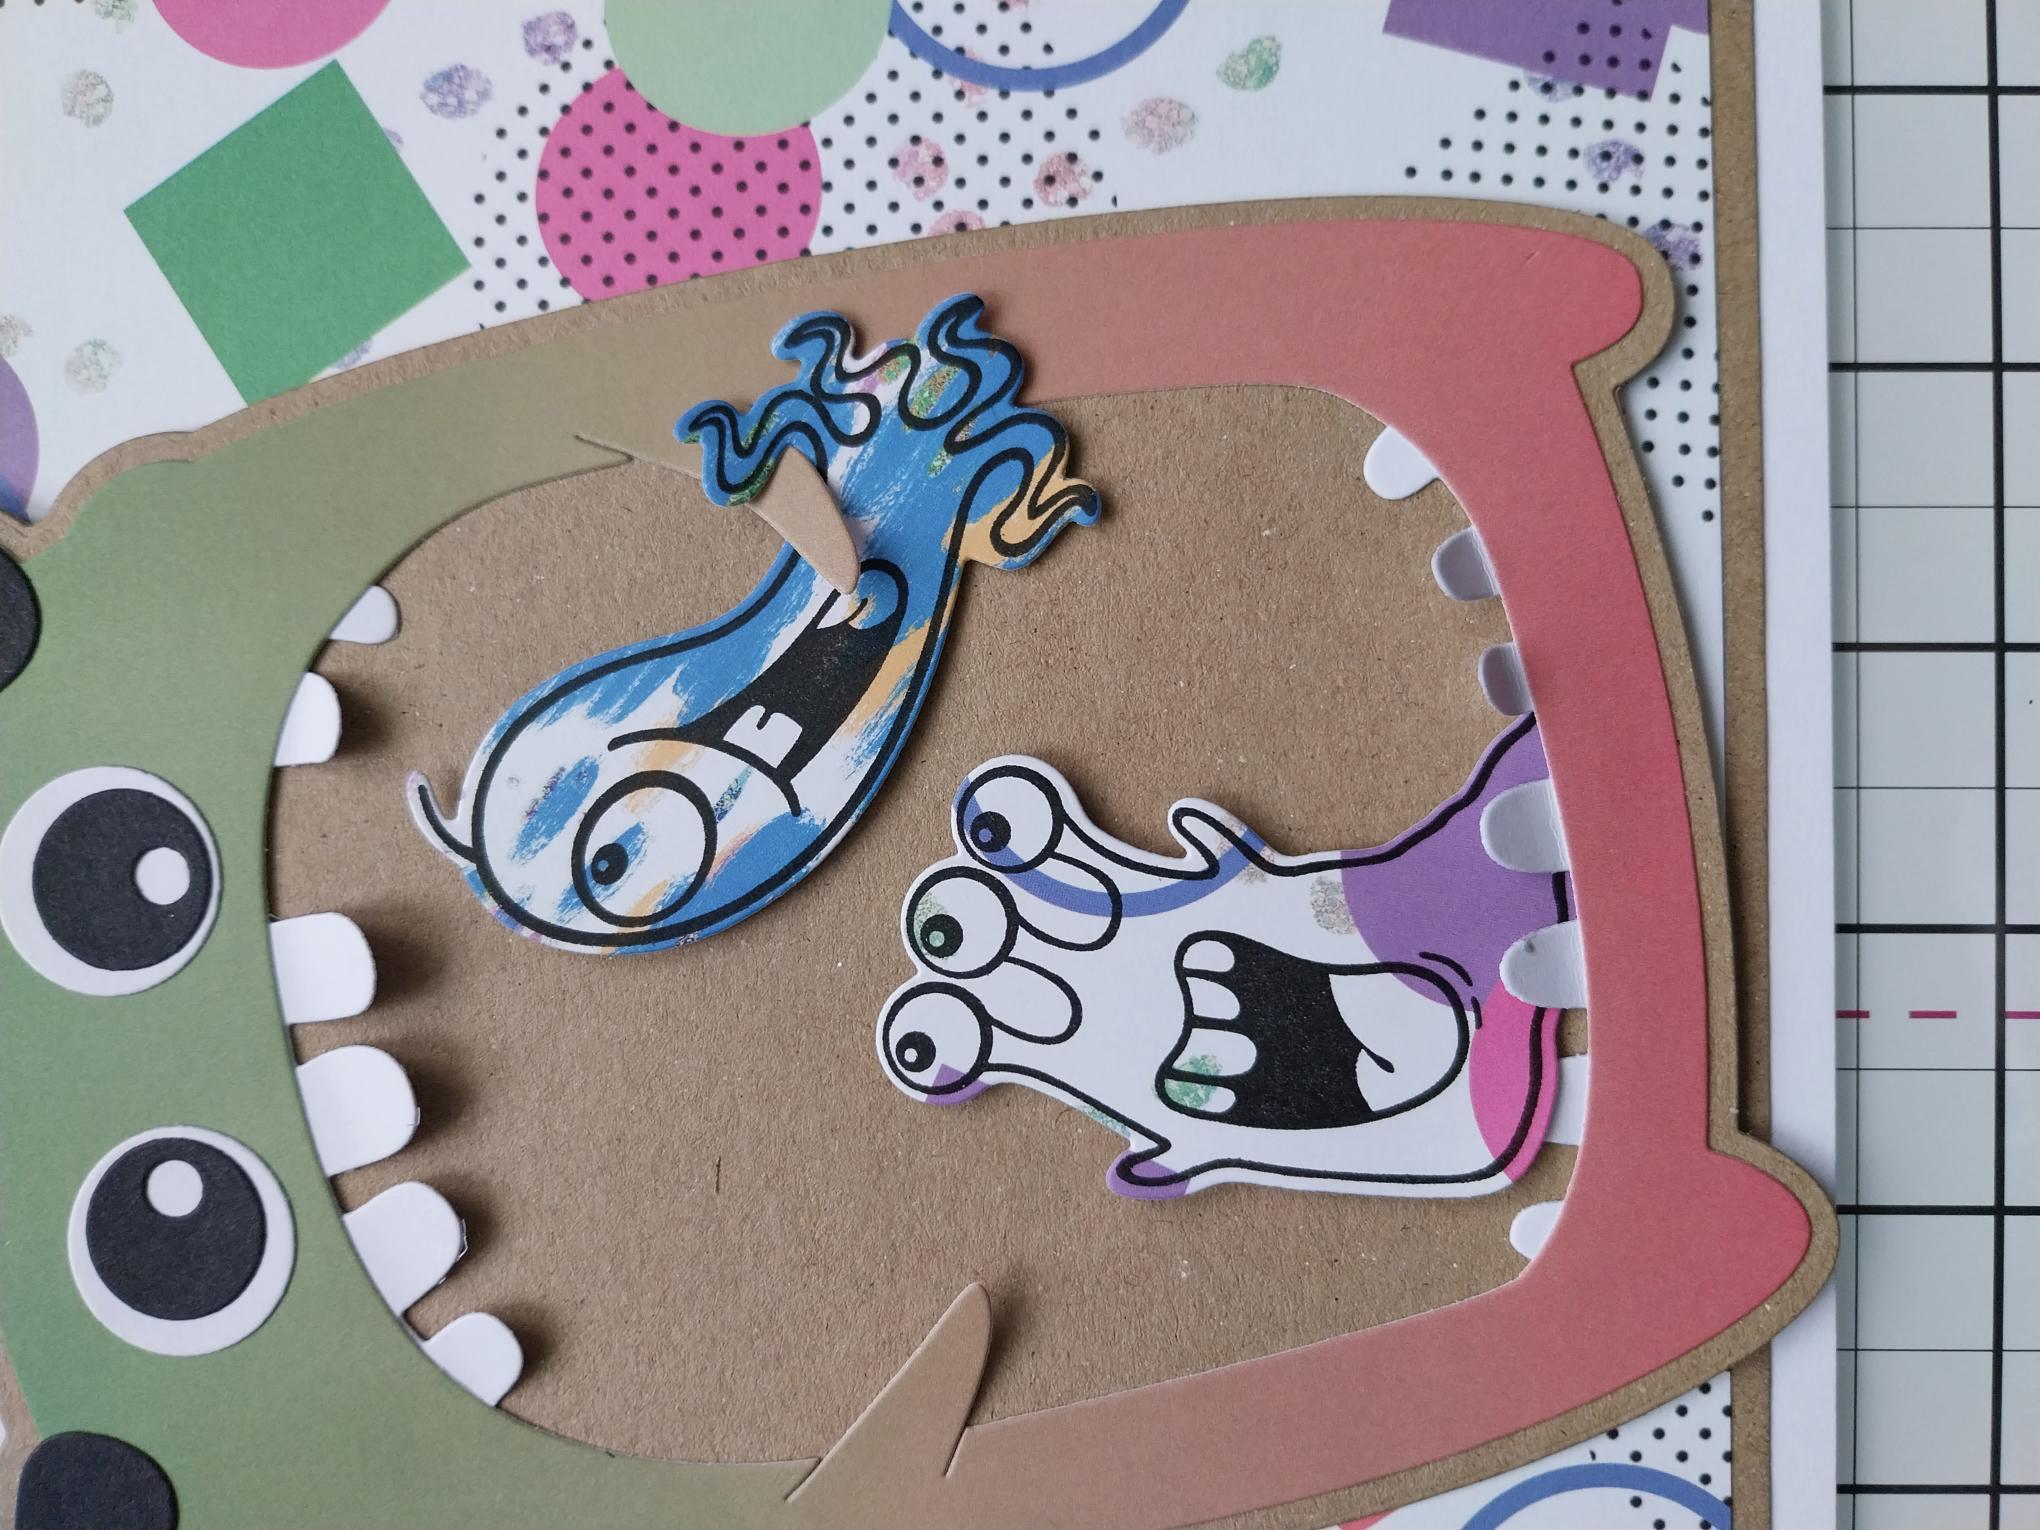
Using papers from the Graffiti Monster paper pack, stamp and die cut these cheeky monsters. |
|
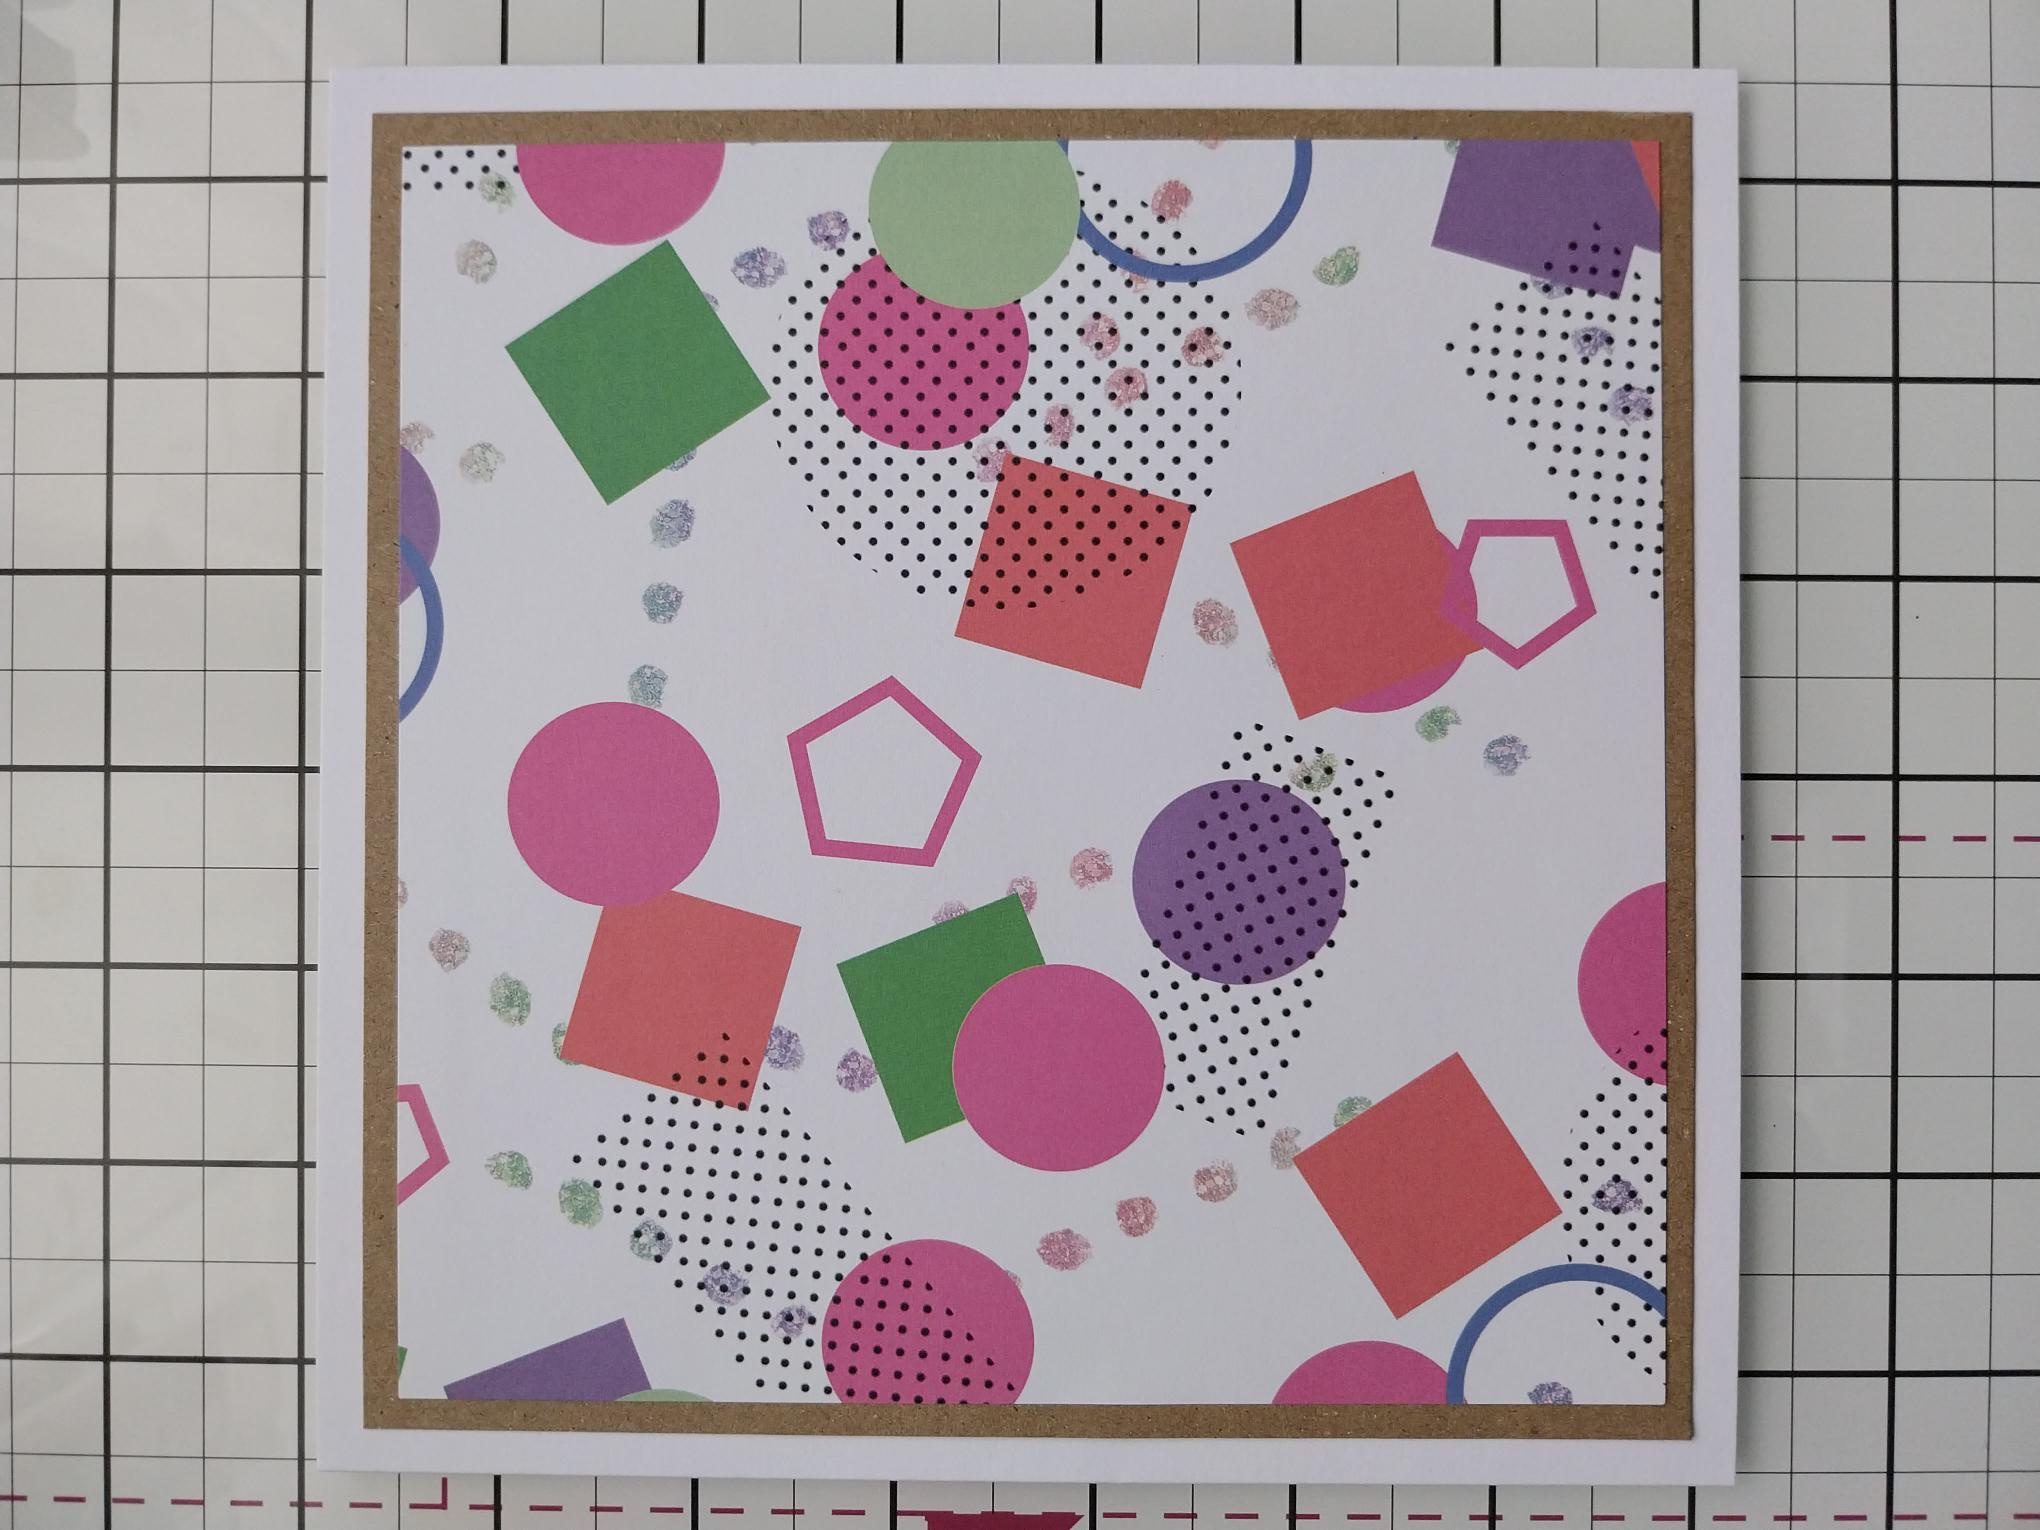
Trim this abstract paper, from the pack, to 6 1/4" square and adhere to the kraft card trimmed to 6 1/2" square. Adhere this on to your white 7 x 7" card blank. |
|
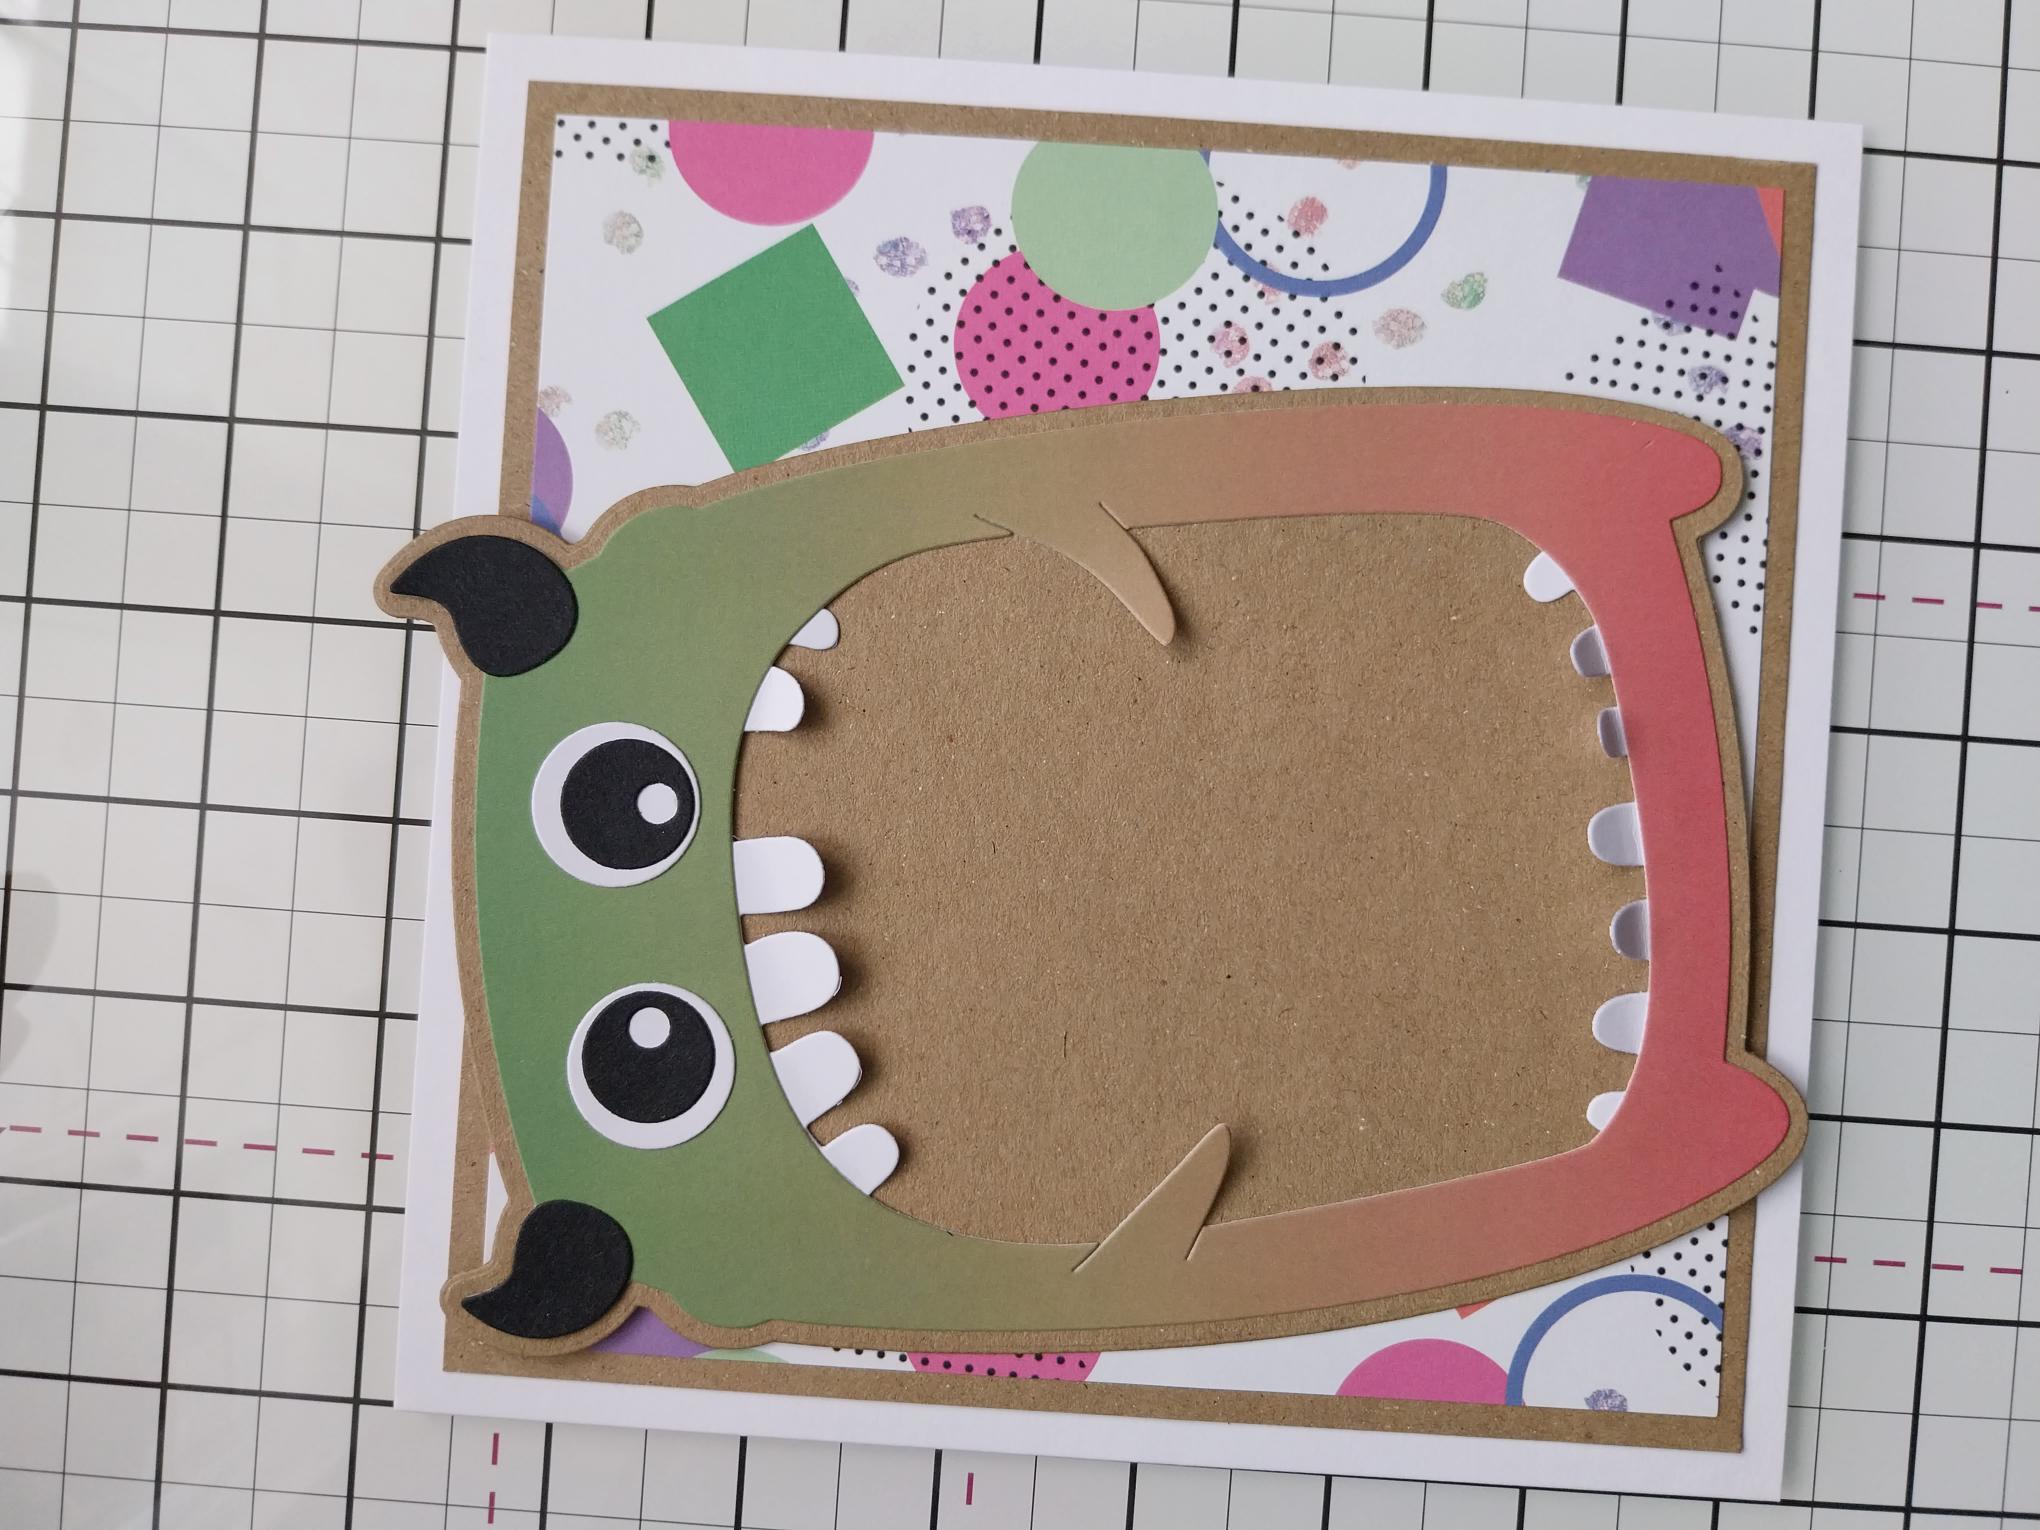
Adhere your die cut monster flat, on to your card. |
|
Adhere your 2 cheeky monsters with foam pads, one tucked under the bottom teeth and the other under the arm. |

|
Adhere the sentiment bubble in place, to finish. |