Give your friends $10 off their first order!
Refer a FRIEND


WHAT YOU WILL NEED:
White card blank 7 x 5"
Mulberry & Gold Damask 7 x 5" Vellum Pack
Mulberry Frames Stamp And Die Set
Mulberry & Gold Damask 12 x 12" Paper Pack
All Surfaces Charcoal 8 x 8" Paper Pack
WOW Embossing Ink Pad
WOW Heat Tool
WOW Gold Embossing Powder
Anti-static bag
Stickles: Diamond
Eureka 101 Watercolour Tablet
SBM Magnetic glass mat
Paper Trimmer
Perfect Together Glue
Double-sided adhesive tape
Tape runner
Die Cutting machine
[click image to enlarge] 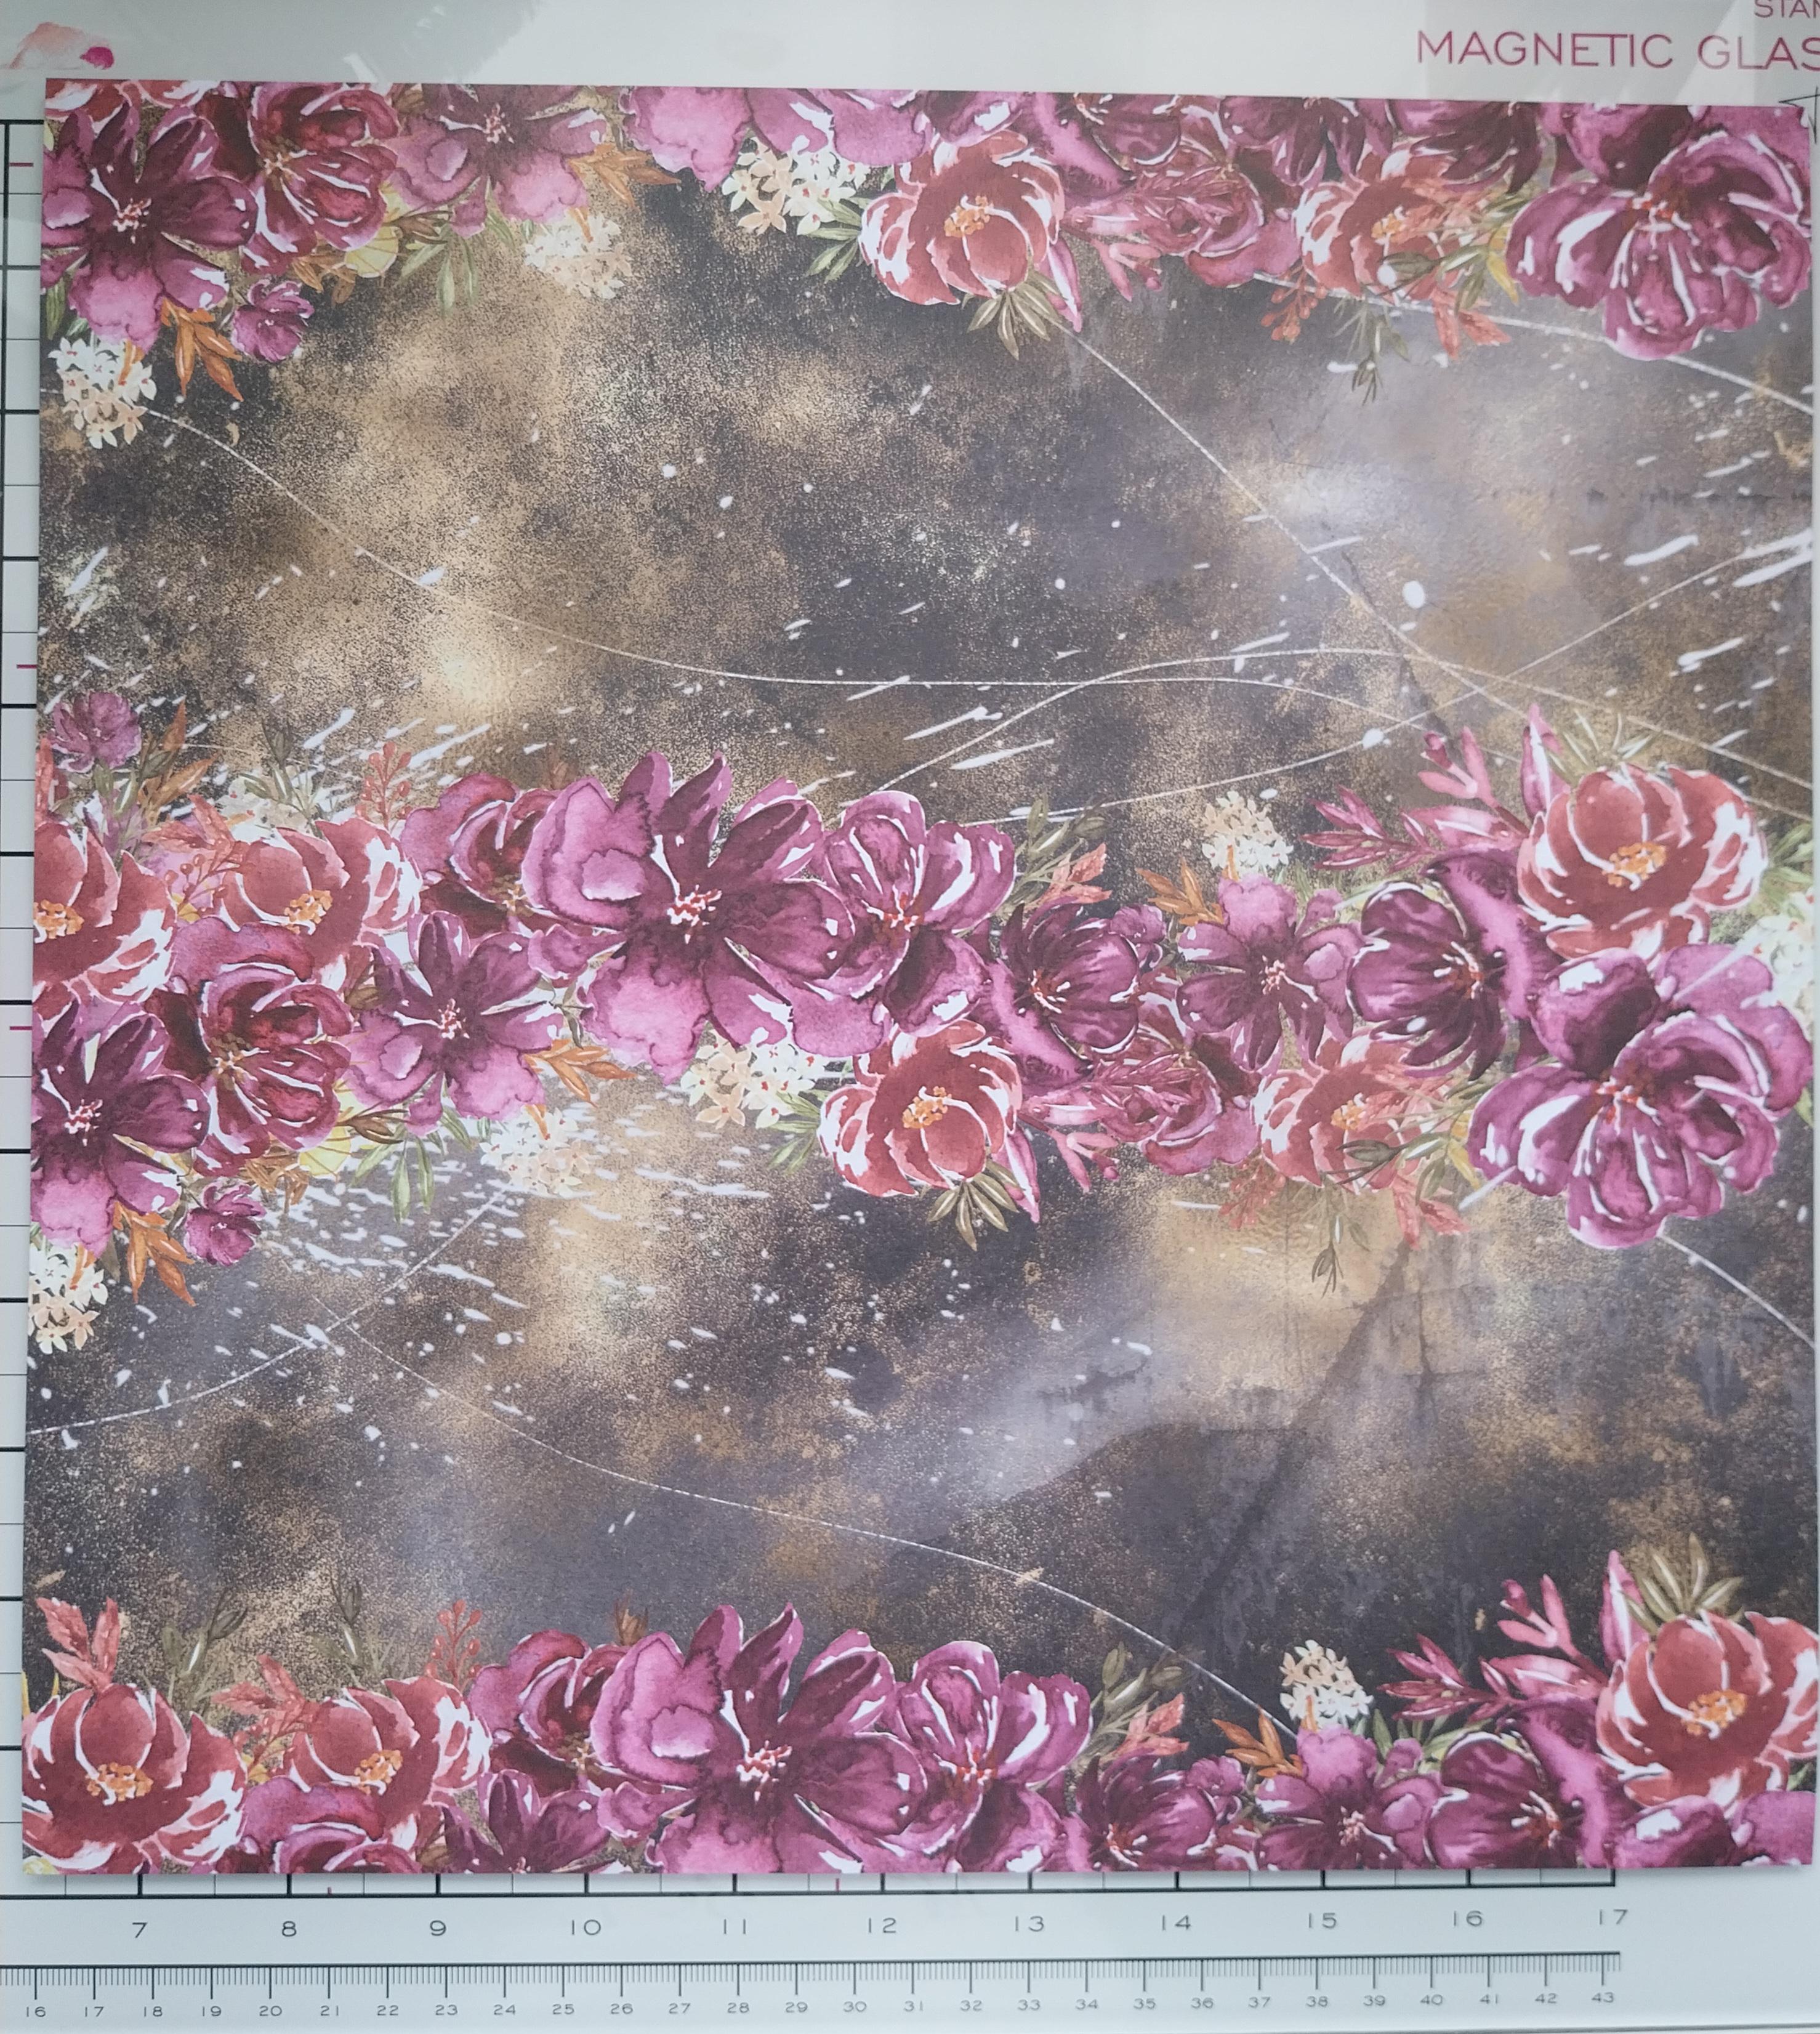
|
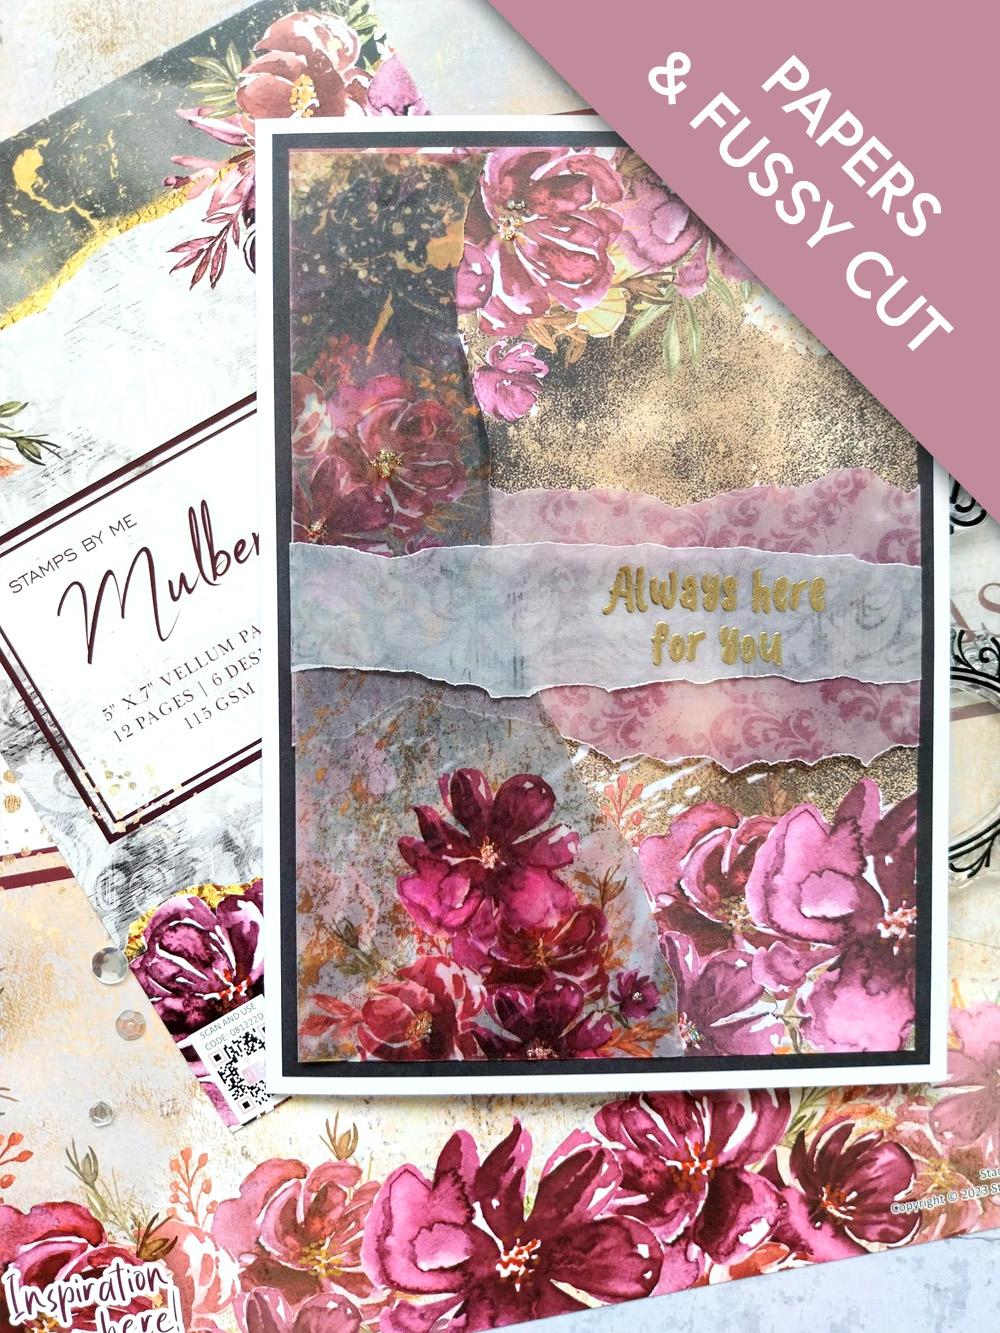
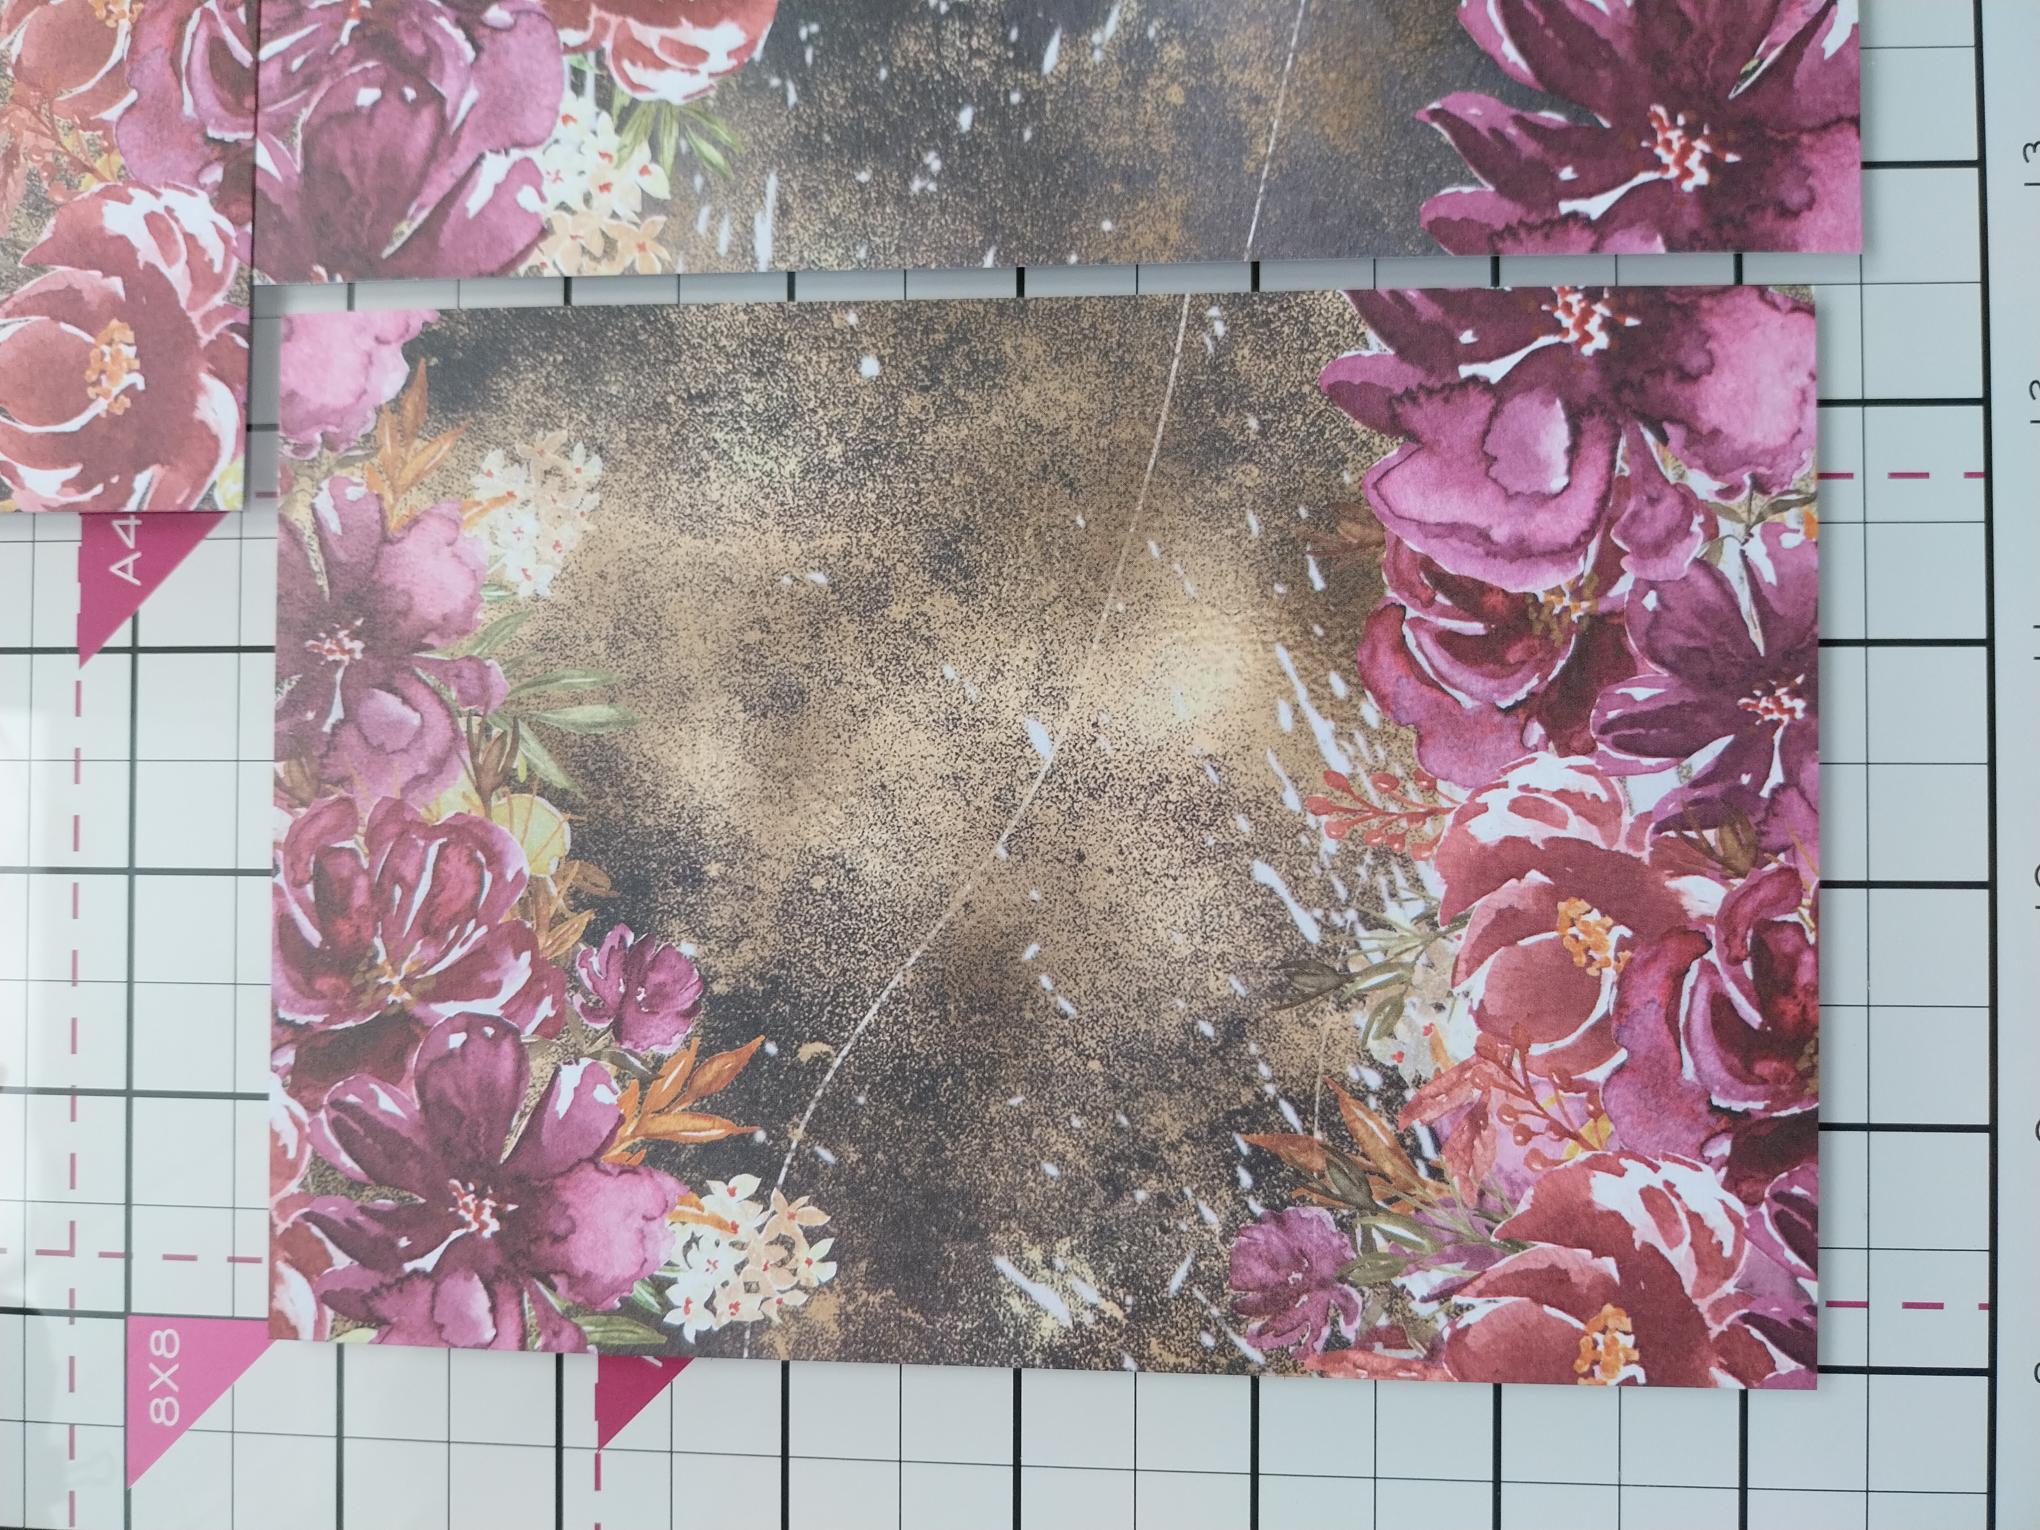
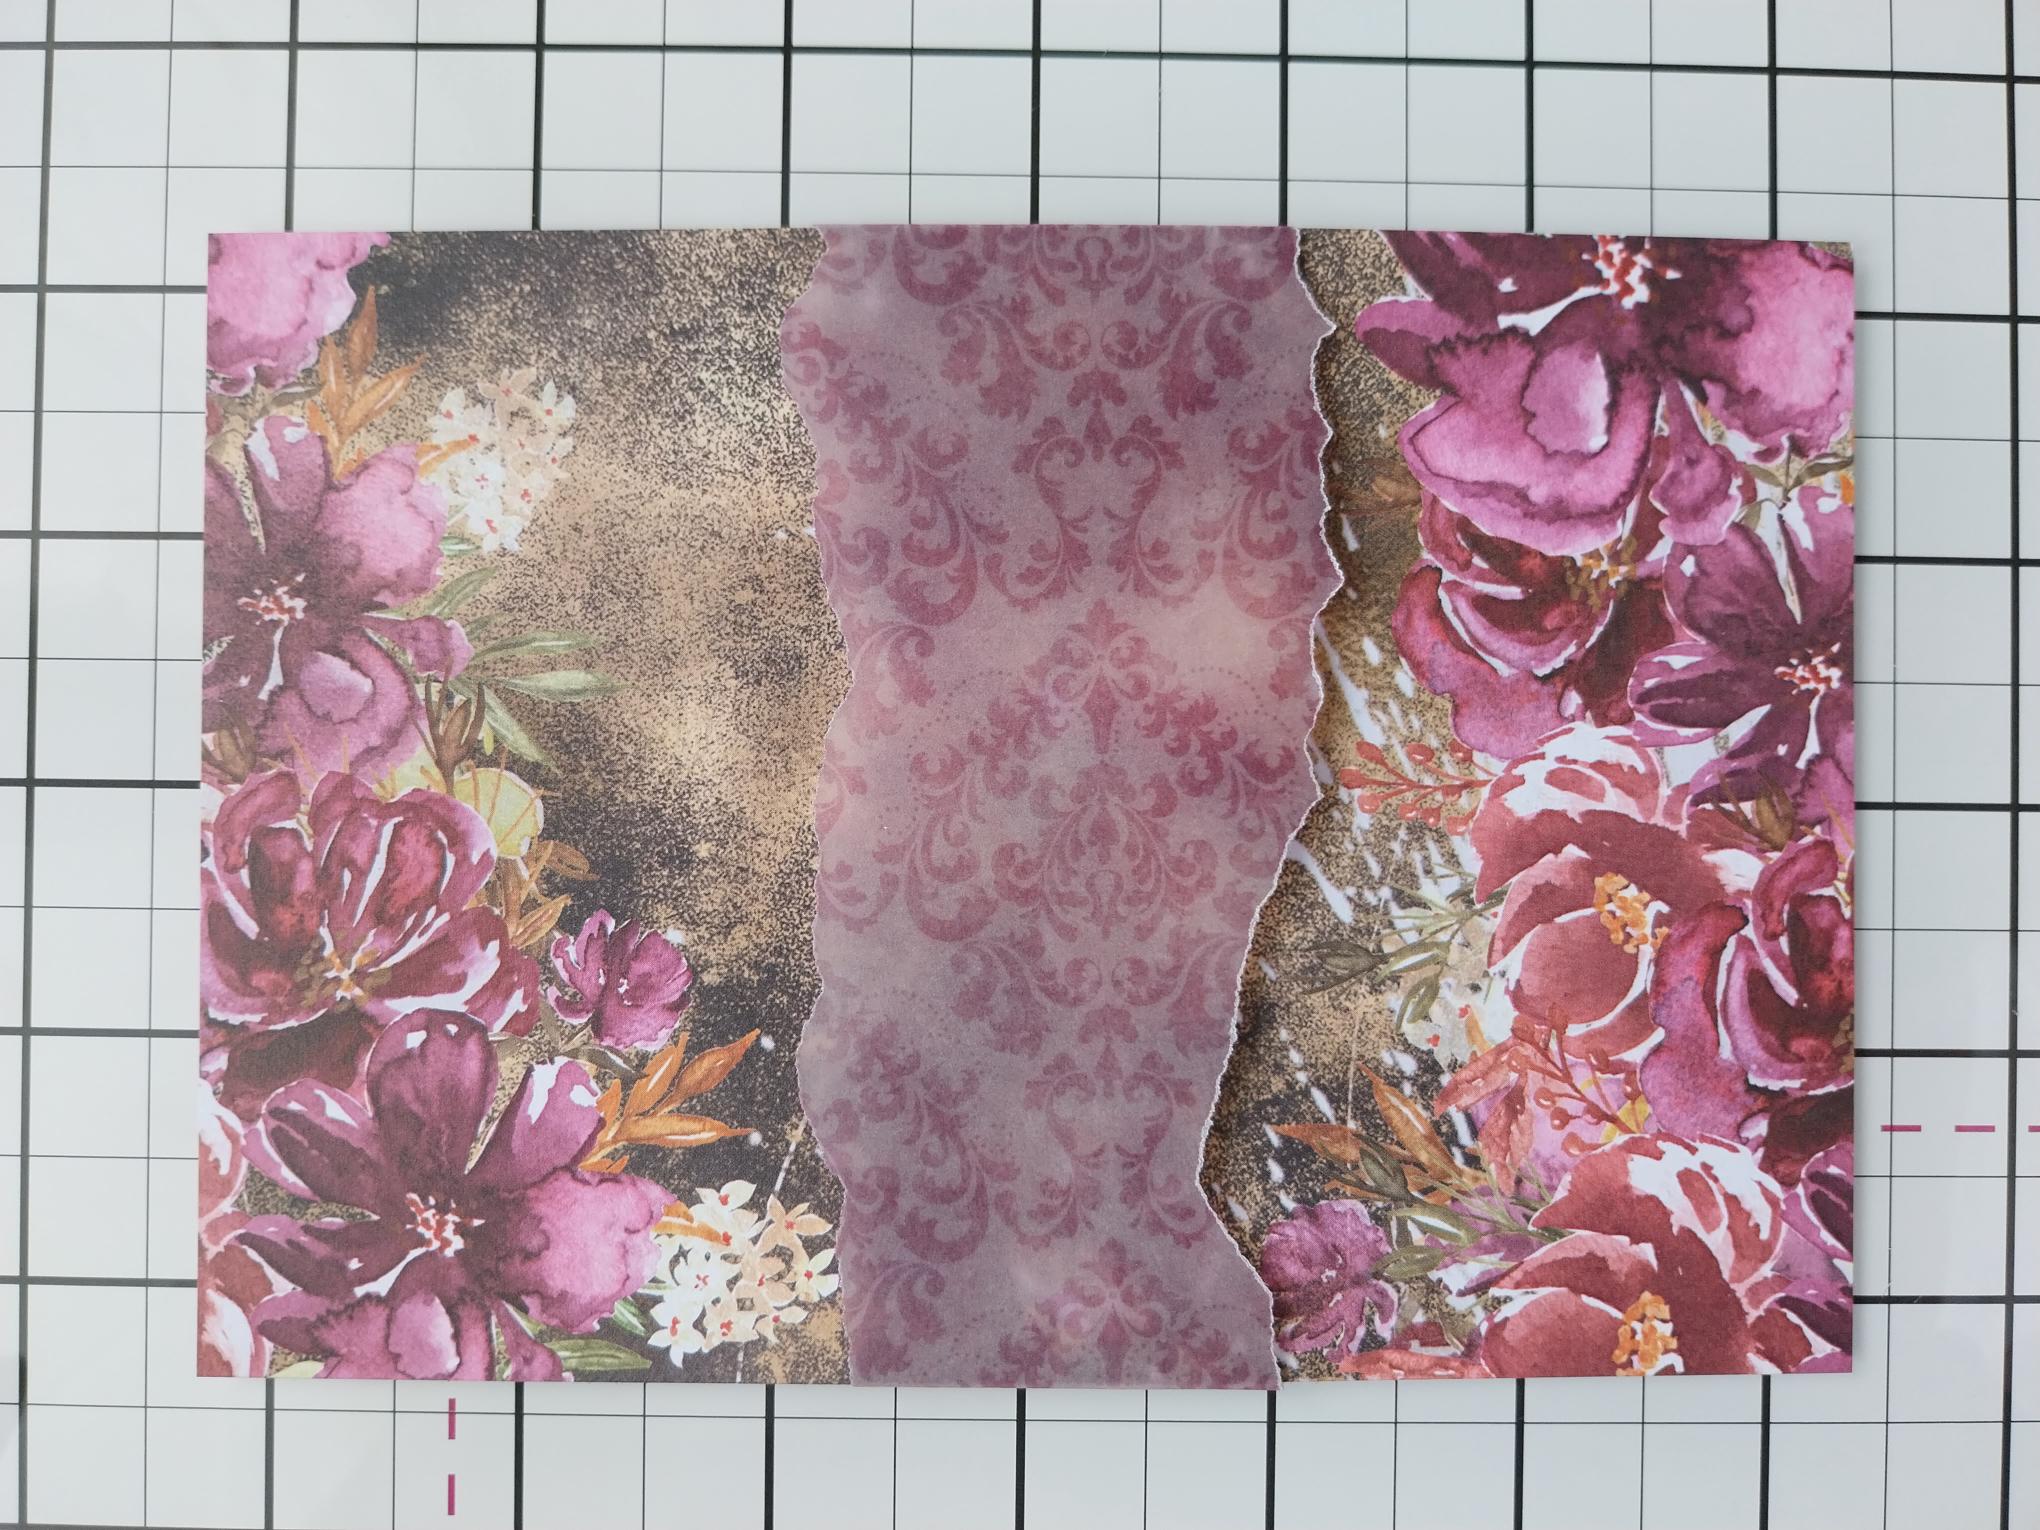
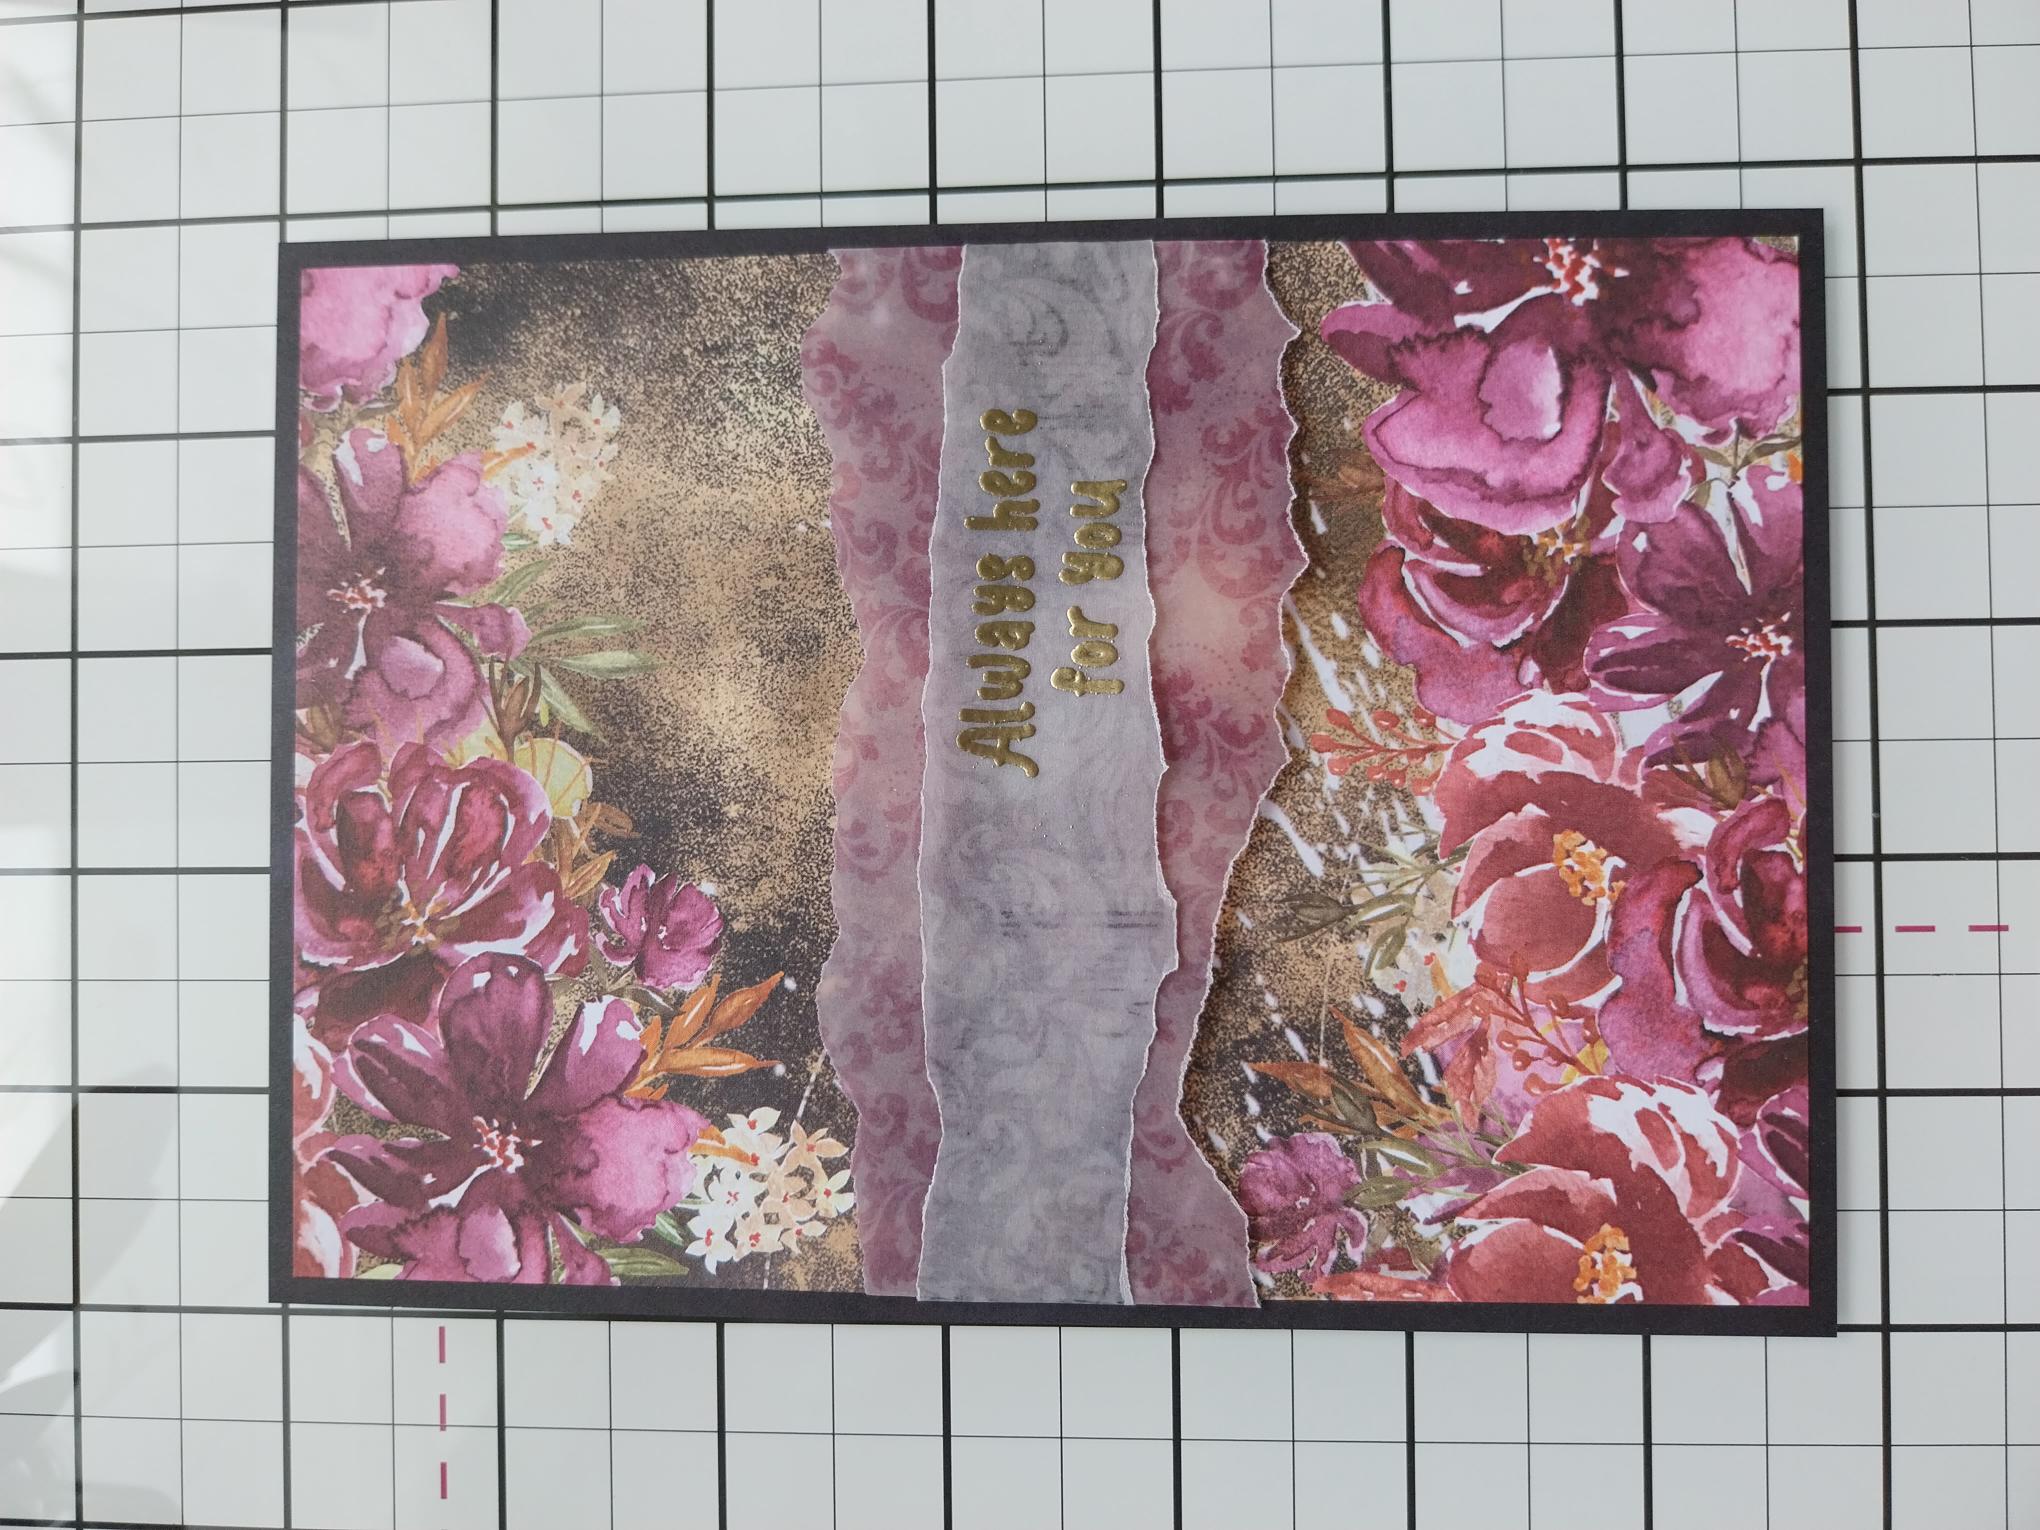
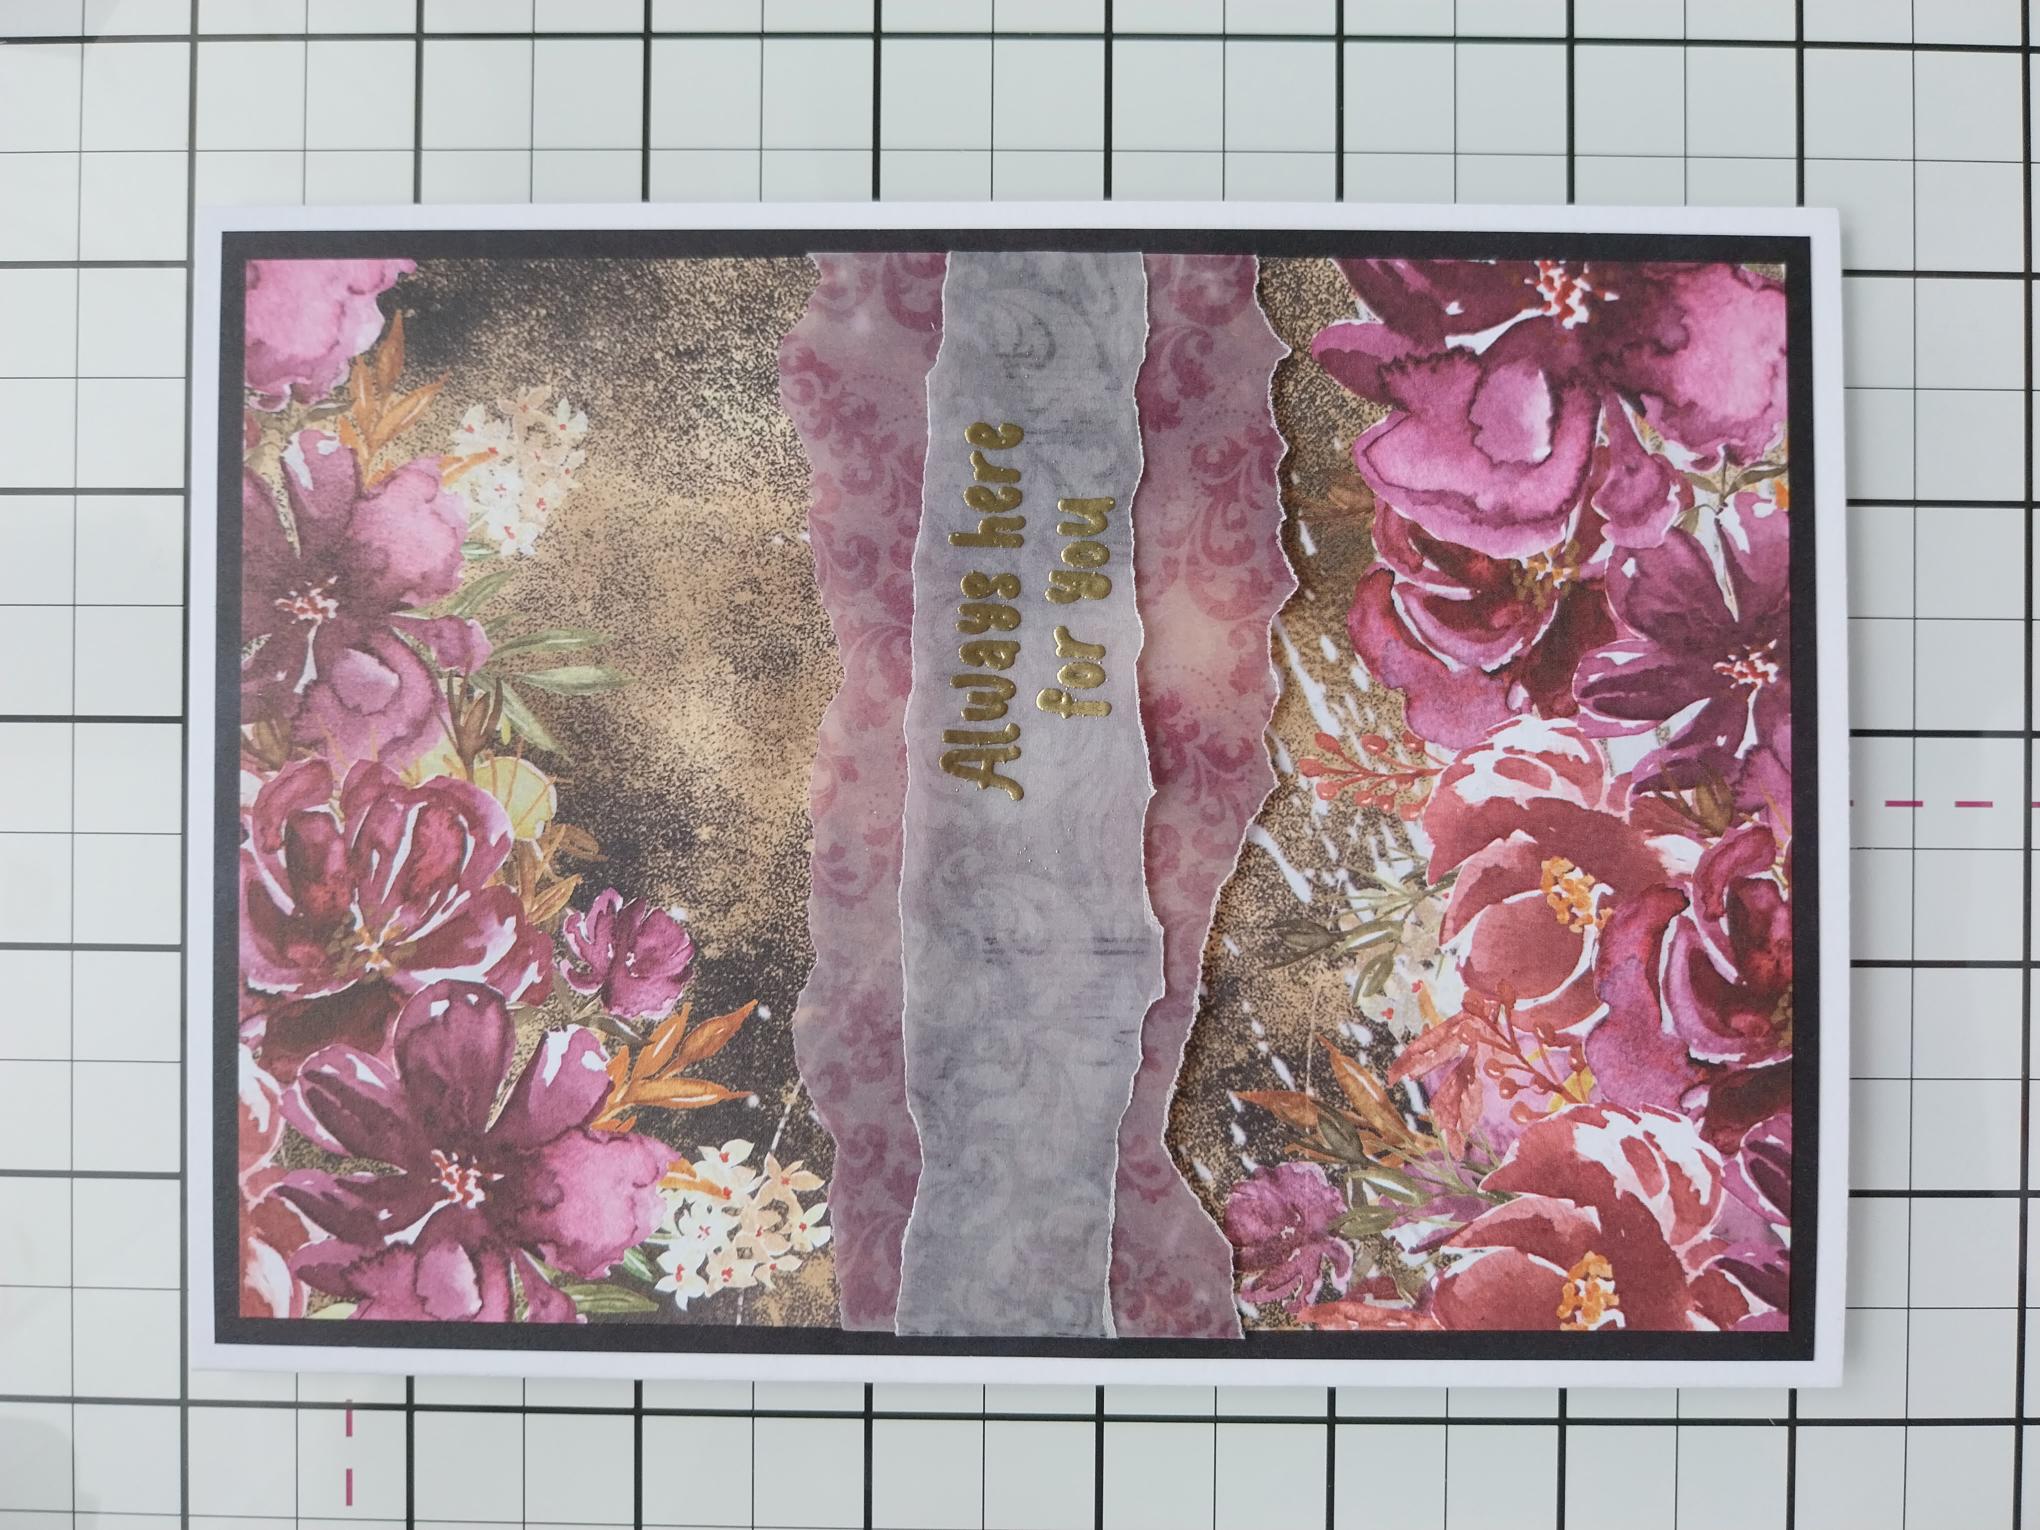
Remove this gorgeous paper from the 12 x 12" Mulberry & Gold Damask Paper Pack. |
|
Cut off a panel measuring 6 1/2 x 4 1/2". |

|
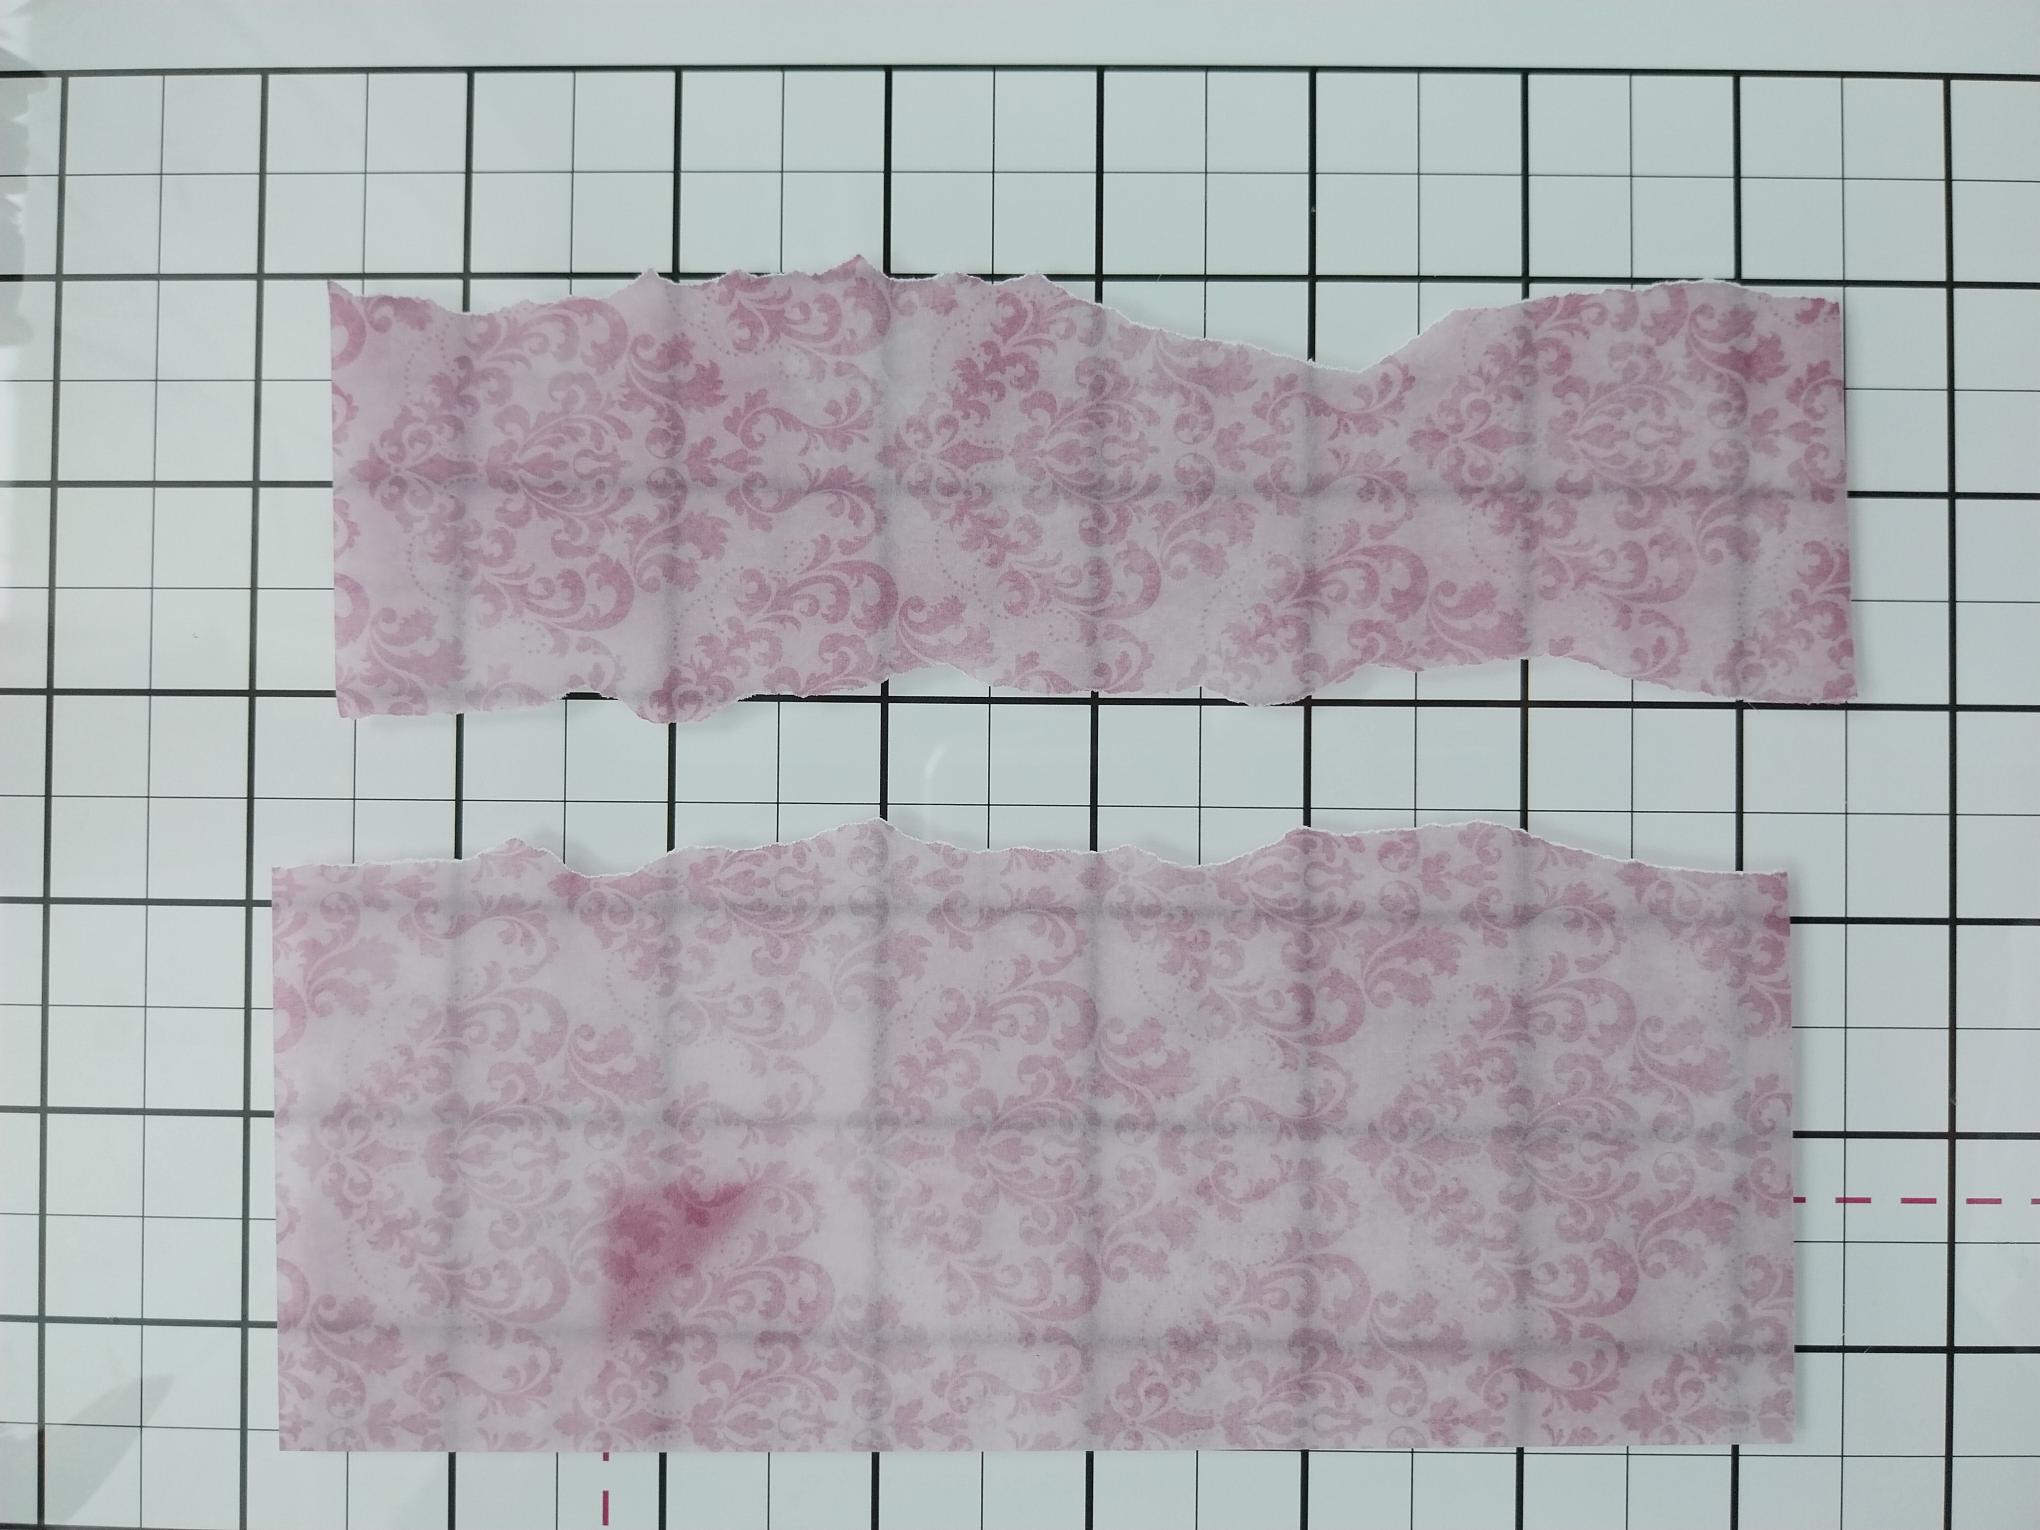
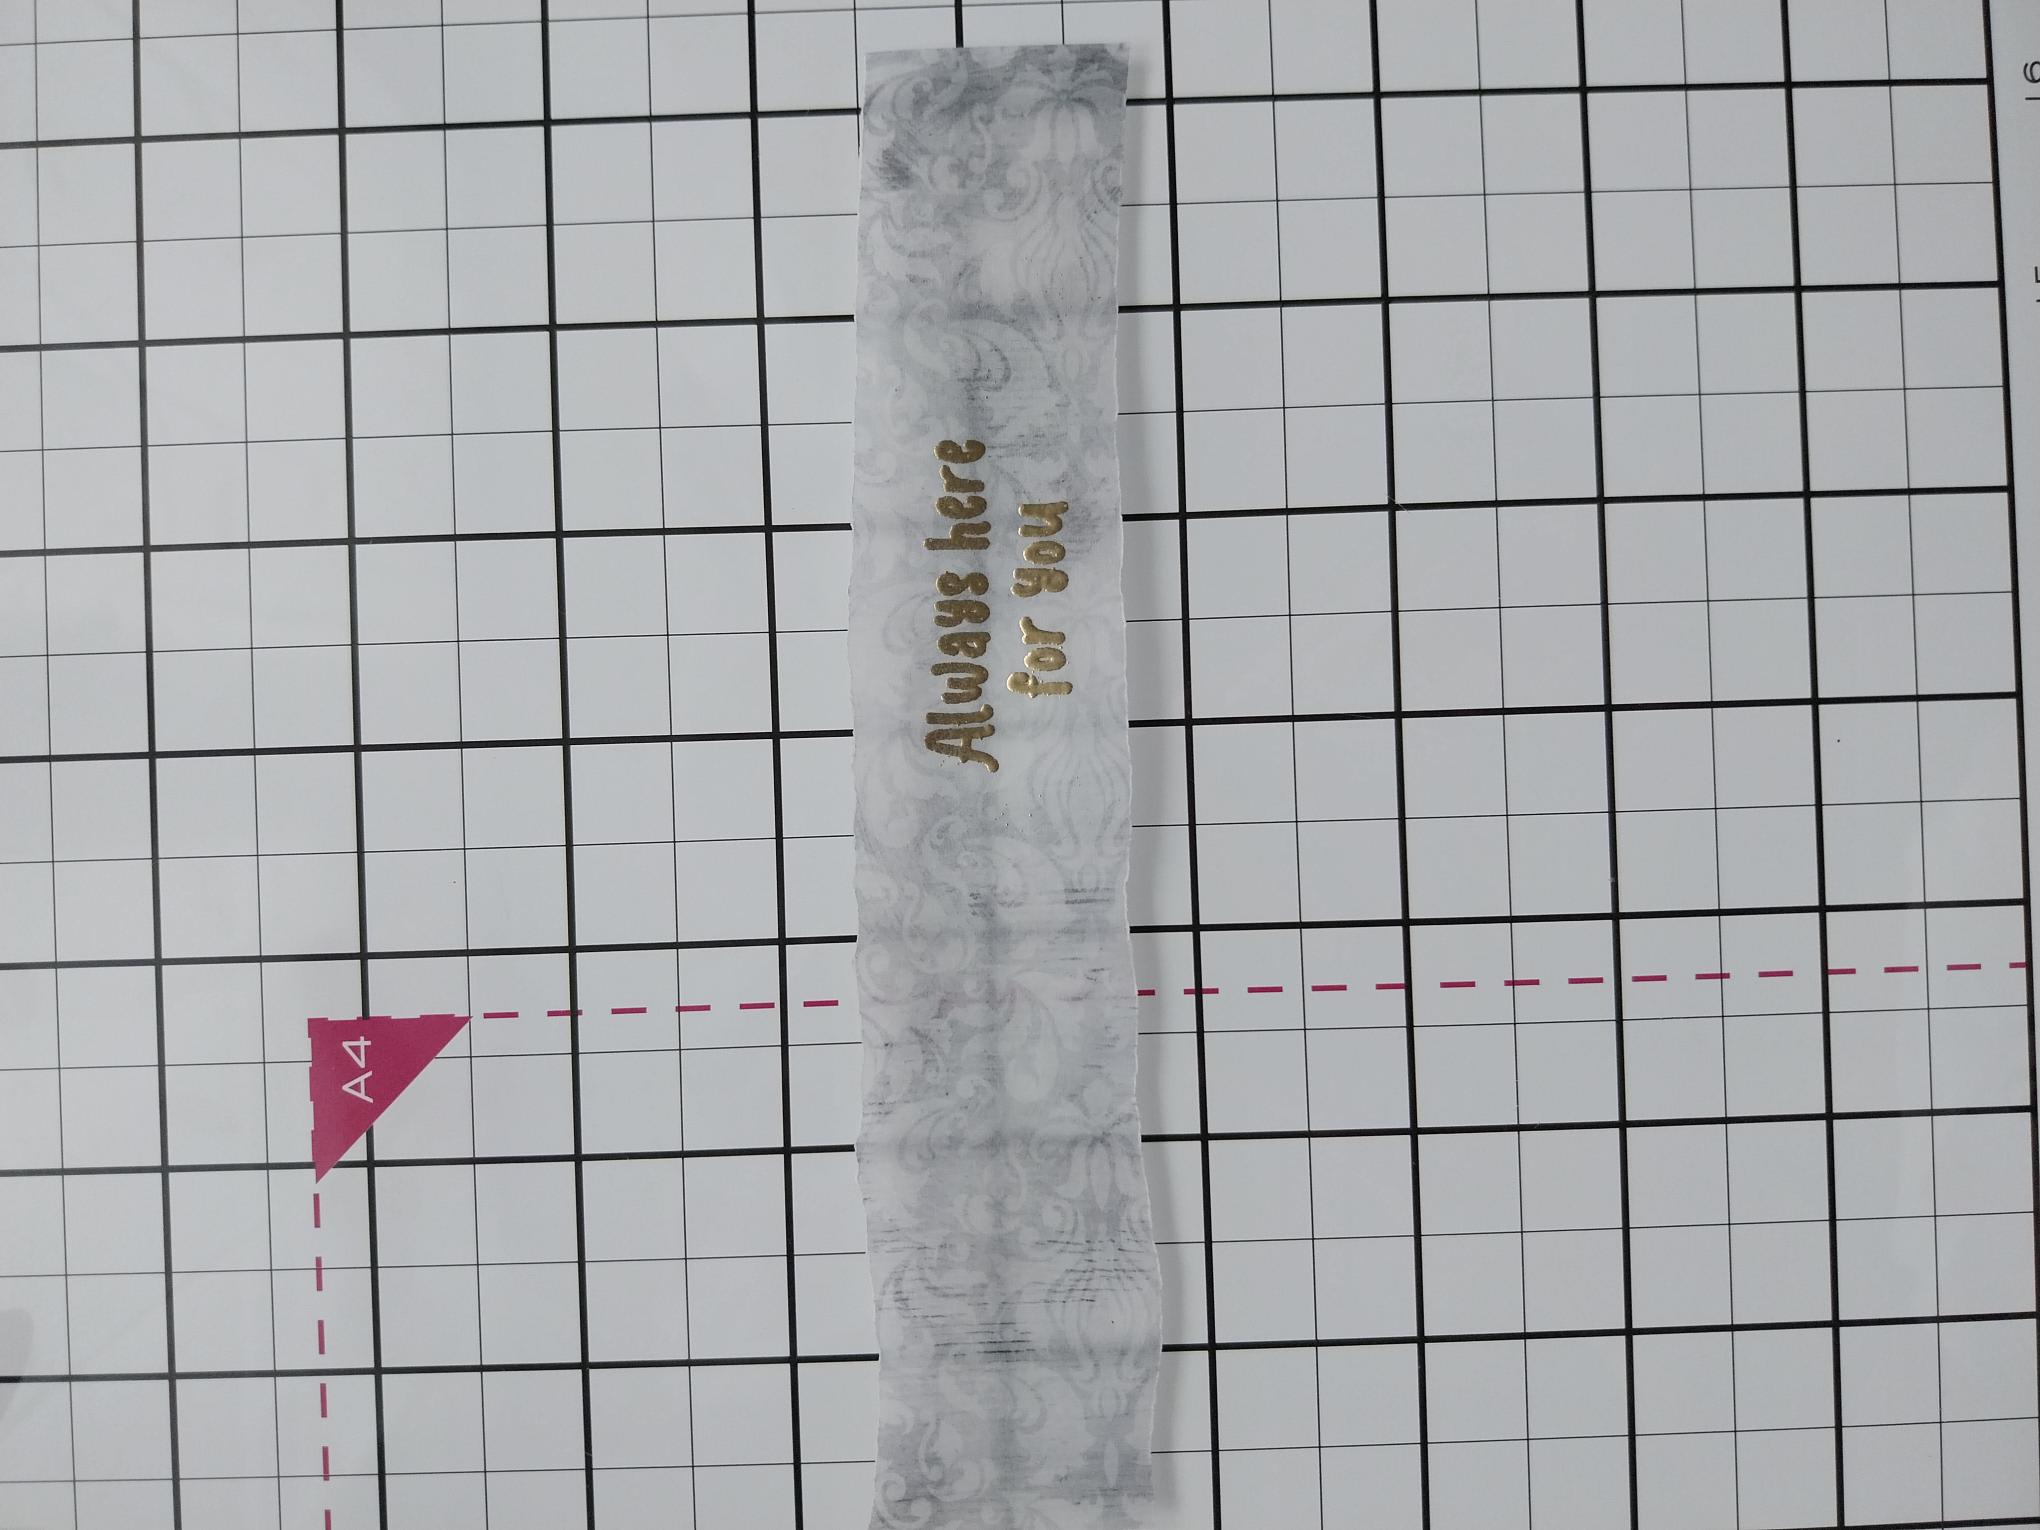
From the Mulberry & Gold Damask Vellum Pack, tear a sheet of grey vellum 5 1/4" in length and wide enough to stamp the "Always Here For You" sentiment on. |
|
Tear a sheet of pink vellum 5 1/4" in length and double the width of the grey one. |
|
Place the pink vellum panel across the centre of the decorative paper. Tuck the edges over and secure on the reverse with double-sided tape. |
|
Wipe the anti-static bag over your torn, grey vellum panel. Stamp the sentiment towards the right side, with the WOW embossing ink pad. Cover with the Gold embossing powder and heat set with a pre-heated heat tool. Move your heat tool as soon as the powder starts to turn, to avoid burning or warping the vellum. |
|
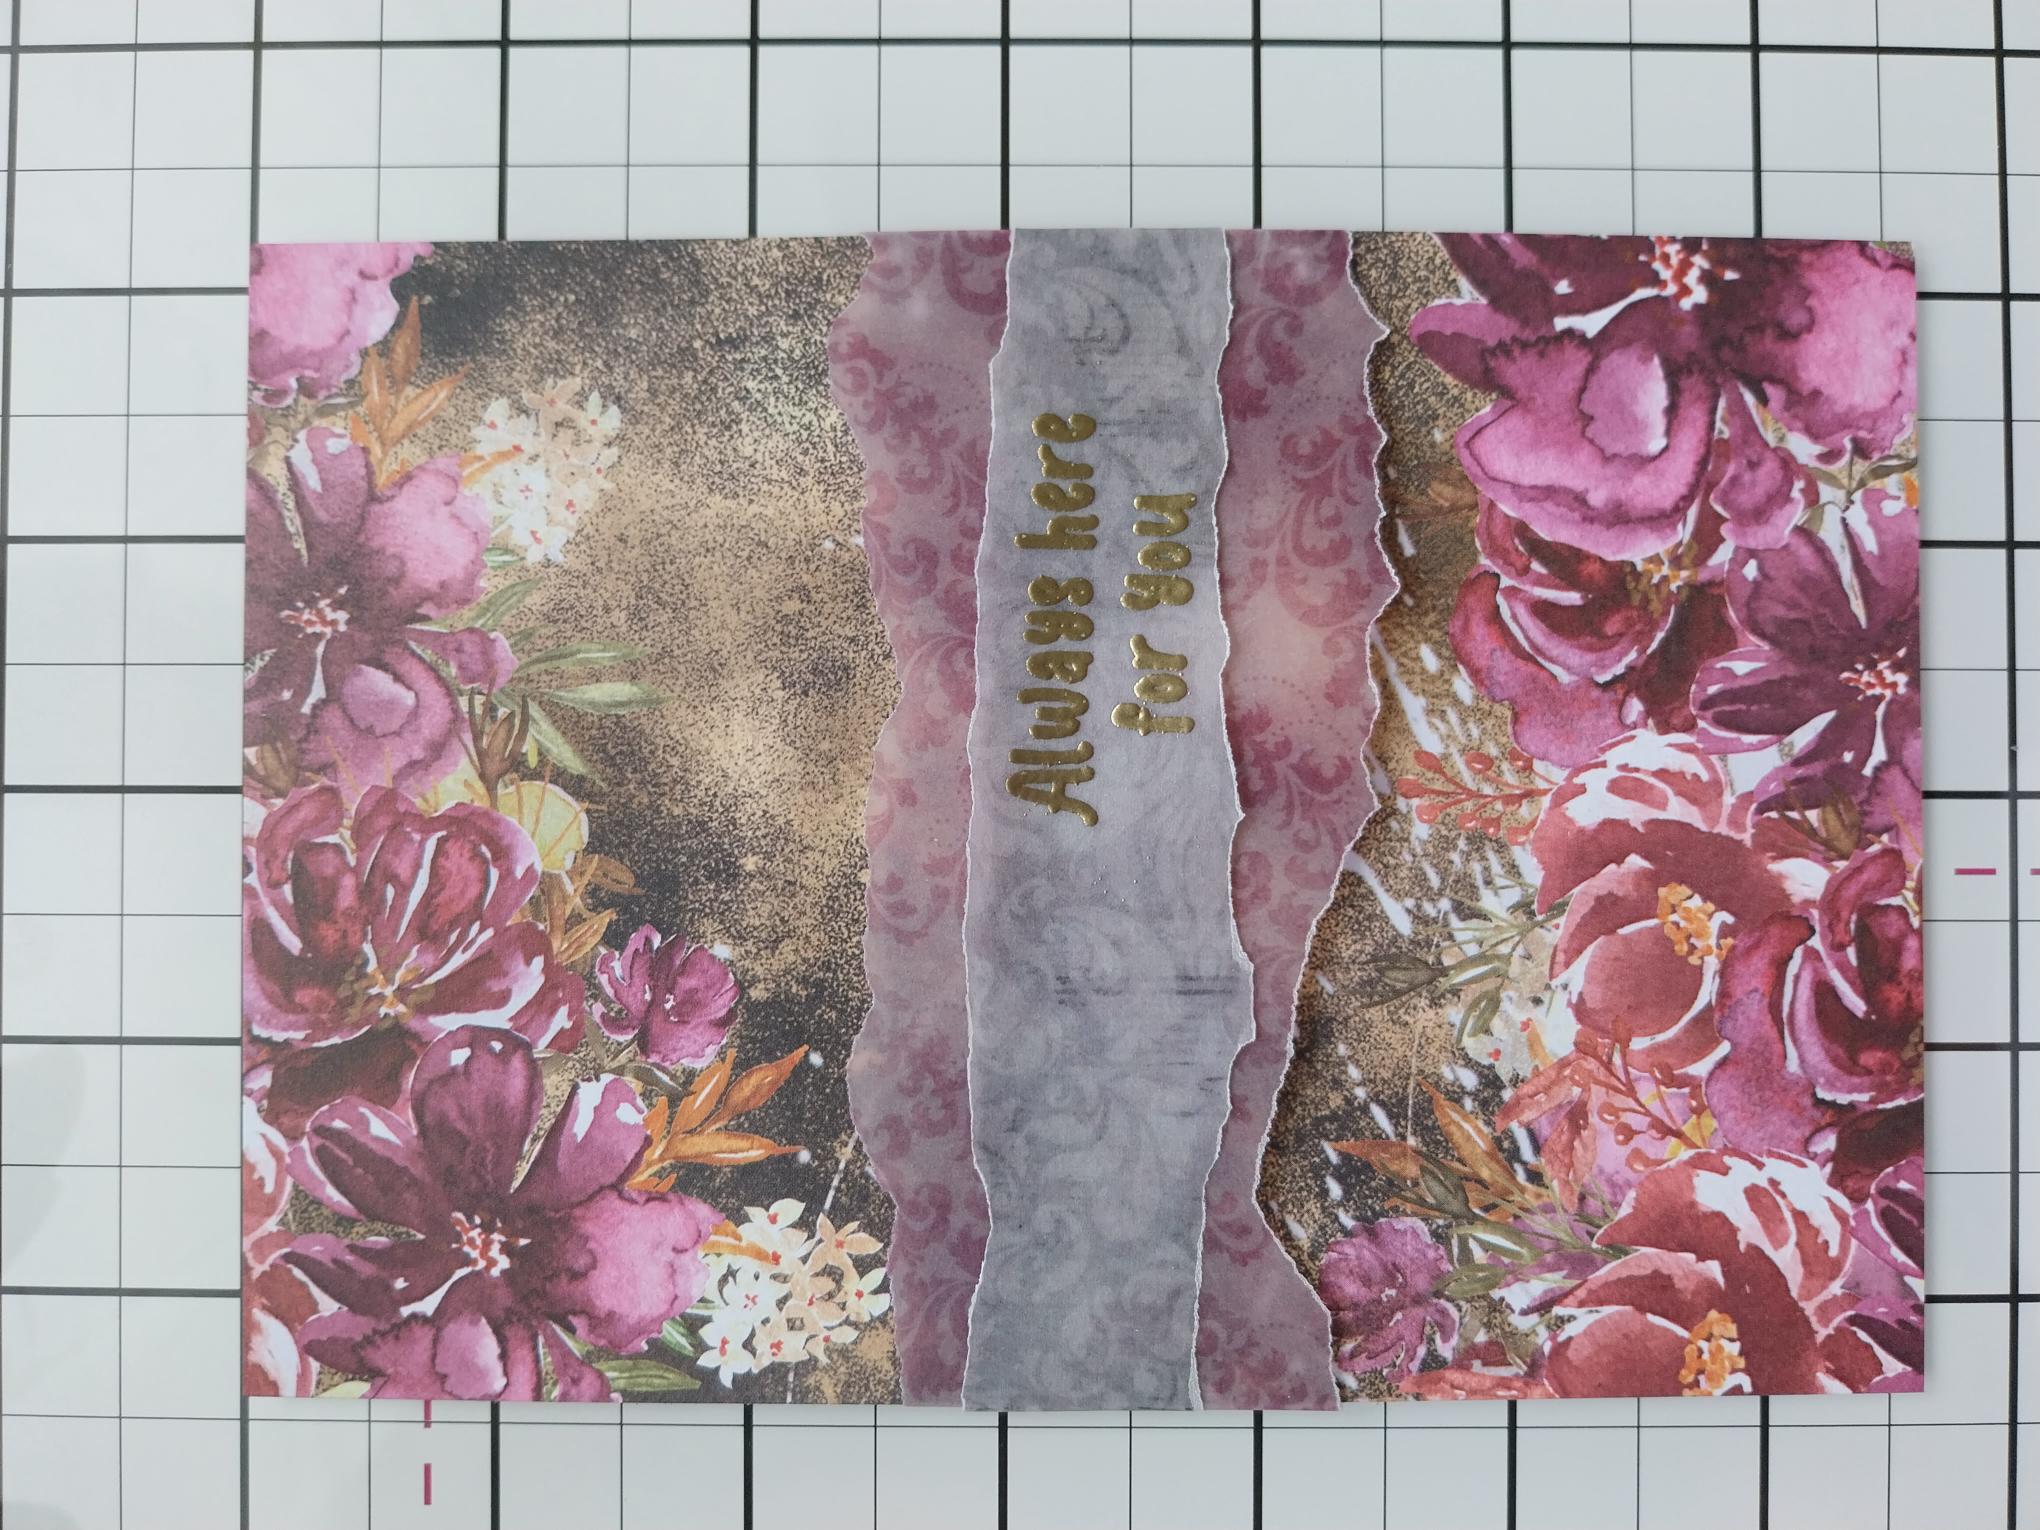
Lay the embossed vellum panel on top of the pink, tuck the sides over and secure on the reverse with your double-sided tape. |
|
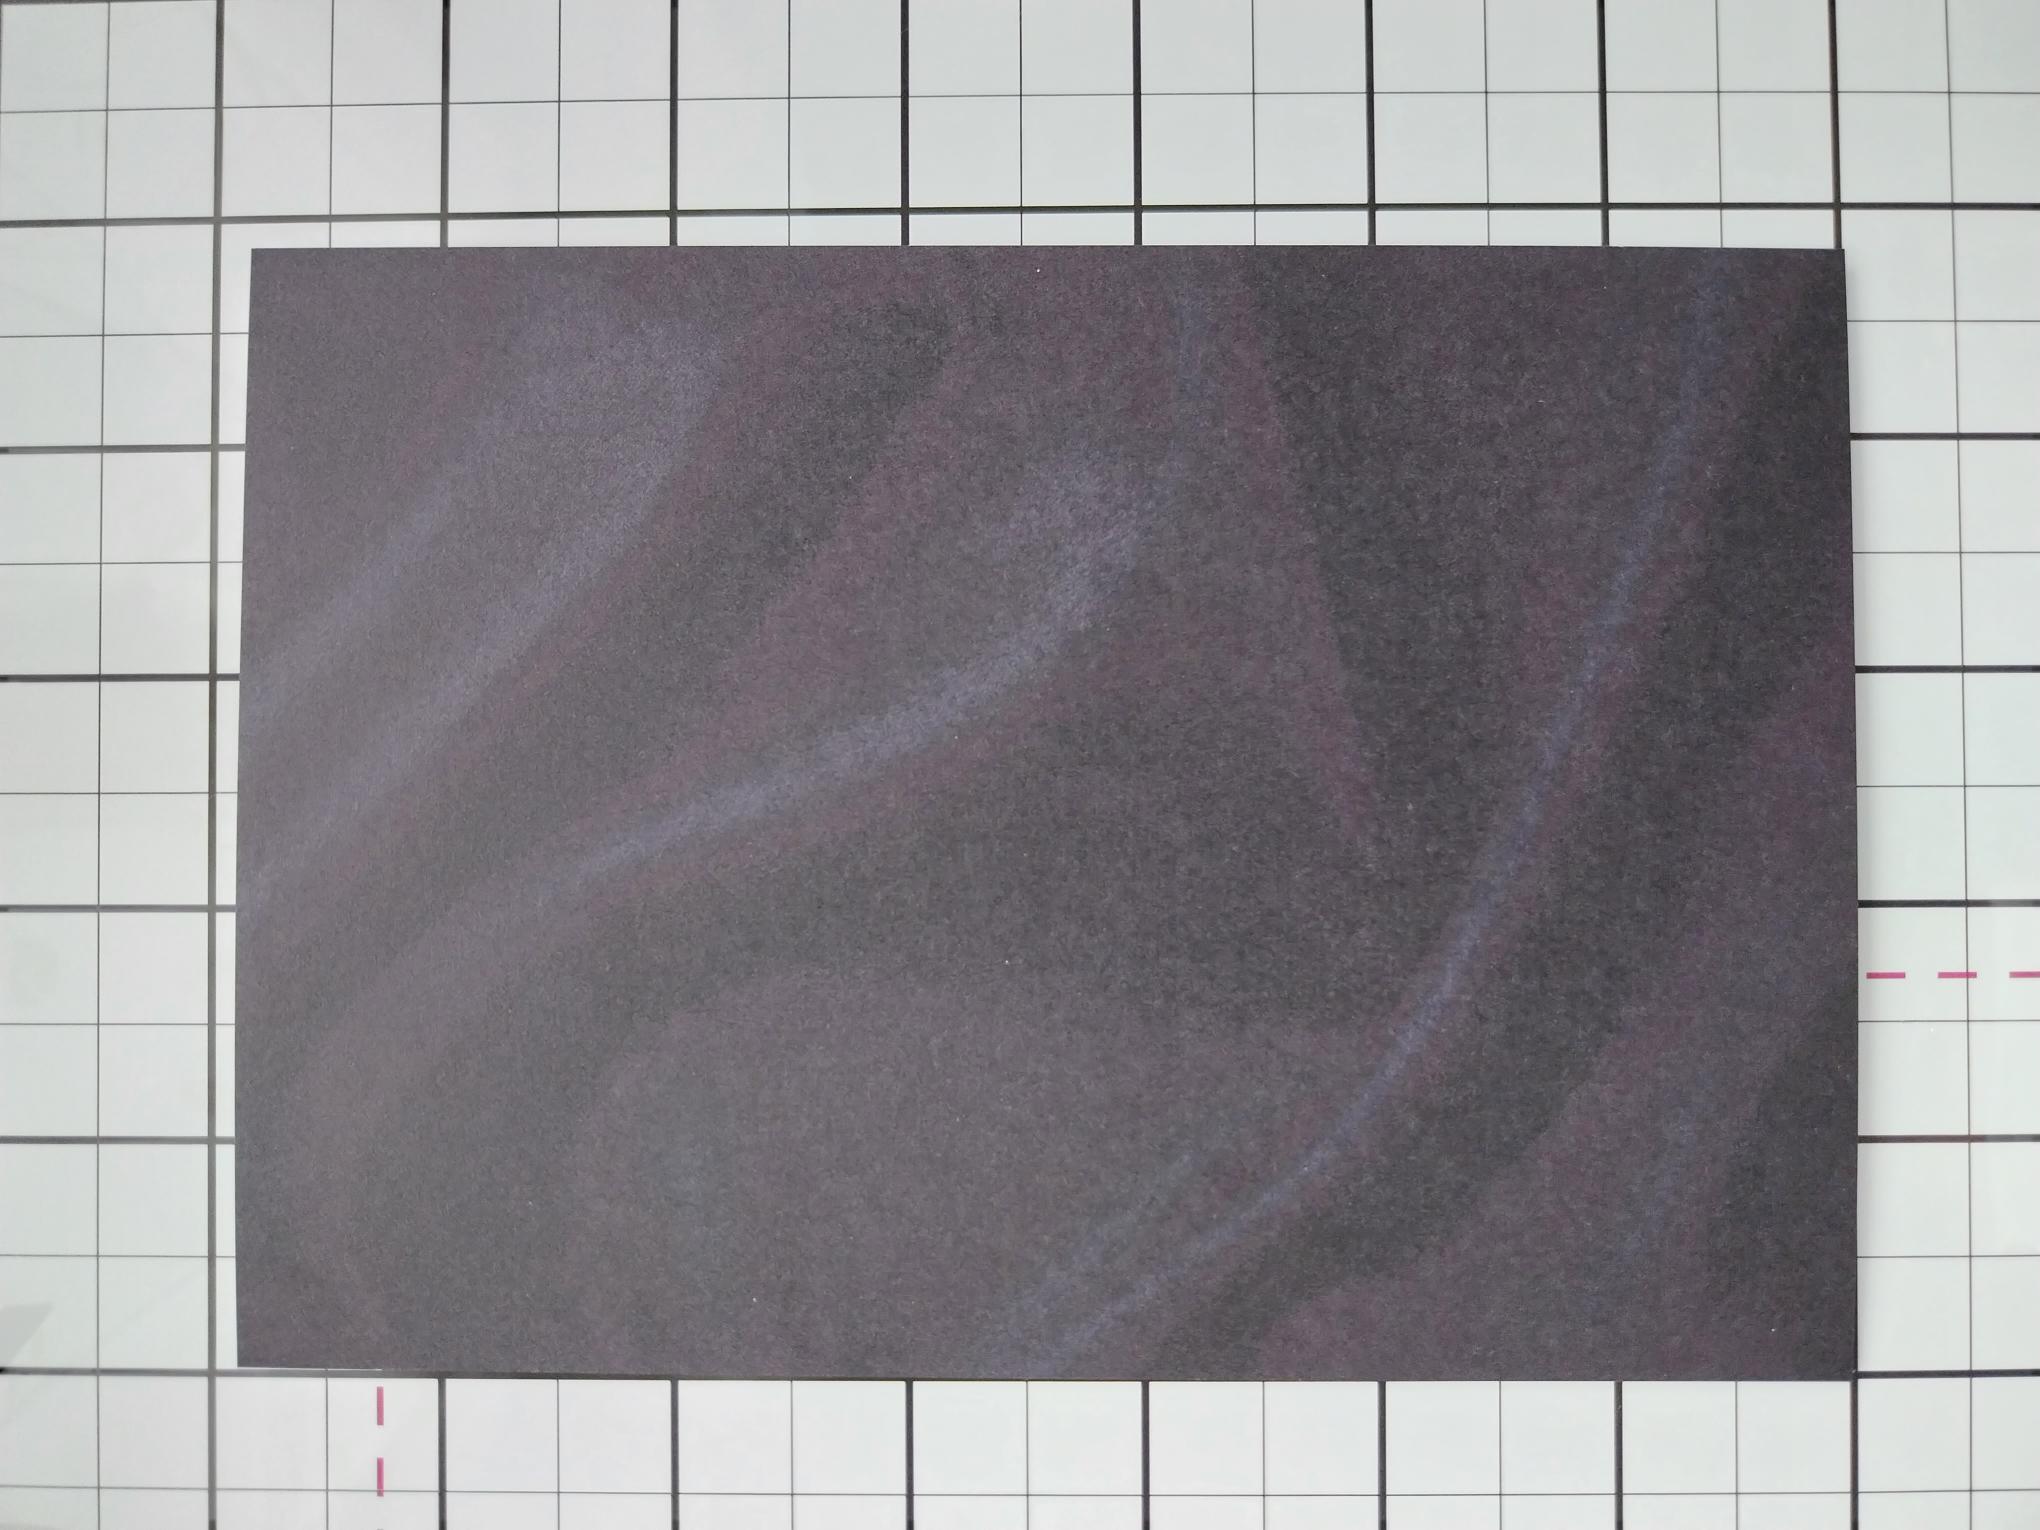
Trim this decorative Charcoal sheet, from the All Surfaces Paper Pack, to 6 3/4 x 4 3/4" |
|
Adhere your papers on to the Charcoal paper. |
|
Adhere to your white 7 x 5" card blank. |
|
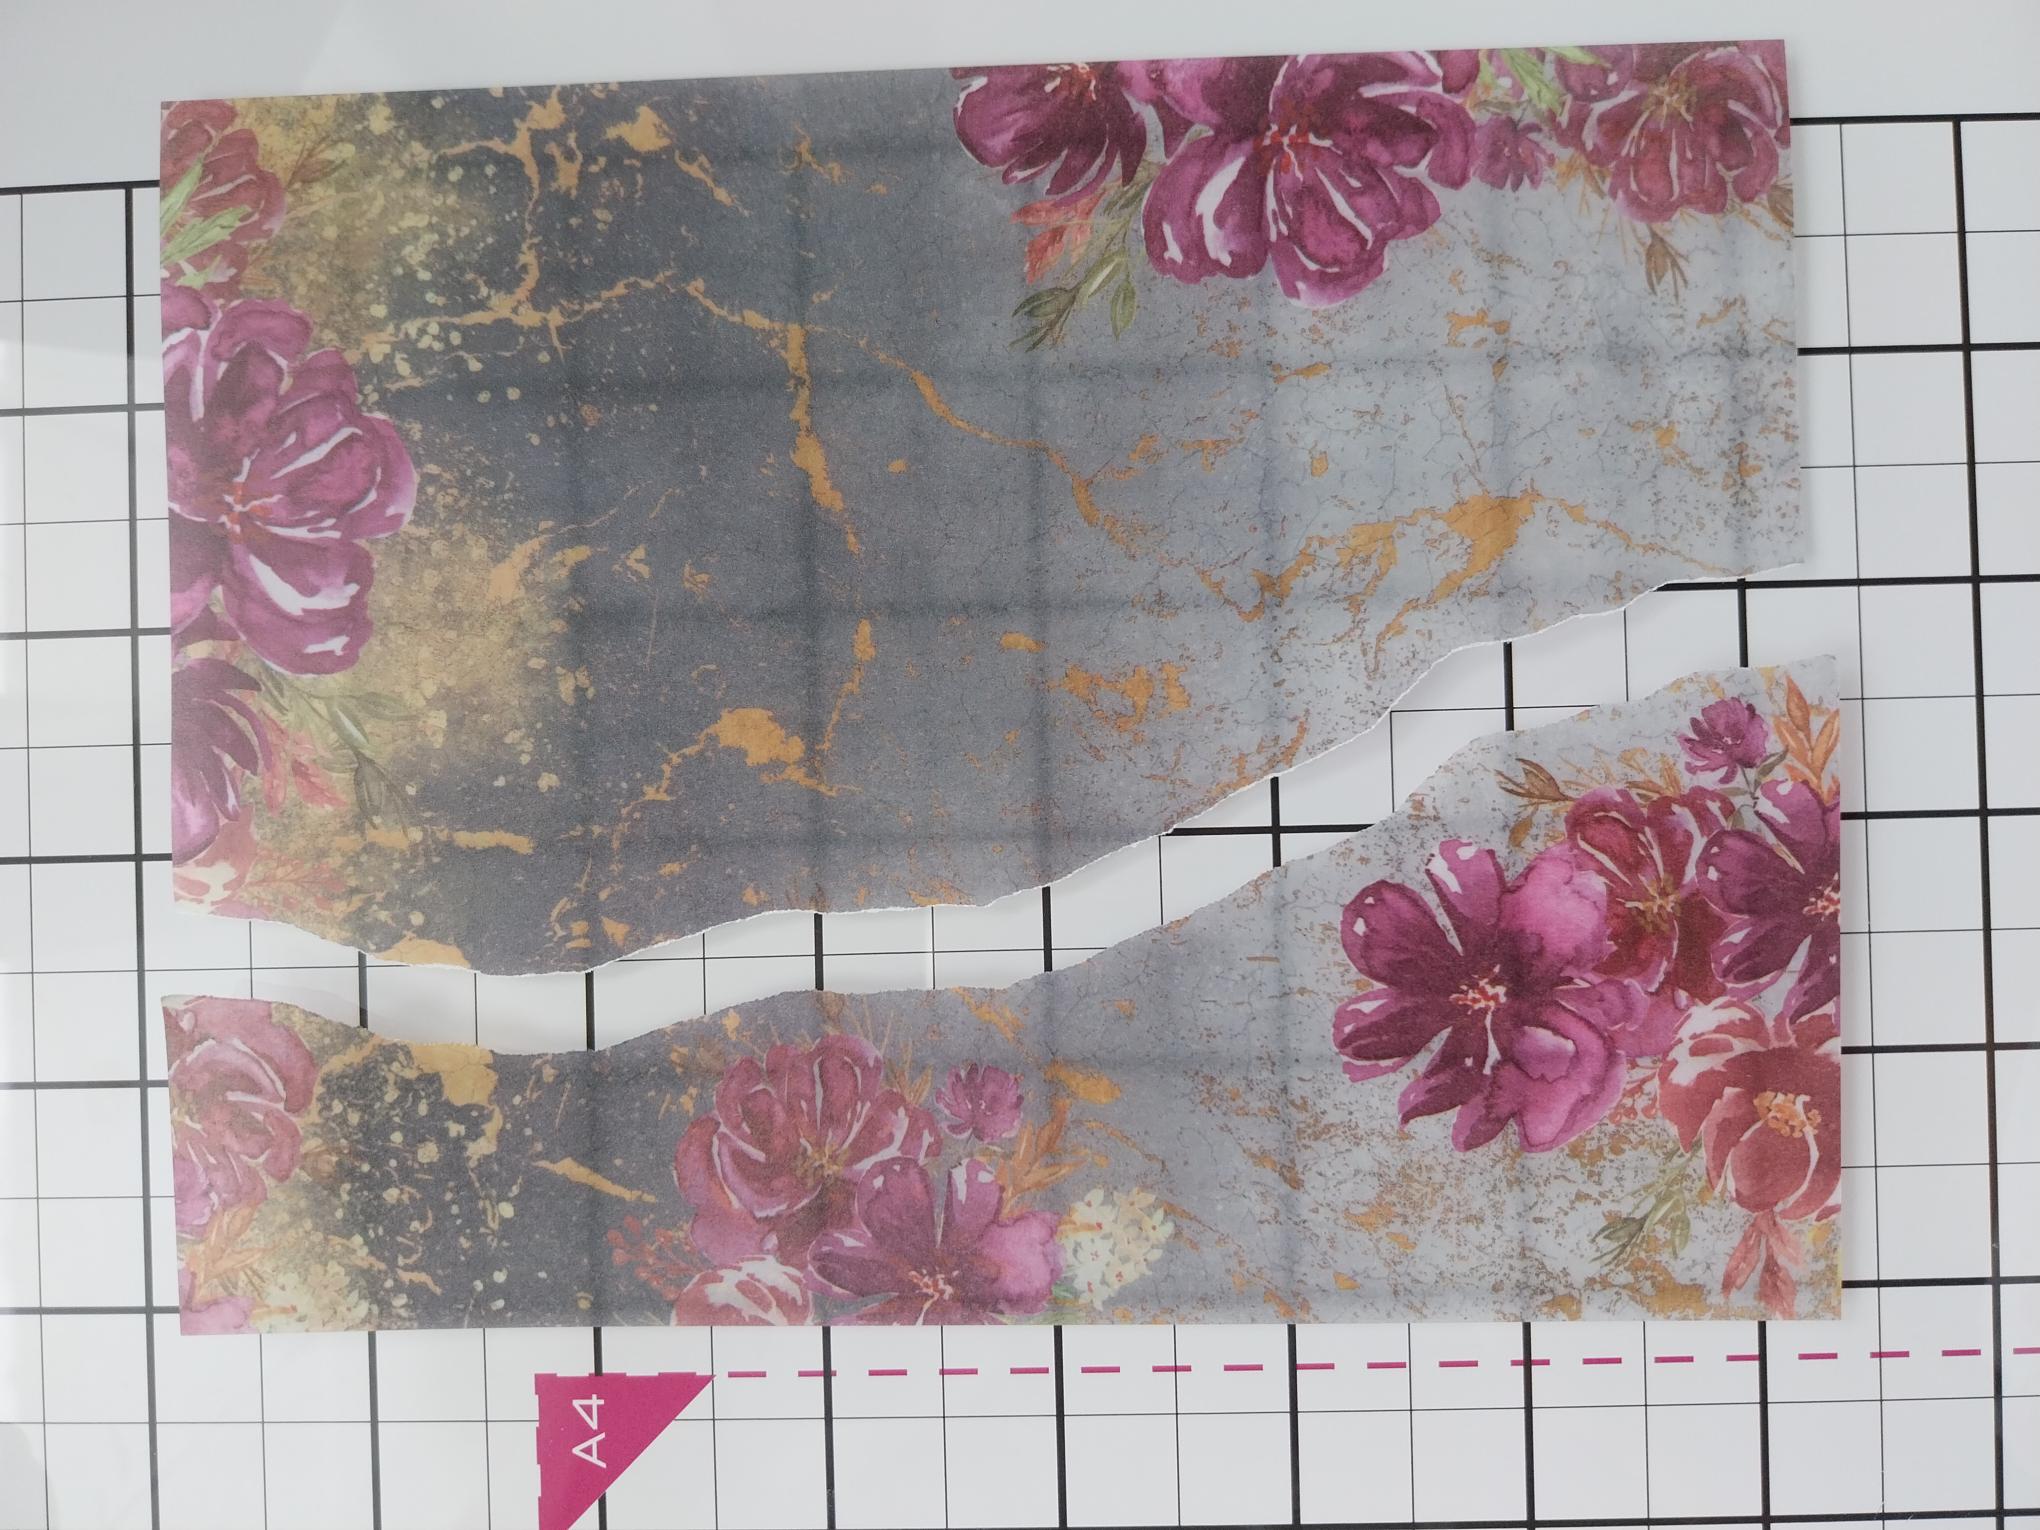
Remove this beautiful vellum sheet and tear down and around, the printed design, as required. |

|
Now, at this point I had every intention of adhering the torn vellum panel on top of the horizontal vellum papers....but after faffing about, I changed my mind!!! I slid it under the vellum panels and adhered it flush with the left side of the paper, with my tape runner, in strategically placed areas. So the choice is yours...on top...or underneath!! |
|
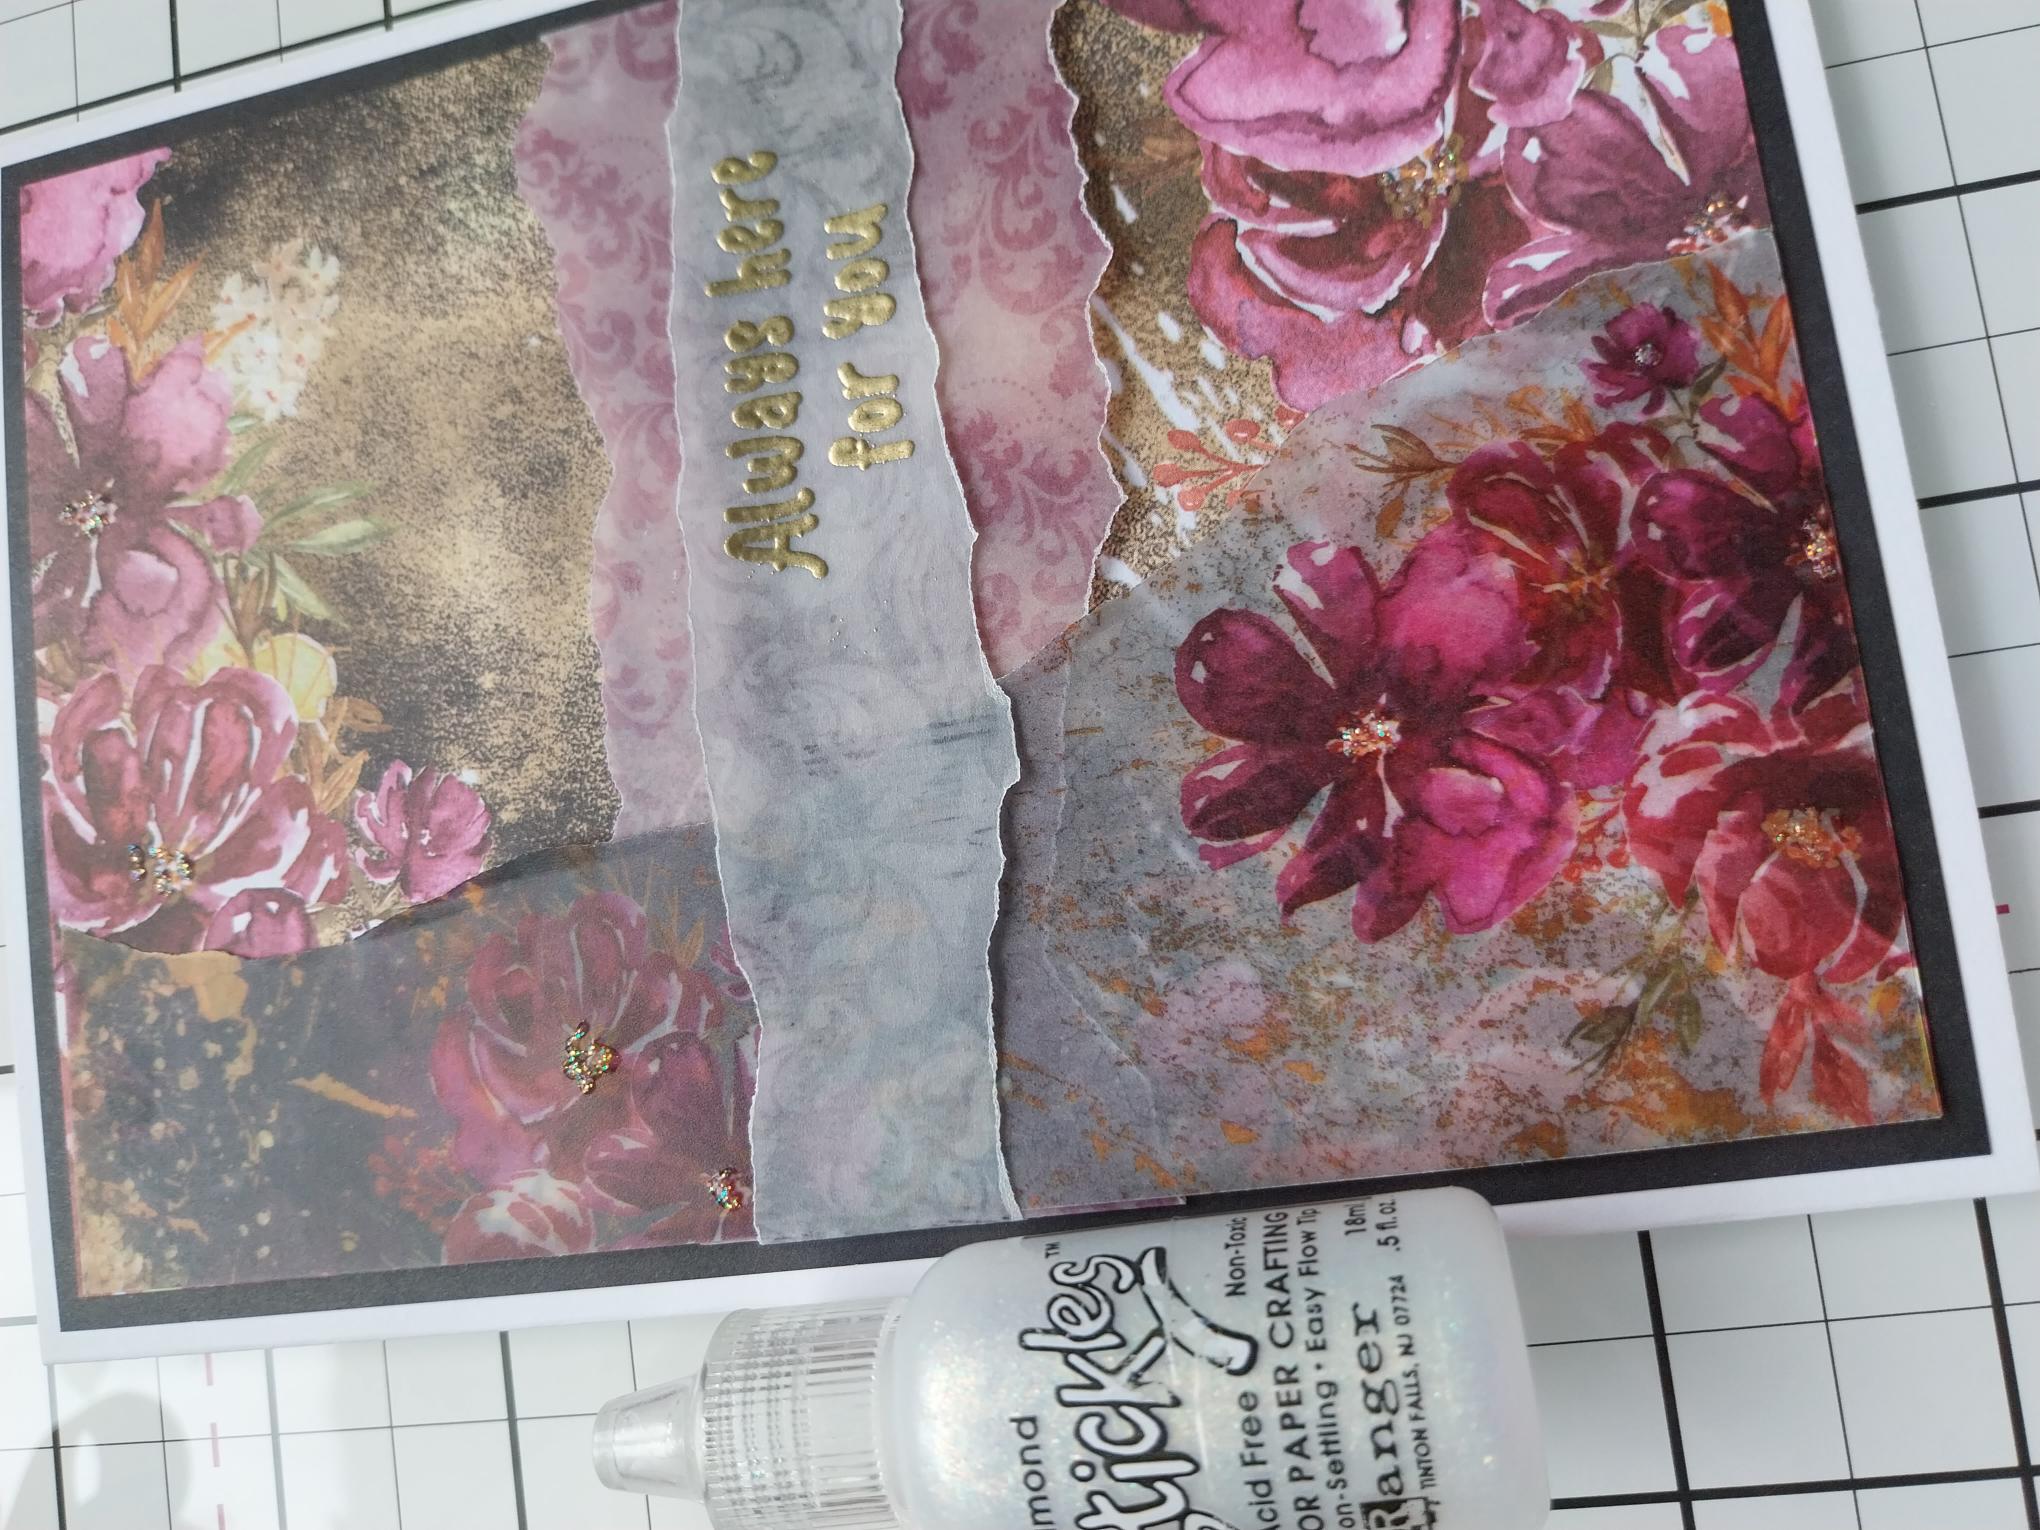
To finish your project, use your Stickles to add a touch of glitter and sparkle to the centres of the printed flowers. |