Give your friends $10 off their first order!
Refer a FRIEND


WHAT YOU WILL NEED:
White card blank 7 x 5"
White card
Watercolour 3D Elegant Frame Embossing Folder
Mulberry Frames Stamp and Die Collection
Mulberry & Gold 5 x 7" Vellum Pack
Mulberry & Gold 8 x 8" Paper Pack
WOW embossing ink pad
WOW heat tool
WOW Gold embossing powder
Anti-static bag
Gold Gilding Wax
Sanding block/sandpaper/emery board
Eureka 101 Watercolour Tablet
SBM Magnetic glass mat
Paper Trimmer
Perfect Together Glue
Double-sided adhesive tape
Foam pads
Die Cutting machine
[click image to enlarge] 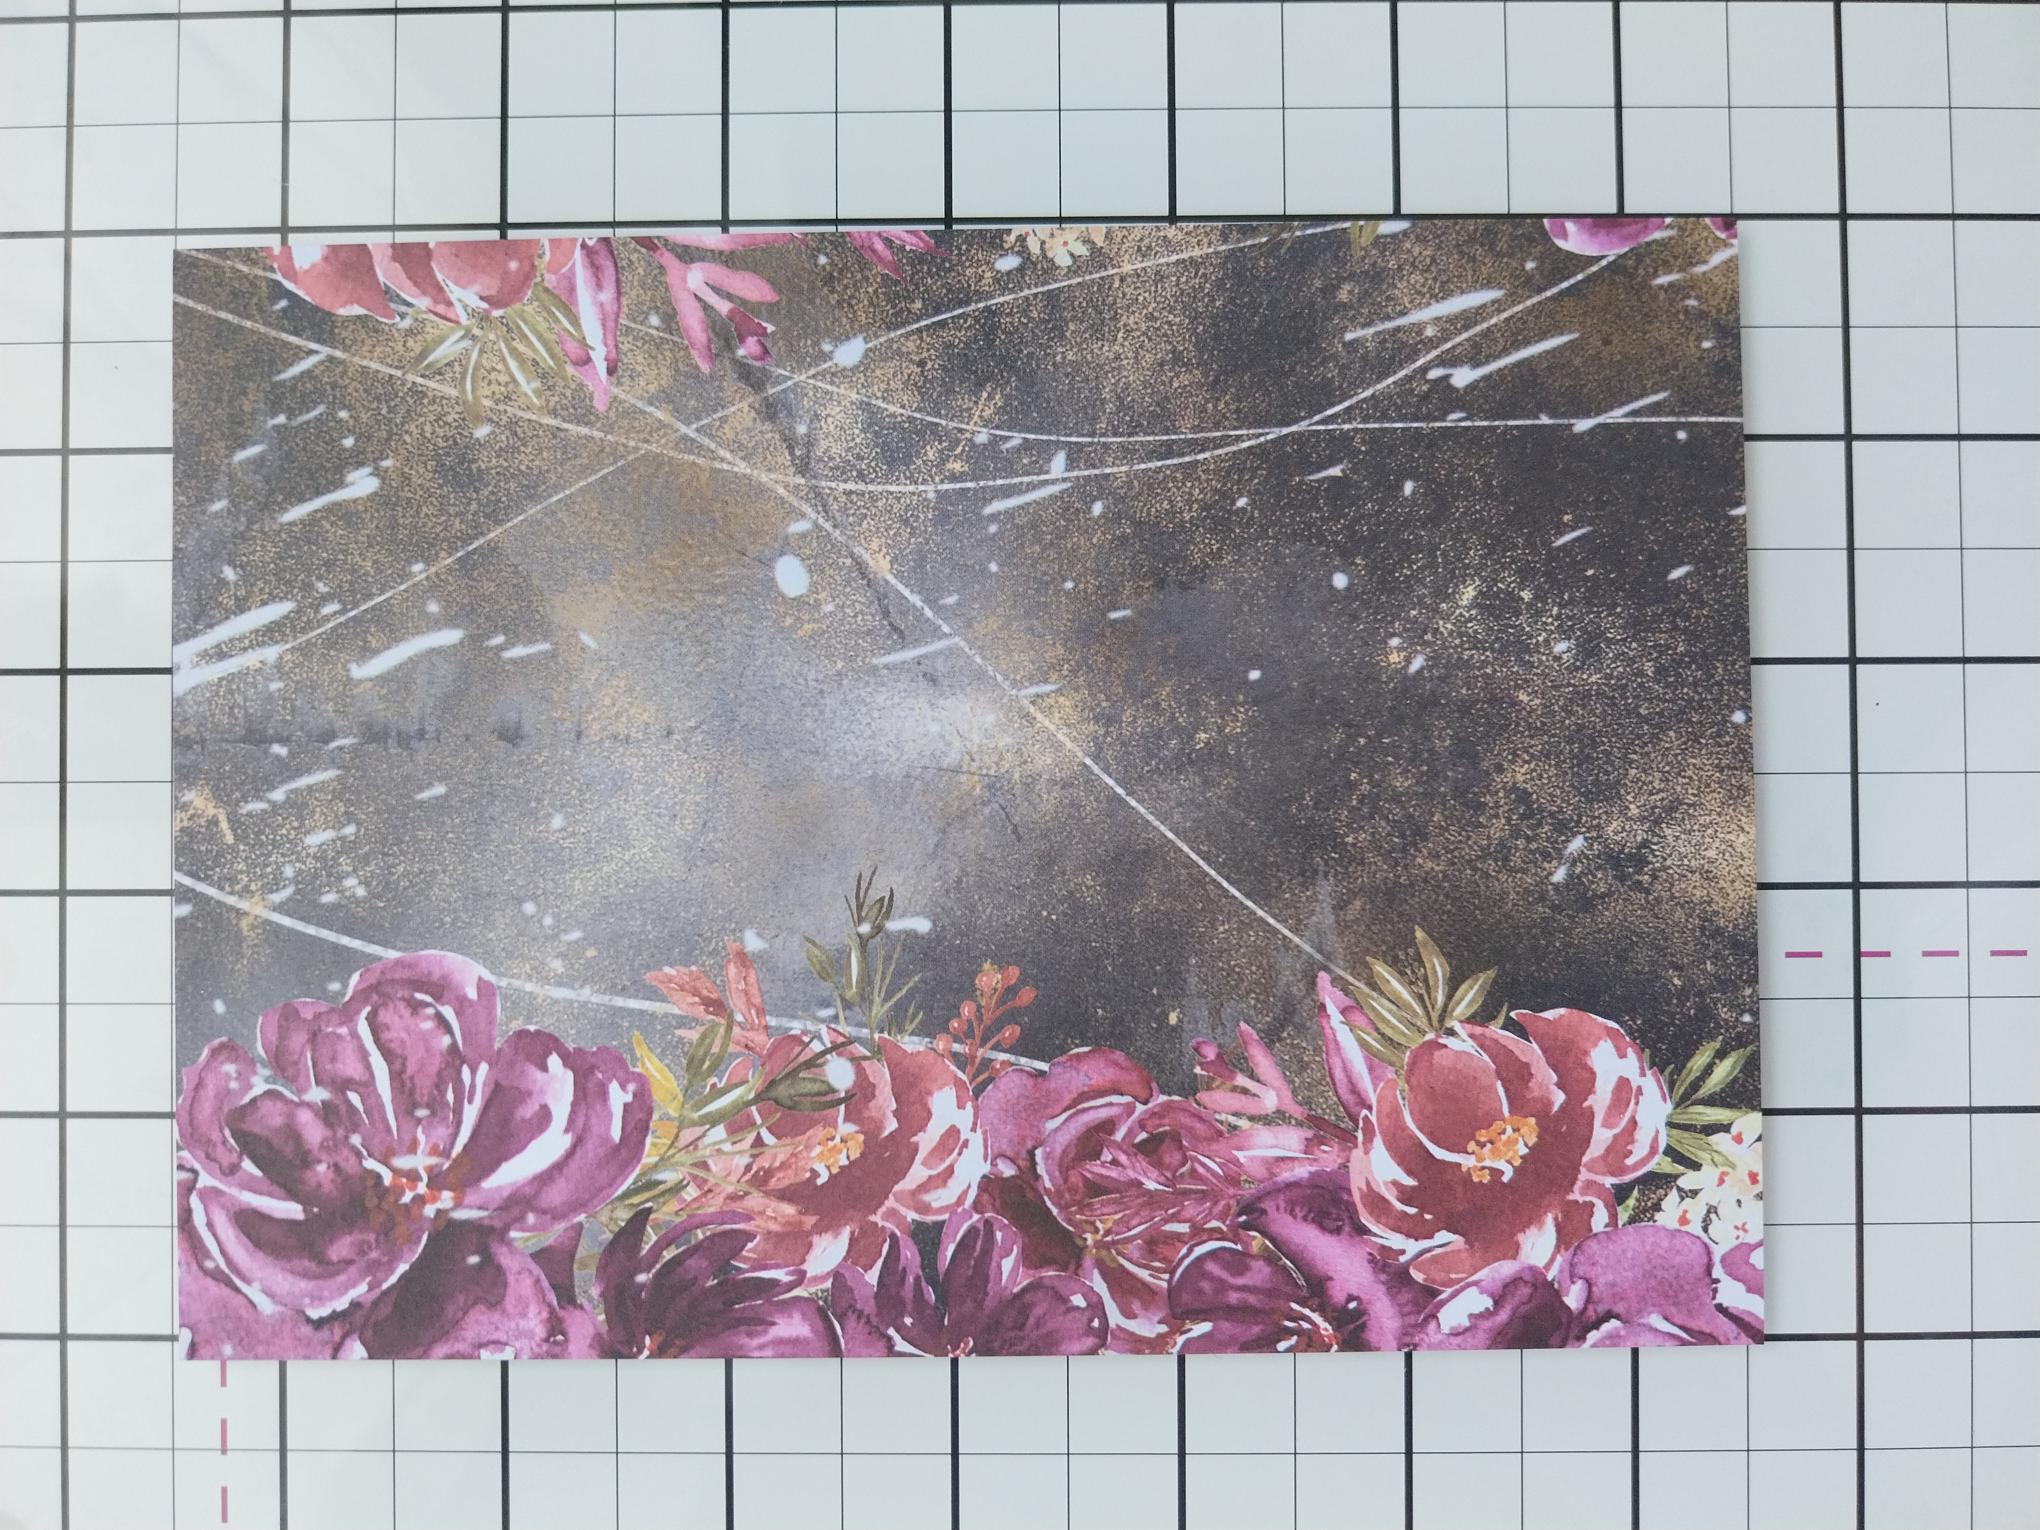
|
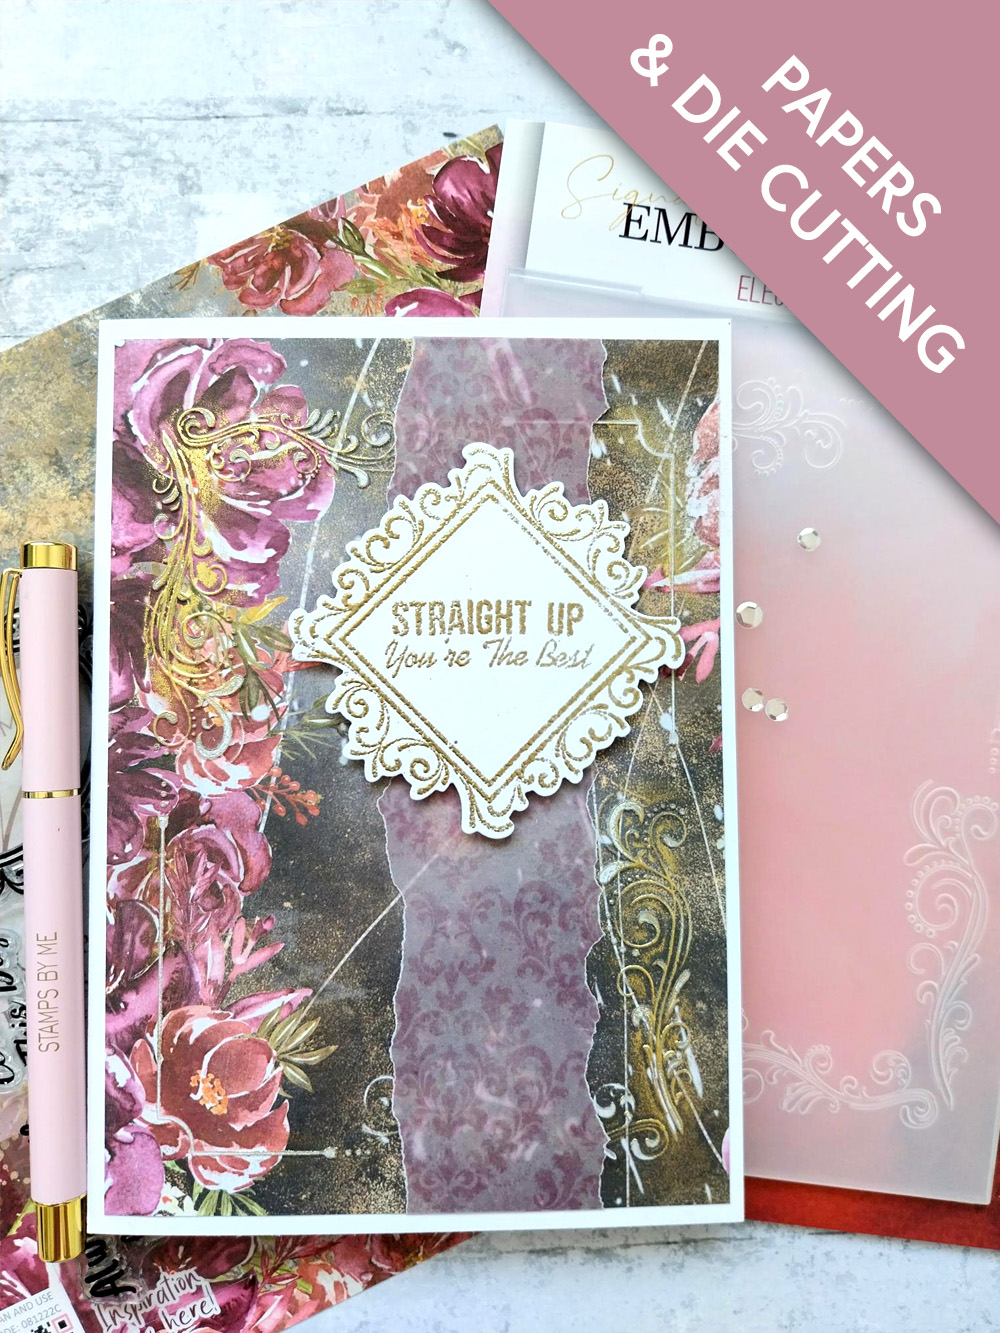
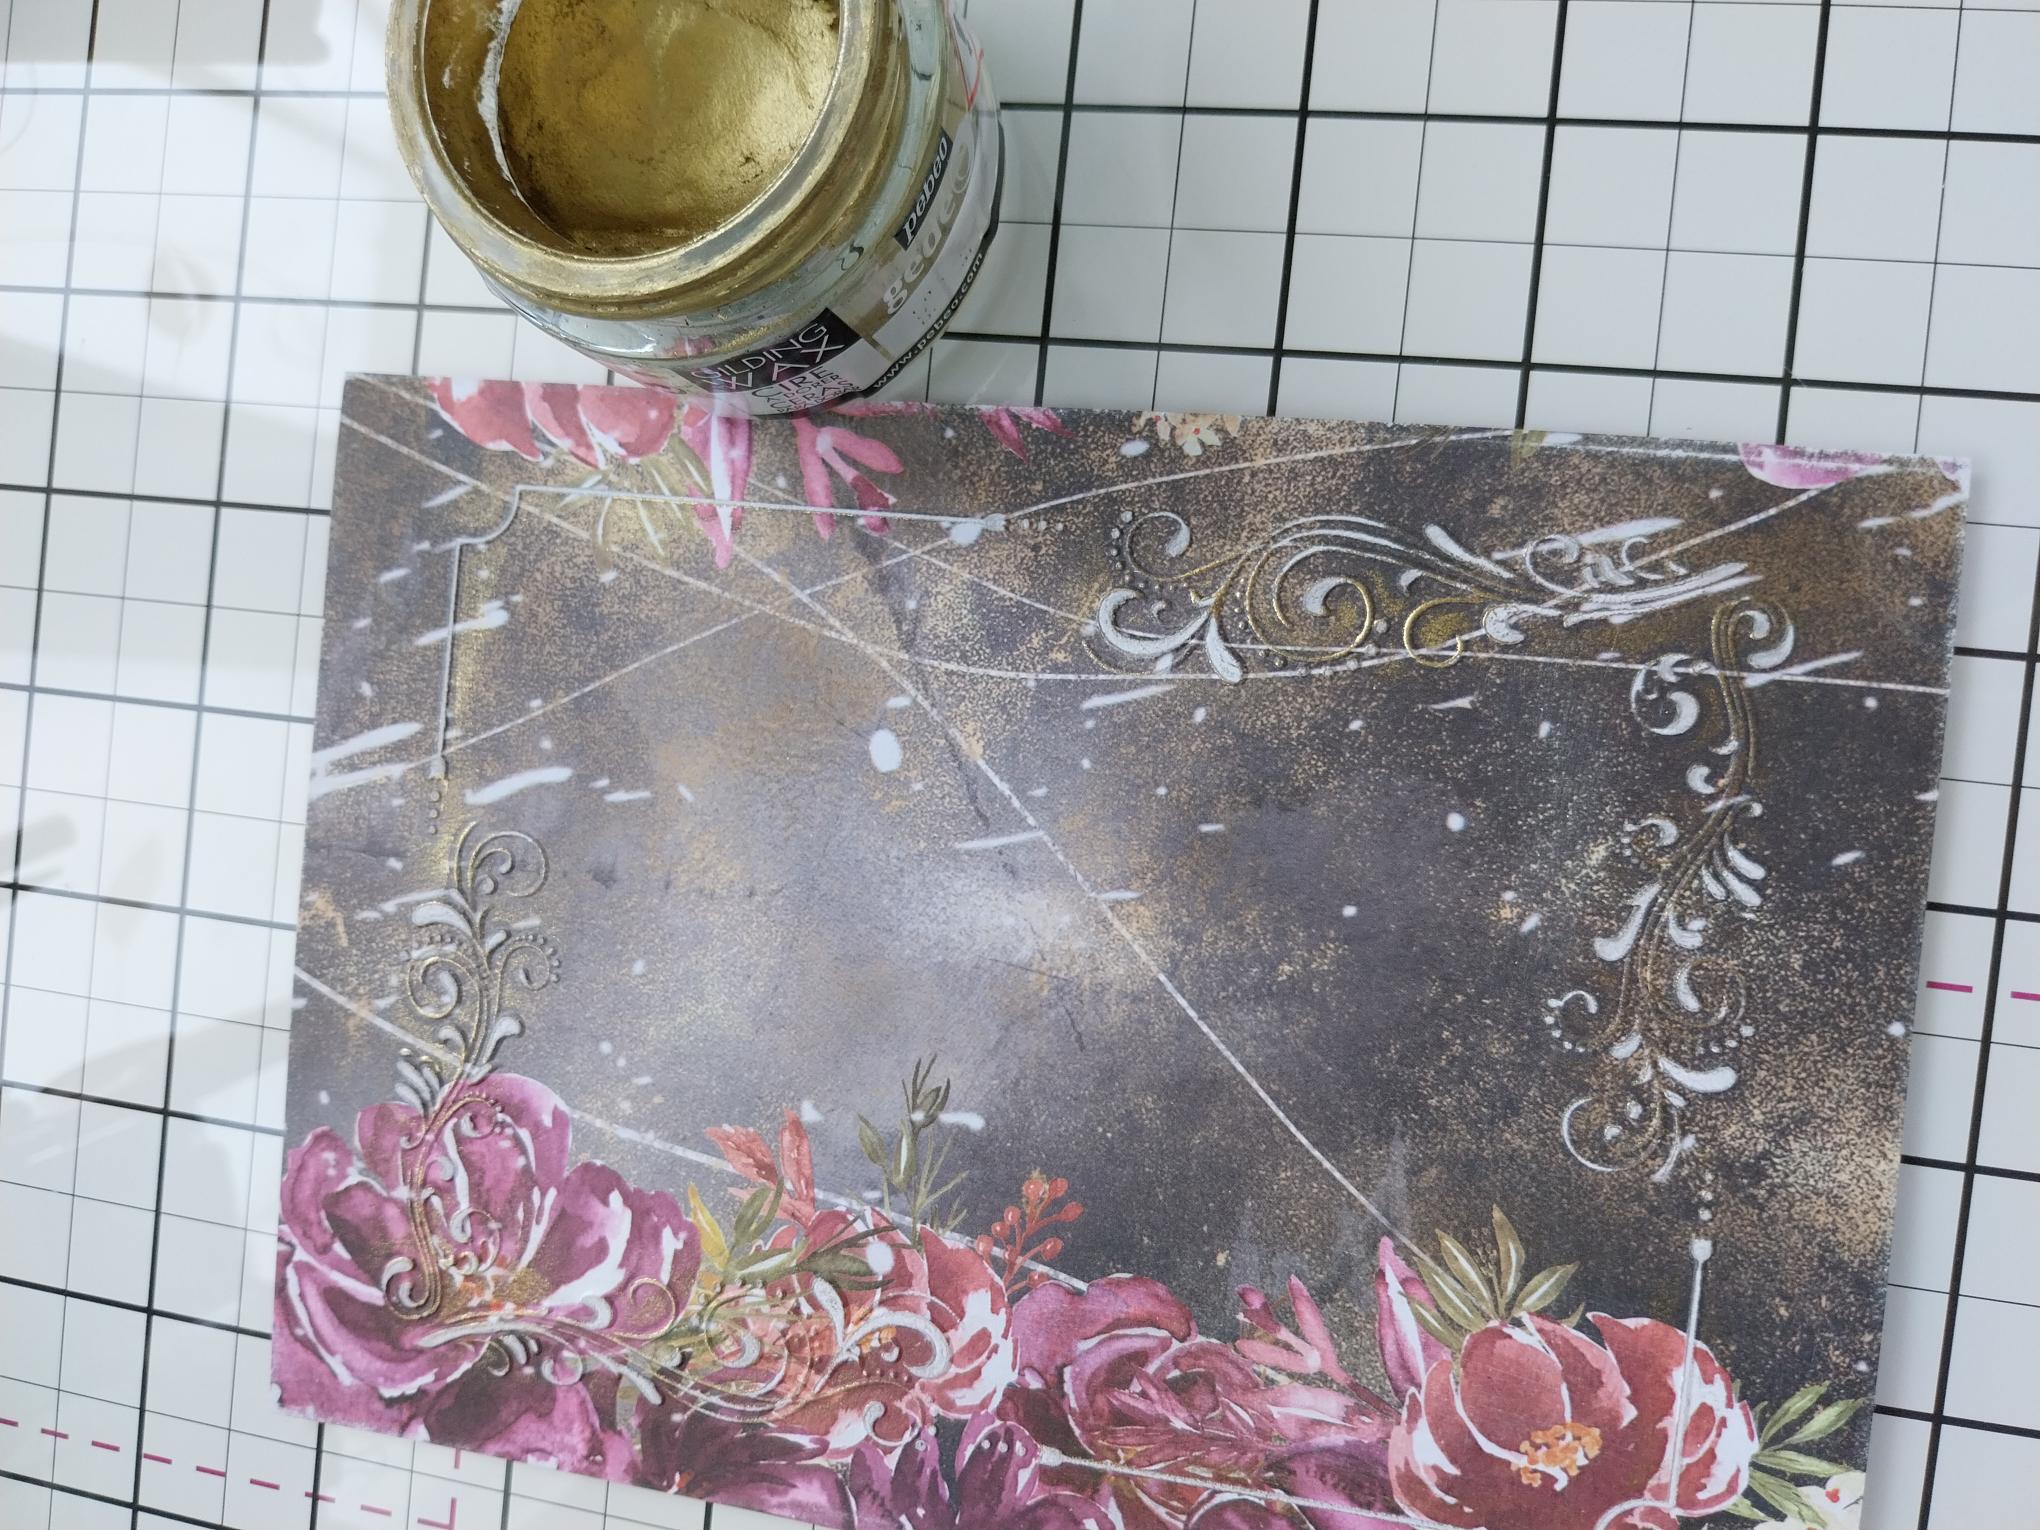
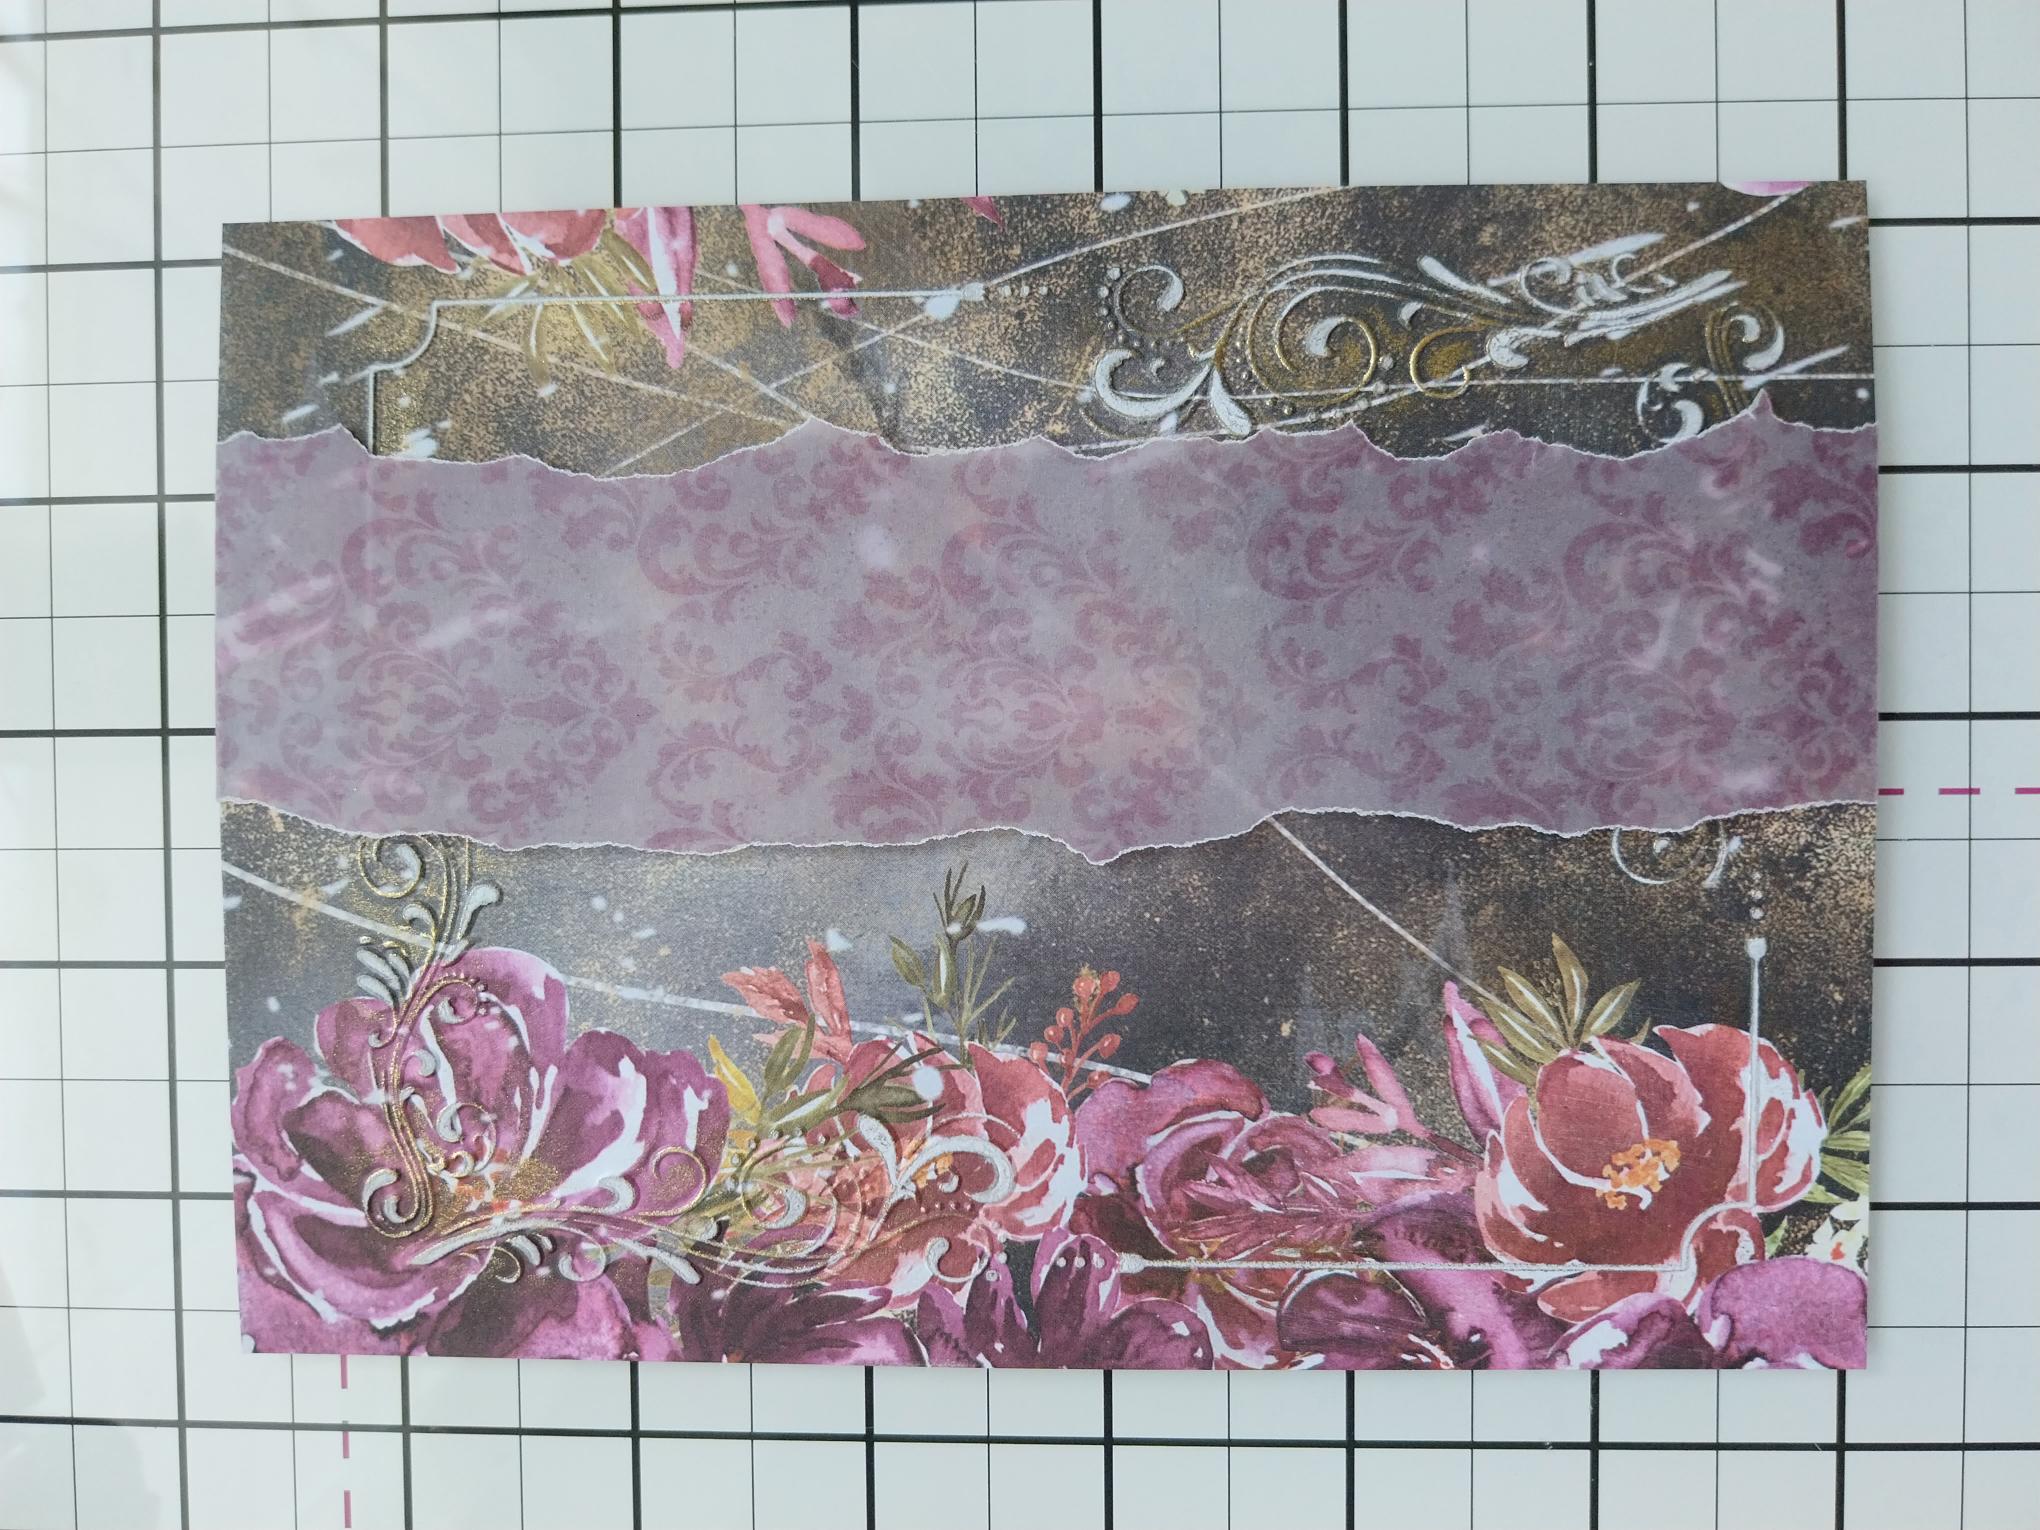
Trim this decorative paper, from the Mulberry & Gold paper pack, to 6 1/2 x 4 1/2". |
|
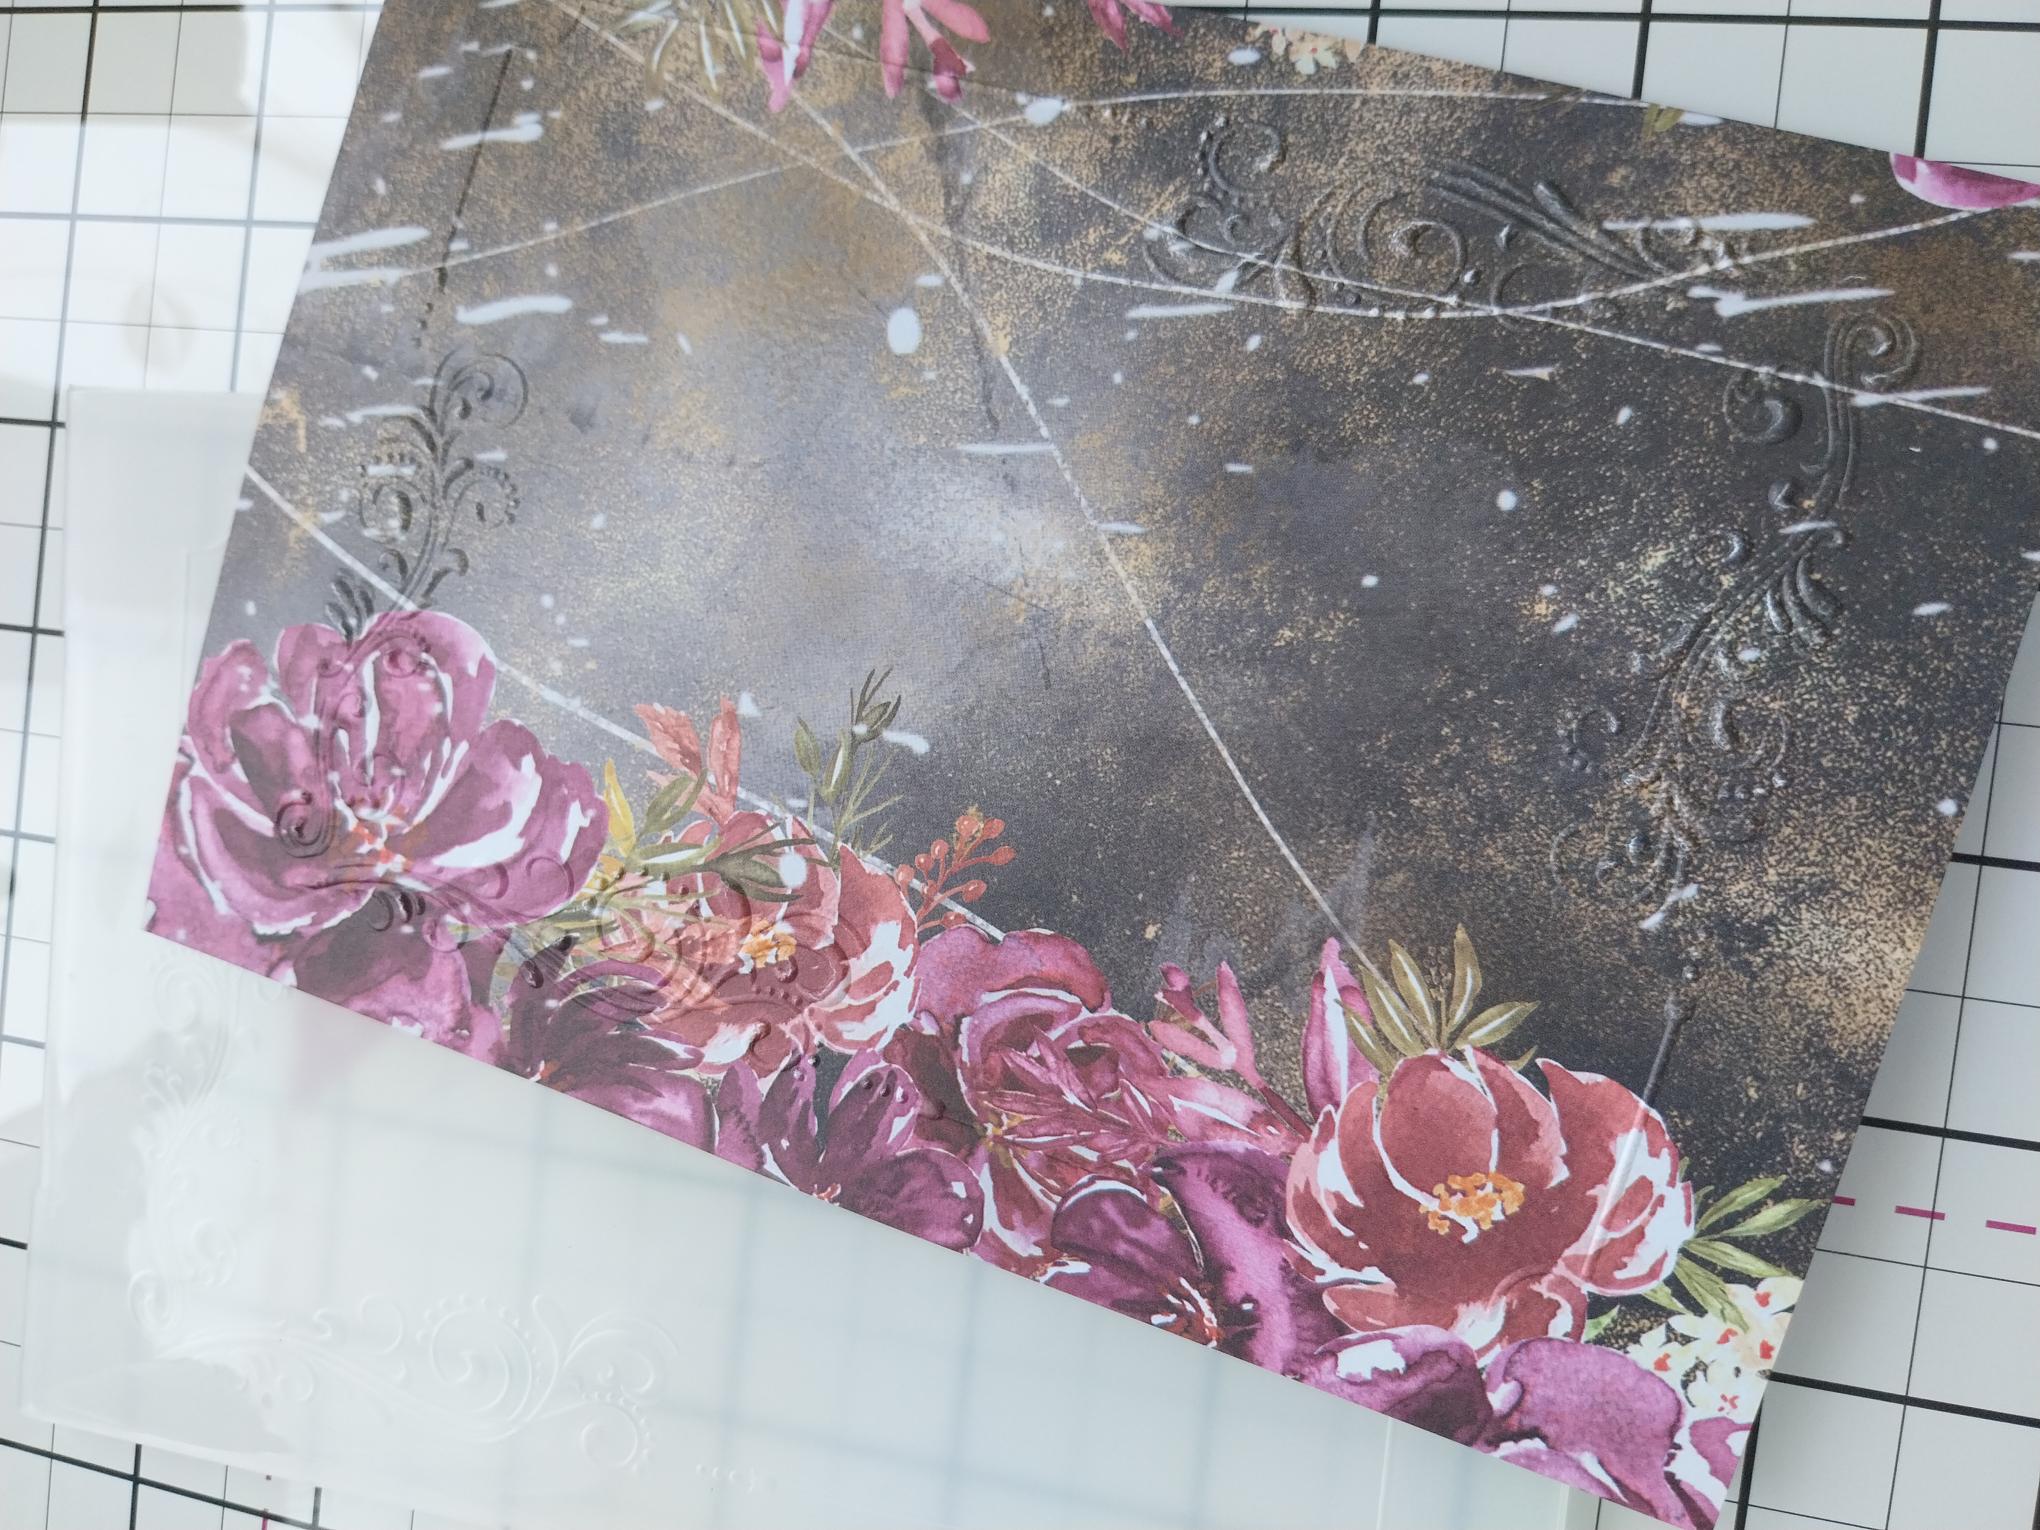
Place inside the Elegant Frame embossing folder and run it through your machine. |
|
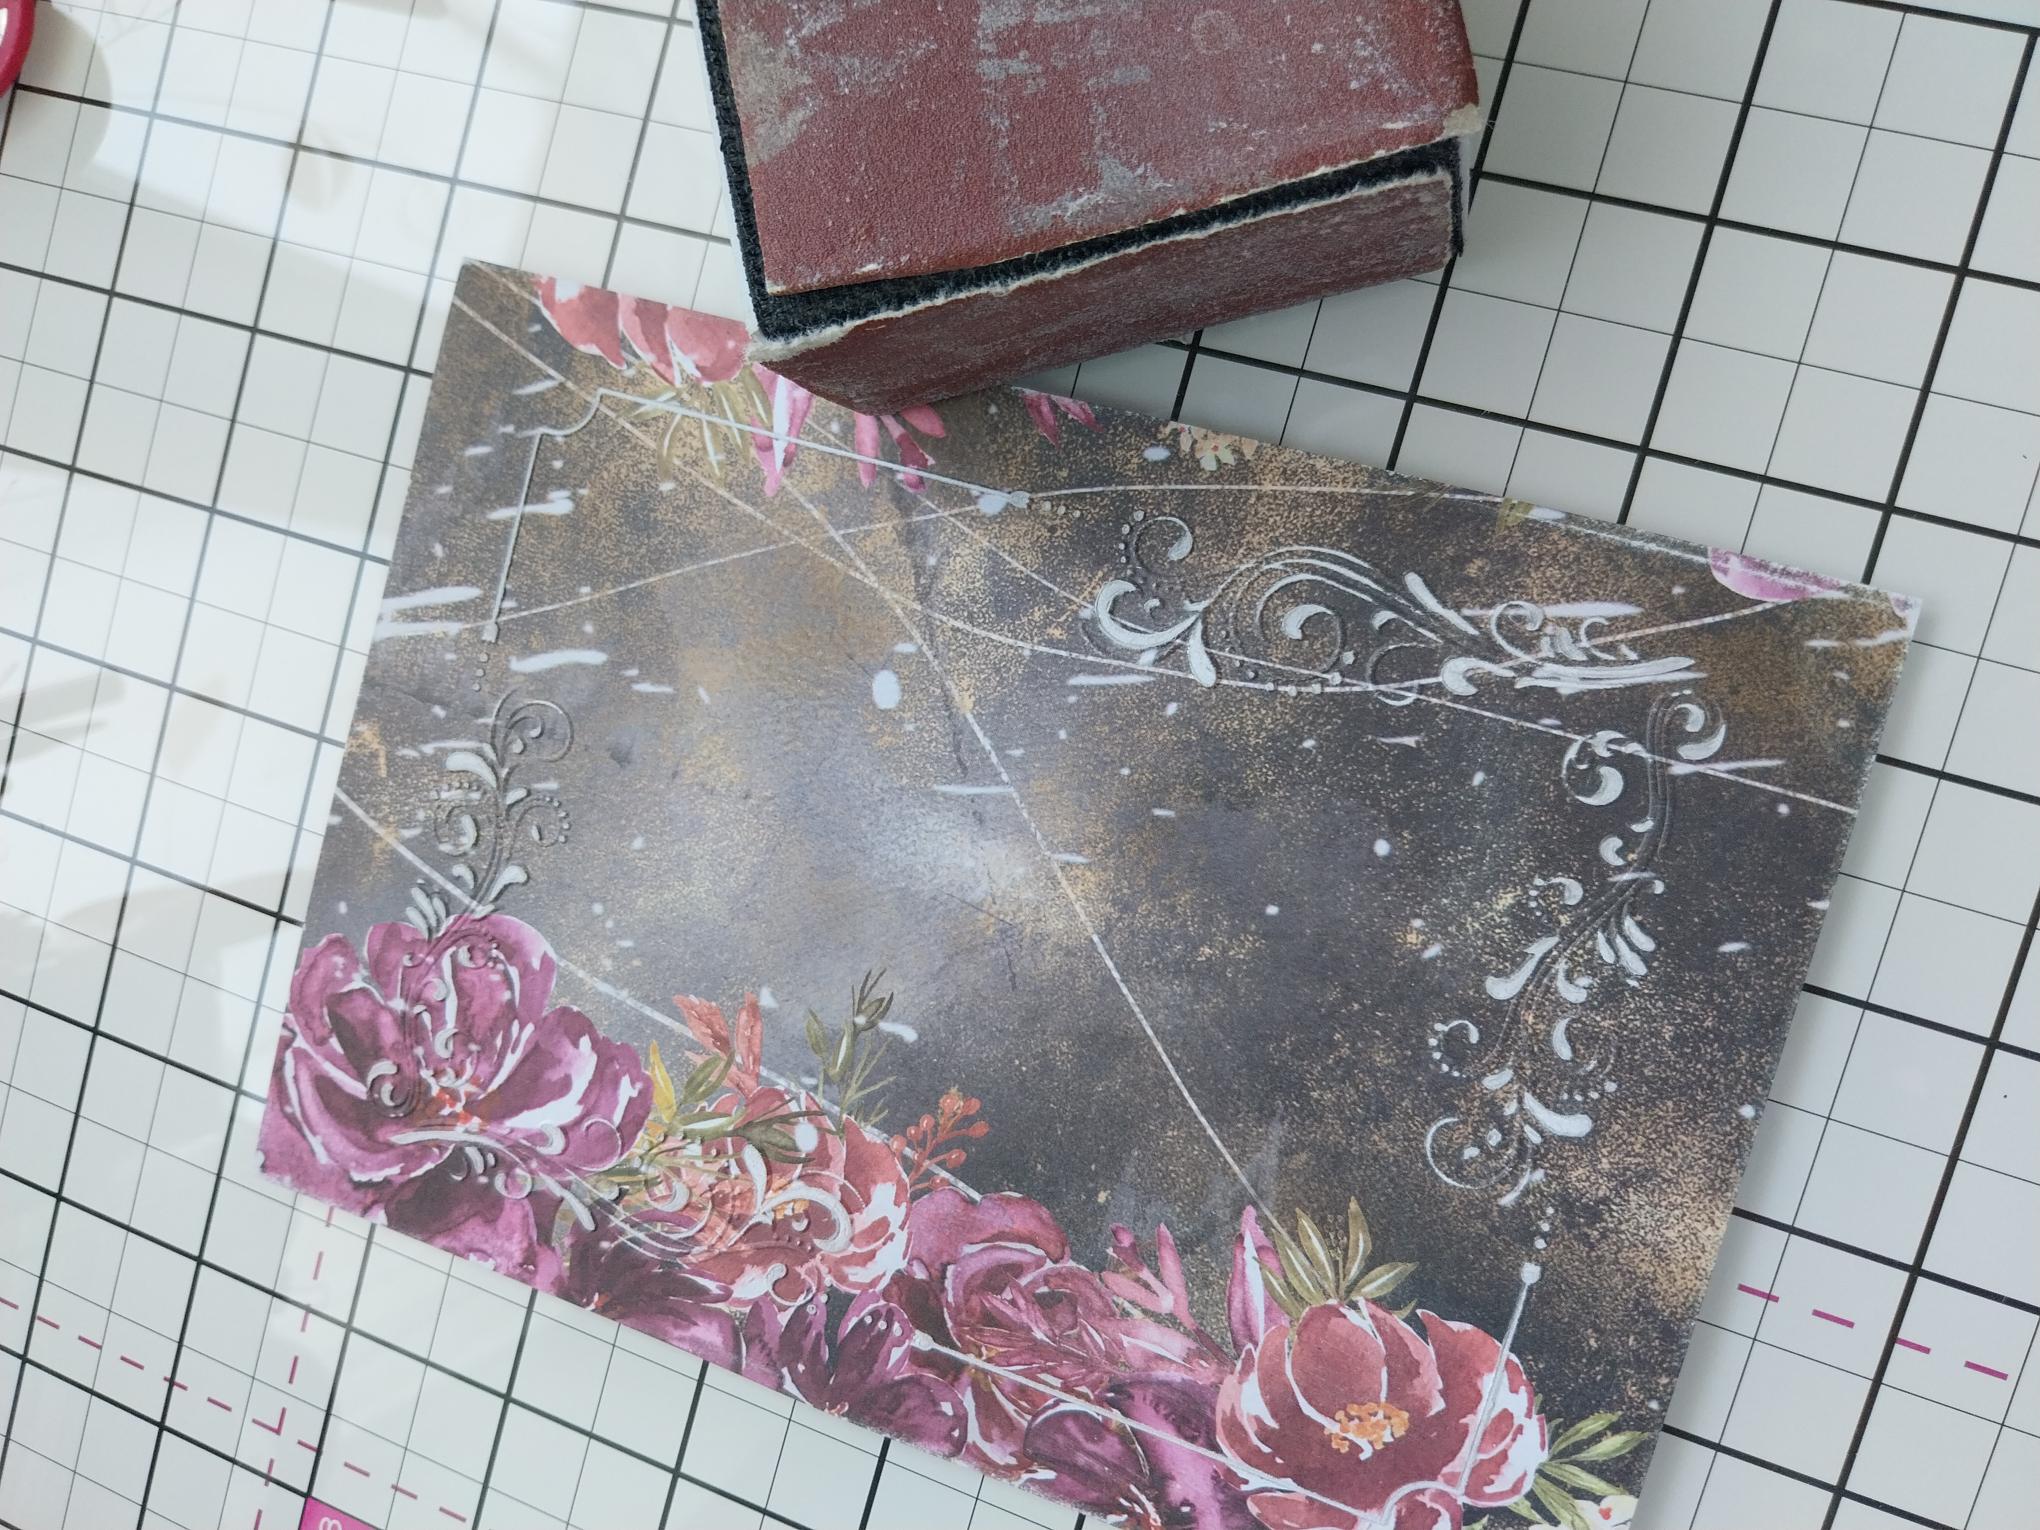
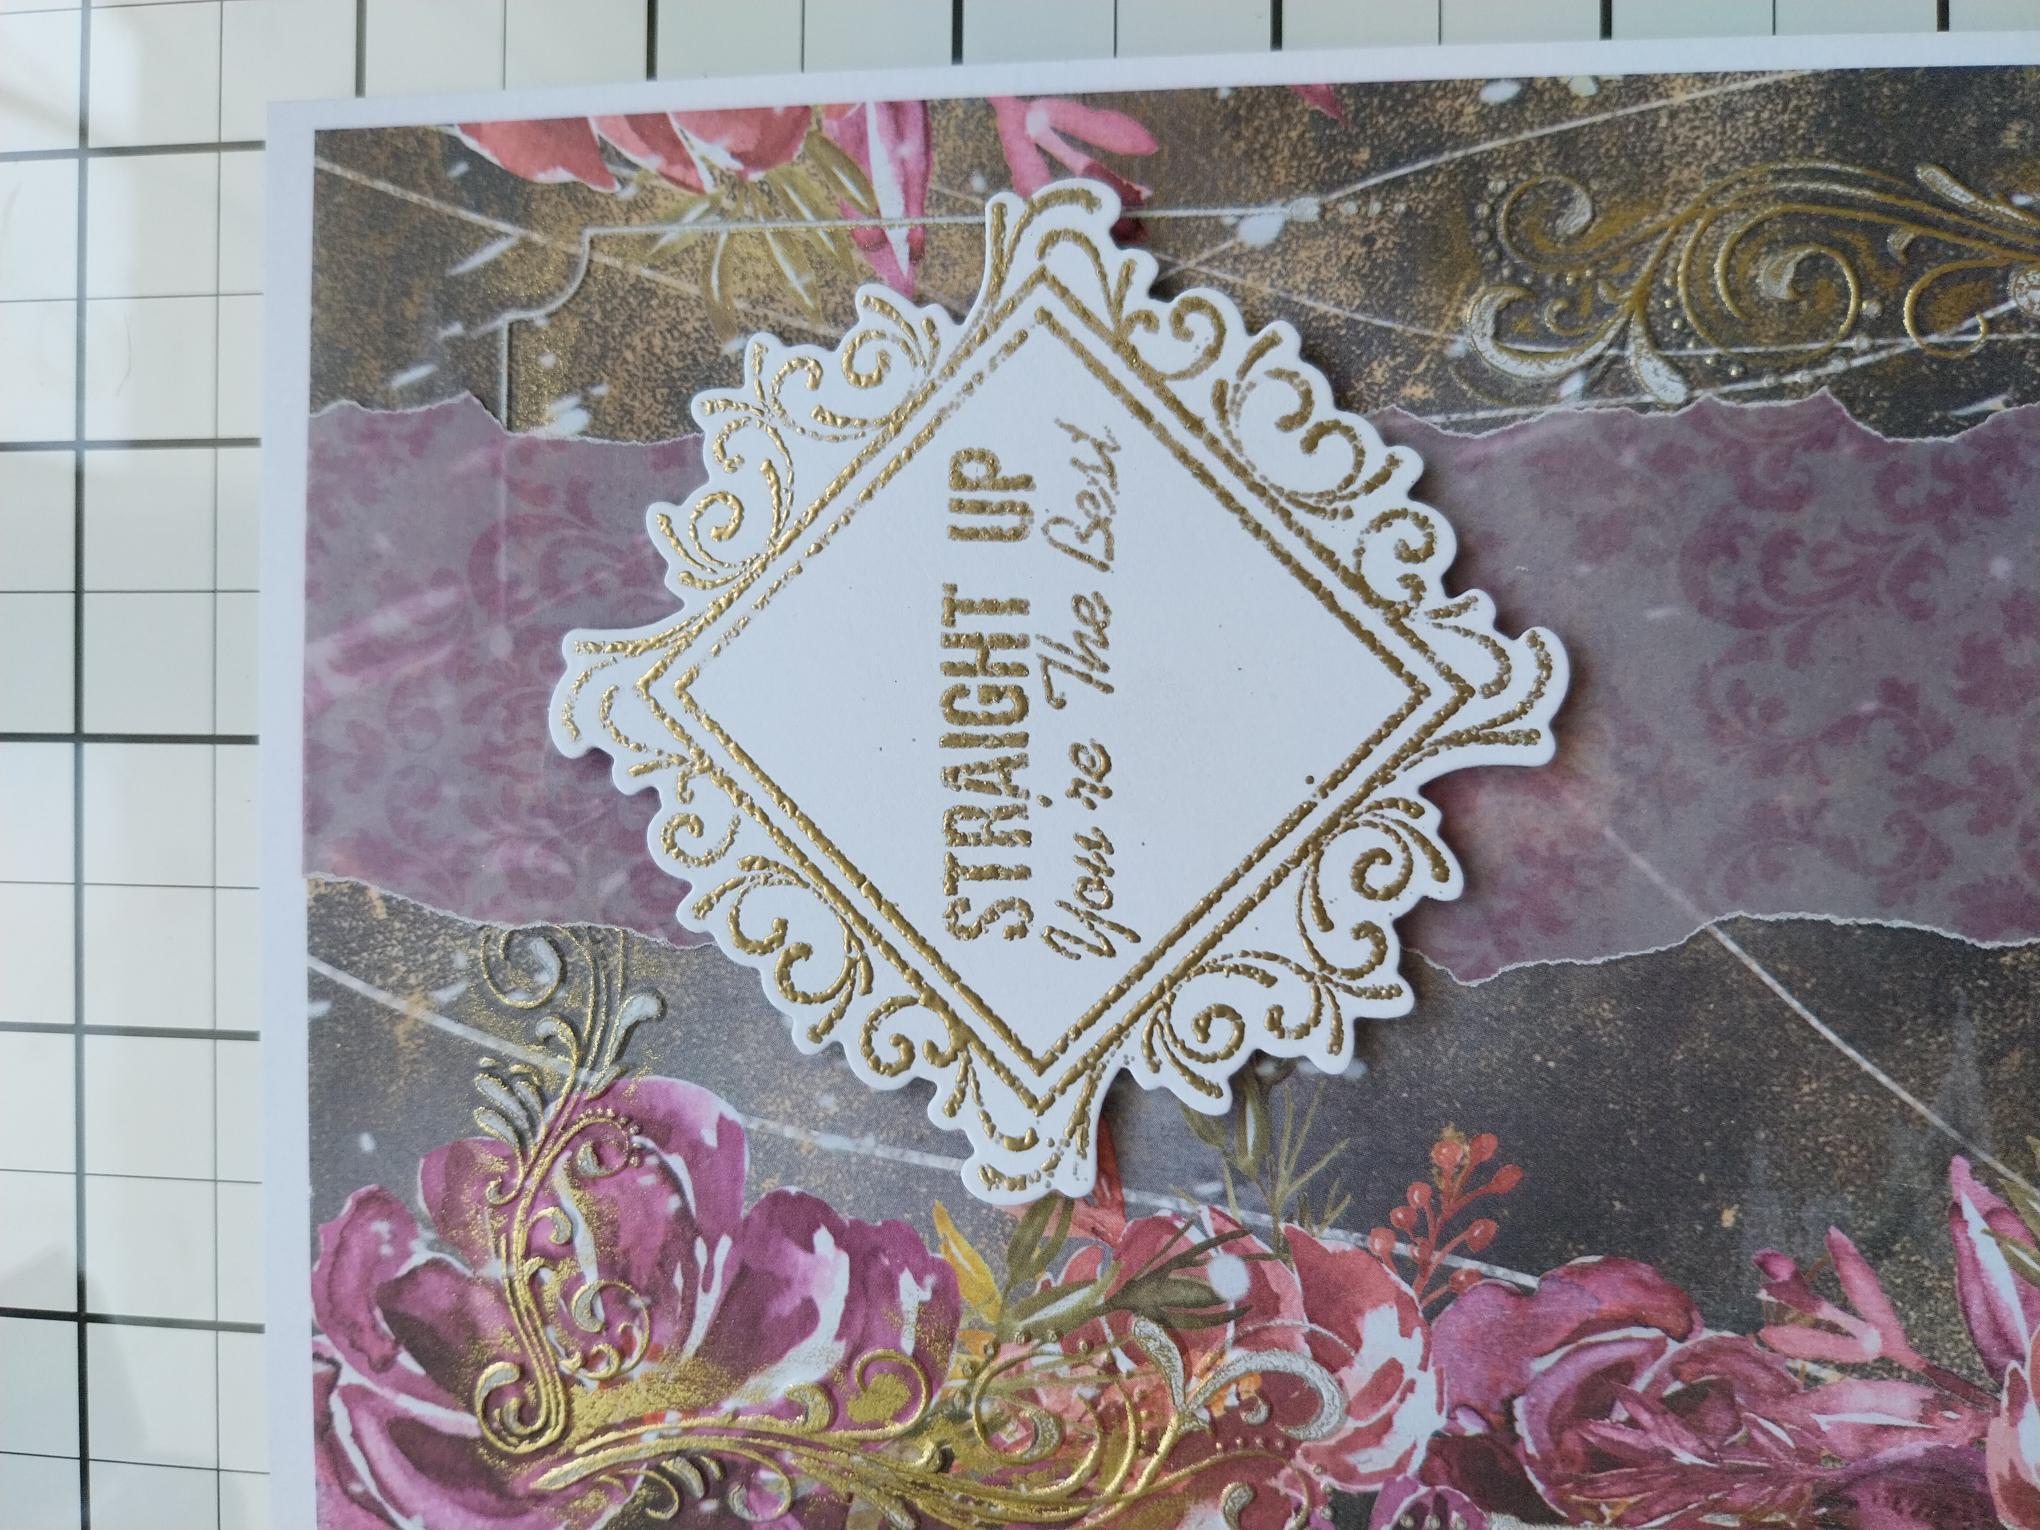
"Sand back" the embossed frame with a sanding block or emery board. |
|
Using the pad of your finger, lightly apply Gold gilding wax over the embossed frame. Buff with a soft cloth, to enhance the shine. Start off by adding the wax lightly, as you can always add more but you cannot remove it! Pop to one side. |
|
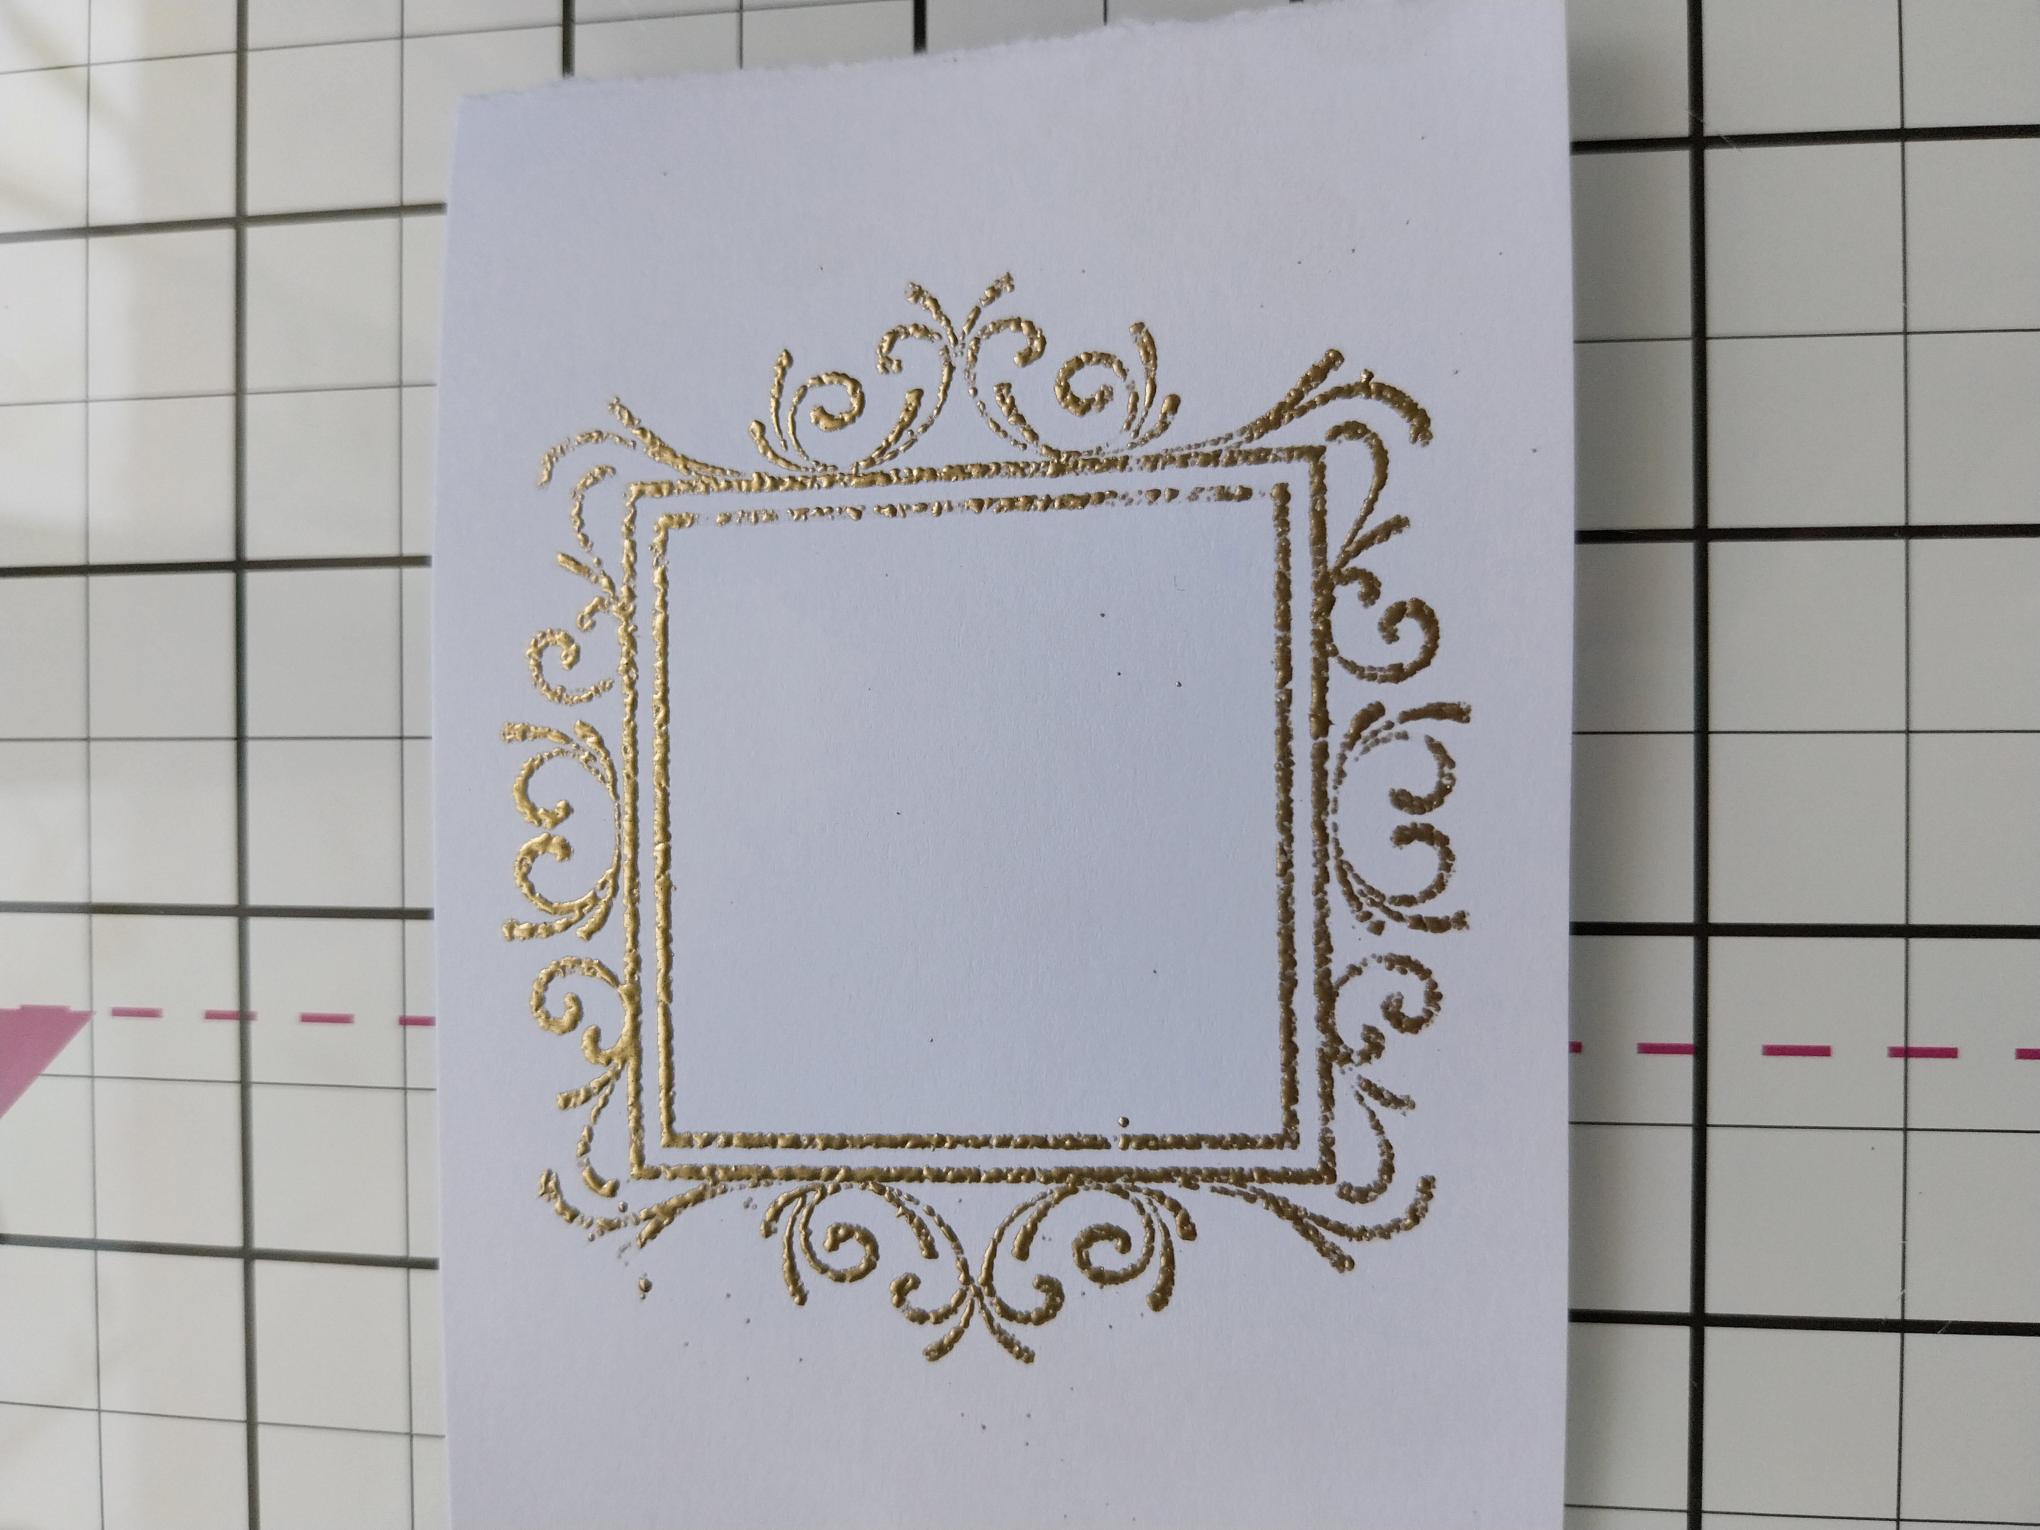
Wipe over a piece of white card with your anti-static bag. Ink up the frame stamp, from the Mulberry Frames Stamp and Die Collection, with the WOW sticky, embossing ink and stamp on to the card. Apply the Gold embossing powder over your stamped frame, then make sure your heat tool is hot, before heat setting the powder. |
|
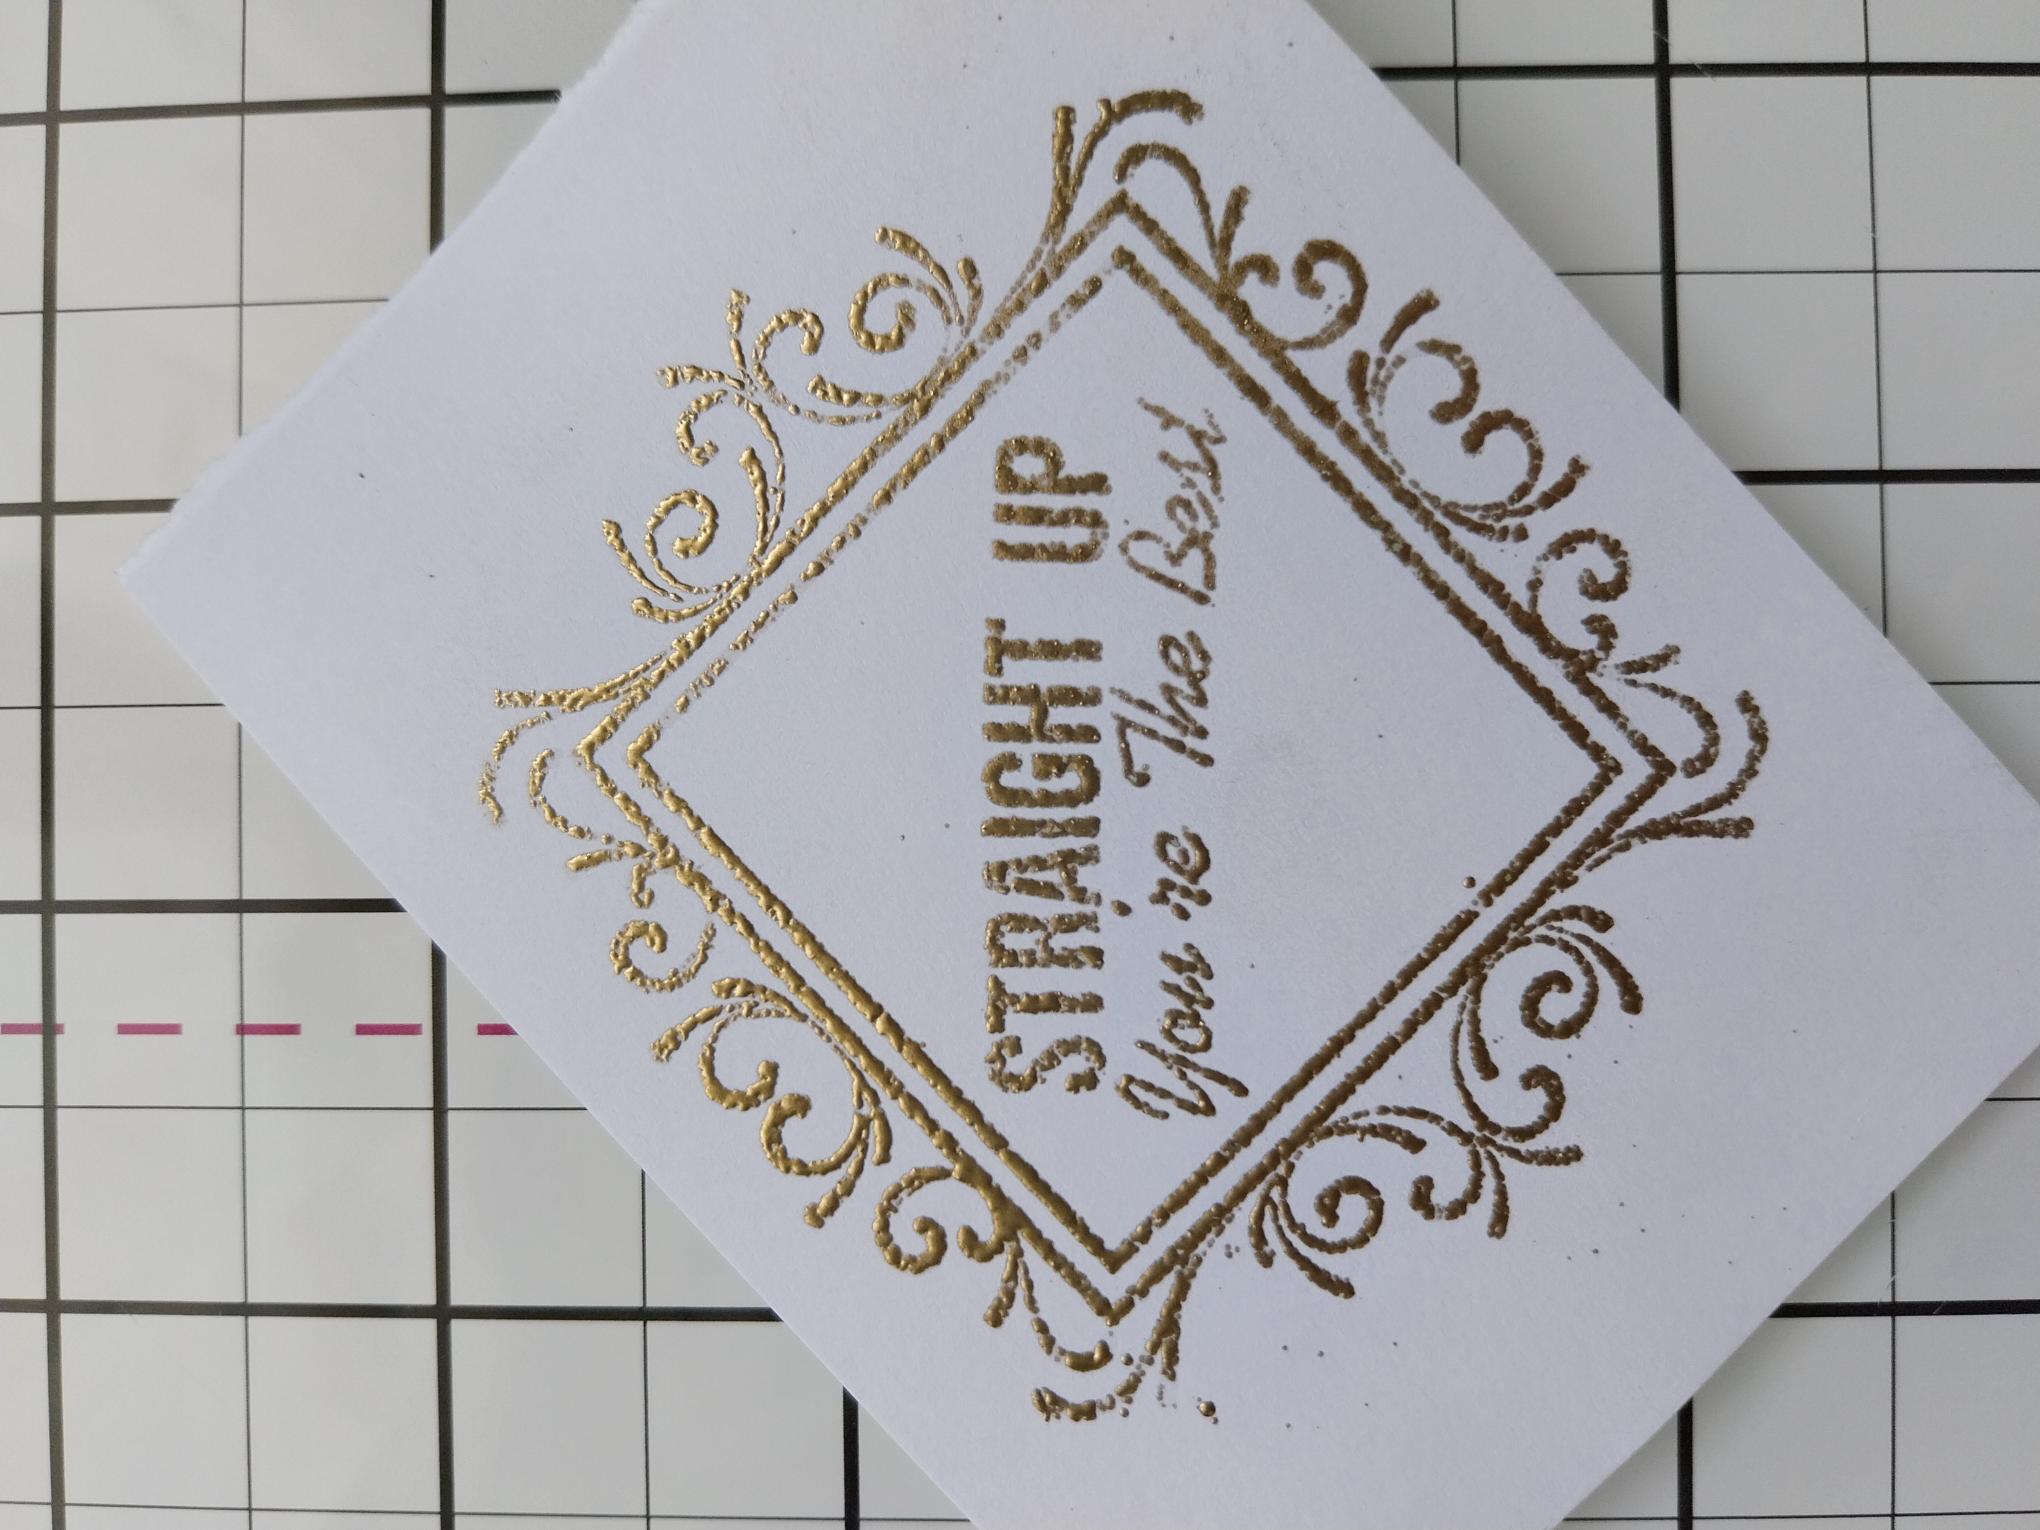
Wipe over the embossed frame with the anti-static bag, before stamping the sentiment with the embossing ink, in the centre of the embossed frame. Apply the embossing powder and heat set as before. I decided to use my frame as a diamond, but the orientation is your choice. |
|
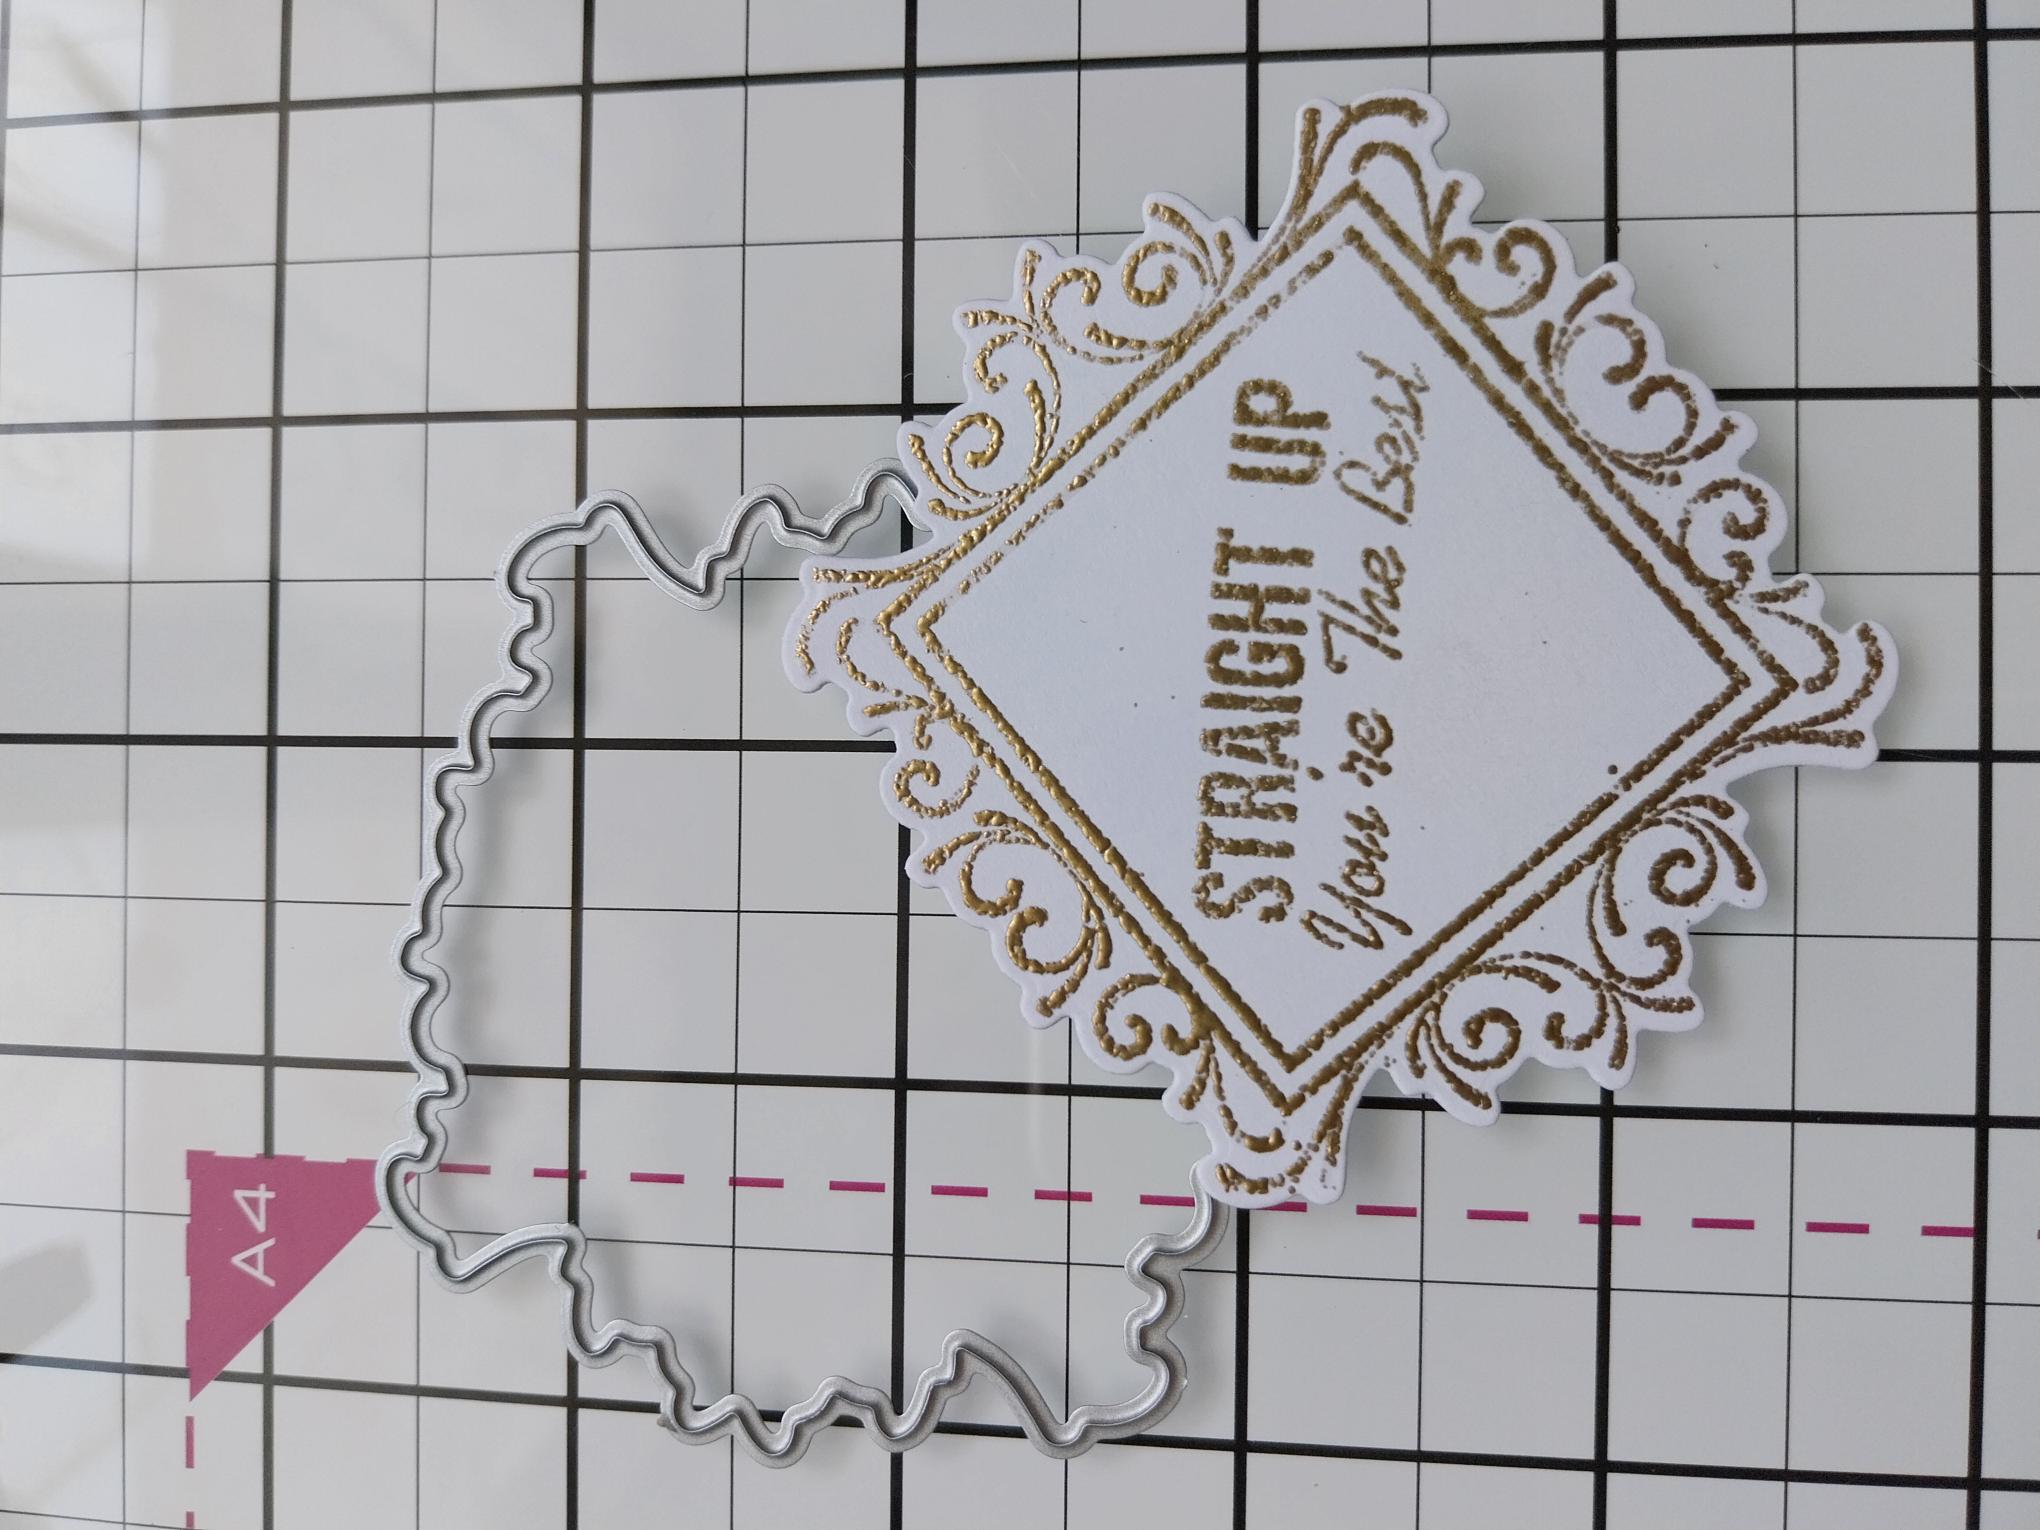
Use the coordinating die to cut it out, before popping it aside. |

|
Tear a panel of vellum from the Mulberry & Gold Vellum Pack, 7" in length and as wide as you want. |
|
Place the vellum panel just off centre right, tuck the top and bottom edges over the back of the embossed paper and secure on the reverse with double-sided tape. |

|
Adhere to your white card blank. |
|
To finish, use foam pads to adhere your embossed sentiment frame to your card. |