Give your friends $10 off their first order!
Refer a FRIEND


WHAT YOU WILL NEED:
Pink card blank 8 1/4 x 5 3/4"
Black card 7 1/2 x 5 1/2"
Black card
Watercolour HD3D Honeycomb Swirl Embossing Folder
Creative Words A5 Die Collection
Paperchain Mulberry & Gold Damask 12 x 12" Paper Pack
Izink Ink Pad: Metal Gold
Confetti Ink: Goldmine
Distress Ink Pad: Black Soot
Paint brush
SBM Magnetic glass mat
Paper Trimmer
Perfect Together Glue
Foam pads
Die Cutting machine
[click image to enlarge] 
|
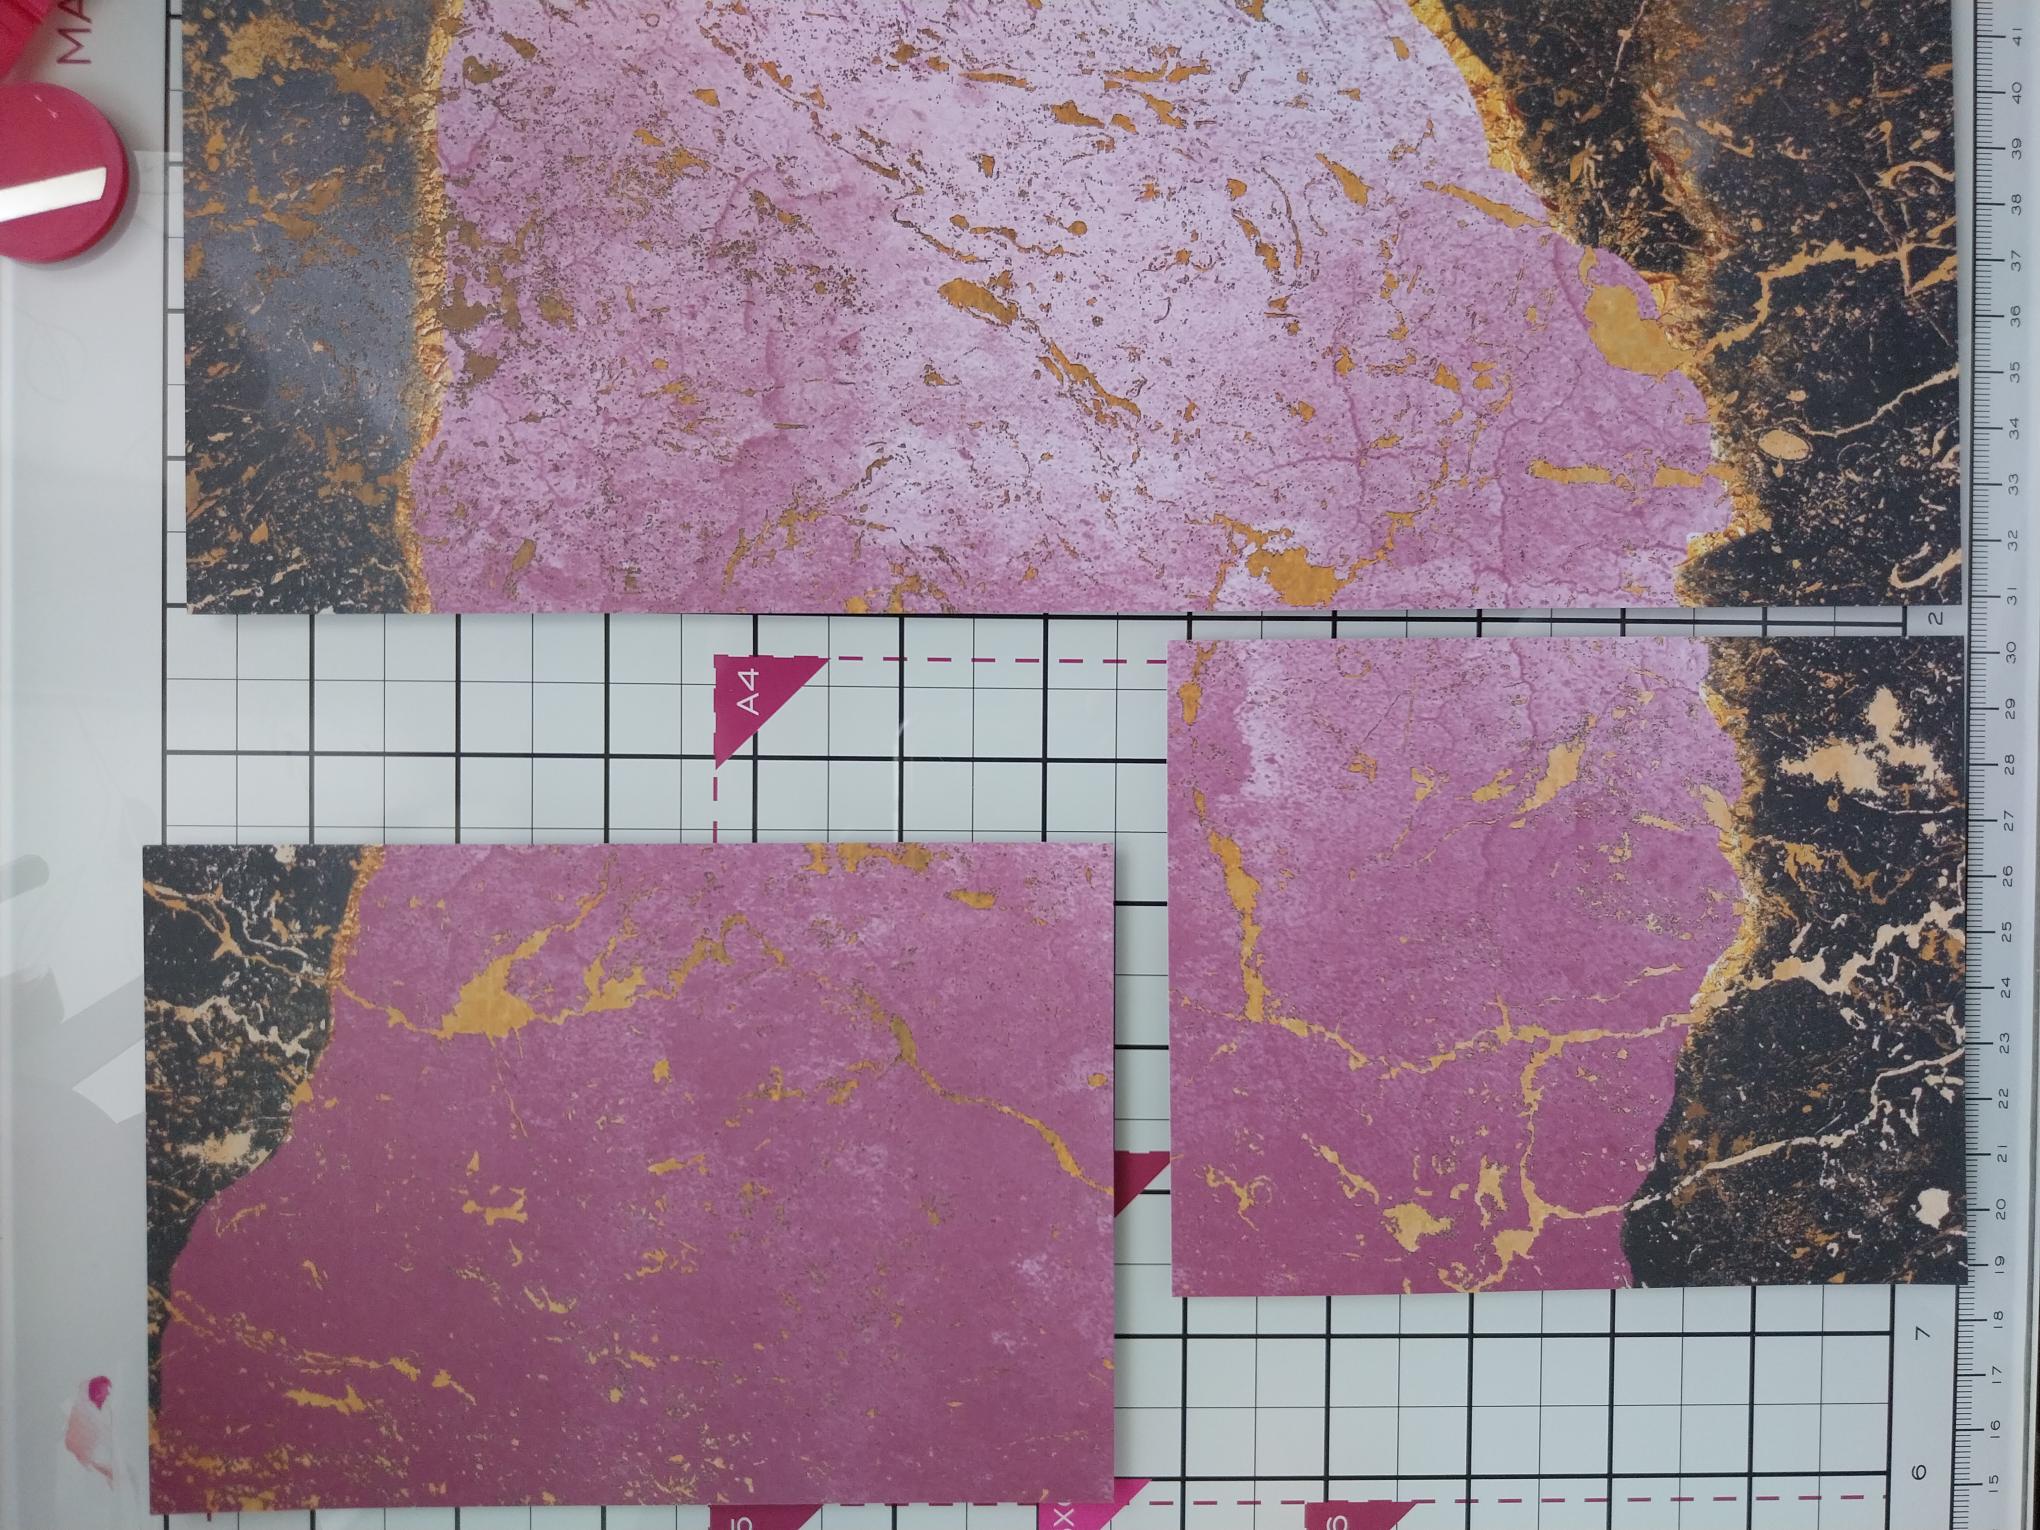
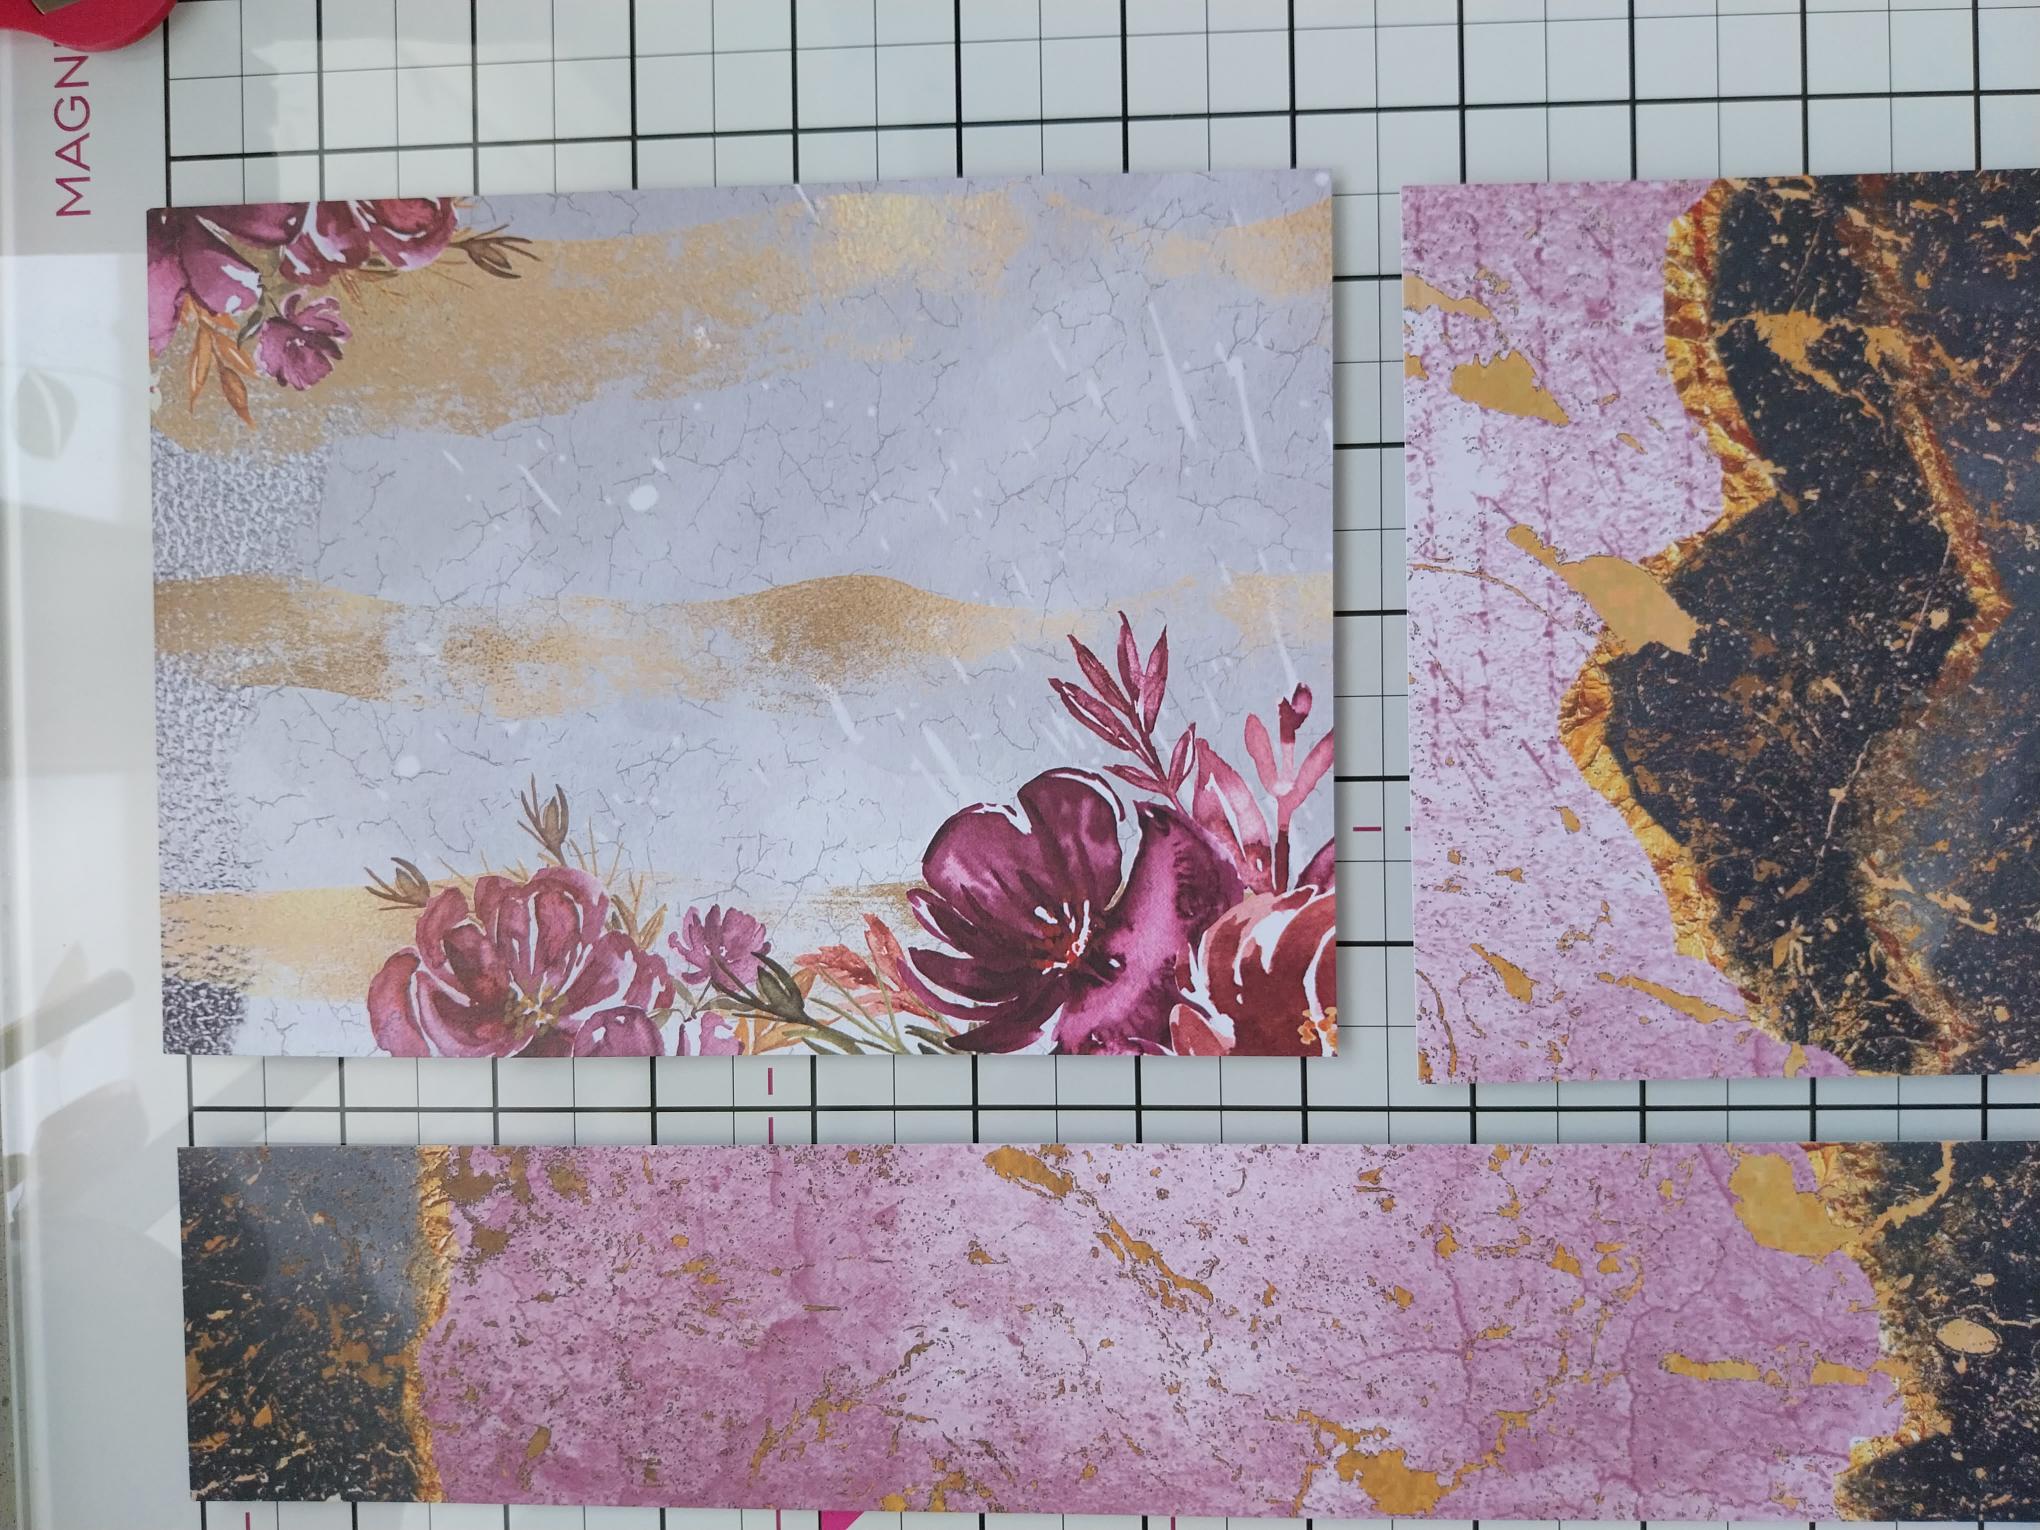
We need this beautiful double-sided 12 x 12" paper, from the Mulberry & Gold Paper Collection. |
|
Trim a piece from the paper 6 1/2 x 4 1/2", which incorporates both the black and mulberry pattern (see top left). Pop the remaining paper off-cuts to one side. |
|
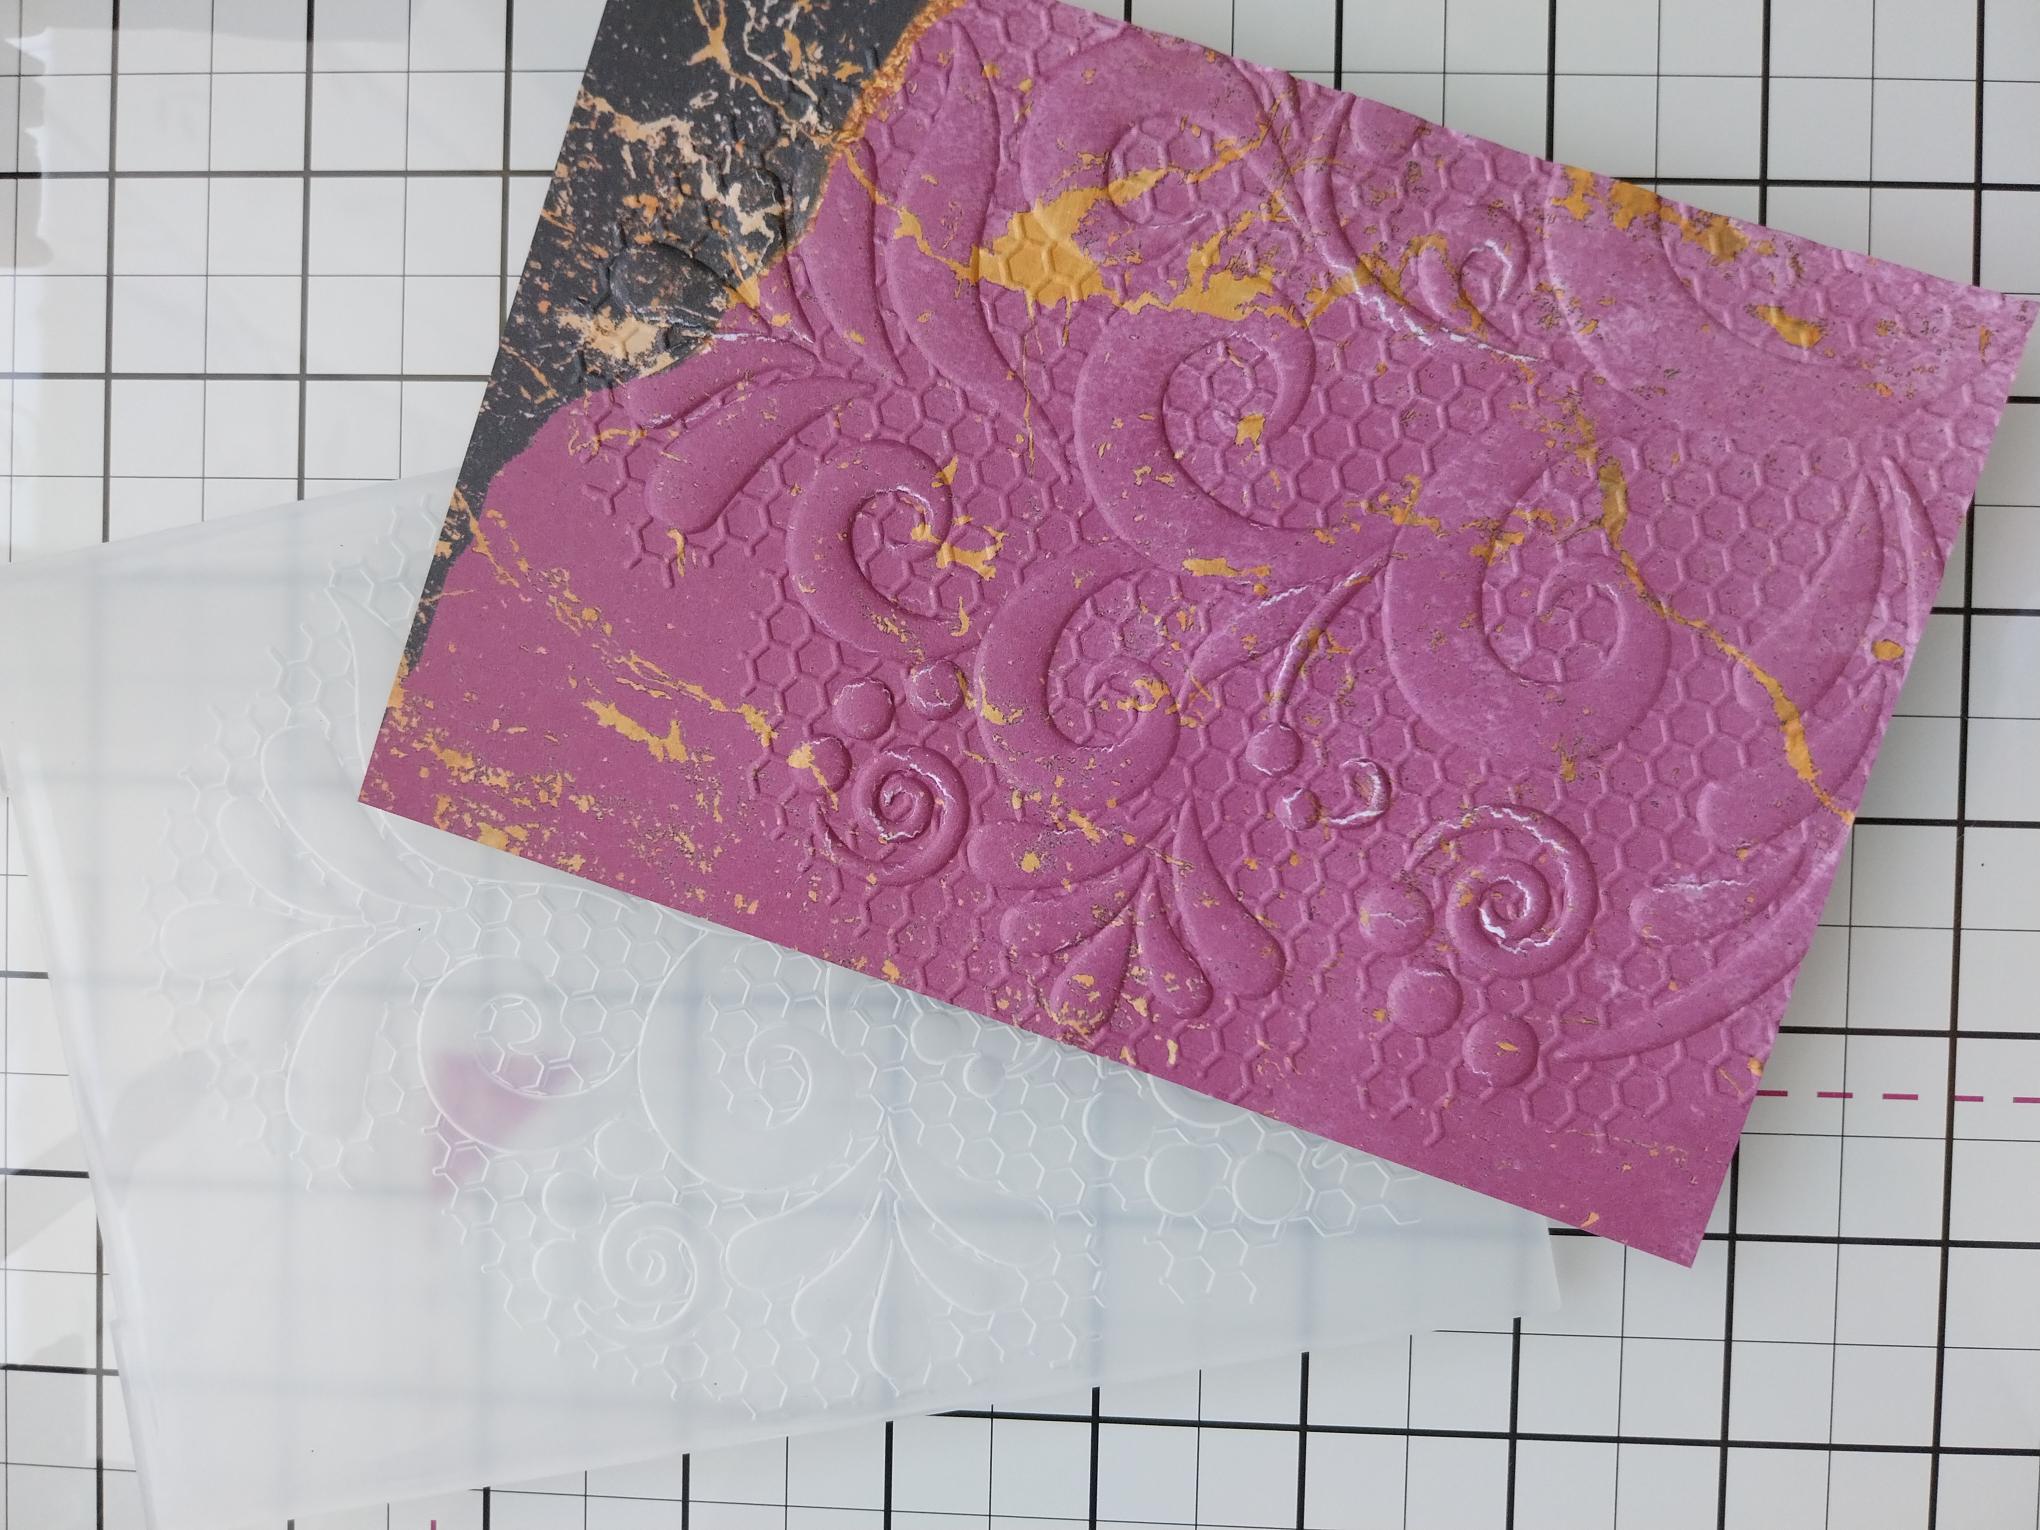
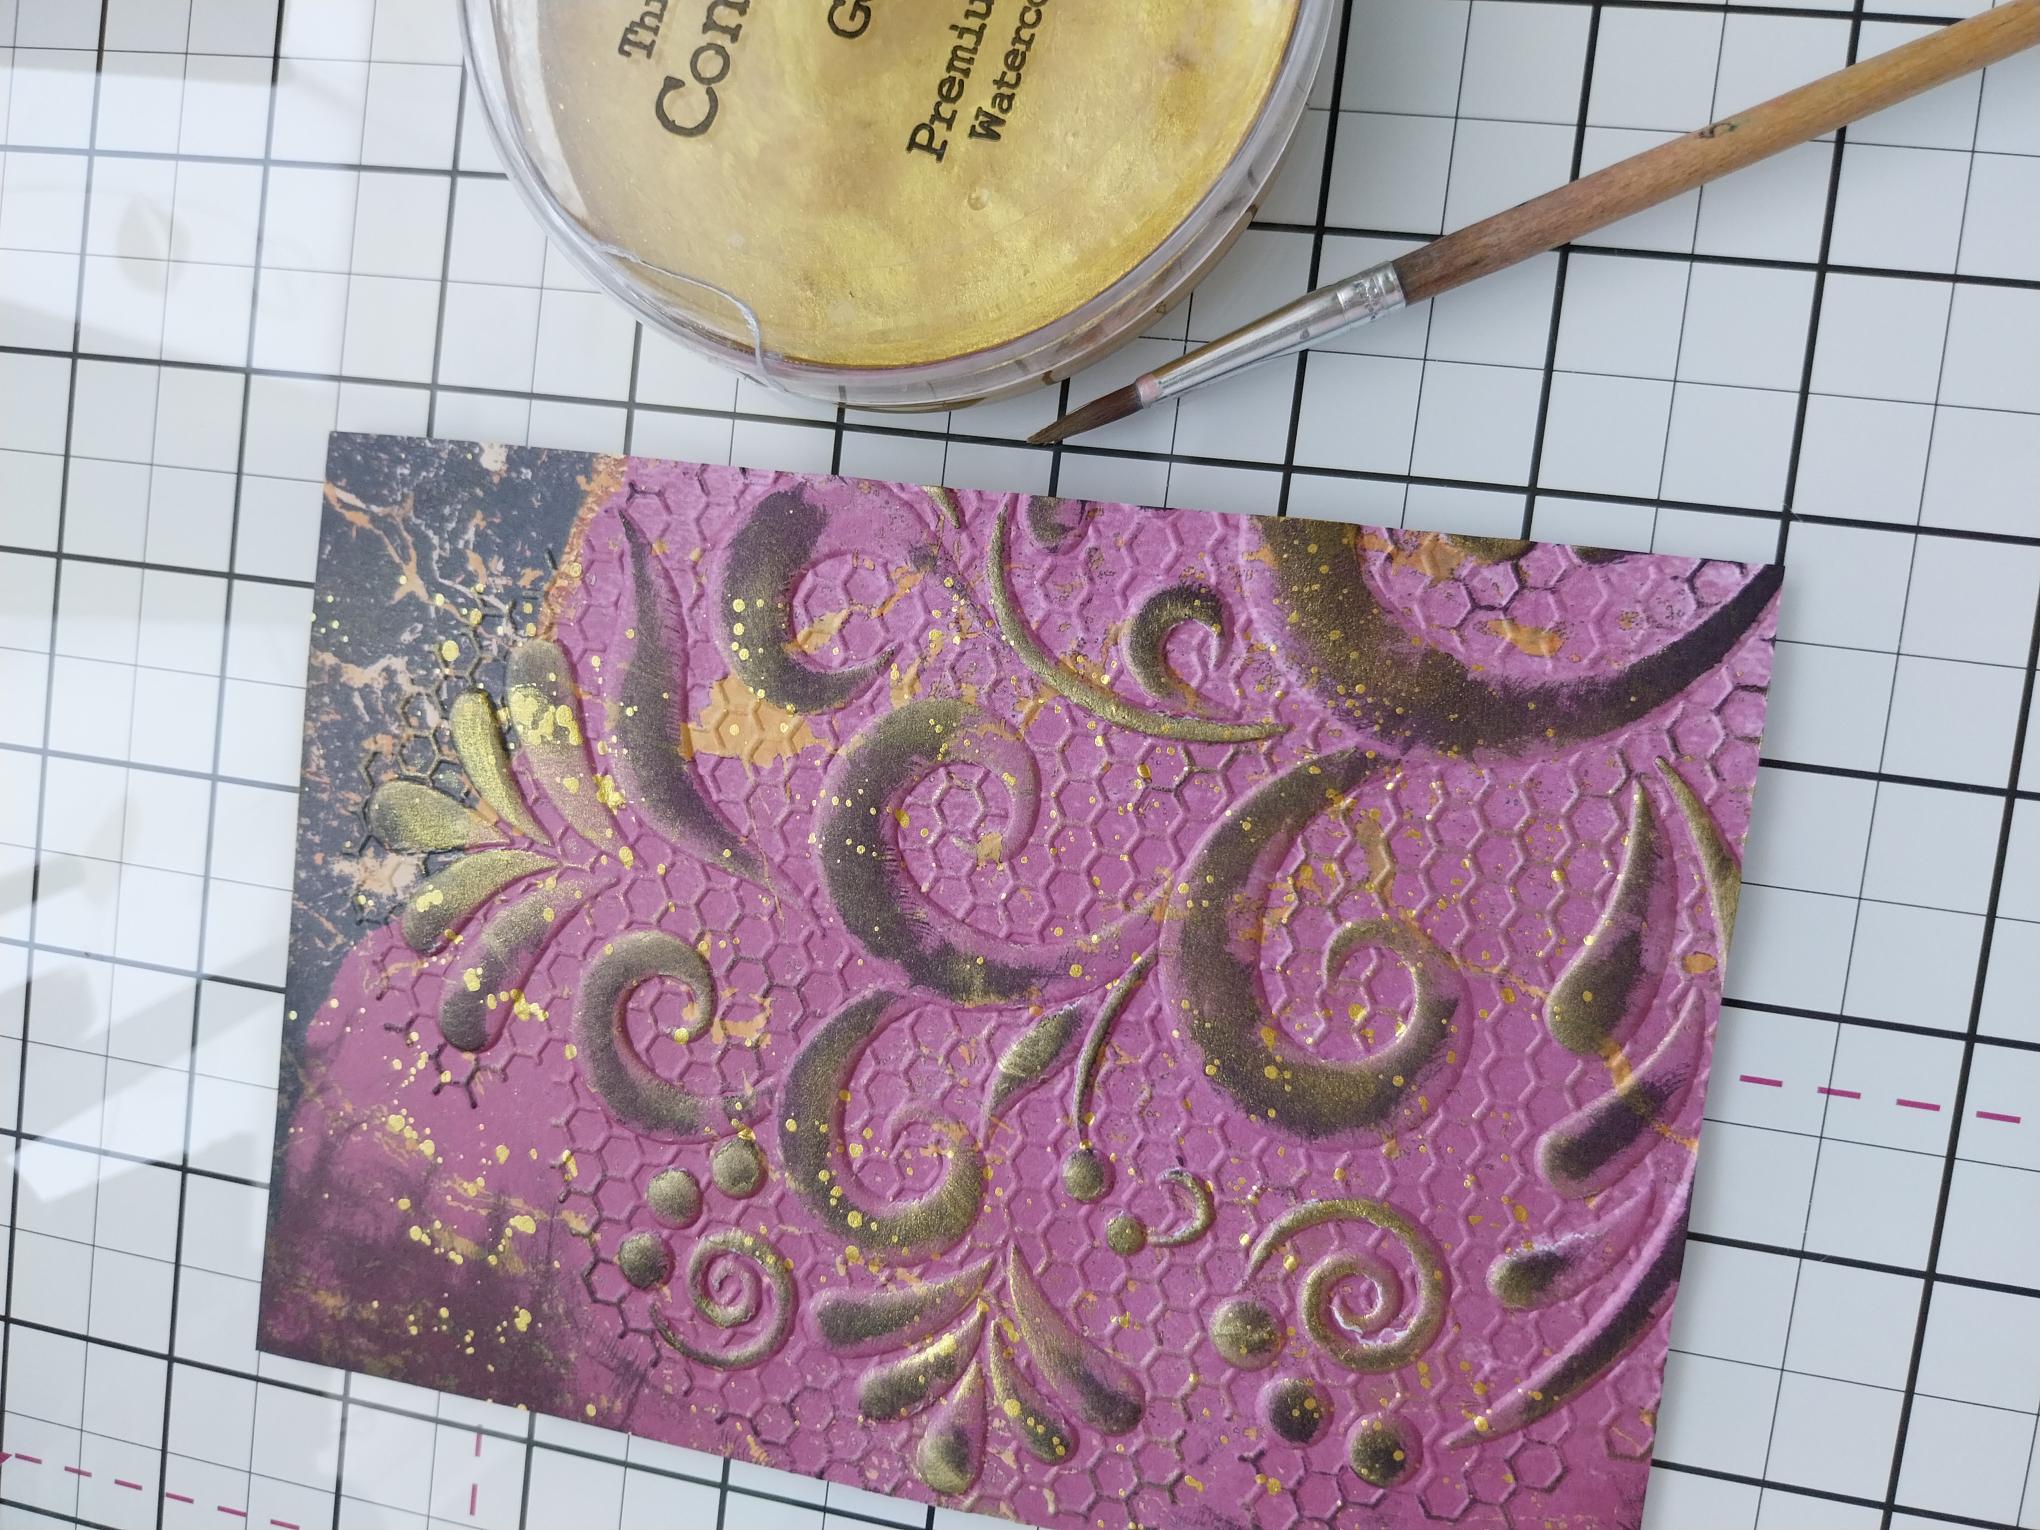
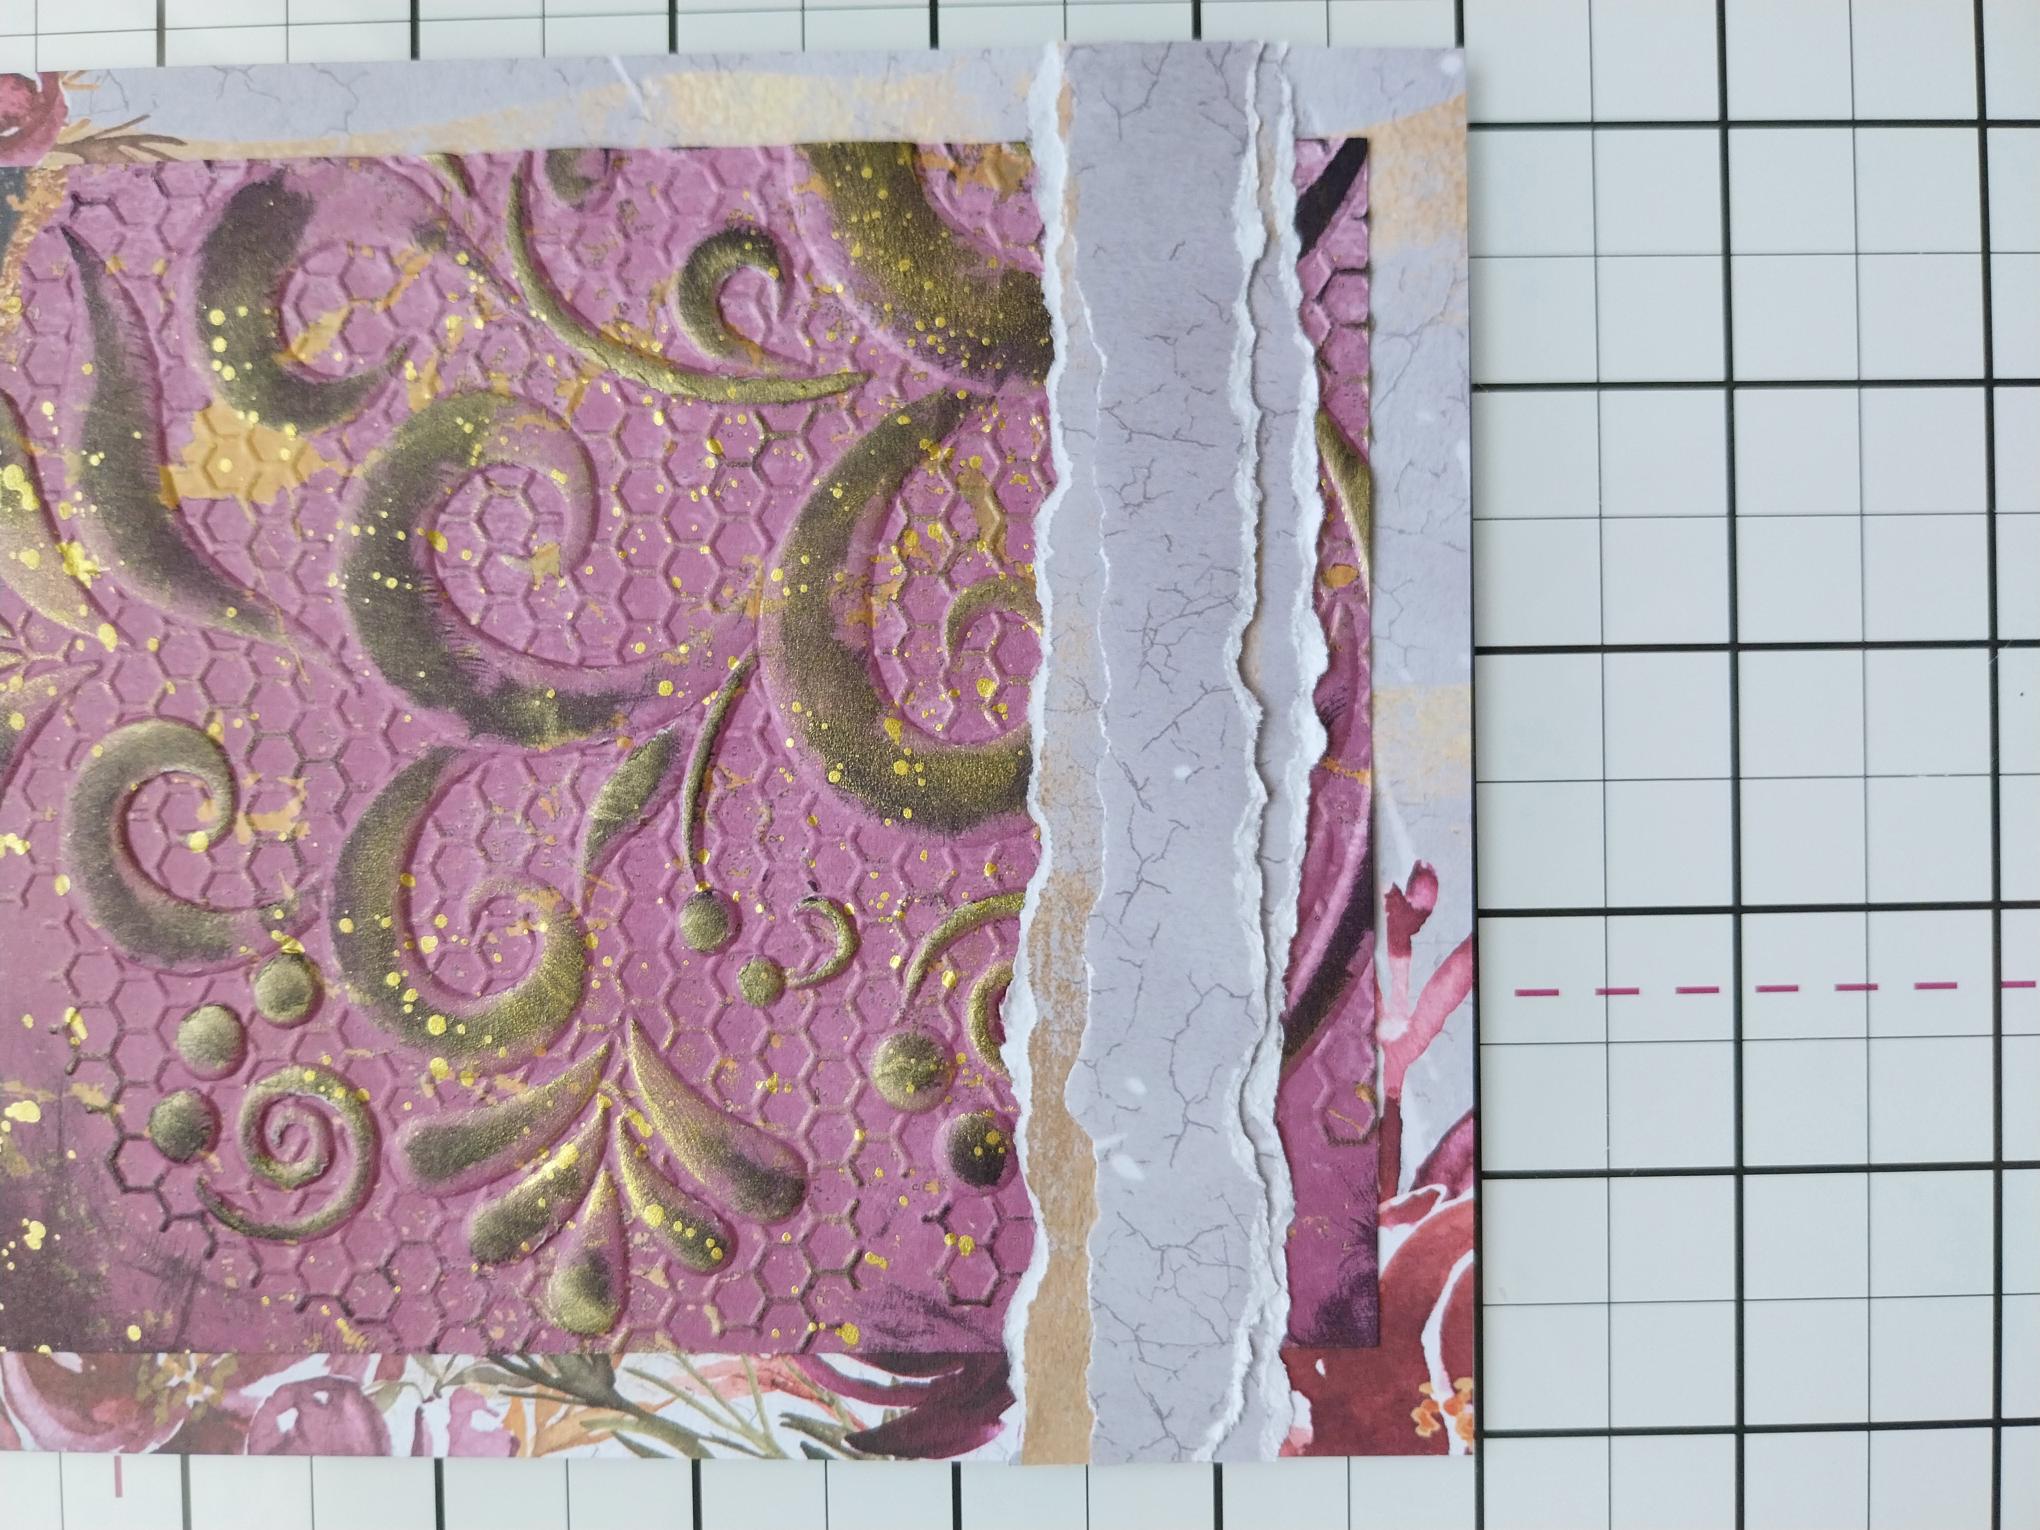
Place the trimmed panel inside your Honeycomb Swirl embossing folder and run it through your machine. |
|
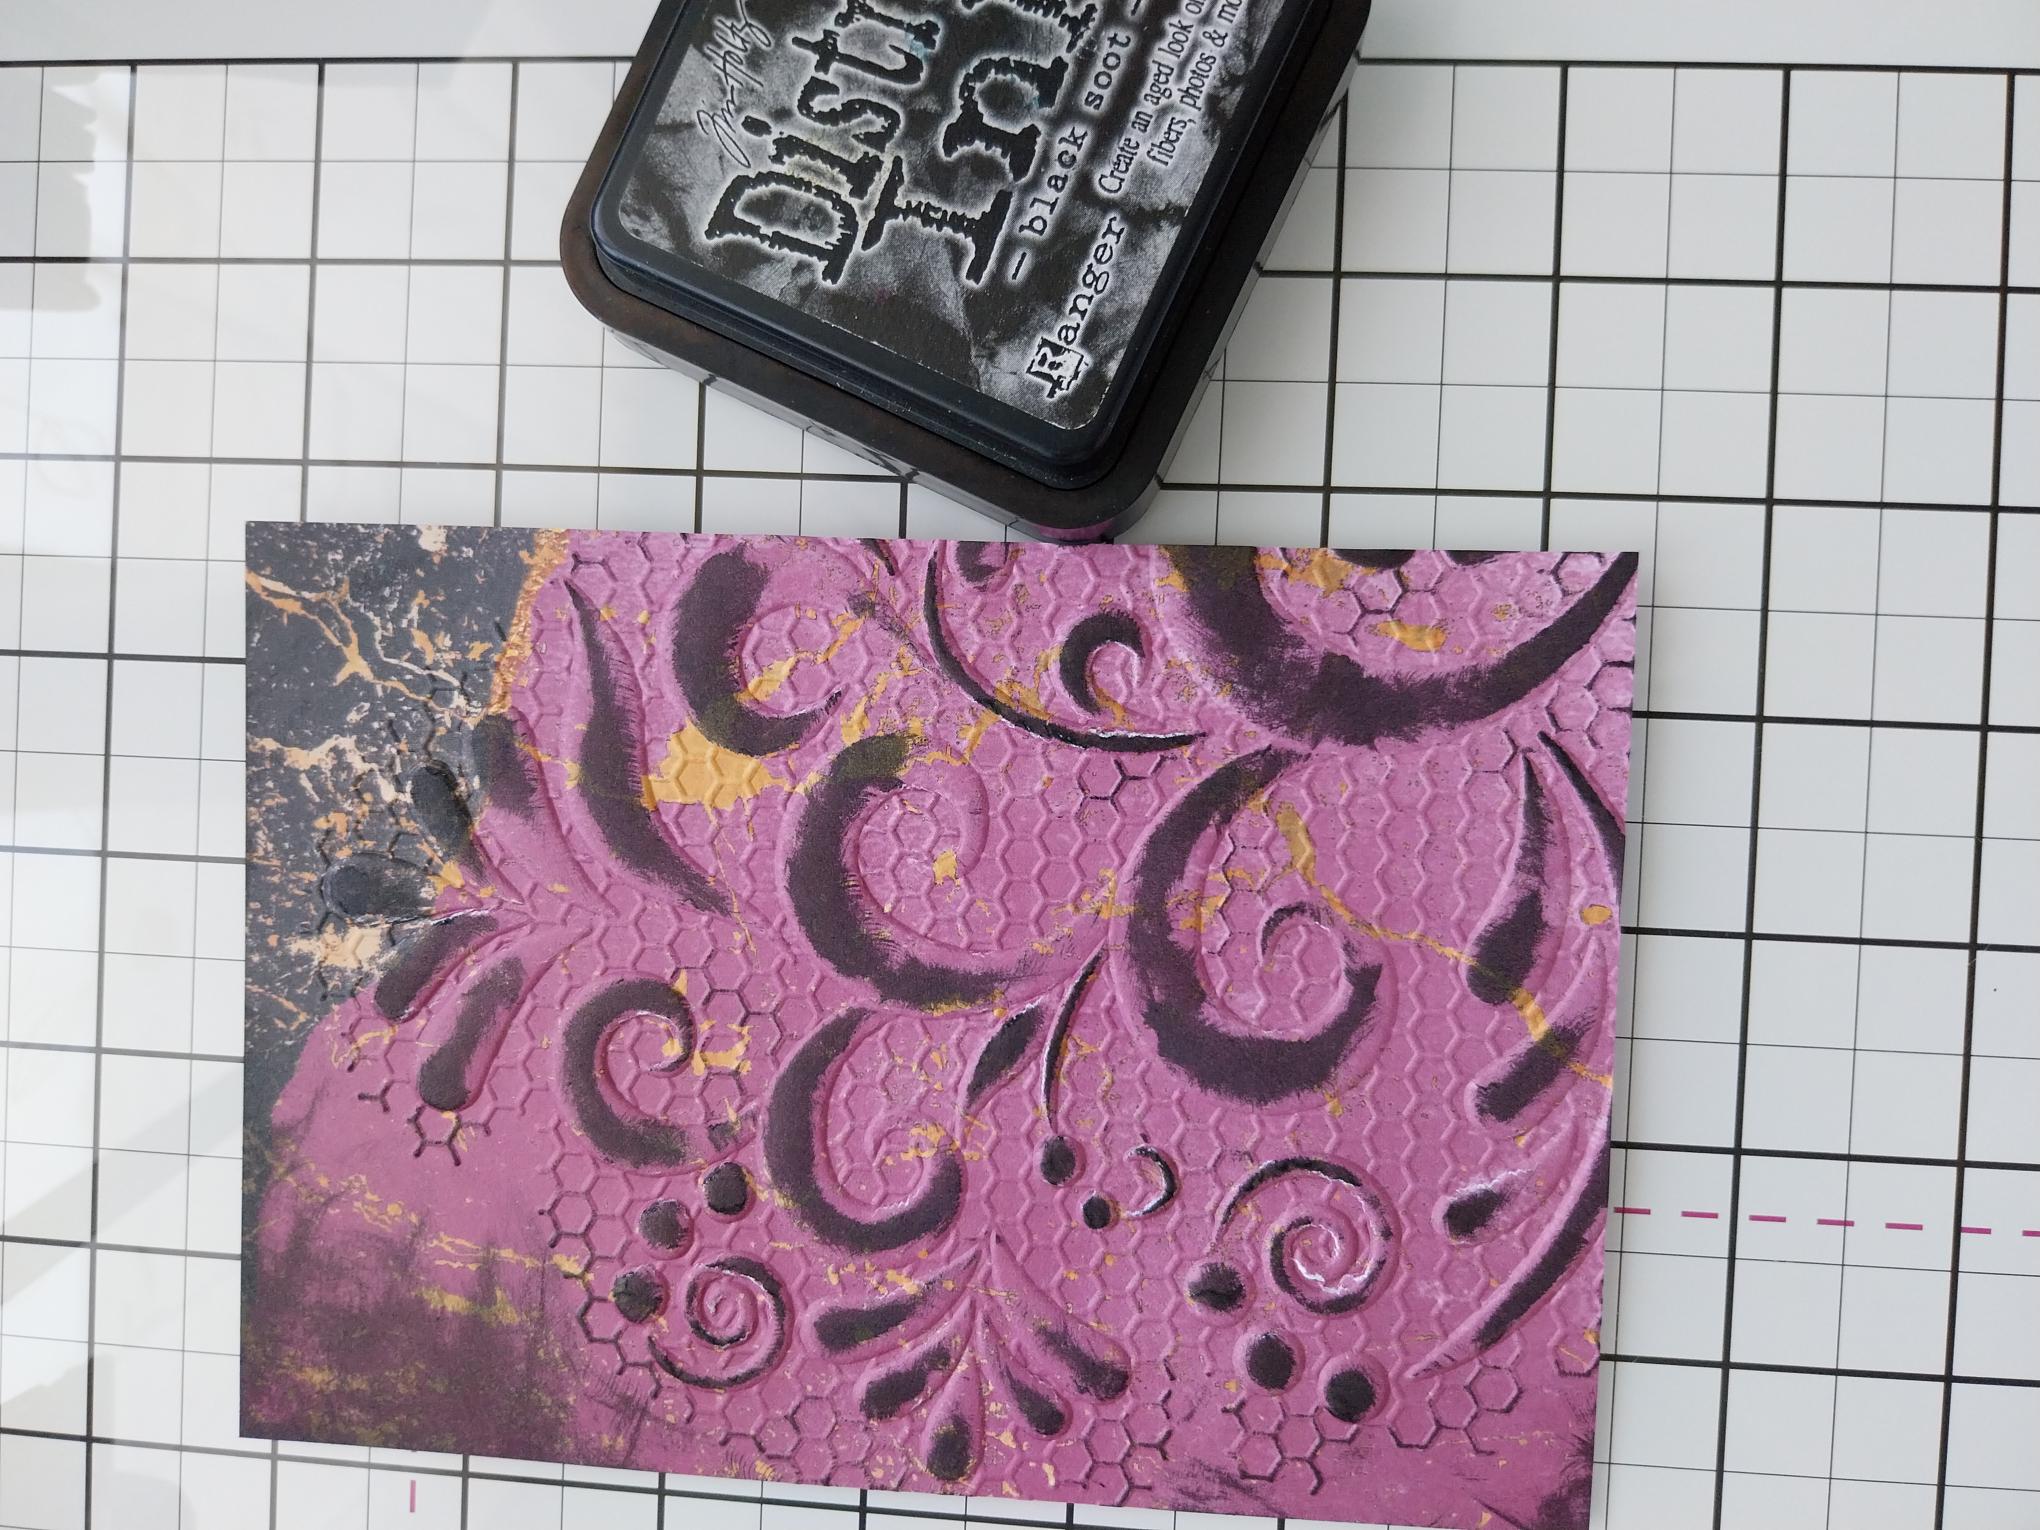
Swipe your Black Soot ink pad lightly over the raised, embossed areas. It's easier to start off lightly, then you can gradually build up the itensity of colour, as required. |
|
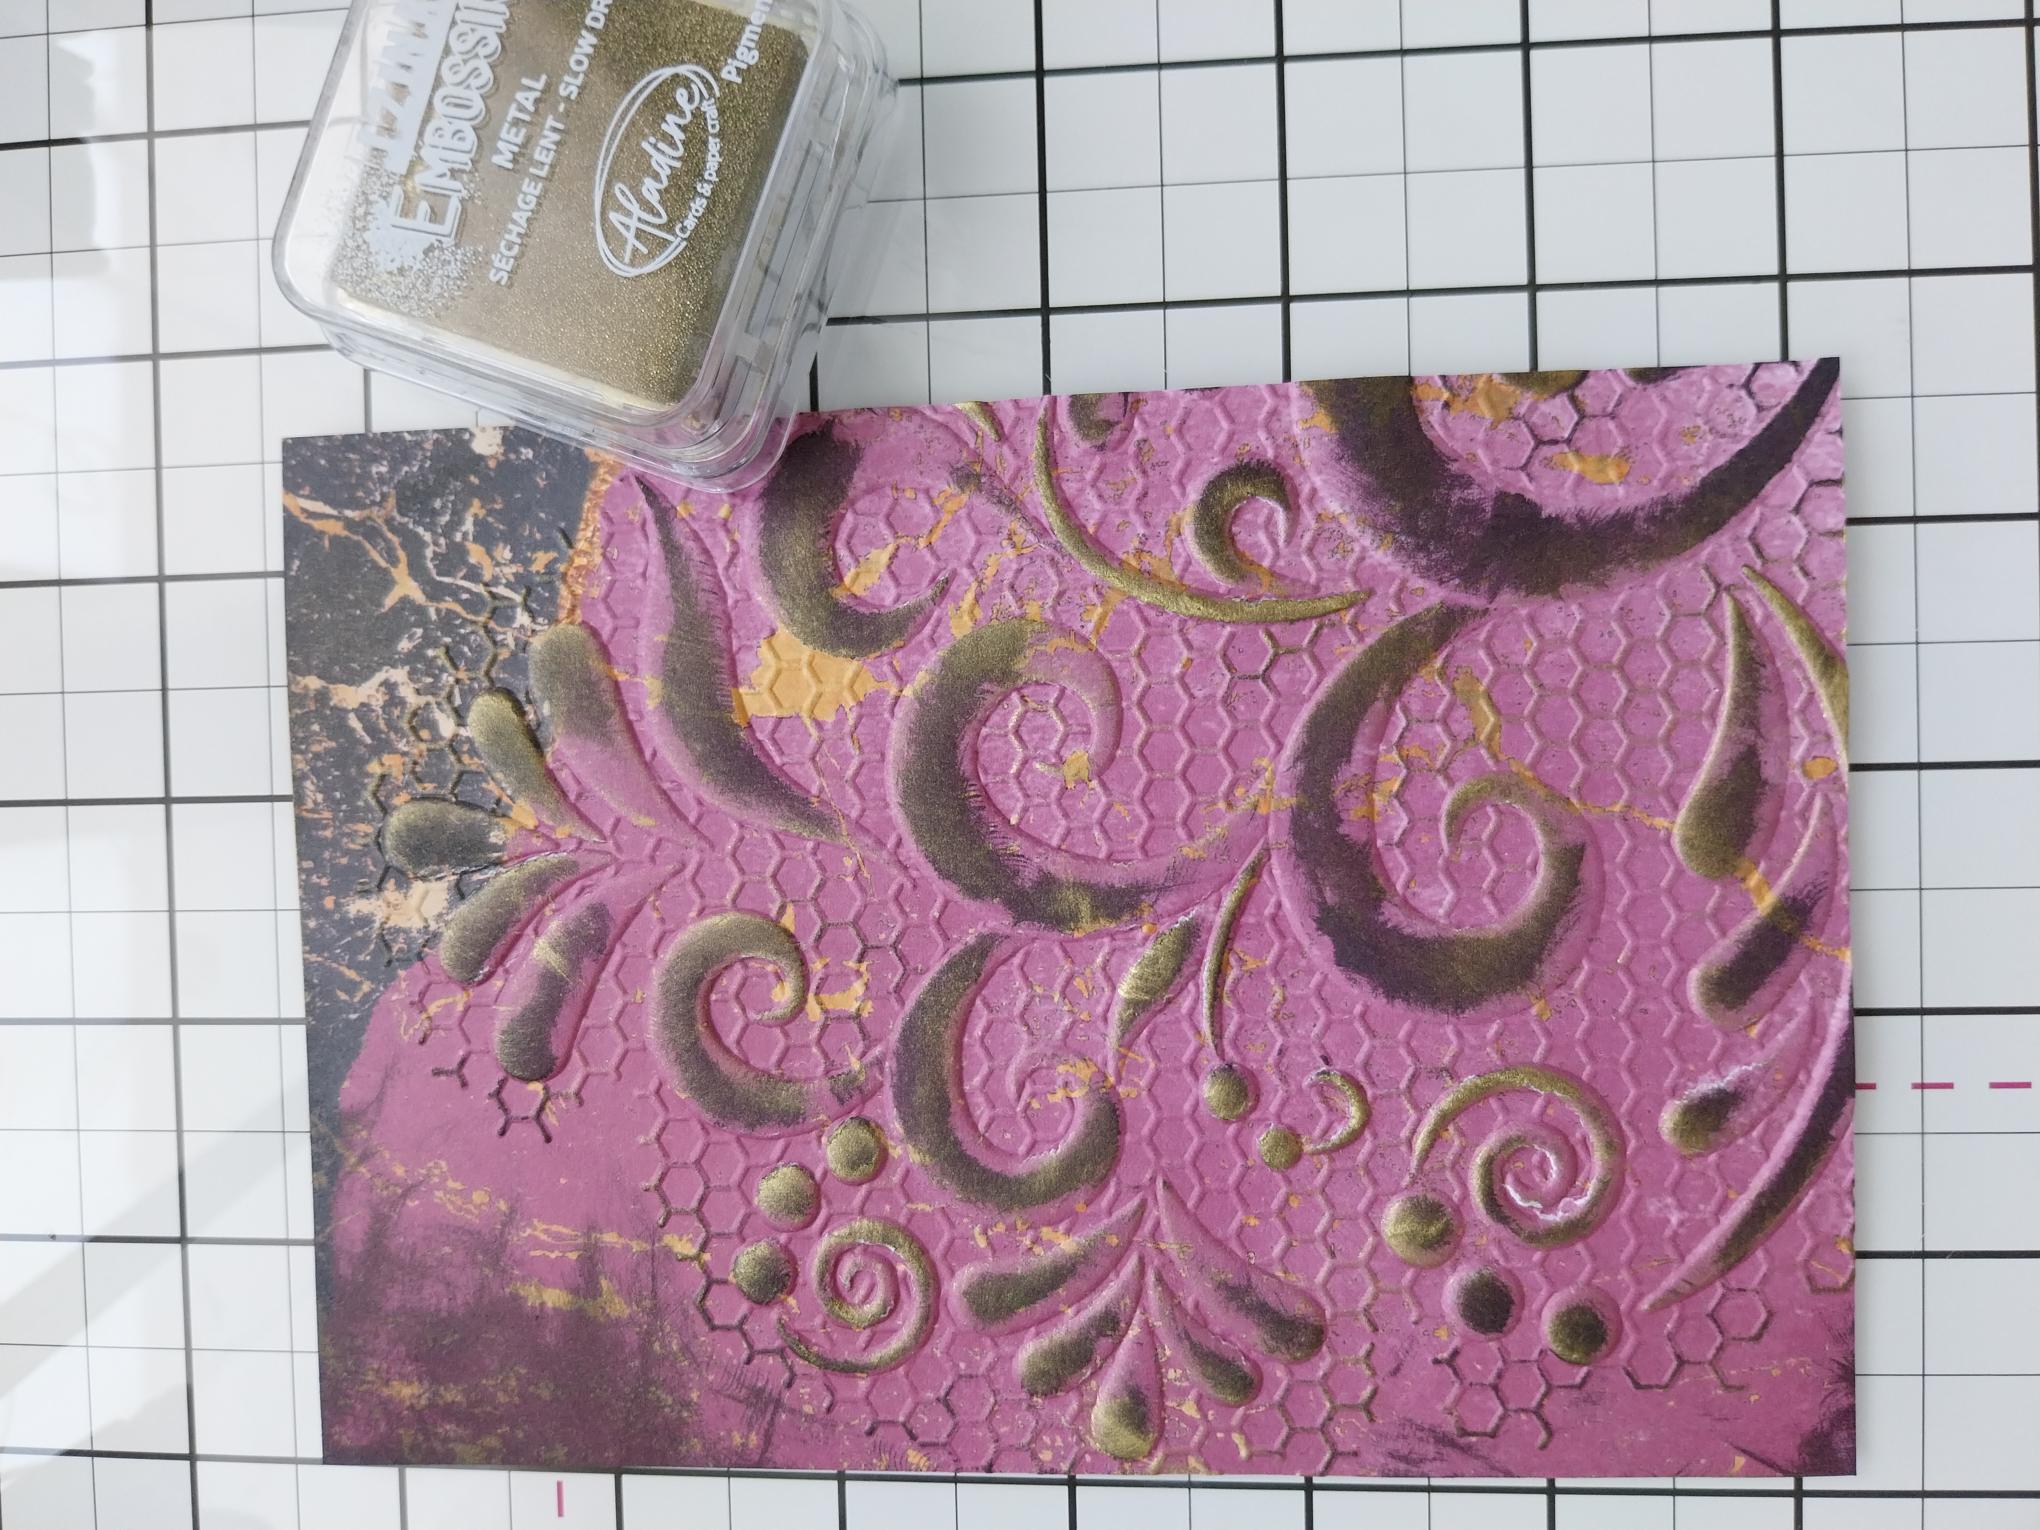
Dry off the black ink before lightly swiping the Metal Gold Izink over random, embossed areas. |
|
Add water to the Goldmine Confetti ink, then splatter over your artwork. Pop to one side to dry or blast with a heat tool, if you're impatient like me!! Note that the pigment/embossing Metal Gold ink is slow drying!! |
|
From the same 12 x 12" patterened paper, trim a panel 7 1/4 x 5 1/4, but this time we will be using the other side of the paper. |
|
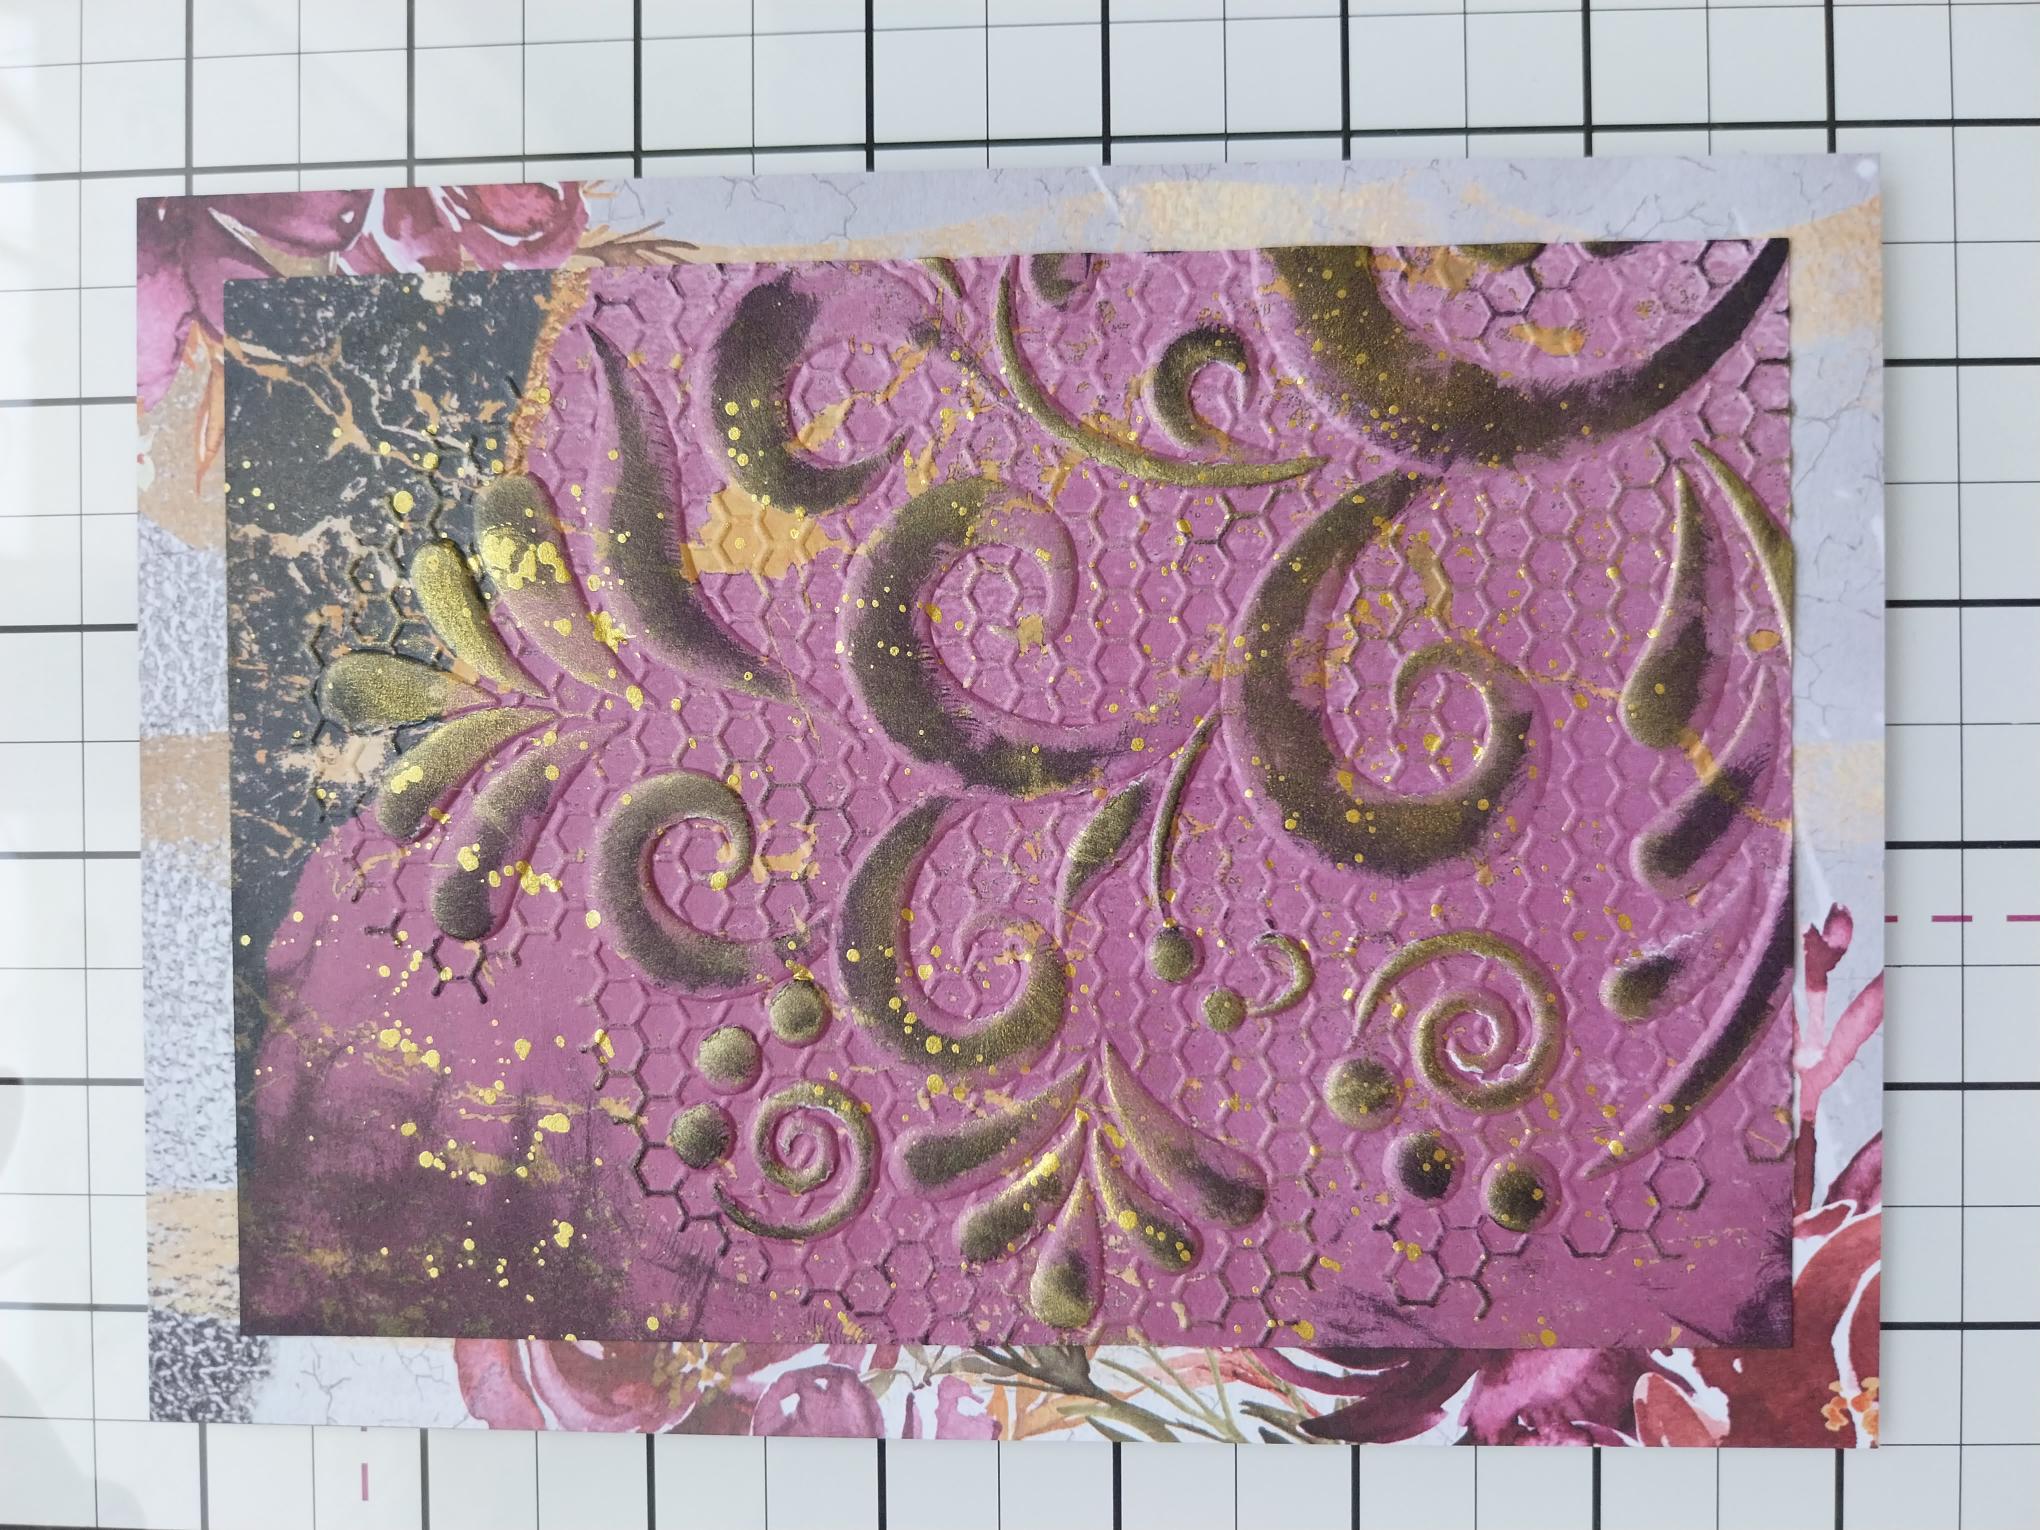
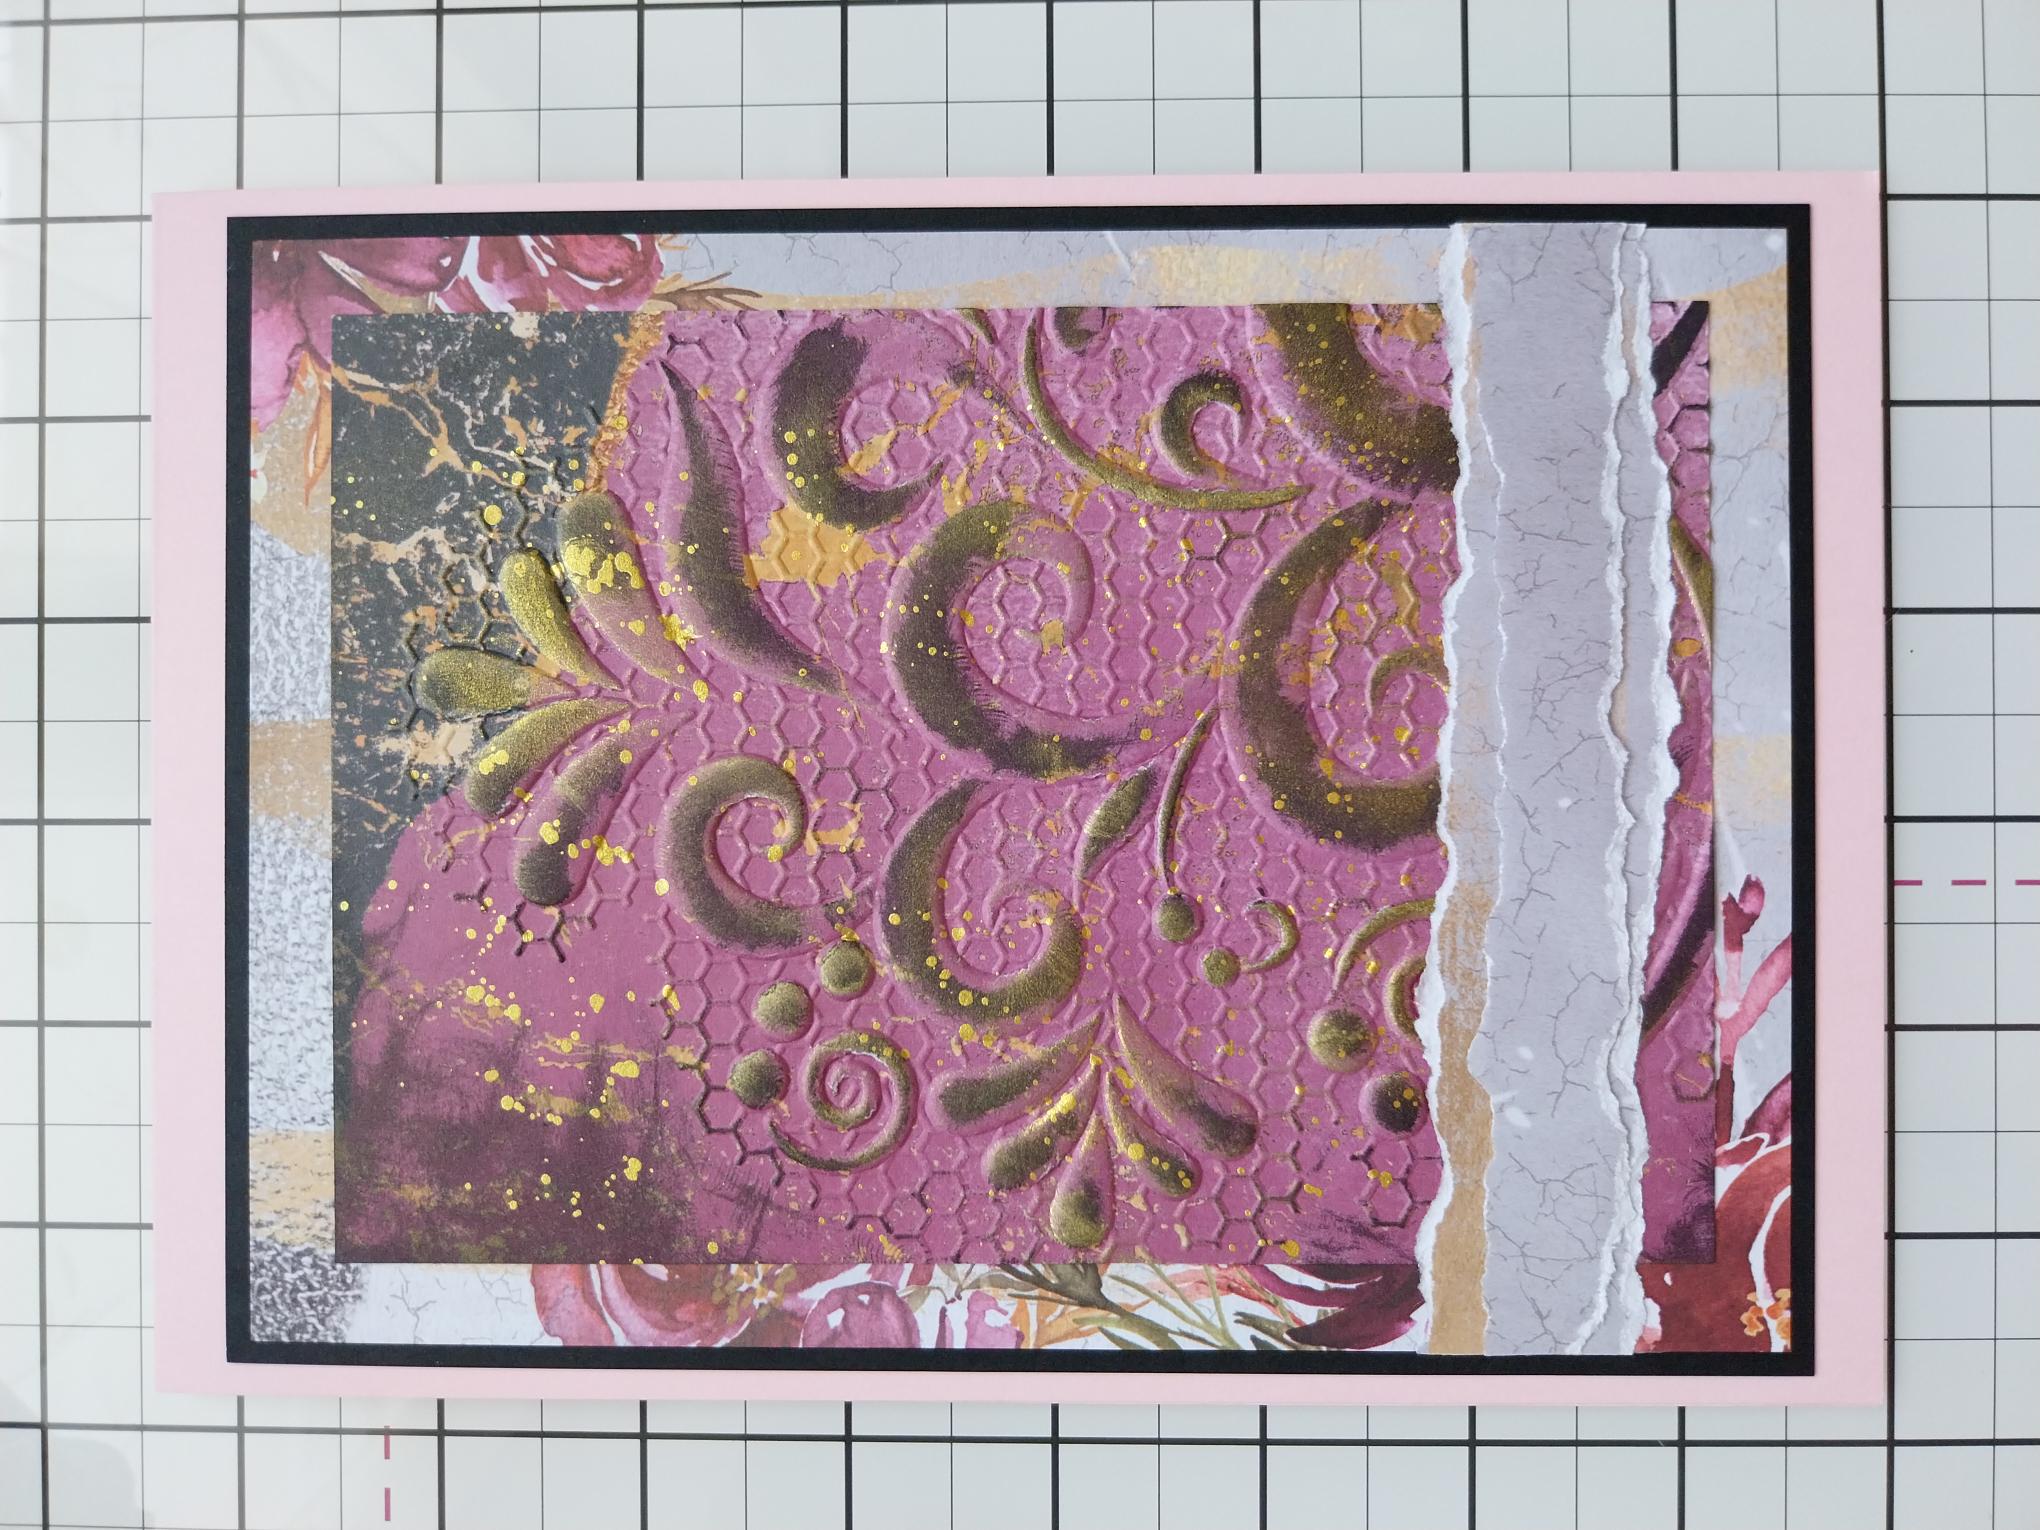
Mat your dried, embossed artwork on to the trimmed, decorative mat, before popping it to one side. |
|
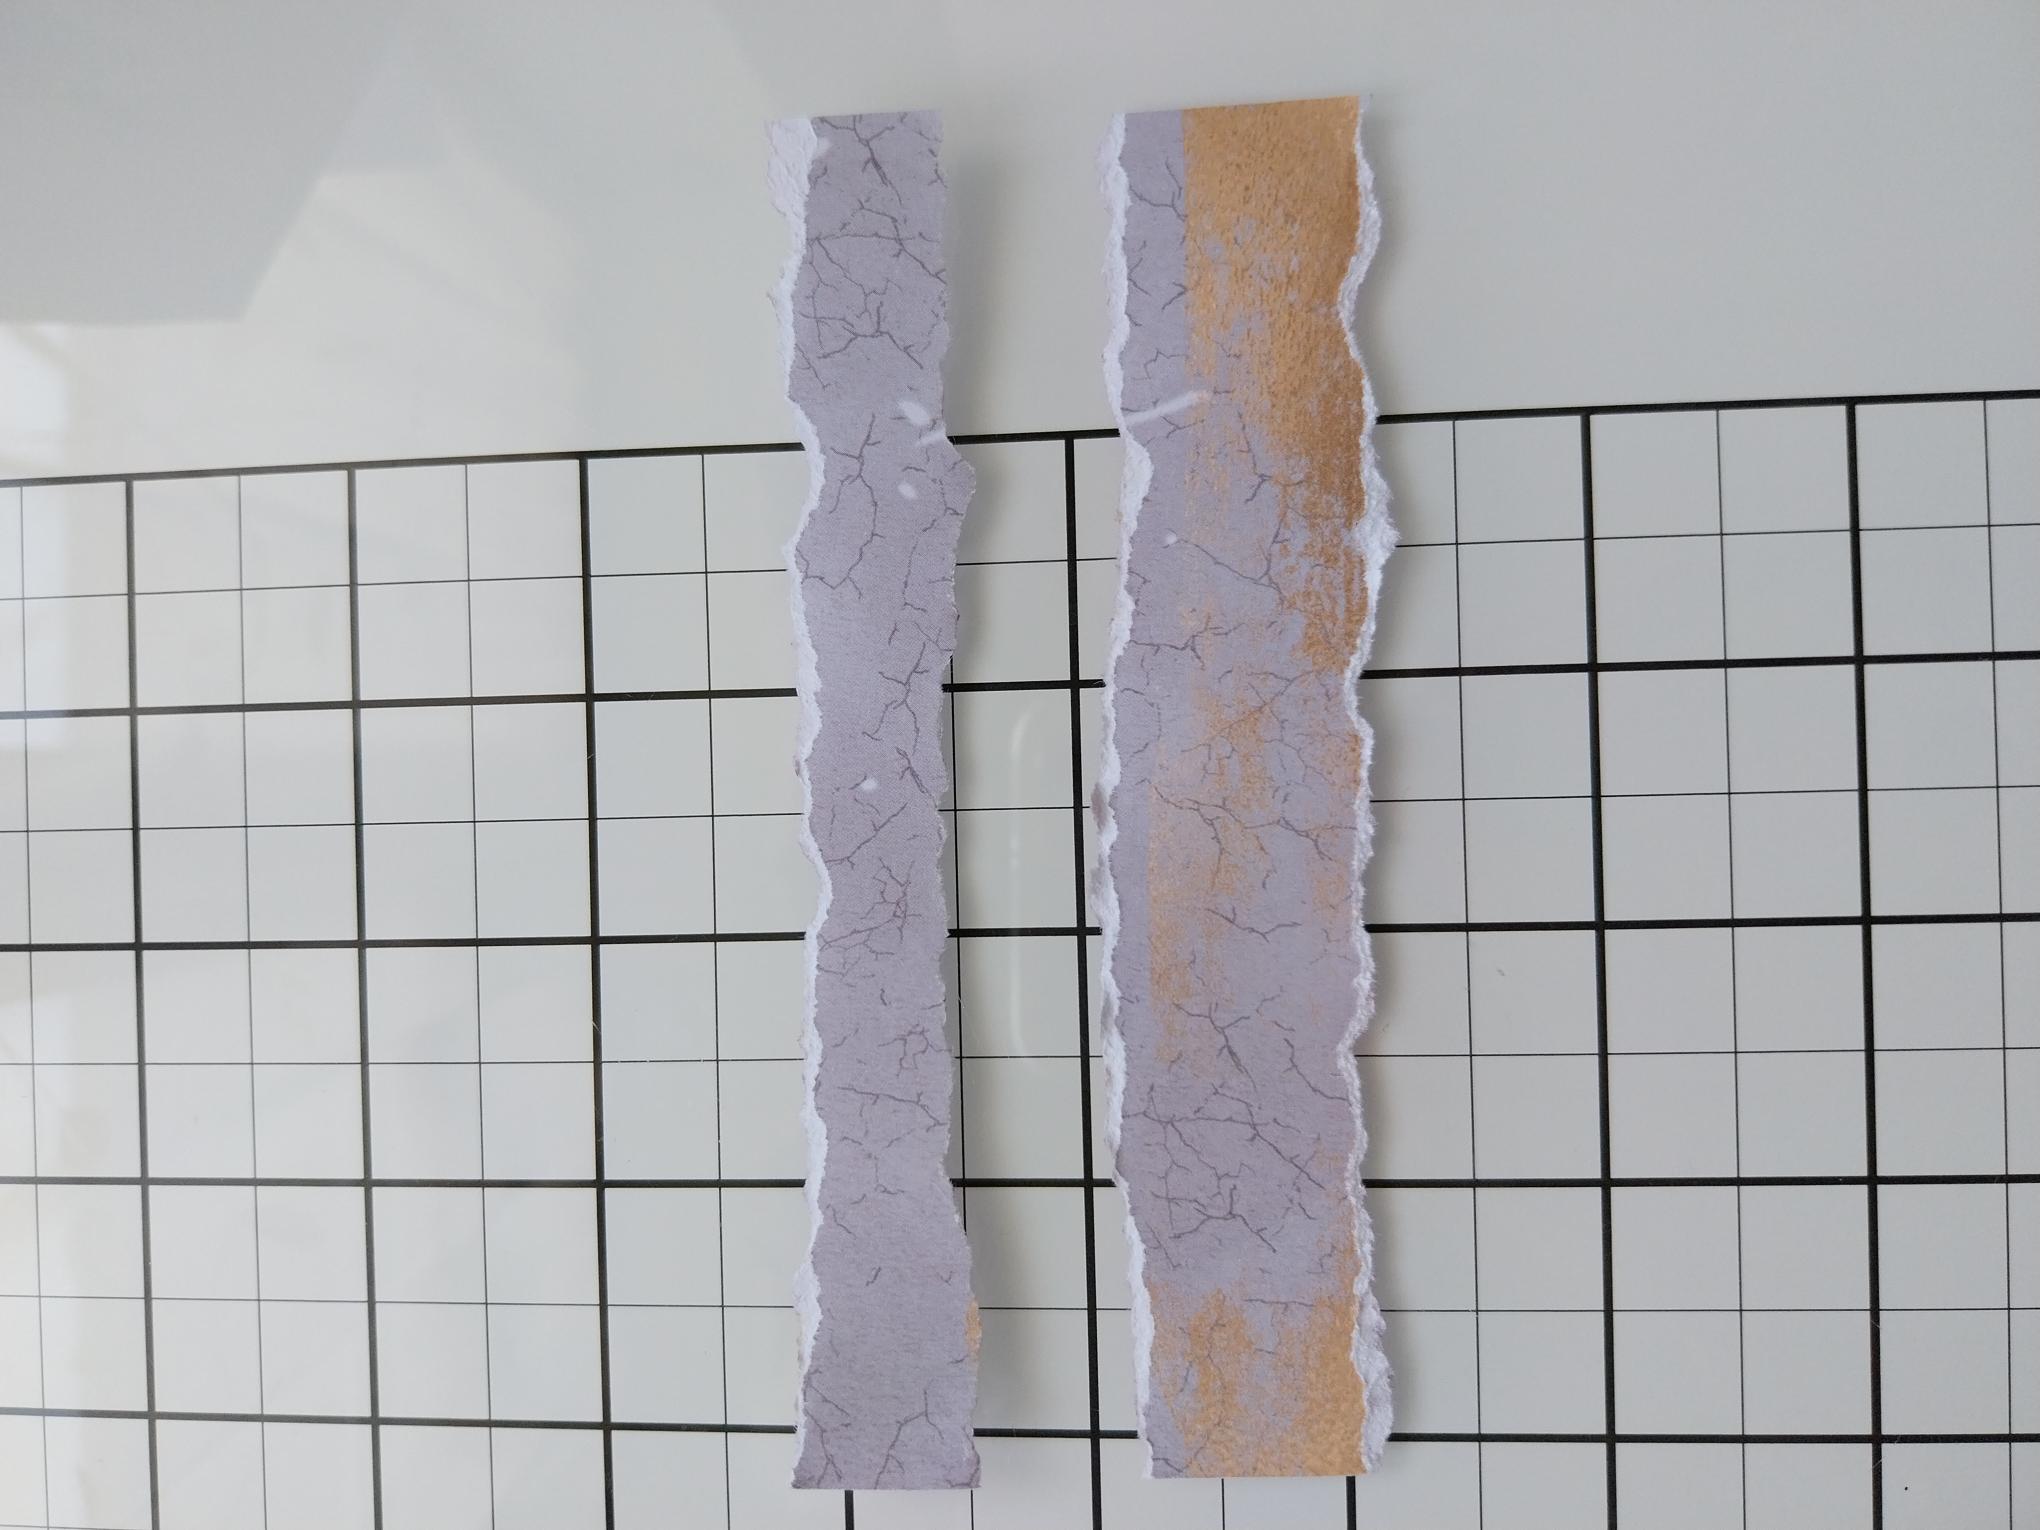
From your left-over pieces of paper, tear TWO panels, 1 wider than the other, both 5 1/4" in length. |
|
Adhere the torn panels across your artwork, the narrower panel being on top, as seen here. |
|
Adhere your artwork on to the black card, trimmed to 7 1/2 x 5 1/2" and then on to your pink card blank. Pop to one side. |
|
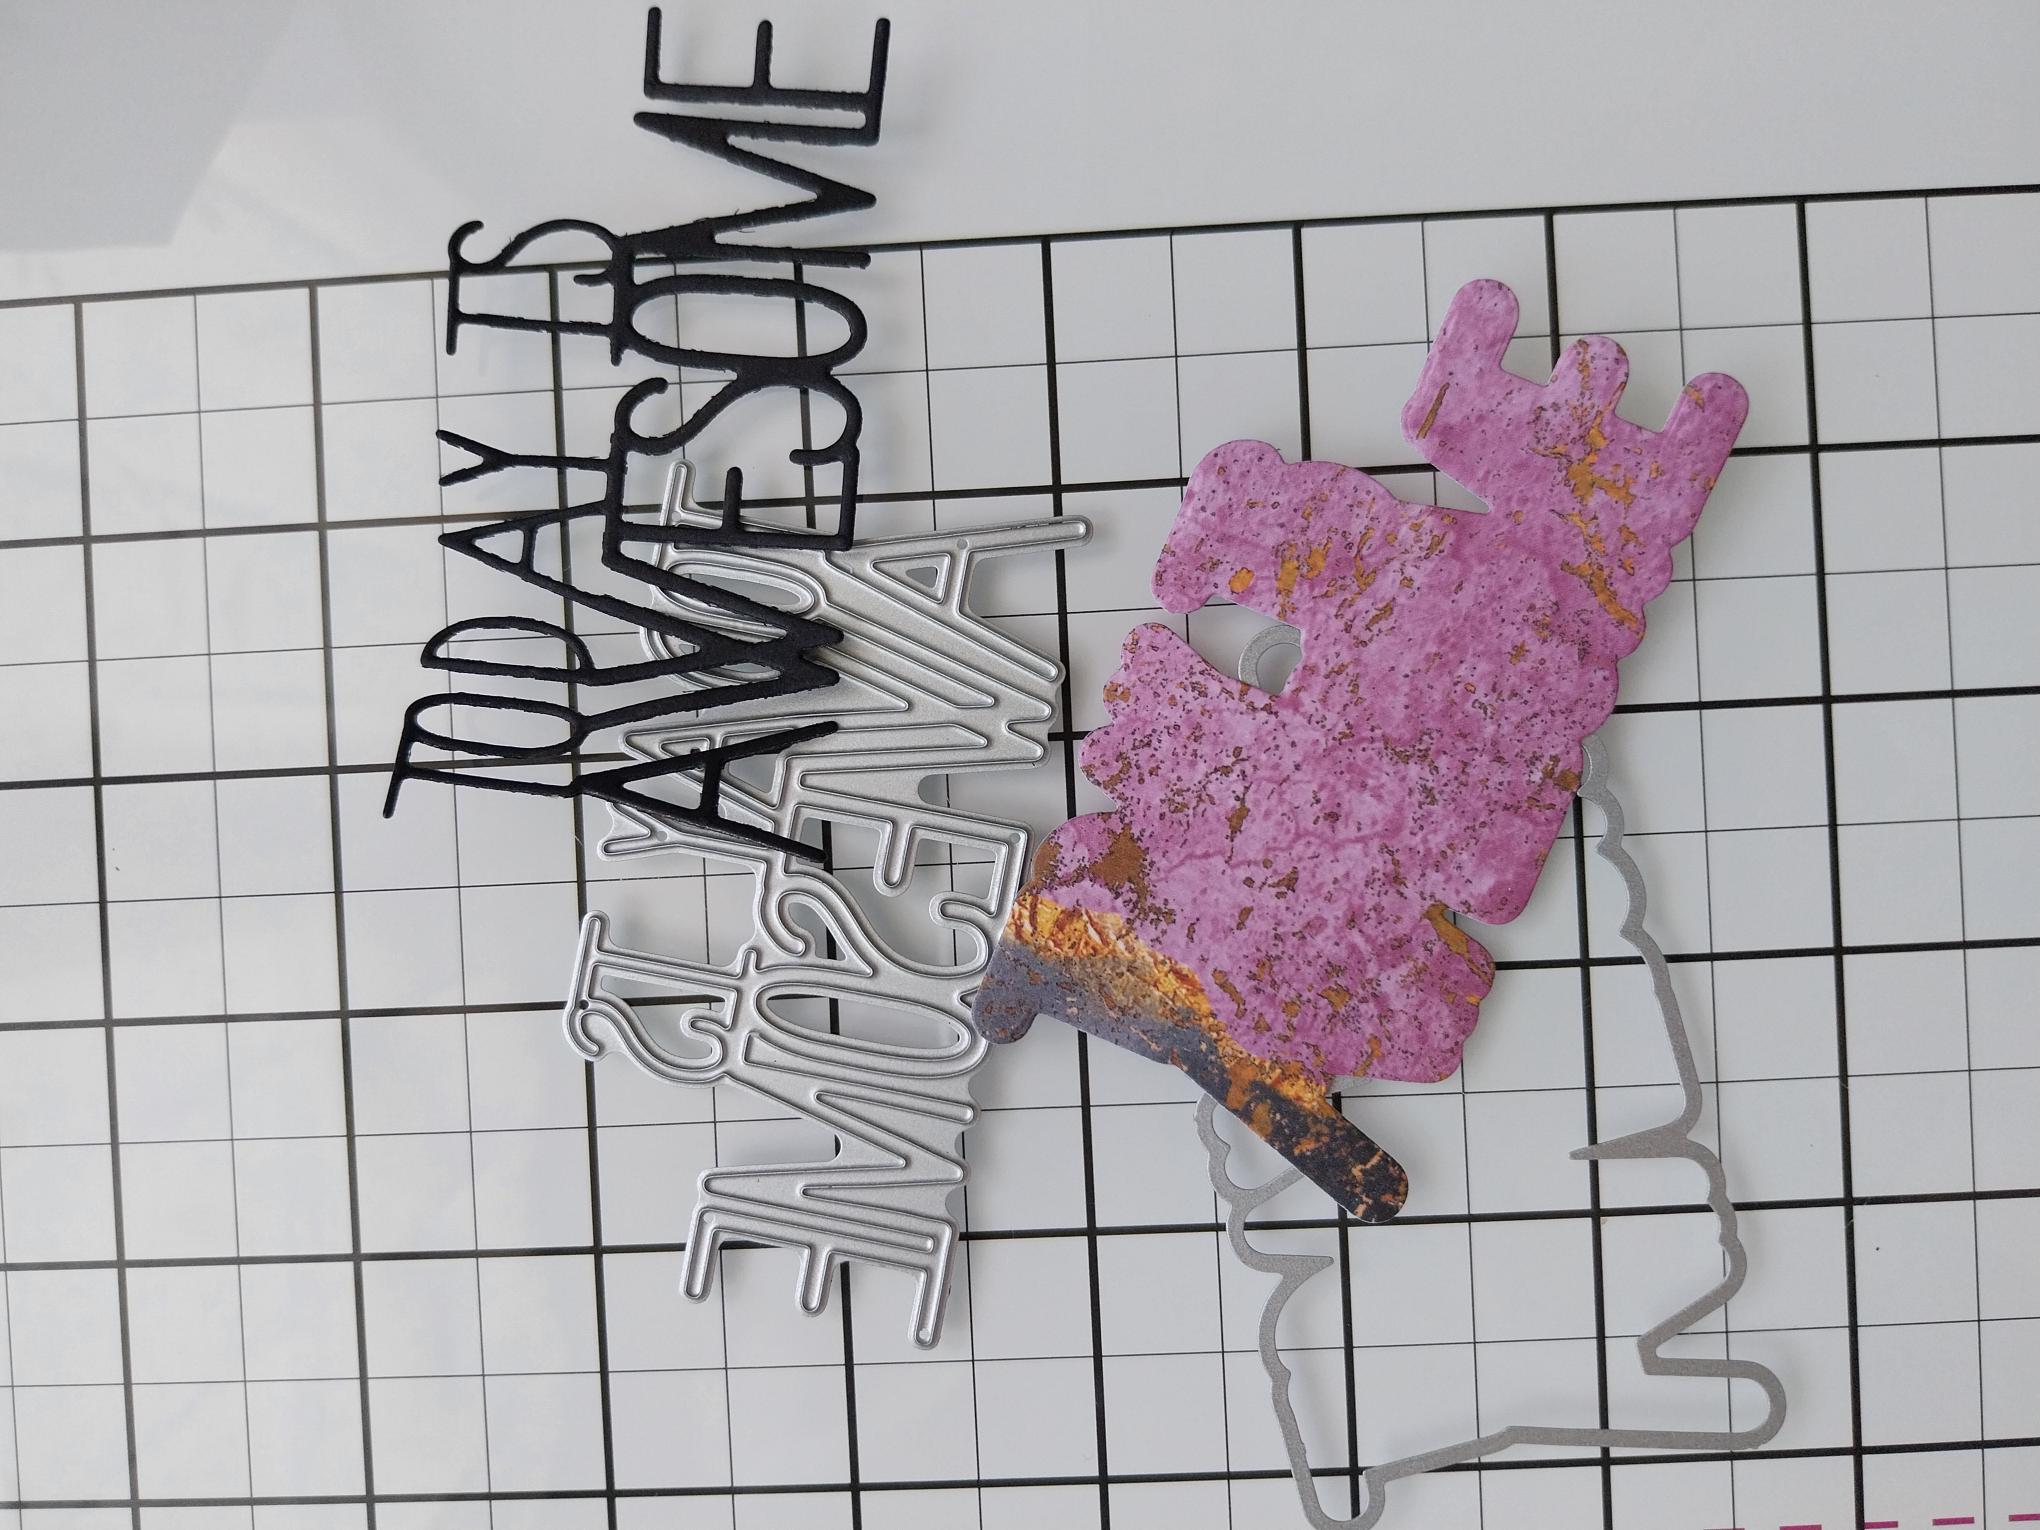
Die cut the detailed sentiment, out of the Creative Words Collection, from a piece of black card and the mat layer from the left over Mulberry paper. |
|
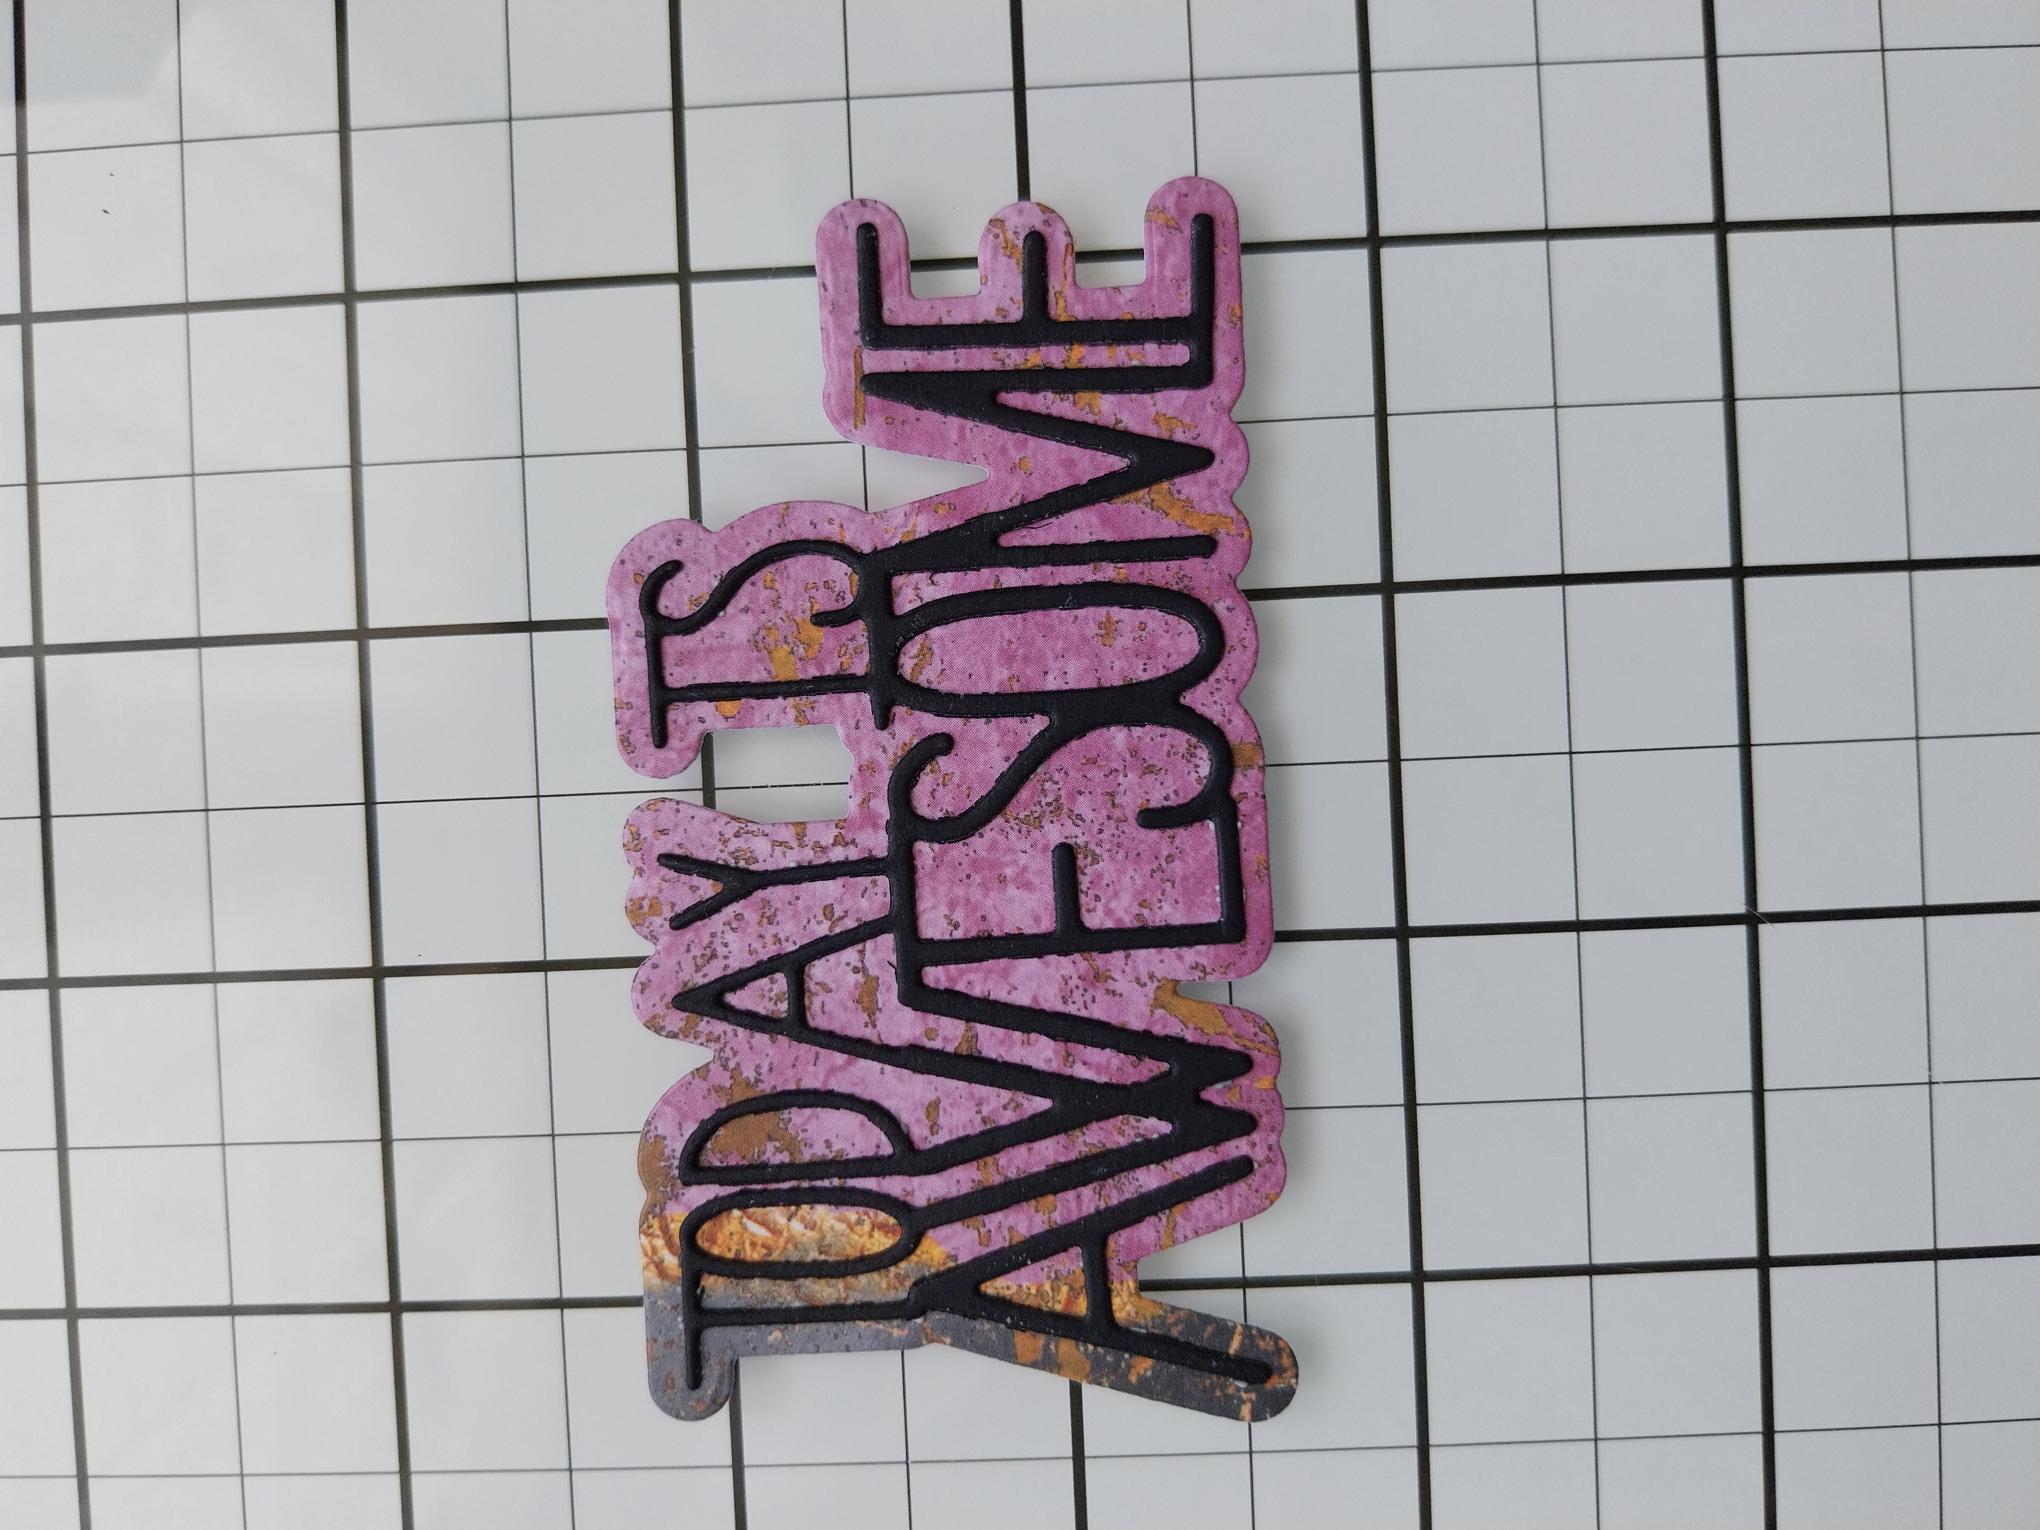
Adhere the detailed die cut on top of the paper die cut mat. |

|
Adhere your die cut sentiment on top of the vellum panels, to the left of your artwork, to finish. |