Give your friends $10 off their first order!
Refer a FRIEND


WHAT YOU WILL NEED:
White card blank 7 x 5"
White card
Black card
Perfect Poppy A6 Stamp and Die Collection
Bloom & Wild 8 x 8" Paper Pack
Quattro D Feel Good Collection
SBM Hybrid Ink Pad: Midnight
Confetti Ink: Goldmine
Paint brush
Sequins: Red
Gem pick up and pokey tool
Stickles: Diamond
Eureka 101 Watercolour Tablet
SBM Magnetic glass mat
Paper Trimmer
Perfect Together Glue
Foam pads
Die Cutting machine
[click image to enlarge] 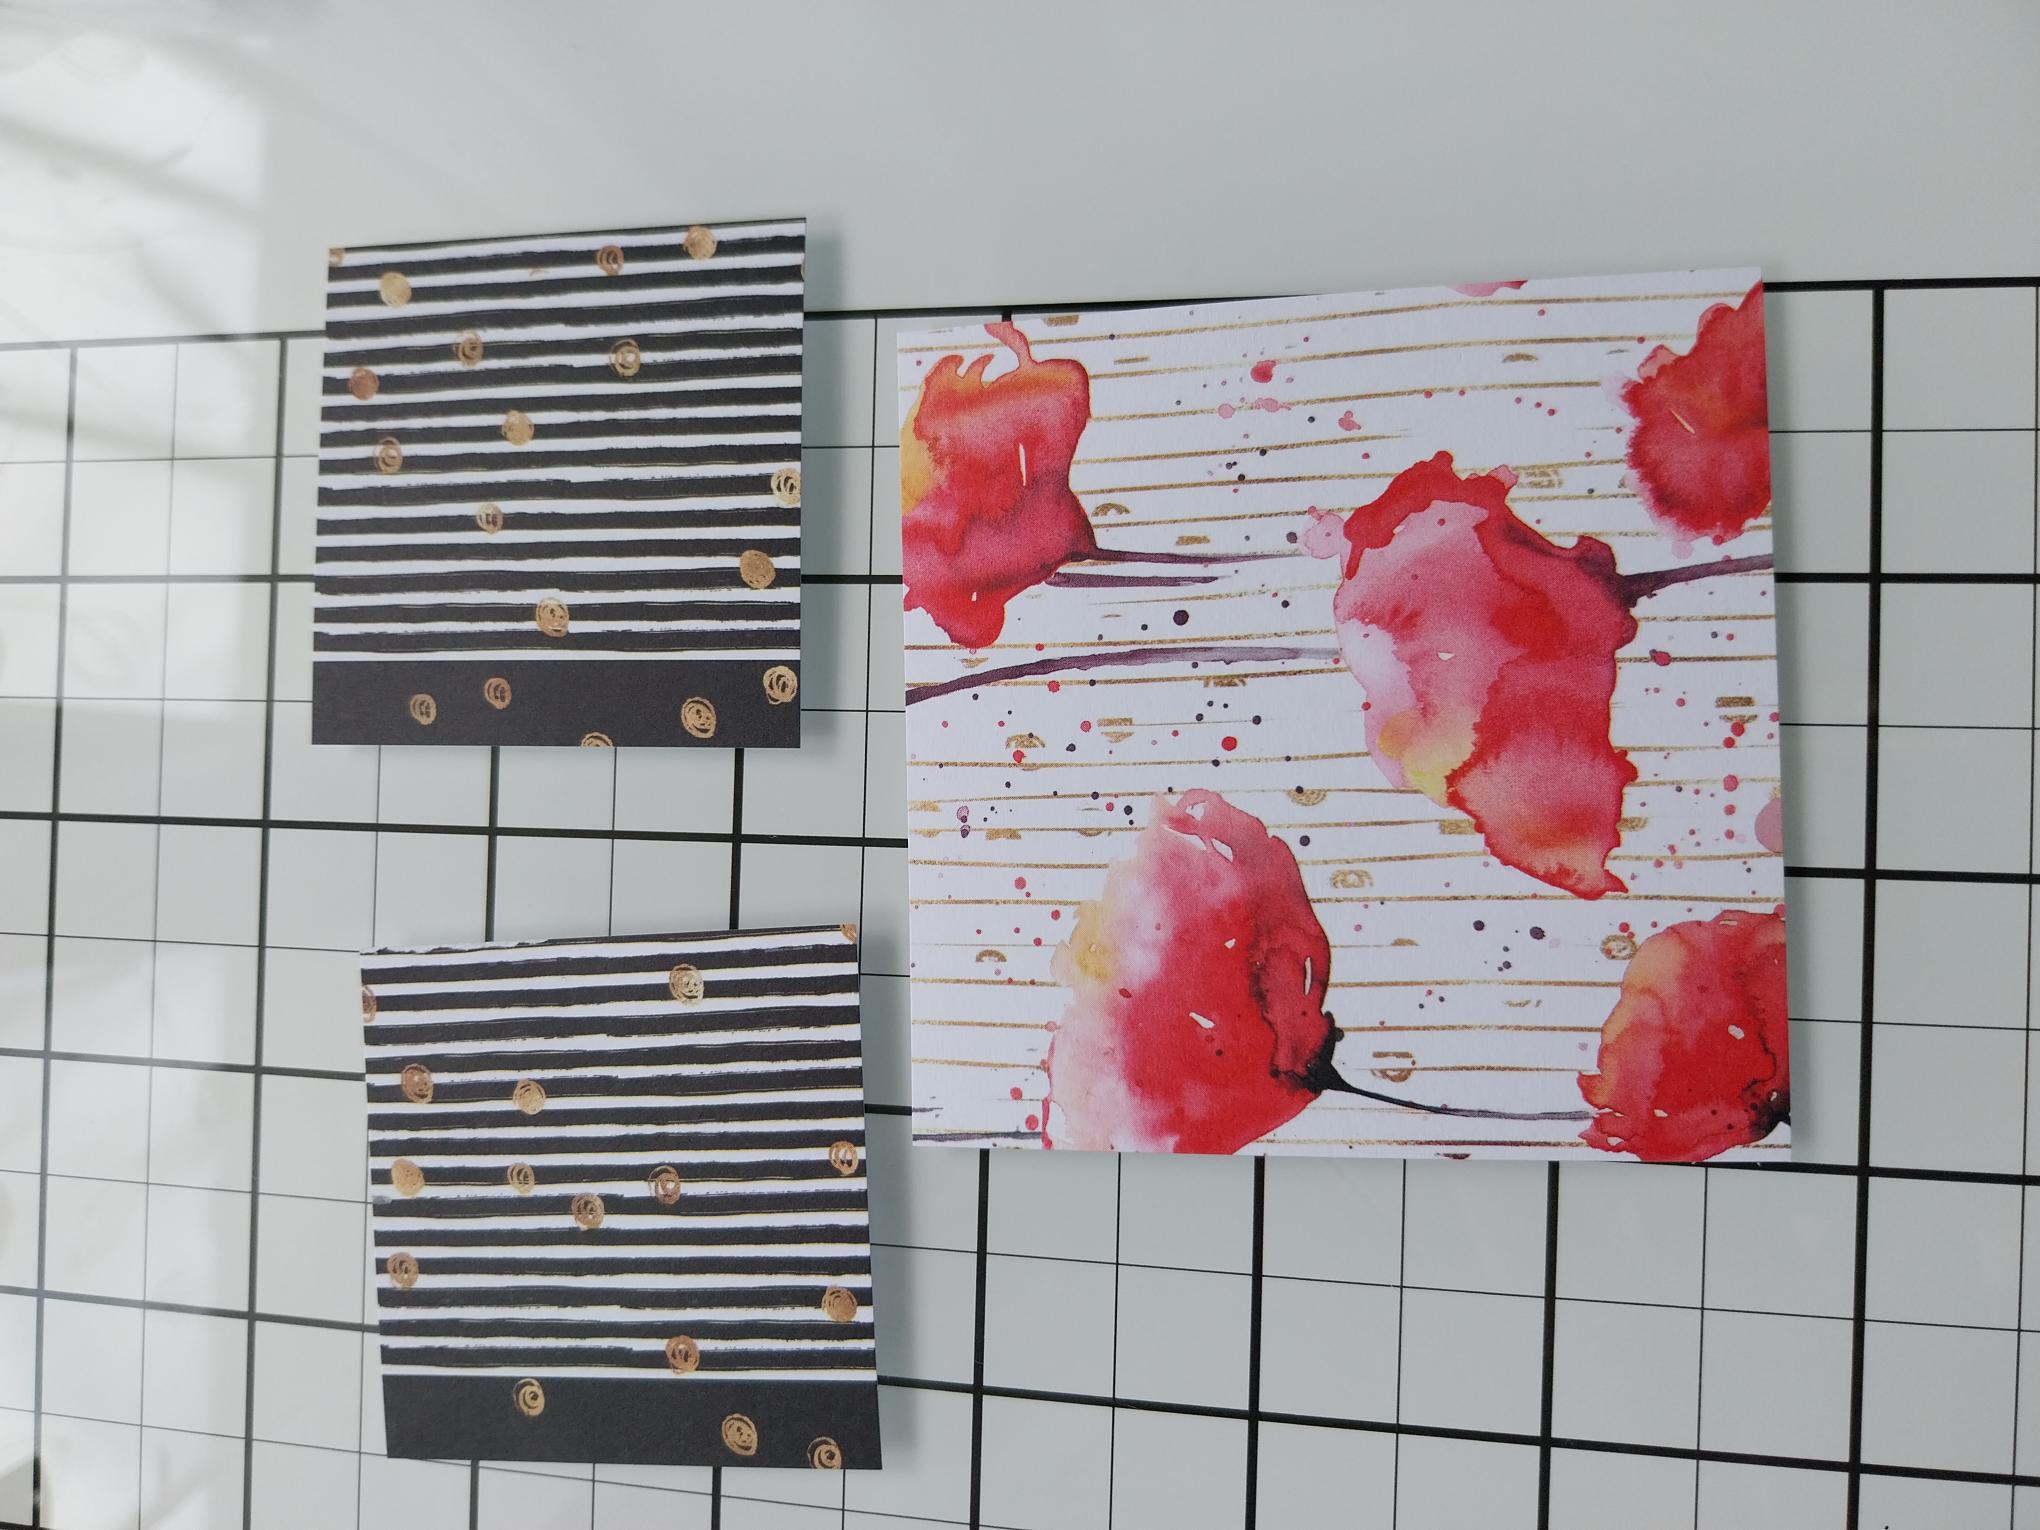
|
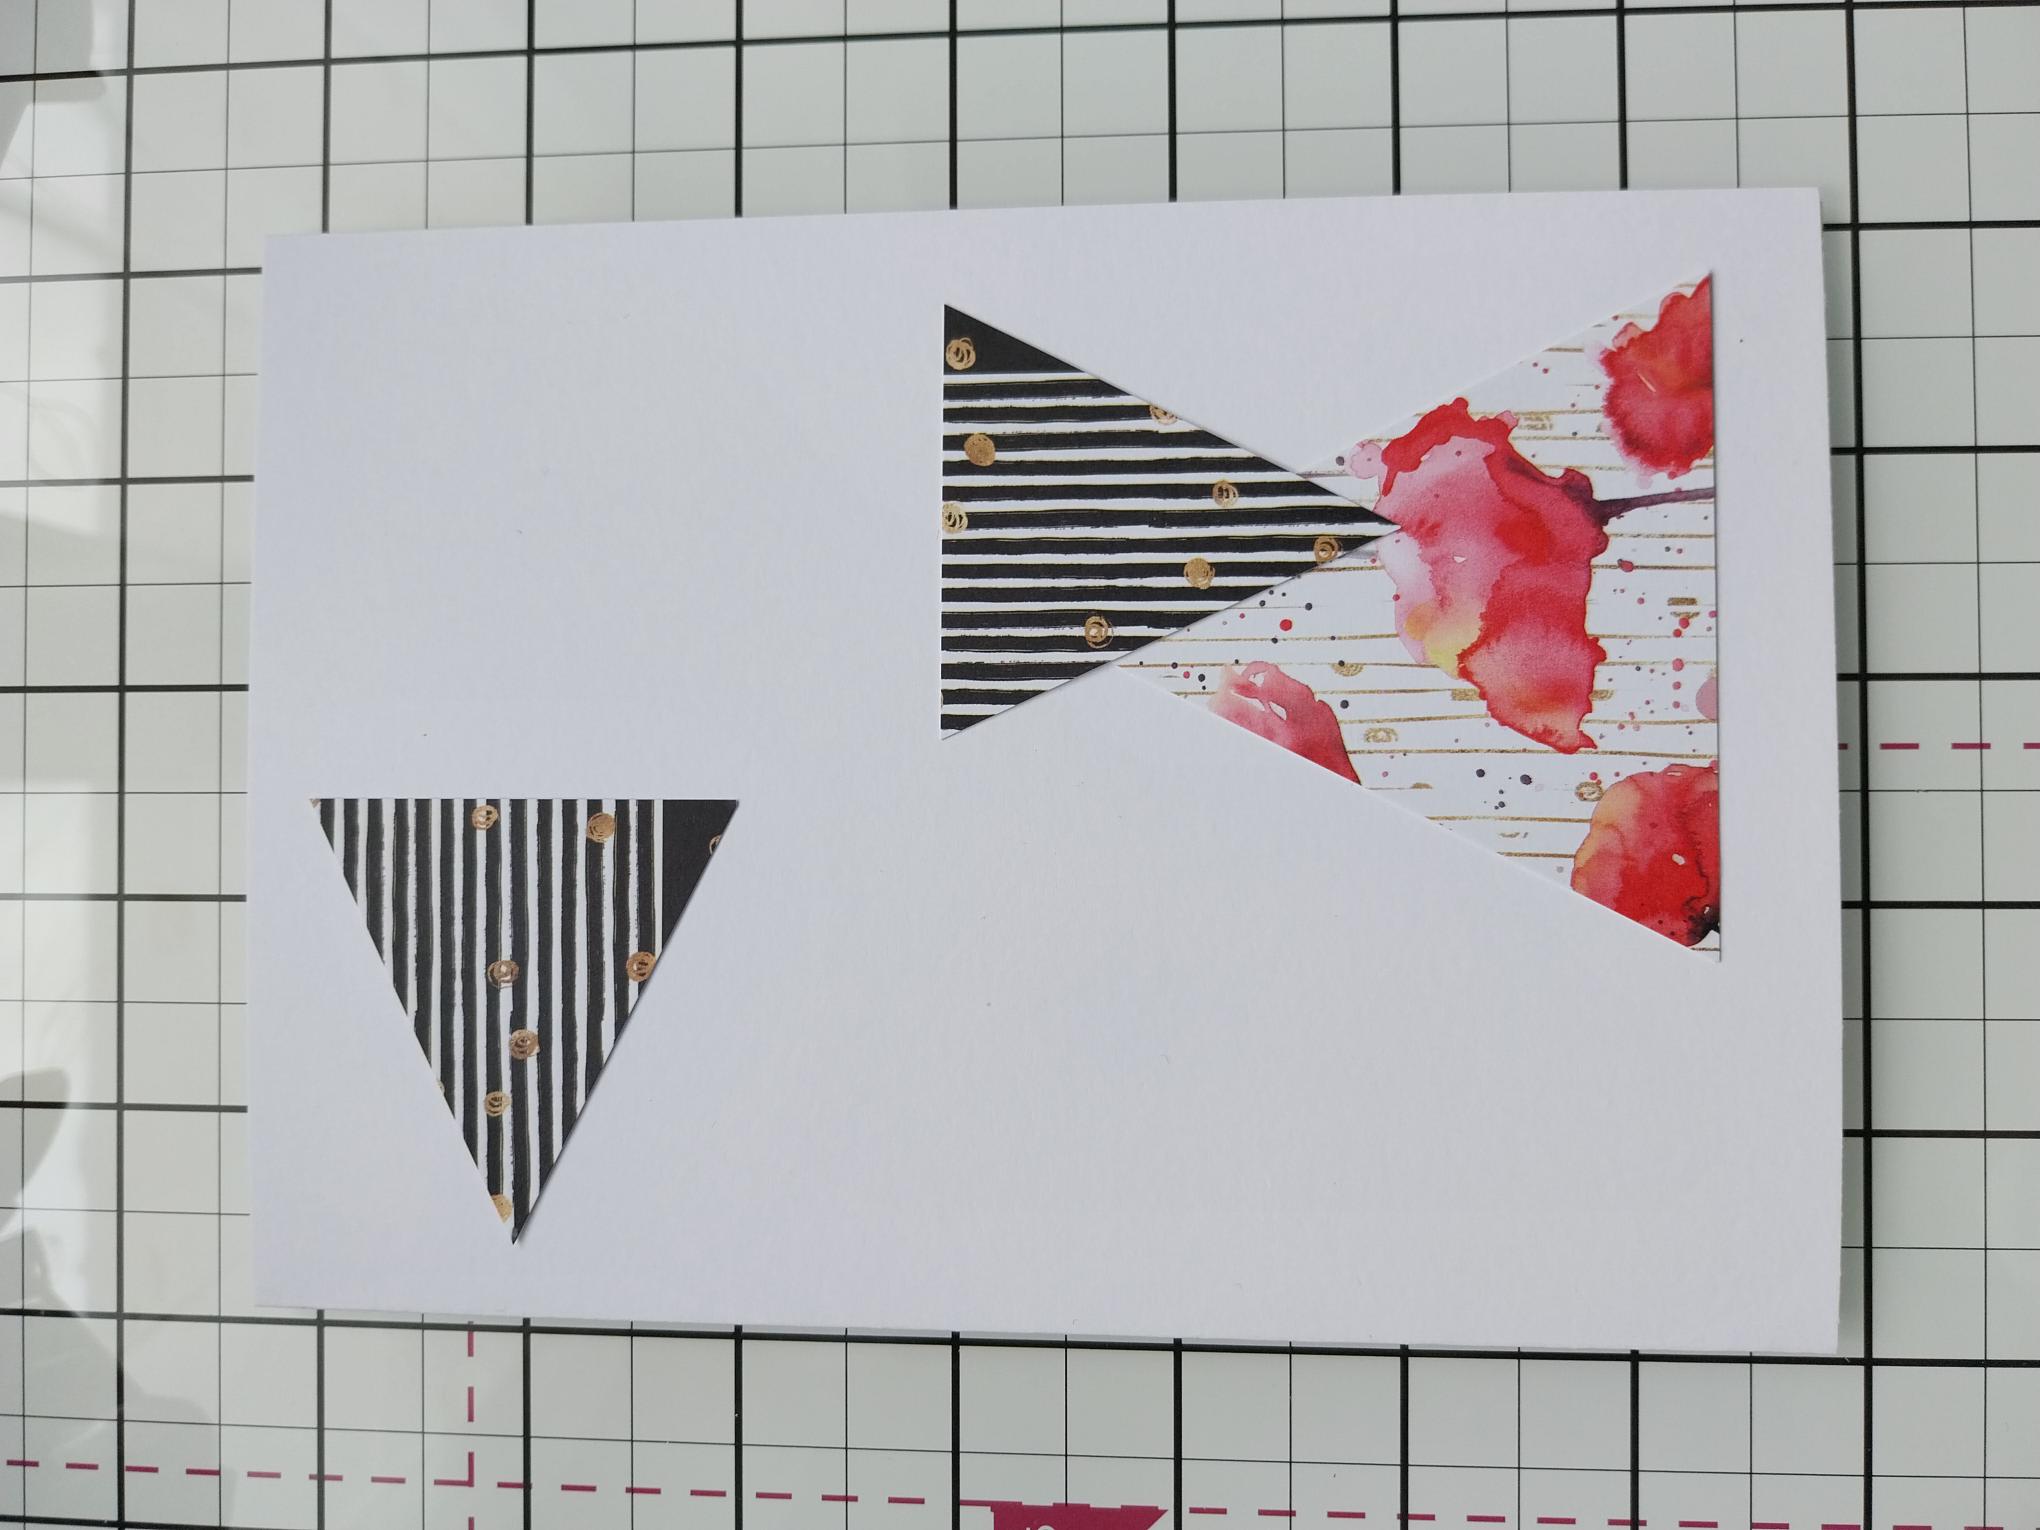
Cut TWO 2" squares from the black decorative paper and ONE 3" square from the Poppy paper, both papers being from the Bloom & Wild Paper Pack. |
|
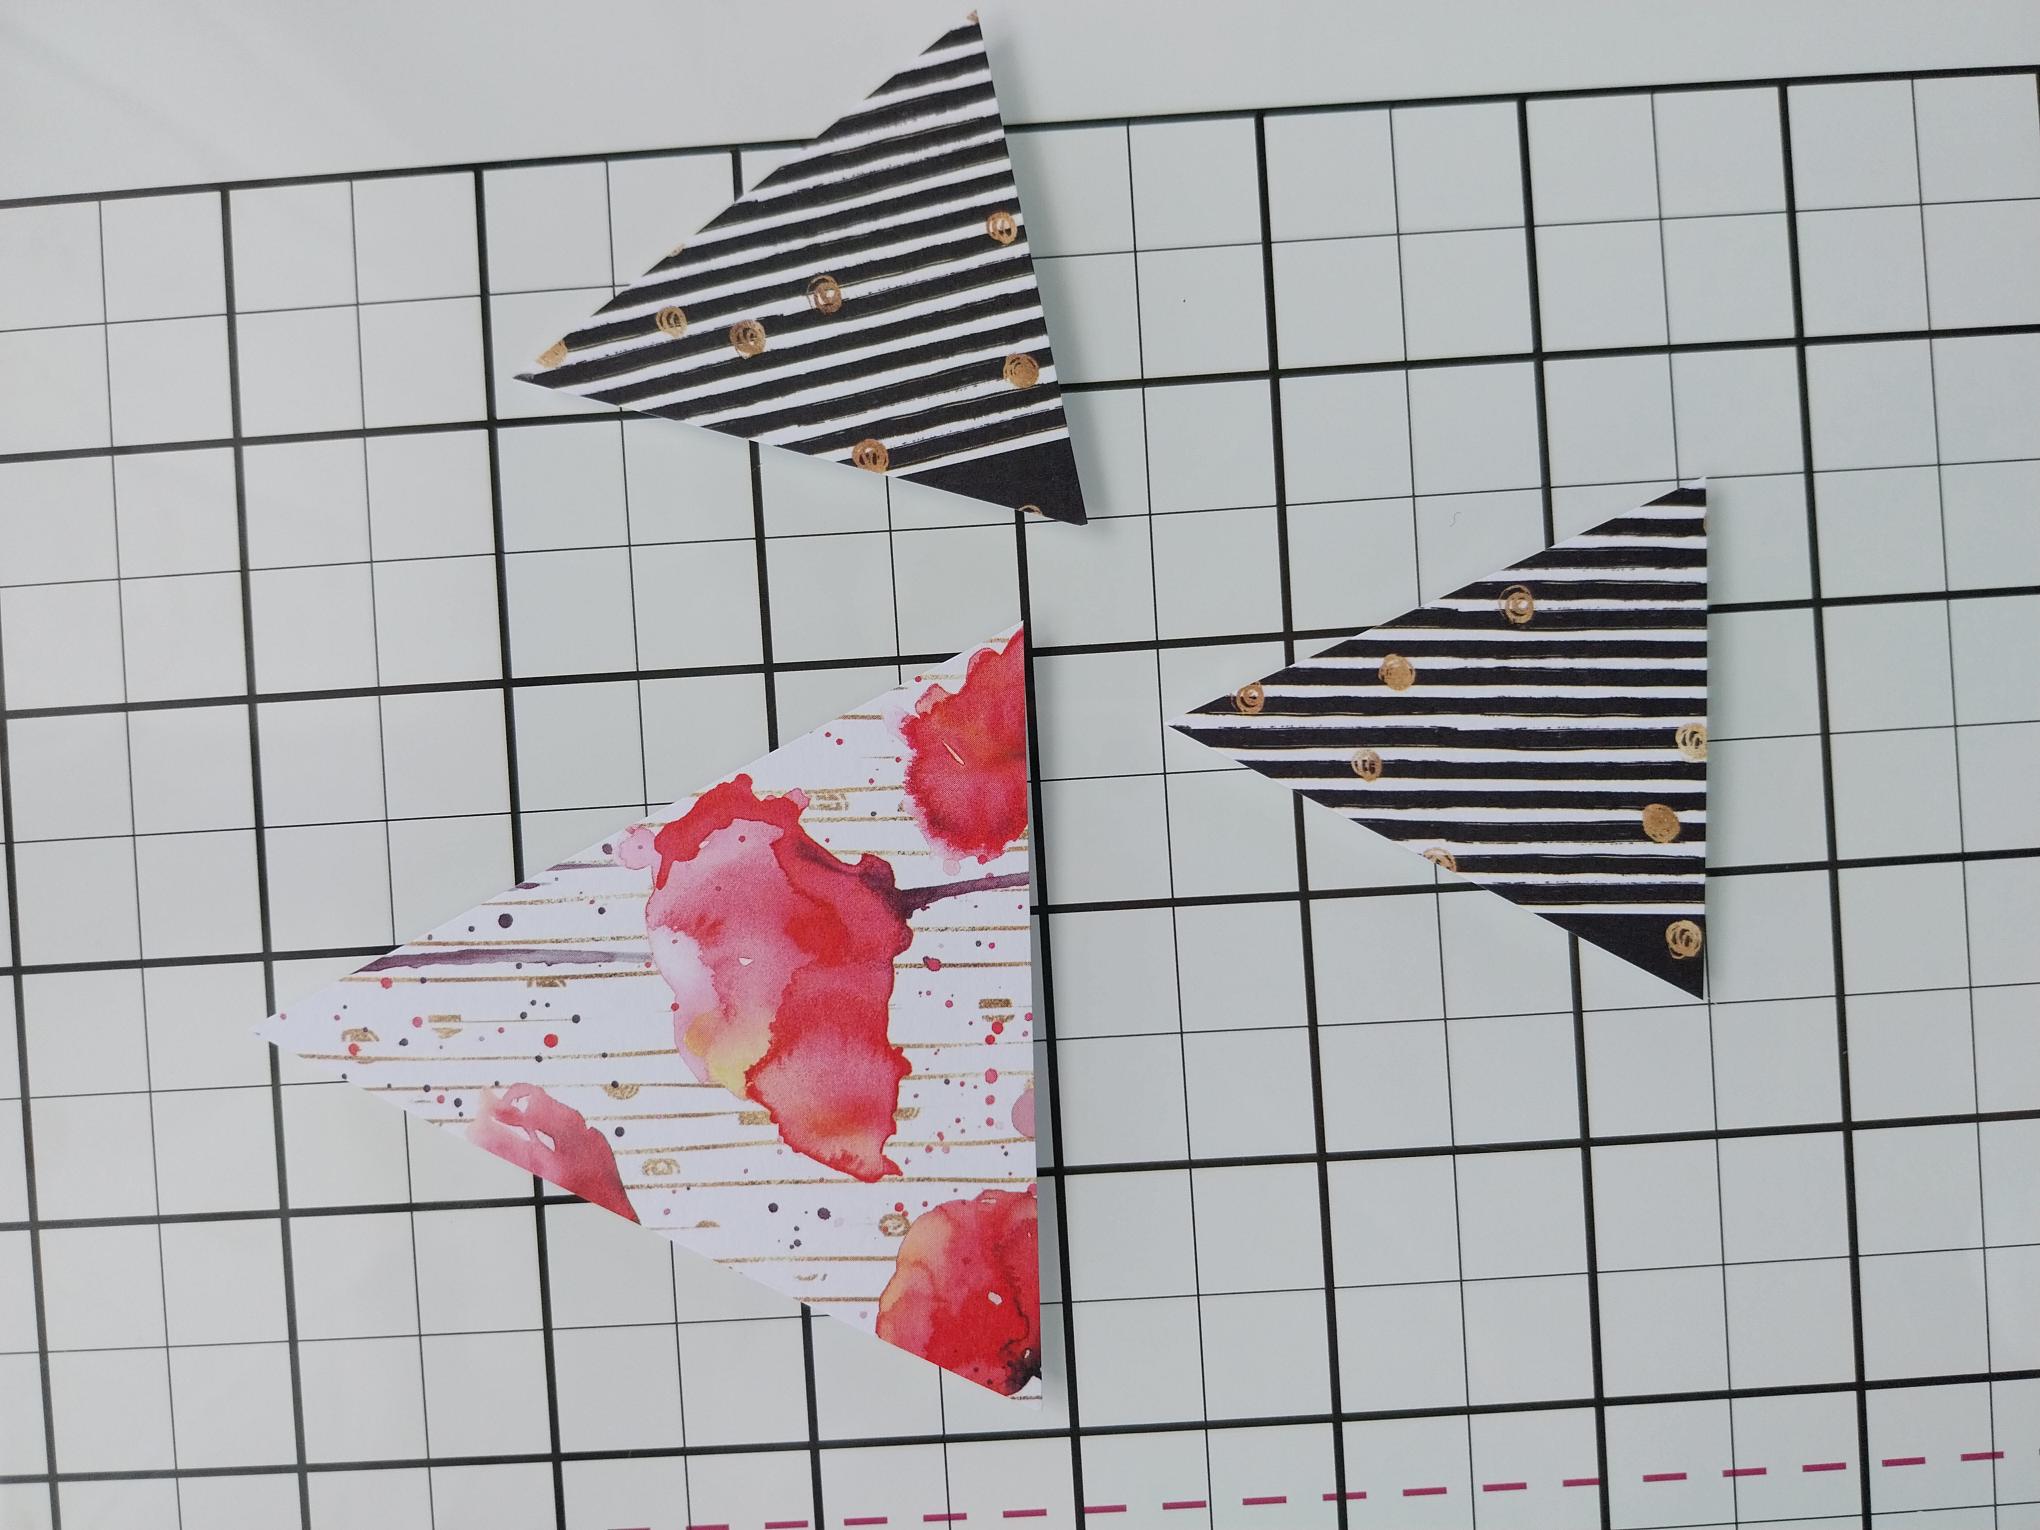
Cut them in to triangles and keep 3, keeping the left over pieces for future projects. NB: The "type" of triangle you cut is irrelevant and totally up to you. |
|
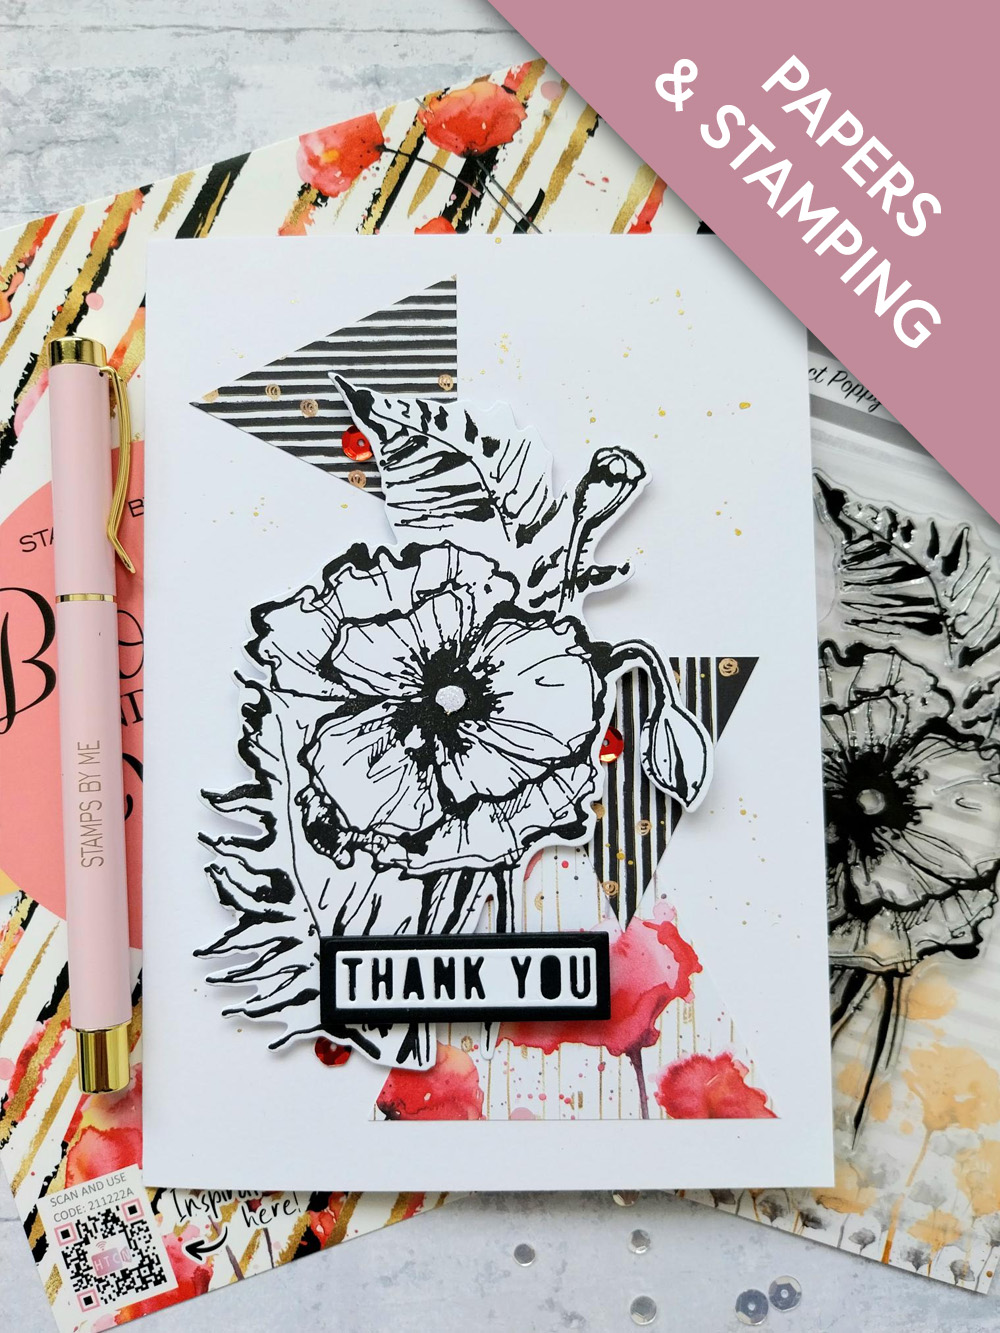
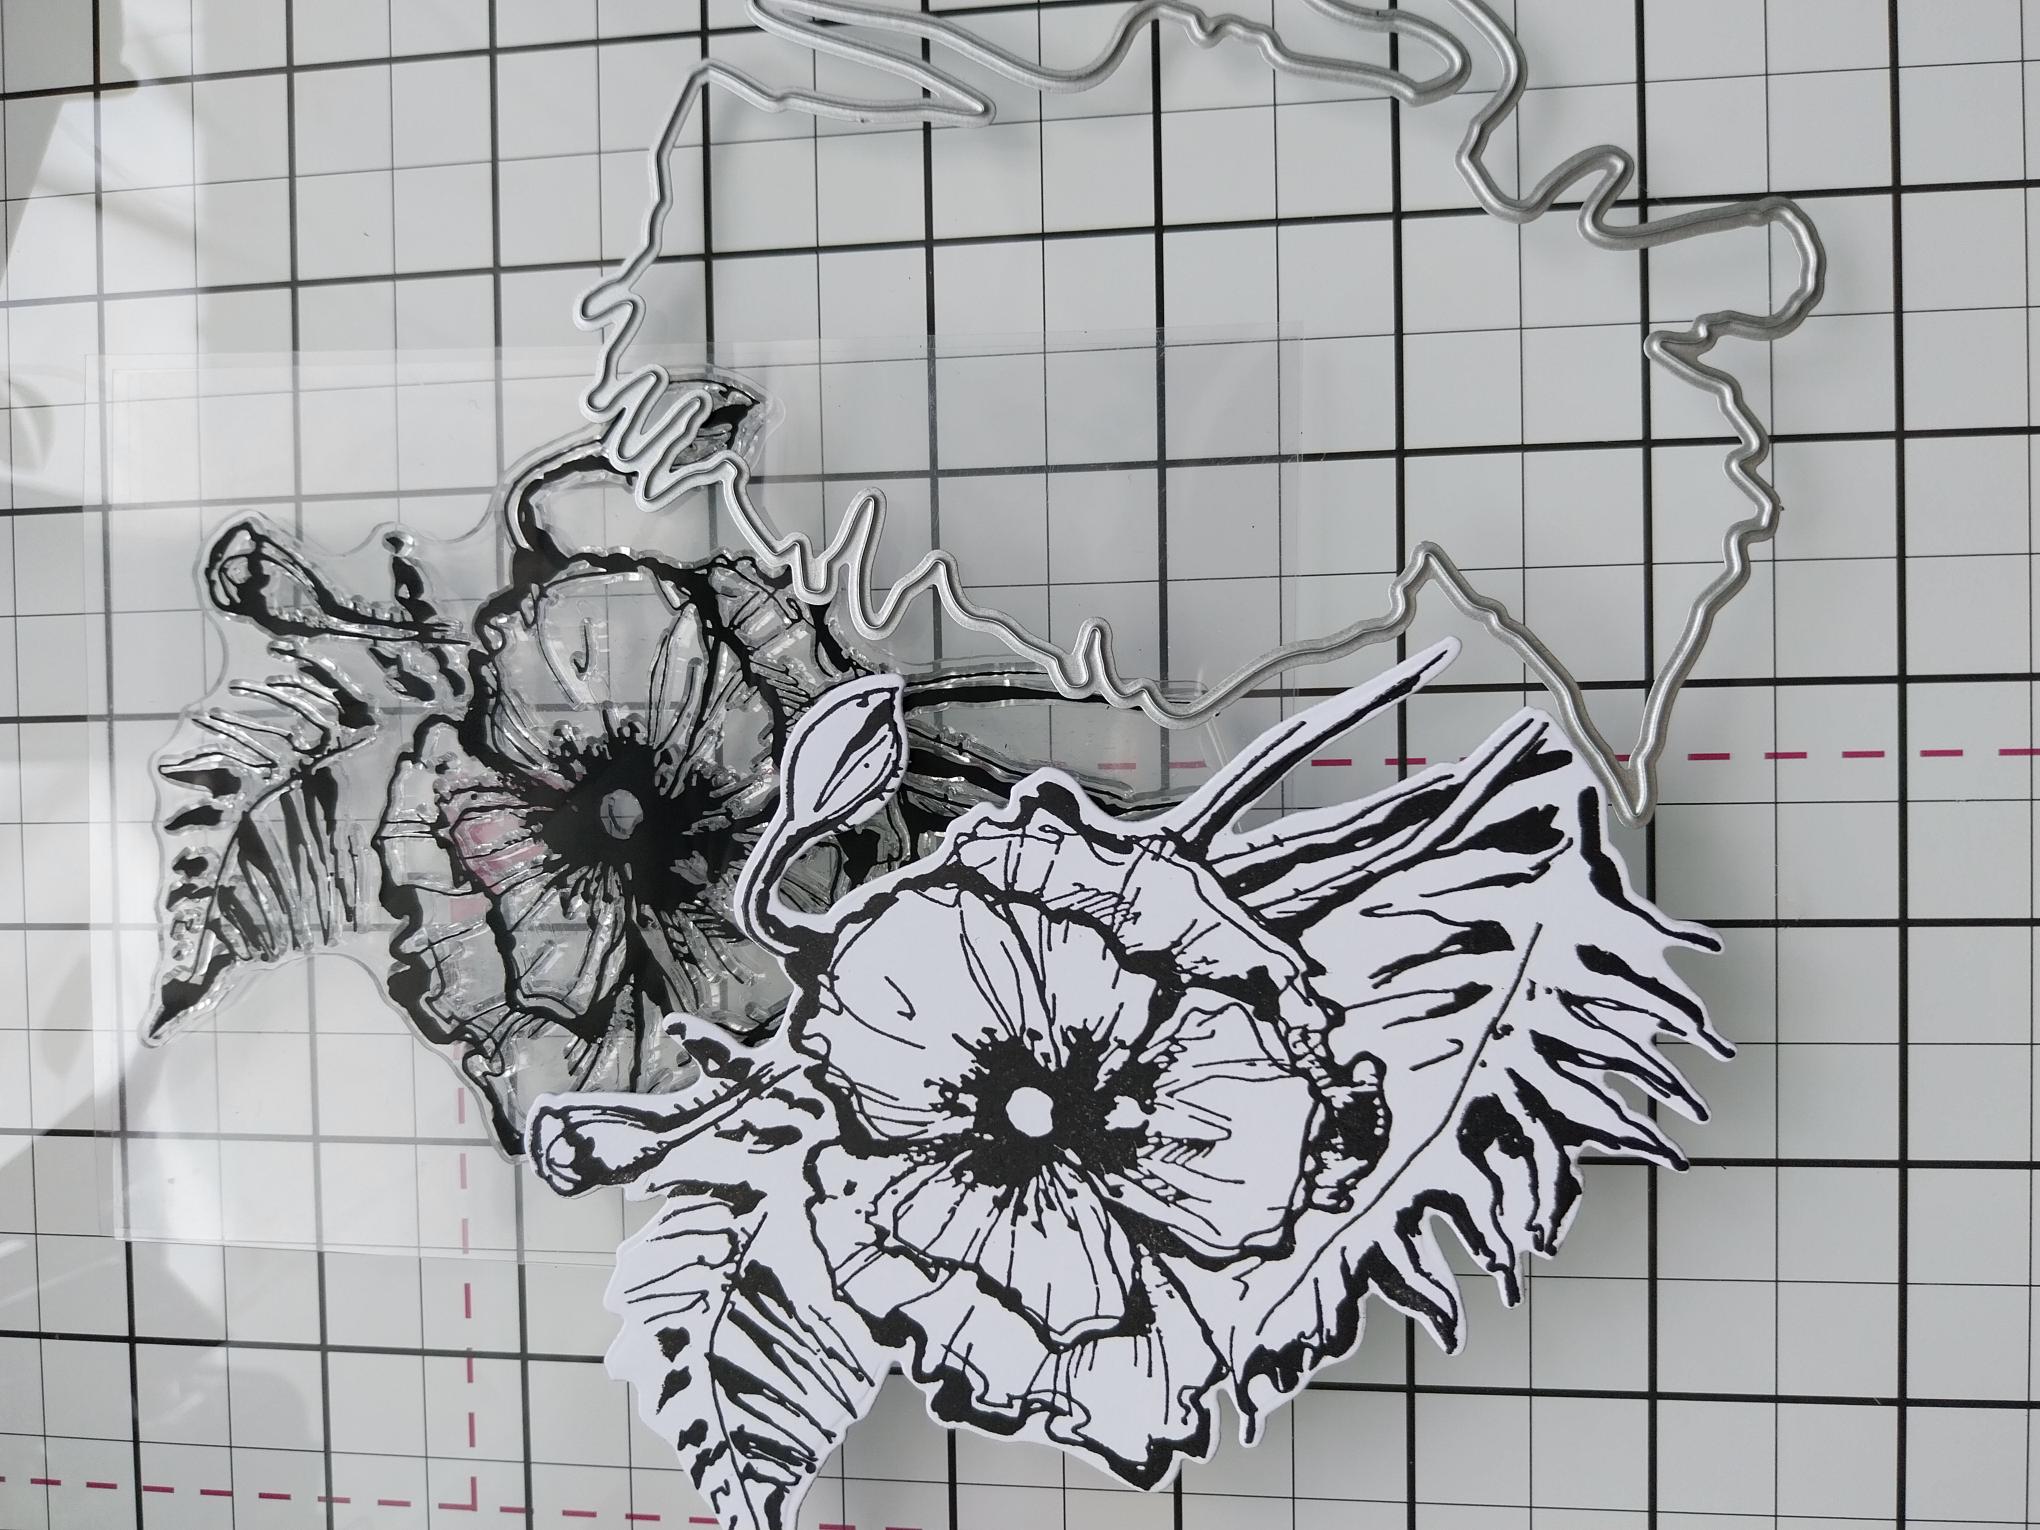
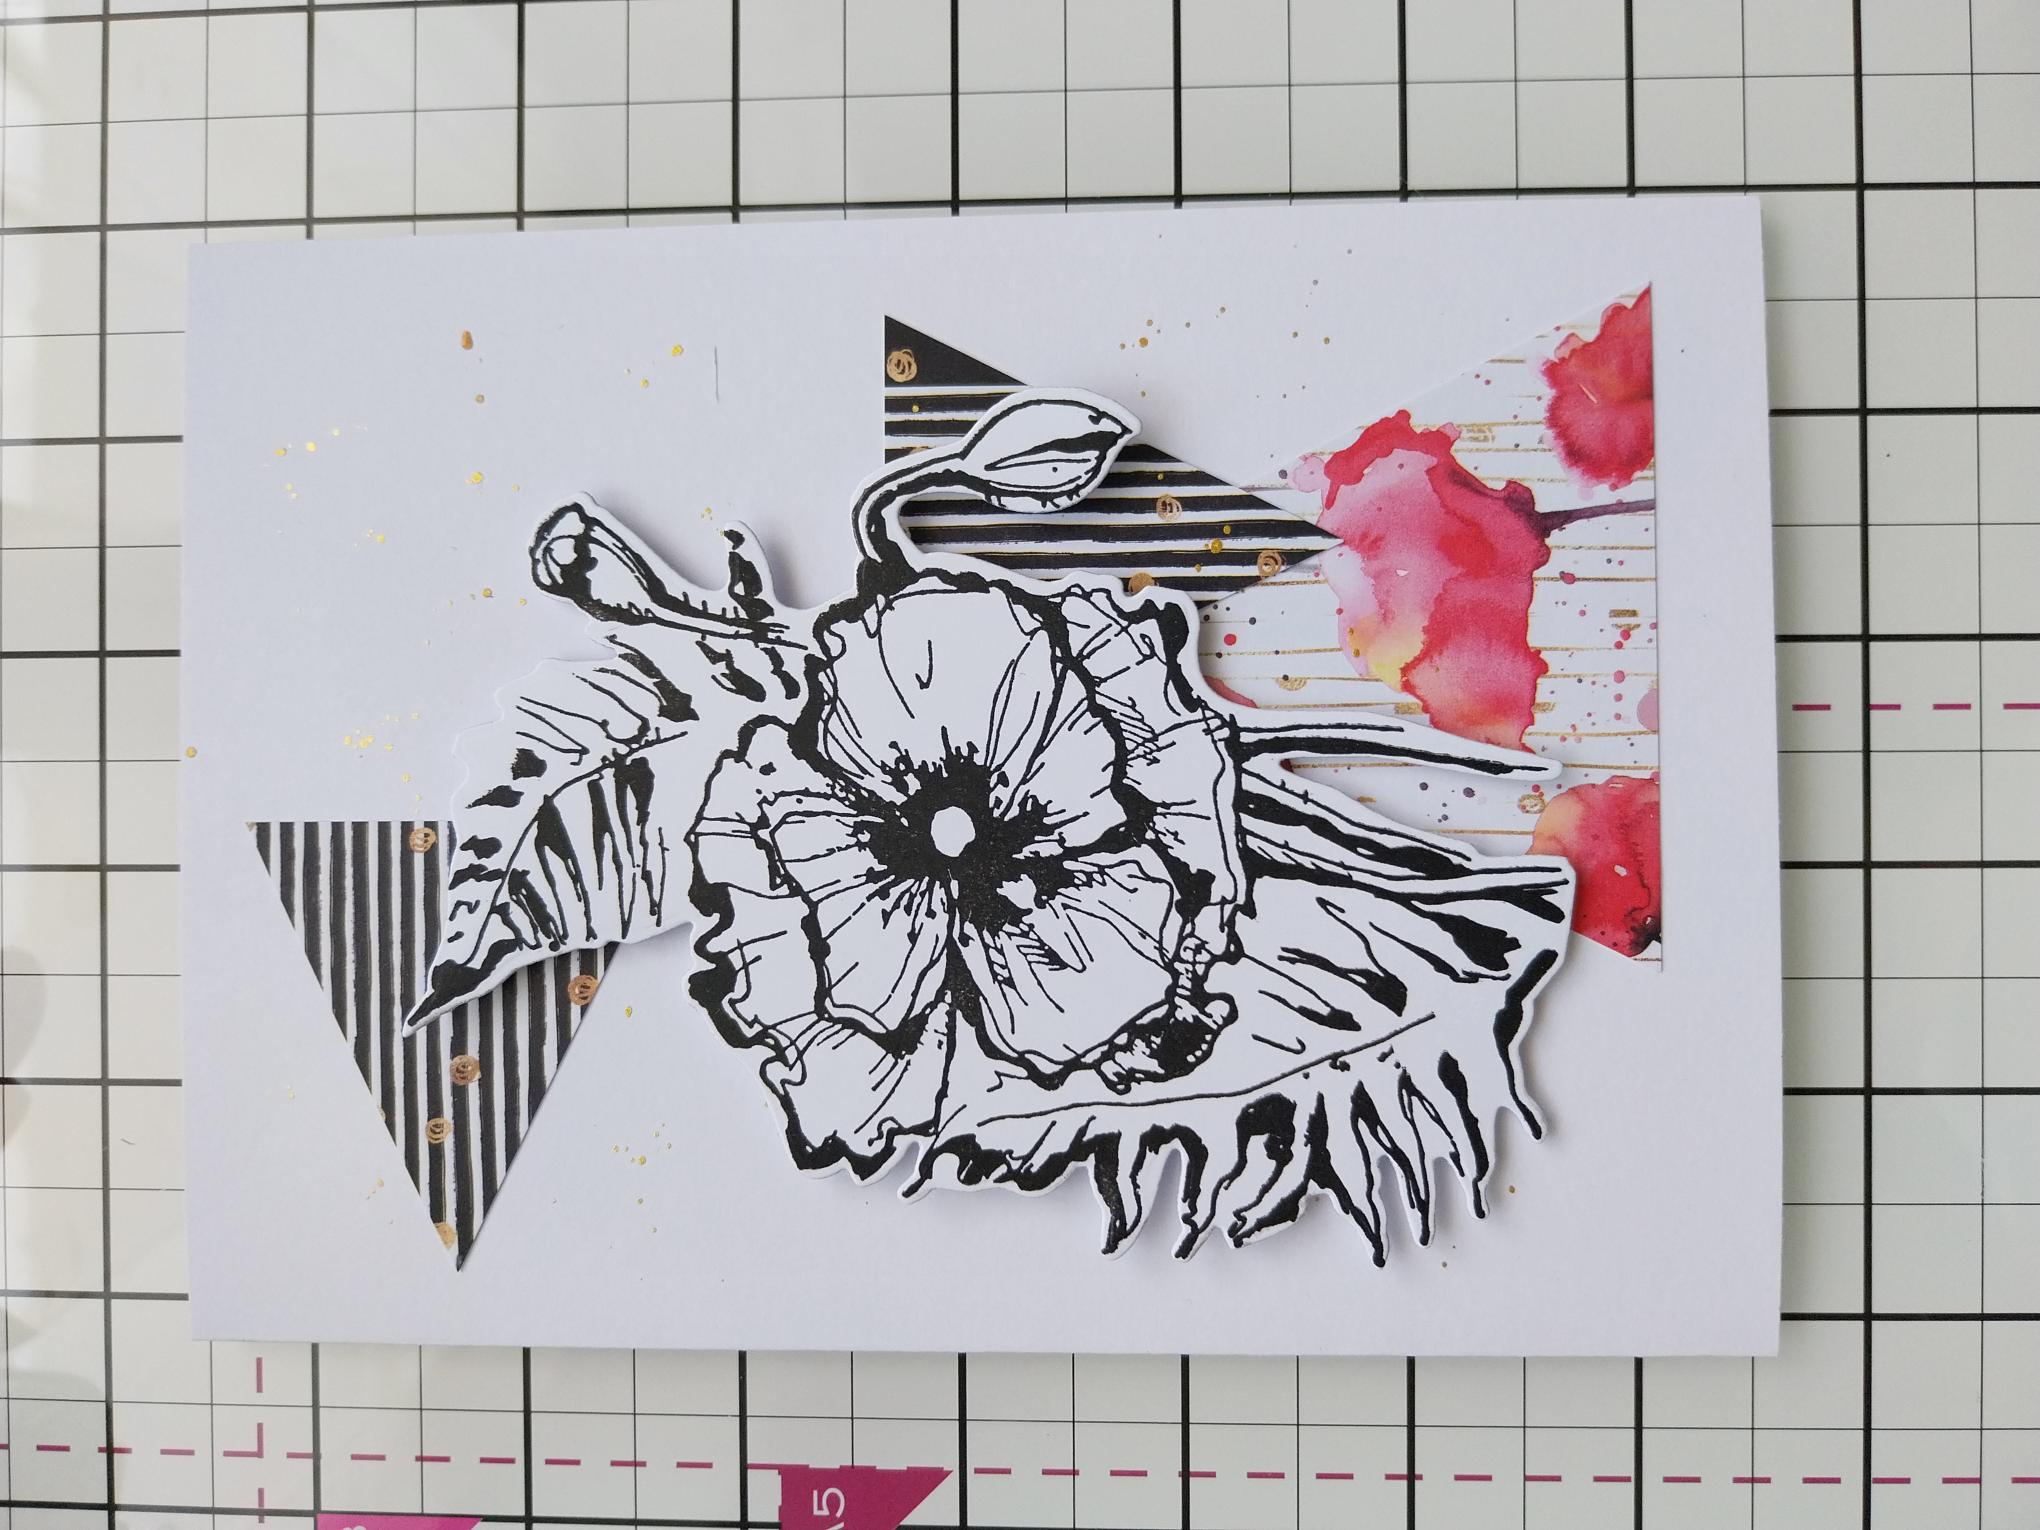
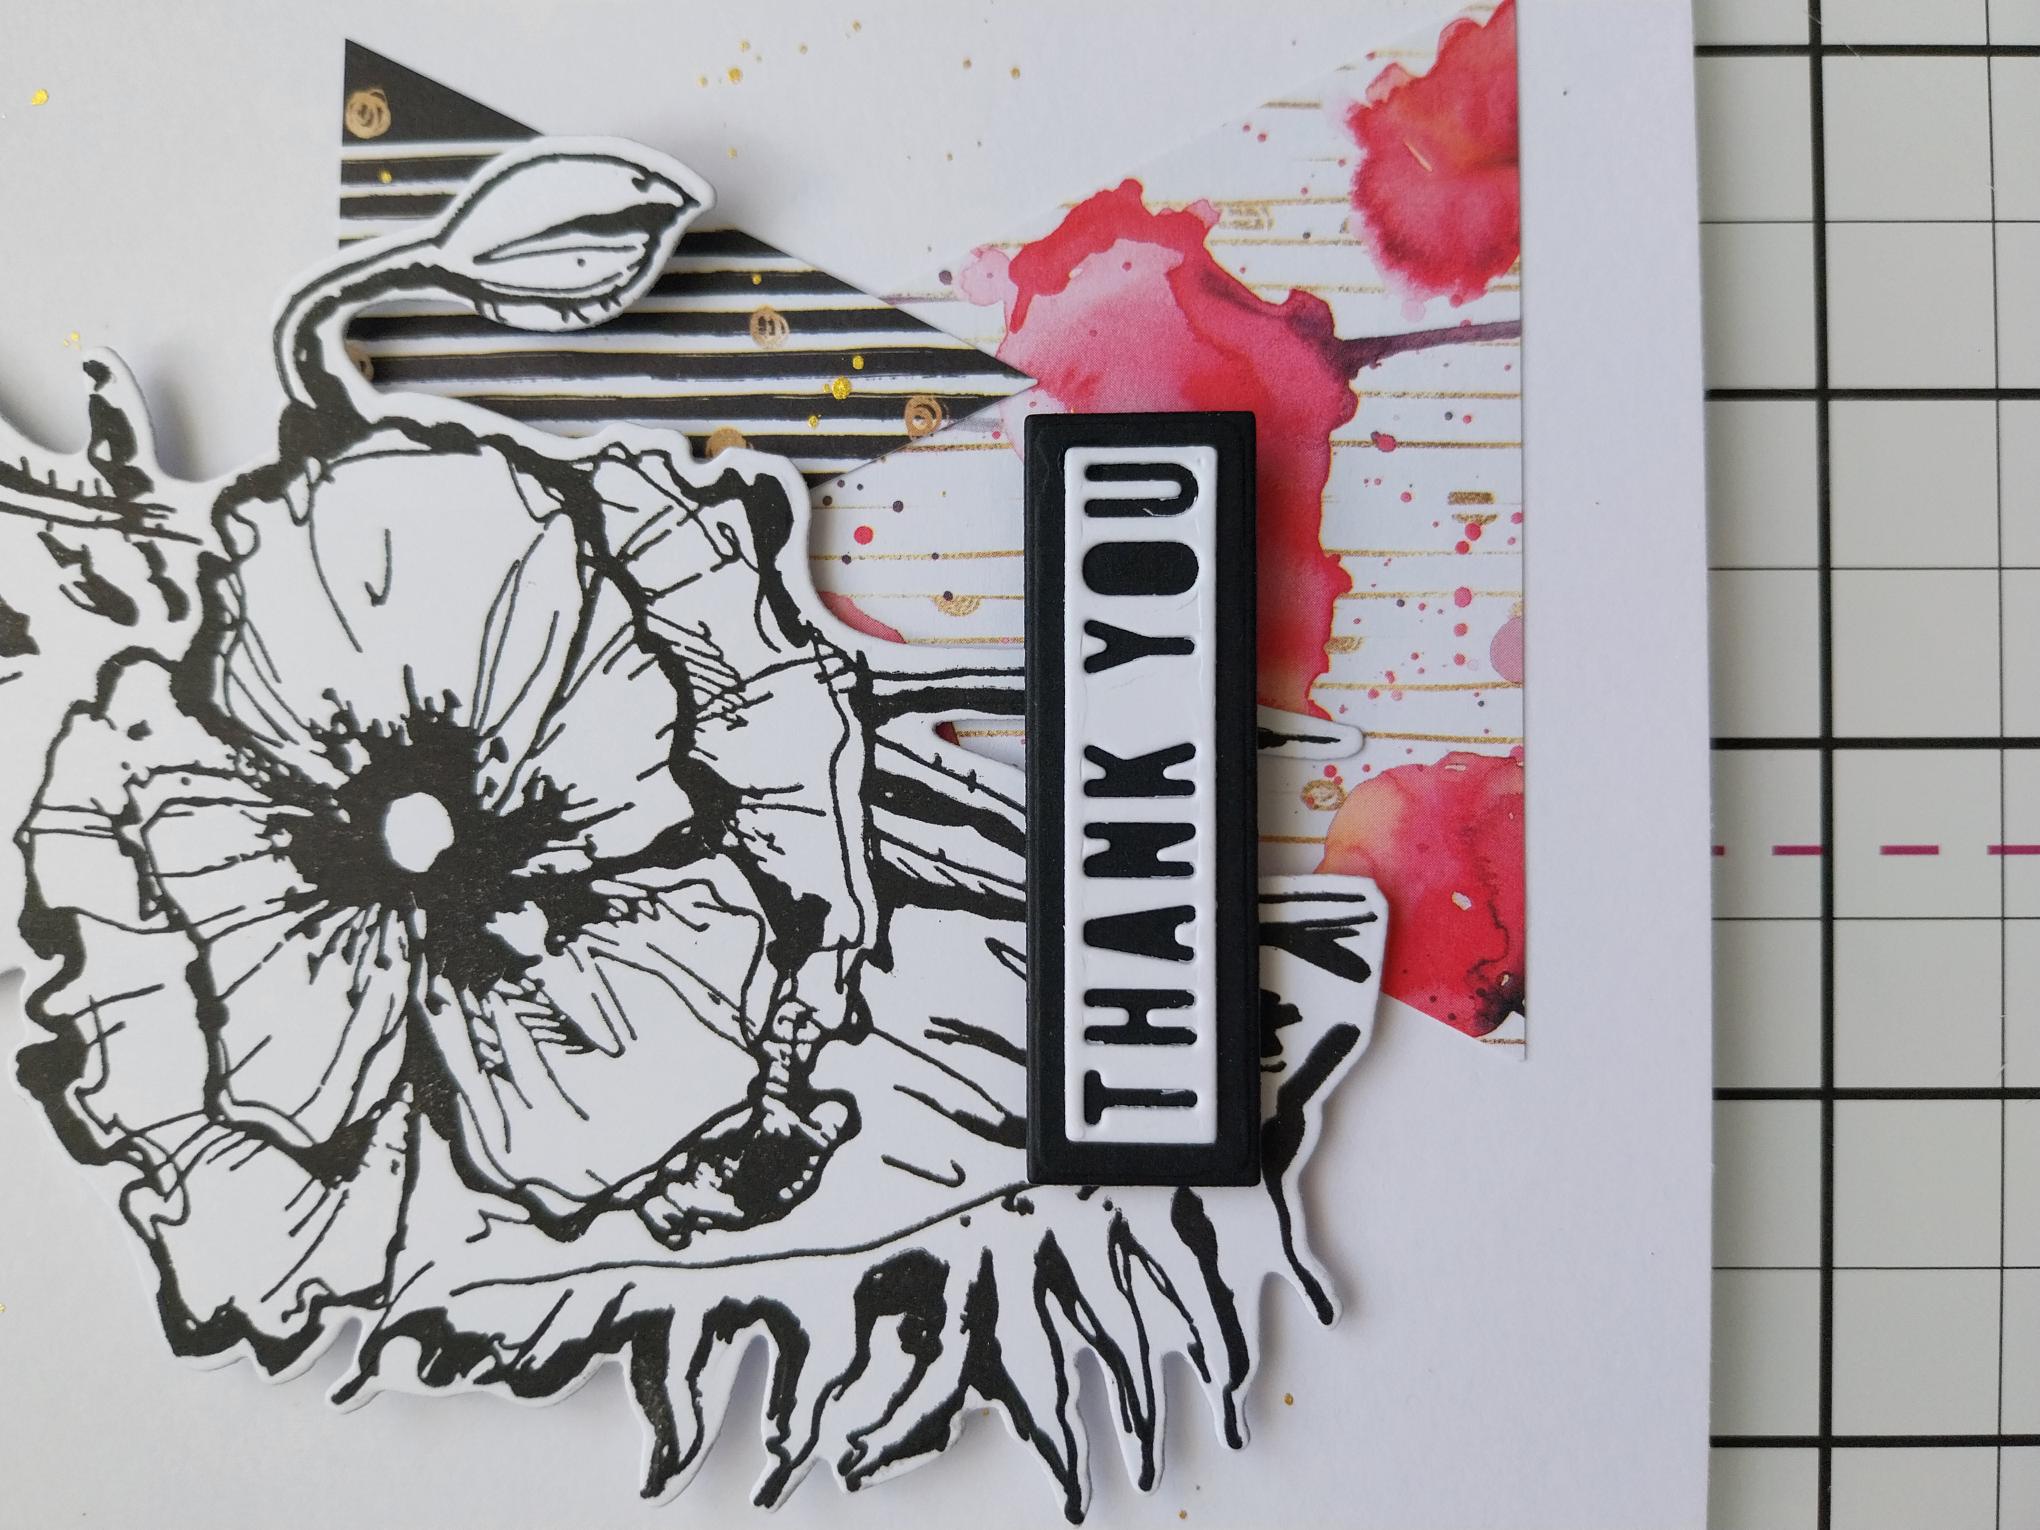
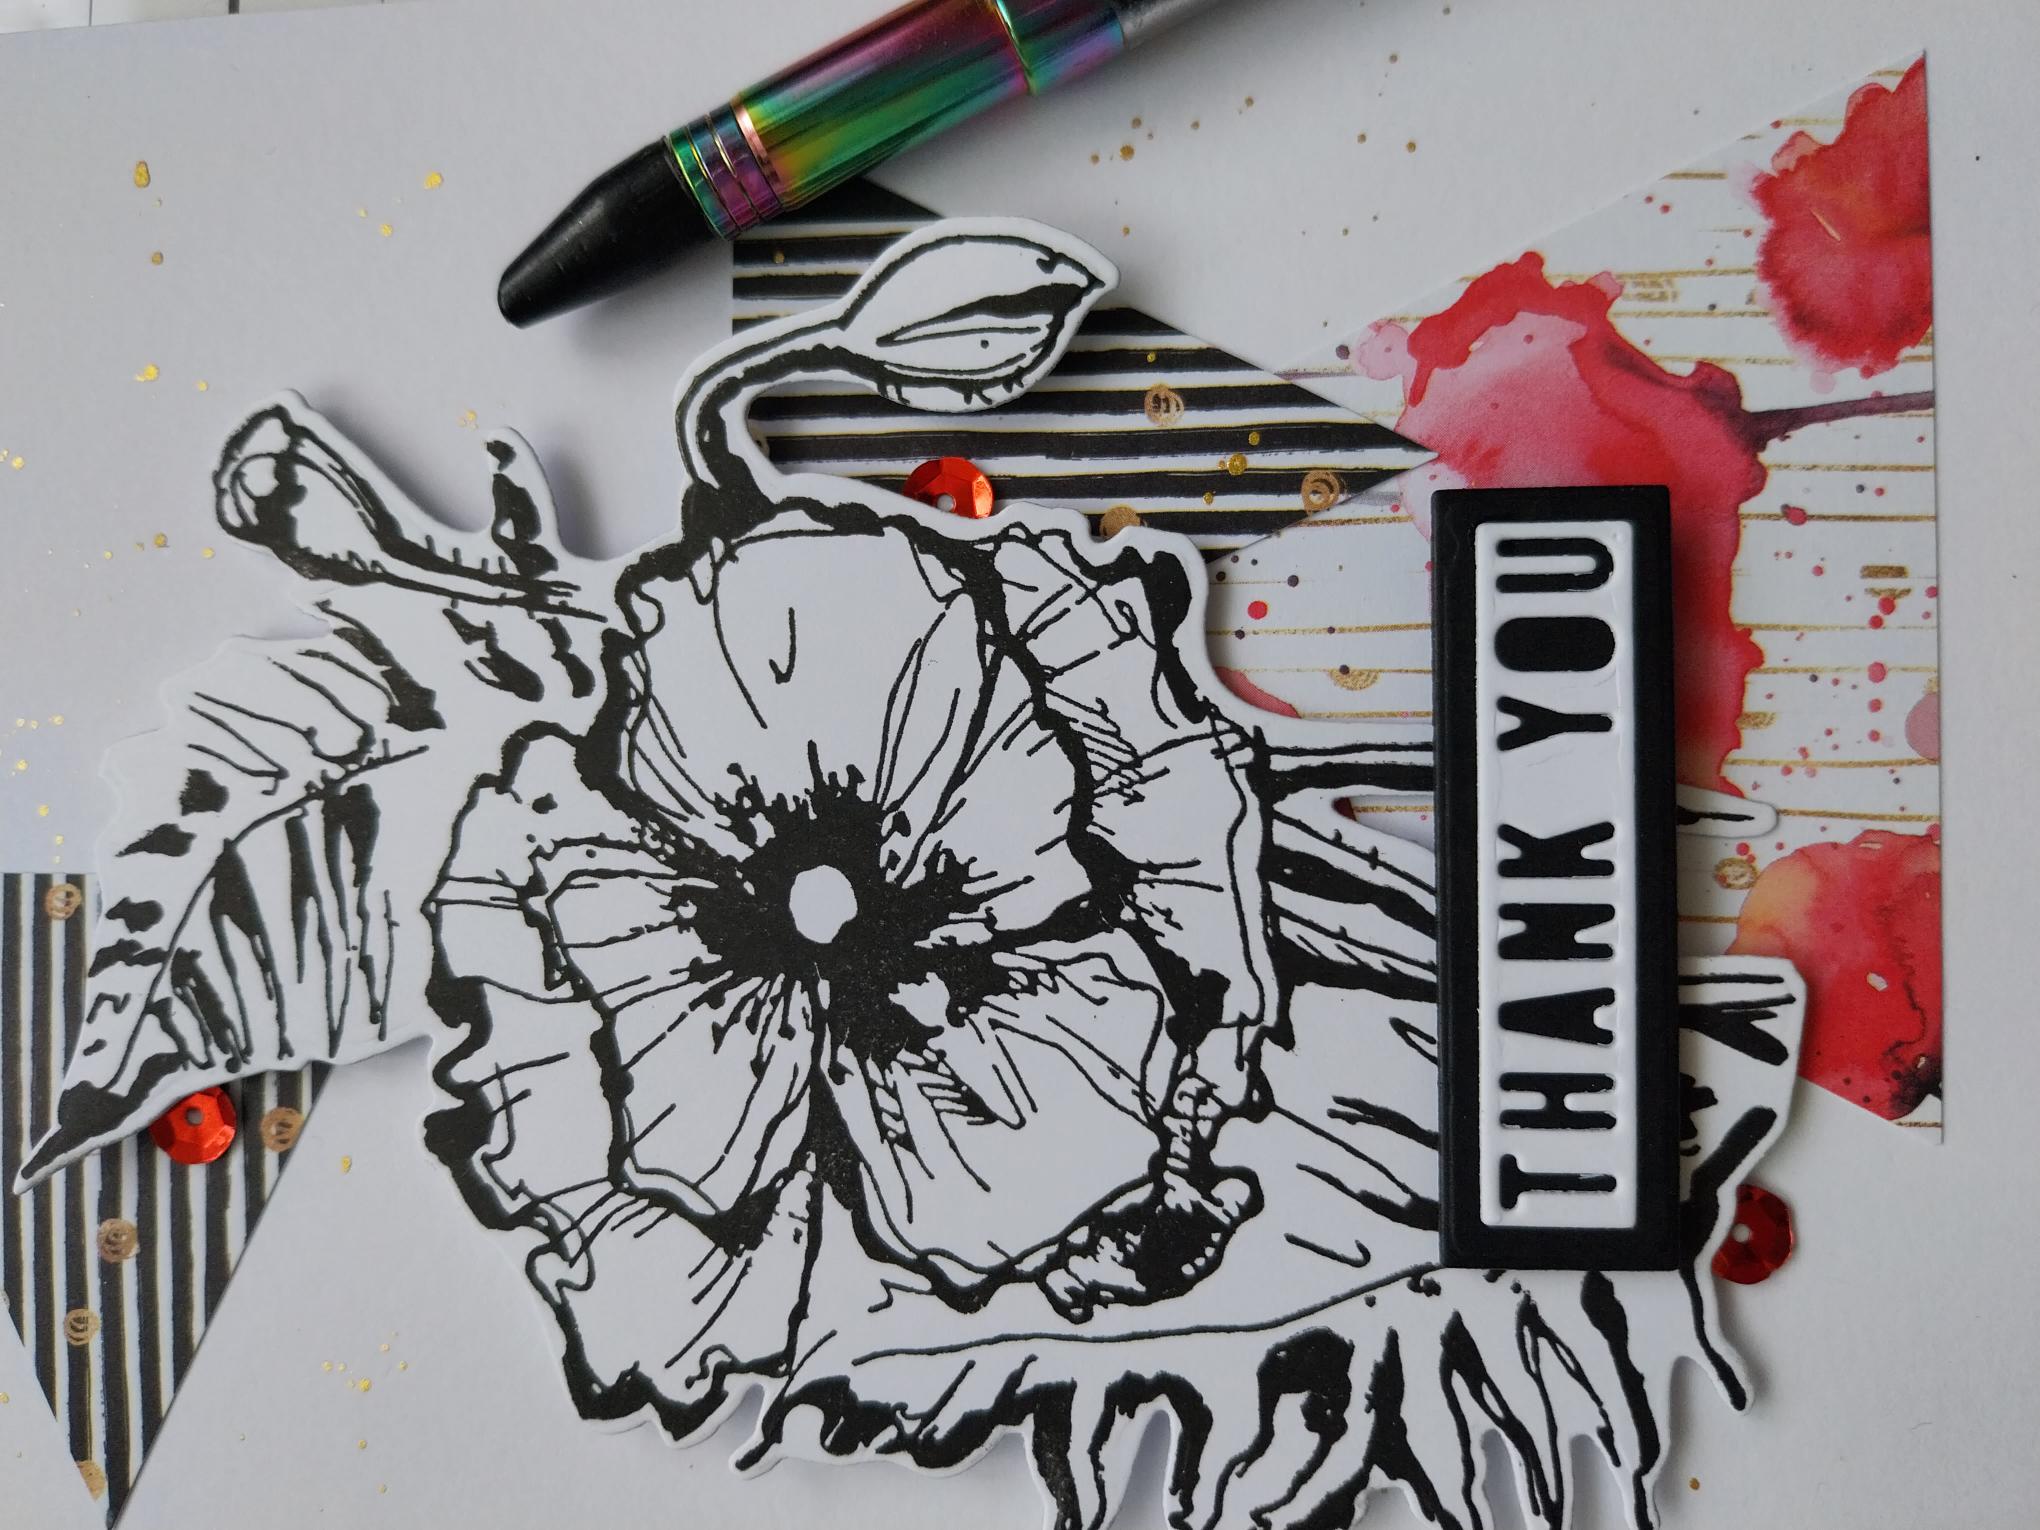
Stamp the Perfect Poppy in Midnight, on to a piece of white card and use the coordinating die to cut it out. |
|
Using your die cut Poppy as a guide, adhere your papers so they will accentuate the shape and curve of your 3D Poppy. |
|
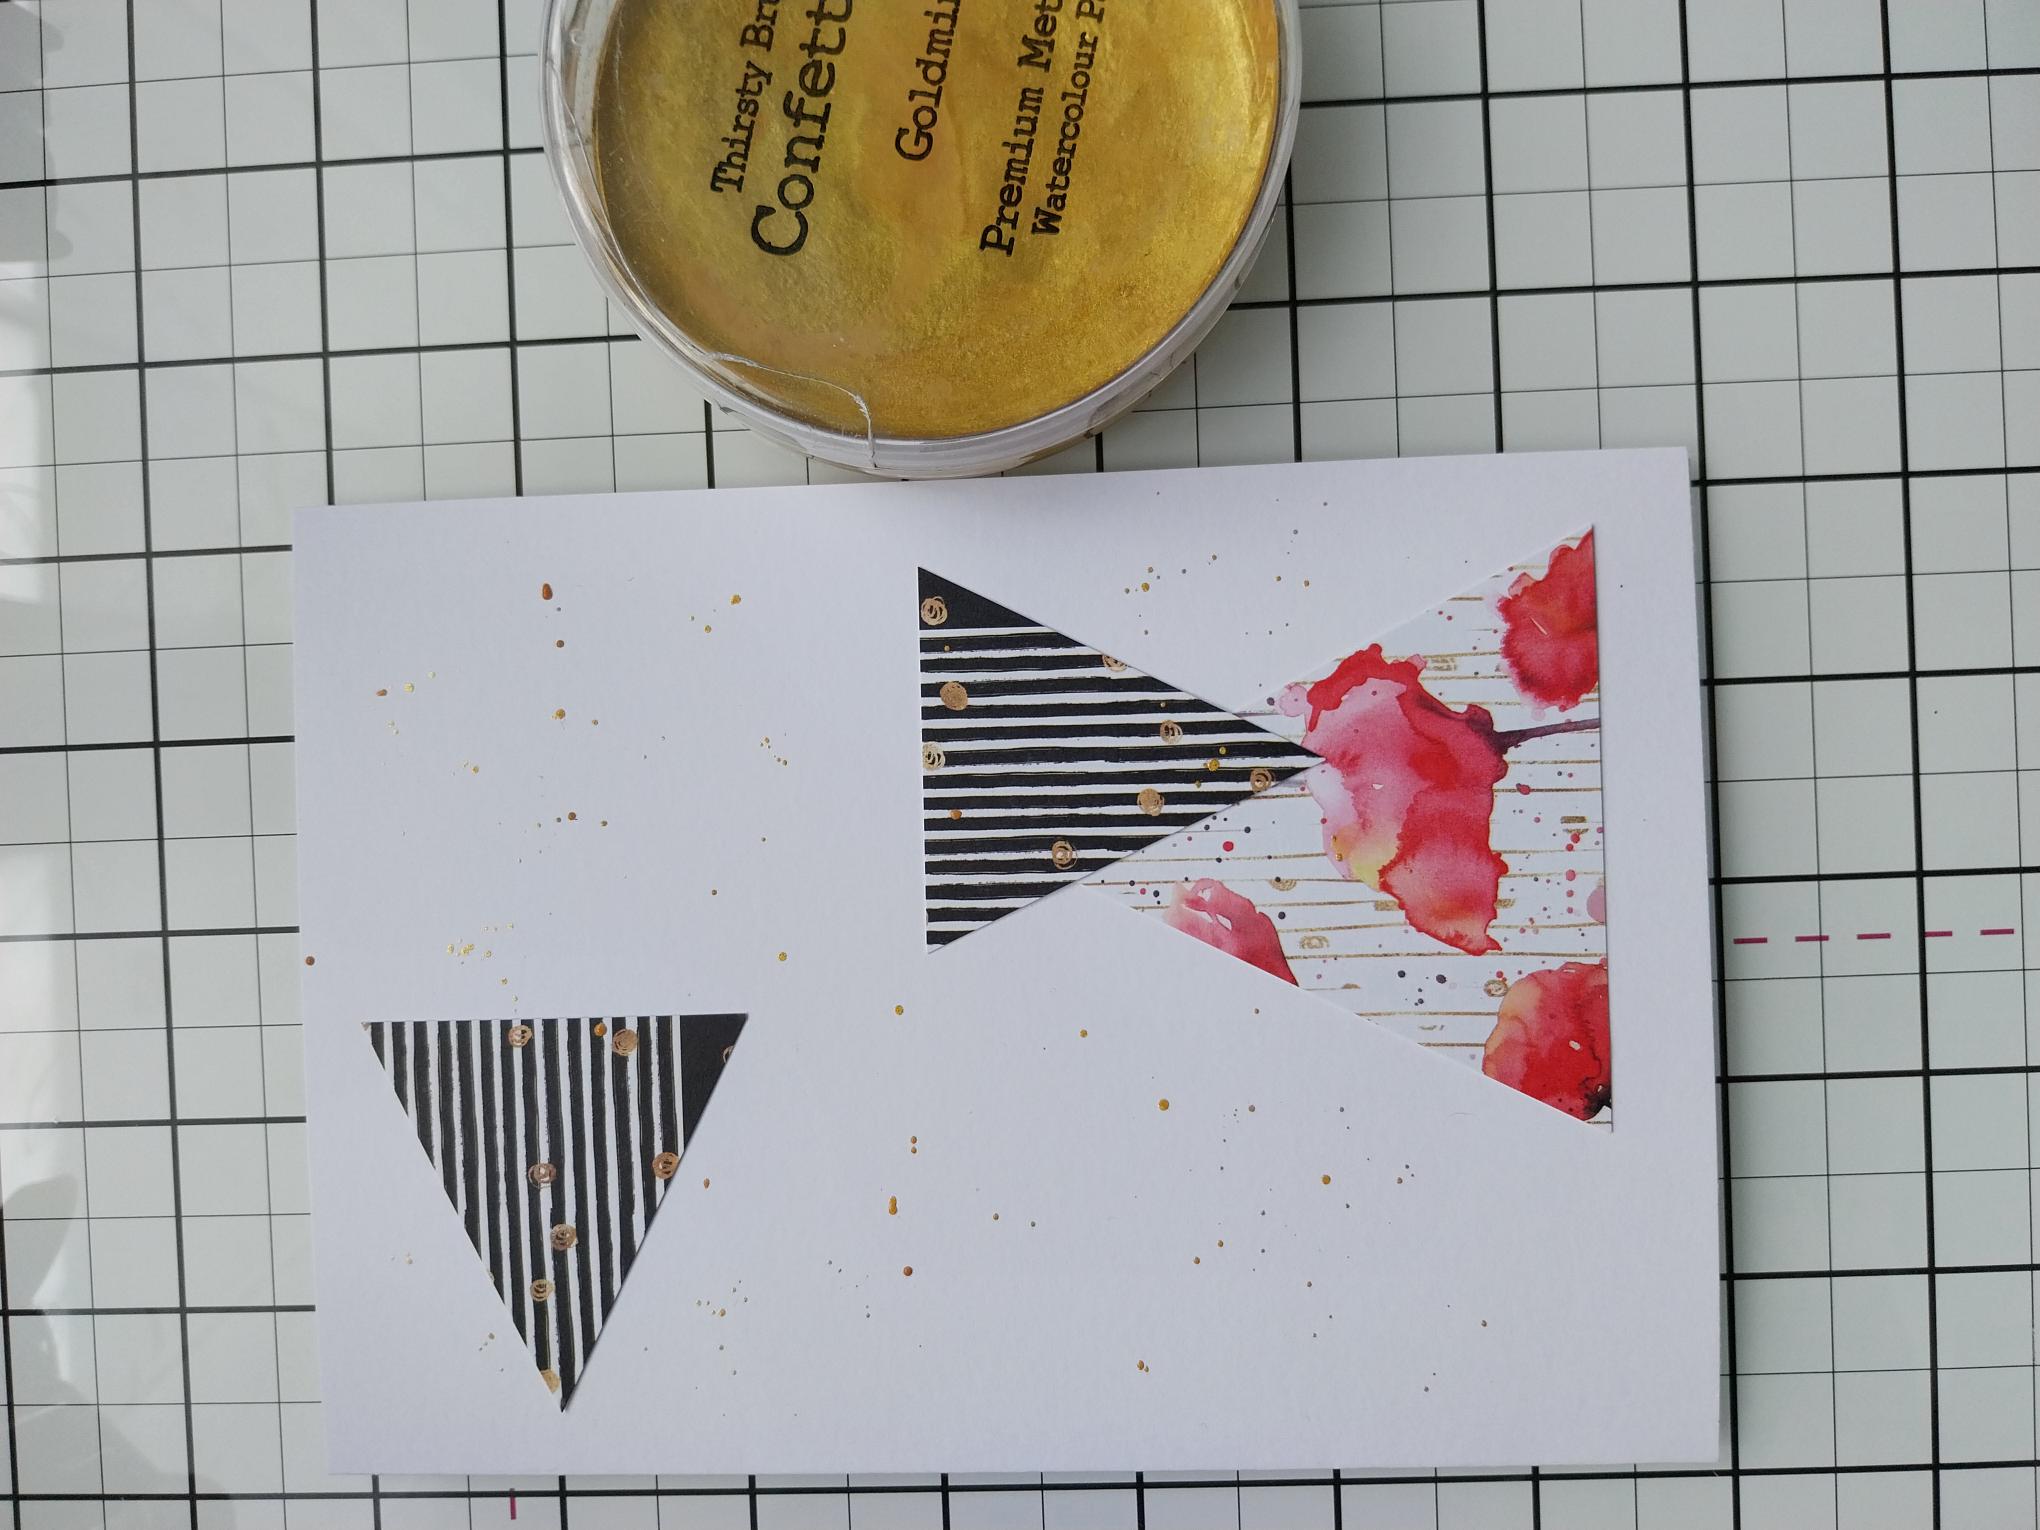
Add a little water to the Goldmine paint and splatter over your artwork. Pop to one side to dry naturally, if possible. |
|
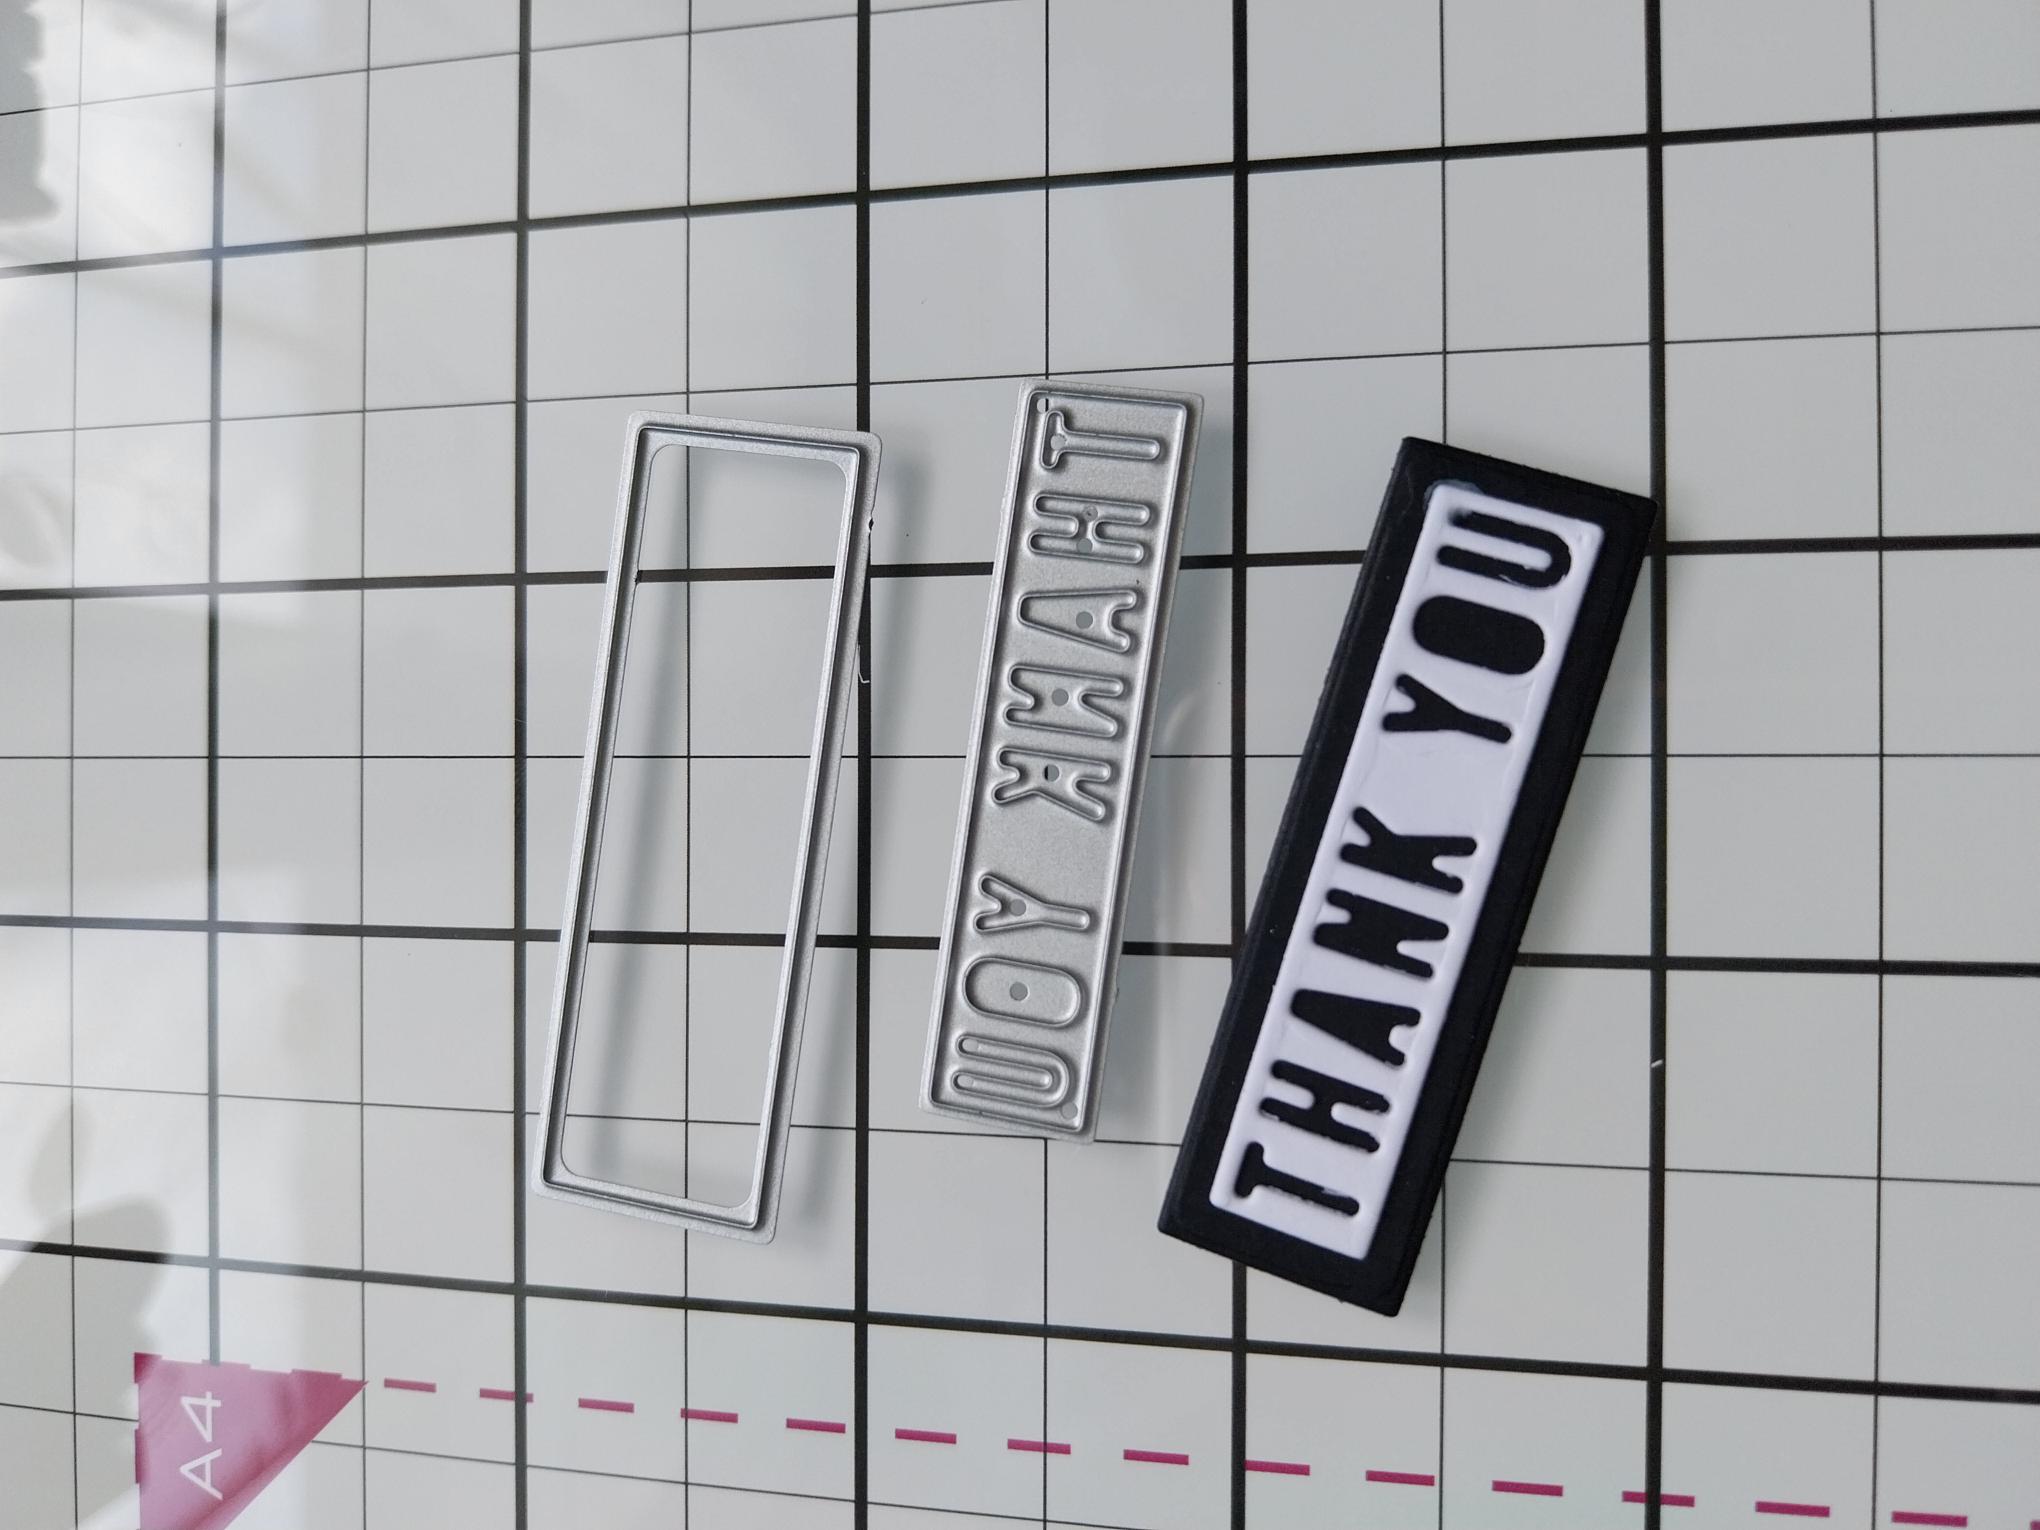
Secure the detailed sentiment die on a scrap of white card and the layering die on black card and run both through your die cutting machine. |
|
Adhere your 3D poppy on to your card, with foam pads. |
|
Use a foam pad to adhere the sentiment across the bottom of your Poppy. |
|
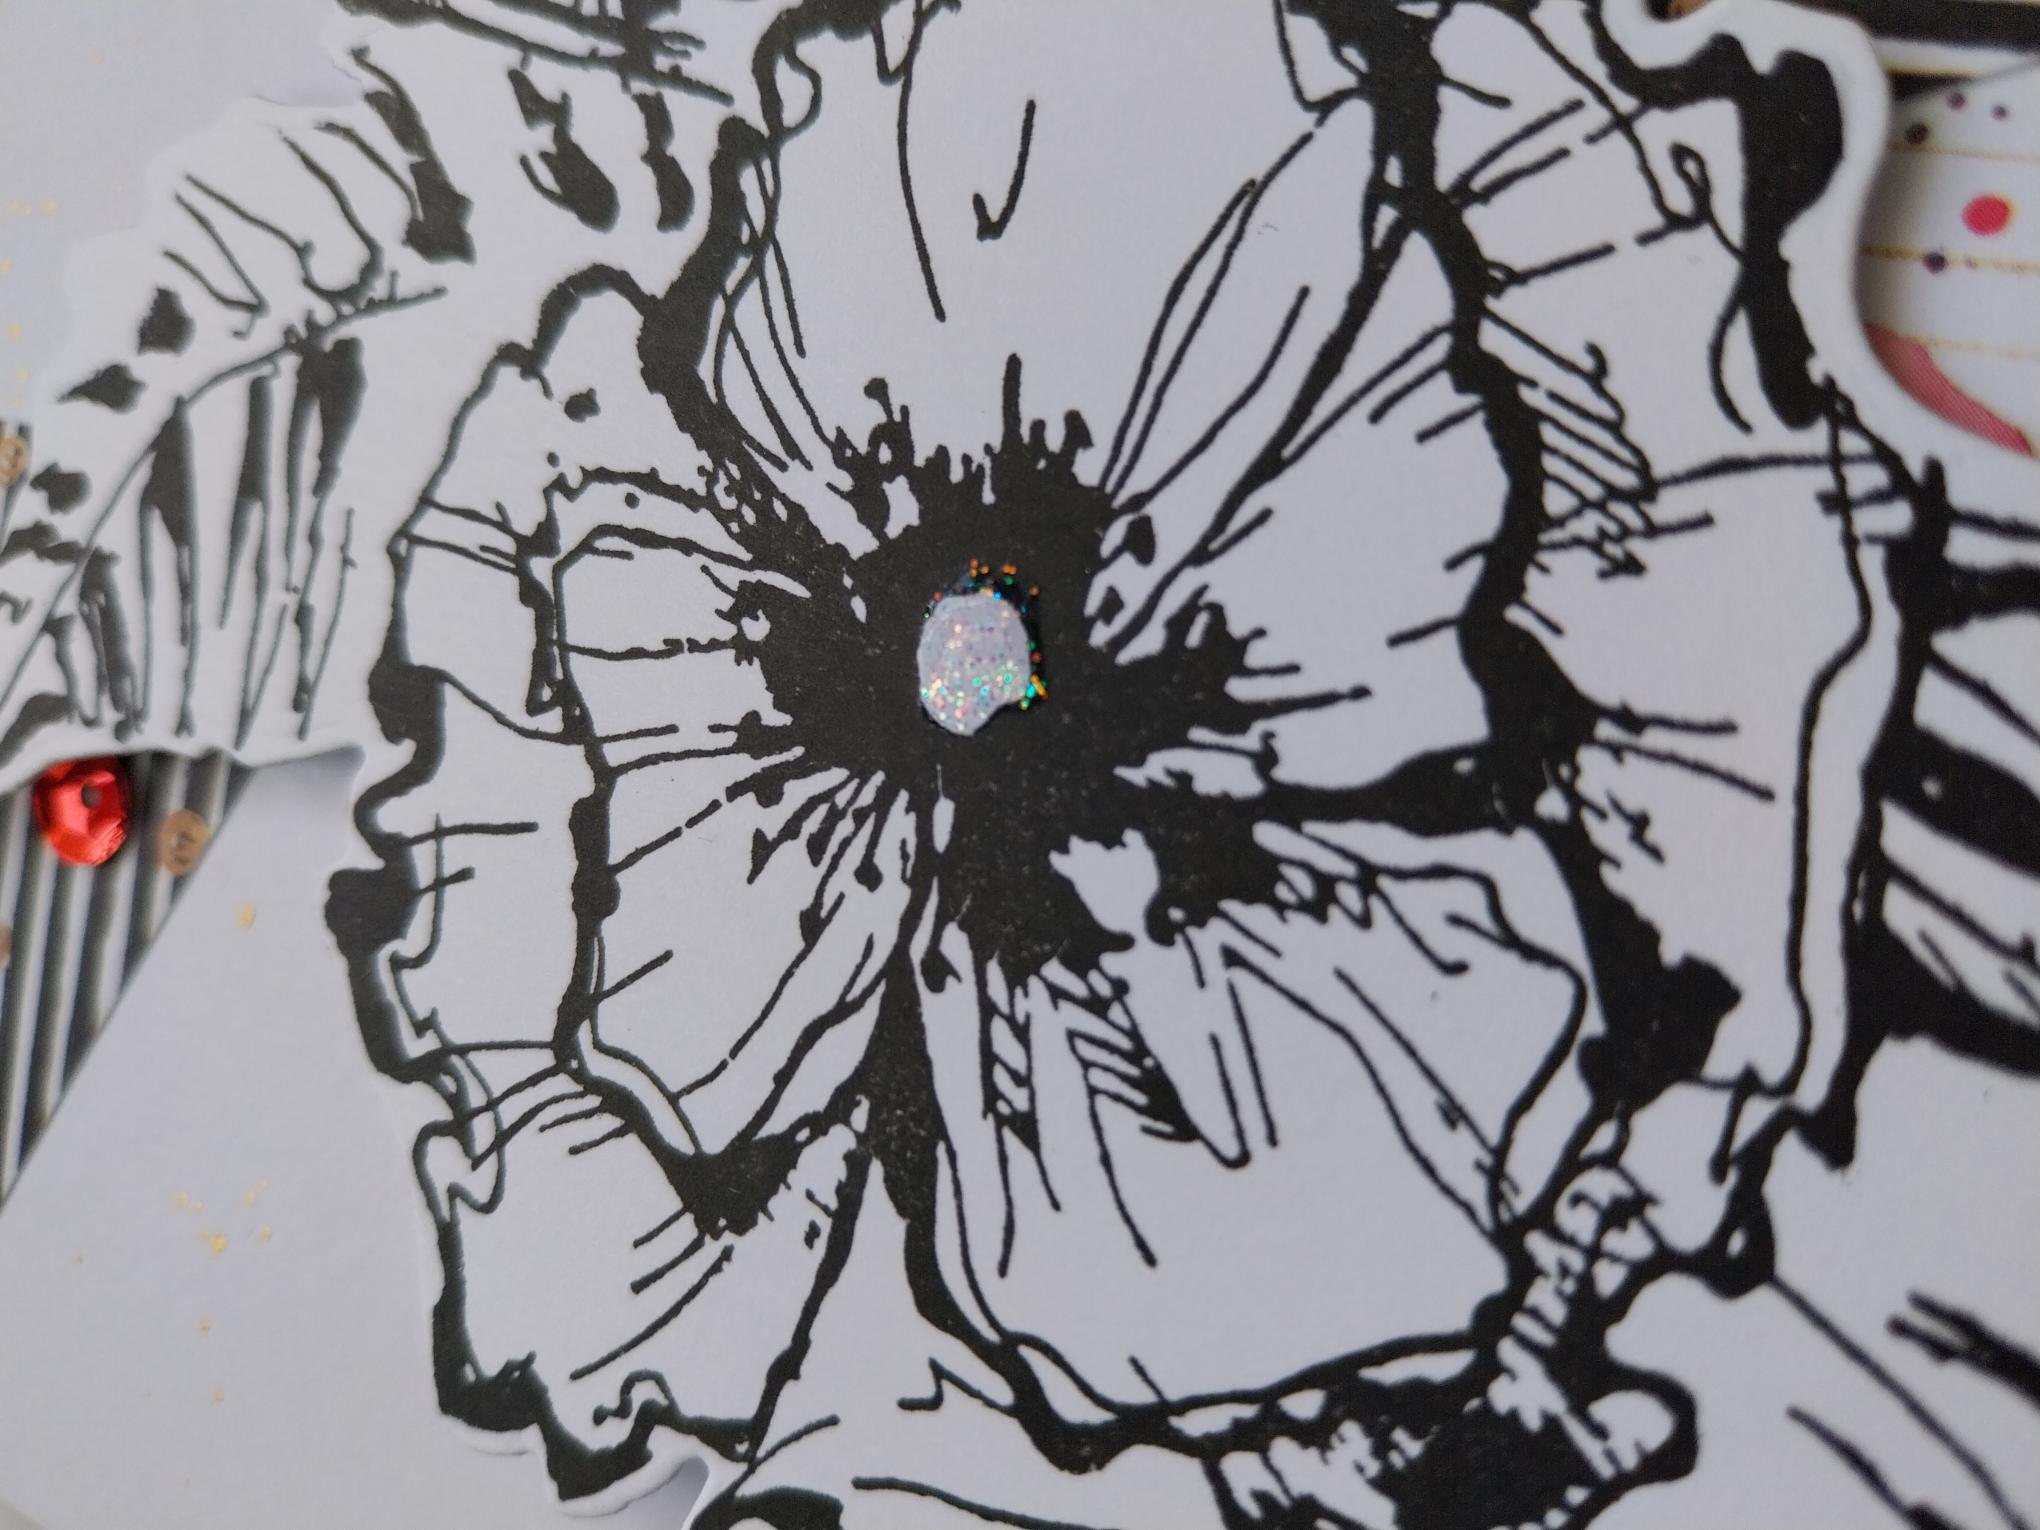
Adhere your sequins on, around and peeking out from under your 3D Poppy. |
|
Finish by adding a touch of sparkle to your Poppy with your Stickles. |