Give your friends $10 off their first order!
Refer a FRIEND


WHAT YOU WILL NEED:
White card blank 7 x 7"
Black card 5 1/2 x 4 1/4"
White card 5 1/4 x 4"
Watercolour Rectangle Icon 3D Embossing Folder
You're Only Limit Is You Stamp Collection
Dare To Dream Stamp Collection
SBM Hybrid Ink Pad: Midnight
SBM Pigment Ink Pad: Surfboard, Magenta
Distress Ink Pad: Black Soot
Water spray bottle
Black pen
Stickles: Diamond
Eureka 101 Watercolour Tablet
SBM Magnetic glass mat
Paper Trimmer
Perfect Together Glue
Foam Pads
Die Cutting machine
[click image to enlarge] 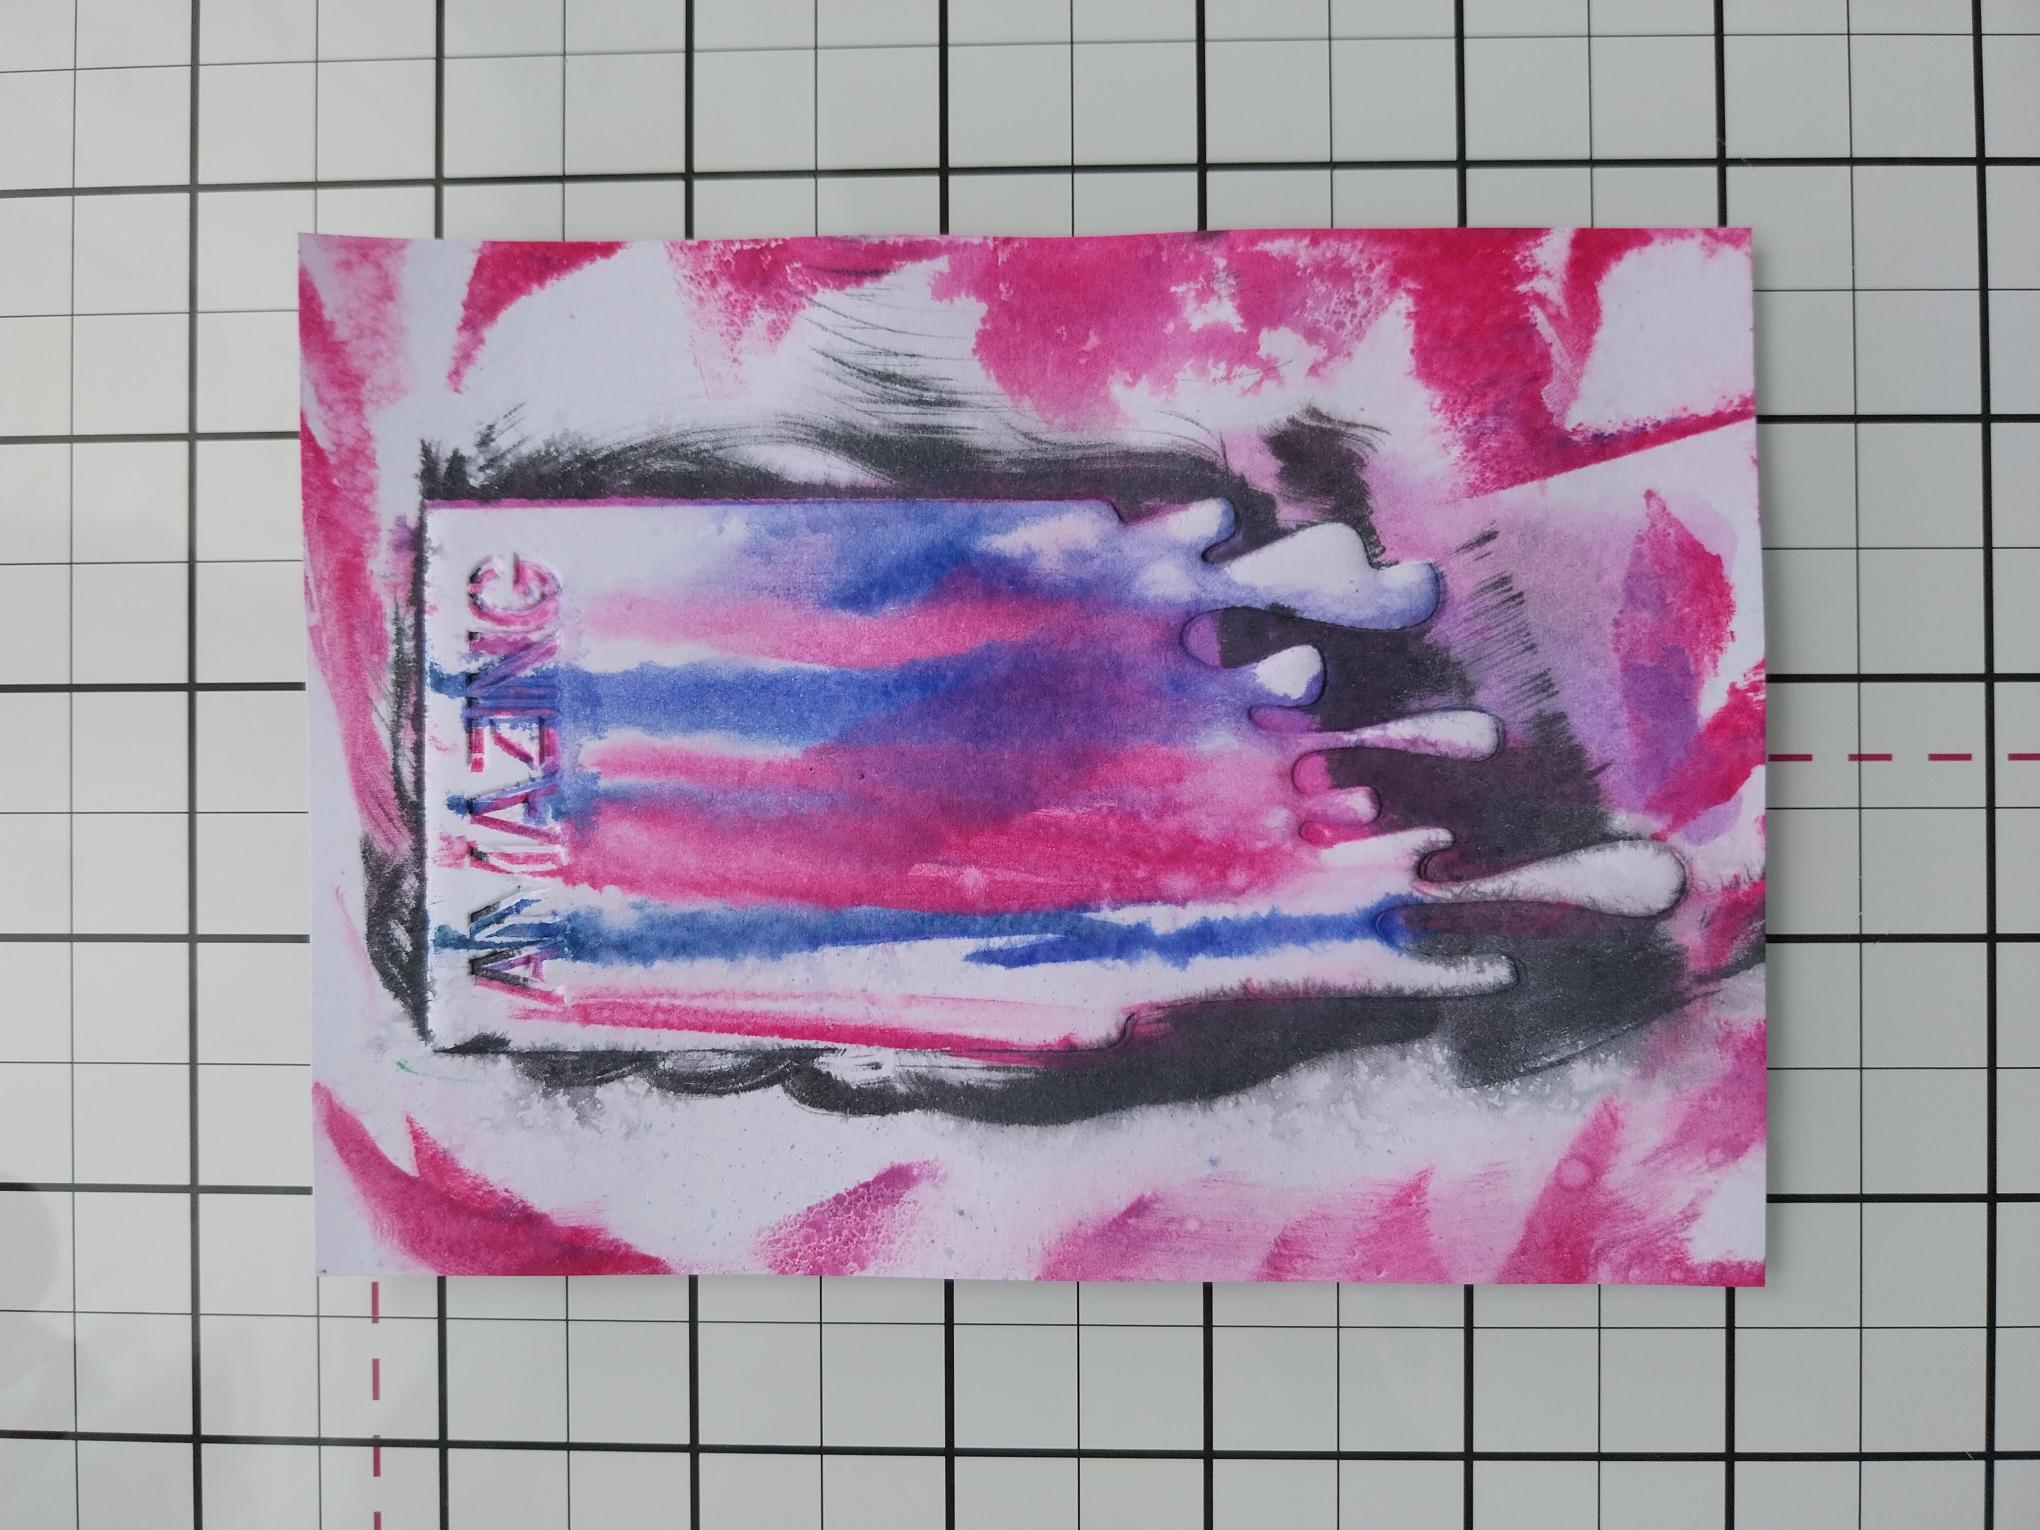
|
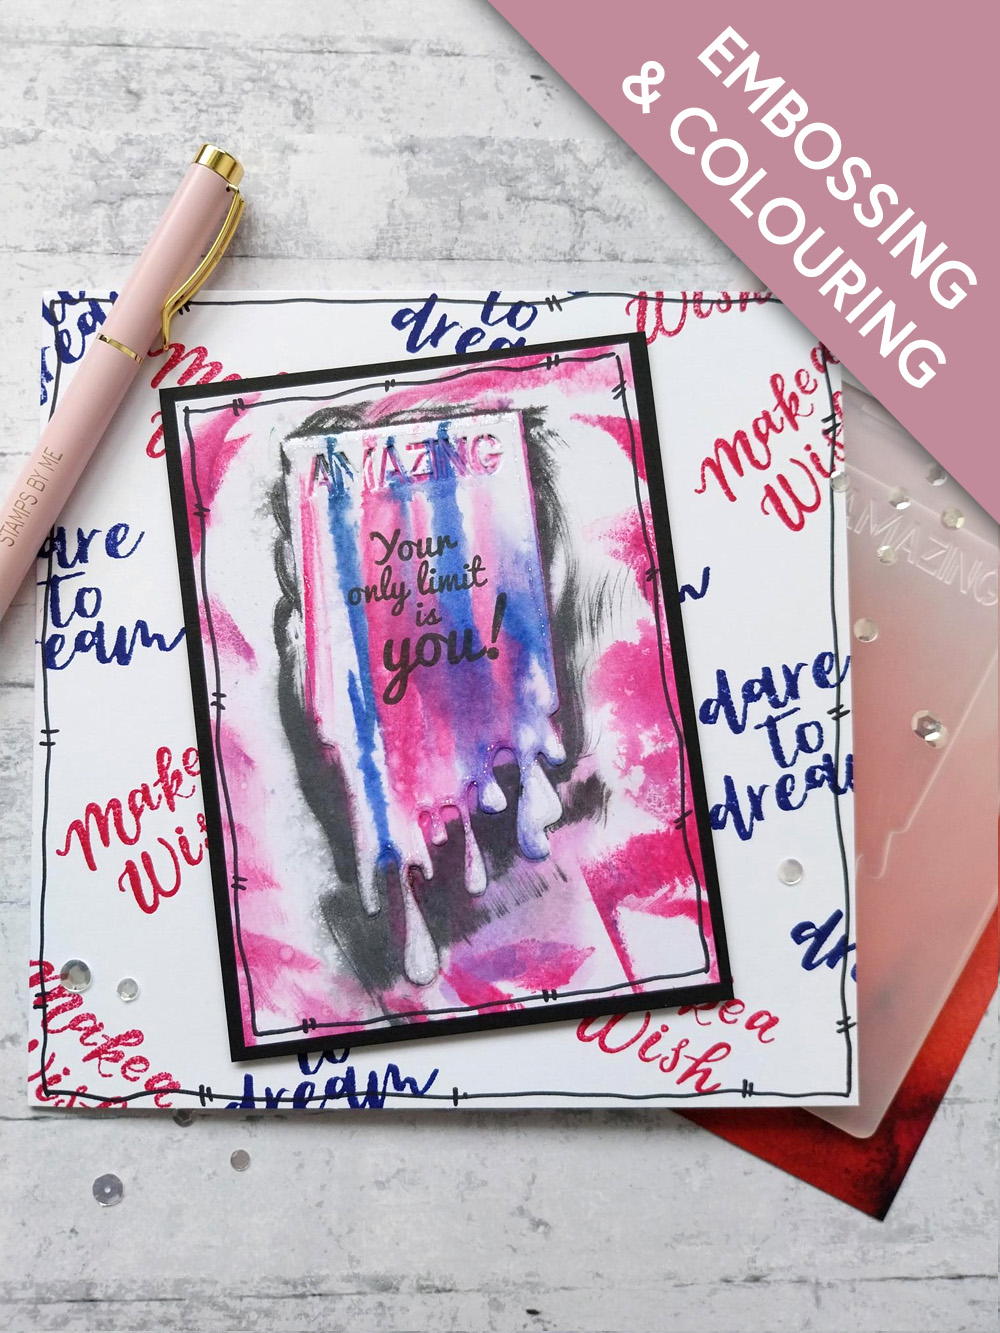
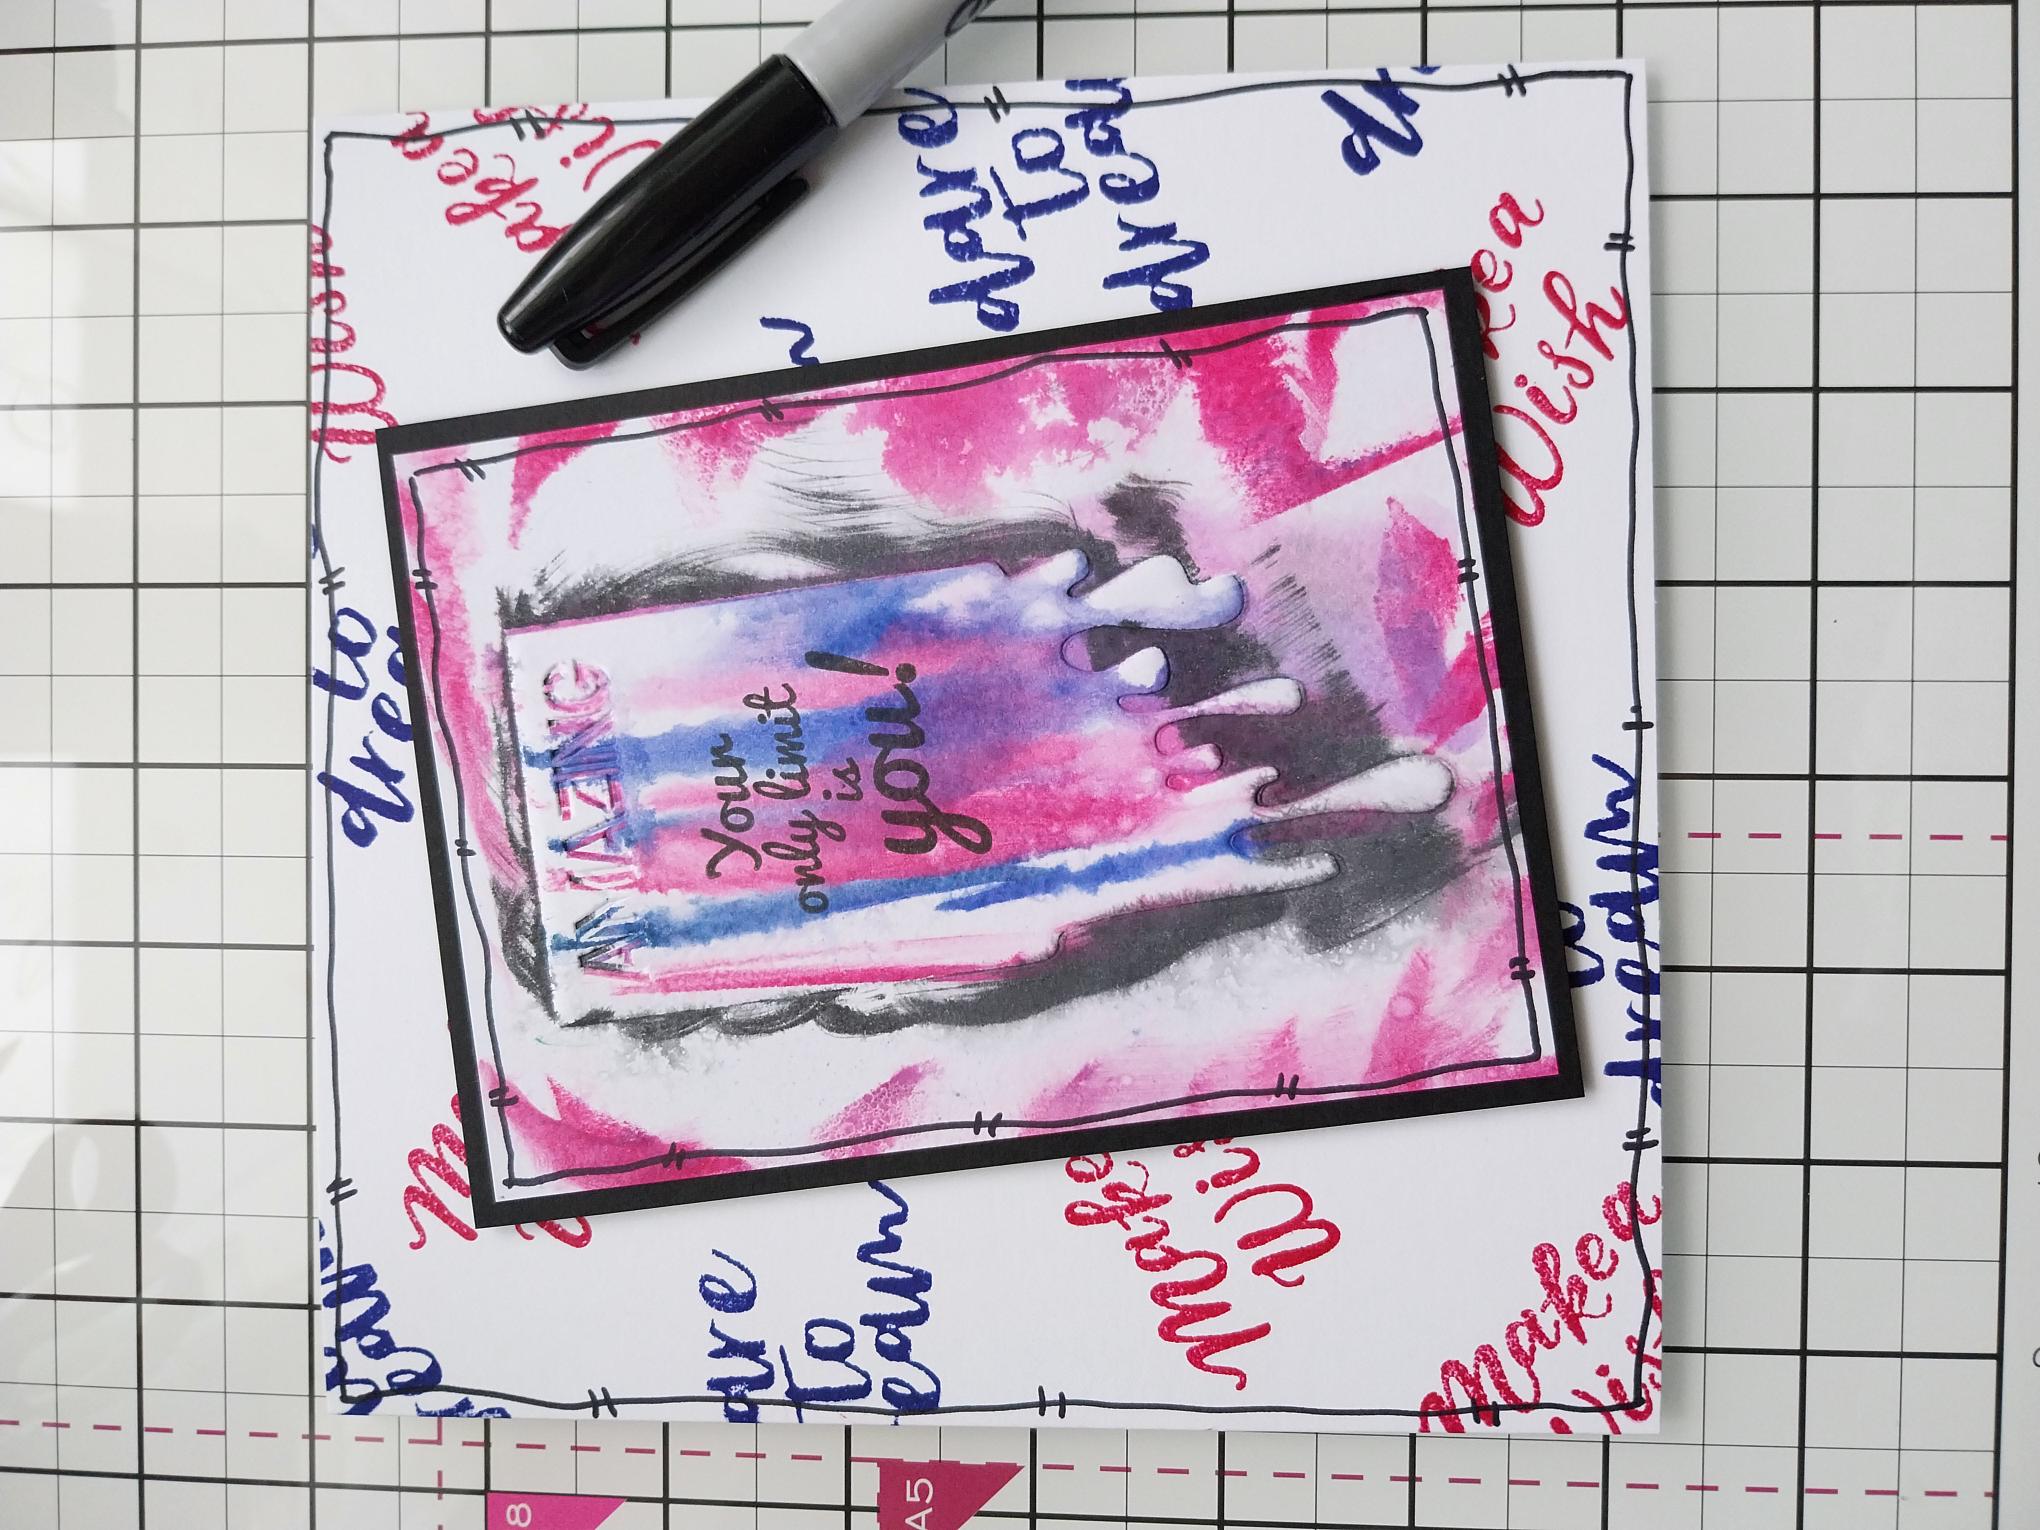
Swipe the Surfboard and Magenta ink pads down the inside of the DEBOSSED Icon recess. Wipe the Black Soot ink pad around the outer edges of the icon and finally swipe the Magenta ink pad around the edges of the folder. Spritz it all with water, before placing the white card inside the folder. Close the inked side down on to the card and run it through your machine. Remove the card and spritz with a little water, allowing the inks to drip and blend, as much or as little, as you want! This is vert ARTY for me but I decided to go with it and see it through to the end...as our Toni would say! |
|
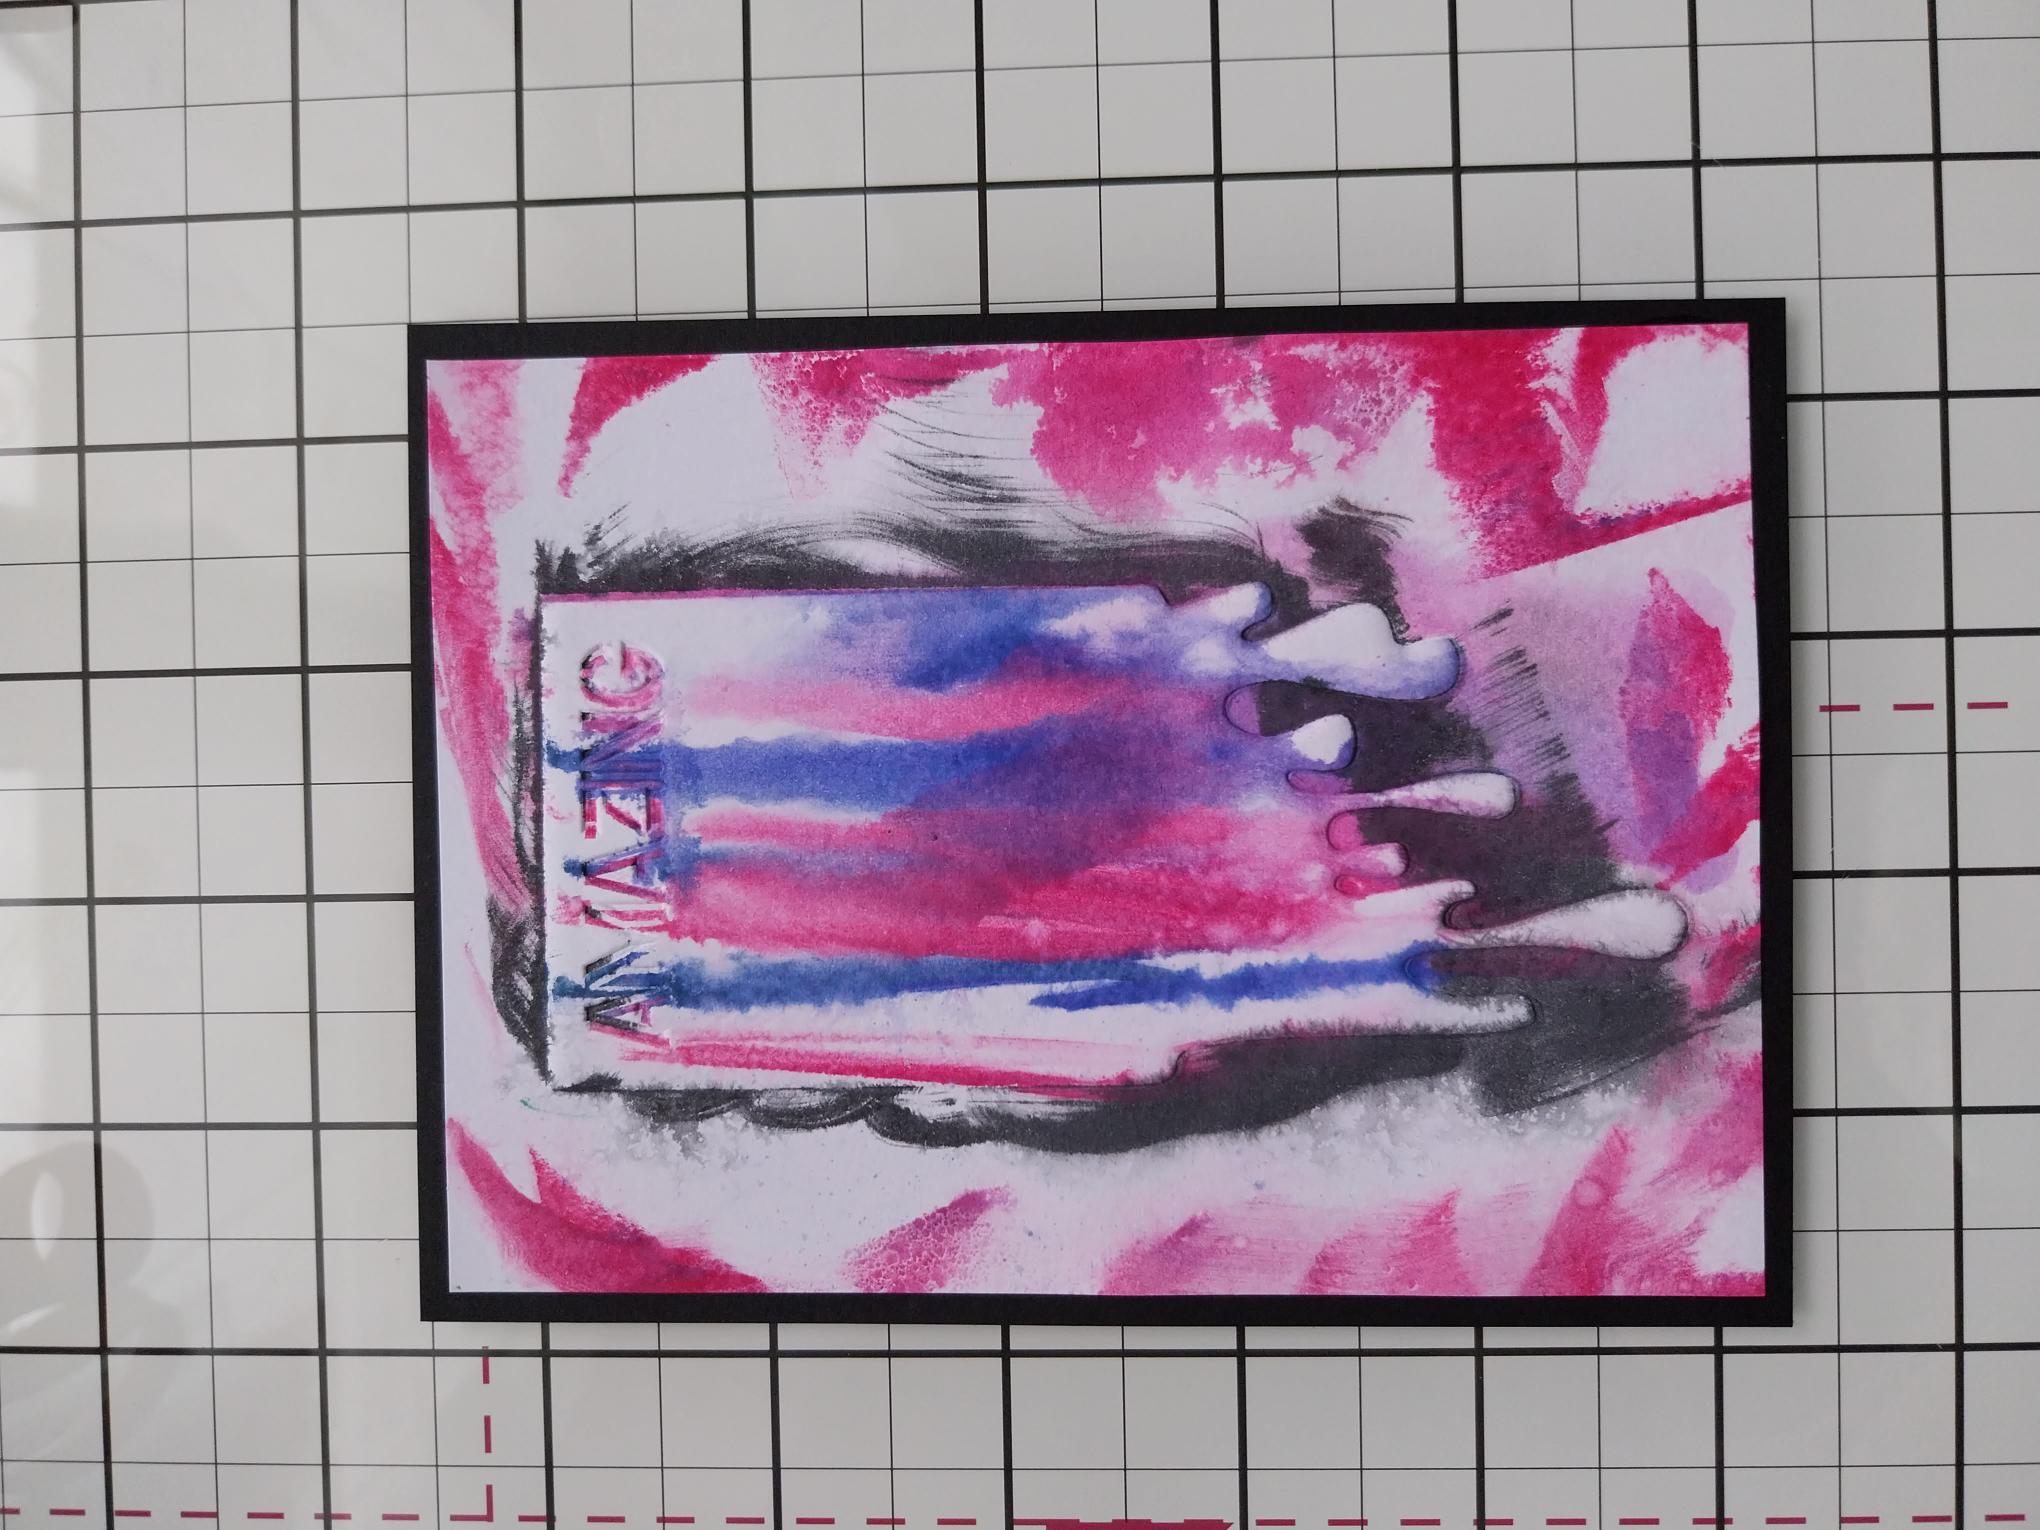
Once the ink is dry adhere on to the black card. |
|
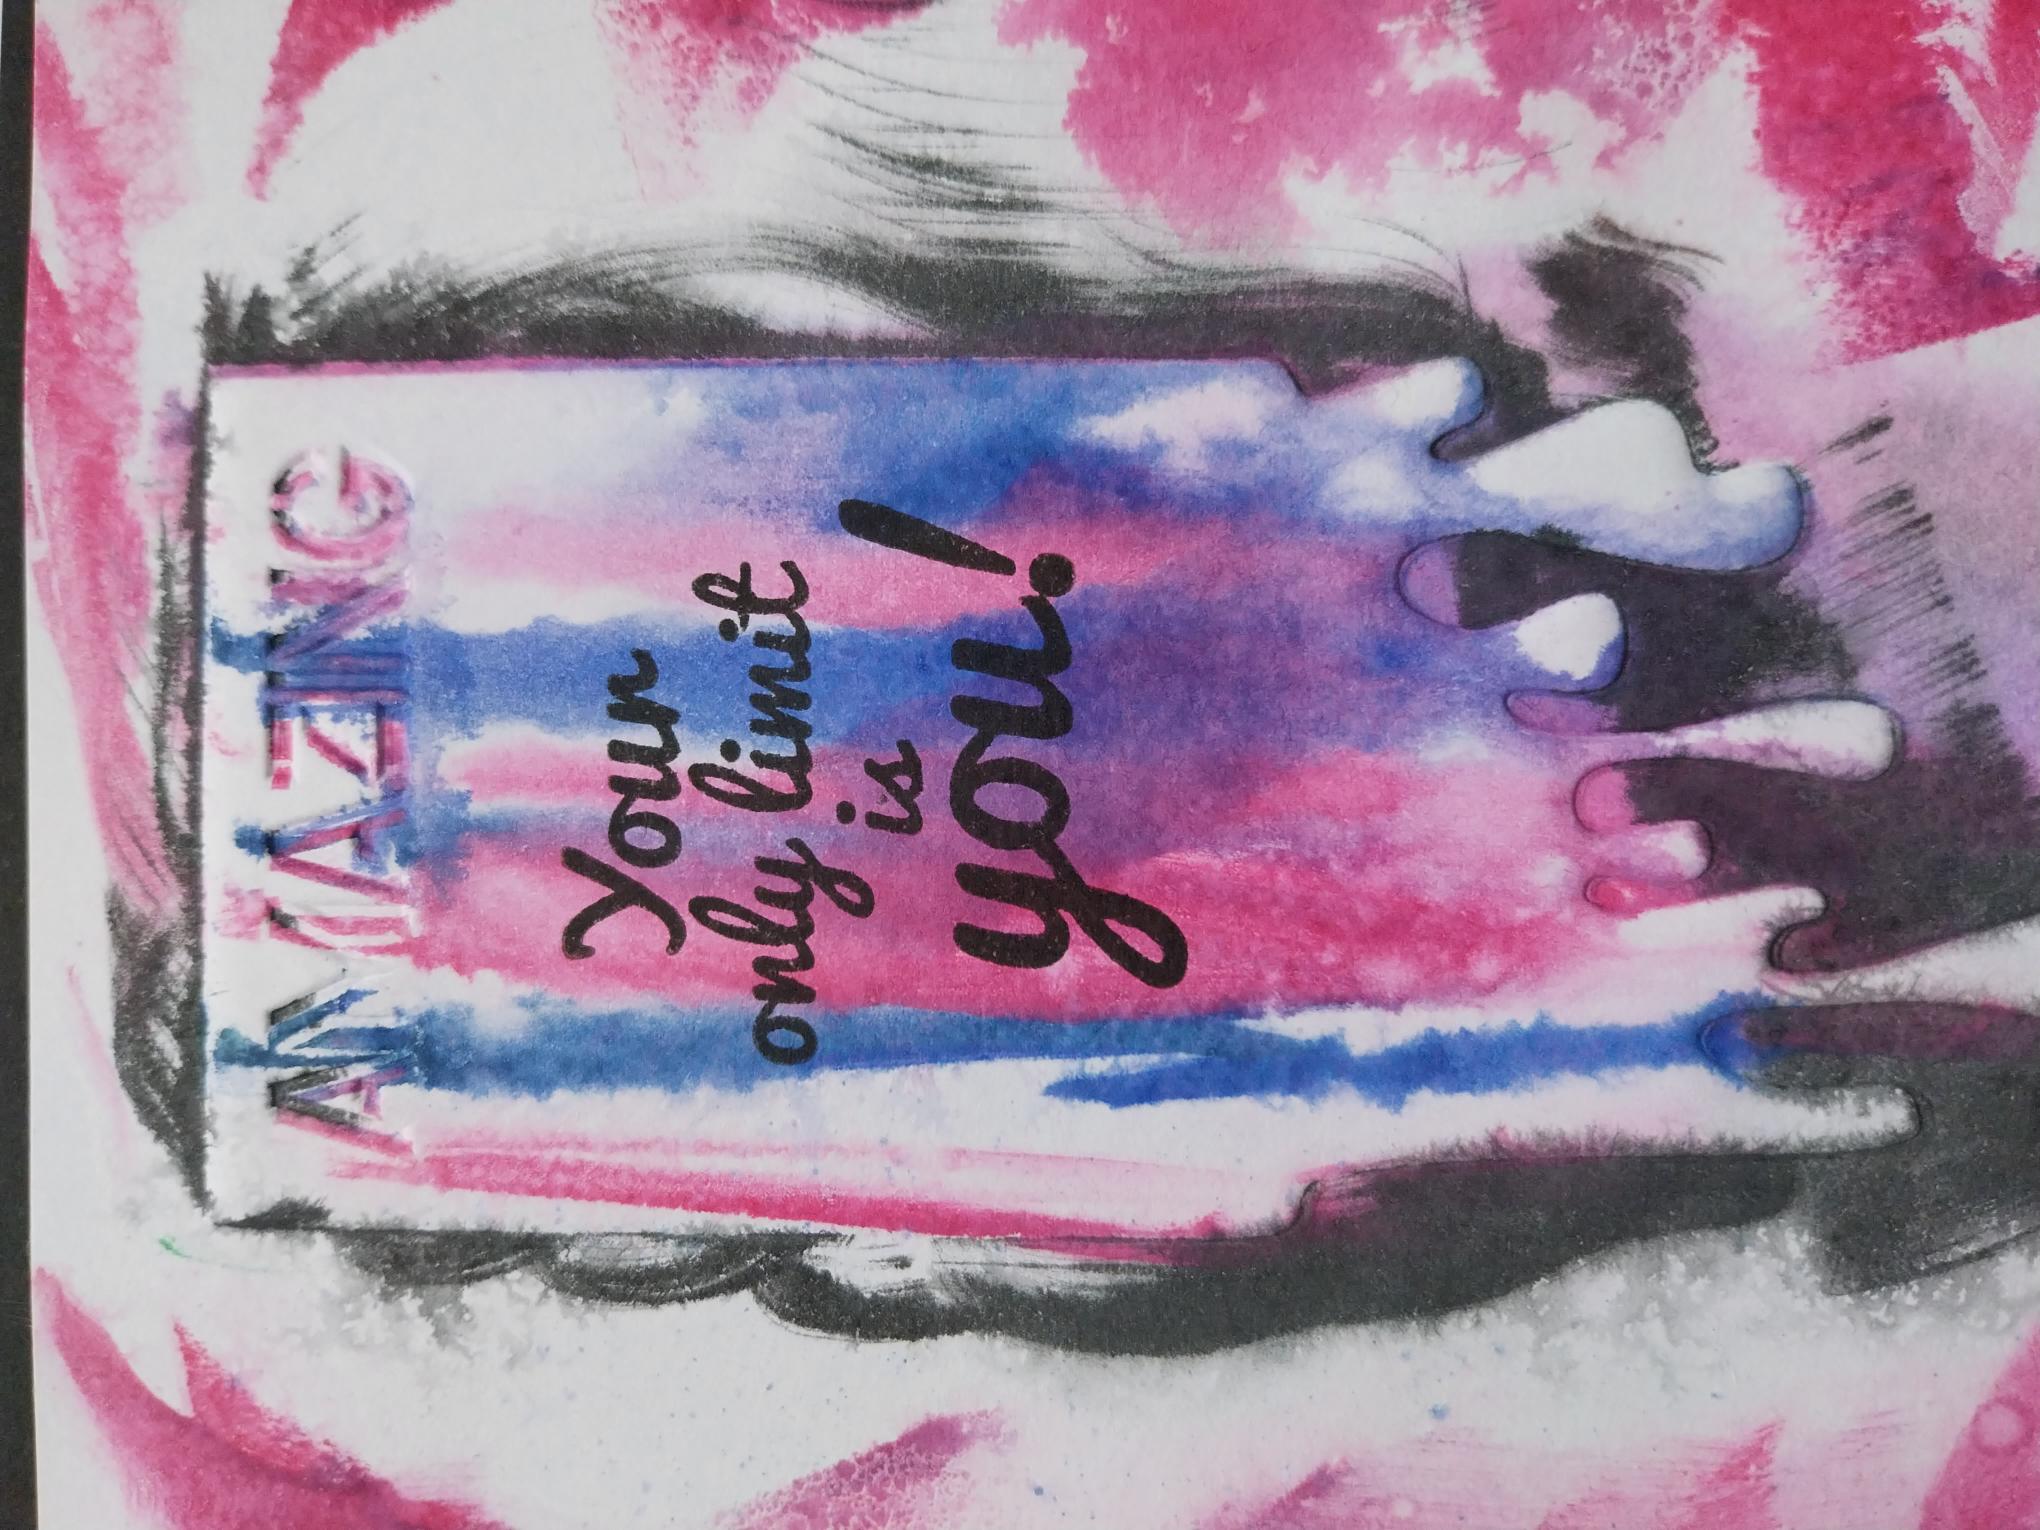
Stamp the sentiment, from the collection by the same name, with the Midnight hybrid ink, in the centre of the embossed Icon. Set to one side. |
|
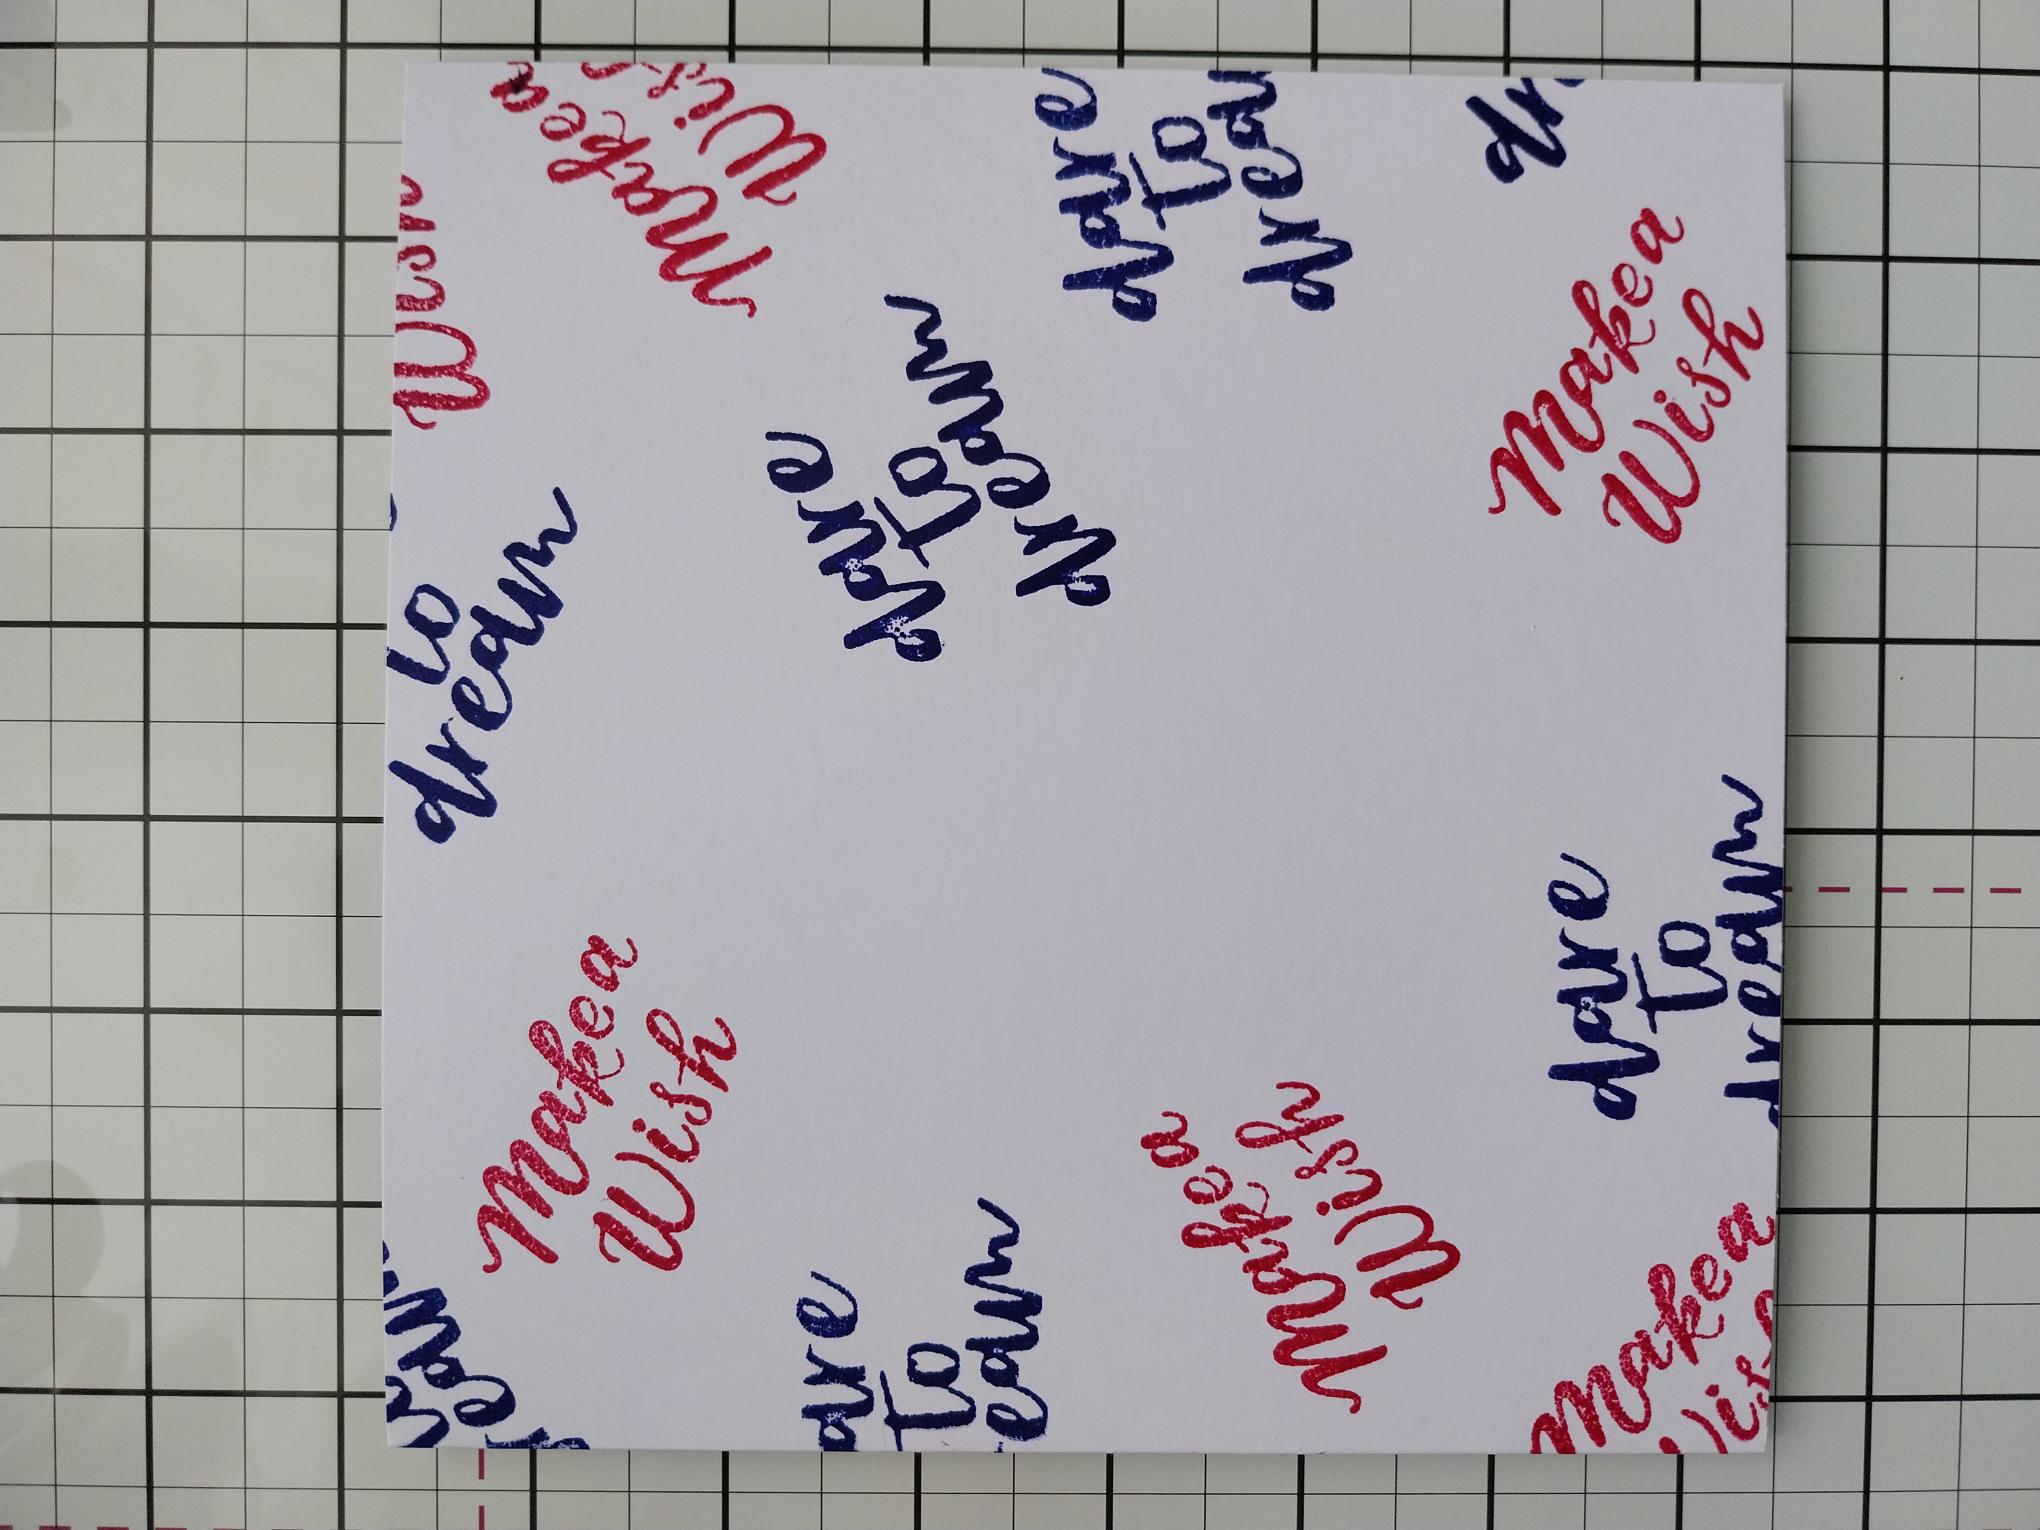
Ink up "Dare To Dream" and "Make A Wish", from the Dare To Dream Stamp Collection, with the Surfboard and Magenta inks and randomly stamp directly on to your 7" square white card blank. |

|
Adhere your artwork on to your stamped card blank. |
|
Use a black pen to draw a decorative, wiggly frame, around your topper and card blank. |
|
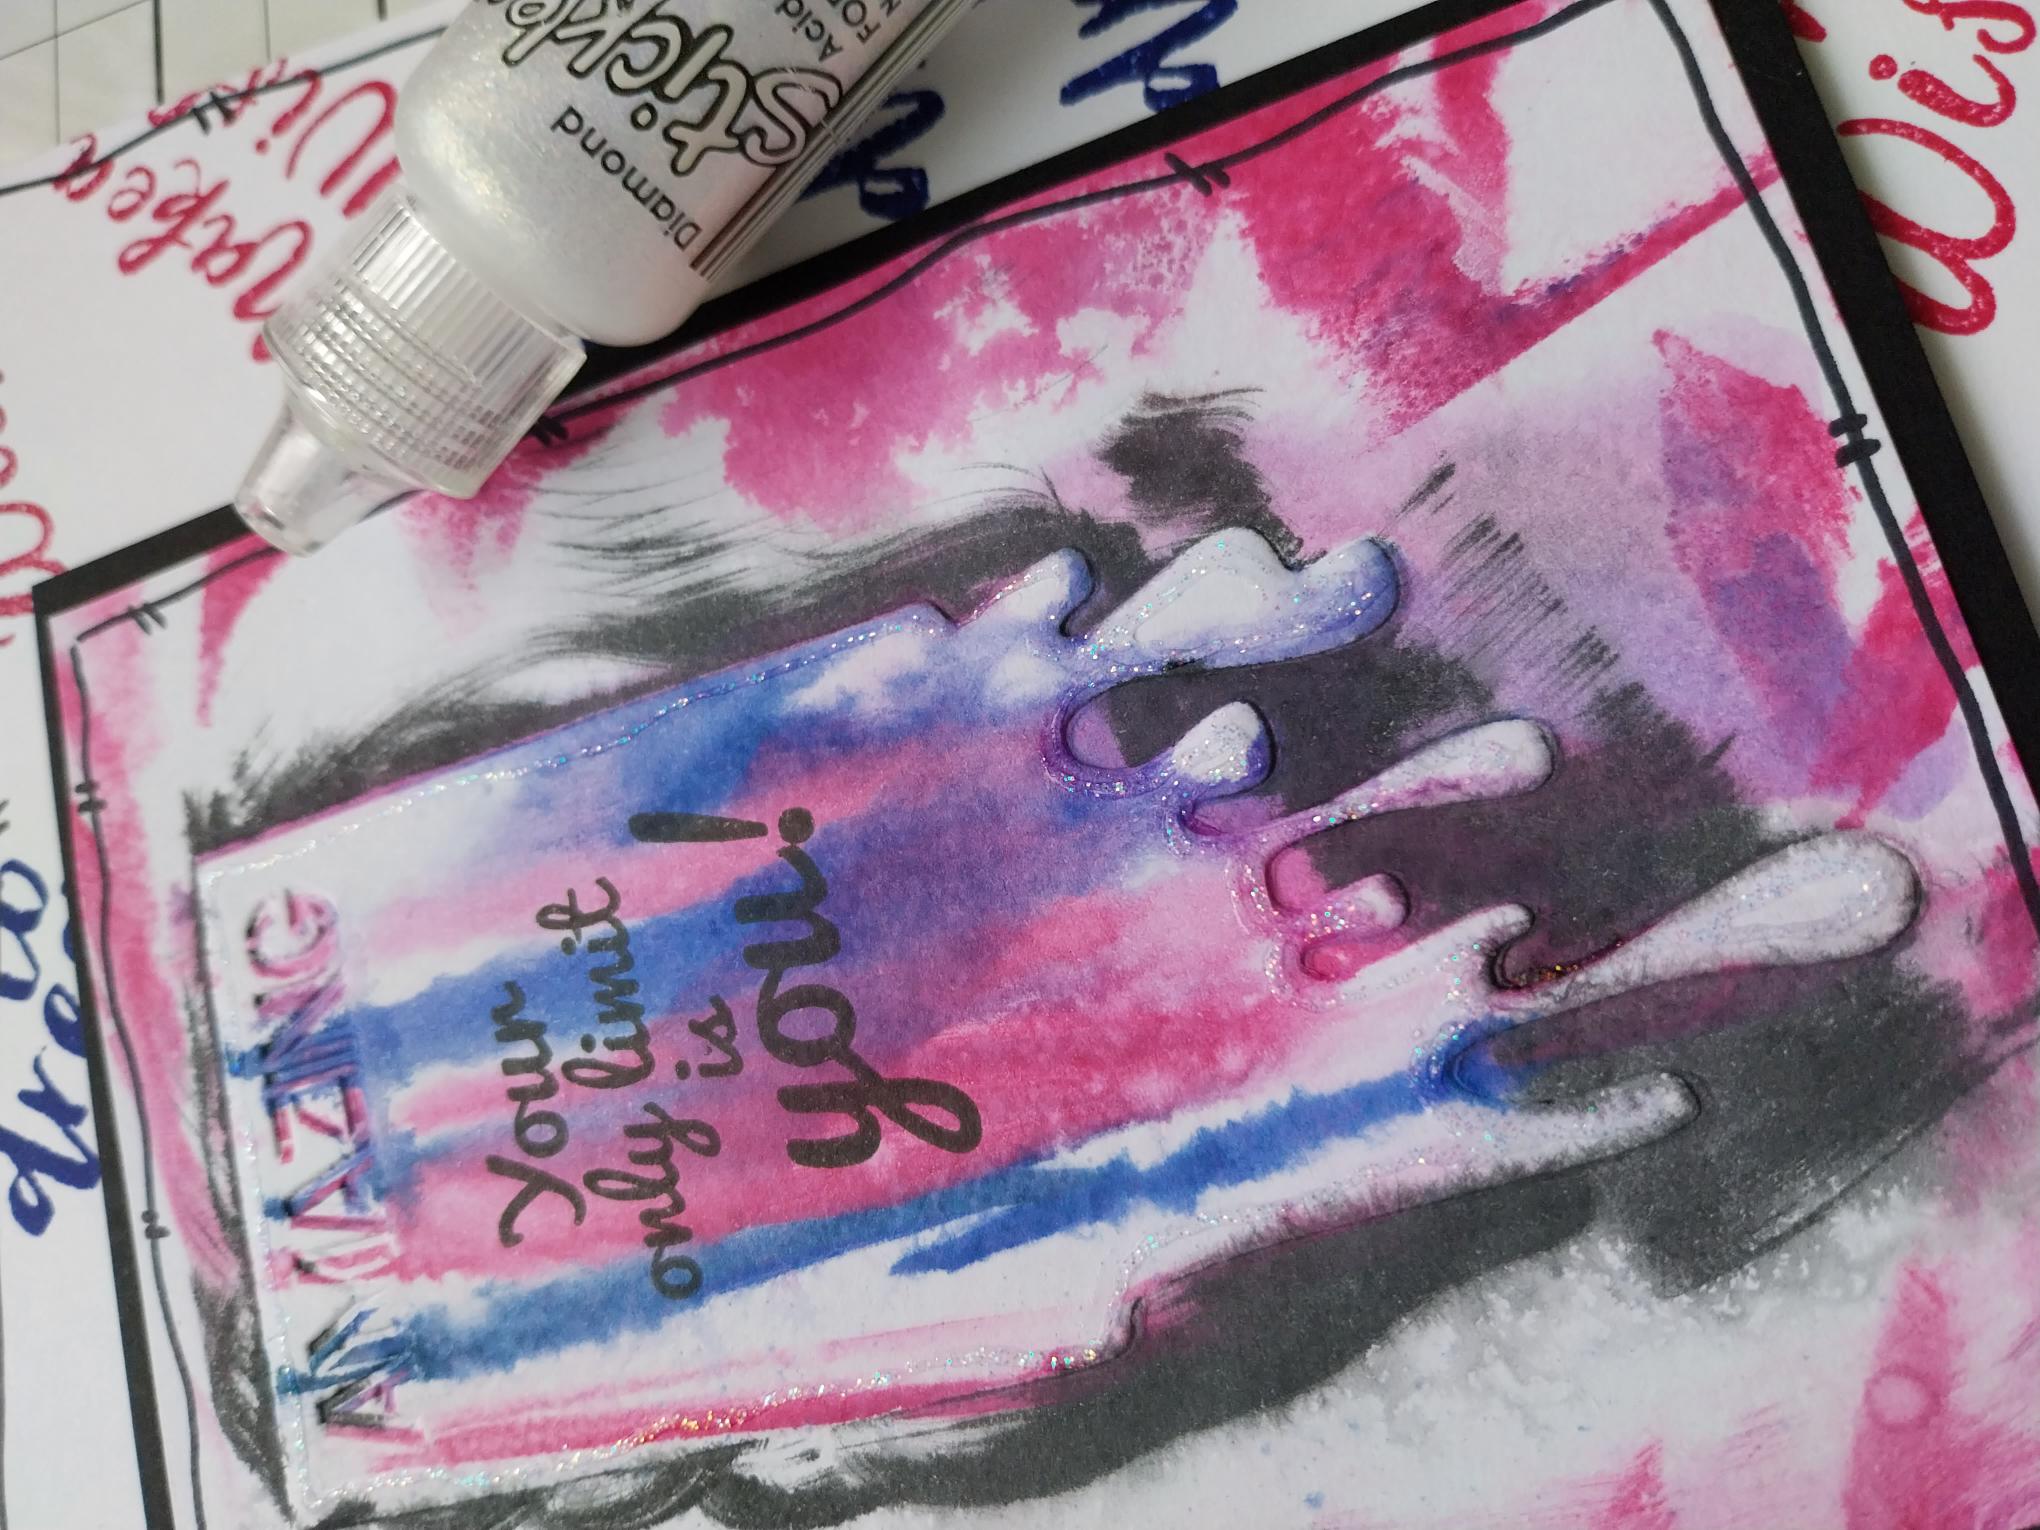
Finish off by edging the embossed icon with your Stickles. |