Give your friends $10 off their first order!
Refer a FRIEND


WHAT YOU WILL NEED:
White DL card blank
Watercolour HD3D Pebble Dash Embossing Folder
Kind Friends Die Collection
Classic Celebration 8 x 8" Textured Paper Pack
Classic Celebration 8 x 8" Paper Pack
Classic Celebration 8 x 8" Vellum Pack
All Surfaces 8 x 8" Royal Blue Paper Pack
Confetti Ink: Graphite
Water spray bottle
Blending tool
Stickles: Star Dust
Paper Trimmer
Perfect Together Glue
Foam pads
Double-sided tape
Die Cutting machine
[click image to enlarge] 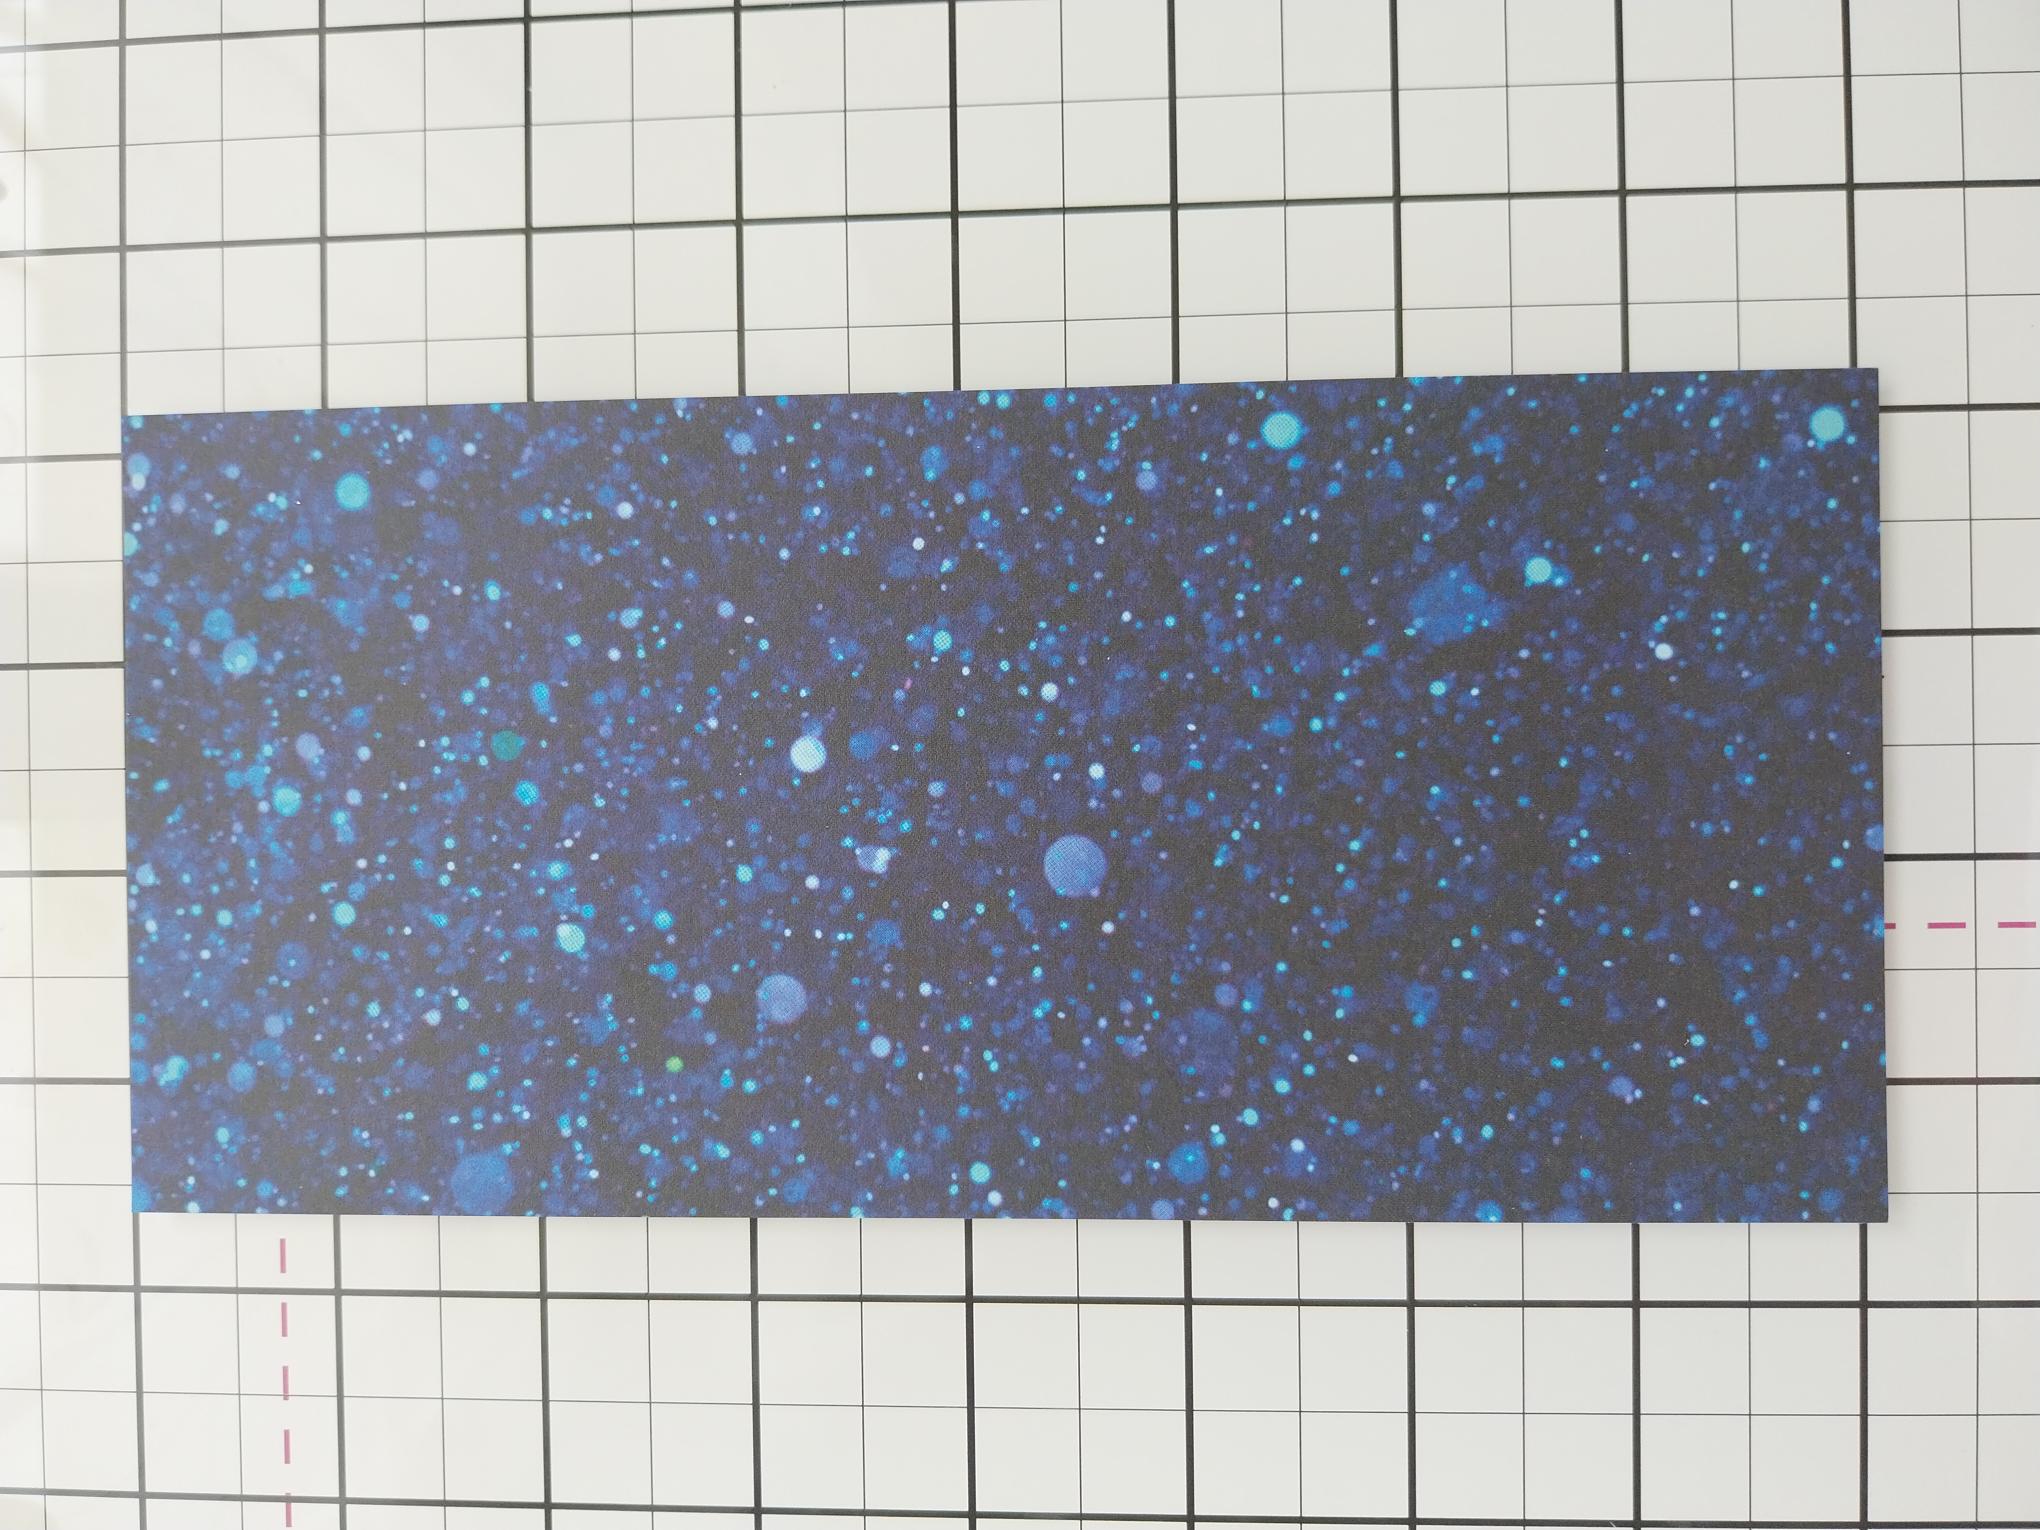
|
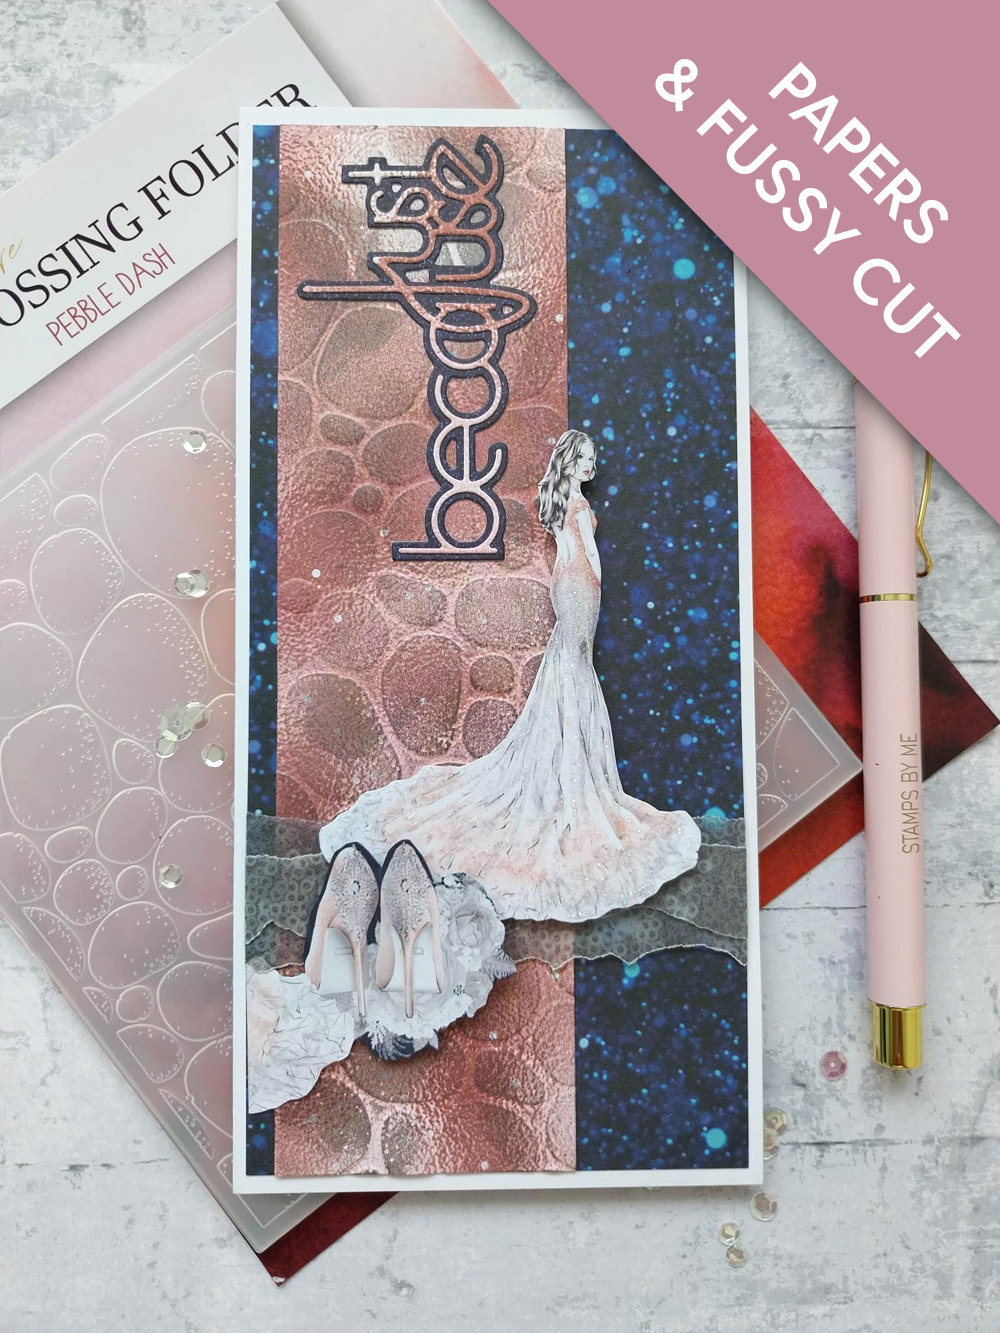
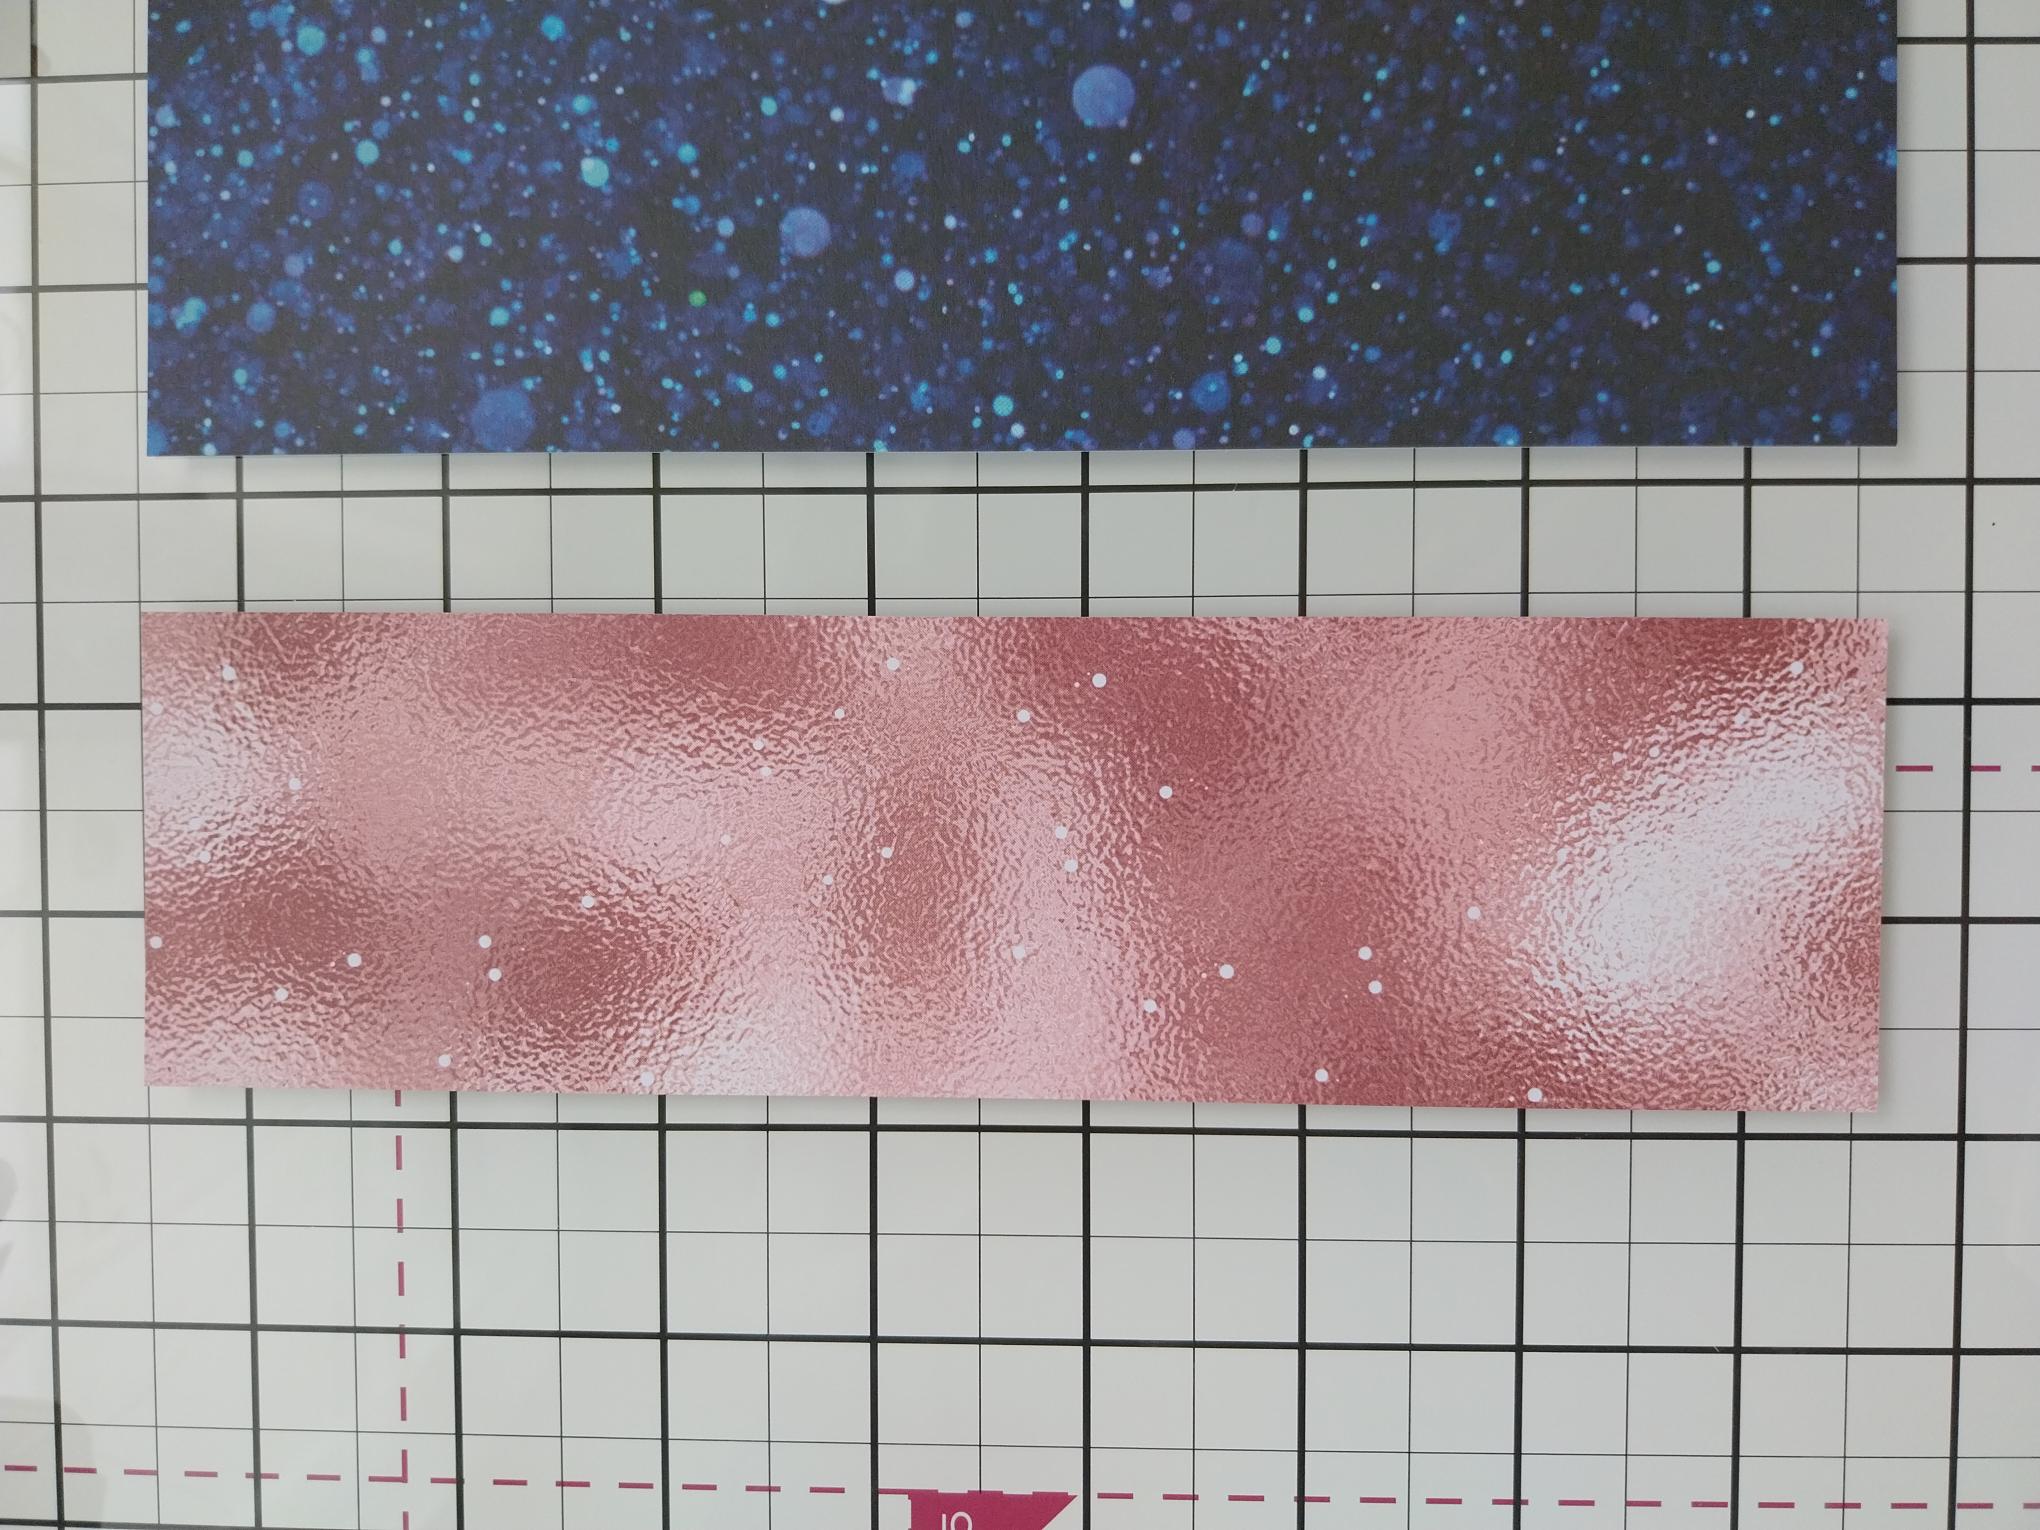
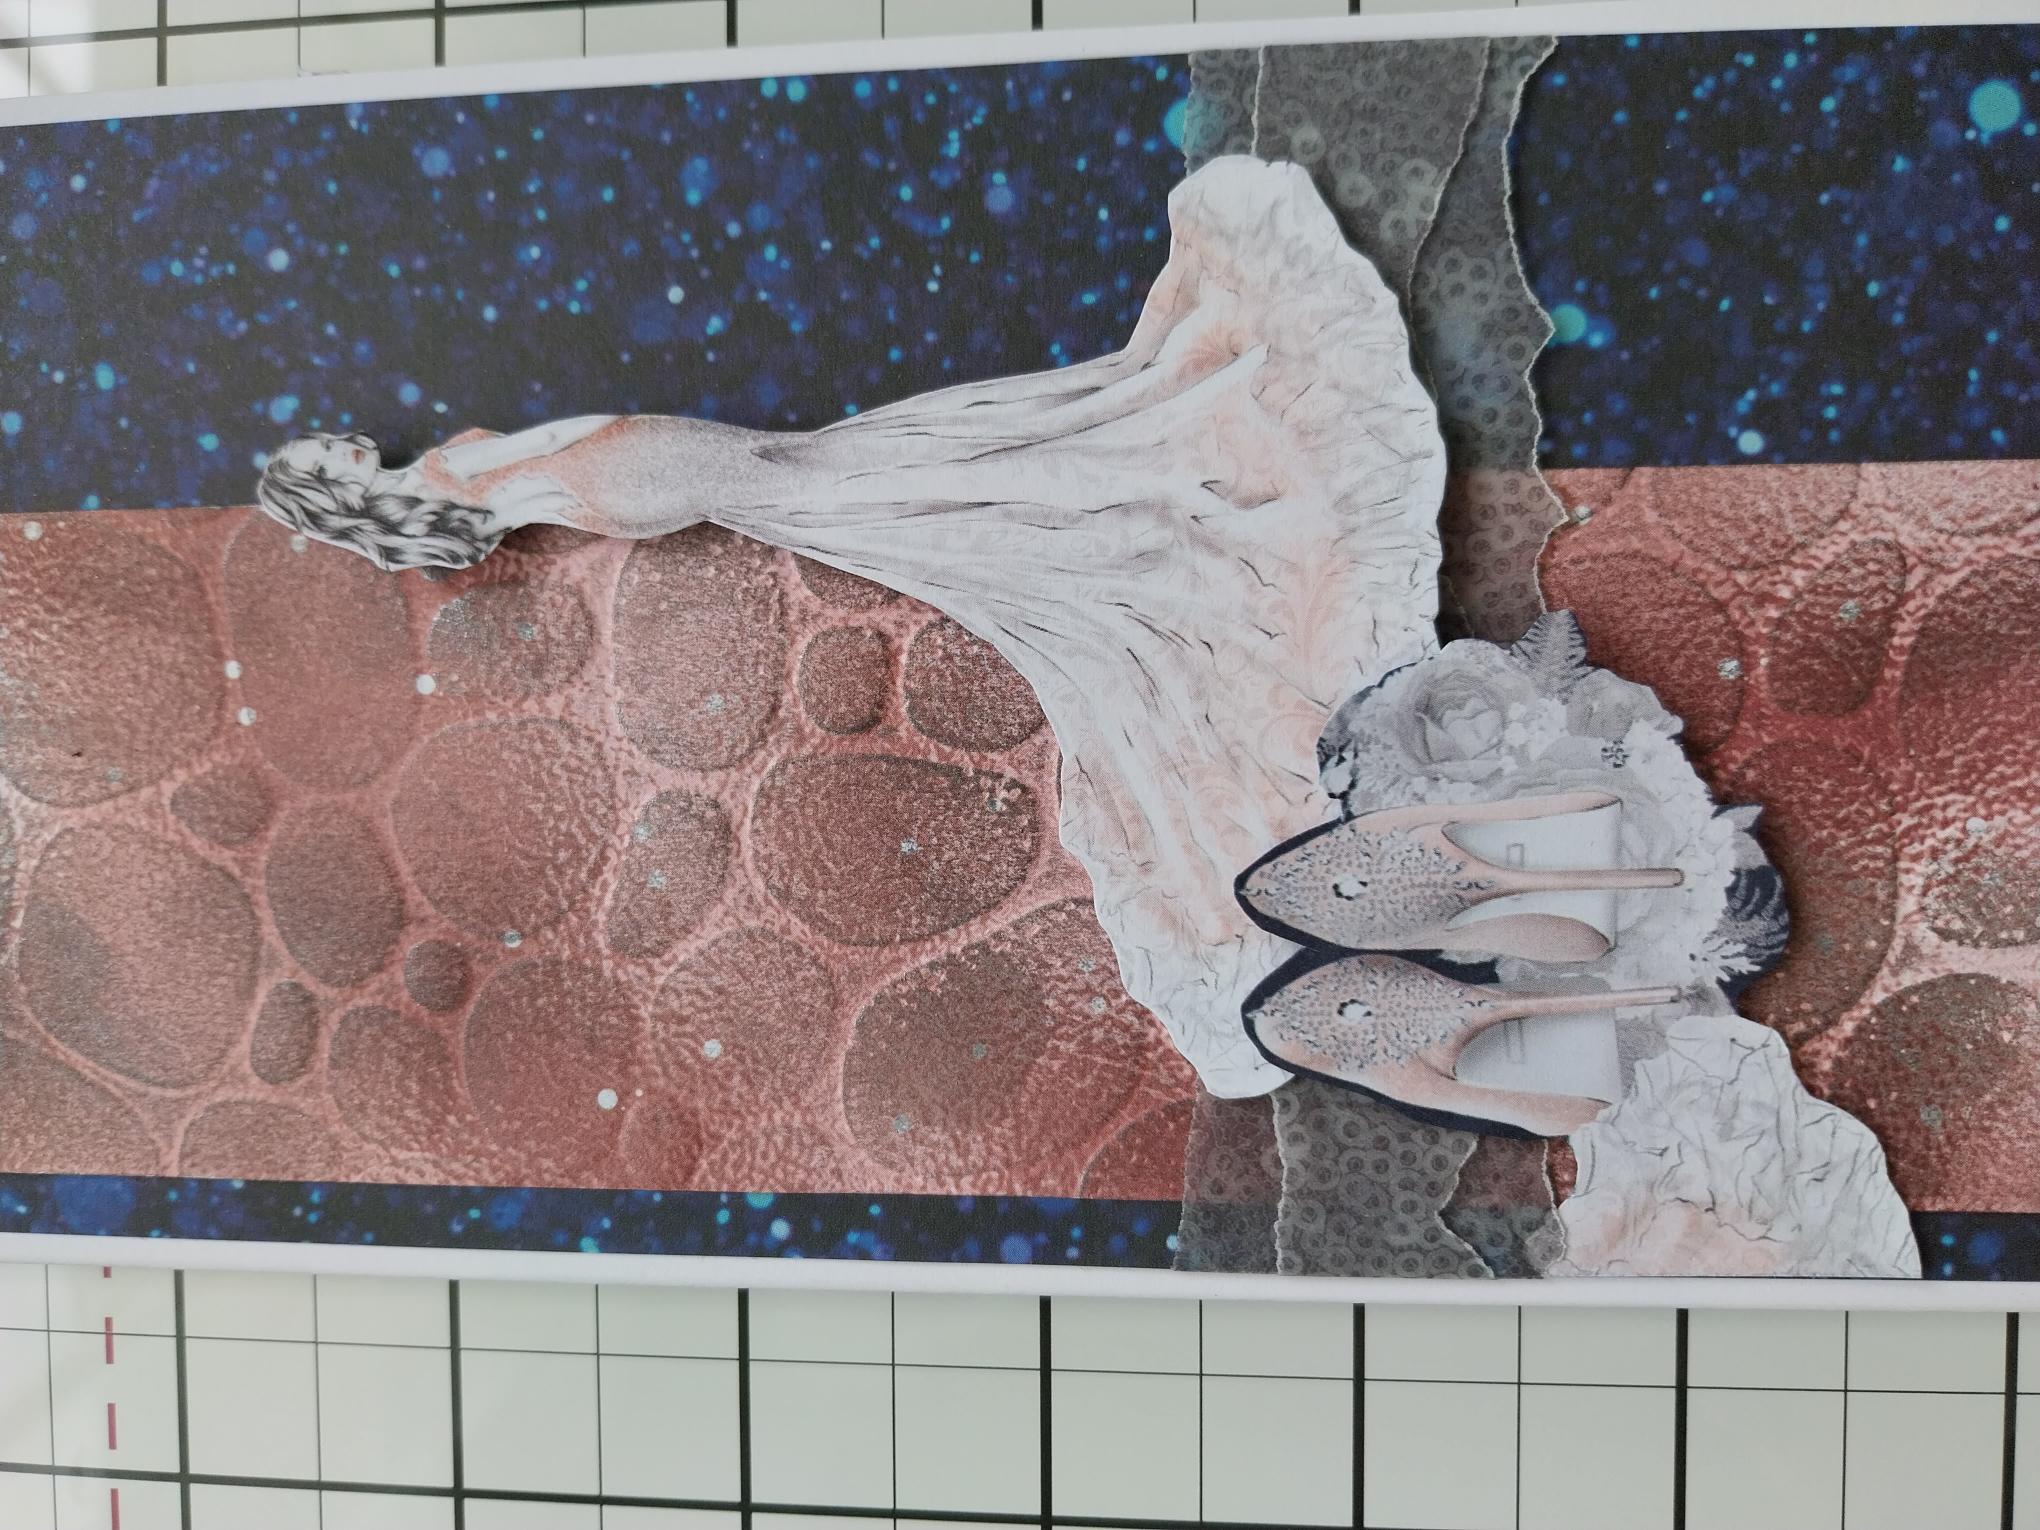
Take out this decorative paper from the Royal Blue paper pack and trim to 8 x 3 3/4". |
|
Remove this paper from the Classic Celebration Textured pack and trim to 8 x 2 1/4". |
|
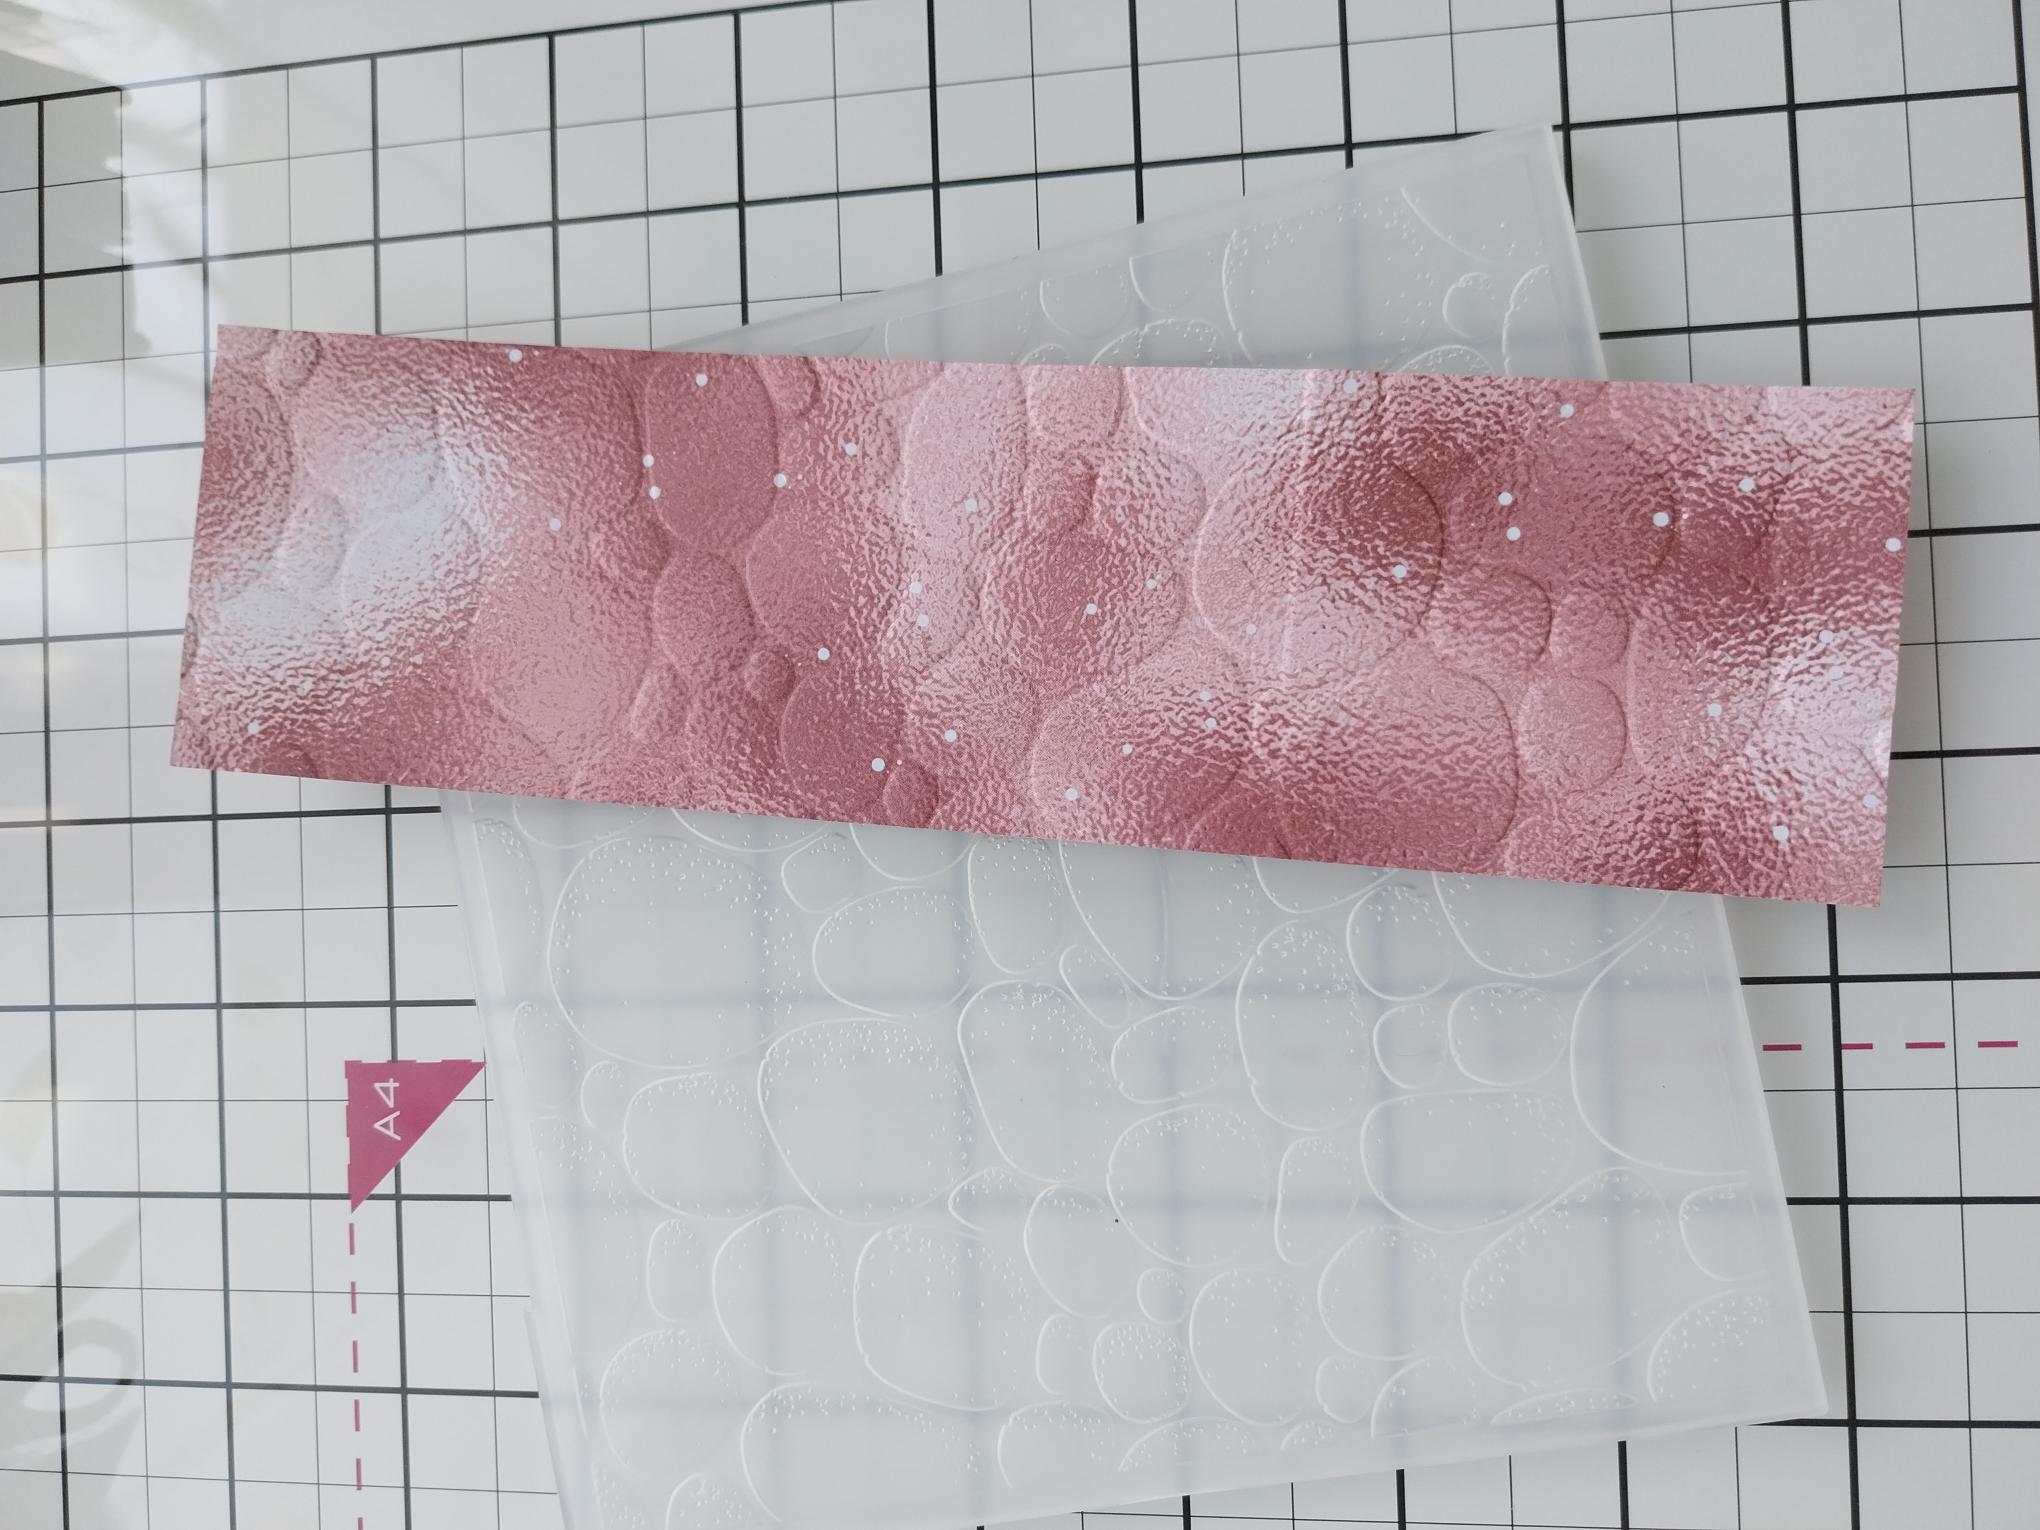
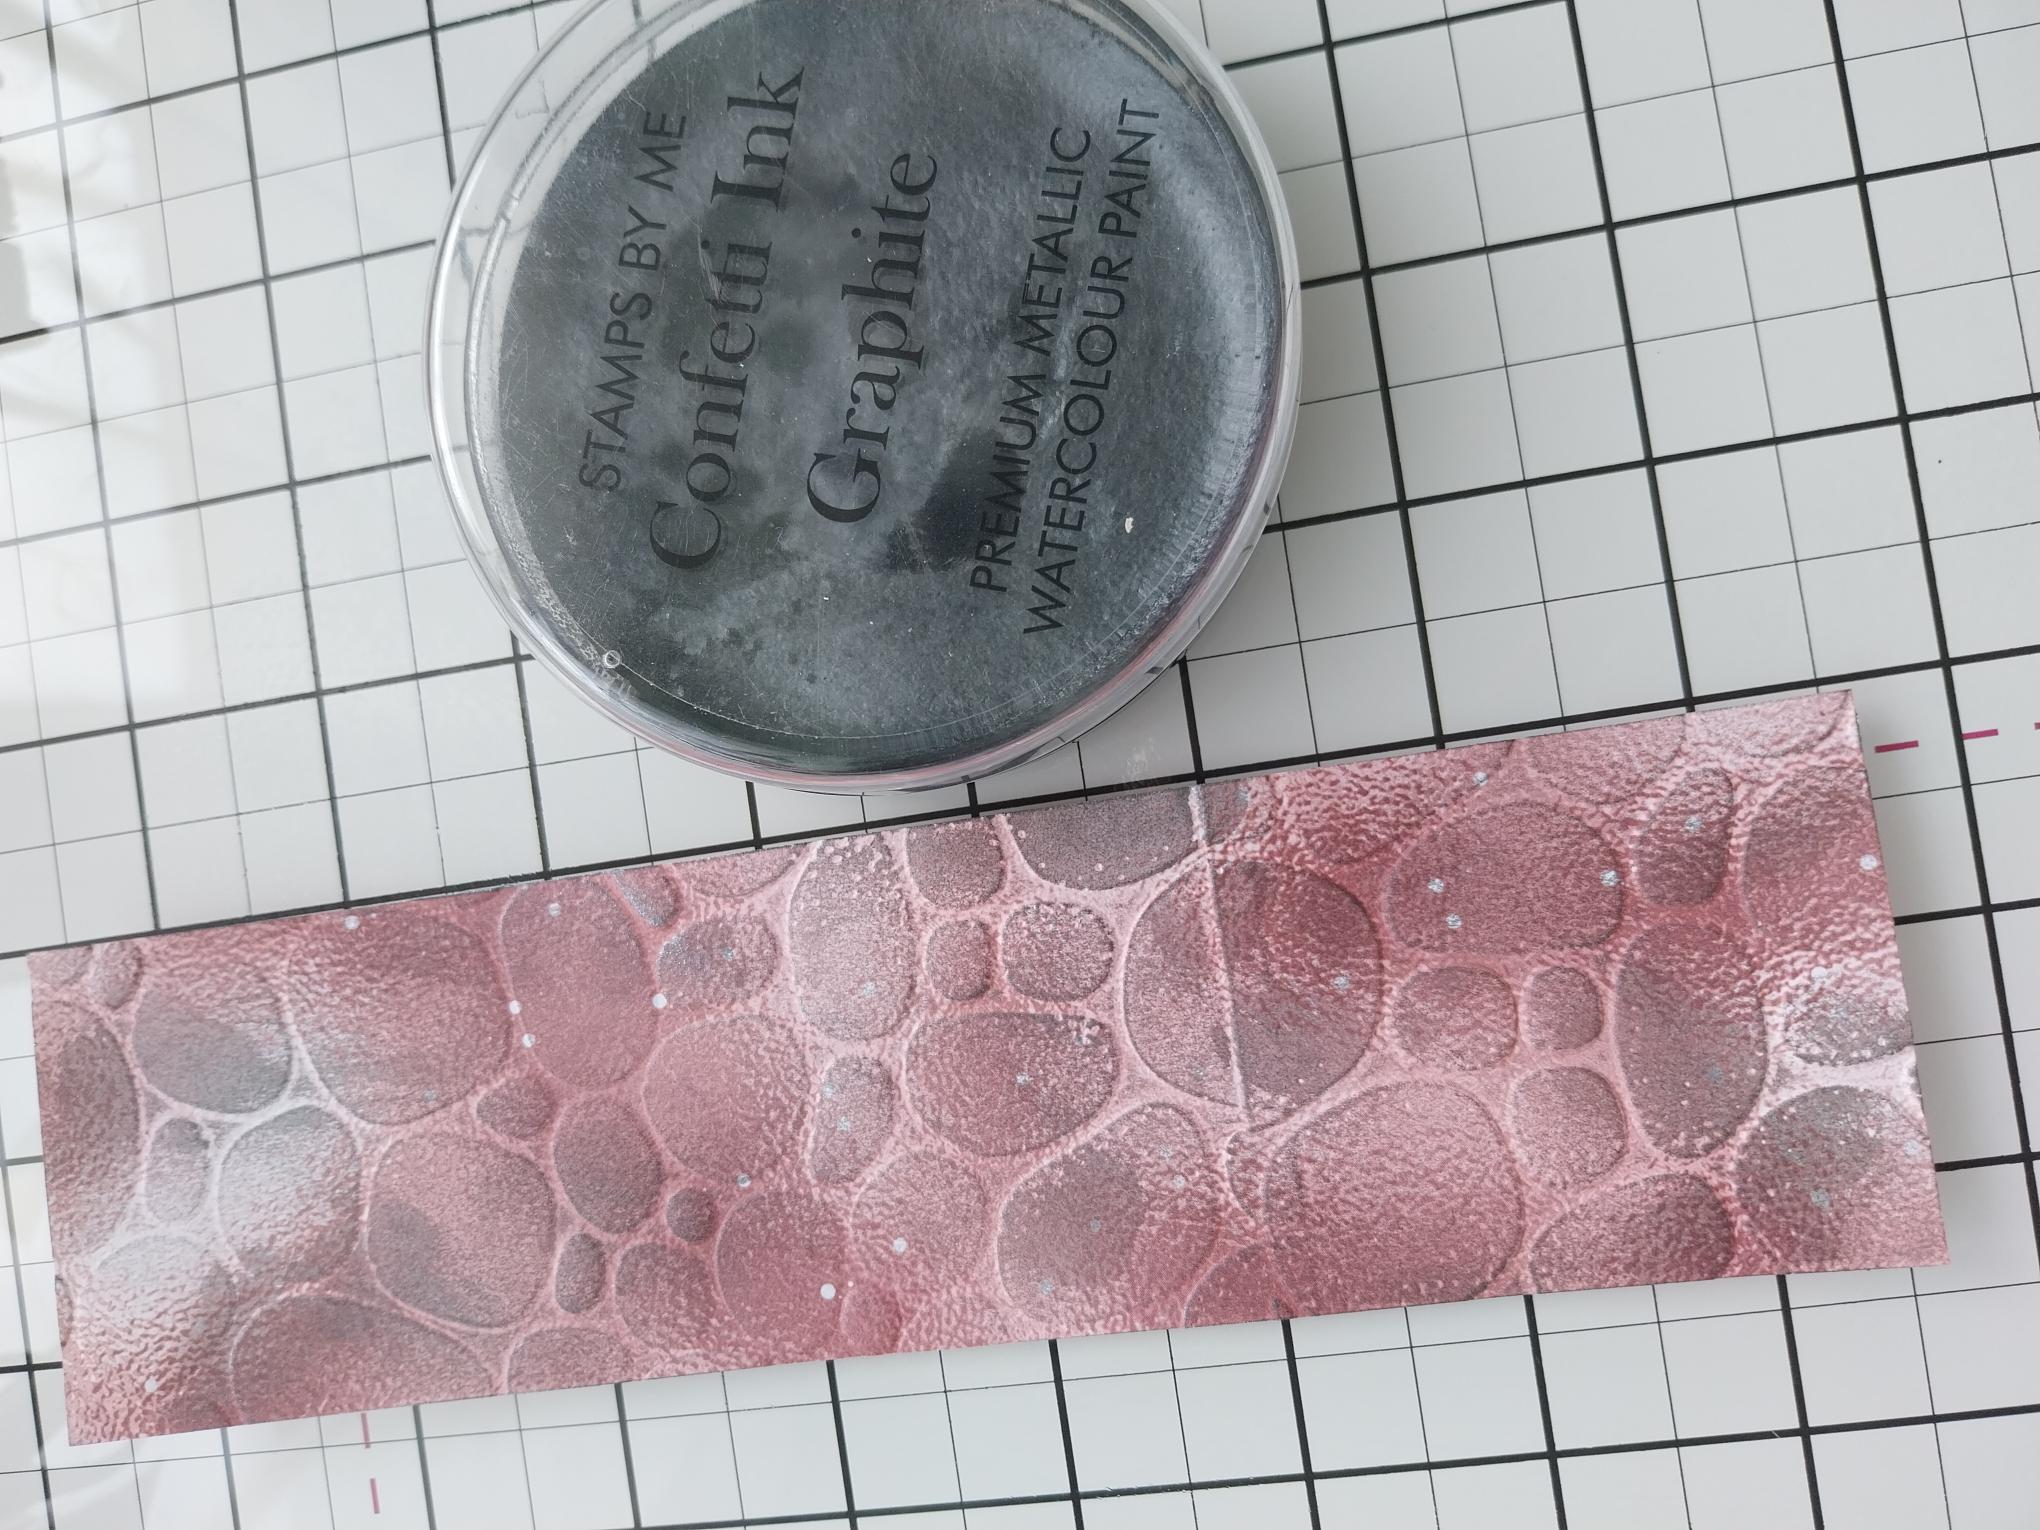
Place the pink paper in your Pebble Dash folder and run it through your embossing machine. Turn it around and emboss the other end, so you have a continuous design. Don't worry if you have a slight line in the embossed detail, as we can cover with our vellum panels. |
|
Add water to the Graphite Confetti ink and using a blending tool...or your finger, smoosh it over the embossed areas of the paper. |

|
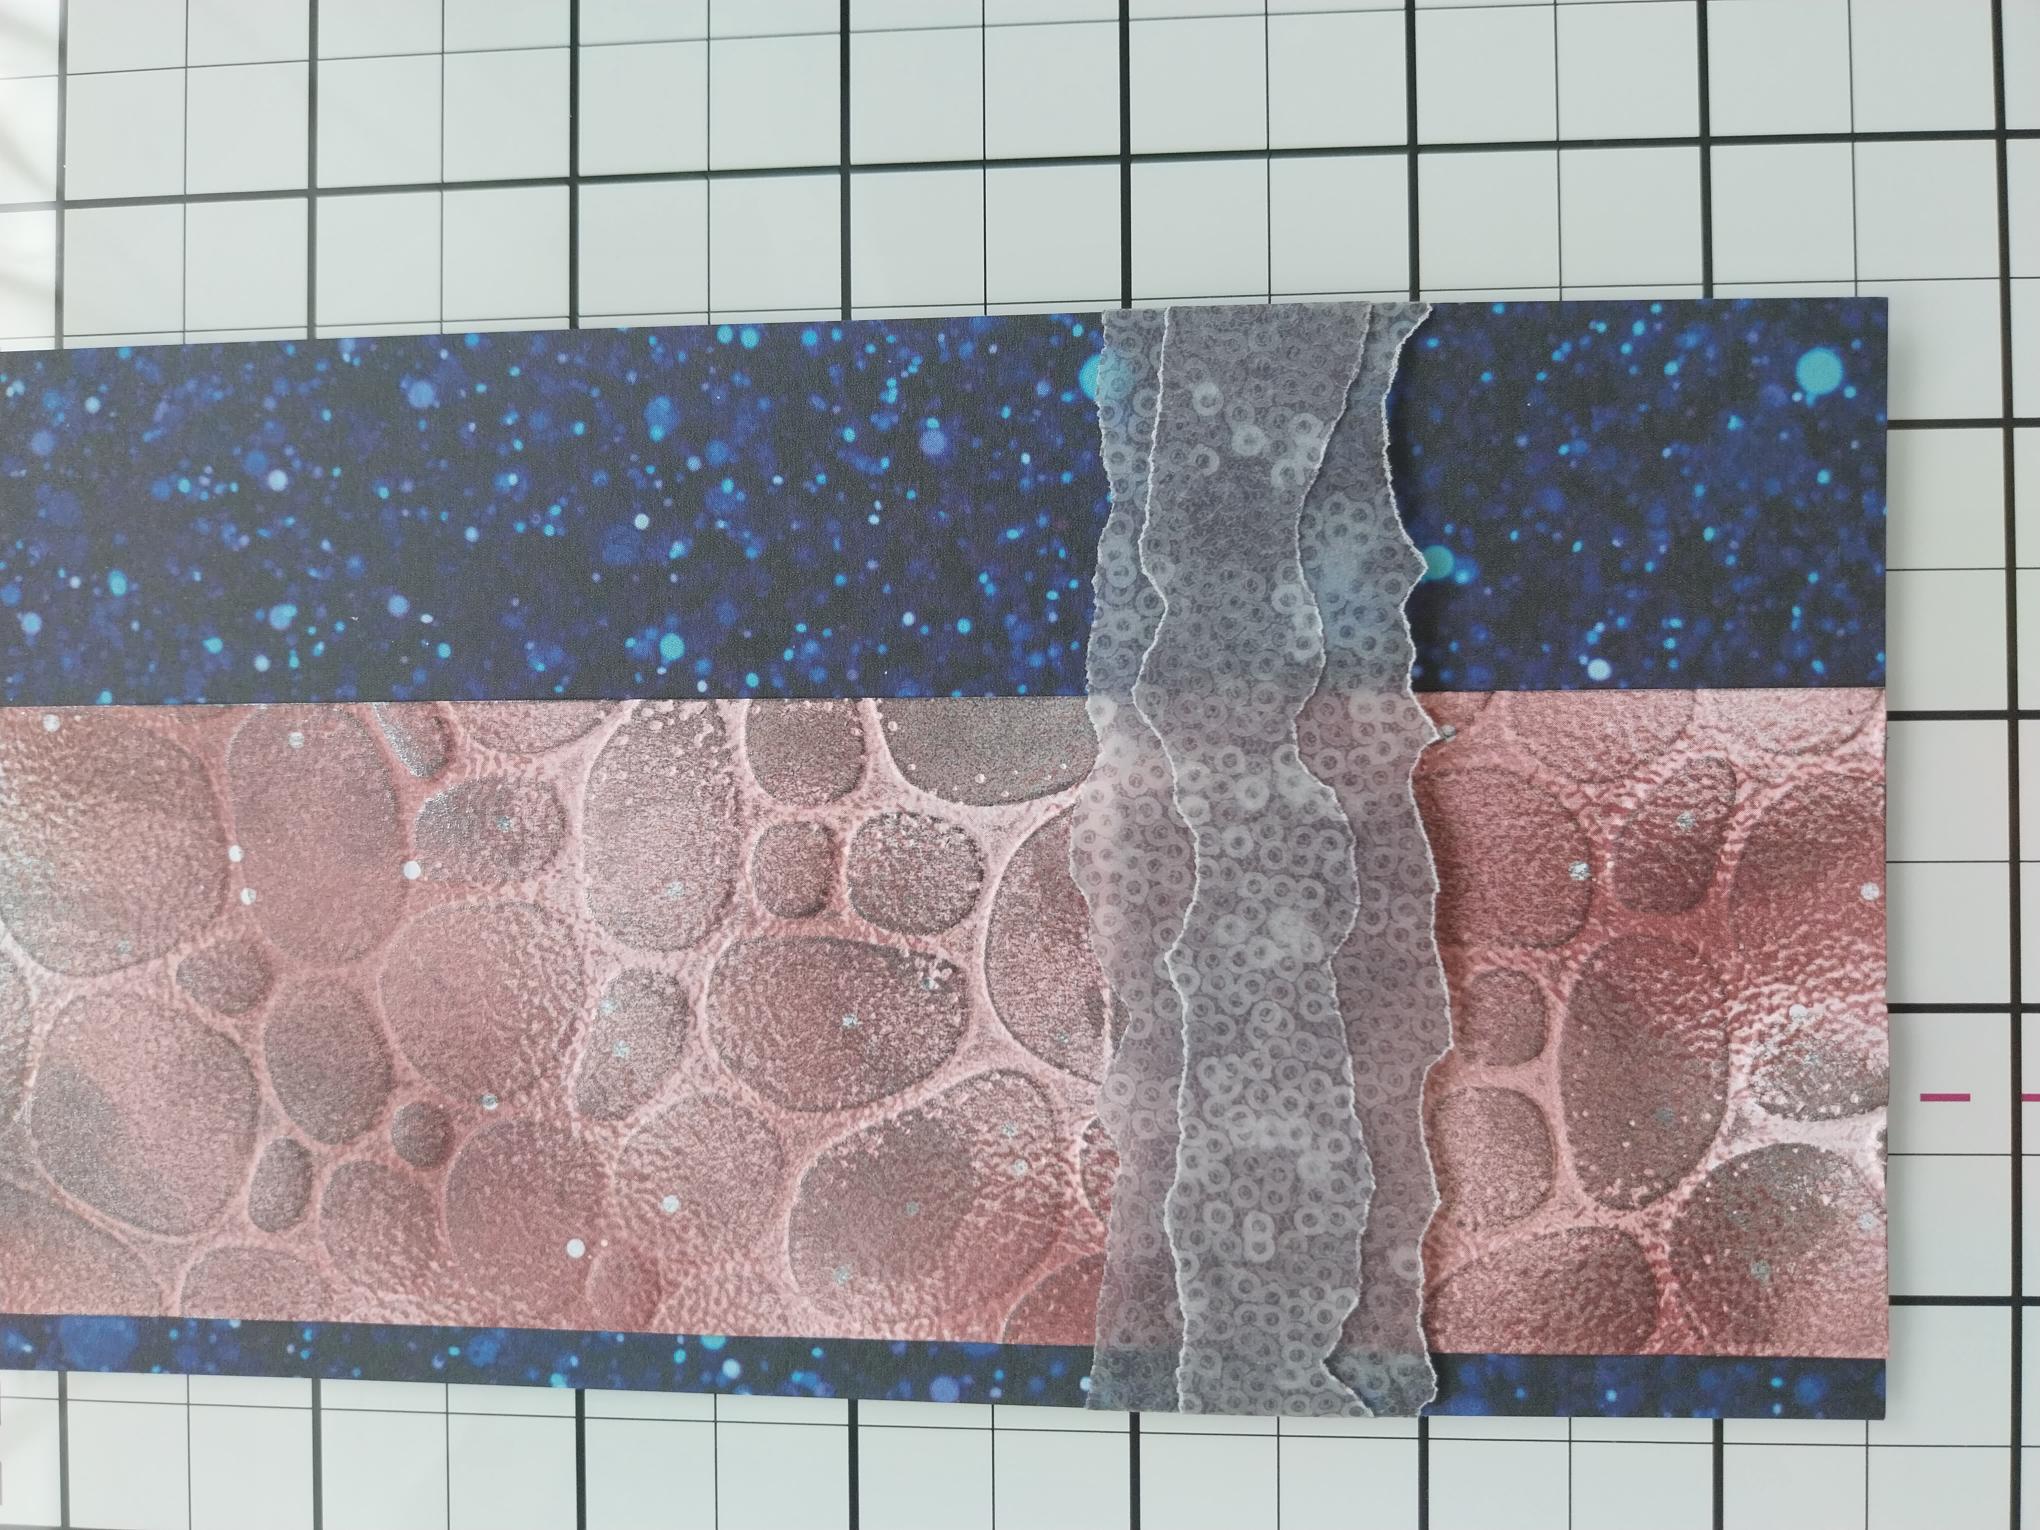
Adhere the embossed panel to the left of the blue paper, leaving a slight gap visible down the left side. |
|
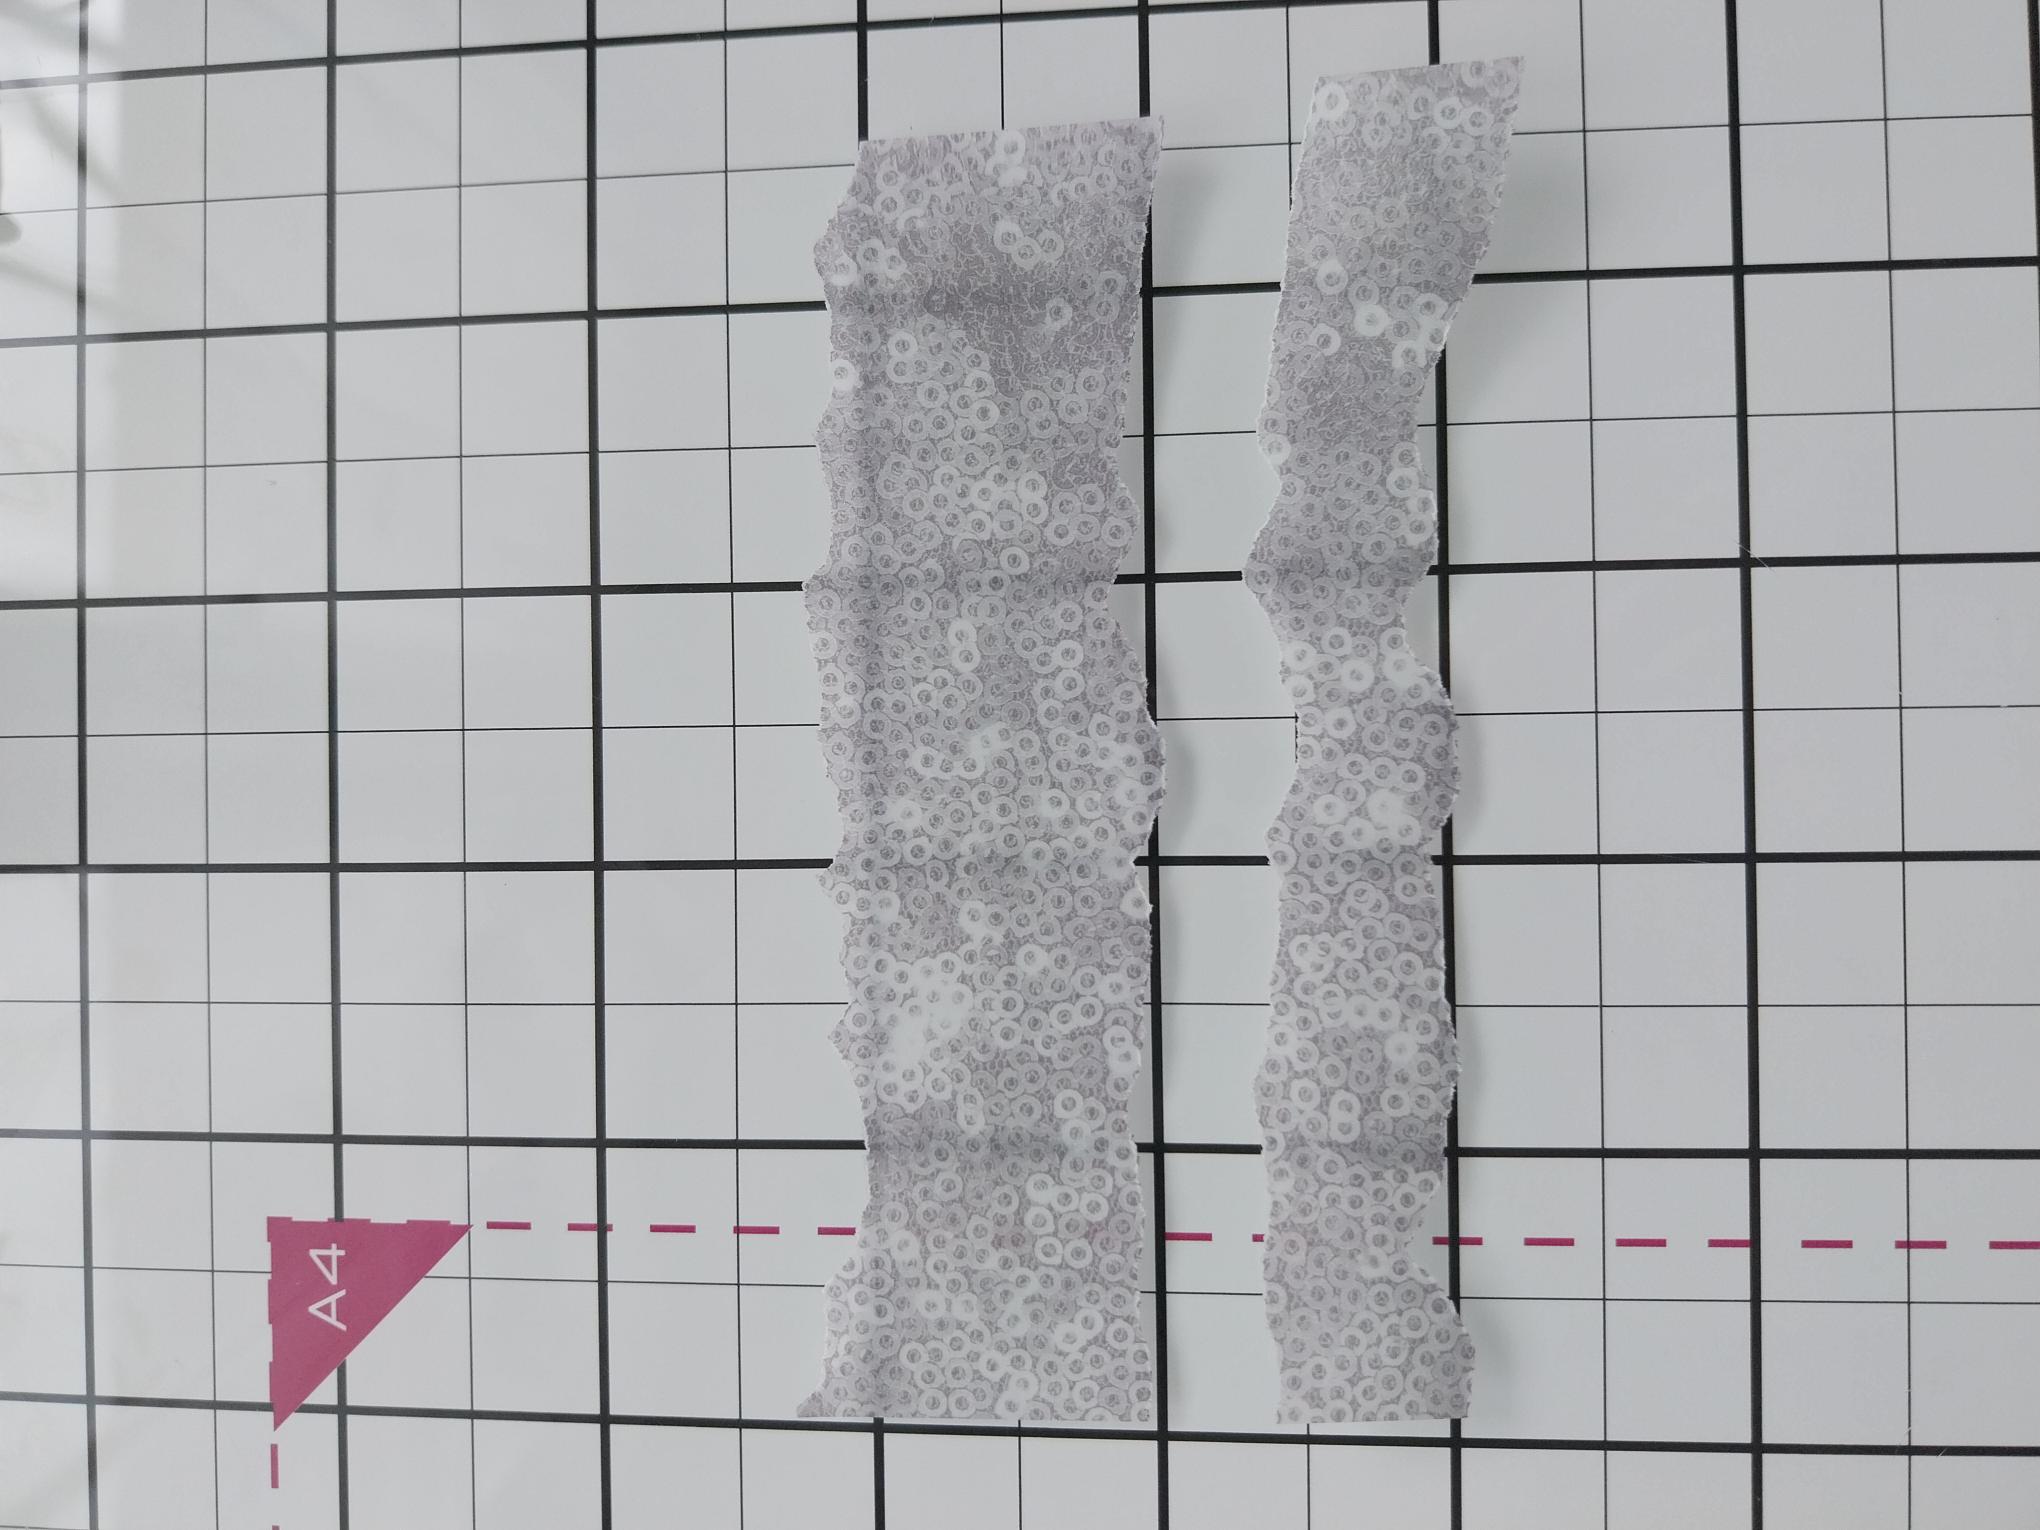
Tear 2 panels of vellum from the Classic Celebration pack, roughly 4 1/4" long and one wider than the other. |
|
Adhere the widest first, across the bottom third of the papers, securing on the reverse with double-sided tape. Adhere the narrower one on top, again securing on the reverse. |
|
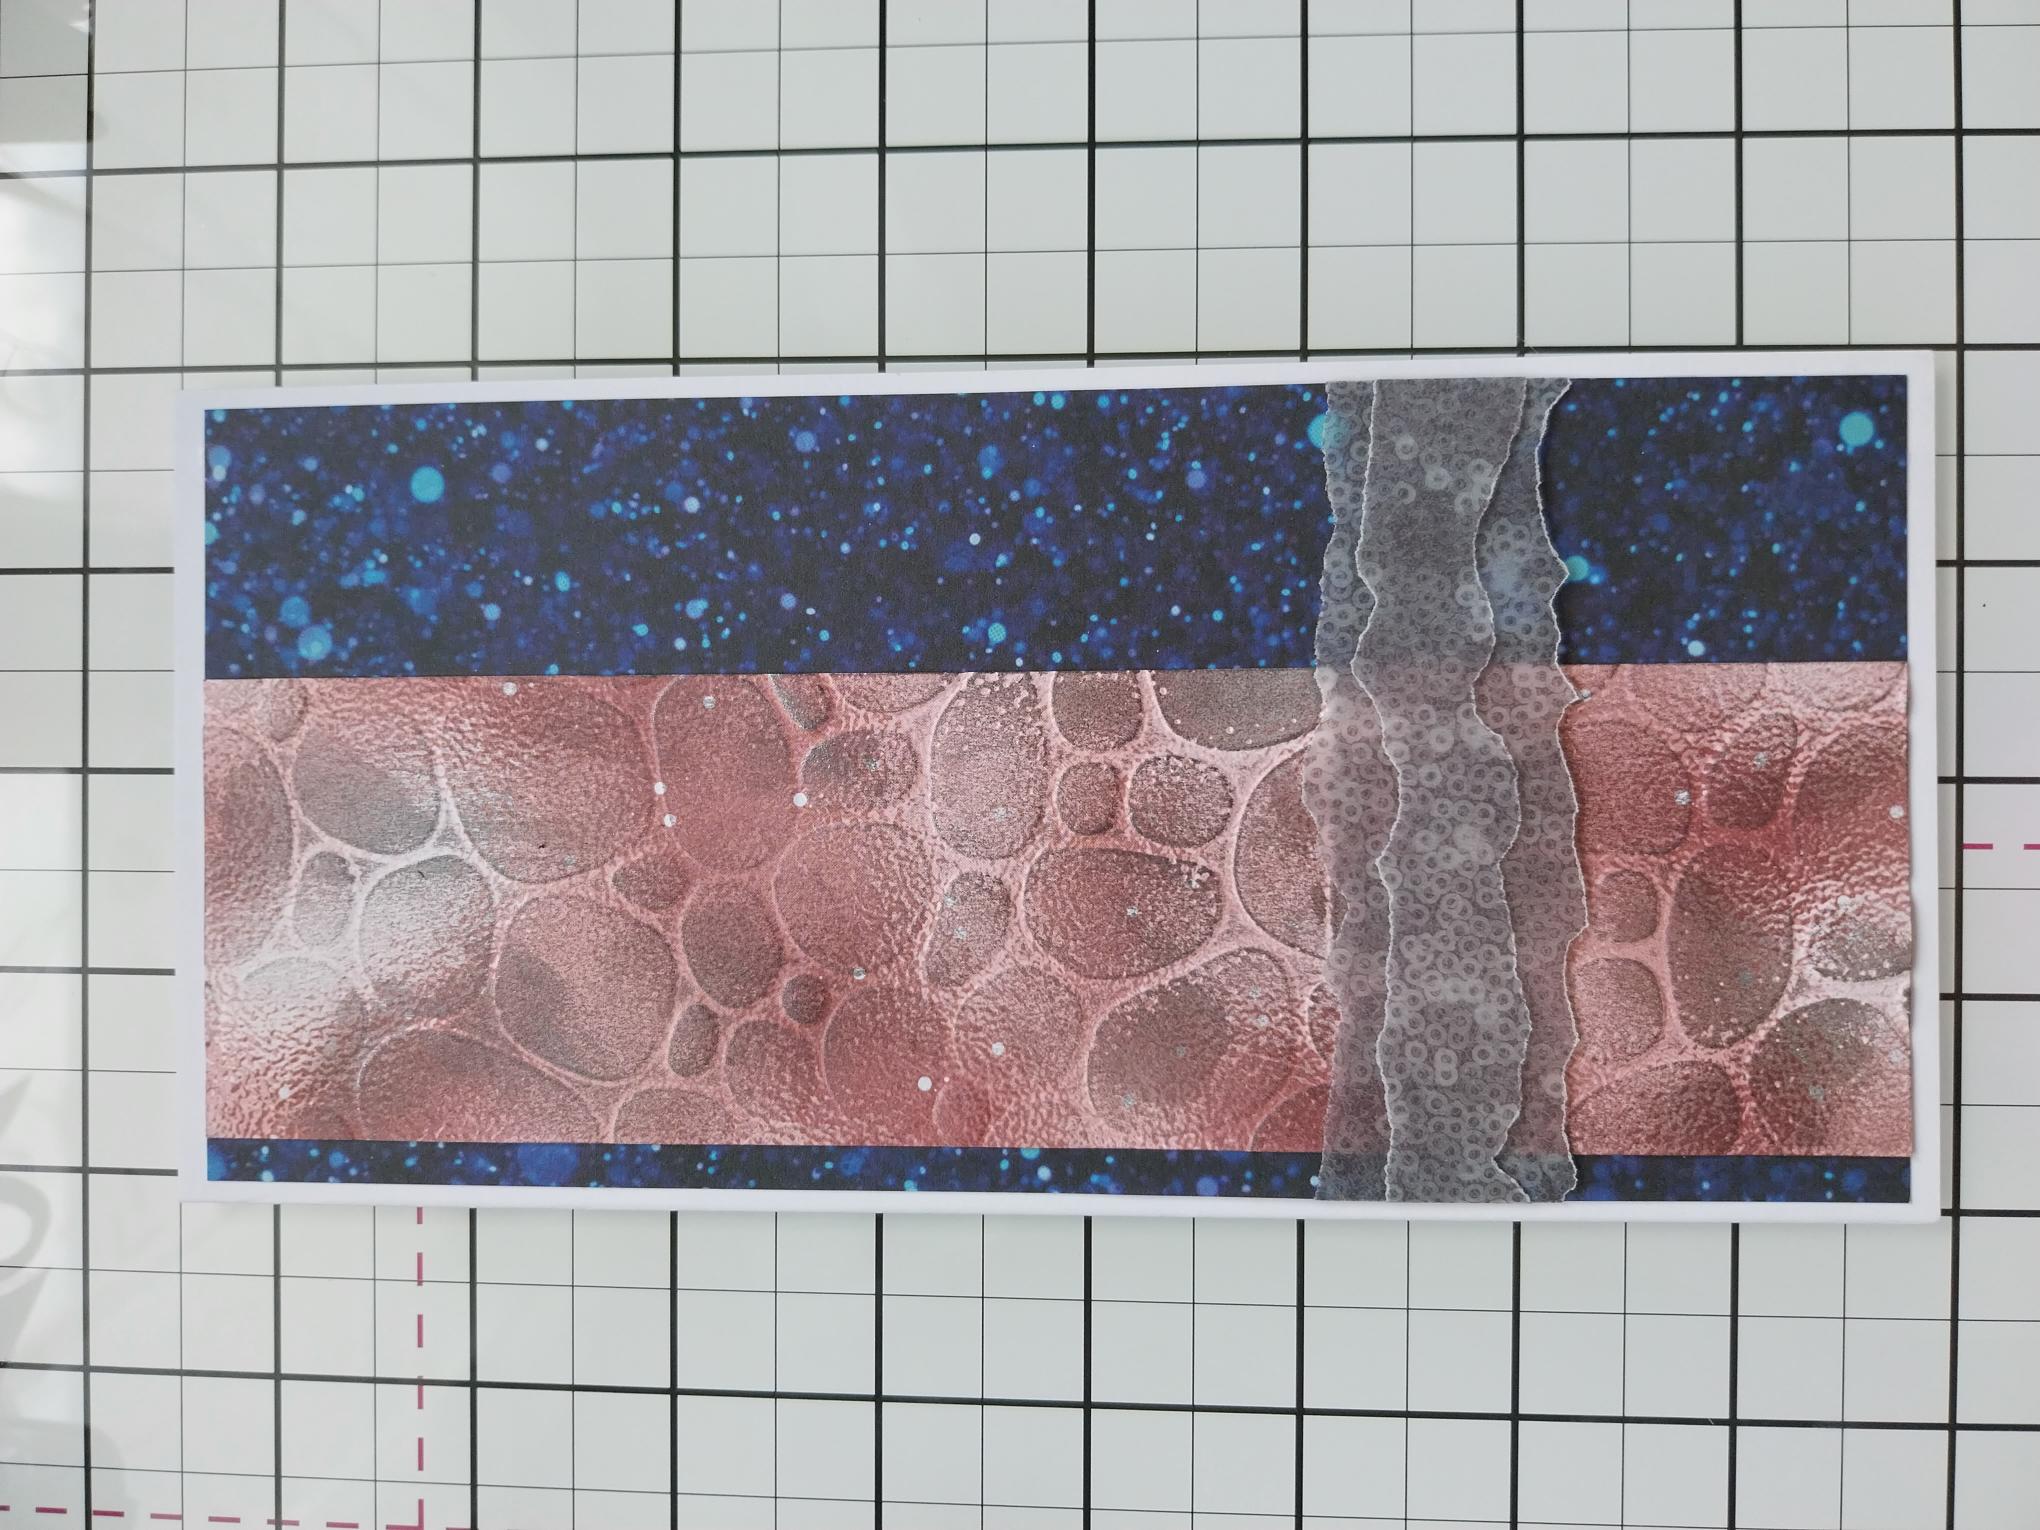
Adhere to the front of your DL card blank and set to one side. |
|
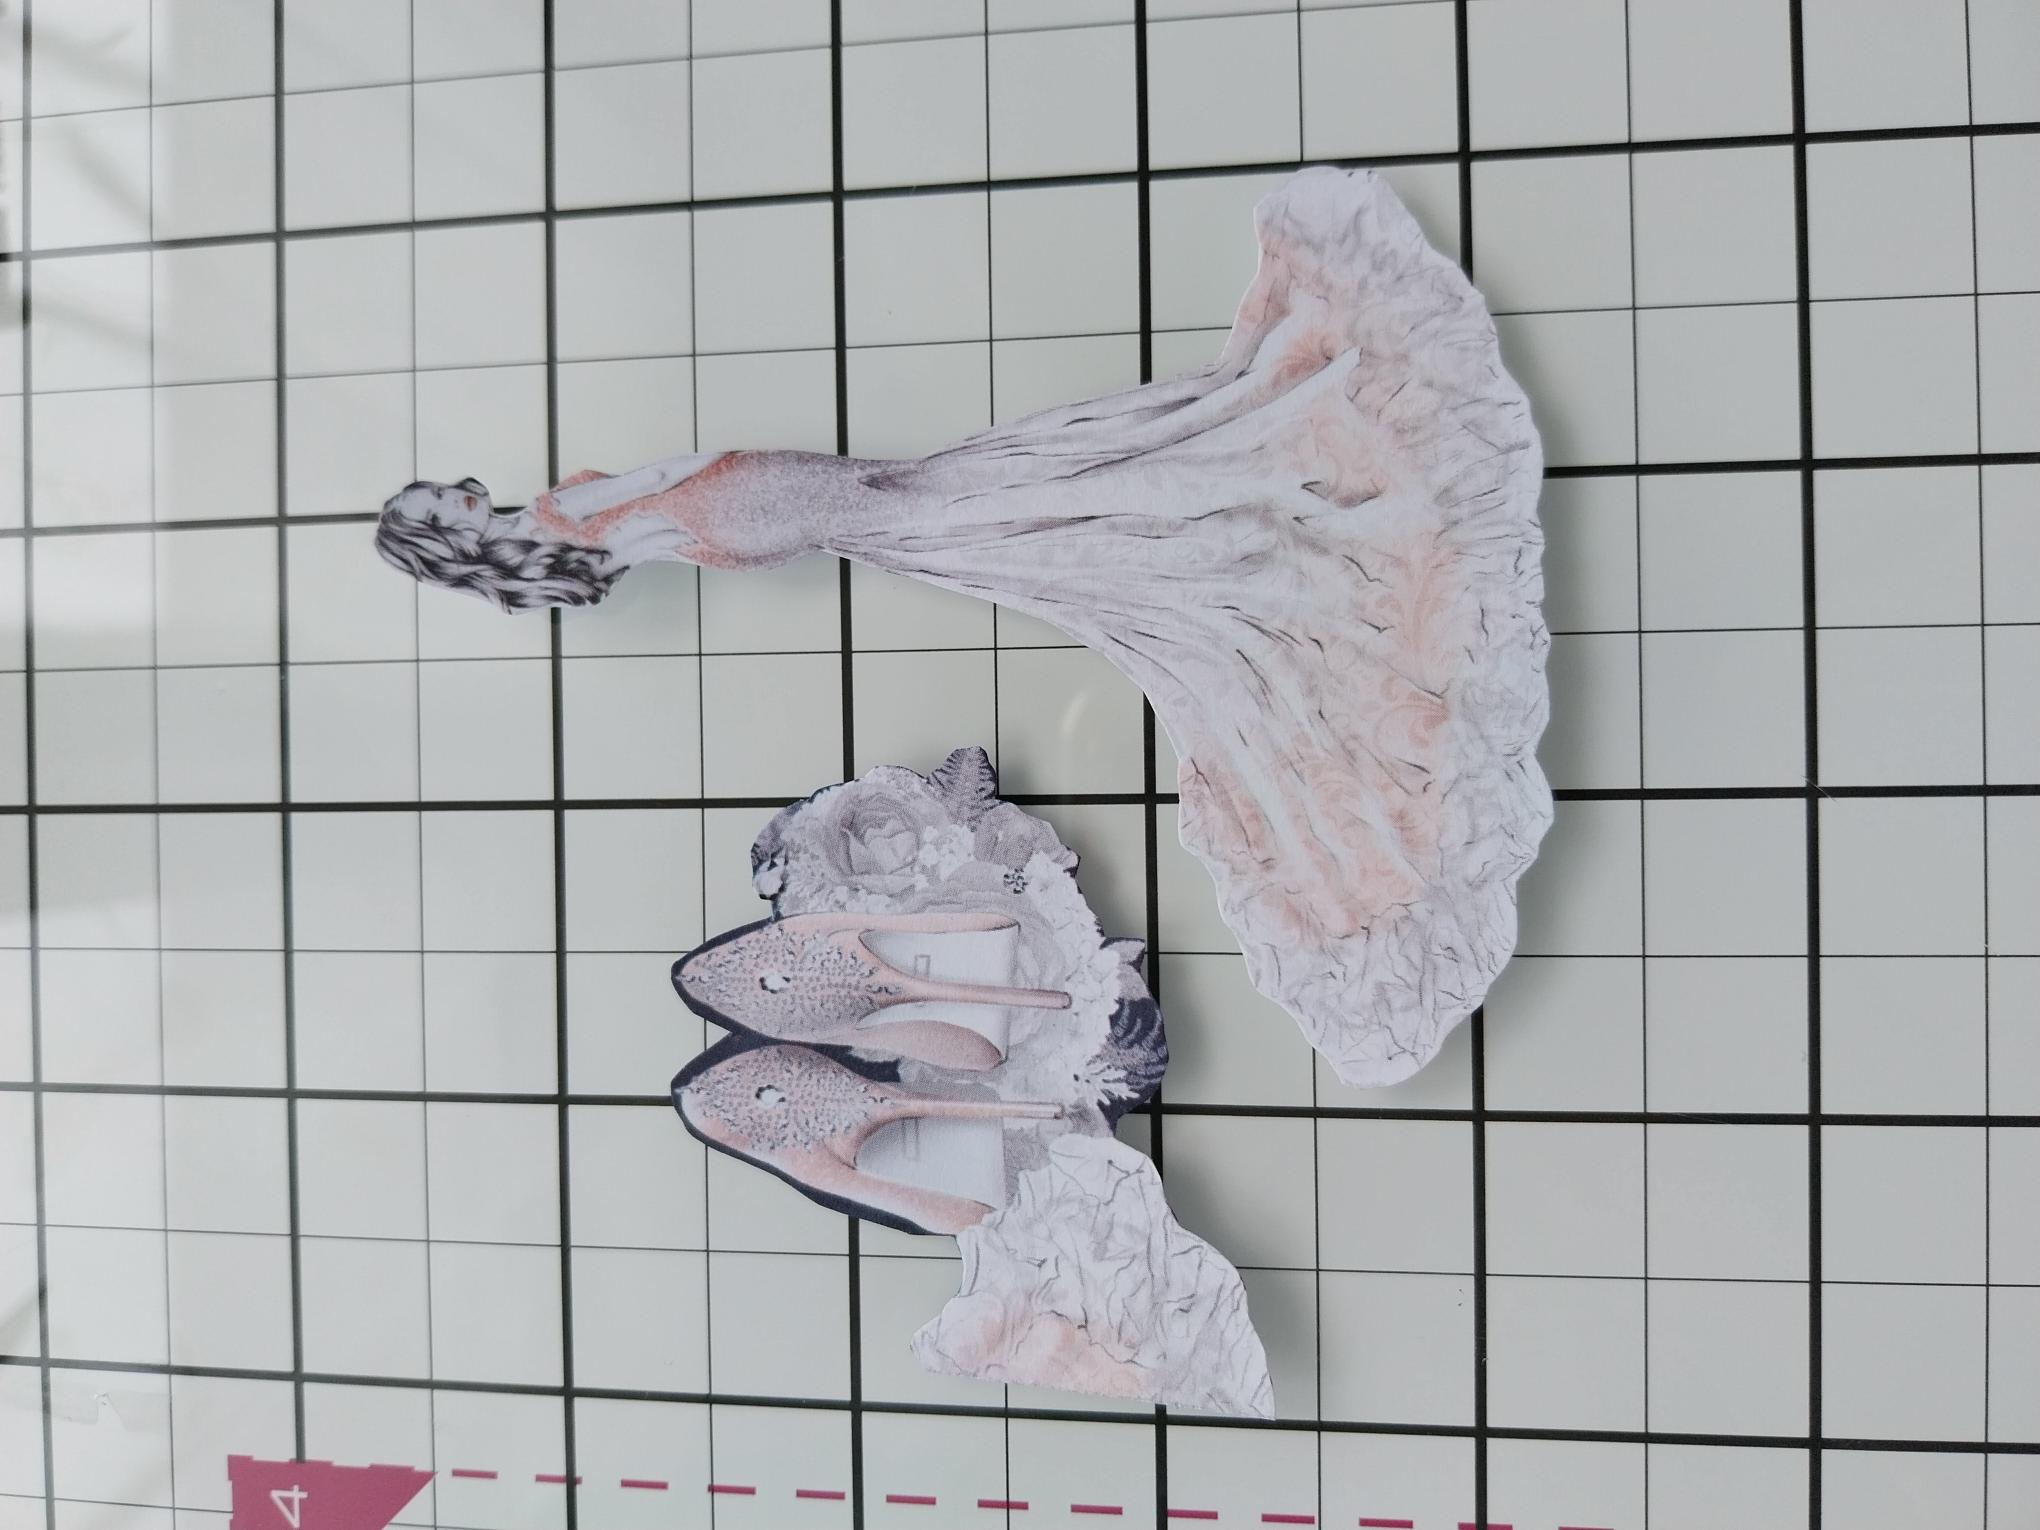
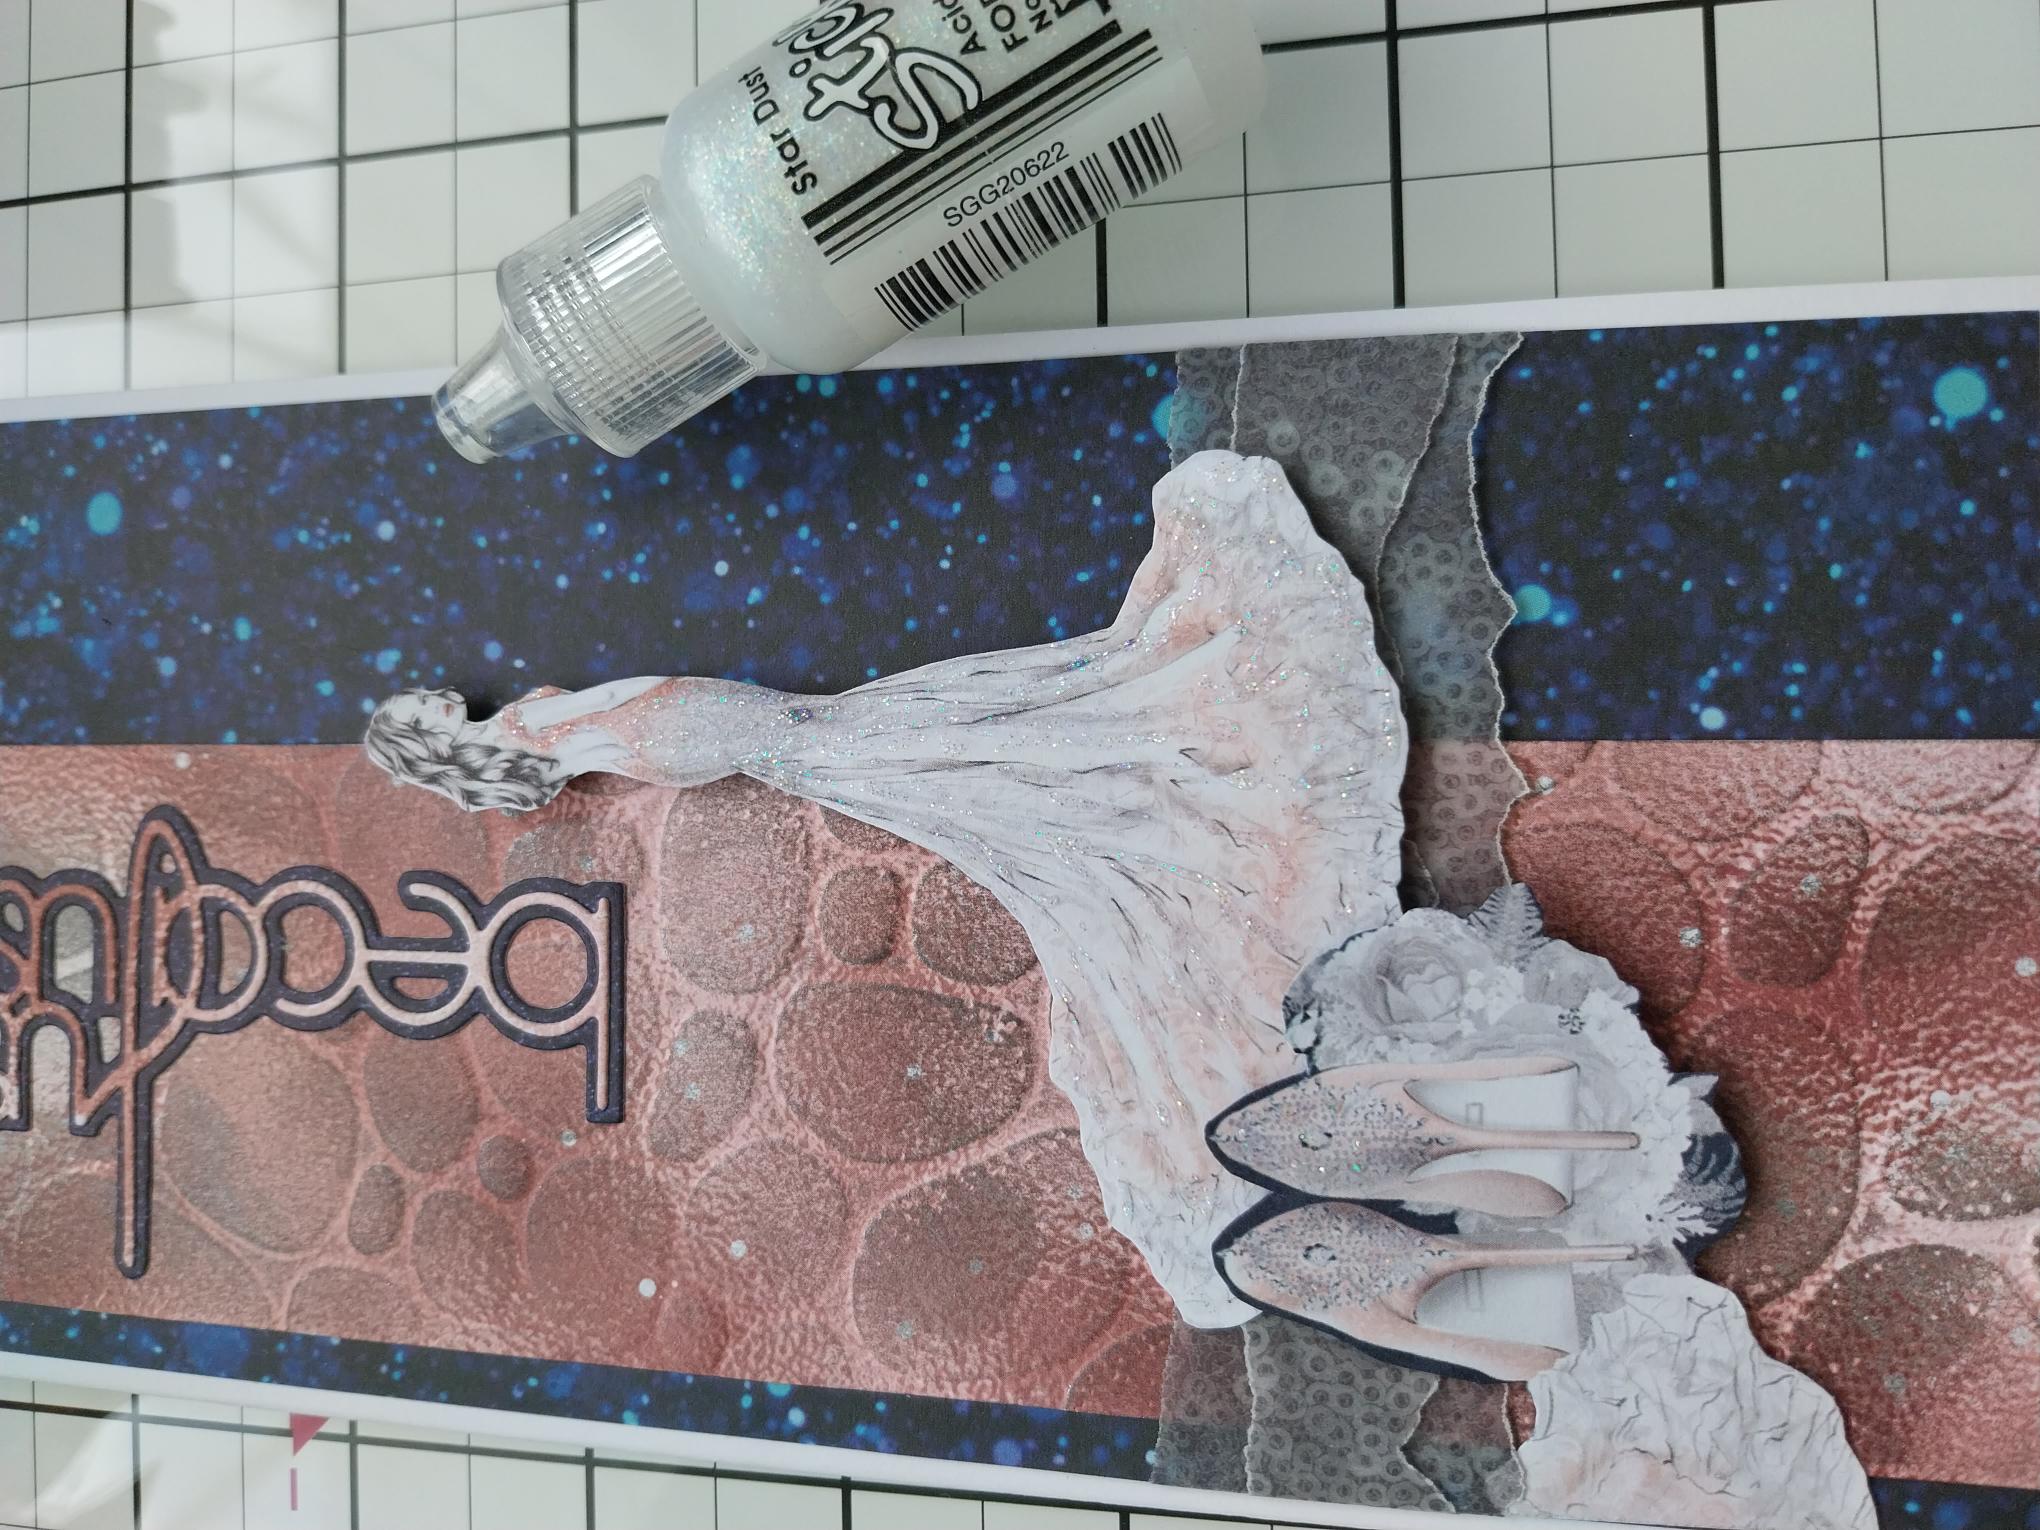
Fussy cut out one of the right-facing lady's, shoes and floral elements from the Classic Celebration paper pack. |
|
Adhere to your card, using a combination of wet glue and foam pads, so she is standing on the vellum panels. |
|
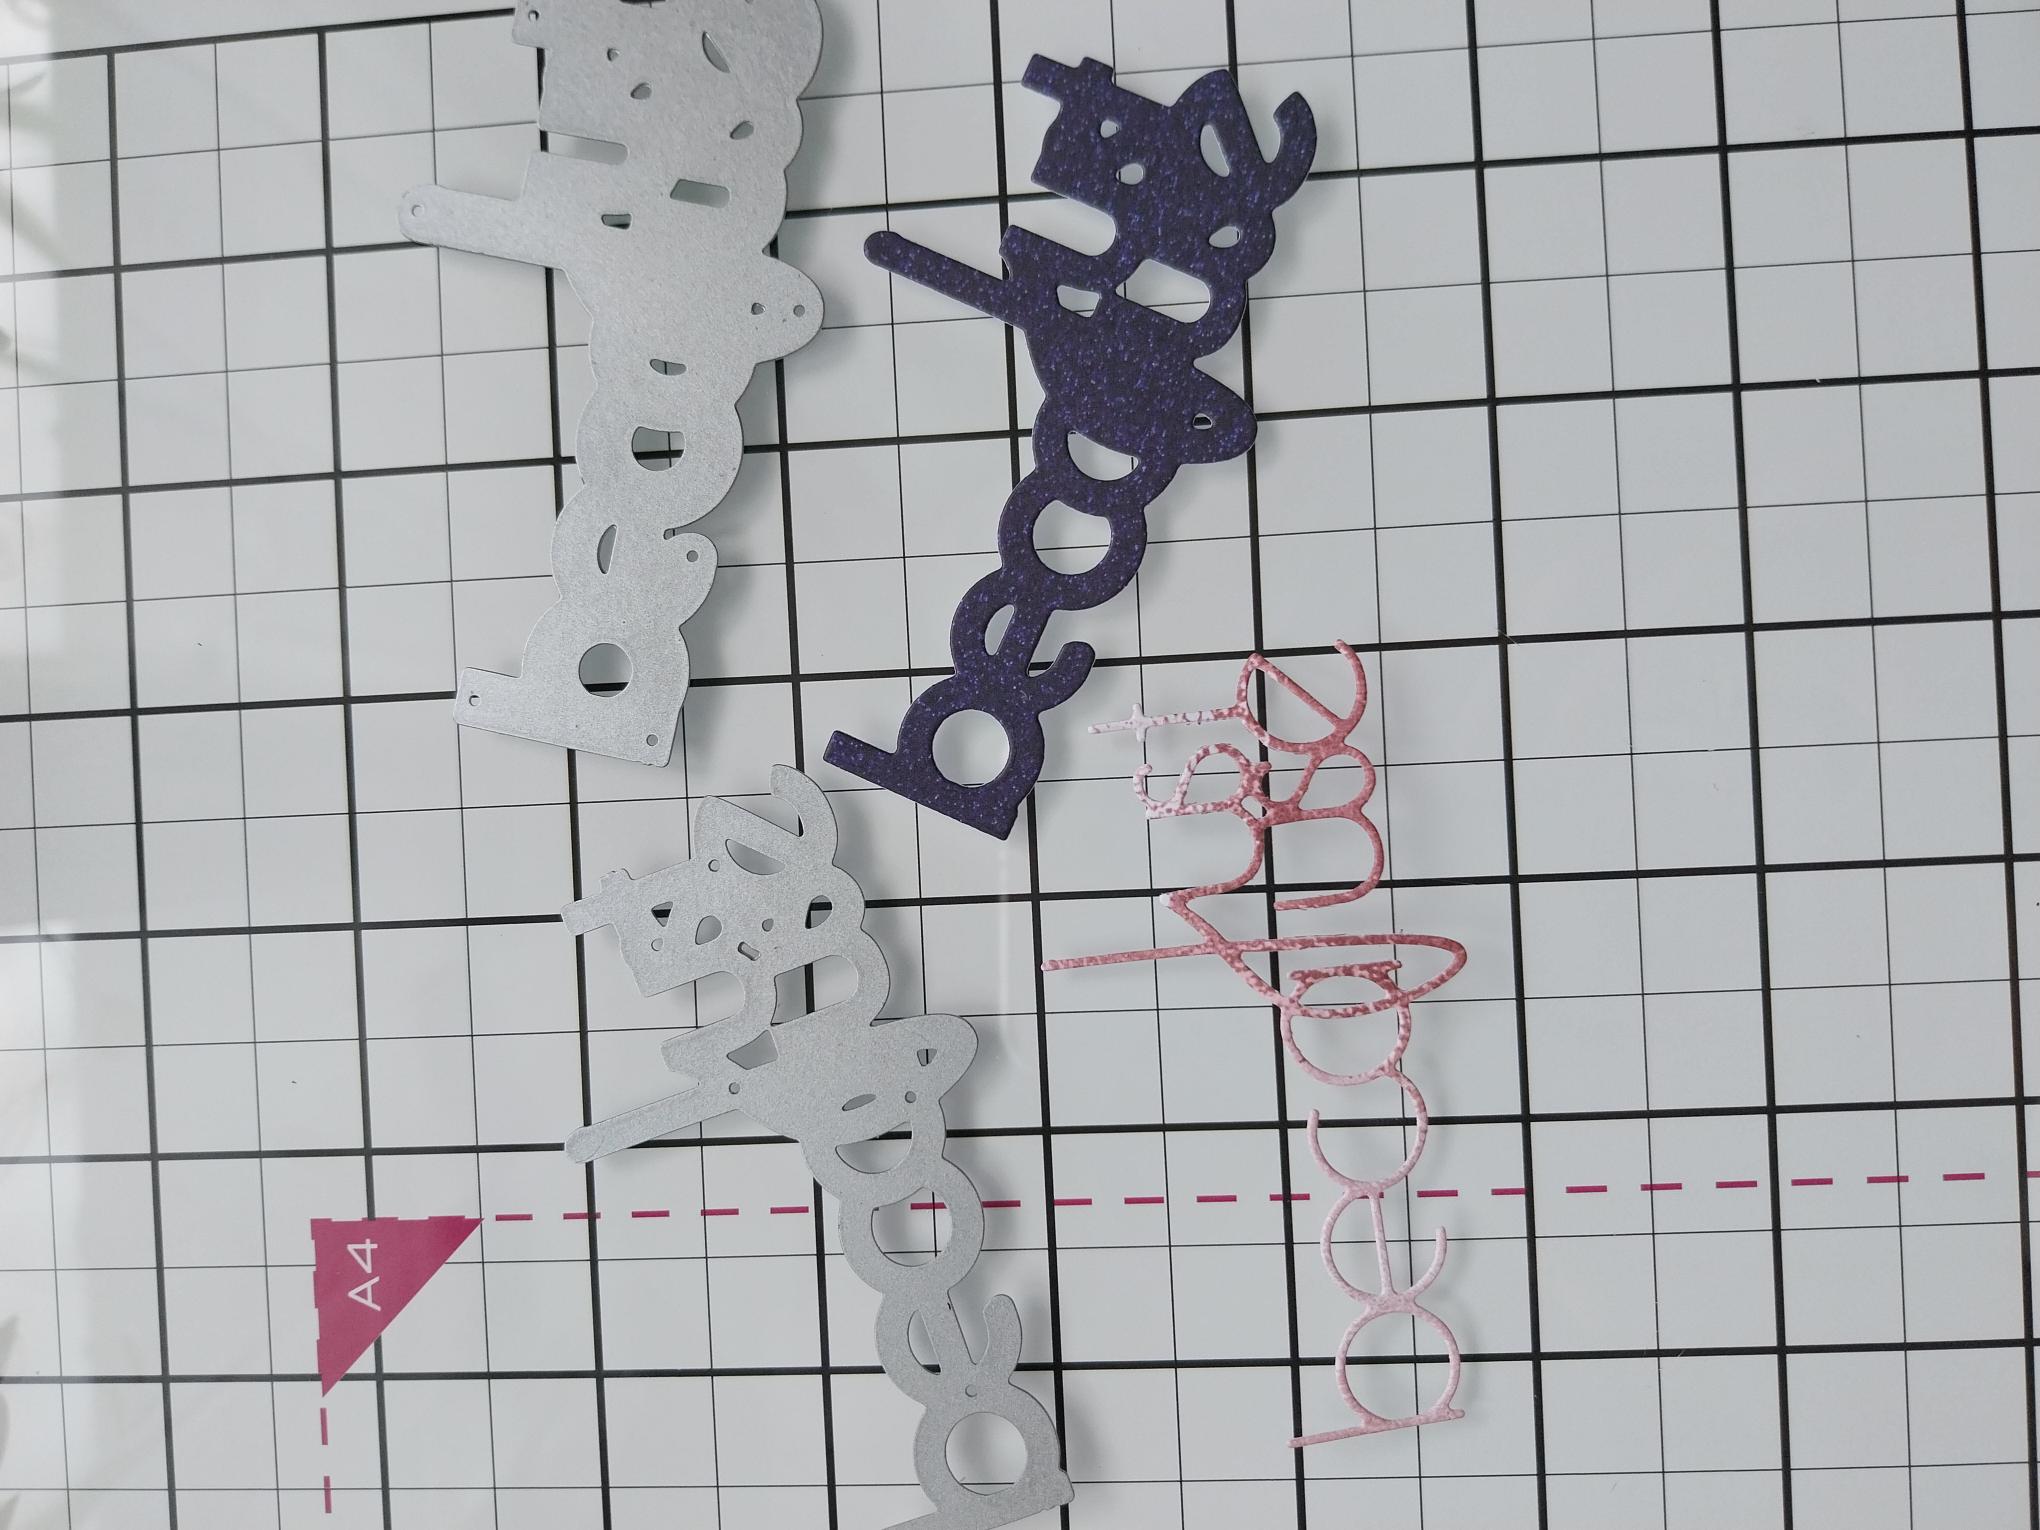
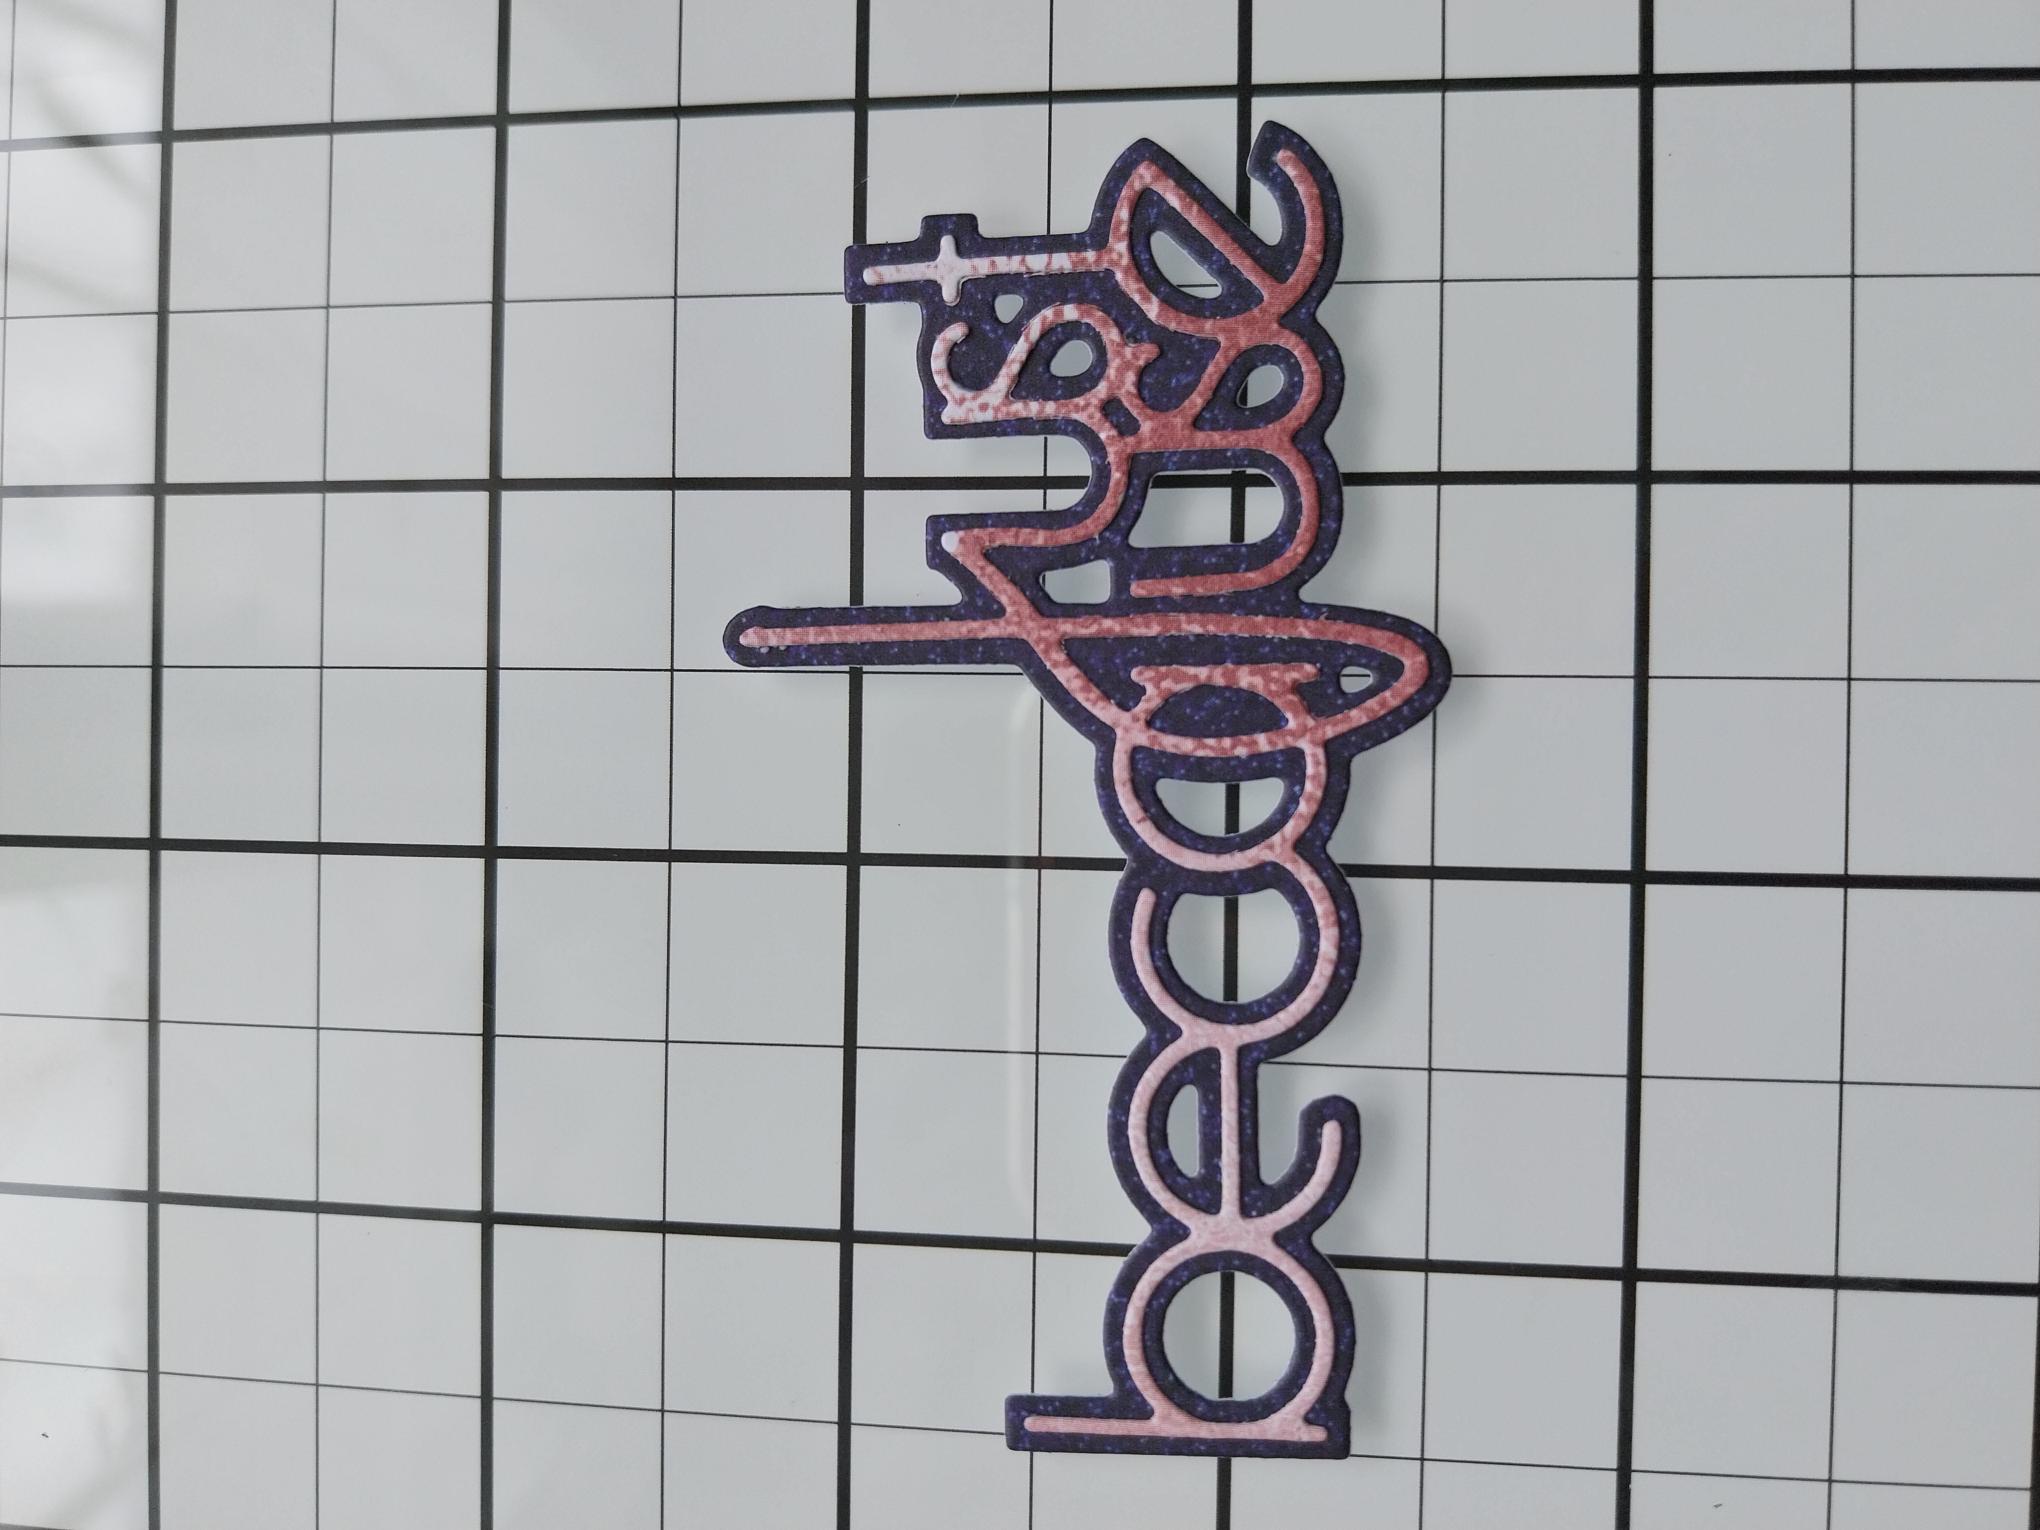
Die cut the detailed and layering "Just Because" sentiments from the left over pink and blue papers. |
|
Adhere the detailed sentiment on to it's layering mat. |

|
Adhere the sentiment going down the embossed panel. |
|
To finish, add Stickles to the folds of the gown, shoes and floral elements. |