Give your friends $10 off their first order!
Refer a FRIEND


WHAT YOU WILL NEED:
White card blank 7 x7"
White card 5 1/2" square
White card A4
White card 6 x 4 1/2"
Watercolour Infinity Embossing Folder
SBM Hybrid Ink Pad: Midnight
Distress Oxide: Victorian Velvet, Vintage Photo, Walnut Stain
Blending tool
All Surfaces Copper 8 x 8" paper pack
WOW Blooms Stamp And Die Collection
Let's Celebrate Stamp And Die Collection
Sepia Tabs Washi Tape and Die Collection
Circle Mask 2 1/2" diameter
Periwinkle sequins
Pick up gem and pokey tool
Water spray botlle
Eureka 101 Watercolour Tablet
SBM Magnetic glass mat
Paper Trimmer
Perfect Together Glue
Foam pads
Die Cutting machine
[click image to enlarge] 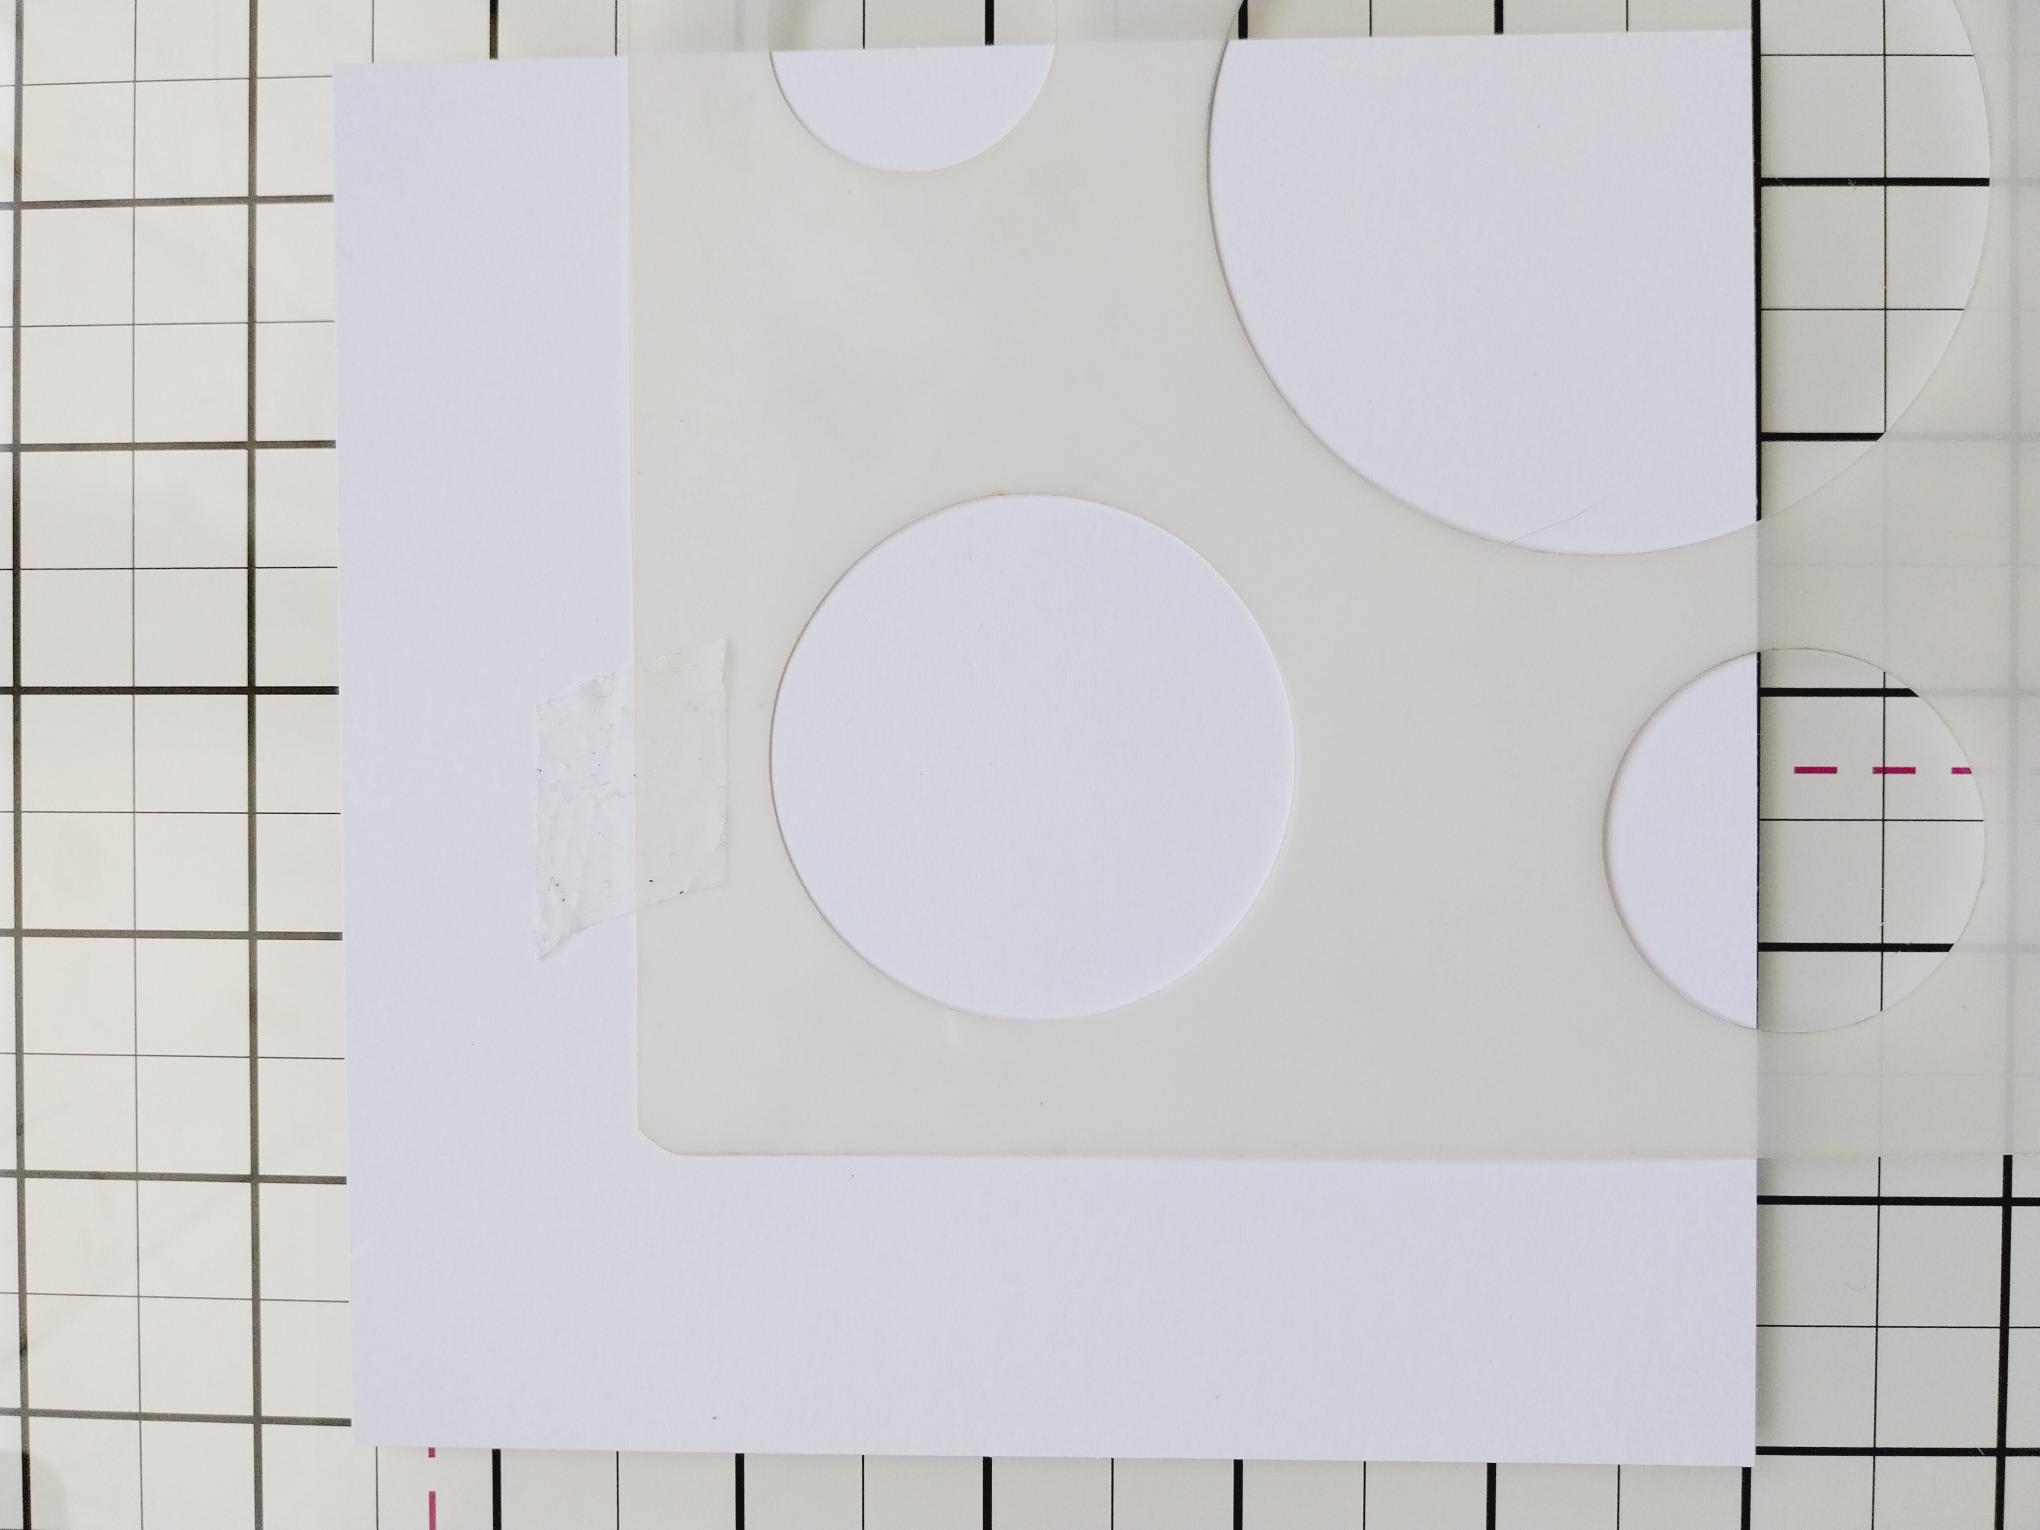
|
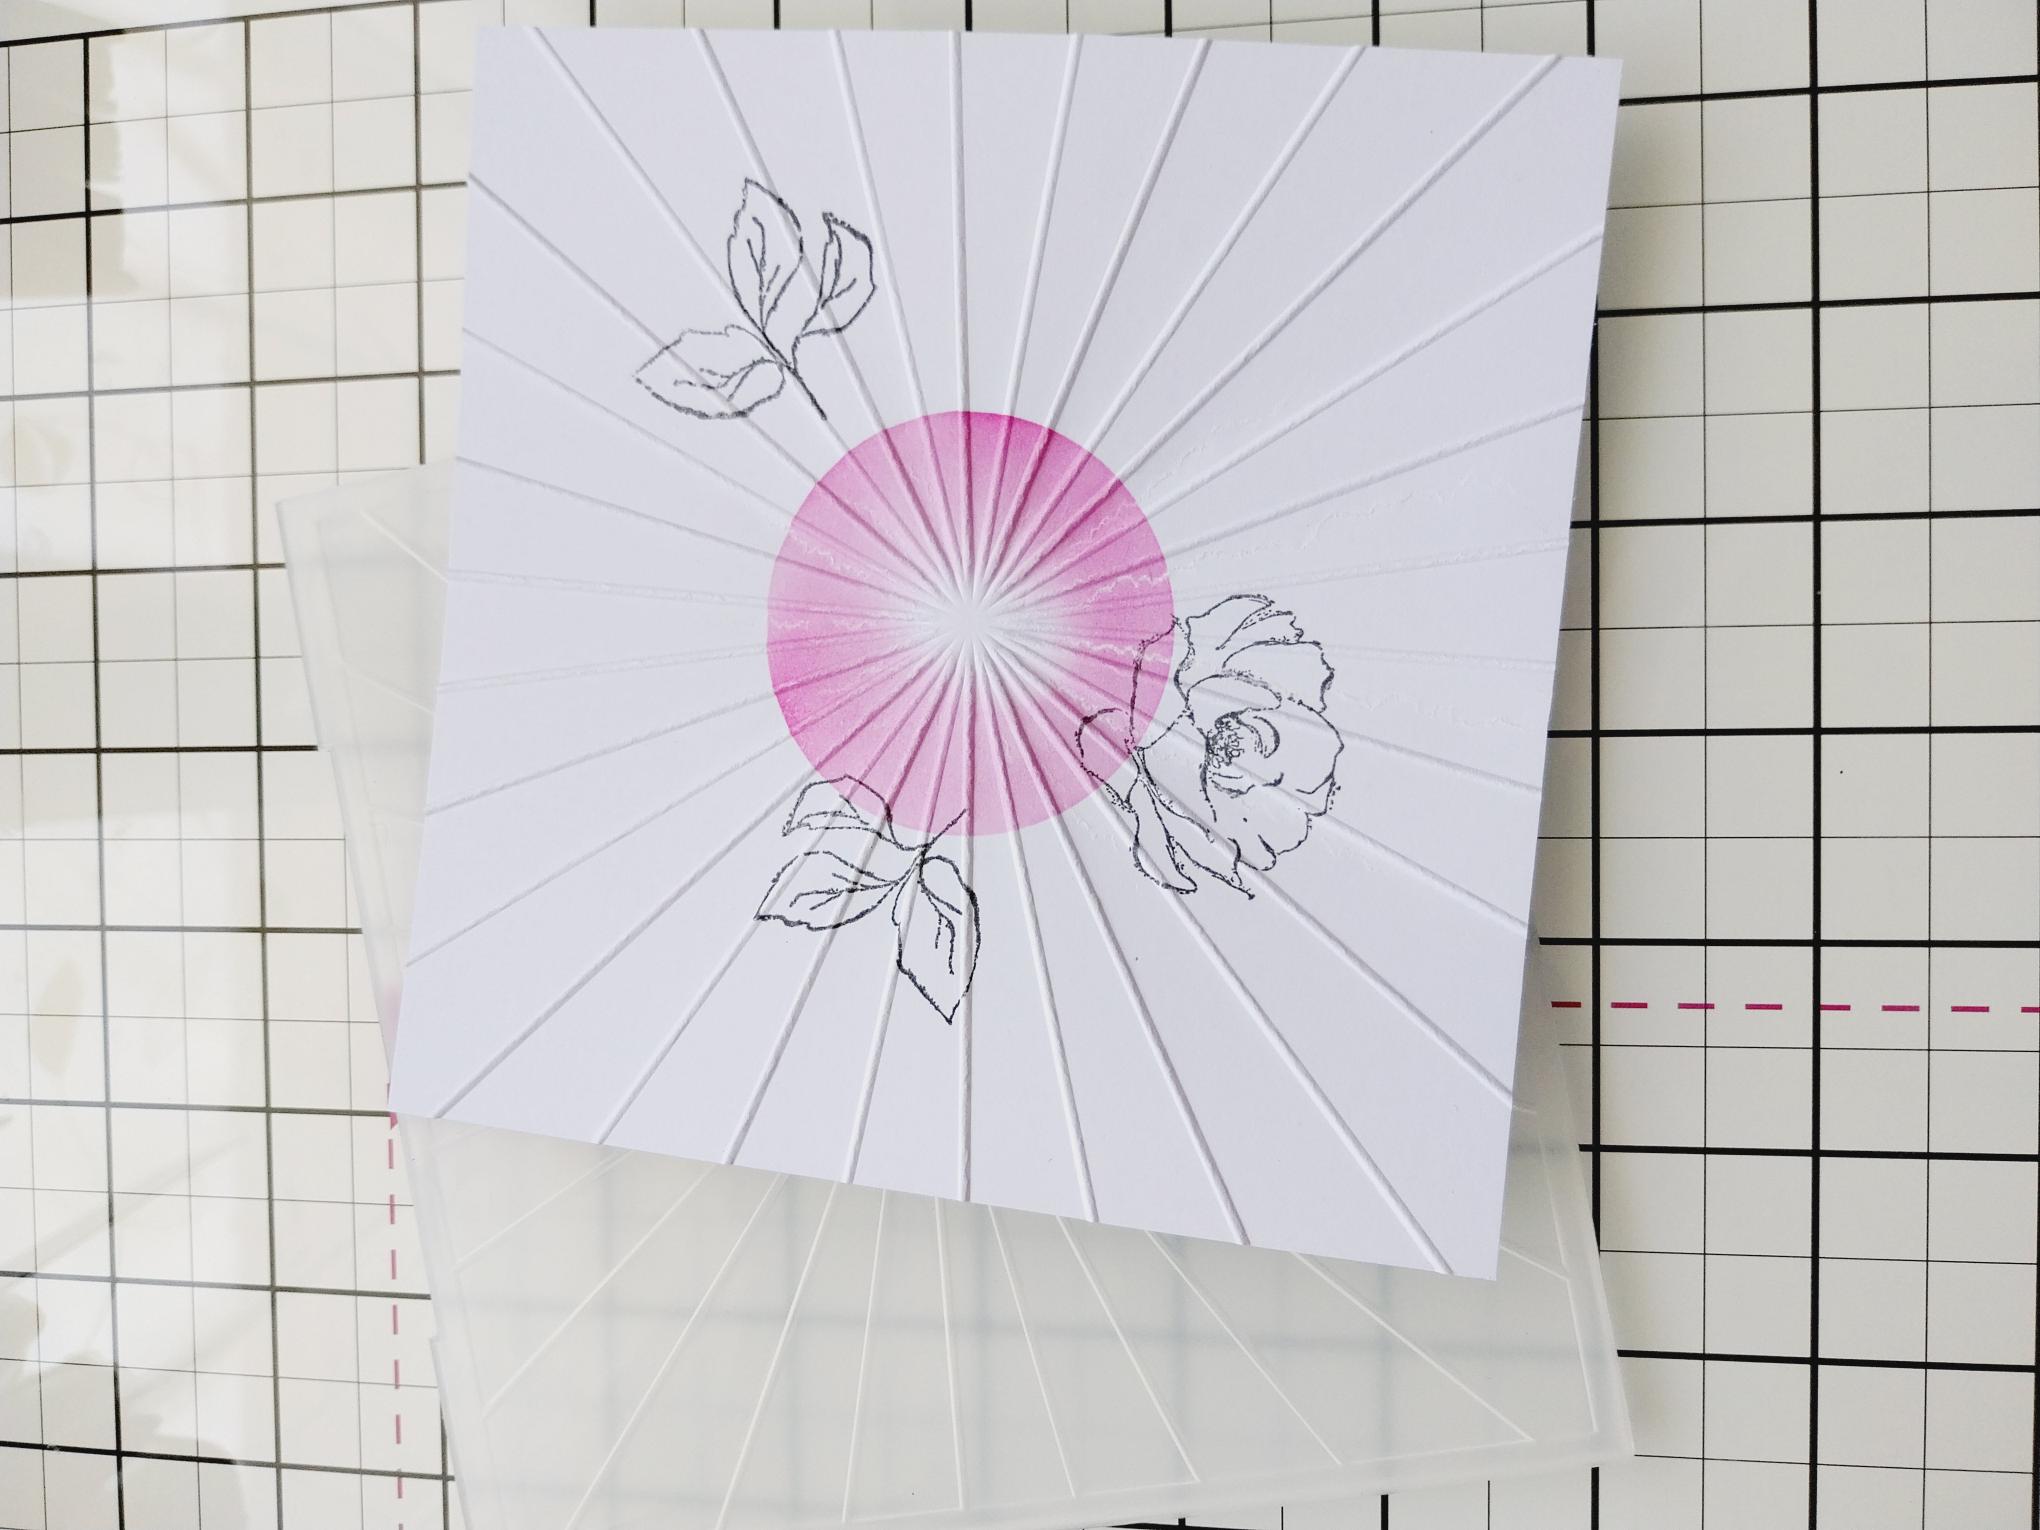
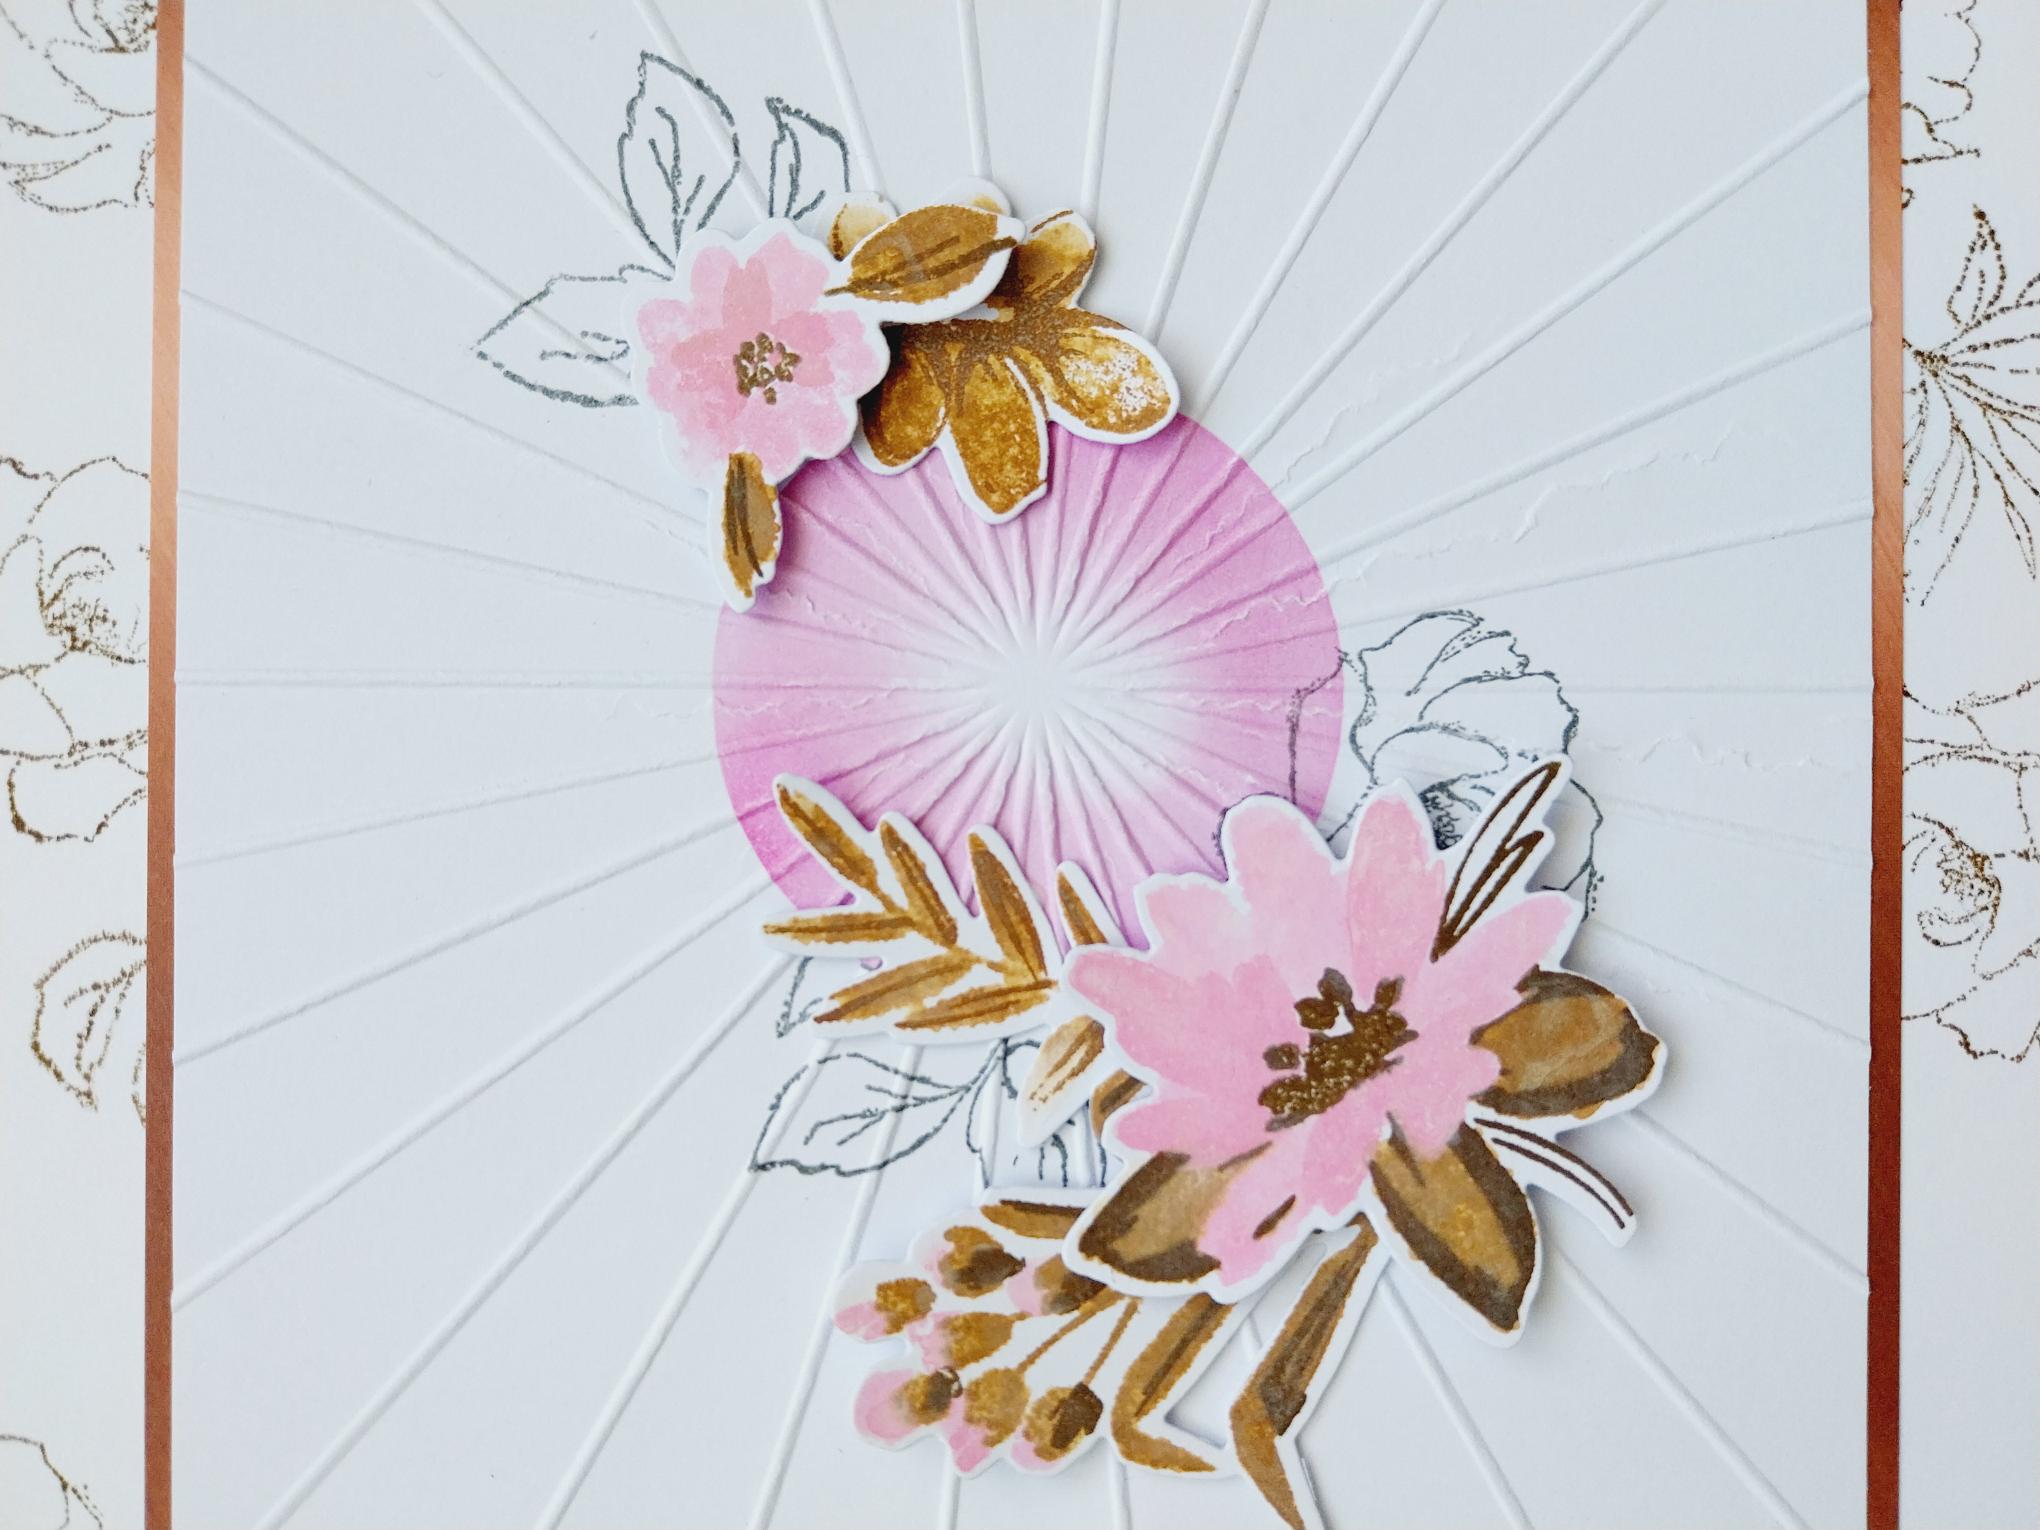
Place your 2 1/2" circle stencil in the centre of the white card, cut to 5 1/2" square. If you don't have a stencil, die cut a circle from copy paper and use the aperture as your stencil. |
|
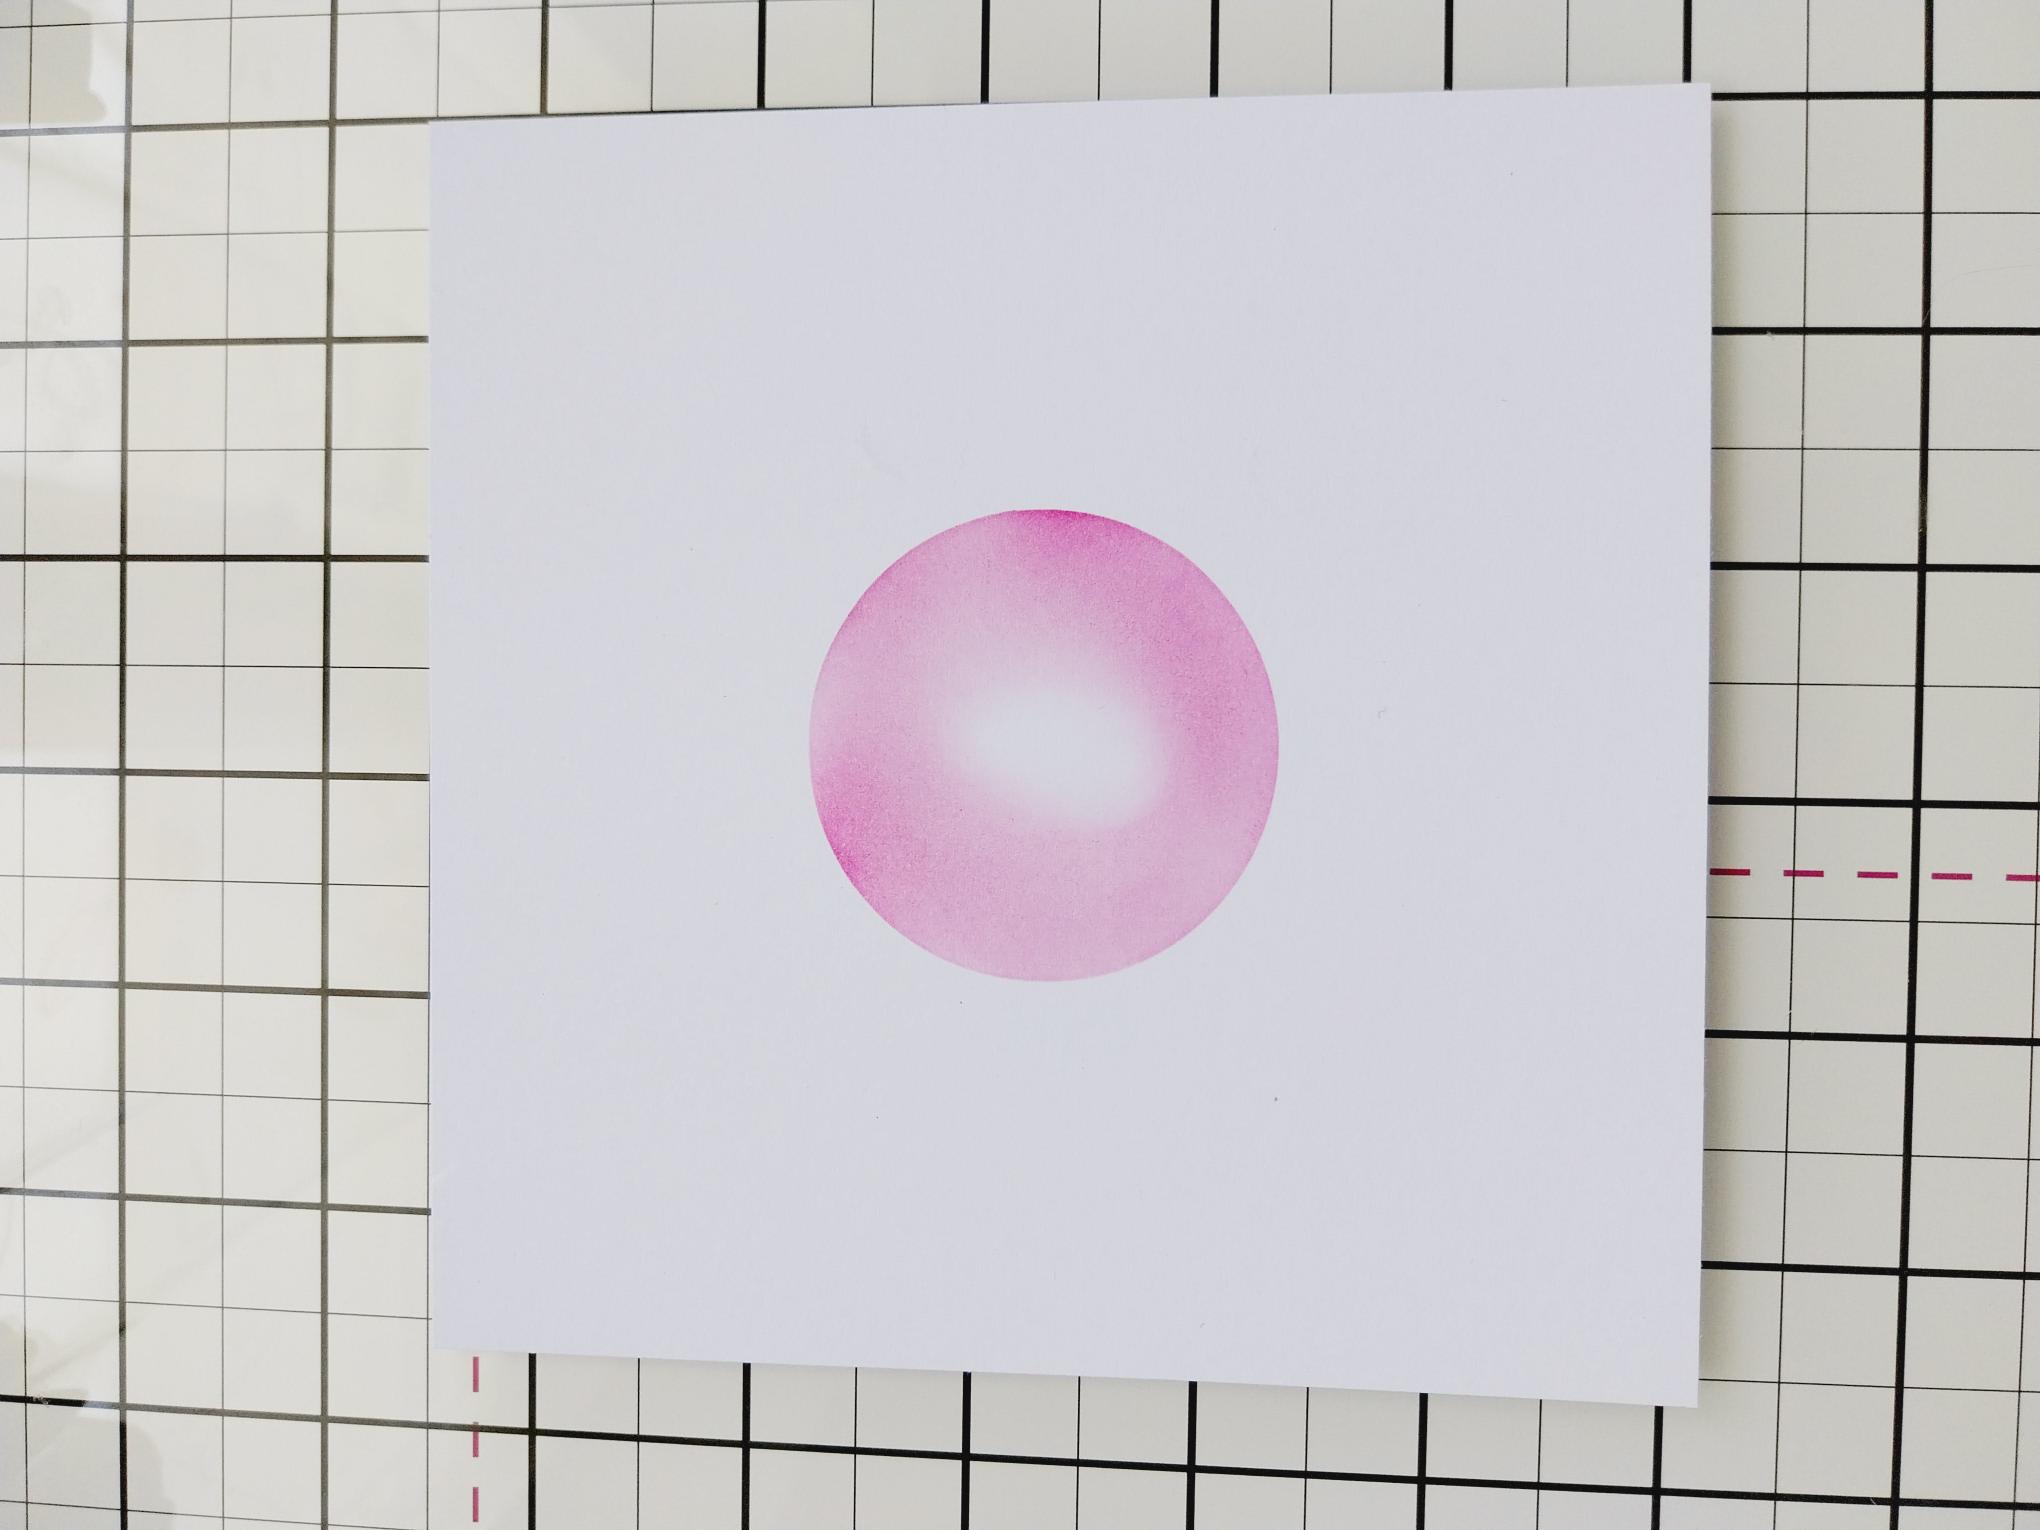
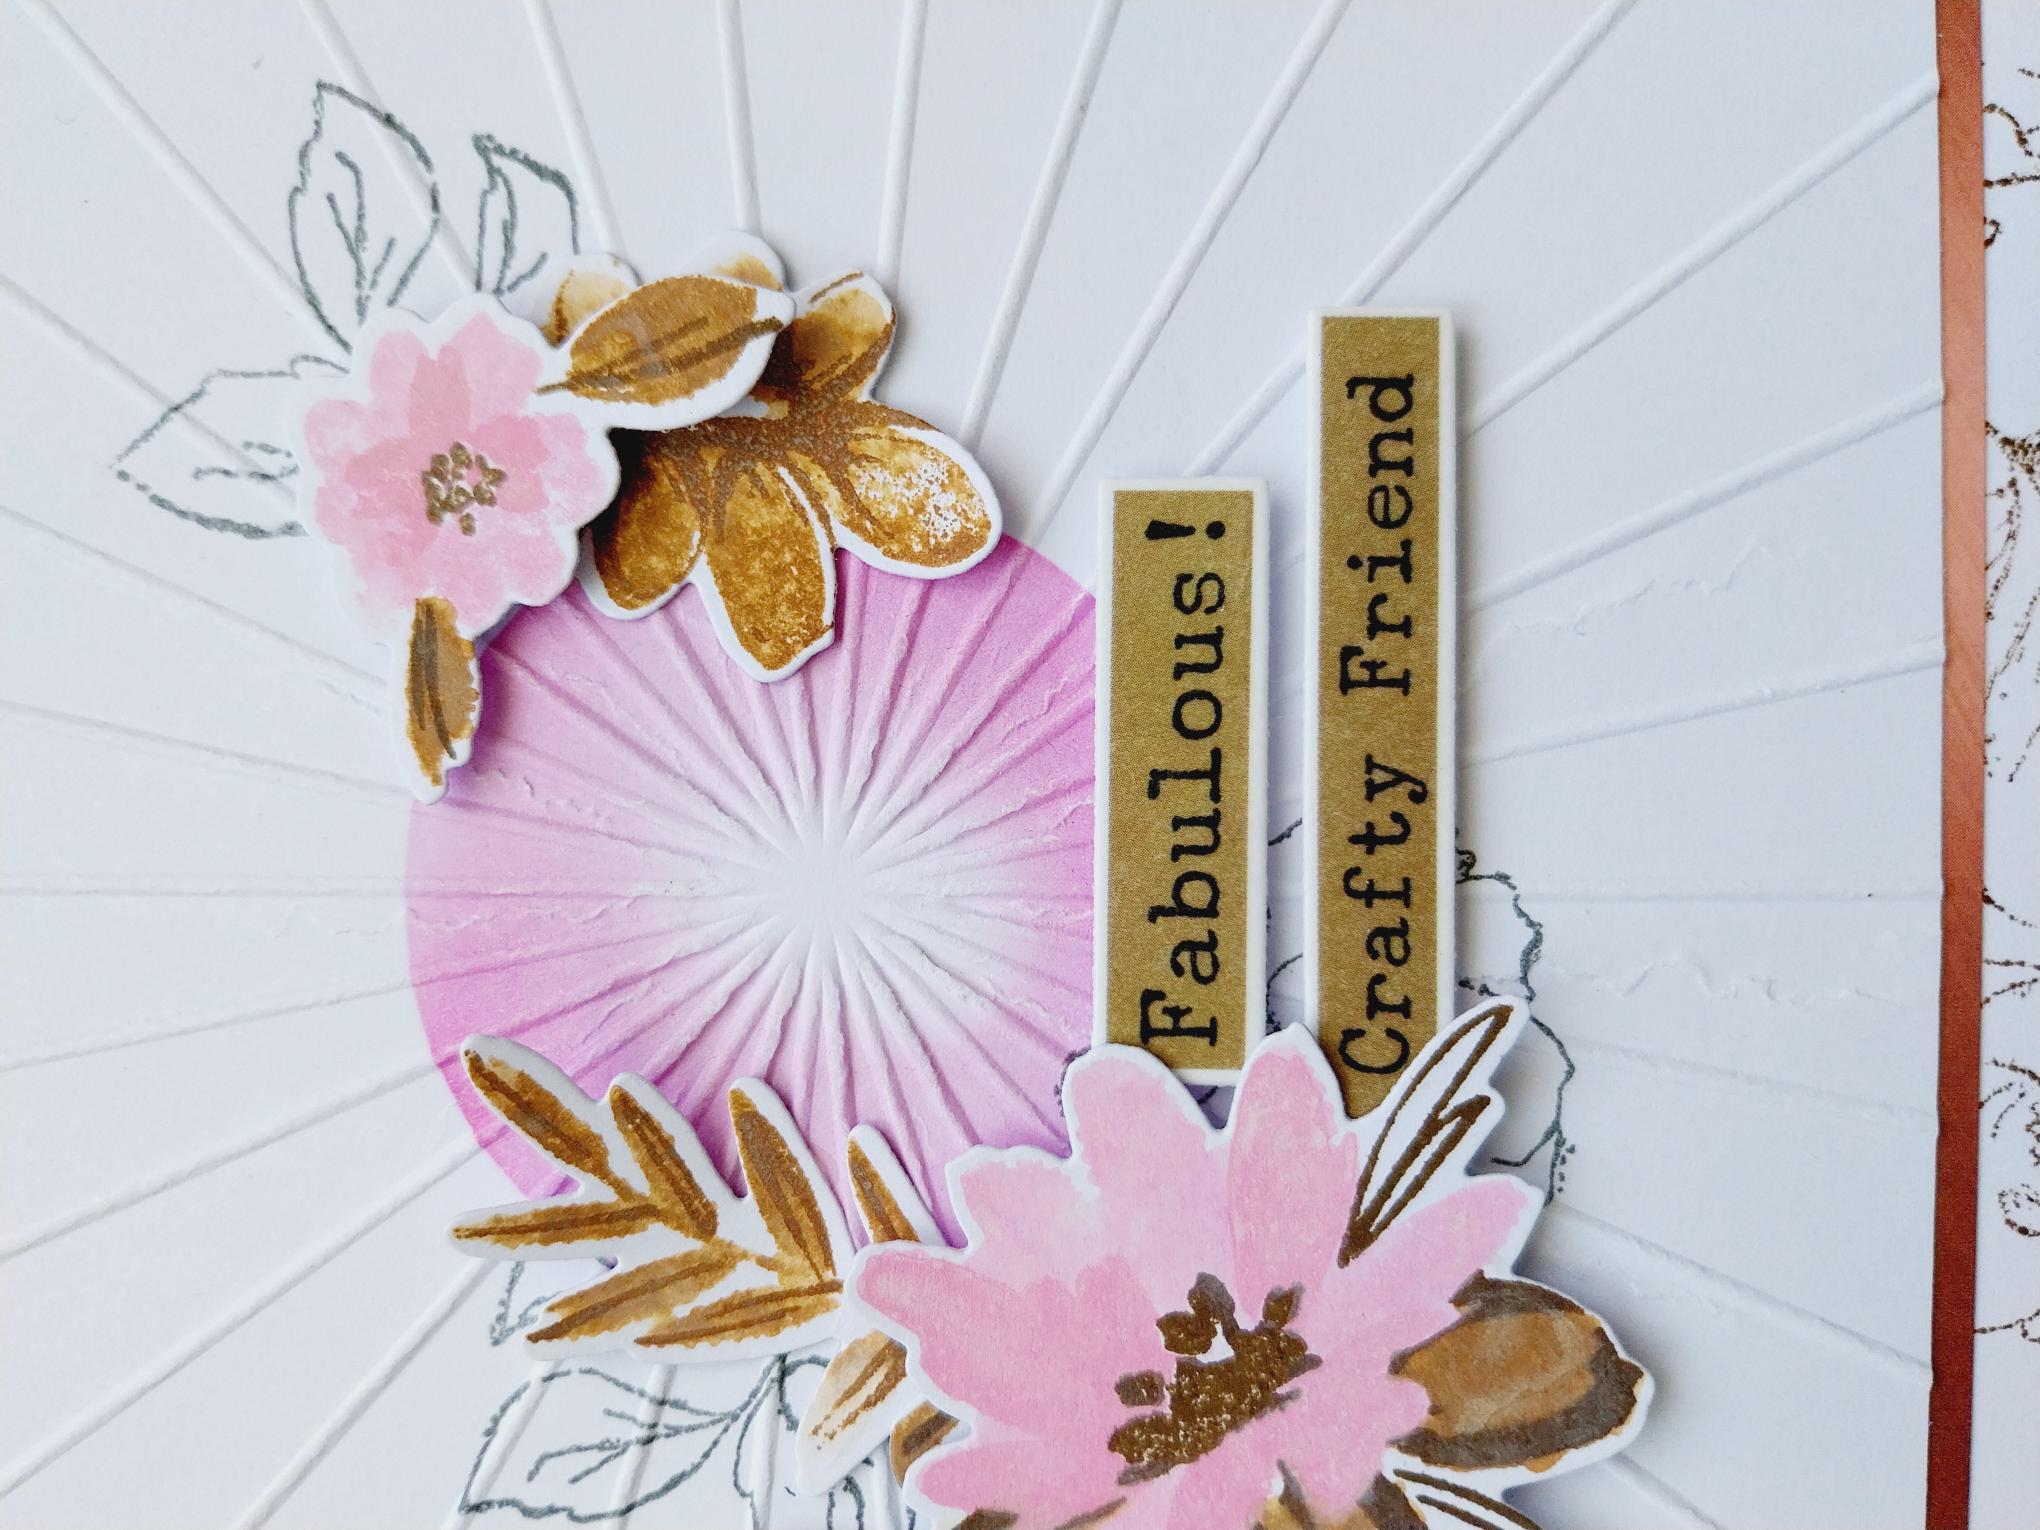
Blend the Victorian Velvet within the stencil, fading out the colour as you move inwards. |
|
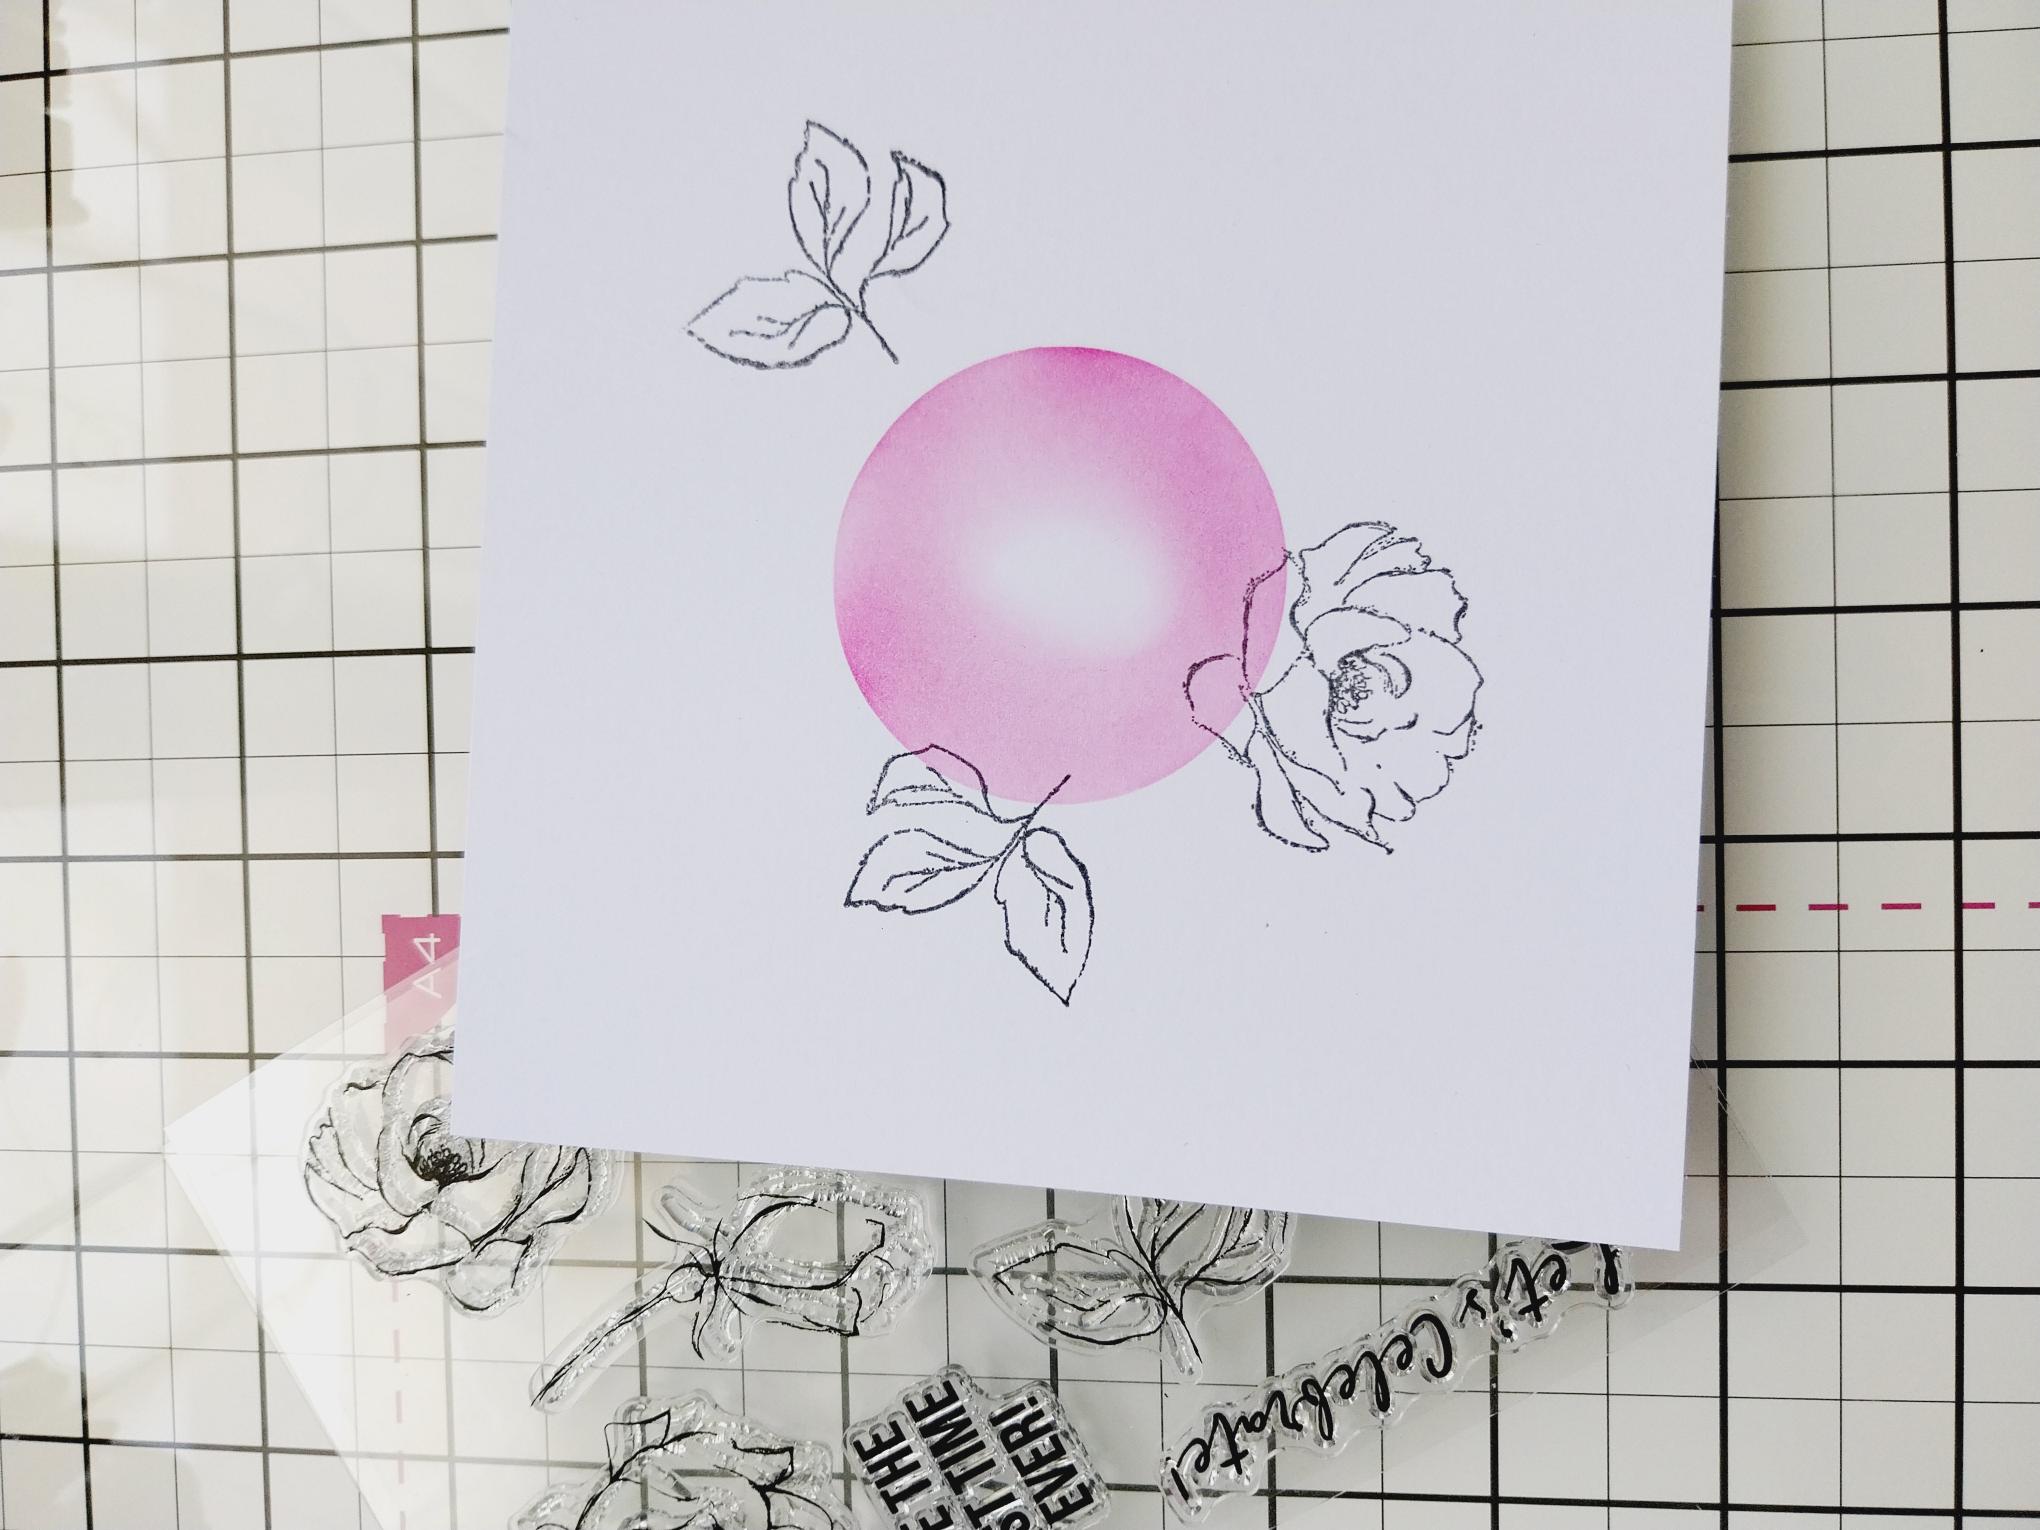
Stamp a couple of the floral/foliage stamps in Midnight, from Let's Celebrate, around the stencilled circle. These will peek out from under your 3D floral elements, so think about their placement. |
|
Place your artwork inside the Infinity embossing folder and run it through your die cutting machine. |
|
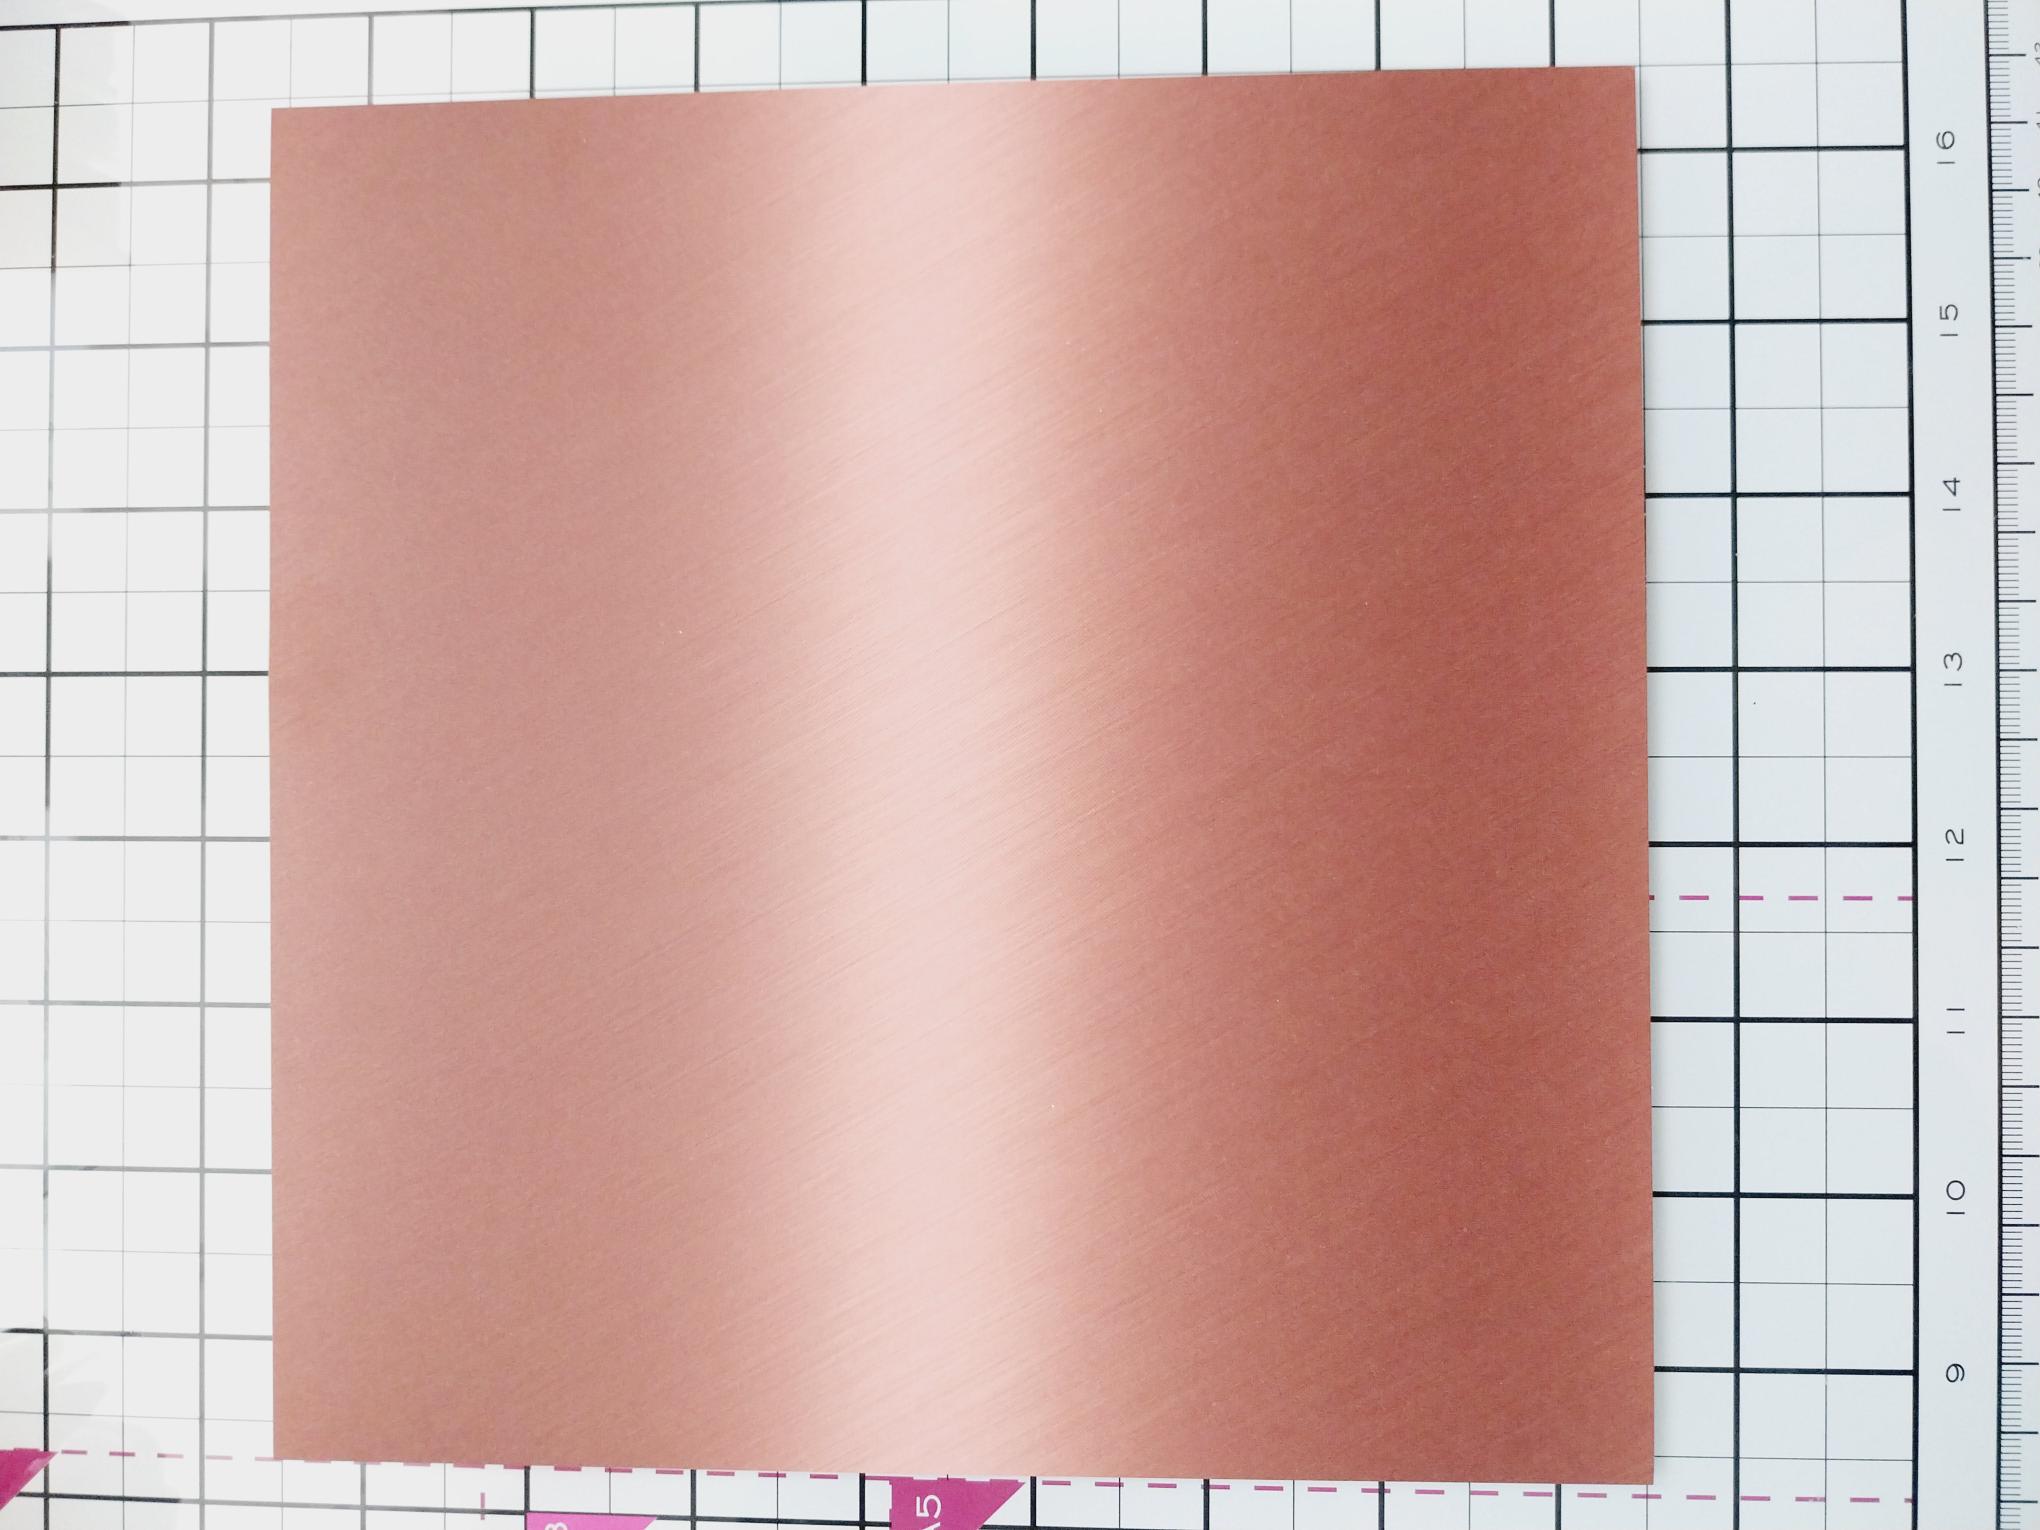
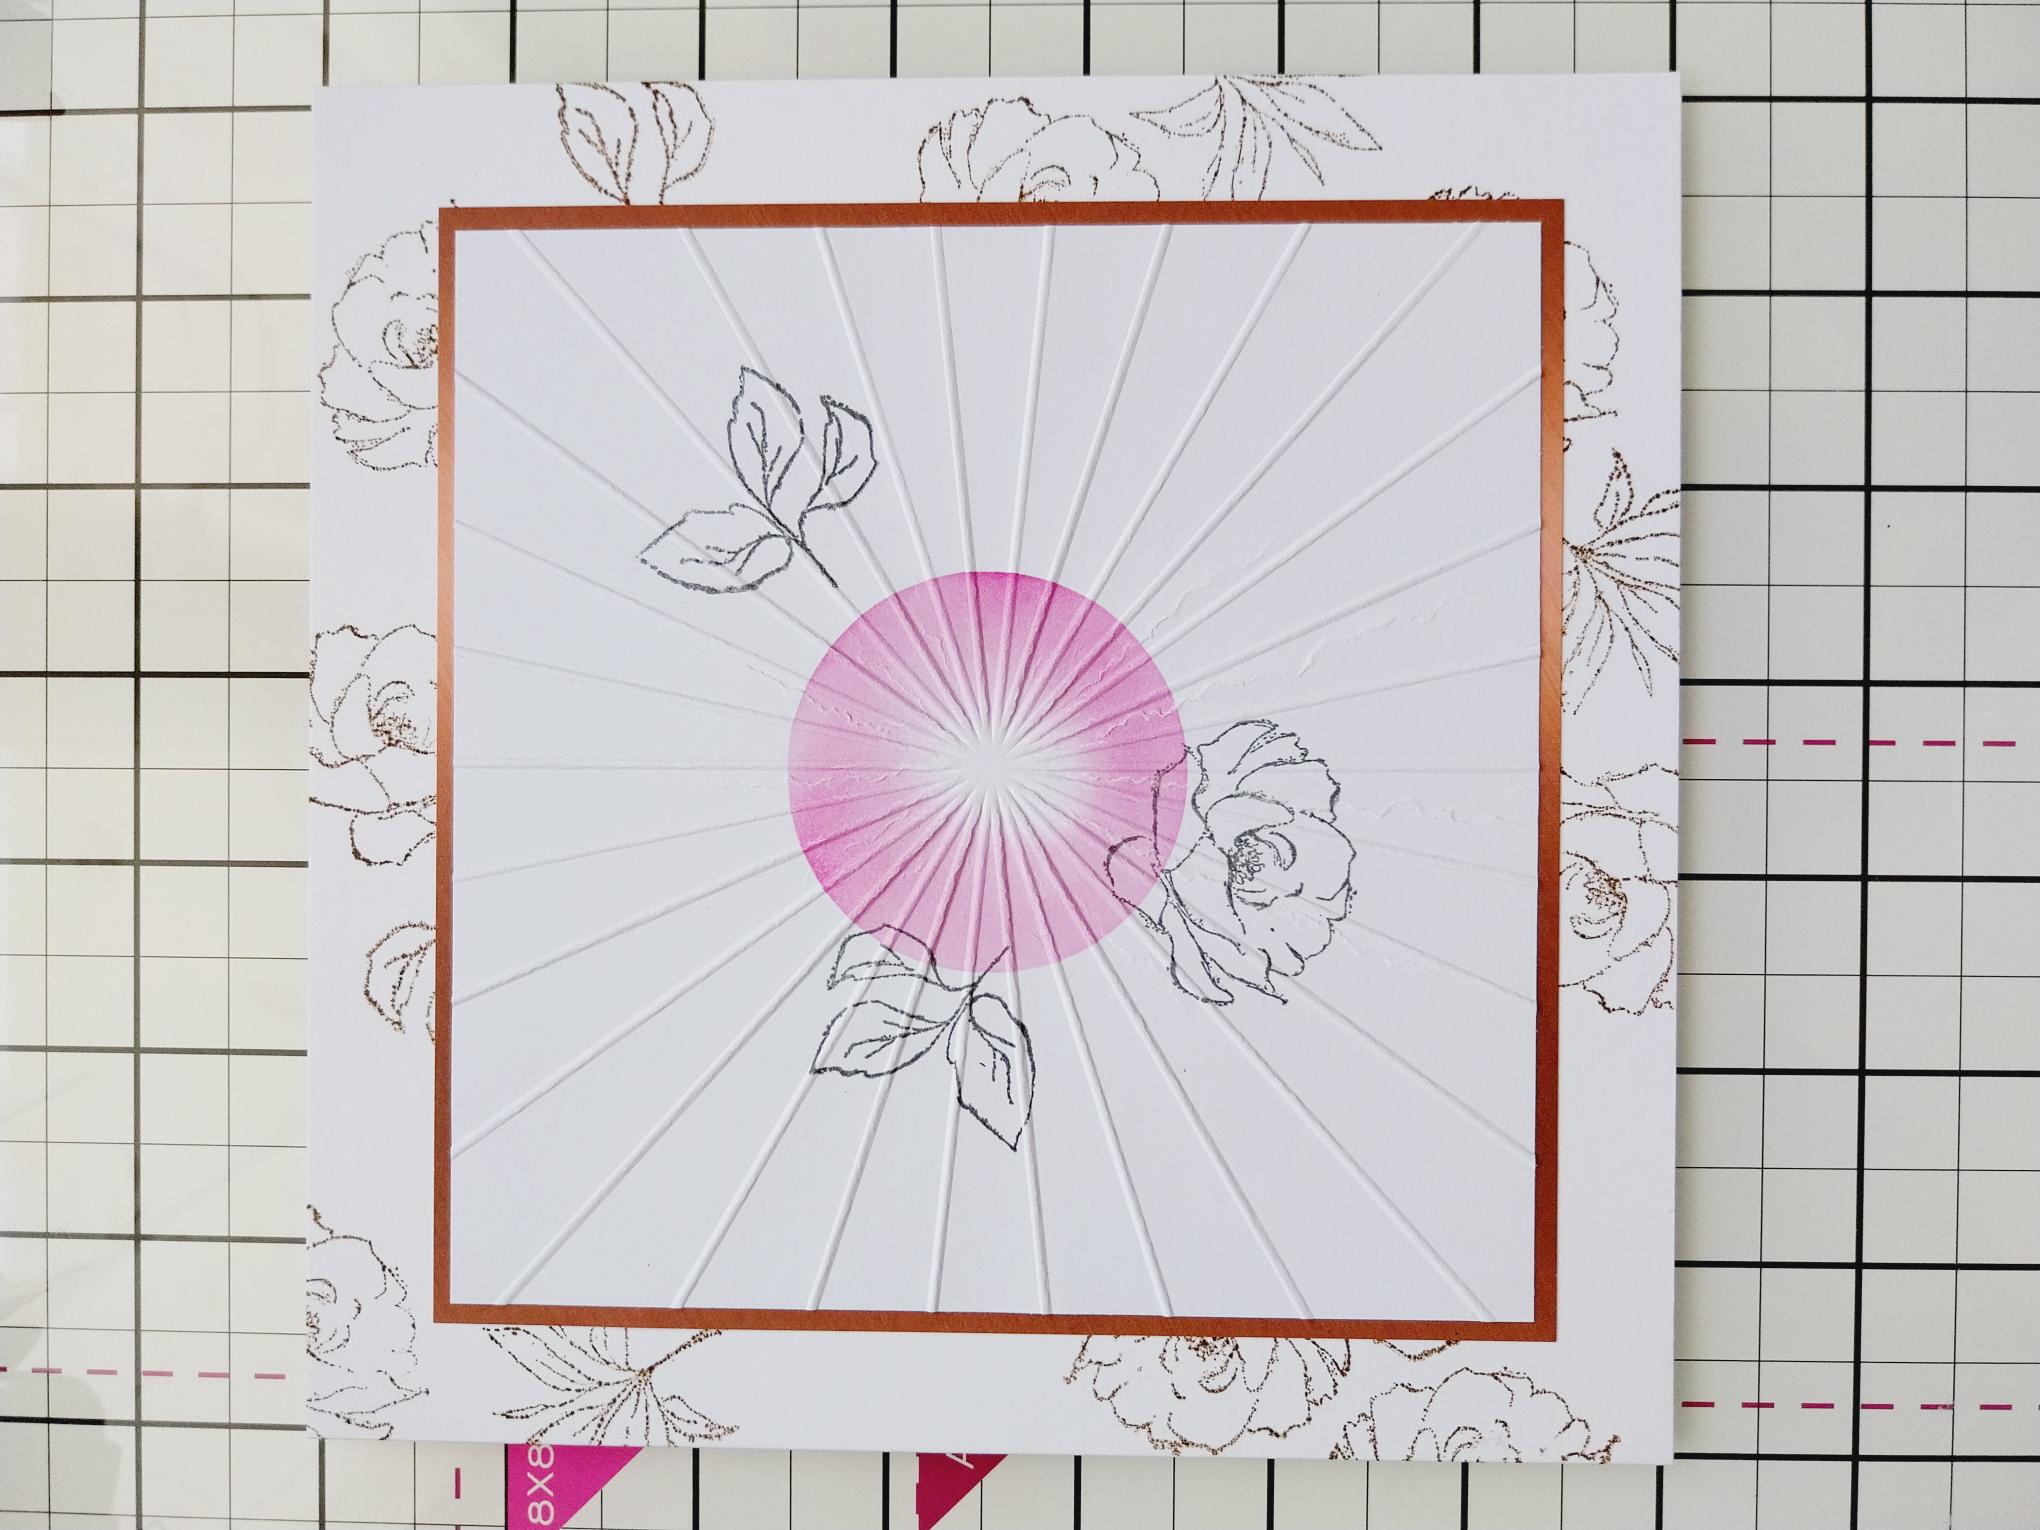
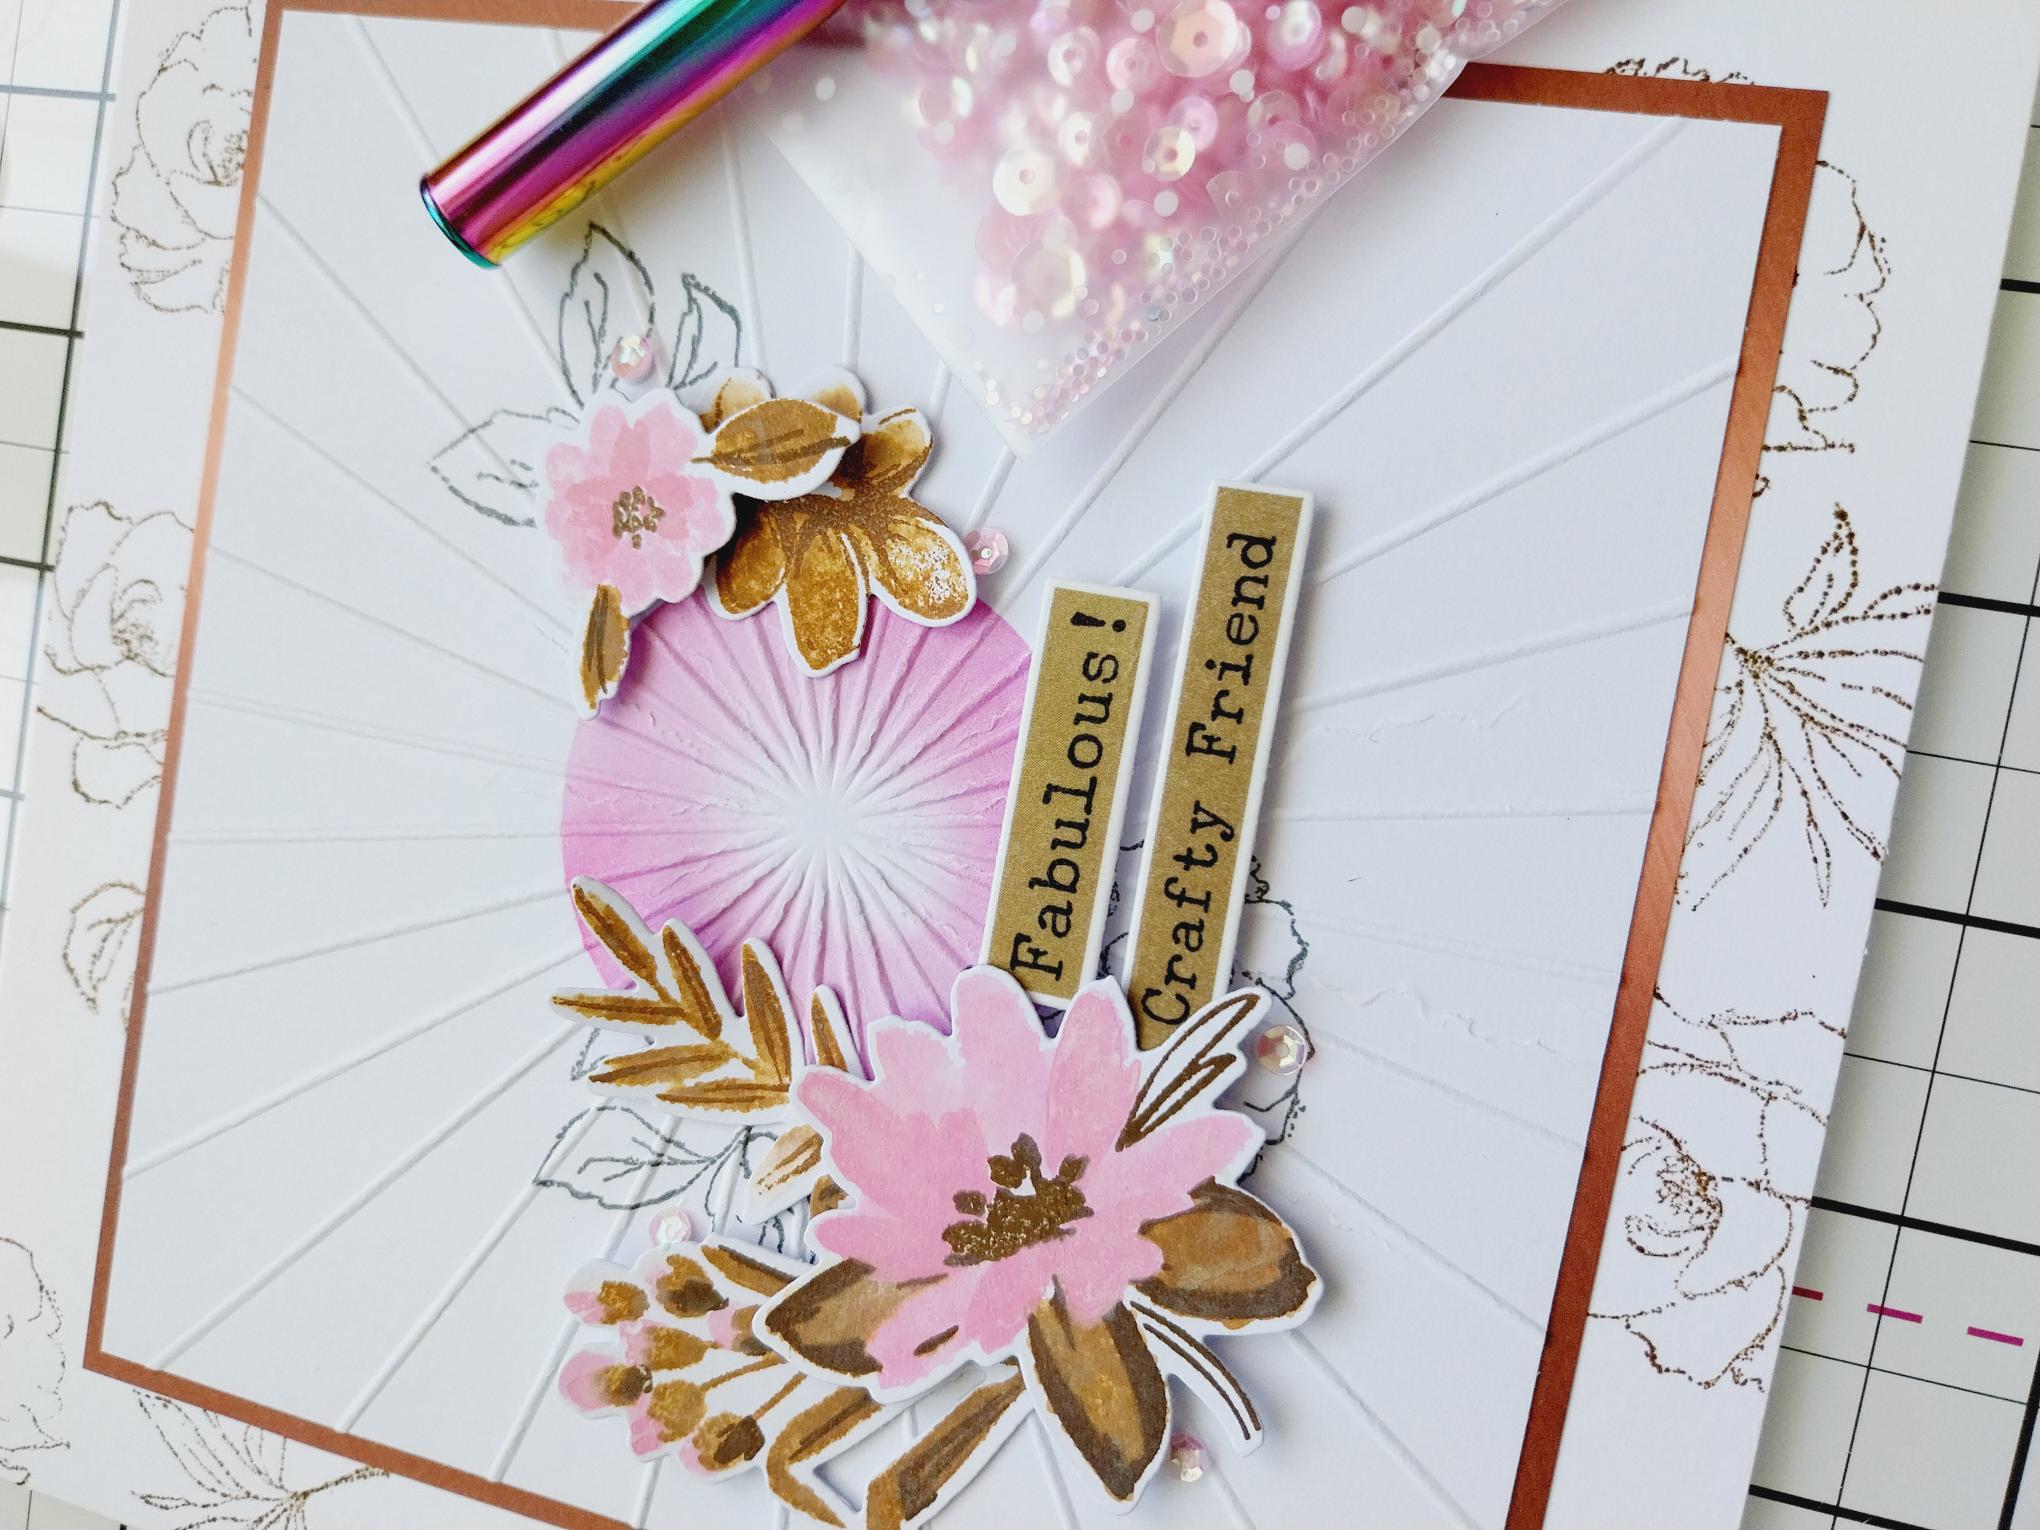
Trim this metallic textured sheet, from the Copper paper pack, to 5 3/4" square. |
|
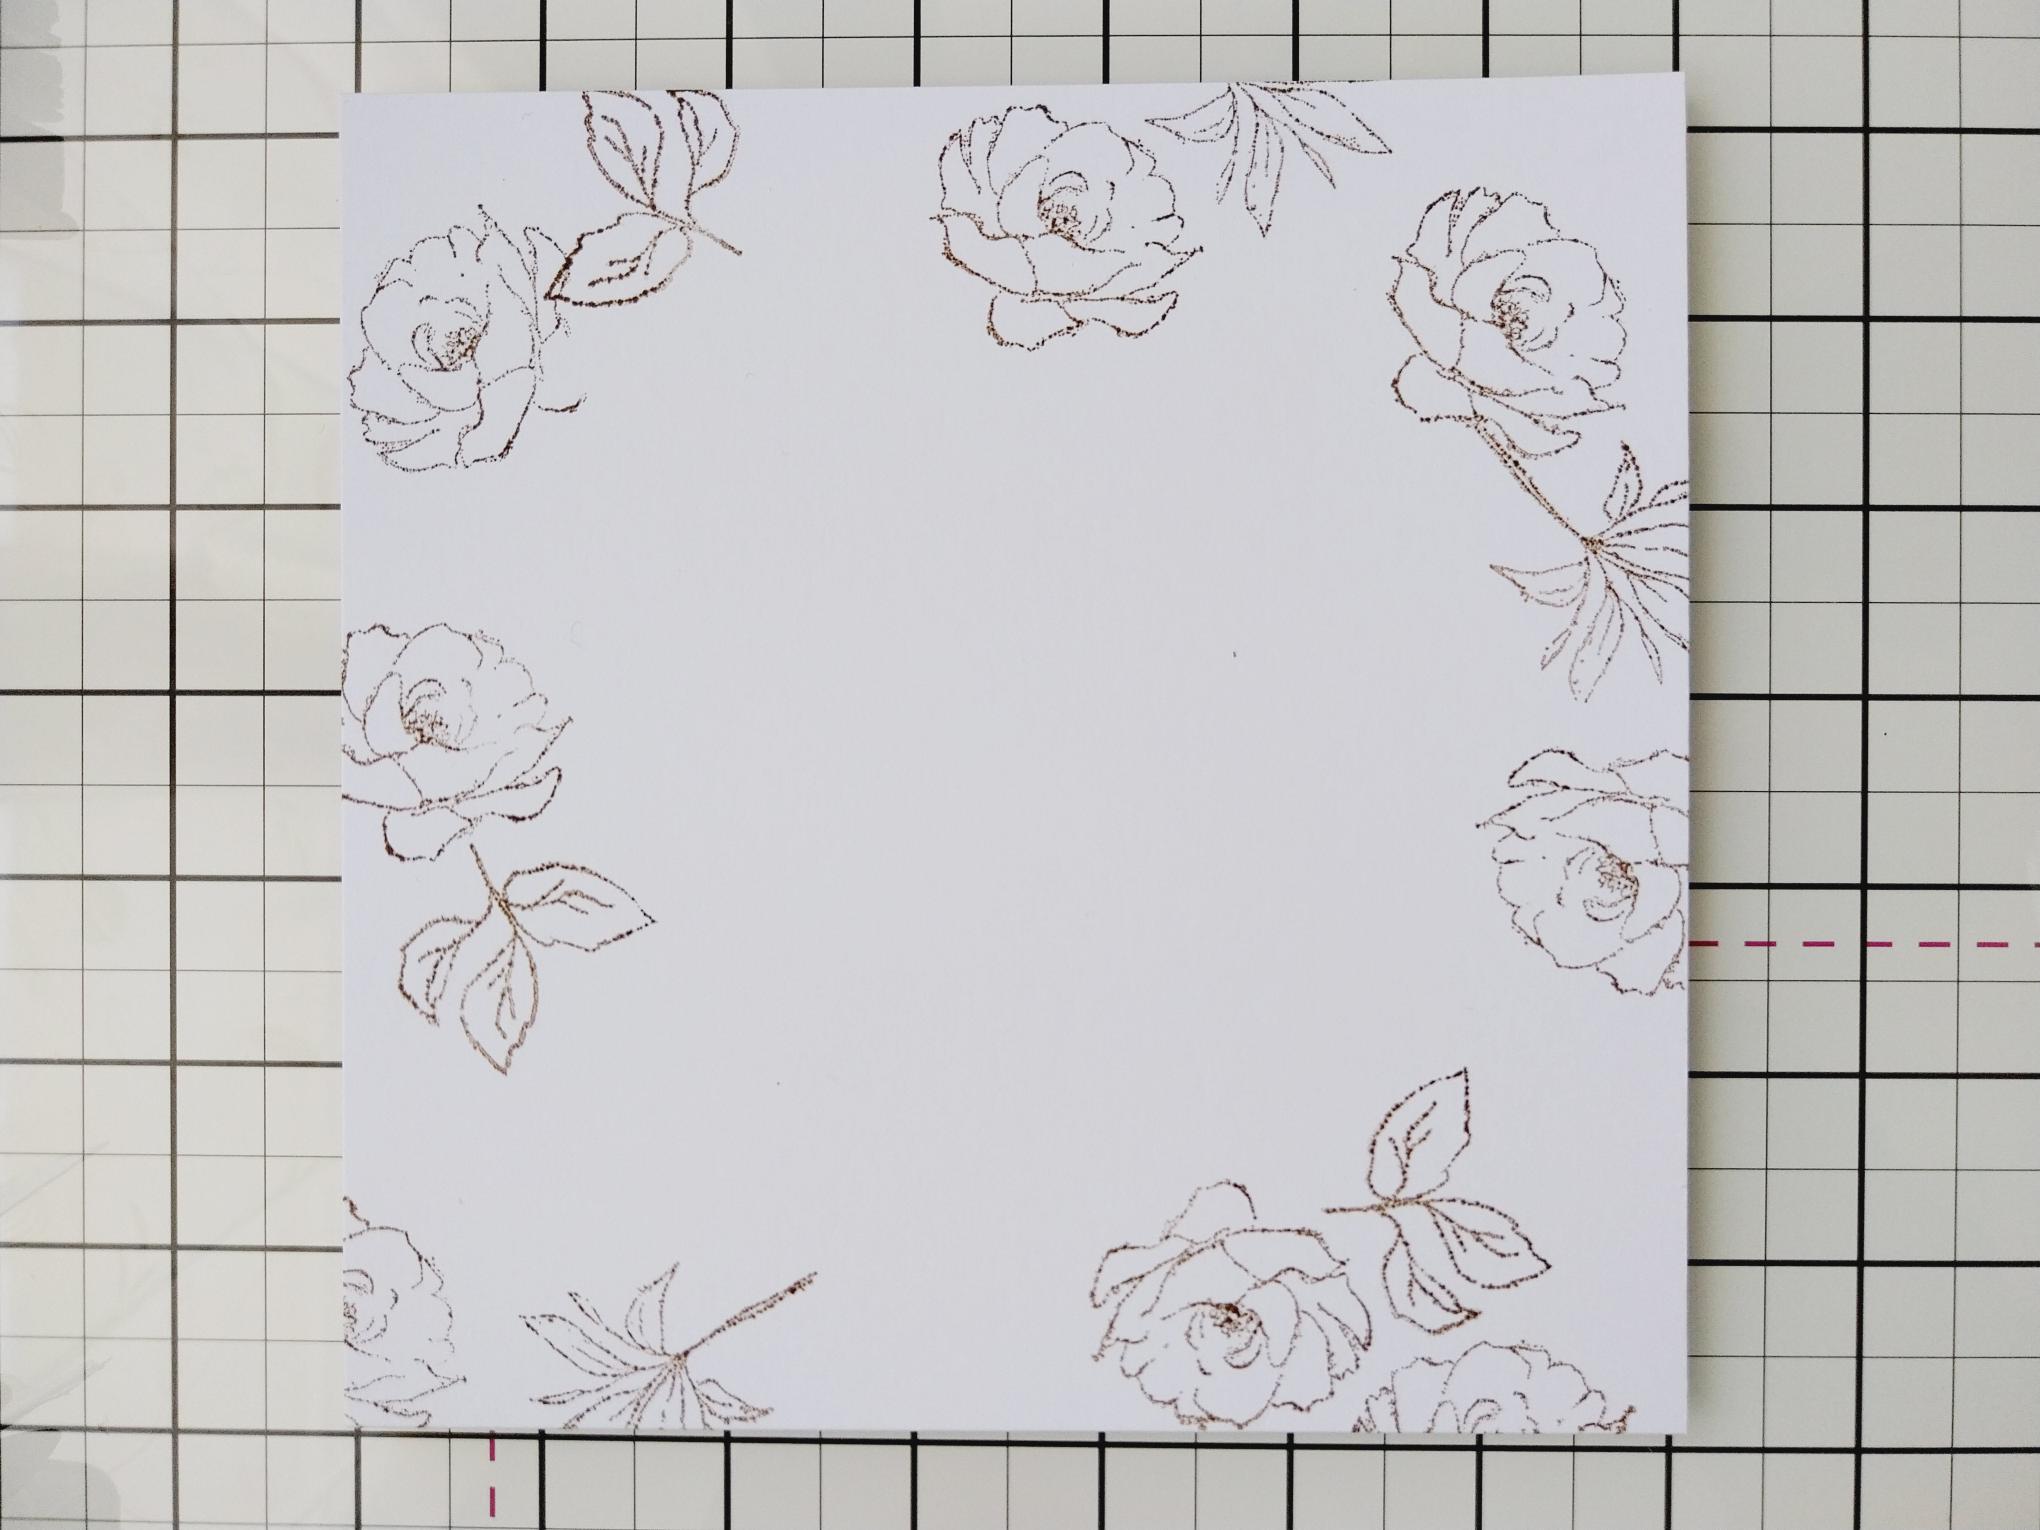
Randomly stamp florals and foliage, in Midnight, around your 7" square card blank. |
|
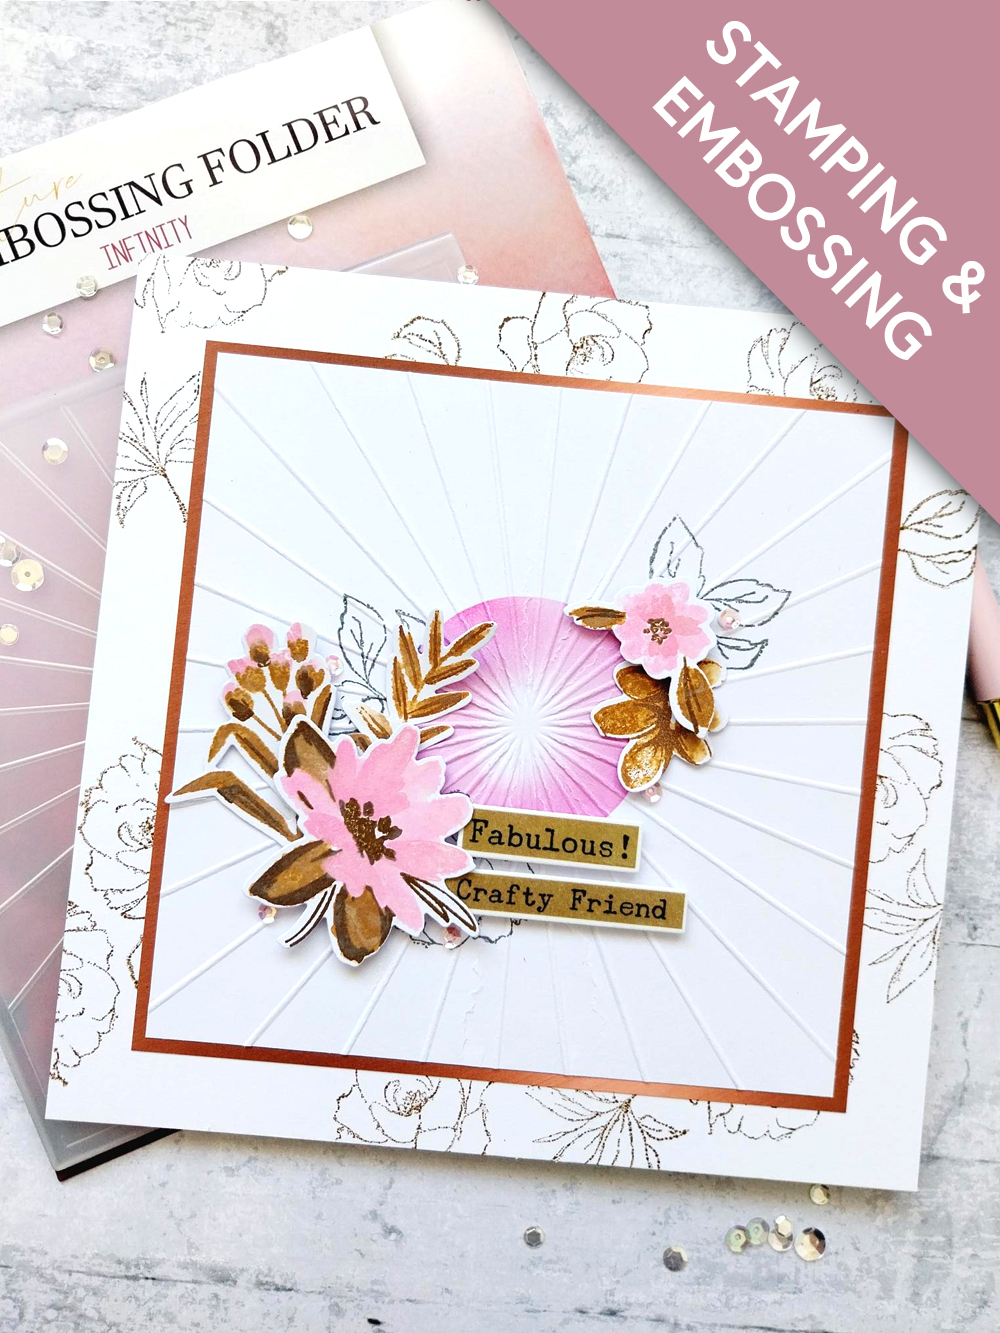
Adhere your embossed artwork on to the textured Copper paper and then on to your stamped card blank. Set to one side. |
|
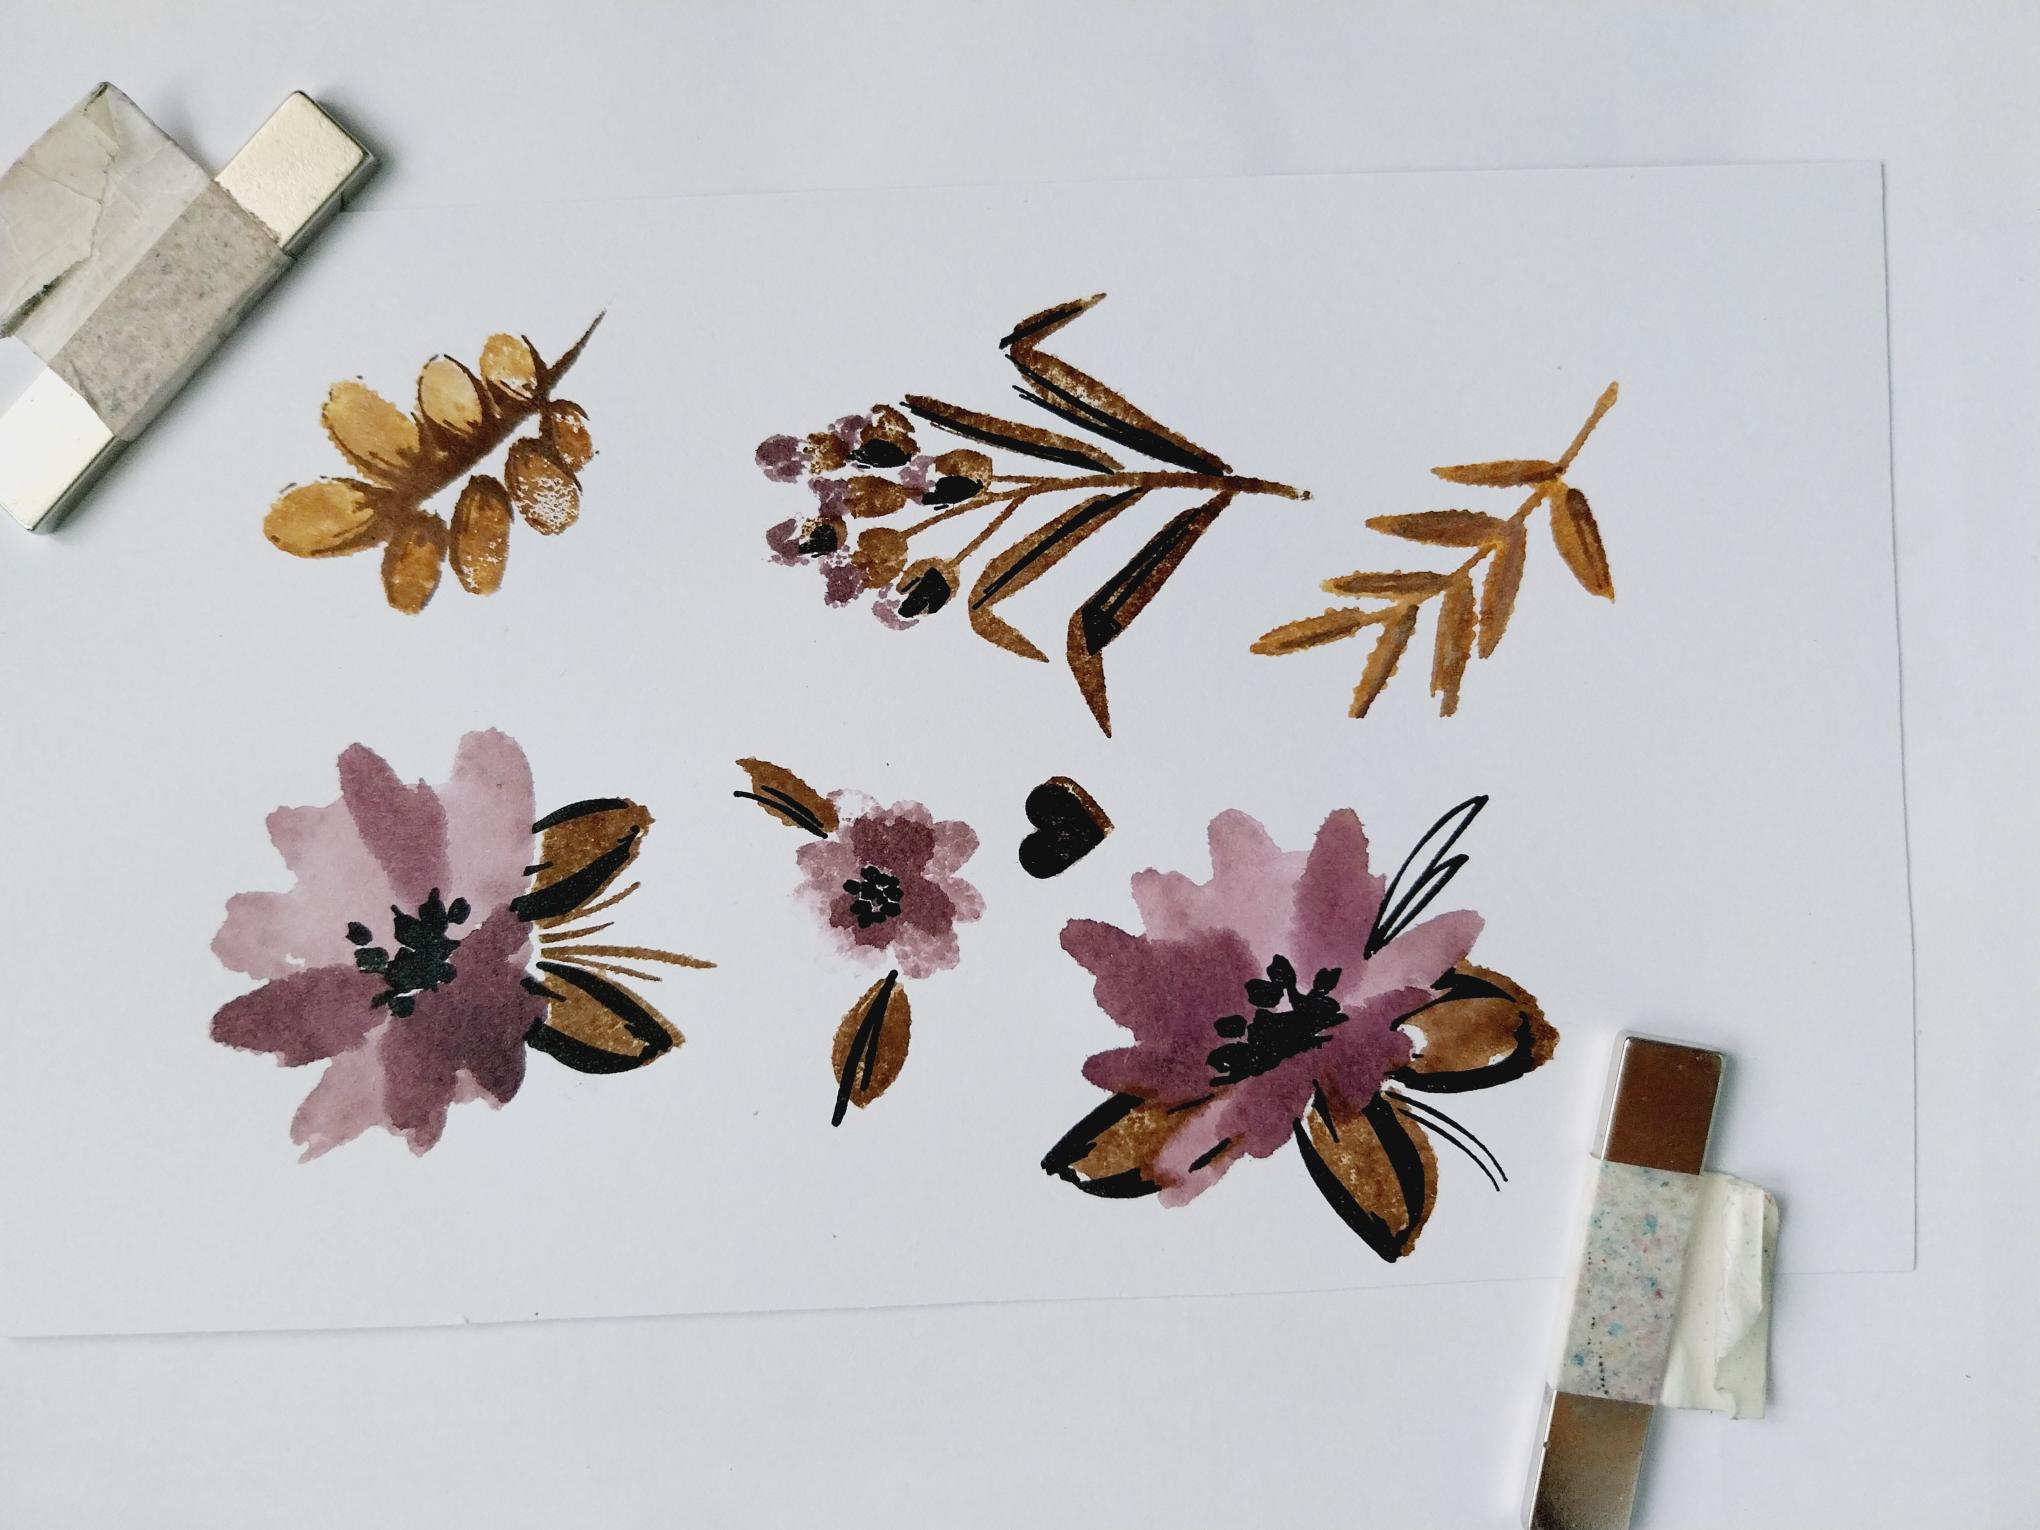
Ink up stamp 1, from the WOW Blooms, with Victorian Velvet on the florals and Vintage Photo on the foliage. Spritz with water and stamp on to the 6 x 4 1/2" white card. Line up stamp 2, ink with Victorian Velvet and Walnut Stain, spritz and stamp. Line up stamp 3, ink up with Walnut Stain, spritz and stamp and finally ink up stamp 4 with Walnut Stain, spritz and stamp. |
|
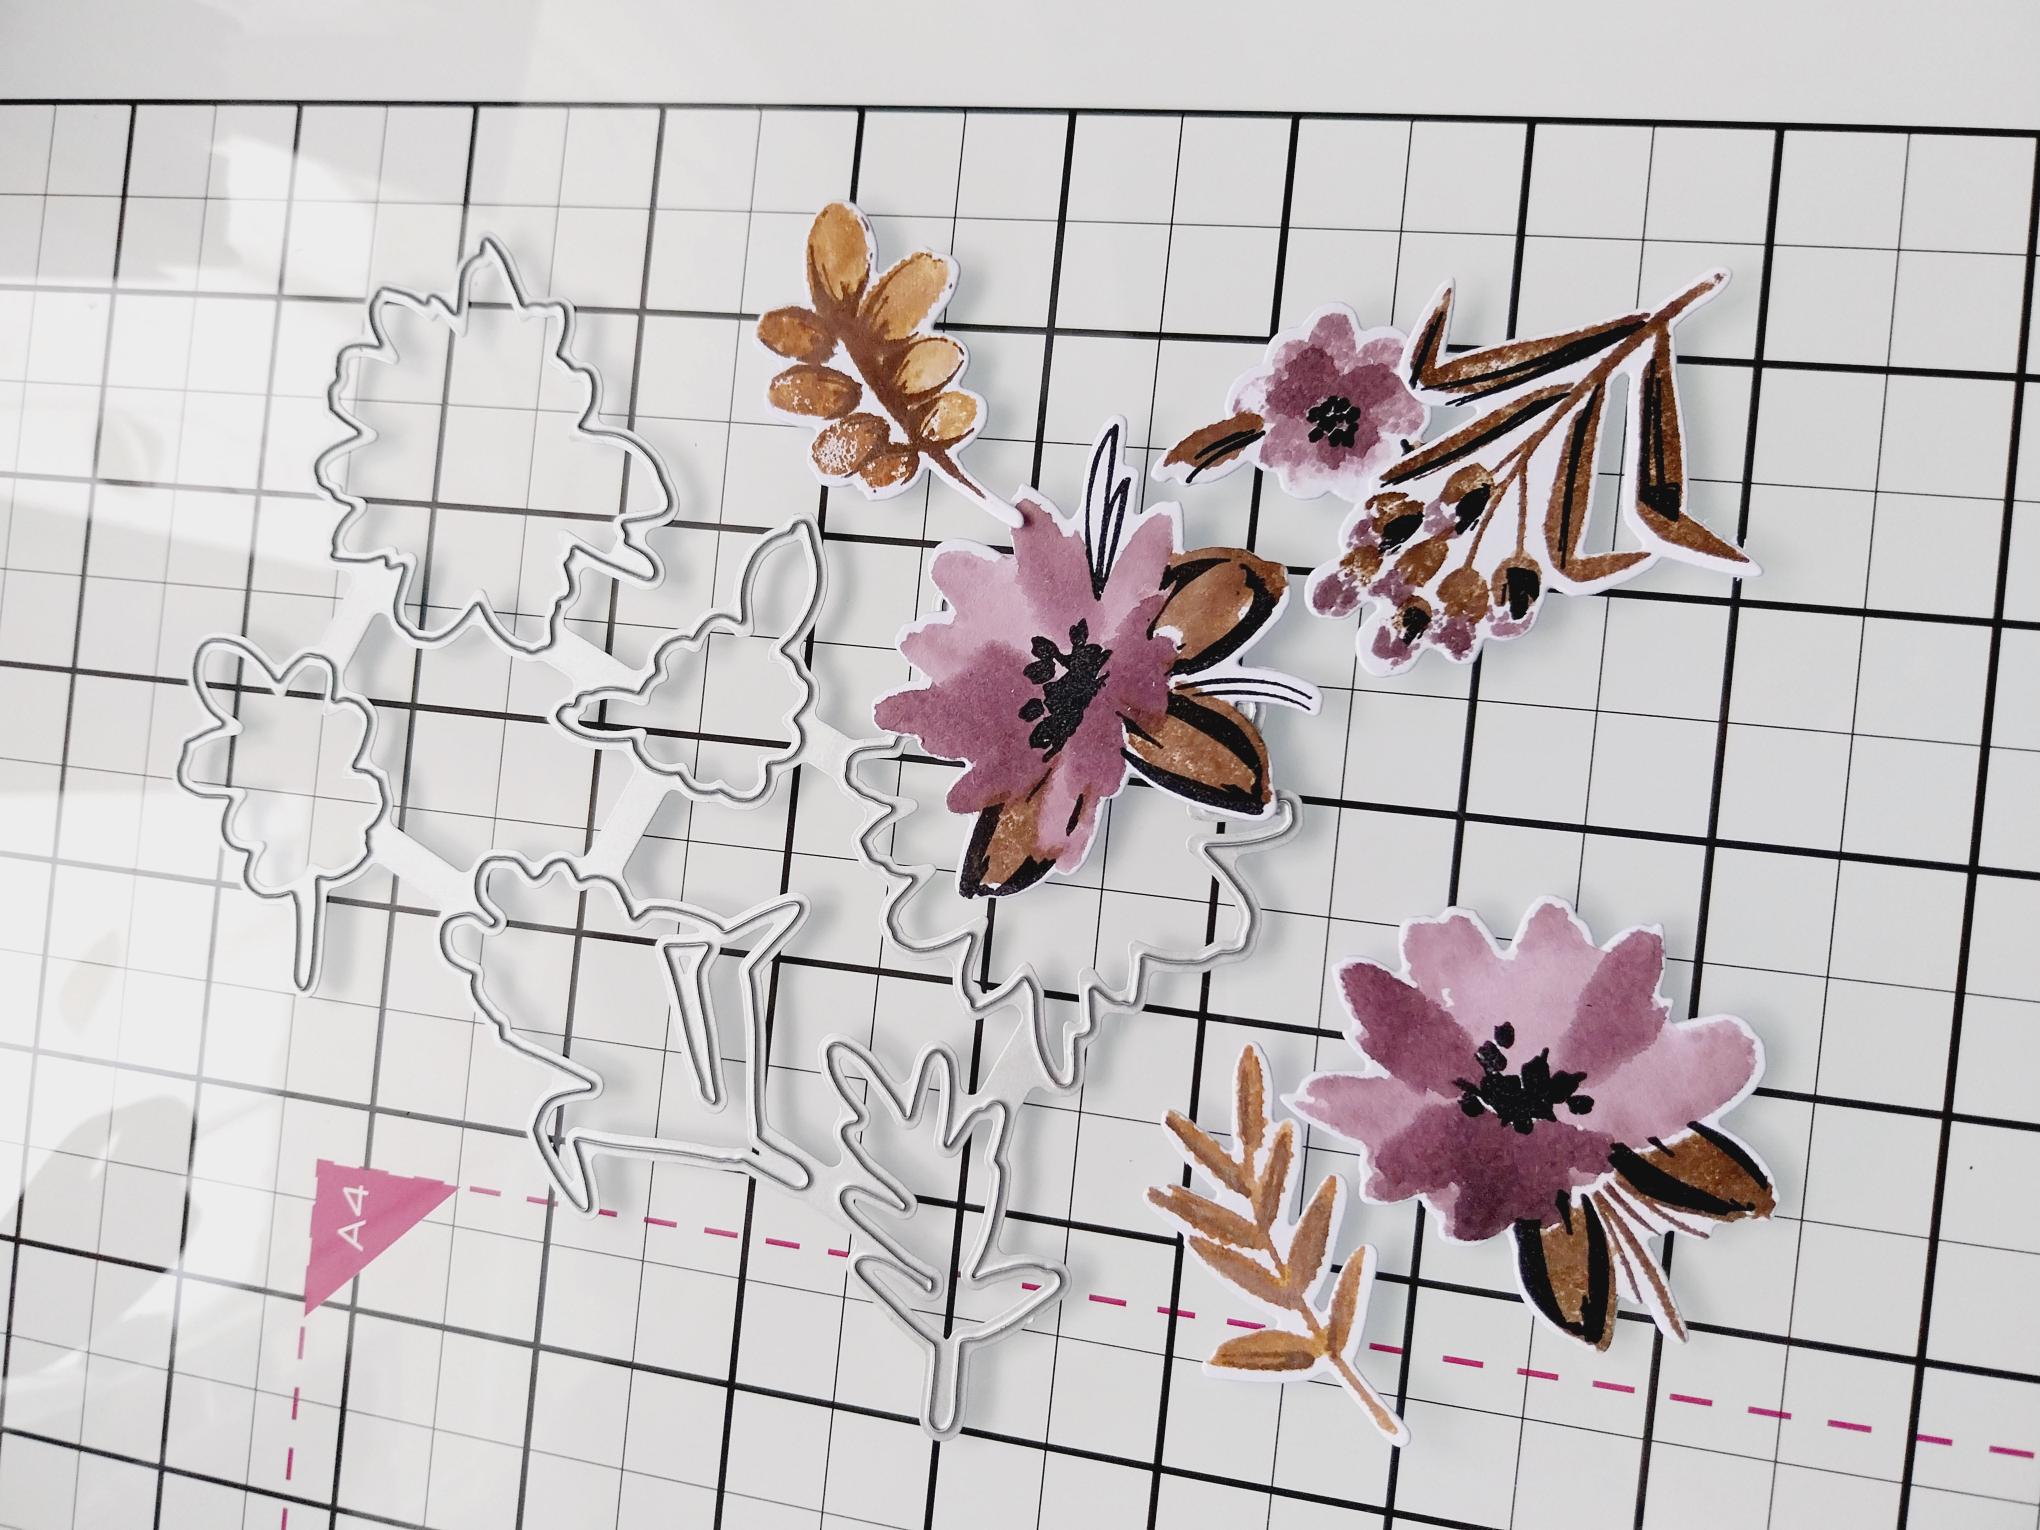
Secure the coordinating die plate over your stamped images and run through your die cutting machine. |
|
Adhere your 3D elements on to your card, as seen in the photo. Use both wet glue and foam pads to create depth and dimension. |
|
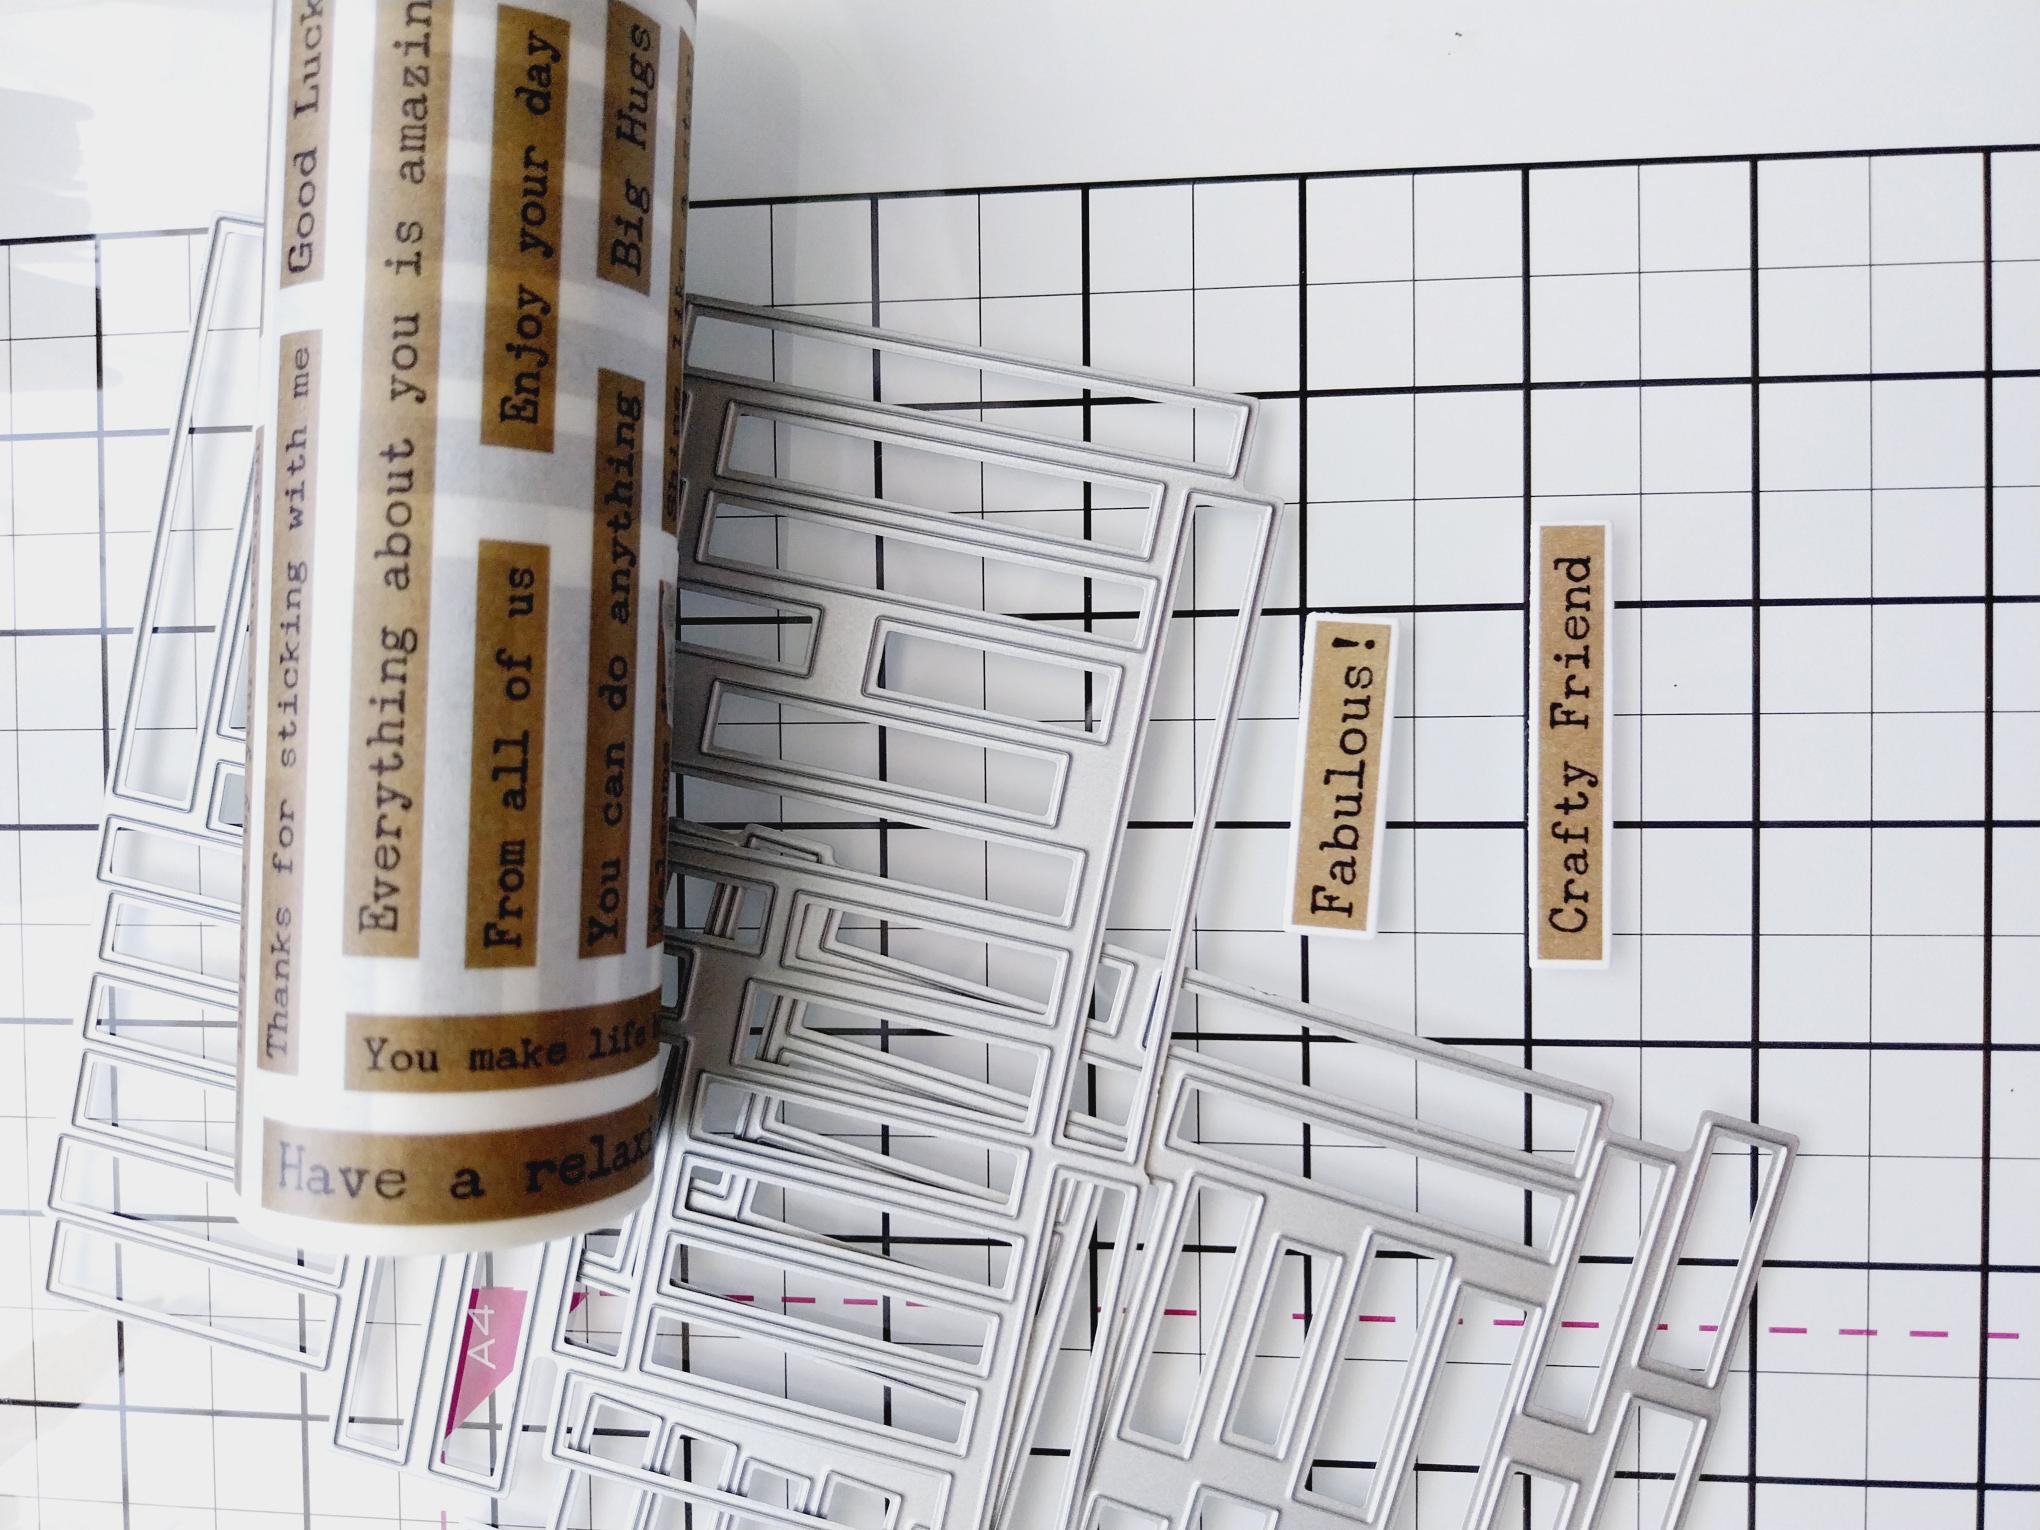
Cut off one "drop" from your Sepia Tabs washi roll, peel up one end of the washi and adhere to the top of the A4 white cardstock. Gently peel off the backing as you stick the washi down and smooth out any air bubbles as you go. Use the die plates ONE at a time, to die cut the washi sentiments. Pick out your chosen sentiments and keep the rest in a tub for future projects. |
|
Adhere the sentiments, with foam pads, to your card. |
|
Finish off by adding a few sequins on, around and tucked just under your 3D elements. |