Give your friends $10 off their first order!
Refer a FRIEND


WHAT YOU WILL NEED:
White card blank 7 x 5"
White card 6 3/4 x 4 1/2"
White card 6 1/2 x 4 1/4"
White card 6 x 4"
White card - for sentiment dies
Watercolour HD3D Carnival Embossing Folder
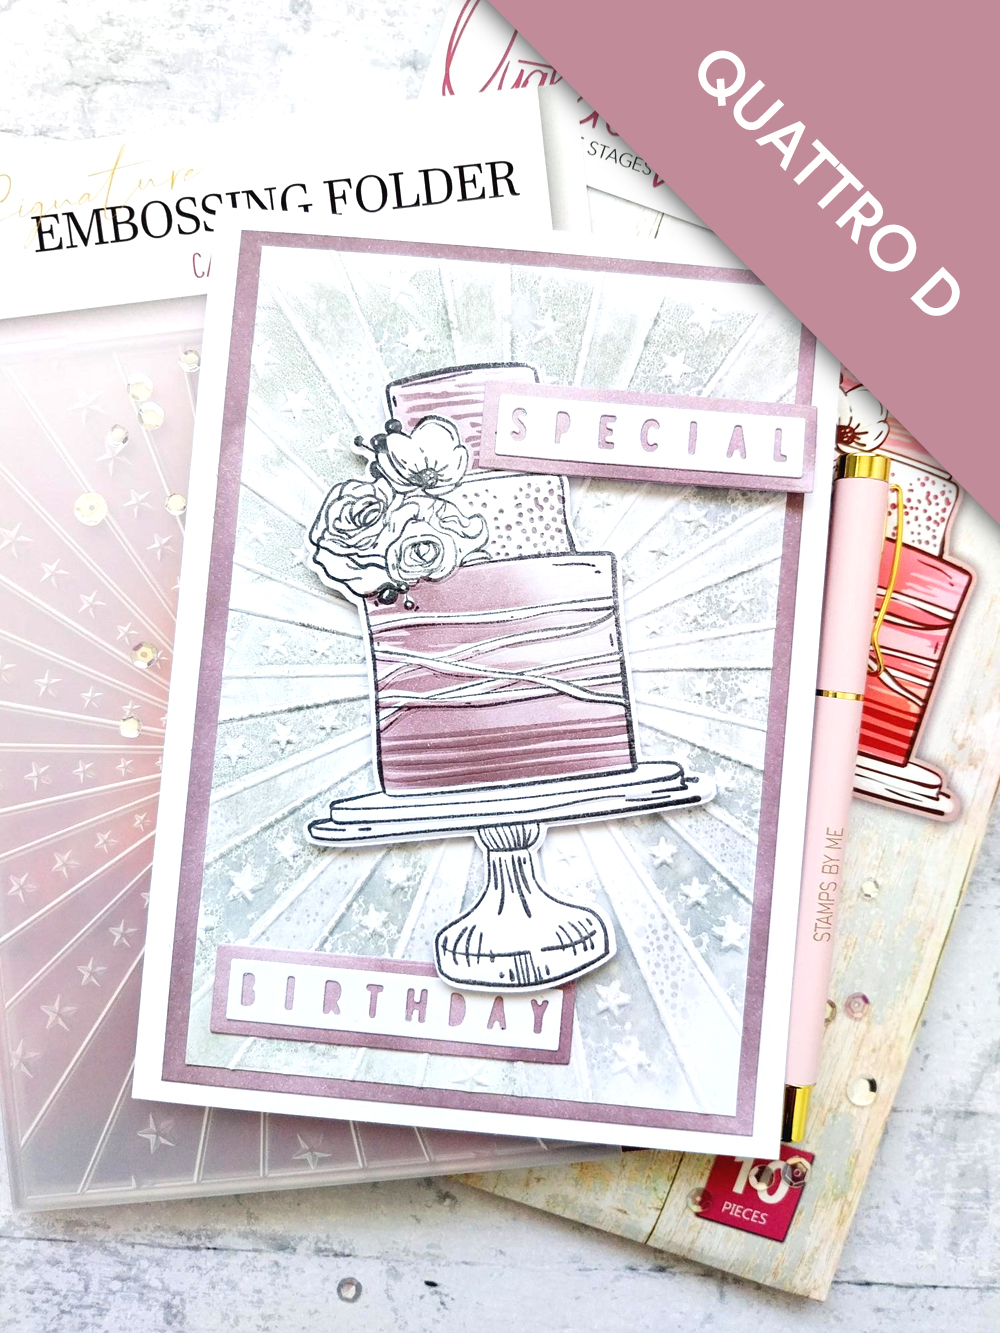
Quattro D Special Birthday Collection
SBM Premium Dye Ink Pad: Heather
Versafine Ink Pad: Smoky Grey
Distress Oxide: Iced Spruce
Blending tool
Gossip clear overlay sparkle pens
Water spray bottle
Eureka 101 Watercolour Tablet
SBM Magnetic glass mat
Paper Trimmer
Perfect Together Glue
Foam pads
Die Cutting machine
[click image to enlarge] 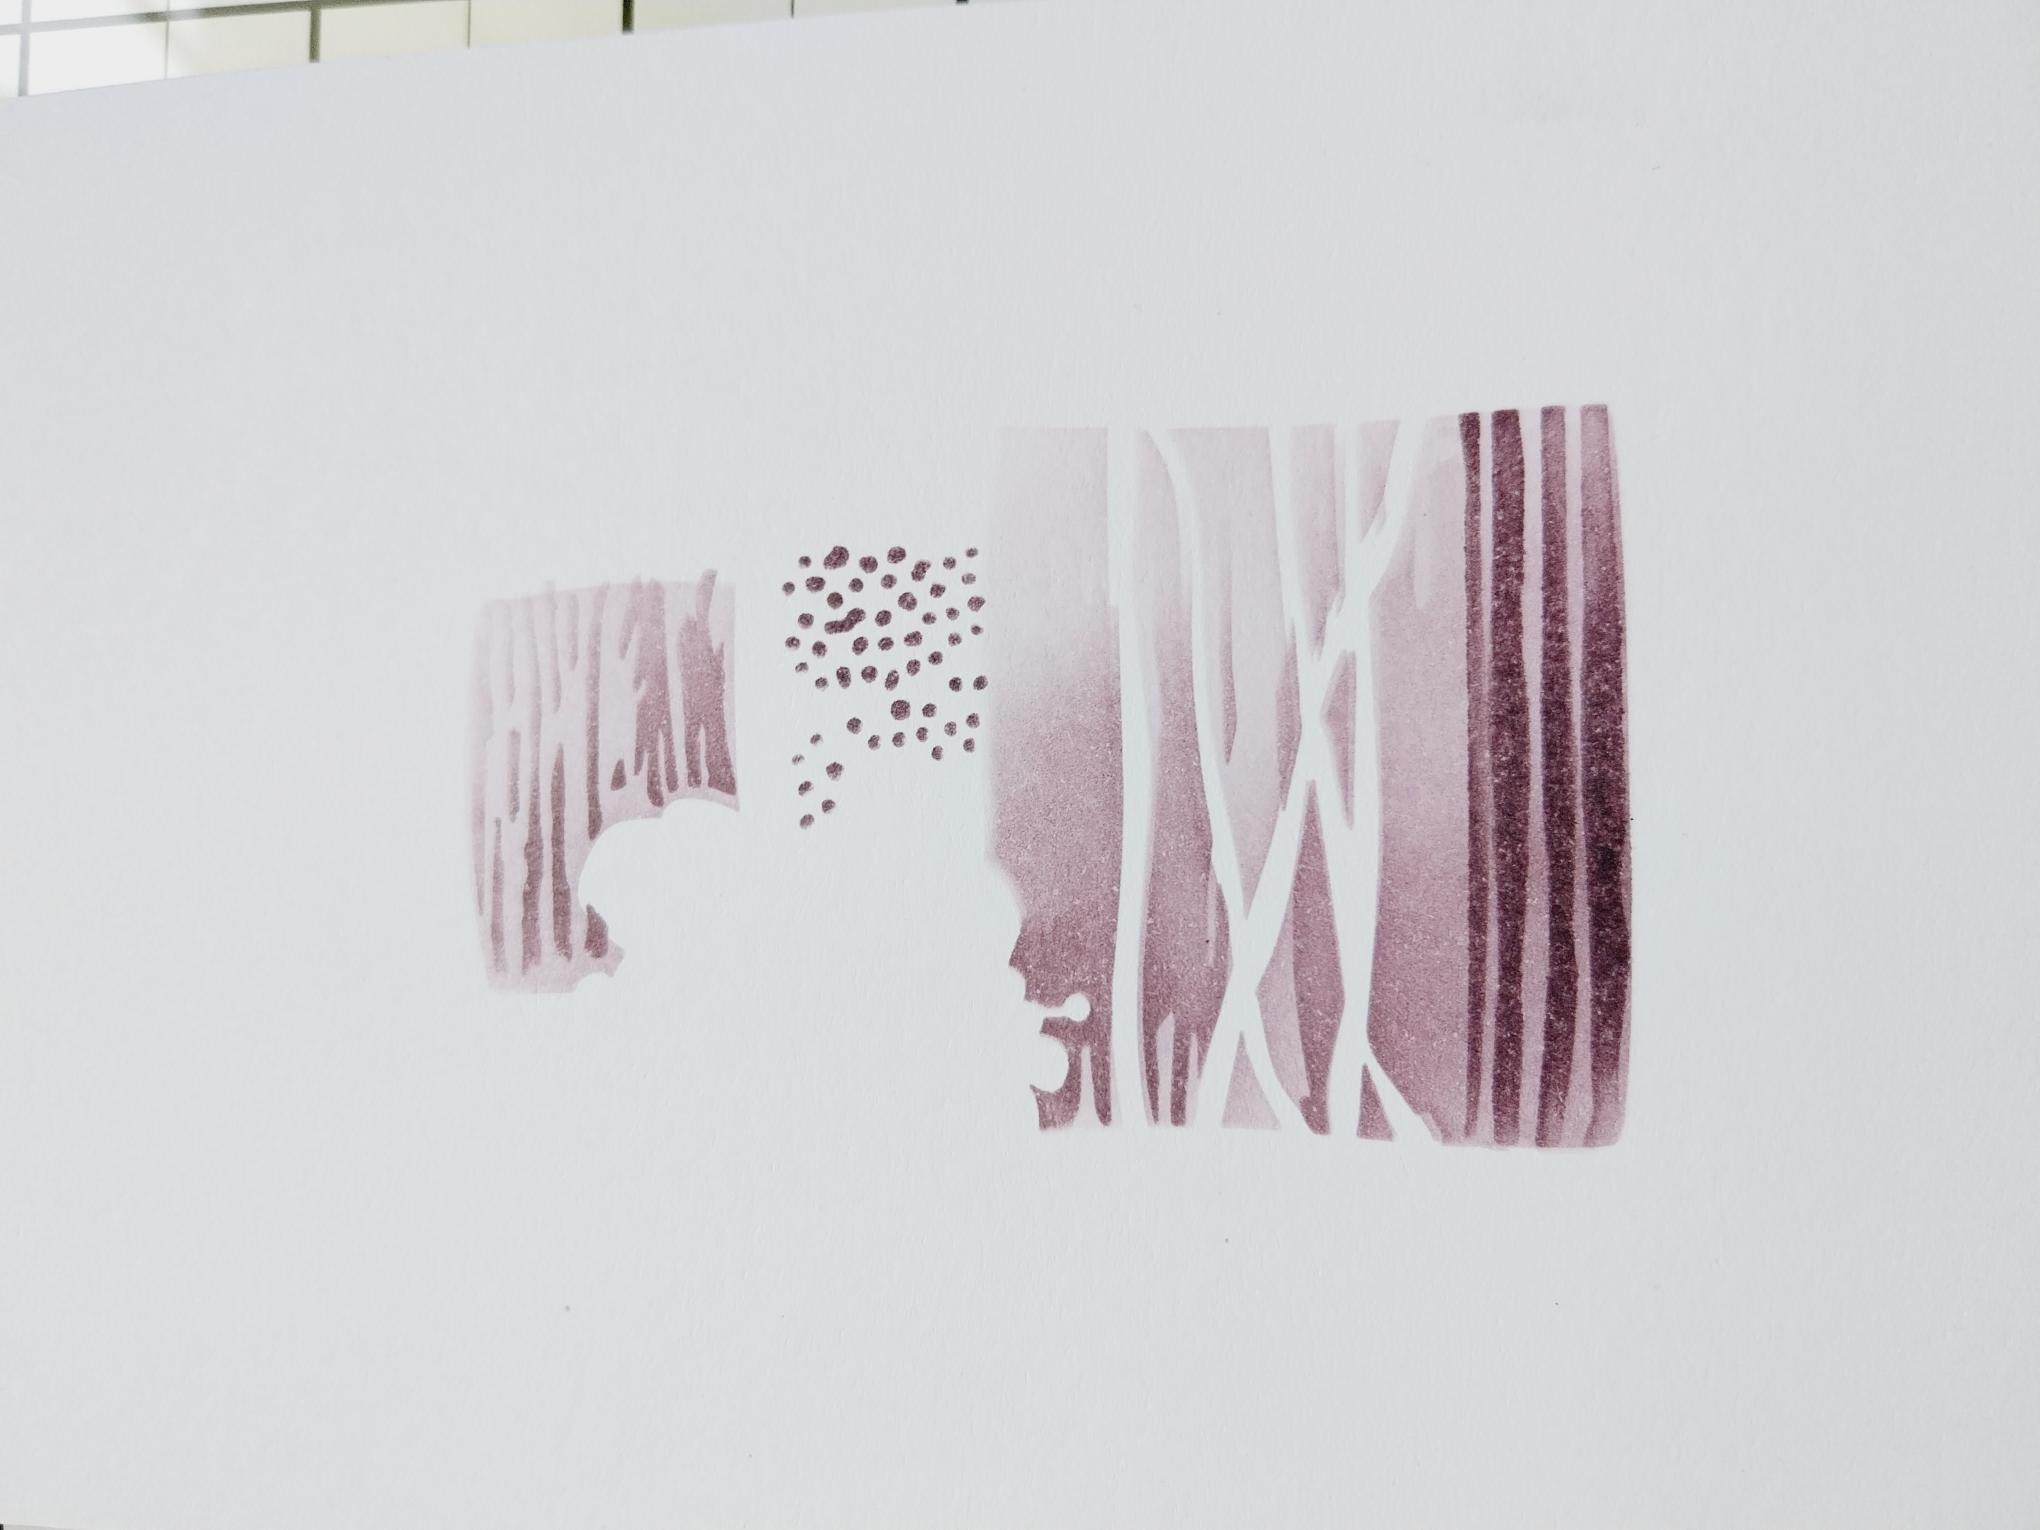
|
Place stencil 1, from the Quattro D Collection, on to the white card cut to 6 x 4". Lightly blend the Heather dye ink through the stencil, with your blending tool. Line up stencil 2 and blend again with the Heather but with a bit more pressure. Finally, line up stencil 3 and go back in with the Heather but with more pressure and loaded ink, to get a deeper tone of colour. |
|
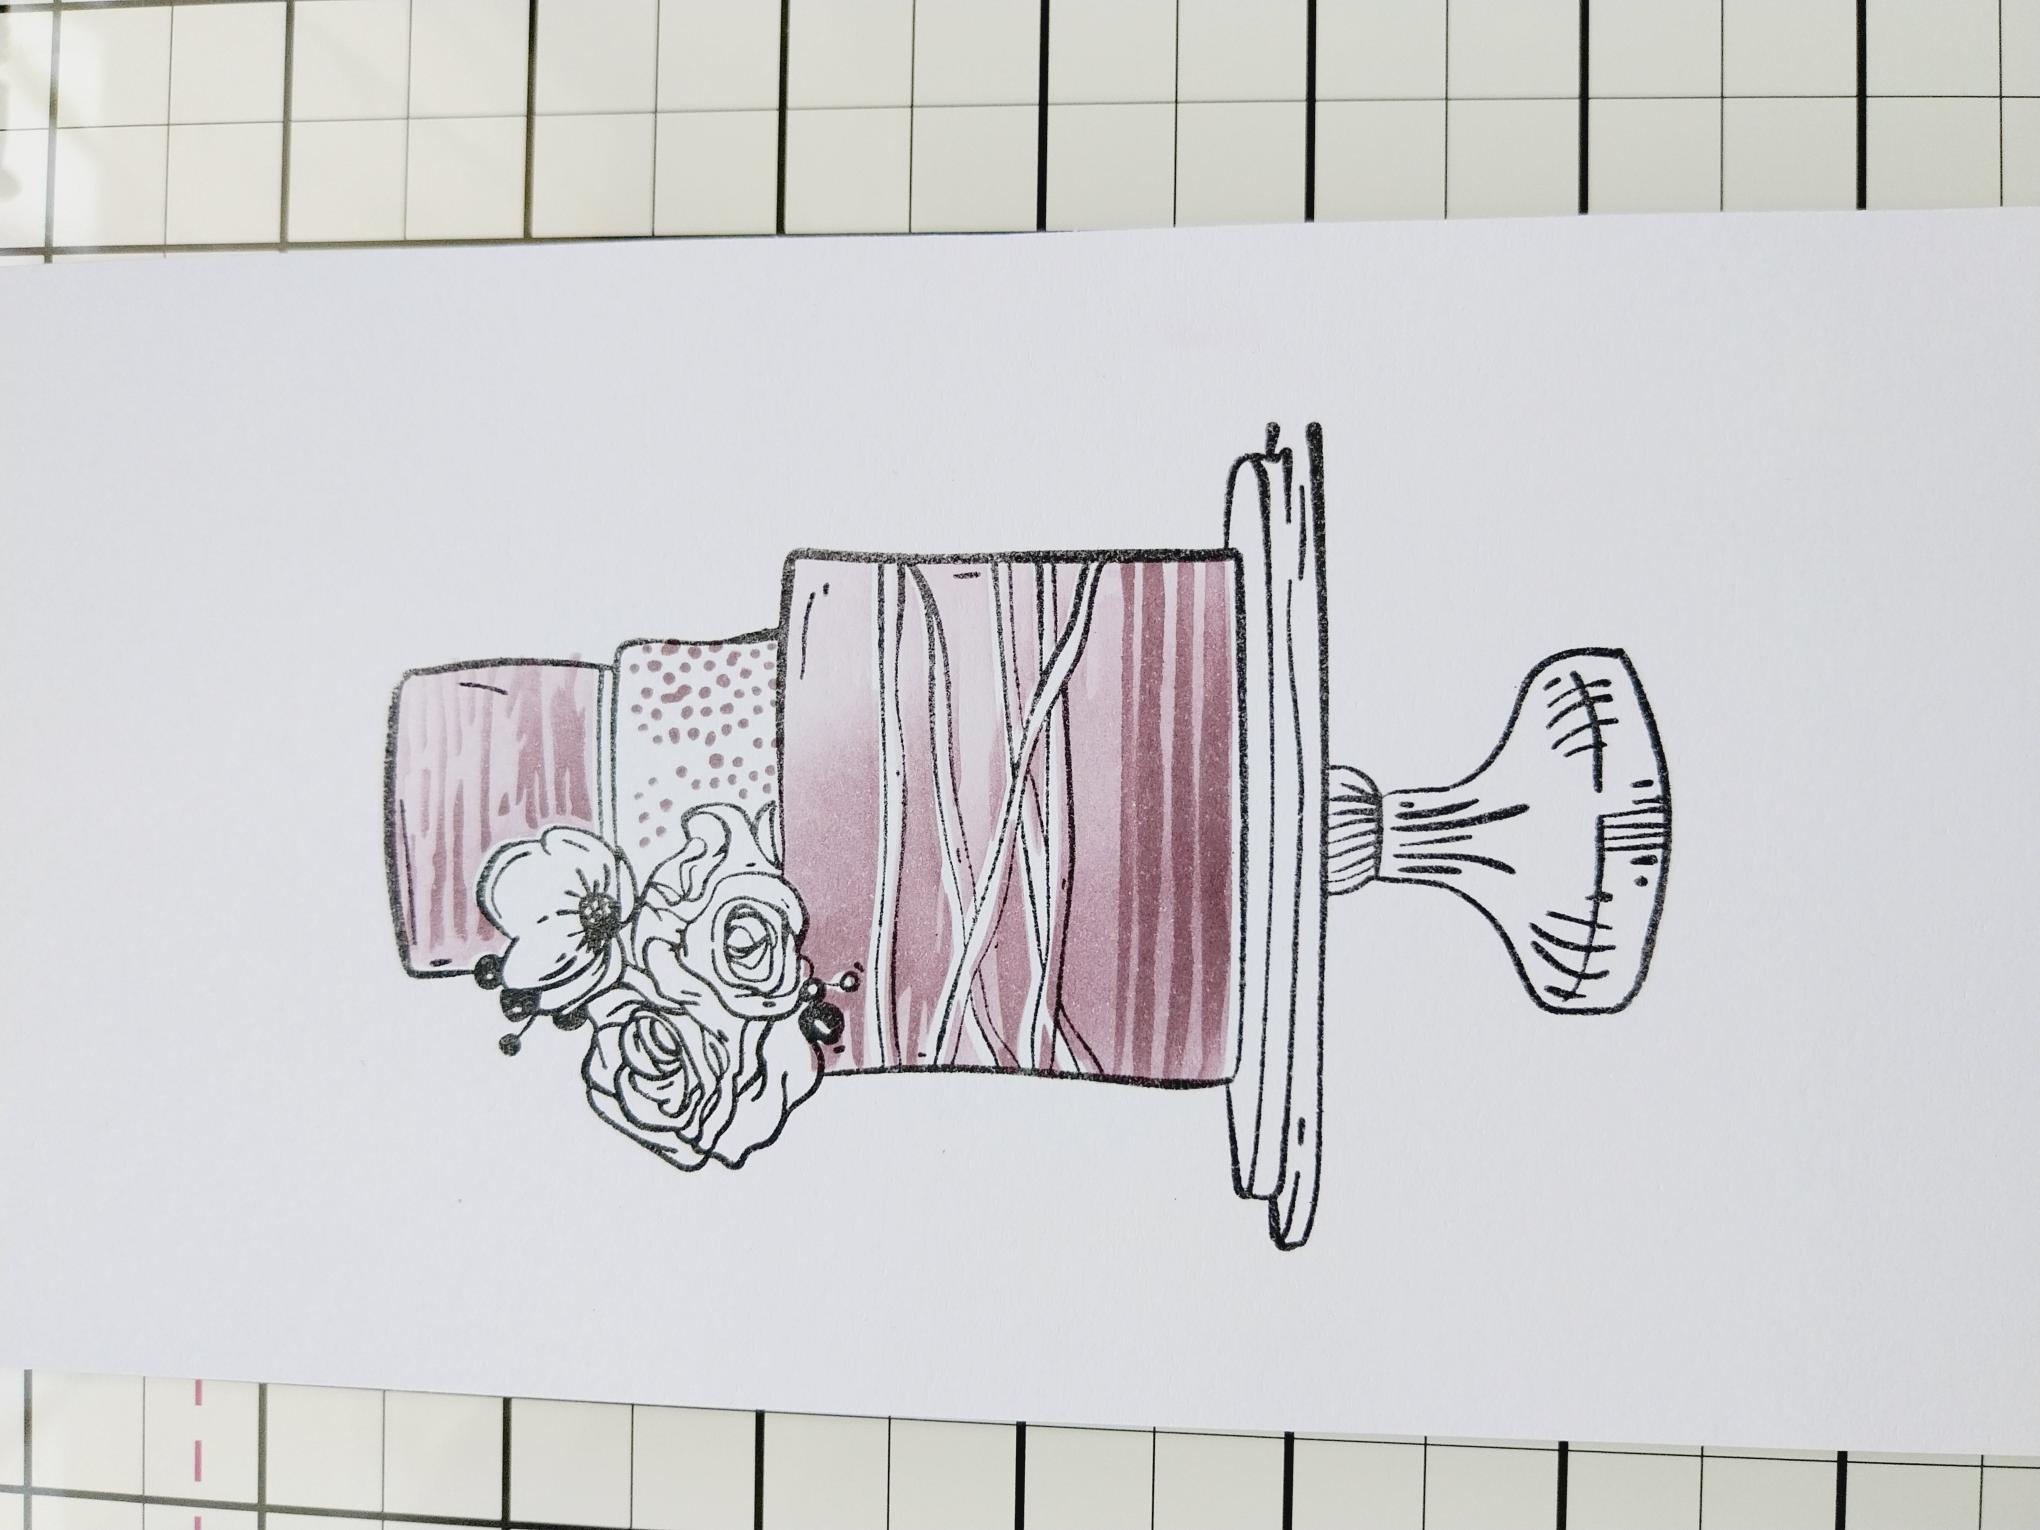
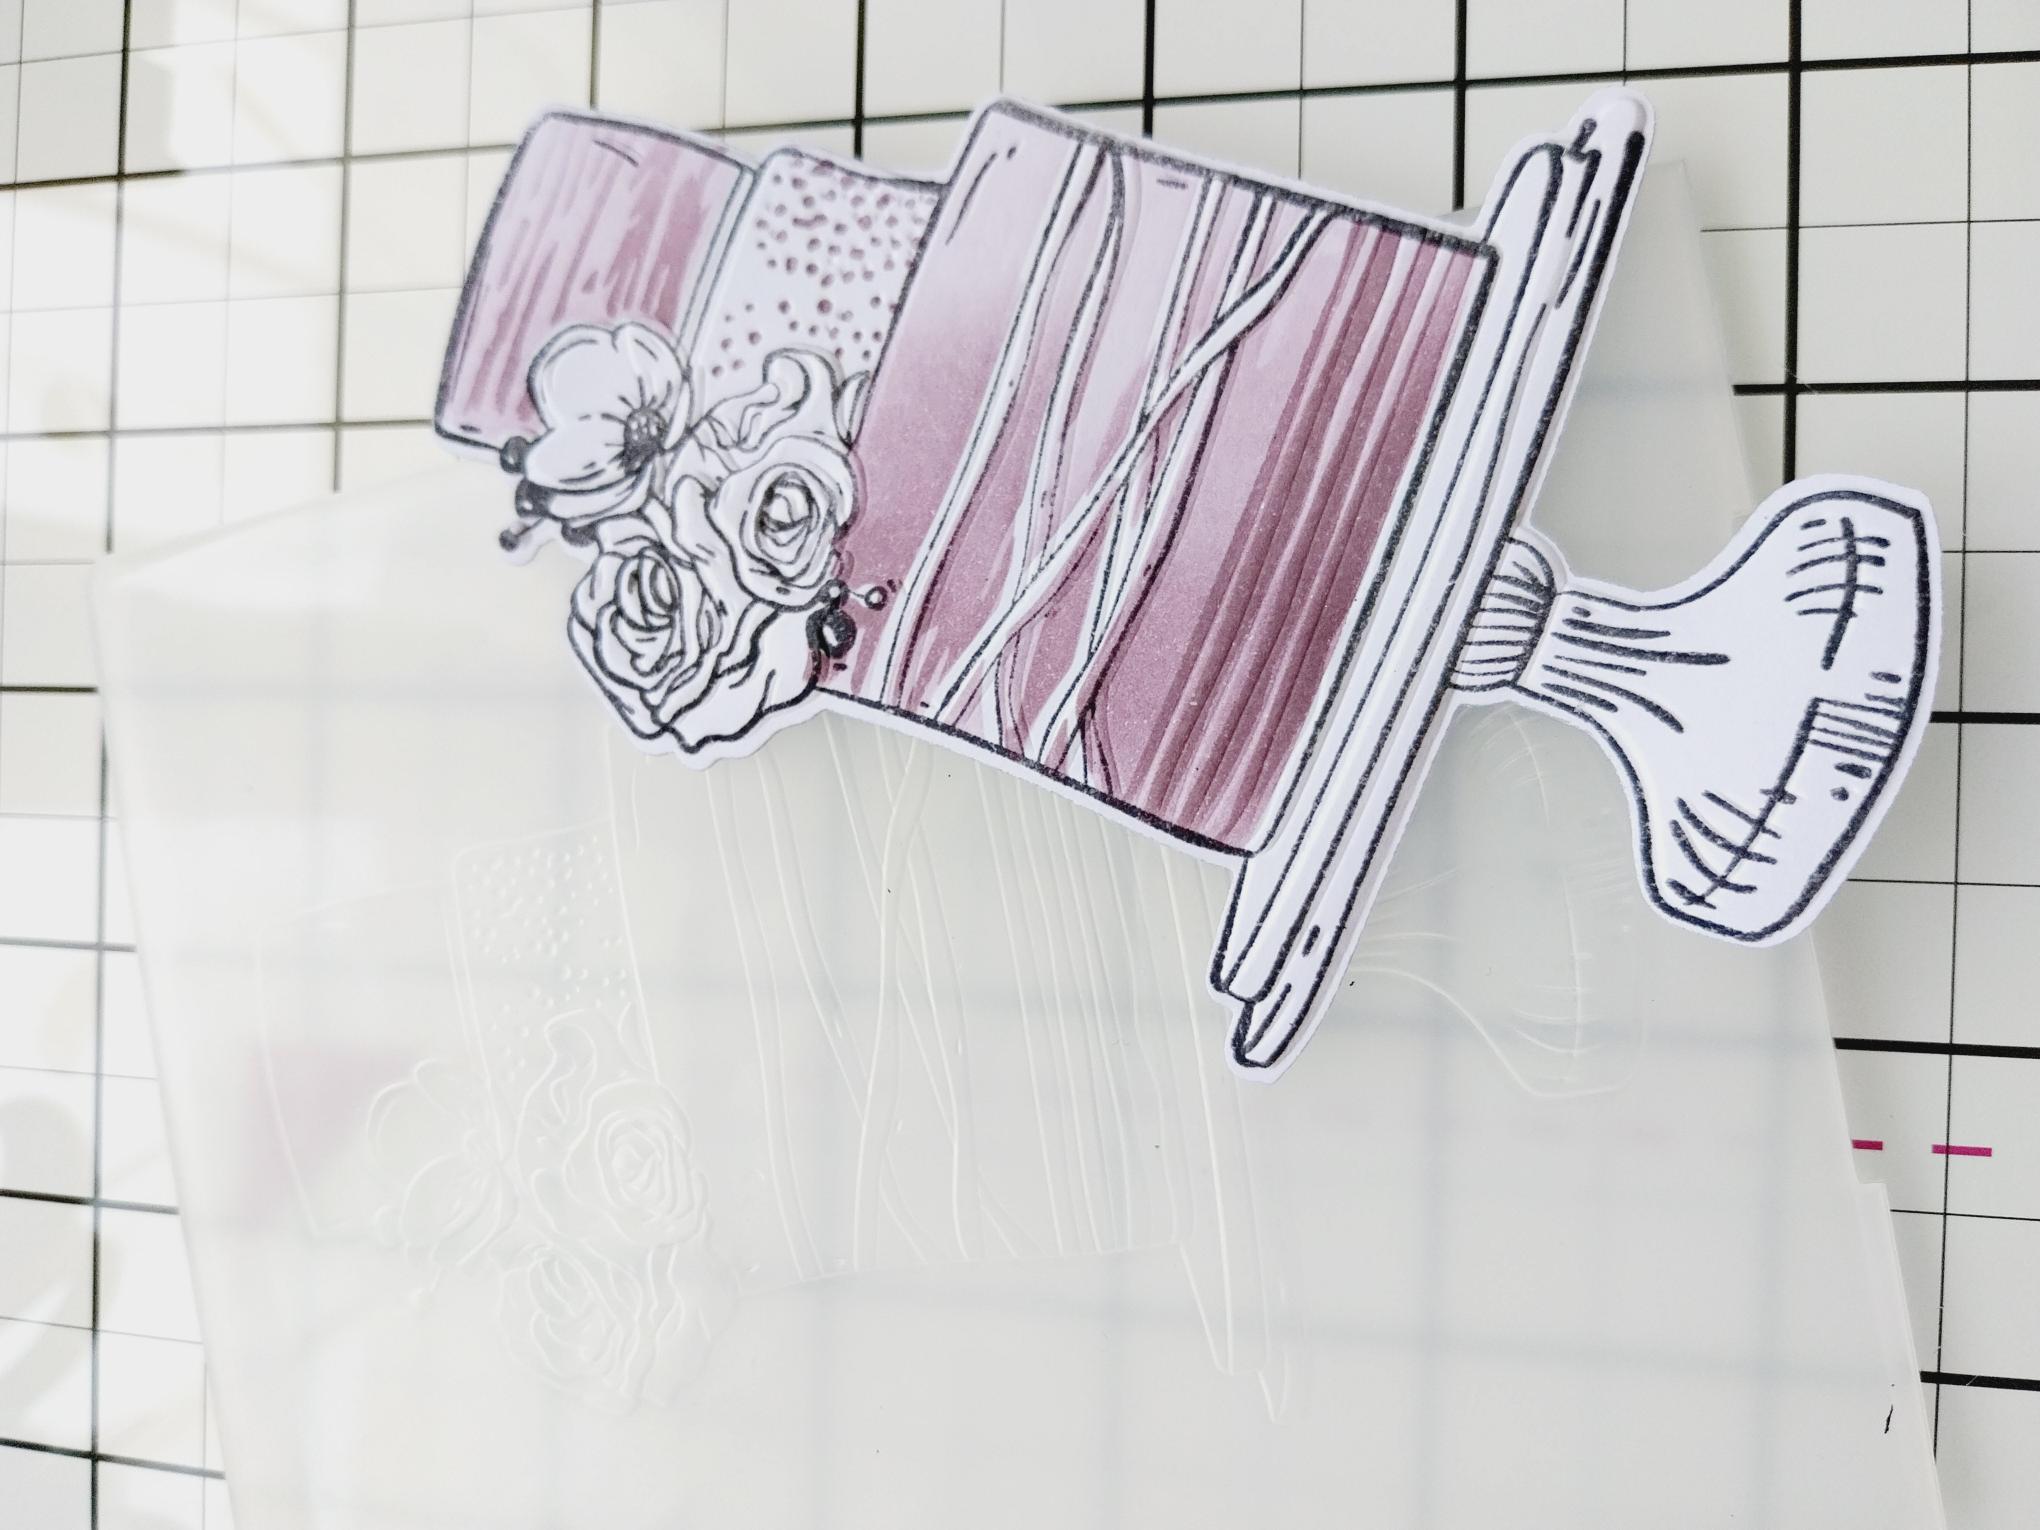
Stamp the detailed stamp over your stencilled image, with the Midnight hybrid ink pad. |
|
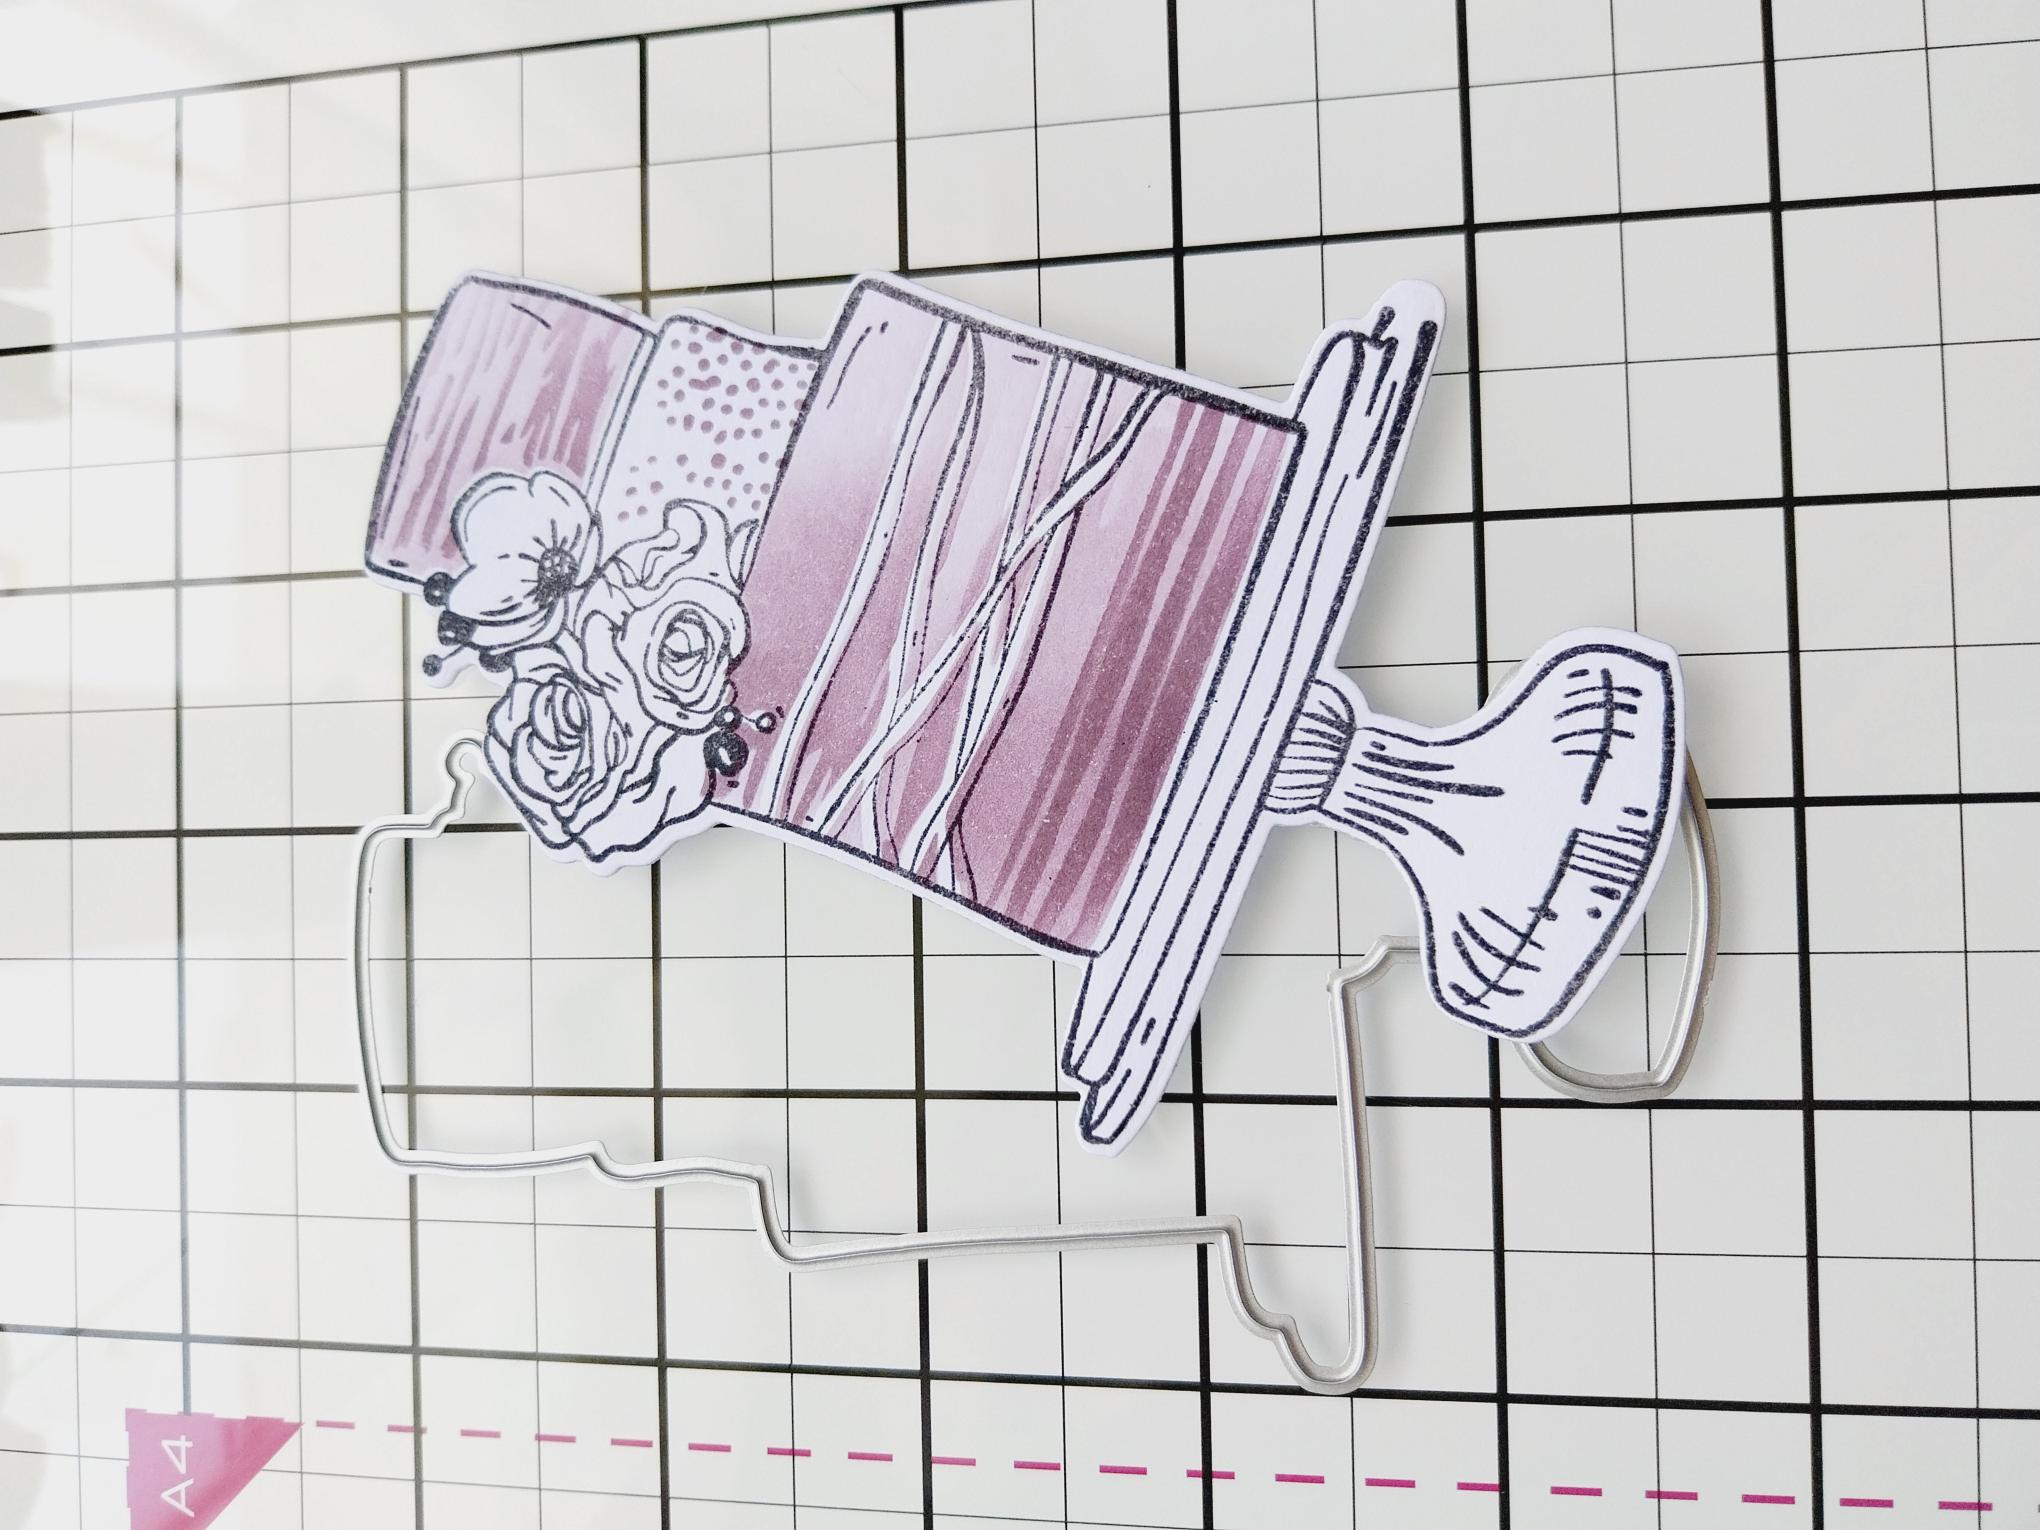
Use the coordinating die to cut out your element. |
|
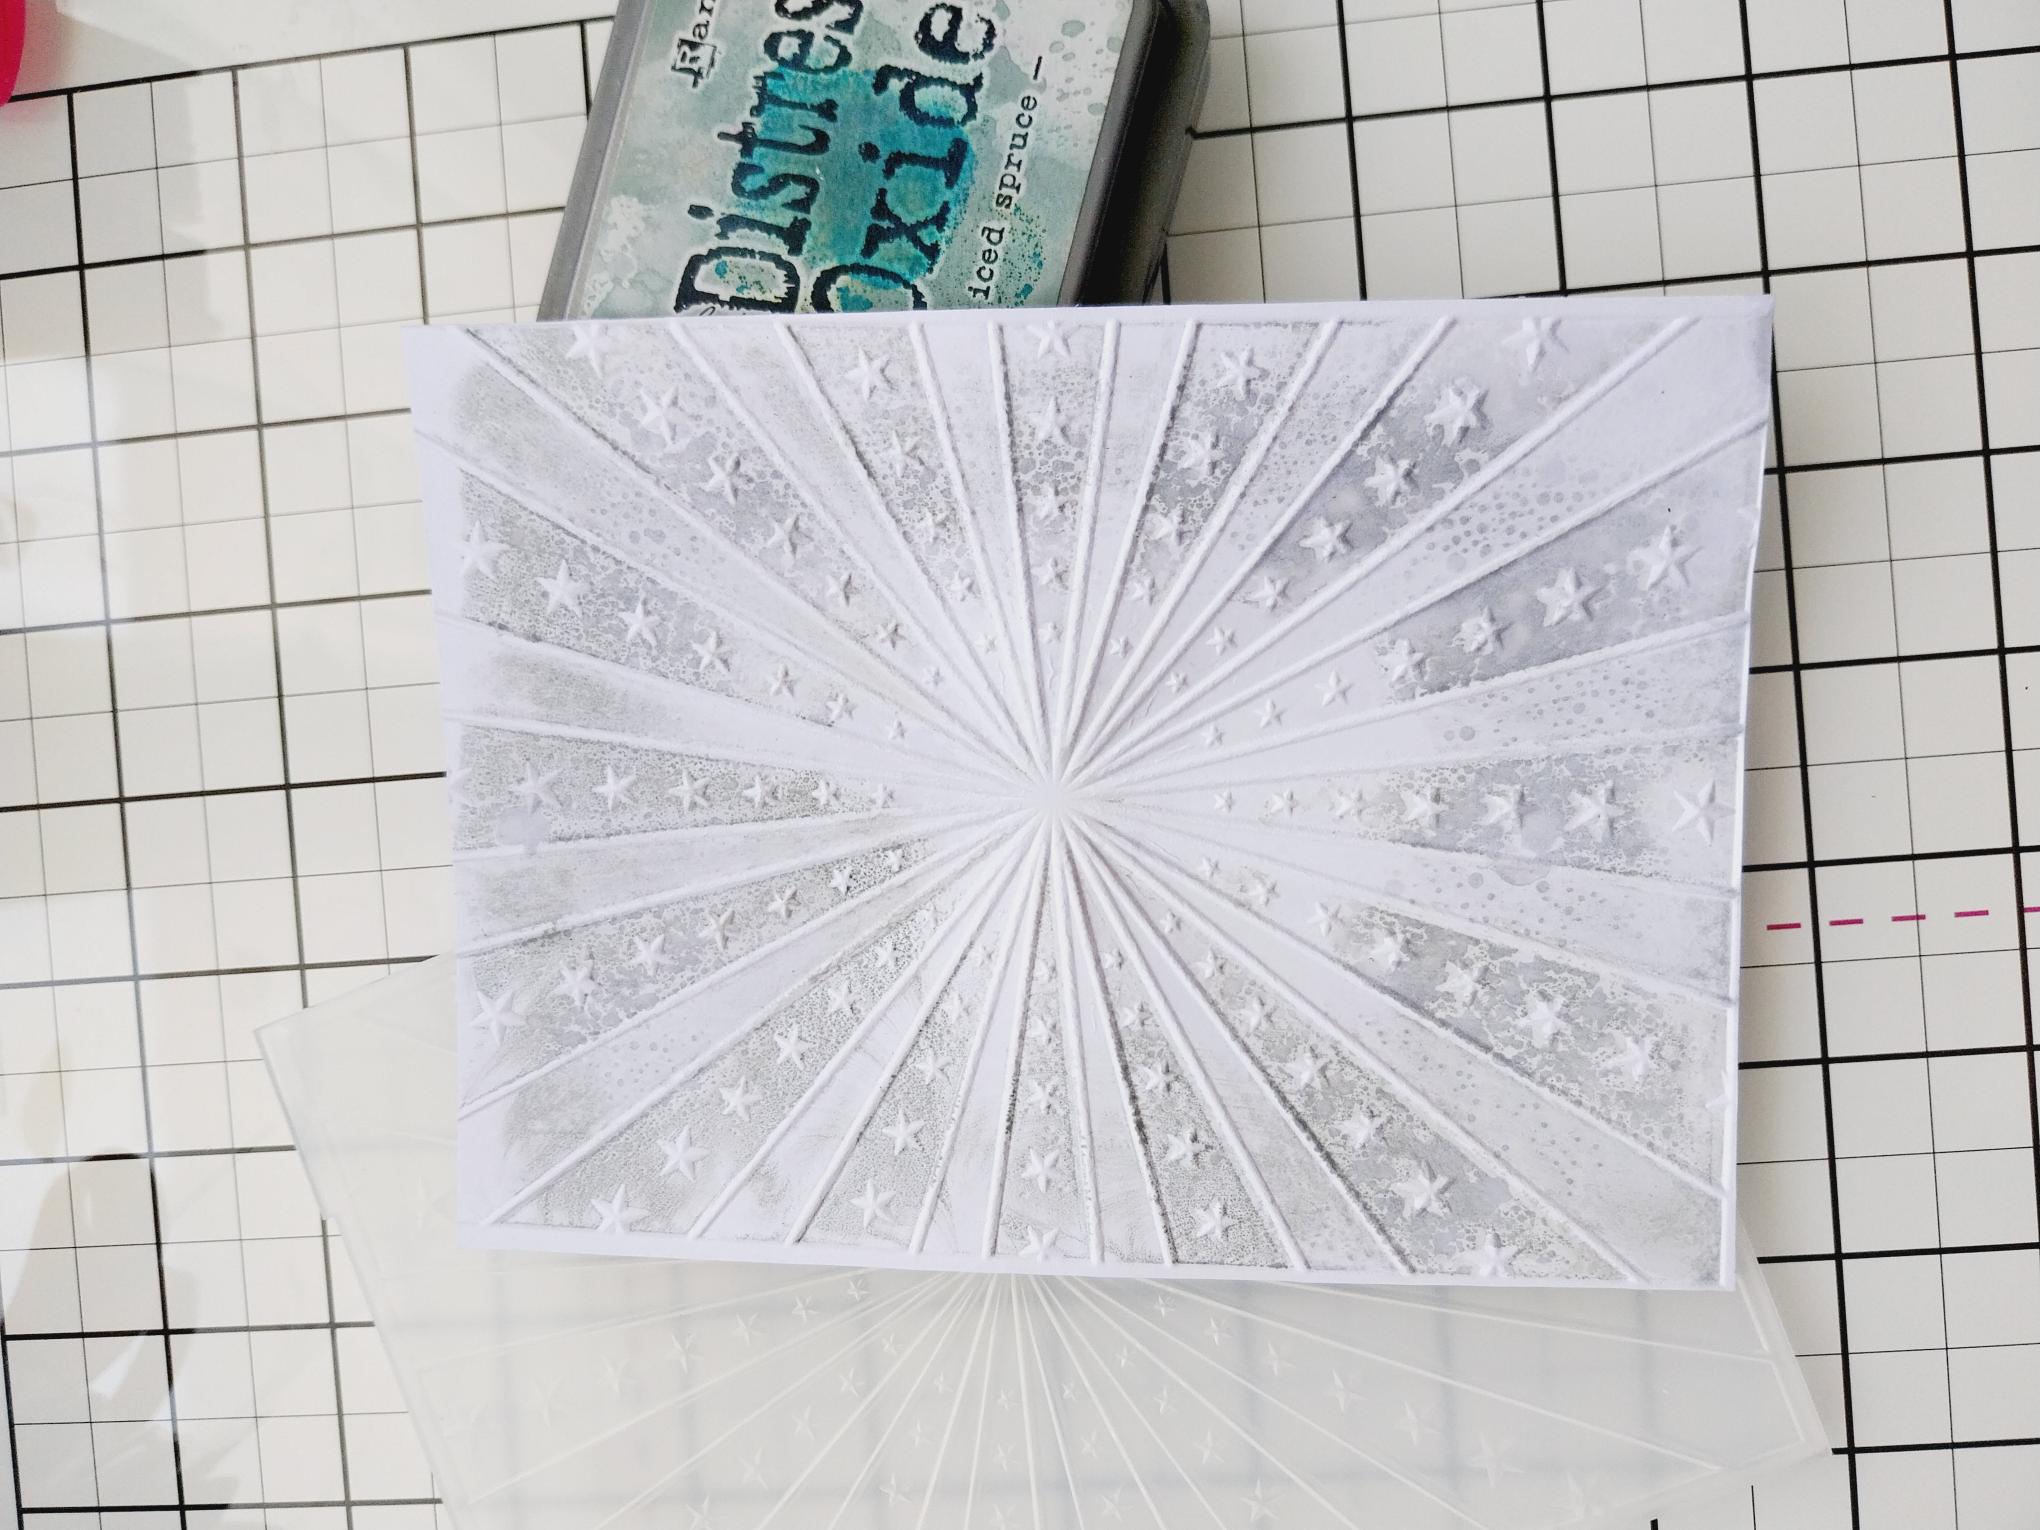
Place the die cut cake inside the embossing folder, run it through your machine, then pop it to one side. |
|
Ink up the debossed side of your Carnival folder, with the Iced Spruce Oxide and spritz with water. Place the white card, trimmed to 6 1/2 x 4 1/4", inside the folder, inked side on the top and run it through your machine. |
|
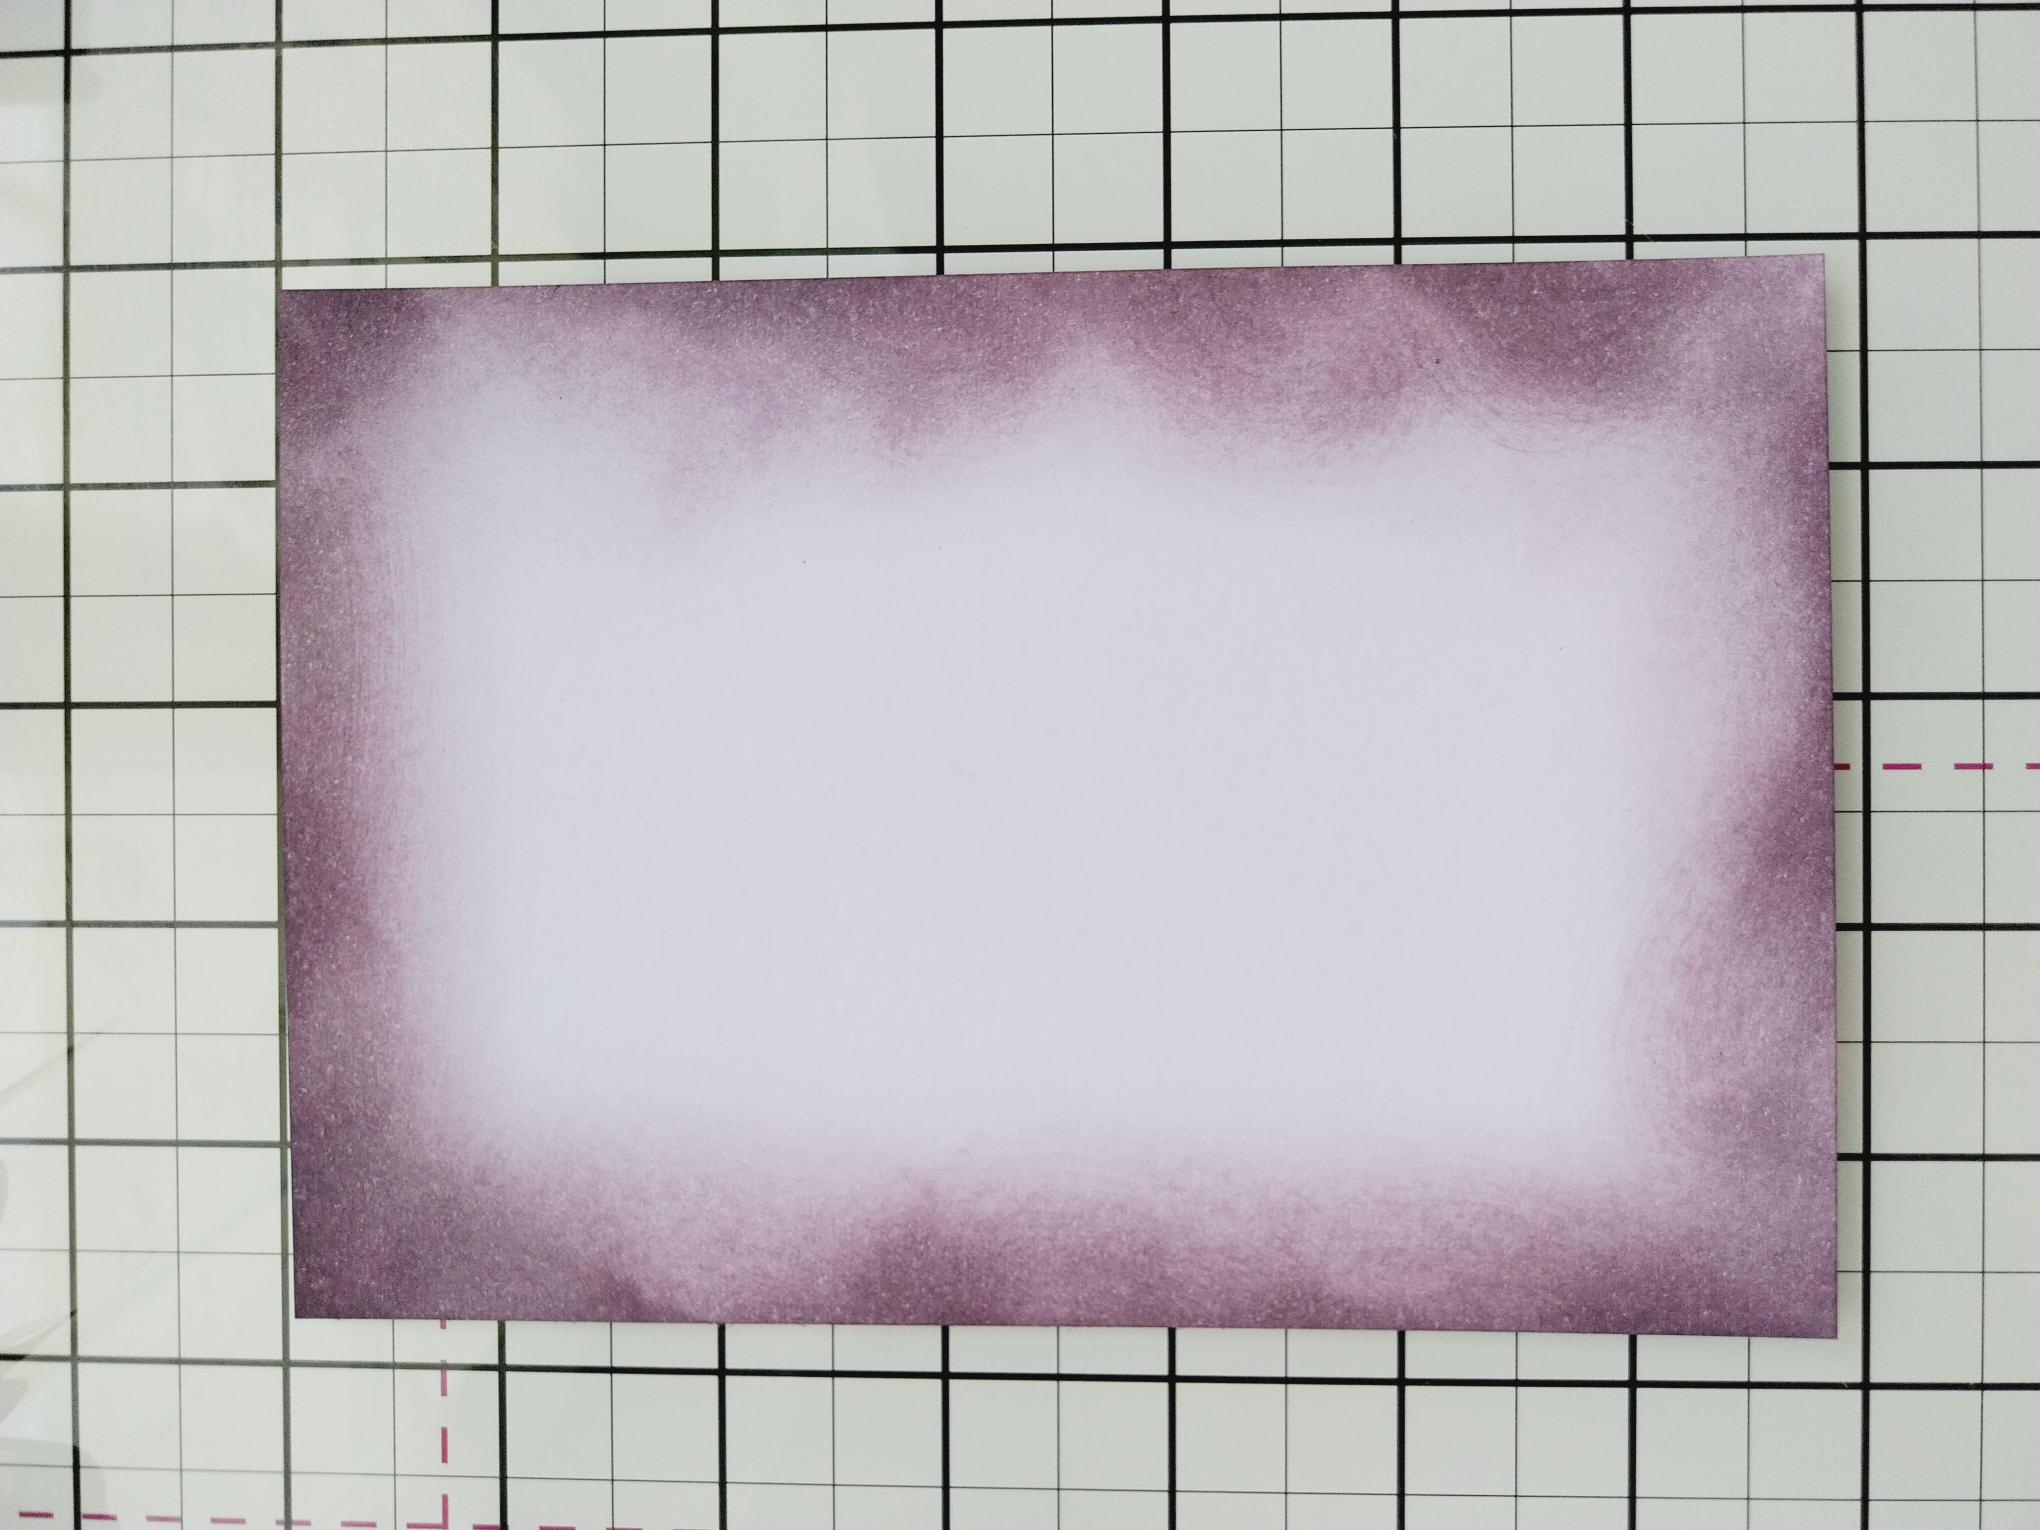
Blend the edges of the white card, trimmed to 6 3/4 x 4 1/2", with Heather. |
|
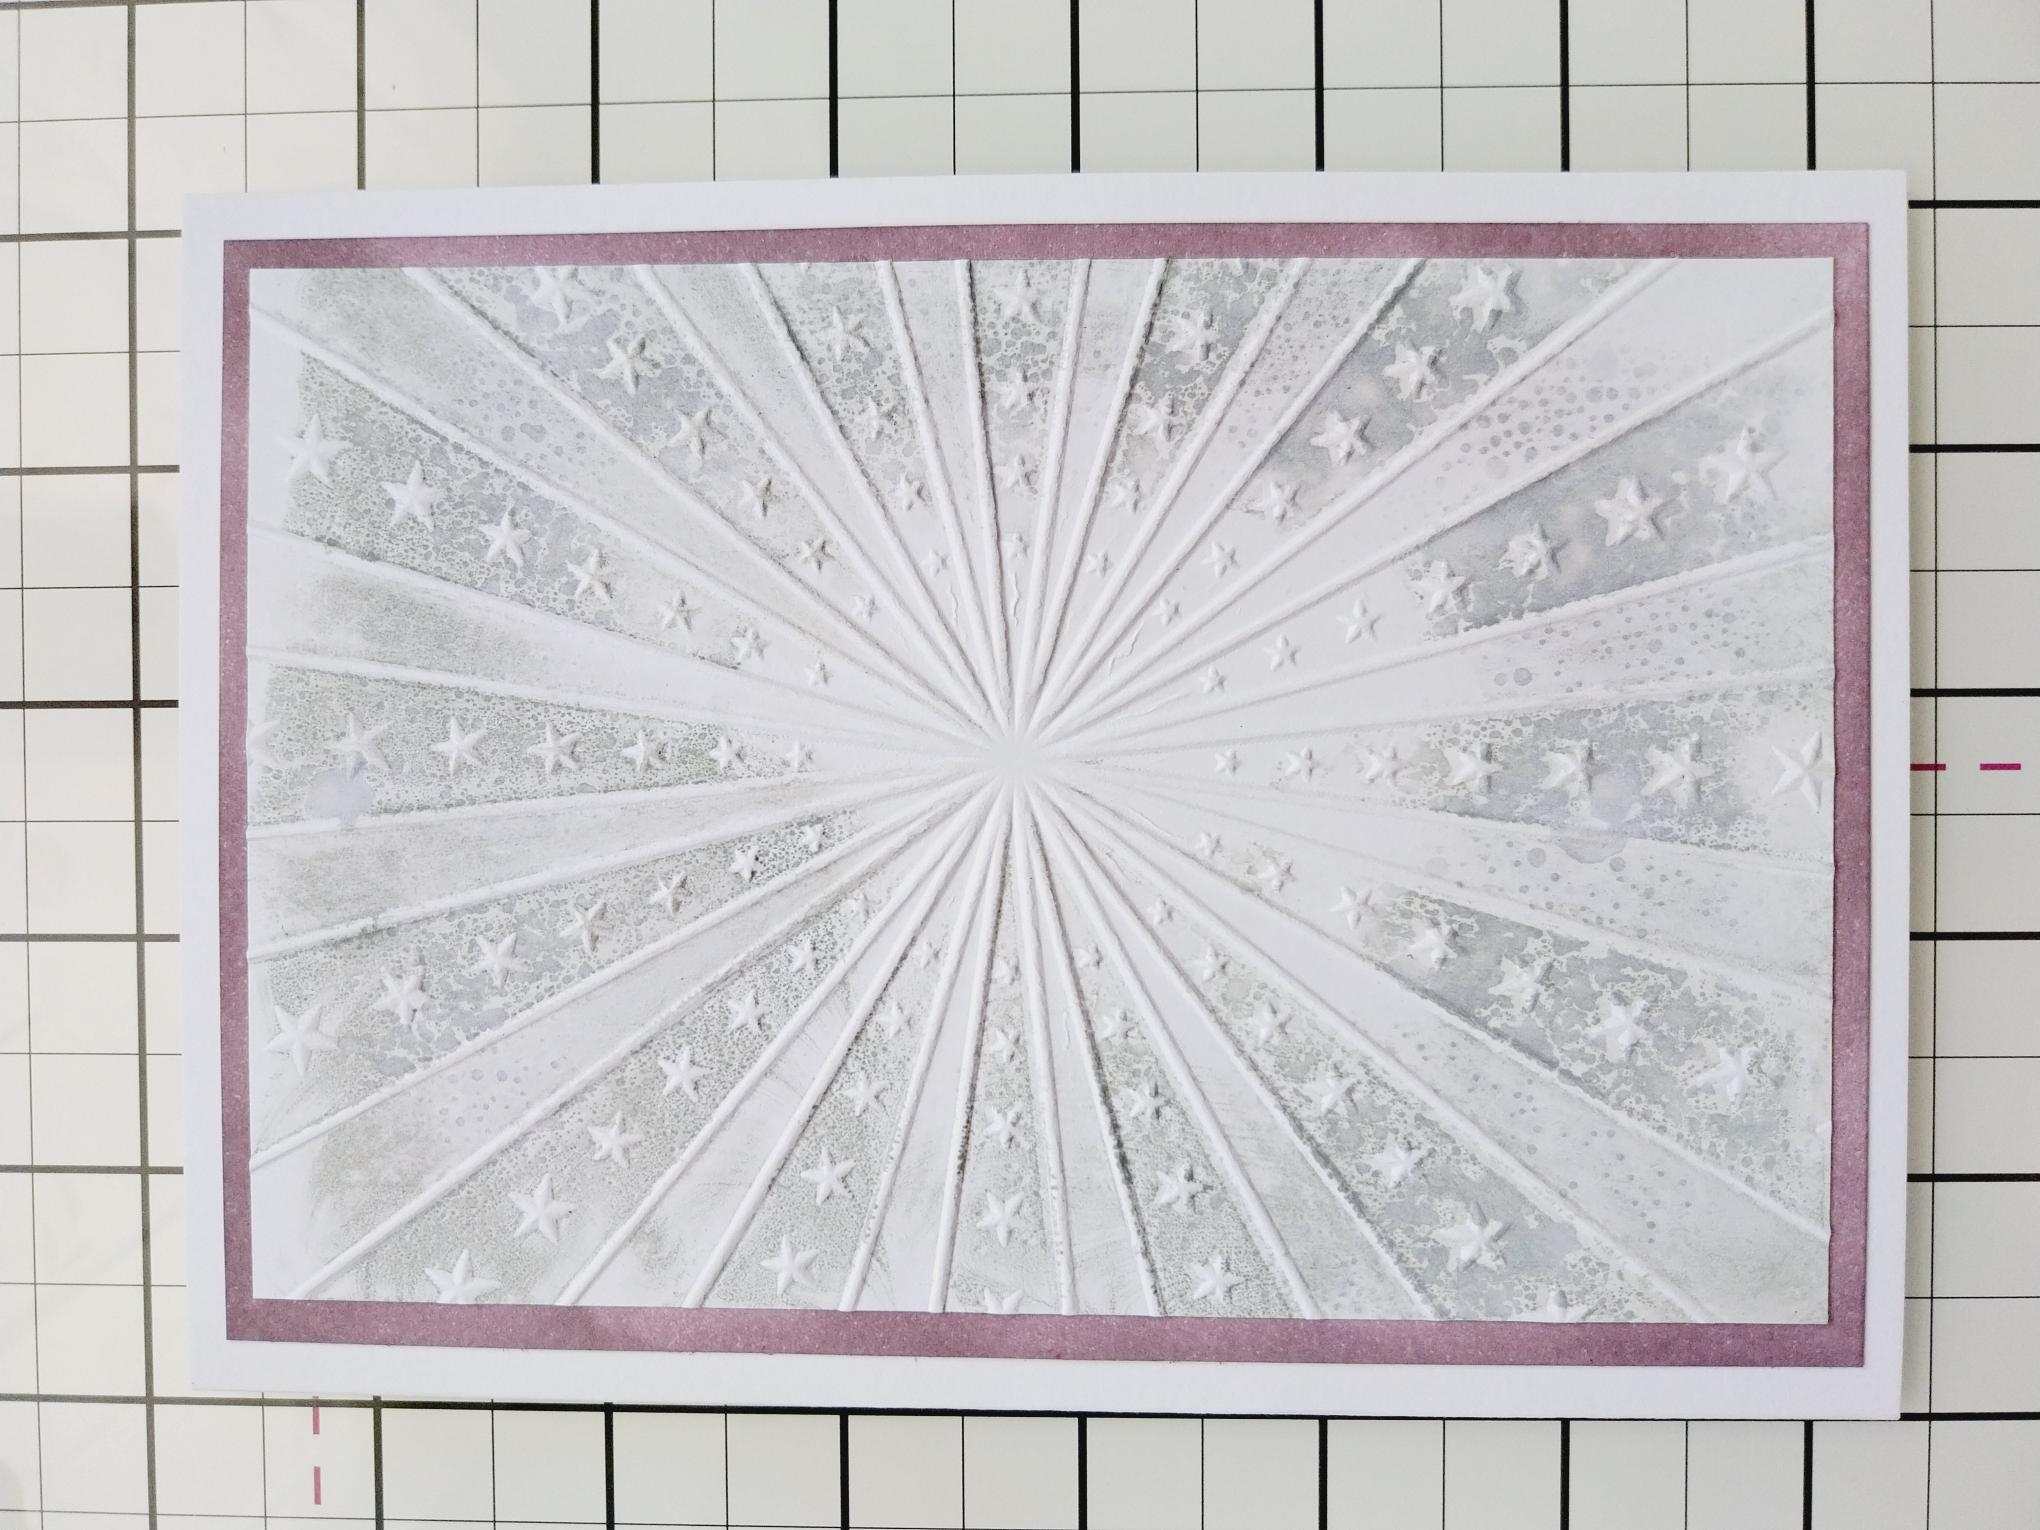
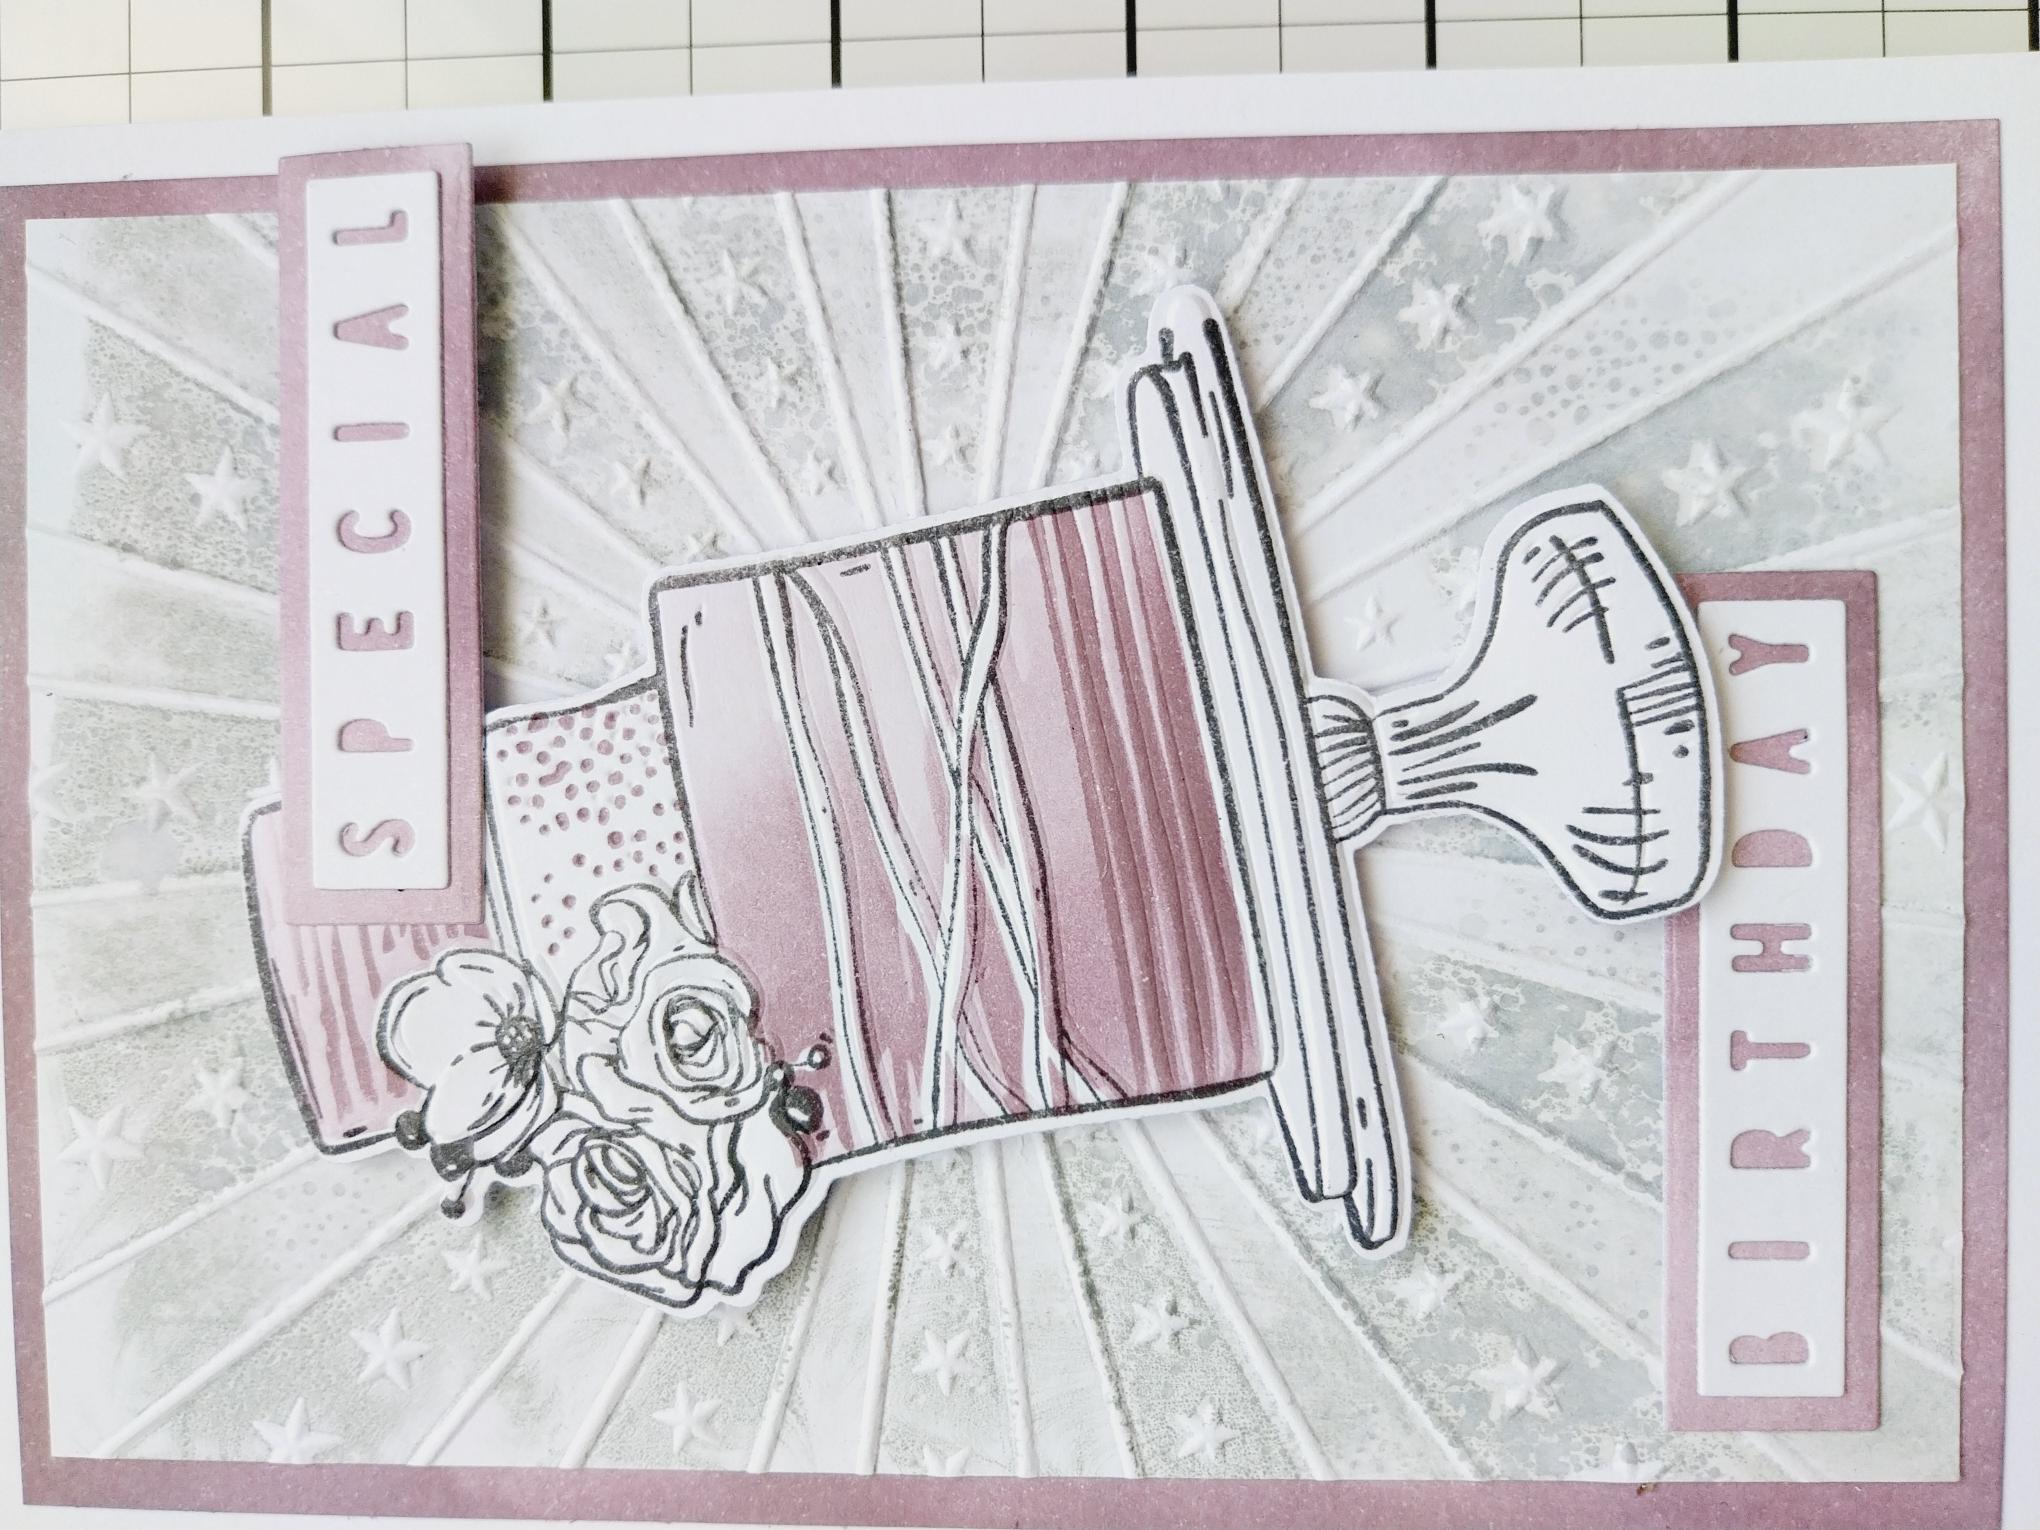
Adhere your embossed card on to the blended card and then on to your card blank, then pop to one side. |
|
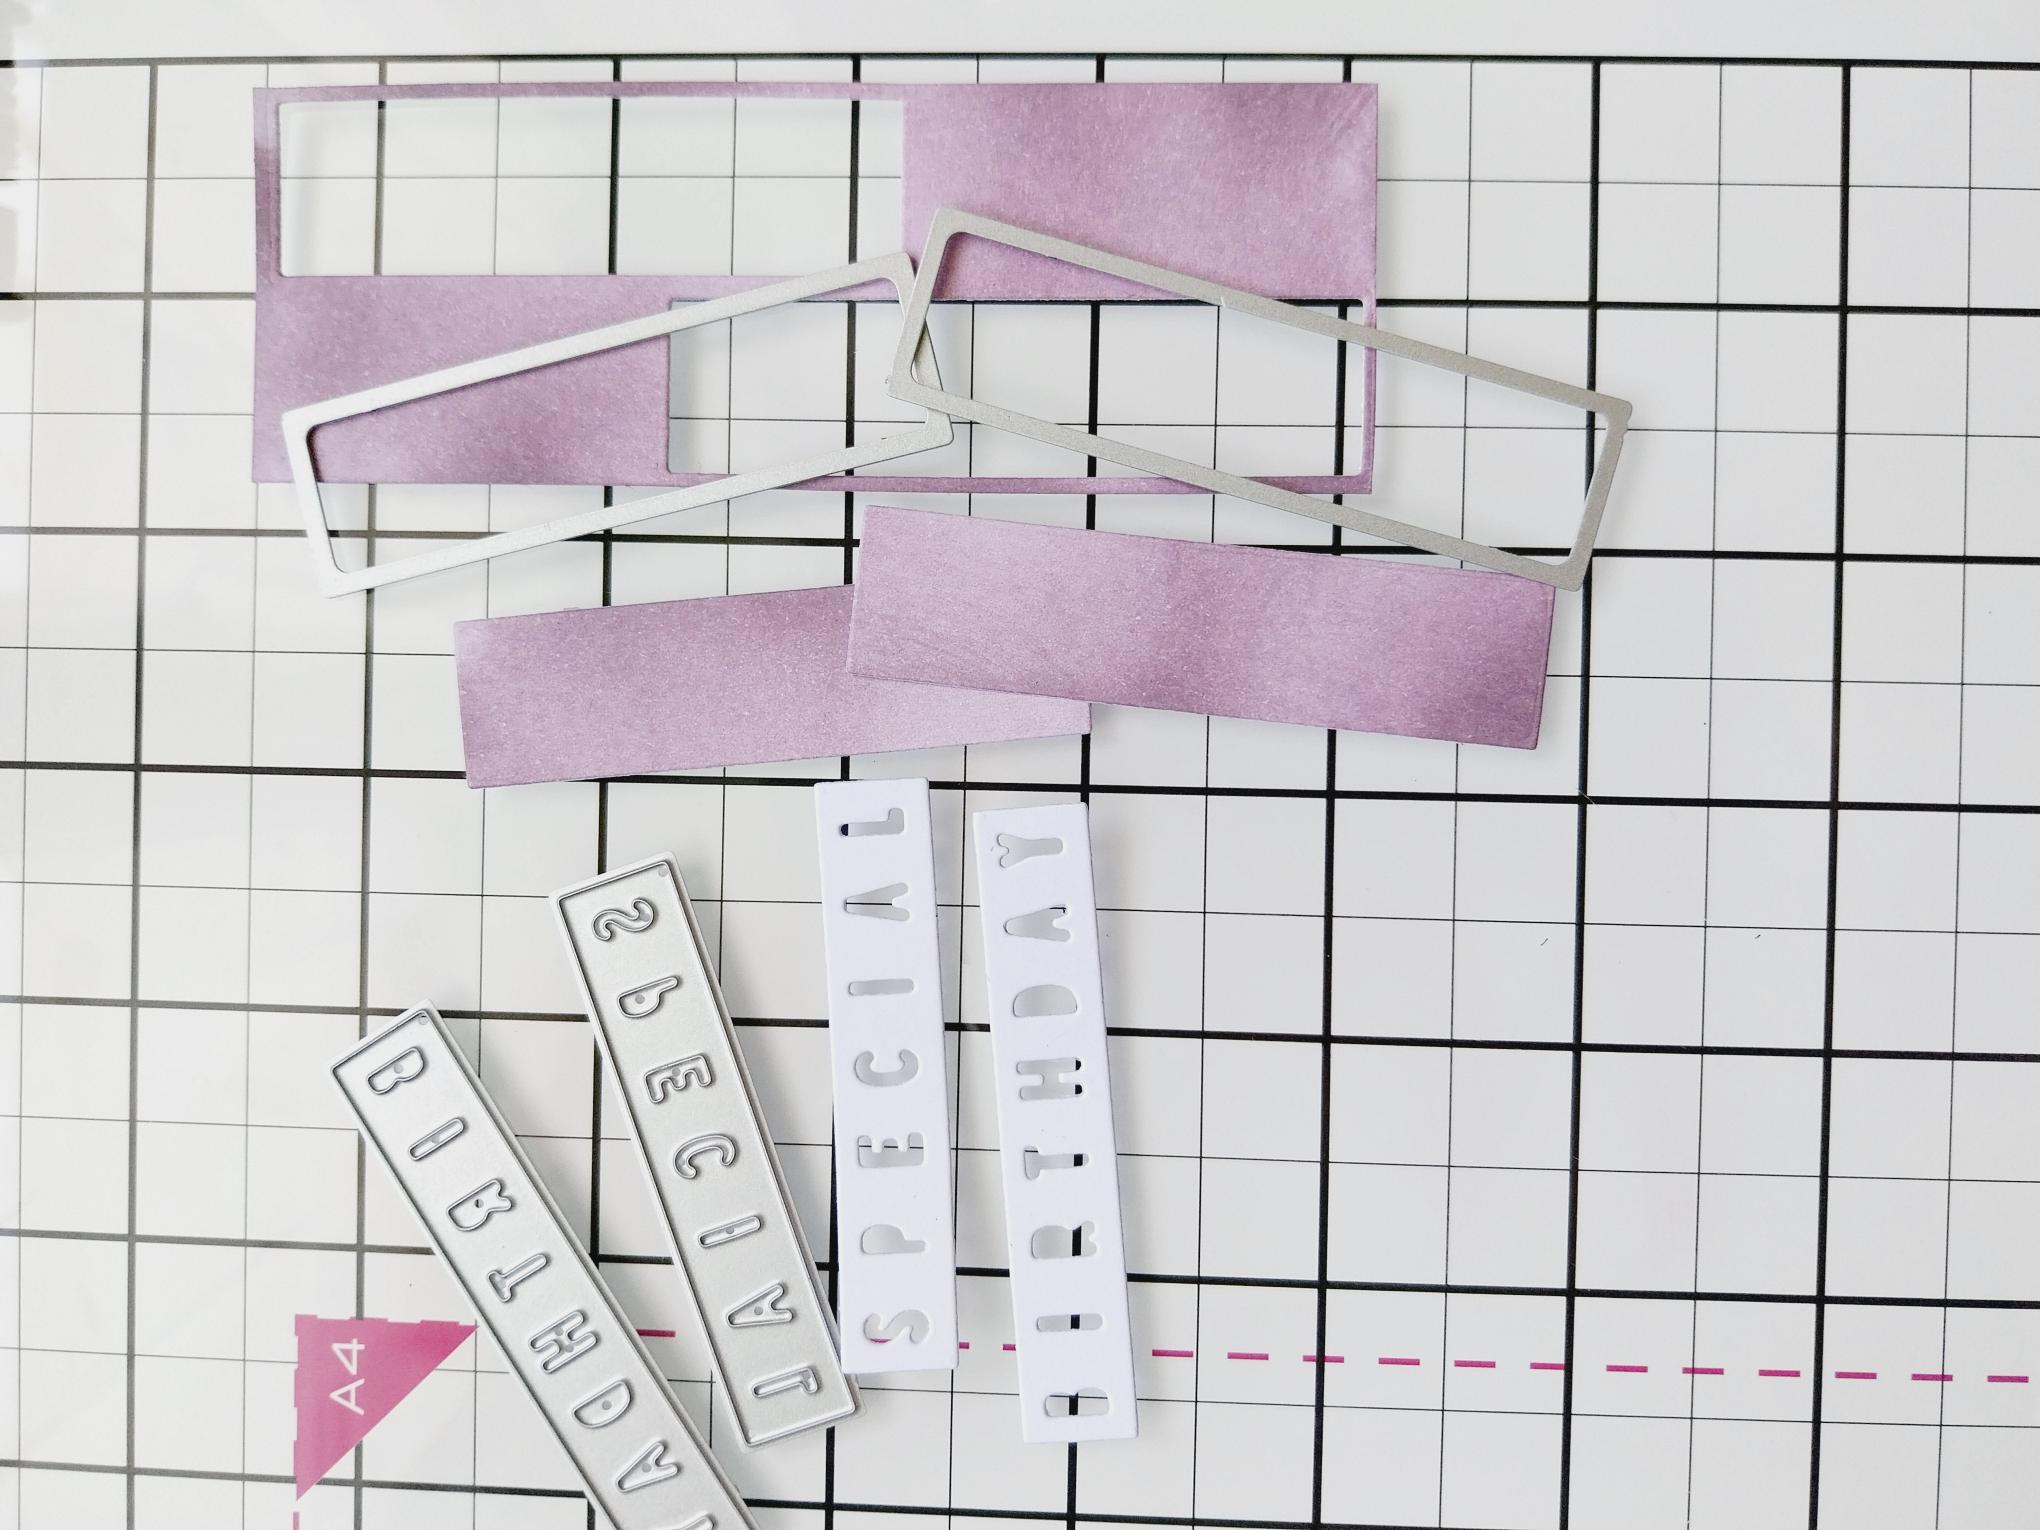
Cut a piece of white card and place the "Special Birthday" detailed dies on top. Cut a piece of white card, big enough to fit the 2 layering dies, ink the card with Heather, then place the dies on top and run them all through your machine. |
|
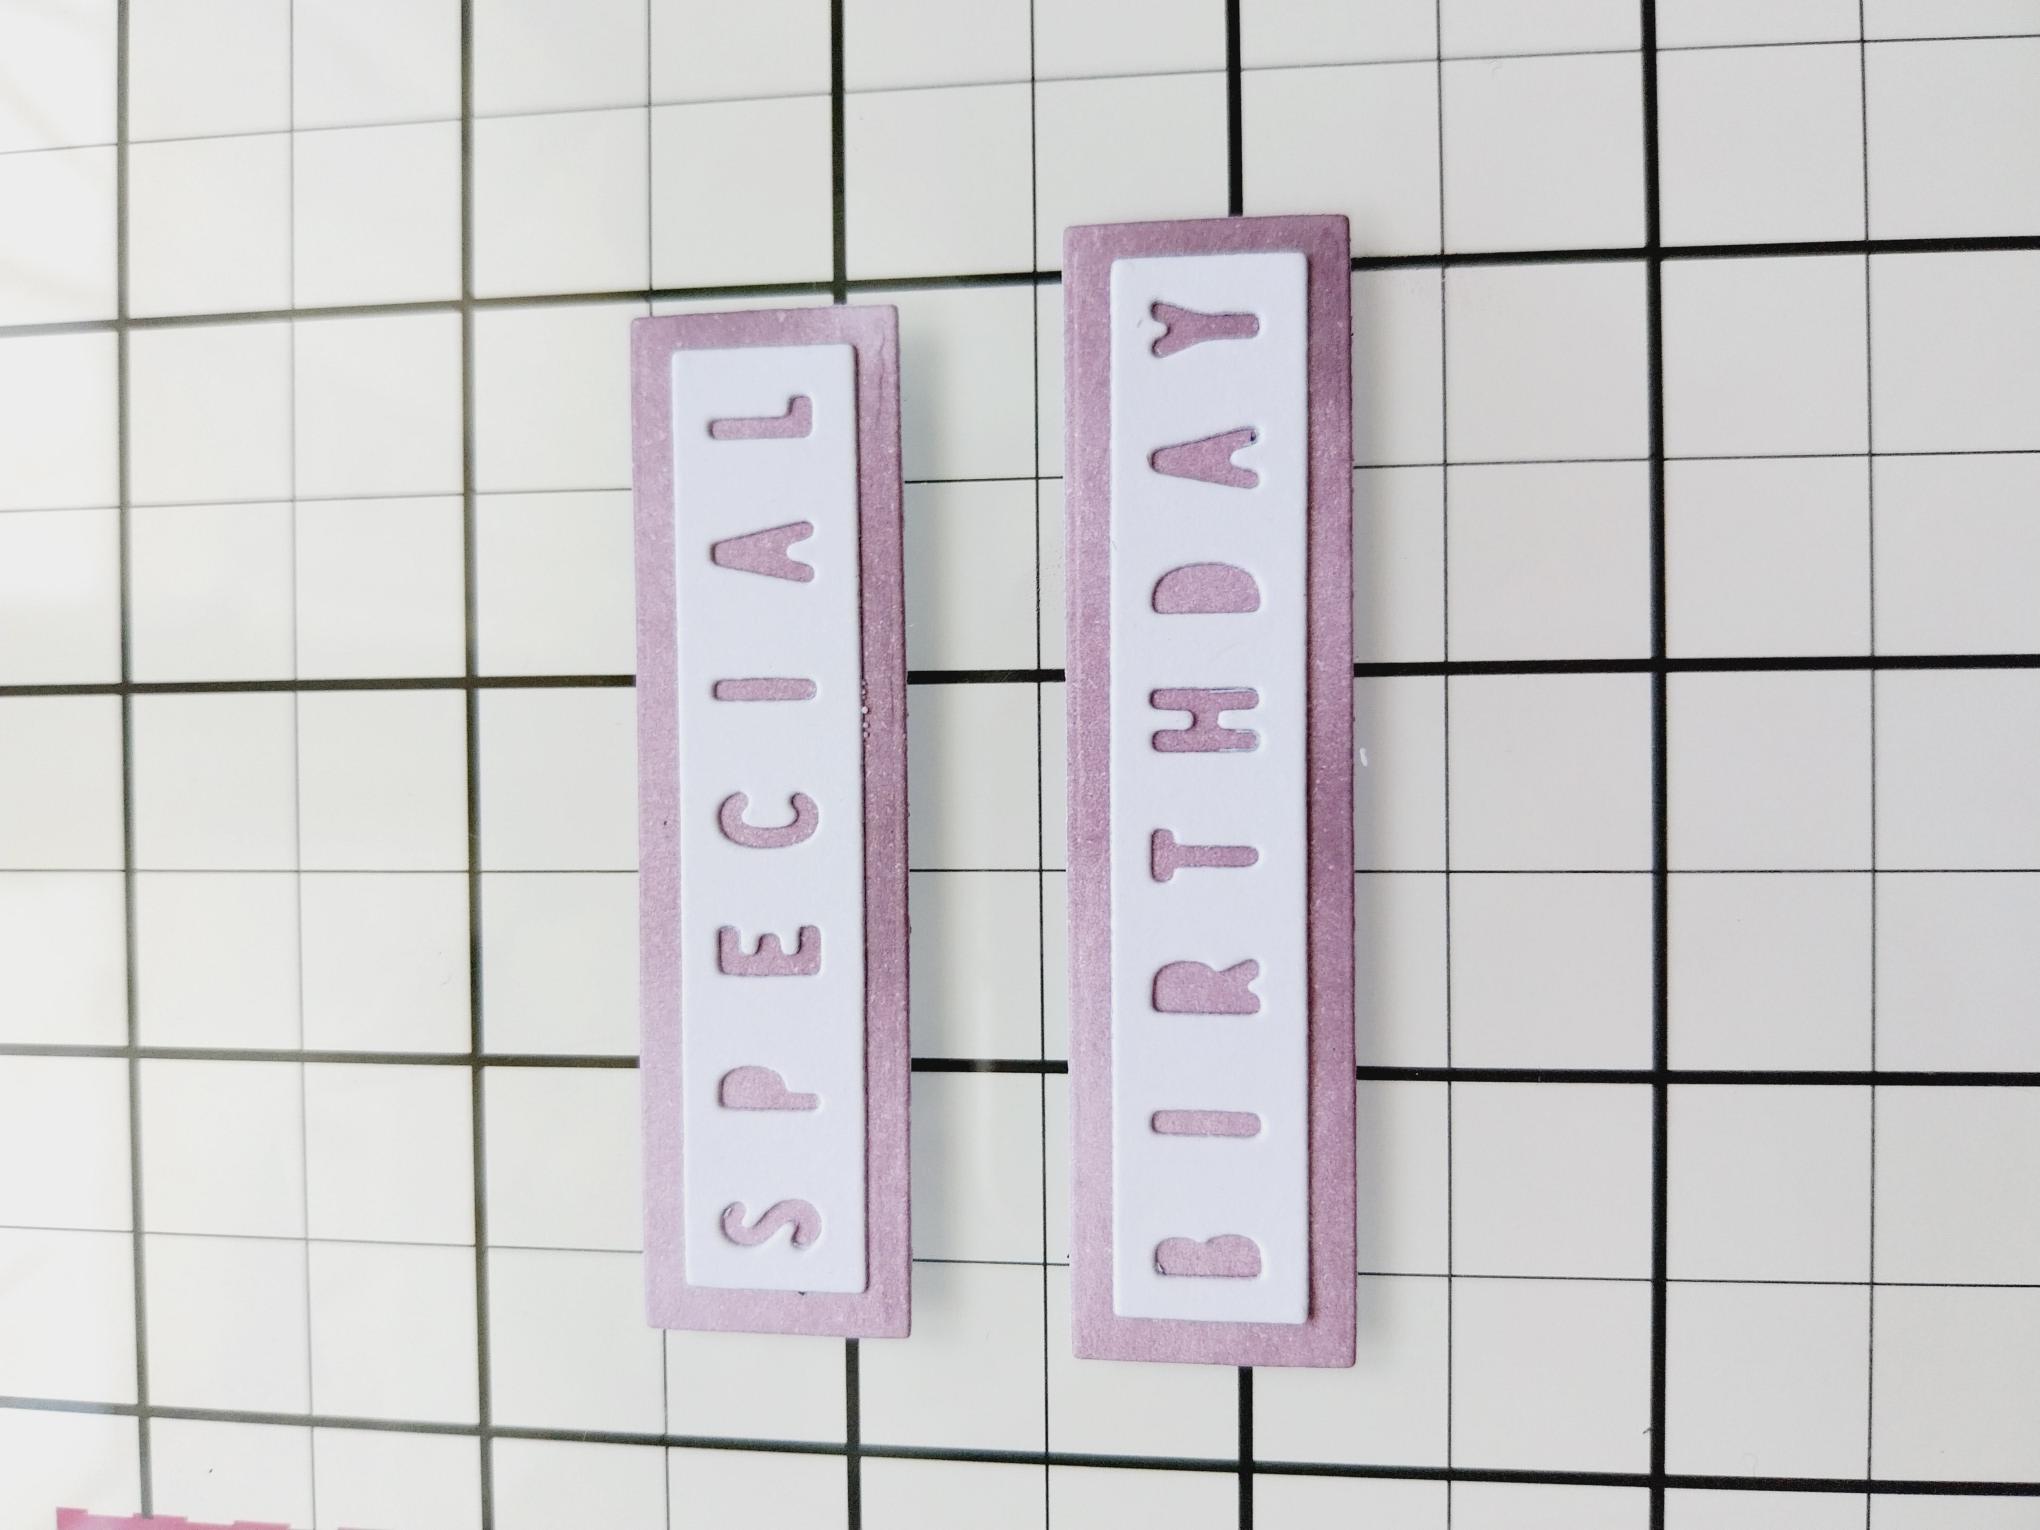
Adhere the detailed sentiment die cuts on top of the die cut layers. |
|
Adhere the sentiments, with foam pads, to the front of your card. |
|
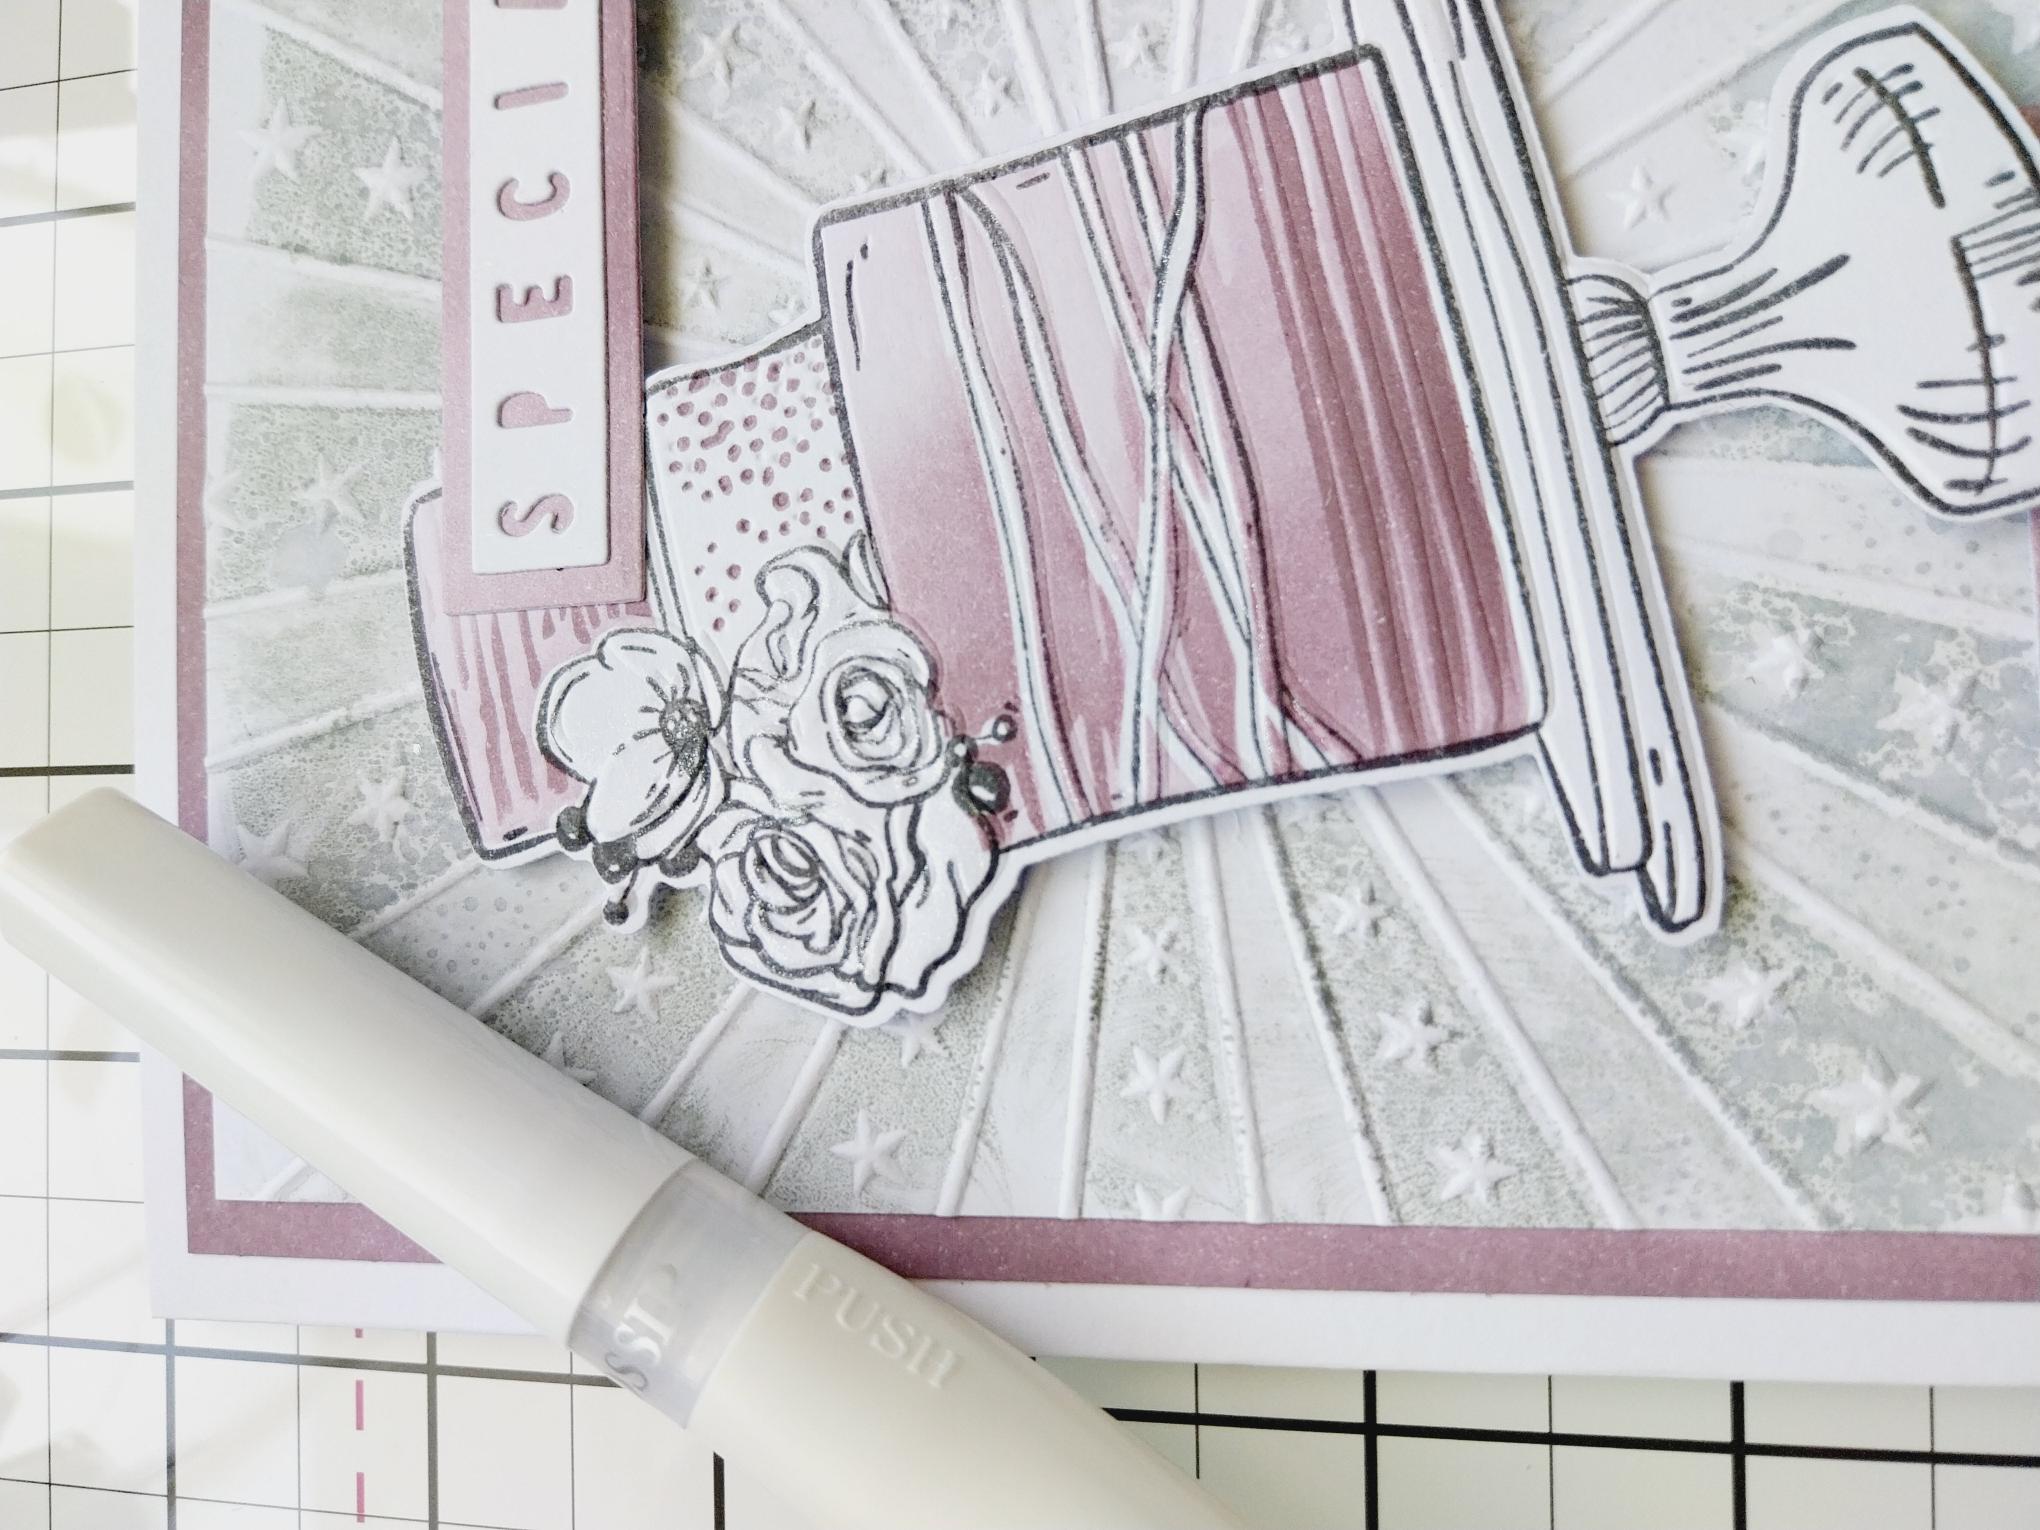
Finish off with a touch of sparkle, where required, using your Gossip clear sparkle pen. |