Give your friends $10 off their first order!
Refer a FRIEND


WHAT YOU WILL NEED:
White DL card blank 8 1/4 x 4"
White card
Classic Celebration 8 x 8" Vellum Pack
Classic Celebration 8 x 8" Paper Pack
Let's Celebrate Stamp and Die Collection
Saying Hello Stamp and Die collection
SBM Hybrid Ink Pad: Midnight
Gossip alcohol pens
Stickles: Star Dust
Eureka 101 Watercolour Tablet
SBM Magnetic glass mat
Paper Trimmer
Perfect Together Glue
Foam pads
Double-sided adhesive tape/tape runner
Die Cutting machine
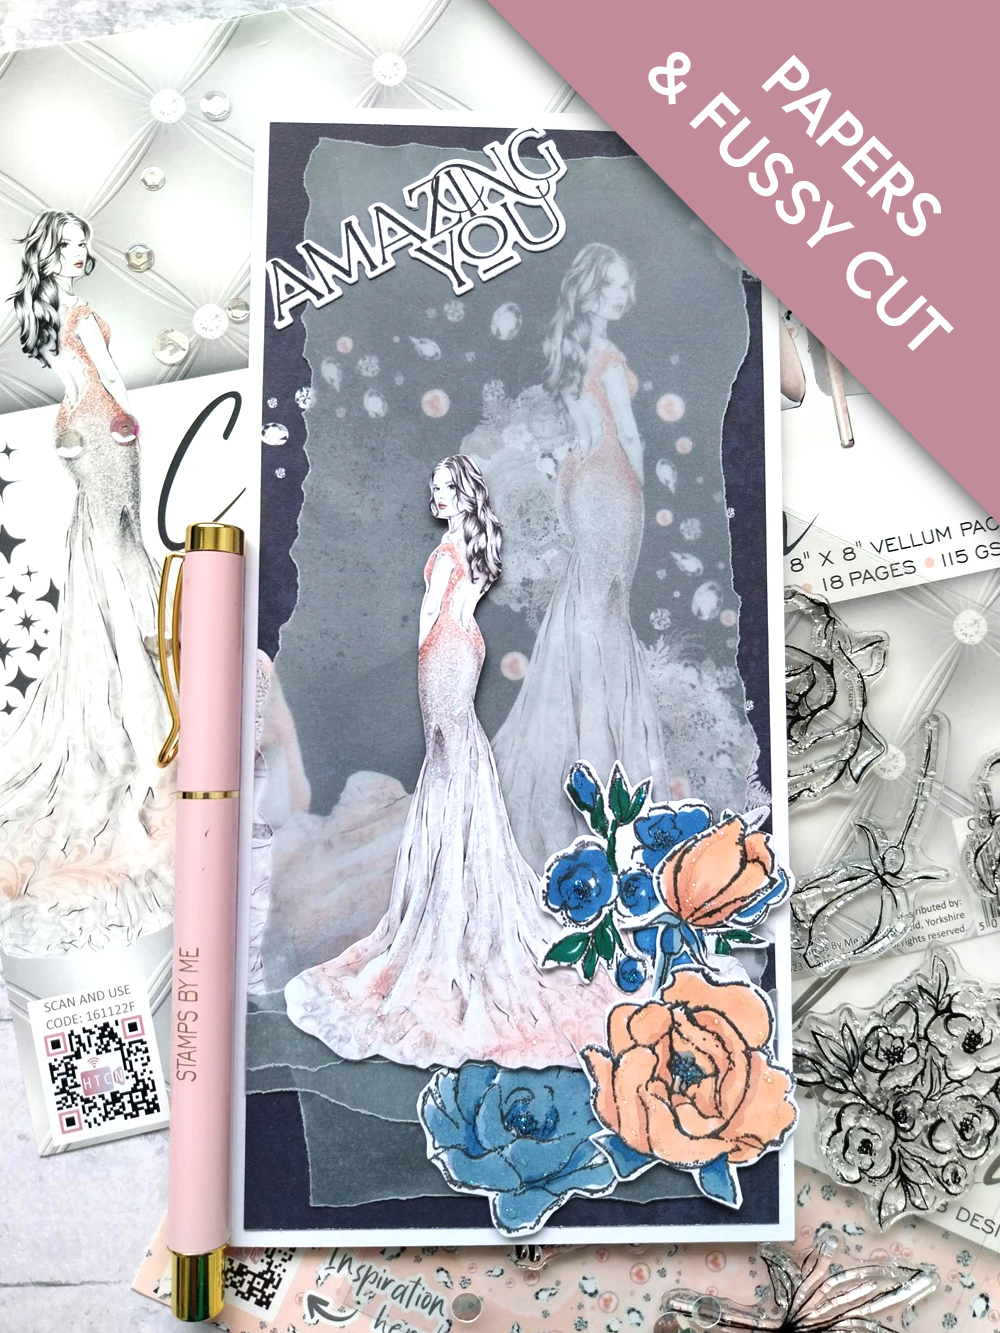
[click image to enlarge] 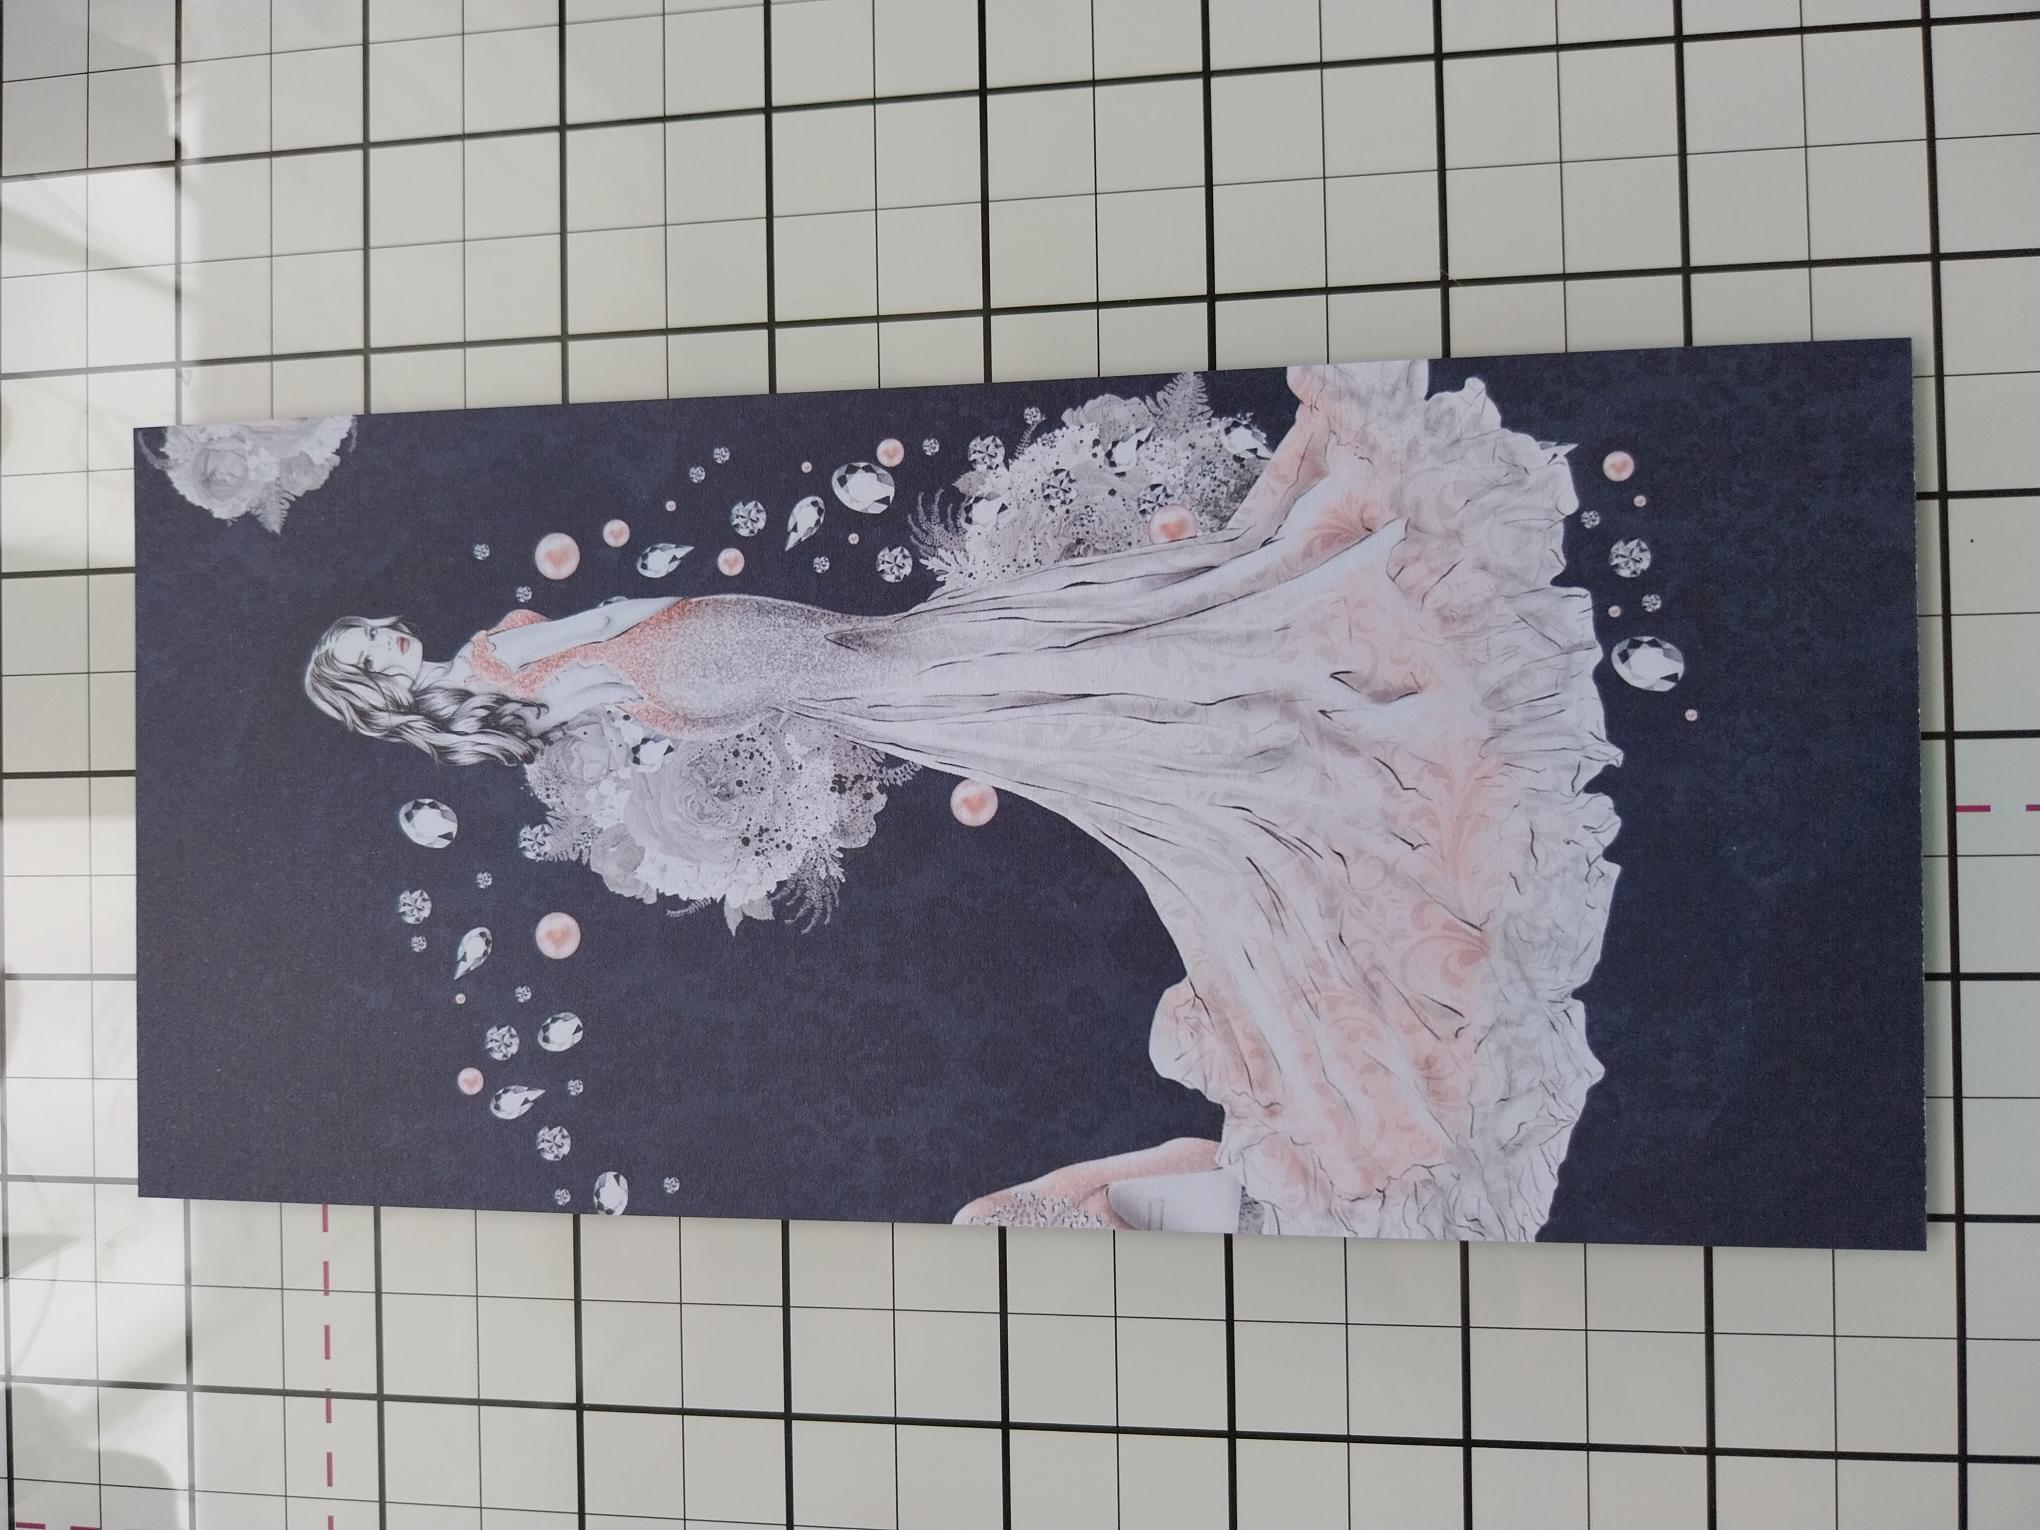
|
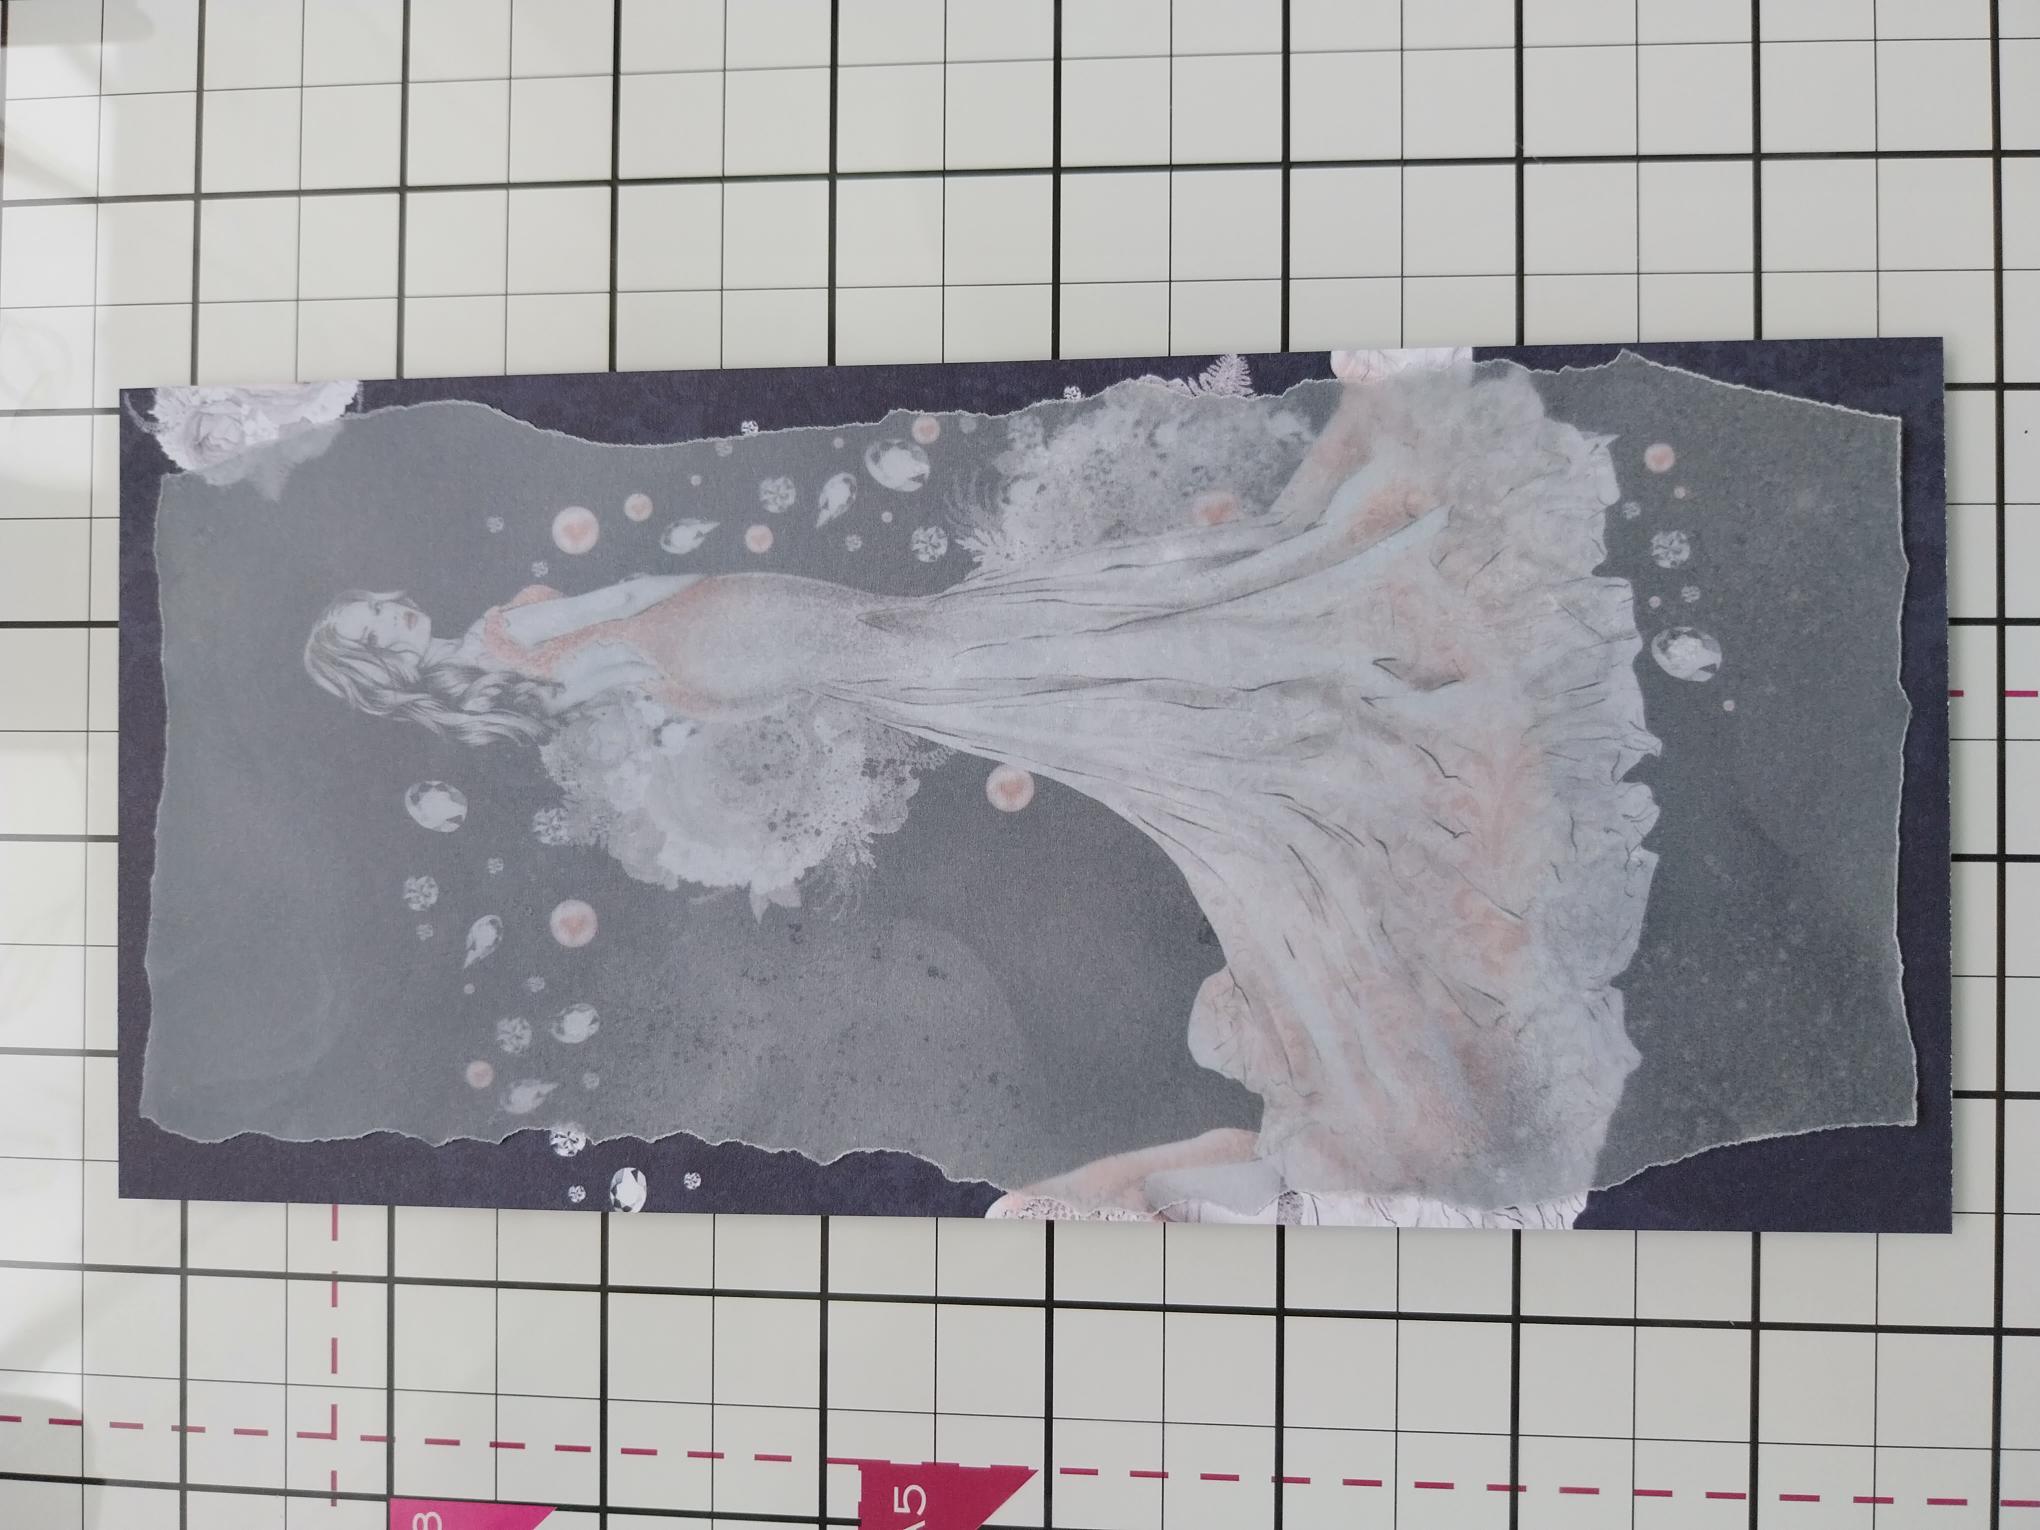
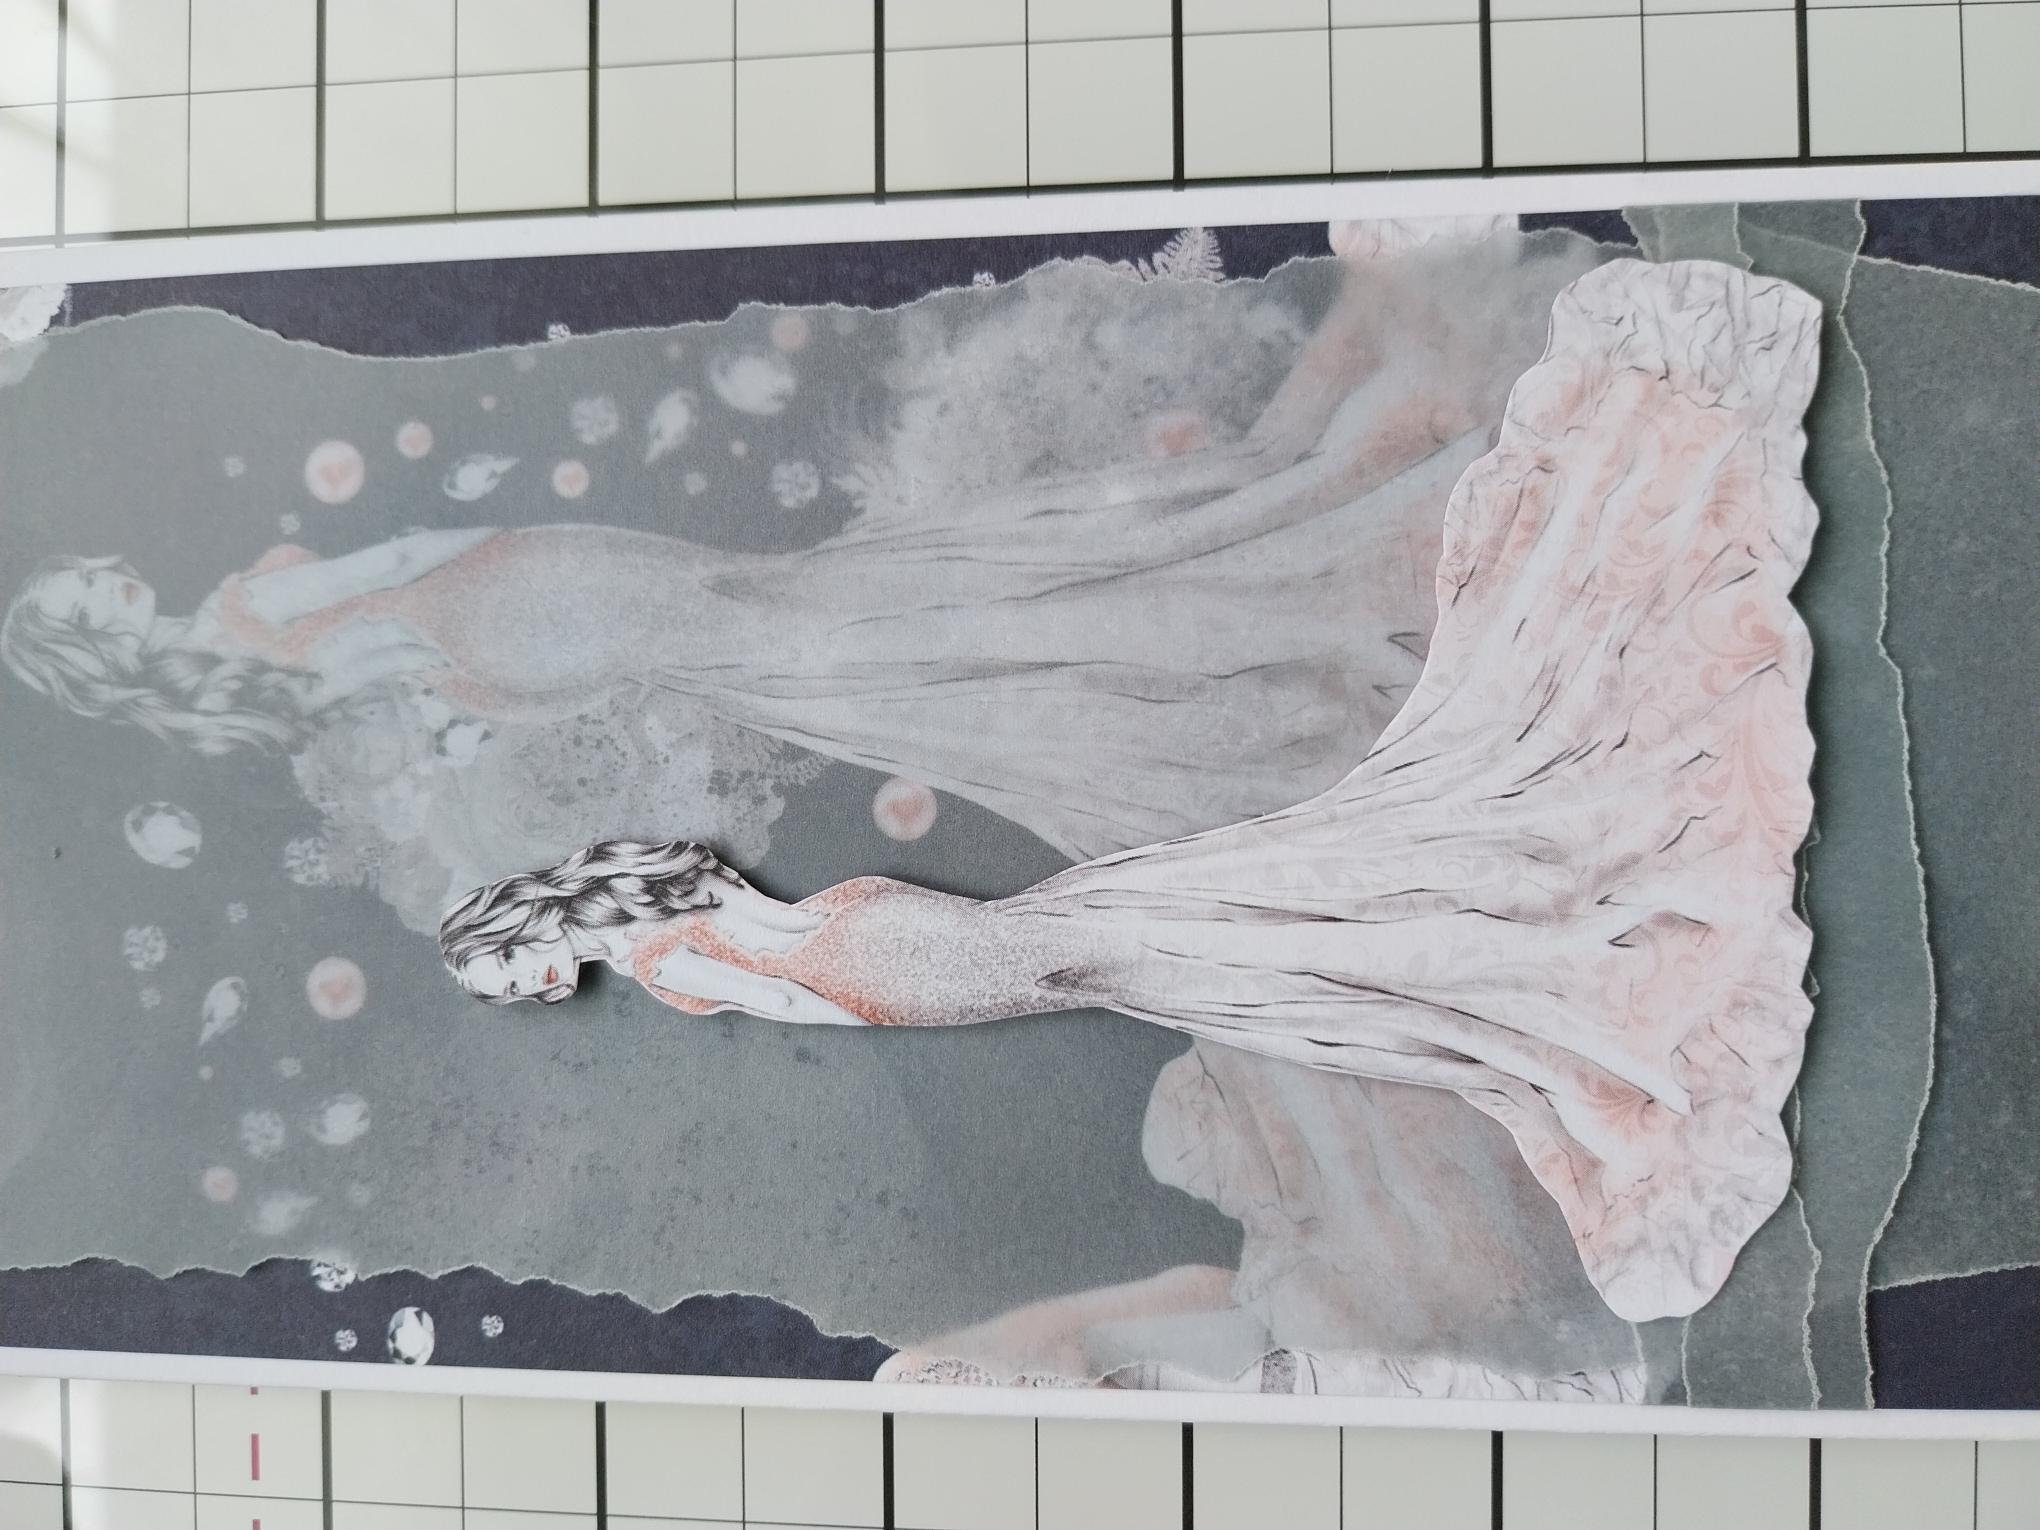
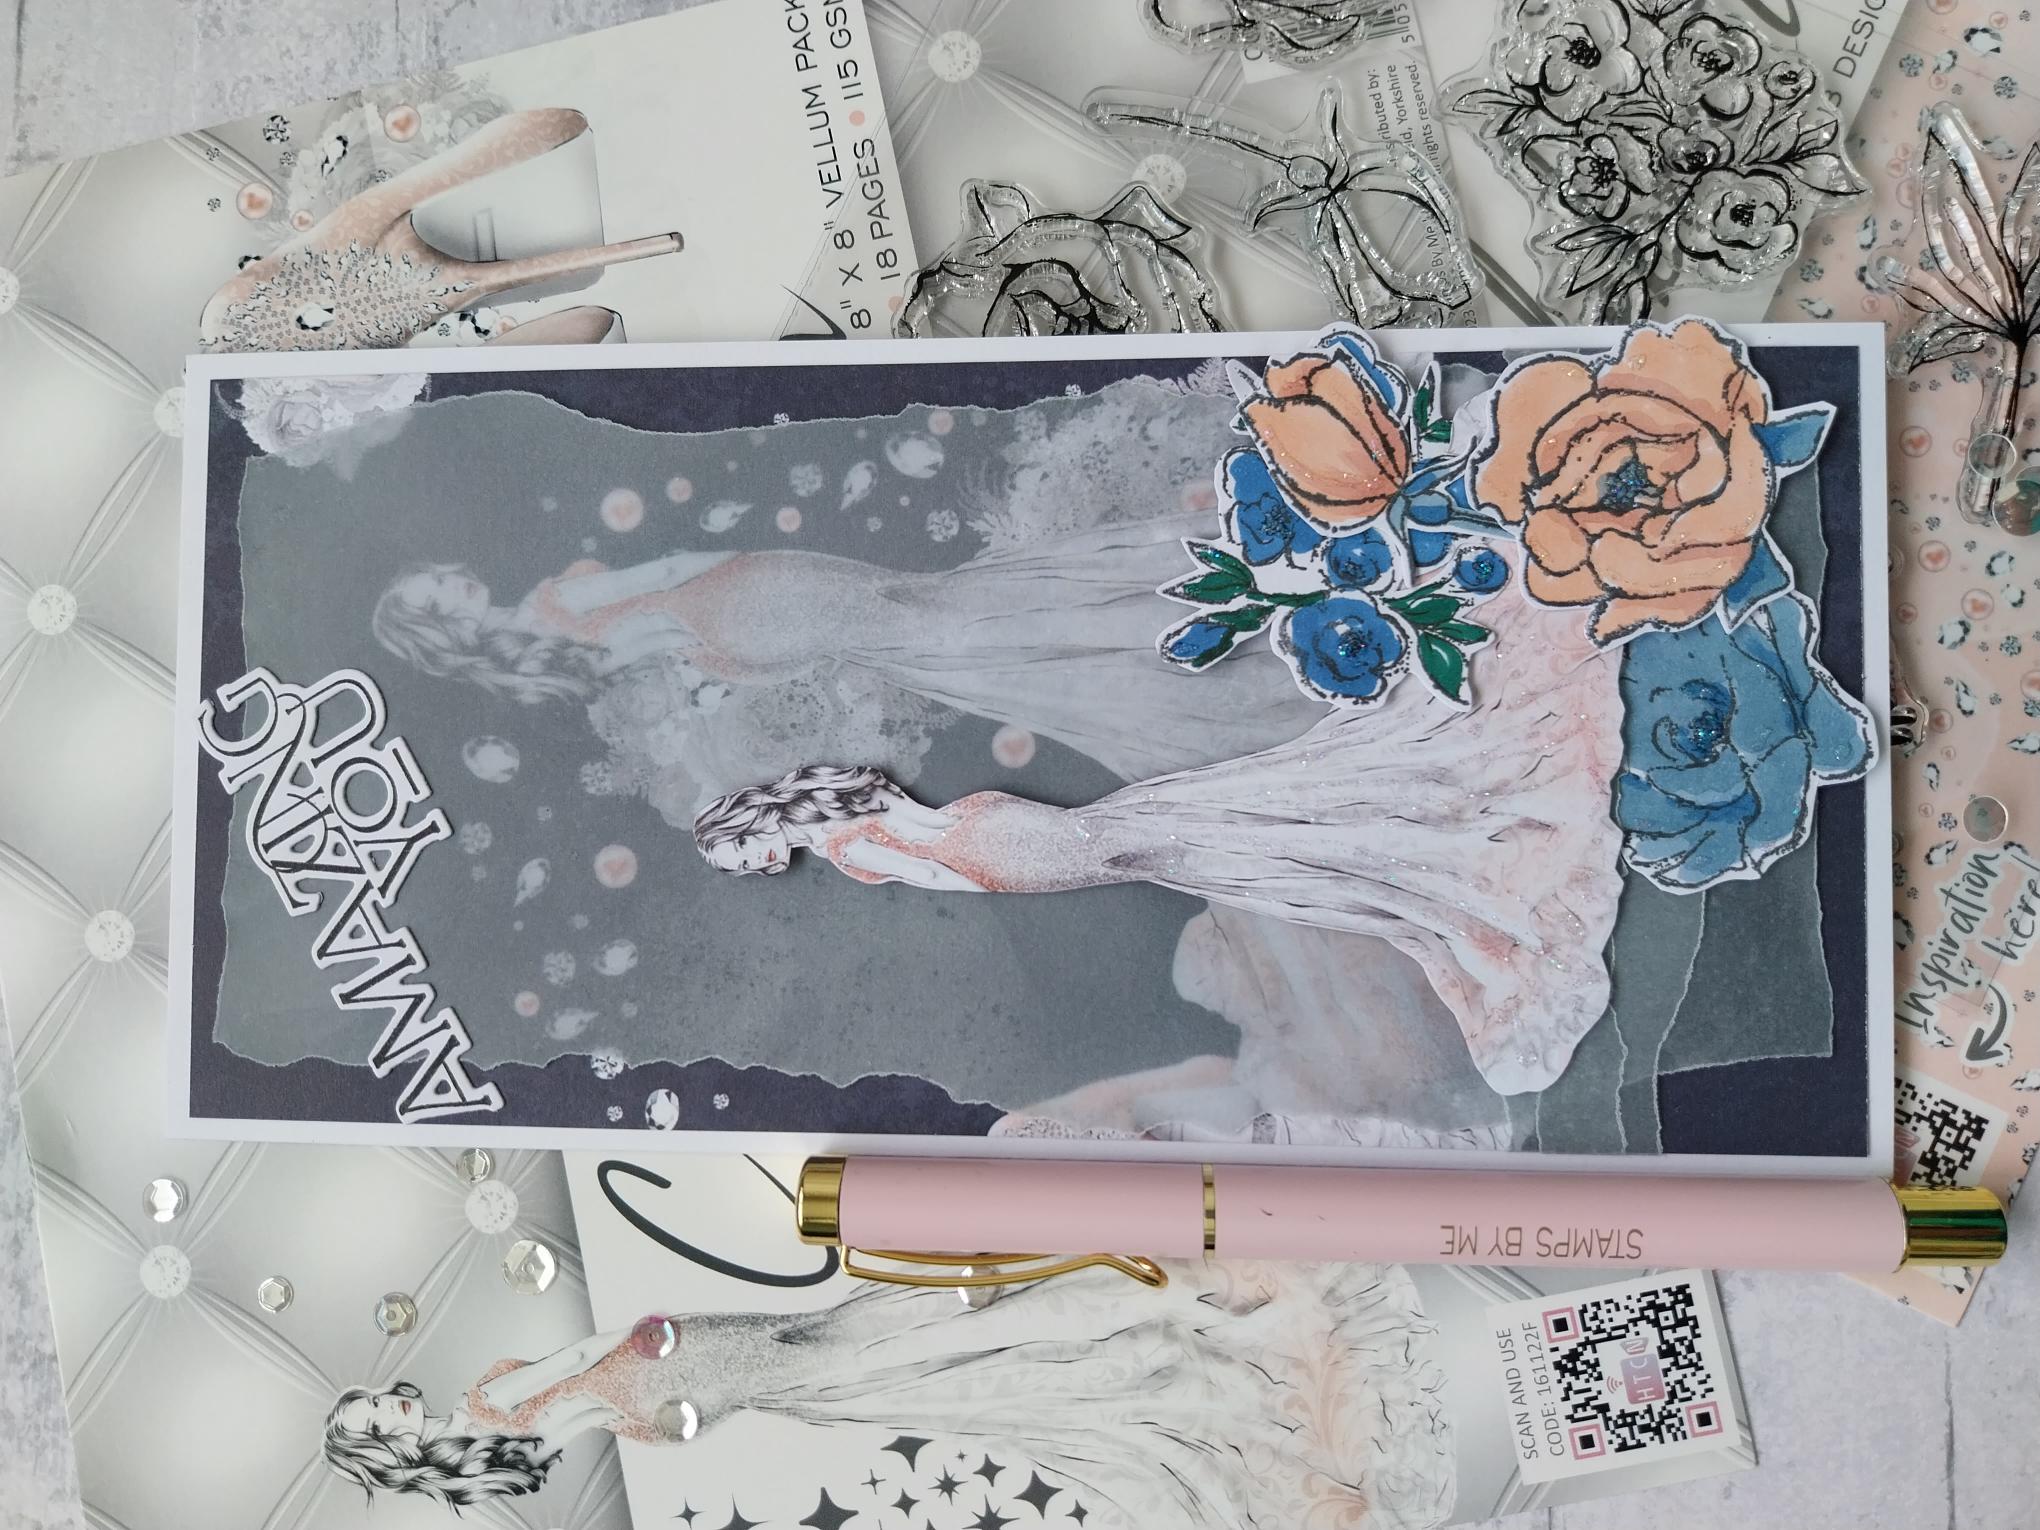
Remove this decorative paper from the Classic Celebration paper pack and trim to 8 x 3 3/4", so our lovely lady is to the right. |
|
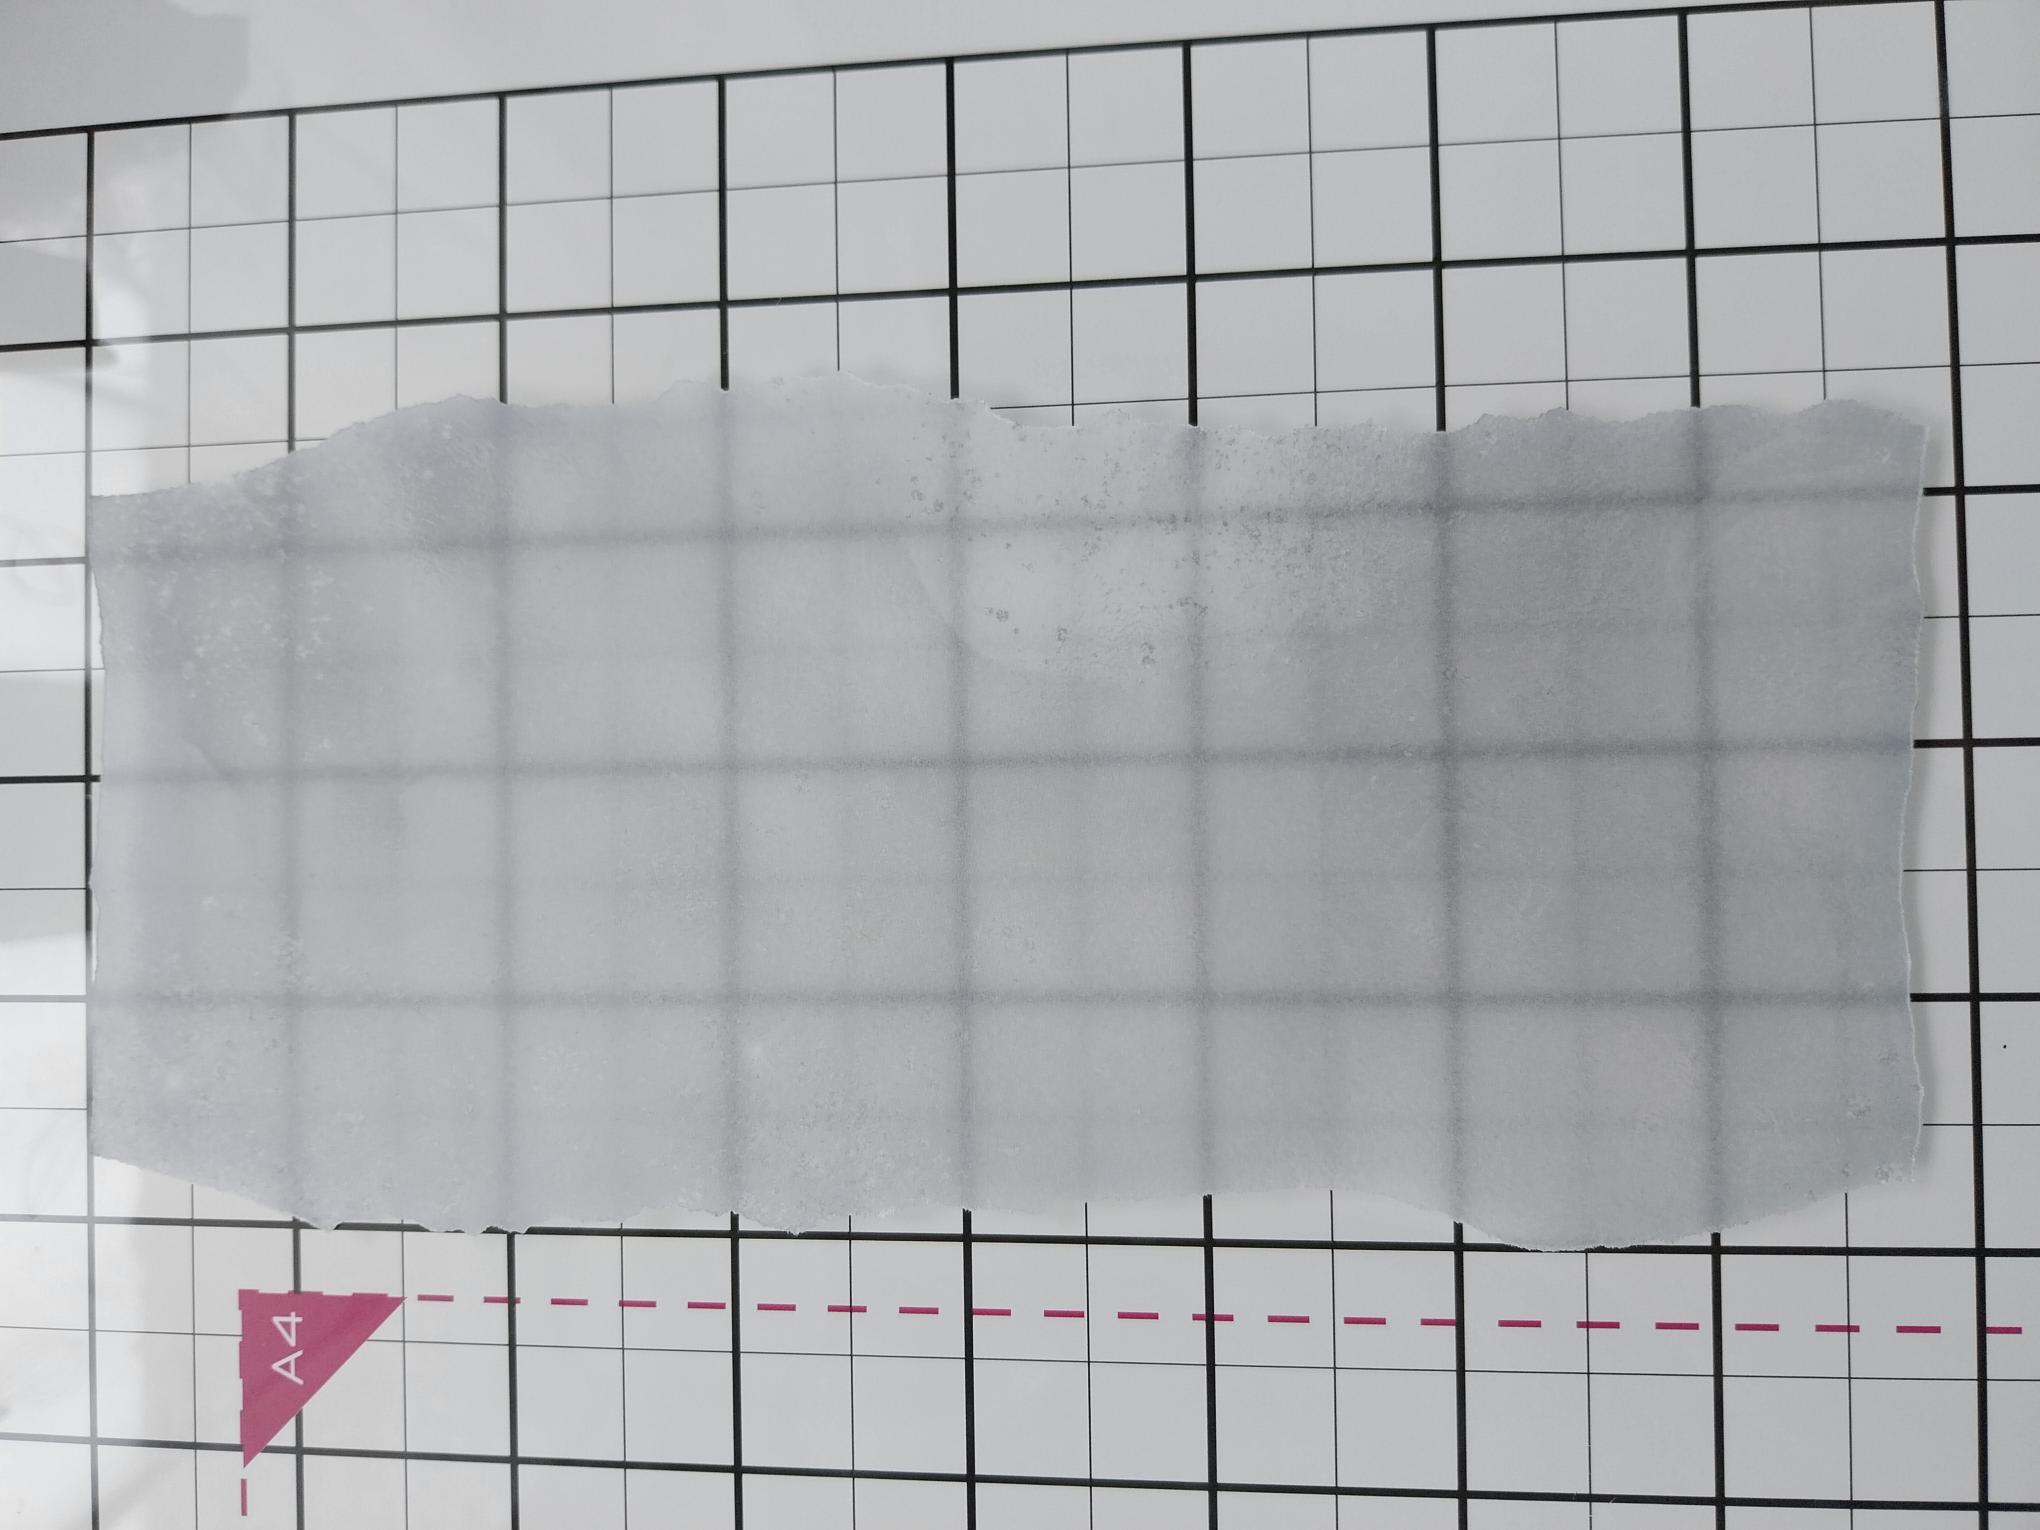
Choose one of the plainer vellums, from the Classic Celebration pack and tear so it will fit on to the decorative paper. |
|
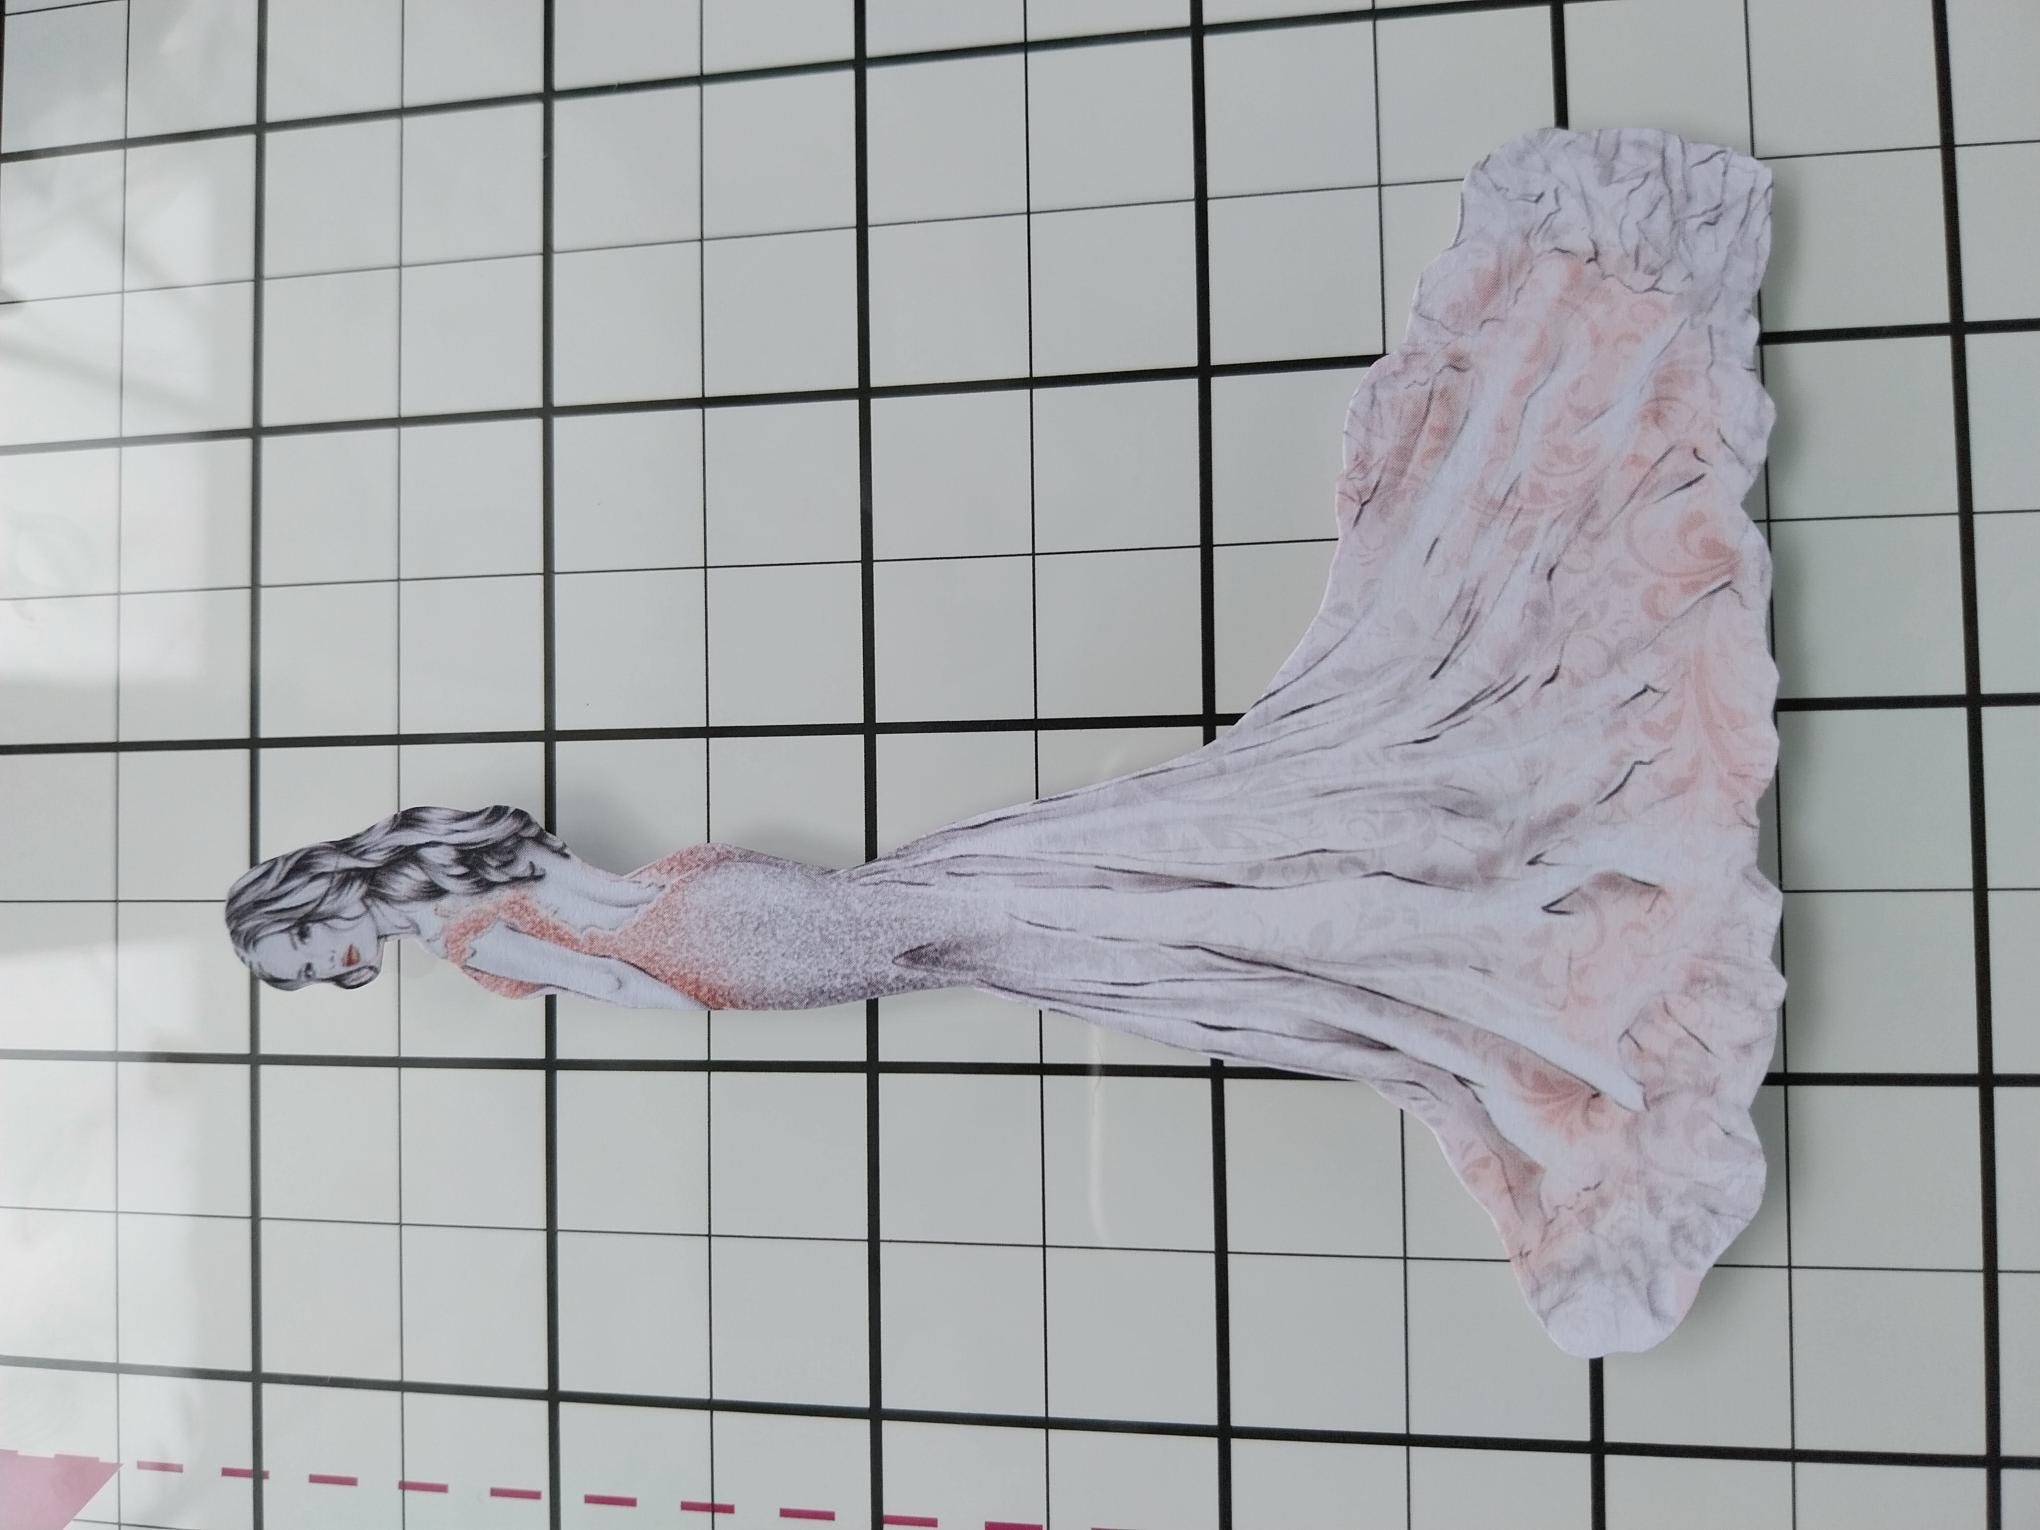
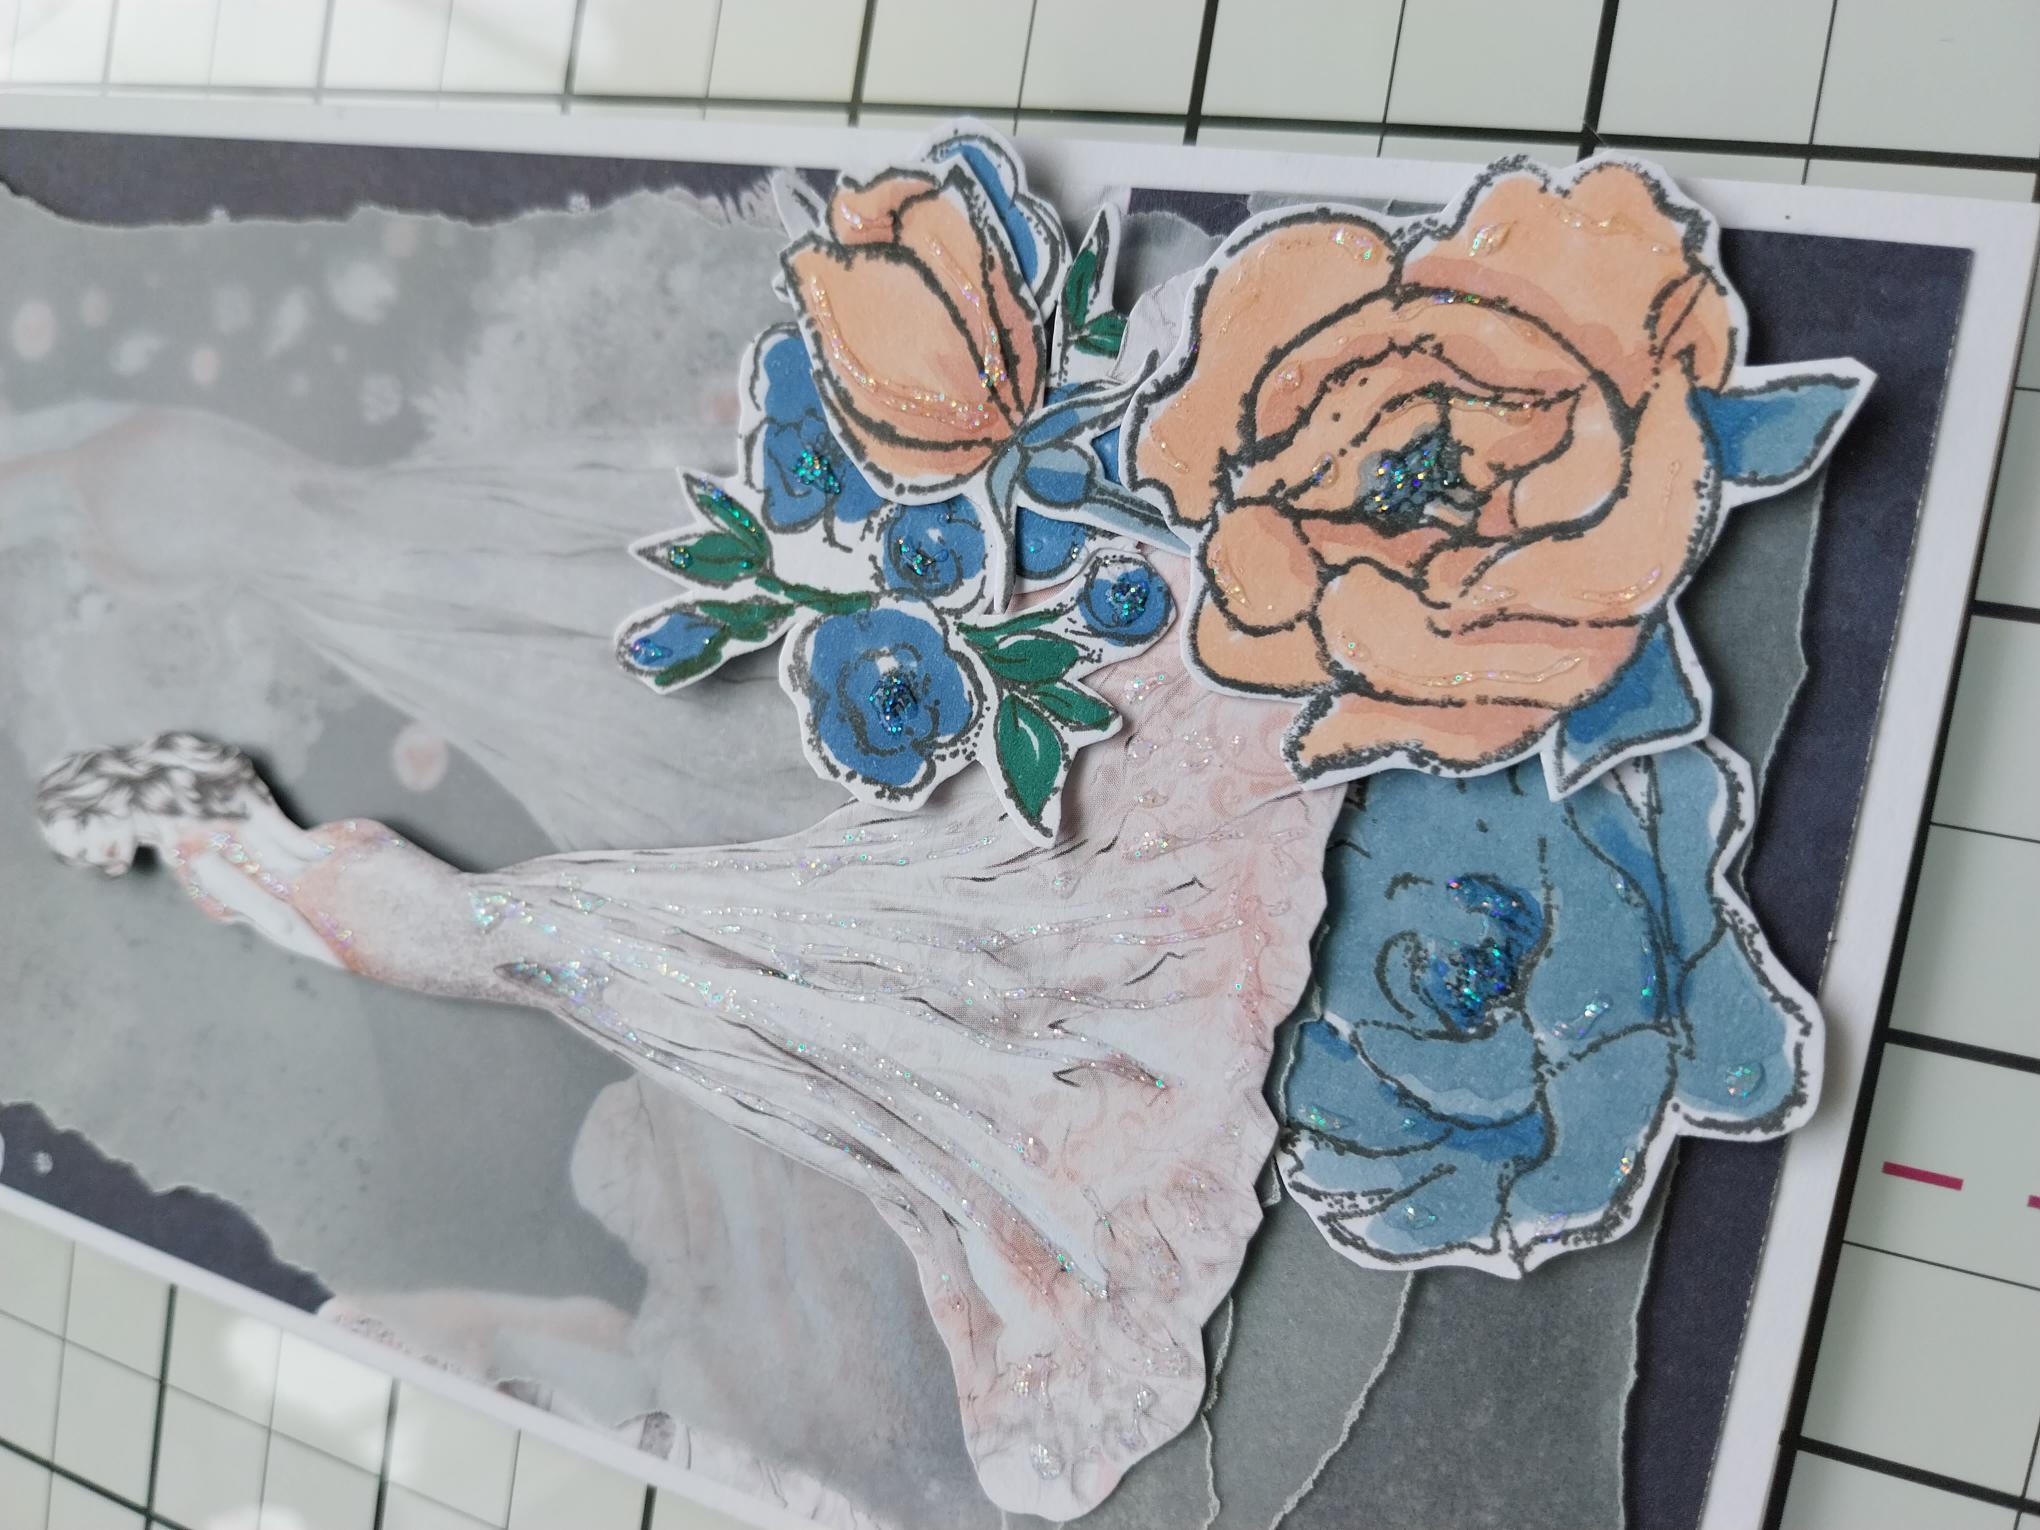
From the paper collection, fussy cut one of the larger, left-facing lady's. |
|
Place the torn vellum on to the decorative paper. If you have special vellum adhesive then you can use this to hold it in place. However, we will be adding elements that will also do this job. |
|
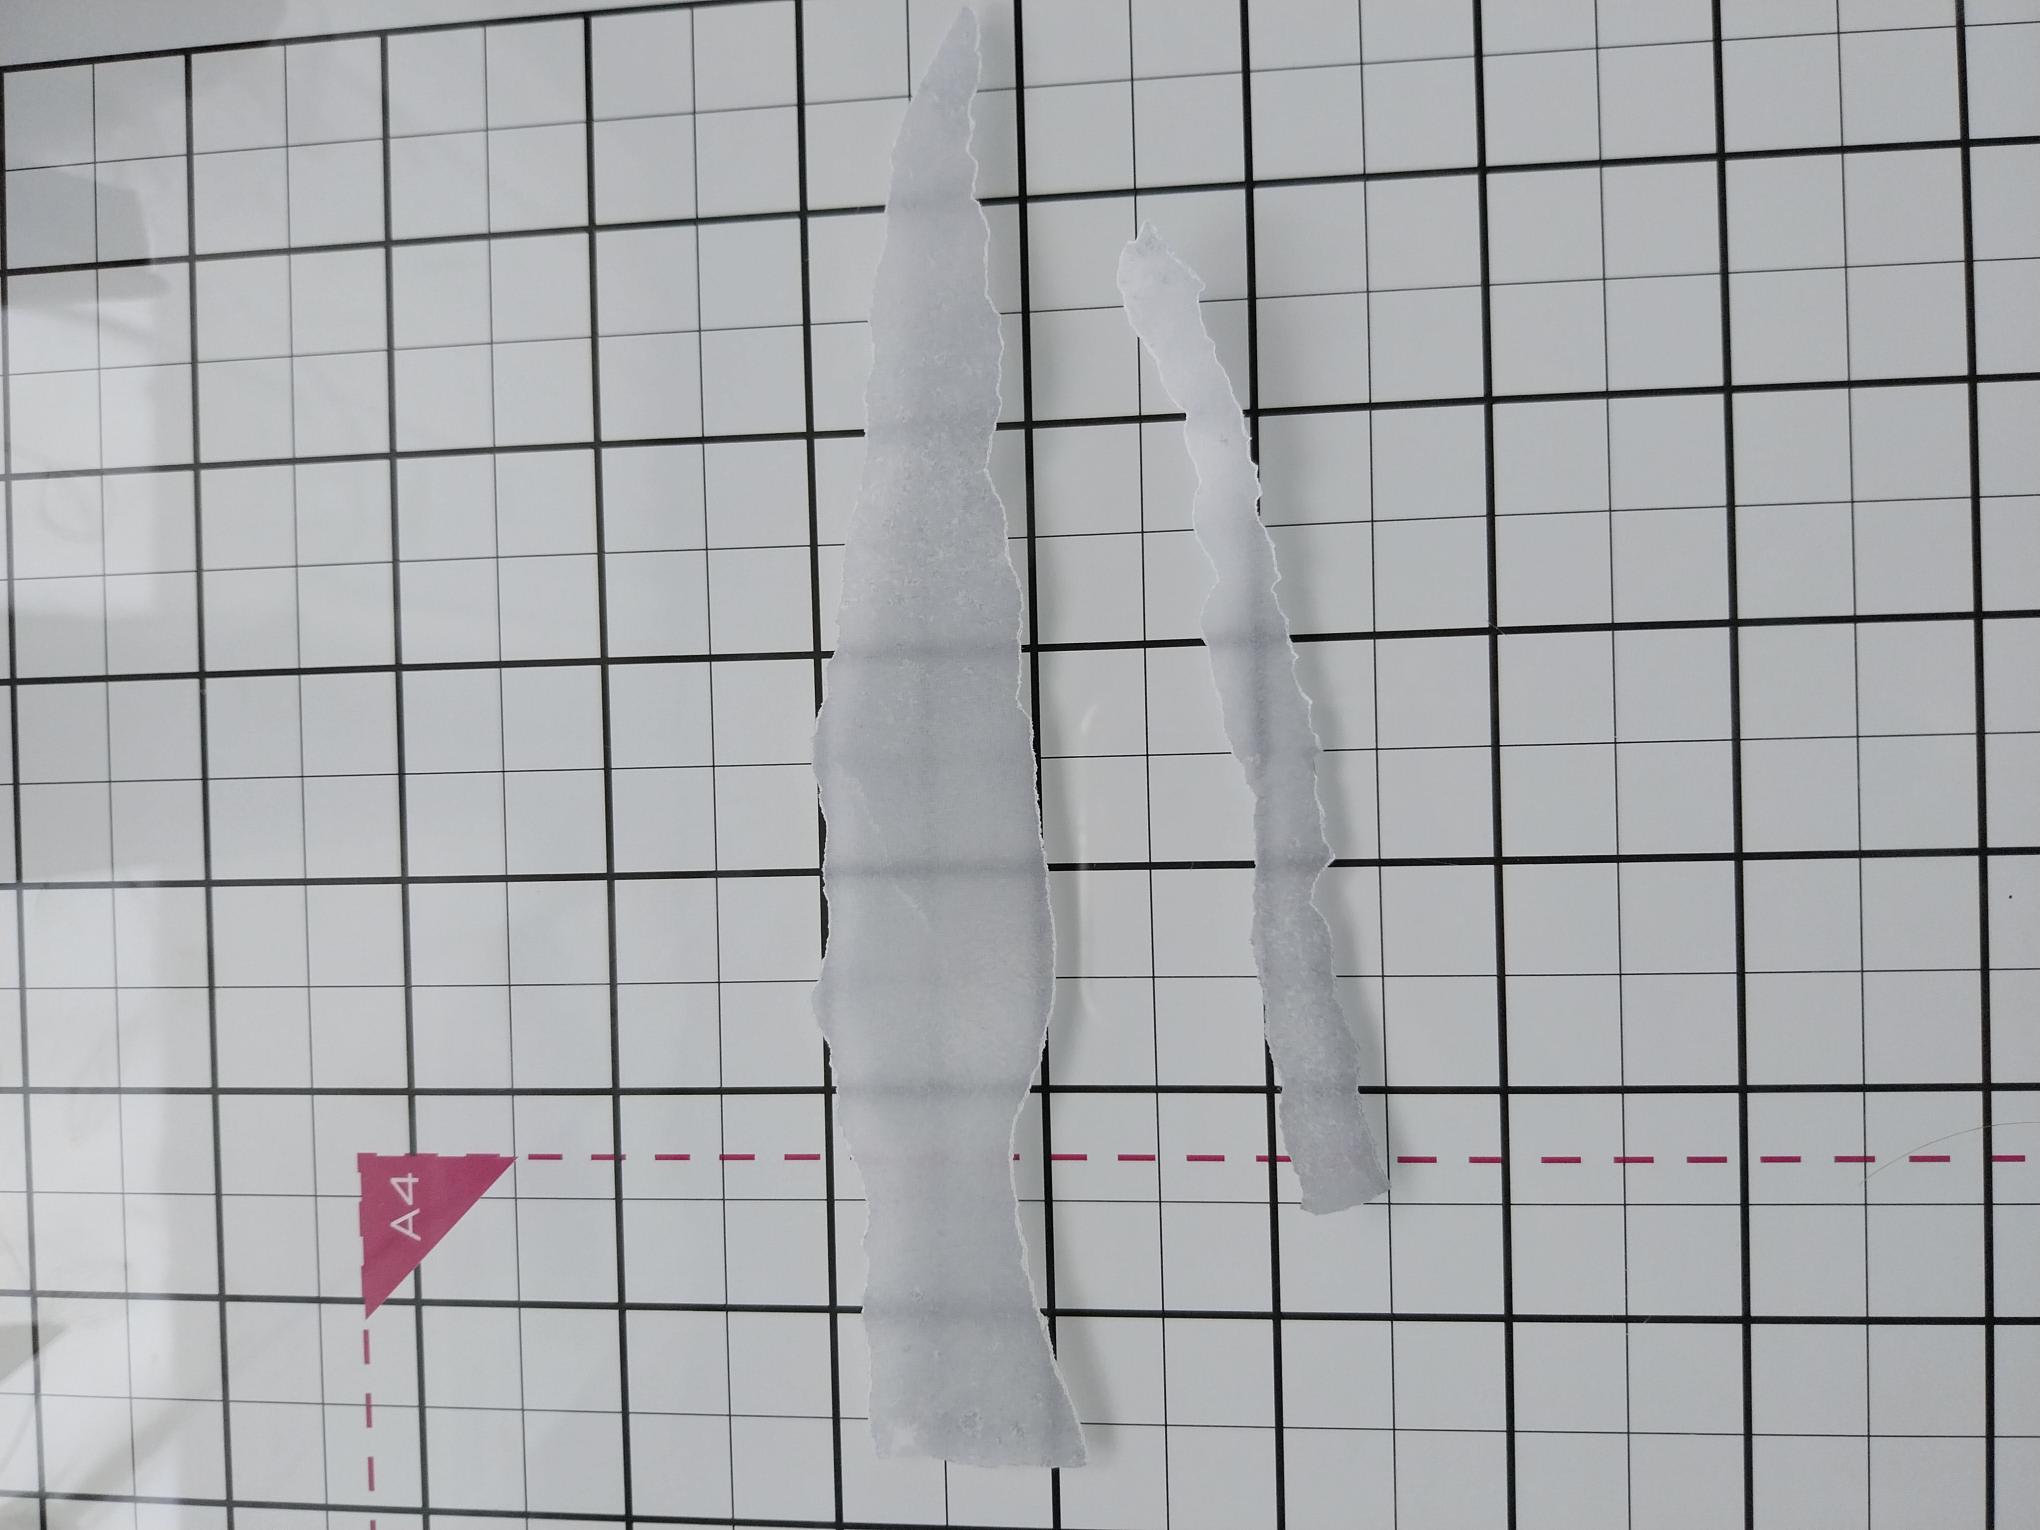
From the leftover vellum tear 2 strips, one narrower than the other and slightly longer than the width of the decorative paper. |
|
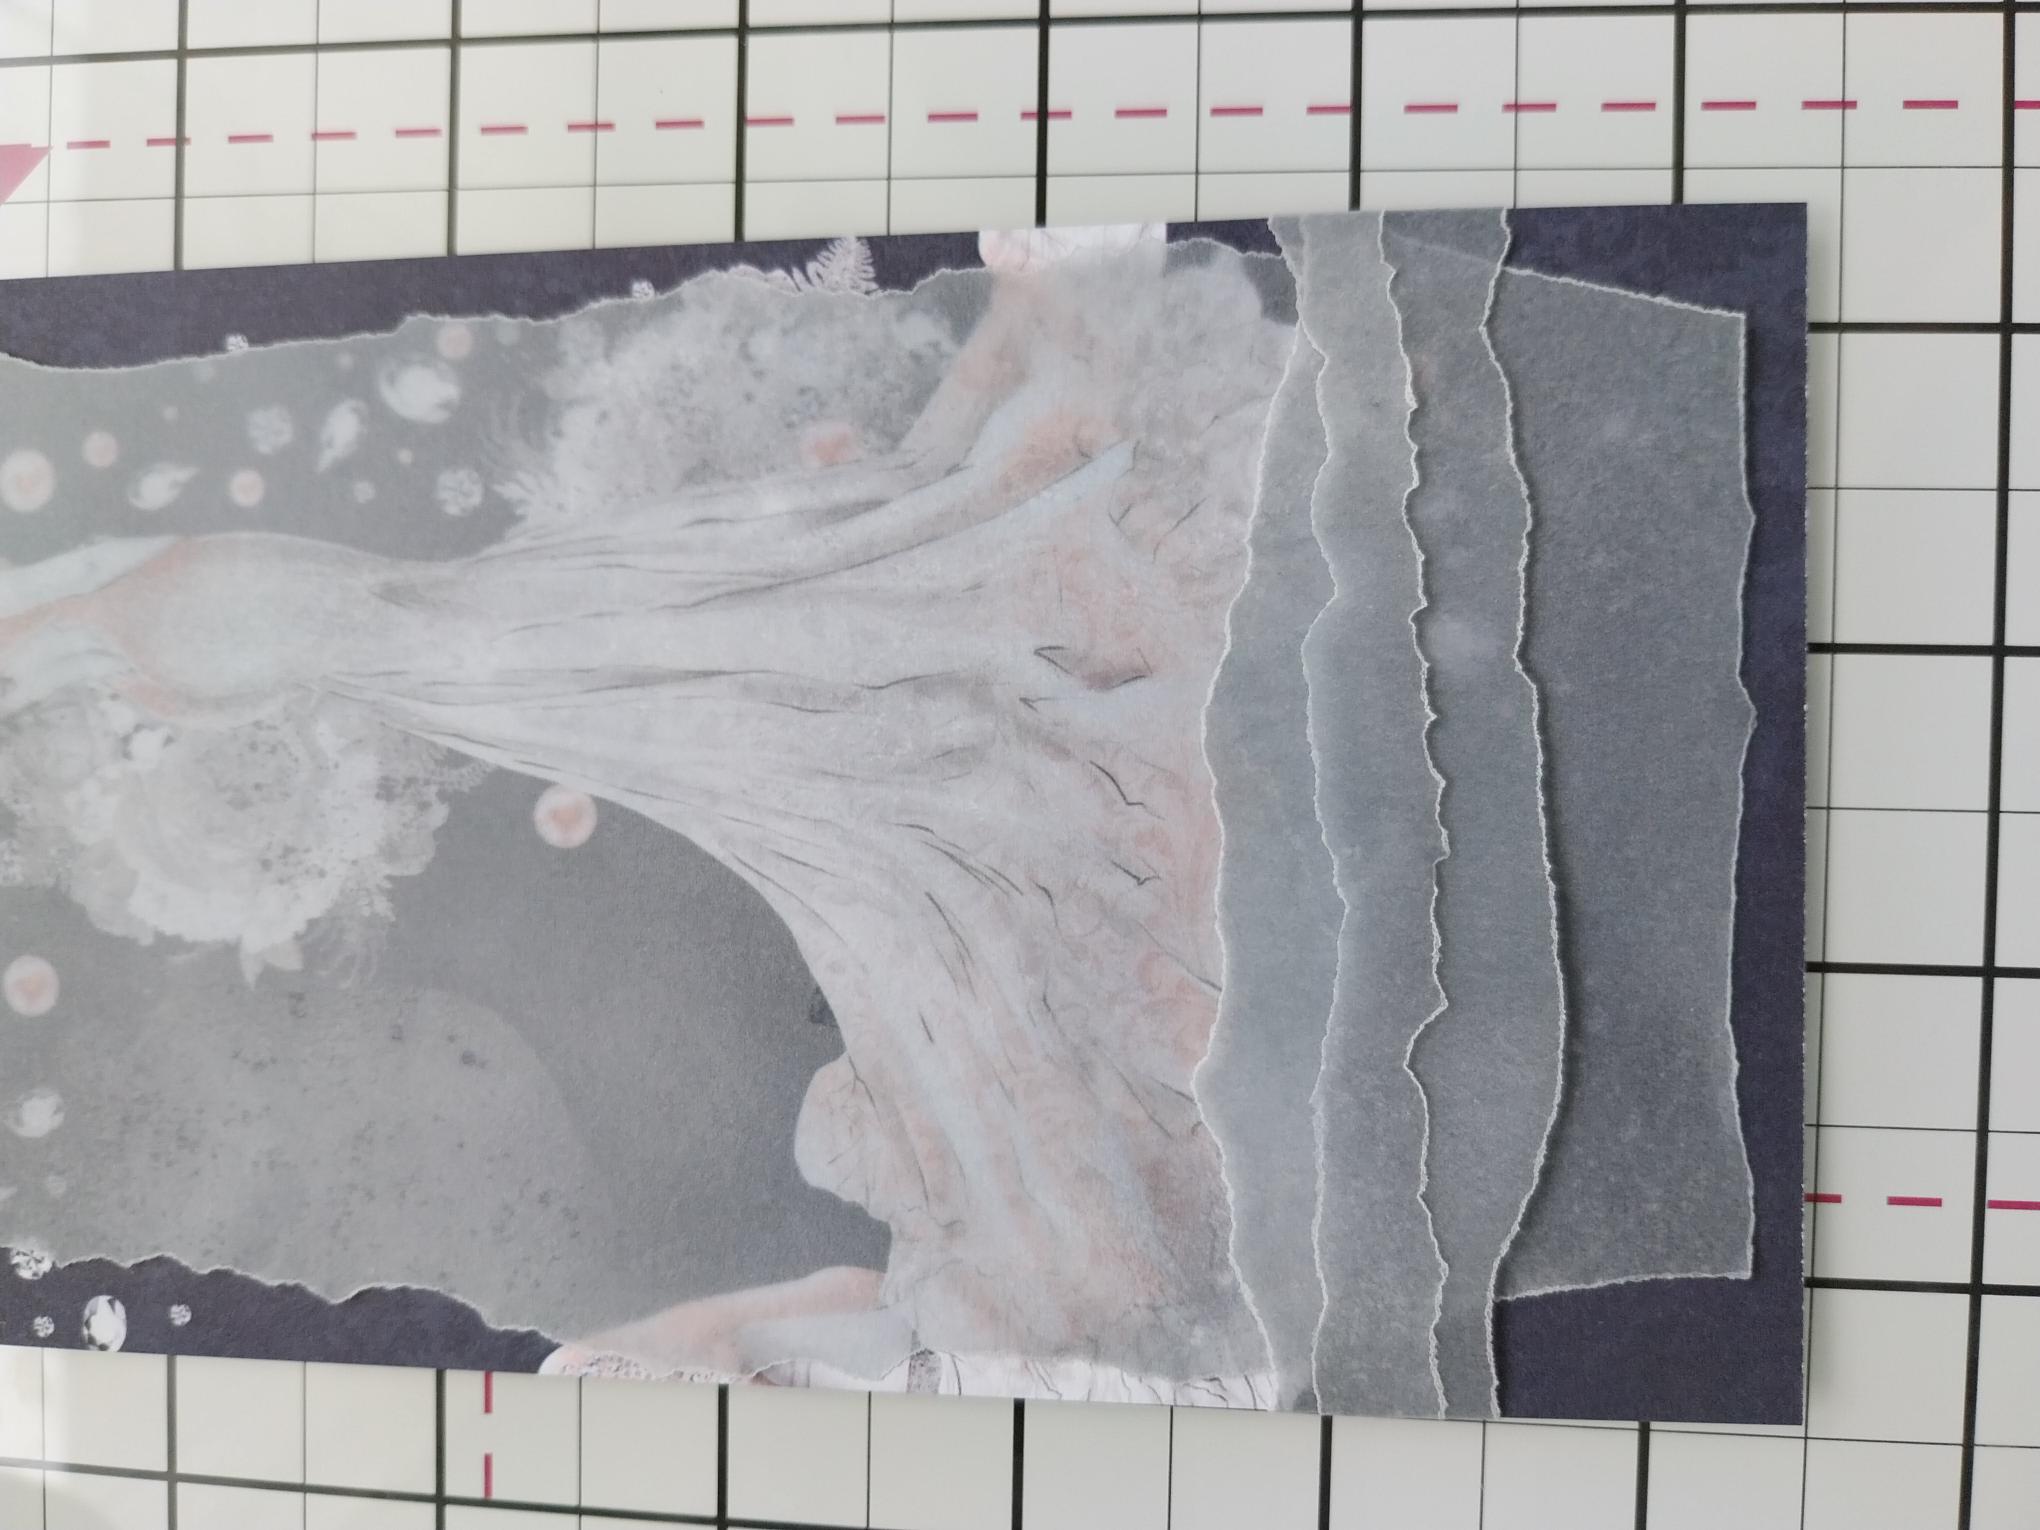
Place the widest strip across the decorative paper and vellum paper, tuck the overhang over the sides of the paper and adhere on the reverse with double-sided tape or a tape runner. Place the narrower strip on top, again tucking the ends over and adhering on the reverse. |
|
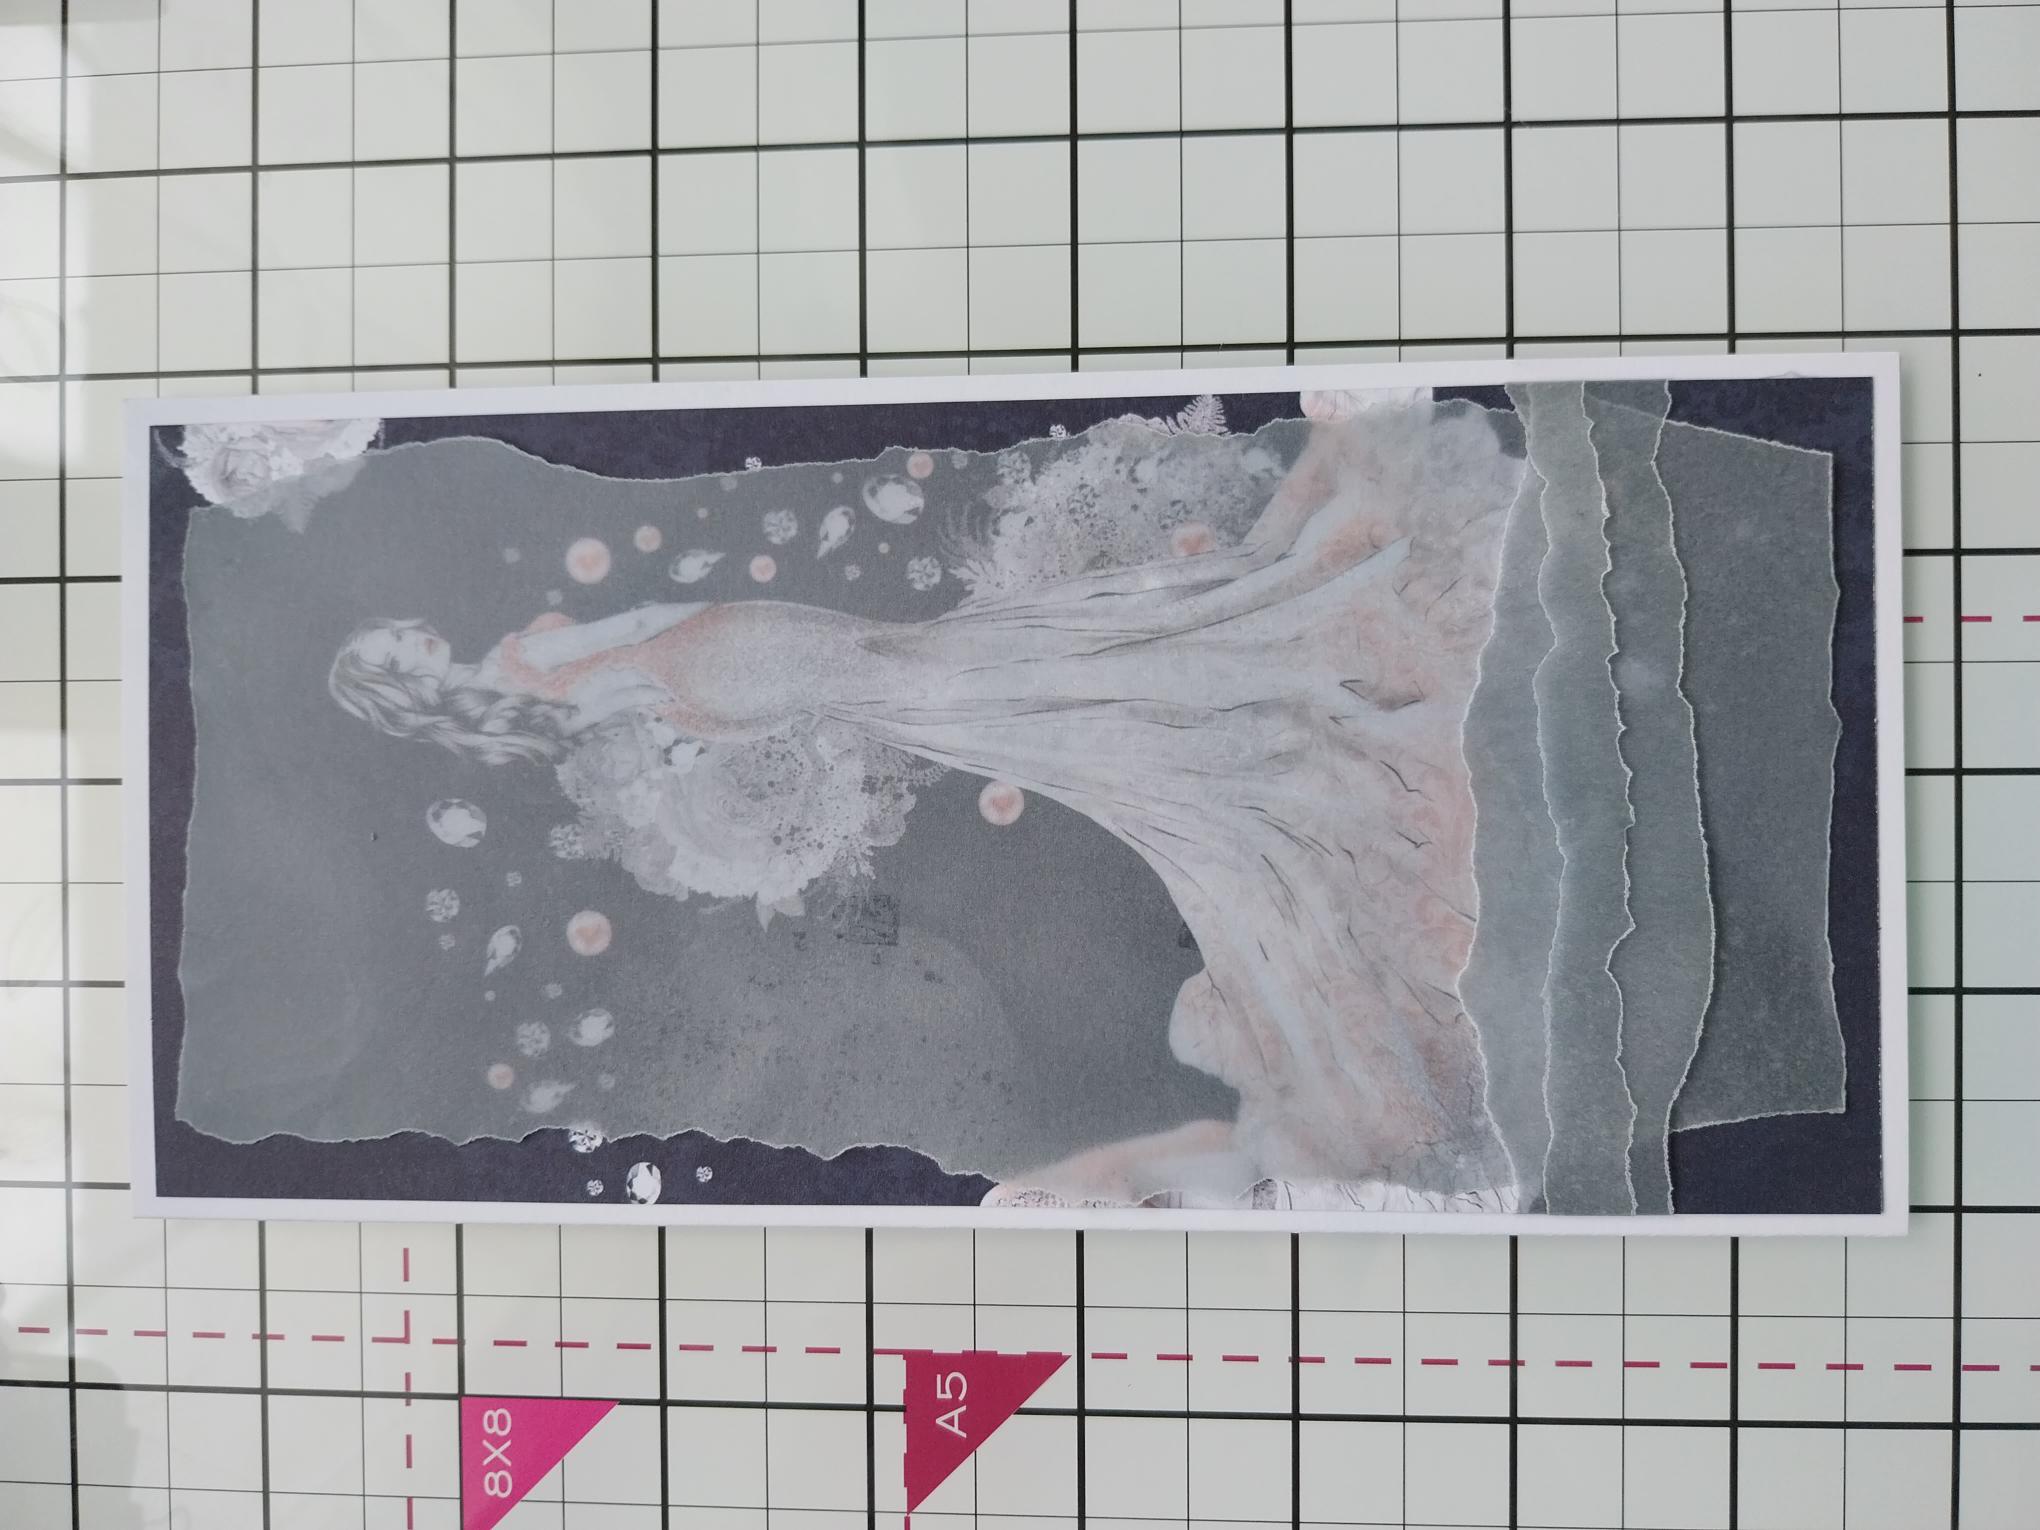
Adhere this on to your DL card blank. |
|
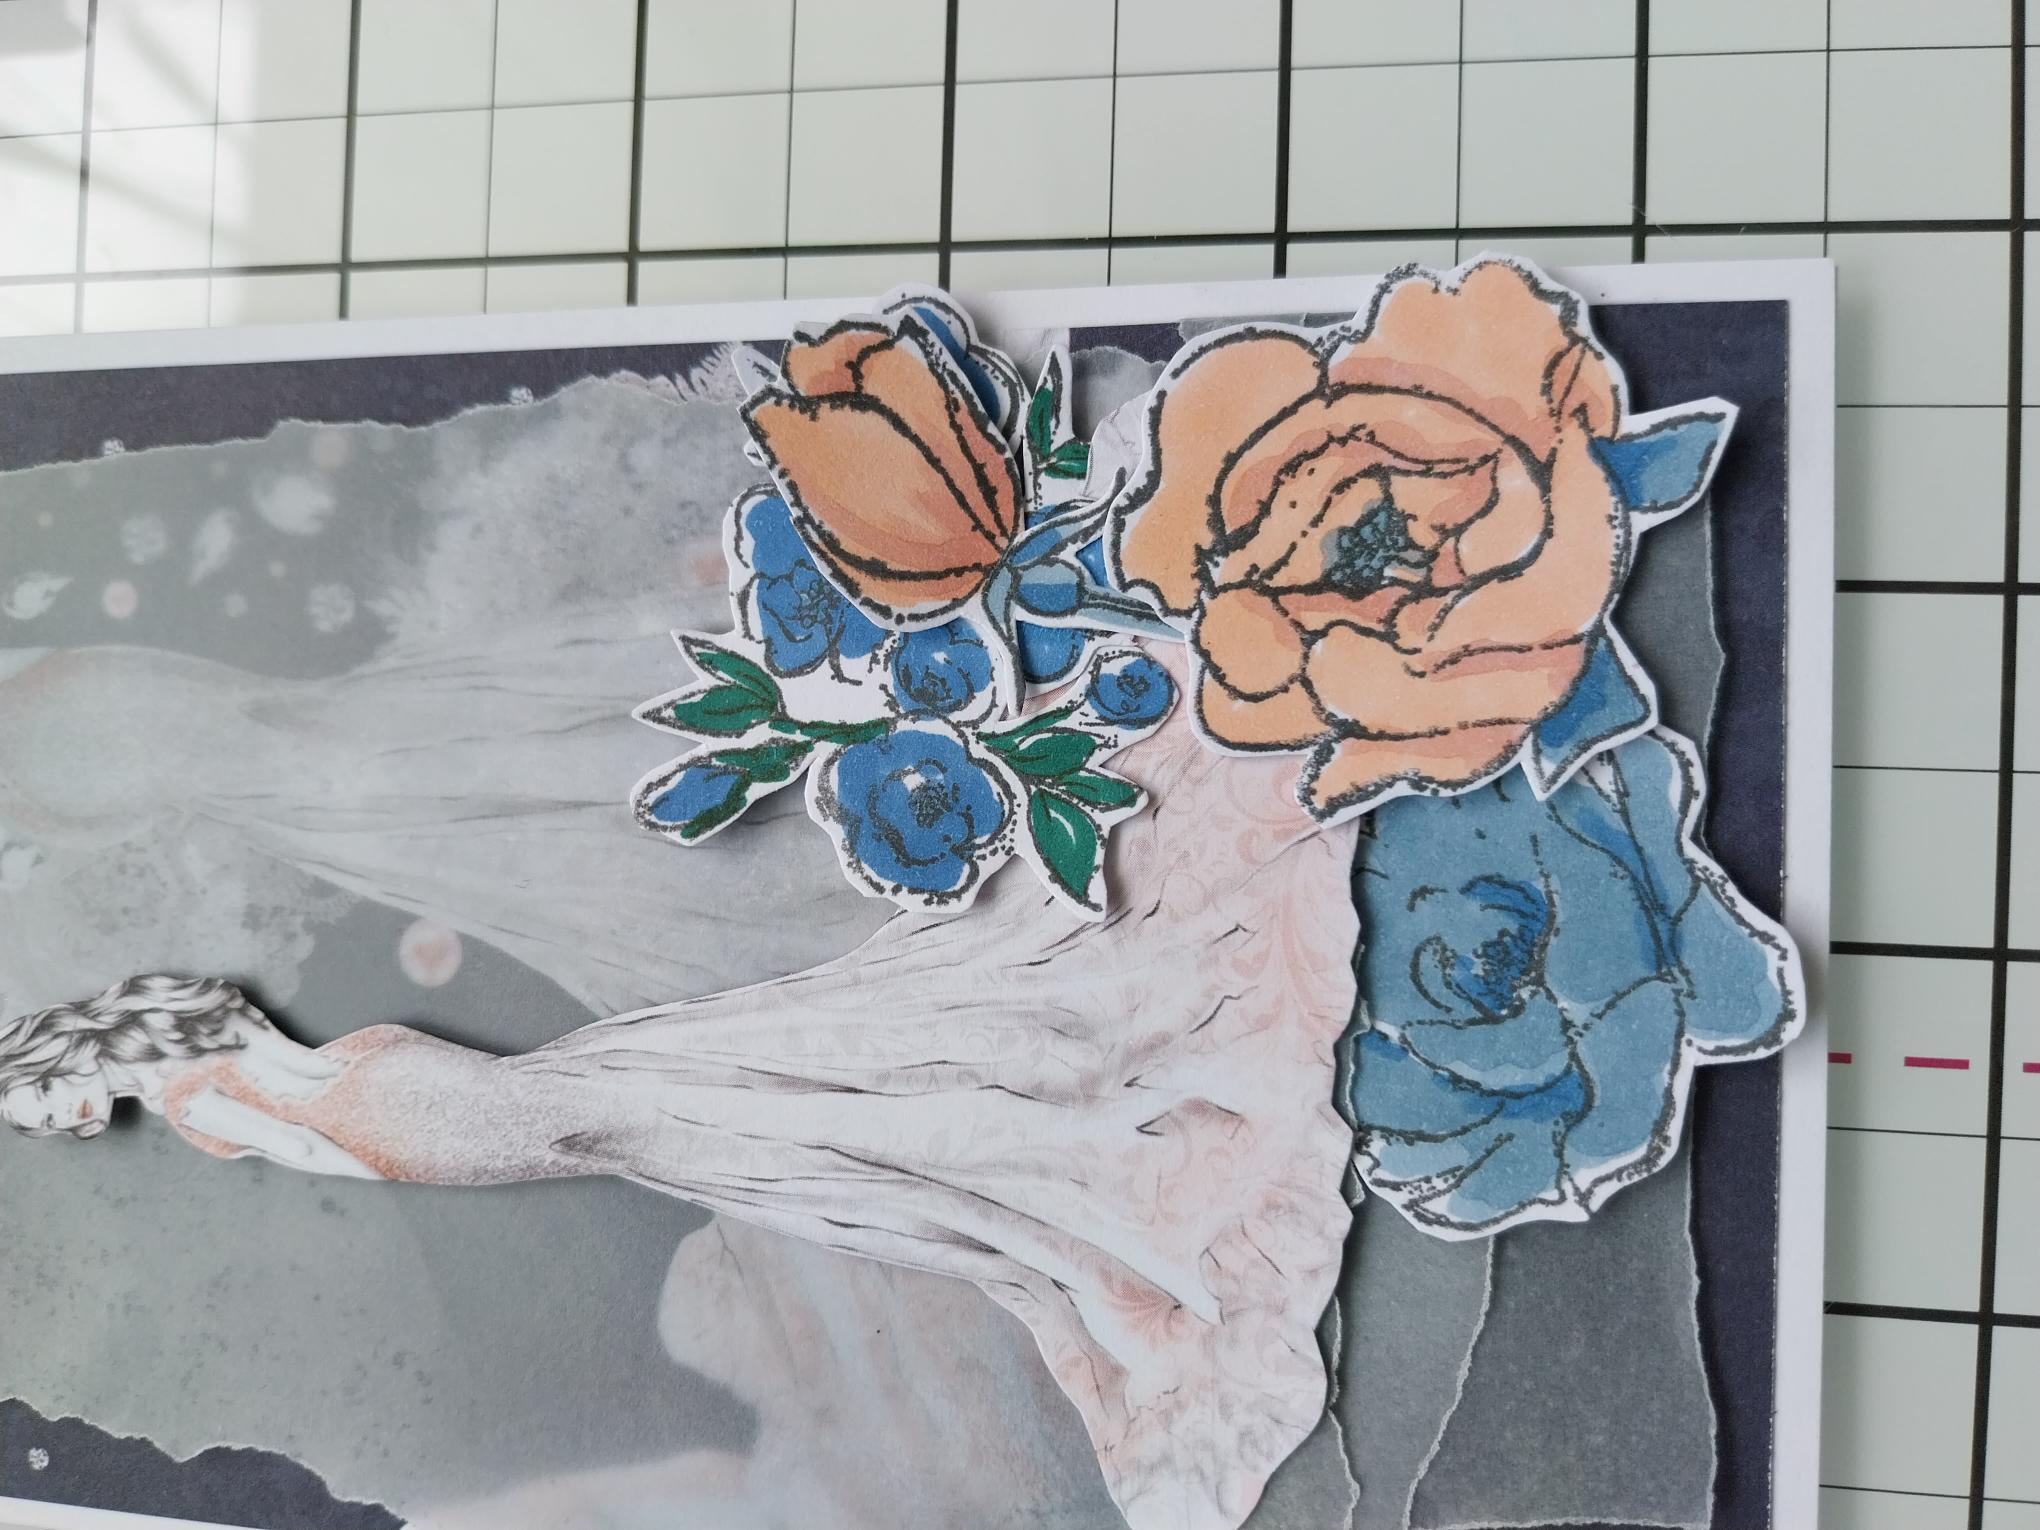
Adhere your fussy cut lady slightly to the left, flat with wet glue or raised with foam pads. |
|
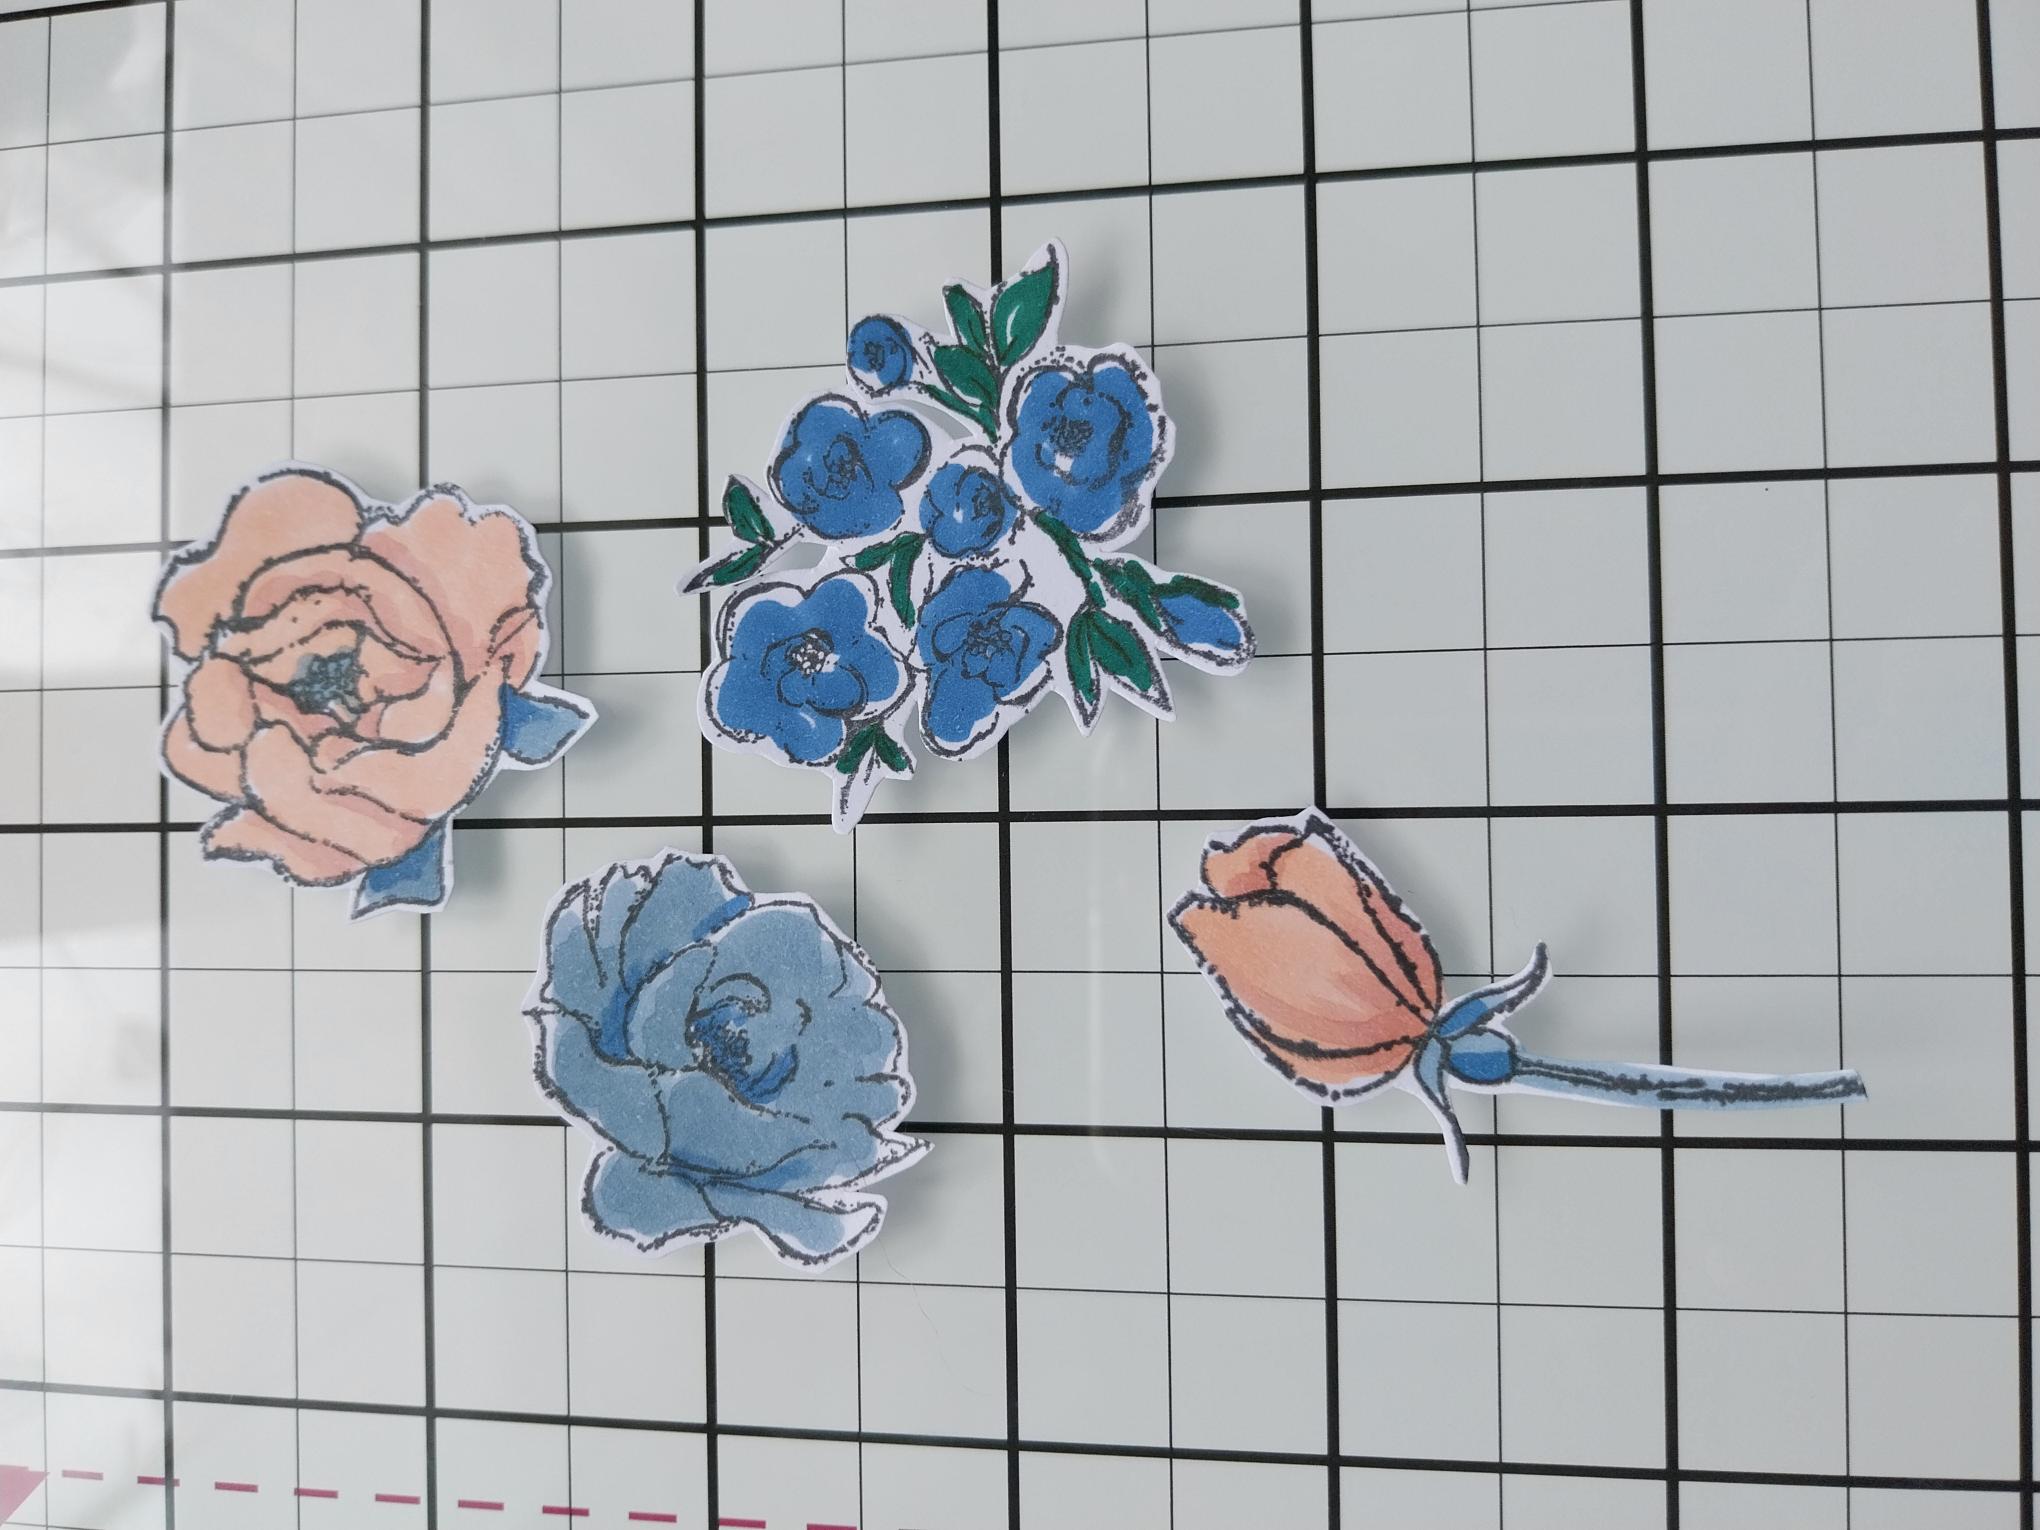
Stamp some of the florals from the Let's Celebrate collection, with the Midnight Hybrid ink, on to a piece of white card. Use the coordinating dies to cut them out, then colour with your Gossip alcohol pens. Pop a sheet of copy paper or scrap card underneath, to protect your work surface from the ink that bleeds through the card. |
|
Use a combination of wet glue and foam pads, to adhere the 3D elements around the bottom of the gown. |
|
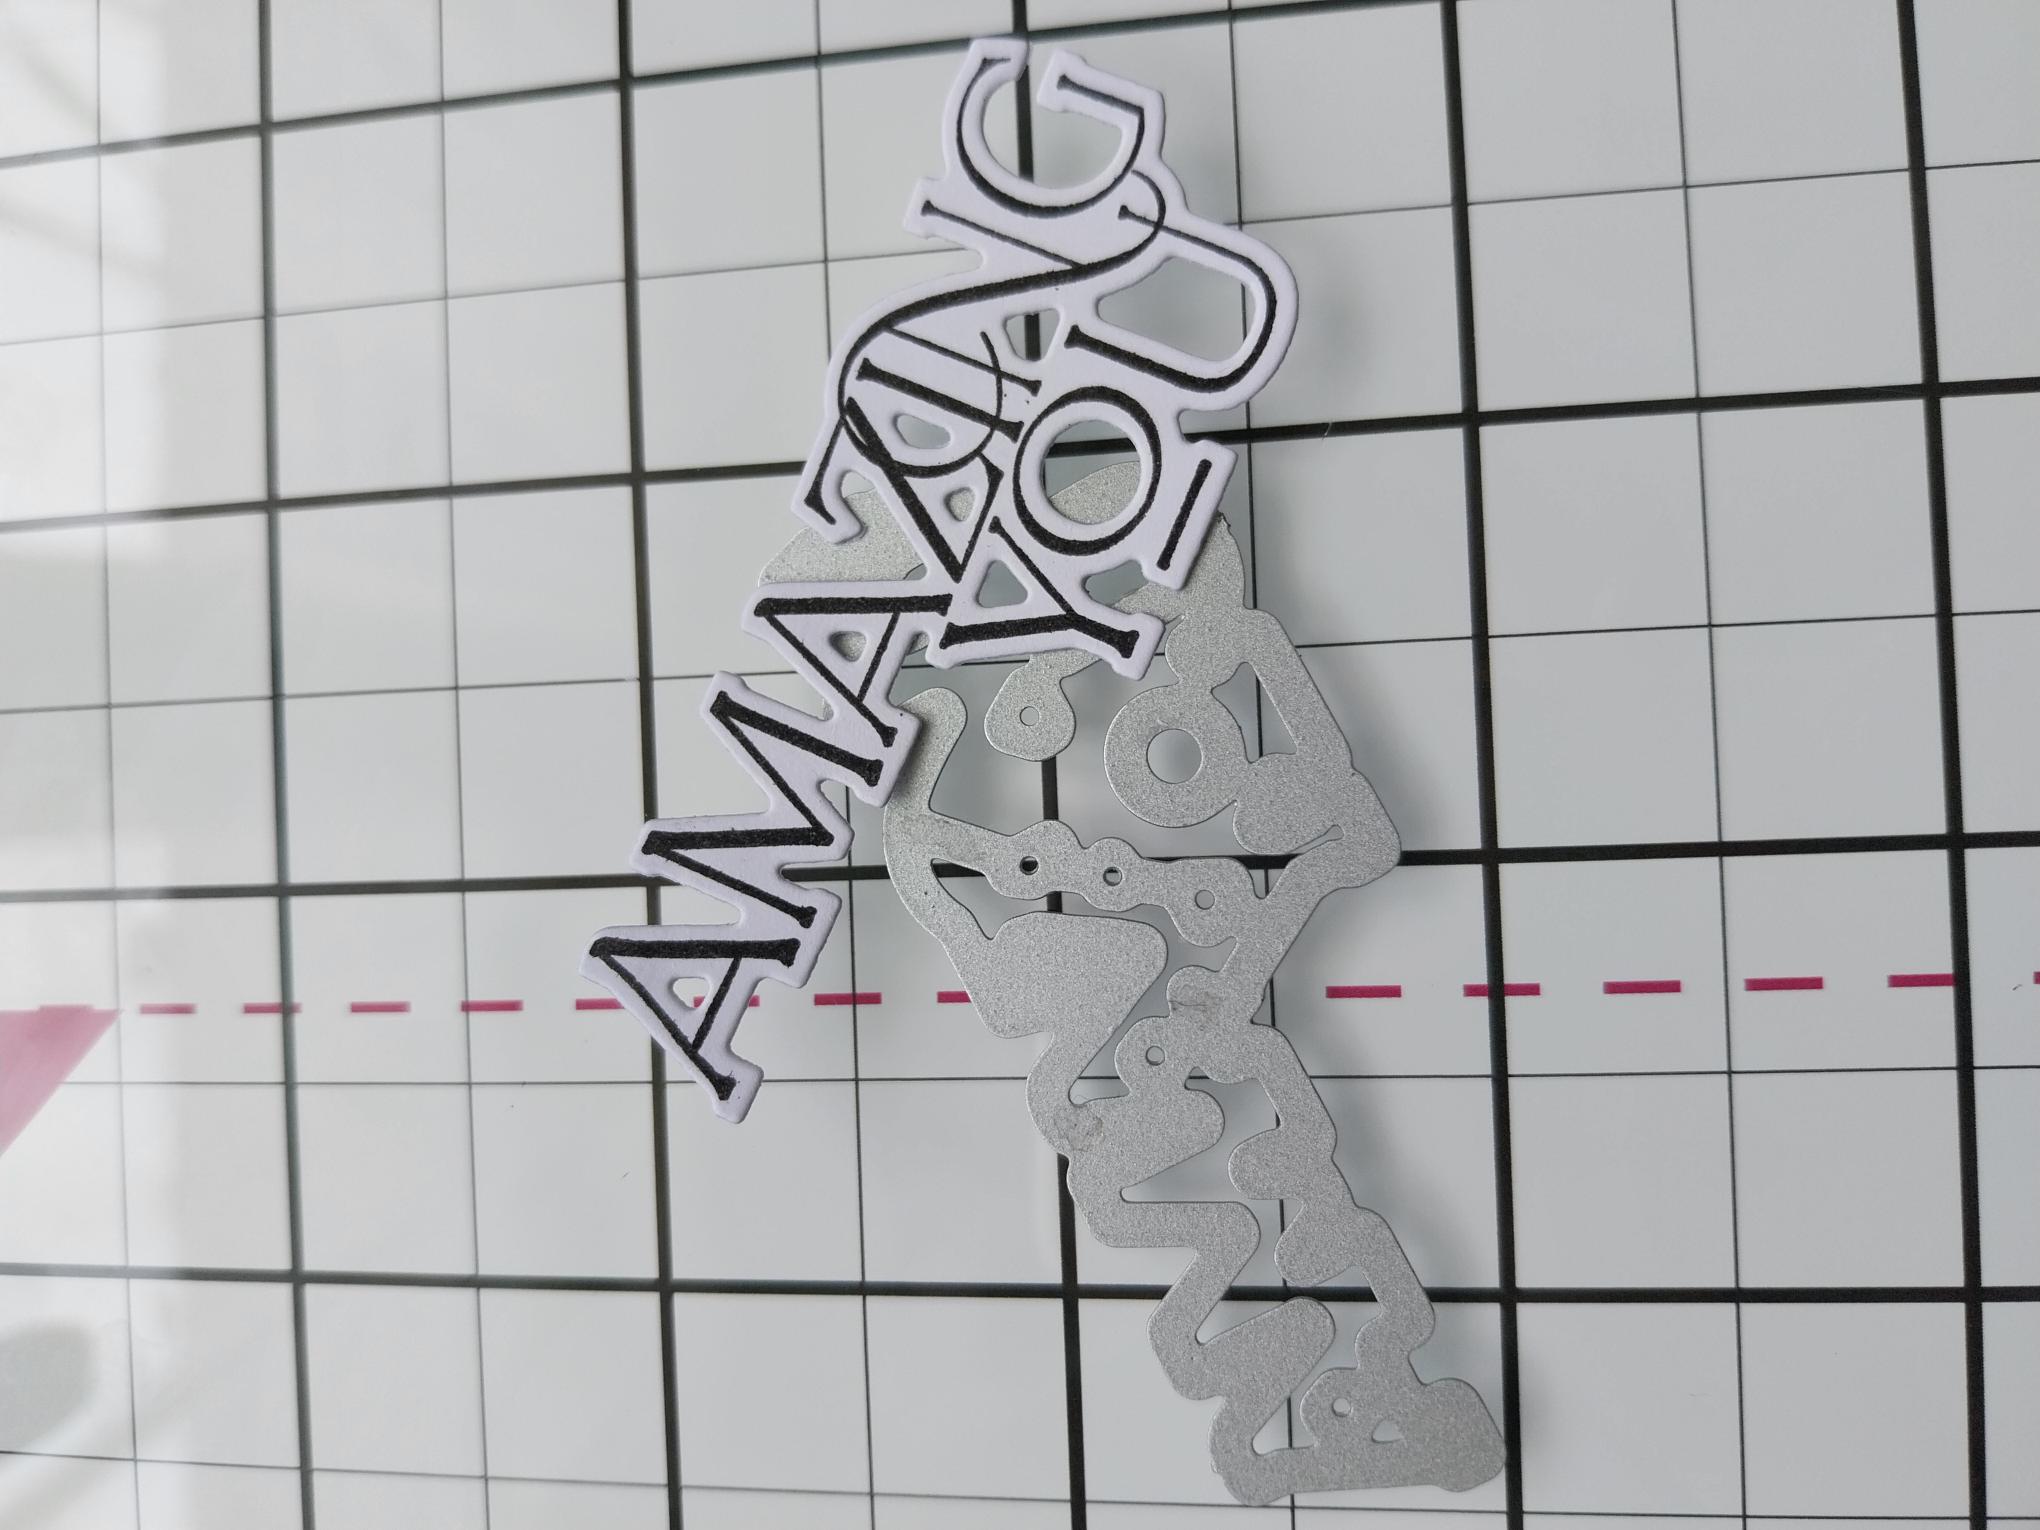
Ink up the sentiment stamp, from the Saying Hello collection, with Midnight and stamp on to white card. Use the coordinating die to cut it out. |
|
Use the Stickles to add a touch of sparkle to the gown and floral elements. |
|
To finish, adhere the die cut sentiment diagonally, in the left top corner of your card. This will "hold" the top of your vellum panel in place. |