Give your friends $10 off their first order!
Refer a FRIEND


WHAT YOU WILL NEED:
Kraft card blank 7 x 5"
White card 5 1/2 x 4"
White Rose 3D Embossing Folder
All Surfaces Copper 8 x 8" paper pack
Gossip alcohol pens
Izink Reglisse Dye Ink Pad
Gold Gilding Wax
Vellum
WOW sticky embossing ink pad
WOW Gold embossing powder
Anti-static bag
WOW heat tool
Eureka 101 Watercolour Tablet
SBM Magnetic glass mat
Paper Trimmer
Perfect Together Glue
Double-sided tape
Foam sheet/pads
Die Cutting machine
[click image to enlarge] 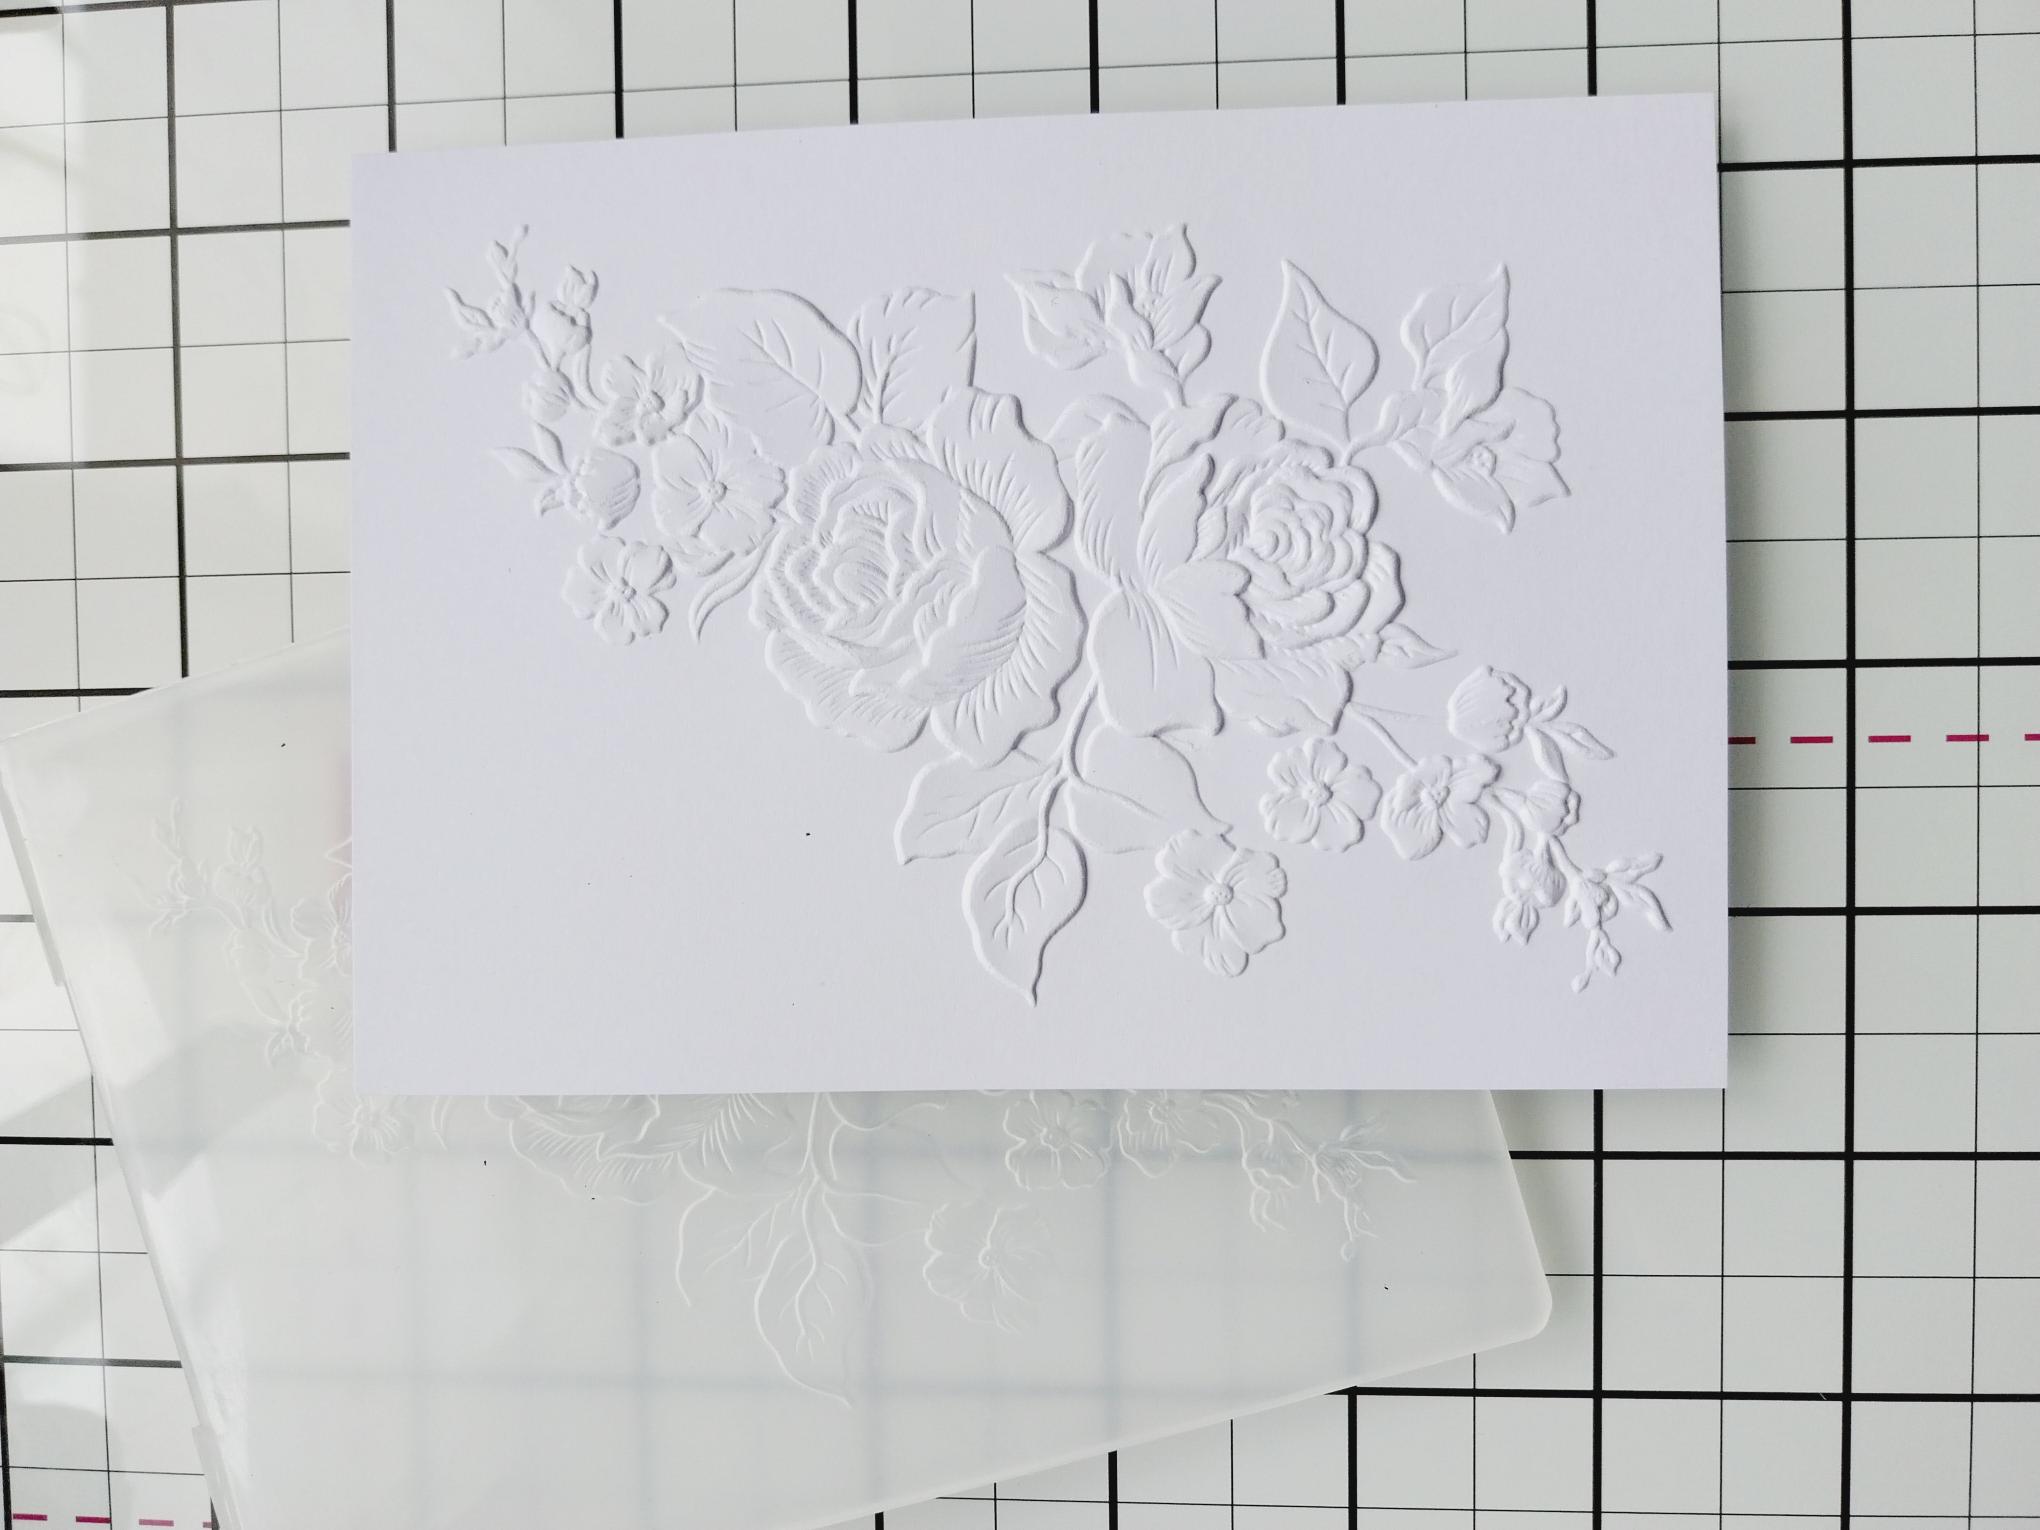
|
Place the white card, trimmed to 5 1/2 x 4", inside the embossing folder and run it through your machine. |
|
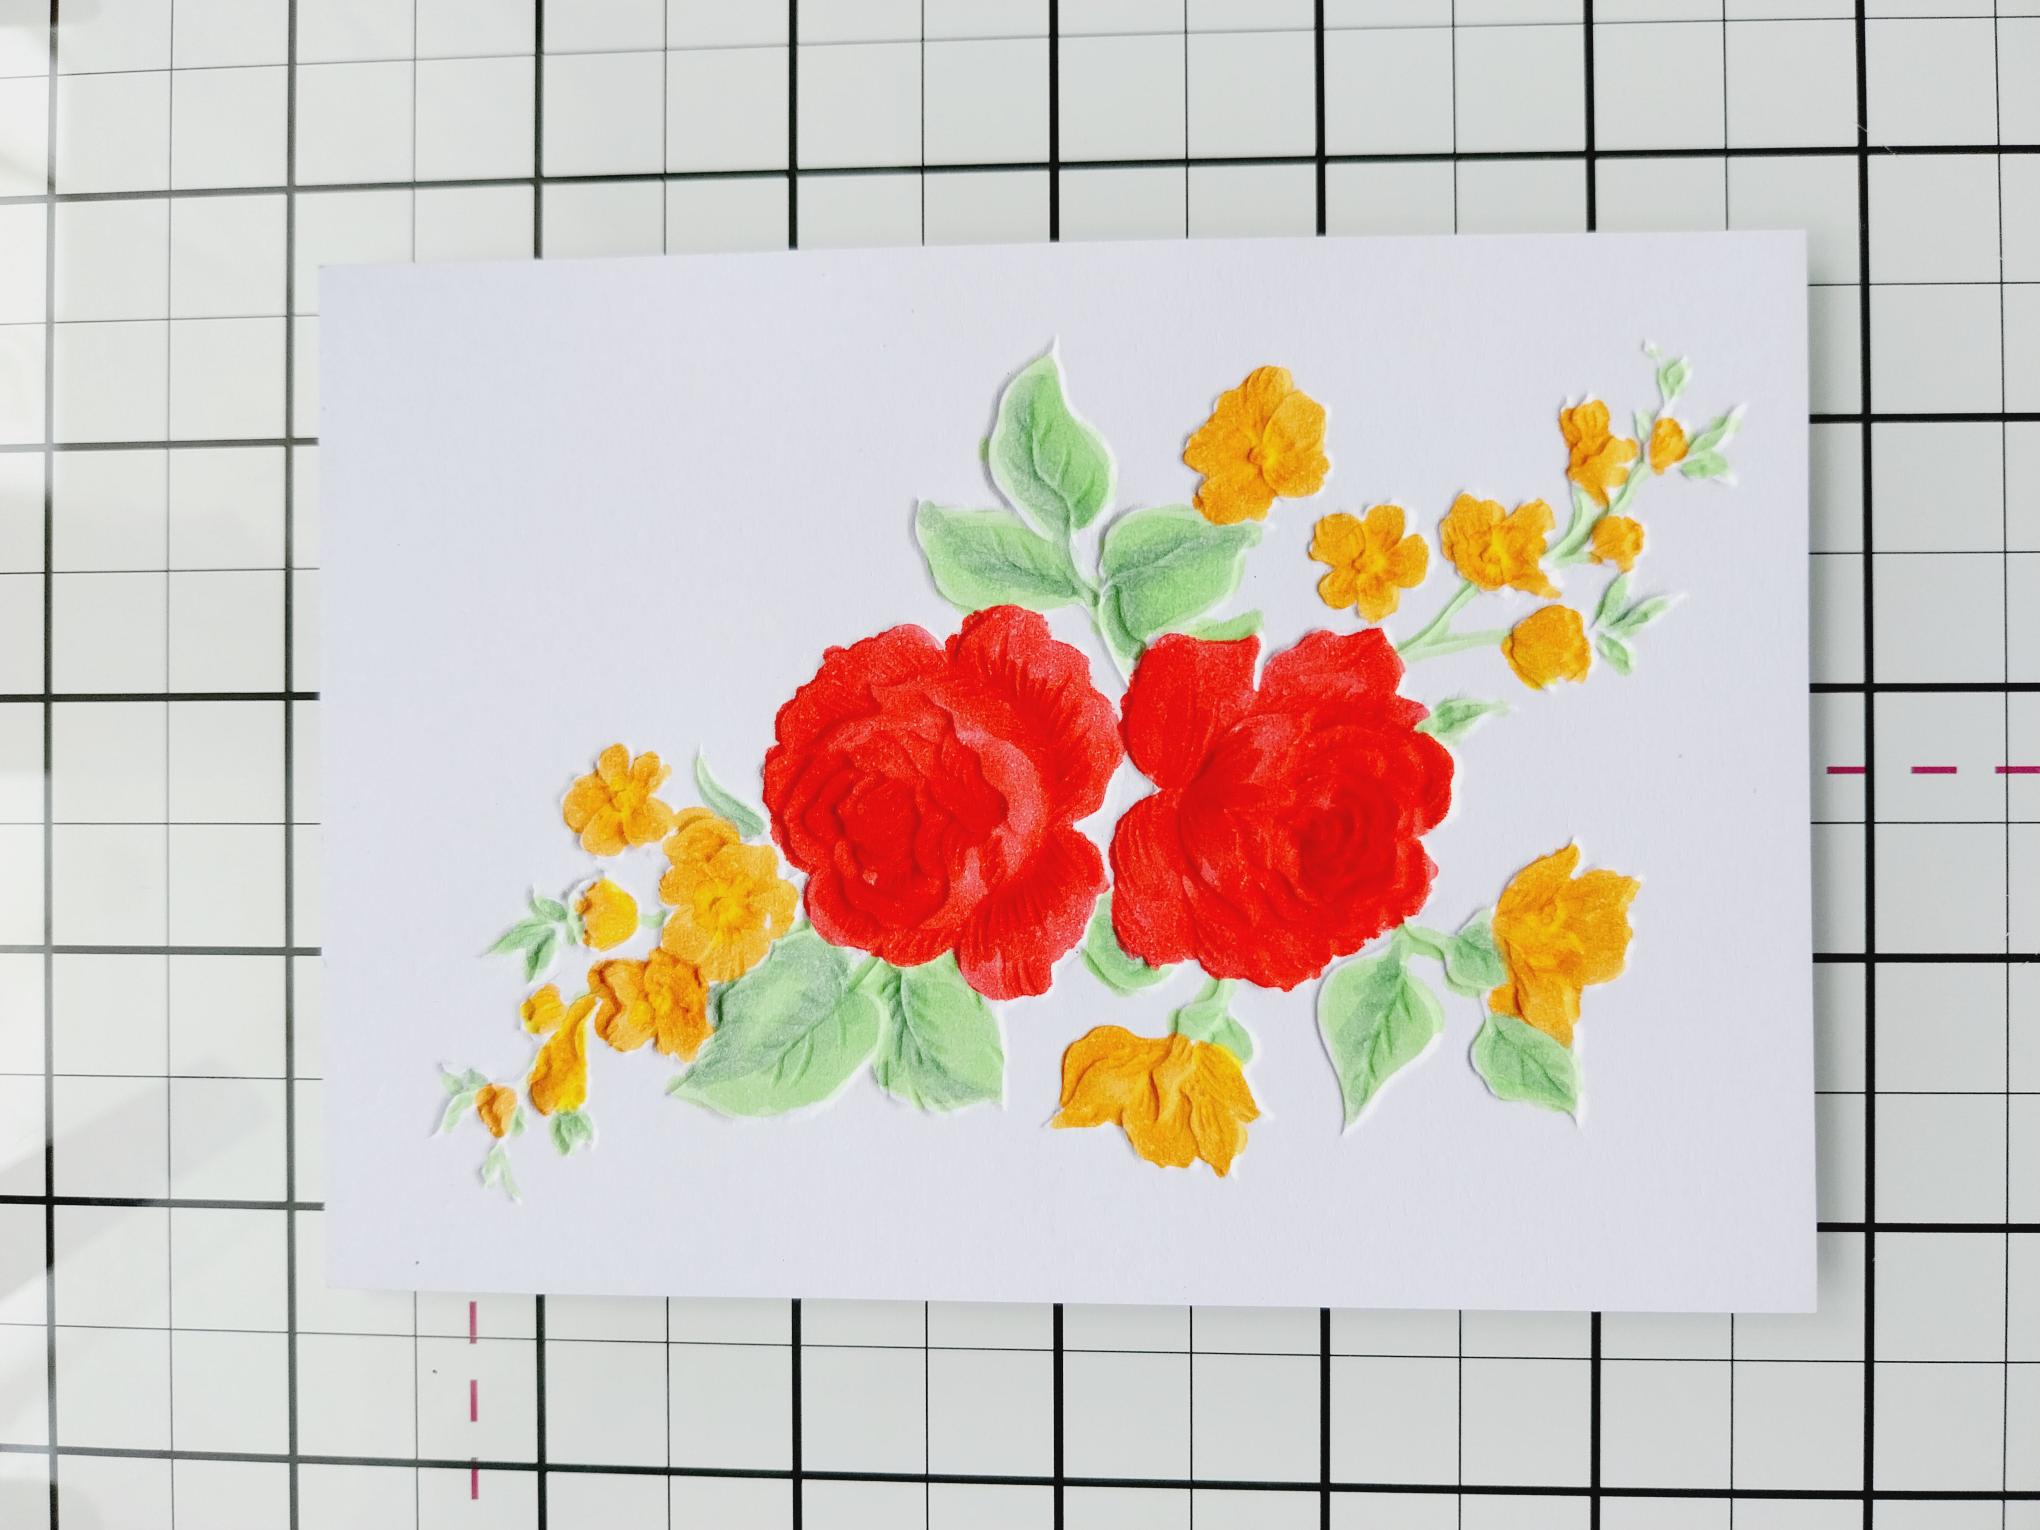
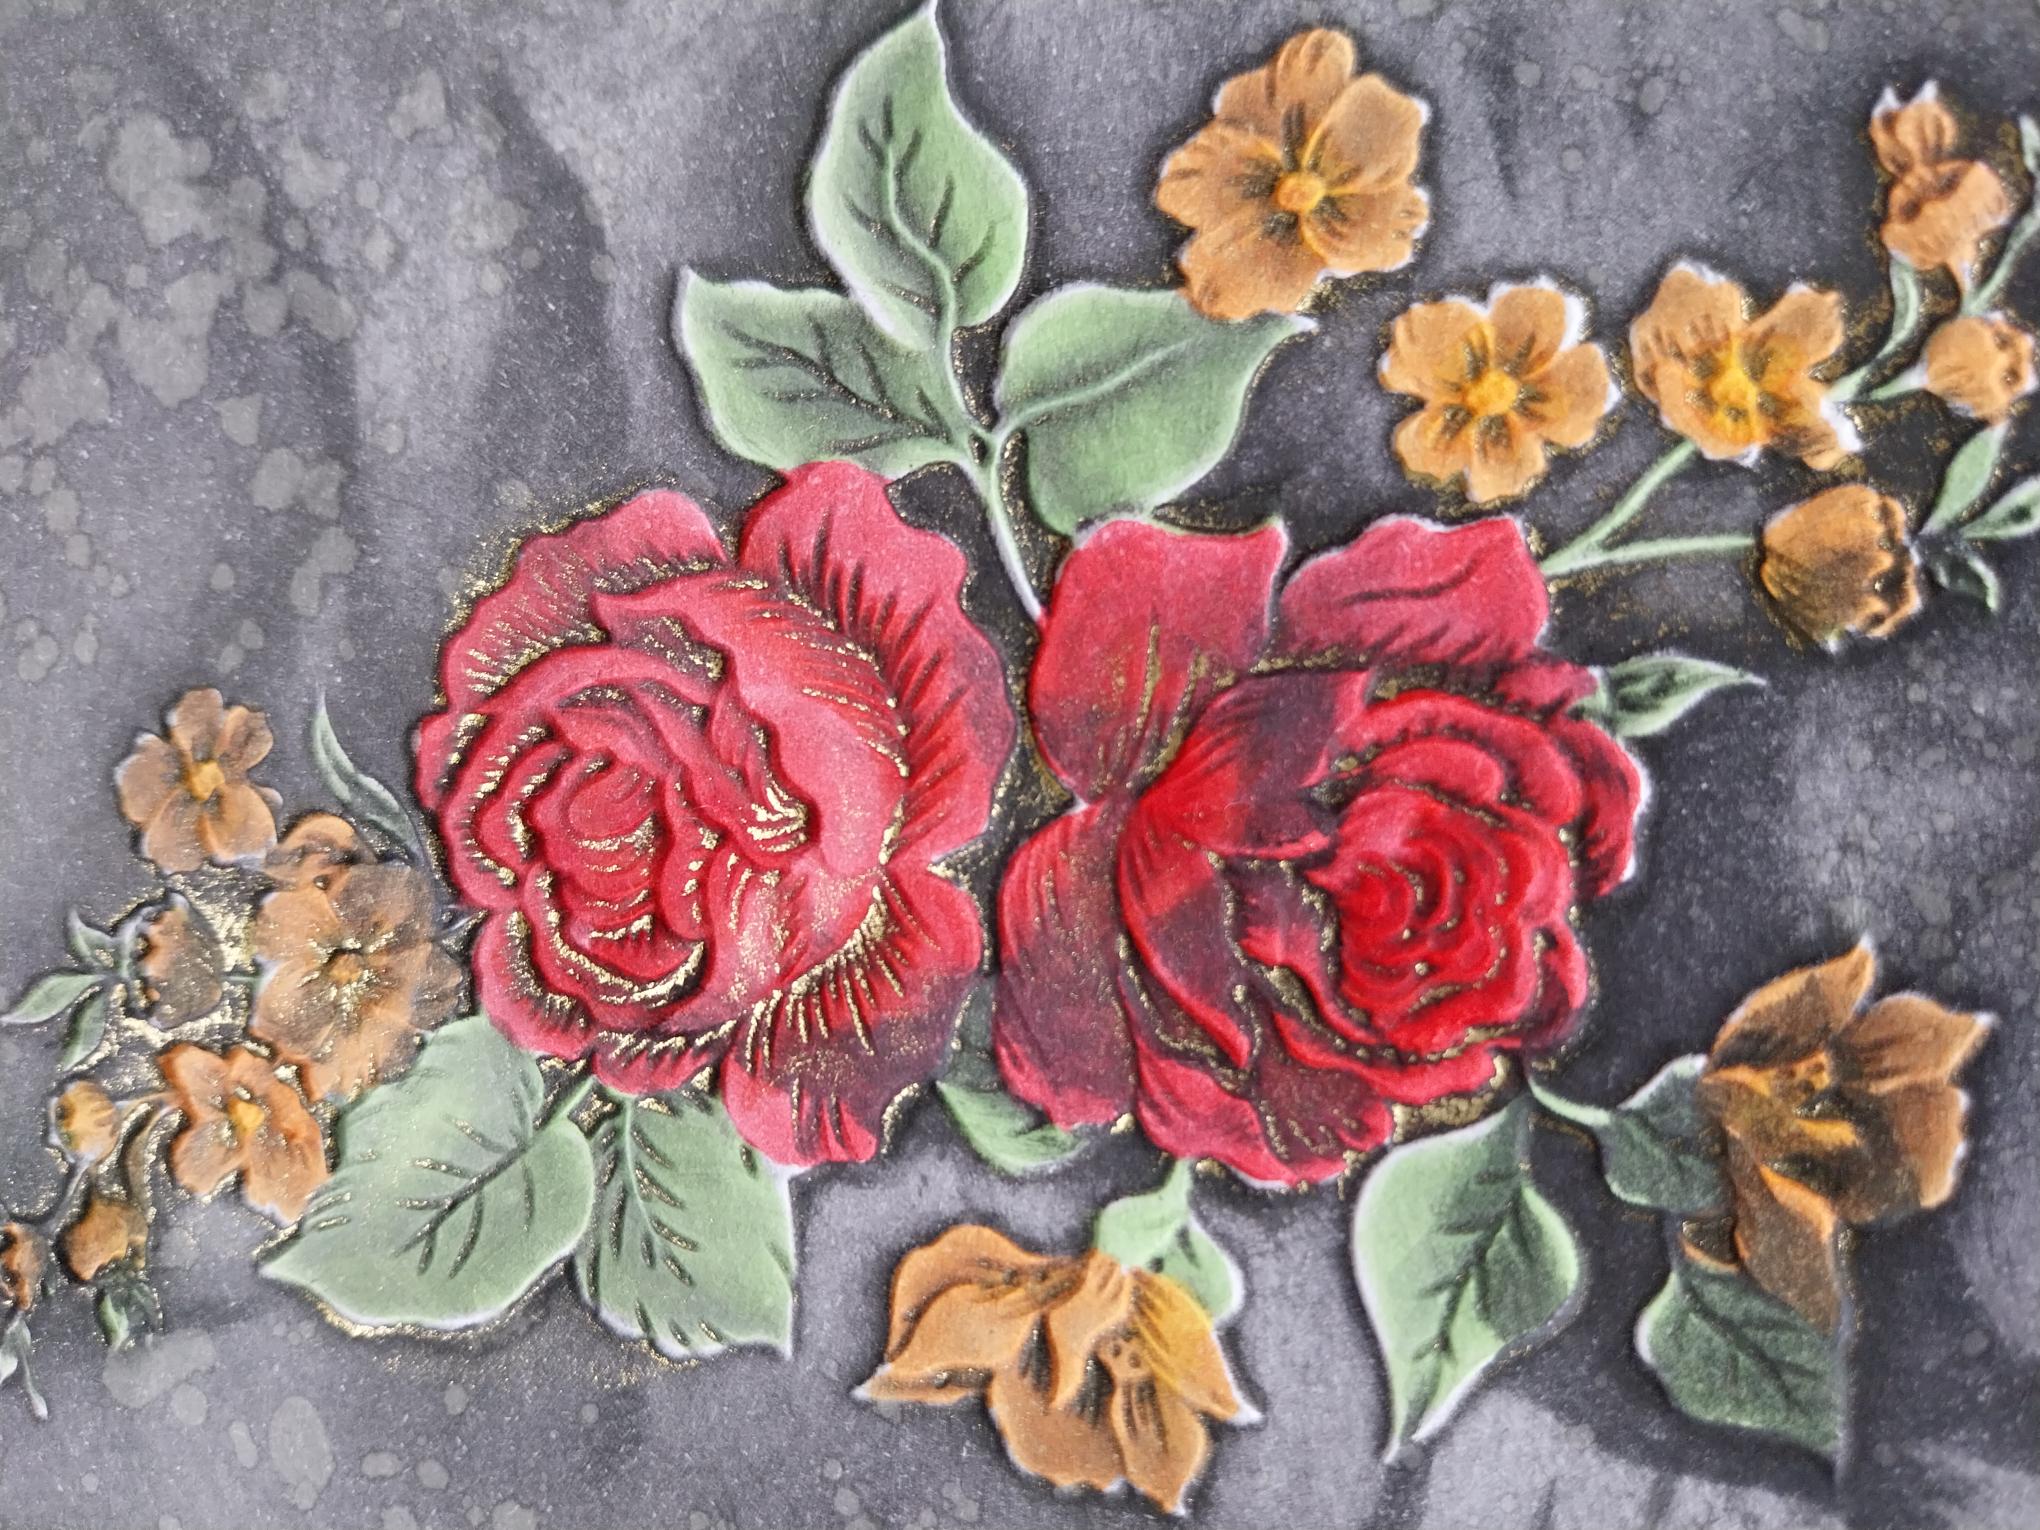
Use your alcohol pens to colour in the DEBOSSED image. Place a sheet of copy paper underneath to avoid damaging your worksurface from the ink that bleeds through the card. |
|
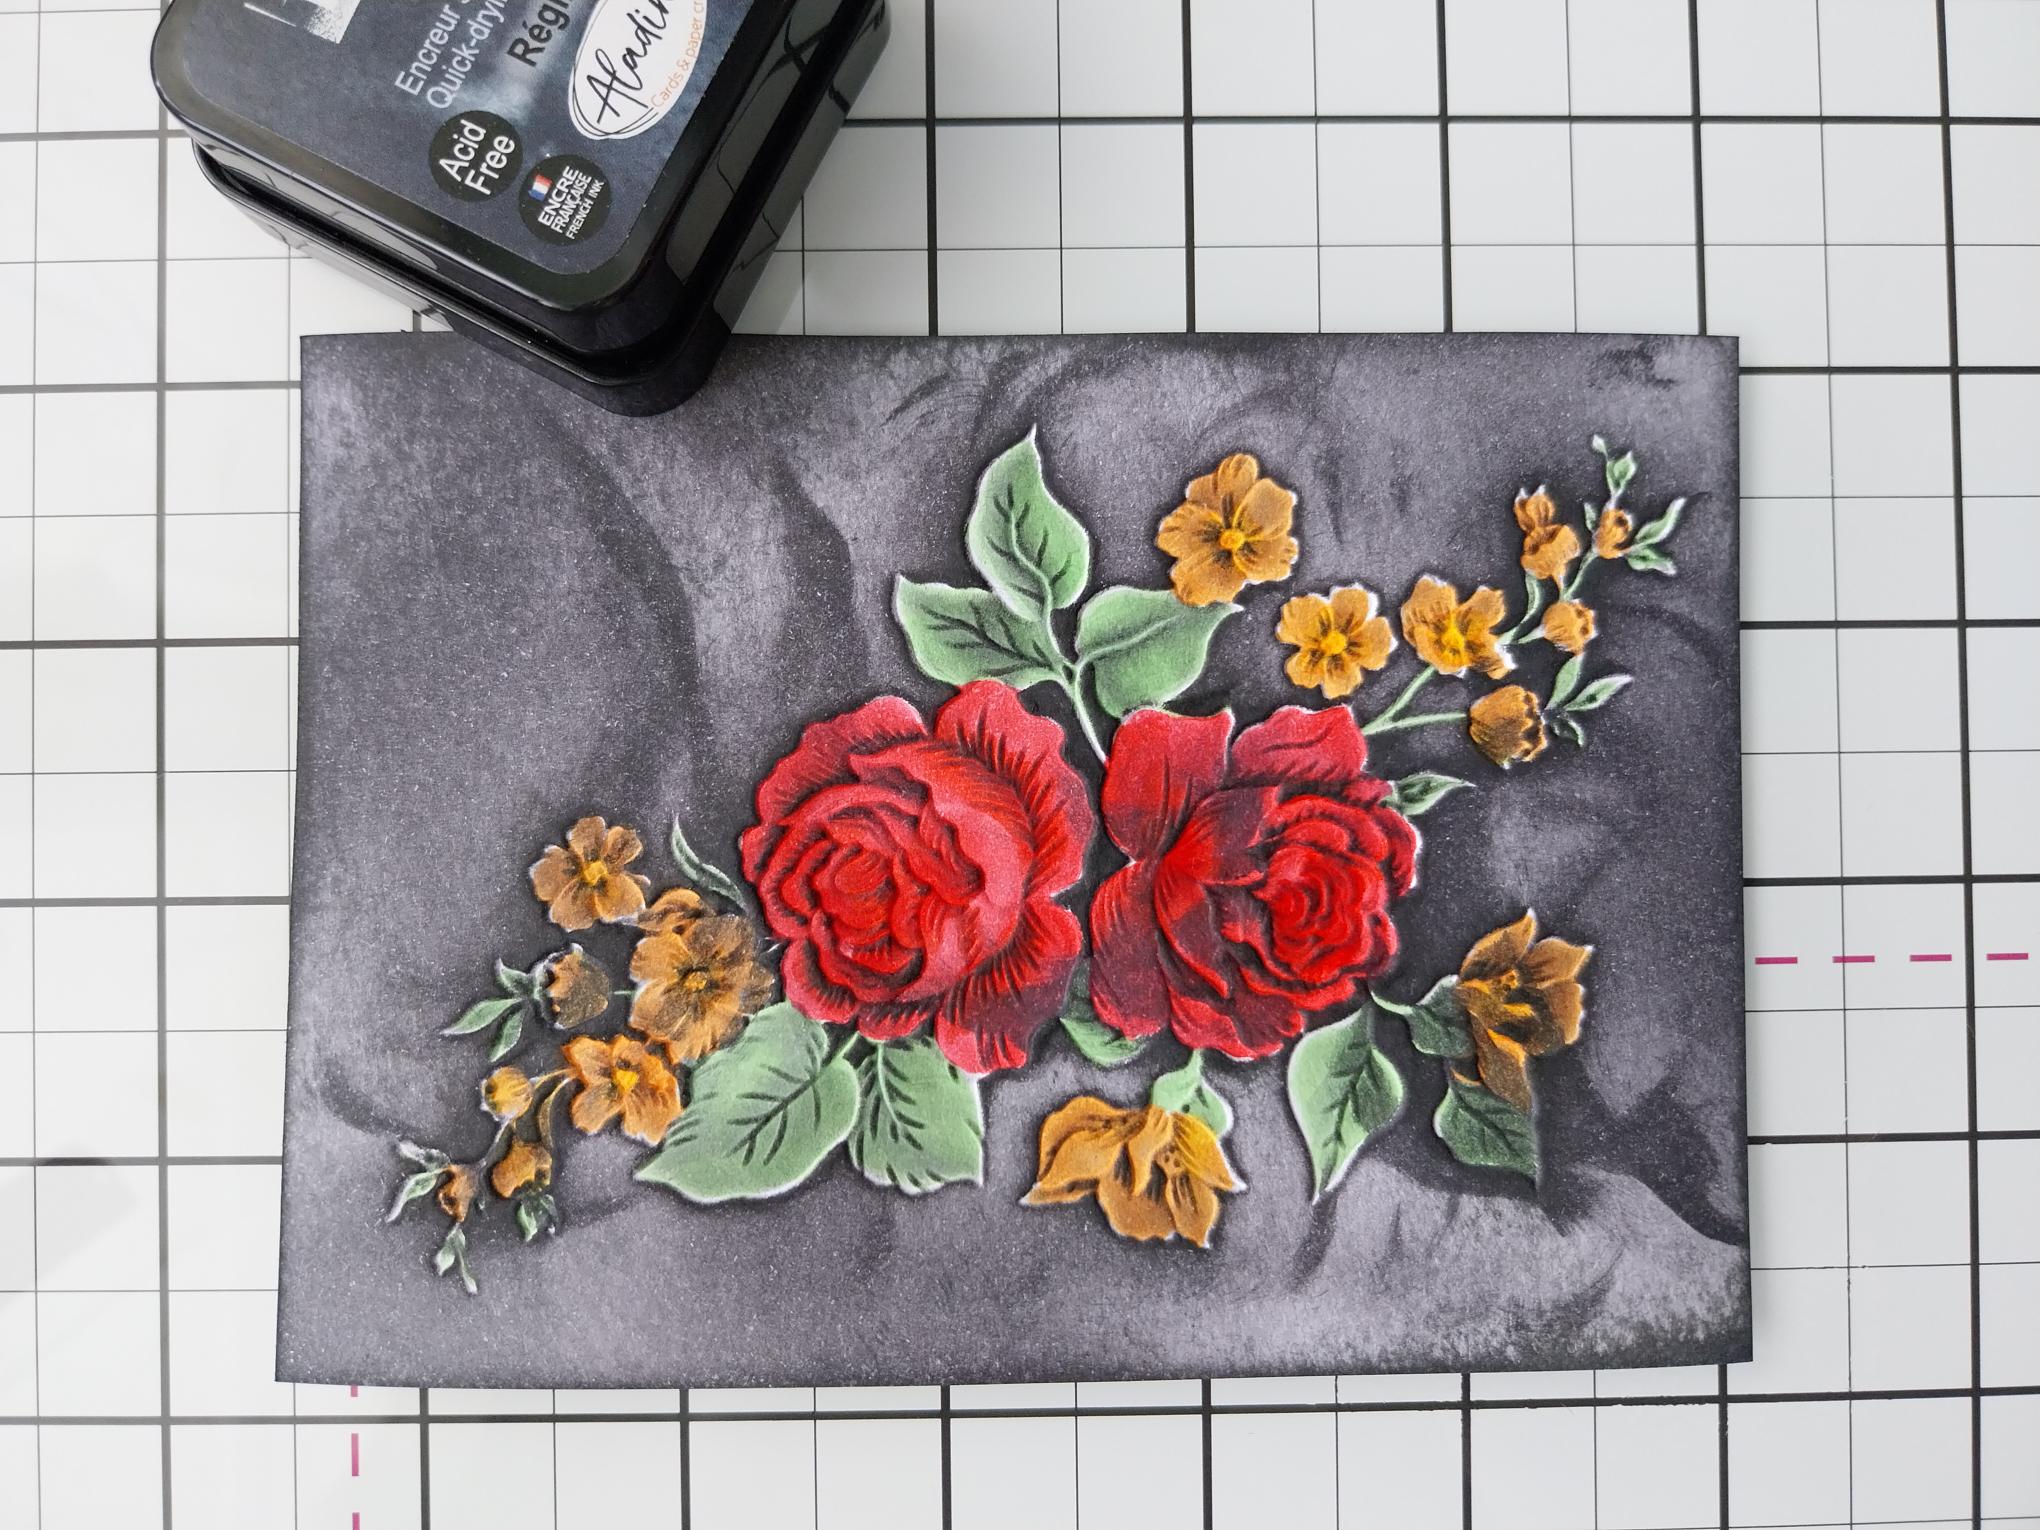
Begin by lightly rubbing your Izink Reglisse ink pad over your card and debossed image. You can go back in adding more ink, to get the effect you require. |
|
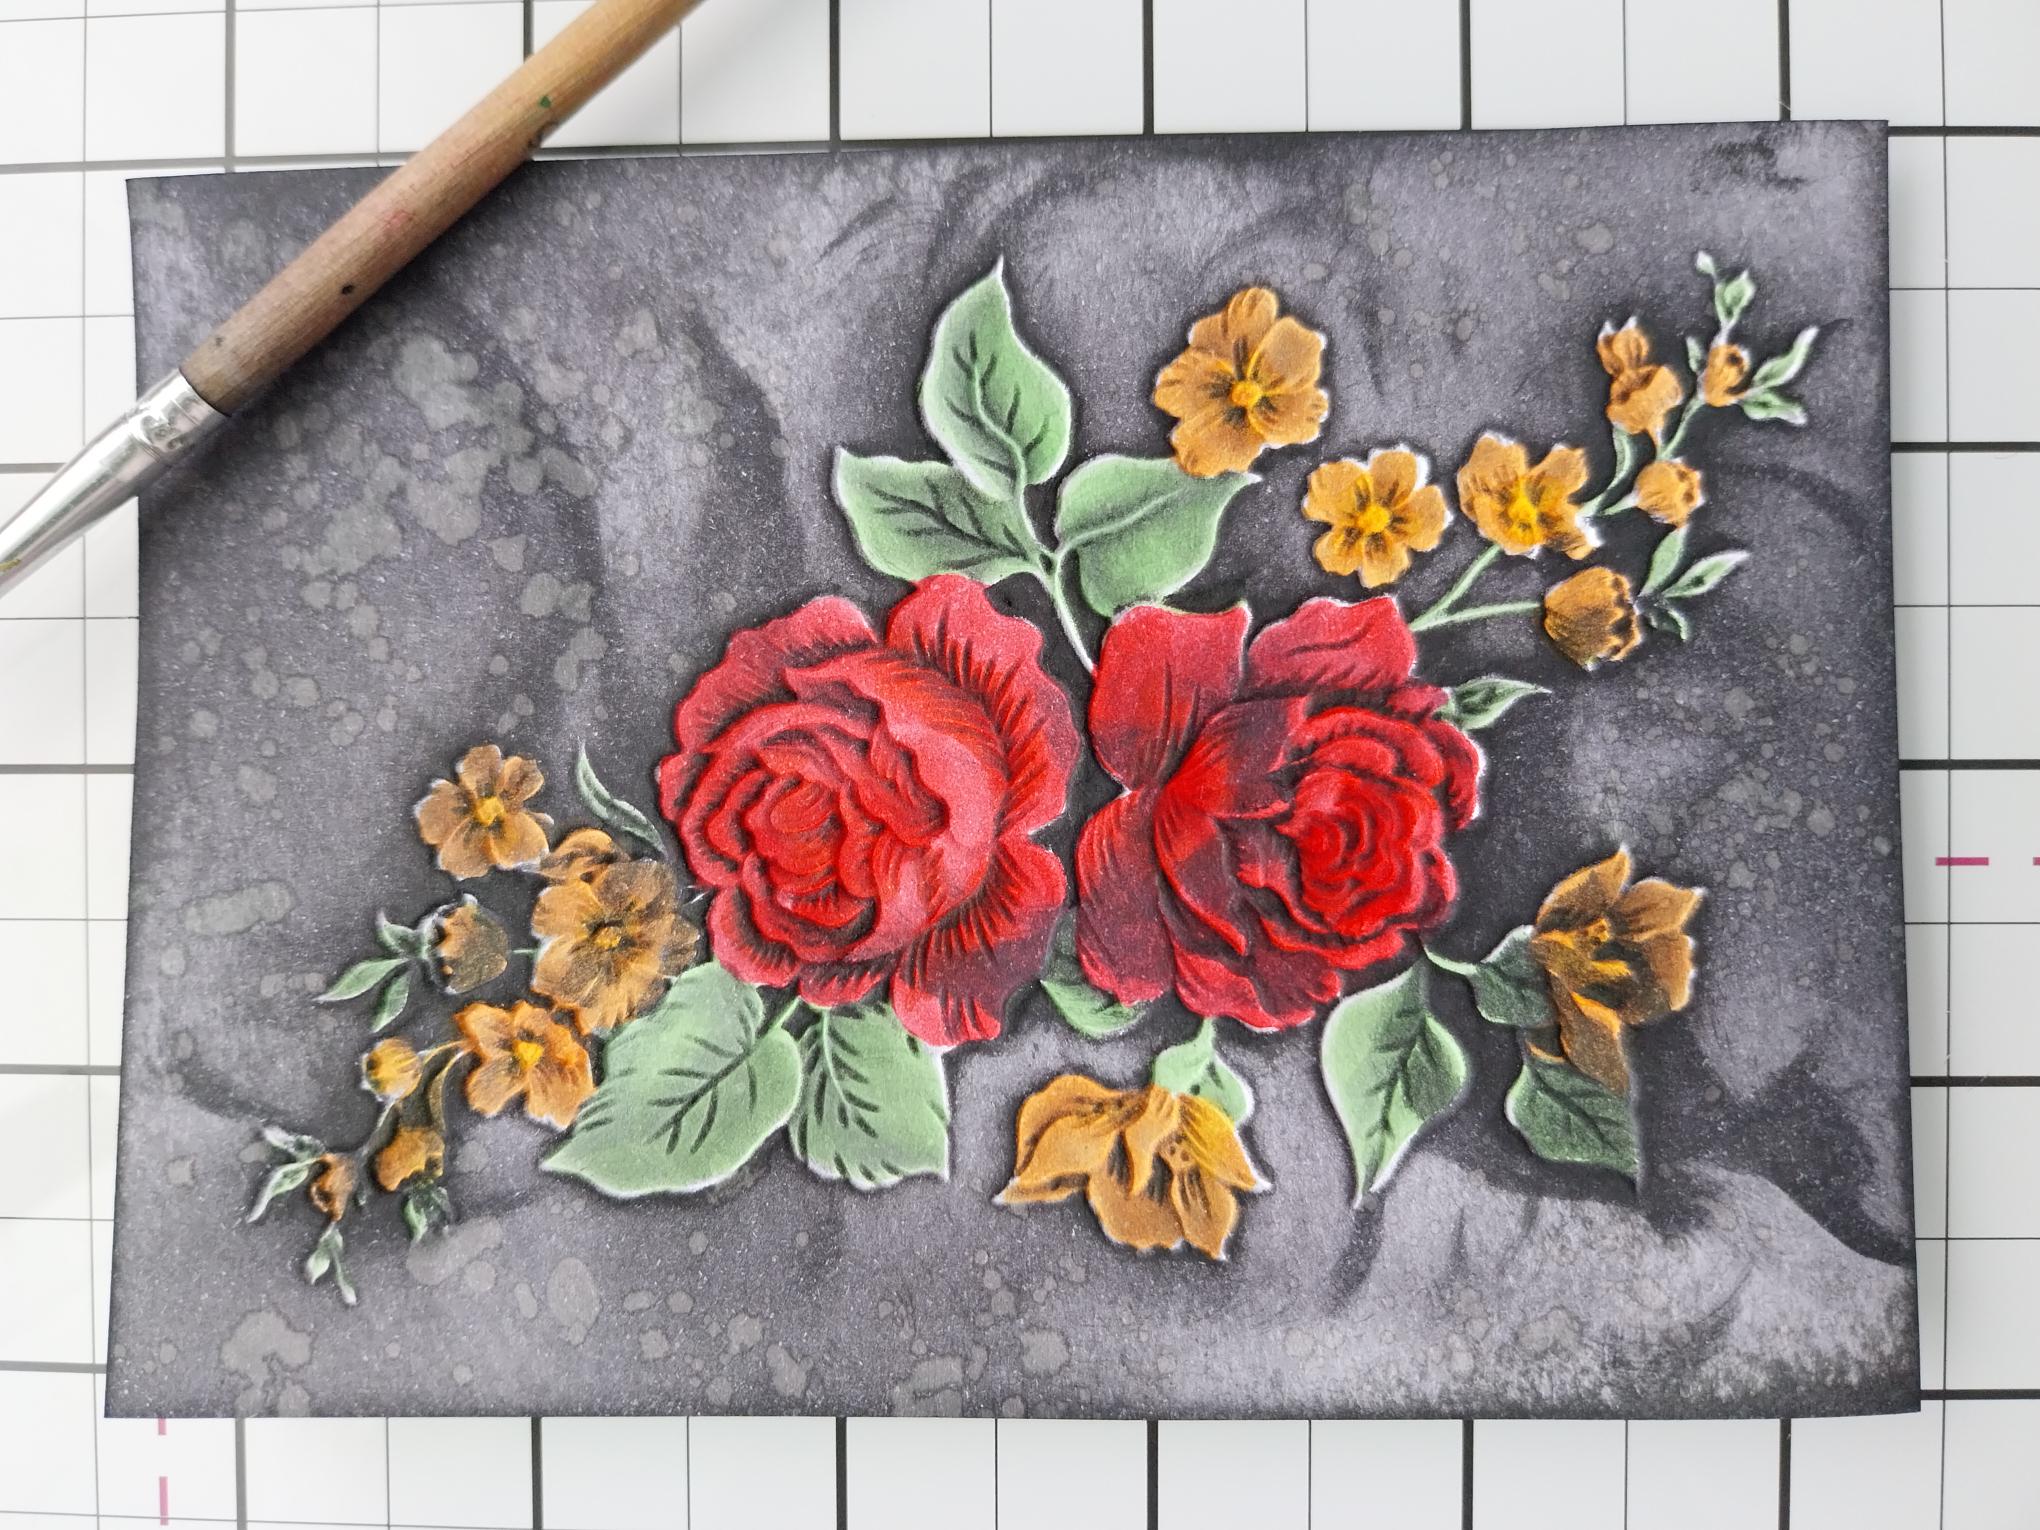
Splatter your artwork with water, wait a few seconds then mop up the ink with a paper towel. At this stage you can keep adding more ink, splatter more water, until you achieve the desired effect. Dry your finished artwork with a heat tool. |
|
Lightly apply the Gold Gilding wax to random areas of your embossed image, then buff with a soft, dry cloth, to bring out the shine. |
|
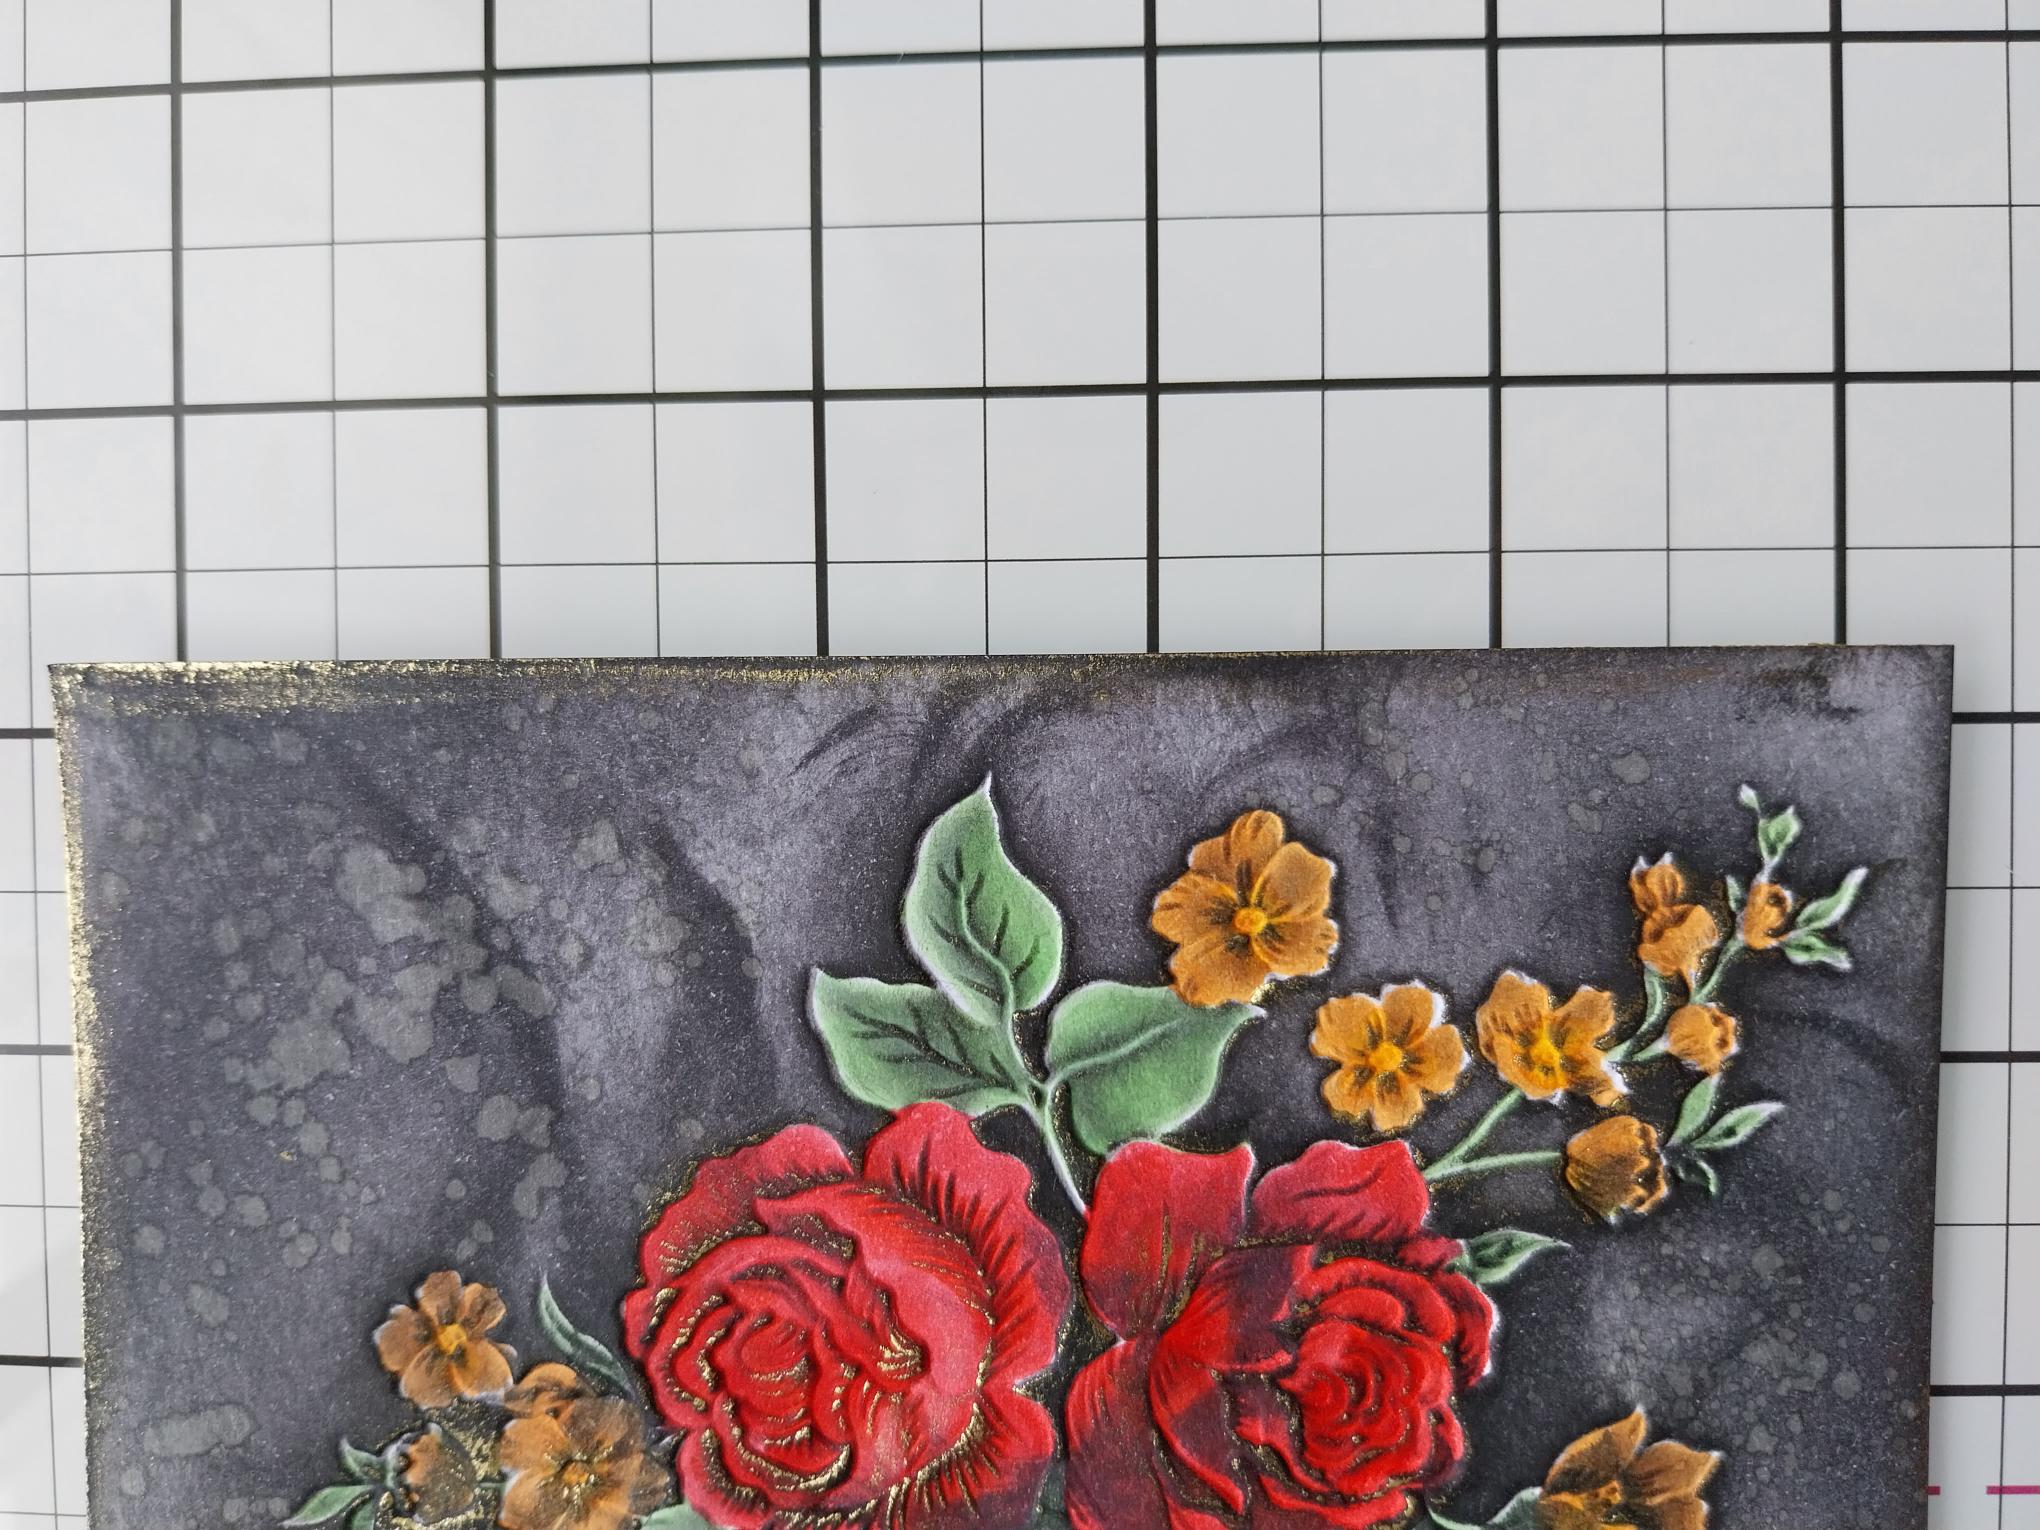
Apply the Gilding Wax around the edges of the card and again, buff with a cloth. |
|
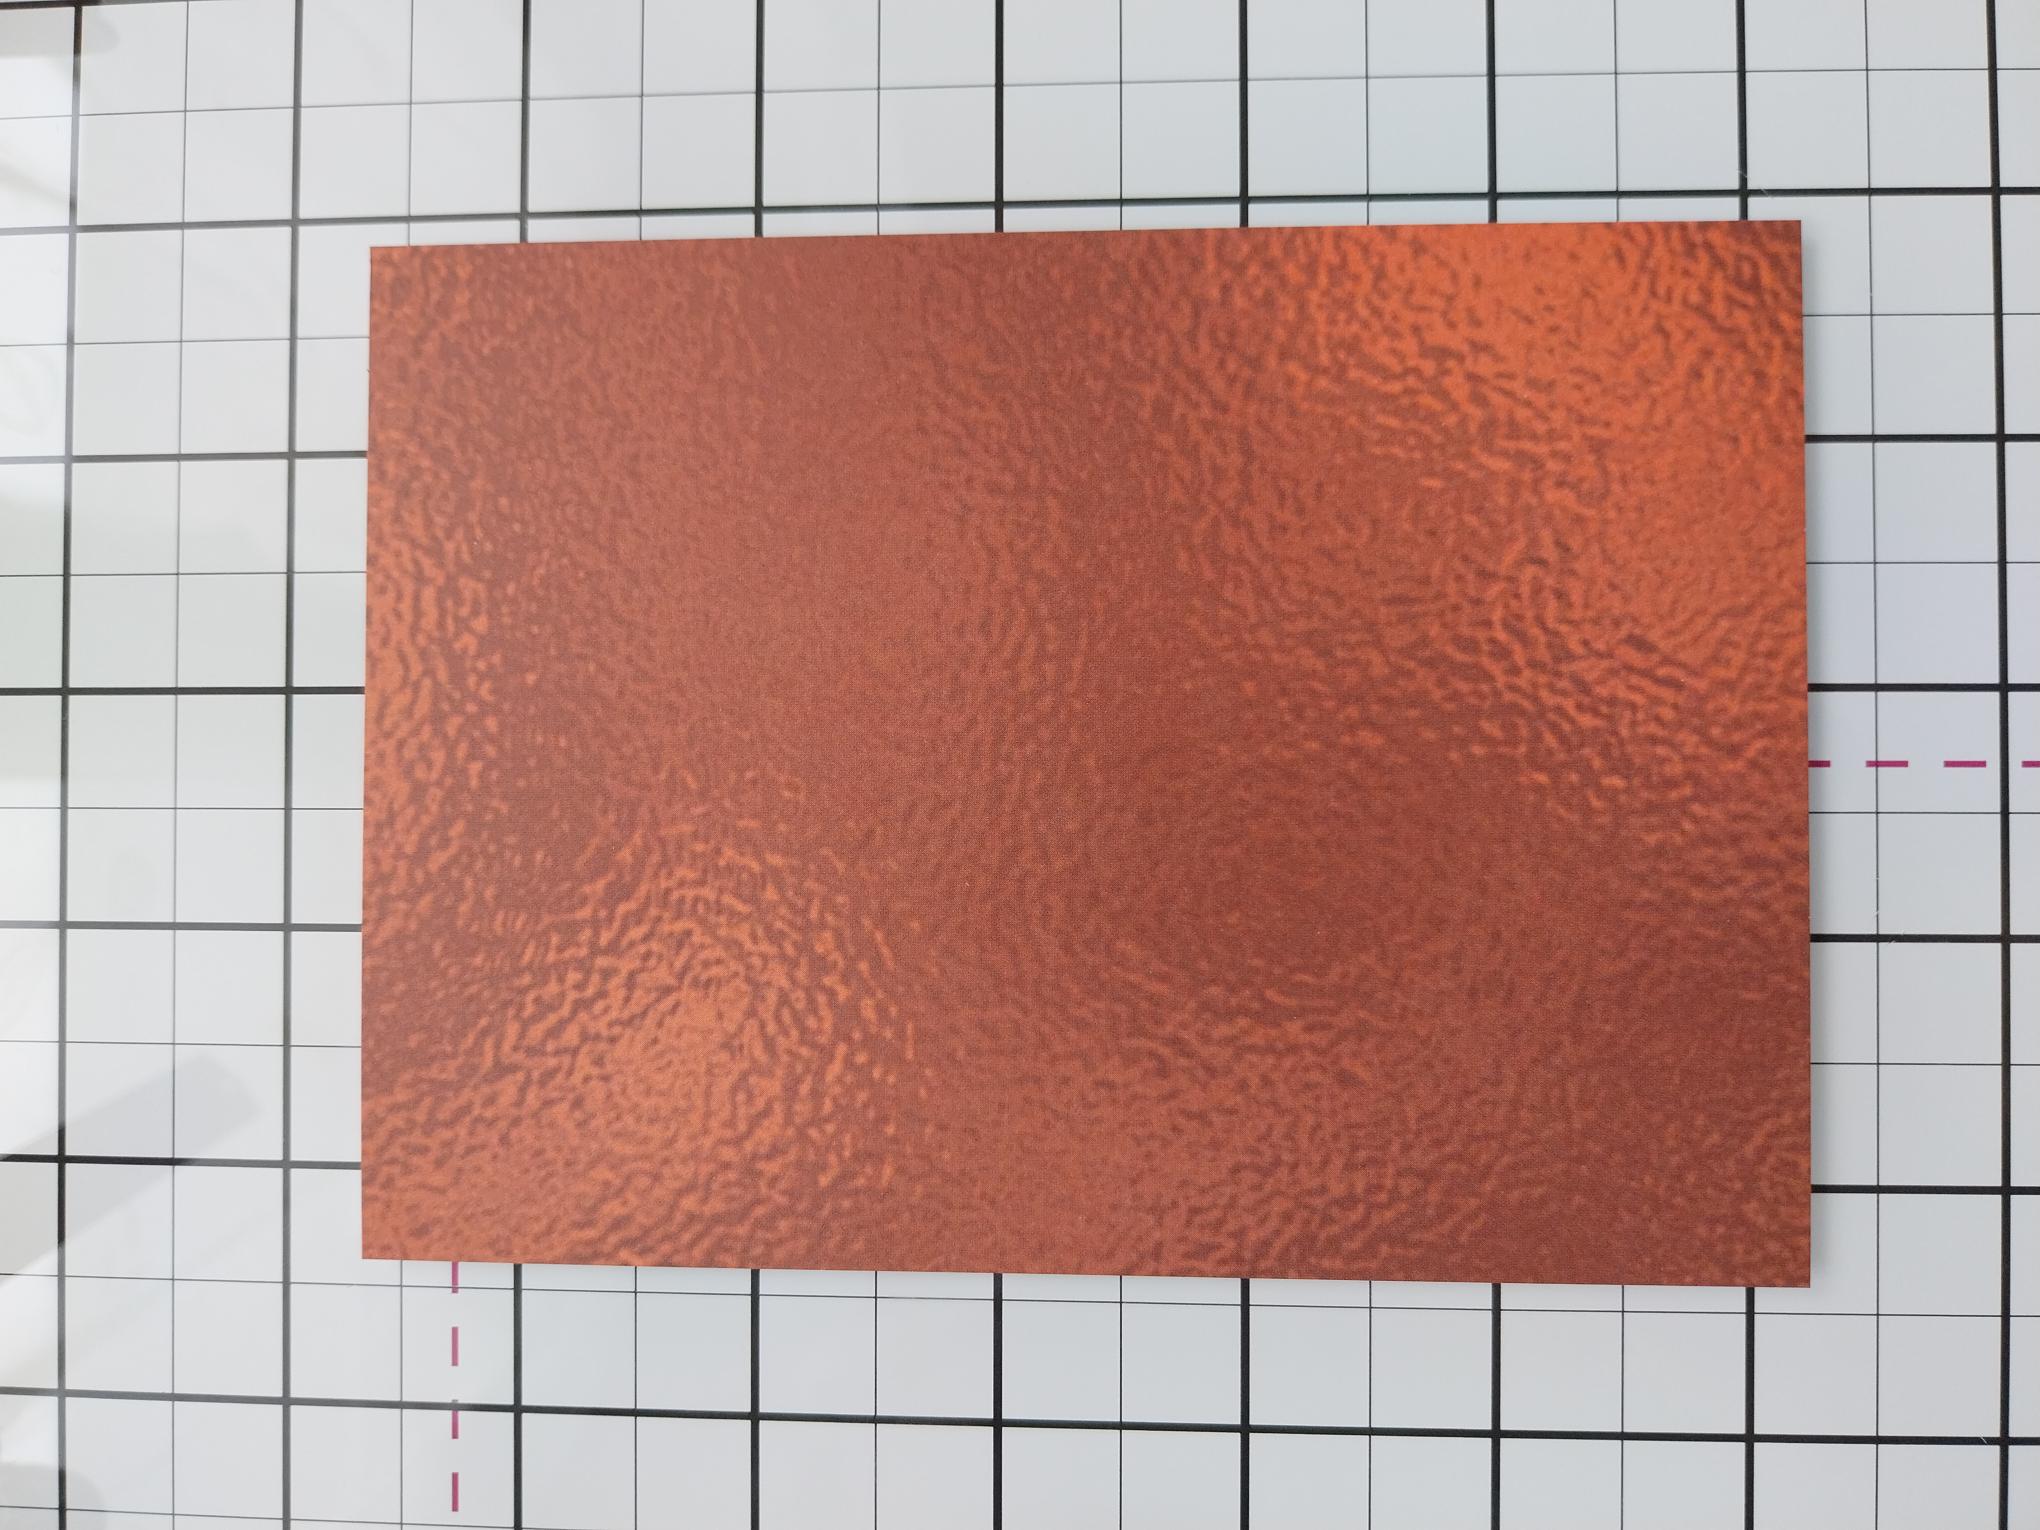
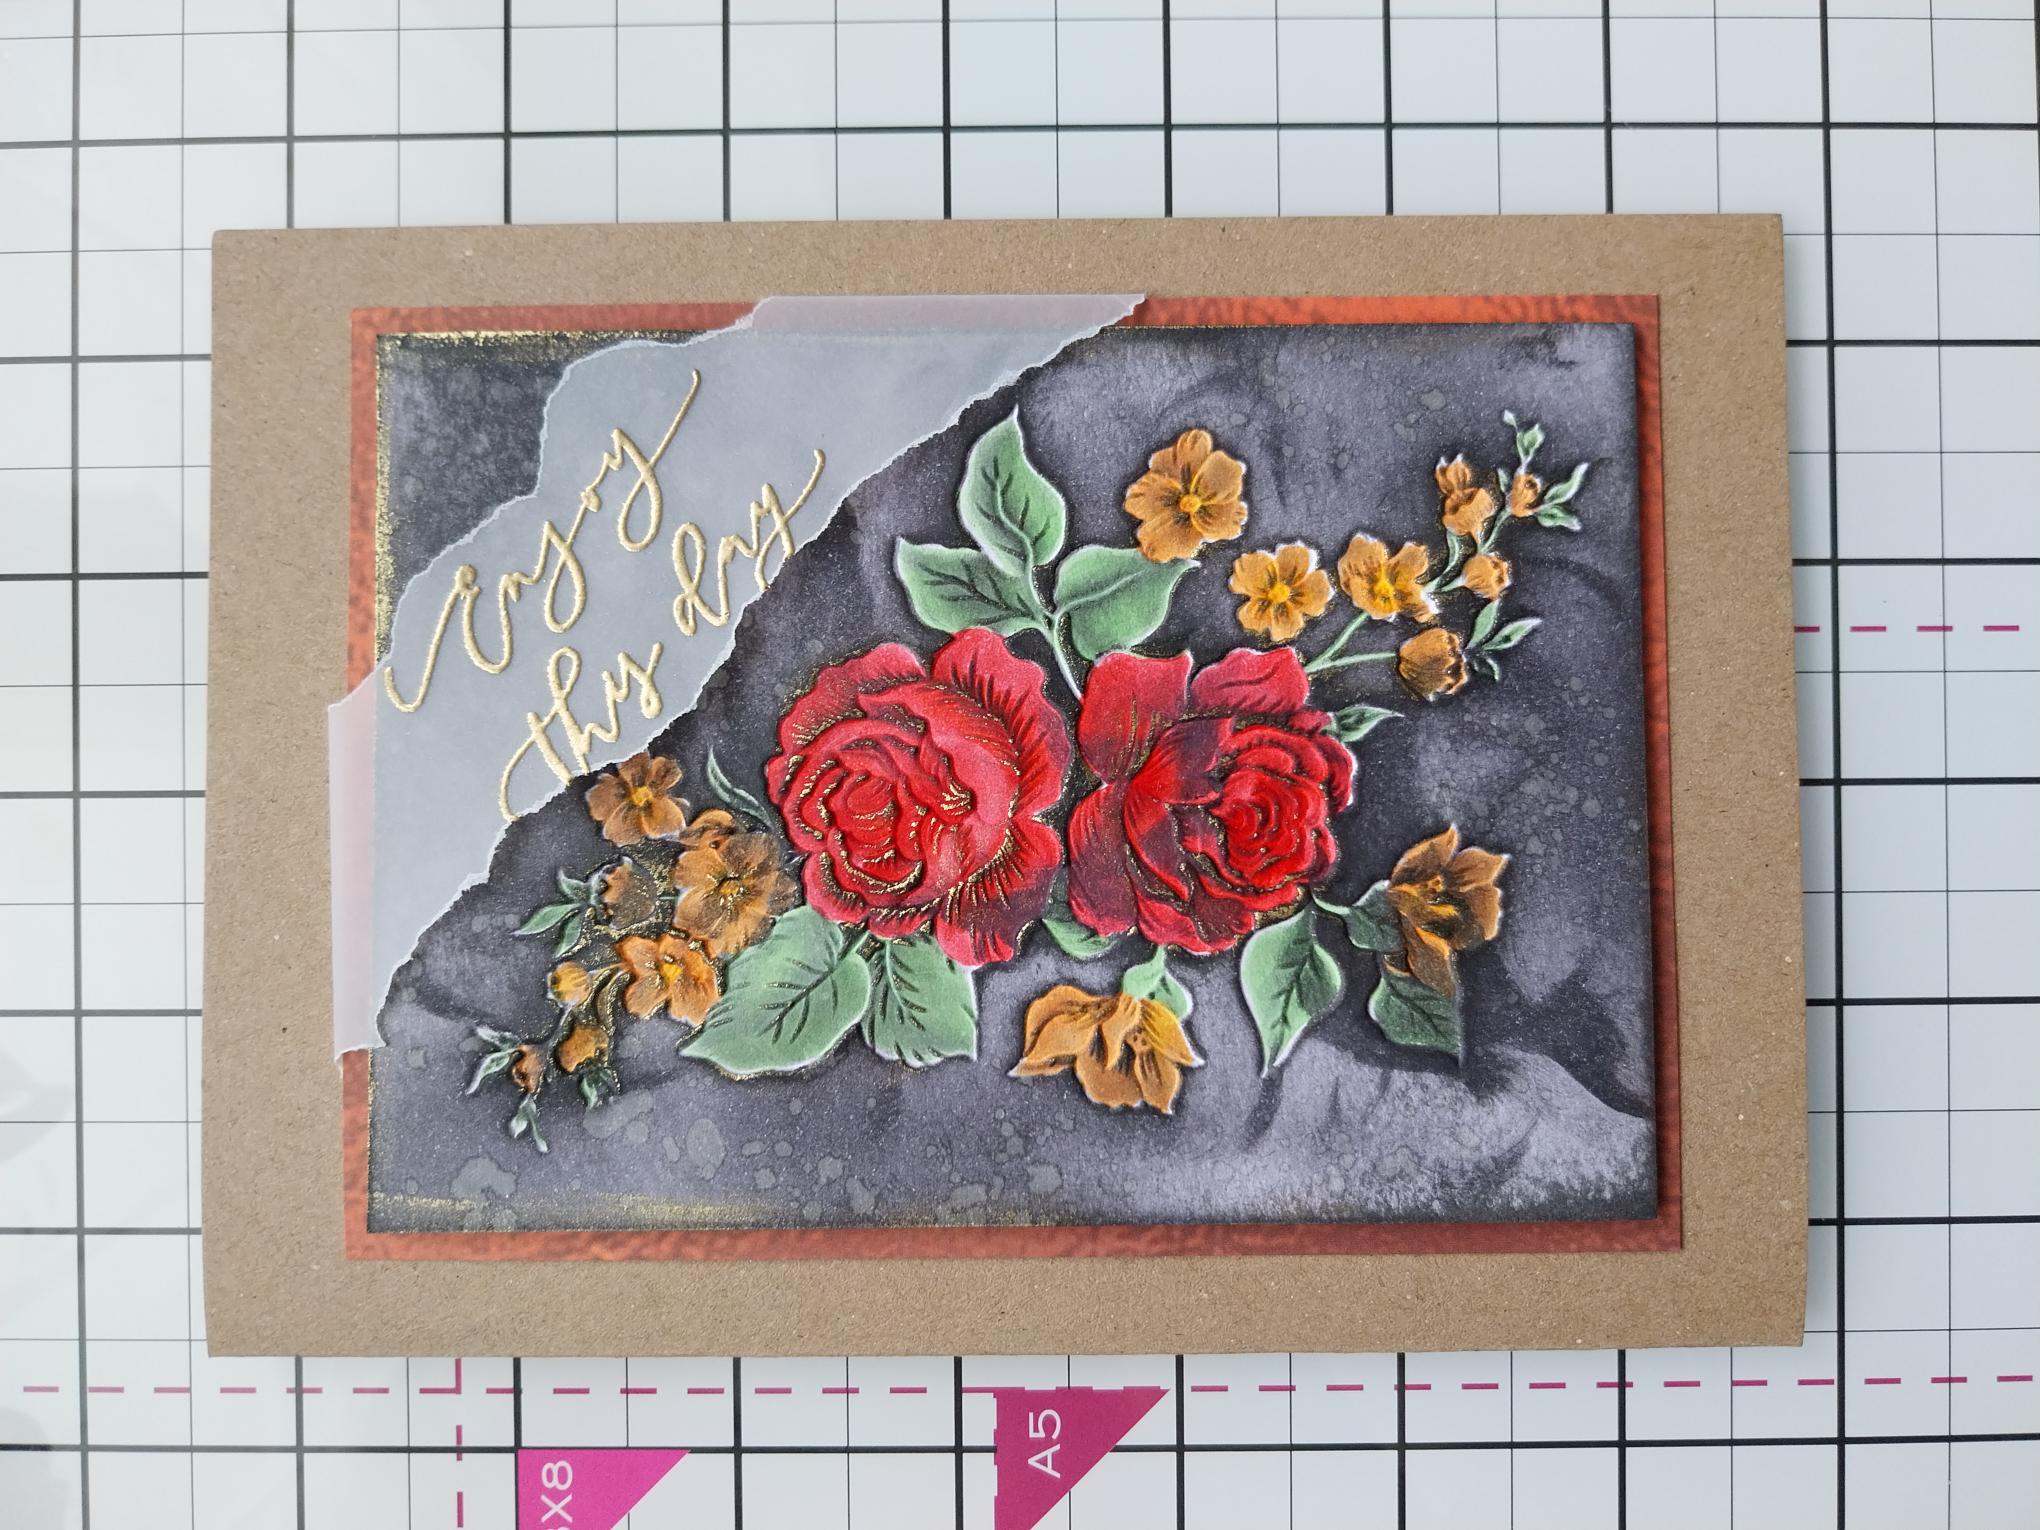
Remove this metallic effect paper, from the Copper All Surfaces paper pack and trim to 5 3/4 x 4 1/4". |
|
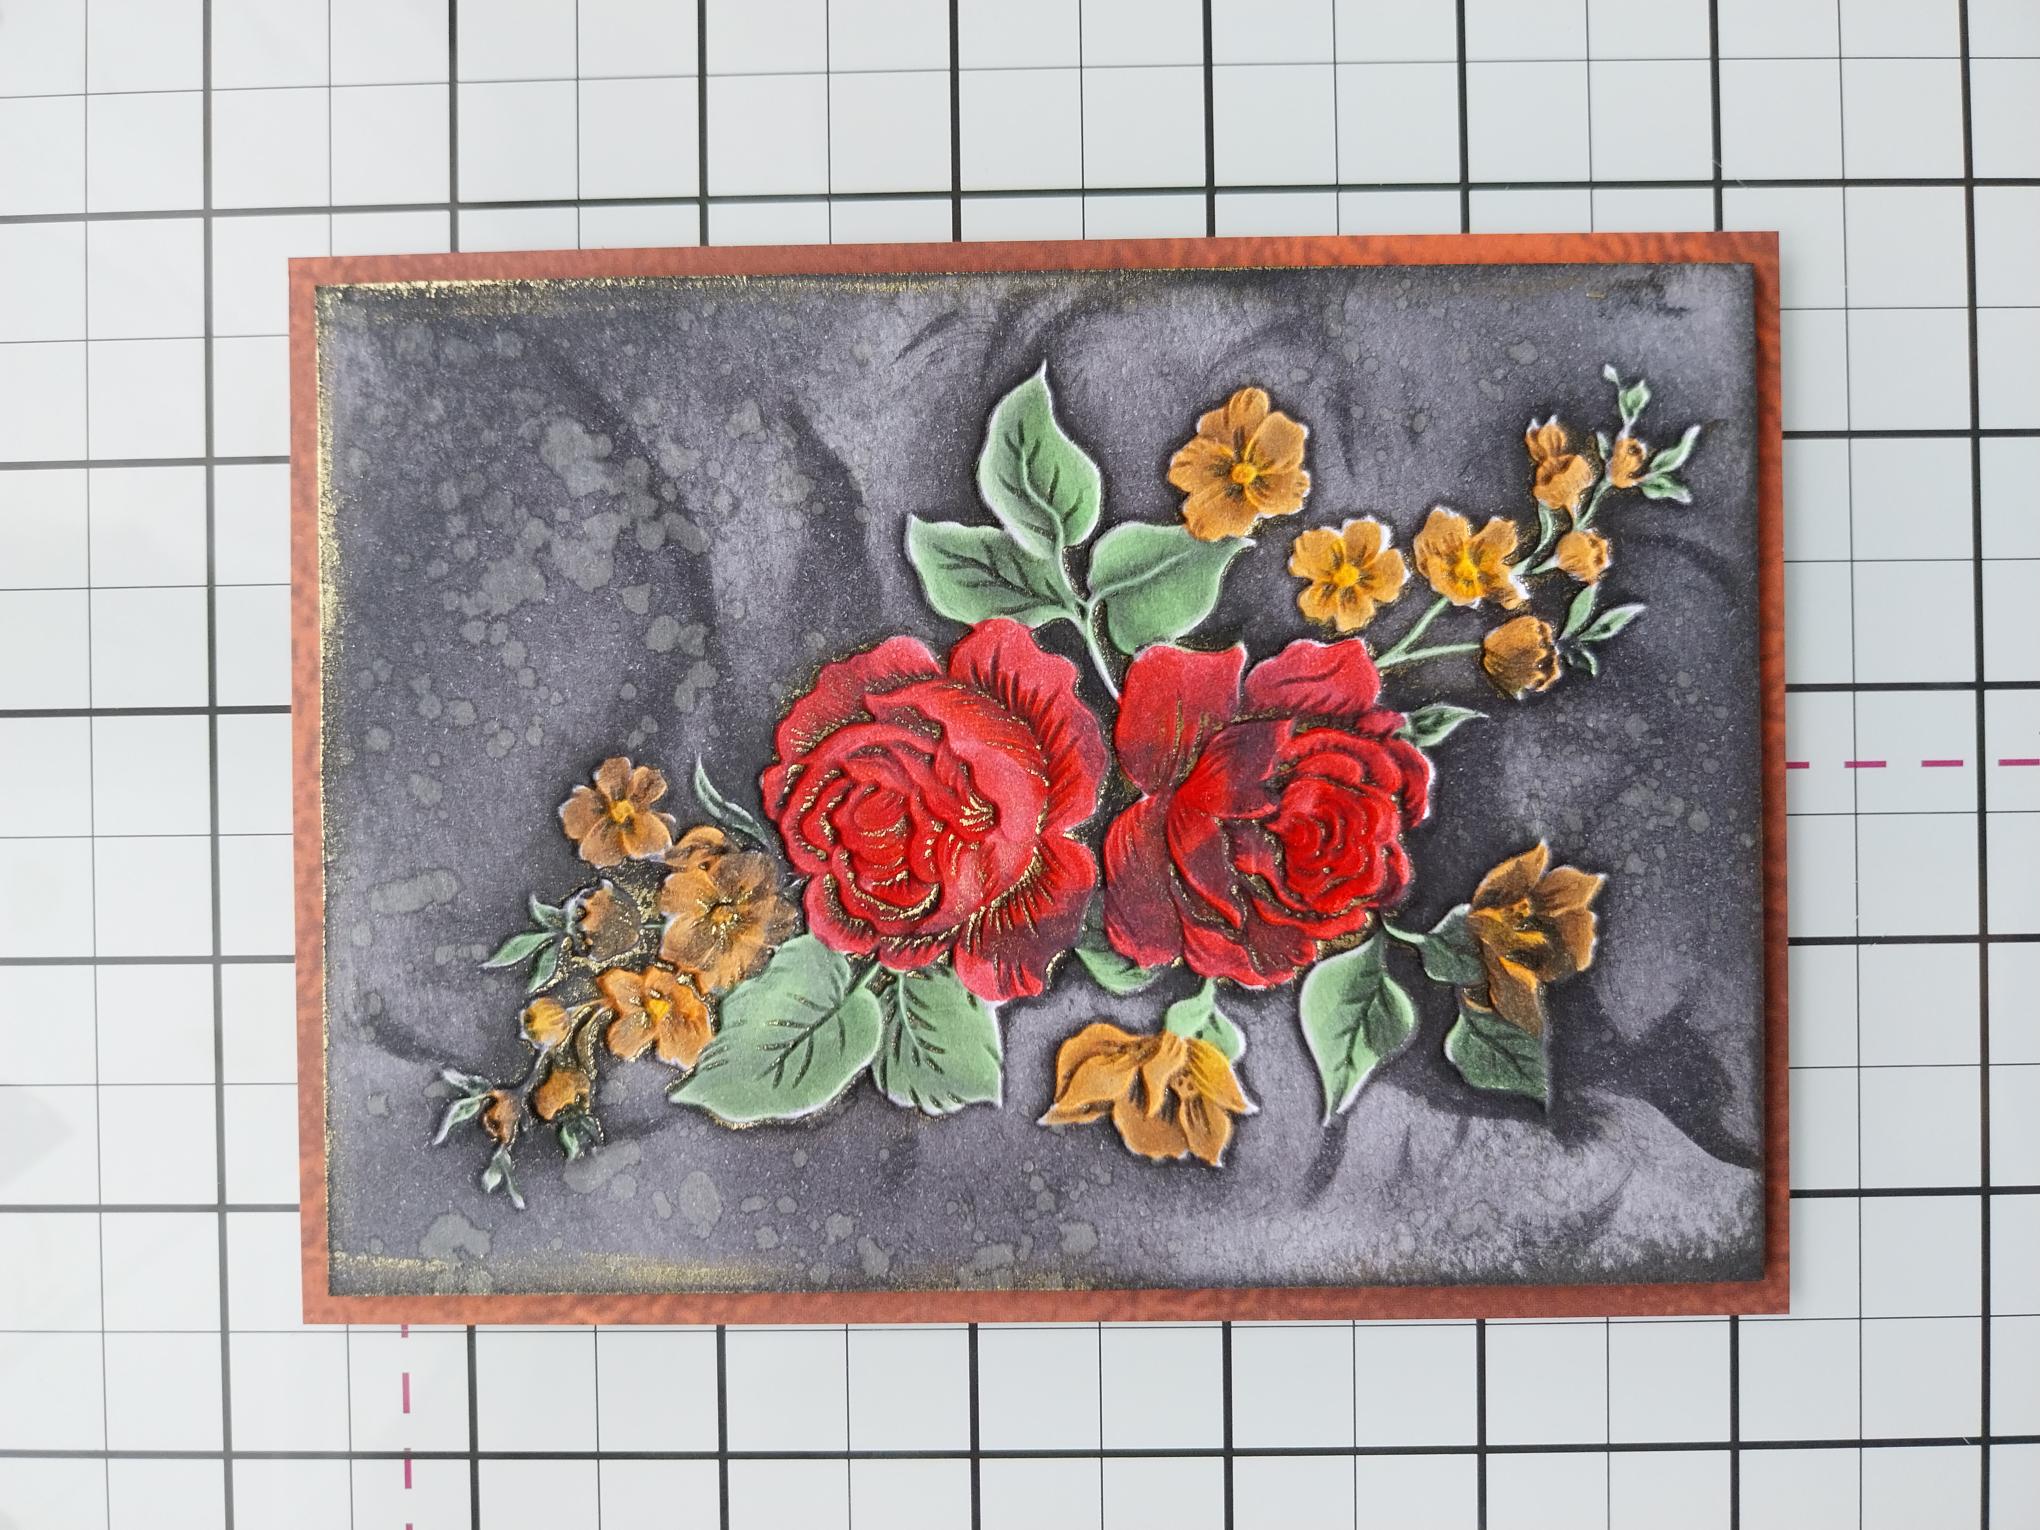
Adhere your embossed artwork on to the decorative paper and set to one side. |
|
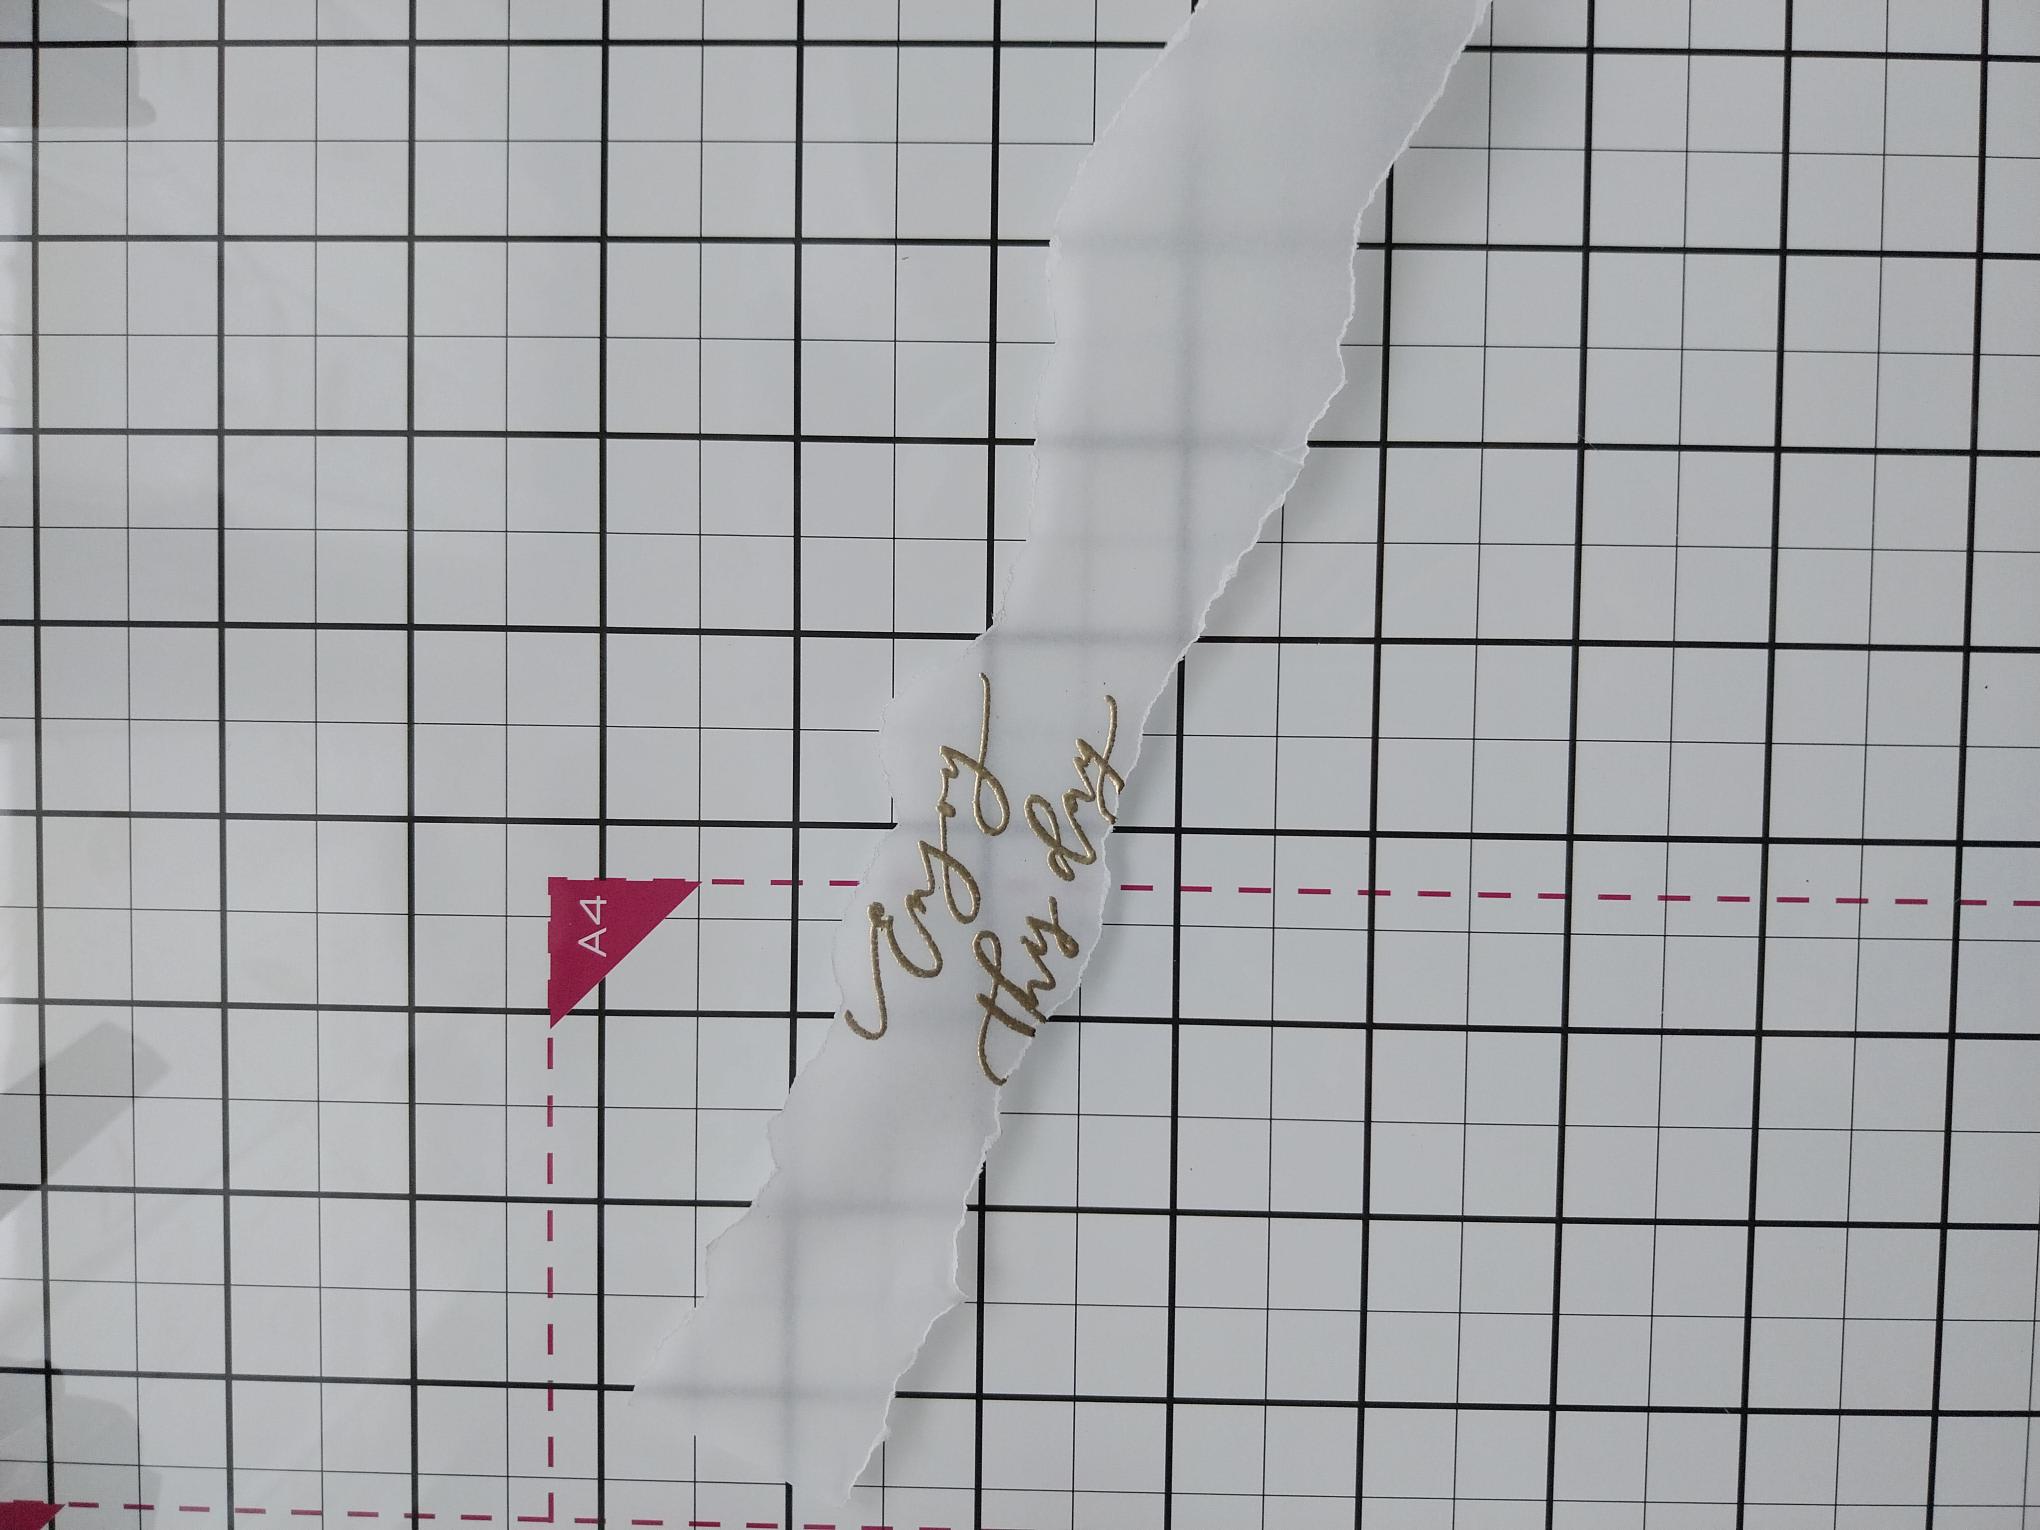
Tear a panel of vellum as wide as the "Enjoy This Day" sentiment stamp and long enough to lay diagonally across the top right of the card, with a slight overhang. Wipe over with an anti-static bag. Ink up the stamp with the sticky embossing ink and stamp it in the middle of the vellum. Cover with embossing powder and heat set with a heat tool. Make sure your heat tool is hot BEFORE setting the powder, to avoid warping the vellum. |
|
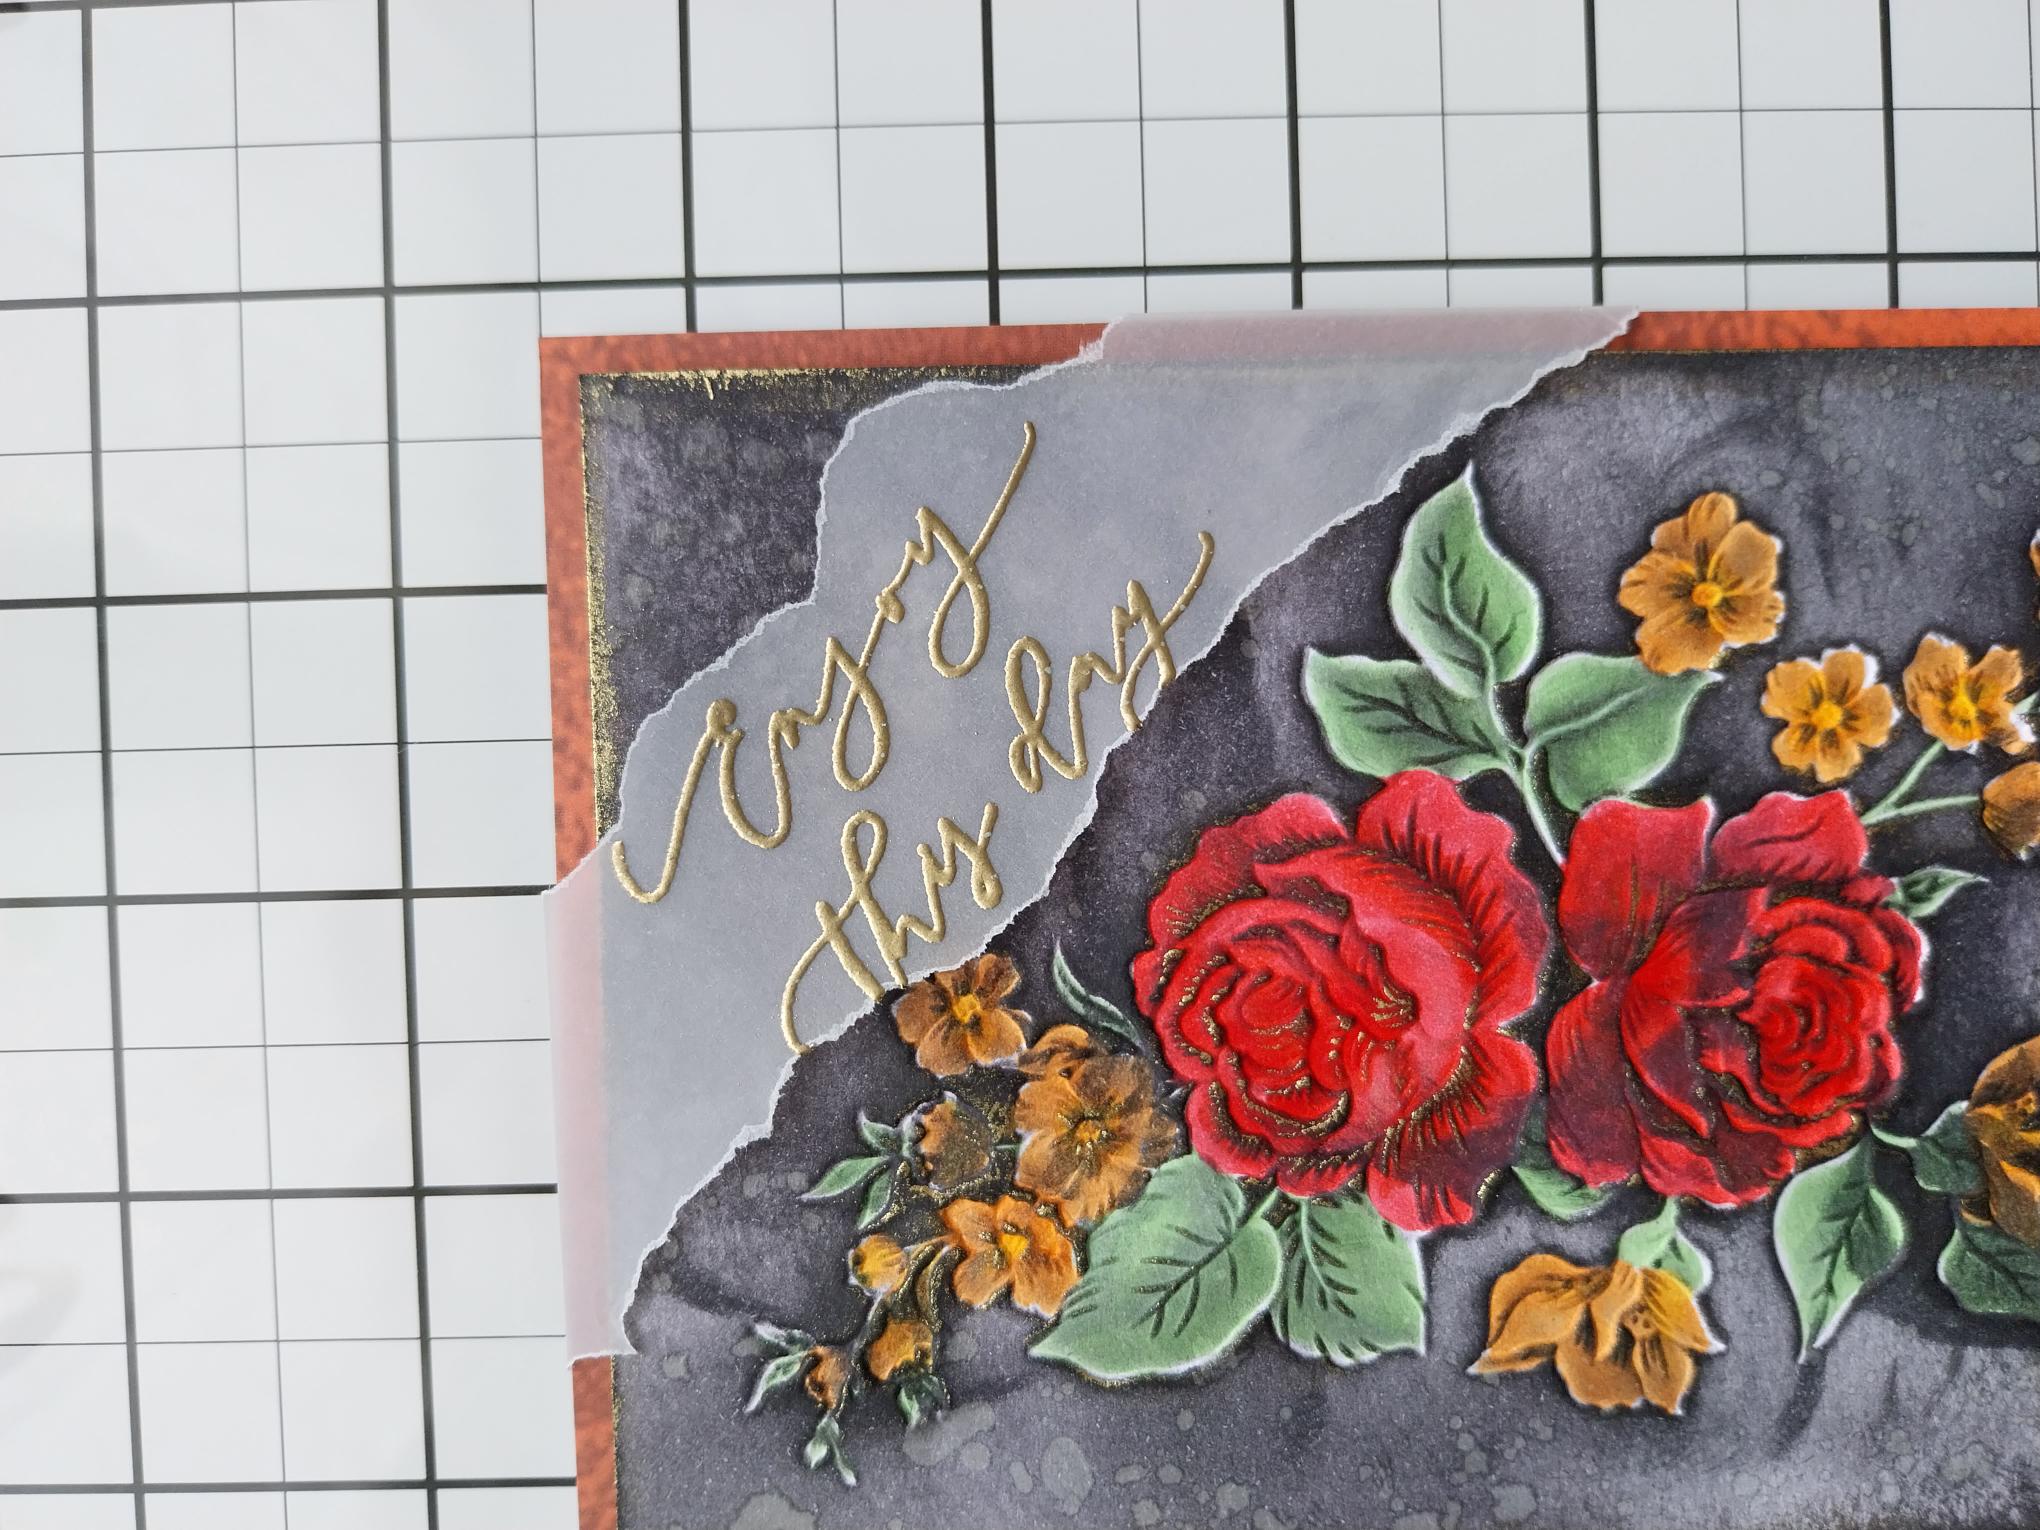
Lay the embossed vellum across the top right corner of your artwork, tuck the edges over and secure on the reverse with double-sided tape. |
|
Cut a sheet of double-sided foam and adhere on the reverse of your artwork. Alternatively, you can use individual foam pads. Adhere on the front of your kraft card blank to finish. |