Give your friends $10 off their first order!
Refer a FRIEND


WHAT YOU WILL NEED:
Black top folding card blank 8 x 5 3/4"
White card 7 3/4 x 5 1/2"
Black card 7 1/4 x 5"
White card 7 x 4 3/4"
White card 7 x 5"
Black/white card
Vellum
Saying Hello Stamp and Die Collection
Sadie Stamp, Die and Stencil Collection
WOW Blooms Stamp and Die Collection
SBM Hybrid Ink Pad: Midnight
SBM Premium Ink Pad: Sherbet, Limeade, Hedgerow, Surfboard, Ocean
Blending tool
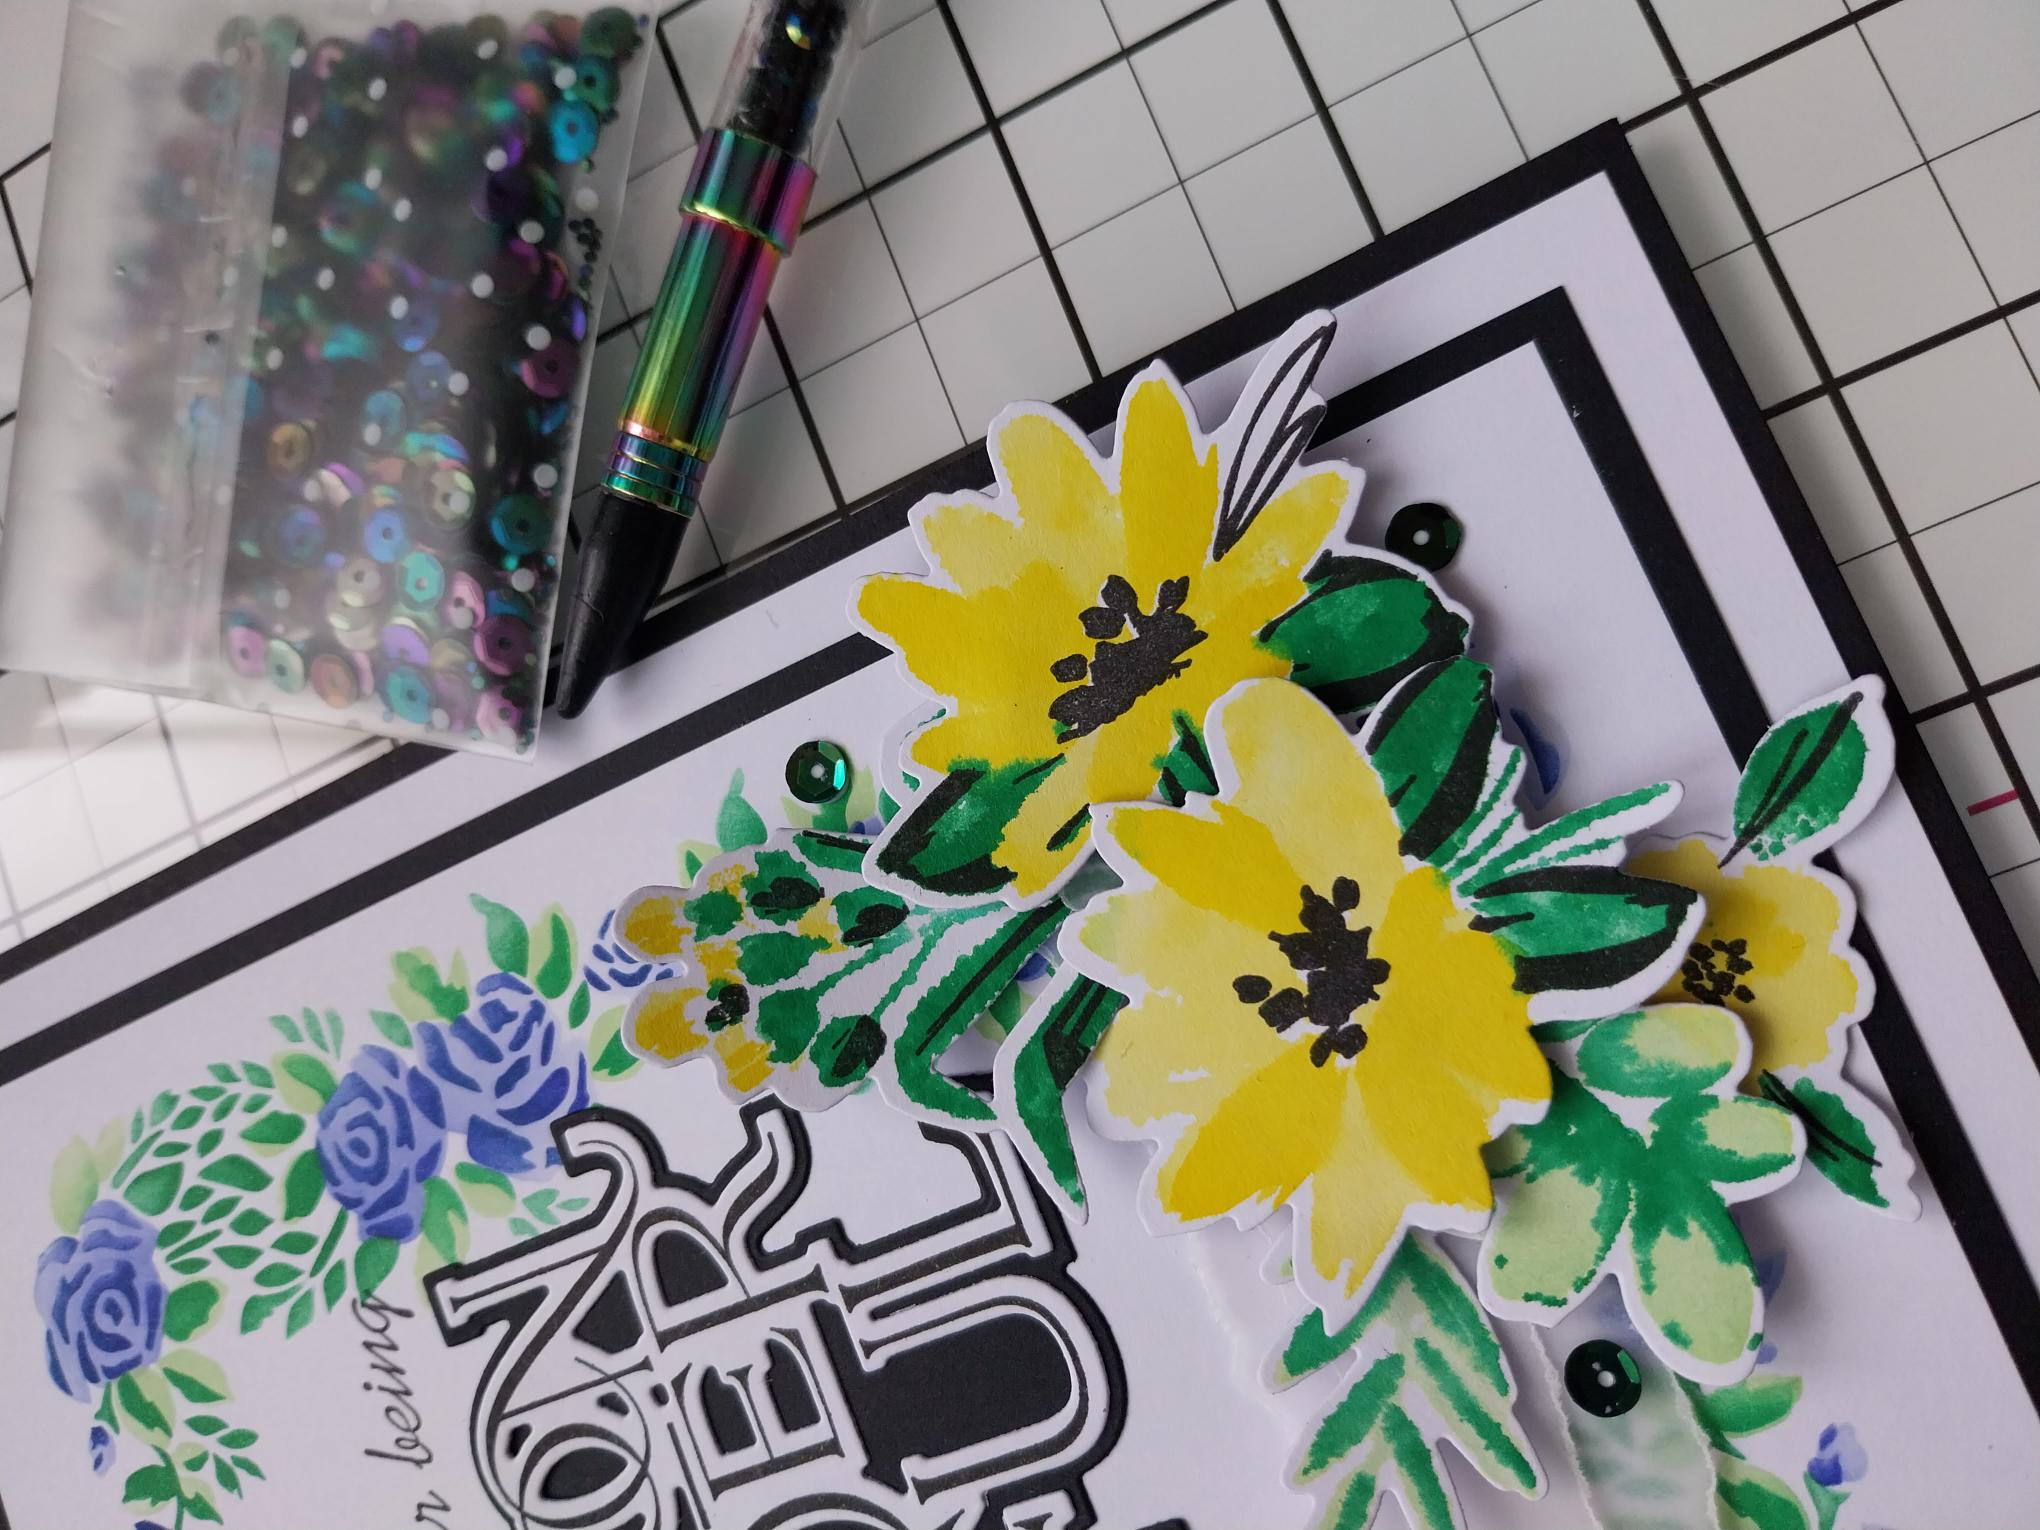
Sequins: Mermaid Lagoon
Gem pick up and pokey tool
Eureka 101 Watercolour Tablet
SBM Magnetic glass mat
Paper Trimmer
Perfect Together Glue
Double sided adhesive tape
Foam pads
Die Cutting machine
[click image to enlarge] 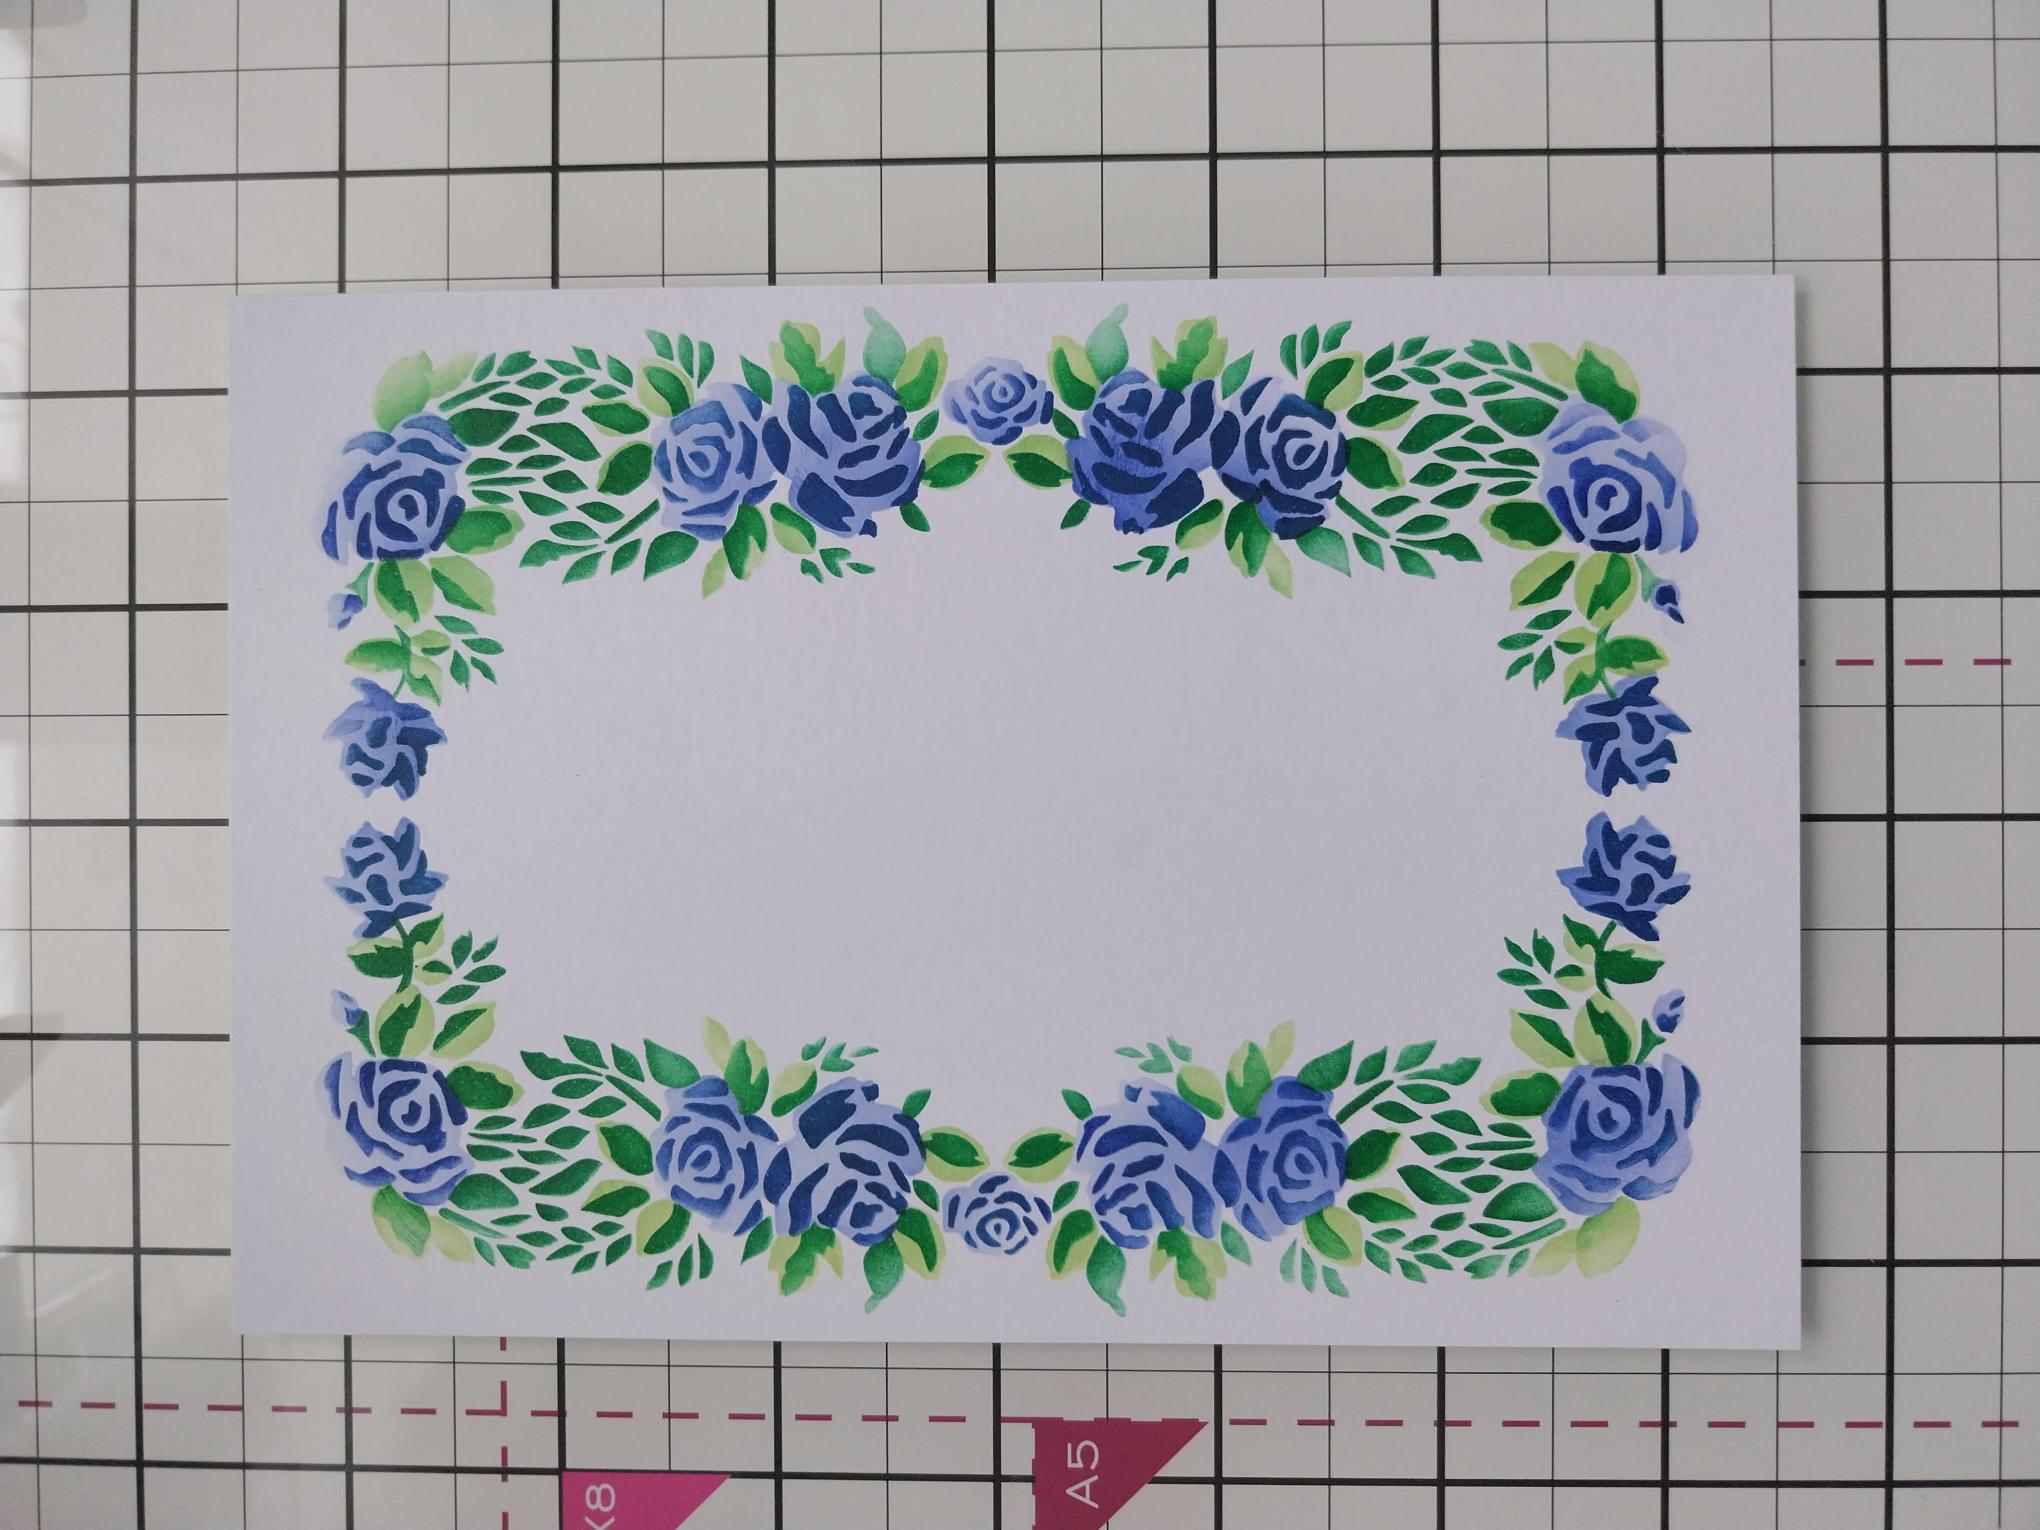
|
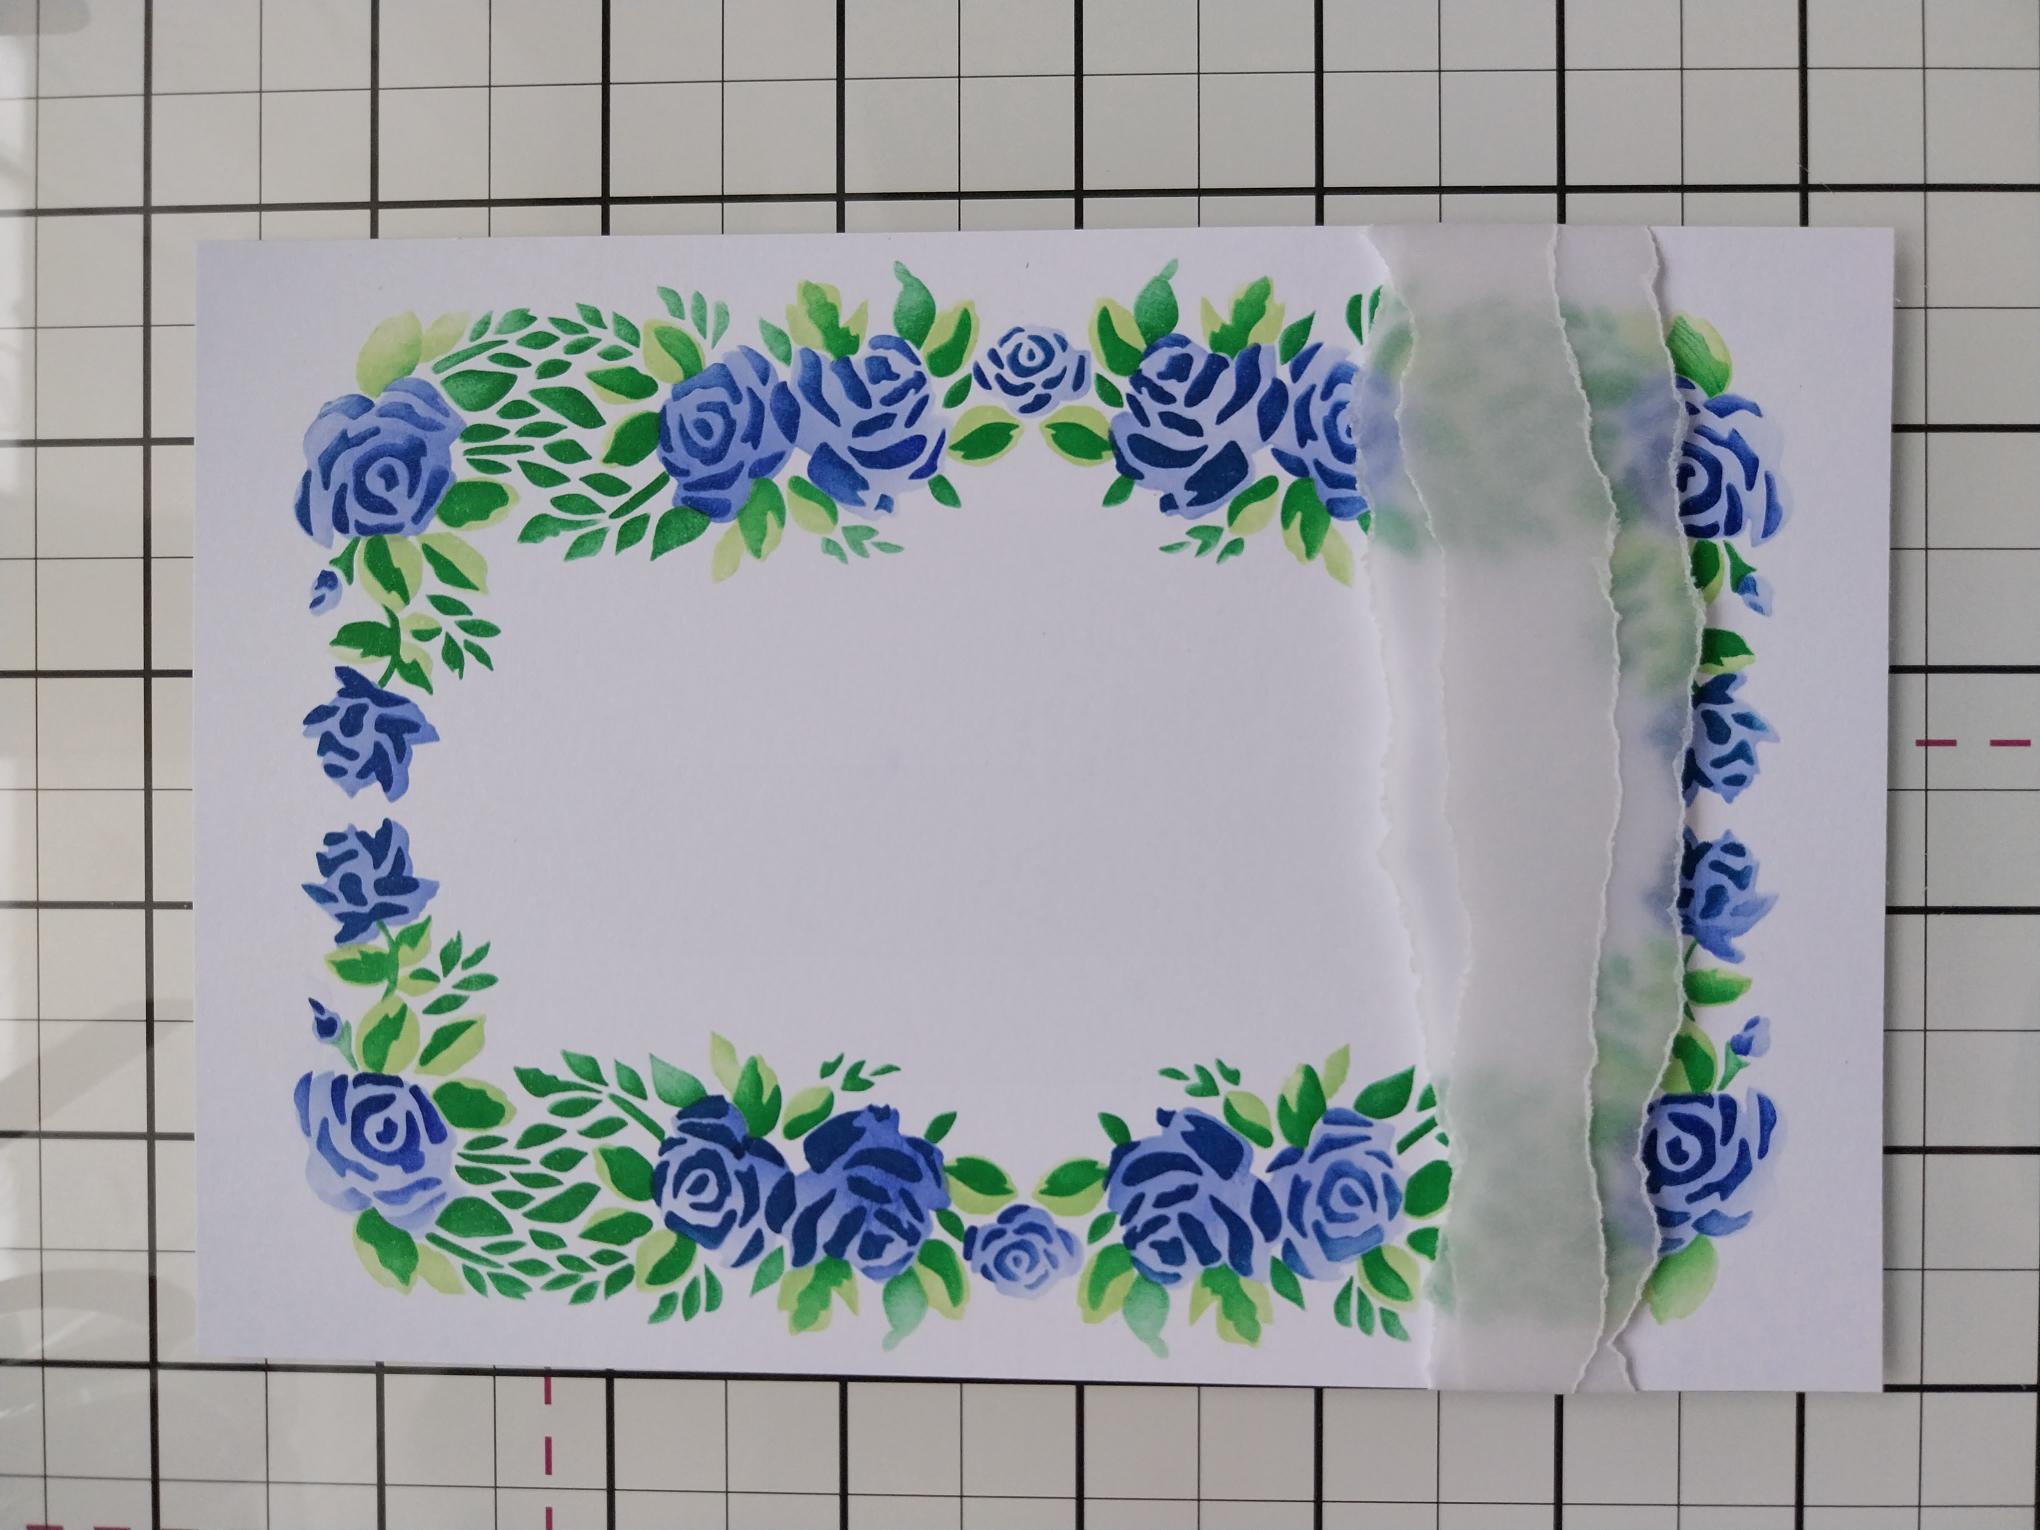
Place stencil 1, from the Sadie Collection, on top of the white card cut to 7 x 4 3/4". Using a blending tool, lightly apply Surfboard through your stencil. Line up stencil 2 and go back in with Surfboard but this time with more pressure, thus achieveing a deeper shade. Keeping stencil 2 in position, randomly apply Ocean, to add more depth and shadow. Lay down stencil 3 and blend with the Limeade and finally, blend Hedgerow through stencil 4. Set aside your stencilled image to dry. |
|
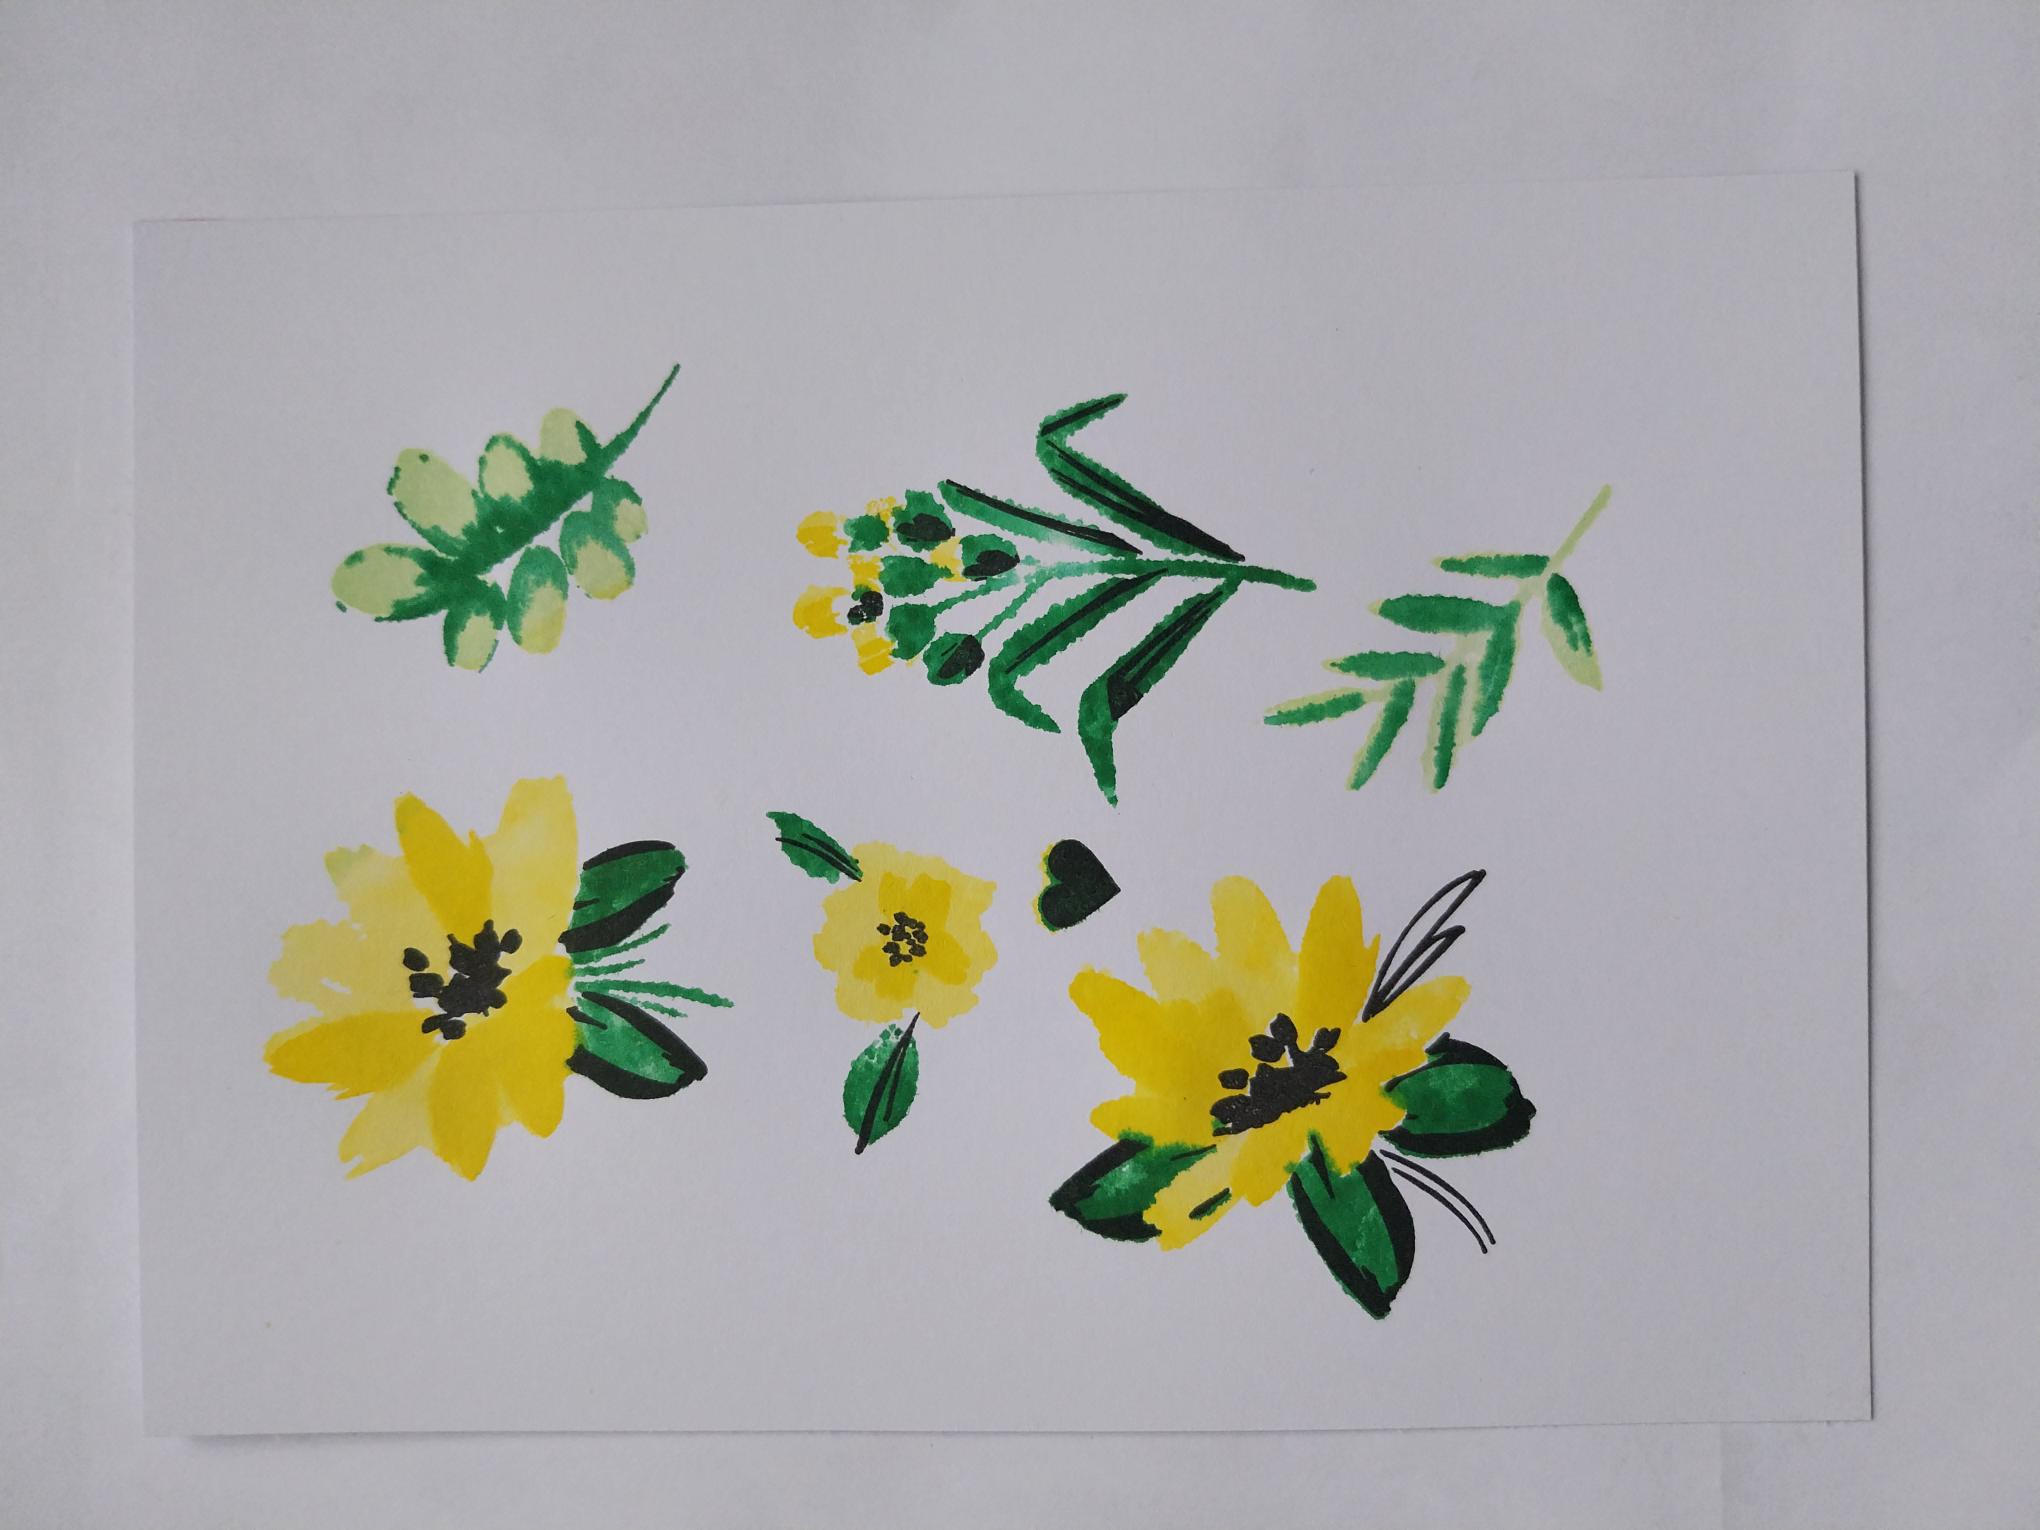
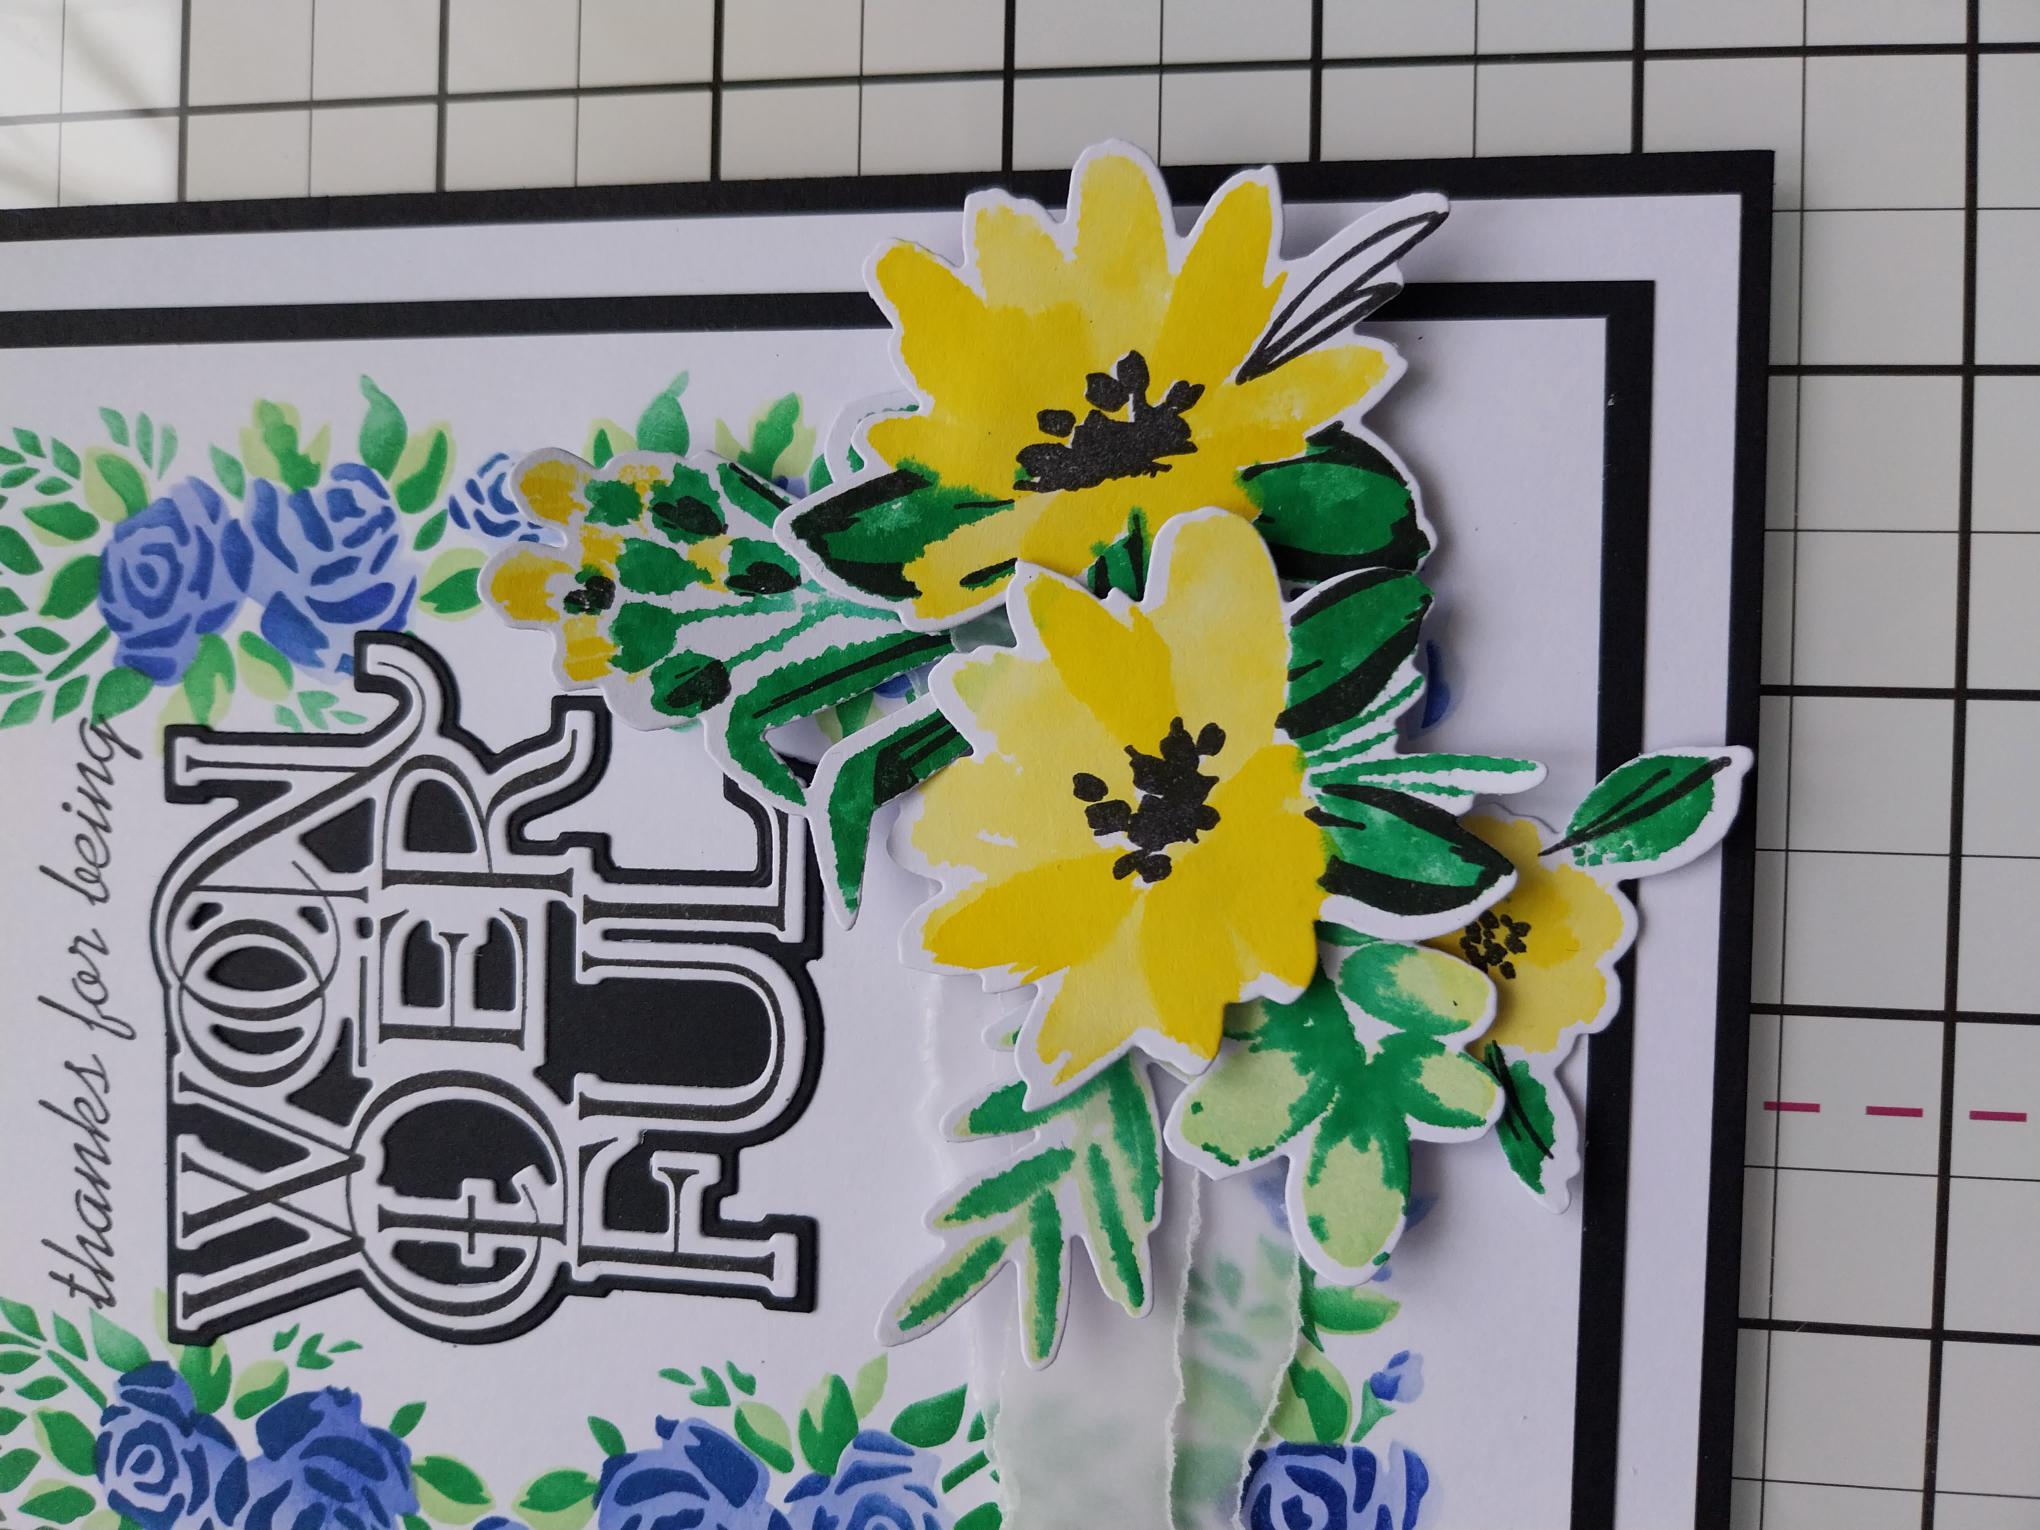
Ink stamp 1, from the WOW Blooms Collection, with Sherbet (florals) and Limeade (foliage), spritz the stamp with water and stamp on to the 7 x 5" white card. Ink up stamp 2 with the Sherbet and Hedgerow (foliage), spritz and stamp over the first image. The "hearts" are a layering tool only...line the hearts up on each layer and the rest of the stamp will line up for you. Ink up stamp 3 with Hedgerow, spritz and stamp in position and finally ink up stamp 4 with your Midnight hybrid ink and stamp, to complete your layering floral elements. |
|
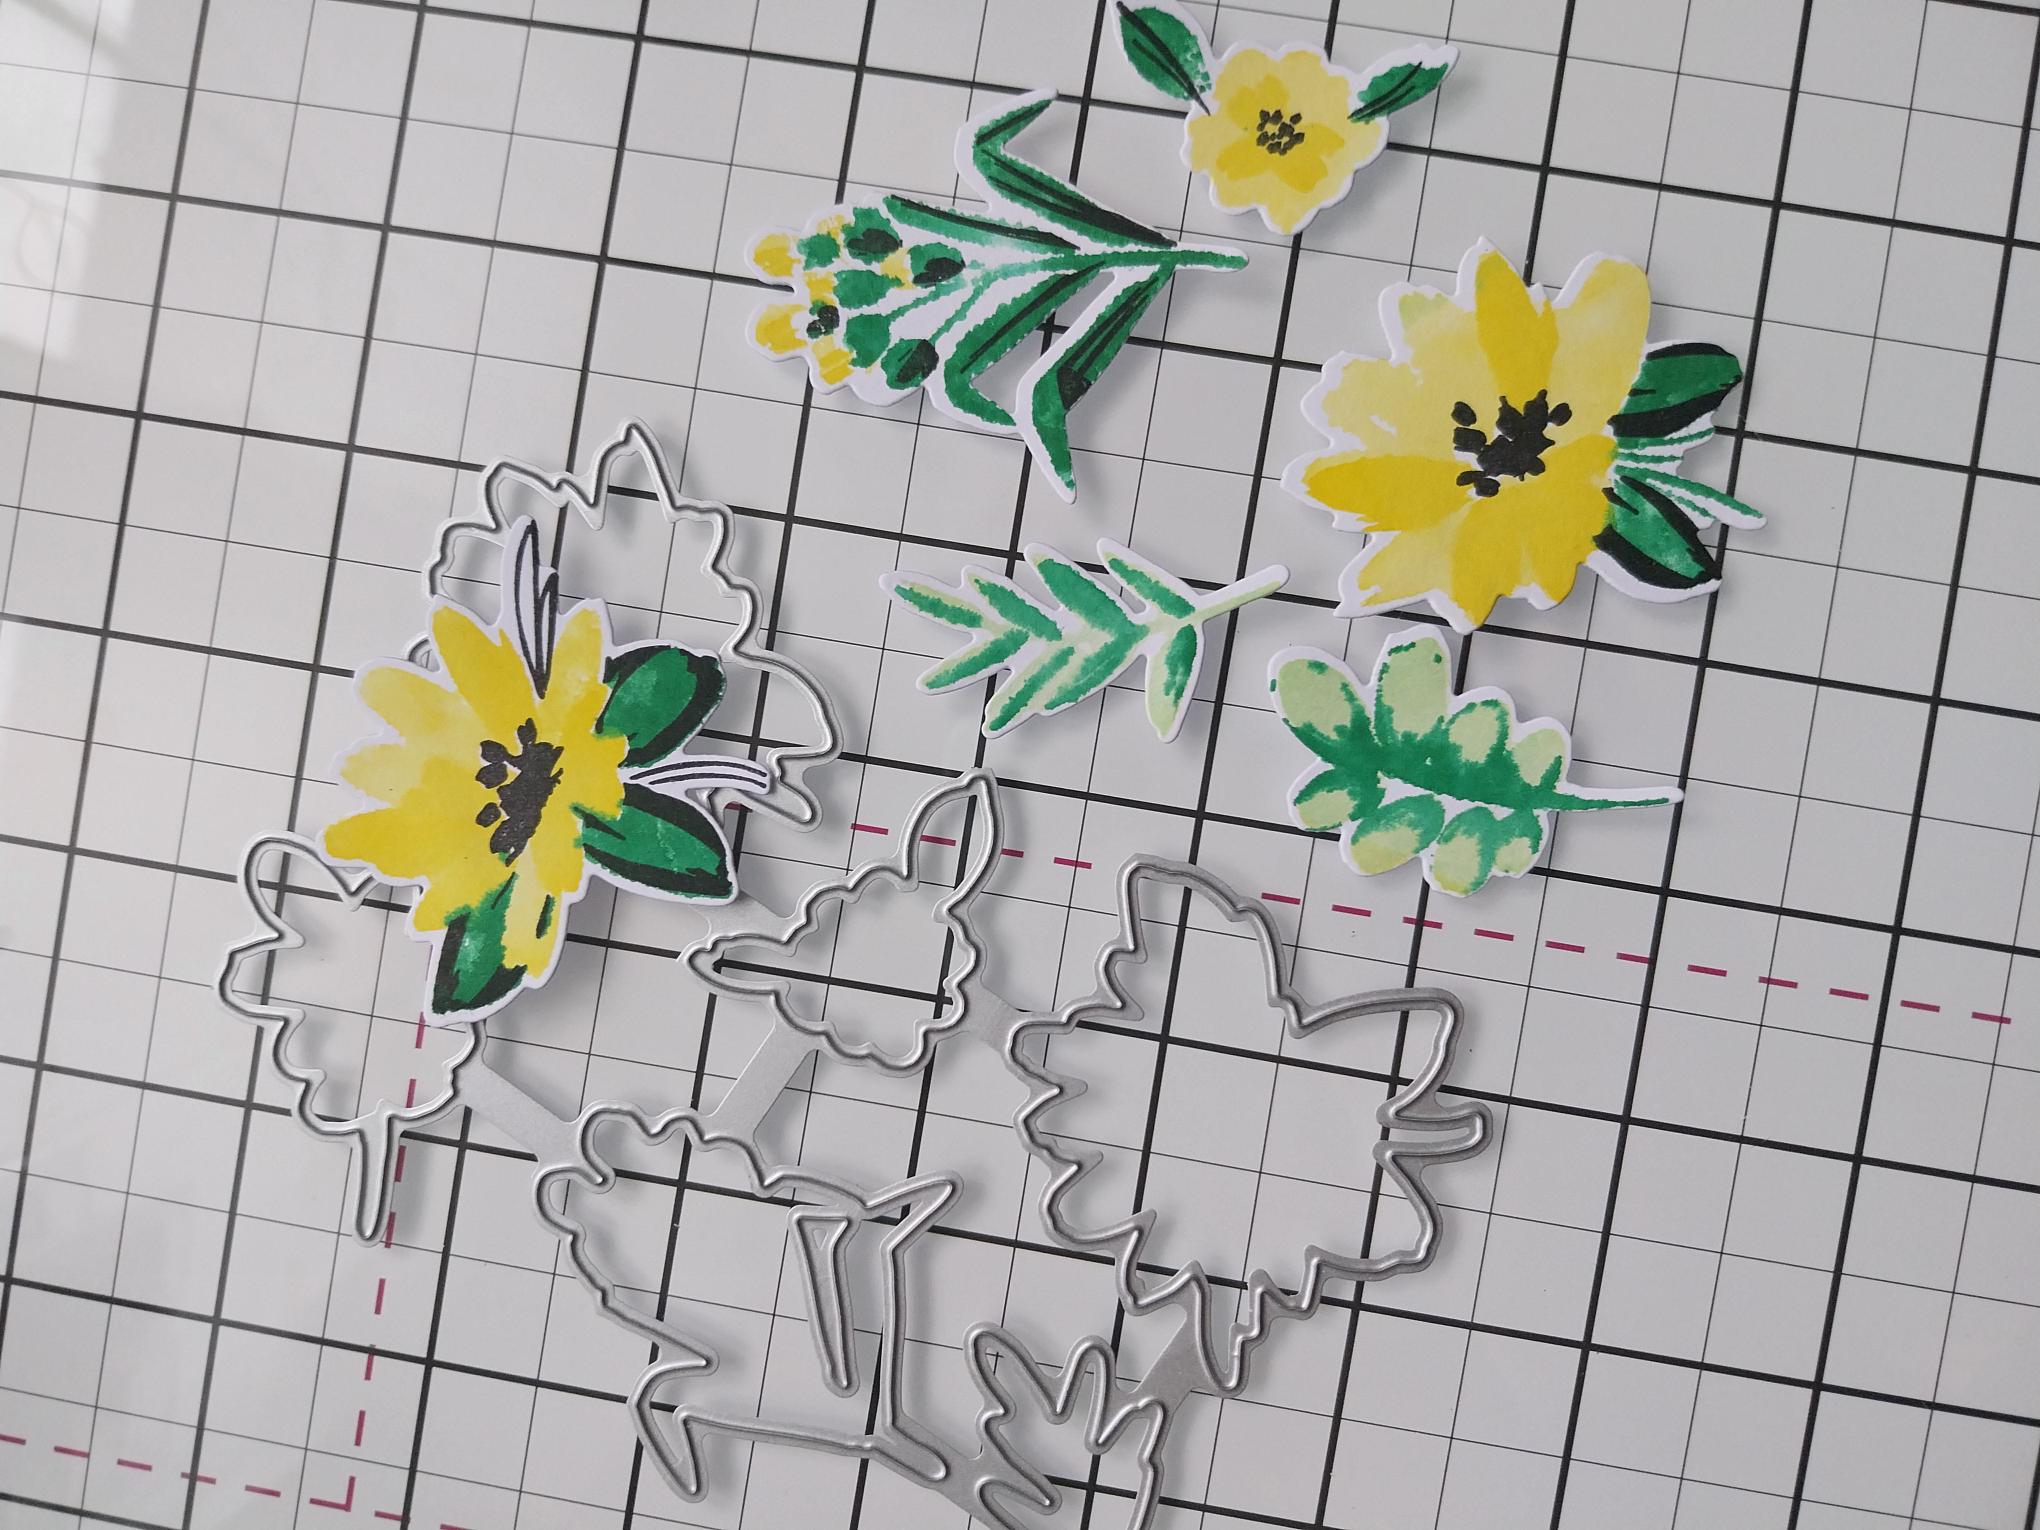
Use the coordinating plate die to cut them all out, in one pass!! |
|
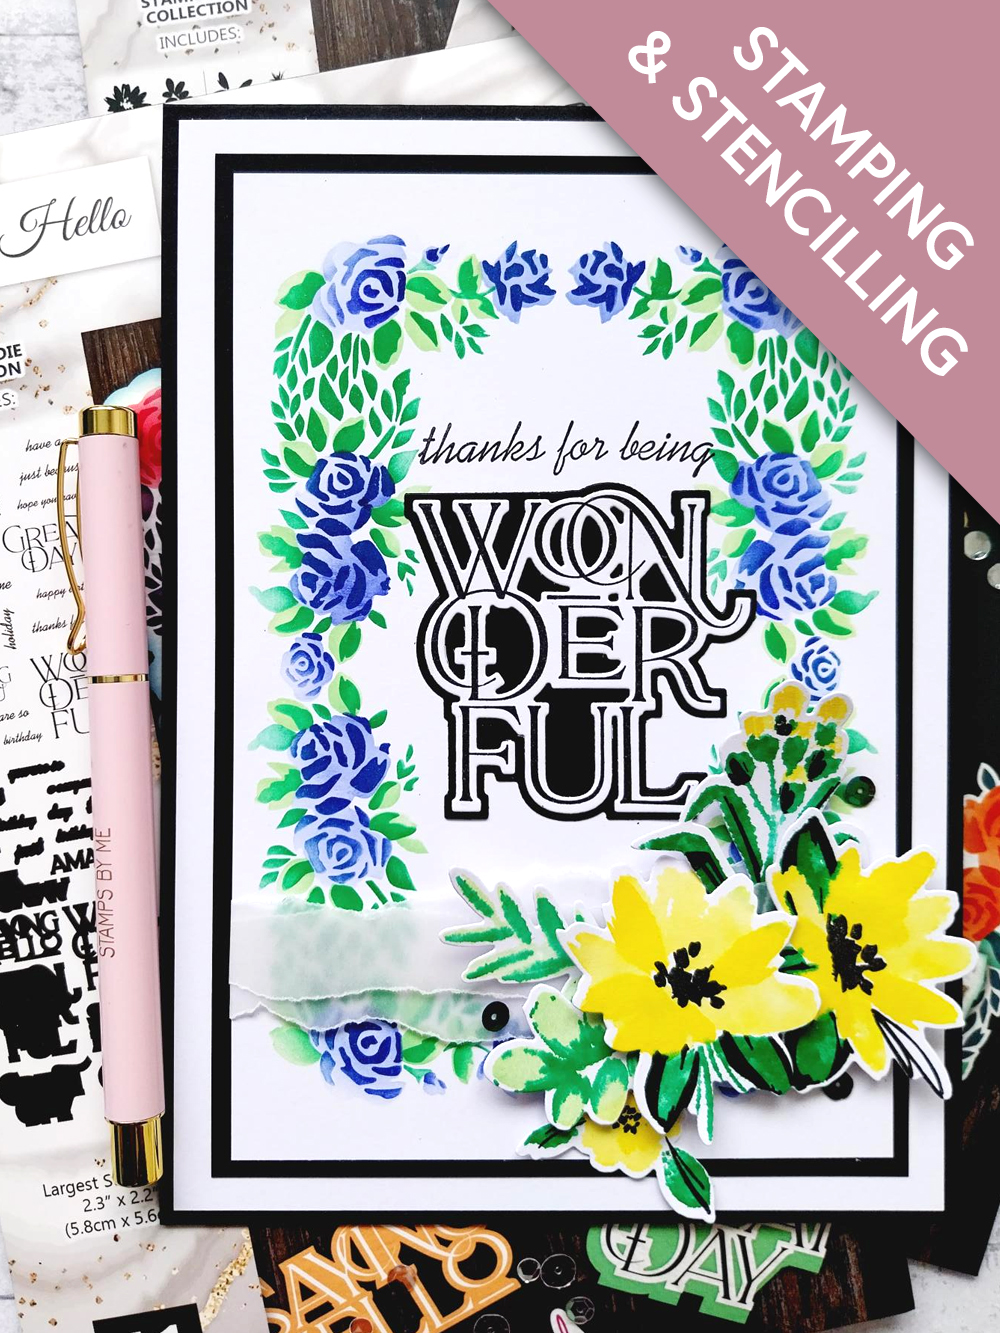
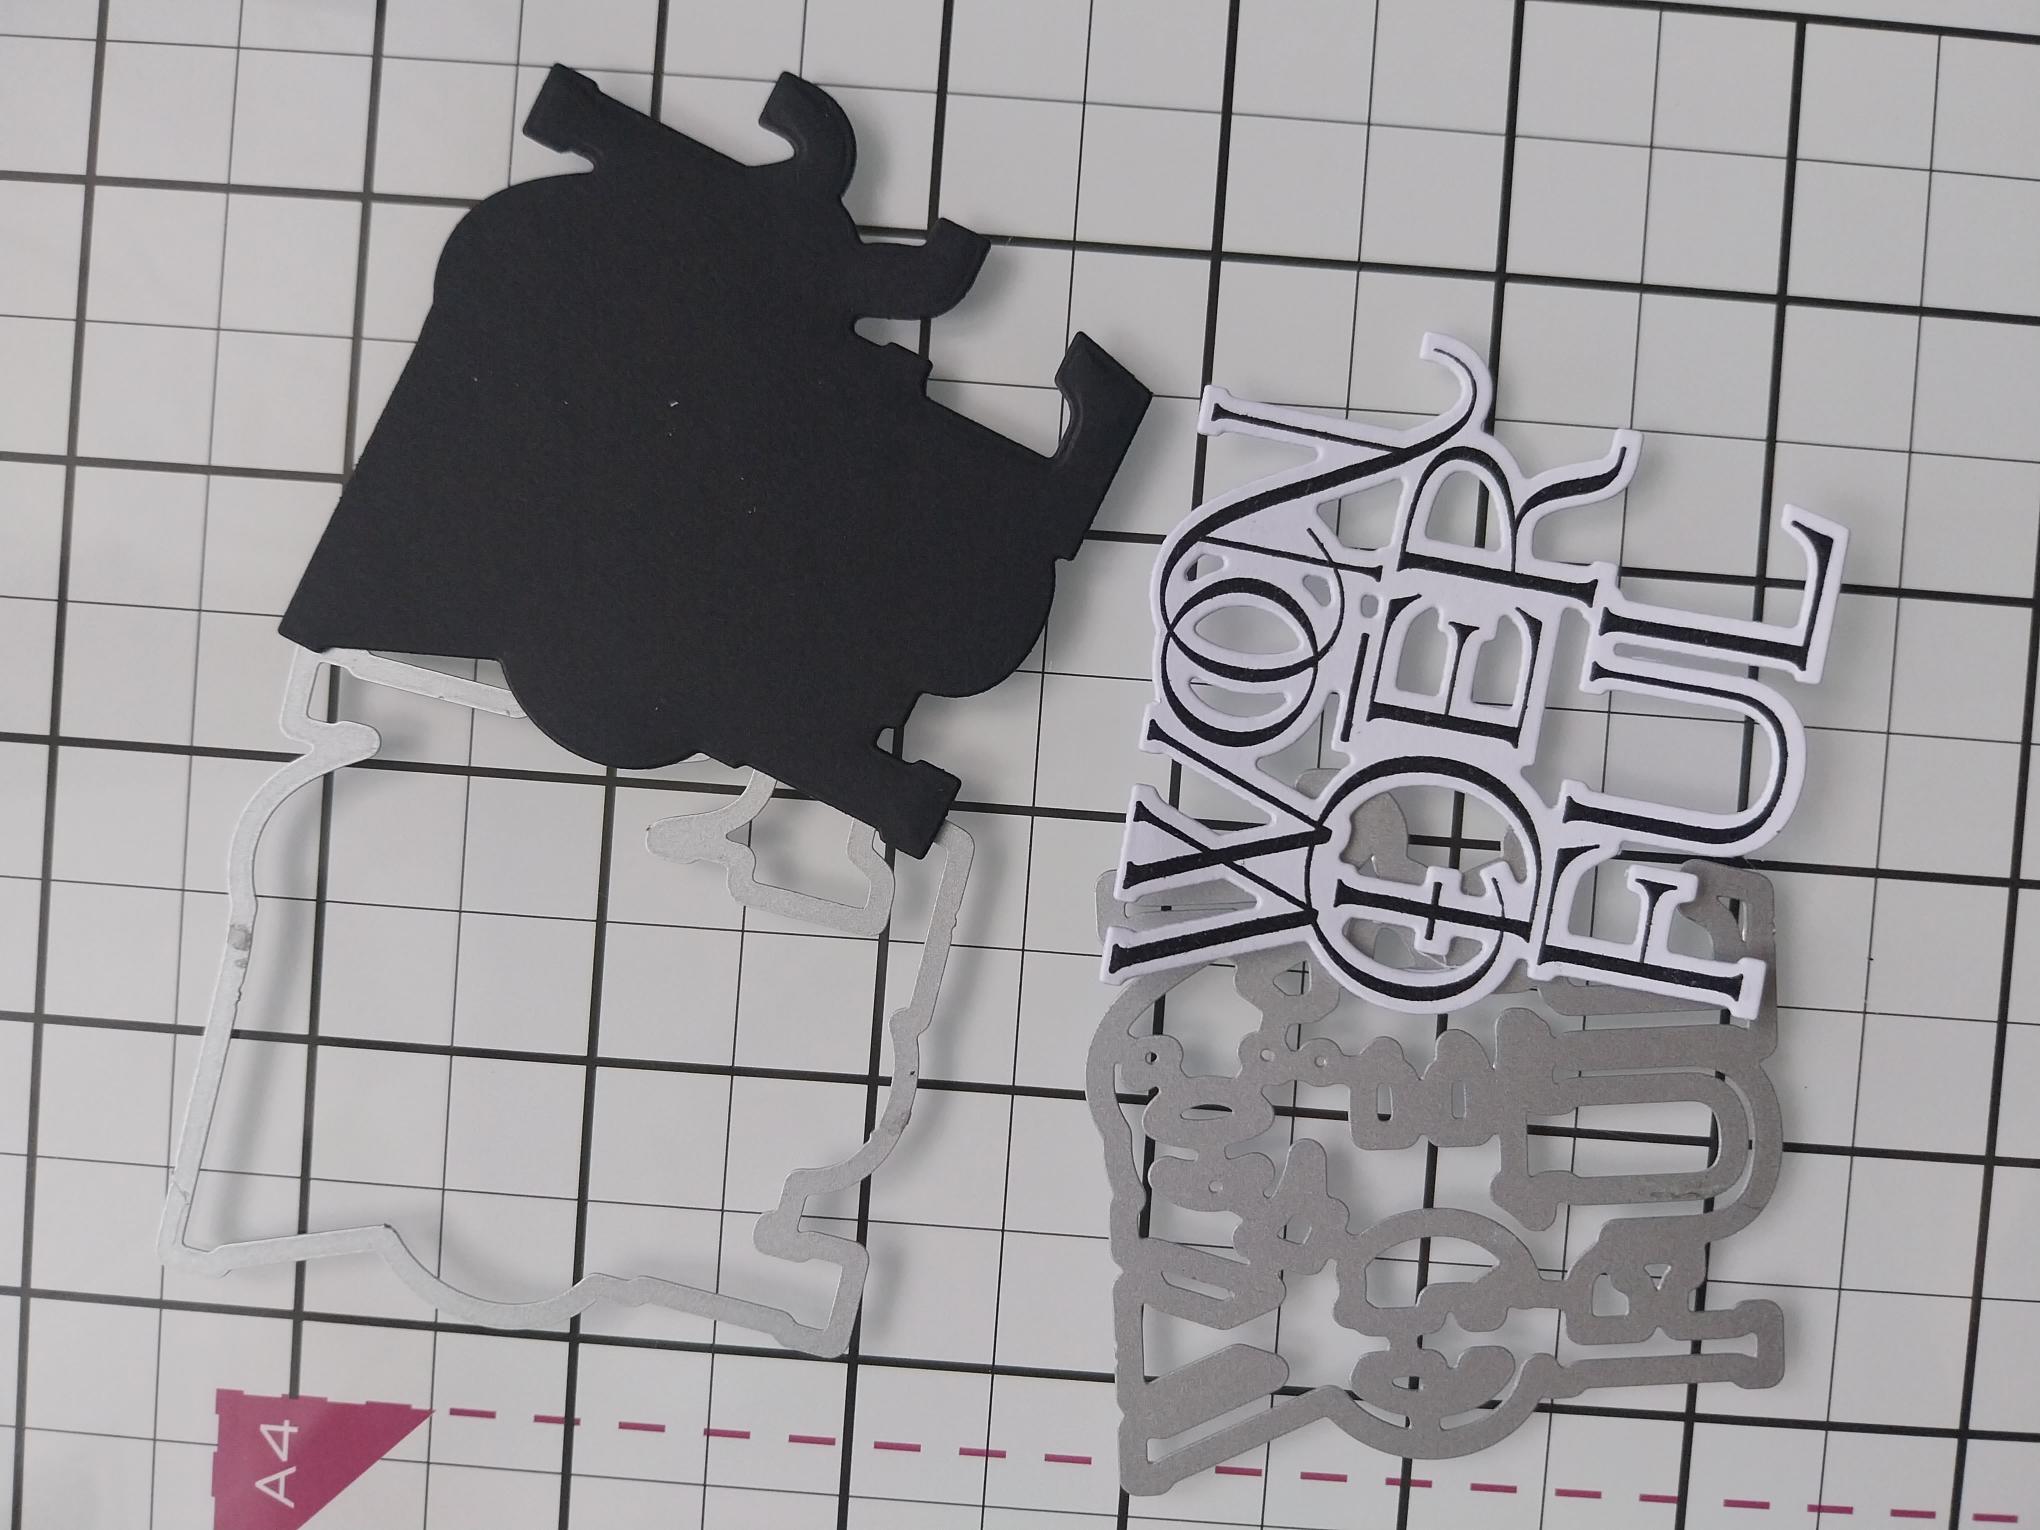
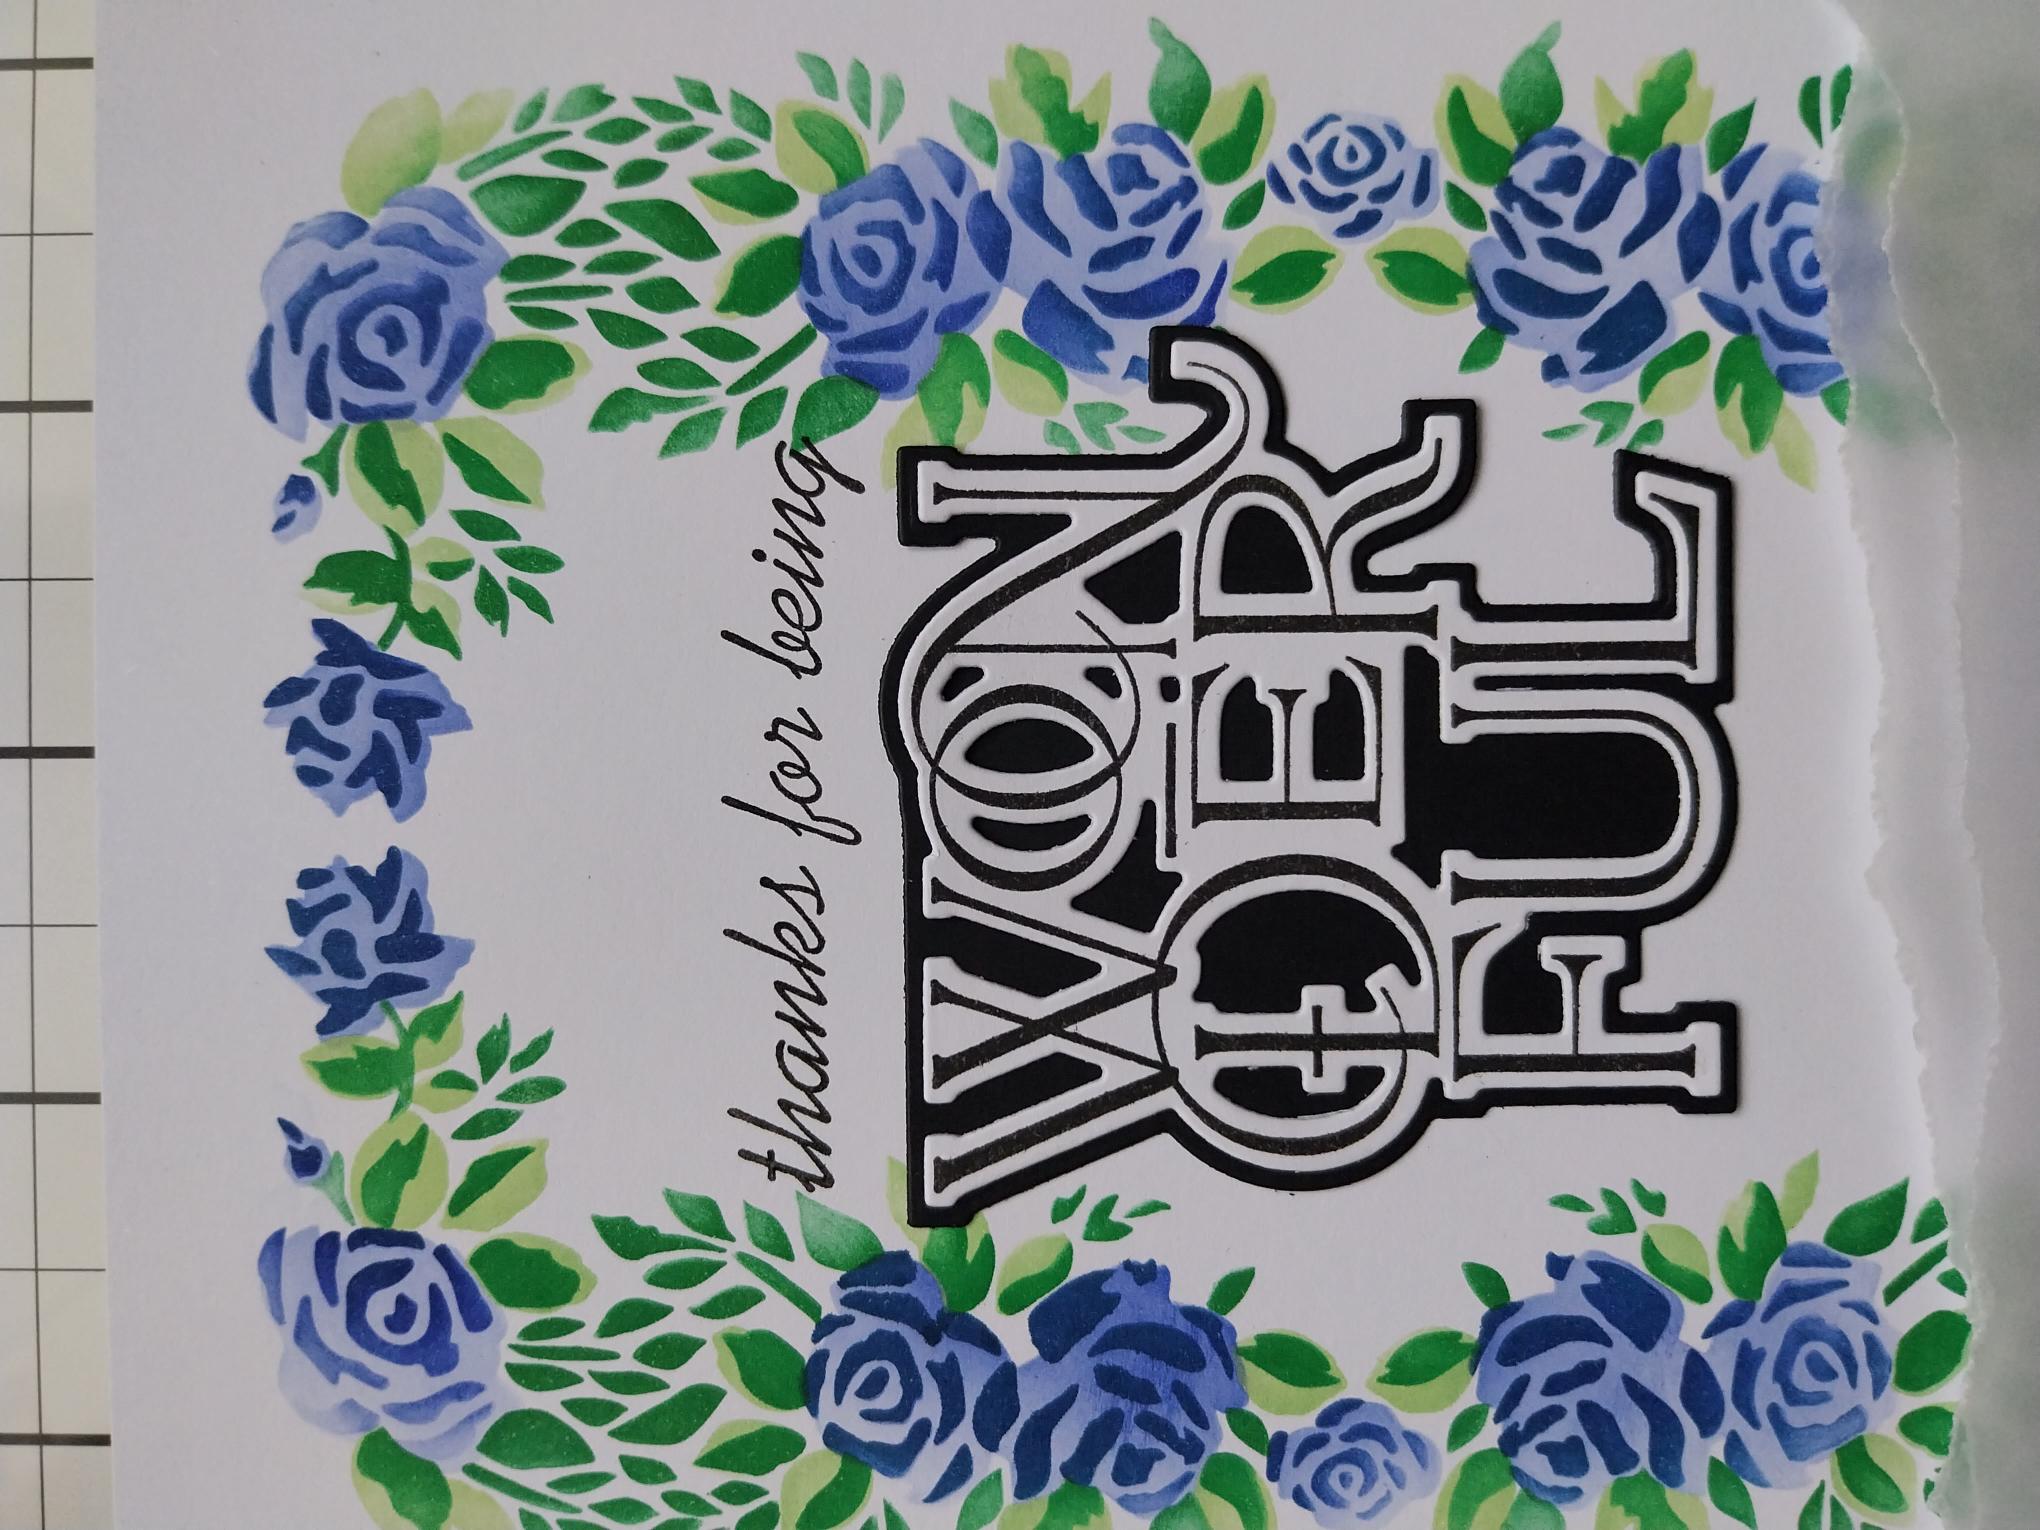
Using Midnight, stamp the "Wonderful" sentiment, from the Saying Hello Collection, on to a piece of white card. Place the coordinating die over the top and secure with low tack tape. Place the corresponding "mat" die on a piece of black card, then run both through your die cutting machine. |
|
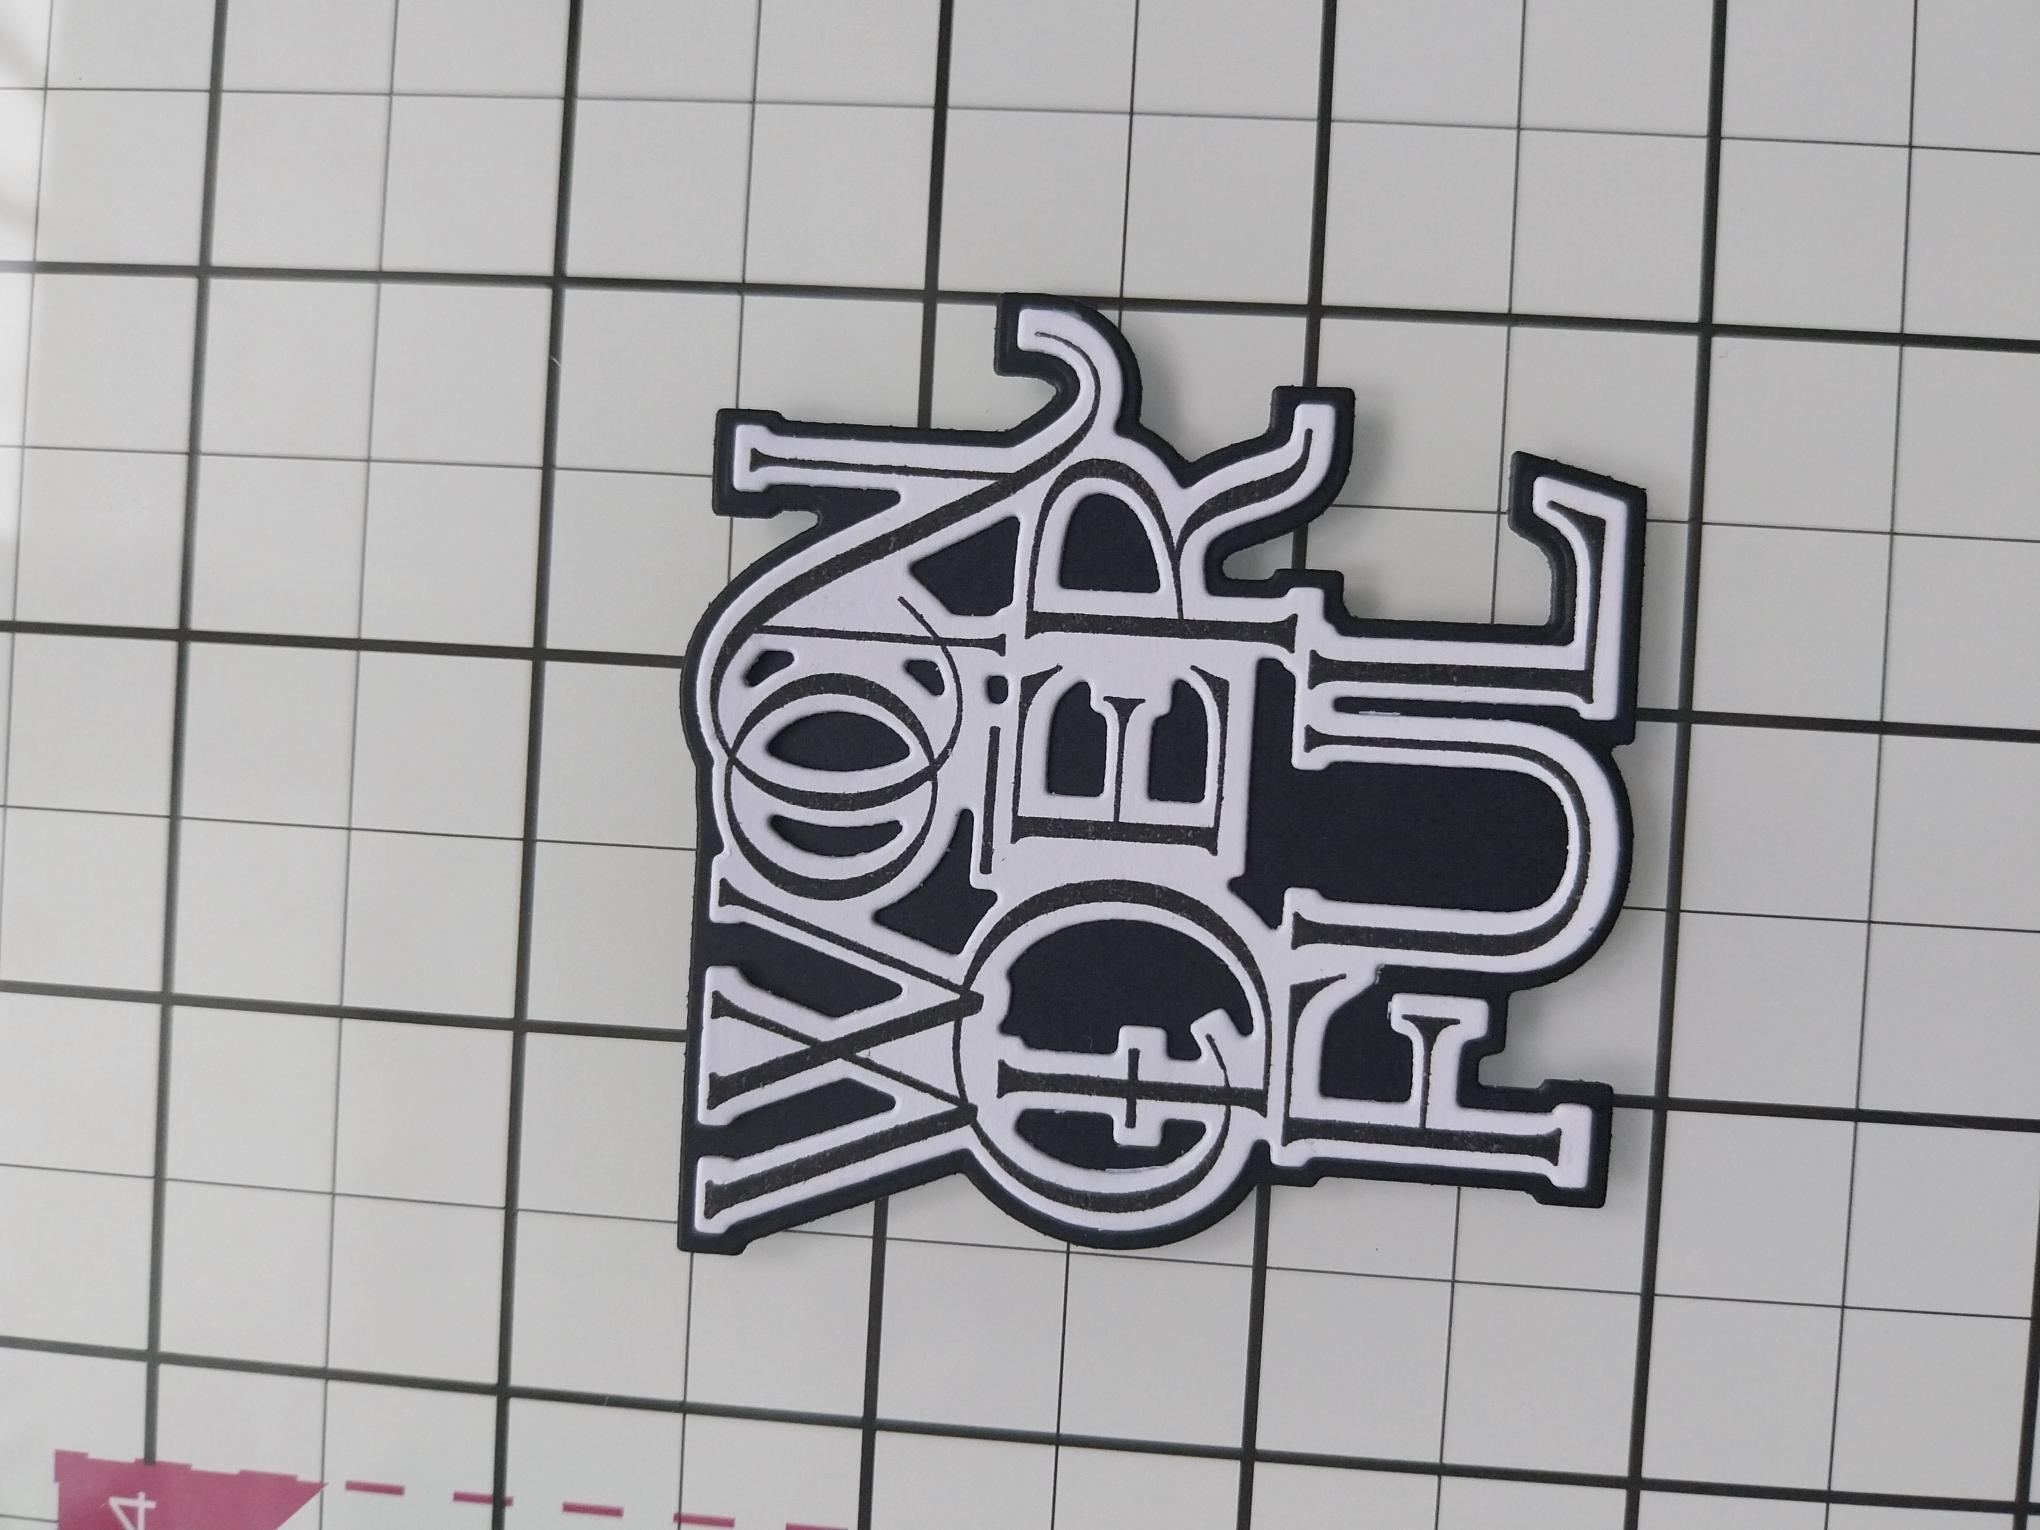
Adhere the detailed sentiment die cut on top of the black, die cut mat and pop to one side. |
|
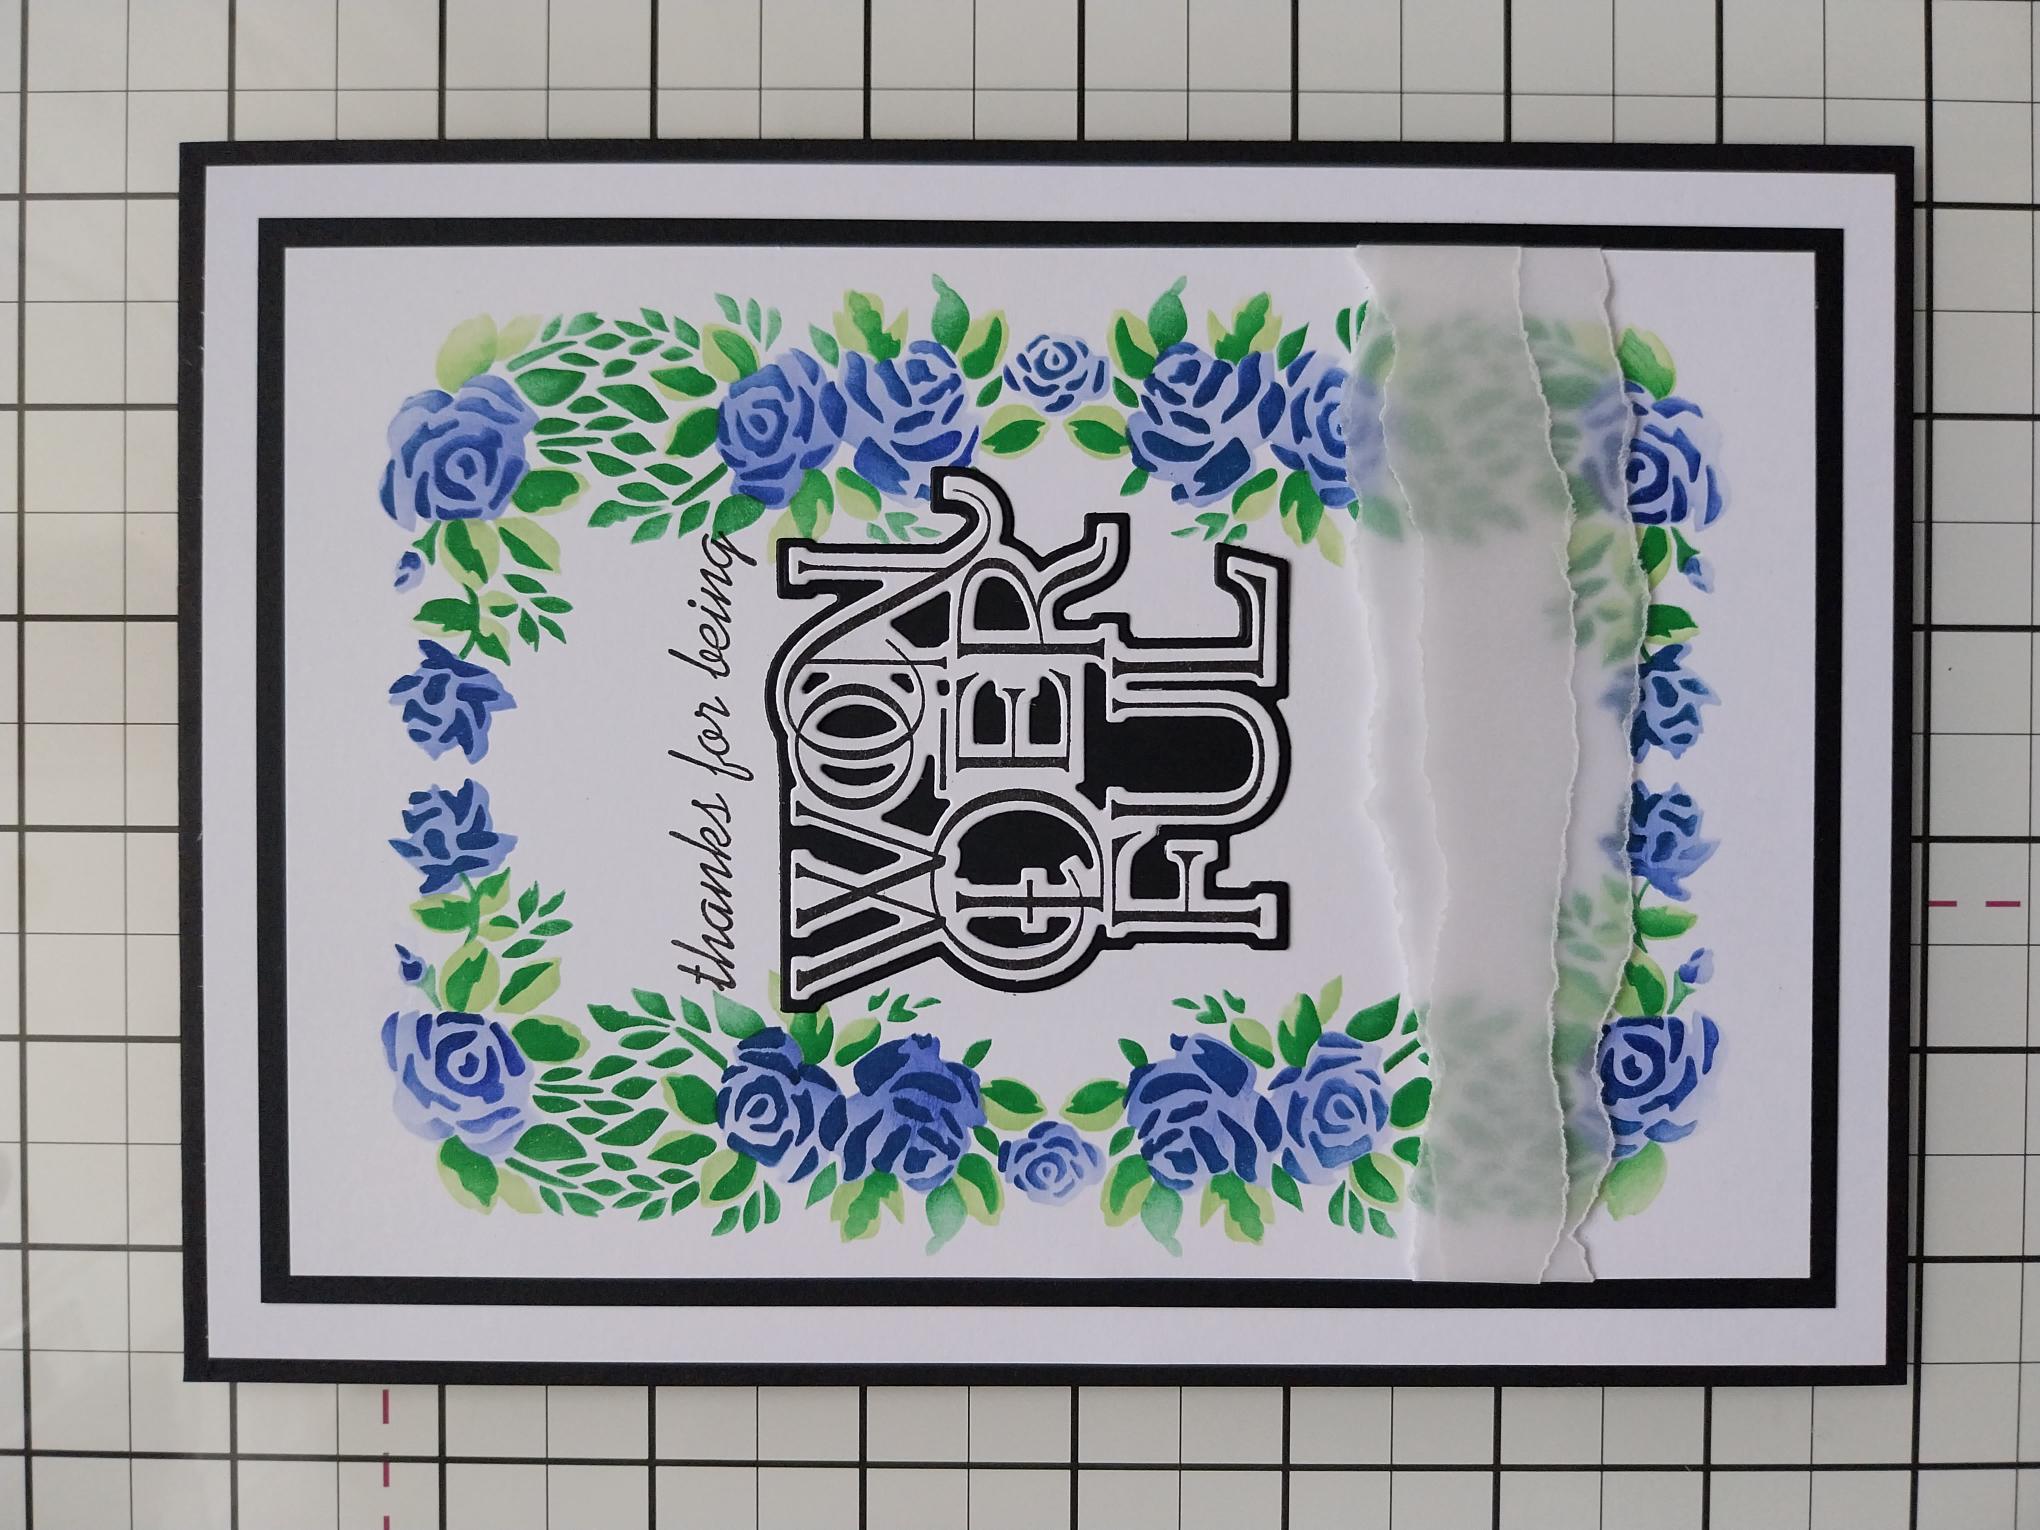
Tear TWO panels of vellum, one slightly wider than the other and both approx 5 1/2" long. |
|
Place the widest panel of vellum across the bottom third of your stencilled floral frame, tuck the edges over and secure on the reverse with double sided tape. Place the other vellum panel on top of the first, again securing the overhang on the reverse. |
|
Ink up your chosen add-on sentiment stamp, from Saying Hello, with Midnight and, using your "Wonderful" die cut element as a guide, stamp it so it will sit just above your 3D sentiment. Adhere your "Wonderful" 3D element flat, with wet glue or raised, with foam pads. |
|
Adhere your artwork on to the black card cut to 7 1/4 x 5", then on to the white card cut to 7 3/4 x 5 1/2" and finally on to your black card blank. |
|
Adhere your 3D die cut floral elements as required, in the bottom right corner of your artwork, using a combination of wet glue and foam pads, to create dimension. |
|
Finish by adding sequins on, around and tucked just under your floral display. |