Give your friends $10 off their first order!
Refer a FRIEND


WHAT YOU WILL NEED:
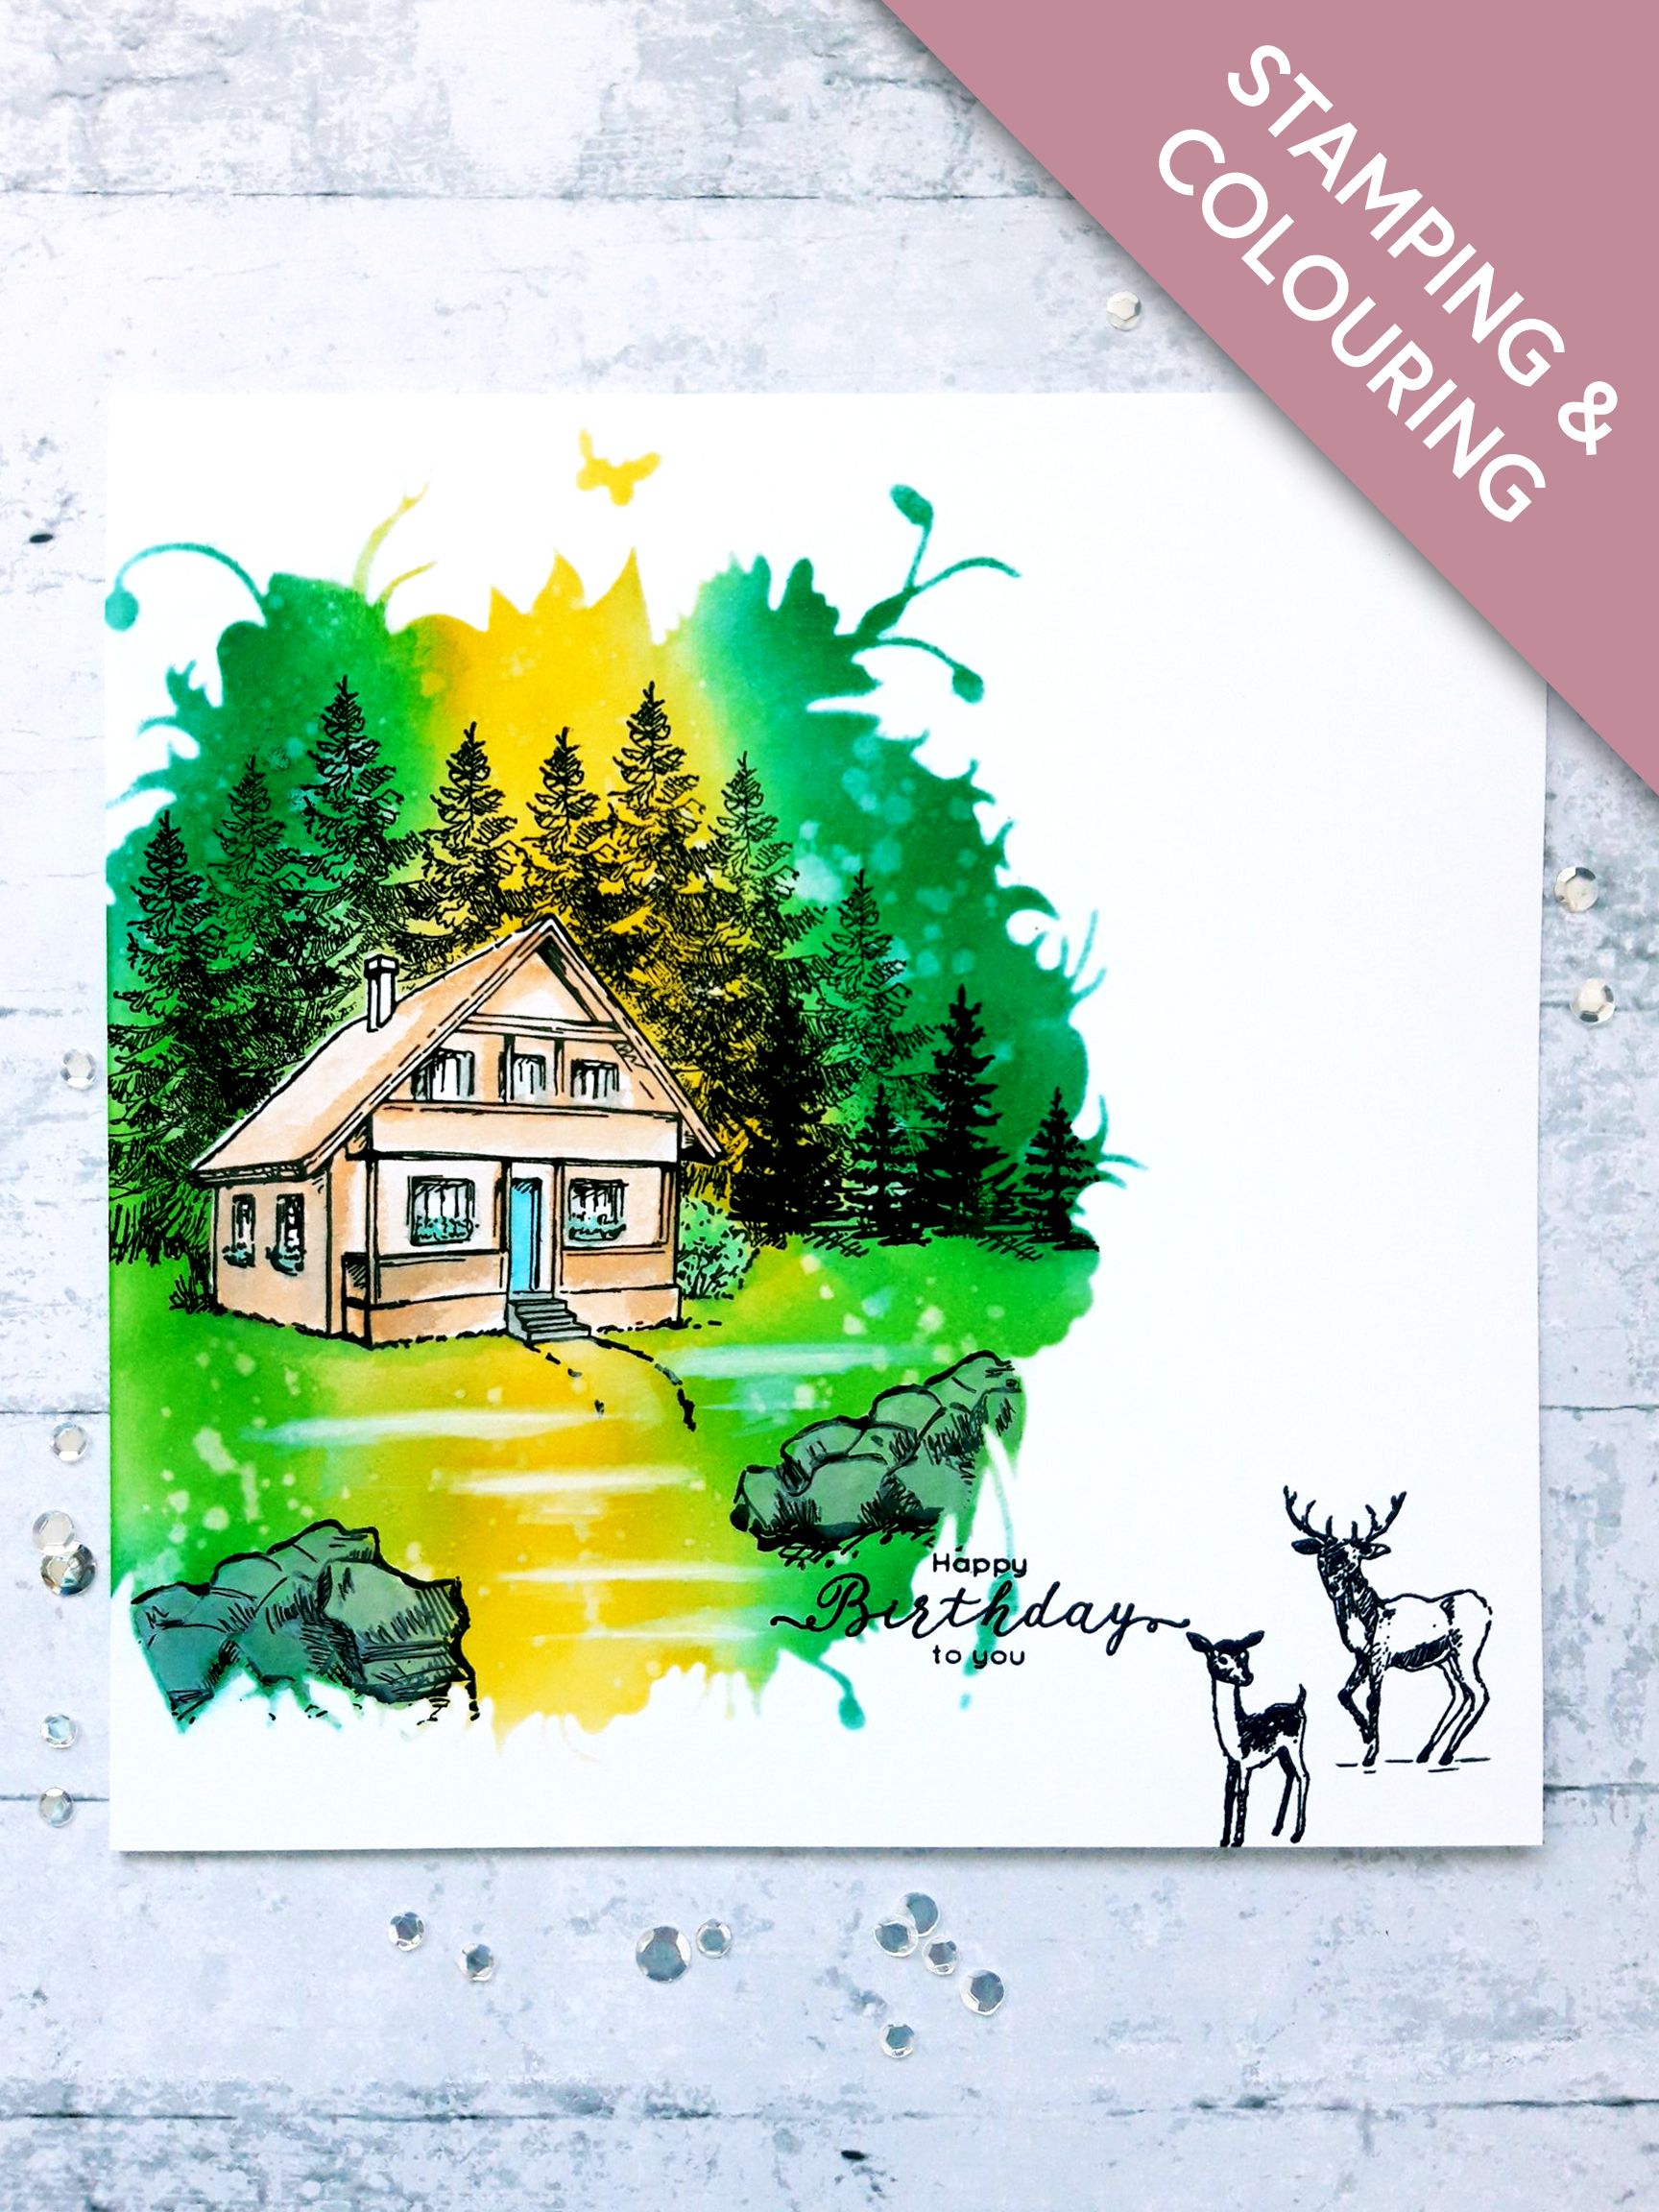
White card blank (7 x 7")
Stamps from Soulful Pencil Sketch Stamp Collection
Stamps from Soulful Pencil Sketch Elements Stamp Collection
Sentiment from Be Yourself Lamination Stamp Collection
Thirsty Brush Secret Garden Stencil
Versafine Ink Pad: Onyx Black
Izink Dye Ink Pad: Menthe, Emeraude, Aurore, The, Outremer, Reglisse
Izink Pigment: Avalanche
Water spray bottle
Heat gun
Paint brush
Masking Sheet (or copier paper/sticky note)
Black pen
Eureka 101
[click image to enlarge] 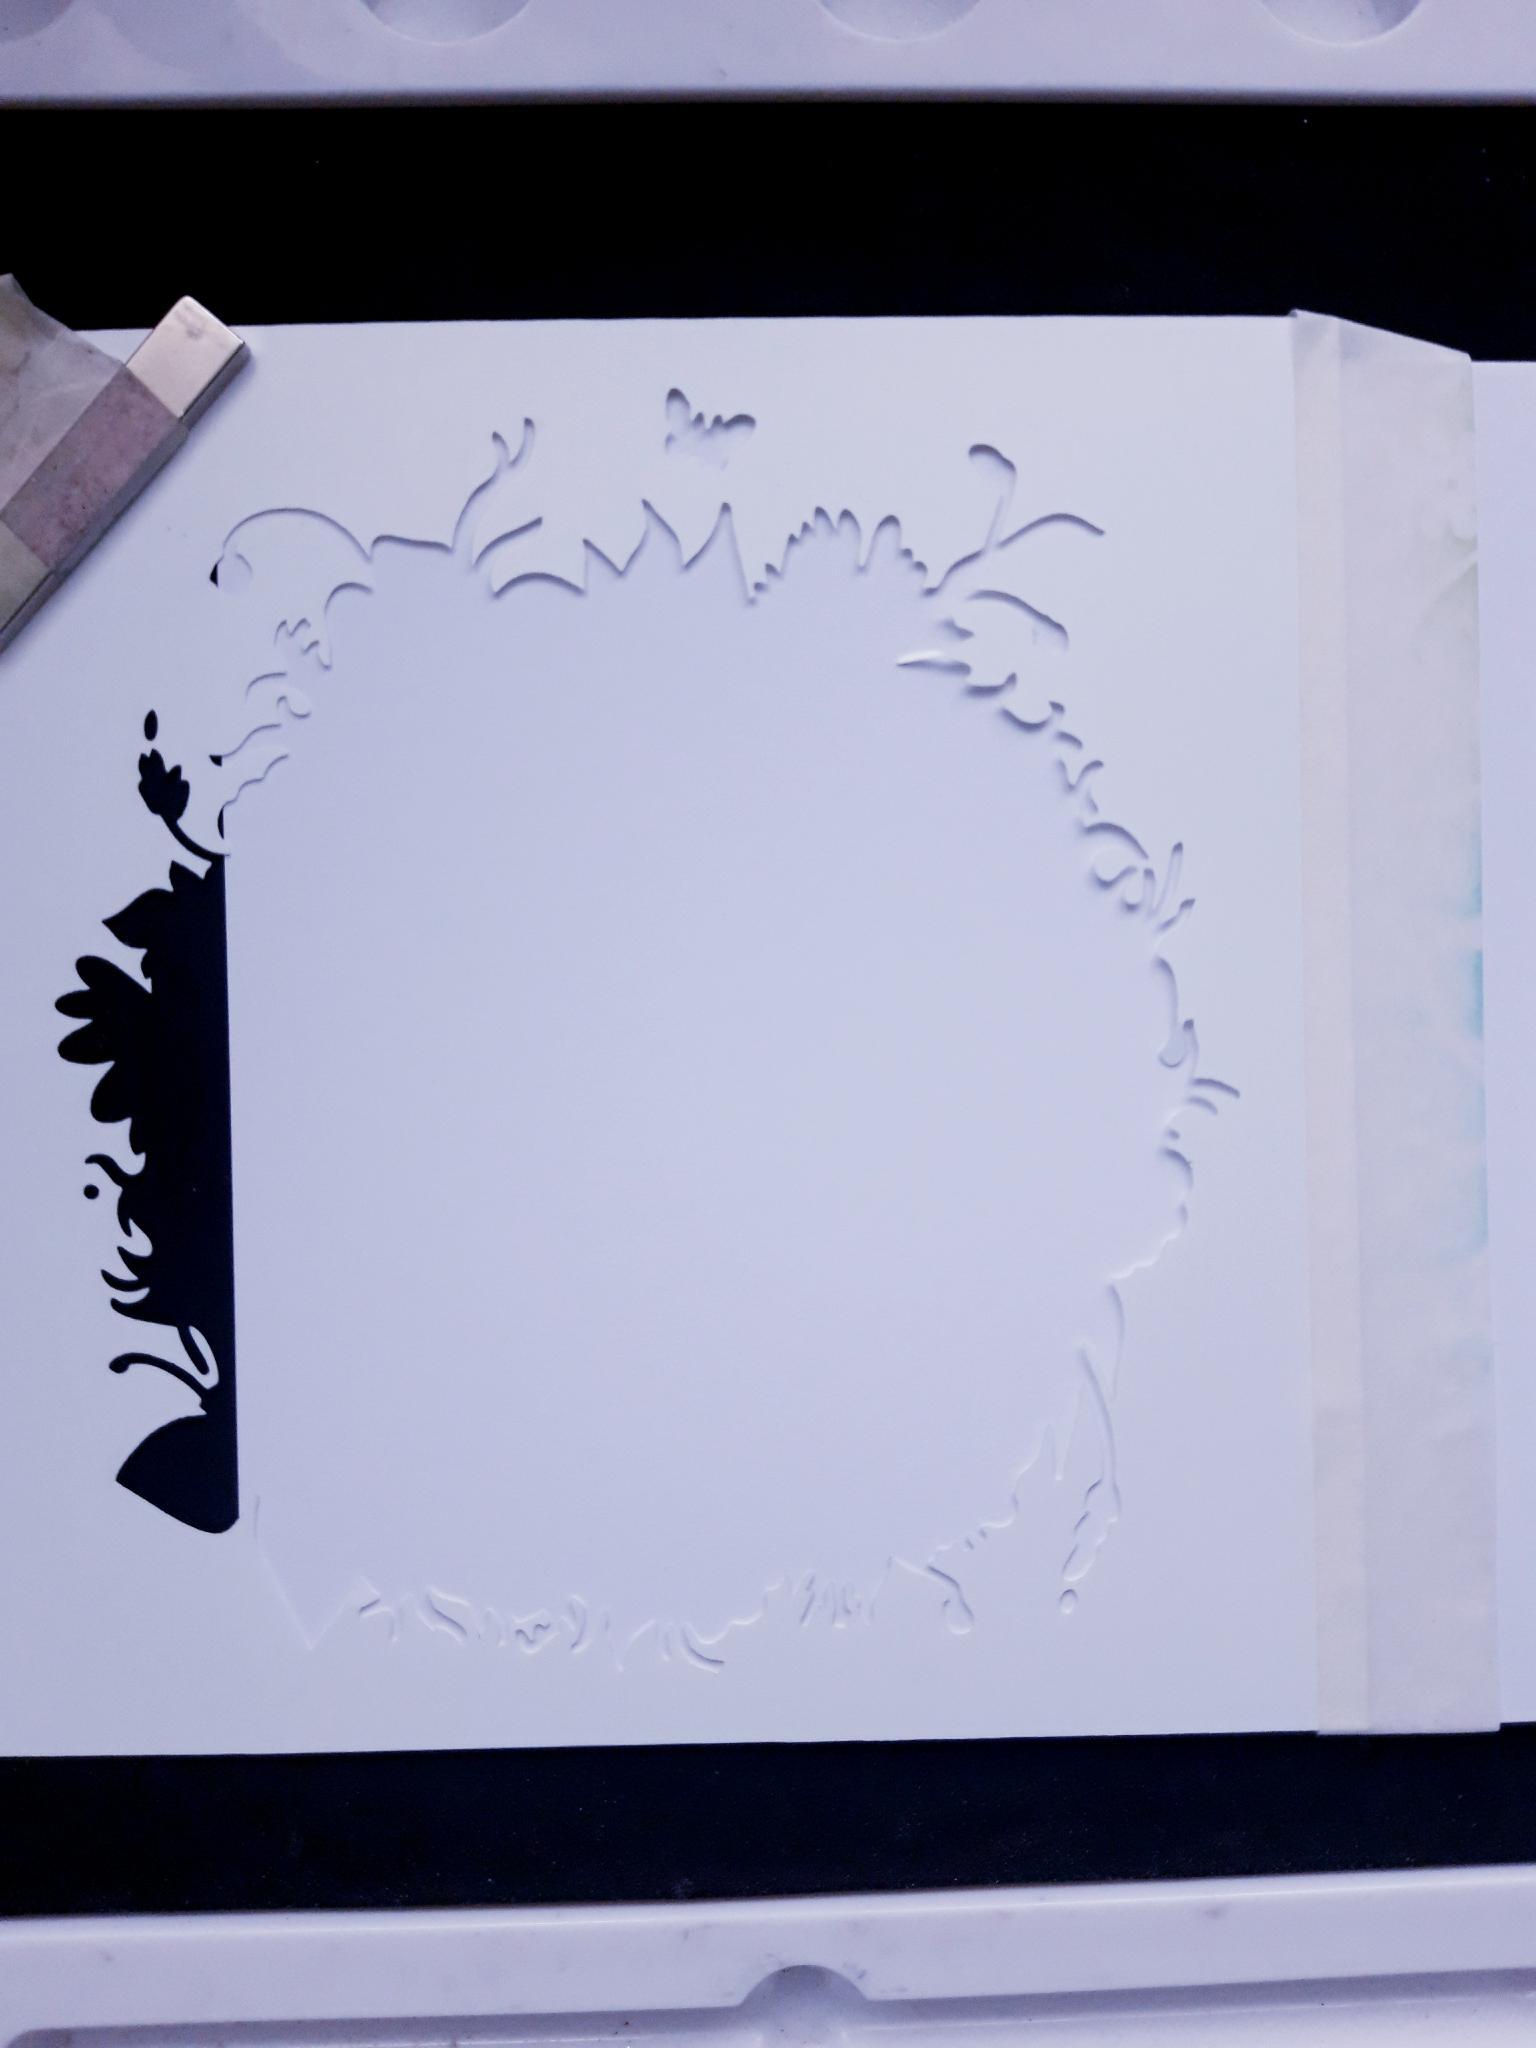
|
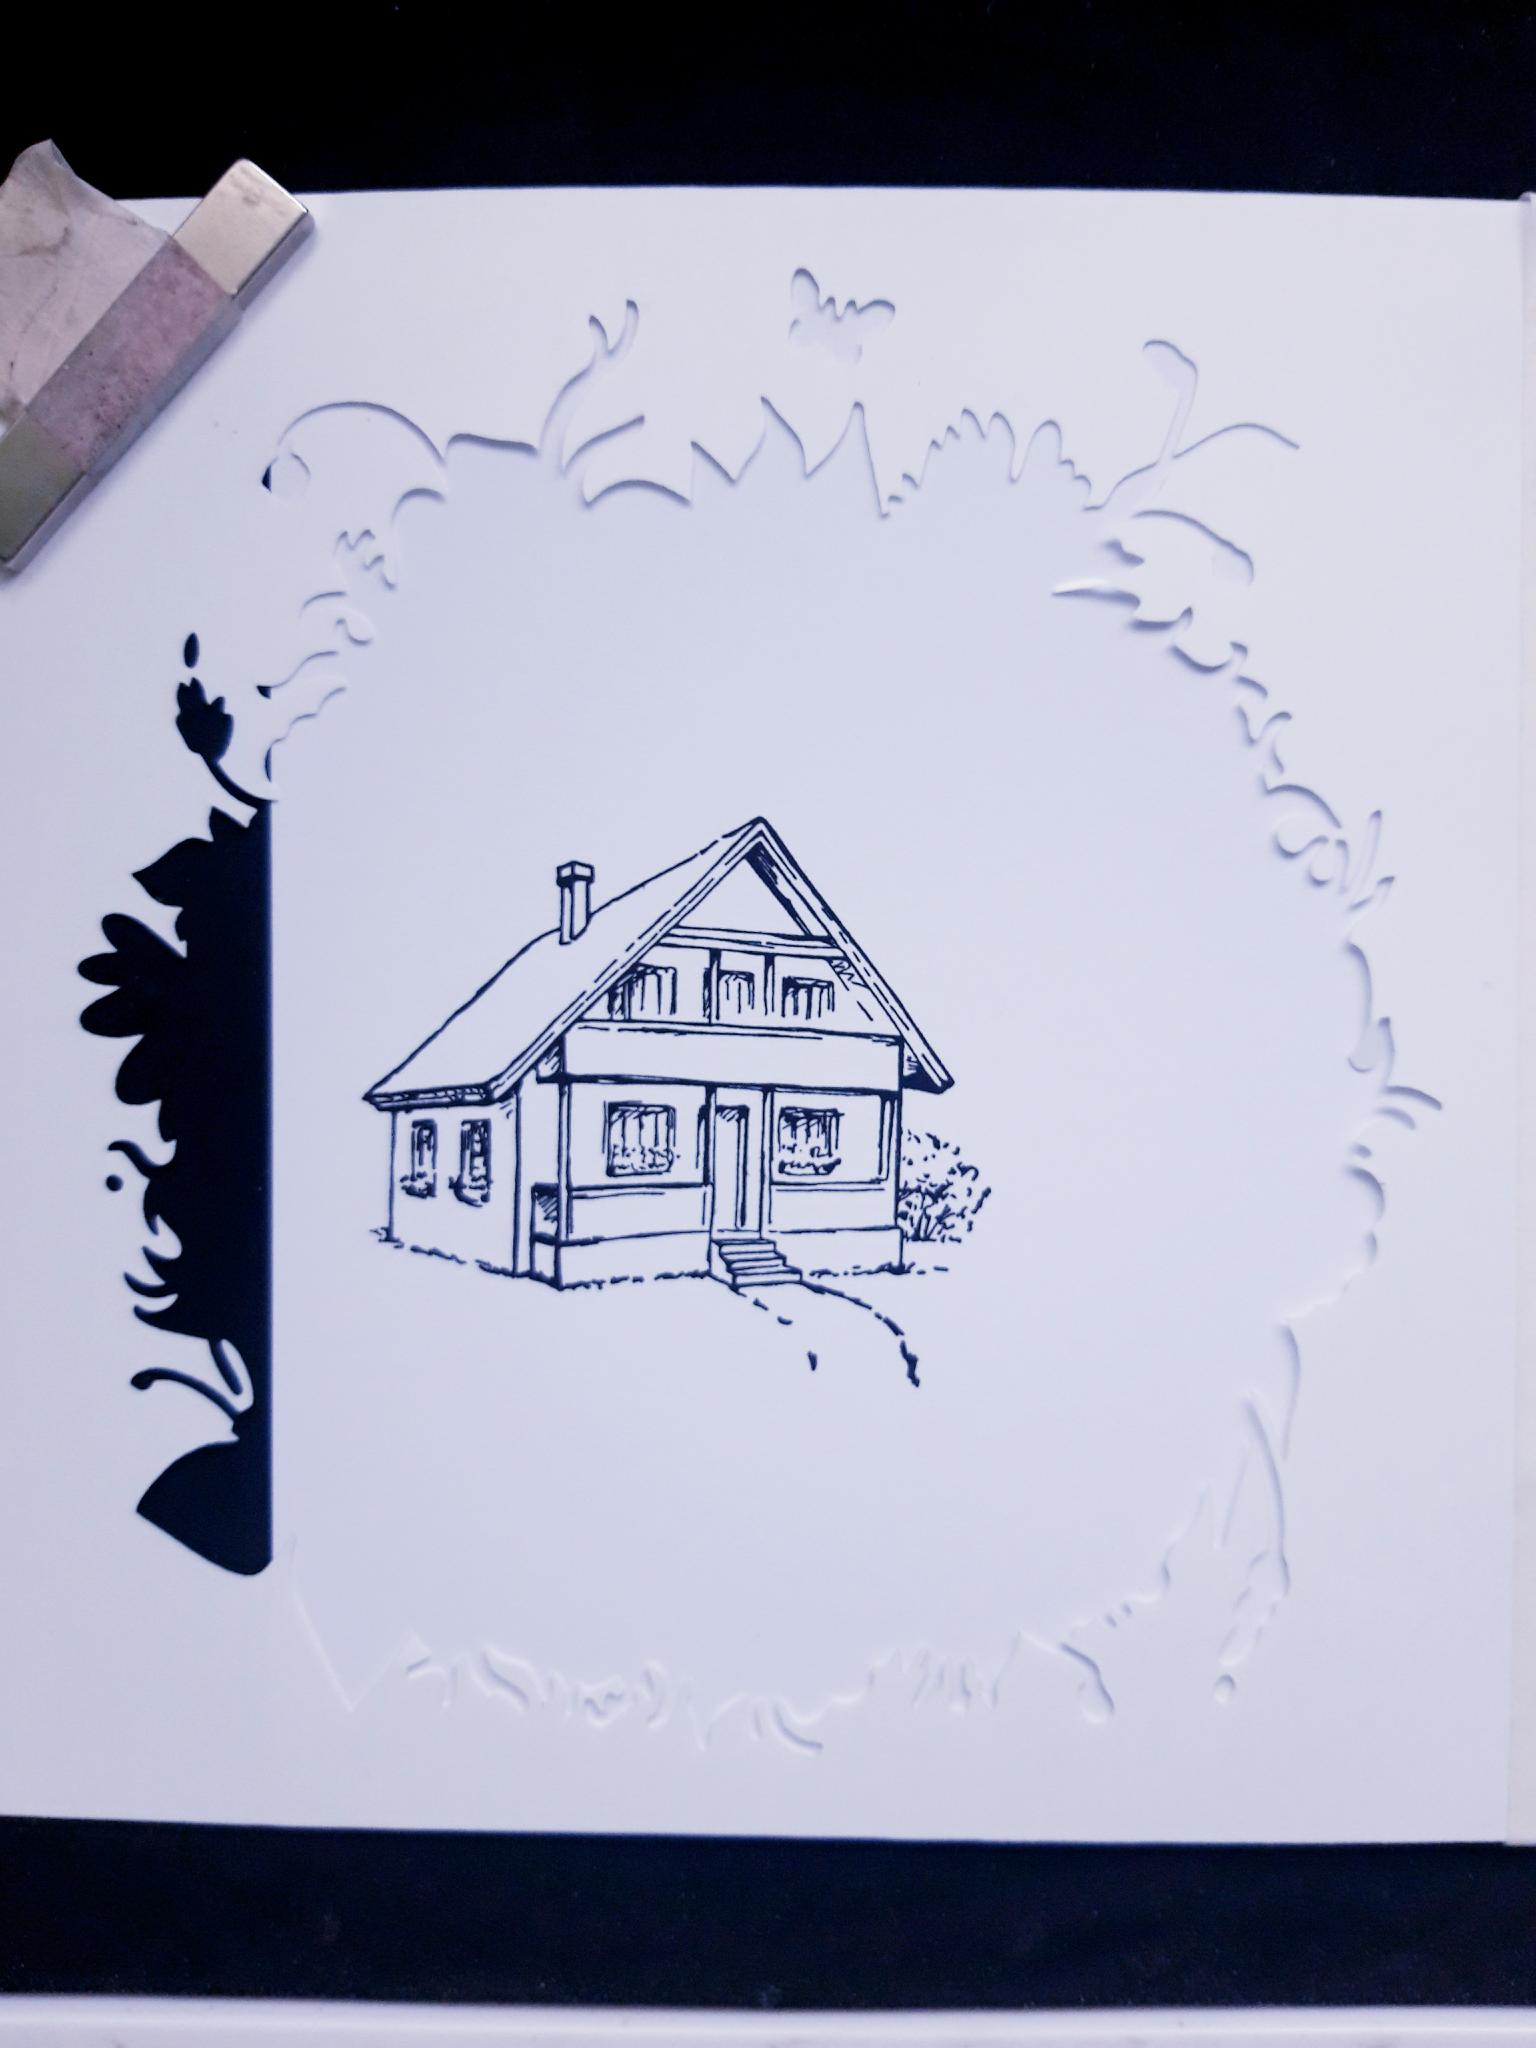
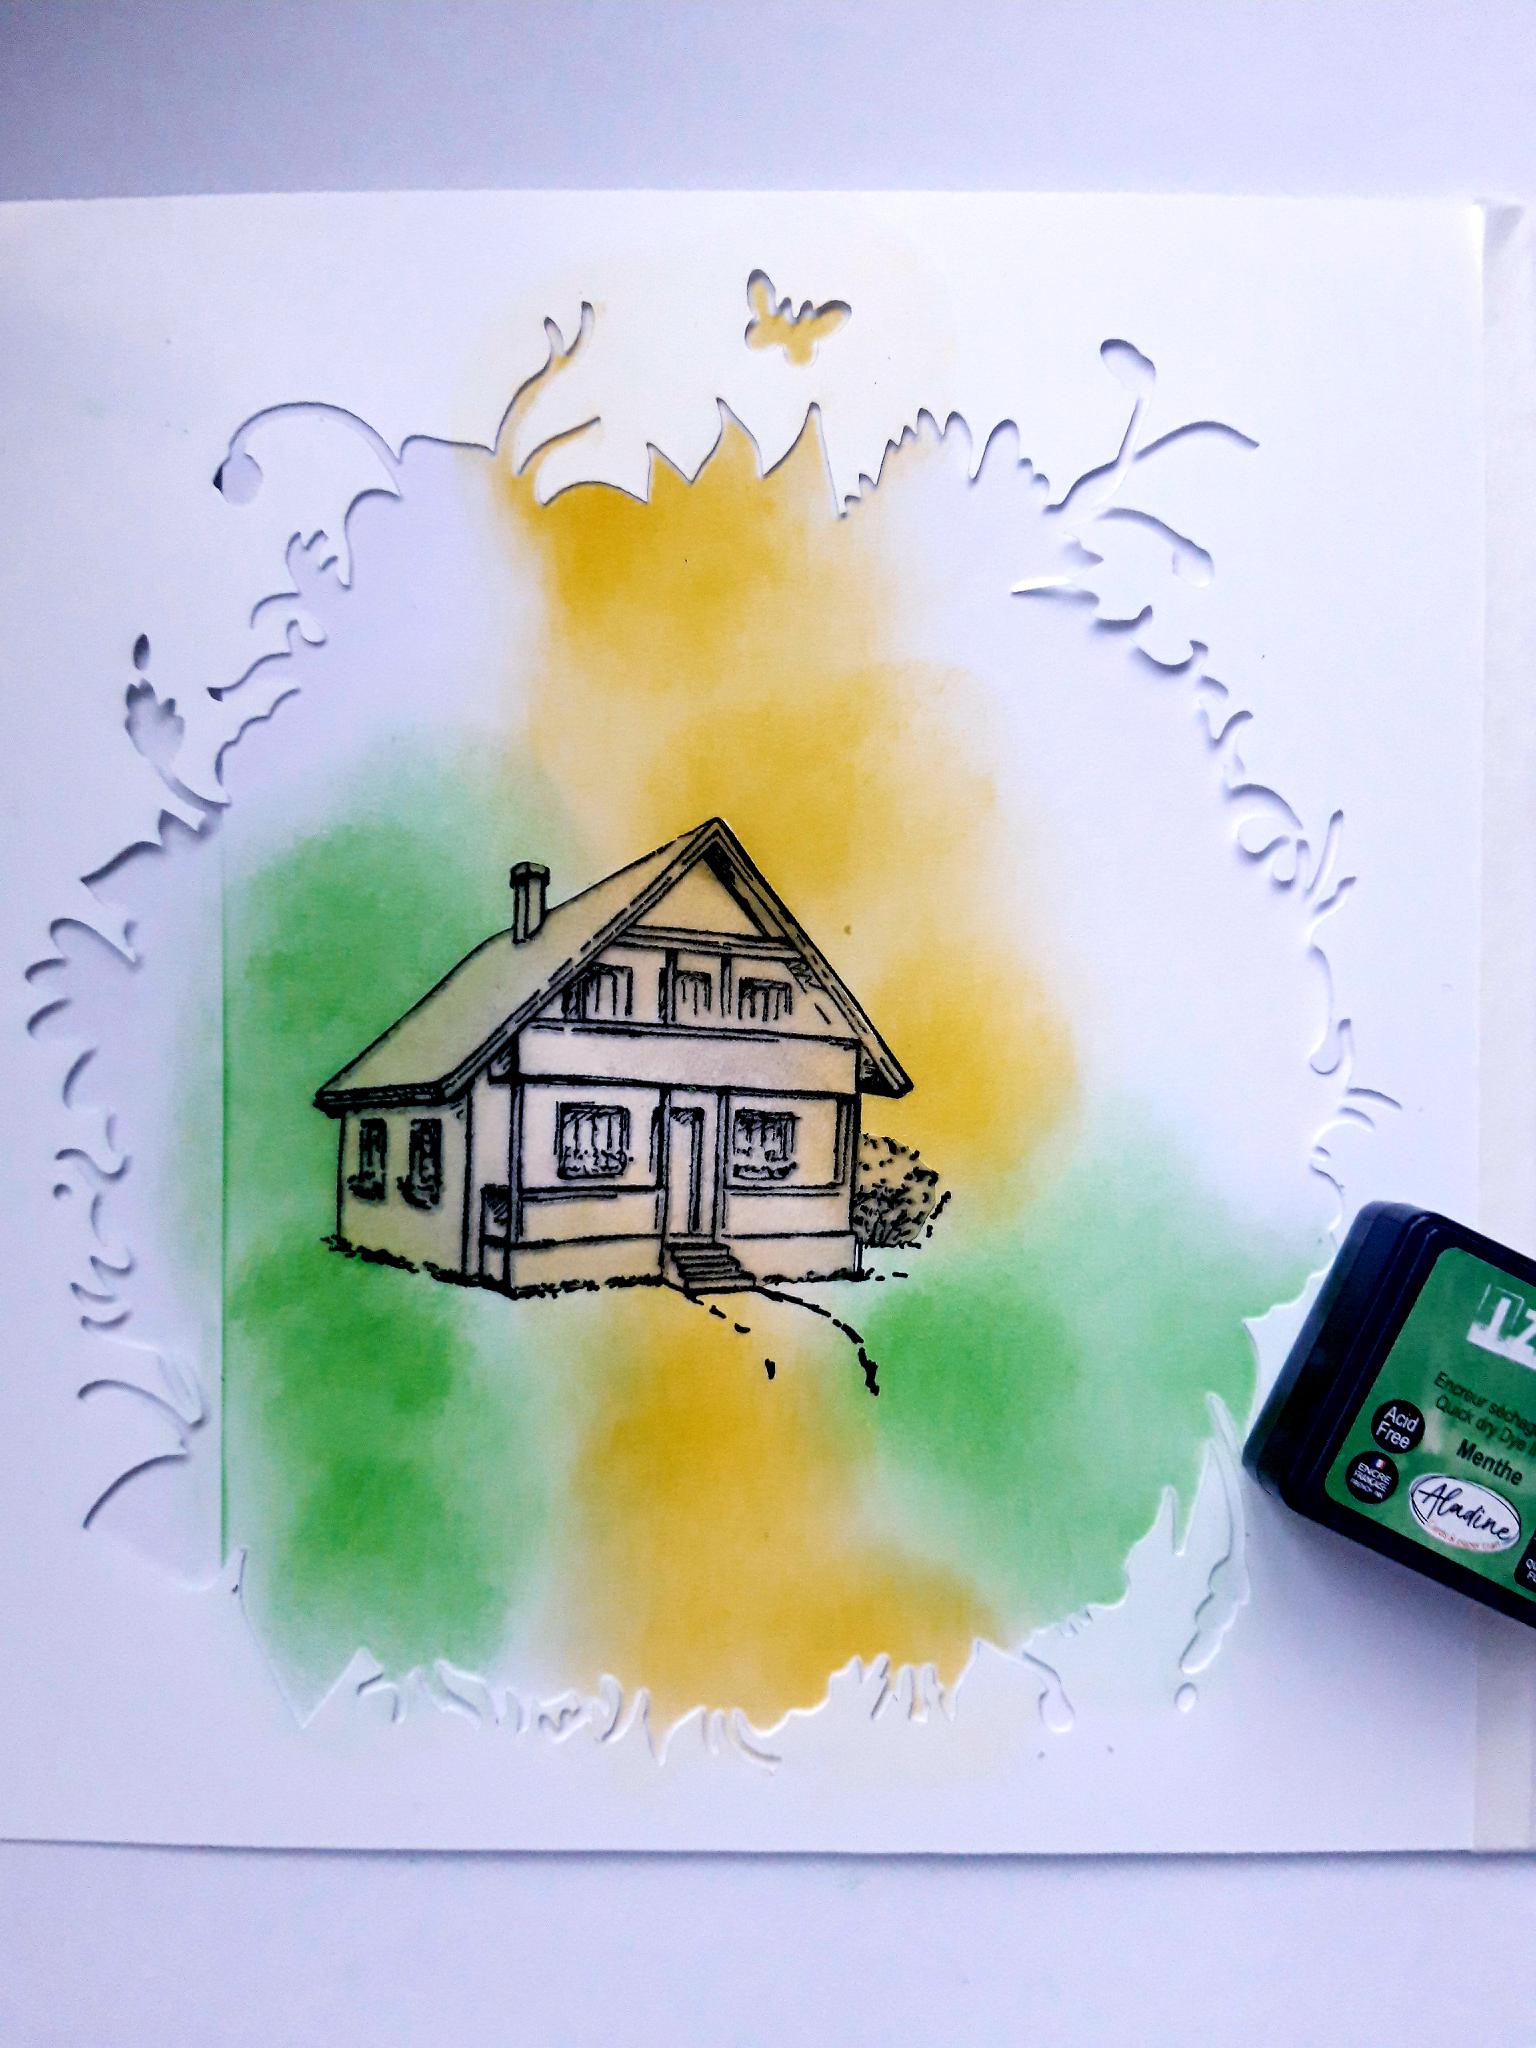
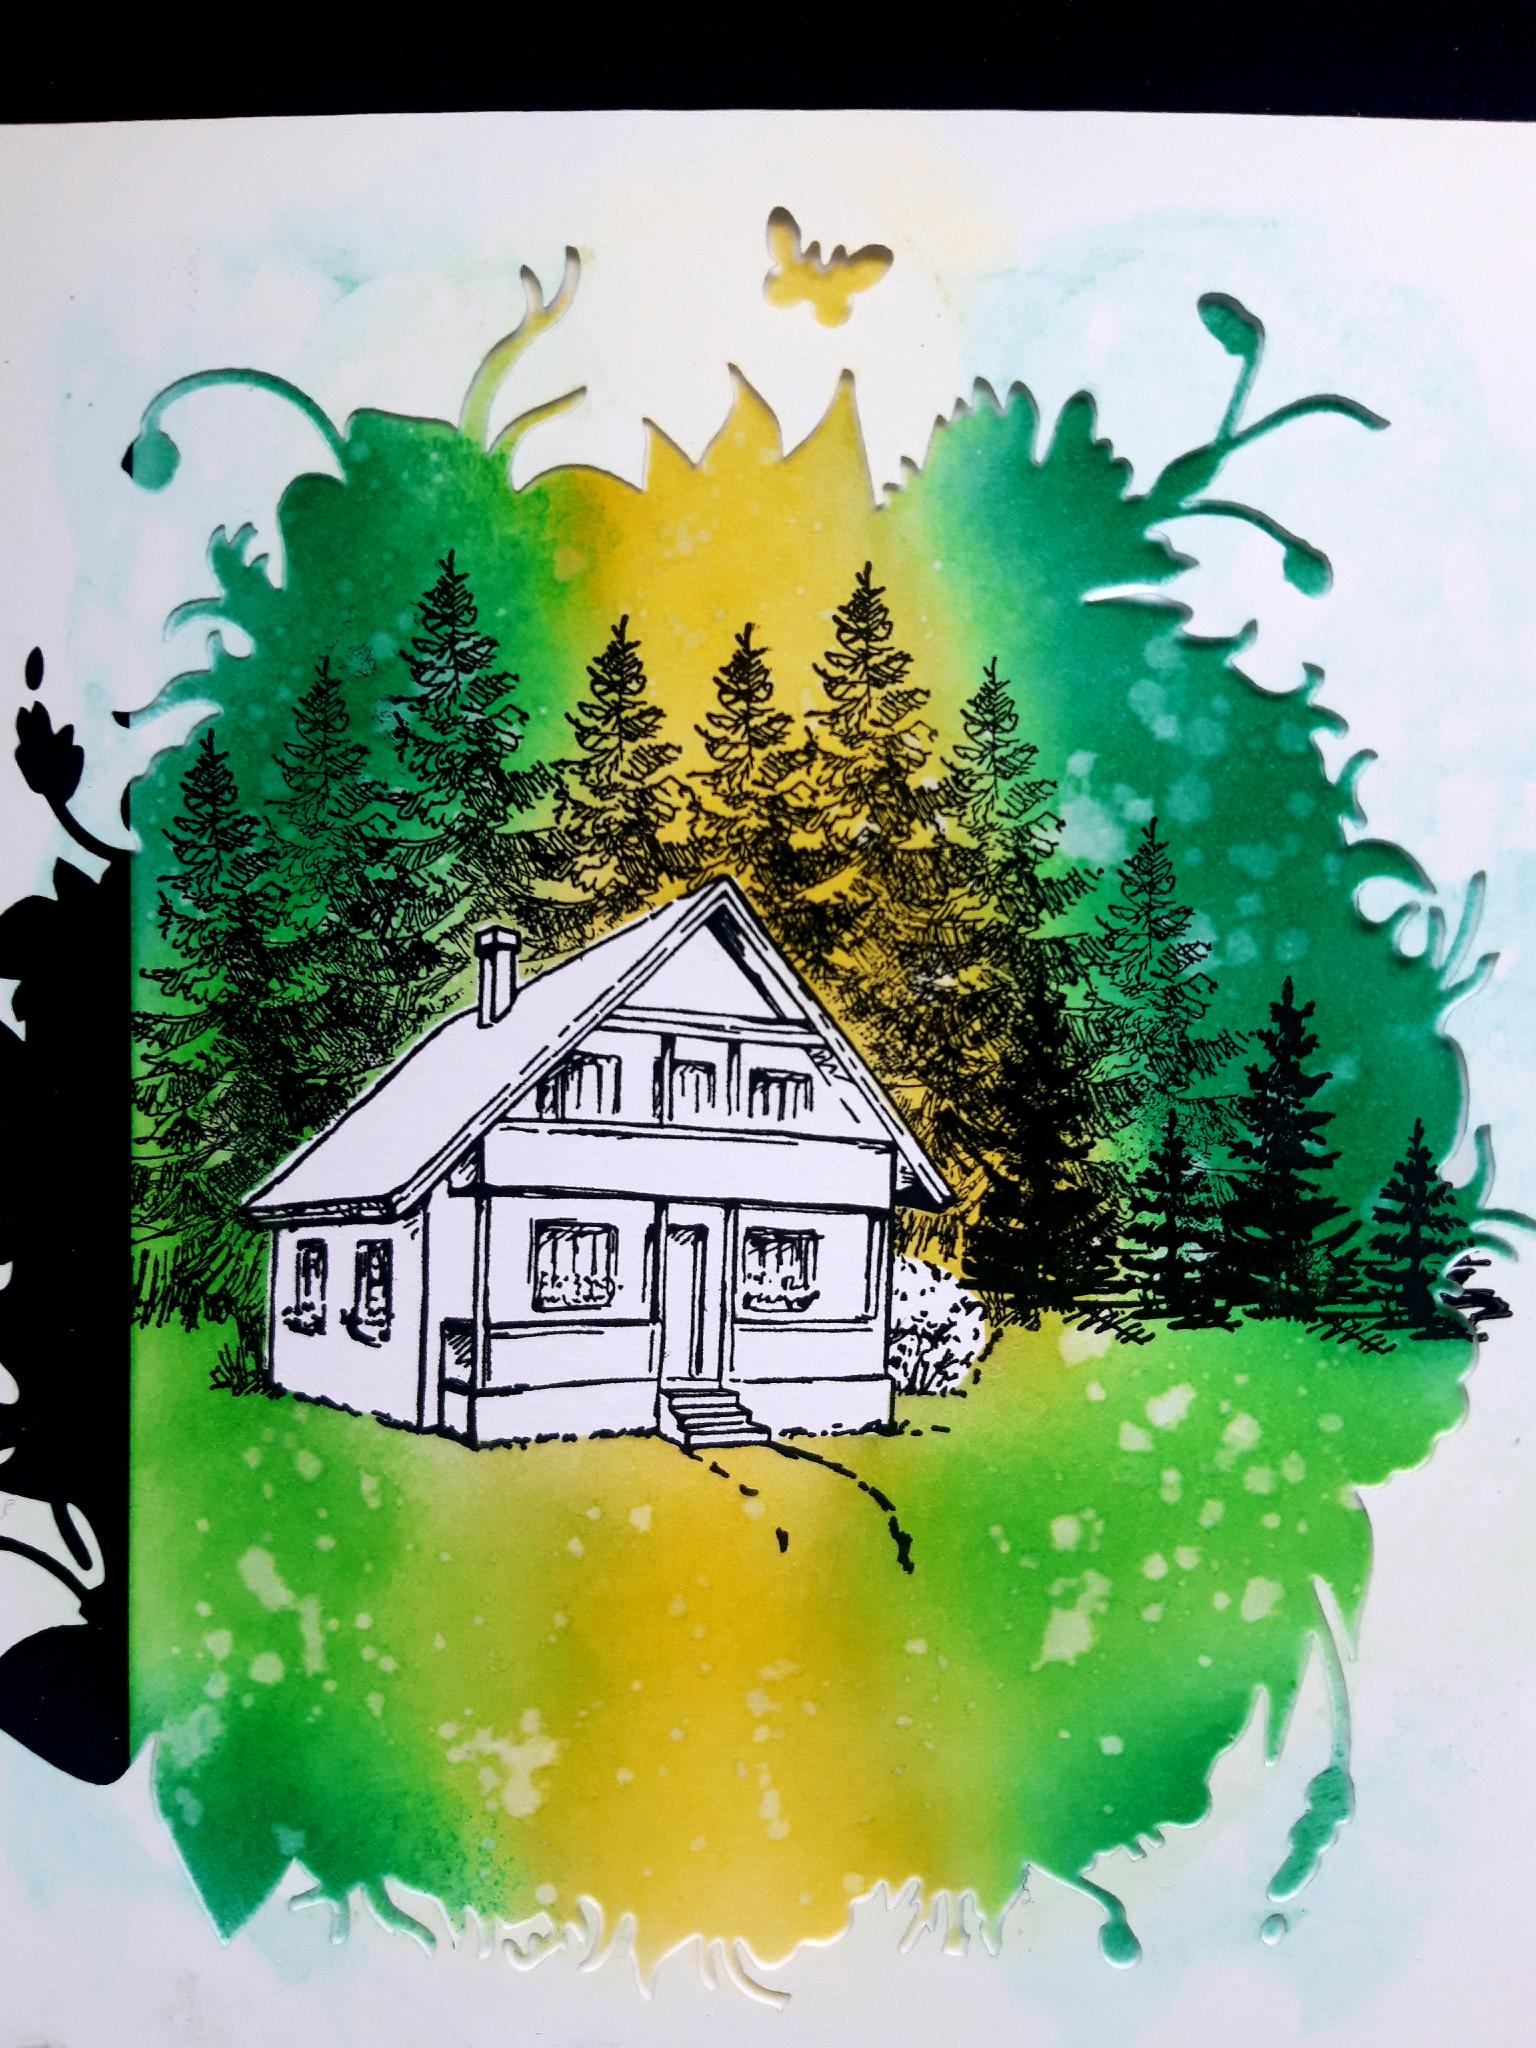
Place your stencil just off the left hand edge of your card blank. You can tape it down and/or use a magnet to hold it in place, in your Eureka 101. |
|
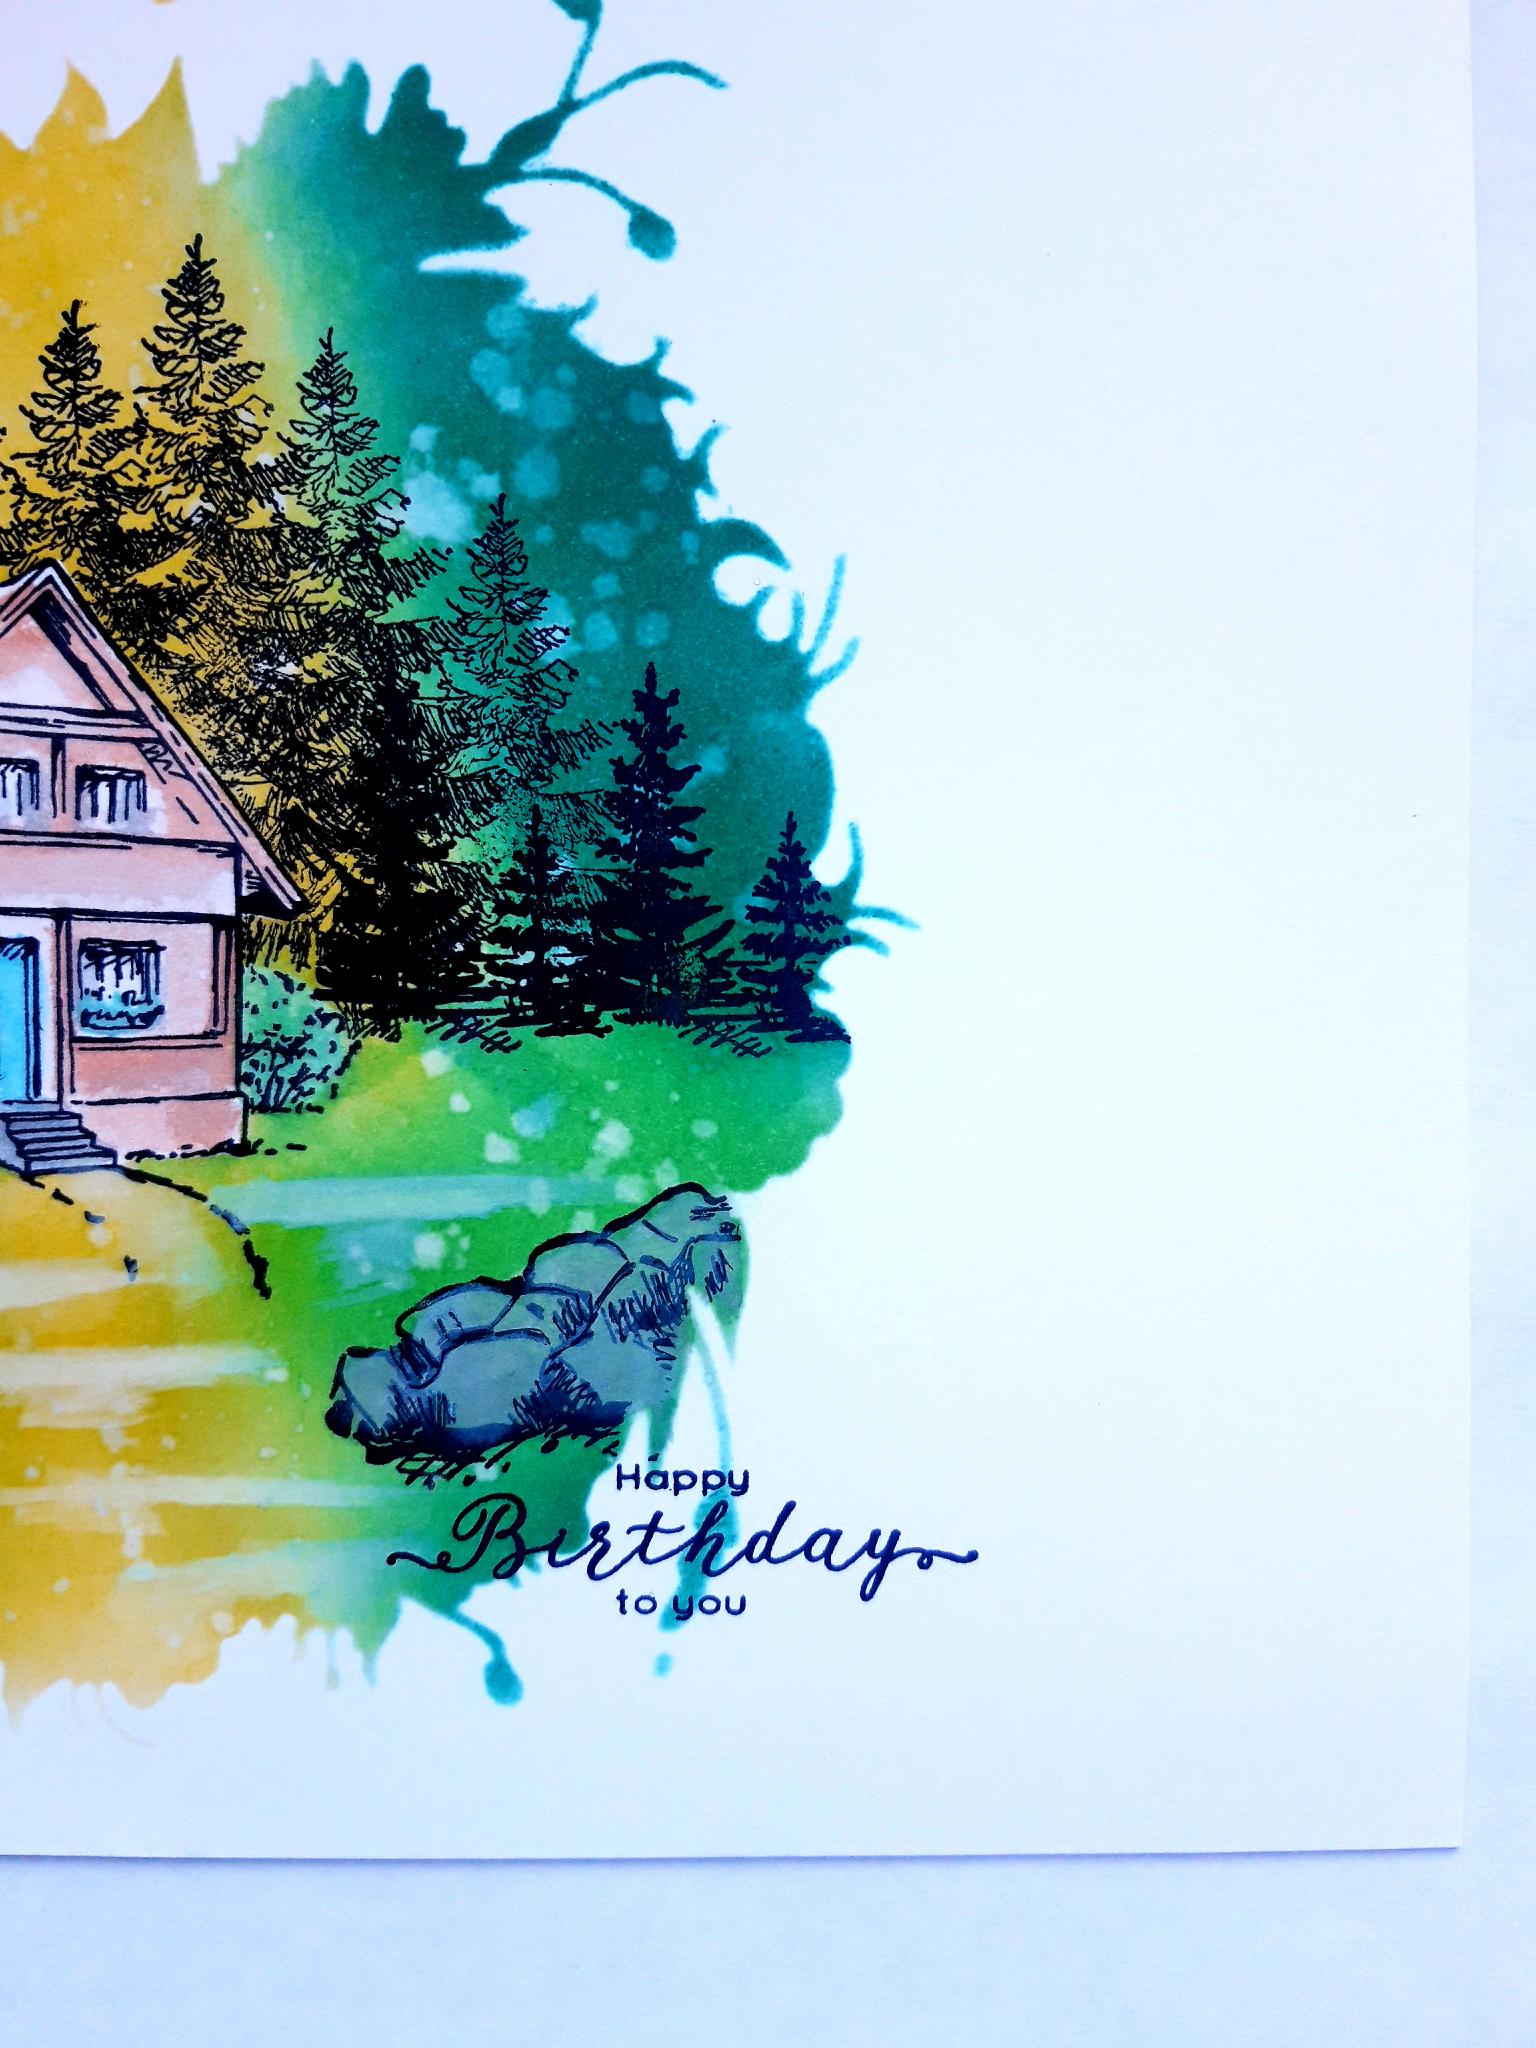
Ink up the Cabin stamp, from the Soulful Pencil Sketch Stamp Collection, in the Onyx Black Versafine. Stamp it to the left side of the stencil aperture. |
|
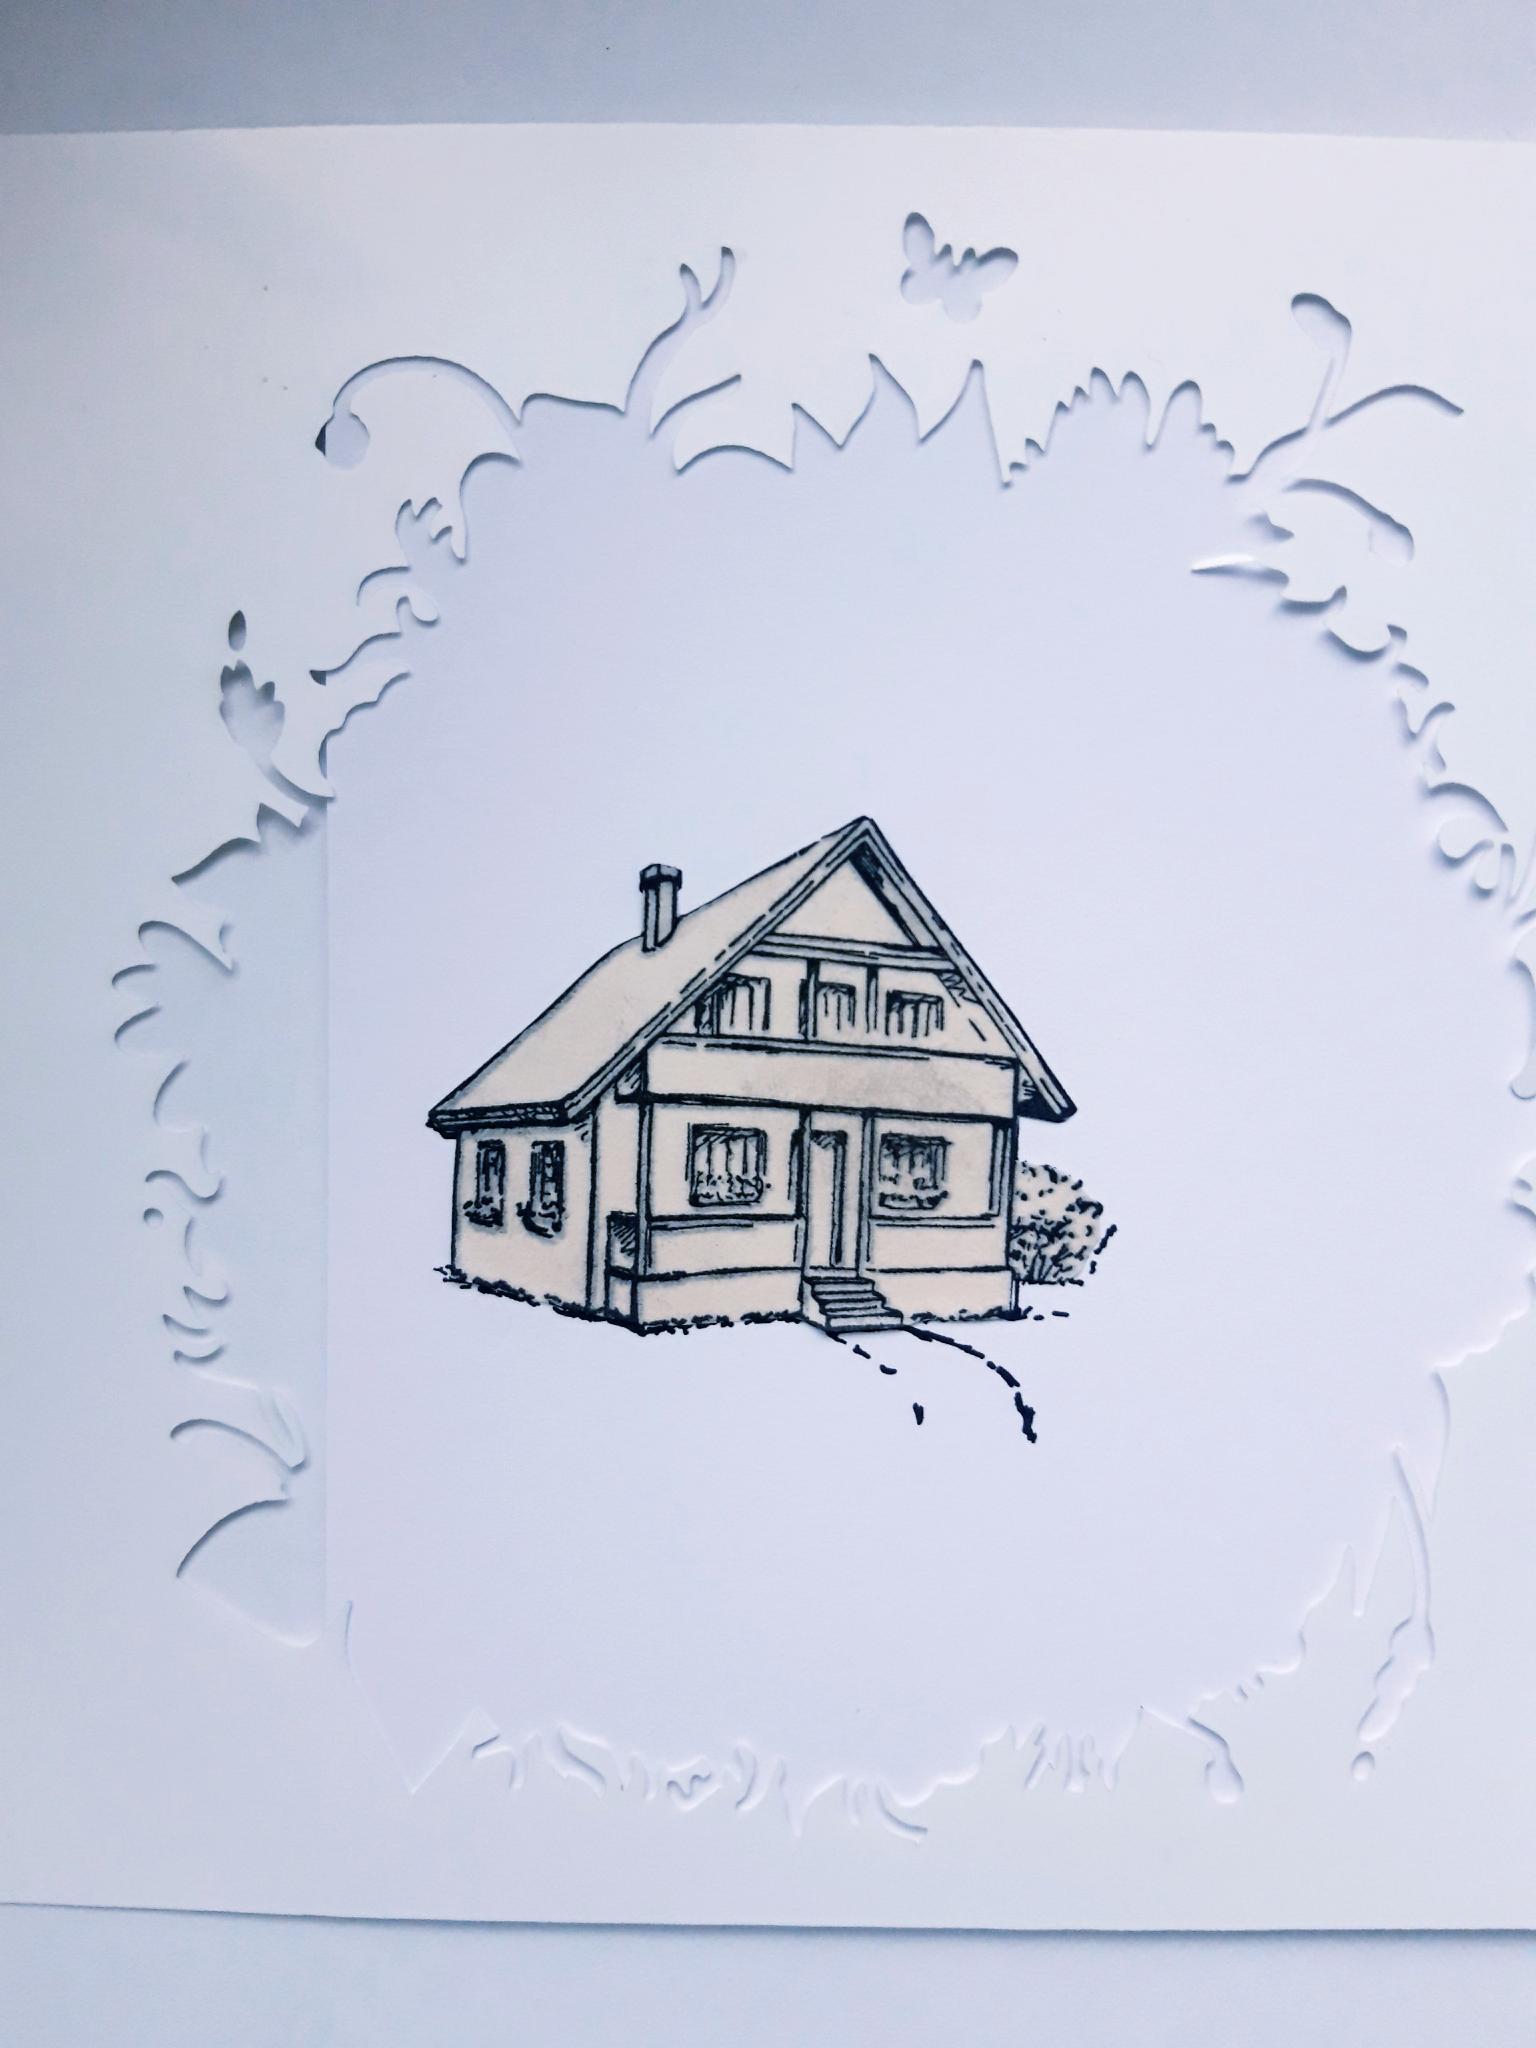
Ink up the Cabin again, and stamp on to your masking sheet, copier paper or sticky note. Cut out and place over your stamped image. |

|
Lay some of the Izink Aurore ink down, centrally above and below the Cabin. Don't worry about the blending too much at this stage, as once all colours are down, you can go back and blend them together with more ink, as required. |
|
Lay the Izink Menthe ink down, to the left and bottom right of the Cabin. Think about where you want your skyline to be. |
|
Lay the Izink Emeraude ink down within the remainder of the aperture. Now go back over with your inks and blend the colours together, until you are happy with the result (Note, you will be stamping over much of the inked area). |
|
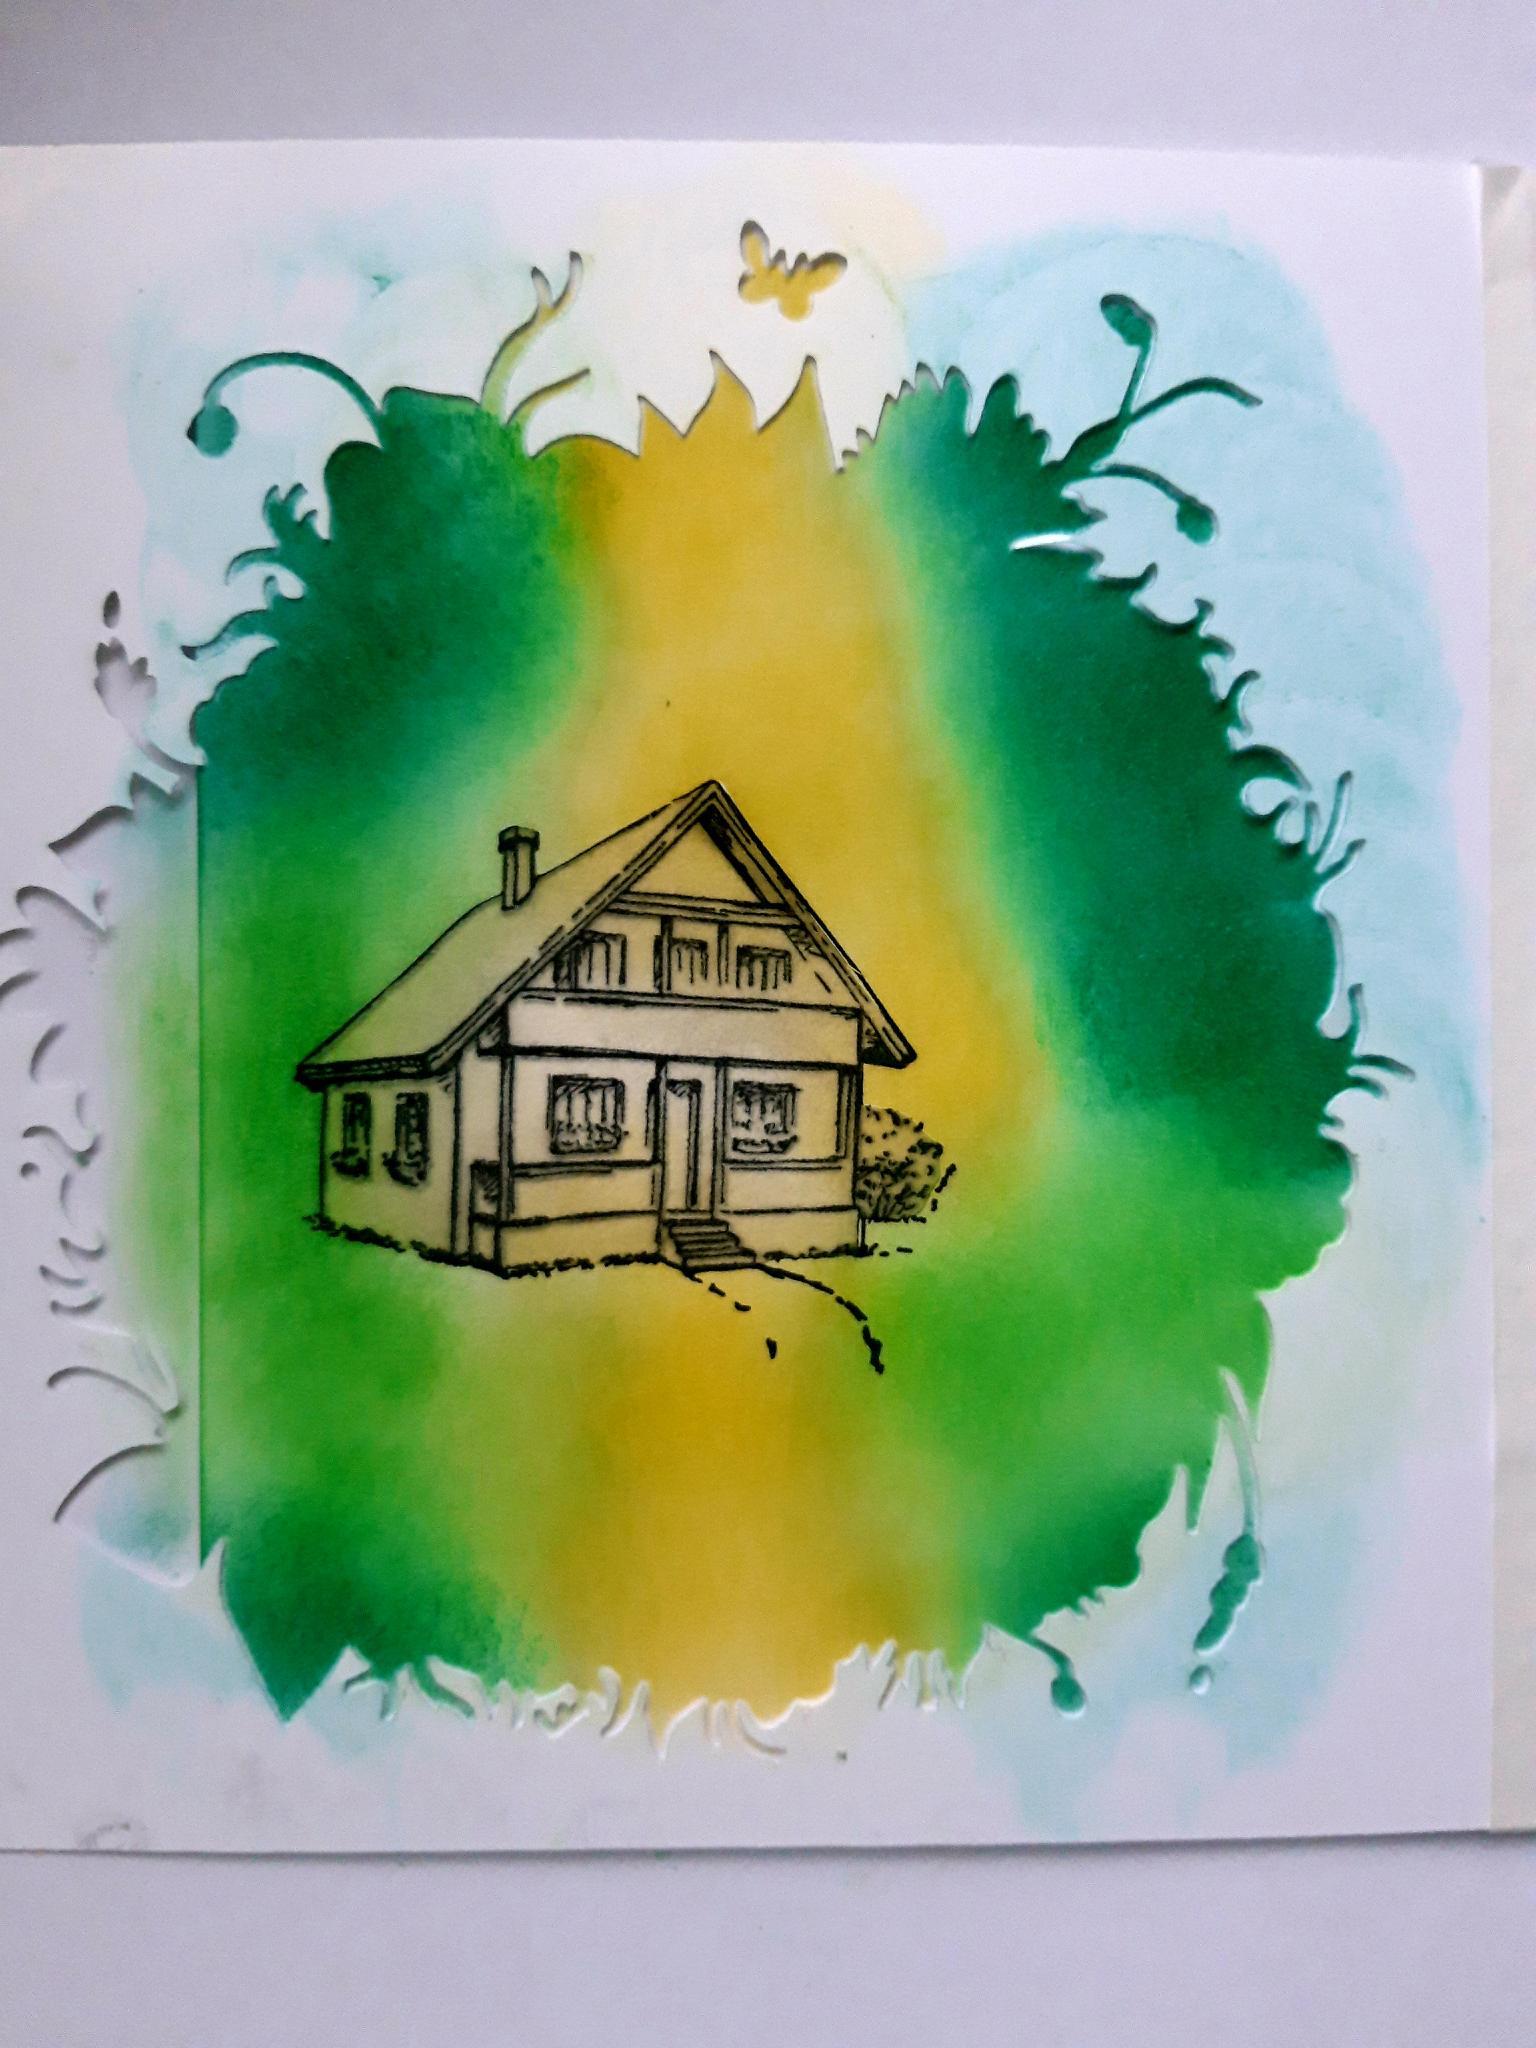
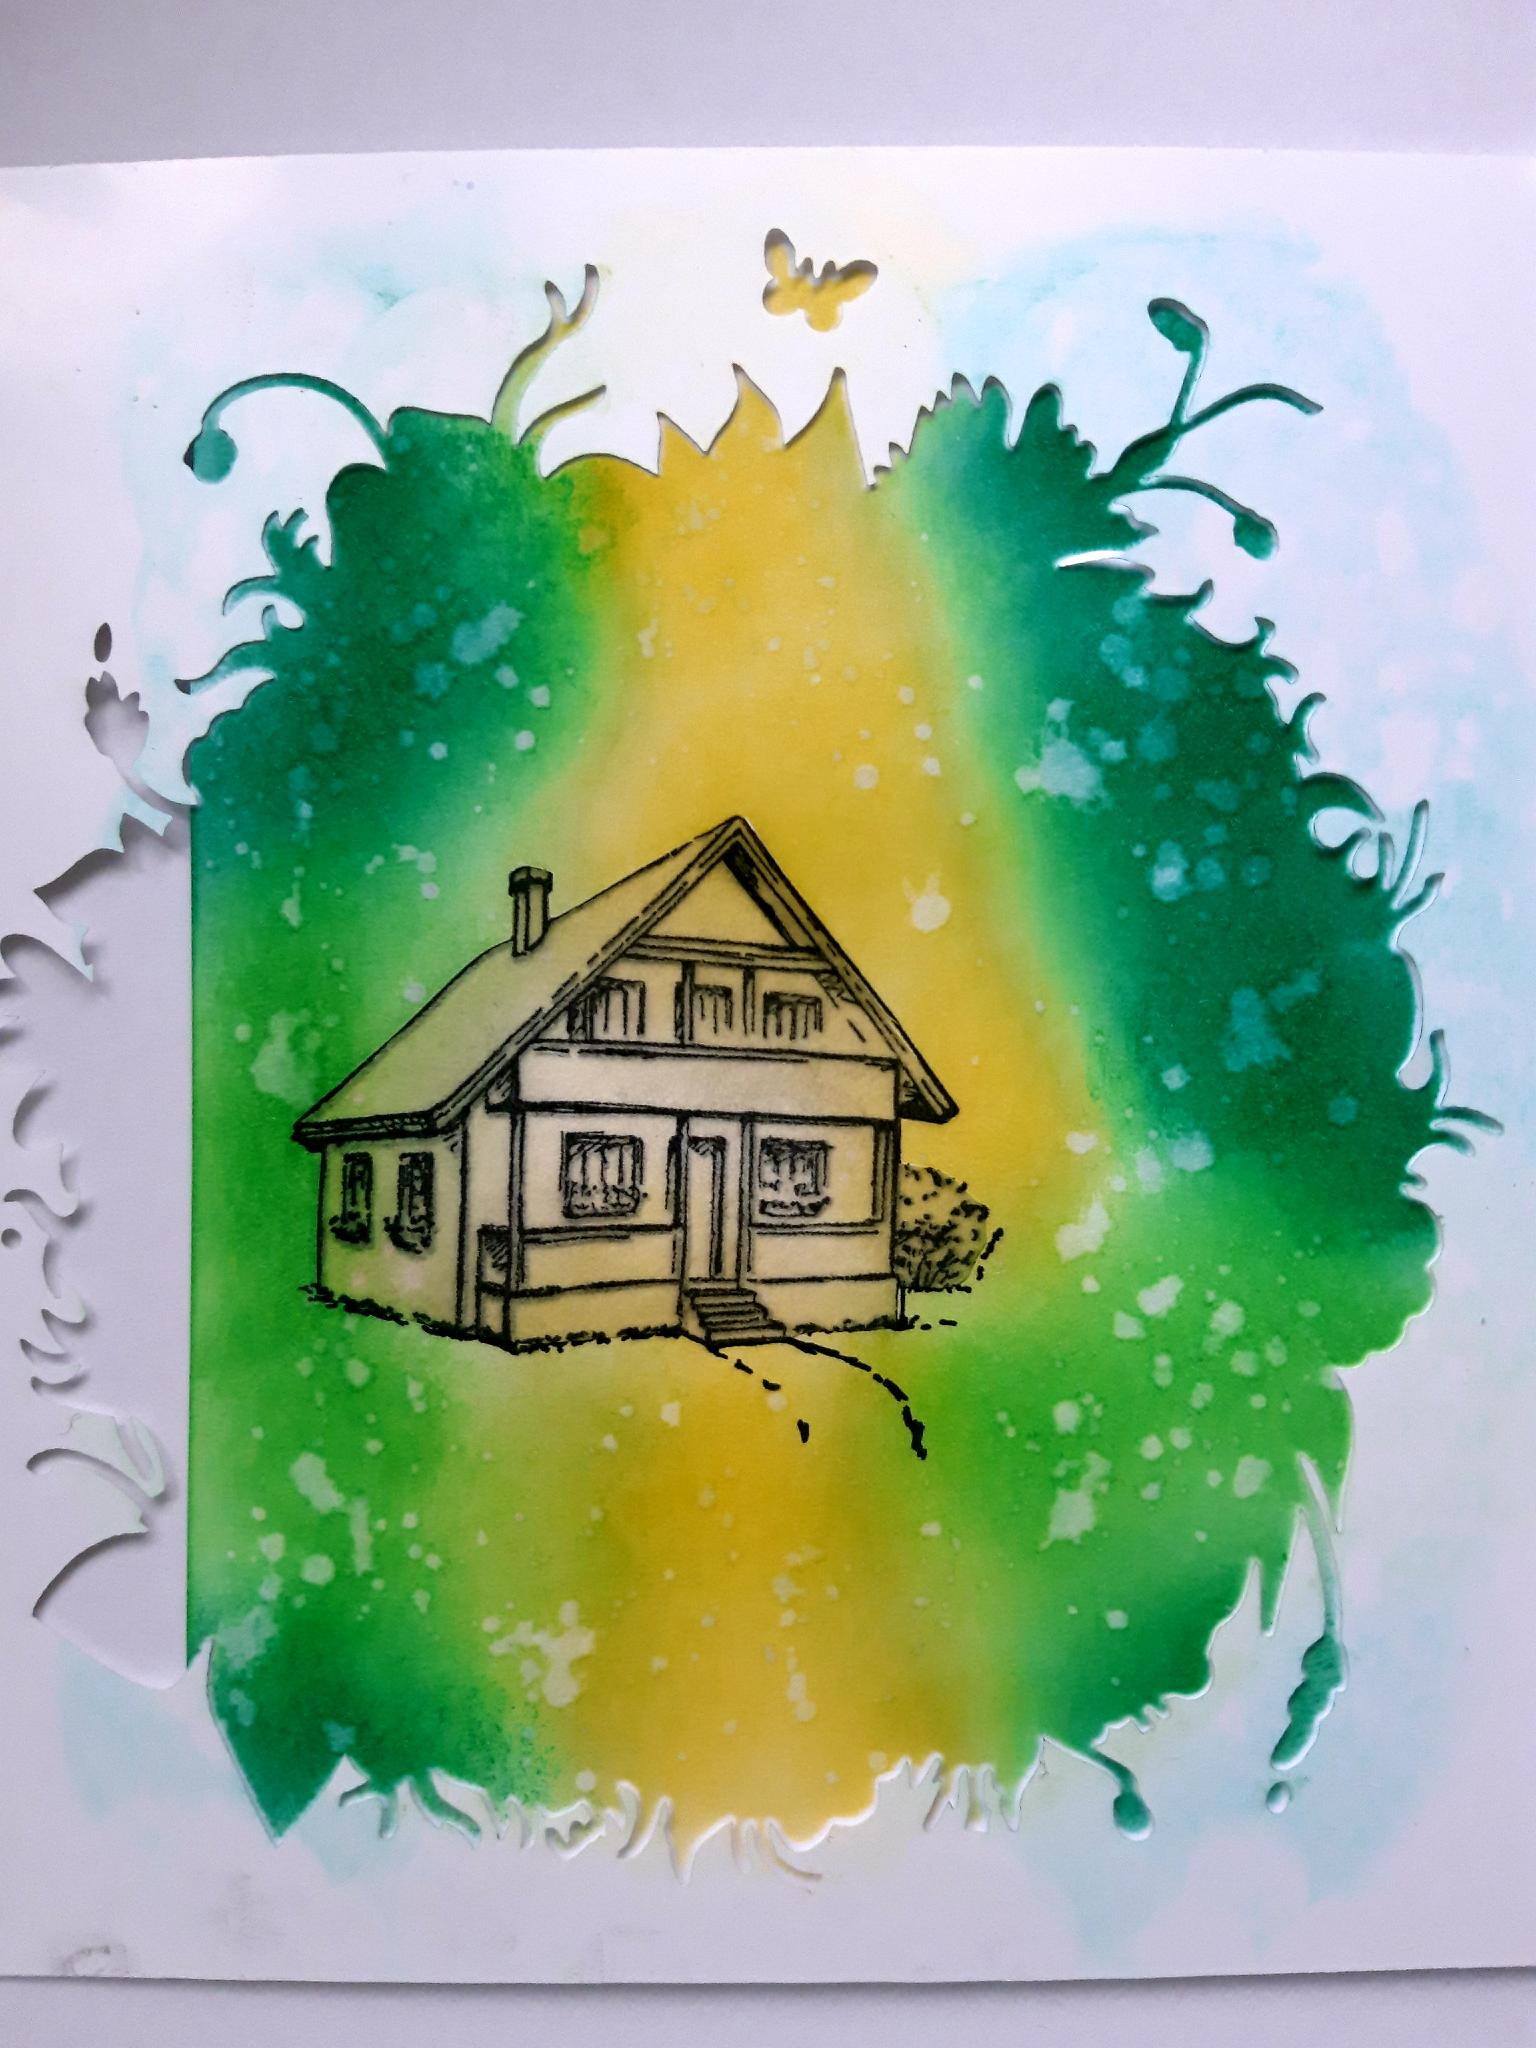
Splatter water over your inked panel, wait a few seconds, then mop up with a paper towel. Dry off the ink and water with a heat gun. |
|
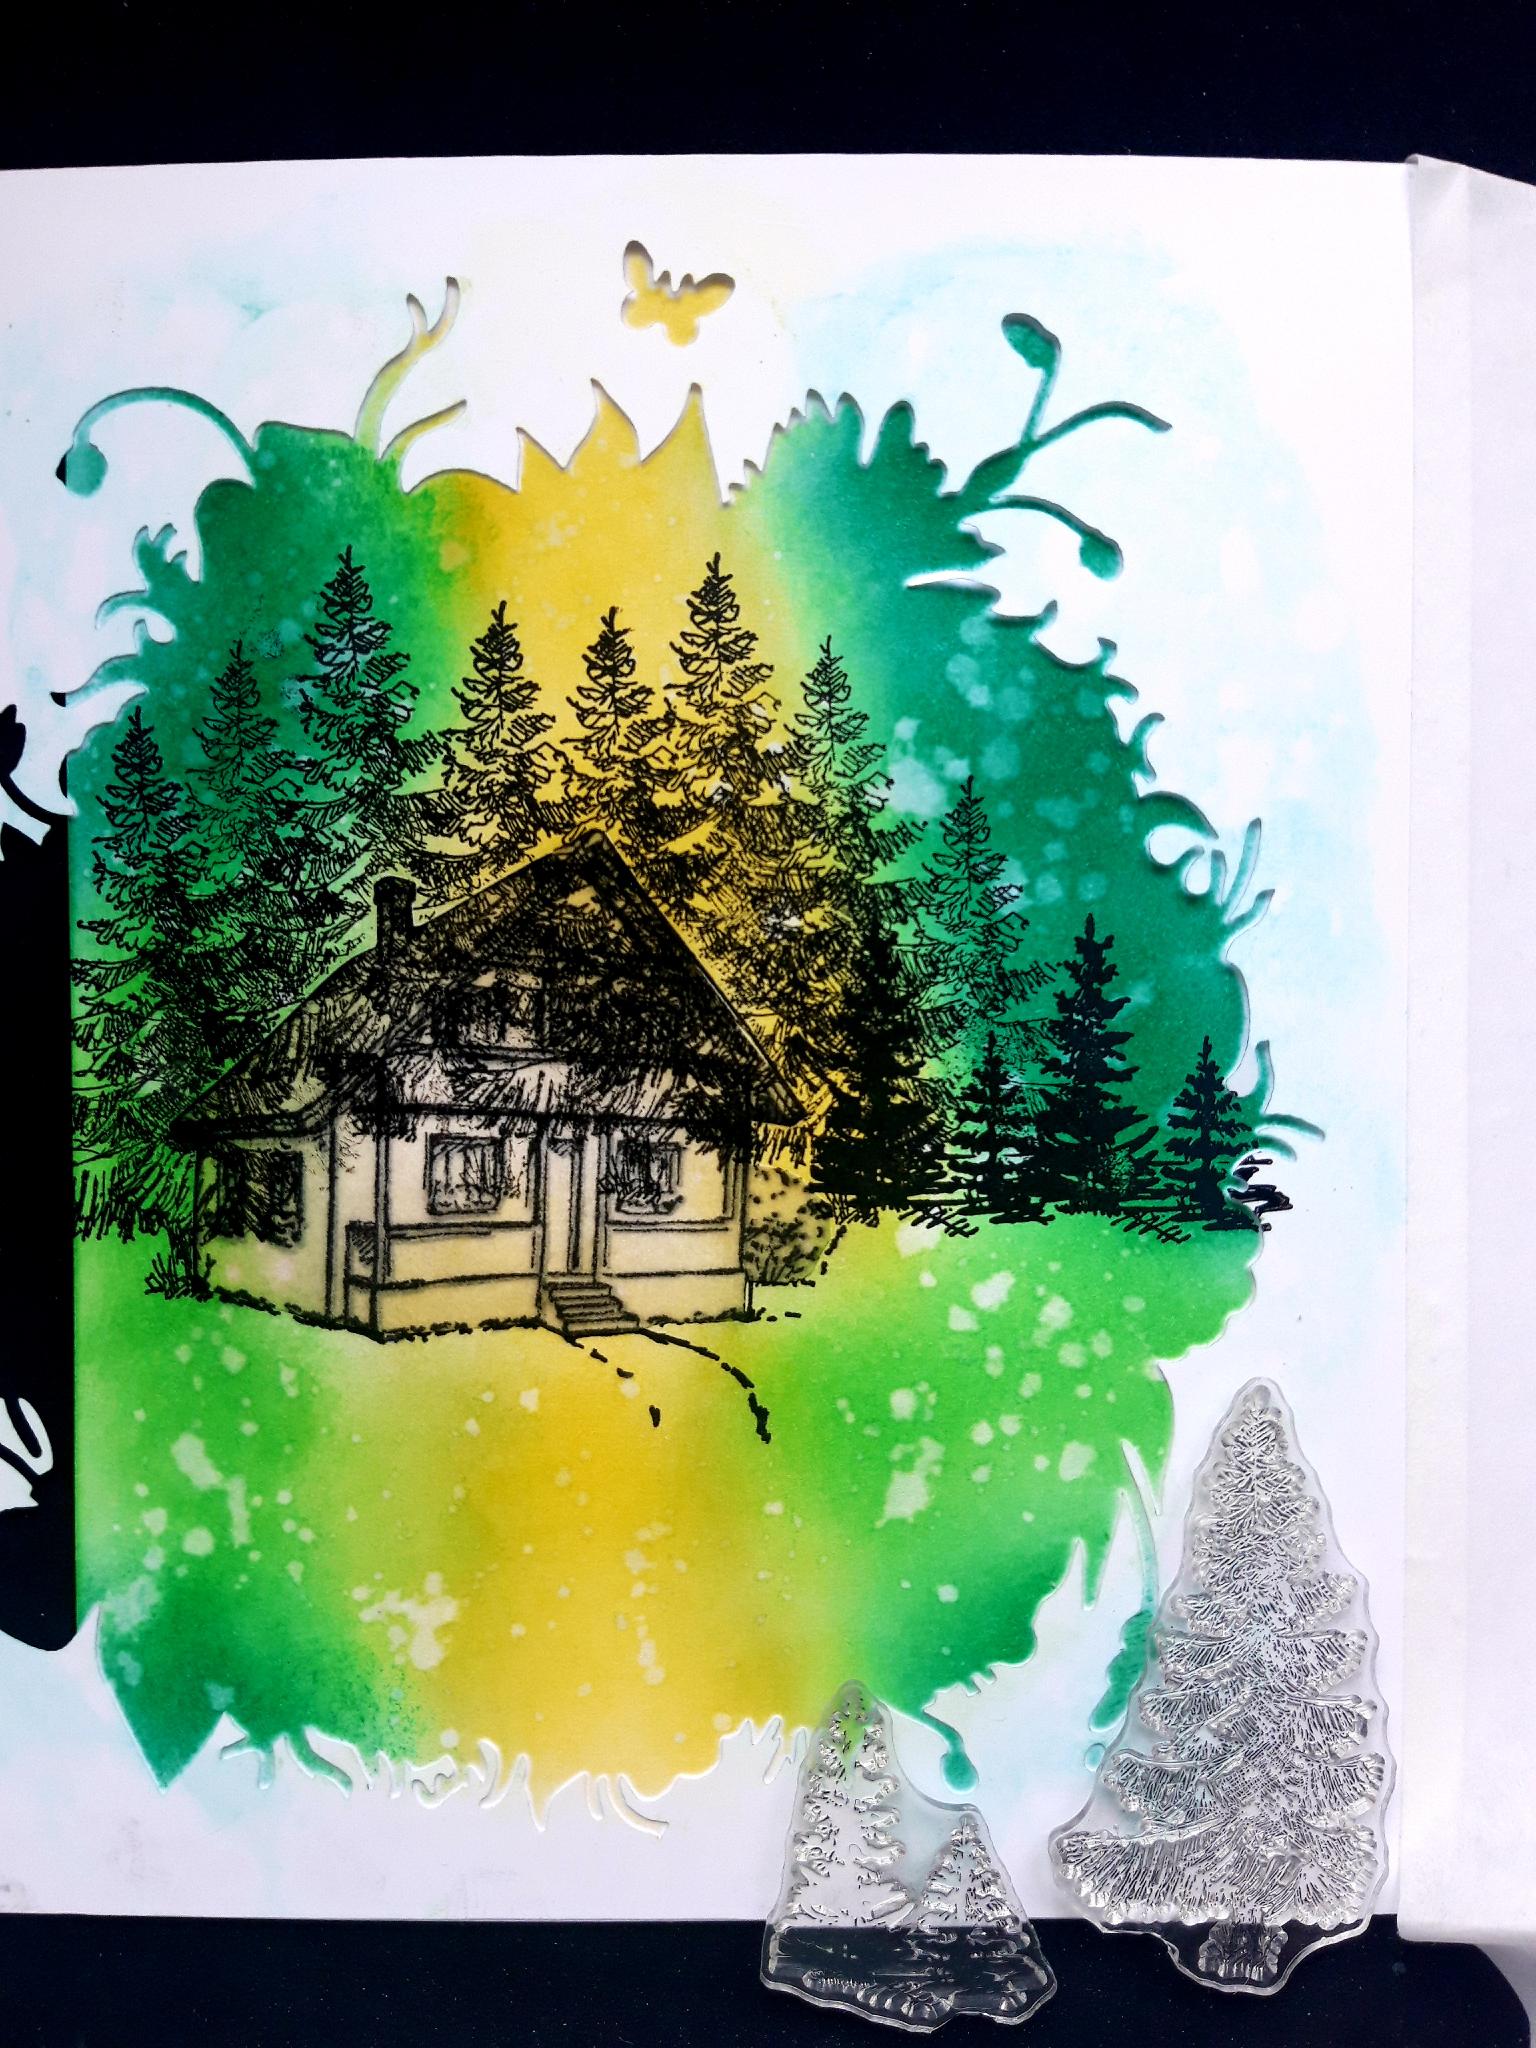
Ink up the tree stamps, from the Soulful Pencil Sketch Elements Stamp Collection, with the Onyx Black Versafine. Alternatively if you want a more loose, watercolour effect, stamp the trees with the Izink Reglisse ink pad, and spritz with water. Stamp around your Cabin, using first and second generation stamping. Stamp some trees higher than others, all adding depth and dimension to your artwork. Think about where you want your skyline to be, when stamping your trees. Allow all the ink to dry before proceeding to the next step. |
|
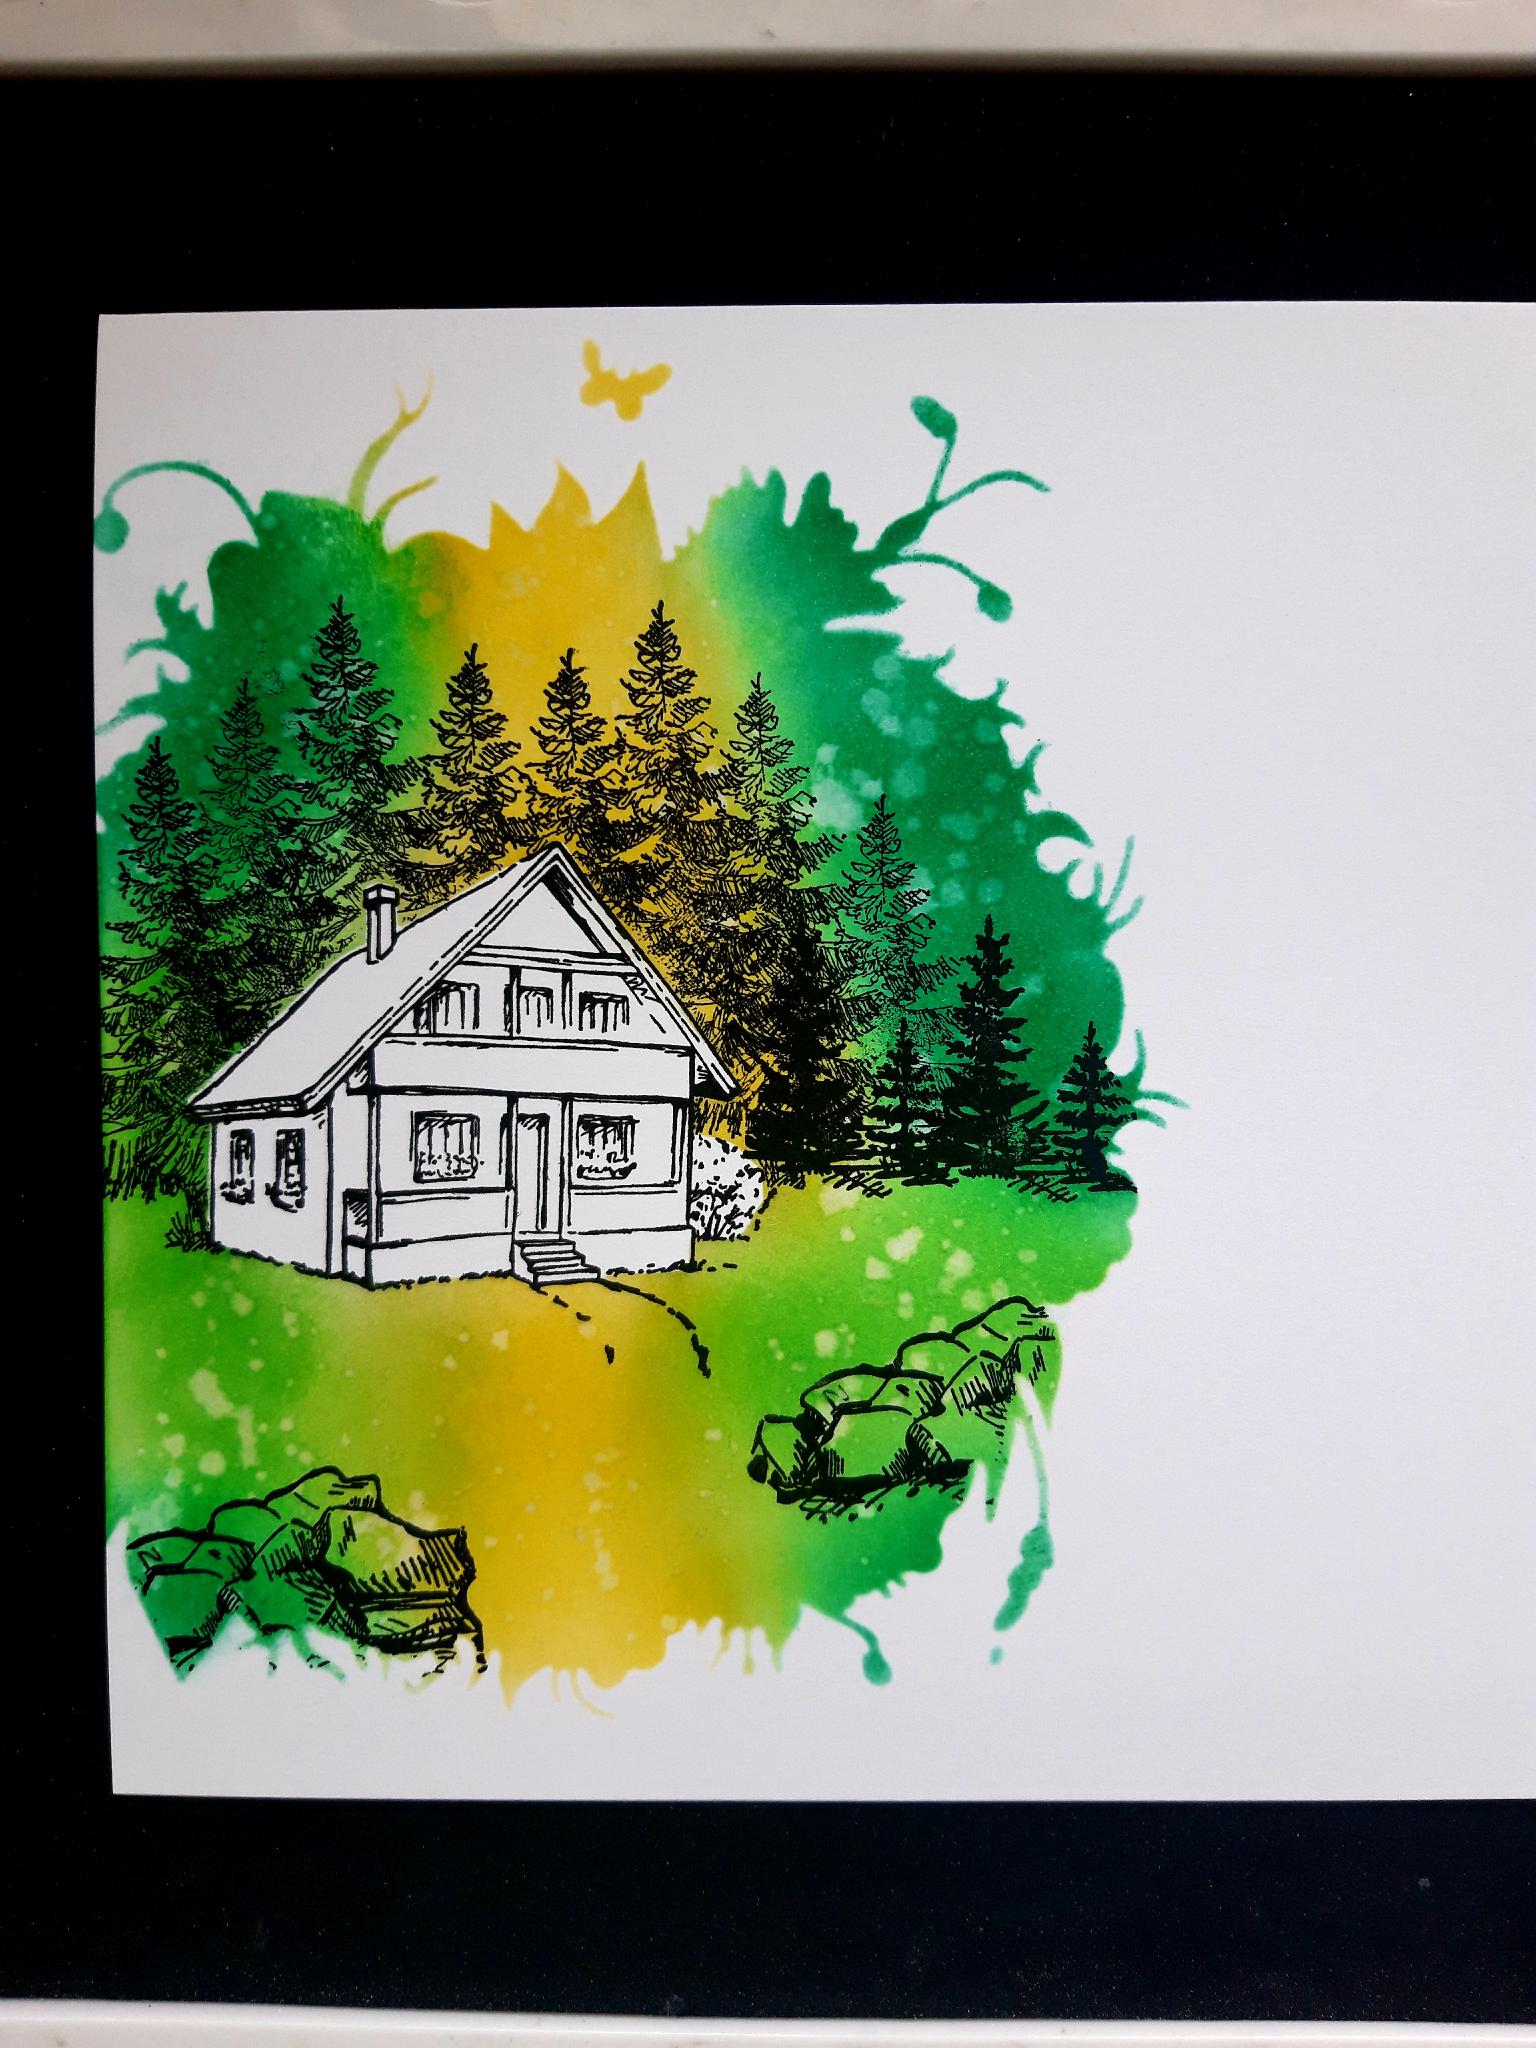
Once all the ink is completely dry, carefully remove the mask from the Cabin. |
|
Ink up the rocks stamp, from the Soulful Pencil Sketch Stamp Collection, in the Onyx Black Versafine. Again, you can ink up with the Izink Reglisse, and spritz with water, for a looser, watercolour look. Stamp just off the right hand edge of your artwork. ink it up again, and stamp off the bottom left corner. |
|
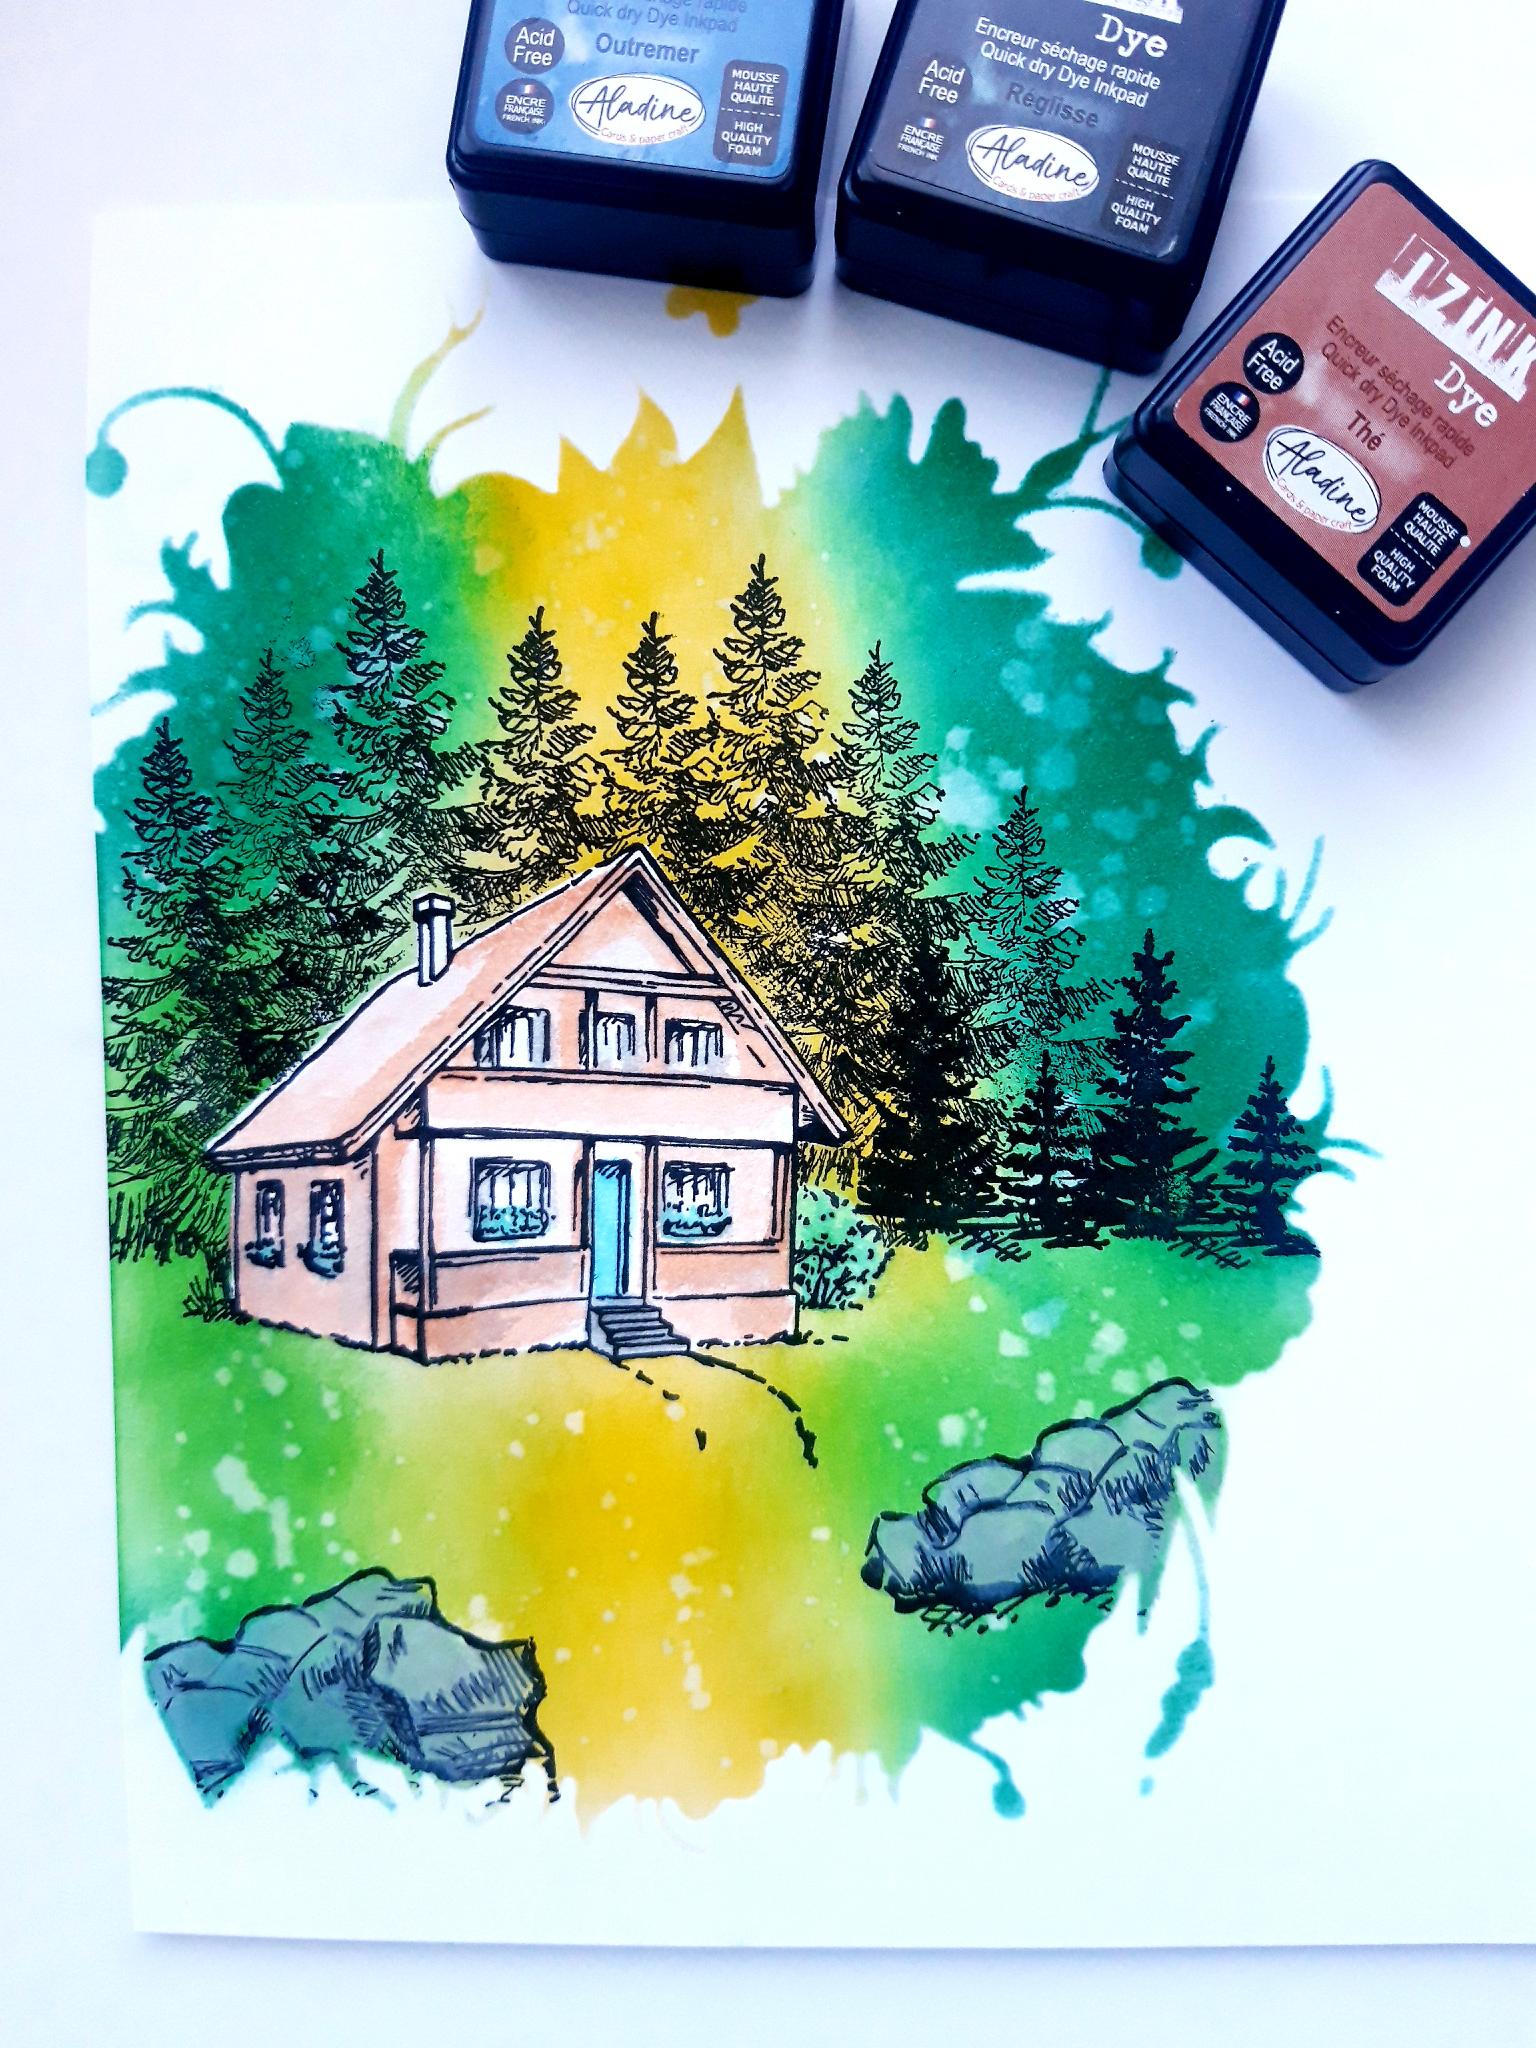
Carefully remove the stencil, once all the ink is completely dry. Apply some of the Izink The to a glass or craft mat, add a little water, and paint your Cabin. Paint the window shutters, door etc, with the Izink Outremer. Paint the rocks with the Izink Reglisse.
|
|
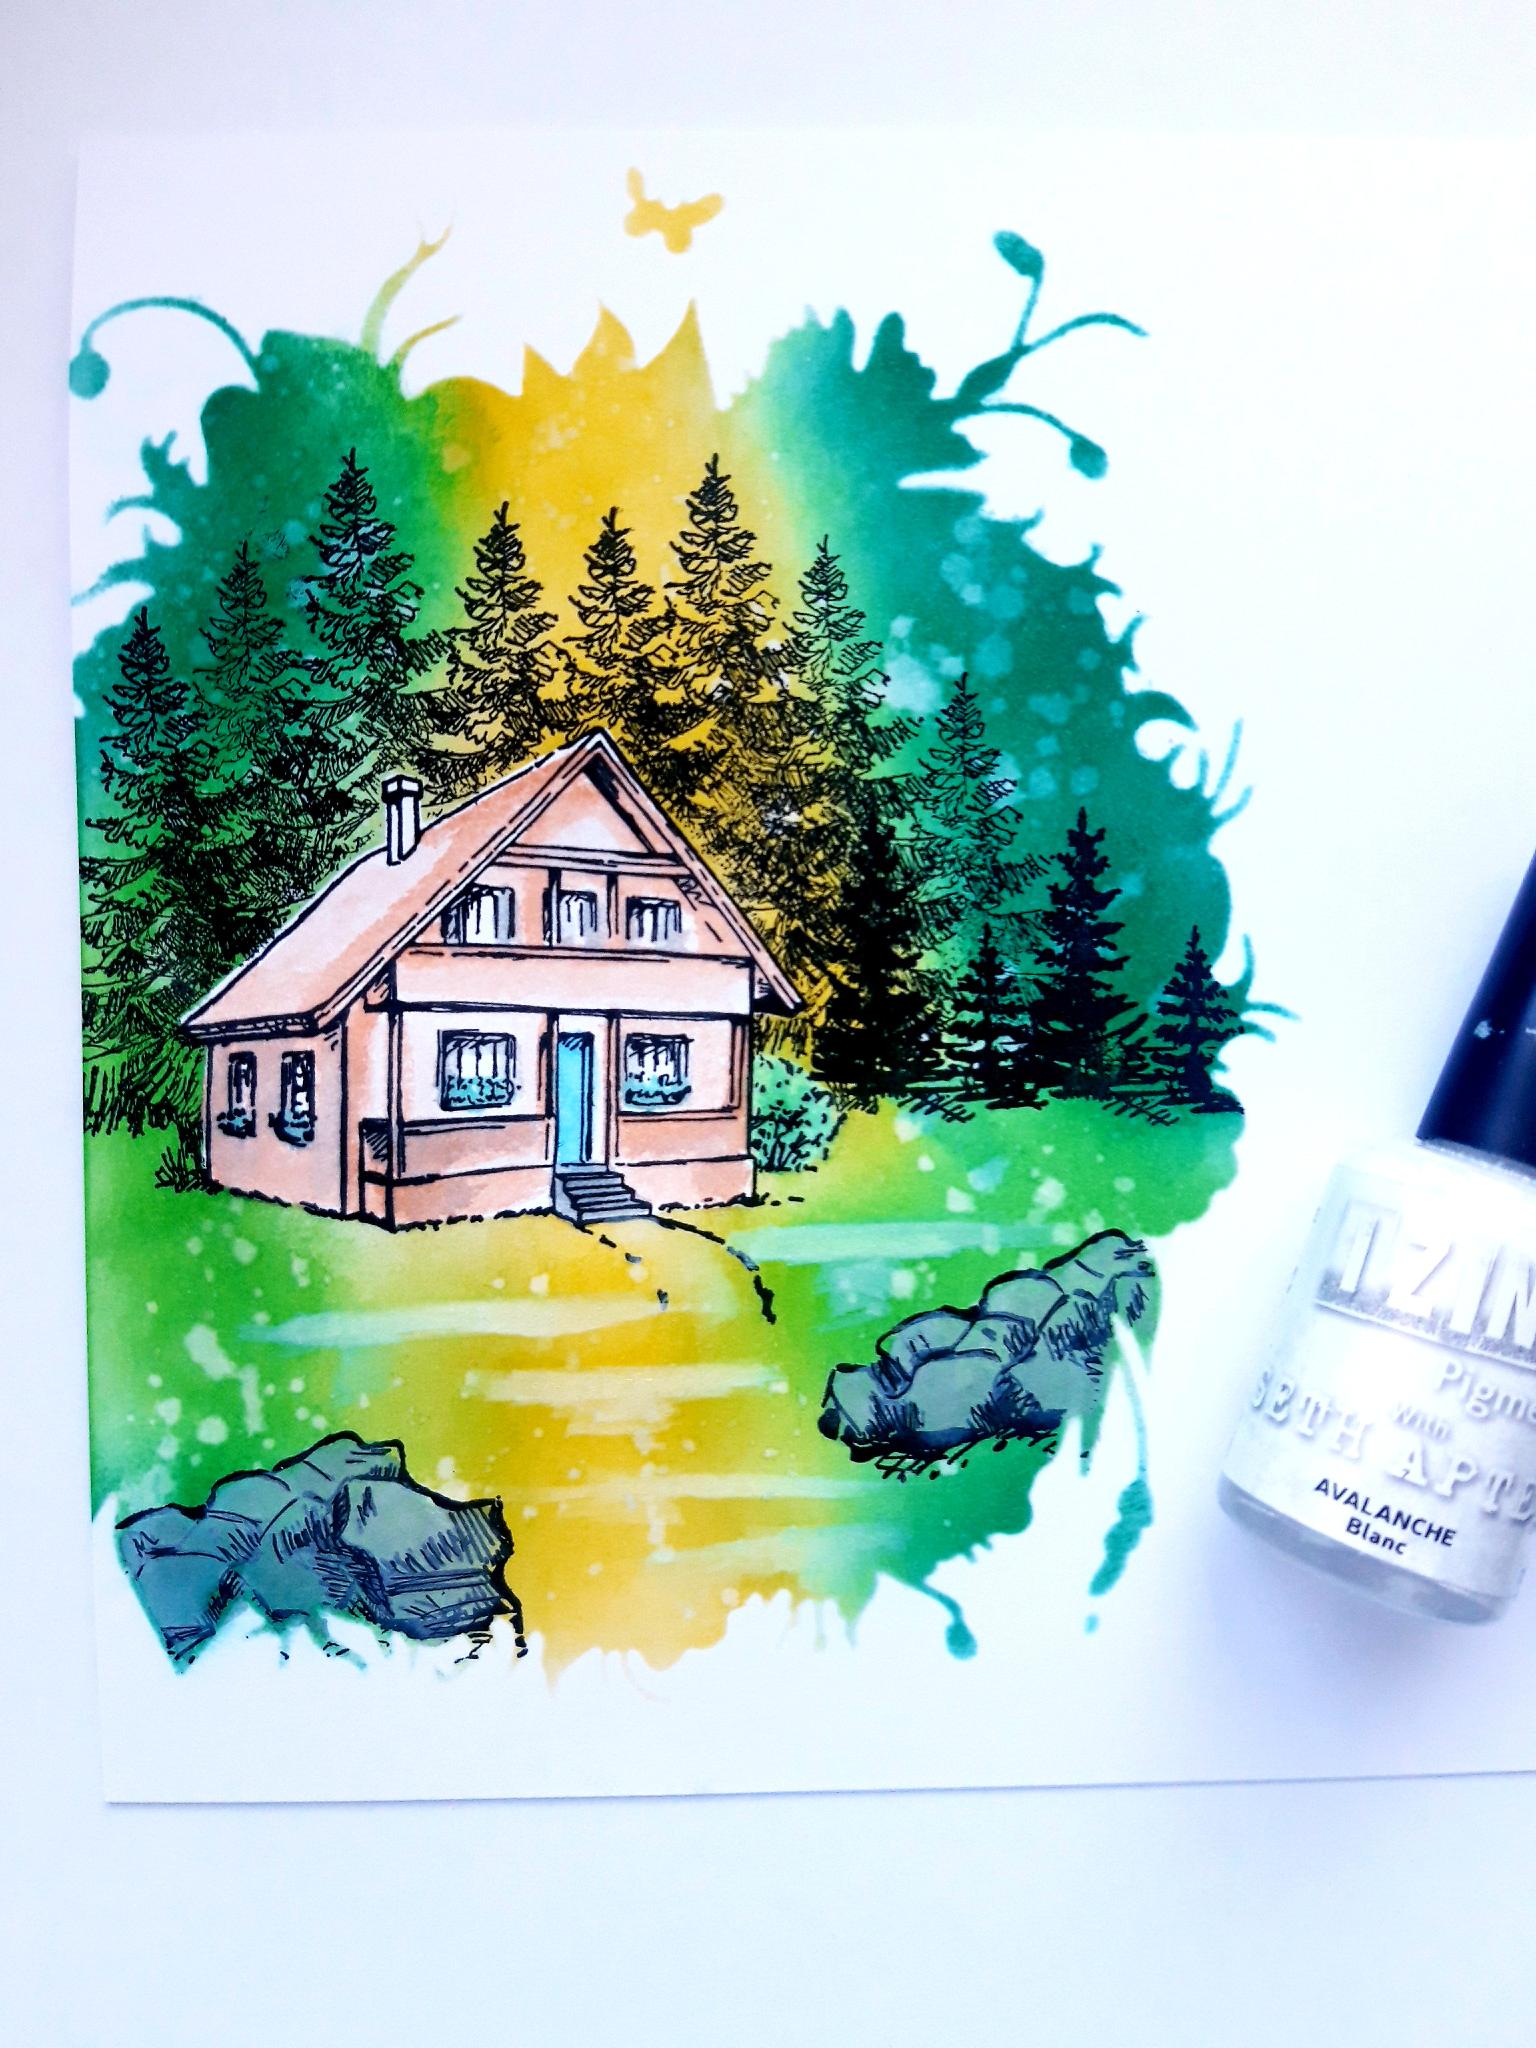
Apply a drop of Izink Avalanche Pigment, to your mat. Add a little water and paint in some highlights on the grass, in front of the cabin. This adds light and shade to your artwork. |
|
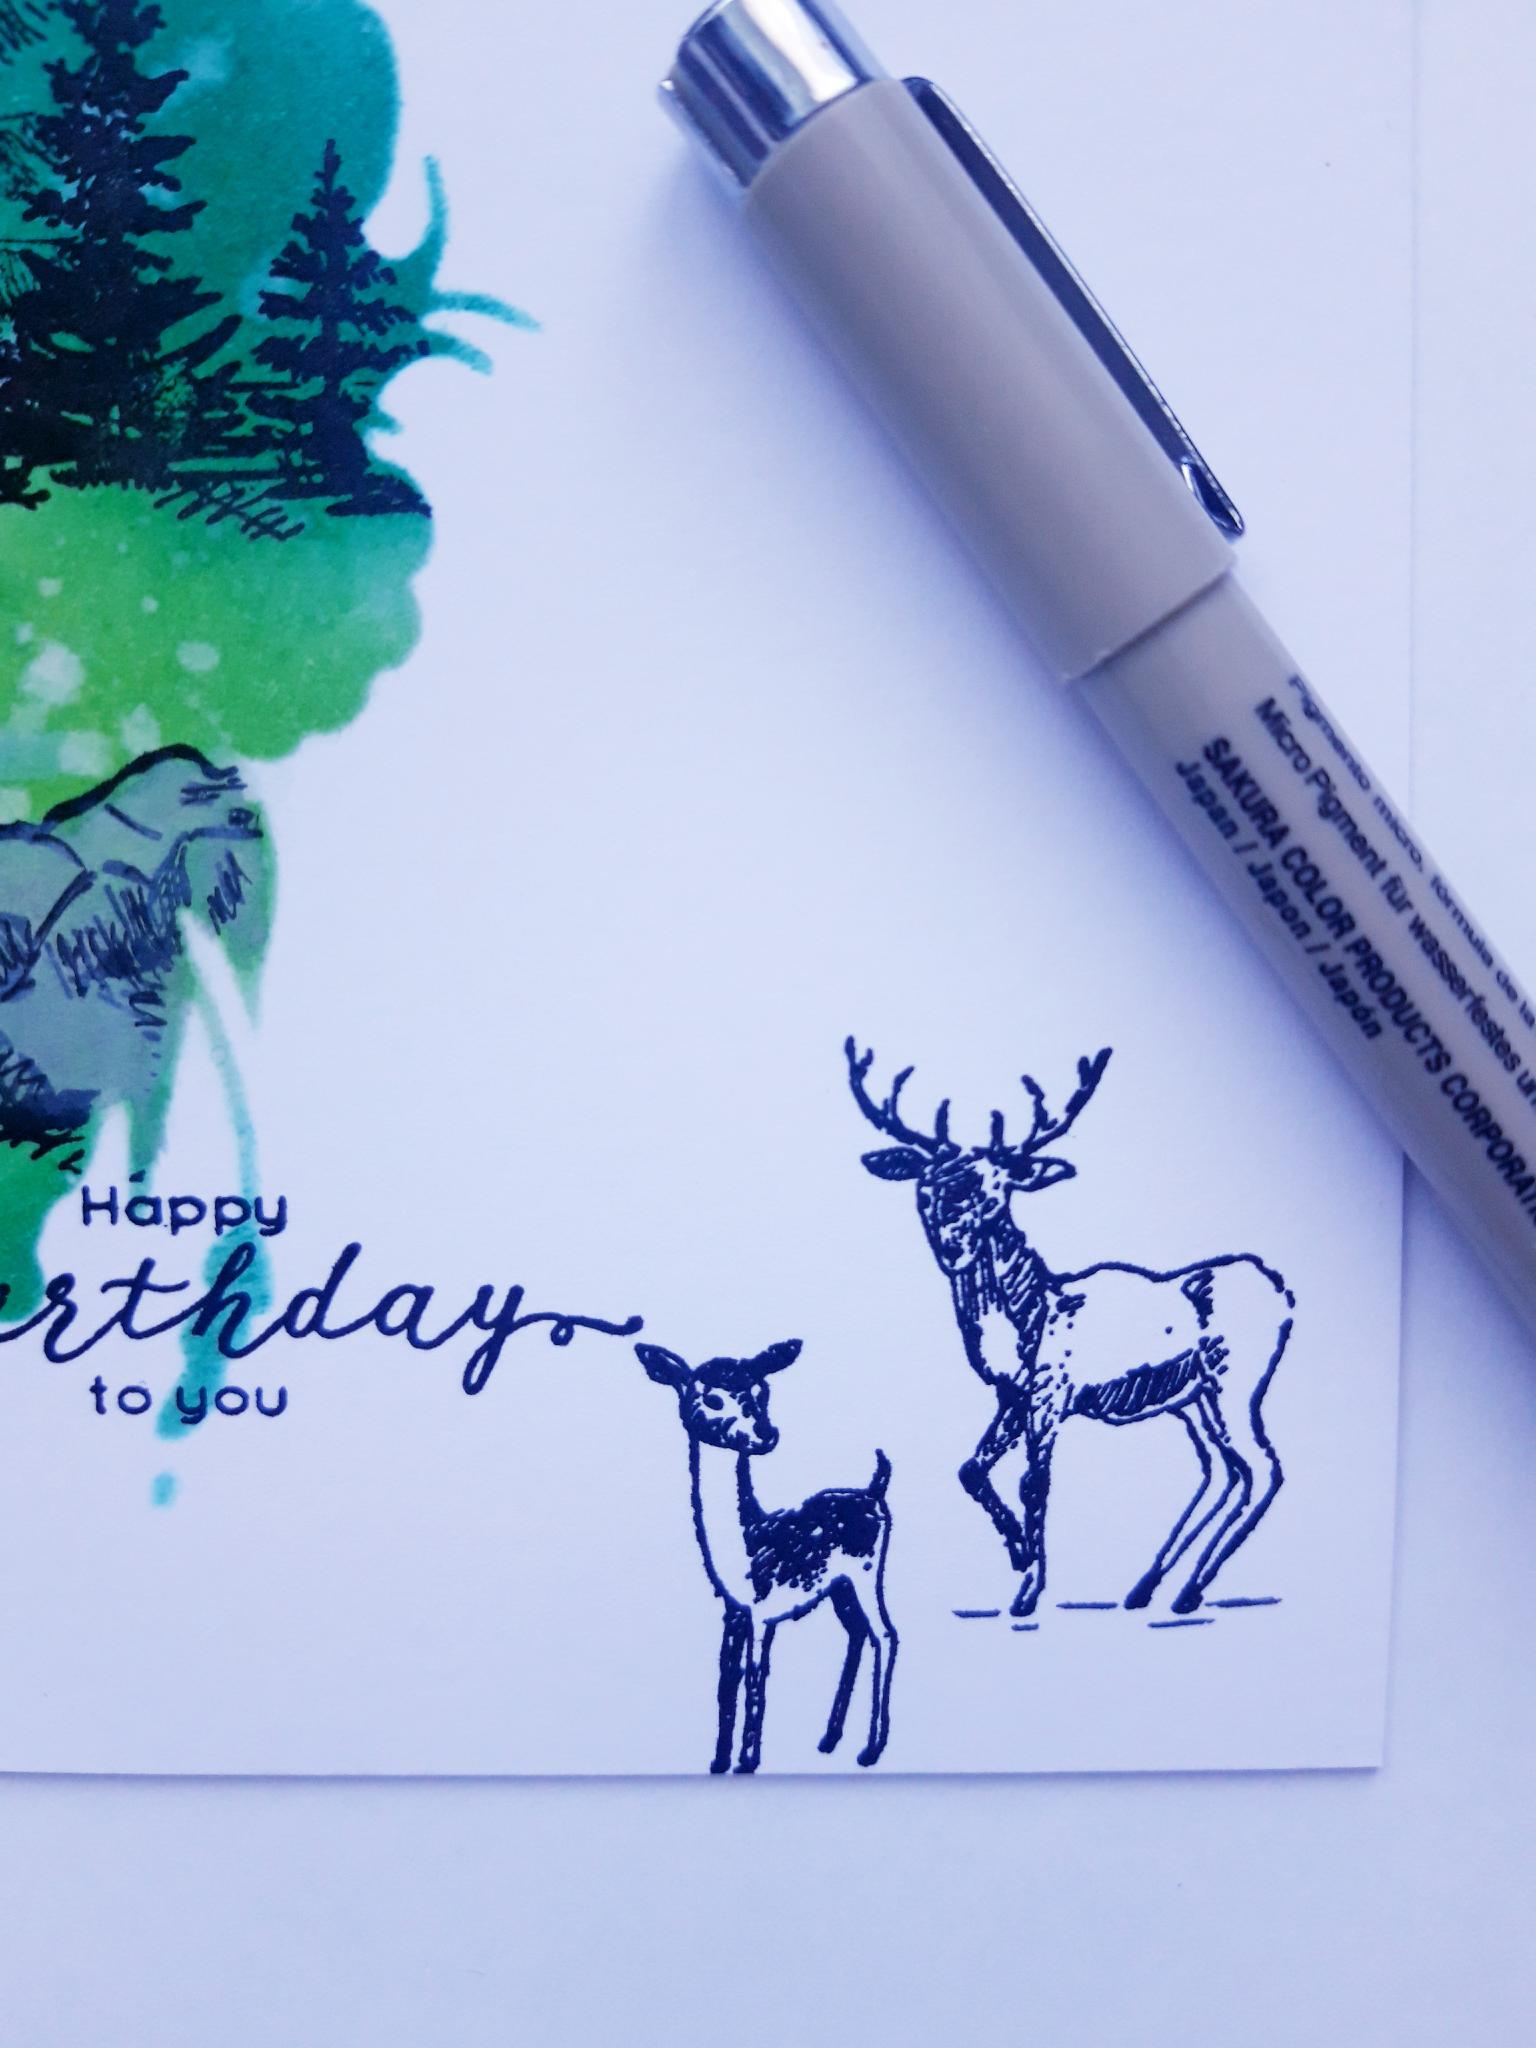
Ink up the sentiment stamp, from the Be Yourself Lamination Stamp Collection, in the Onyx Black Versafine. Stamp to the bottom right of your artwork. |
|
Ink up the deer stamps, from the Pencil Sketch Elements Collection, in the Onyx Black Versafine. Stamp them to the right of your sentiment, where desired, to finish your card. |